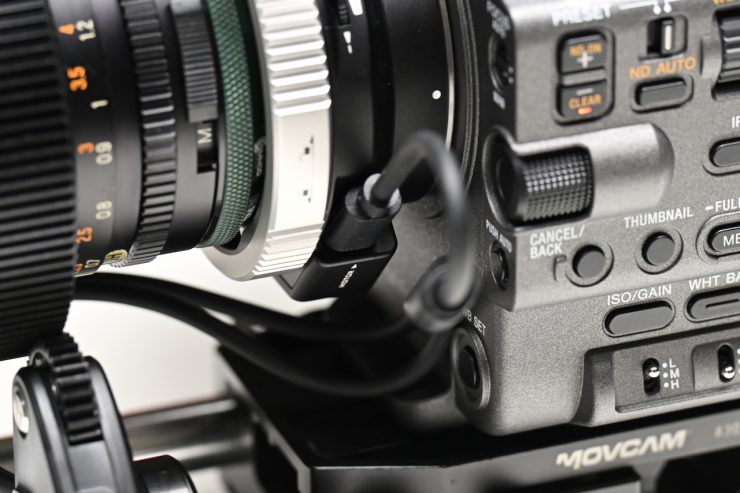
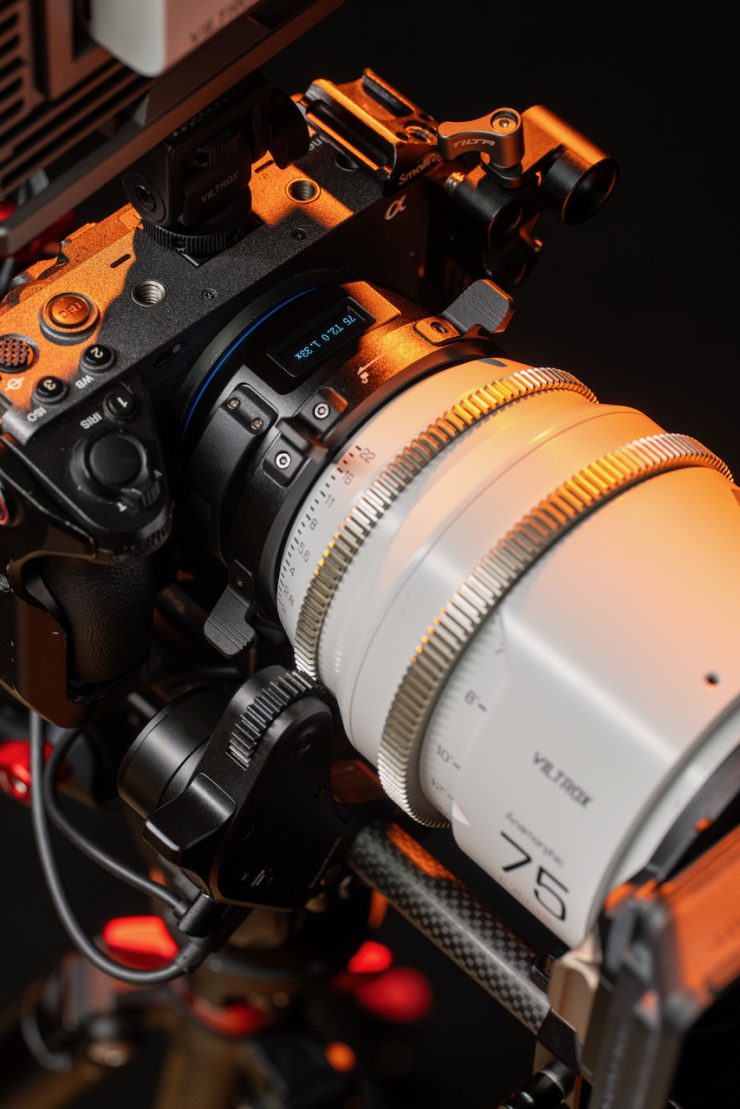
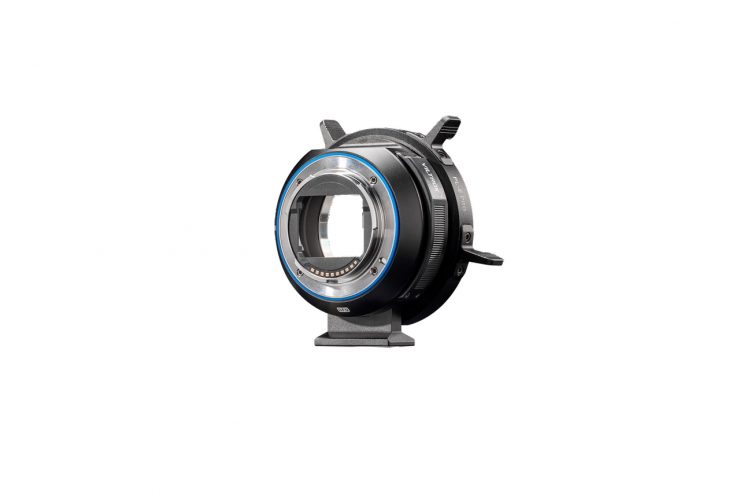
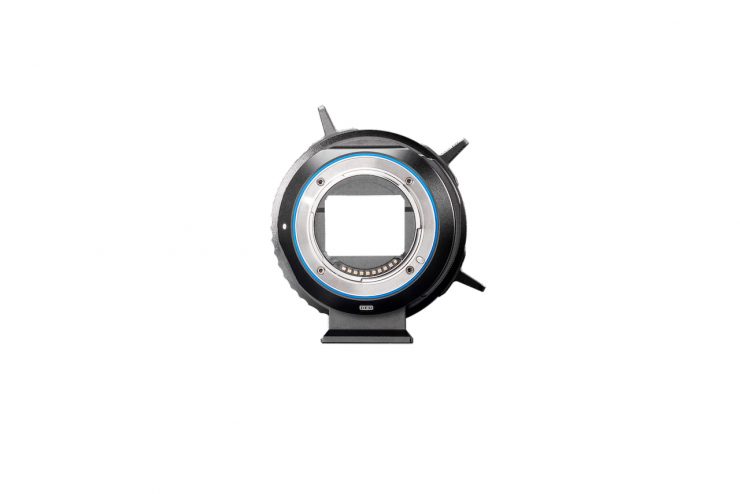
Tilta officially launched its new Nucleus Autofocus Adapter just before NAB 2026 in April. The Nucleus Autofocus Adapter brings modern autofocus performance to manual PL mount cinema lenses. Unlike common LiDAR solutions, the adapter leverages the camera’s native autofocus system to drive lens focus and aperture adjustments.
According to Tilta, filmmakers love the character of vintage and cinema glass but sometimes avoid them due to their manual focus limitations. Tilta wanted to bridge this gap by combining the look and character of these lenses with the speed and convenience of modern autofocus control.


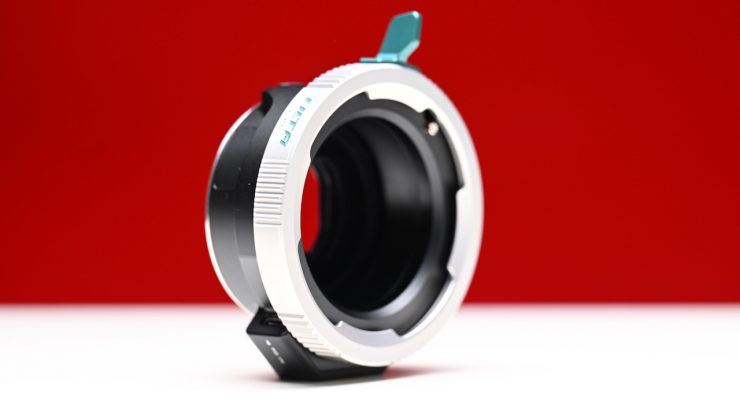
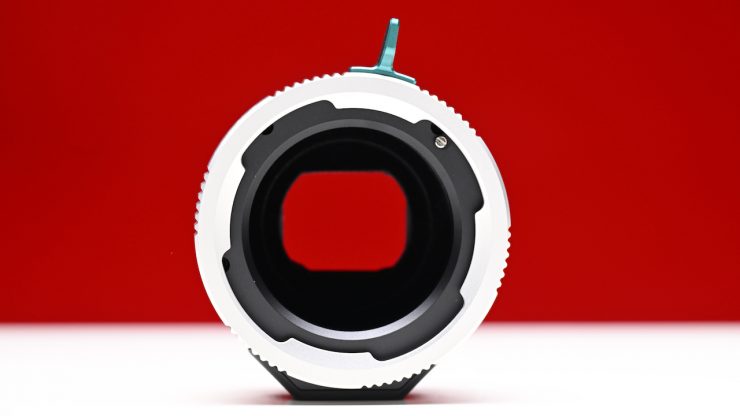
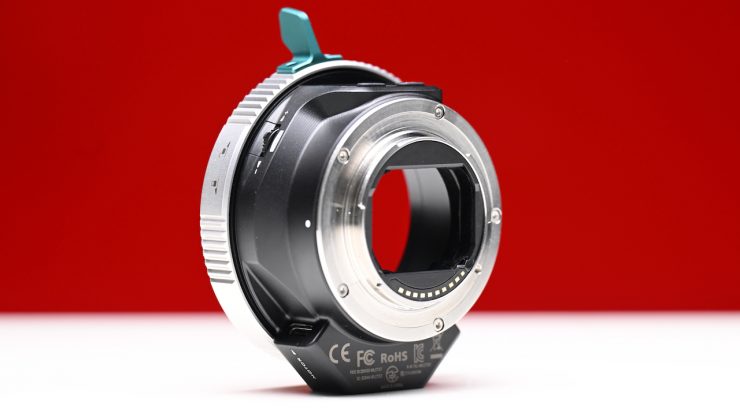
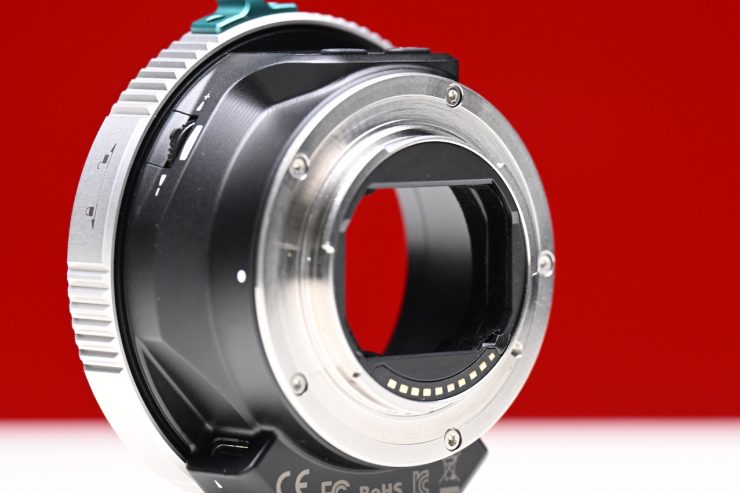
Through the lens adapter mount, Tilta motors can receive and translate that autofocus information directly from the camera sensor.
This system uses the camera’s native phase-detection autofocus and translates that data directly to external motors through the Nucleus-M II Wireless Control System. A built-in lens library allows for fast and easy calibration, while the adapter intercepts AF data to drive the motor with accurate, responsive focus. The system is also compatible with both the Nucleus-M II motor and the Nano II motor. When using the system with two wireless motors, users can adjust the iris via the camera’s electronic control.

Essentially, when you touch the back LCD screen on the camera, the AF system sends the same information to the lens motors as it would to a native E-mount AF lens. This allows for full AF tracking, eye detection, etc. As it is deeply integrated with Sony’s powerful PDAF and AI subject recognition, the Nucleus Auto Focus Adapter is claimed to provide instant, reliable, and smooth focus performance.
This is a very clever solution, which, in my opinion, is easier to use than something like the LiDAR-based DJI Focus Pro. What you need to clearly remember is that a LiDAR-based system has the advantage that it can be used with any camera, including digital cinema cameras that don’t feature AF.

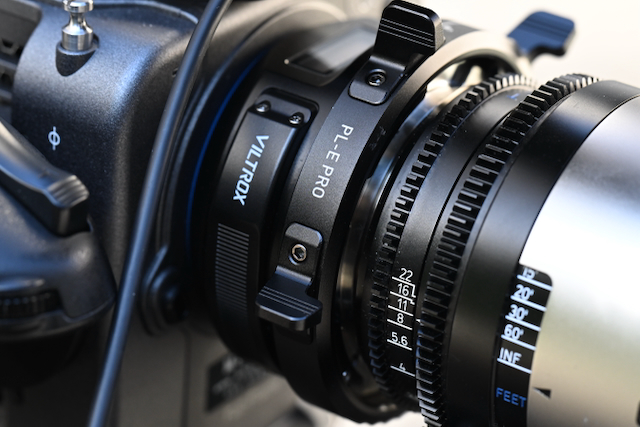
Unlike the competing Viltrox NexusFocus F1 adapter, you don’t require an app for lens data entry and calibration. Everything can be done directly on the adapter.

Lens data can be edited and shared across devices as the adapter unit’s built-in storage stores lens data, which can also be accessed on the Nucleus series hand unit when connected.

For traditional workflows, the Nucleus-M II FIZ unit can override autofocus so that the 1st AC can pull focus manually. The E-mount Autofocus Adapter is compatible with select Sony cameras, including the FX2, FX3, FX30, and FX6. It won’t work with the BURANO or FX9. Tilta told me that the main reason why it won’t work with the BURANO or FX9 is that the E-mount design is different from cameras like the FX3 and FX6.
Sony E-mount will be supported first, followed by Canon RF mount support. Further mounts should come in the future, including Leica L and Nikon Z.
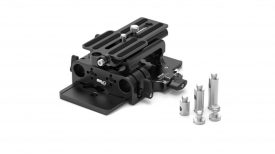
What do you get in the Tilta Nucleus Auto Focus Adapter Dual NANO II Motor Kit (E to PL)?
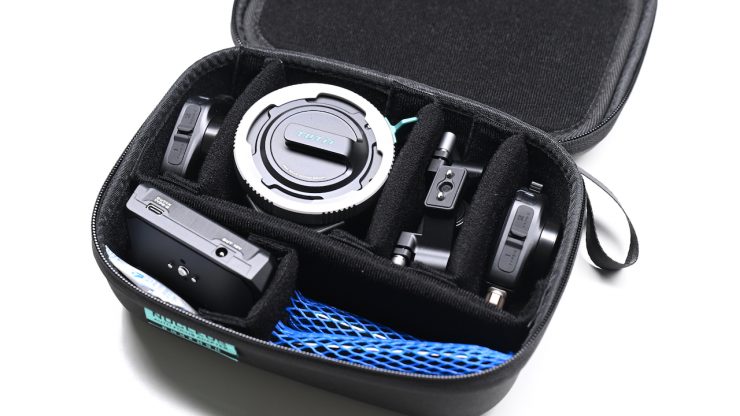
The Tilta Nucleus Auto Focus Adapter Dual NANO II Motor Kit (E to PL) comes with the following items:
- Tilta Nucleus Autofocus Adapter Base Kit (Sony E to ARRI PL)
- Nucleus Autofocus Adapter
- 15mm Rod Adapter
- 2 x Aluminum 15mm Rod (3.9″)
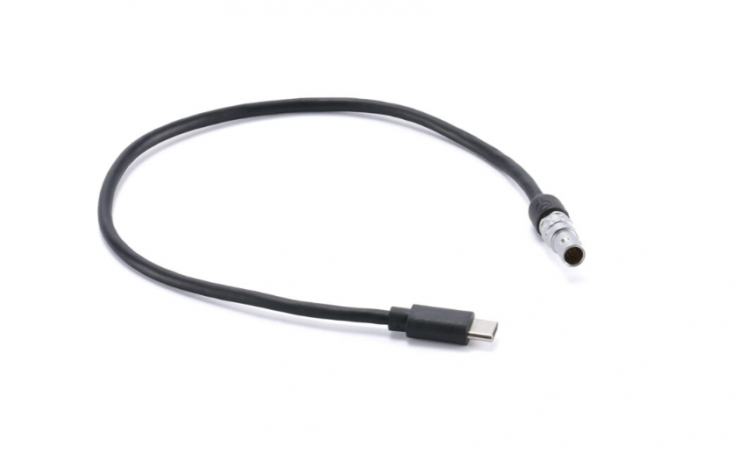
- 7-Pin LEMO-Type to USB-C Cable (14.2″)
- USB-C Control Y-Cable (13.8″)
- Allen Wrench
- Limited 1-Year Manufacturer Warranty (on Electronics)
- Limited 2-Year Manufacturer Warranty (on Machined Parts)
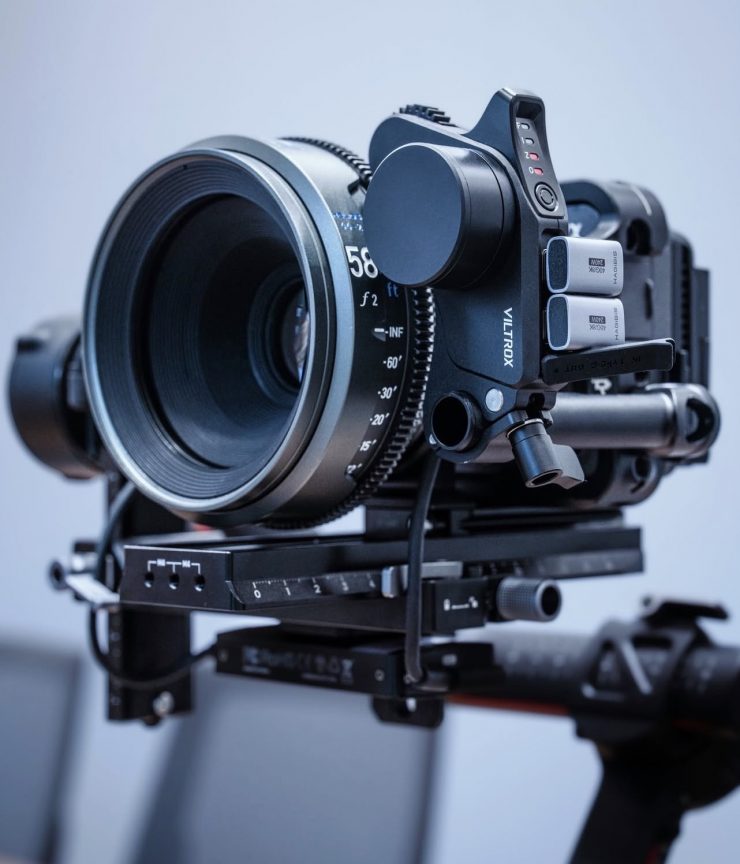
- 2 x Tilta Nucleus Nano II FIZ Lens Control Motor Kit
- Tilta DSLR Lens Follow Focus Adapter
- USB-C Power Cable (11.8″)
- Limited 1-Year Manufacturer Warranty (Electrical)
- Limited 2-Year Manufacturer Warranty (Mechanical)
- Tilta L-Series Battery Plate (Black)
- 1/4″-20 Screw
- Limited 2-Year Manufacturer Warranty (on Machined Parts)
- Limited 1-Year Manufacturer Warranty (on Electronic Parts)
The kit gives you everything you need to get up and running.
Build Quality
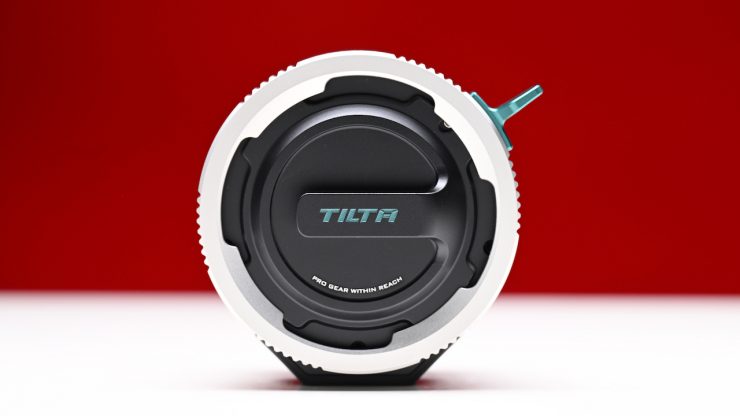

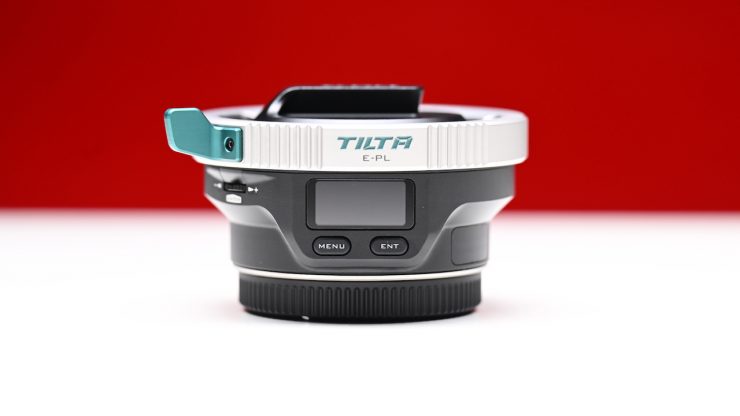
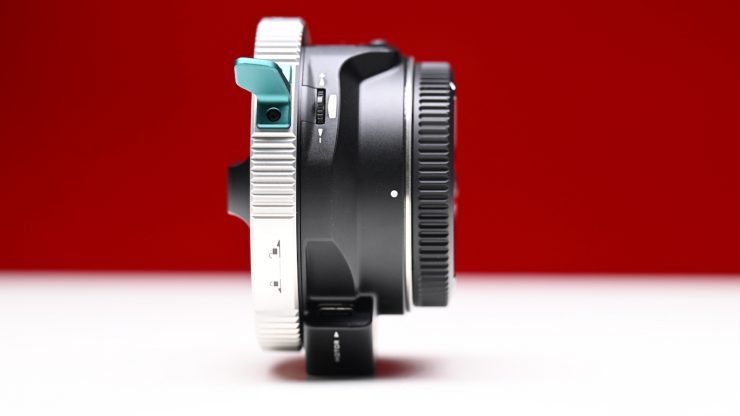
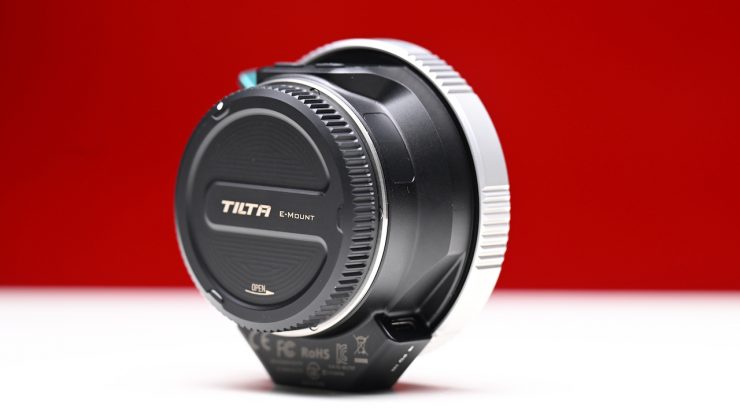
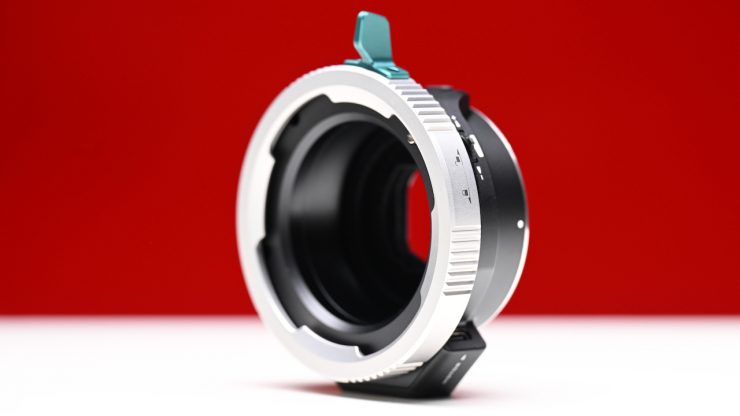
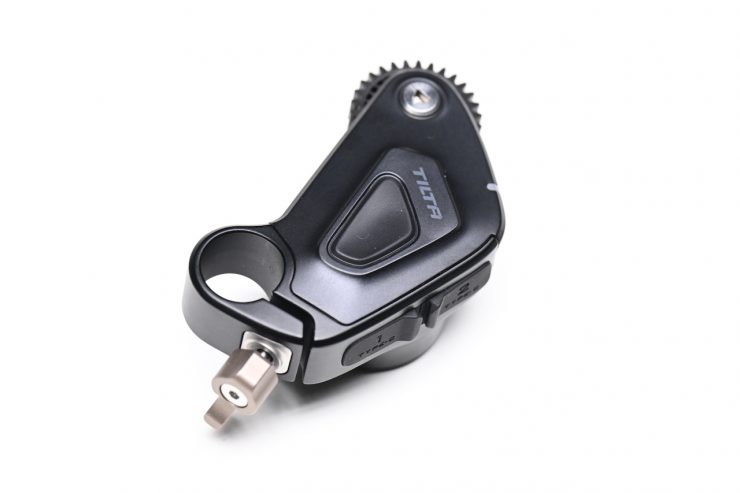
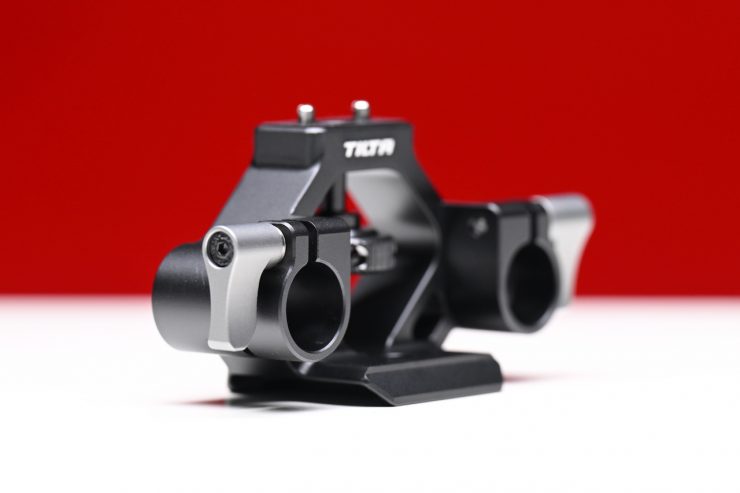
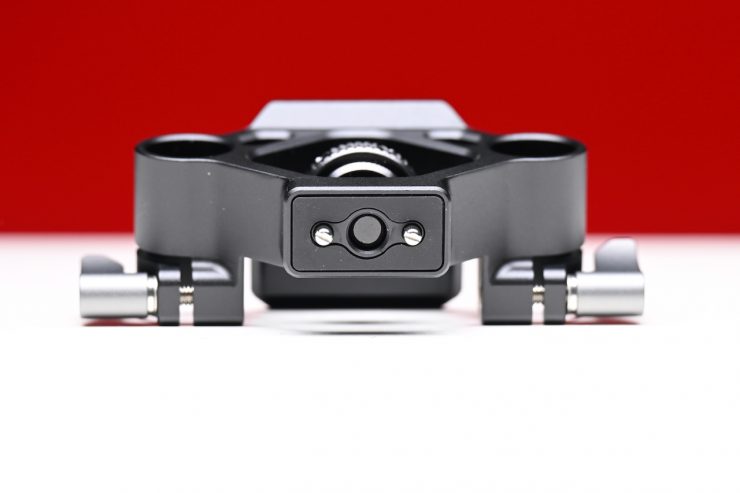
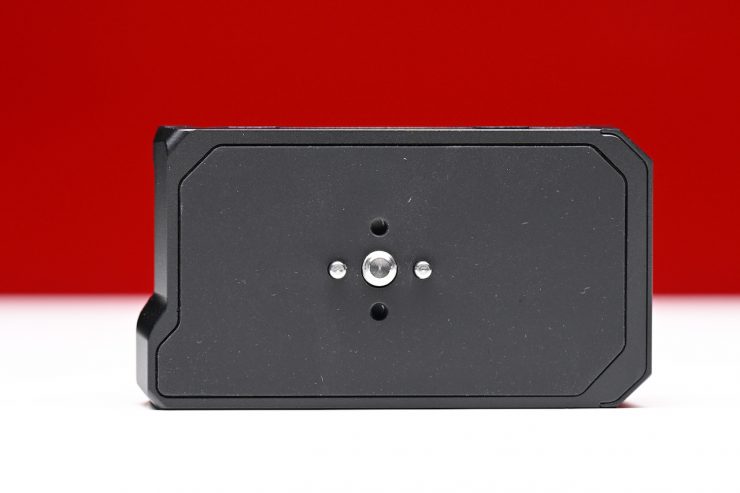
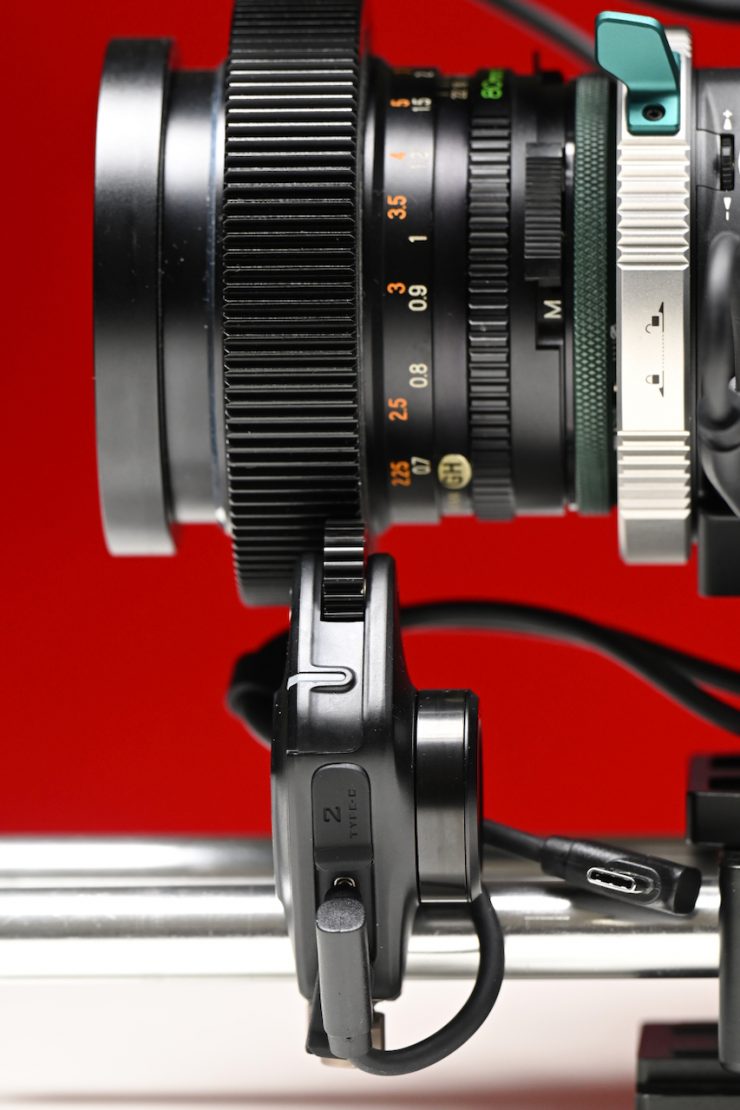
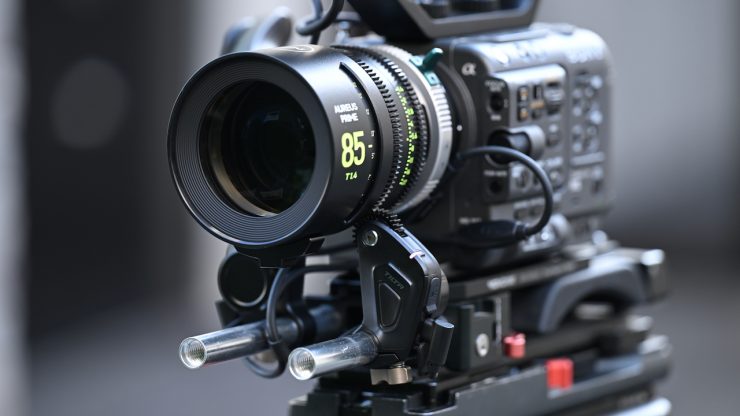
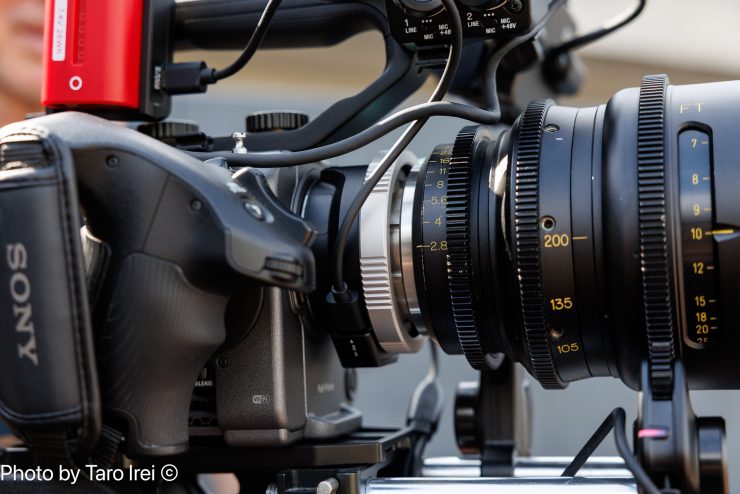
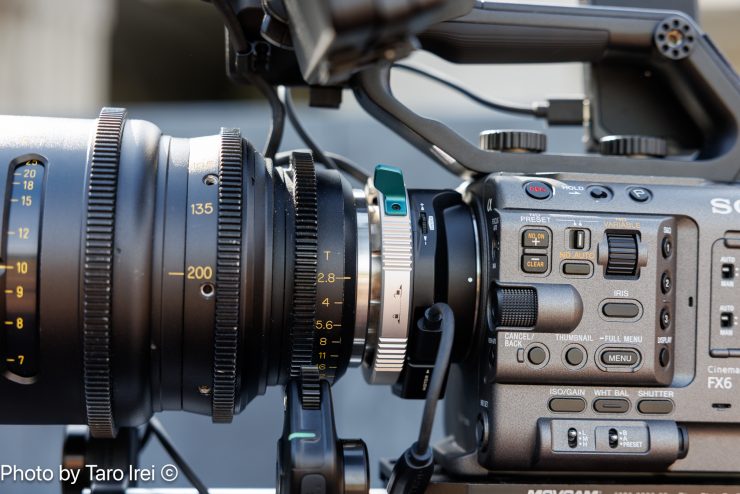
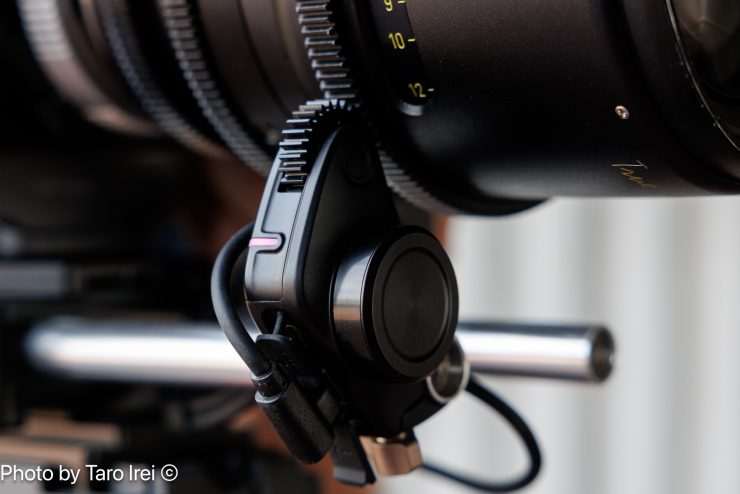
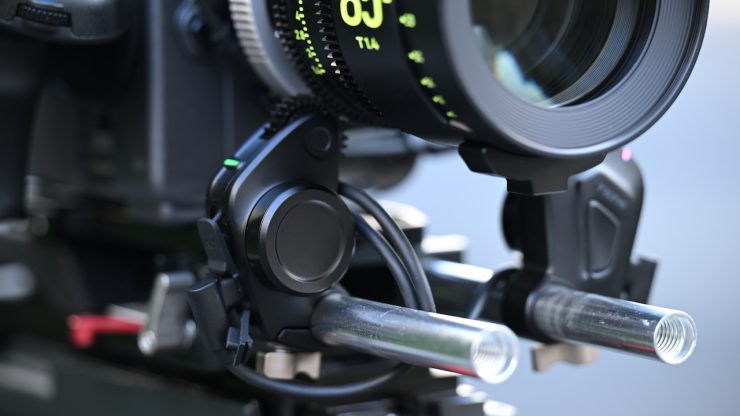
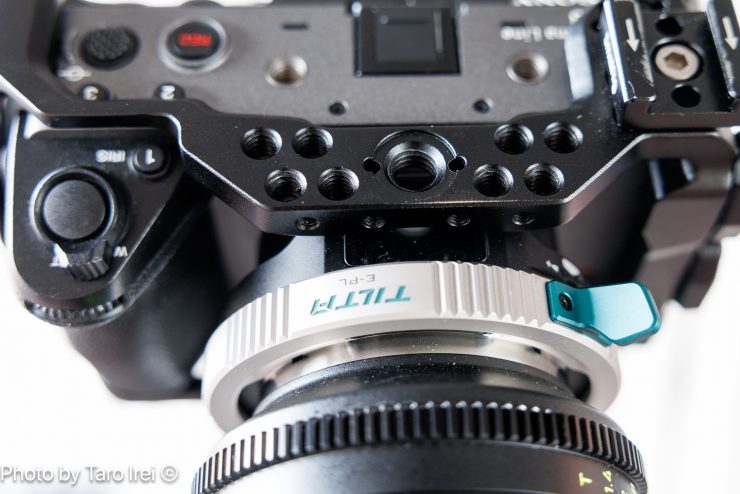
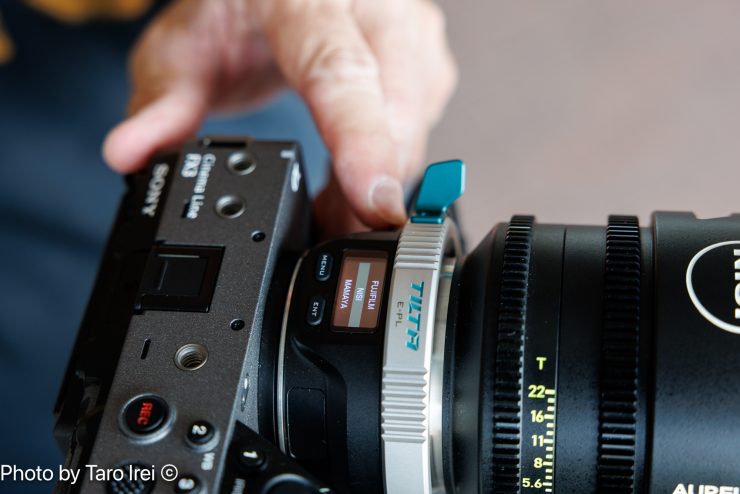
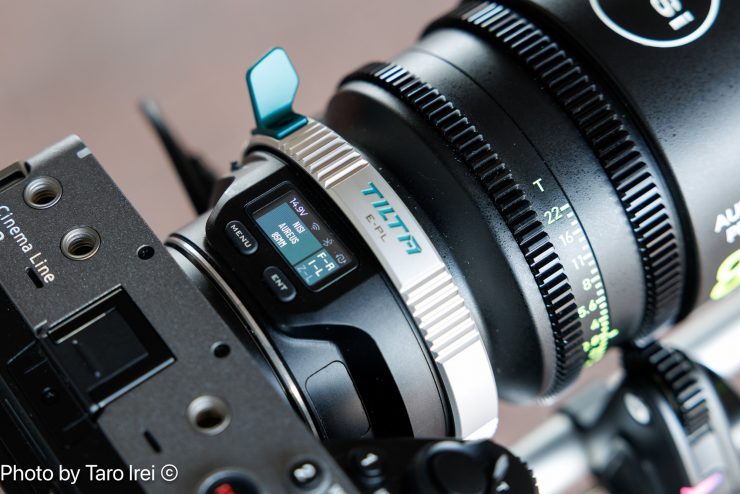
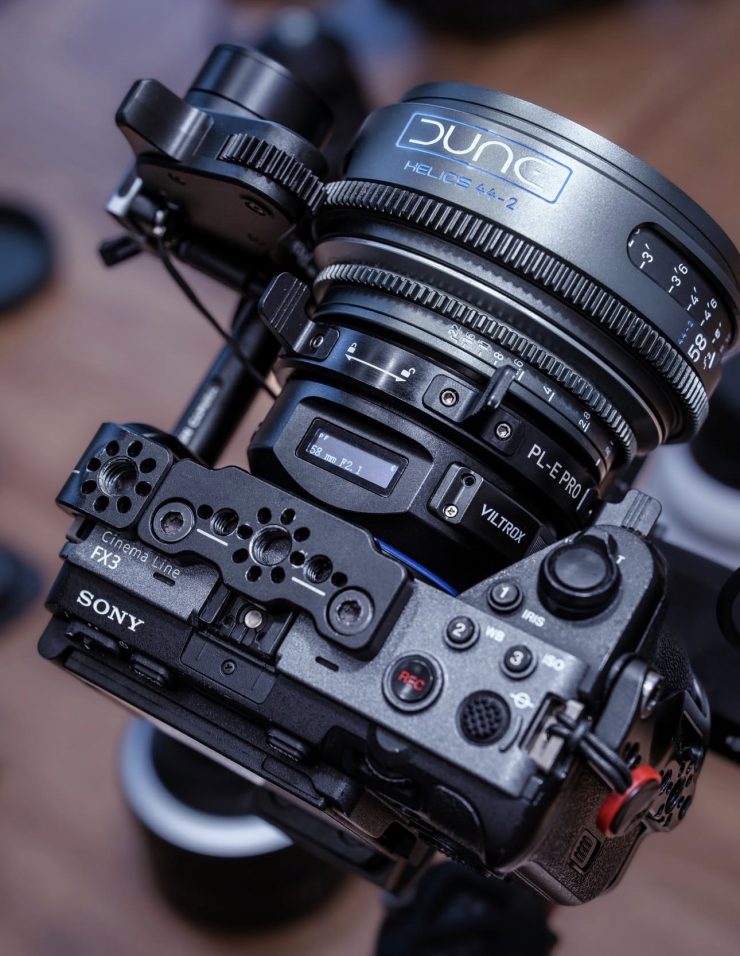
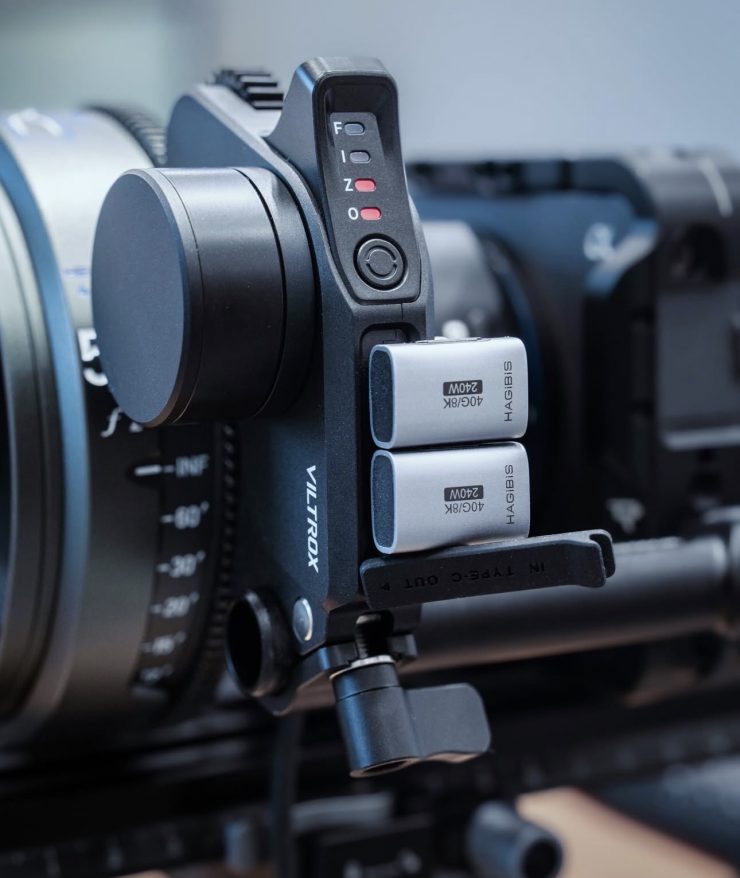
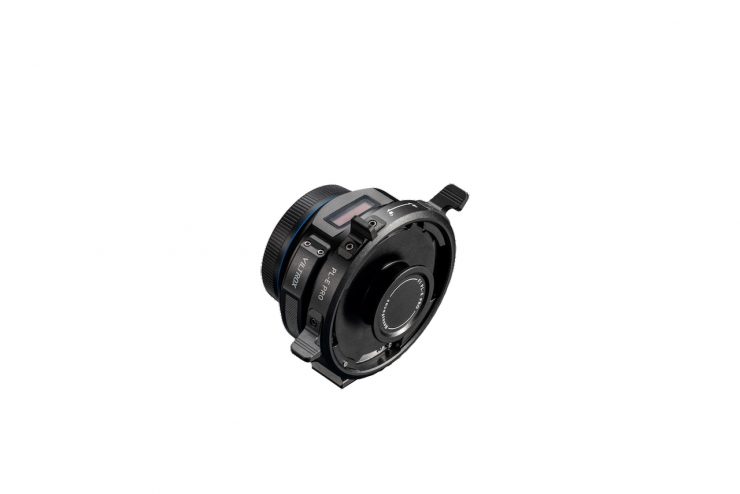
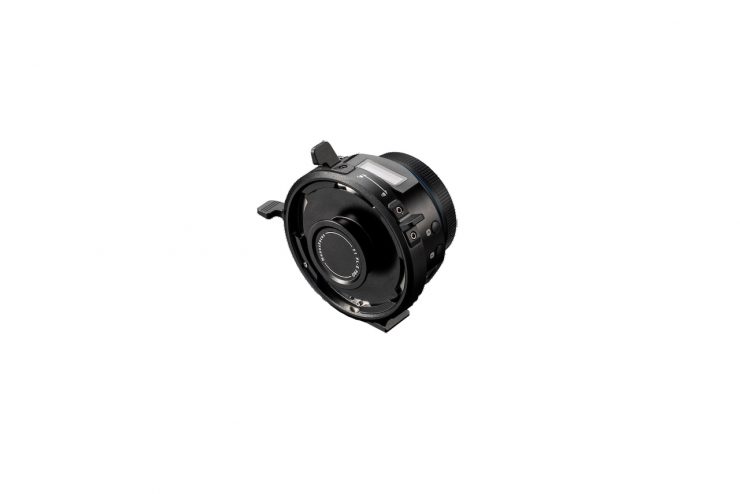
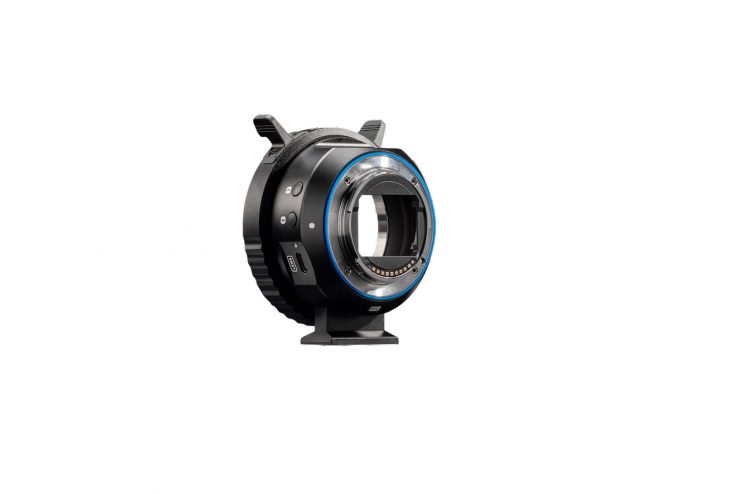
The Tilta Nucleus Autofocus Adapter is solidly made. It weighs 1.21 lb / 550g. As a comparison, the competing Viltrox NexusFocus F1 adapter weighs 0.57 lb / 262g.
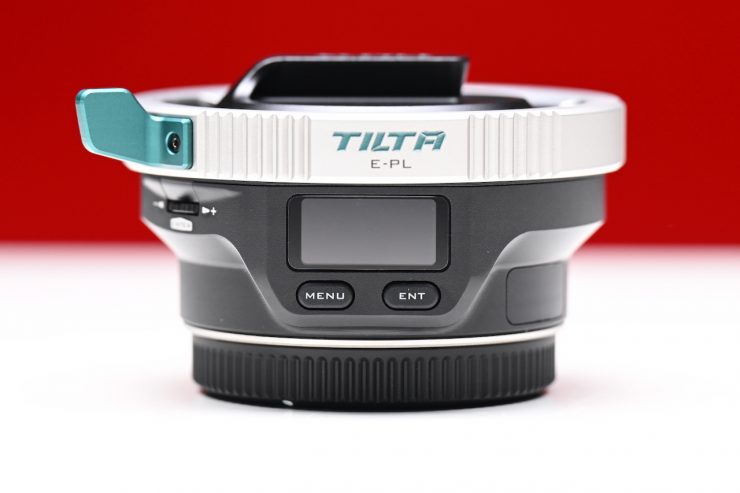
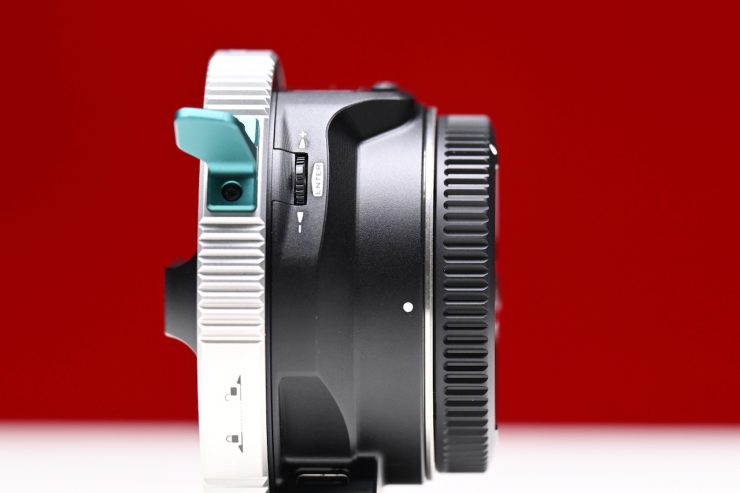
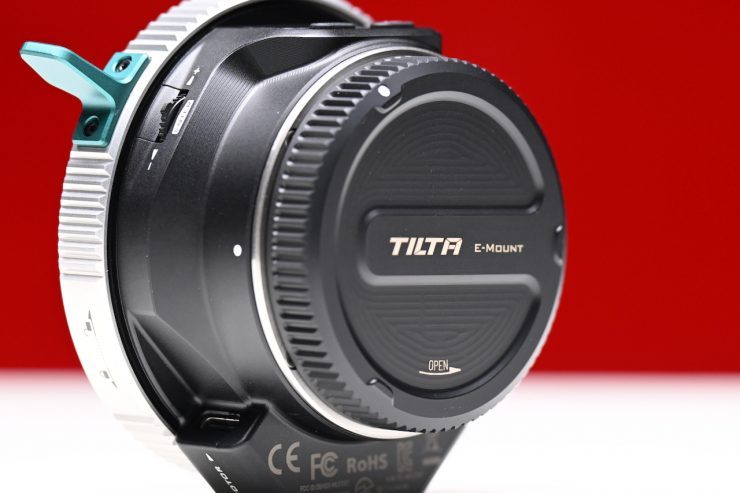
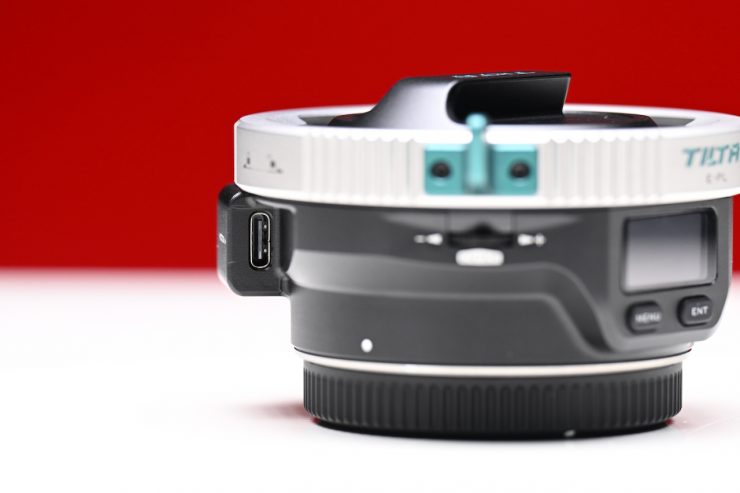
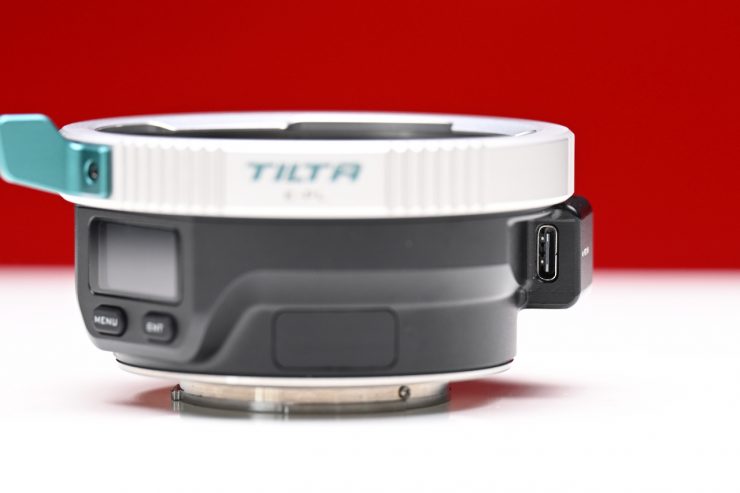
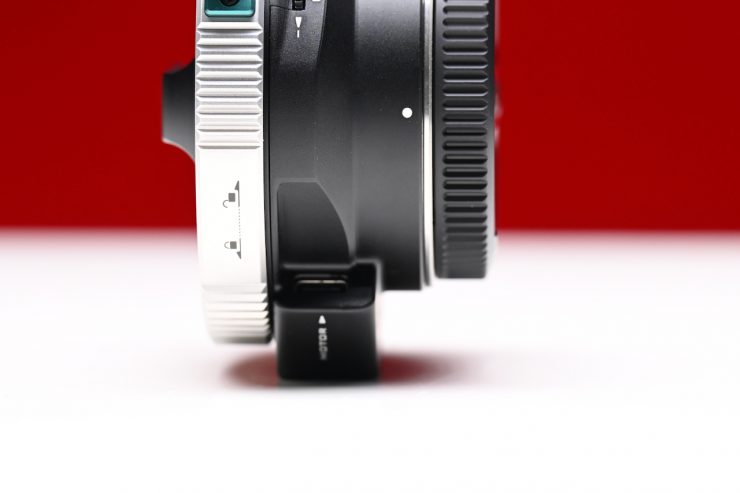
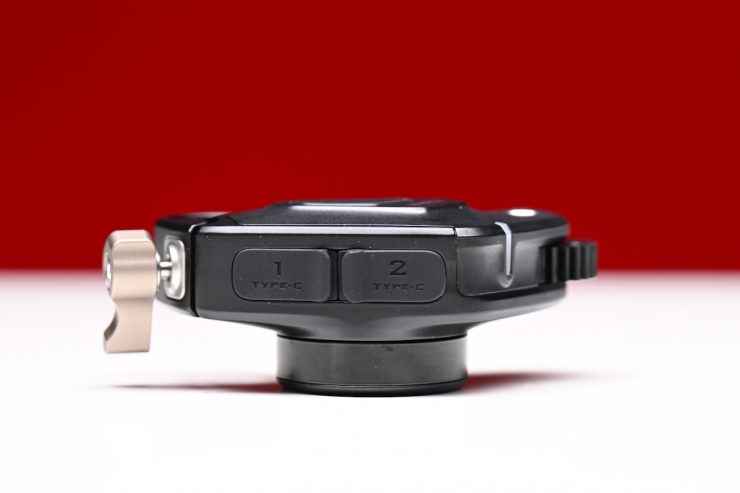
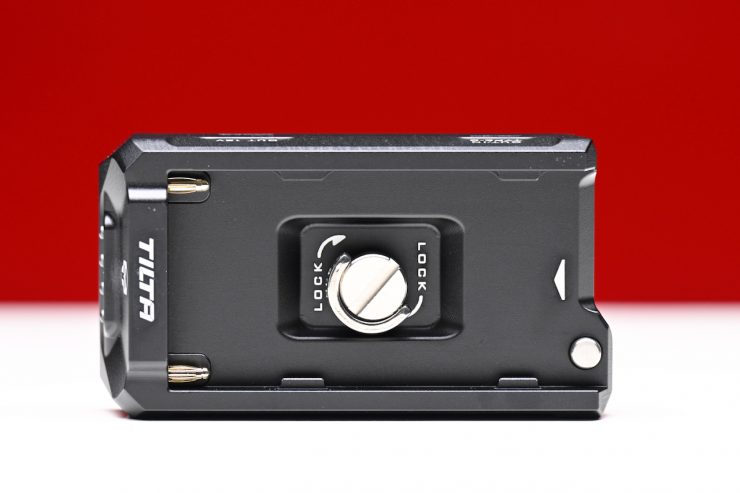
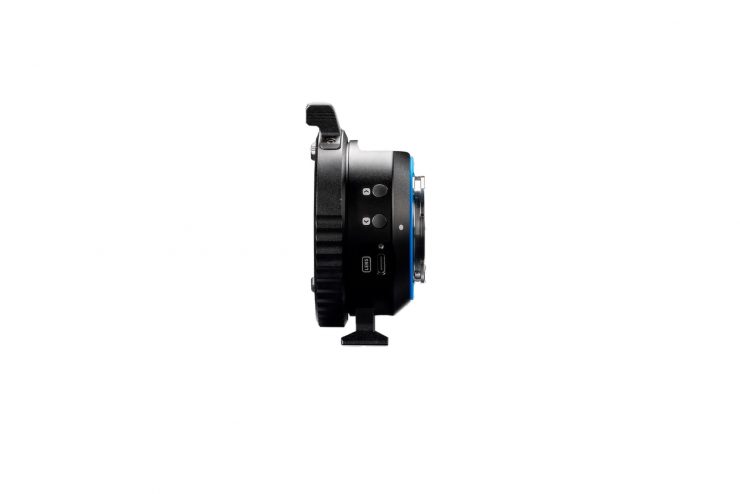
The buttons and dials are tactile, and the USB-C ports face up to help protect the cables.
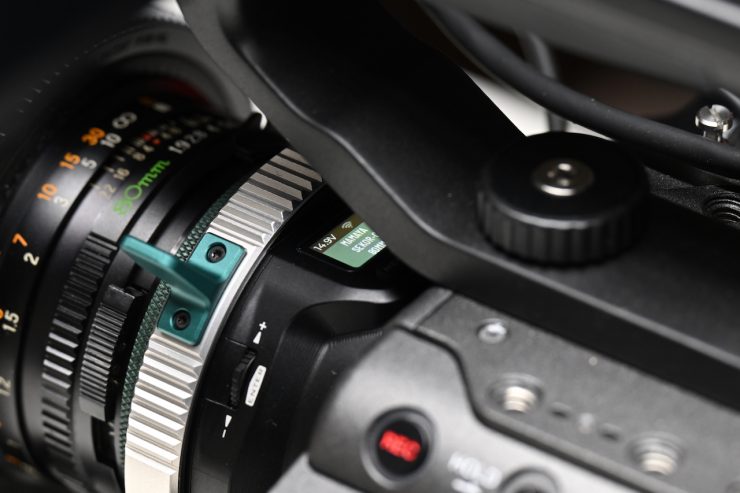
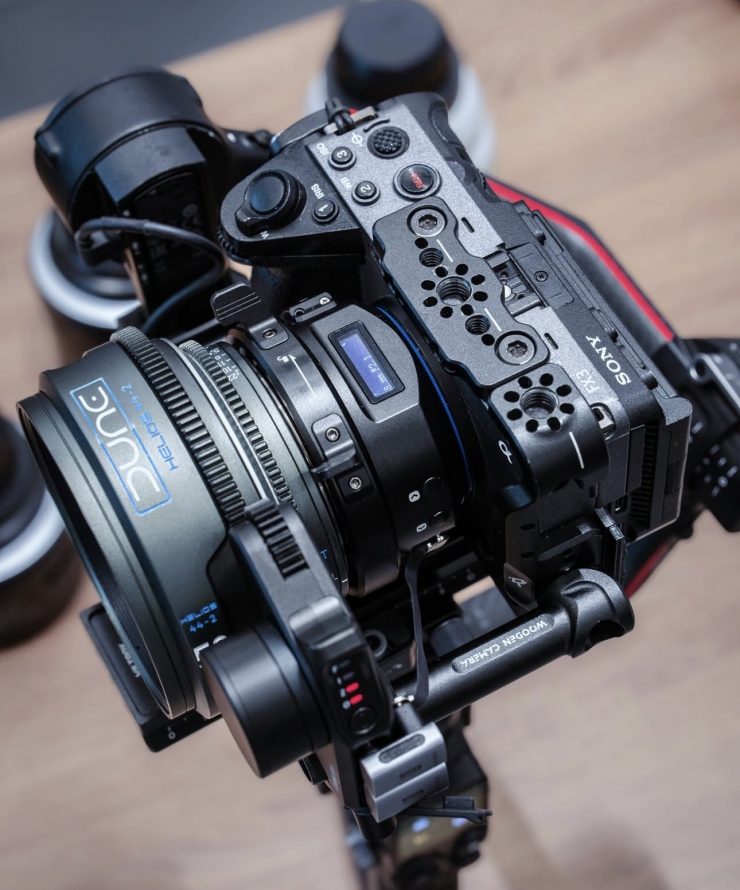
I like that there is an in-built lens support foot on the adapter.

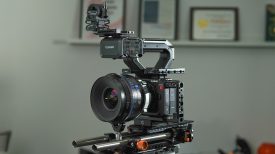
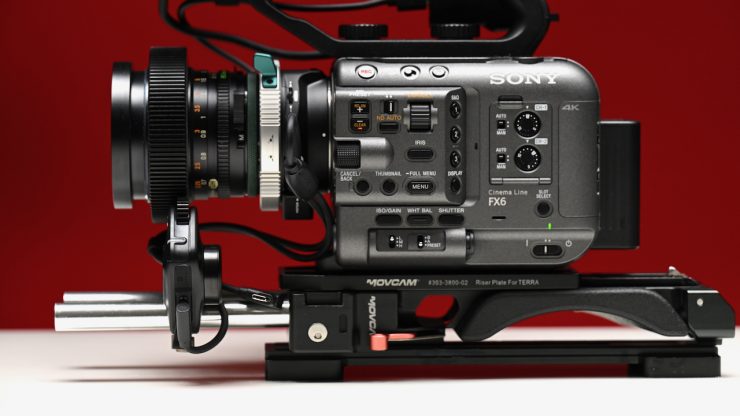
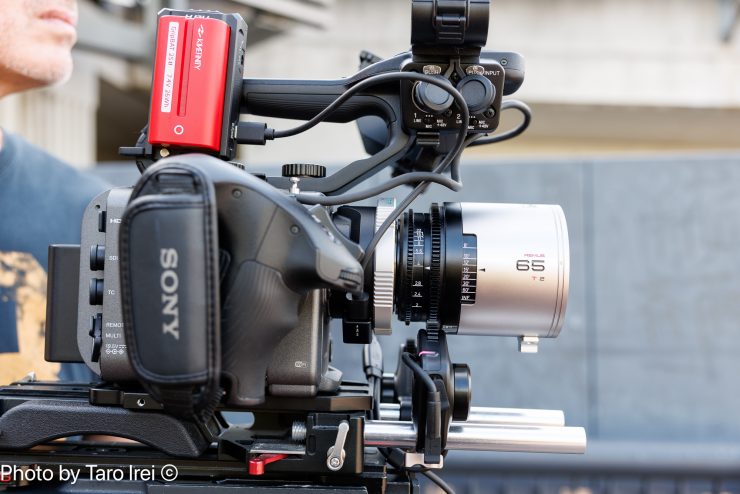
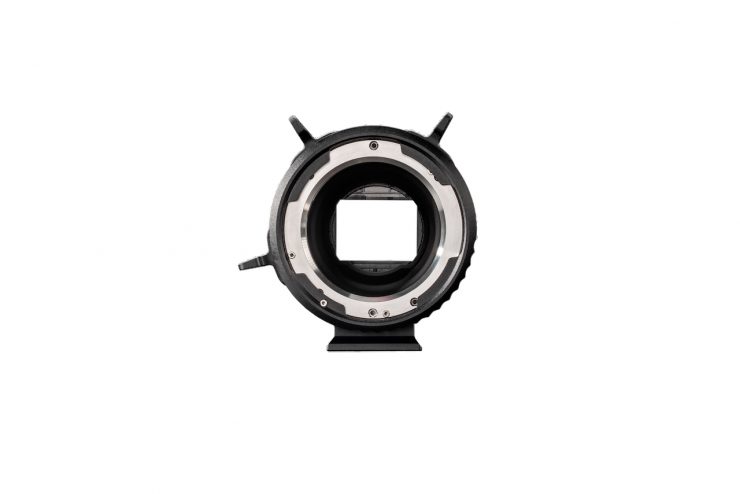
I tried the adapter on a Sony FX6, and it attached securely with no wobble or movement on the mount.
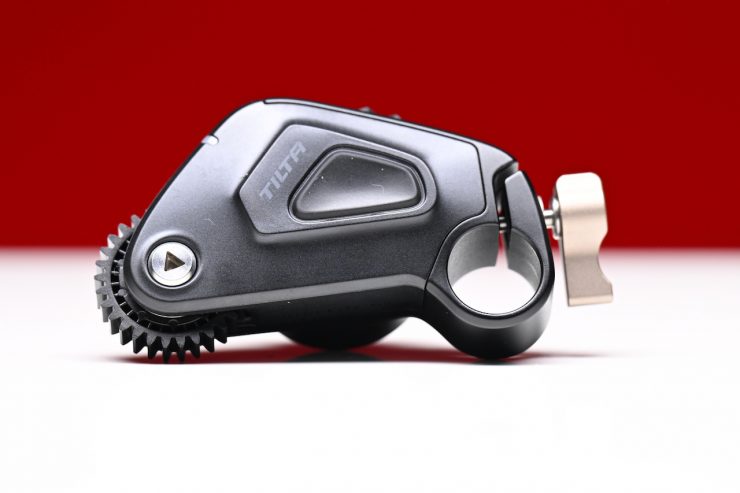
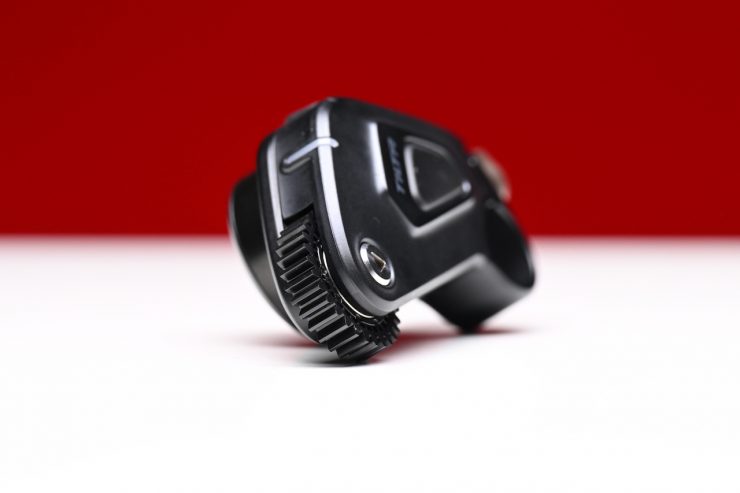
The included motors are reasonably small and compact.
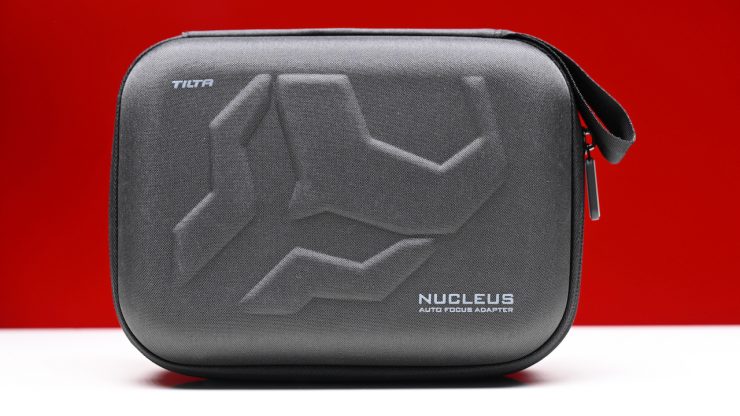
The Tilta Nucleus Auto Focus Adapter Dual NANO II Motor Kit (E to PL) comes in a nice little case that doesn’t take up much space.

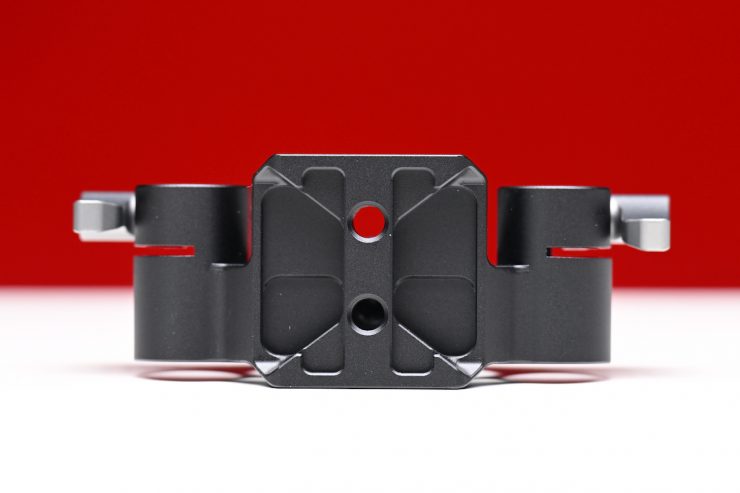
It is also nice that in the Nucleus Auto Focus Adapter Dual NANO II Motor Kit (E to PL), you get a 15mm Rod Adapter that attaches directly to the bottom of the adapter. This is handy if you are using a camera that doesn’t have the ability to mount 15mm rods.
It’s not an entirely new concept
The Tilta Nucleus Autofocus Adapter builds on previous concepts that enabled AF with manual stills lenses.
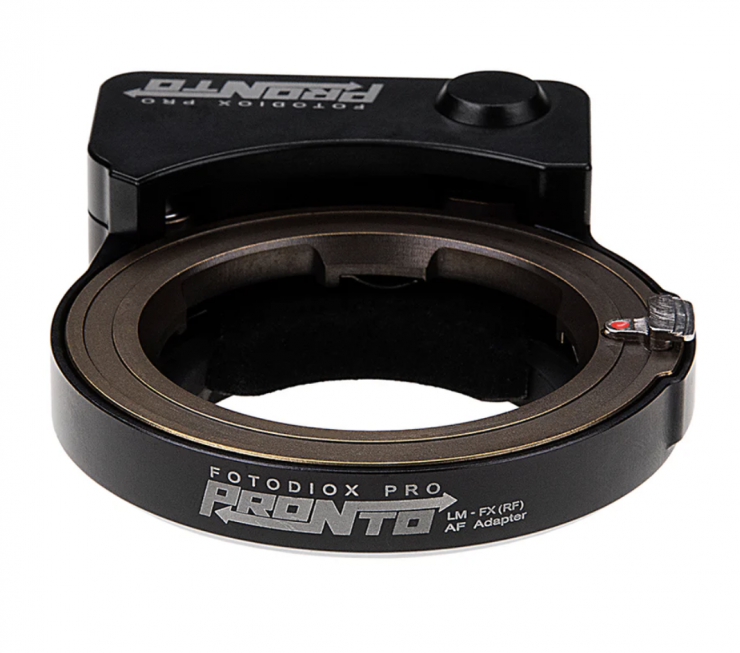

Products like the Fotodiox PRONTO and Techart PRO Autofocus Adapters that give you AF-S capabilities when using manual focus Leica M Mount Lenses on various camera systems have been around for quite a long time, but they have severe limitations.
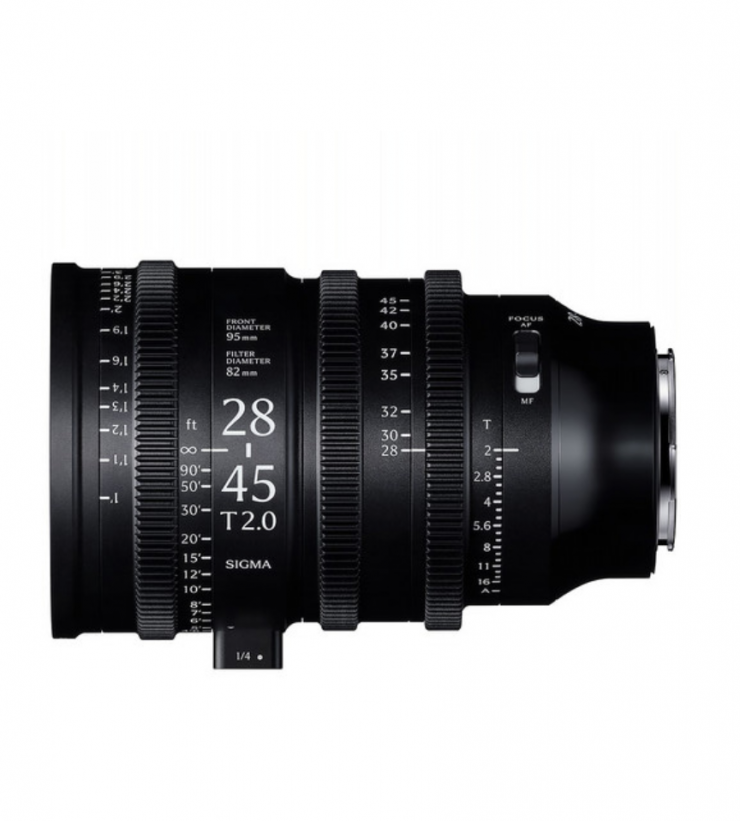
We have also seen cinema lenses with AF capabilities, including Sigma’s 28-45mm T2 Cine zoom lens, and AF anamorphic lenses from companies such as Blazar and Sirui.
Of course, there have been quite a few so-called “cine lenses” with AF before, but a lot of them were still lenses that have a manual aperture and the word cine tacked on.
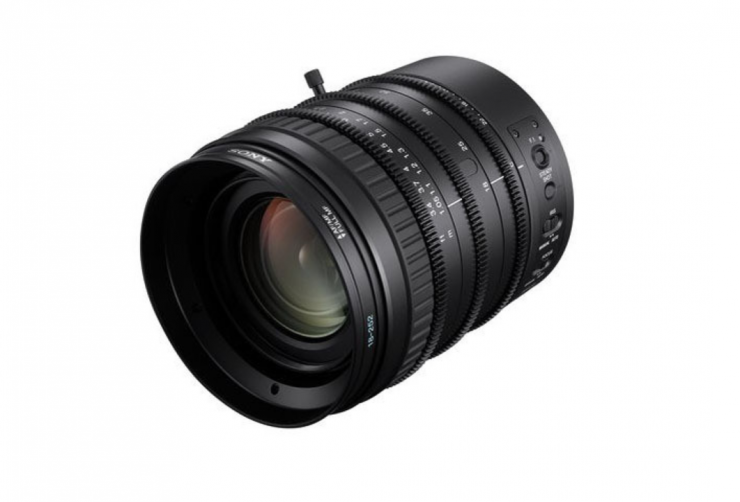
In fact, if you go back 14 years, Sony released the 18-252mm T3.9-T6.8 zoom lens that was for FZ mount that featured AF. This was arguably the first cinema zoom with AF capabilities, albeit not very good ones!
I reviewed that lens at the time on the site.
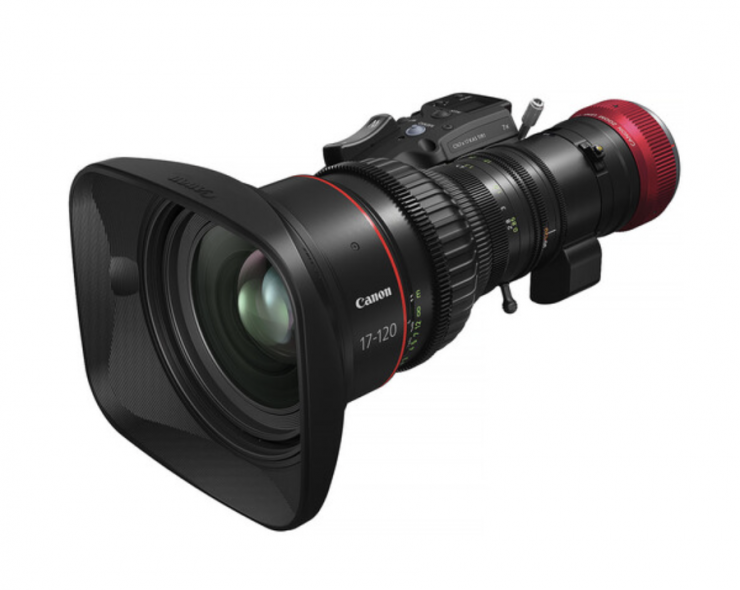
Canon also had a few Cine Zooms, such as the Cine-Servo 17-120mm T2.95-3.9 Lens (Canon RF), that could do Dual-Pixel CMOS AF II when combined with compatible cameras such as the EOS C400.
The trouble with most of the cine lens solutions that enable AF is the lack of hard stops and the fly-by-wire focusing system that is utilized. This makes manual focusing tricky.
No Variable ND solution
An issue with the Nucleus Autofocus Adapter is that if you are using it with a mirrorless hybrid or smaller-sized digital cinema camera that doesn’t have built-in ND, you are going to have to use a matte box and ND with a lot of cine lenses. That said, there are a lot of smaller-sized cine lenses on the market that allow you to attach common-sized variable ND filters.
I think a lot of shooters, especially those using mirrorless hybrids or smaller-sized digital cinema cameras that don’t have built-in ND, would have liked to have seen a solution that features a rear-mounted variable ND filter. I imagine that there could be some limitations or technical reasons why the Nucleus Autofocus Adapter doesn’t include one.
How do you power it?
The power setup for the Nucleus Auto Focus Adapter and its motors varies depending on the specific motor model you are using:
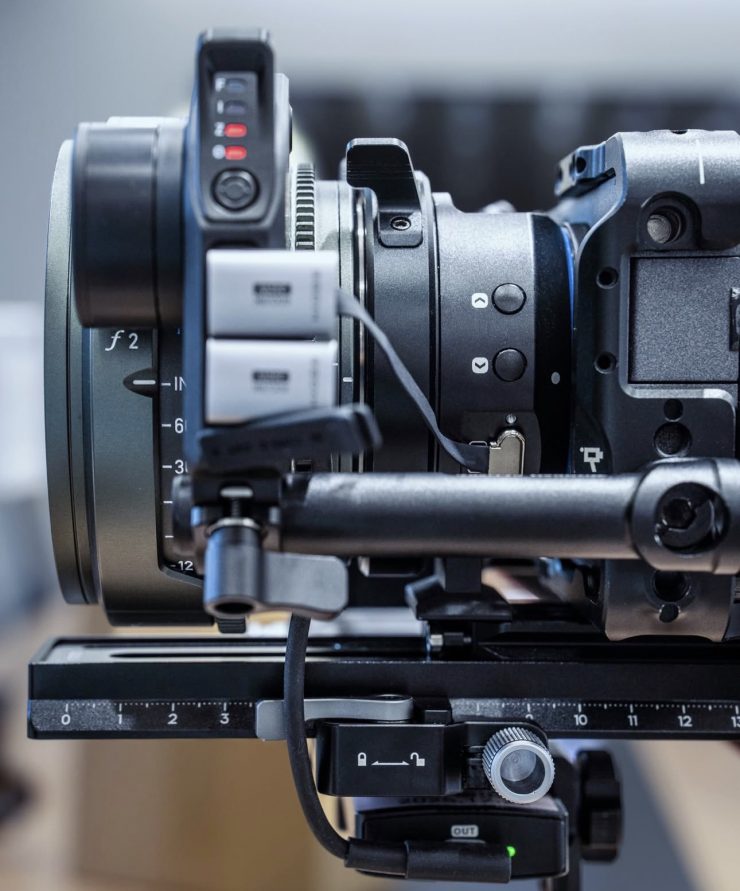
- For Nucleus Nano II Motors: You power both the adapter and the motors via USB-C. Connect the power source to the power USB-C port located on the right-hand side of the adapter.
- For Nucleus M-II Motors: The setup typically utilizes a P-TAP power source, such as a battery plate, to power the motors directly. You then use a 7-pin to 7-pin extension cable to distribute power from the first motor to the second.
Unlike the competing Viltrox solution, the adapter isn’t powered via the camera. You need to supply it with power from an external source.
The only caveat with doing this is that if you turn the camera off and you power the adapter from its own battery source, the adapter will stay on.
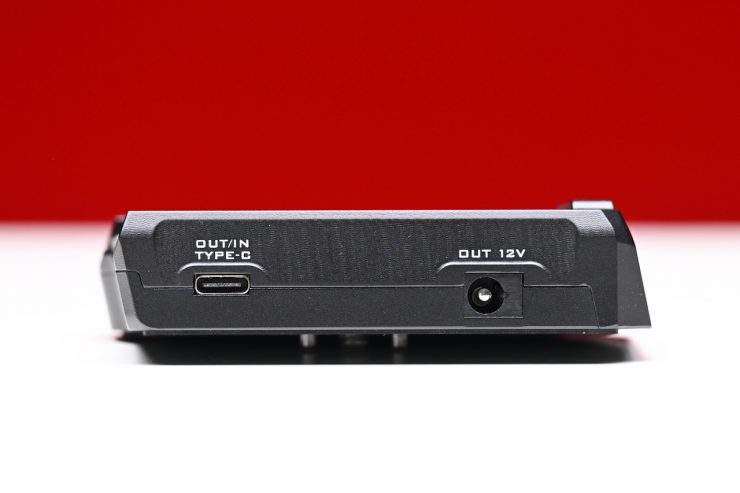
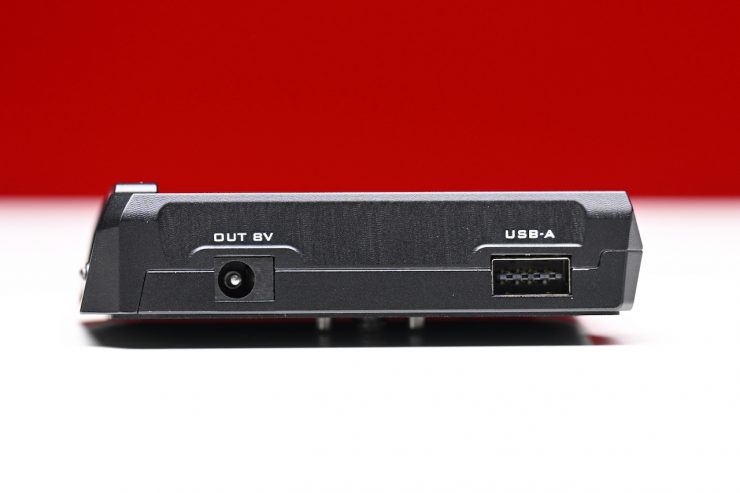
In the kit I was testing, you get a Tilta L-Series Battery Plate that has a USB-C Input/output, a 12V DC output, an 8V DC output, and a USB-A.
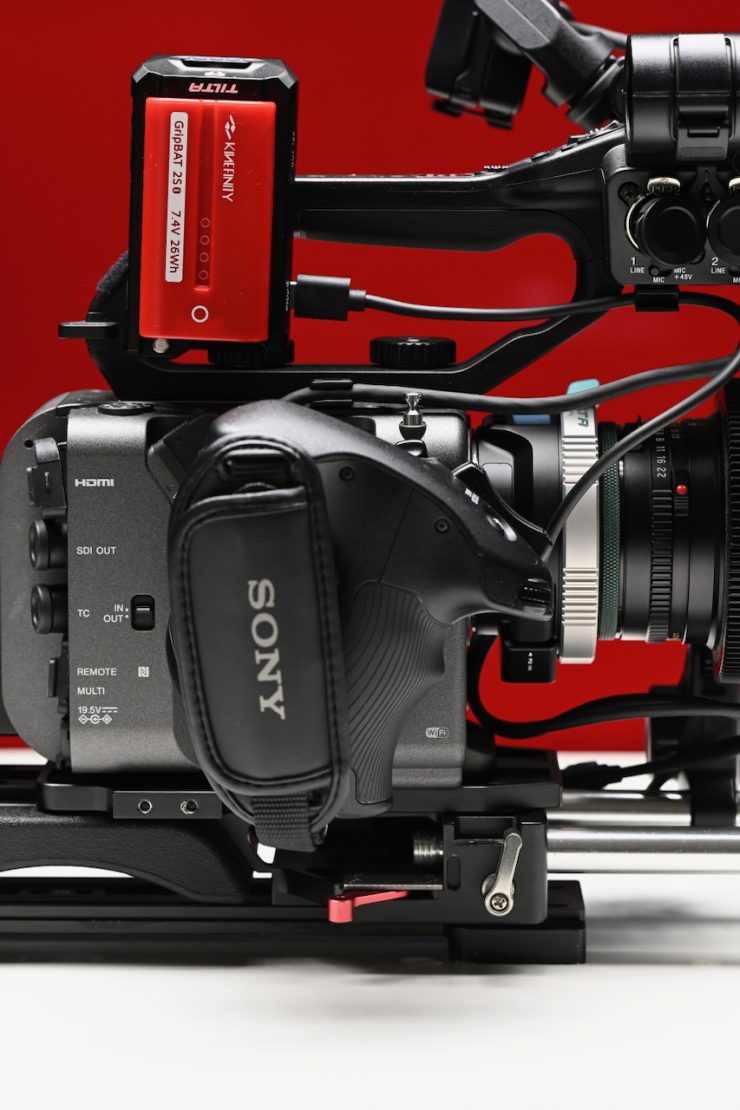
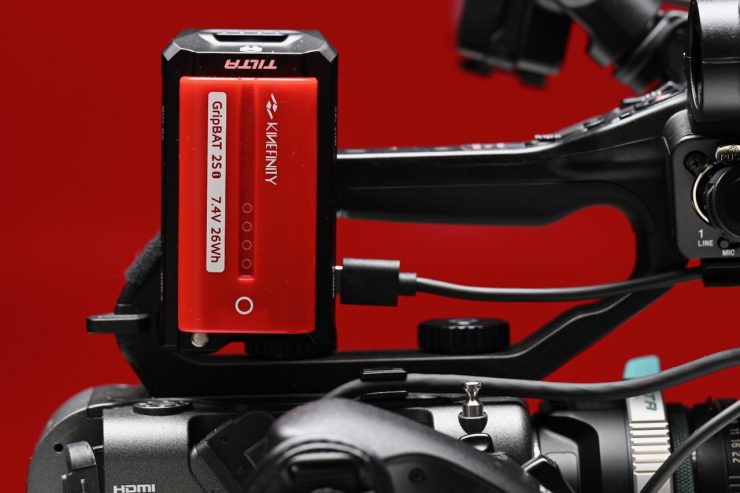
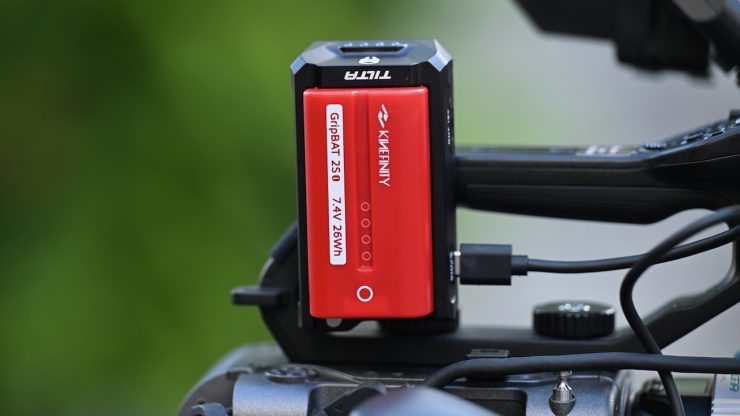
I found that the easiest place to mount it on an FX6 was on the top handle towards the back.
How do you set it up?
The setup process for the Tilta Nucleus Auto Focus Adapter depends on whether you are using Nucleus Nano II or Nucleus-M II motors.

In the adapter menu, you can choose whether you are using Nucleus Nano II or Nucleus-M II motors
What you also need to be aware of is that the system utilizes proprietary USB-C cables, so you can’t just use your own.
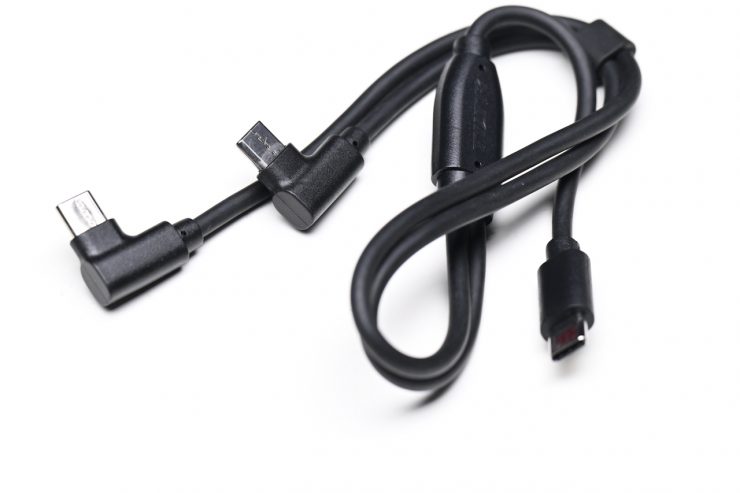

The reason you need to use these specific cables is that the system relies on specialized wiring and signaling protocols provided by the included proprietary cables to ensure proper communication and power delivery between the adapter and the connected focus or iris motors. Standard, off-the-shelf USB-C cables may not support the necessary data transfer requirements or pin configurations required for the adapter to calibrate and control the motors accurately.
Using the Nucleus Nano II motors
- Connect the motors to your lens.
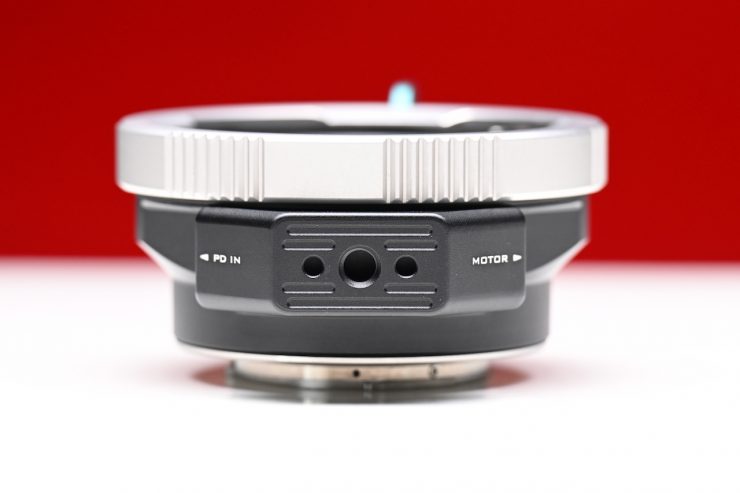
- Use the dual USB-C cable to connect the ‘motor’ port on the adapter to the bottom ports of both Nano II motors.
- Power the adapter and motors by connecting a power source to the USB-C port on the right side of the adapter.
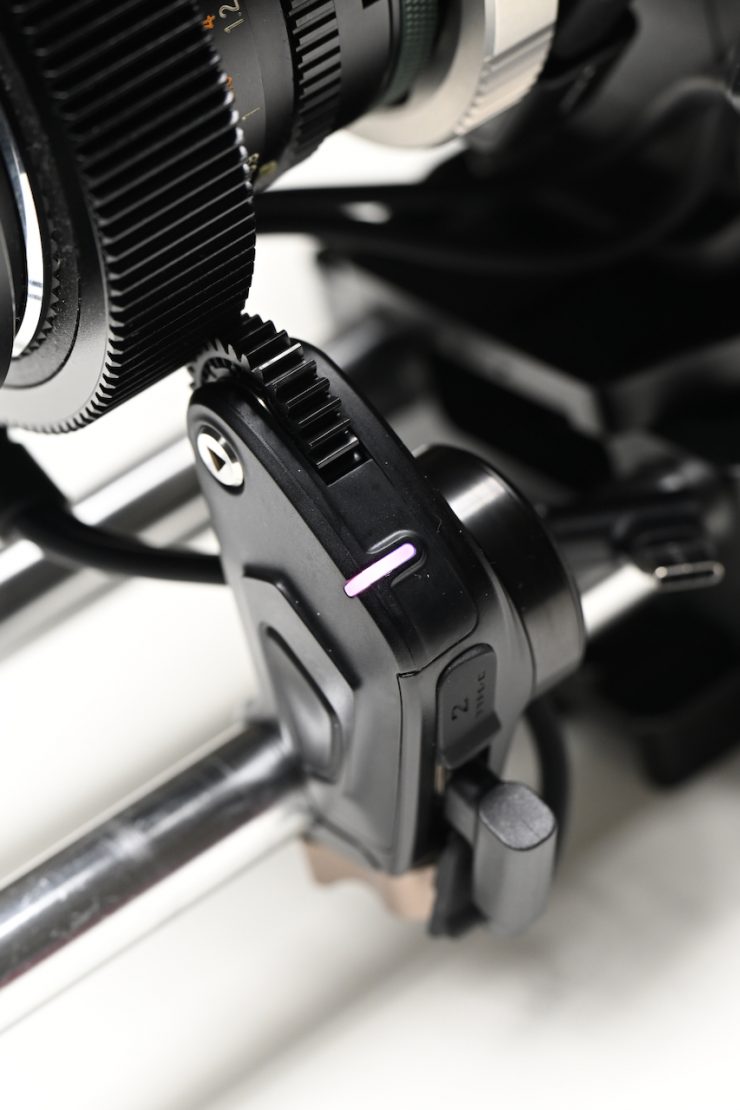
- Once the motors calibrate (indicated by solid LED lights), ensure the focus motor LED is purple and the iris motor LED is green.
- Configure the motor positions on the adapter’s screen by double-tapping the button on the right to assign the left/right orientation for each motor.
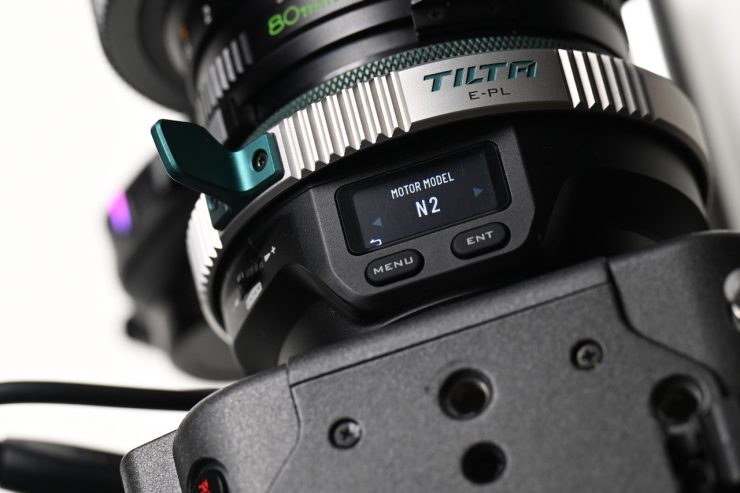
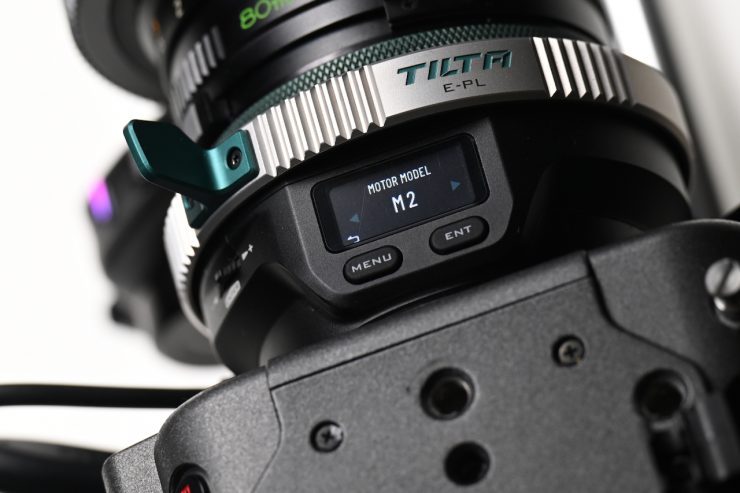
- Navigate the menu to ‘motor model’ and ensure Nano II is selected.
Using Nucleus-M II motors
- Attach the motors to your lens and power the system via a PTAP source.
- Use a 7-pin to 7-pin extension cable to daisy-chain the two motors together.
- Connect the ‘motor’ port on the adapter to the open 7-pin port on the second motor using the 7-pin to USB-C cable.
- Similar to the Nano II setup, verify the motor colors (focus: purple, iris: green) and use the adapter interface to assign the correct motor side.
- Select M II in the ‘motor model’ menu.
Here is what Tilta doesn’t tell you that is very important. On the M II motors, you need to go into the Menu, select Mode, and then choose Auto Focus. If you don’t do this, the motors won’t work.
If you have the Nucleus-M II 7-Pin to USB-C Power Cable (36cm) instead of the 7-pin to USB-C cable that comes in the Nucleus M II Kit, you don’t need to use a 7-pin to D-tap cable to power the system.
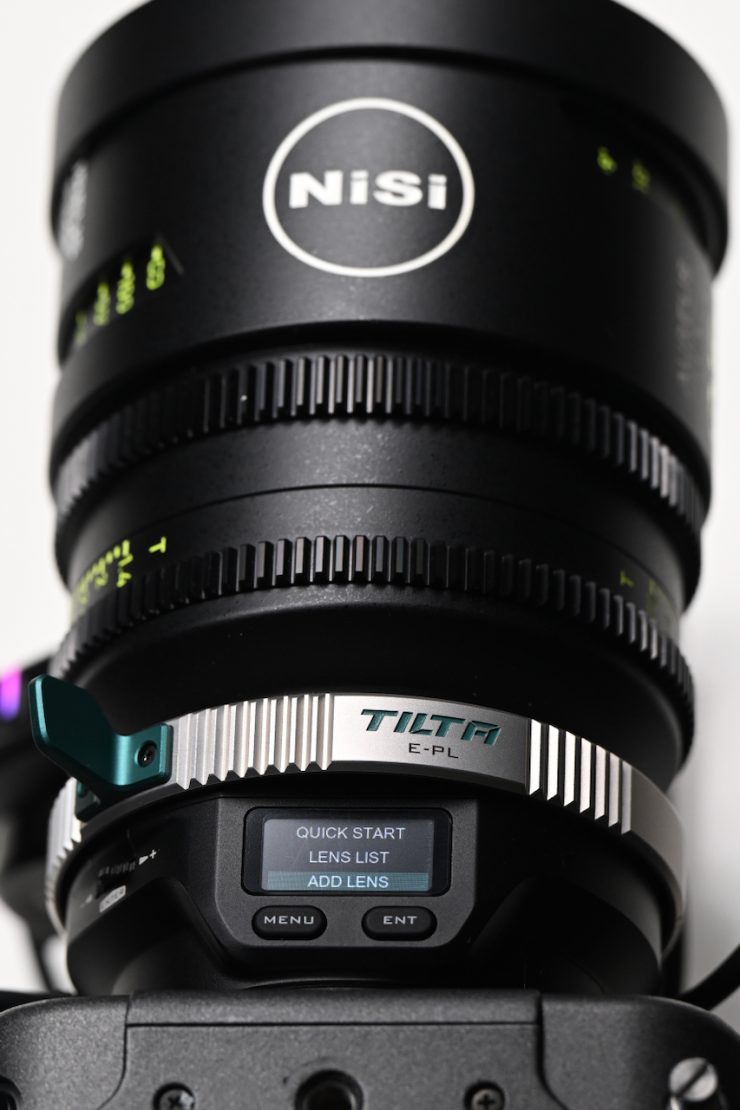
Quick Start function
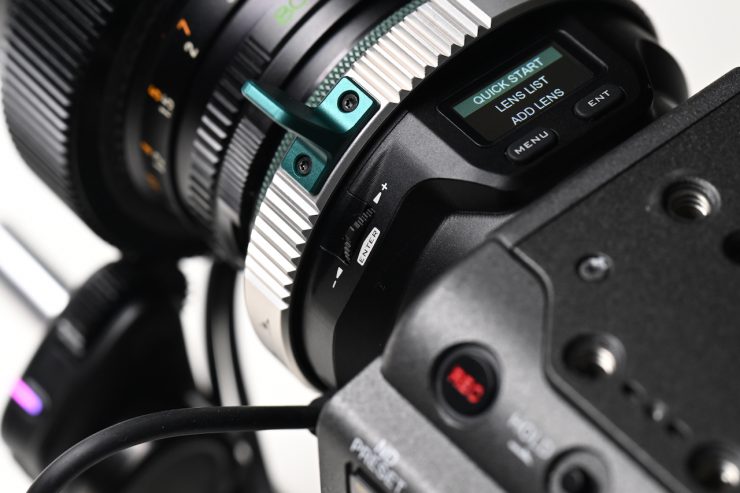
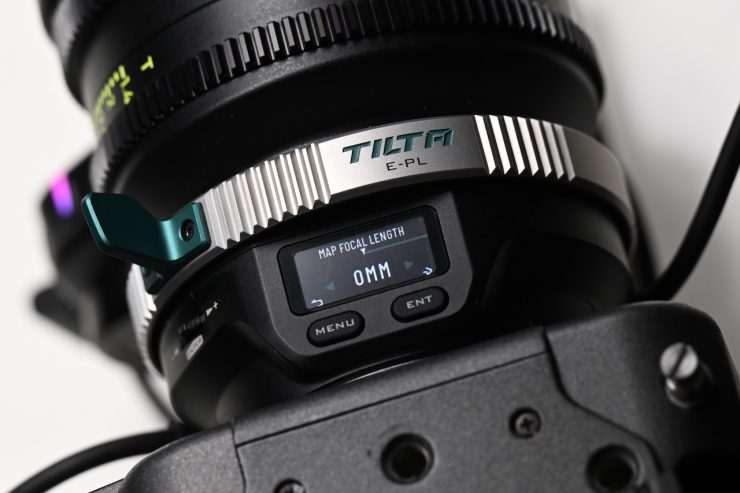
The Quick Start function is designed to get the Nucleus Auto Focus Adapter up and running quickly when you don’t have a fully mapped lens file available. It allows you to input basic lens information, such as the squeeze factor for anamorphic lenses, focal length, and the widest iris, to calibrate the system for immediate use.
While this provides a fast way to enable autofocus, it is important to note that it will not be as accurate as using a fully mapped lens from the library. In saying that, if you need to do something in a hurry, it still works well for certain shots and applications.
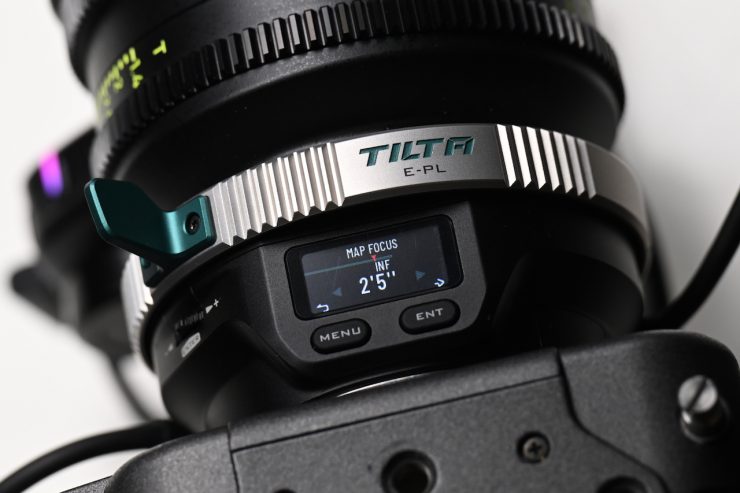
Calibration & Adding a Lens
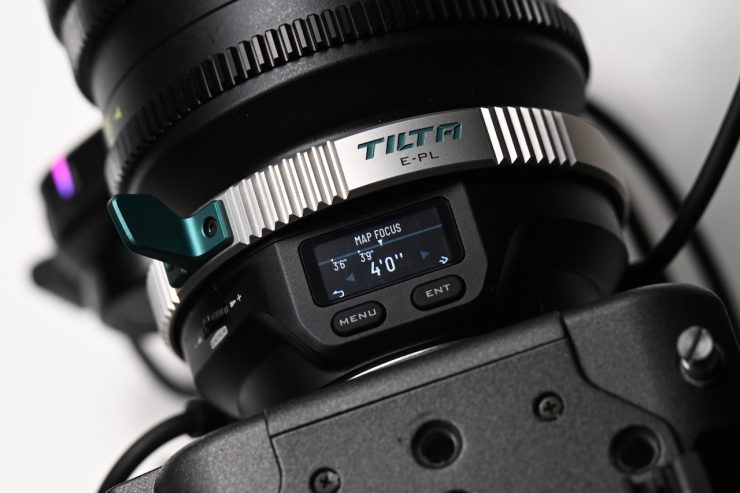
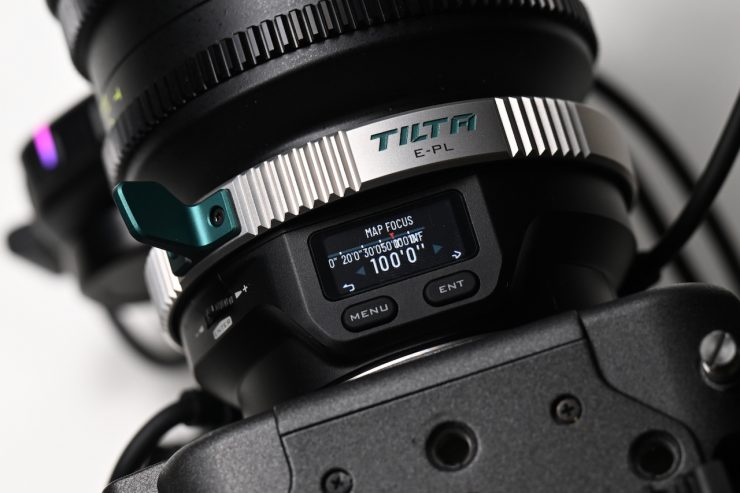
To calibrate your lens with the Nucleus Auto Focus Adapter, you need to manually map the lens’s focus and iris marks through the adapter’s interface. This process is necessary to ensure the system works accurately.
Mapping the Lens
- Access the Library: Press the menu button on the left and navigate to “Add Lens”. Enter the brand name, series, circle of confusion, anamorphic squeeze factor, and focal length for your lens.
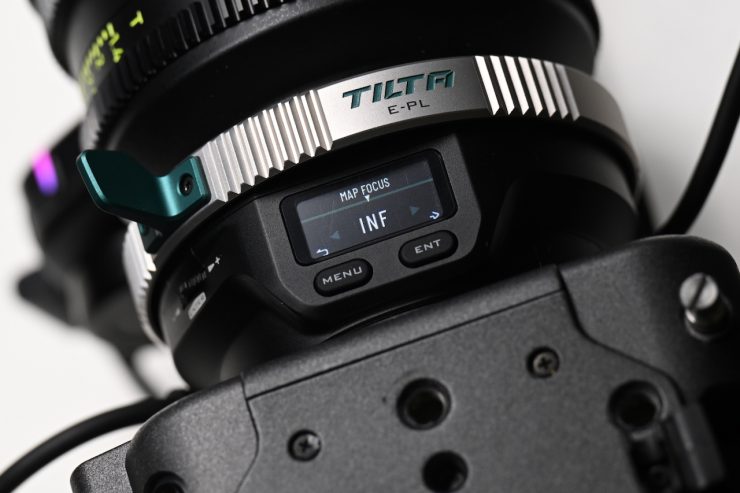
- Map Focus Marks:
- Start by setting your lens to infinity, then press enter on the adapter to mark that data point.
- Move the lens to its minimum focus distance (e.g., 2 ft) and adjust the distance on the adapter to match, then press enter.
- Continue mapping various focus points along the lens. The more marks you set, the more accurate your focus pulling will be.
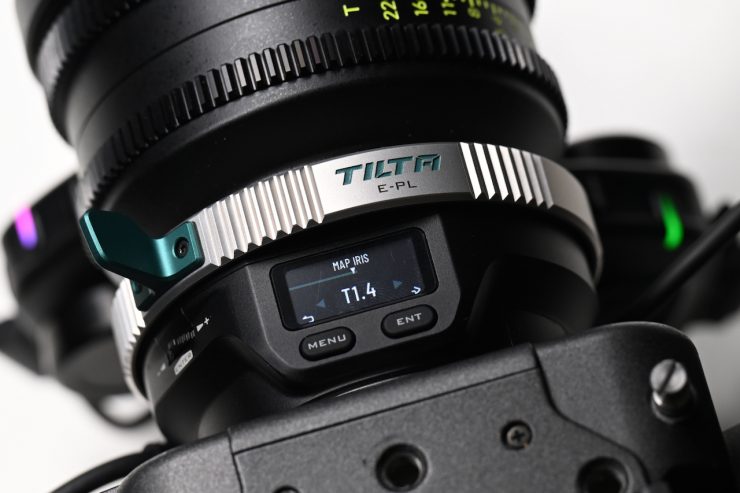
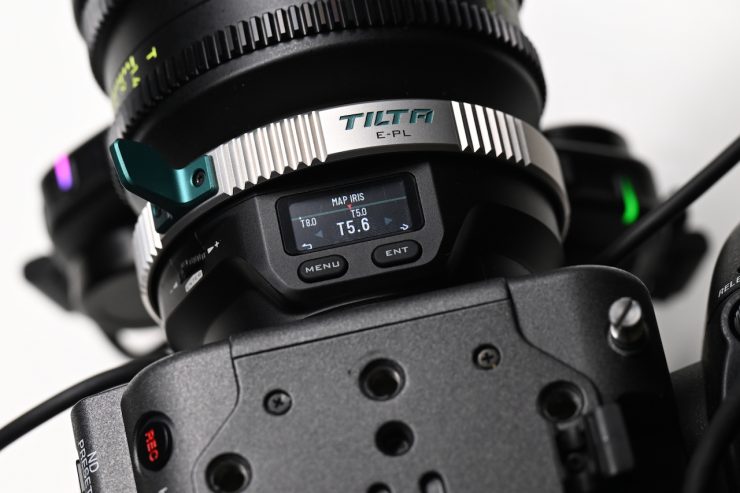
- Map Iris Marks:
- Once focus is mapped, use the button on the right to switch to iris mapping.
- Turn your lens iris ring to the most open position and use the selector on the adapter to match the T-stop or F-stop value.
- Continue moving to the next iris marks until the process is complete
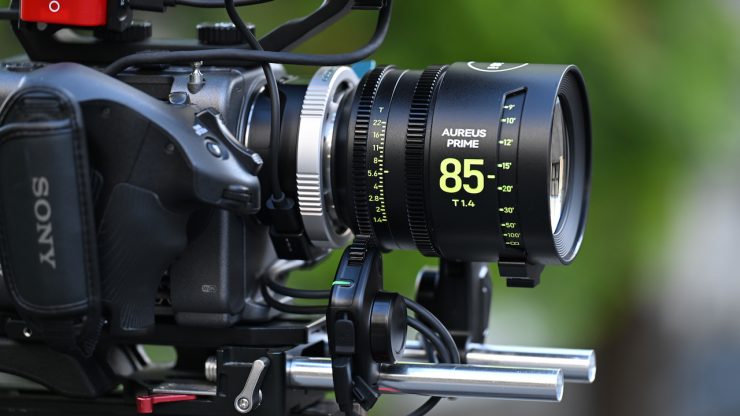
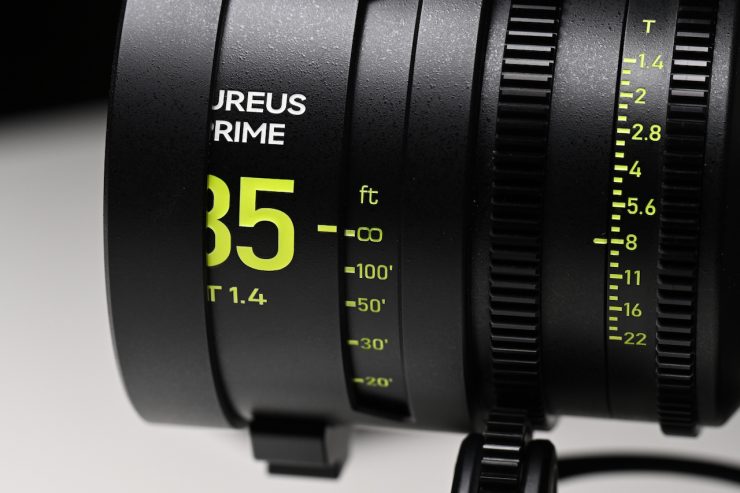
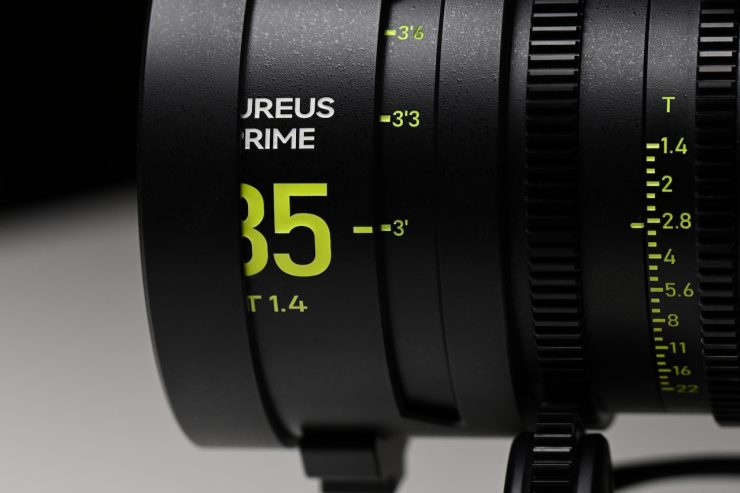
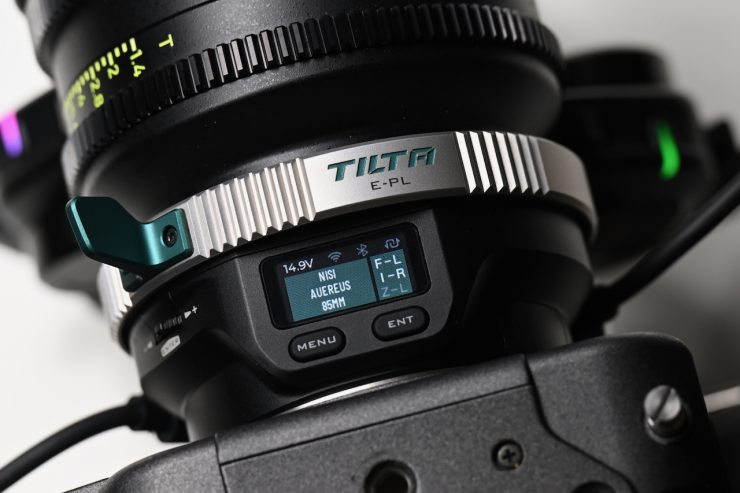
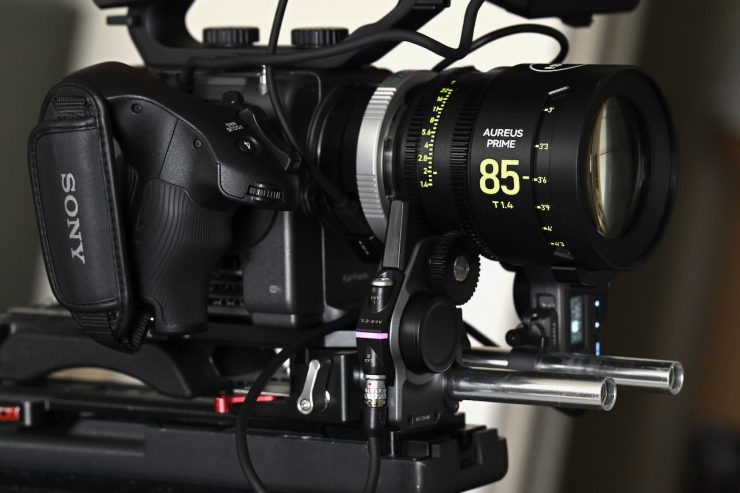
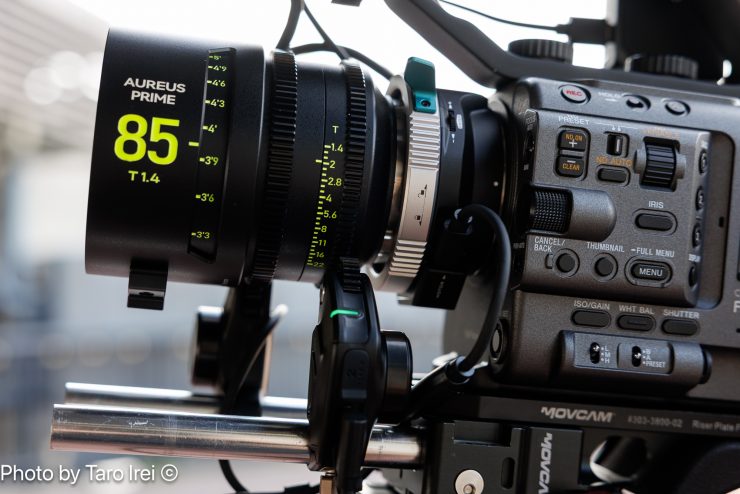
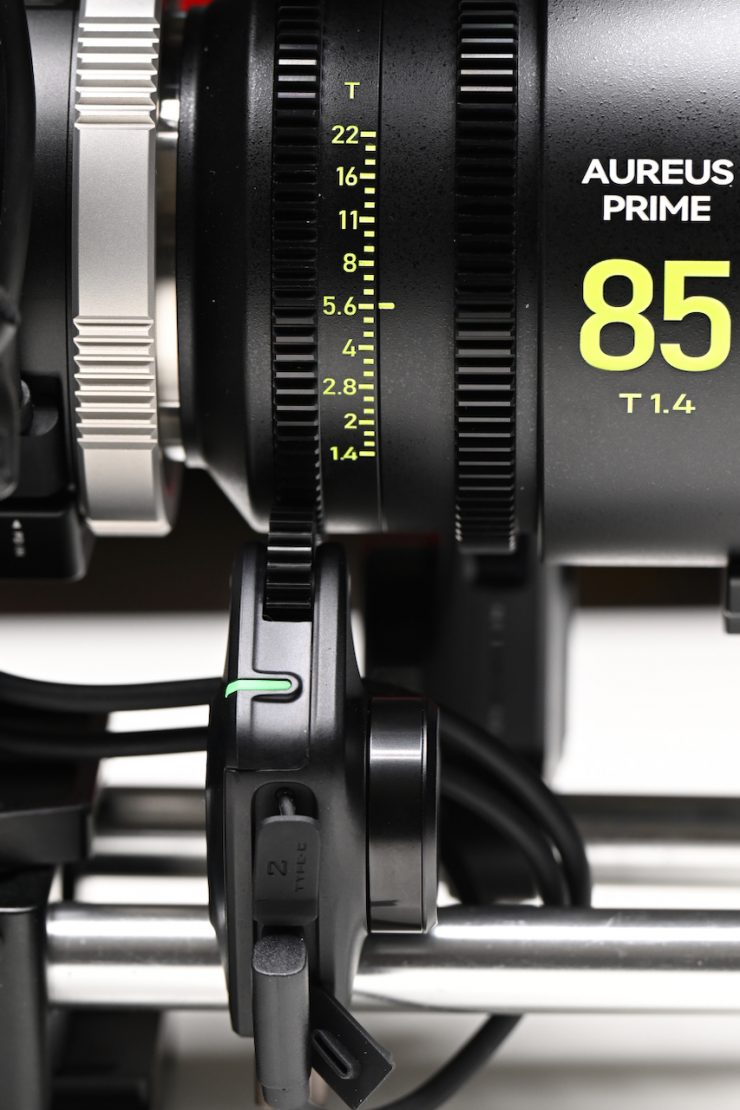
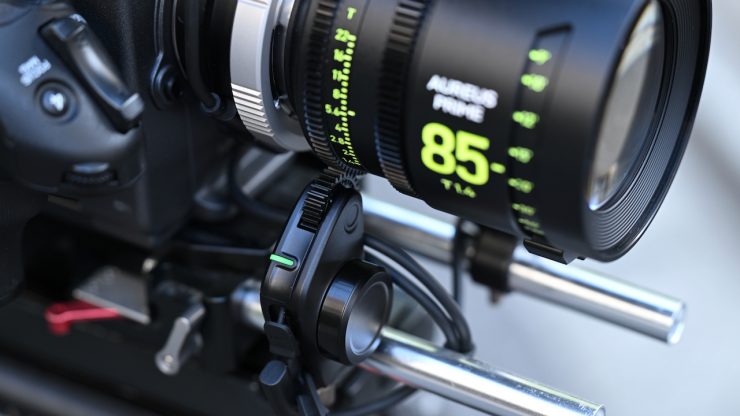
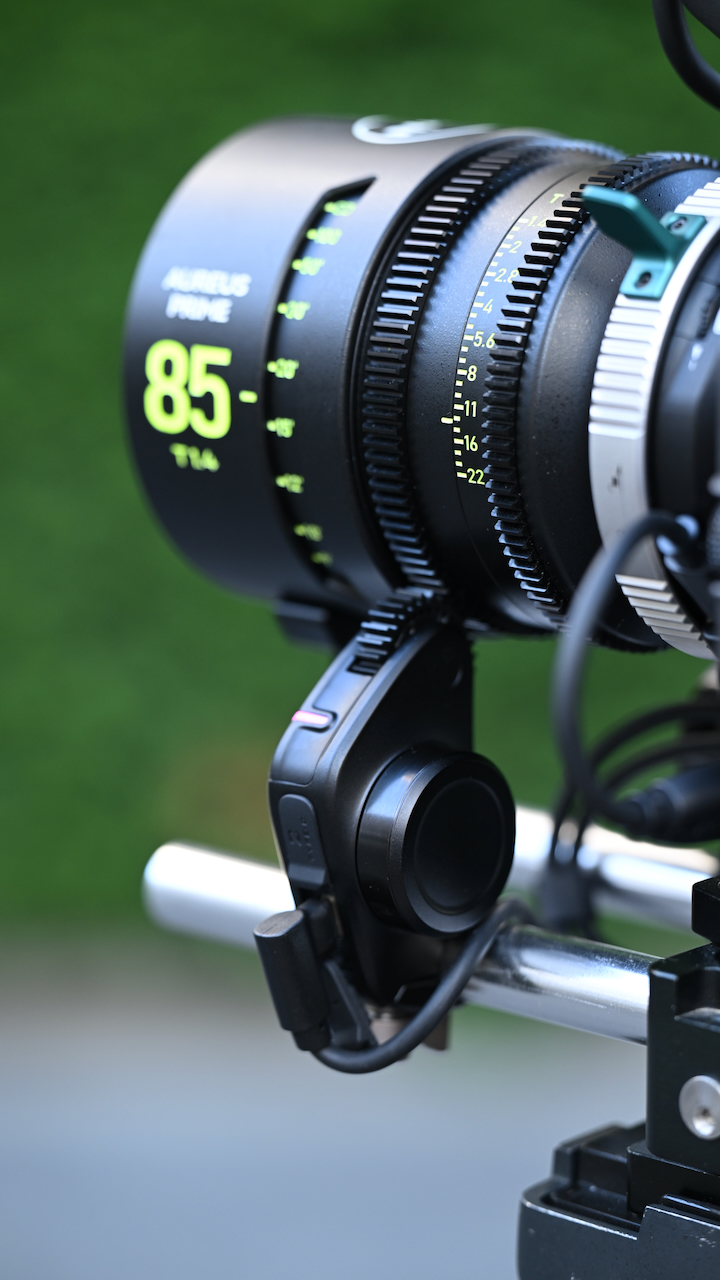
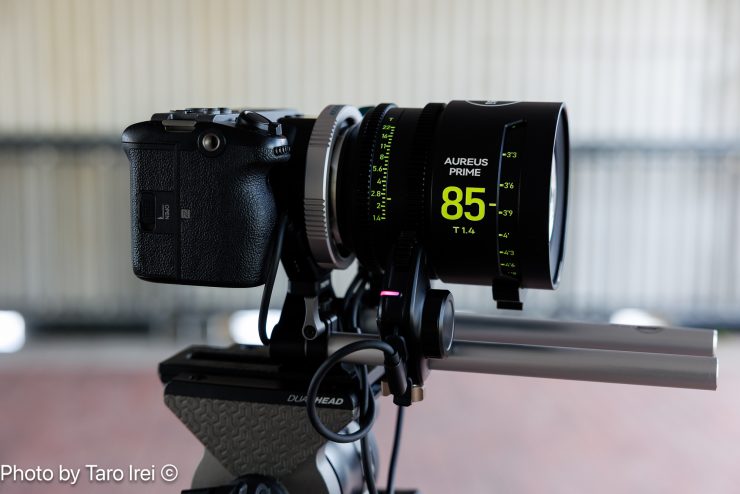
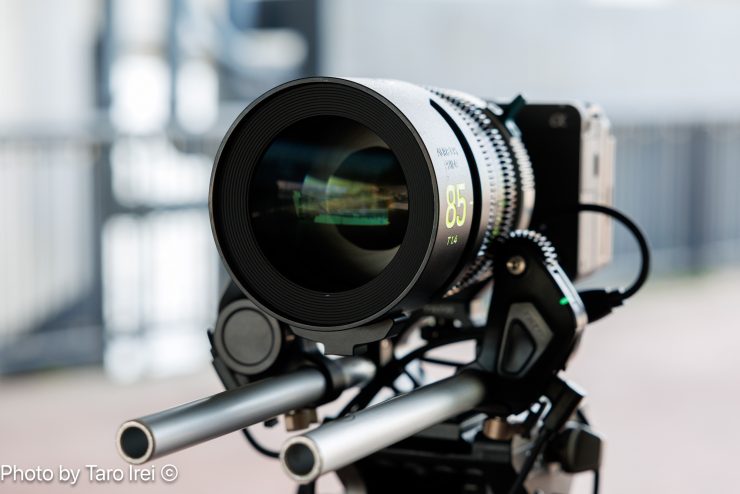
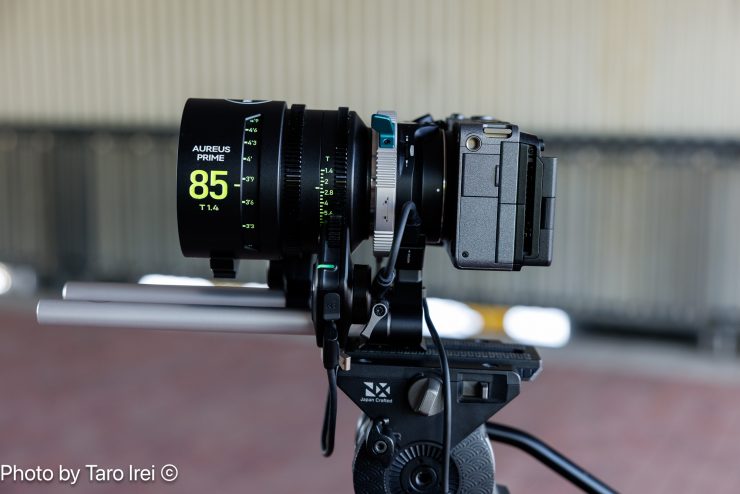
As an example, let’s map a NiSi AUREUS 85mm T1.4 lens from scratch.
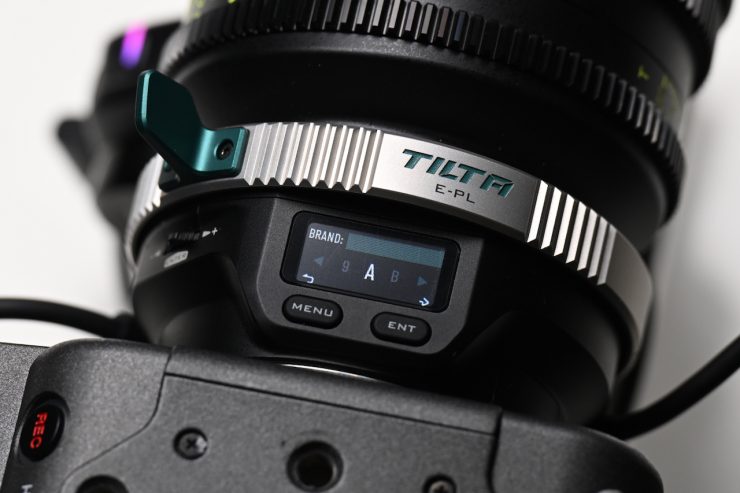
First, we go to Add Lens and then press the ENT button. It will then ask me to enter the lens brand.
I will go ahead and enter NISI. After I have done this, I press the ENT button again.
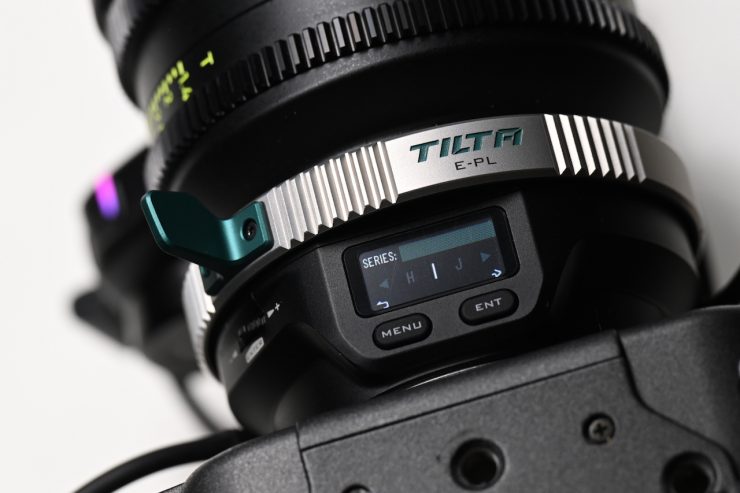
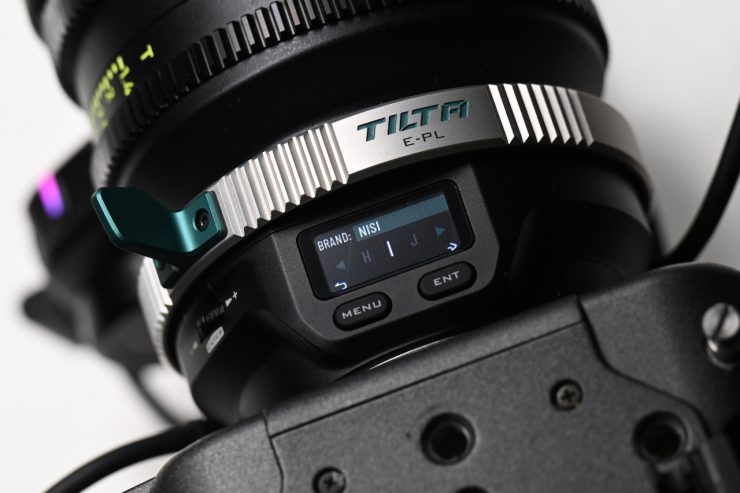
It will then prompt me to enter the lens series.
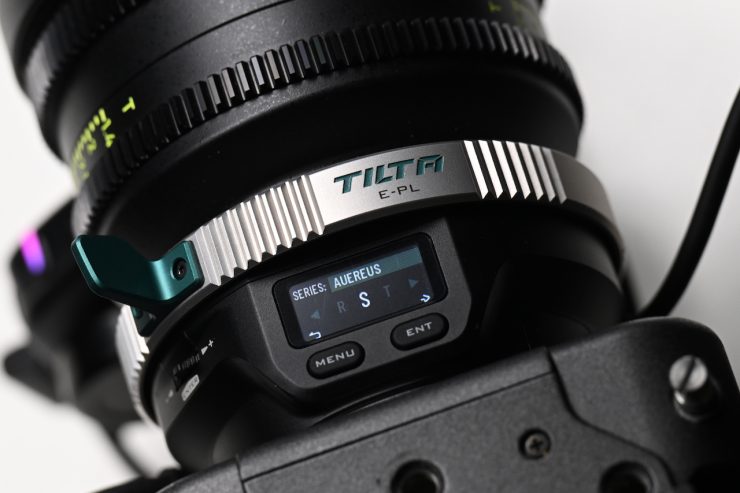
I will go ahead and enter AUREUS. Once I have done this, I will press the ENT button.
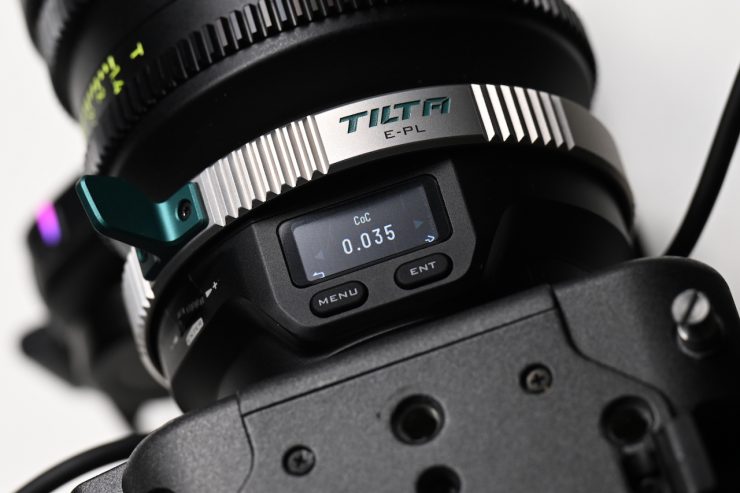
Now it will ask me to set the Circle of Confusion. Once I have done that, I press the ENT button again to go to the next step.
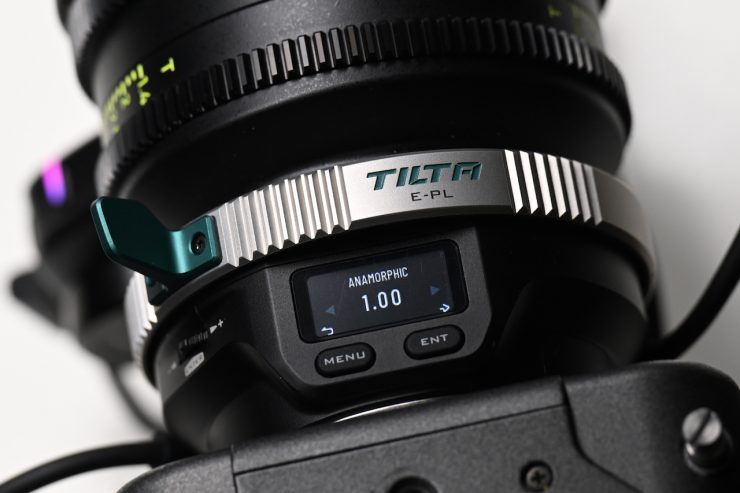
In the next step, I can choose whether or not the lens is anamorphic or not. In my Case, the lens is not, so I will just press ENT.
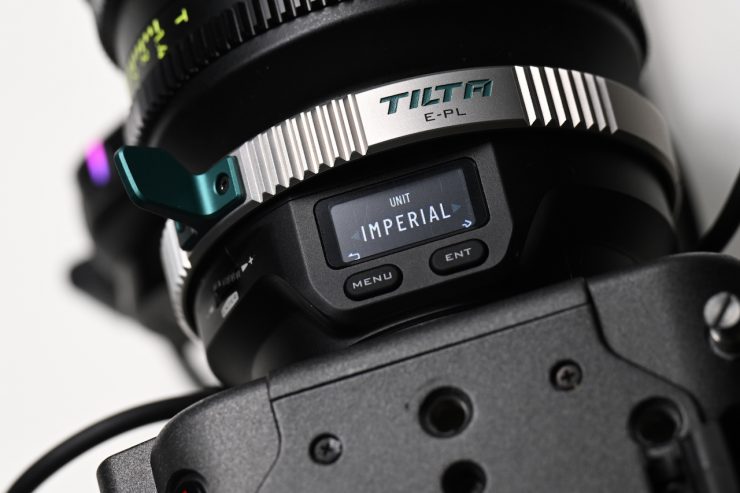
I can then choose between Imperial or Metric for the focus markings. My lens is Imperial, so I will just go ahead and press ENT.
Now, it will ask me what the focal length of my lens is.
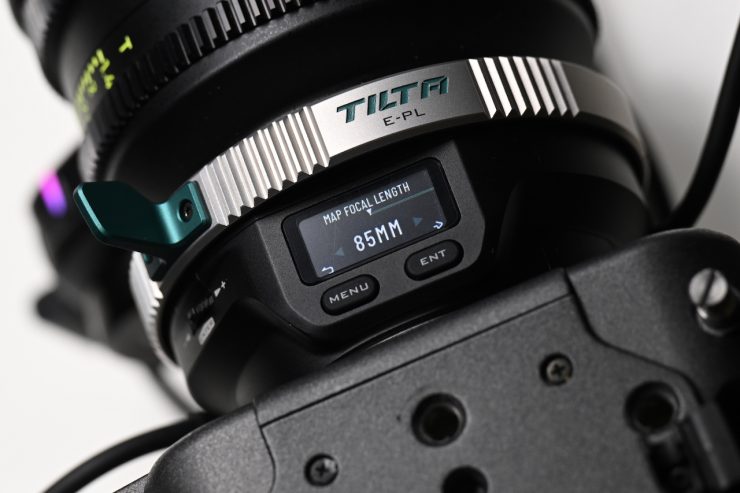
I will select 85mm and then press ENT.
Now, I am ready to start adding the focus and/or iris marks.
Firstly, I will manually move the focus barrel till I reach infinity, and then I will press down on the scroll wheel to mark that point.
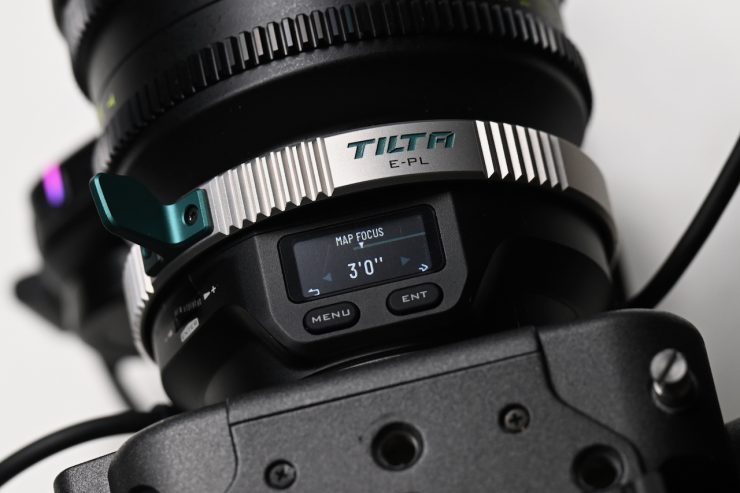
I will then add the minimum focusing distance for the lens.
After this, I will proceed to enter all the other focus marks for the lens. Once I have finished, I will go ahead and press ENT. Now, you don’t have to enter all of them if you want, but you will get more accurate results by entering more focus scale marks.


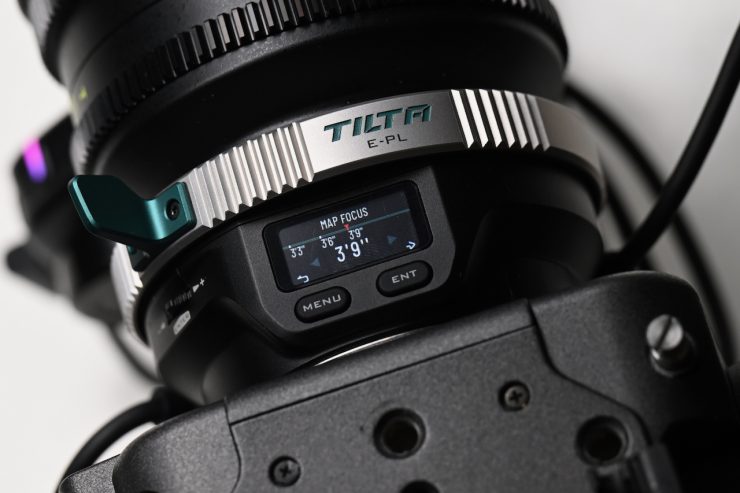
Next, I will go ahead and enter the Iris marks in the exact same way I did the focus marks (I only have to do this if I am using a second motor for iris).
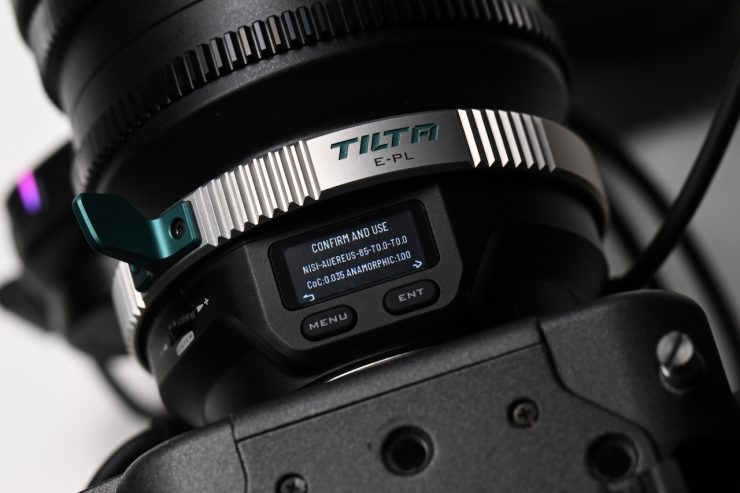
Once I am finished, I will go ahead and press the ENT button once more. This will then give me a prompt asking if I want to save and use that data. I will go ahead and press ENT to do so.
Now, the adapter will display the lens I am using.
Like any calibration process, this can take some time, but once you have your lenses mapped, it provides better results. The lens map lens process is entirely reliant on the markings on your lenses being accurate. You could measure out distances manually and then map out focus points if you wanted to. In saying that, as the adapter is using the camera’s AF sensor data, the markings are more of a reference than anything else.

A caveat I found is that there doesn’t seem to be any way of going back into a mapped and saved lens to change information. For example, if I mapped the focus for a lens and then saved that lens, I can’t simply go back in and add the T-stop data for it if I decide to use another motor to control the iris.
What I needed to do was to delete that lens and then re-add everything again. This is something that needs to be changed via a firmware update.
There also doesn’t appear to be any way of deleting a mark if you make a mistake. For example, if I accidentally enter T5.0 instead of T5.6, I couldn’t delete that mark or override it.
Adjusting the Lens Speed
To adjust the Lens Speed of your autofocus system on the Nucleus Auto Focus Adapter, you simply follow these steps:
- Press the menu button on the left side of the adapter.
- Use the selector to navigate through the menu options until you reach Lens Speed.
- Within this setting, you can adjust the speed of the autofocus system to your preference, allowing you to fine-tune it independently of your camera’s internal settings.
Tilta recommends experimenting with different speed settings to find what works best for your specific shooting style.
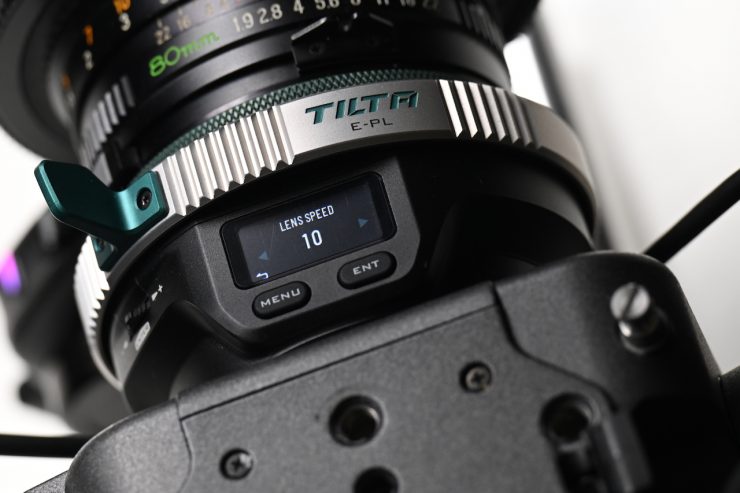
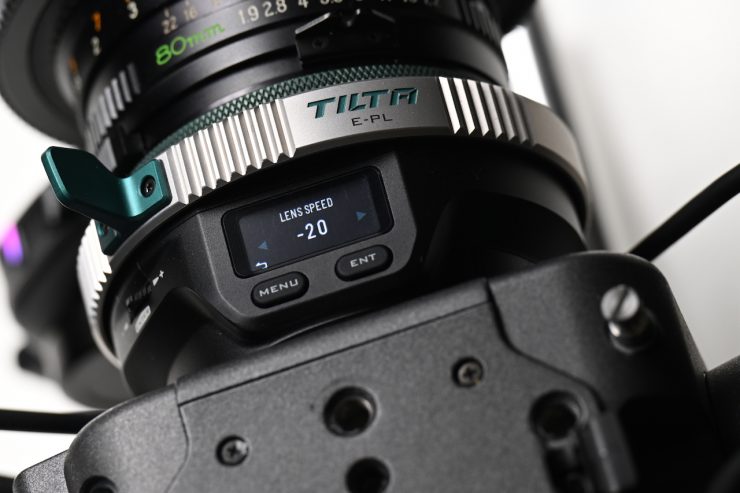
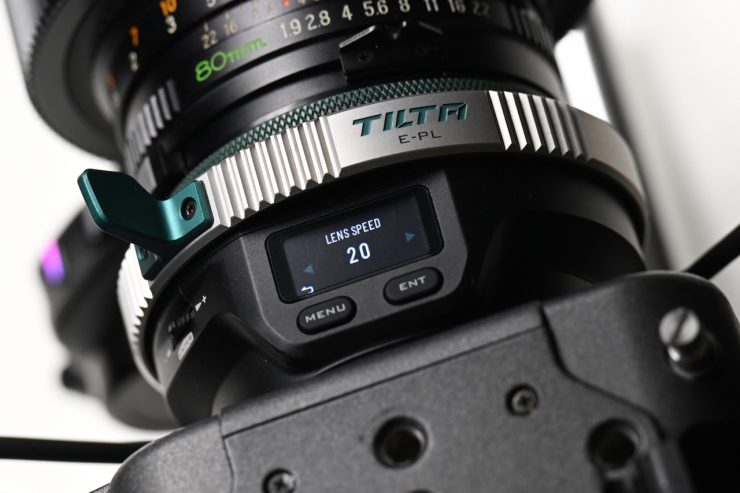
I found that there is a good amount of adjustment available. You can set the speed anywhere between -20 and 20. At lower speeds, you get a nice, gradual focus transition, and if you dial it up, it is pretty snappy.
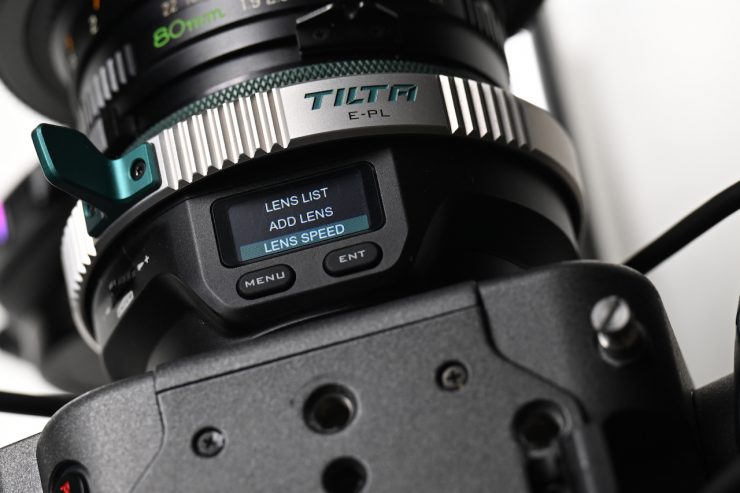
Lens List Library

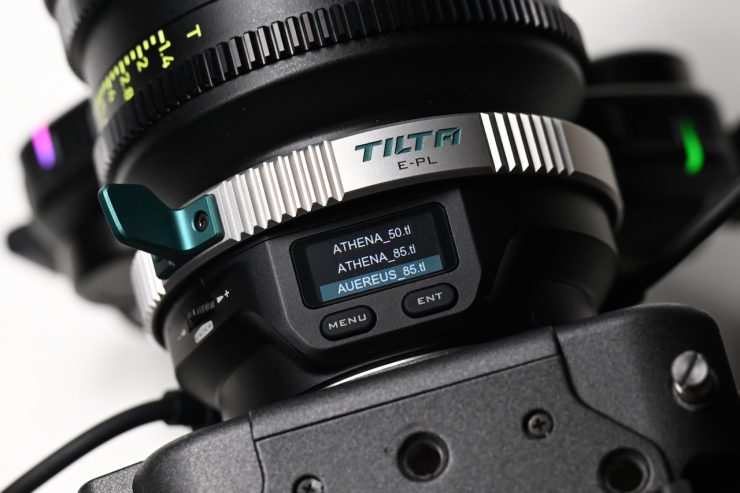

The Lens List Library allows you to access pre-configured data for supported lenses to help the Nucleus Auto Focus Adapter perform accurately. Here is how it works:
- Accessing the Library: Press the menu button on the left side of the adapter, then use the to navigate to Lens List
- Selecting a Lens: Browse the list by brand name to find your specific lens, then use the selector to choose the matching focal length.
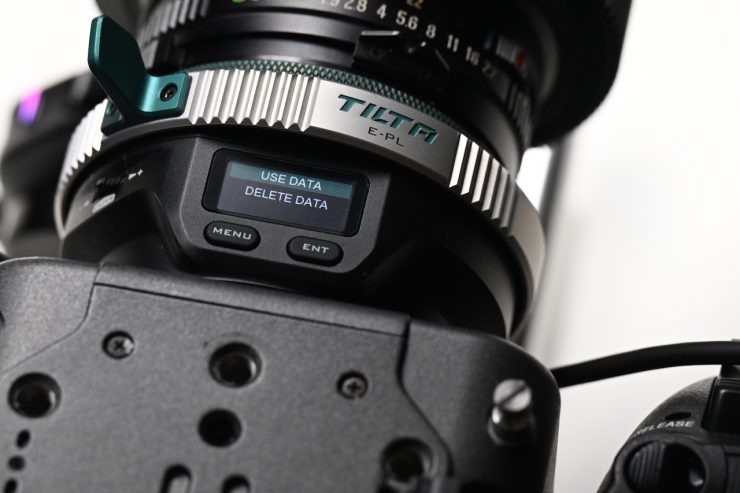
- Loading Data: Once you have located your lens, press Enter and select Use Data to load the settings.
- Ready to Use: After the data is loaded on the homepage, the adapter is configured and ready for operation with that specific lens.
You can switch between imperial and metric units for focus distance. When adding a lens to the library, you can toggle between these measurement systems during the configuration process.
You can also export your custom lens files. The process for exporting lens data from the adapter is identical to the process used for importing data or updating firmware.
To export your files:
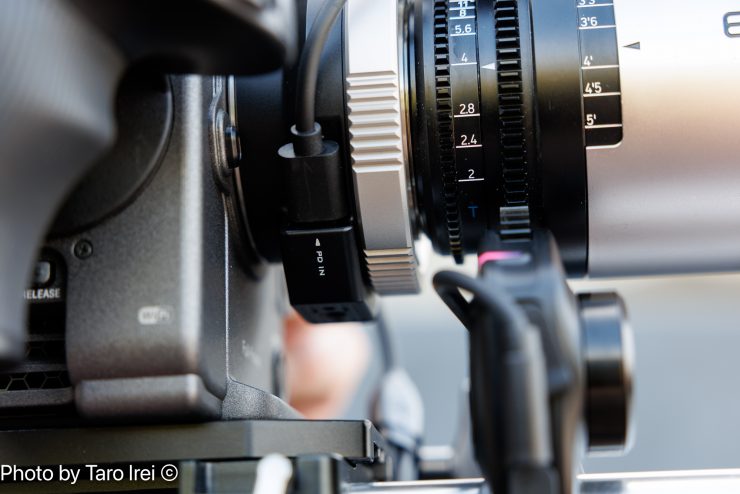
- Connect the adapter’s PD IN USB-C port to your computer.
- Use the menu button on the adapter to navigate to the Import/Export Data section.
- Once the adapter appears as a drive on your computer, you can access your lens library and move the files as needed.
Changing the Motor function
To configure the motor layout on the adapter’s screen, follow these steps:
- Enter Configuration Mode: Double-tap the button on the right of the adapter to access the motor assignment menu.
- Select the Motor: The focus motor is typically assigned to the left side by default. To adjust the iris motor, double-tap the right button again until the letter next to the ‘I’ (Iris) begins to flash.
- Set Position: While the indicator is flashing, use the dial on the left to toggle the setting between ‘L’ (Left) and ‘R’ (Right), depending on where you have physically mounted the motor on your lens.
- Confirm: Wait a few seconds for the indicator to stop flashing, which saves your selection.
It’s not all smooth sailing

If you already own Nucleus N-II or Nucleus M-II motors, they need to be updated with firmware to work with the Nucleus AF Adapter. Tilta has made this a little confusing to do, and they should provide clearer instructions and a more detailed video.
I ran into issues when I tried to update the Nucleus M-II motors. If you go to the Nucleus Auto Focus Adapter update page, there is firmware there, but the problem is that if you try to update the M-II motors by attaching them to the Nucleus Auto Focus Adapter, the update won’t work. The firmware would say Success, but then the motor would not turn back on. What I needed to do was download this firmware and update the M-II motors using the Nucleus M II FIZ Controller Hand Unit.
This was very, very strange because Tilta instructed me to update the firmware for the M II motors by using the Nucleus Auto Focus Adapter. The other issue with trying to do that is that Tilta’s instructions tell you to attach an M-II motor directly to the Nucleus AF Adapter using a USB-C to 7 Pin cable. The problem is, the USB-C to 7 Pin cable that comes in the Nucleus M-II Kit isn’t the right cable, as its actaully a Run/Stop cable and it doesn’t supply power. This ultimately means you can’t do the update correctly, as you actually need this Nucleus-M II 7-Pin to USB-C Power Cable (36cm). This causes a ton of confusion, and I know a lot of people who have bought the Nucleus AF Adapter who already own existing Nucleus N-II or Nucleus M-II motors have run into lots of issues.
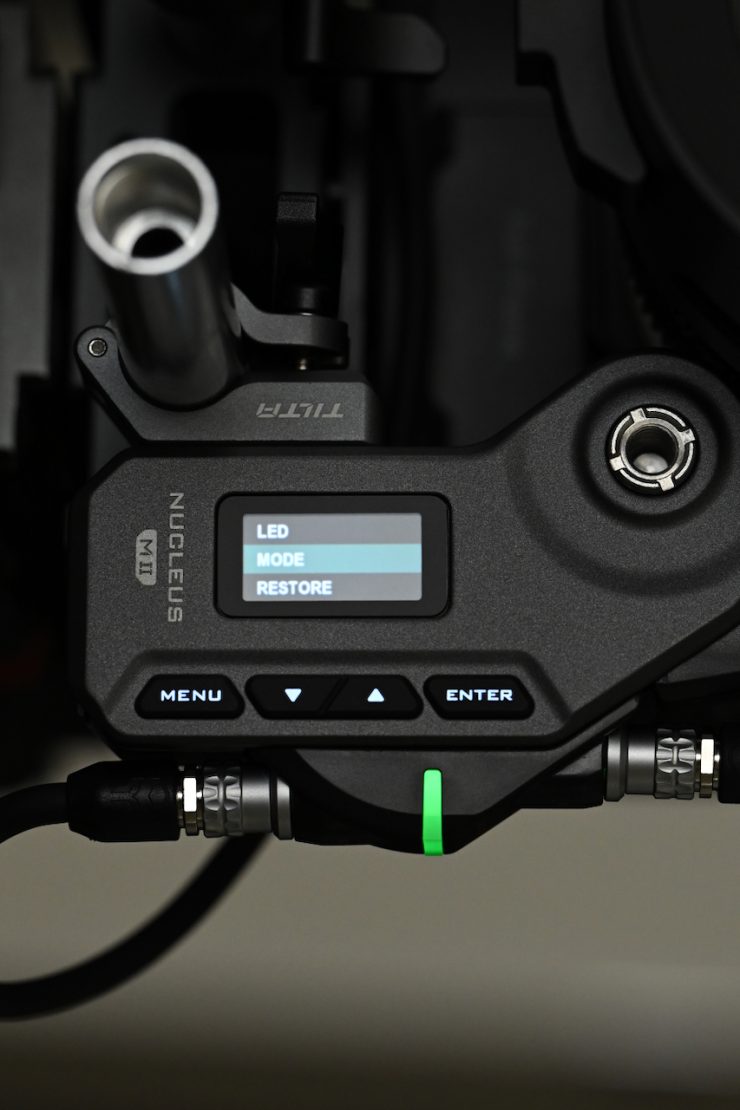

As I mentioned earlier in the review, once you have updated the firmware for the M II motors, you need to go into the Menu, select Mode, and then choose Auto Focus. If you don’t do this, the motors won’t work!
Controlling Zoom or Running a third motor
If you had an additional Nano II or Nucleus M-II motor (all three motors would need to be the same model), you could control FIZ.
If you just want to control the zoom and not the iris with the two-motor kit, you can, of course, just set one of the motors to the zoom function. By doing this, you can use the zoom rocker or zoom lever on compatible Sony cameras. You would need to set one of the motors to Z (zoom) for this to work.
No App
Unlike the competing Viltrox NexusFocus F1 adapter, the Nucleus Auto Focus Adapter doesn’t have any app. While it is convenient to change the settings and do the setup directly on the adapter, I think an app that allowed you to do the same thing would be a welcome addition.
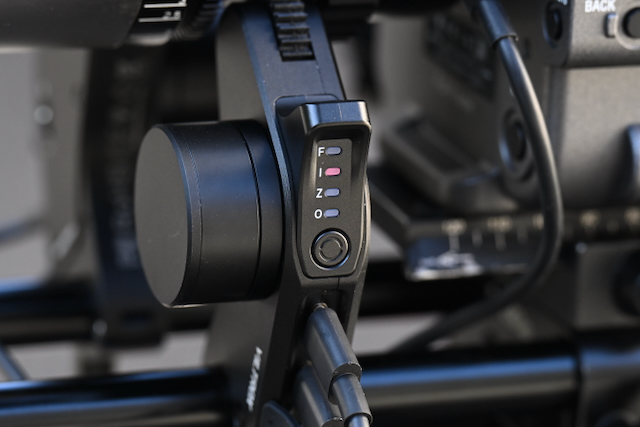
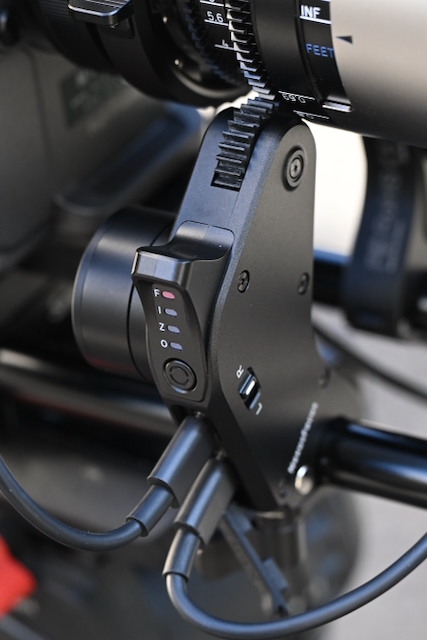
Nucleus M-II FIZ Override
The Nucleus M-II FIZ Override allows you to take manual control of the motors even while the autofocus system is active. Here is how Tilta states that it works:
- Override Process: If you need to make a manual adjustment, simply hold the function button on the side of the FIZ unit.
- Resuming Autofocus: Once you release the function button, the system will immediately resume its automatic control.
This feature would be useful for making temporary manual focus or iris corrections without needing to disable the autofocus entirely.
Now, I tried this out, and I couldn’t get it to work. Holding the Function button down on the FIZ unit didn’t do anything. When the Nucleus-M II motors are set to Auto Focus, the FIZ unit wouldn’t take over control.
Increased Footprint
With smaller-sized digital cinema cameras or mirrorless hybrids, you are going to increase your camera’s footprint, as you need to add motors, rods, and power for the adapter. This is something you need to keep in mind.
Usability & Performance

In general, the Tilta Nucleus Auto Focus Adapter is much easier to set up and use than the competing Viltrox NexusFocus F1 adapter.
You can get up and running very quickly, and that makes a huge difference.

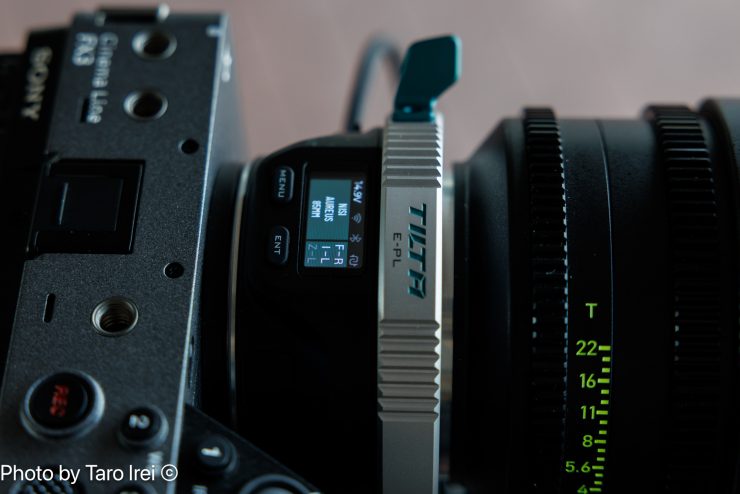
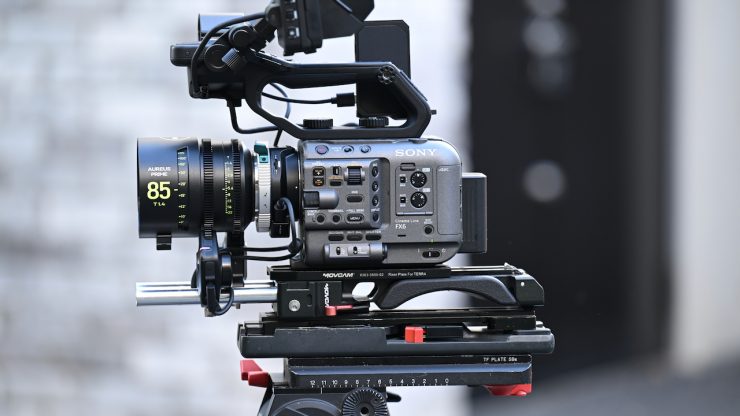
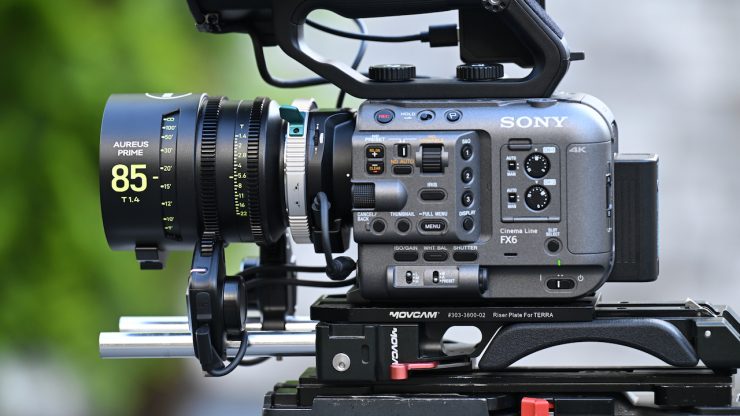
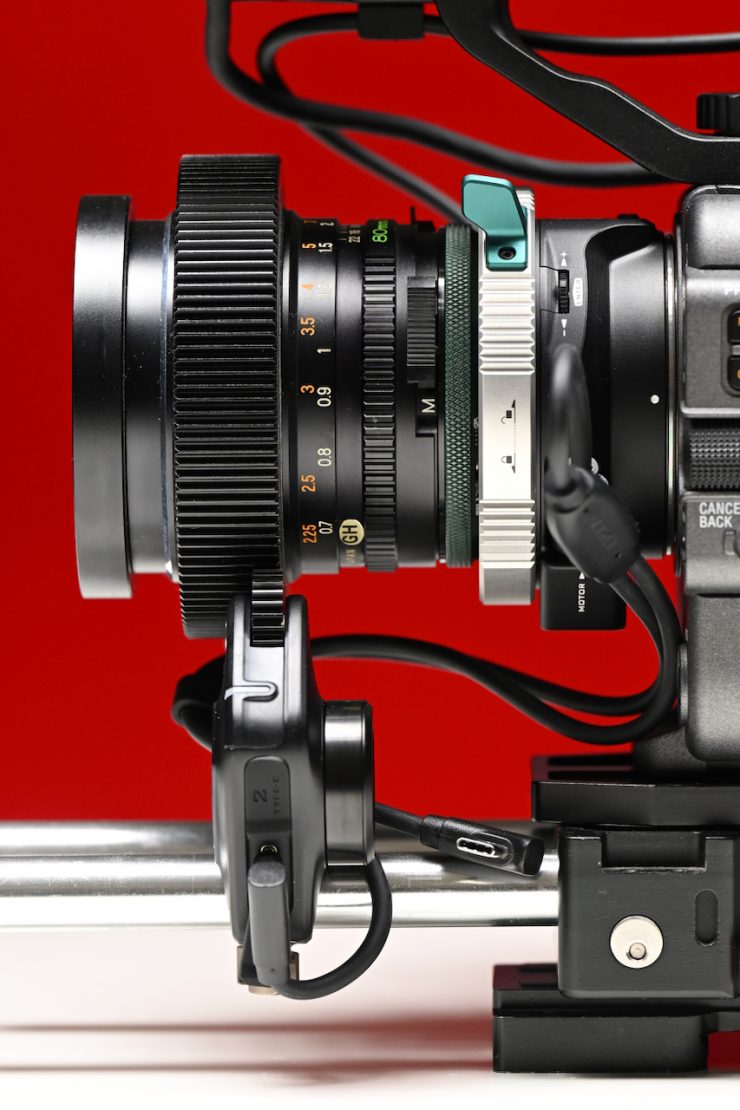
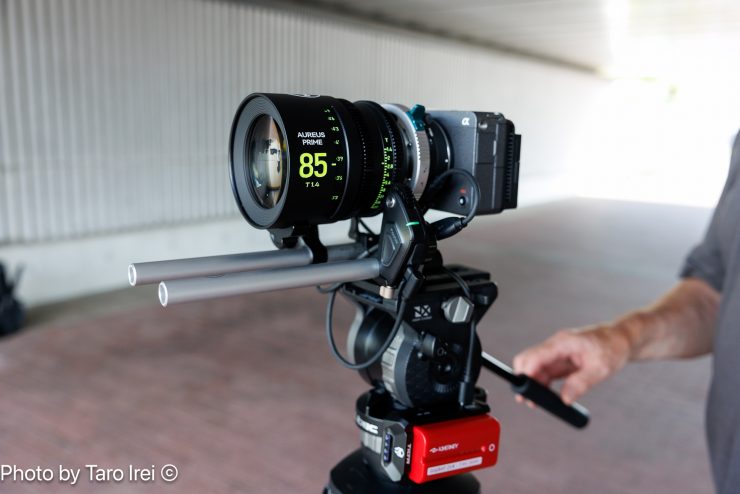
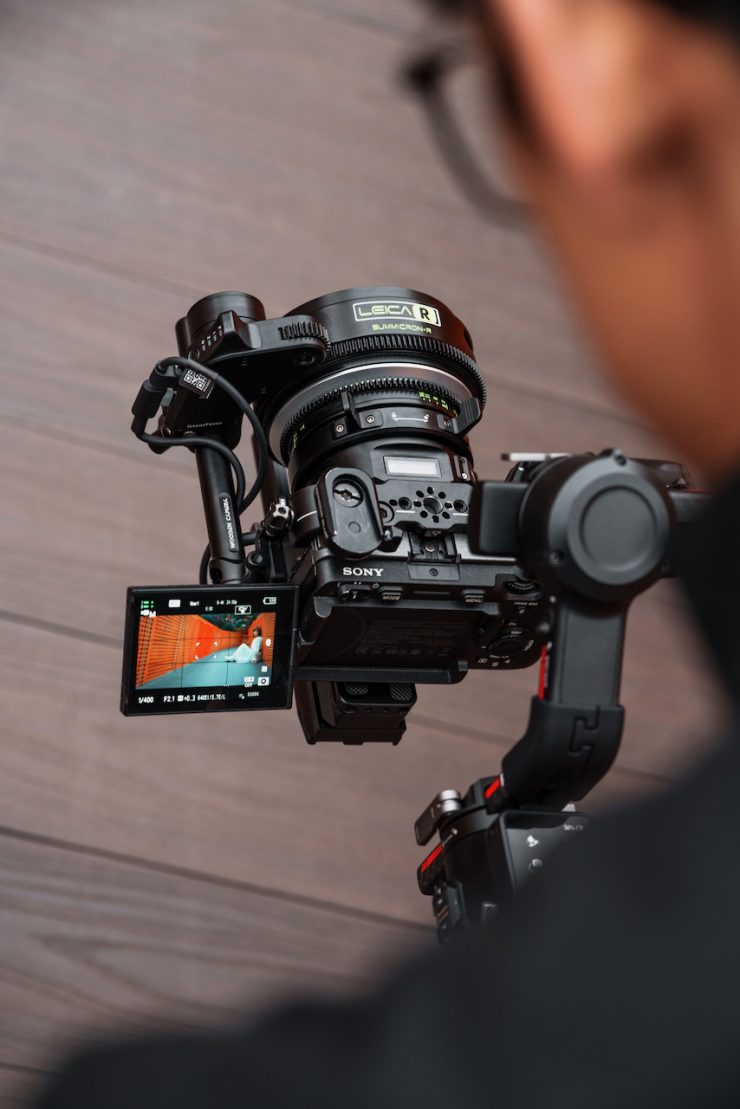
I tried the Nucleus Auto Focus Adapter with quite a few different lenses on both the FX6 and the FX3.
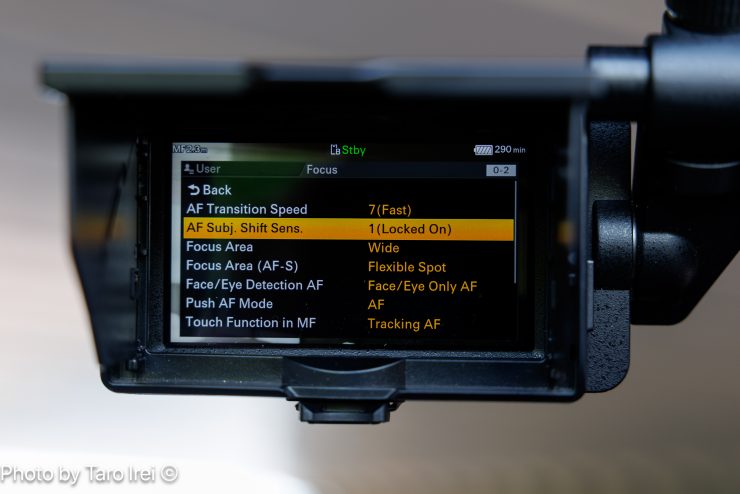
Above are the AF settings I was using on the FX6 for the later shots in the test footage.
Above you can see some example footage using the Sony FX6. Generally, it worked pretty well, especially in more controlled conditions or favorable lighting.
I also tested it against a native Sony FE 4/24-70 lens to see how it compared. A native lens does perform better, and I found its focus transitions were smoother and more refined, which was to be expected. With Face & Eye Detect, a native lens also performed better overall. In saying that, the Nucleus Auto Focus Adapter still did a pretty good job, considering it has to send the AF information to motors and then those motors need to respond quickly.
Speaking of motors, I did personally find that the adapter worked slightly better with the larger Nucleus-M II motors than it did with the smaller Nucleus-N II ones.
If you use it in heavily backlit conditions with wide open T-stops or in challenging lighting, then it can struggle, but that is more a limitation of the AF system than the adapter.
What you may also find is that with larger and heavier PL lenses on cameras like the FX6 and FX3 that don’t have a locking E-mount, you do get some movement and flexing of the camera, which can be noticeable in shots.
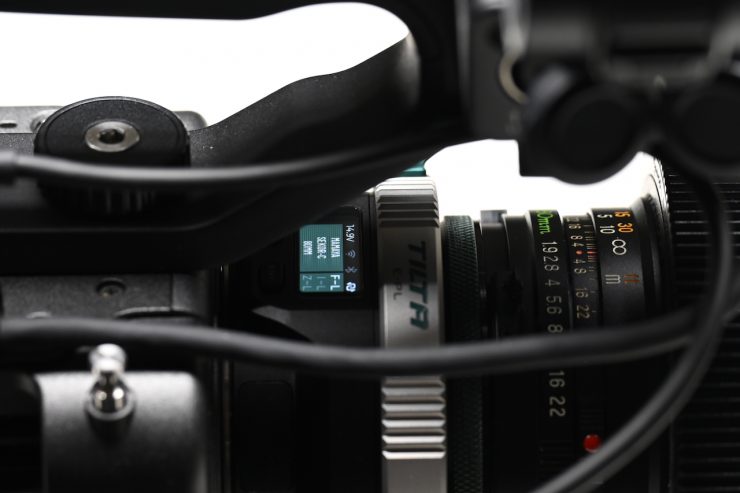
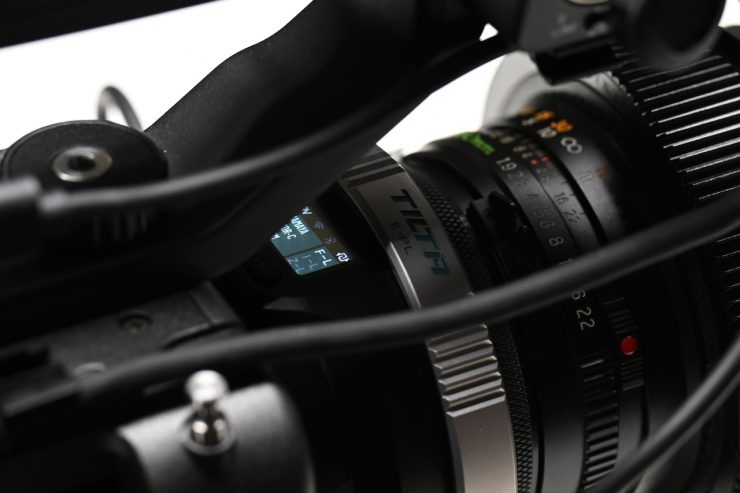
The only issue I had when using it with the Sony FX6 was that the adapter’s display and controls got covered up by the camera’s top handle. This makes it difficult to see and access the controls.

The Nano II motors that come in the kit are actually stronger than you probably think. I didn’t have any problem using them, and they locked down tightly and didn’t slip on the Bright Tangerine Drumstix 15mm rods I was using.

You need to keep in mind that if you are using the Nano II motors, they are not height adjustable, and if you are running bottom rods, you don’t have any adjustment available, and the motors will sit very low on a lens.
As an example, when running a Blazar Lens Remus 1.5x anamorphic lens on standard spaced rods, the Nano II motor wasn’t high enough to reach the iris gear. So I could only end up running the focus motor.
If you have a smaller-sized mirrorless hybrid like the FX3, I would recommend using it with the 15mm Rod Adapter that comes in the kit.
With certain cages, you need to be careful with access. On the 8Sinn cage, the top plate completely covered the display panel and controls of the adapter.

I needed to remove the cage to use the adapter.
Having integration with the Tilta Nucleus ecosystem makes this a great solution, especially if you already own a Tilta Nucleus M-II or Nano II system.
Ultimately, how well it works comes down to your camera’s native AF performance. On newer cameras with more advanced AF, it will perform better.
Pricing & Availability


The Tilta Nucleus Auto Focus Adapter (E to PL) is available for $299 USD. This makes it extremely affordable, especially if you already own Tilta motors.


The Dual Nano II Motor Kit version I was reviewing is $499 USD.
Competition


Competition comes in the form of the Viltrox NexusFocus F1 adapter. I reviewed the Viltrox NexusFocus F1 adapter on the site, and you can see that review here.
The NexusFocus F1 Adapter costs:
Conclusion
The Tilta Nucleus Auto Focus Adapter is a well-thought-out and easy-to-use product. Set-up and installation are very straightforward, which, in my opinion, is one of the reasons Tilta’s solution is a better option than the competing Viltrox.
Performance-wise, it works as advertised, and as I previously mentioned, how it actually works entirely depends on the camera you are using it with and the limitations of AF systems. It won’t give you the exact same AF performance as a native E-mount lens will, but it will get you 80-85% of the way there.
It is a great option if you own a camera like the FX6, as it allows you to run PL lenses and utilize the AF capabilities to get the best of both worlds. Even if you don’t want to use any motors, you can still use the adapter as a standard E to PL mount adapter, which is handy.
Tilta took their time releasing the Nucleus Auto Focus Adapter, and they did so in order to get the product right before shipping it. While it wasn’t the first to market, it feels like a more polished and well-thought-out solution, although they still need to sort out the firmware update issues for the N II and MII motors!
The Tilta Nucleus Auto Focus Adapter is also very reasonably priced, and it has the advantage that it can be integrated into Tilta’s Nucleus ecosystem.