Z Cam is better known for its MFT E2 camera and is now aiming bigger with the E2-F6 by going full-frame. Z Cam has two models, the E2-F6 6K and E2-F8 8K.
The design is very similar but a little bigger than the Z Cam E2 micro four-thirds sensor camera. While it is bigger, it’s not large by any means.
Z Cam also upgraded the original E2. The new E2-M4 has the new body design, making it compatible with cages and accessories that have been released for the E2-F6, and F8.
The big news is it has an upgradable mount. The included MFT mount can be swapped out for the ARRI PL or Leica M lens mounts. Z Cam doesn’t list the EF mount as compatible with the E2-M4. The only advantage of having it would be the eND option. However, the MFT mount with a SpeedBooster would be a better option.
Key Differences
Full Frame Sensor
The E2-F6 has a 6K 37.09 x 24.75 mm 26-megapixel full-frame CMOS sensor capable of shooting 6064×4040 @30fps max in Open Gate. 6k is generally not a standard you finish in as it’s in between 4K and 8K resolutions, but if you master in 4K, having the extra resolution is great for reframing and image stabilizing in post. One key advantage of a full-frame sensor with fewer pixels is the photosites are larger and gather more light, hence lower noise. I found the E2-F6 noise low, even at ISO 8000, but I did run into some issues.
CF Card Slot
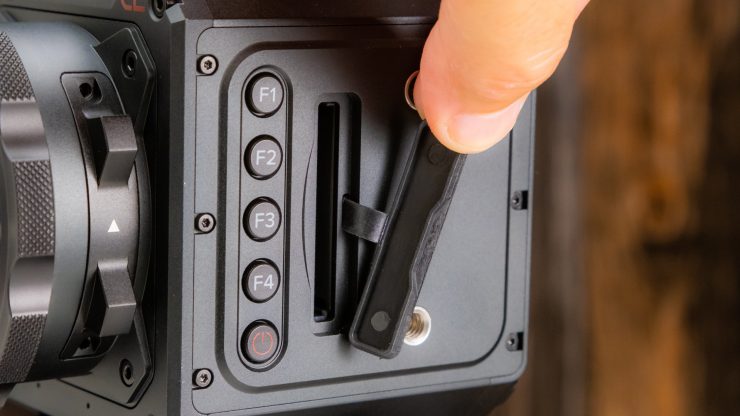
The Z Cam E2-F6 has a single Cfast card slot that is now on the user side with an easier to open flippy door. The original was hard to open. The “newish” door design pops open and has a longer plastic piece where it inserts into the camera, making the door stay open better than the previous model. I tend to leave it slightly open if I’m not shooting in dusty environments, but that isn’t necessary anymore since it’s a better design. I’m not a fan of these types of covers.
Having the media slot on the operator side makes a lot of sense. It’s much easier to get to without reaching around the camera or panning it to the left for access. If you build up the camera this makes even more sense. The only downside is if you add kit to the left side of the camera like an EVF and mounting hardware, you have to make sure you don’t block the card slot.
Shortcut Buttons
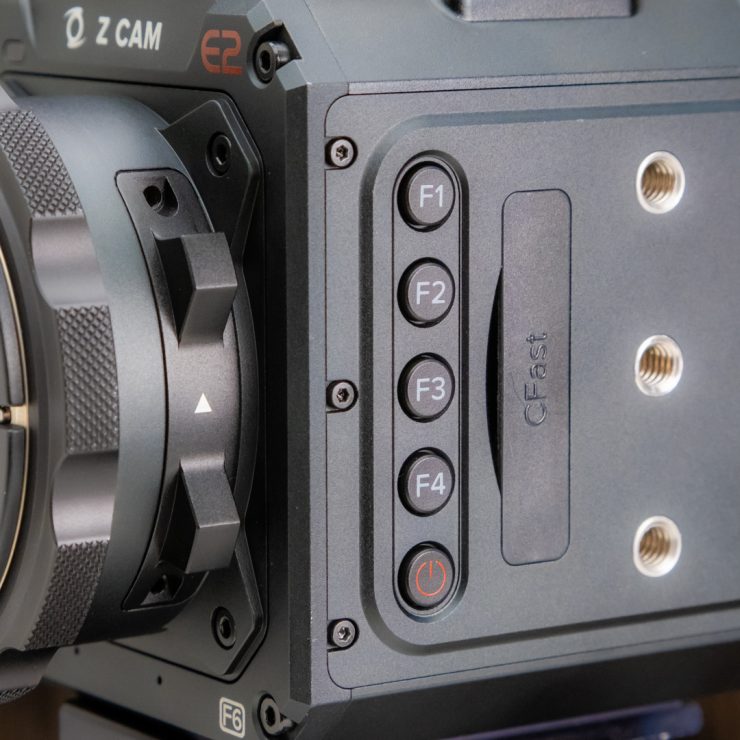
The function presets and the power button has moved to the user side of the camera. The E2 has three so get an extra one with a total of four.
Under the F4 button is an on/off button that also switches the cameras to playback mode if it is pushed with a quick press as opposed to a long press that turns the Z Cam off. All the buttons are programmable making it easy to get the E2-F6 set up the way you want to shoot.
This looks familiar. The top placement of the controls are the same as the E2 but improved.
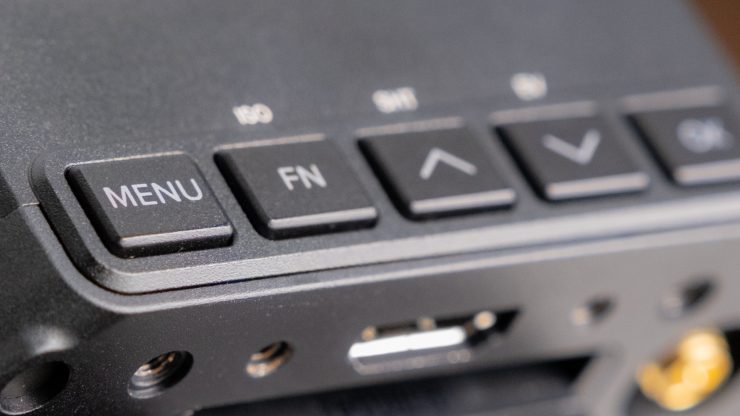
Each button now has white lettering making it much easier to see. The FN, up, down, and OK are all customizable.
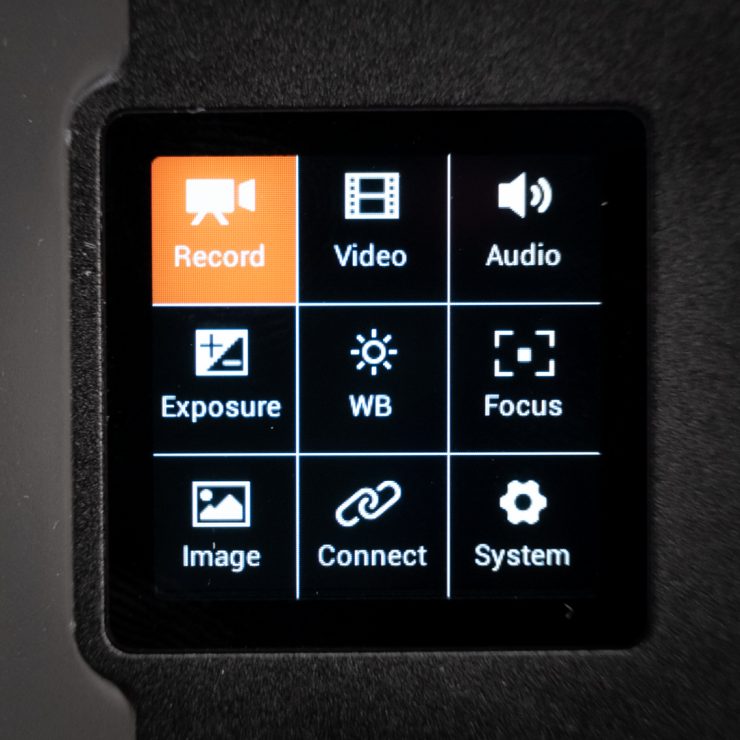
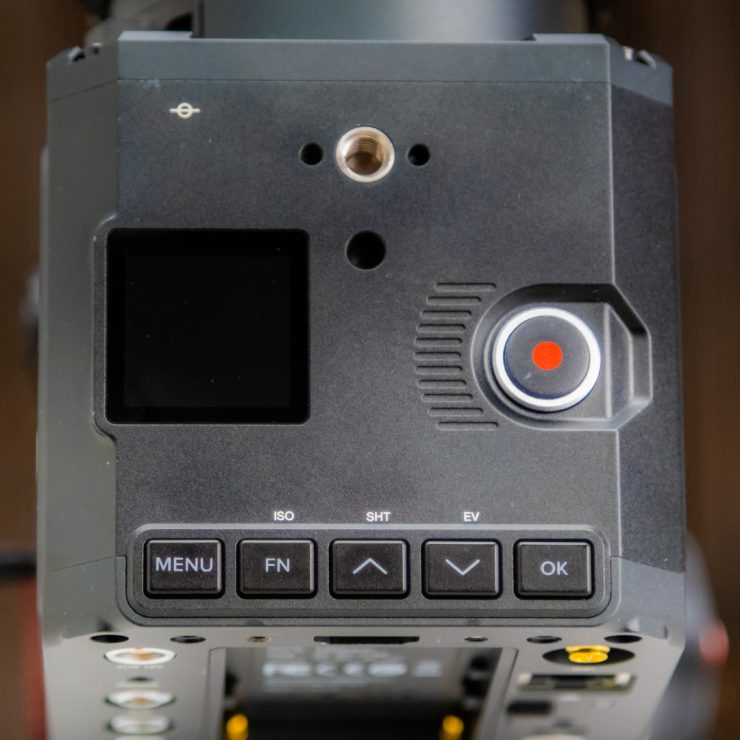
Menu View 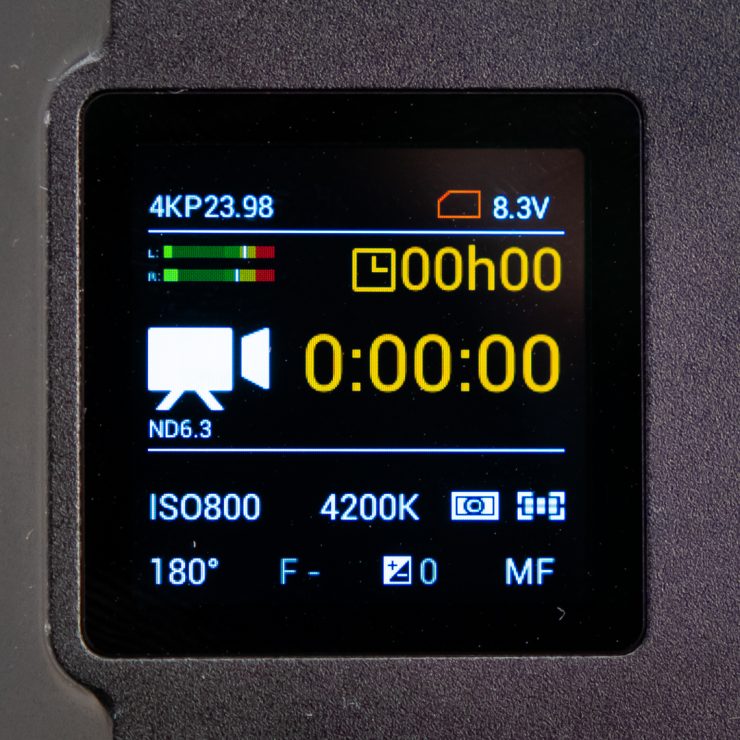
Operational View
The LCD looks to be the same as the E2. It’s very small. Fortunately, the menu is simple to navigate making it fairly easy to use.
The 3.5mm mic input and headphone jack remain on the right side.
Backside
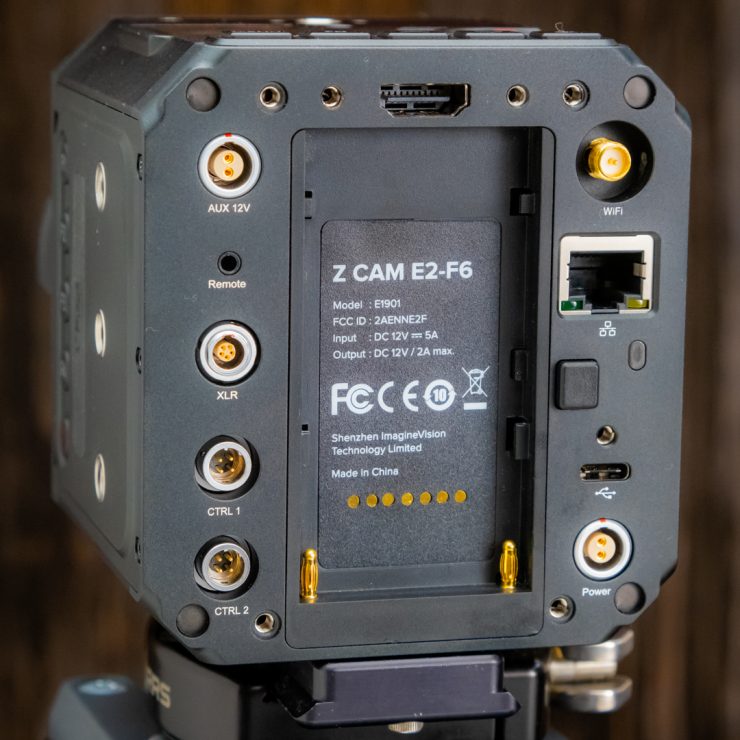
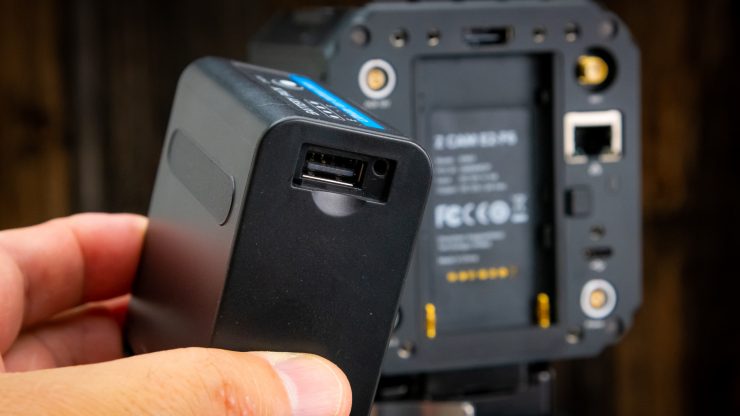
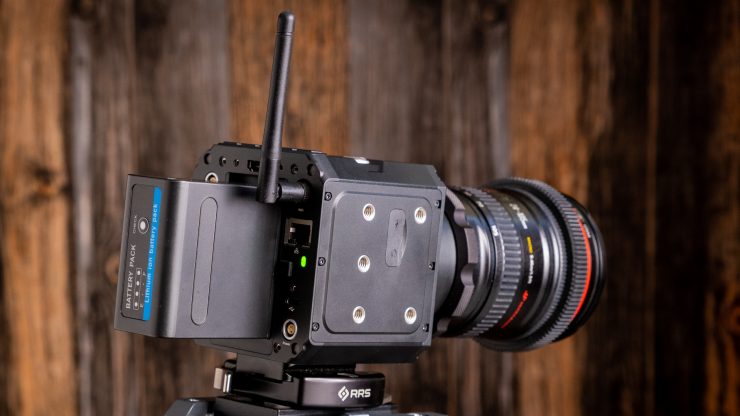
The back of the E2-F6 hasn’t changed much, if at all, just has a tad more room. Here is where all the outputs live on the E2-F6. To keep it small, Z Cam uses mini jacks for everything. The micro XLR is the same type that ARRI uses on the Mini. The camera also has an ethernet port, WiFi antenna port, and USB-C that can be used with compatible media and camera control with the Z Cam app.
Audio I/O
The audio input on the Z Cam uses the same micro XLR as the ARRI Alexa mini. I purchased this cable from Uonecn for $59. The tiny connector locks in and is a tight fit. I’m not sure how robust the connector is, but I feel it might be best to tie the cable down somewhere on the camera, so there is less strain on the connector. With XLR cables attached to the adapter, it will pull down on the tiny input. The micro XLR connector supports 2-channels of audio.
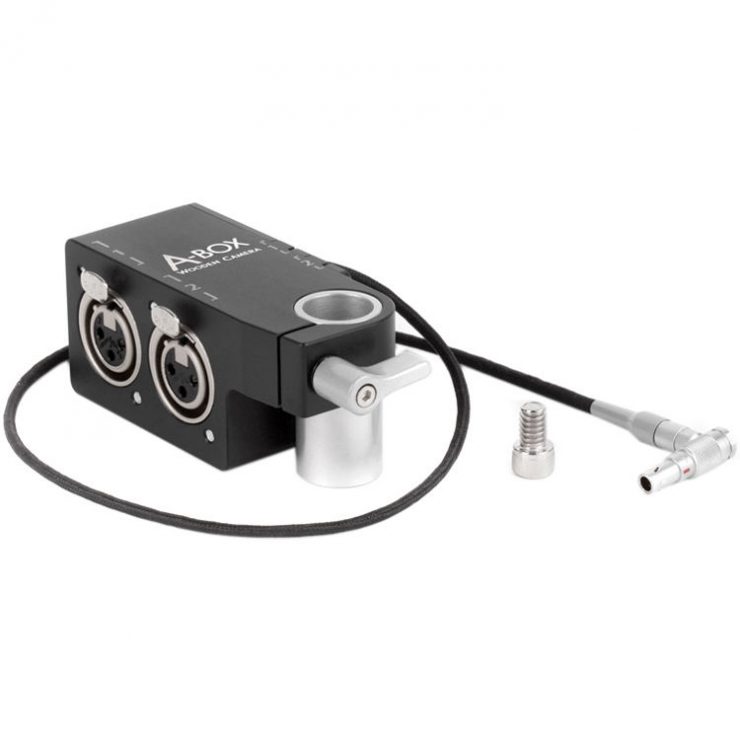
To solve the cable strain issue a mountable XLR box like the Wooden Camera A-Box would work well, however, at $250 is a little expensive.
A big improvement with the V.95 firmware is the ability to set the levels on both channels separately. This wasn’t possible on the previous firmware. You can also choose to have the internal or a 3.5mm mic and either left or right XLR with independent levels.
This is a significant improvement. When the camera is set to use the internal microphone, if you plug a 3.5mm mic into the camera, it will automatically switch the input. This is handy since you don’t have to go into the menu to make the change.
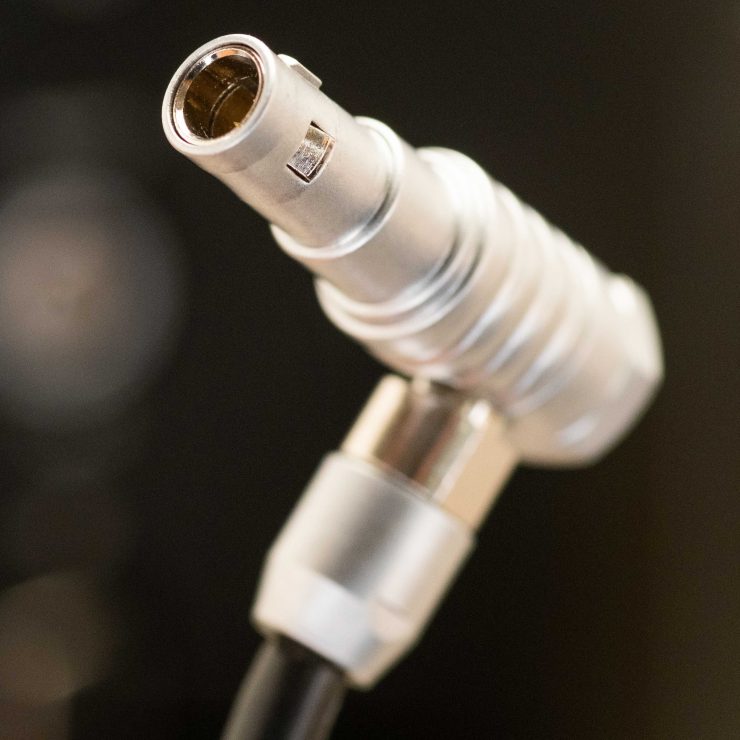
Going back to the micro XLR connector. It is hard to plug in when the battery is attached as It’s a tight fit. I had a hard time getting the tiny connector inserted since it needs to line up perfectly, and forcing it just doesn’t feel safe with such a tiny connector.
Maybe I’m overly cautious, and over time, it will be fine. The connector has a spring-loaded lock on it that releases when you pull back on the sleeve. It does stay connected and hasn’t accidentally unplugged yet. It’s a compromise with such a small body so I’ll take it instead of no audio inputs at all or just a 3.5mm option.
Is it Better Than The E2?
I like the slightly larger body. I wouldn’t mind if it was a little bigger.
The new and improved hard plastic buttons are better. The white markings instead of raised rubber icons are easier to see. The side shortcut buttons are also now plastic with white lettering. All around a very nice upgrade.
I would like illuminated buttons for darker shooting environments, as that can be an issue.
The Brain Camera
The Z Cam cameras are brains. Basically, a box with a sensor. It’s up to you to accessories it so it can work for you. This is a plus and a minus. With conventional video cameras, you need a lens, media, and batteries as they usually have an LCD and viewfinder. While the new Canon C500 MKII, and C300 MKIII have somewhat gone to the brain-style they offer modules to get the camera up and running. Z Cam leaves this up to you.
The price for a Z Cam E2-F6 is $3,995.00 and includes the following in the kit.
- Z CAM E2-F6 Full-Frame 6K Cinema Camera (EF Mount)
- LEMO Power Cable
- Lens Mount Cap
Yes, that list is short, so you will need at the least a monitor. The good news is you have a lot of options. The Portkeys BM5 is a good choice since it has integrated camera control on the touchscreen display. It works well for the options it has. The BM5 also is bright at 1500 nits making it a solid affordable all-around option.
Key Specifications
Z cam e2-f6
| Sensor Type | Full Frame CMOS |
| Sensor Size | 37.09 x 24.75 mm |
| Effective Pixels | 26M |
| Dynamic Range | 15 Stops |
| Lens Mount | EF / PL (different hardware variants) |
| Audio IO | Built-in Stereo Microphone/Micro XLR/3.5mm microphone in – Headphone Jack |
| Raw | Internal – ZRAW External – ProRes Raw with Atomos Nija V HDMI |
| Codecs | ProRes, H.264, H.265 |
| Built In ND | Electronic Neutral Density in Mount (Sold Seperatly) |
Powering the E2-F6
The camera uses the popular and affordable Sony NPF style batteries. For the longest run times, a large NPF-900 series is an excellent choice.
Some brands have USB 5V options that can come in handy for powering other devices like a Tilta Nano motor.
If you’re wondering why the Z Cam E2-F6 has a file split option ranging from 5-60 minutes that you set in the camera menu, it is for safety, but there is a gotcha. If the camera loses power while recording, you will lose the clip regardless of the length. The Z Cams don’t close the clip while recording is active.
I don’t have an issue with this as I don’t pull batteries off a camera while recording, and the battery is locked on the camera so accidental dismounting would be rare if ever. I also don’t record until the camera battery dies. You get a warning from the camera when the voltage drops close to being dead. If you have concerns you can use redundant power via the DC input.
If you set the file split to a lower time setting and record a longer period of time you will have to use the Z CAM VideoConcatenator software to merge the clips. The reason for this is there is a gap in the recording that requires the frames to be trimmed. You can do it manually, but it can be a pain, so the software will make it one long clip and then you export it out to use in your NLE.
Resolution & Max Frame Rate
The Z Cam E2-F6 at 6K has some resolution limitations. When shooting in 6064×4040 Open Gate, the max frame rate is 30fps. In 6K UHD, you get 48fps max. If you want to shoot 6K at 60fps, the only option is in 2:4:1 crop. 5K 4:3 is 5376 x 4032 (4:3 aspect ratio), can be used with an anamorphic lens. In 4K you can shoot 120fps max, but it will also be in 2:4:1. The maximum frame rate in UHD is 72fps. In full HD, you get 120fps max.
- 6064×4040 @30fps max (Open Gate)
- 6064×3196 @48fps max (6K DCI)
- 6064×2560 @60fps max (6K 2.4:1)
- 5760×3240 @48fps max (6K UHD)
- 5376×4032 @30fps max (5K 4:3)
- 4848×4040 @30fps max (5K 6:5)
- 4096×2160 @72fps max (4K DCI) *
- 4096×1728 @120fps max (4K 2.4:1)
- 3840×2160 @72fps max (4K UHD) *
- 1920×1080 @120fps max (FHD)
- Super16 (16:9) 2112 x 1188 (16:9), S16 mode
- * supersampling / cropping selectable, 4K supersampling is supported at the same frame rates as 6K DCI resolution mode
Crop Modes
With the full-frame sensor, you have an option to shoot cropped S35 in 4K mode. This is very helpful for a few reasons. One is being able to use existing APS-C or S35 cinema lenses alongside full-frame lenses. Another is being able to get a punch in if you don’t have the reach or just want to do a quick tight shot without swapping lenses out. The S35 crop mode doesn’t work in 6K mode. The E2-F6 performs well when shooting in S35 crop mode.
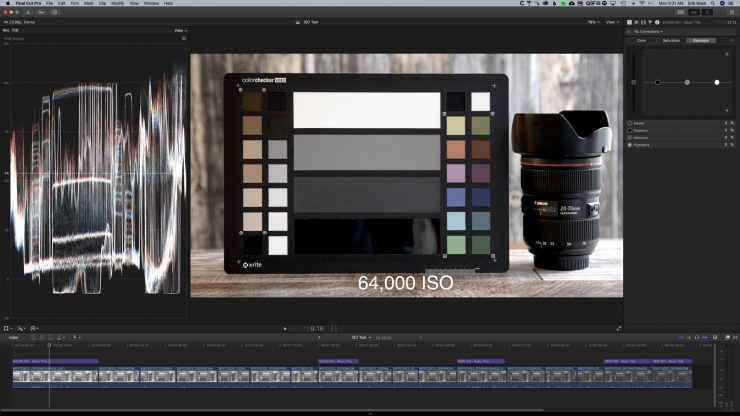
ISO Performance
The ISO range is pretty good with the E2-F6. The camera tops out at 64,000 ISO, and it’s surprisingly usable. I ran a few tests to see how it would look in Zlog2 and got some interesting results.
The noise added green in the shadows and was very easy to fix with the wheels adjustments. I used an overhead lantern as not to over light the card.
Without noise reduction added, I think it’s usable. Shooting log requires a little more skill as you can’t underexpose the image. If it is, then the noise and artifacts, all show up, making the image practically unusable.
Strange Color Shifts
I wanted to see what each ISO setting looked like so I recorded from 64,000 ISO to 5000 ISO on my first test. I had to stop at ISO 5000 to add more light, as I wasn’t able to get proper exposure.
I found that the color shifts a touch with a little green tint in several ISO levels.
ISO Settings With Green Push
- 64,000
- 51,200
- 40,000
- 8000
- 6400
- 5000
- 4000
- 3200
- 2500
- 2000
ISO Settings Without Green Push
- 32,000
- 25,000
- 1600
- 1250
- 1000
- 800
- 650
- 500
- 400
It’s safe to say the higher ISO levels have more green, and this could be due to chroma noise in the higher ISO grain. It is odd that 51,000 and 40,000 don’t seem to have as much green. It starts to become more present at 2500 ISO. I also noticed that the highest ISO level of 64,000 is cleaner than the next level down. The camera is probably adding noise reduction. 25,000 is the sweet spot for high ISO. 64,000 is also impressive and would be usable in the right situation.
Exposing For Zlog2
Z Cam has stated the best practices when shooting with Zlog2 middle grey should be exposed to 40% IRE. I personally found 45-50 IRE yields a cleaner image in the higher ISO levels.
Don’t underexpose. Noise will be an issue, and it makes a big difference to get it right.
When shooting humans, the skin tone should be exposed to 40%-70% range depending on the tone.
The Z Cam with ProRes codec has enough headroom for overexposure just as long as you don’t blow out the highlights. Using a waveform or false color tools will help a lot when shooting in any log format.
Jason Zhang from Z Cam wrote up an article to help explain Zlog2. It’s interesting and worth a read.
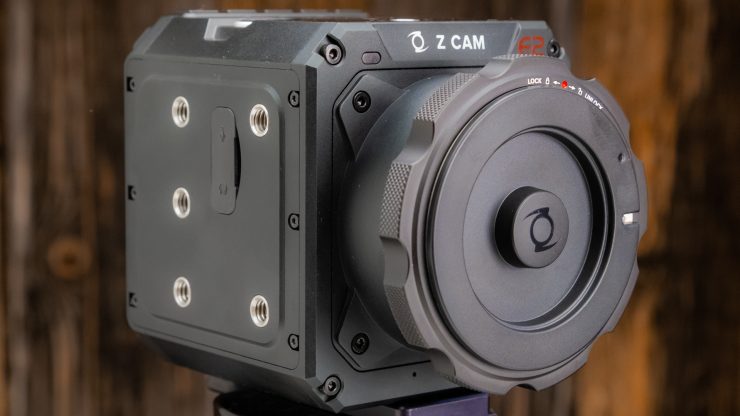
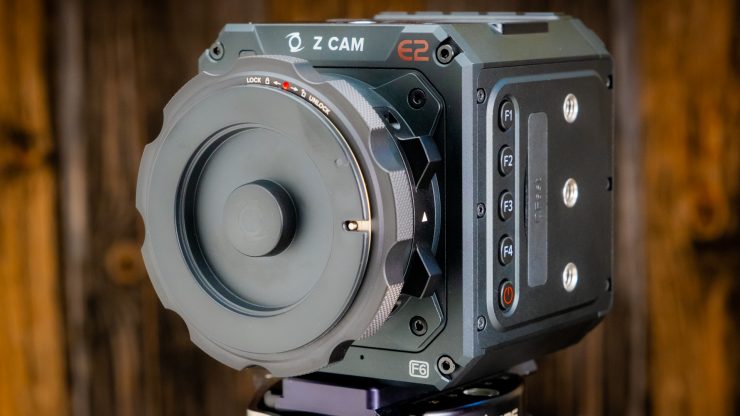
Positive Locking EF Mount
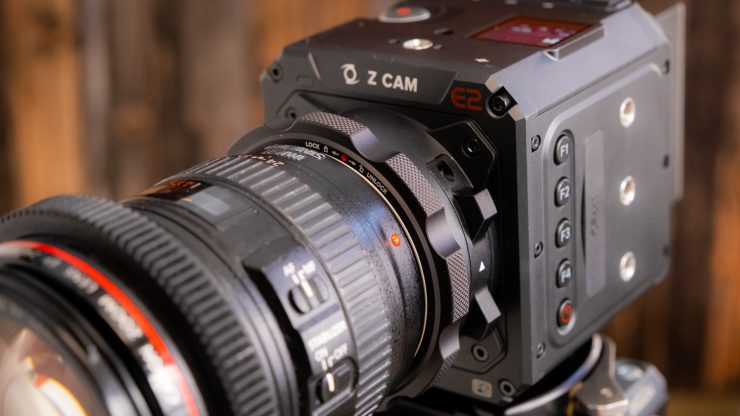
The E2-F6 comes in three user-upgradable mount options. MFT, Locking EF, and PL. The PL design is the most rock-solid mount available. That is why cinema cameras use them. For large heavy lenses, it’s preferred.
The other advantage is lens twist, and wobble is nonexistent with a PL mount, making pulling focus silky smooth.
The E2-F6 PLEF Mount is very nice. It locks on to the EF mount securely just like a PL mount does. The range is small, so I do have to be careful to have a good hand on the lens while loosening. I like the locking EF mount a lot. It is tight and solid with no wiggle at all on the lens. This is important when using a follow focus motor as you get no lens twisting or bounce when changing the focus direction.
The locking mount isnt for everyone and can be a little slower when changing lenses. I have to use both hands when swapping a lens on the locking EF, but with a standard EF, I can press the button with my thumb and twist off the lens single-handed. I like the locking EF mount for cinema cameras. It’s rock solid and for filmmaking and video production, it’s a solid option.
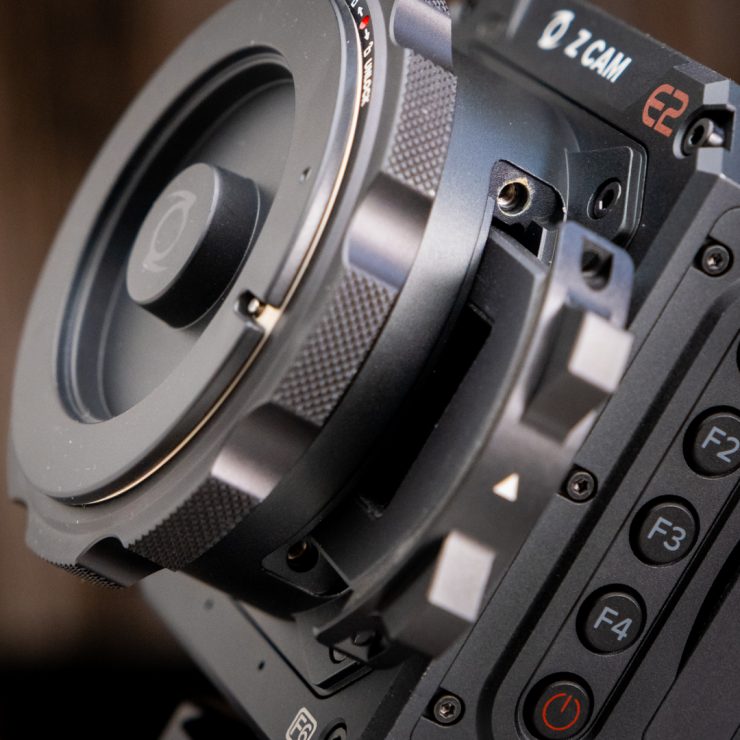
Built-in eND Filter

A new feature I like a lot is the built-in eND module filter on the lens mount. I’m a former photojournalist that used large ENG cameras with a 6-stop ND wheel right under my nose. For newsgathering and event shooting, it’s a must. When you are running and gunning theirs usually no time for adding filters. Having this feature in the Z Cam E2-F6 positive-locking EF mount is fabulous, but it’s not perfection.
The Z Cam eND Module retails for $399.00, And at this time, doesn’t come with a new camera purchase. It is only available for the EF and PL removable mounts. Z Cam has an E Mount coming, however, I’m not sure if the eND will be included with that option.
Mounting the eND
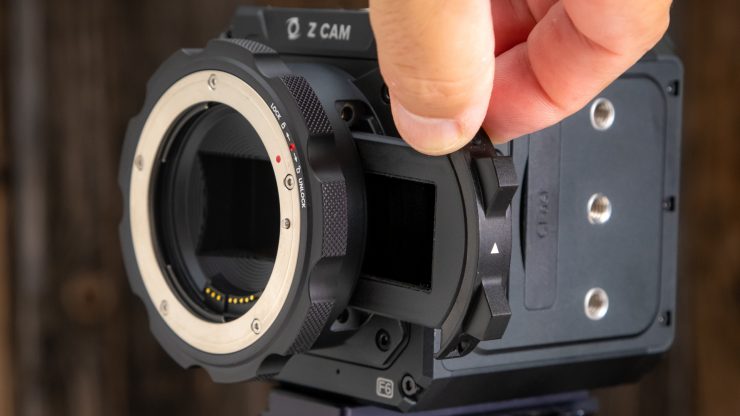
The Z Cam eND is inserted into a slot on the side of the mount. The camera ships with a clear filter already installed. It is removed with two Philips screws. These two screws are locked onto the filter mount so they won’t get lost when removed. That’s a good thing because they are tiny.
Unfortunately, the eND mount doesn’t have the same design, as the screws come in a tiny Ziplock bag instead. I might find a way to add those locks so I don’t lose them in the field when switching to clear. The small filter does have a fairly tight fit once the eND engages with the electronic contacts. I decided to try it out without screwing the eND into the mount and seems to hold just fine with normal use, but tightening it down will get a better seal to prevent dust from getting on the sensor, and filter. It would be better if it had a toolless design.
ND Stops
The eND starts at 1.7 stops and goes to 6.7 stops in 1/3 increments. If you don’t need any ND, you will have to remove the eND, and replace it with the included clear filter. Don’t forget to white balance when you add or remove the filter.
Changing eND Strenght
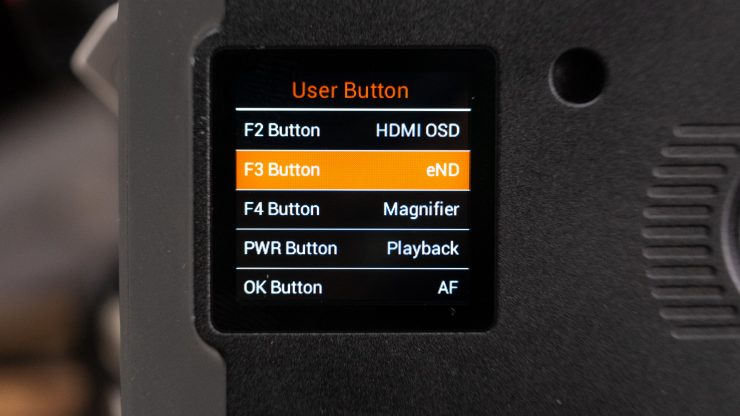
The amount of ND is changed in the menu under EXPOSURE. This is a tad slow to access so a better way to control it is by adding the eND to a shortcut button. I put the eND on the F3 shortcut. Once I press the button I use the up/down buttons on top of the Z Cam to adjust the strength.
One issue, if you don’t use an external monitor you won’t see that the eND has been selected or the value that it’s set at. To see this you need to have the Display Info option on. Again. The fastest way to access the Display Info is with a shortcut. So effectively you need to use up two shortcut buttons to work quickly with the eND.
Color Shift with eND
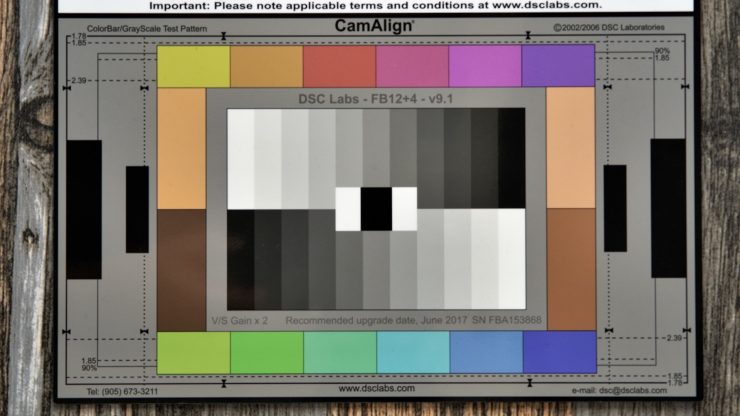
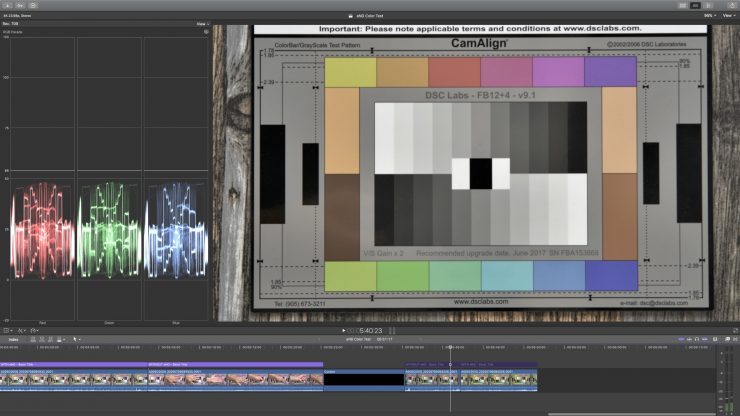
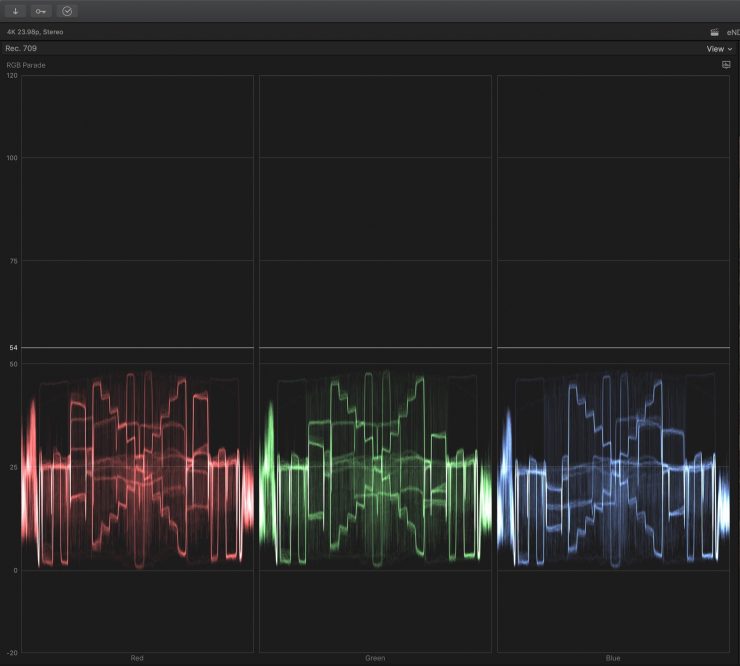
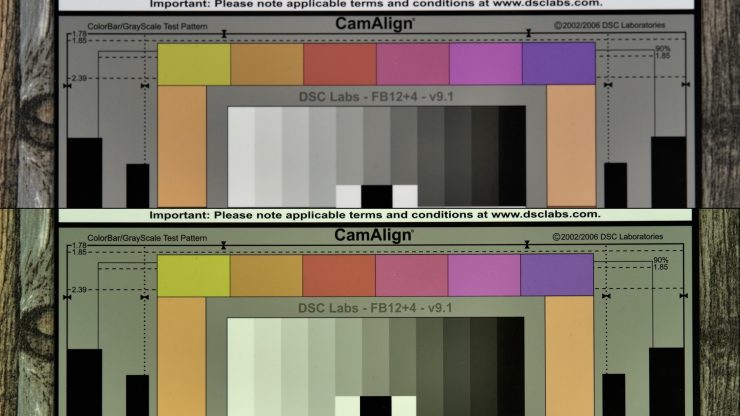
Using an ND filter can change the white balance so it’s always a good idea when adding one to rebalance the camera. Let’s see if the eND has a color shift since it’s not like conventional ND.
With the clear filter installed, I took a white balance with a grey card covering 100% of the image. The Z Cam E2-F6 gave me a white balance of 4700K -5. With the eND inserted, the color balance was the same at 4700K, however, it changed to 4700K +0.
Without eND and white balanced With eND keeping white balance the same
I need to stress that color shifts with neutral density filters are common, and the best of the best have a lower amount. The eND does have a high amount of green push that can be fixed in post fairly easily, but it would add some time in the editing process. The Sony FS6 has an active color correction to address the issue of color shift. That is a handy feature if you are running and gunning.
Focus Shift
While performing the Color Shift Test, I noticed that the focus had changed after taking the eND out. In my initial test, I had the eND inserted and focused on the chart then performed the tests without changing the focus, and it appears the eND, when used will require refocusing.
Potential Issues
Since the eND filter is removable as opposed to a built-in design, there is a higher chance for dust and microparticles to get inside the mount and on the sensor. I would carry at least a blower to clean off the eND before inserting it into the mount. Sensors are like dust magnets, and the eND sits right in front of it, and dust particles could then get on the sensor causing black spots in the image. The dust usually isn’t visible when shooting at wider apertures like f2.8, but when stopped down for deeper depth of field those pesky particles will show up.
Z Camera App
I love this app! Next…
Many cinema cameras don’t have wireless control options, and I like a good app to control the camera via WiFi. The Z Cam app is excellent. It’s not perfect, but most apps for cameras tend to be very buggy and offer limited features. This isn’t the case here.
WiFi Option
You have two options on how to control the camera via the app and a smartphone.
With the antenna attached to the camera and WiFi activated in the menu, you connect to a smartphone, or in my case the iPhone. The app will see the camera. Then tap on the “Camera” option on the screen. Now you’re ready to control and monitor with the app.
The camera control feature on the app is very handy. You can change pretty much all the settings on the Z Cam. White Balance, ISO, F-stop, and other key functions. It’s really excellent.
With an autofocus lens, you can tap on the screen to set focus and get a one-shot AF and lock. It works pretty well, however, the AF on the E2-F6 isn’t very good but for one-shot AF it’s fine. This is very handy when you are doing a live stream without a camera operator. I’ll sit in front of the camera. Tap on my face and focus is locked. Then change the ISO or f-stop to dial in the image. It’s really a great app.

Need to change the ISO? No problem. Tap on the HUD in the display, and it opens. This works with F-stop, and white balance as well.
The available setting changes are vast. As I stated earlier. A great app with a cinema camera is much appreciated. Most apps leave a lot to be desired if they offer one at all.
USB-C Option
The second option is using a USB-C cable to connect to the iPhone. The latency is less, and in a pinch, it can be used as an external monitor with camera control. I often wished I had control like this with Canon Cinema EOS cameras. Another option is the USB-C input can be used for recording straight to an SSD drive. You can’t use a smartphone and SSD recorder with USB-C at the same time.
Accessories For The Z Cam E2
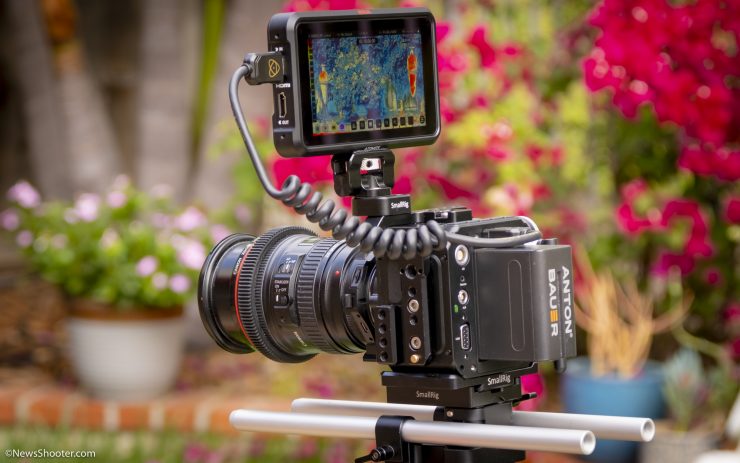
The Z Cam cameras require accessories for a working camera. Yes, you can use that tiny LCD on the top, but it is too small to focus correctly. Maybe you can frame up a shot, but you could miss a lot since it’s so tiny. At the very least, a monitor or RVF is a must purchase.
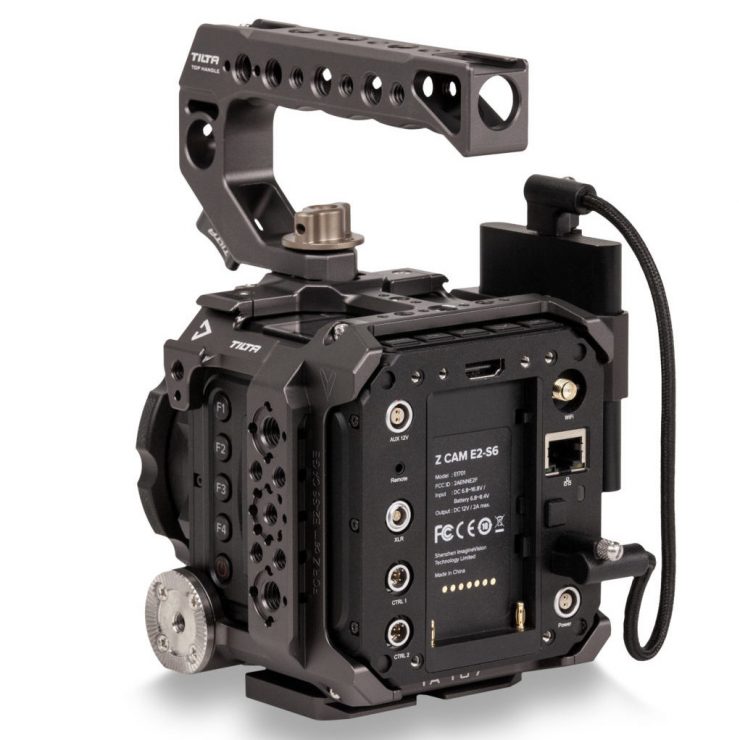
Cage
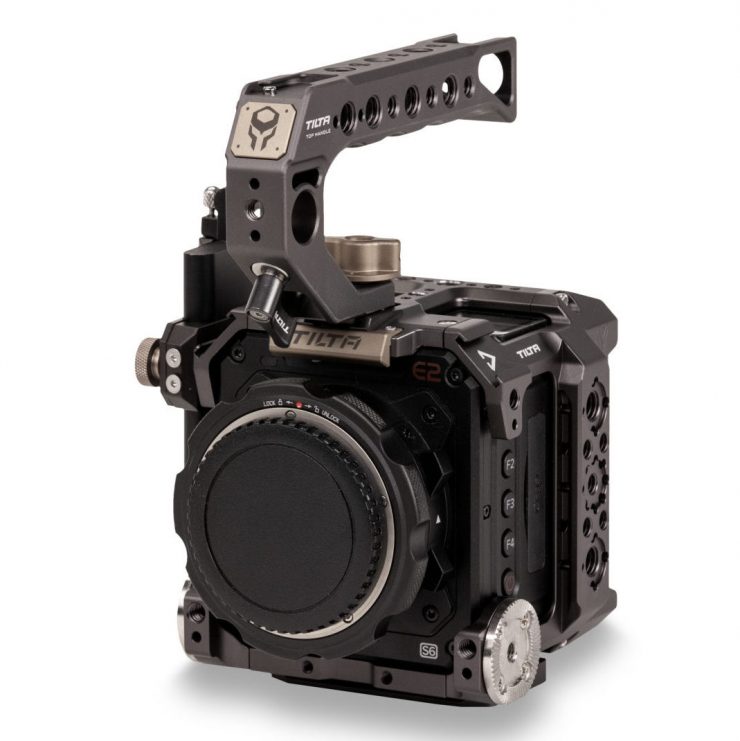
You don’t necessarily have to get a cage but I feel it’s a good investment if you want to have options for the needed accessories, the Z Cam E2 needs to make it a workable shooting machine.
I like the SmallRig cage I have with the original E2 MFT camera. It is light and gives you plenty of mounting options.
Tilta has a new cage that I’ve been trying and so far I like it. Tilta has an ecosystem going with cages. They have several battery grips with record trigger and the ability to control the Tilta Nano wireless follow focus. It’s a very cool setup and can be used with other newish Tilta cages.
Monitor
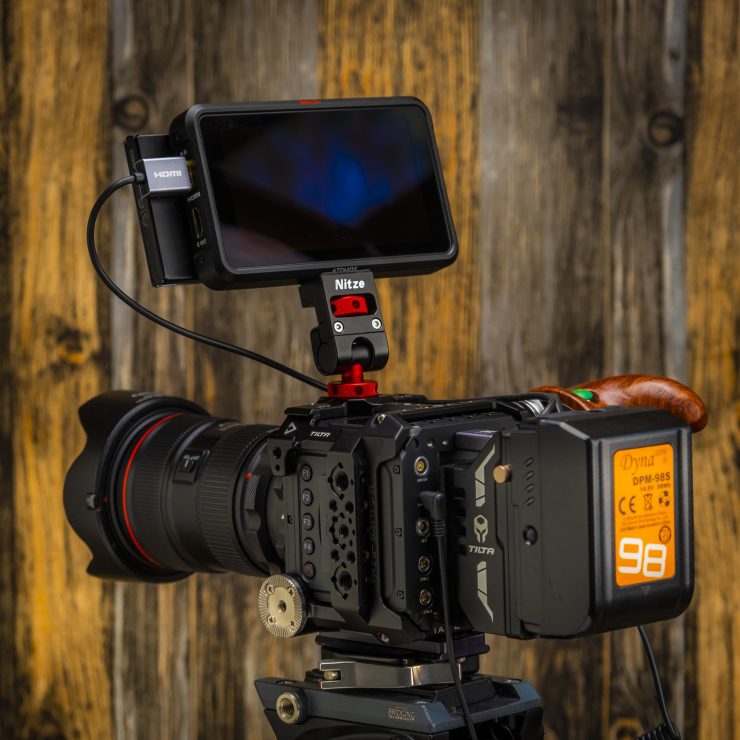
Like I mentioned you, need a few things for the E2 to make it usable as no monitoring solution is included with the camera. I have been very happy with Atomos Ninja V, and Portkeys BM5 5″ monitors because they are small and have very good tools. The BM5 does have the edge with a 1500 nits touchscreen for outdoor use as the Ninja V is 1000 nits. The Portkeys BM5 camera control feature works pretty well and makes it easier to get to key settings and features.
The Atomos Ninja V with the 10.5 update, includes camera control features now. To use it you need a proprietary Atomos USB Type-C to Serial LANC Calibration Cable that retails for $65. The cable is on the long side at 6.5′. The cable is not available yet, so I haven’t had a chance to test it.
With the ability to record ProRes Raw and a solid toolset, the Ninja V is more versatile, but it’s also more power-hungry. I do like it and feel it is a better fit for me as I can use the recorder option with other cameras.
EVF
Depending on how you choose to power the Z Cam an EVF with a battery might be a better option. I have the Zacuto Graticle that is powered by a Canon LPE6 battery. The key is mounting the EVF, so it’s in a good position. Zacuto and SmallRig have excellent options depending on the cage you choose. An EVF does add size and weight to the E2-F6, but outdoors, nothing beats an EVF.
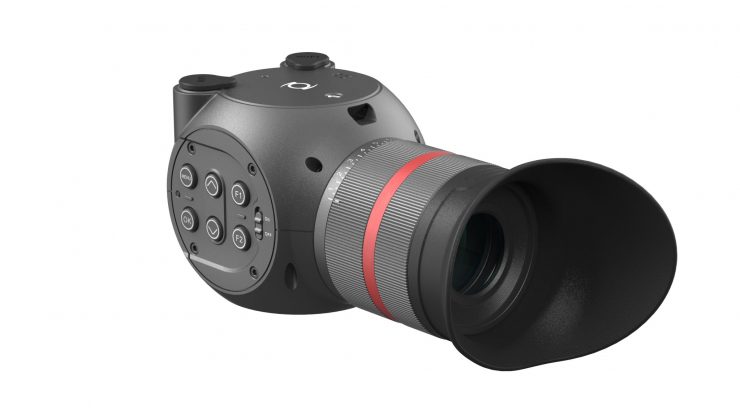
Z Cam has a new EVF in development that looks to be priced very competitively. I did a preview on the new EVF and is worth a read.
Grip With Record Trigger
A side grip is an excellent option as the camera is hard to hold due to its small size. The camera can use a LANC cable to trigger record. It uses the same protocol as Panasonic cameras.
I have a Tilta wood handle grip that I have used on several cameras. It’s a right-hand version since that is what I’m more comfortable with.
Codecs and Raw Options
The Z Cam cameras have some of the best codec options in a cinema camera at there price point. I like to record ProRes if it’s available. Yes, it’s an older codec, but it still is very usable, and NLE’s love it! If H.265 is more your jam you have that as well plus H.264.
Internal Codecs
- ProRes HQ
- ProRes 422
- ProRes LT
- ProRes Proxy
- H.265 [Bitrate] 300 Mbps max – High, Medium, Low [Proxy Optional]
- H.264 [Bitrate] 300 Mbps max – High, Medium, Low [Proxy Optional]
- ZRAW
ProRes Raw Over HDMI with Atomos Ninja V
With the new Z Cam 0.96 firmware update, you now have the ProRes Raw over HDMI with an Atomos Ninja V recorder. The camera outputs open gate 5.8K to the Ninja V. This is pretty amazing to achieve with HDMI. Be warned. The files will be HUGE. In standard ProRes Raw, you get approximately 11-min of recording time with a 256GB SSD drive.
Internal Raw
The E2-F6 offers two Raw options. ZRAW internal and ProRes Raw external to an Atomos Ninja V HDMI recorder. While having two Raw options is great, both have some quirks. Let’s start with ZRAW.
ZRAW records in 1.2Gbps, which will fill up 1TB of storage with 2.5 hours of media.
Z Cam ZRAW is different than Blackmagic BRAW and Red Raw as it doesn’t offer compression ratios. It does offer in post many of the familiar features, but there is a catch.
ZRAW plugin for editing in NLE’s is only supported with a plugin for Premiere Pro on the Windows platform. To date, it isn’t available for FCPX or Premiere Pro on a Mac. I you don’t use Windows with Premiere Pro you will need to use the Z Cam ZRAW VideoSuite to pre-edit the ZRAW footage, then export the clips to edit in your NLE of choice. This makes shooting ZRAW unpractical for me.
I prefer to stay in my NLE for editing and grading. My primary NLE is FCPX and I also use Premiere Pro at the station I work at. I rarely use Davinci Resolve, but I am familiar with it, and it keeps getting better over time. For color grading, it’s the boss.
Using two pieces of software for post-production isn’t uncommon, as many people will edit in one, and export to Resolve to grade, and then send it back to the NLE to finish. The added step with ZRAW at the beginning means you are baking in the color and then converting it to ProRes for editing. If you have a large project this seems unpractical to me.
Below is a demo on how it works with OSX.
For ProRes Raw, you use an Atomos Ninja V external recorder. This is my choice if I wanted Raw. ProRes Raw is finally being integrated into more NLE’s than AppleFCPX, with Adobe Premiere Pro now able to natively edit the files in version 2020. ProRes Raw is very easy to edit as it uses the same tools already included in the NLE so you don’t have to learn how to use it. The only downside is you need to buy the Atomos recorder.
Check out my preview on shooting ProRes Raw with the Z Cam E2.
This might not be a downside. You need a monitor for the Z Cam E2-F6 as it doesn’t include one. The Atomos Ninja V retails for $499. Also need are batteries and media. A 1TB Anglebird SSD drive retails for $389.59. The approximate cost is $888.
I will say the Ninja V is a good monitor, and I like the false-color option a lot as it makes nailing exposure, and protecting the highlights easy.
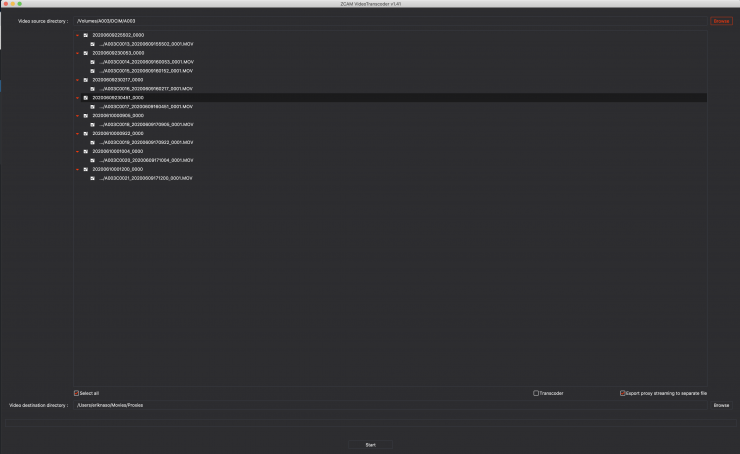
Proxy and Frame Grab
If you’re shooting in HD, 4K, or 6K and want to get proxies for easier editing, the E2-F6 will record them in two different ways. When using ZRAW, and ProRes, the proxy files are embedded in the ProRes file instead of a separate file on the Cfast card. I thought this was a bad idea, but if need playback from the E2-F6 the proxies are used. They do load quickly, and playback smoothly. You don’t have the option to not capture them as it’s a feature the Z Cam E2-F6 doesn’t offer when shooting in ZRAW and ProRes. With H.265, and H.264 you have the option to turn on proxy recording.
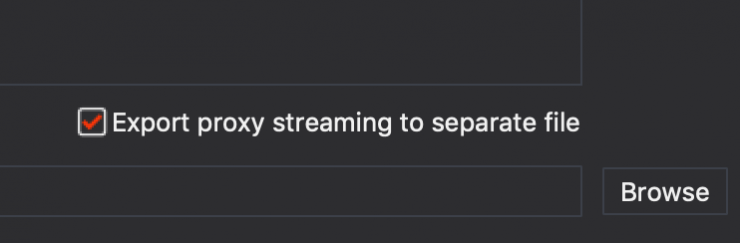
You can separate the proxies with the free Z CAM VideoTranscoder app to save space on your drive if the proxy files are not needed.
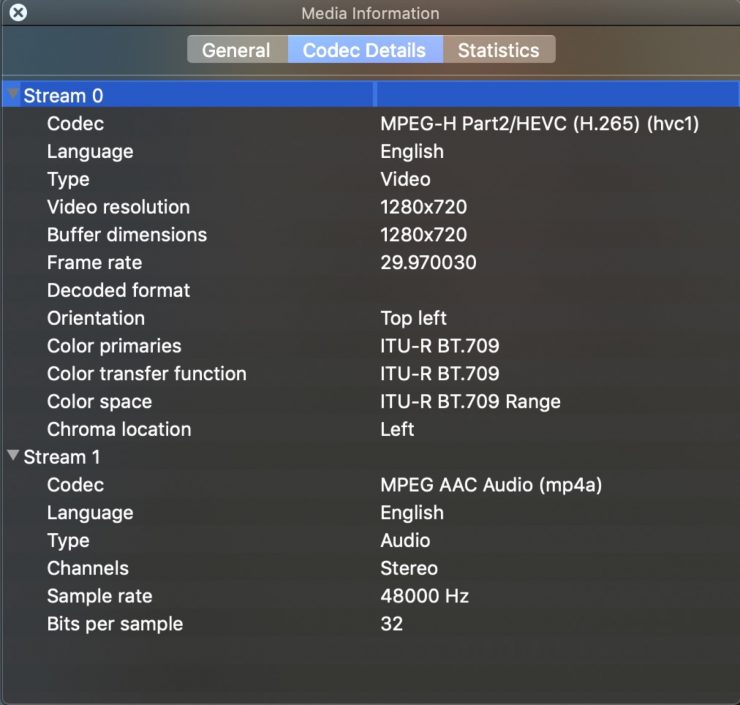
The original ProRes HD file is 2.17 GB while the H.265 file is 662.4 MB, so yes, a 1/3 of the original size is a substantially smaller file. In 4k and 6K the difference will be much larger.
Some might be annoyed that the files have to be separated from each other, and I understand that. It would be good to have the option, but then you would lose in-camera playback. It must be a programming thing with the E2-F6 as I don’t fully understand why.
Editing with Proxy Files
Once the files have been extracted, you can now use them in your favorite NLE just like you would with any proxy workflow. Again the downside is you don’t have a choice of capturing the proxy files when recording Zraw and ProRes.
Frame Grab

I wasn’t expecting much from the frame grab mode, but it is surprisingly very good. The F6 offers jpg, PNG, and Raw compression. The Raw setting is a DNG file.
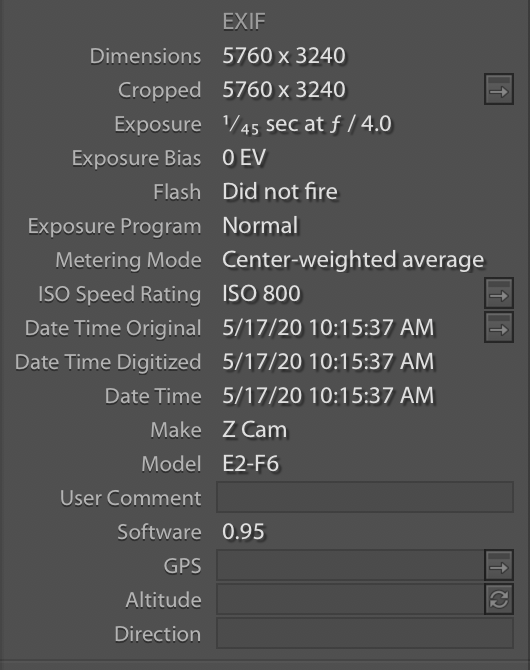
In Lightroom, EXIF info is available including dimensions, exposure, and ISO.
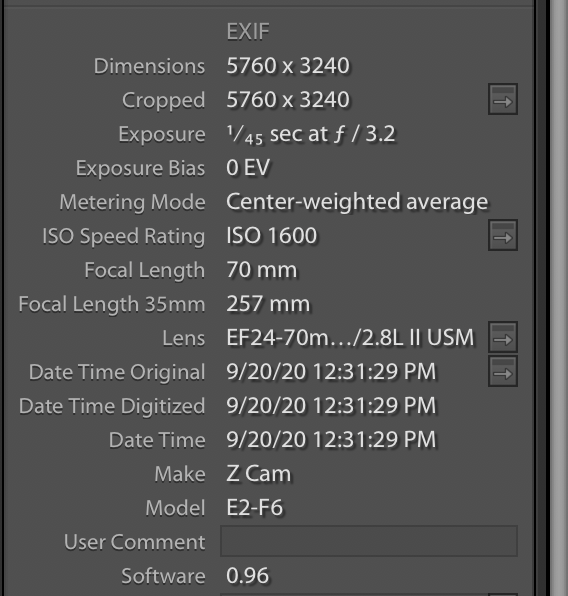
The RAW file option is a good one. The file is larger but holds up better in post. The camera captures the file as DNG and is easily editable in Adobe Lightroom.
The Z Cam doesn’t offer advanced photography features such as chromatic aberration, or lens barrel distortion correction like a matching Canon lens on a Canon body, but I like having the ability to get good quality stills that I then can use in my review, or share with others in the production.
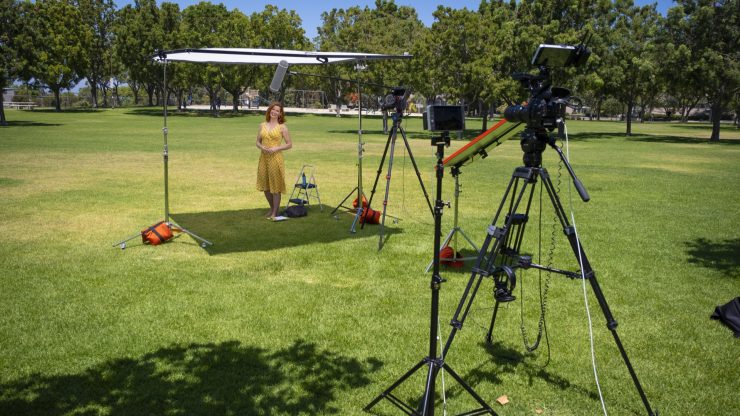
Putting The Z Cam E2-F6 To Work
Unfortunately during the pandemic, I haven’t been shooting as much, however, I finally had a weather promo come up, and I decided to add a second angle, so out came the Z Cam E2-F6.
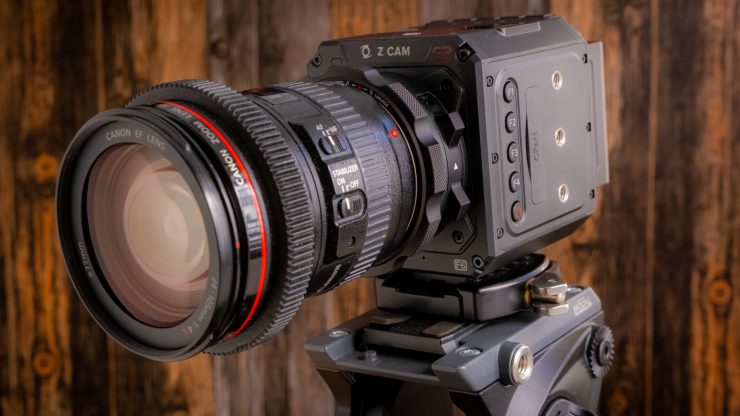
The Canon C300 MKII is the A-Cam mainly because it’s the station’s main camera. I used the Sigma 50-100 on the C300 MKII and the Canon 24-70 MKII on the E2-F6. Love that lens! I bought one to use with the Z Cam since I lacked a fast full-frame zoom in my kit. Such a nice lens. I wish it had image stabilization like the Sigma, but it’s lighter and the IQ is better in my opinion.
While I tried to get another shot from the E2-F6 in the edit it just didn’t work. I do feel having that one shot made a difference, so still a win, plus I had a chance to have a look at both of the cameras together.
Since I was operating both cameras, I added a Mars 300 wireless system to the Z Cam so I could make sure it was recording without issues. Nothing worse than flying blind with a camera several feet away.
The Hollyland Mars 300 is a solid inexpensive system that I use a lot. I reviewed the system last year.
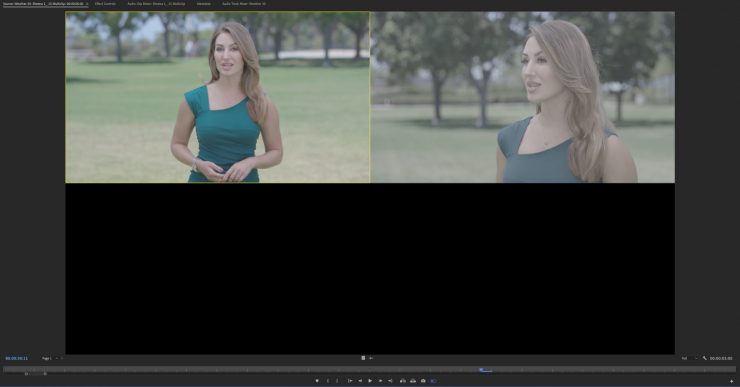
The cameras don’t match, as you can see in the ungraded sample. They are close, and shooting in log is the best way to match in post.
The green channel on the Z Cam E2-F6 with Zlog is more accurate than the C300 MKII Clog3, but it wasn’t overly difficult to match them.


Dare I say I like the Z Cam color more than the C300 MKII? The dynamic range is also very good as I had the talent under a full stop diffusion overhead with a bounce for fill. No need for a black net in the background as these cameras handled it well.
We spent several hours in the hot sun, and the Z Cam E2-F6 didn’t have any overheating issues whatsoever. These days that seems to be an issue with cameras. Personally I wouldn’t use a camera that is unpredictable in a professional environment.
I’m very pleased with the results, and the skin tone on the E2-F6 looks very nice to me. The footage is very easy to grade. Zlog is flatter than Canon Clog3 so it does take a little more work to normalize the image. I’m not a big LUT user, but Z Cam has a very good set to get a look going quickly in post. I generally use Colorista IV to grade with.
The Z Cam E2-F6 has a very nice Rec709 setting that has room in the shadows for grading and not overly saturated. I like it because not all shots need to be in log like this image above. The light isn’t contrasty and doesn’t have any benefits with wider DR. The shot above is my lovely Bridget, who has fair skin, and the E2-F6 renders it nicely in REC709.
I also have a profile for a baked-in look in rec709 with more saturation and contrast that doesn’t need grading. This is great for live camera and streaming.
Z Cam Community
I think you can learn a lot about a camera based on its users, and Z Cam’s community on Facebook is over 5000 strong. The cameras have a very solid following, and the users are helpful in both answering questions, and requesting features they would like. The CEO of Z Cam is Kinson Loo and he is very active in the private user group. The only downside is it’s on Facebook, so you have to have an account.
So Many Options
It’s September 2020, and already we’ve had several cameras released this year making it tough to decide on one if you are in the market. The brain camera is different than a full-featured cinema camera that has all the inputs and outputs on the body. With the Z Cam, Red, and hybrid cams you need to build it up for your needs. That’s a good and bad thing depending on the price of those accessories. A usable EVF alone is over $1000.
The E2-F6 retails for $3995 with positive locking EF mount. The eND retails for $399 and I think it’s a must purchase, especially if you don’t already have an ND solution.
As you can see from the list below, the options are quite large and not a one size fits all situation. I think you need to take into consideration what you shoot, and a realistic budget. How much you are willing to spend is a big deal, as accessories add up fast. Media can also be expensive
| PRICE | |||
| RED Komodo | Approx. $6,000 USD | ||
| Z CAM E2-S6 Super 35 6K | $2,995 USD | ||
| Z CAM E2-F6 Full-Frame 6K | $3,995 USD | ||
| Blackmagic Design Pocket Cinema Camera 6K | $1,995 USD | ||
| Kinefinity MAVO 6K S35 Camera | $4,995 USD | ||
| Panasonic S1H | $3,997.99 USD | ||
| Canon EOS C200 | $5499 USD | ||
| Canon EOS-1D X Mark III | $6,499 USD | ||
| Canon R5 | $3899 USD | ||
| Sony Alpha 7S III | $3498 USD |
Conclusion
I like the Z Cam E2-F6, but I don’t think it’s for everyone since it requires more kit to get a working camera. A camera like the C200 out of the box is ready to get to work since the camera includes an EVF and LCD touchscreen. Slap a battery and media card in and get to shooting. With the E2-F6, you have to customize it from the get-go due to the brain design. You need to own or buy at least a monitor and or an EVF to make the E2-F6 usable.
Good field monitors used to cost a lot if you wanted one that can be used outside. Generally, over 1000 nits are required. The $499 Portkeys BM5 is 2200 nits and affordable. The $600 Atomos Ninja V is 1000 nits plus the ability to record ProRes Raw. With the new FCPX update, ProRes Raw is looking like a much better option now with its expanded settings such as white balance and ISO.
The full-frame sensor has a unique look to it and performs very well. You will need to use full-frame optics, so if you don’t have them already, it will add a lot of expense. The S35 mode, is very good and opens up a lot of options with lenses.
The eND option is a must purchase as it makes shooting outdoors easier. I do wish the initial strength was a little less than 1.7 stops. It would be great to start at clear. I didn’t have dust issues on the sensor and that is something to worry about. If the eND is constantly being removed it opens the side to dust getting in. Similar to lens changes. Again, I didn’t have issues but my environment isn’t that dusty. Shooting constantly outside wreak havoc on camera sensors.
THAT’S A WRAP!
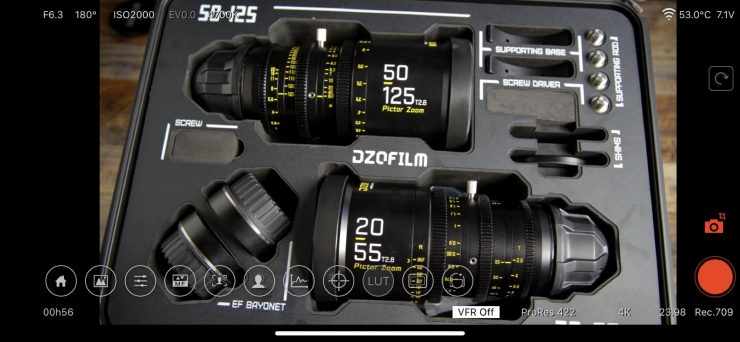
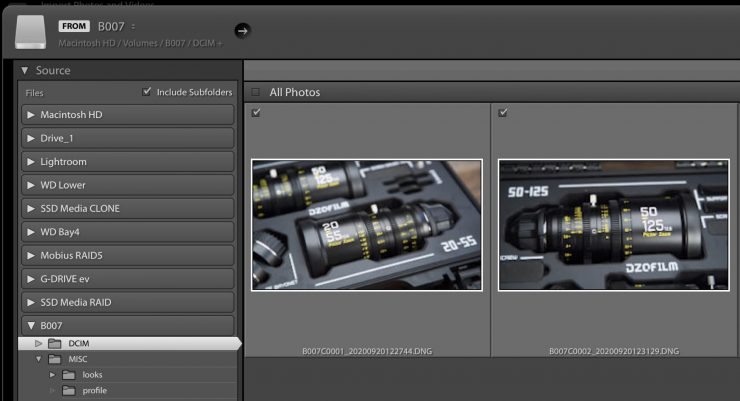
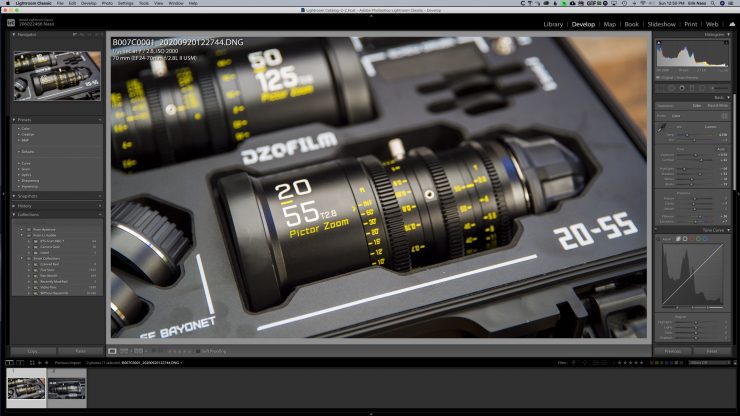
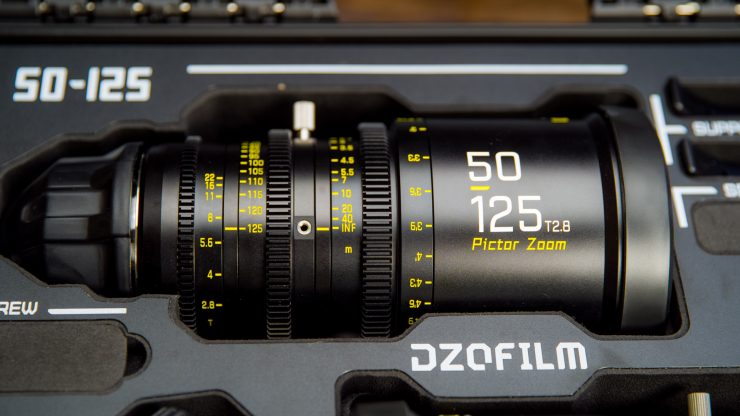
You might have noticed a set of DZOFILM Pictor Zooms in the article. I have them and working on a full review of the affordable S35 parfocal cinema zooms.
Like what we do and want to support Newsshooter? Consider becoming a Patreon supporter and help us to continue being the best source of news and reviews for professional tools for the independent filmmaker.