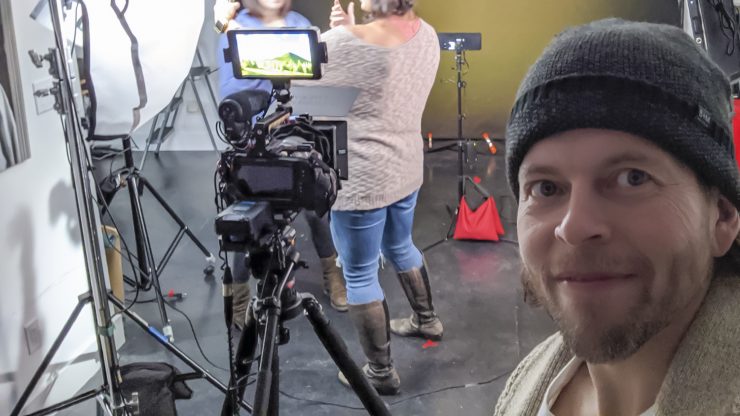
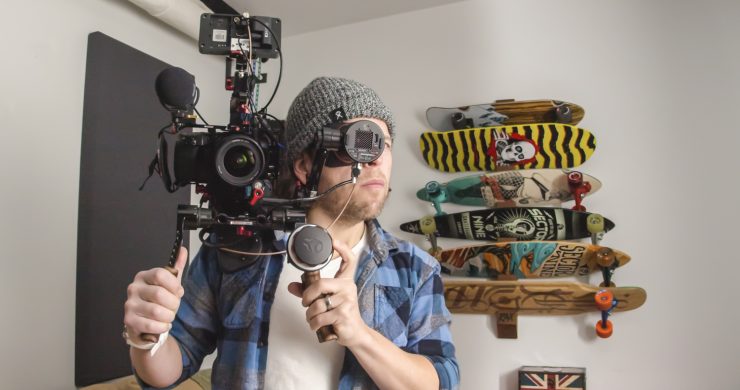
I’ve just locked picture on a feature documentary about the world’s last Blockbuster Video store. I’ve been working on it for three years with my friend Taylor Mordon the director of the excellent ska doc, “Pick It Up”. We’ve had bits of help from time to time, but we shot about 95% of it with just the two of us.
As the story unfolded the scope changed and it took a lot longer than we’d planned. Over that time we ended up using several different cameras – from the small a7sII, Sony FS5, Canon C300 II, all the way up to the RED DRAGON‑X. But my favorite camera to use overall on this project has been the Blackmagic Pocket Cinema Camera 4K and 6K.
I’m not going to dive into the cameras themselves. There is plenty of detailed information right here on Newsshooter and around the web. What I’m going to talk about is the three main setups I use with these cameras, and the accessories I use with them that make my life easier.
I’ve been making films for over 25 years. So when something makes my job easier or faster or gets me better results, I’ll use it. That doesn’t mean it’s necessarily the right gear for you. There is lots of other great gear out there. Check out reviews online, ask your friends, do some testing on your own to see what works best for you.
For me, being able to use the same camera and have multiple setups for varying situations, all with the same high-quality image is hugely valuable.
The three Blackmagic cam setups:
1 – Low Profile Setup: This is a very compact setup that I use when we need to be inconspicuous and/or move fast. You know what I mean, right?
2 – Medium Setup: When we have to travel light – no checked bags and/or no crew, but still be able to shoot for many hours in a day and have the right tools with us to make our job easier.
3 – Larger Setup: This one is mostly for event coverage – shoulder-mounted.
Keep in mind, these are hacked together. They’ve all worked well for me so far, but they may not work for you. Don’t try anything that might damage your camera, property, people, or anything else. And always test out any new setup before you use it in production.
Low Profile:
As a filmmaker, I get to travel all over the world and I find the less I carry, the more freedom I have. Shooting with a very stripped-down setup is the same. There are definitely sacrifices to be made when shooting this way. Some of those sacrifices do affect the end product – like the limited focal range of having just one lens. But mostly it limits the way I can shoot. Is it worth the sacrifice? When the situation requires it, definitely! I’m using this in situations where a larger rig would mean I wouldn’t be able to cover as much ground, I’d be kicked out by security, or a larger rig would alter the people’s behavior that I’m trying to document.
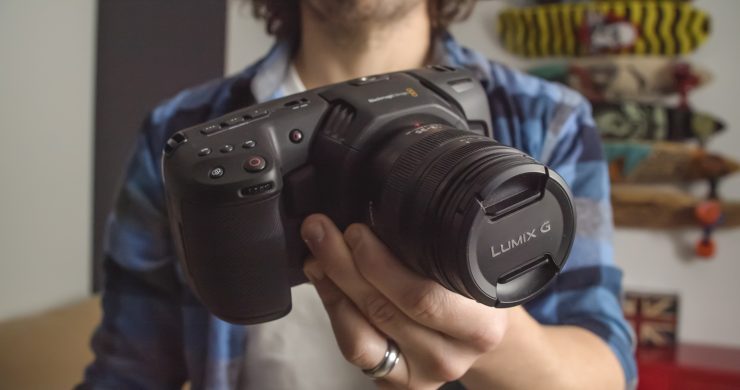
For this set up I usually have the BMPCC 4K Camera with just a Panasonic 12-35 2.8 lens. This lens has stabilization built in that helps a lot with handheld shots – it’s not the best stabilization in a lens, but the small size and lightweight are a big win. It really helps with keeping the low profile size and the I’m-not-making-a-film look.
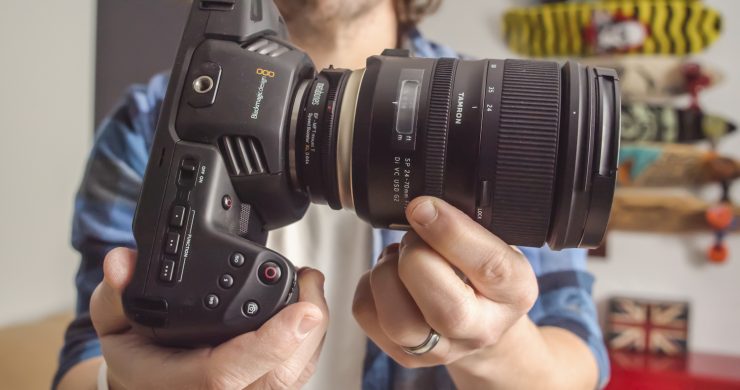
Depending on the situation, I’ll switch out the lens for the larger Tamron 24-70mm f/2.8 G2 with a Metabones Speed Booster XL. The stabilization, image quality, and converted aperture of 1.8 make this a killer run and gun lens. It also doesn’t use focus by wire making focusing much more predictable. If I don’t mind drawing a bit more attention the added size and weight of this combo is definitely worth it to me.
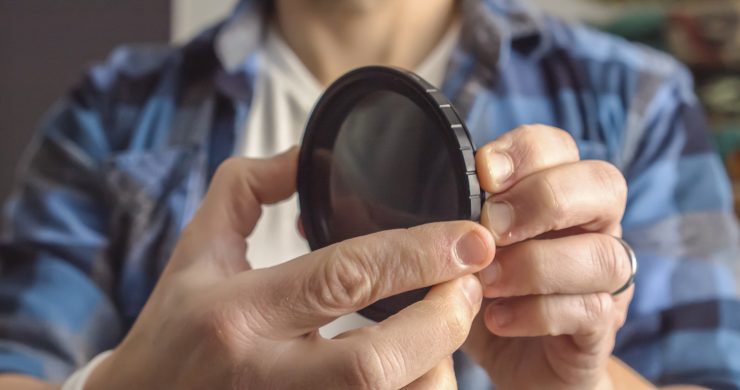
I also carry a variable ND with this setup. I really don’t like what variable ND’s do to the image, but with the super stripped-down setup, it’s about compromise. If I know I won’t have time to swap out proper ND filters, at least I knock down the light.
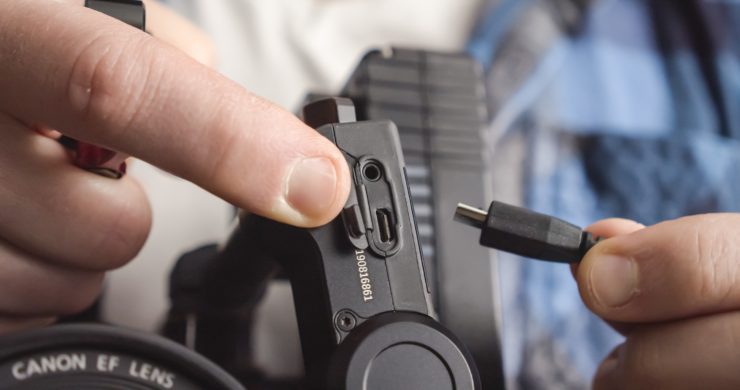
For power, I usually have a handful of Canon batteries with me just in case, but I rarely use them. I always bring along a barrel to DC adapter and a DC to d-tap cable so I can plug in my favorite v mount battery.
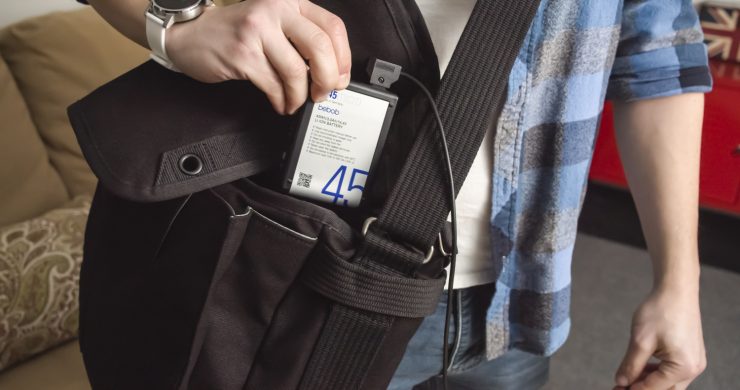
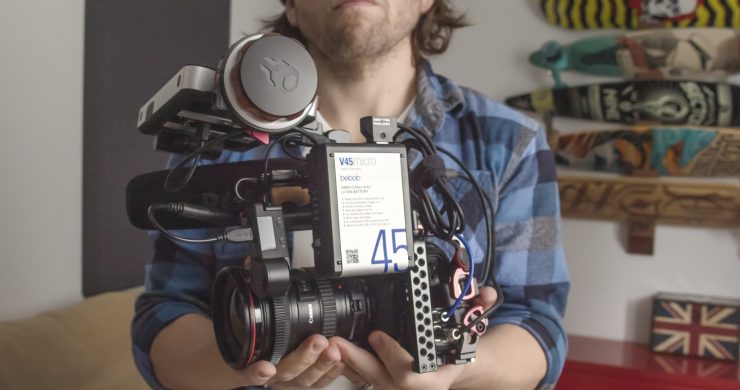
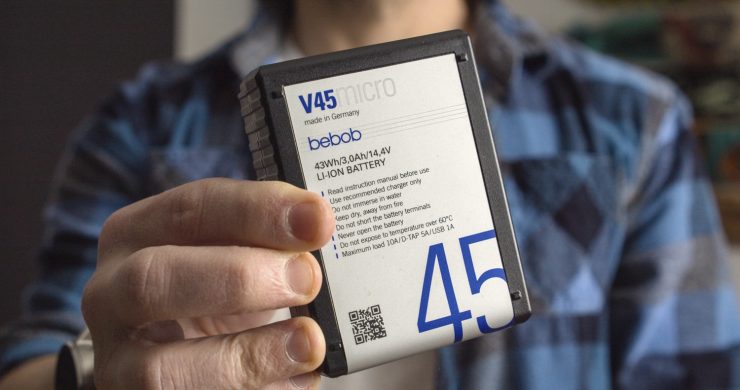
I really like the bebob V45 Micro. Instead of 30-45 minutes with the canon batteries, I can get 3 to 4 times that with the bebob V45 and 7 to 8 times with the V98. The bebob V45 Micro is small enough that I can put it in my pants pocket or I’ll leave it in my camera bag and run a power cord to the camera. I love these batteries. They’ve never let me down – unlike some of the cheap V-Mounts I’ve used. If I had to dig deep for a way to improve this battery, the only thing I can think of would be to add a high power USB C port on it so I could use it to power my laptop in a pinch or recharge it on the road with a 65w or 100w laptop brick. My wife thinks it’s crazy how excited I am about a battery. But having high quality, reliable power that lasts through much, if not all, of a shoot without needing a swap makes my job so much easier. And this battery solution just gets more exciting as the rigs scale up. You’ll see what I mean.
Medium Setup
My Medium Setup is my favorite and most used of the three. It still keeps everything fairly compact but adds a ton of functionality that improves my shooting experience.
Cages
This camera really wants to be in a cage and that’s not a bad thing. Having a camera I can configure and reconfigure for the situation takes some experimentation, but putting in the work can reap big rewards. I’ve tried half a dozen cages. The quality ranged from garbage to fine, but not for the way I shoot. Then there was one that I liked considering the cost. That’s the Smallrig full cage. I was using it for about a month, and though it had a few annoying quirks, I was satisfied with it. But then I started using the Zacuto cage and haven’t gone back to the Smallrig.
Over the years I’ve used a fair amount of Zacuto gear and it’s always been smartly designed with fit and finish that shames most of the other brands. All cages let you add gear and handles to the camera, so what do I like about this one? It’s sturdy but lightweight. It leaves the camera grip open so you don’t have to hold the cage with your right hand. It comes with a really nice hand strap and a – what would you call this – a thumb stud? It’s really comfortable. Unfortunately, there’s not as much love for the left hand. I would have liked to see the front underside of the cage rounded off more. It digs into the pad of my left hand when I’m holding it in the focusing position. It’s not unbearable, but it is a little distracting if I’m doing a lot of hand-holding.
The top of the cage has a cold shoe socket with a crazy amount of ¼ 20″ taps and a NATO compatible rail. I nearly always use it with the Zacuto top handle. I like shooting handheld with the top handle, but even if I just used it to move the camera from bag to tripod and back again, it’s a huge improvement in ergonomics.
The top of the handle has a cold shoe socket for a mic, monitor, or light mounts, and a NATO compatible rail along the remainder. Very handy.
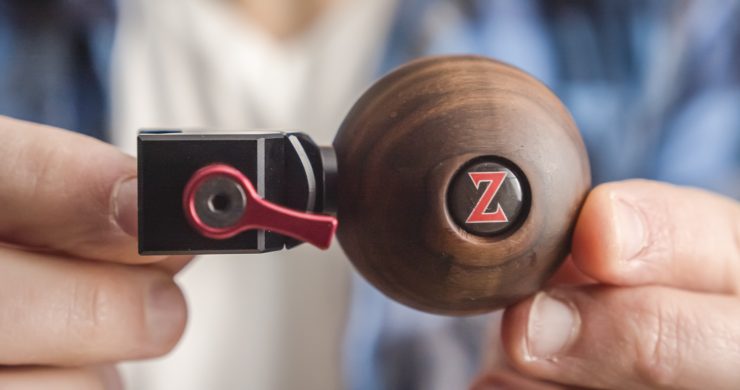
The left side of the cage also has a NATO compatible rail, so adding or removing a side handle is fast and easy. For side cage handles my top pick is the Zacuto Zarn. It’s ball-shaped so you don’t need to adjust the handle when you want to change your camera/hand angle. It’s simple and clever. It helps a lot with reducing micro-vibrations. Works great. The bottom of the cage has an integrated Arca Swiss plate that works with its quick-release clamps. I’ll talk more about that later. The Zacuto Blackmagic cage comes with cable angles and locks that work great – this could save a busted USB or HDMI on the camera which would end up costing you more than the entire cage.
The Medium Setup is where using the Bebob micro V-Mount batteries really starts to shine. No more separate batteries for everything. No more constant swapping. I’m a filmmaker, not an electrical engineer, so do this at your own risk, but I’m using a D-Tap to barrel connector out from the bebob to a 2-way DC Power splitter. One side of the splitter goes to the Kondor Blue DC Barrel to BMPCC 4K cable to power the camera.
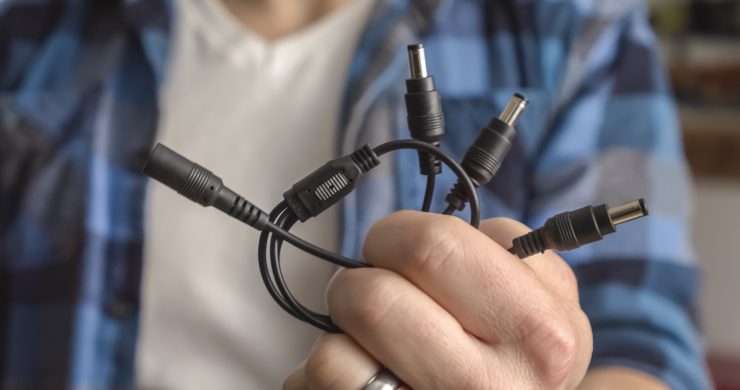
The other side of the splitter goes to a second of the same splitters with the left side going to a SmallHD Canon dummy battery to power the monitor and the other side of the splitter going to an Adafruit MicroUSB Plug to 5.5/2.1mm DC Barrel Jack.
I use that to power my wireless follow focus motor. Keep in mind this is passing all 14.4v (ish) through to the motor, not 5v like a normal USB would. The motor I’m using has a 5-18V input tolerance, so it’s working great, even giving me more torque than I was getting from a USB battery. Best of all, when I’m out of power I just swap one battery. It’s so nice.
These bebob VMicro batteries are rated for up to 10A (5 from the D-Tap) so splitting it out the way I am has been working great. The batteries have a built-in LED light, which I originally thought was cute, but silly, but I’ve actually used it several times and it’s less of a hassle than pulling out my phone or a flashlight when I’m trying to find something in my camera bag.
The bebob has a feature I haven’t seen on any other brands and it’s incredibly helpful, especially when using these on rigs – it’s the reversible D-Tap port. It gives me more options of where I can mount the battery because I can run the D-Tap cable out of the battery in either of two directions. If you’ve been running D-Tap to power your rig for a while you probably know what a pain it is when you want to mount the battery in a spot, but the D-Tap forces you to mount it elsewhere. This is clever enough that it makes me never want to use another brand battery on a rig again.
On the medium size setup, I either pocket the bebob V-Micro 45 if I’m doing a lot of handheld work, or if I’m on sticks or going back and forth, I’ll use the Came-TV V-Mount clamp. The Came-TV V-Mount comes attached to a mini clamp so you can connect V-Mounts to light stands, tripod legs, etc. Works great, but I wanted a super-compact way to mount the Bebob mini batteries to my cage so I took it off the clamp and screwed it to a rail plate.
Monitoring
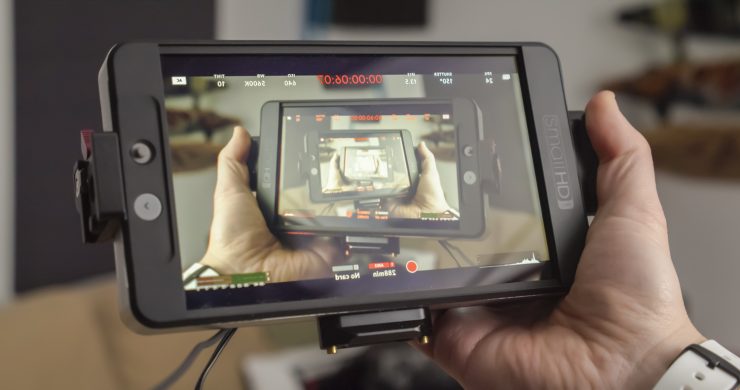
I’ve been using the SmallHD 702 Bright for quite a while. Sometimes it’s a bit big for my needs, but most of the time I’m happy to have the 7” screen. And it’s bright enough to use outside in most situations. There’s a 5” super bright monitor out now from another brand that I haven’t had time to check out yet, so in the meantime, if I need something smaller, I throw on my SmallHD 502. It’s pretty useless outside in the bright sun, but I have the Sidefinder on there so I can use it as a decent enough EVF if I need to.
Monitor Mounts
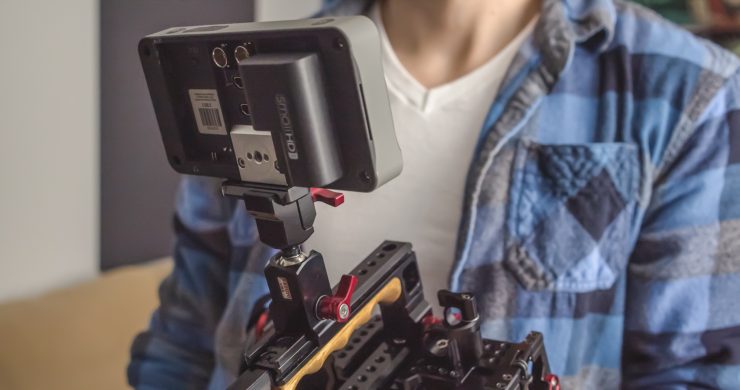
My two favorite monitor mounts are the Zacuto Z-Rail Ball Mount and the XTENDER 210 Friction Mount. The Z-Rail Ball mount has Nato clamps on both sides so moving it around the rig or taking it off to pack up is quick and easy. But the magic happens when you tighten the ball down just right. You can adjust the position of your monitor with one hand without having to unscrew anything. It also comes with an anti-twist plate that works with just about any on-camera monitor. Very nice.
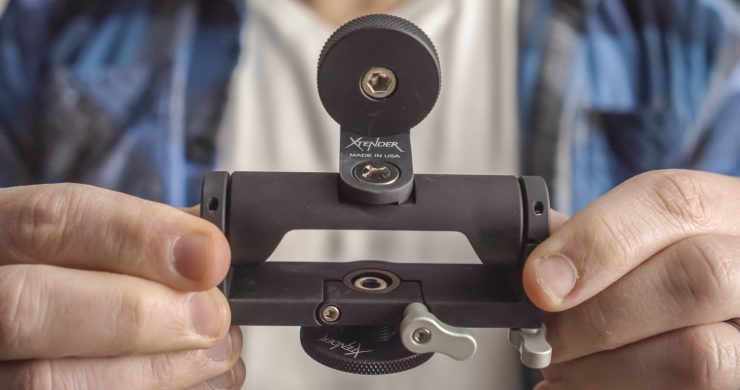
The XTENDER 210 Friction Mount attaches to a cold shoe on the cage or handle. It’s basically like having a quick release, so loosening it and pulling it off the rig to put in a bag is quick and easy. Once you’ve mounted your monitor to the mount, adjust the two knobs based on the weight of your monitor one and then you can move the monitor with just one hand without having to touch the mount again. It’s a very clever design.
Follow Focus
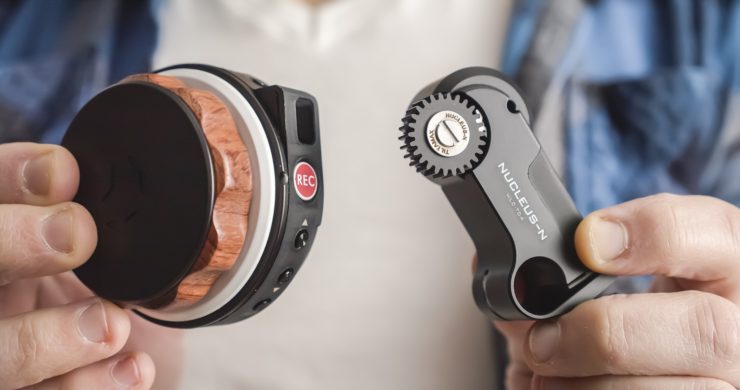
I’ve been using the Tilta Nucleus Nano lately. It’s super lightweight and compact. And as long as I’m already using my bebob’s to power the rig it’s a breeze to add in the Nano. It’s not without its quirks, but it dramatically improves my focusing options during production and for the price, it’s really an impressive piece of gear. To keep my medium size setup as compact as possible, I don’t usually run it with full rails. So I’ll screw a Niceyrig Single Rod Clamp on the top of the cage and I can use that to hold the Nano motor as well as the V-Mount Battery.
Lenses
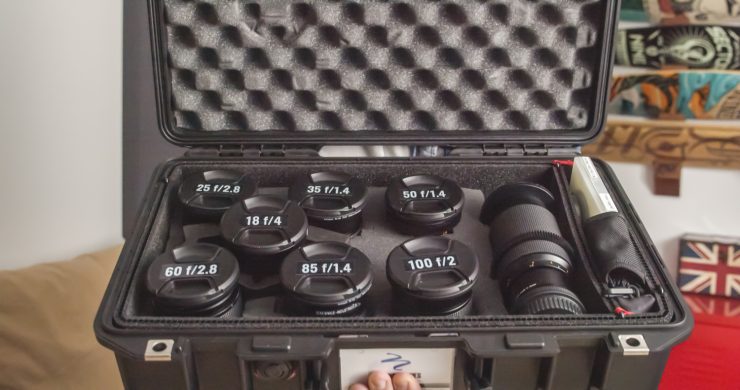
With the medium set up I sometimes just bring the Metabones and Tamron combo, I mentioned earlier – especially if I know I’m going to have to work quickly and be on the move, but if I know I’ll have time to do lens changes and proper setups, I’m happiest to bring along my set of vintage Contax Zeiss glass. It also depends on what look I’m after.
Audio
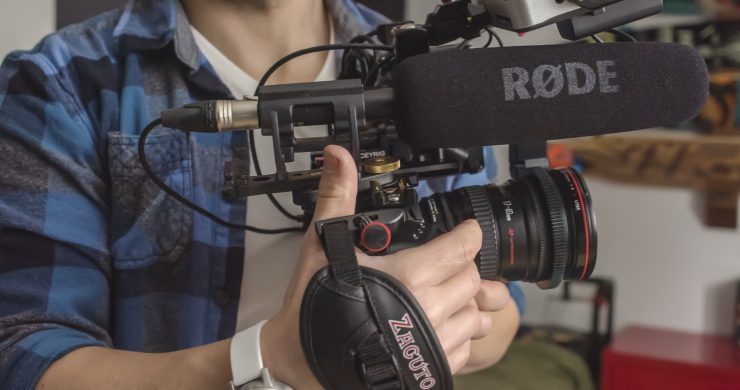
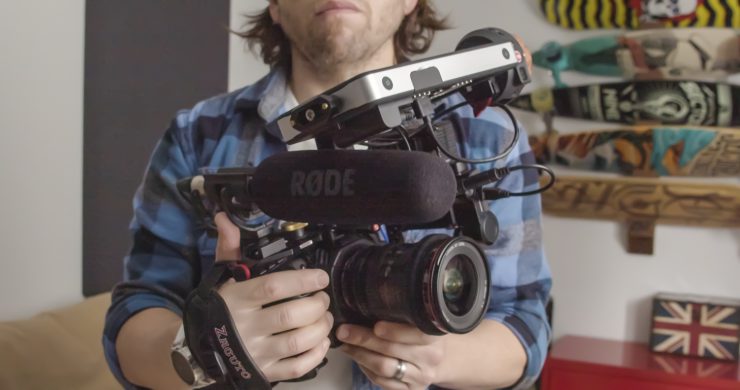
Since I’m not worried about being inconspicuous with the medium-sized rig, I can throw a shotgun mic on there. I’ve been using a Kondor Blue XLR to mini XLR to connect the RODE NTG3. The NTG3 is a really great mic, particularly when we’ve got a boom operator. Using audio from a mic that’s mounted on the camera is never my first choice, but again, filmmaking requires compromise and sometimes it’s the least bad option. That said, if I’m going to mount this on camera I attach it to the cage with my absolute favorite mic mount – the Rycote Invision Video 1/4″. It’s got a very robust build, kills off vibrations before they get to the mic, and it’s got this little swing arm so you can hang it over the edge if your cage is already loaded to the gills.
As great as the NTG3 is, I think for the way I’ve been using it, I’d prefer a smaller mic. I haven’t had a chance to try the Deity S-Mic 2S yet. But it’s a little over half as long and half the weight of the NTG3. Looks like it could replace the NTG3 for me in these situations. Also on the need-to-check list is the RODE NTG5 which looks interesting at half the weight and a couple of inches shorter than the NTG3. Hopefully, I’ll get a chance to test both of those out soon.
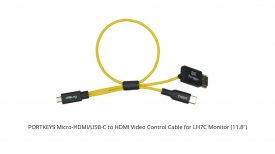
I’ve found Kondor Cables to be reliable and affordable. I’ve got the DC Right Angle Coiled Cable to D-Tap, DC Barrel 2.5mm to BMPCC 4K, and Mini XLR Male to XLR.
Larger Setup
In the history of cinema, I’d still consider my larger set up quite small. If I break it down, I can still get it into a carry on size bag. It’s basically the medium set up: Zacuto cage, bebob V Micro batteries, monitor, etc. with the addition of a few extras. My larger set up includes rails, shoulder pad, handles, and a dedicated EVF.
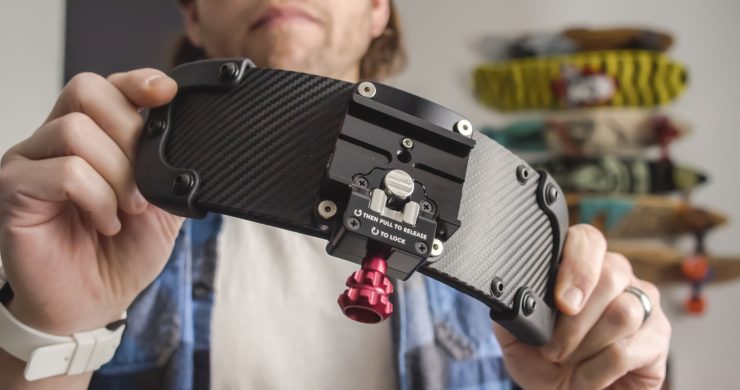
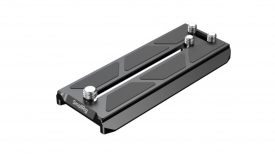
Of the many, many different shoulder rigs I’ve used, Zacuto quickly floated to the top. They use a slicker version of the QR modular system I hacked together for myself a couple of years ago. It’s called the Polaris Baseplate System. It’s basically a series of Arca-Swiss compatible plates and clamps that let you quickly change your set up from tripod to handheld to shoulder mount, slider, gimbal, or however you need it at the time.
I absolutely hate fiddling with screwdrivers and allen keys on set, so the Polaris set up lets me switch my rig around without wanting to rip my hair out. It looks like they put a lot of effort into cutting away the unnecessary weight and bulk to make this streamlined.
Their cage has a compatible plate cut right into it, so it helps keep the weight down and the size nice and compact when you hook it into their system. You just pop the cage right into the clamp that’s mounted to the rod support when you need rods. And when you want to go shoulder mount, you pop that into the Zacuto shoulder pad. It’s a really compact pad that’s also comfortable and adjustable.
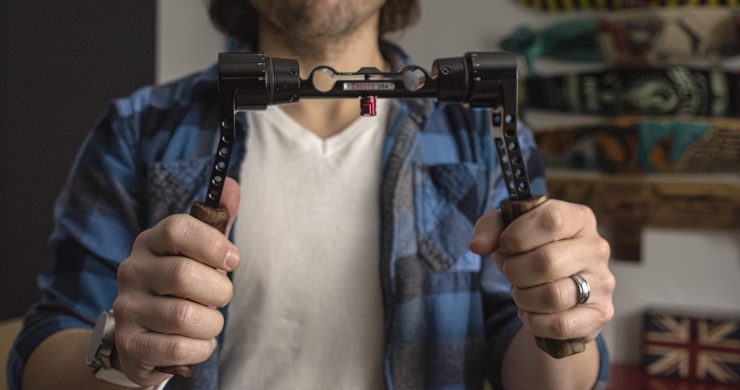
I must have tried a half dozen shoulder pads and this is the only one I’ll use. Lately, I’ve been using it with the Shorty Trigger Grips which feels really nice in the hand. They’re nice and solid, too. But the best part is you can quickly adjust them by just pressing the thumb trigger. Being able to change the angle of the grip without having to take my eye off the monitor is incredibly valuable.
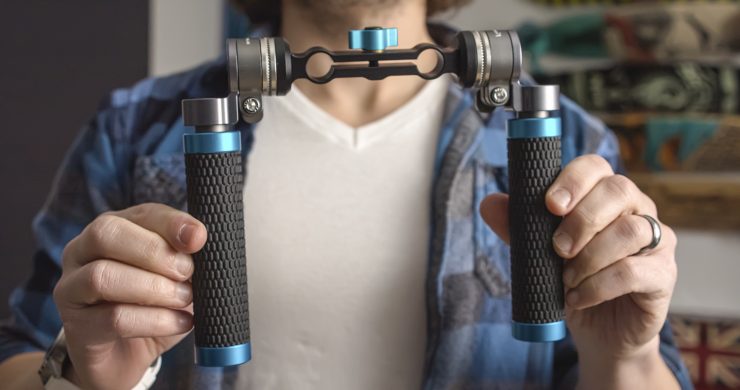
Kondor Blue also makes QR Rosette Hand Grips that are similar. I’ve just started testing those out. The grips aren’t as comfortable as the wood Zacuto grips but they can be used independently, not just as a pair, which would come in handy for me in some situations.
Zacuto Kameleon EVF
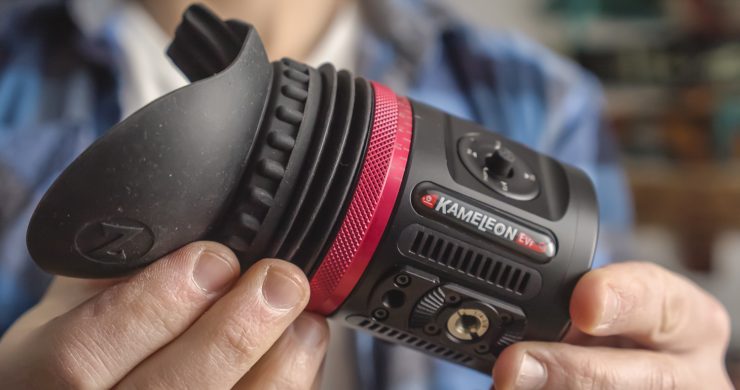
Using an electronic viewfinder that costs more than the camera may seem counterintuitive. But you’ll likely be using the same viewfinder long after you’ve upgraded your camera through several generations. Do I wish it cost less? Sure. And I wish there was a zero carb all-you-can-eat ice cream buffet. But in the big picture – for the way I work – it’s a reasonable expense for how much it improves my filmmaking experience. The Zacuto Kameleon EVF is compact and has a phenomenal display, and just as important, the interface is powerful and intuitive. You can import 3D luts.
There are four customizable buttons to trigger things like false colors, peaking, and other tools to make your job easier. It’s got an adjustable diopter and an anti-fog coating, too. And you can run the signal into it with SDI or HDMI. It’s 1080 but will accept a 4k signal. Very handy. It’s an impressive piece of engineering. It uses a 4 pin LEMO for power, which locks on there and is super pro and reliable – I run it from the D-Tap out on my bebob Coco 15Vmicro. The Kameleon has Arri Rosettes on both sides and Zacuto makes the Axis Mini, an adjustable dampened mount, that I think is an essential add on. It’s the slickest, smoothest, one-handed mount I’ve ever used. I love it.
Whenever I’m using a full rail set up, I love throwing on the bebob Coco 15Vmicro V-Mount to 15mm rod adaptor. It’s a very clever design: compact, lightweight, and you can easily mount it to tilt back or hang down and position it up and down or left and right. That means I get to use it however works best for me at the time. Options! I love it. And because it has its own two-direction D-Tap separate from the one built into the battery I think you could pull an additional 5 amps from the battery for a total of 10 amps – though I’ve yet to need that much all at once. I’m a sucker for great design and this definitely makes me nerd out.
Favorite accessories for any size rig
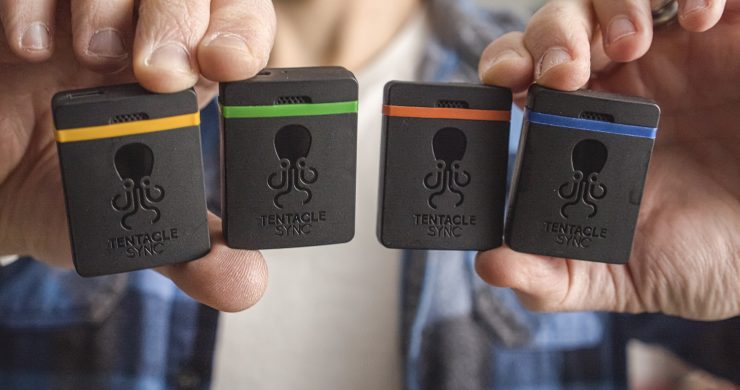
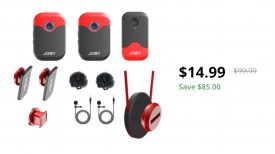
The Tentacle Sync E is this camera’s brother from another mother. If I’m shooting with an external audio recorder and/or two or more cameras, you can bet I’m using the Sync E. If you’re not familiar with the benefits of having all your cameras and audio have the exact same timecode, basically, it makes editing much, much easier because the sources all lineup. How do they do it? These timecode spitter-outers have built-in rechargeable batteries that last up to 35 hours at a time.
They connect to an app on your phone through Bluetooth so they can perfectly sync up. Then you plug them into the device you want to sync. The BMPCC 4K accepts timecode through the mic jack, so you just sync up your Tentacle Sync E’s and then plug them into the 4K’s mic jack. You’ll see that the camera’s TC now matches and it says “ext” to show it’s receiving the timecode from an external source. So simple. So small. Amazing tech support. They also work with cameras and audio recorders that don’t have dedicated timecode inputs. They have built-in mics, too, so if you’re shooting on a Sony, for instance, it’ll record the TC signal on one channel and scratch audio on the other. Very smart. I’d love to see Tentacle make a deal with Blackmagic to put their Tentacle built inside all of the Blackmagic cameras.
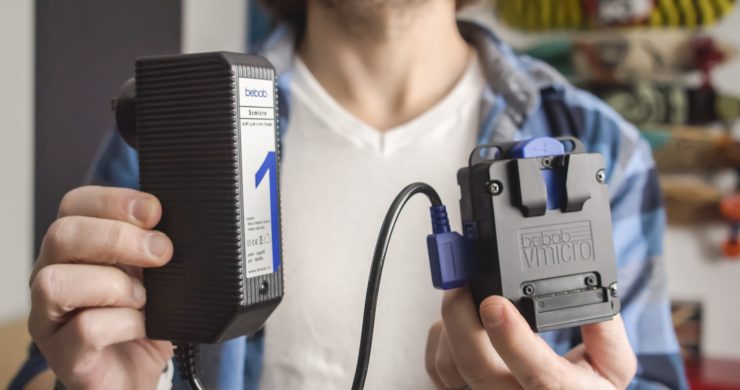
V-Mount Battery Charger: Having micro-sized V-Mount batteries is great, but if I have to lug a massive charger along for out of town trips or really long shoot days, not all, but some of the shine starts to wear off.
Fortunately, bebob must be reading my mind because they made the smallest 2 channel V-Mount charger I’ve ever seen and now flying to locations for multi-day shoots just got a whole lot lighter. The bebob VS2MICRO is almost impossibly small and will simultaneously charge 2 V45 Micro batteries in under 90 minutes and a pair of V98’s in under two and a half hours. Small, fast, and powerful – I love it.
Lighting wit the Luxli Viola²

It seems like there are a million Little RGB lights out there. The ones with built-in batteries are handy for quick shots, but for general production work, I haven’t found anything that comes close to the quality and usefulness of the Luxli Viola².
I can slap a small battery on there and keep it super compact, but if I know I need a long run time I can throw a big guy on there and not have to think about it. It’s easily controlled from my phone, so I can stick it in hard to reach places and not have to touch it again until it’s time to pack up.
I got the set with the diffuser which is smartly designed to squish up, hardly making the light much bigger for transport. It’s all small enough that I’m happy to keep it in my bag on almost all occasions. For its size, it’s quite bright. Depending on the situation it works great as a hair light or an eye light, maybe some fill. Because of the small size, it’s going to be a bit too hard for my taste as a key light for interviews without bouncing it. I don’t really use it for that unless a specific situation calls for it. But I’ve been using it quite a lot as an edge light and using soft, natural window light as the key. Makes for a nice two-light setup while only having to bring one tiny light.
The interface both in the app and on the light itself is really smart and simple. And matching the color to the room light is quick and painless. I don’t use the RGB colors nearly as often, but it sure is handy to have them available. Sometimes we get to a location and we’re only allowed to shoot the interview in a conference room or another visually uninspiring spot. Being able to wash the background with a vibrant color can dramatically liven it up.
X-Rite ColorChecker Passport Video
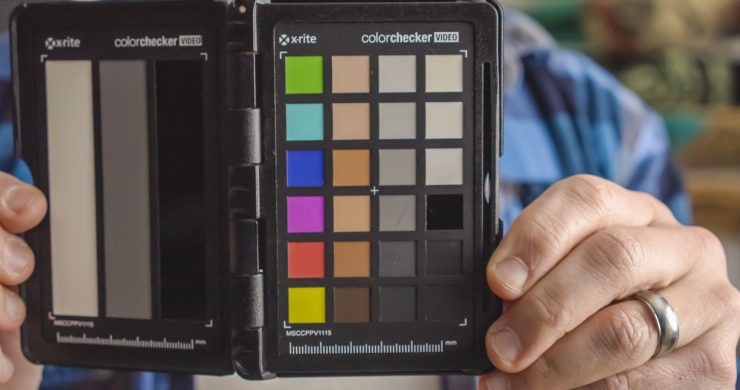
X-Rite ColorChecker Passport Video. If you don’t know what these little guys are for, go look it up. These are so incredibly helpful – especially when shooting two cameras – for matching and getting accurate colors. I’ll use the focus card sometimes, and the white balance card is handy too, but since I’m shooting RAW with the Blackmagic and editing in Davinci, the most used feature for me has been the Color Chips – You can use video of it in Davinci to set a base that can speed up and simplify your post color workflow. If you’ve been thinking about getting one of these, do it.
Software
I’ve been playing with Davinci Resolve off and on for years, but I’ve now switched over permanently. After using Premiere for almost 20 years, I really didn’t want to switch, but the more I use Resolve, the more happy I am to never go back to Premiere.
Offloading and backups
No one needs offloading software – unless they actually want to keep the footage they shoot. If you’re not offloading your cards with specialized software, please, please, please, for your own good, switch. There are several out there that all work great. My personal favorite – especially when I’m on the road, is Hedge. Professional offload software does 2 things – makes the process of offloading and organizing/renaming your files during offload quicker and more streamlined – and the more important part – they verify that the files copied over without errors. What I like about Hedge, in particular, is the streamlined and attractive interface. It stays out of the way and does what it’s meant to do.
Tripods
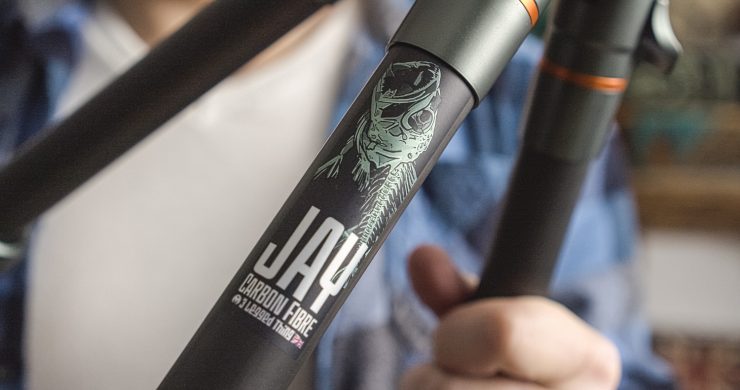
I’m not going to get too much into tripods. They are a conundrum. I want them to pack down small and light, but want them to be open up huge and be steady as a rock. For some reason, physics keeps getting in the way. I will say, I just started playing around with a new video tripod from 3 Legged Thing. The owner of 3 Legged Thing is a close personal friend, so do your own research to see if this is right for you. Danny knows my frustration about traveling with a tripod as a filmmaker. I just started testing out their new bowl mount tripod – they’ve named it Jay. It only extends to under 4 feet, but it packs down to under 16 inches. I’ve got some more testing to do with it, but so far, I’m excited about putting this in my gear line up.
Bags
There’s just too much to talk about. Briefly, though, I usually keep my low profile rig in the Think-Tank Retrospective 7 (or 20) V.2. It doesn’t scream camera bag, but it’s one of the best thought out shoulder camera bags I’ve ever used.
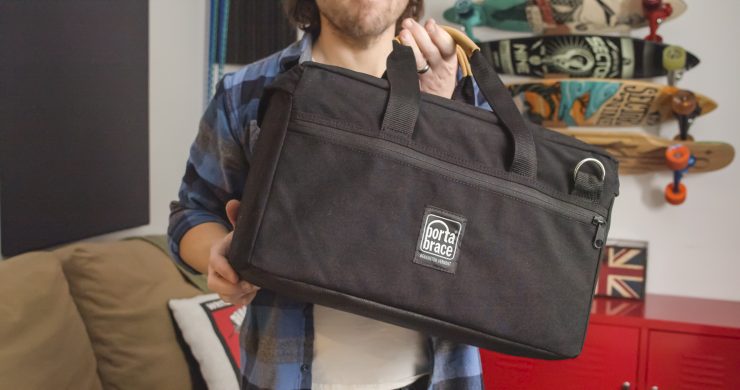
The medium set up changes bags depending on the situation. If I’m running around locally, I’ll usually still have the Retro 7 for the bulk of it and grab the Pelican Air 1485 for my lenses. It’s crazy tough and I enjoy shooting out of it on set. If I’m flying and not checking – which is always my preference, I don’t like hard cases. So I’ll usually switch it up with something like the Portabrace LB-1B. It’s small enough to pass as a personal item bag on many airlines, but it’s built like a brick house.
For the larger set up if I’m driving I LOVE the Tenba Cineluxe Shoulder Bag 21 Hightop. It’s like a box-truck and a camera bag had a baby. It’s tall enough that I can leave my full rig set up even with the top handle and go right from bag to shoulder. If I’m flying that’s too big to carry on and it’s a little awkward to carry long distances, so I’ll put everything in the Peak Design Travel Backpack 45 with a camera cube.
That’s a wrap!
So that’s my 3 main setups. Of course, I don’t just stick to any one of these three. I evaluate each upcoming shoot and bring whatever seems like the best option at the time – starting with one set up and pulling items from another if I think I might need it.
I find having a base to build off that I’m already happy and familiar with greatly streamlines my workflow and lets me concentrate on my favorite part of filmmaking – telling the story.
Like what we do and want to support Newsshooter? Consider becoming a Patreon supporter and help us to continue being the best source of news and reviews for professional tools for the independent filmmaker.