I visited Z Cam at NAB 2019 to get a look and learn about two new cameras. The E2-S6 an S35 and full frame Z Cam that is 6k and another option will be a full frame 8k model. These are scheduled to be released later this year. Z Cam is on an innovation roll right now. Seems they keep coming out with new updates and ideas.
Wanting to learn more about Z Cam cameras they offered to send Newsshooter an E2 MFT for this review. Z Cam in no way was involved in the editorial process of this review. They were available to me for answering the questions I had while reviewing the camera.
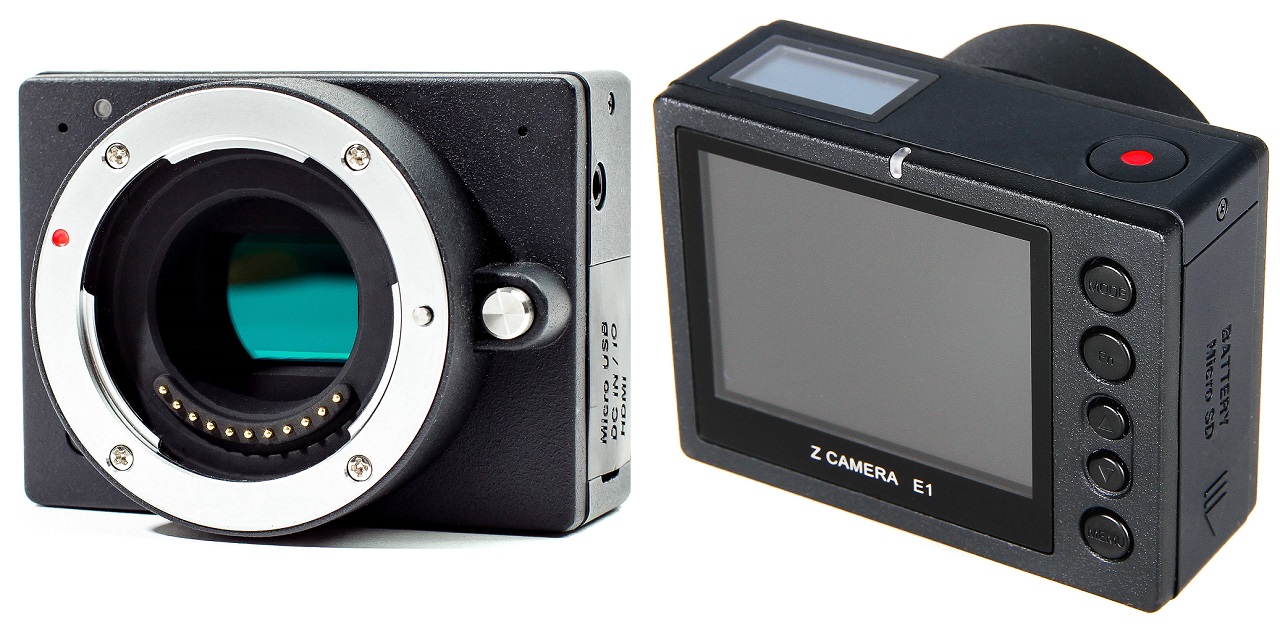
At NAB 2018 Z Cam introduced the E2 MFT cinema camera. It starting shipping in October 2018. Prior to the E2 Z Cam’s first camera, the E1 was funded with a 2015 Kickstarter campaign. It is a much different product than the E2 and shows what a company can do once they are funded. The E1 raised $306,973 for the interchangeable lens MFT mount GoPro looking camera. The E1 is showing out of stock in the US and might be discontinued soon.
E2. The Next Generation from Z Cam

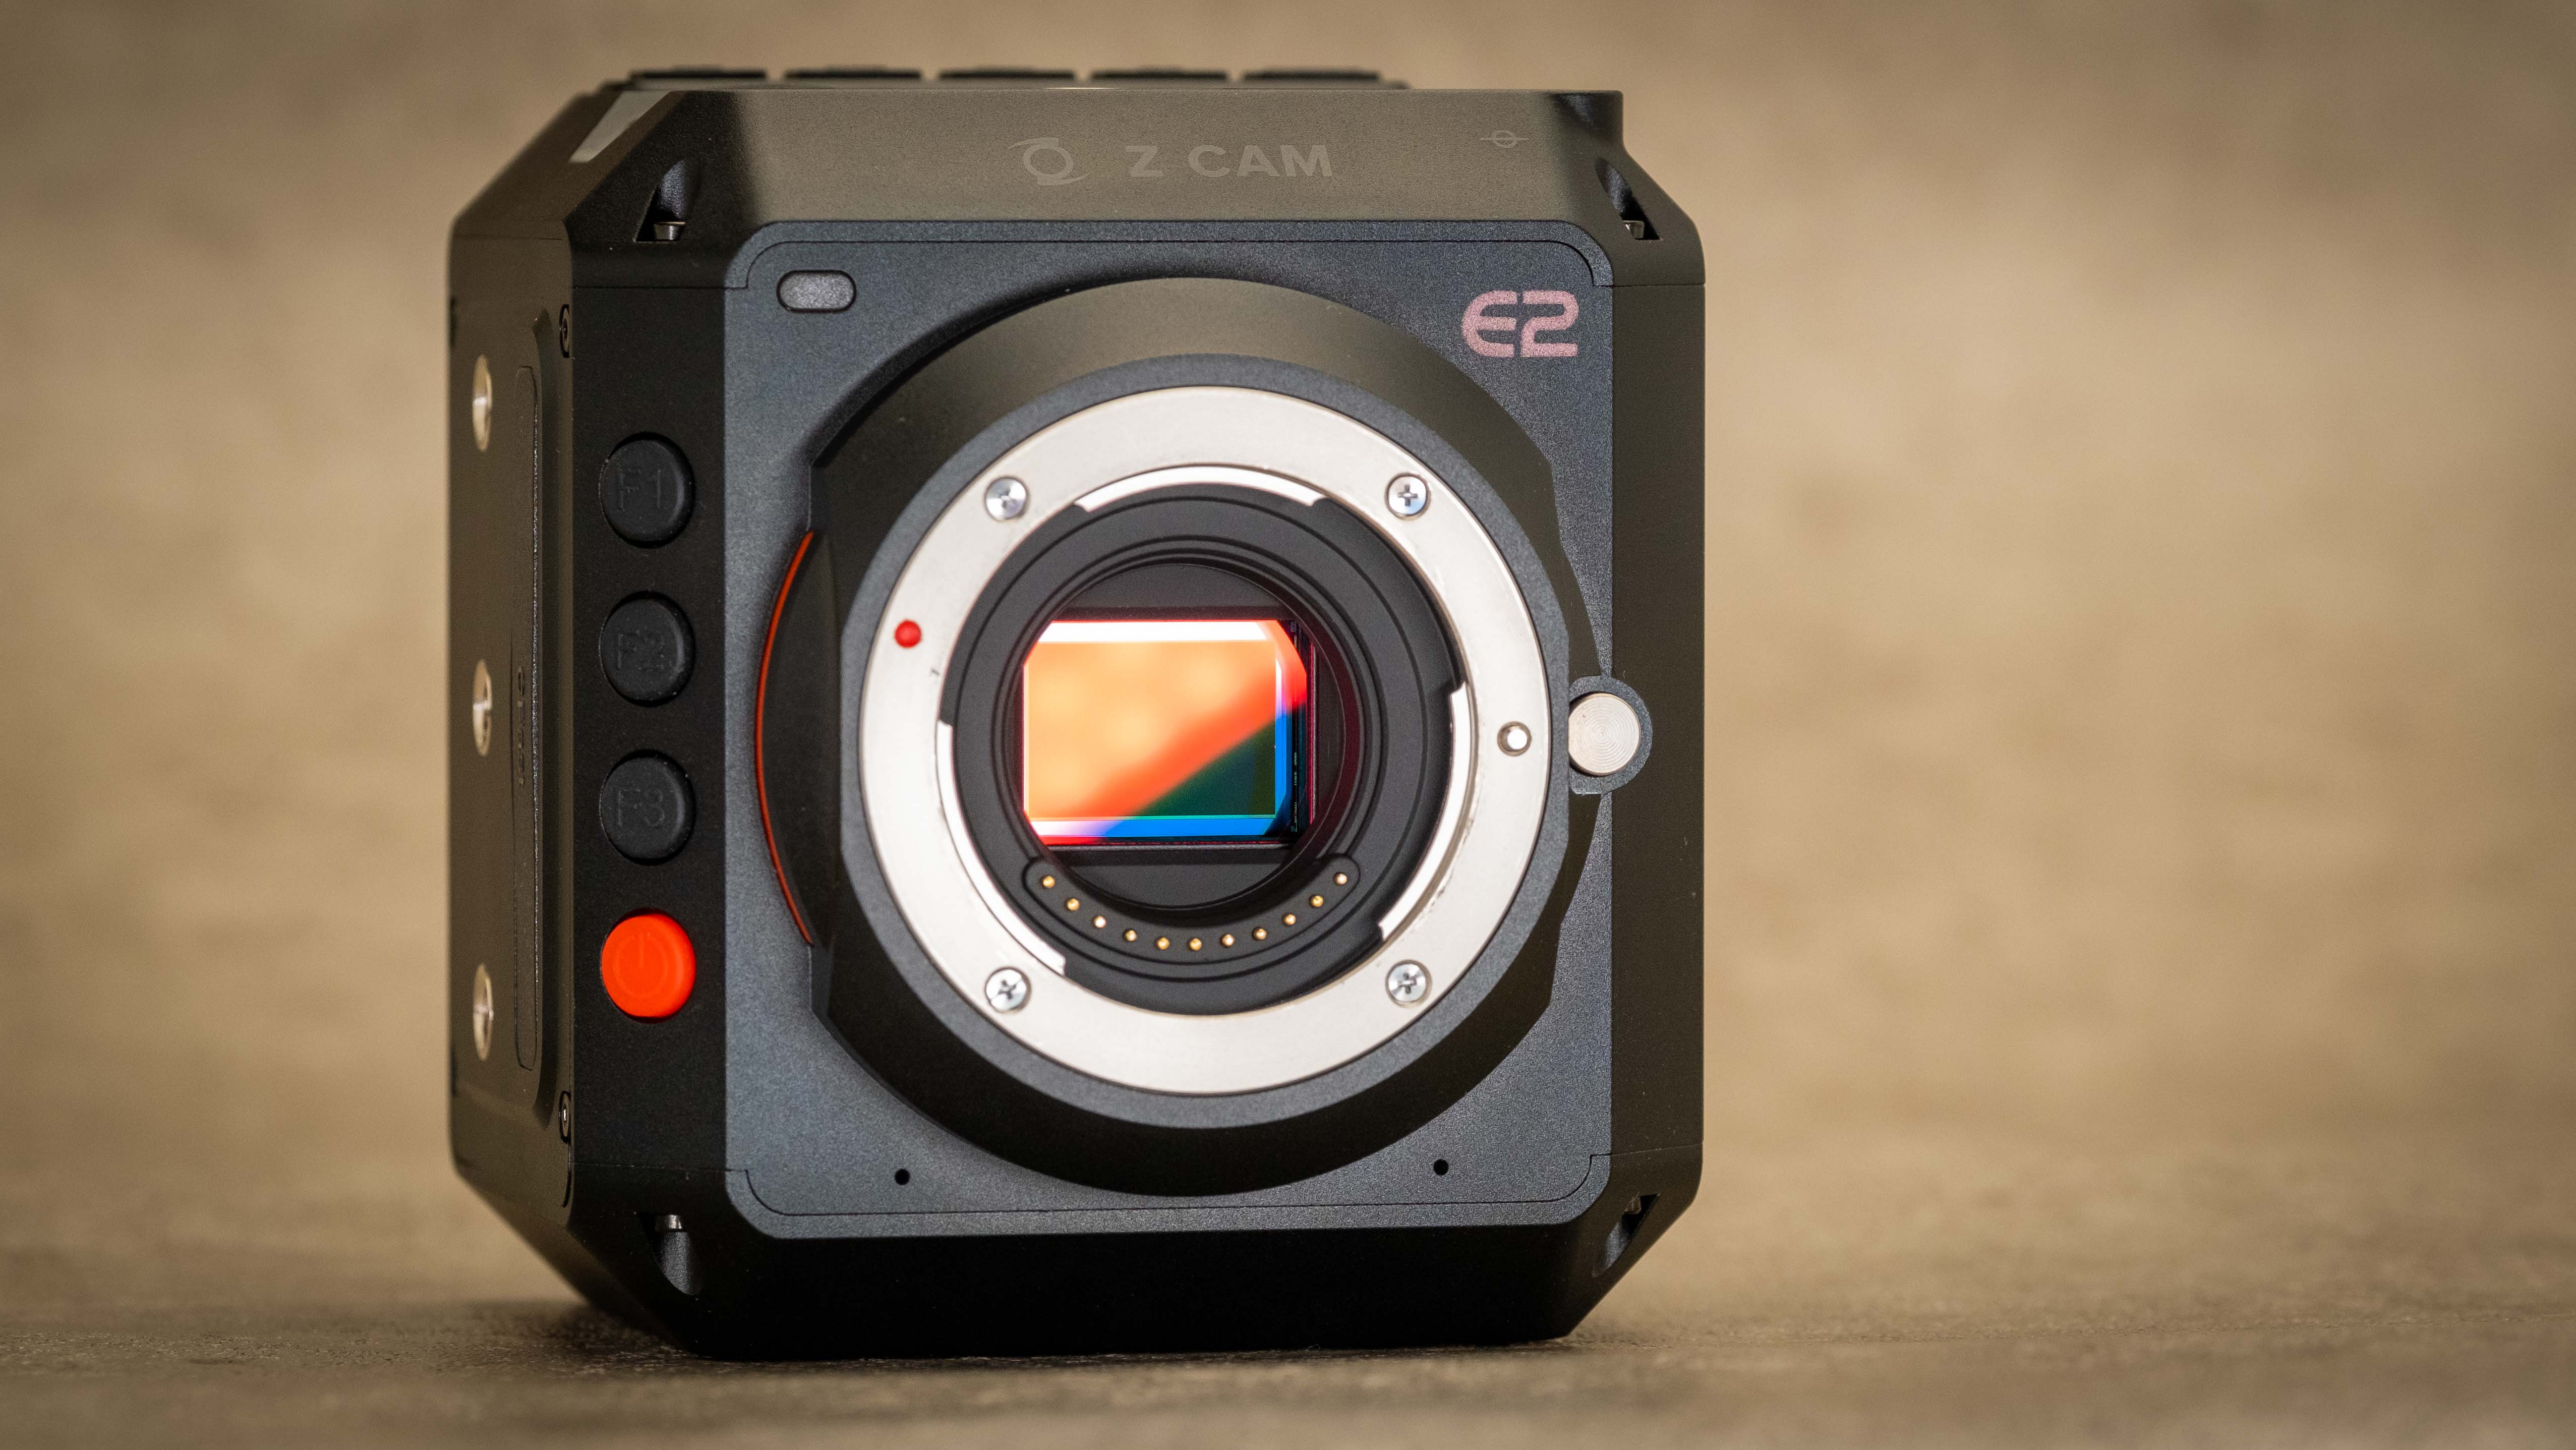
The Z Cam E2 is a huge jump up from the E1. While it’s still an MFT sensor it has a much larger body, more inputs, and much-improved codec and frame rate options. The body is very compact coming in at 91.2 mm x 99.2 mm x 89.1 mm or for us Yankees 3.59″ x 3.90″ x 3.50″. Yeah, the E2 is compact. It’s really remarkable how much tech is in such a small body and it doesn’t have a fan inside to cool it down. This has to do with a specific chip choice that Z Cam decided to use.
Chips Matter. FPGA or ASIC?
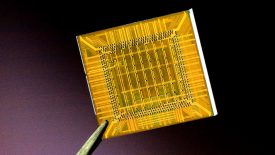
Cameras need to have a chip that is basically the architecture of the camera’s features. The two options, for the most part, that cameras use, are FPGA and ASIC. Both have advantages over the other however one big difference is power requirements. FPGA requires more power thus generates more heat over the ASIC chip. Its advantages are that features can be changed by reprogramming the camera’s menu and options adding growth over time with new hardware features that the camera didn’t have when shipped.
ASIC hardware is constant and can’t be rebuilt with extended features and redesigned as FPGA can. The hardware is locked but they can be updated with software. Today, there are ASIC IP cores that offer FPGA functionality that can be embedded into the ASIC, allowing parts of the ASIC to be programmable.
The E2 uses the ASIC chip because it requires much less power than the popular FPGA chip, therefore, runs cooler. Is it the best choice? For a camera that is focused on having such a small form factor heat will be an issue so the ASIC chip wins.
To learn more about FPGA and ASIC chips check out this article on AnySilicon.com.
Image Quality
This is what it’s all about, so let’s dive into what the E2 looks like. The Z Cam E2 has a very nice look to it. I like the Rec709 setting a lot. It’s not contrasty and has plenty of room for a light grade with the slightly lifted shadows. It’s really, very nice. If you need more dynamic range Zlog2 and WDR work great. The color science is also excellent. Skin tone looks natural, and colors are accurate. You won’t need to work the image very much in post.
Skin Tone
For me, skin tone rendition is one of the most important aspects of a camera. I shoot people a lot more than places. The E2 is very pleasing and reminds me of the ARRI soft color look.
Shooting log does give you more control over the image but it’s not necessarily a must in all situations. I find shooting in log when the situation does not warrant it for example in a low contrast scene a waste of time. Shooting in Rec709 yields excellent result with some wiggle room for post-production color grading.
The detail is also very good in 4K If you are working in an HD timeline the punch ins look really sharp with plenty of detail. If you prefer a softer image you can dial it down in the menu as well as saturation. I didn’t make any setting changes to the image. It looked good to me.
Frame Rates
frame rates and codecs
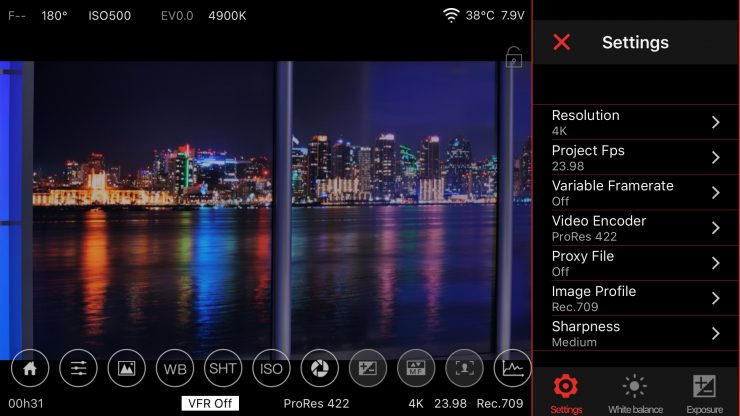
| Video Format | 4096 x 2160 @ 59.94 / 50 / 29.97 / 25 / 24 / 23.98 fps 3840 x 2160 @ 59.94 / 50 / 29.97 / 25 / 24 / 23.98 fps 3696 x 2772 @ 59.94 / 50 / 29.97 / 25 / 24 / 23.98 fps 1920 x 1080 @ 59.94 / 50 / 29.97 / 25 / 24 fps / 23.98 |
| Variable Frame Rates & Codecs | 120 fps C4K 4096 x 2160 H.265 120 fps 3840 x 2160 H.265 60 fps 3696 x 2772 H.264/H.265/Prores LT & Proxy 60 fps 3312 x 2760 H.264/H.265/Prores 422, LT & Proxy 160 fps 3312 x 2760 H.265 240 fps 1920 x 1080 H.265 |
| Max Bit Rate | 230 Mbps for 4096 x 2160 230 Mbps for 3840 x 2160 230 Mbps for 3696 x 2772 200 Mbps for 1920 x 1080 |
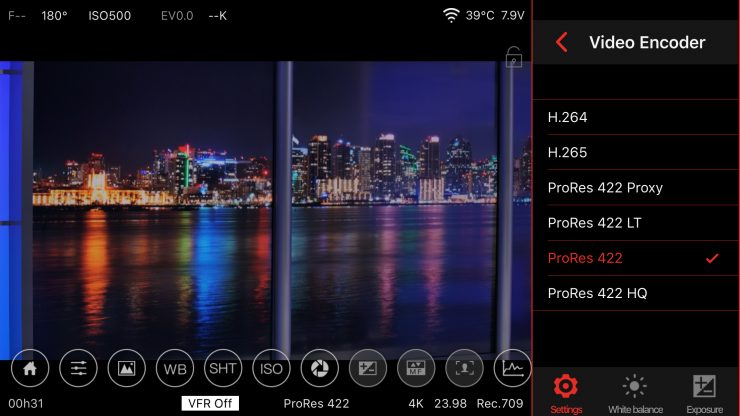
| Video Encoder | ProRes 4:2:2 HQ, ProRes 4:2:2, ProRes 4:2:2 LT H.264 high profile / H.265 main 10 profile |
| Color Bit Depth | 10 bit (H.265) / 8 bit (H.264) |
| File Format | MOV / MP4 |
| Video System | NTSC / PAL / CINEMA |
Variable Frame Rates
Many cameras can shoot in higher frame rates these days however they tend to look fuzzy at or beyond 60p. The Z Cam can do 4K up to 120 fps and it looks really good. I shot a test chart to see if the image was soft and it’s so slightly softer it’s impossible to tell at 100%.
Here is a sample of Bees in the yard collecting pollen at 120 FPS. I used the Tokina Cinema 100mm Macro and Tokina Cinema Pro IRND filters. Chasing bees isn’t easy 😀 and no I didn’t get stung. I do see some interesting noise in some of the shadows at 120 fps. For the most part, it’s impressive for a sub $2000 cinema camera.
I was surprised to see so much detail. Using H.265 for all variable frame rates over 60p isn’t an issue but you probably will need to transcode it for easier editing on lesser computers. On my 2017 iMac, it all edited fine without transcoding.
It’s impressive the E2 can even do 240 fps in 1920 x 1080 with H.265 however, noise and some banding are present.
The water fountain was shot at 500 ISO in Zlog2 and graded with FCPX’s included color tools. I used Red Giant Denoiser III for noise reduction when it seemed distracting. It cleans up but I still notice it. Again, it’s impressive how much Z Cam is getting from this Micro Four Thirds Sensor.
Firmware Update Version 0.86
After testing the Z Cam E2 for a few weeks a new firmware update was released. I debated on updating while in the home stretch of this review however I felt it was necessary as the updates addressed a lot of the issues I was having.
What’s New in V 0.86
Firmware 0.86 features Added
- 4K 2.4:1 (3840×1620) @160fps max (in VFR)
- C4K 2.4:1 (4096×1728) @150fps max (in VFR)
- 2704×1600 resolution (S16 format)
- HLG support
- Reel name and Camera ID input (Meta Setup) Added: Center Mark & Frame Line.
- Quick manual White Balance operation*
- Added: 4K/C4K Low Noise Resolution
- Record function assignable to F1/F2/F3 or Power button.
- Long press Menu button takes you back to the menu home page.
- Longest exposure time can reach up to 1 sec (VFR mode only)**
- Magnify function allowed to enable/disable during recording.
- Audio input channel option: XLR left + Mic right, XLR right + Mic left
* If you assign F1 button as White Balance, press and hold it will determine the white balance of the current scene.
** For instance if VFR is set to 1, then longest exposure time is 1 sec.
firmware 0.86 Improvements
- 1920×1080 @200/240fps in H.265 10 bit.
- Audio gain optimized.
- Dual native ISO updated from 160/800 to 500/2500*
- Added HDMI display info: Resolution, Project FPS, VFR value, Encoder,
- Audio level indicator…
- Video System option removed. Project FPS can be set directly.
- Battery/Power display in voltage instead of a percentage.
- Multi-cam sync recording stability.
- Center mark, frame line, waveform, and vectorscope refined.
- Profile Management
⊲ Save Profile, save current settings as a profile to the camera.
⊲ Save To Card, export setting profiles to storage media, located in
⊲ /MISC/profile/
⊲ Exported profiles can be renamed (English letters only and file extension
⊲ must be .prf).
⊲ Load From Card, import setting profiles from storage media to camera.
⊲ Load Profile, select setting profile to use. - *Value change only, not affecting dual native ISO actual performance. Dual native ISO in WDR mode is 250/1250
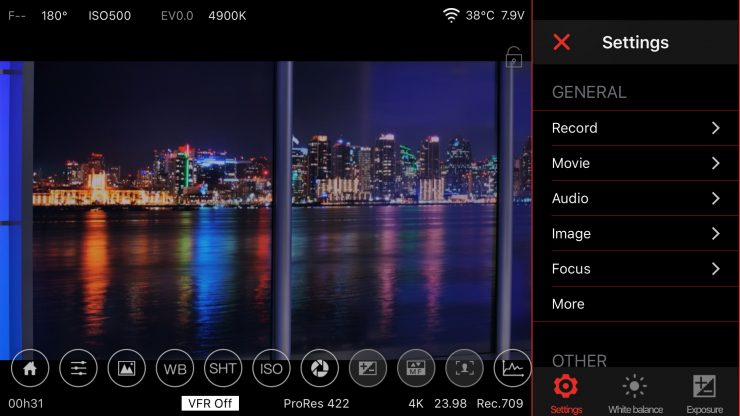
Menu System
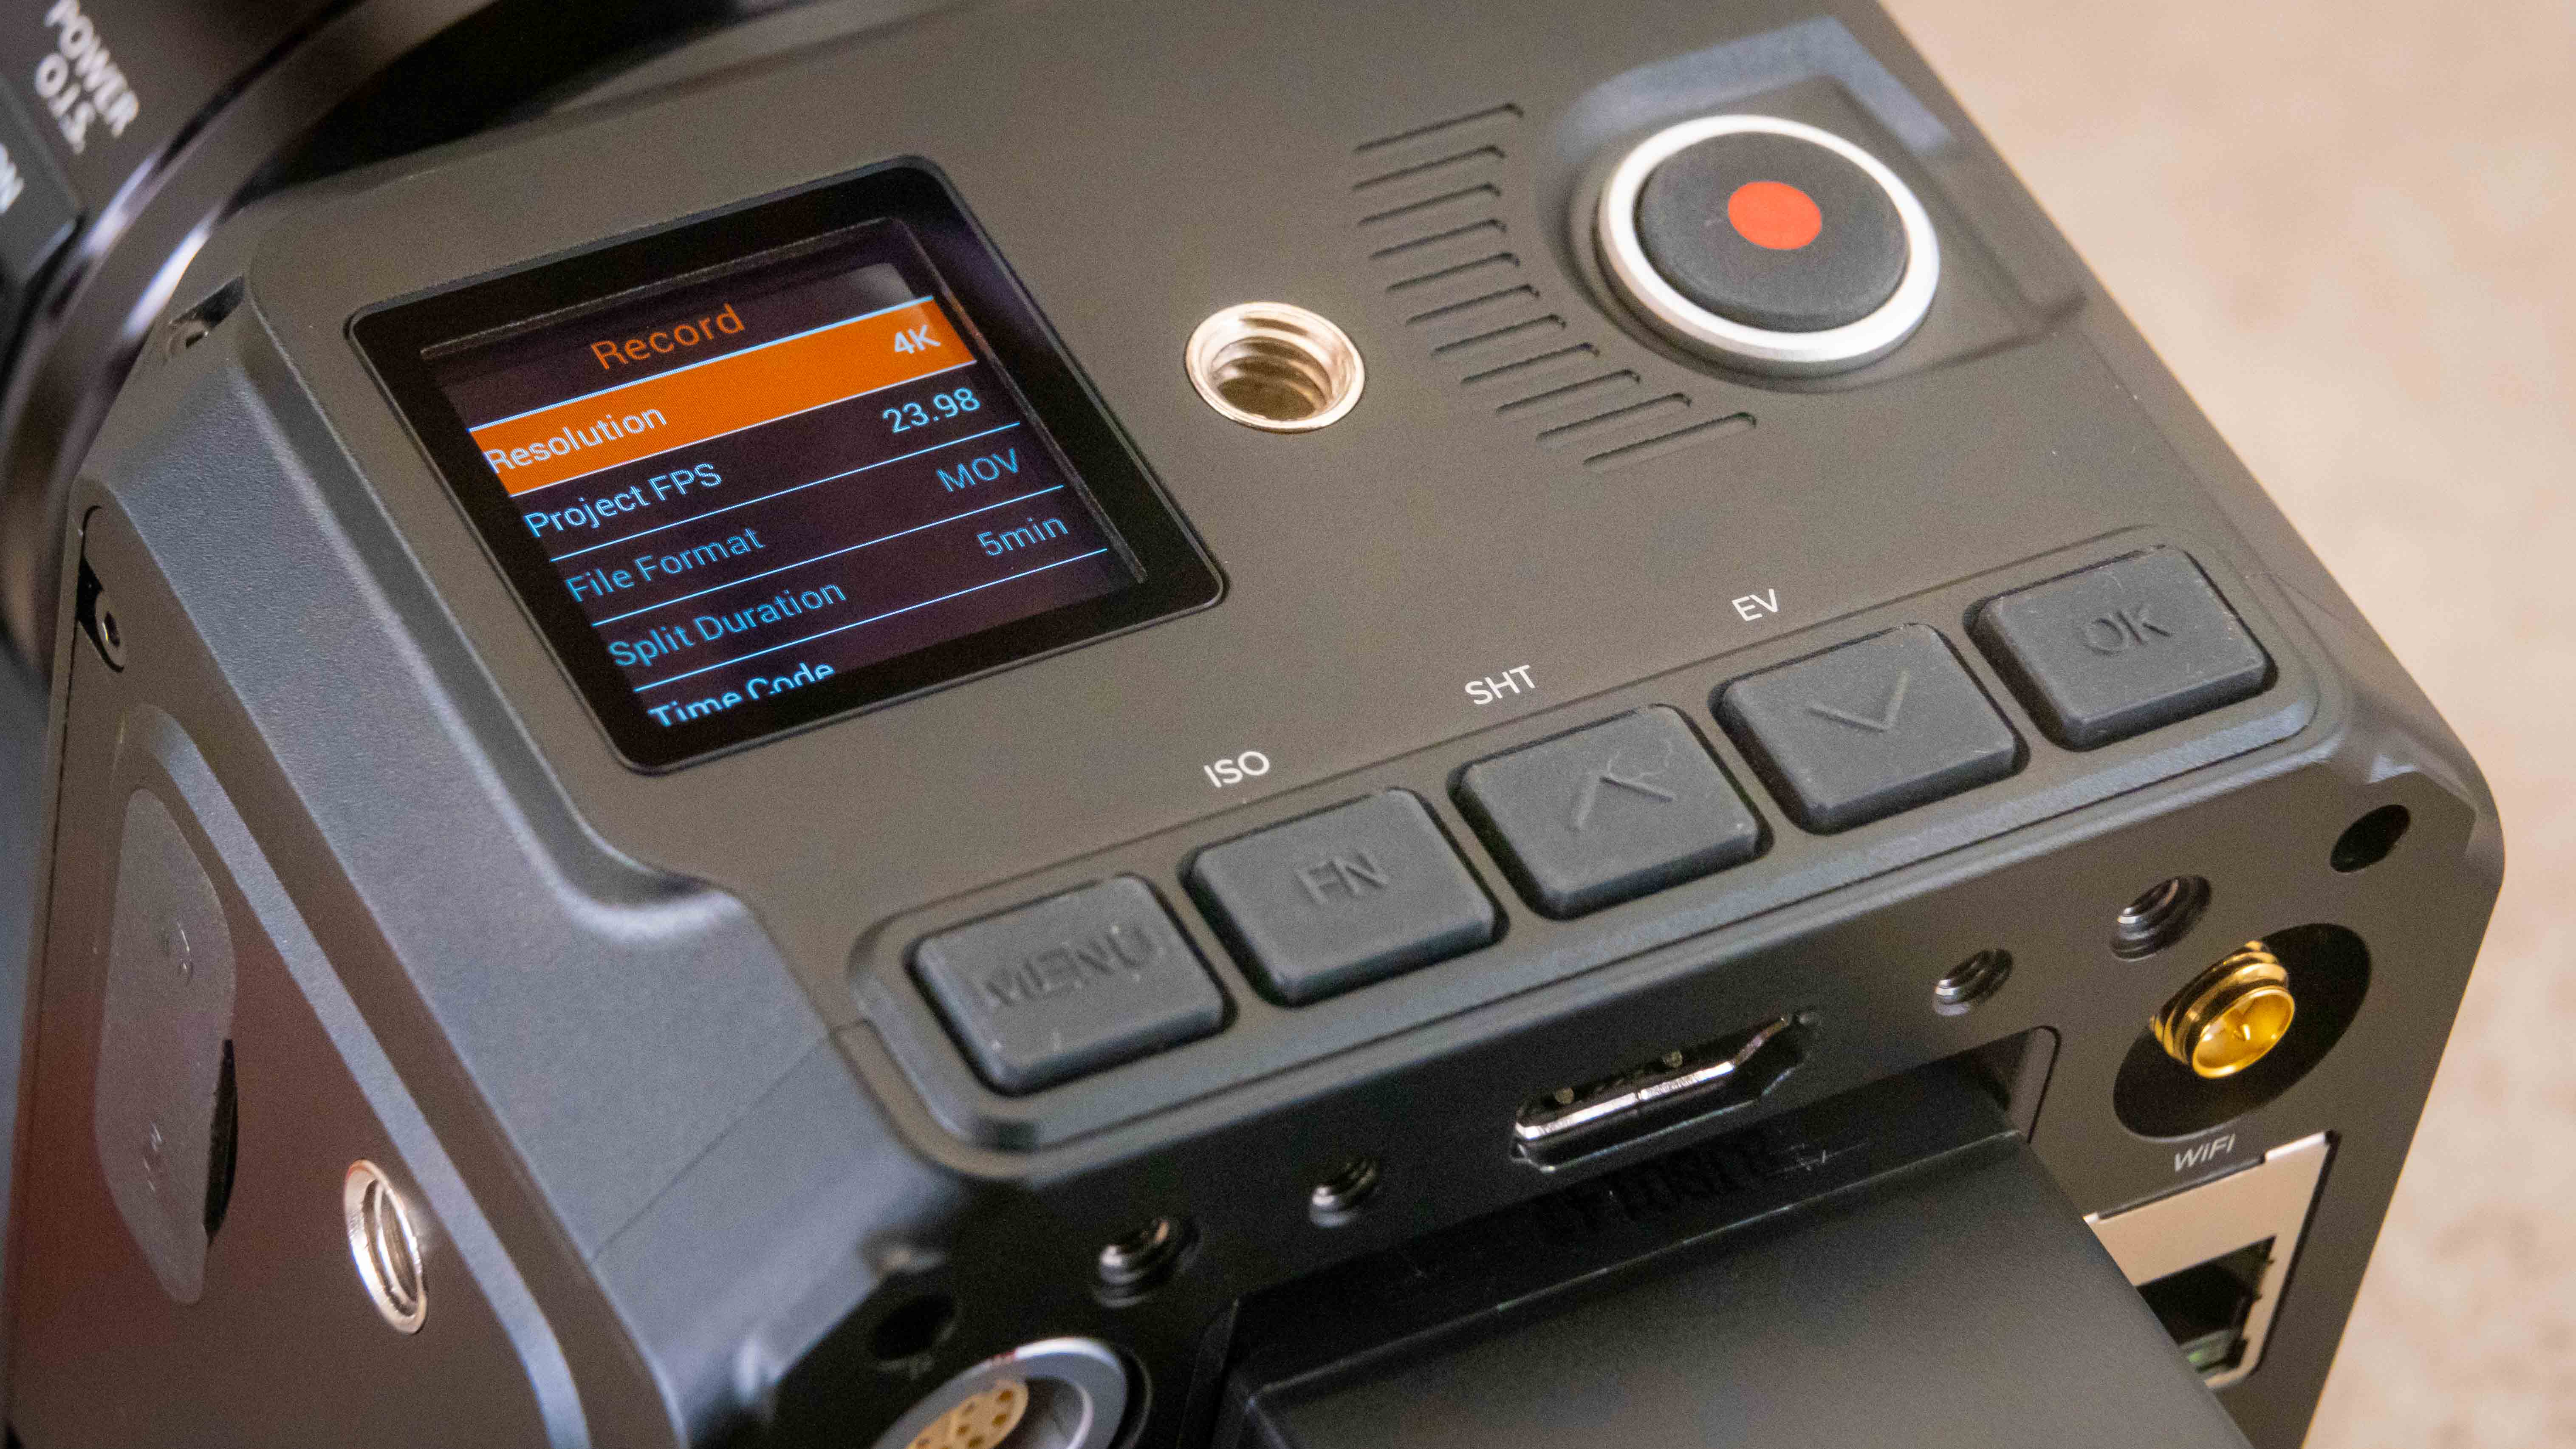
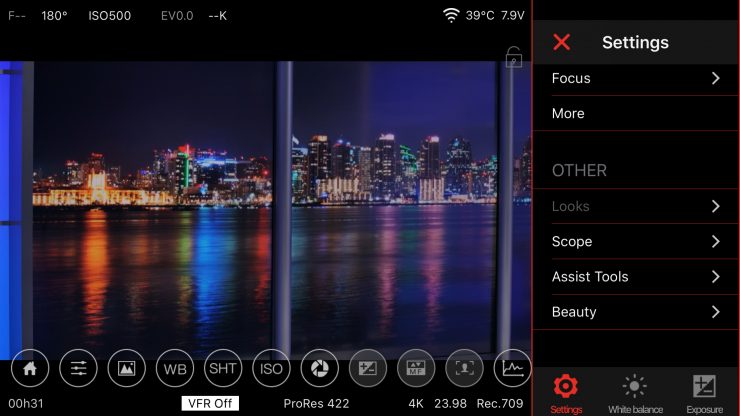
An easy to use menu system is a blessing in any camera. The BMD URSA Mini Pro cameras, for example, have a menu that is very simple to navigate and change settings. The Z Cam E2 follows in the less is more style. Settings are broken up into six main categories with logical titles.
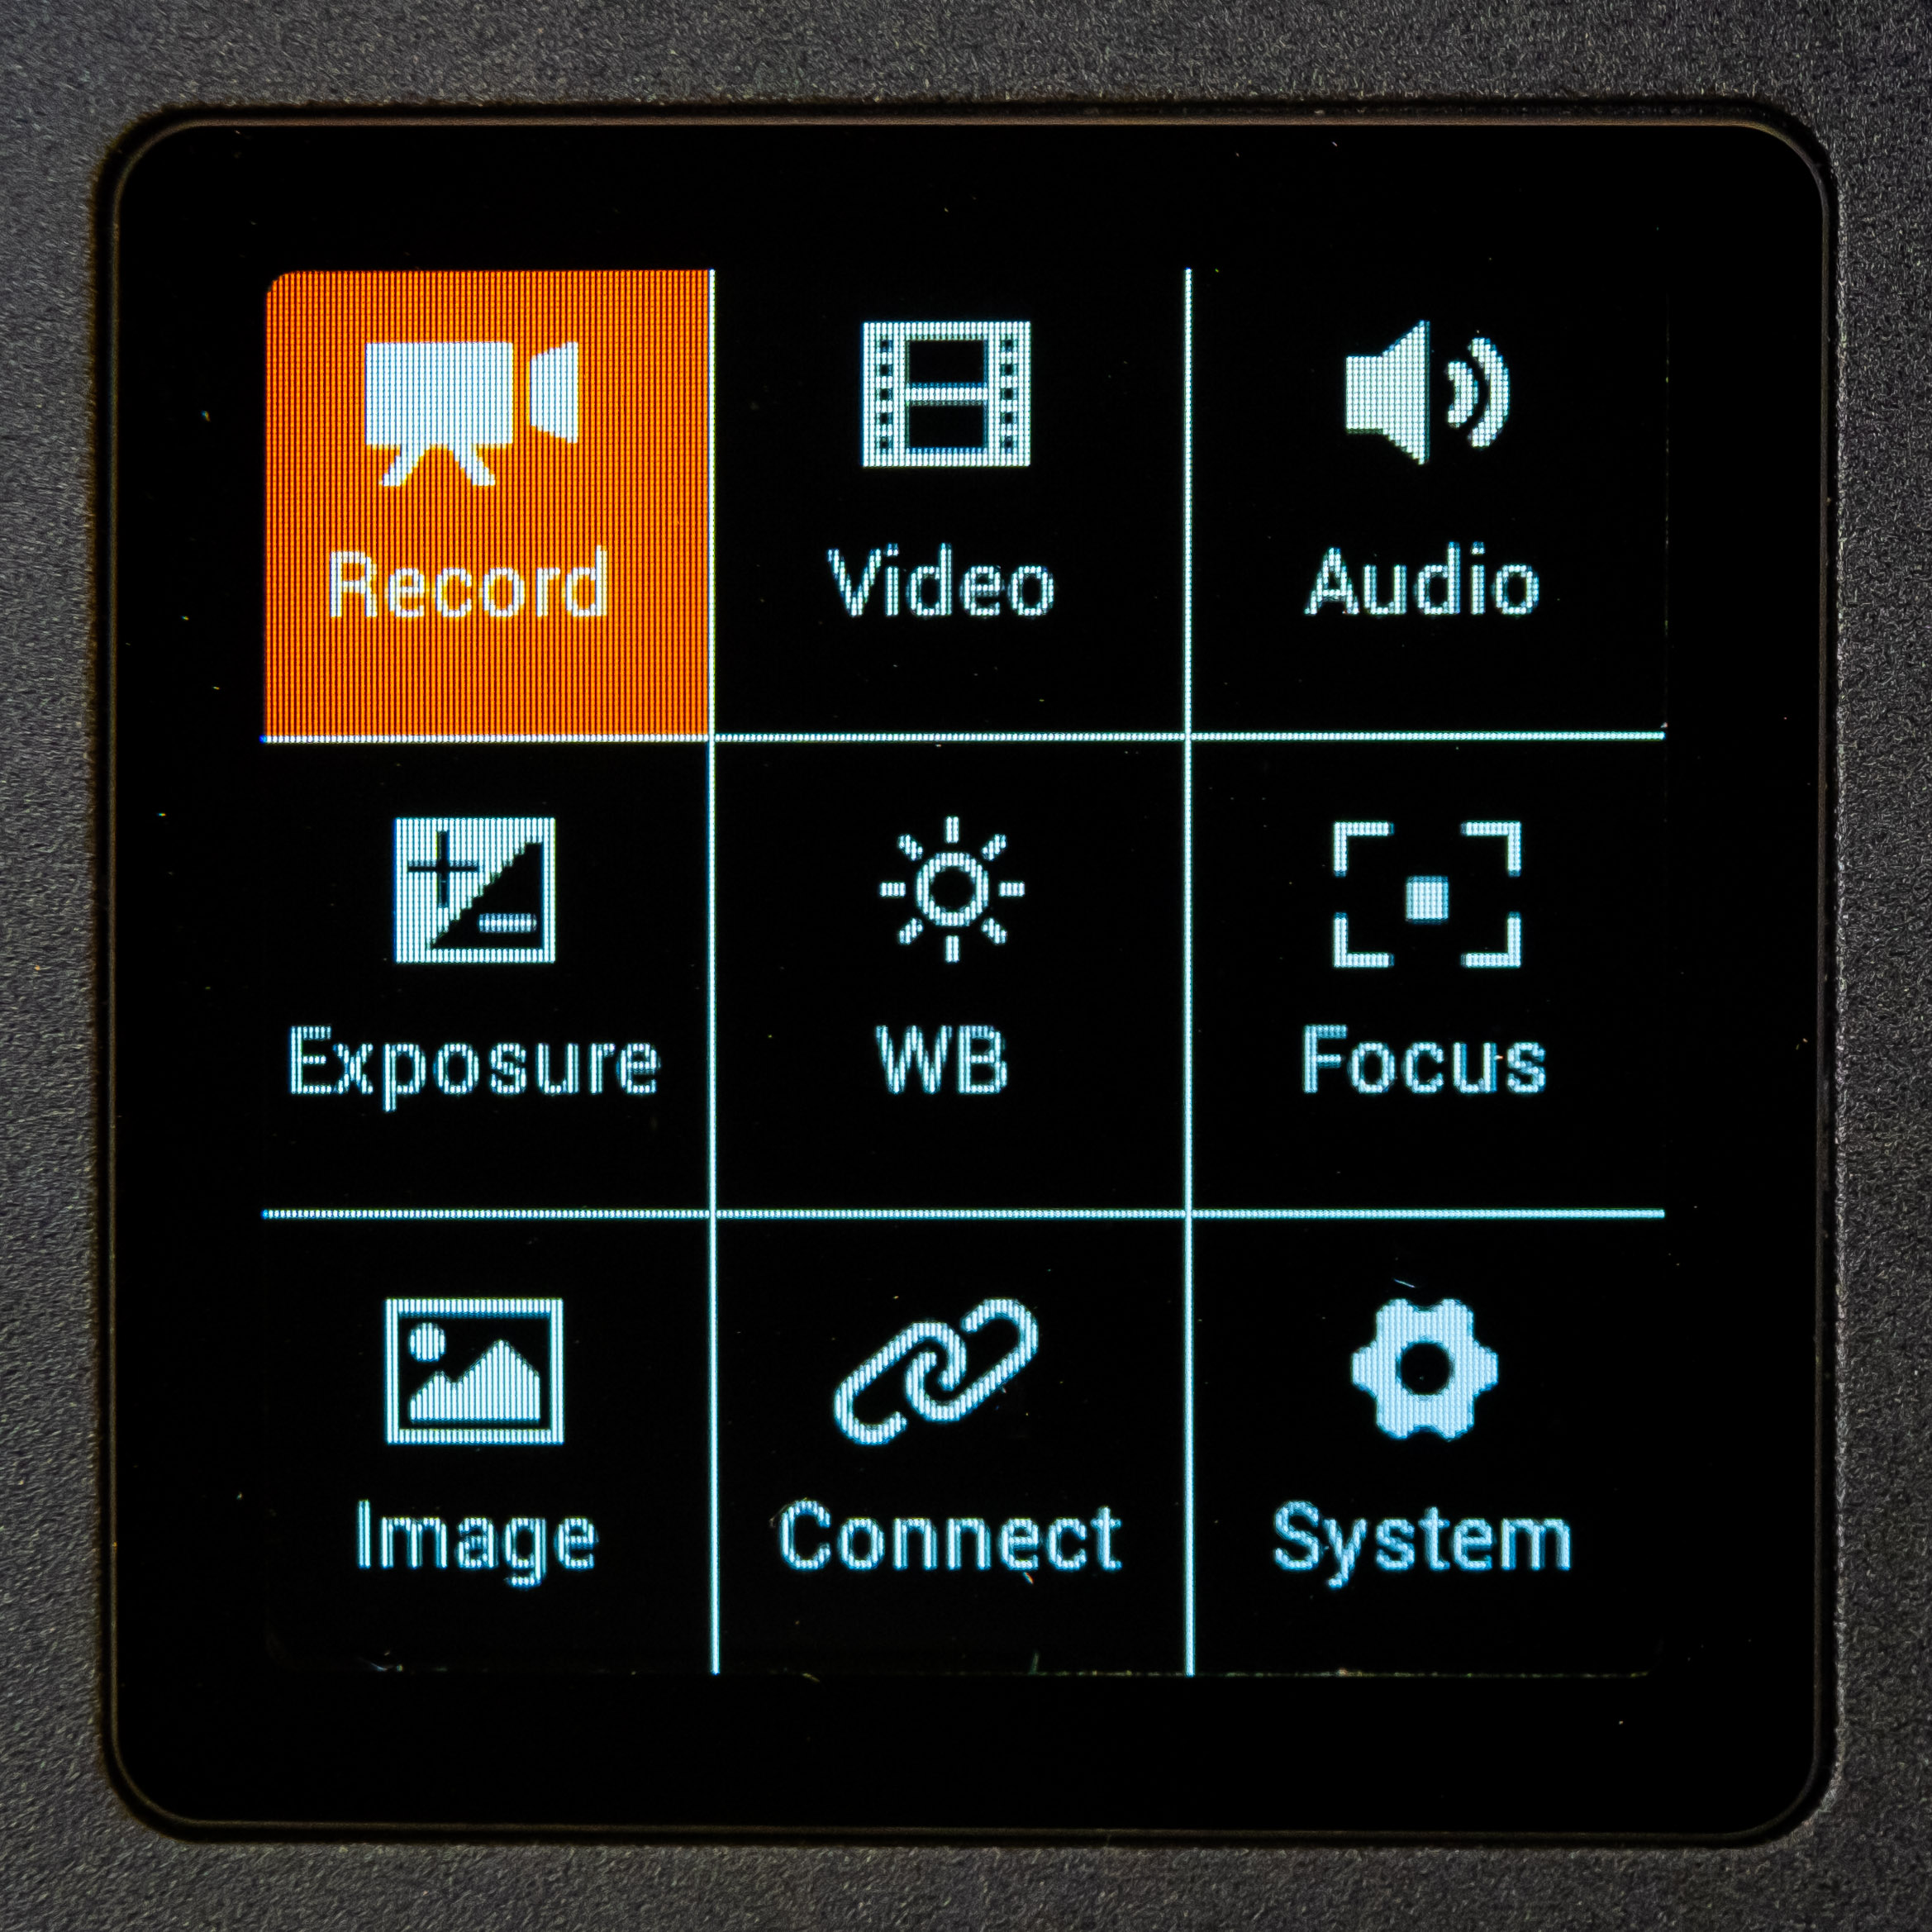
I like that all the main settings are on one page. however, the interface is very small and moving around the main settings can be a little tedious with the hard to see ▲/▼ buttons. The display really is small however I understand why since the body is very compact and doesn’t have a lot of real estate to work with.
The settings in the menu are broken down in categories. This works well to find specific settings like Audio. While using the Z Cam E2 I seemed to forget what settings are in the “Record” & “Video”. Must say something about my age 😀 It’s not the fastest menus I’ve used and the up/down buttons can get a little confusing if you’re moving fast. I like the mini toggle design better. In this situation, with such a small body I think it would have worked really well.
With the new V0.86 update when using an external monitor, it displays the menu larger and is easier to see. This option is selected in the menu. I highly recommend turning this on.
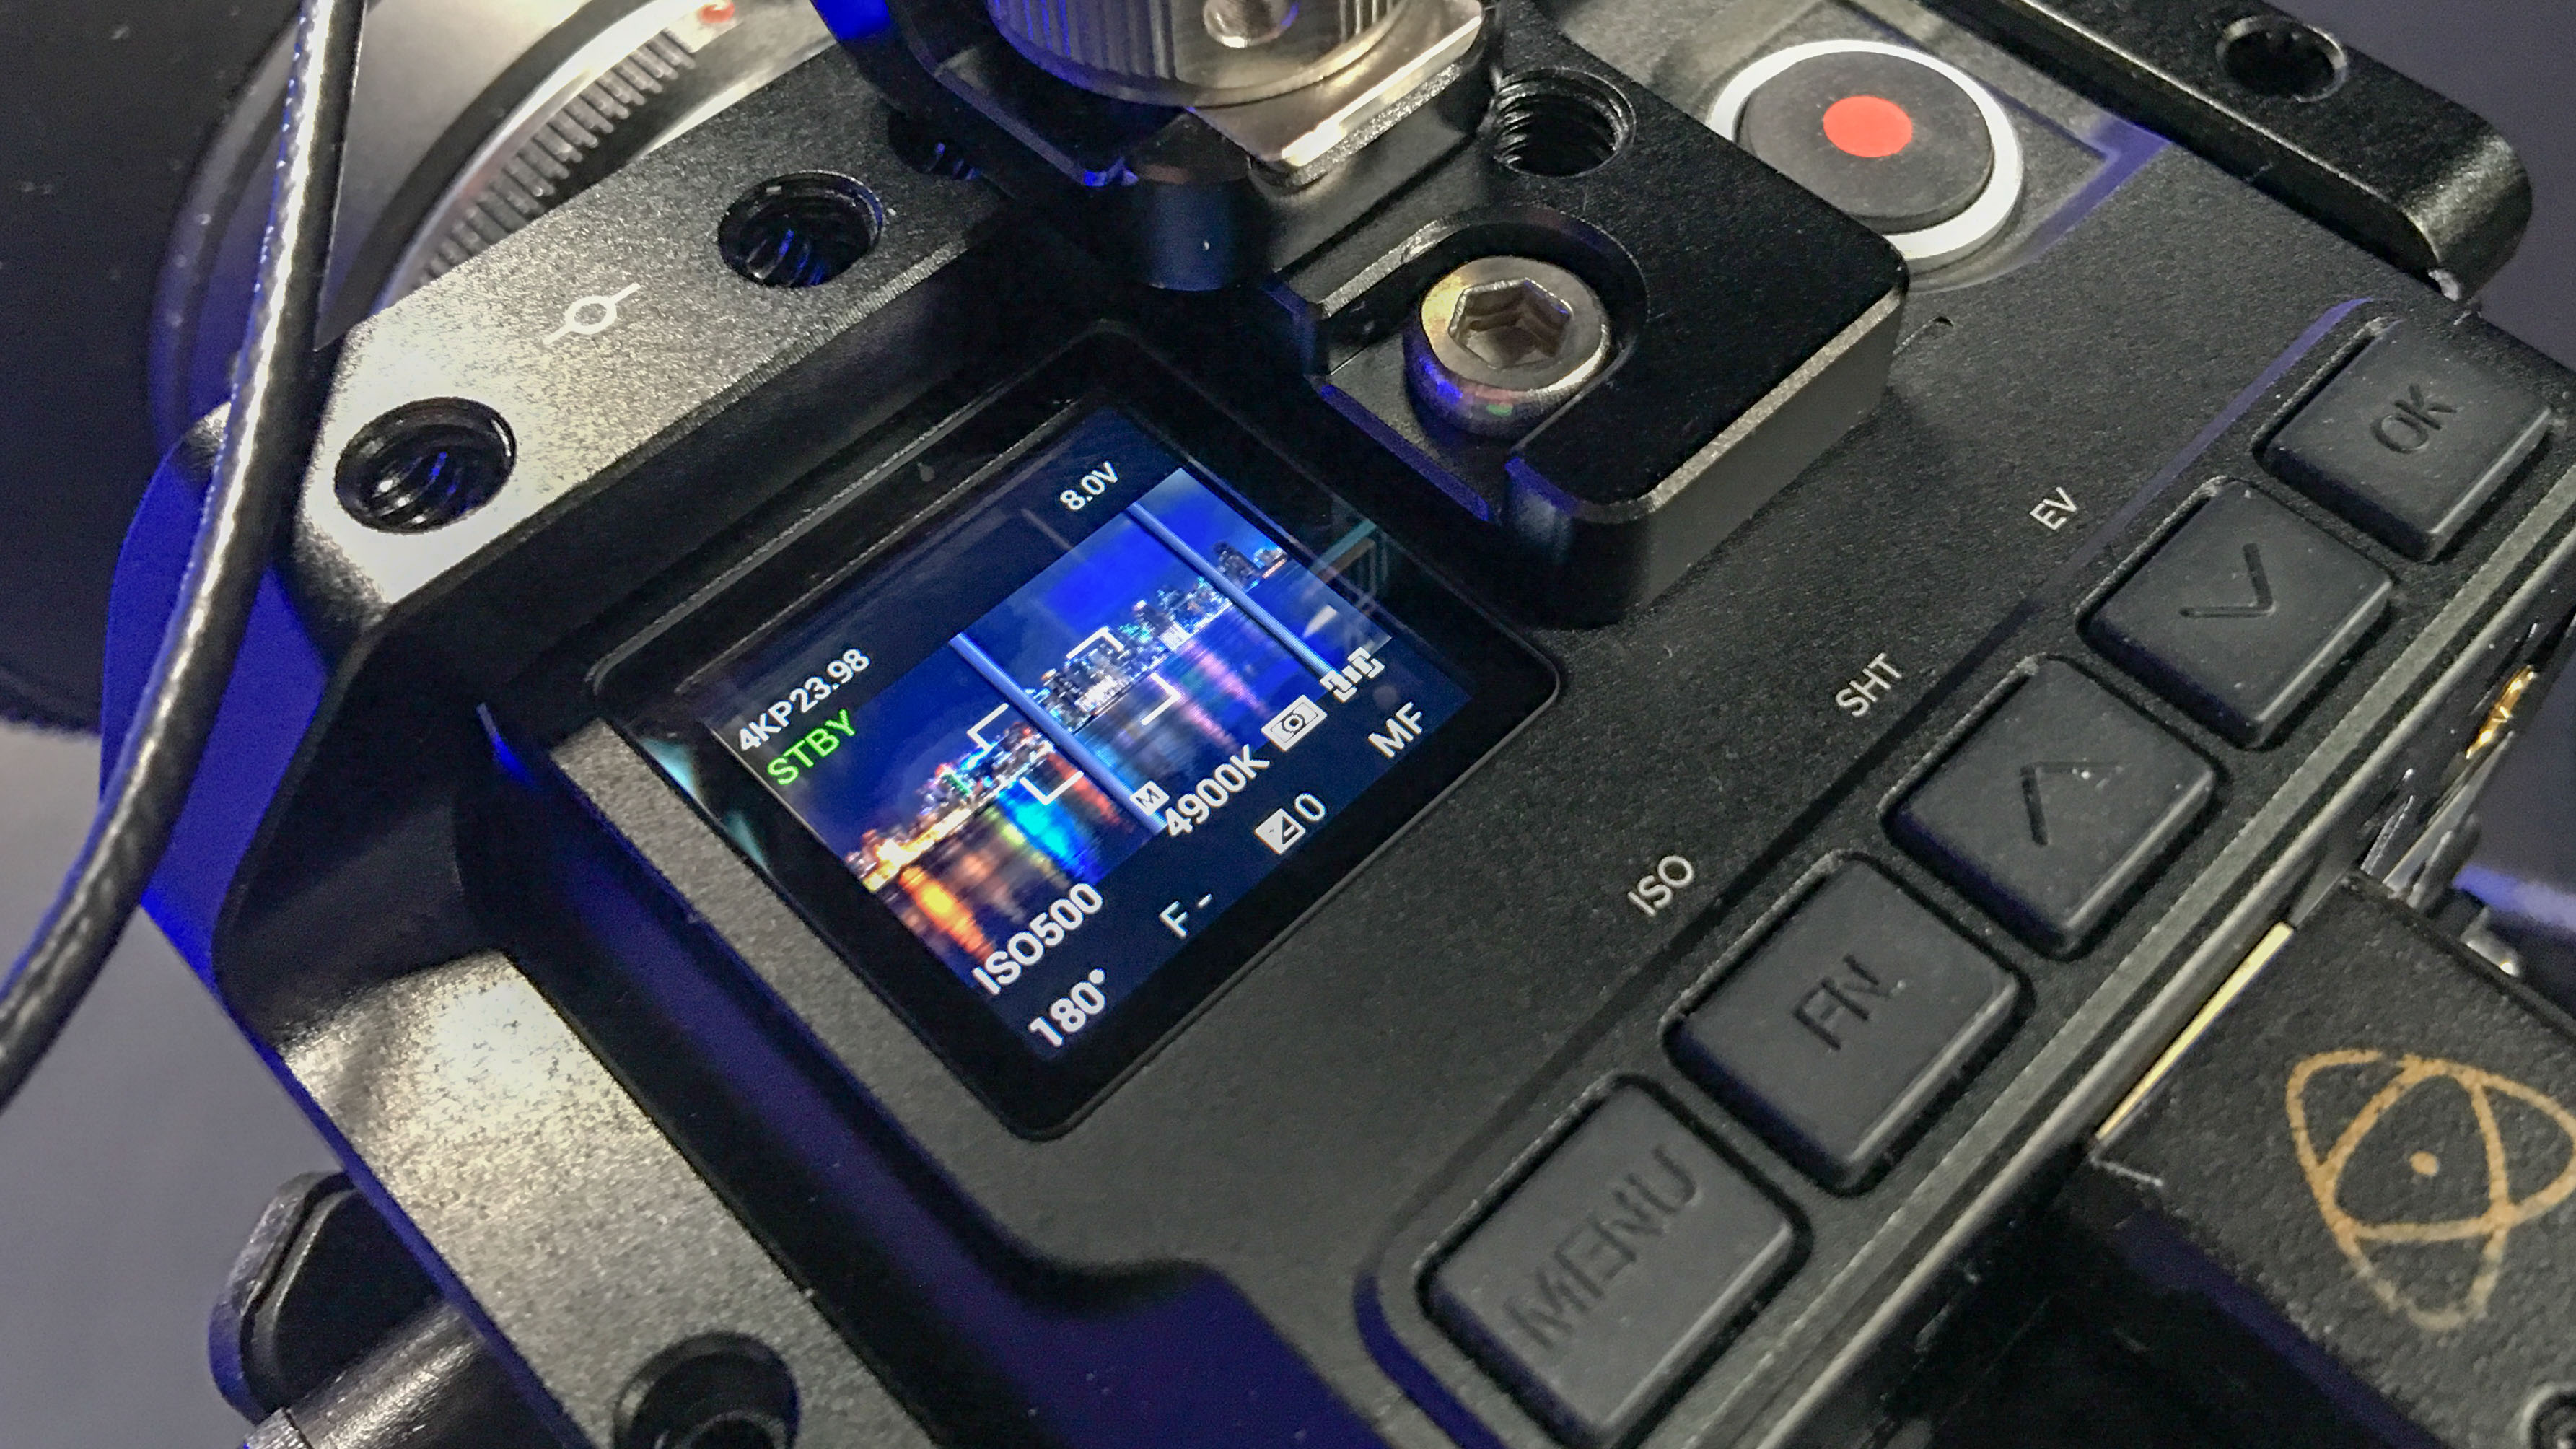
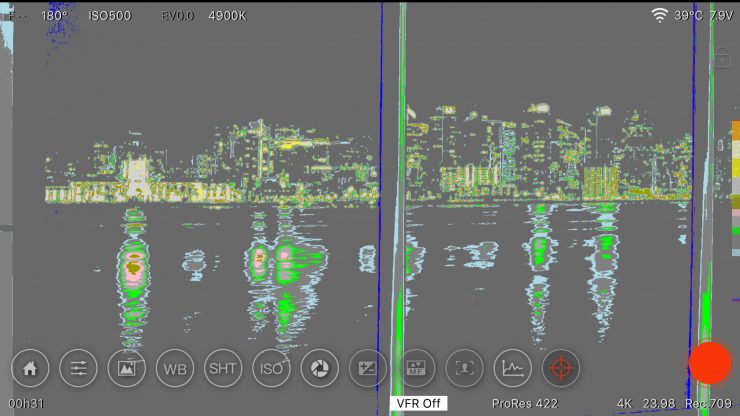
By pressing the “FN” and “OK” buttons down simultaneously the tiny LCD will show a live image from the camera, however, it’s very small and would be near impossible to use it solely for shooting. A monitor or EVF is needed to operate the camera. The Z Cam App is another way to see a live image. This is helpful when the camera is mounted in tight spaces or in situations where no operator is controlling the camera directly like mounted to a car rig or high up on rigging for an overhead shot. More on the App later in this review.
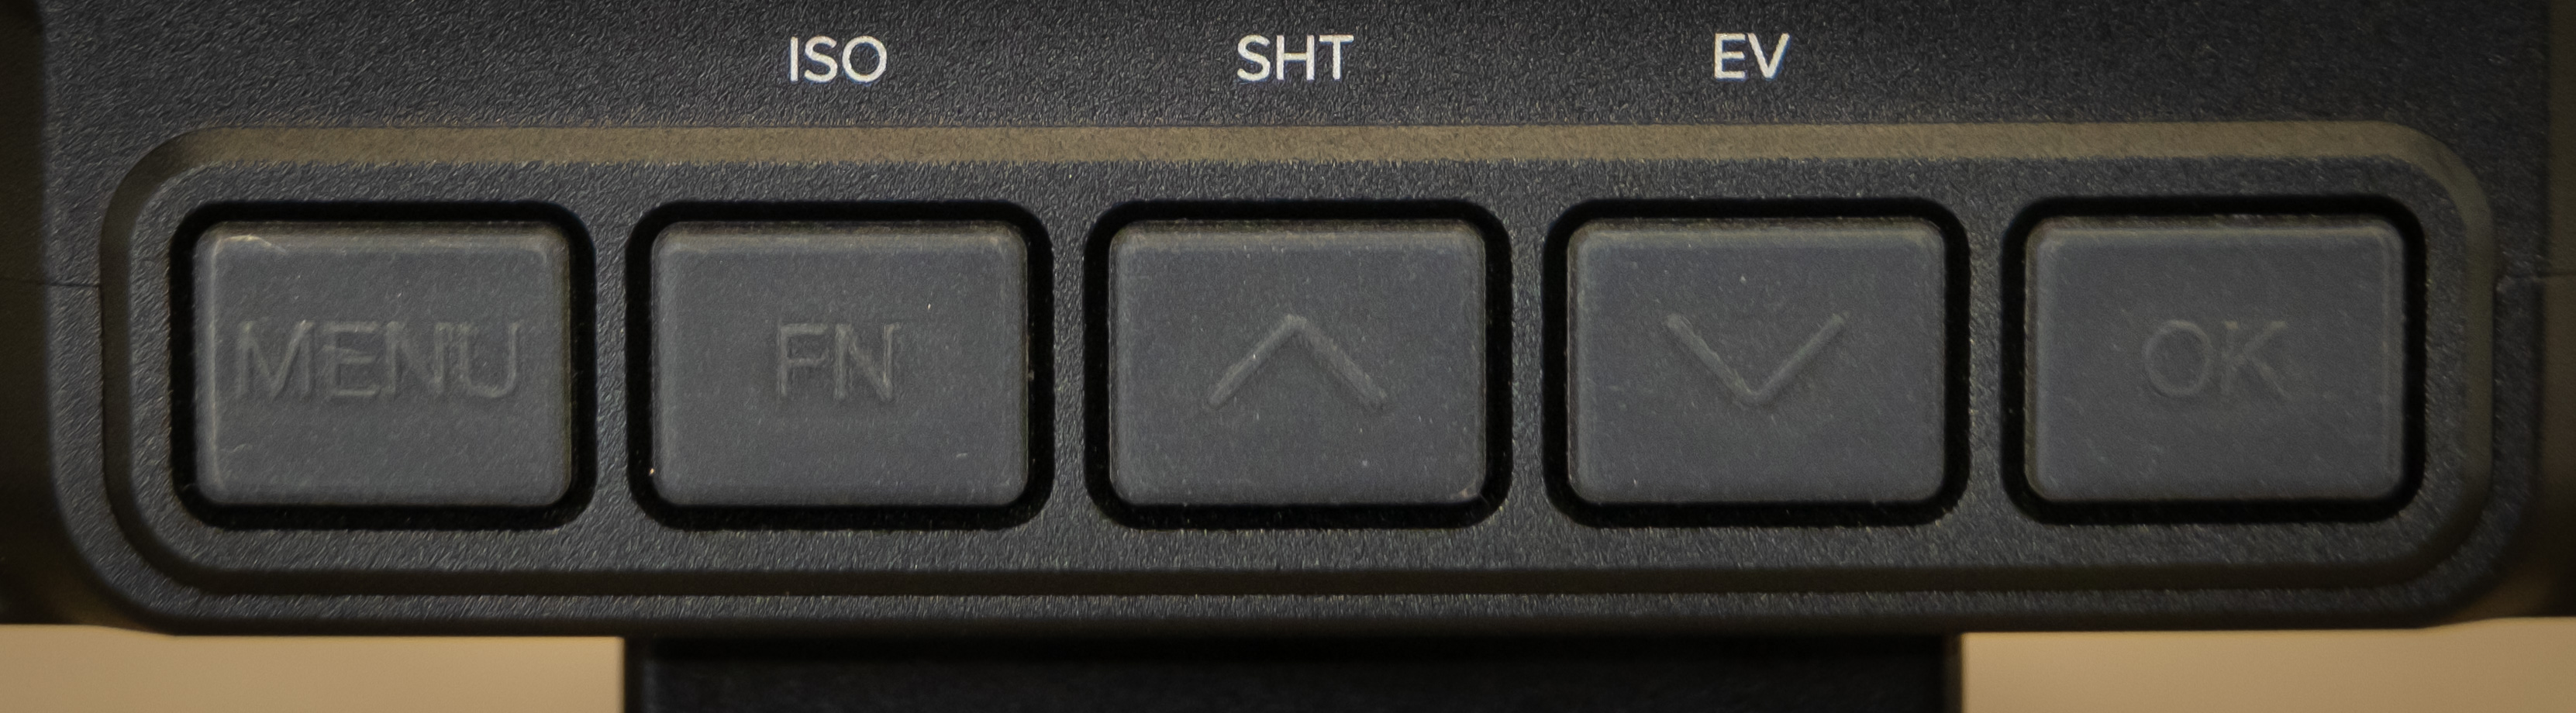
To open the menu a dedicated “MENU” button is pressed then the ▲/▼ buttons navigate the different options. Then press the “OK” button to select and save the setting. To exit press the Menu button again. The buttons have raised letters and icons however they don’t help much as they are hard to see and in dim conditions, it’s very difficult. I think white color added to them would help. You have to get used to the camera by touch.
Menu Accessibility
With the menu and navigation buttons on the top of the camera, it makes it difficult to see when shooting a person standing at eye level. I do this a lot. I have to tilt the camera up to see the menu and function buttons. This is an issue with the Canon C300 as well with adjusting audio record levels. The C300 LCD/audio clamshell is a horrible design.
With the camera settings set for external viewing, you can see the menu and settings on an external monitor. The new 0.86 updates improved this function by increasing the size of the menu. It’s much bigger than it was previously. Another improvement is the text size when outputting the camera’s settings onto a monitor. It’s now twice as large as before making it much easier to see.
I/O, Buttons & Functions Overview
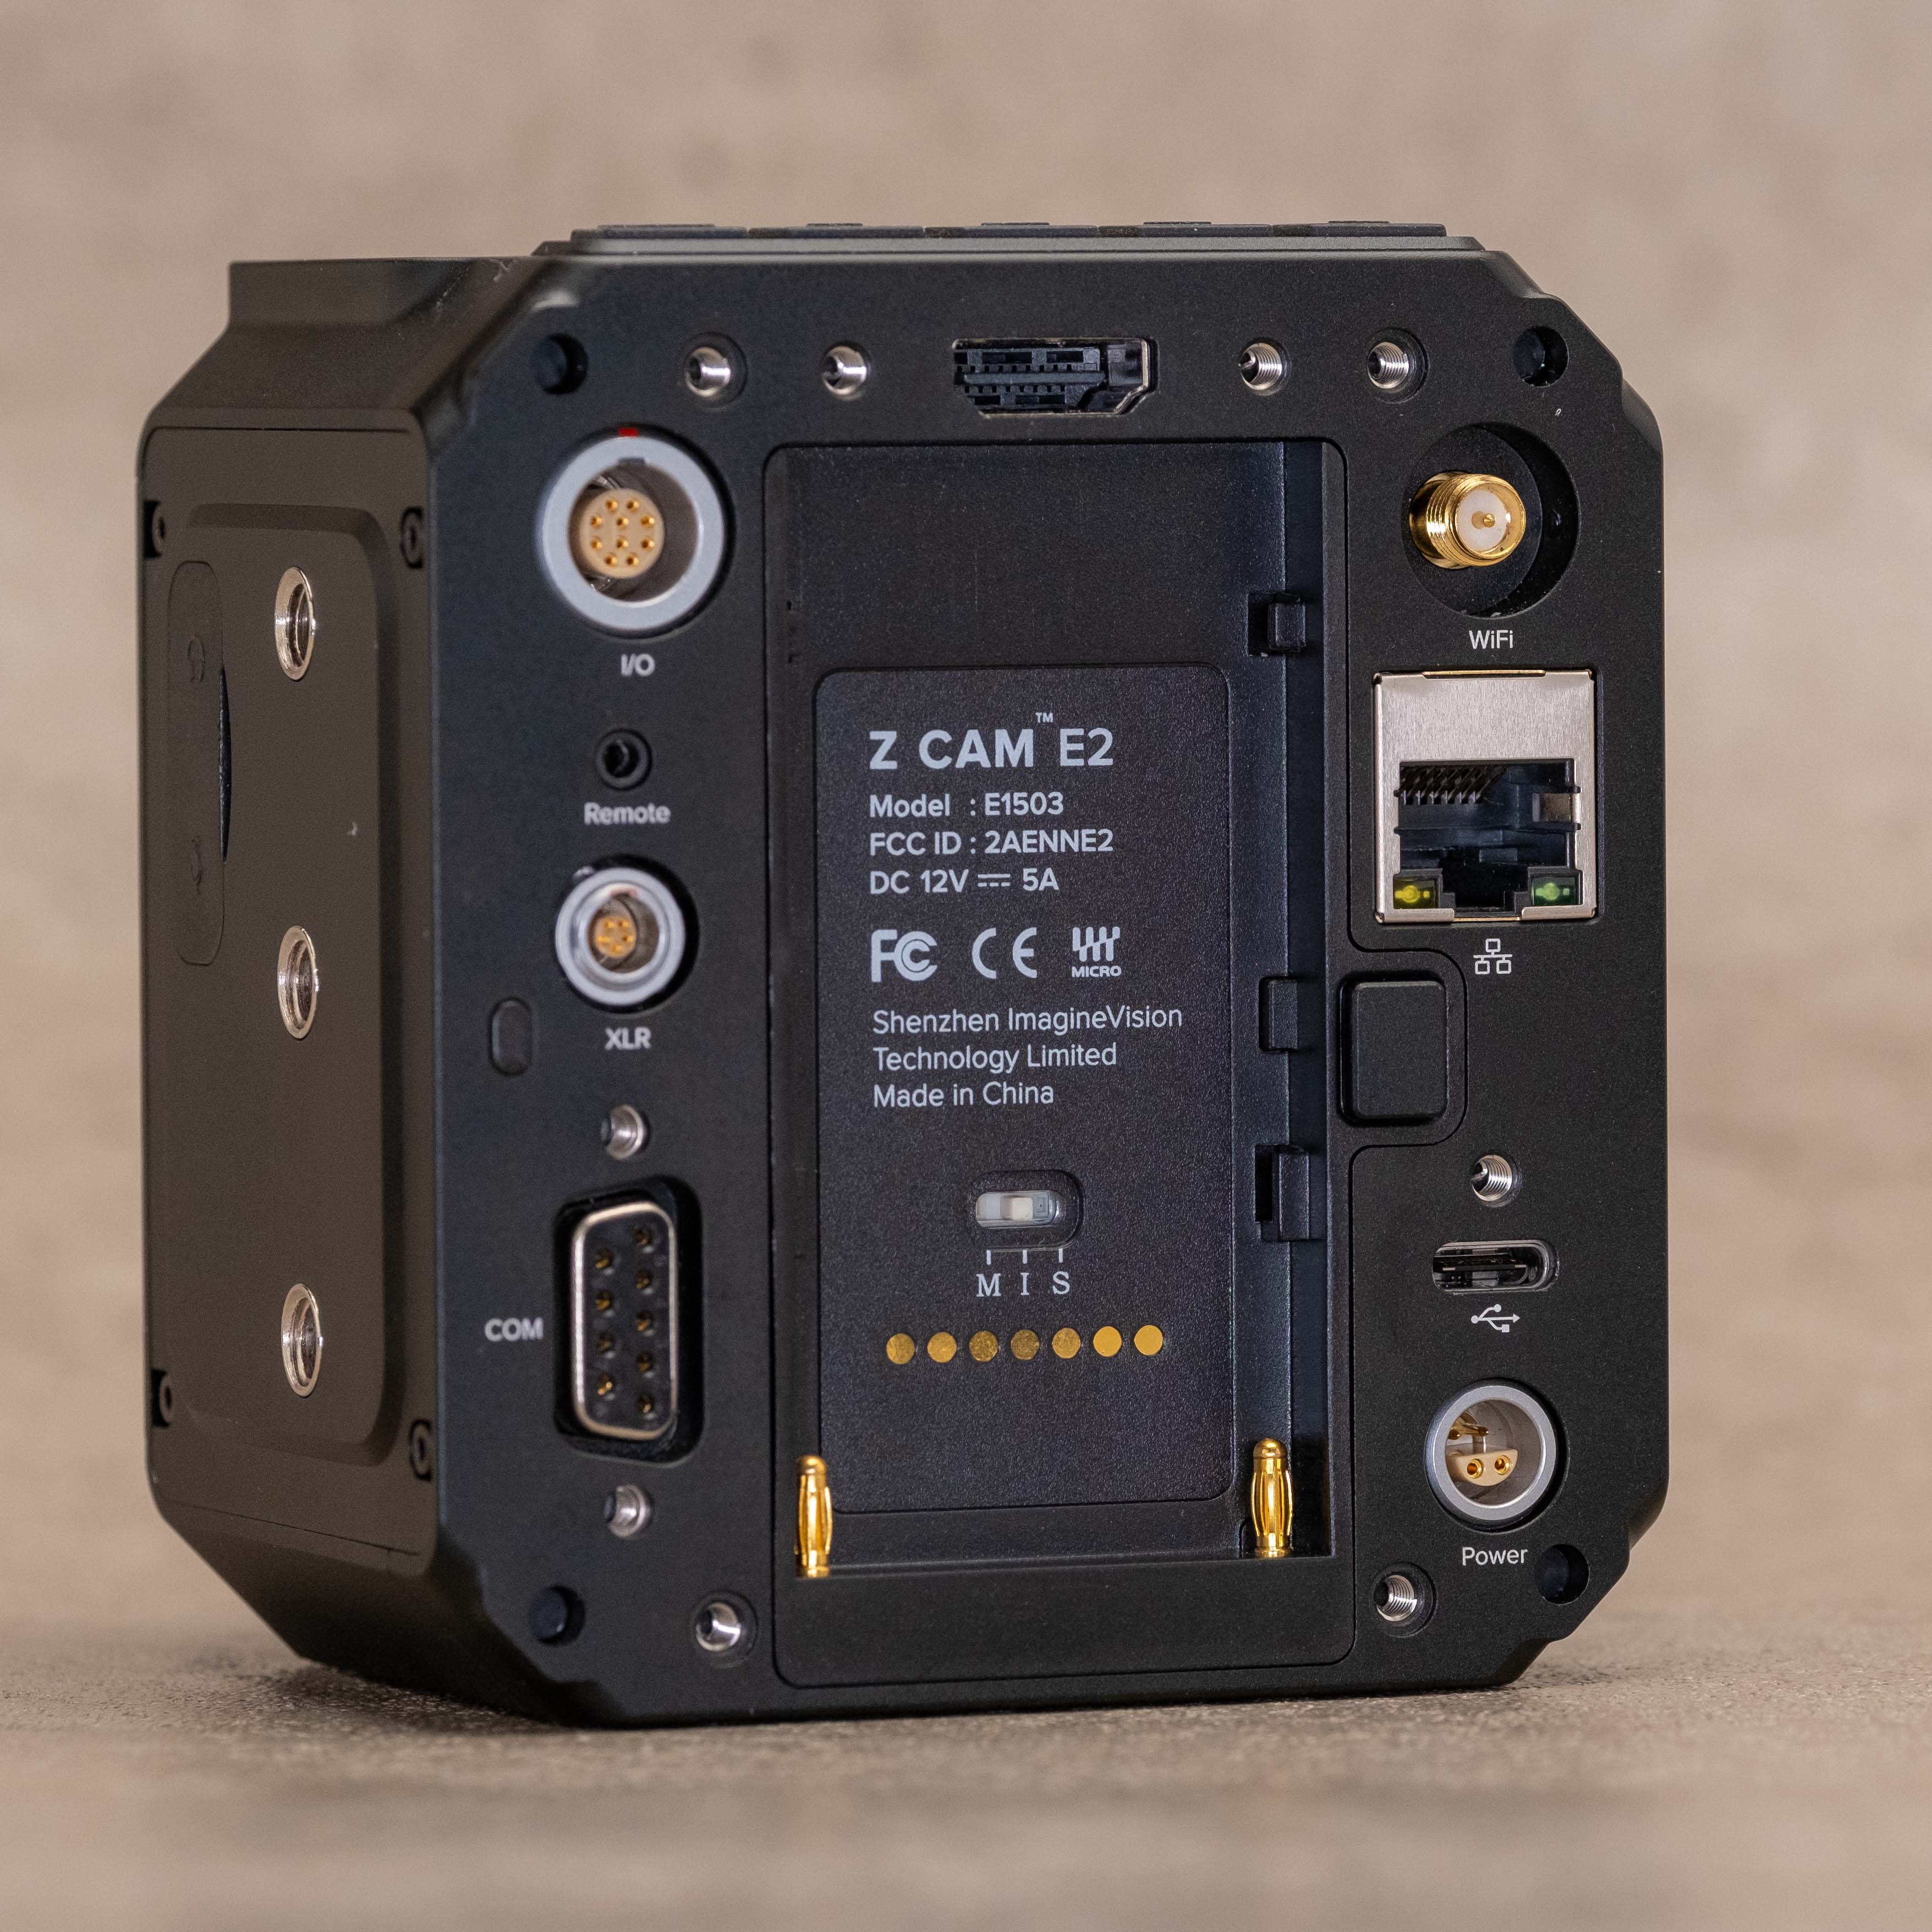
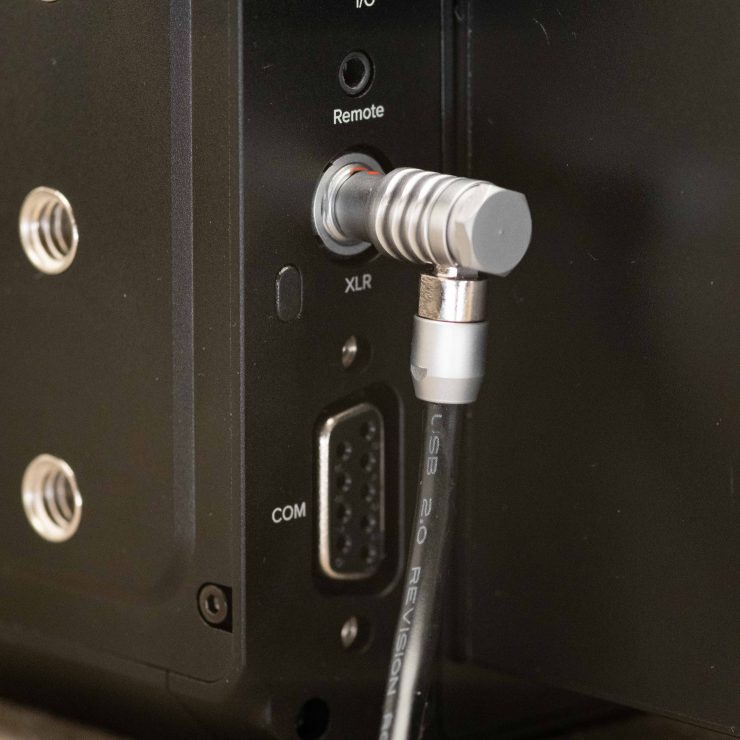
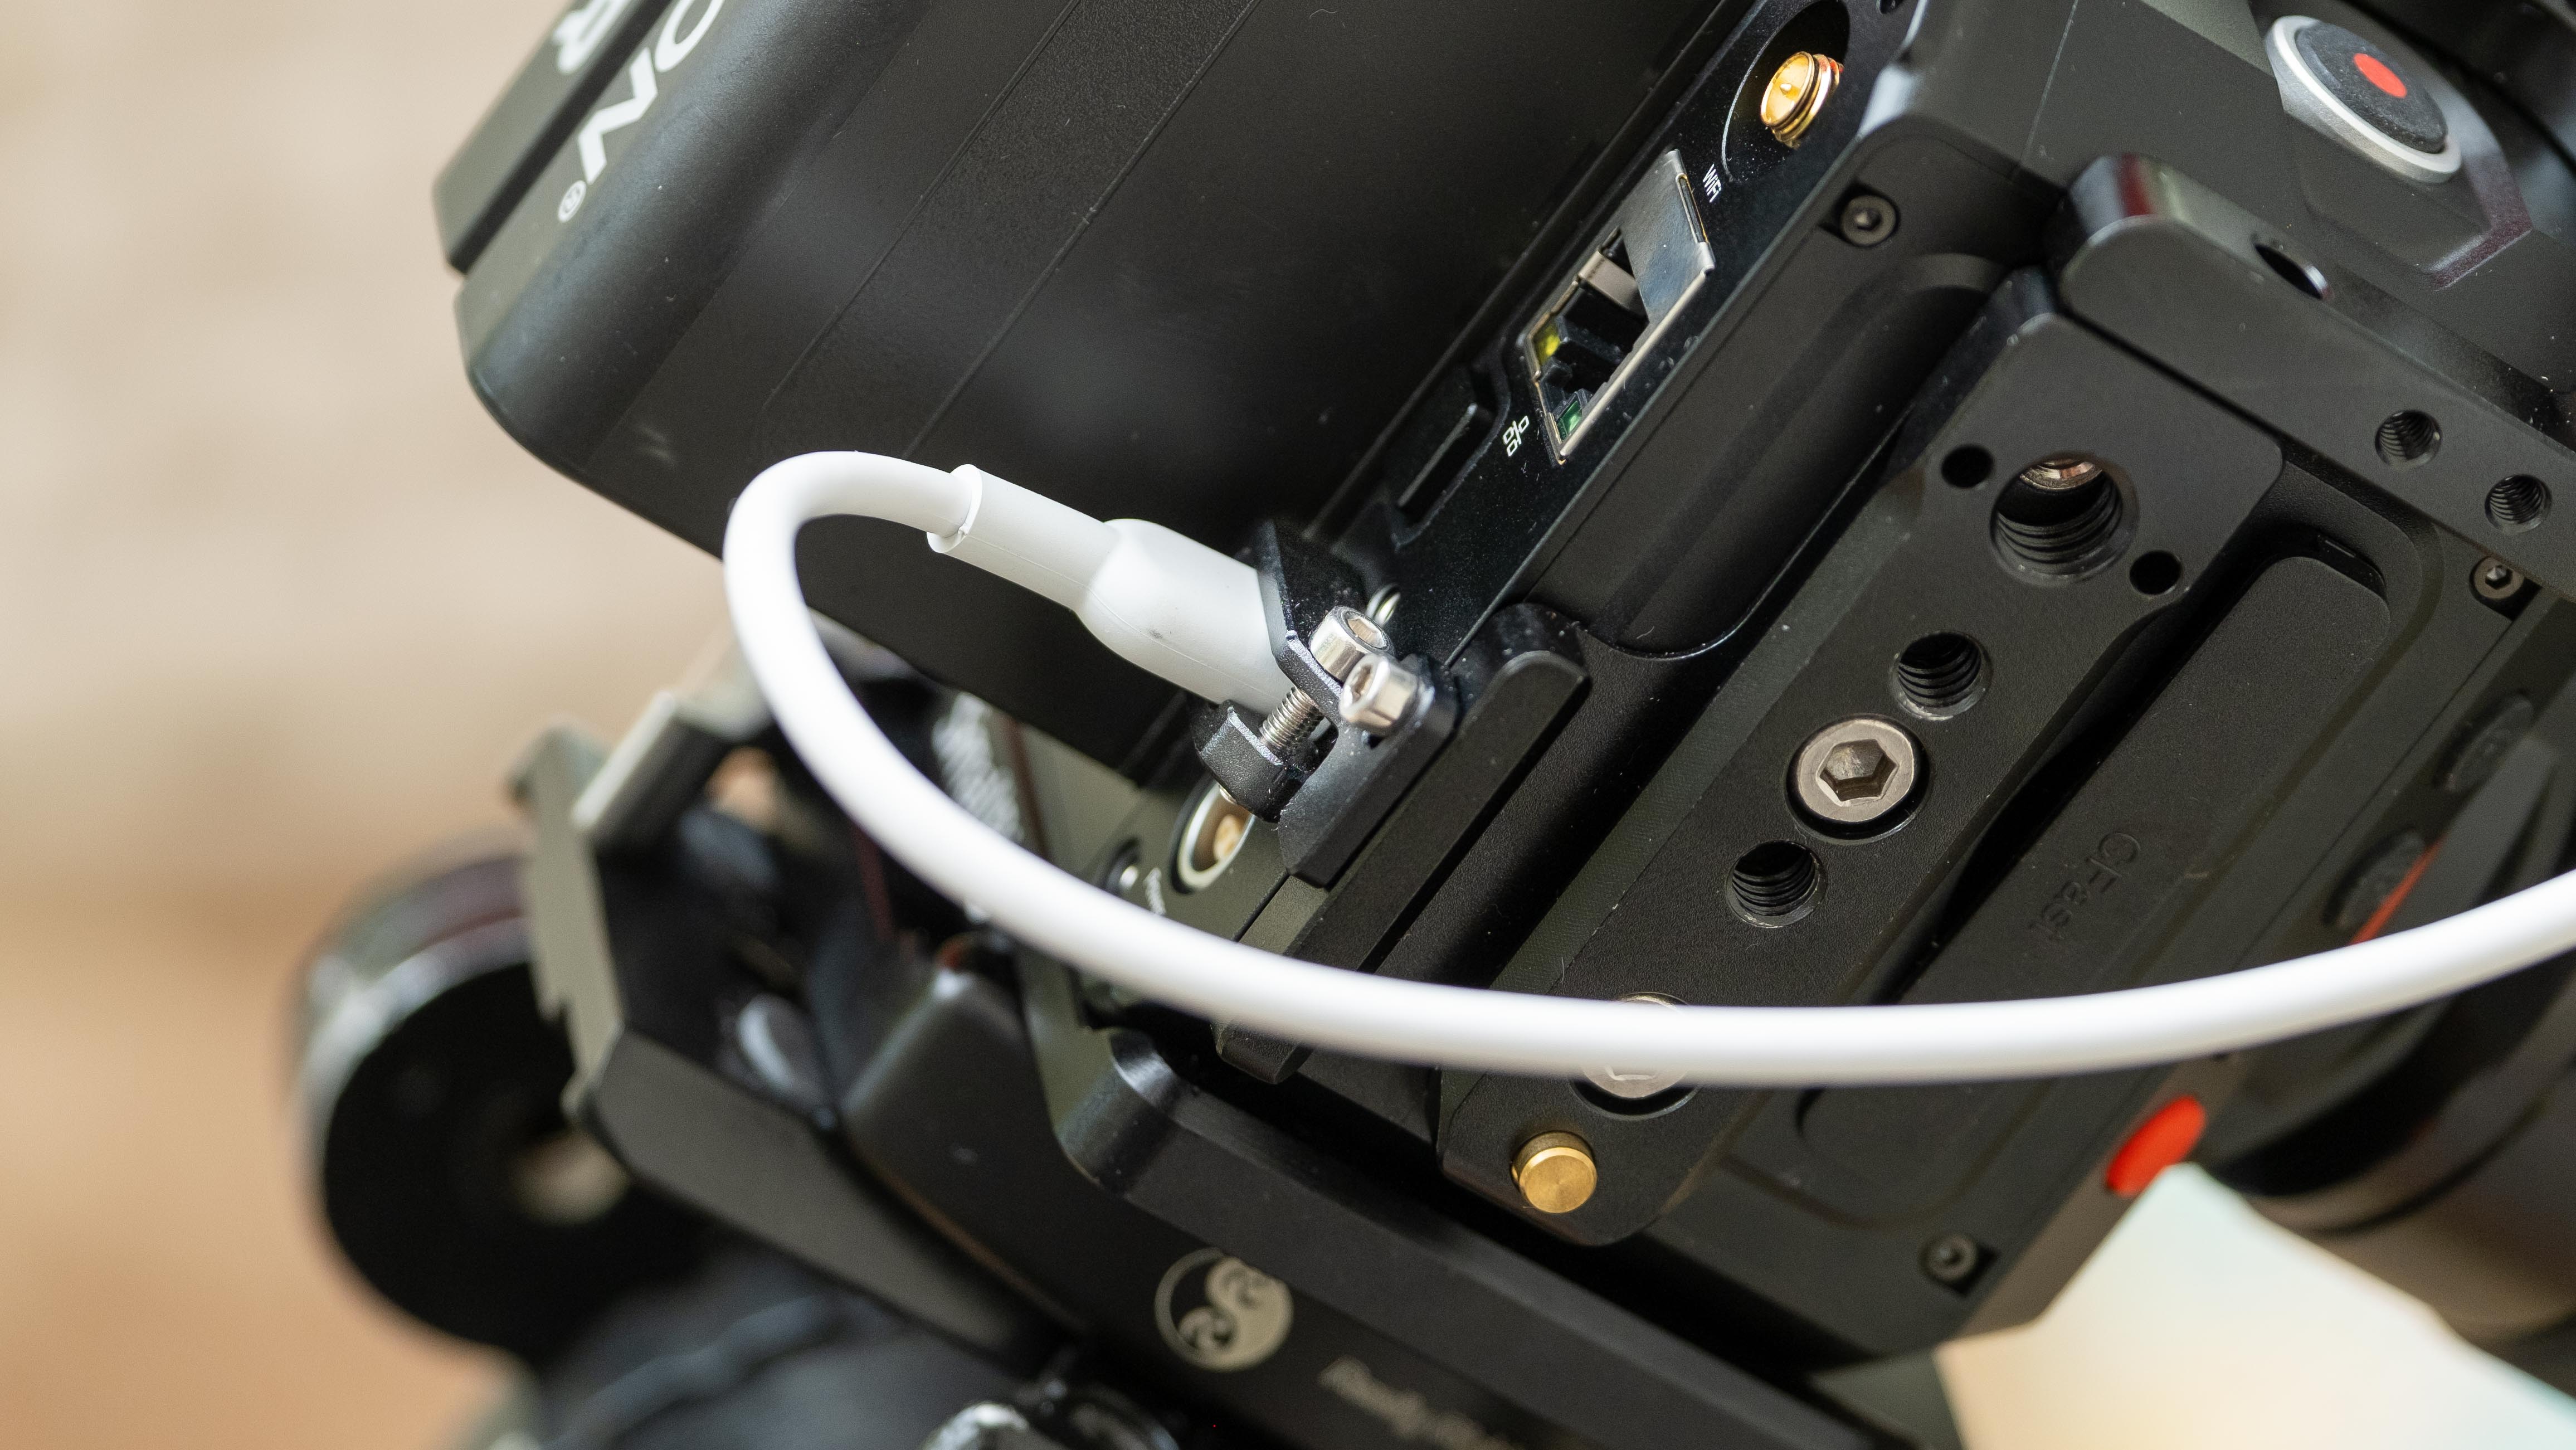
Most of the E2 inputs live on the back of the camera. Top left is an I/O 10-pin LEMO port for multi-camera synchronization with another Z Cam E2. This is a proprietary Z CAM E2 Sync Cable and isn’t included. The COM port is a DB-9 input with RS232 protocol support.
On the right top side is a connector for a WiFi antenna and underneath that is a Gigabit Ethernet port for camera control, setting & live streaming with Z CAM software installed on a computer.
A USB Type-C port is used for camera control with the Z Cam app and SSD drives.
Single CFast Card Slot
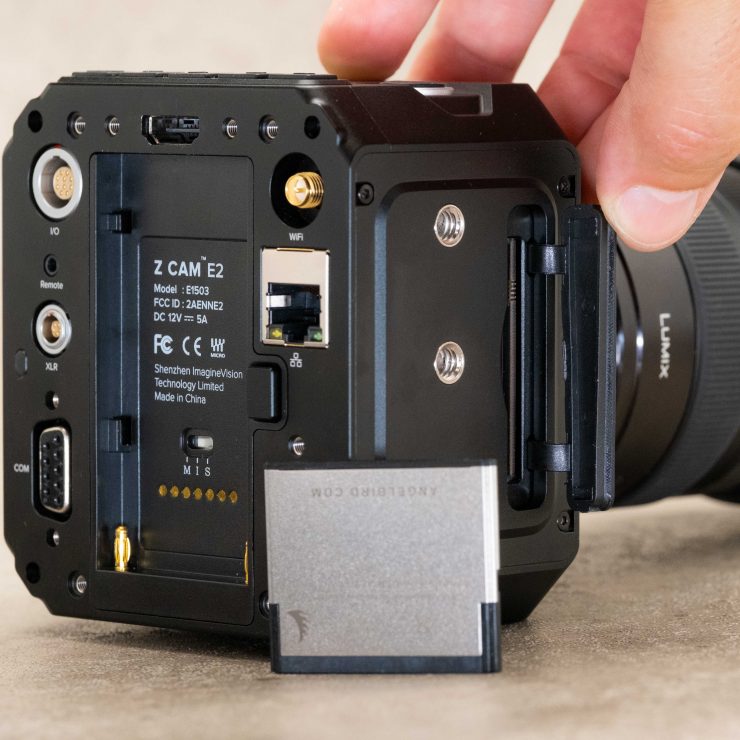
The single CFast slot is on the right side of the E2. It has a plastic cover that is relatively easy to open. I had to use a pen cap to open it with a cage installed as it’s fairly tight. For the most part, I left it halfway open, making it more accessible.
Headphone & 3.5mm Mic Input
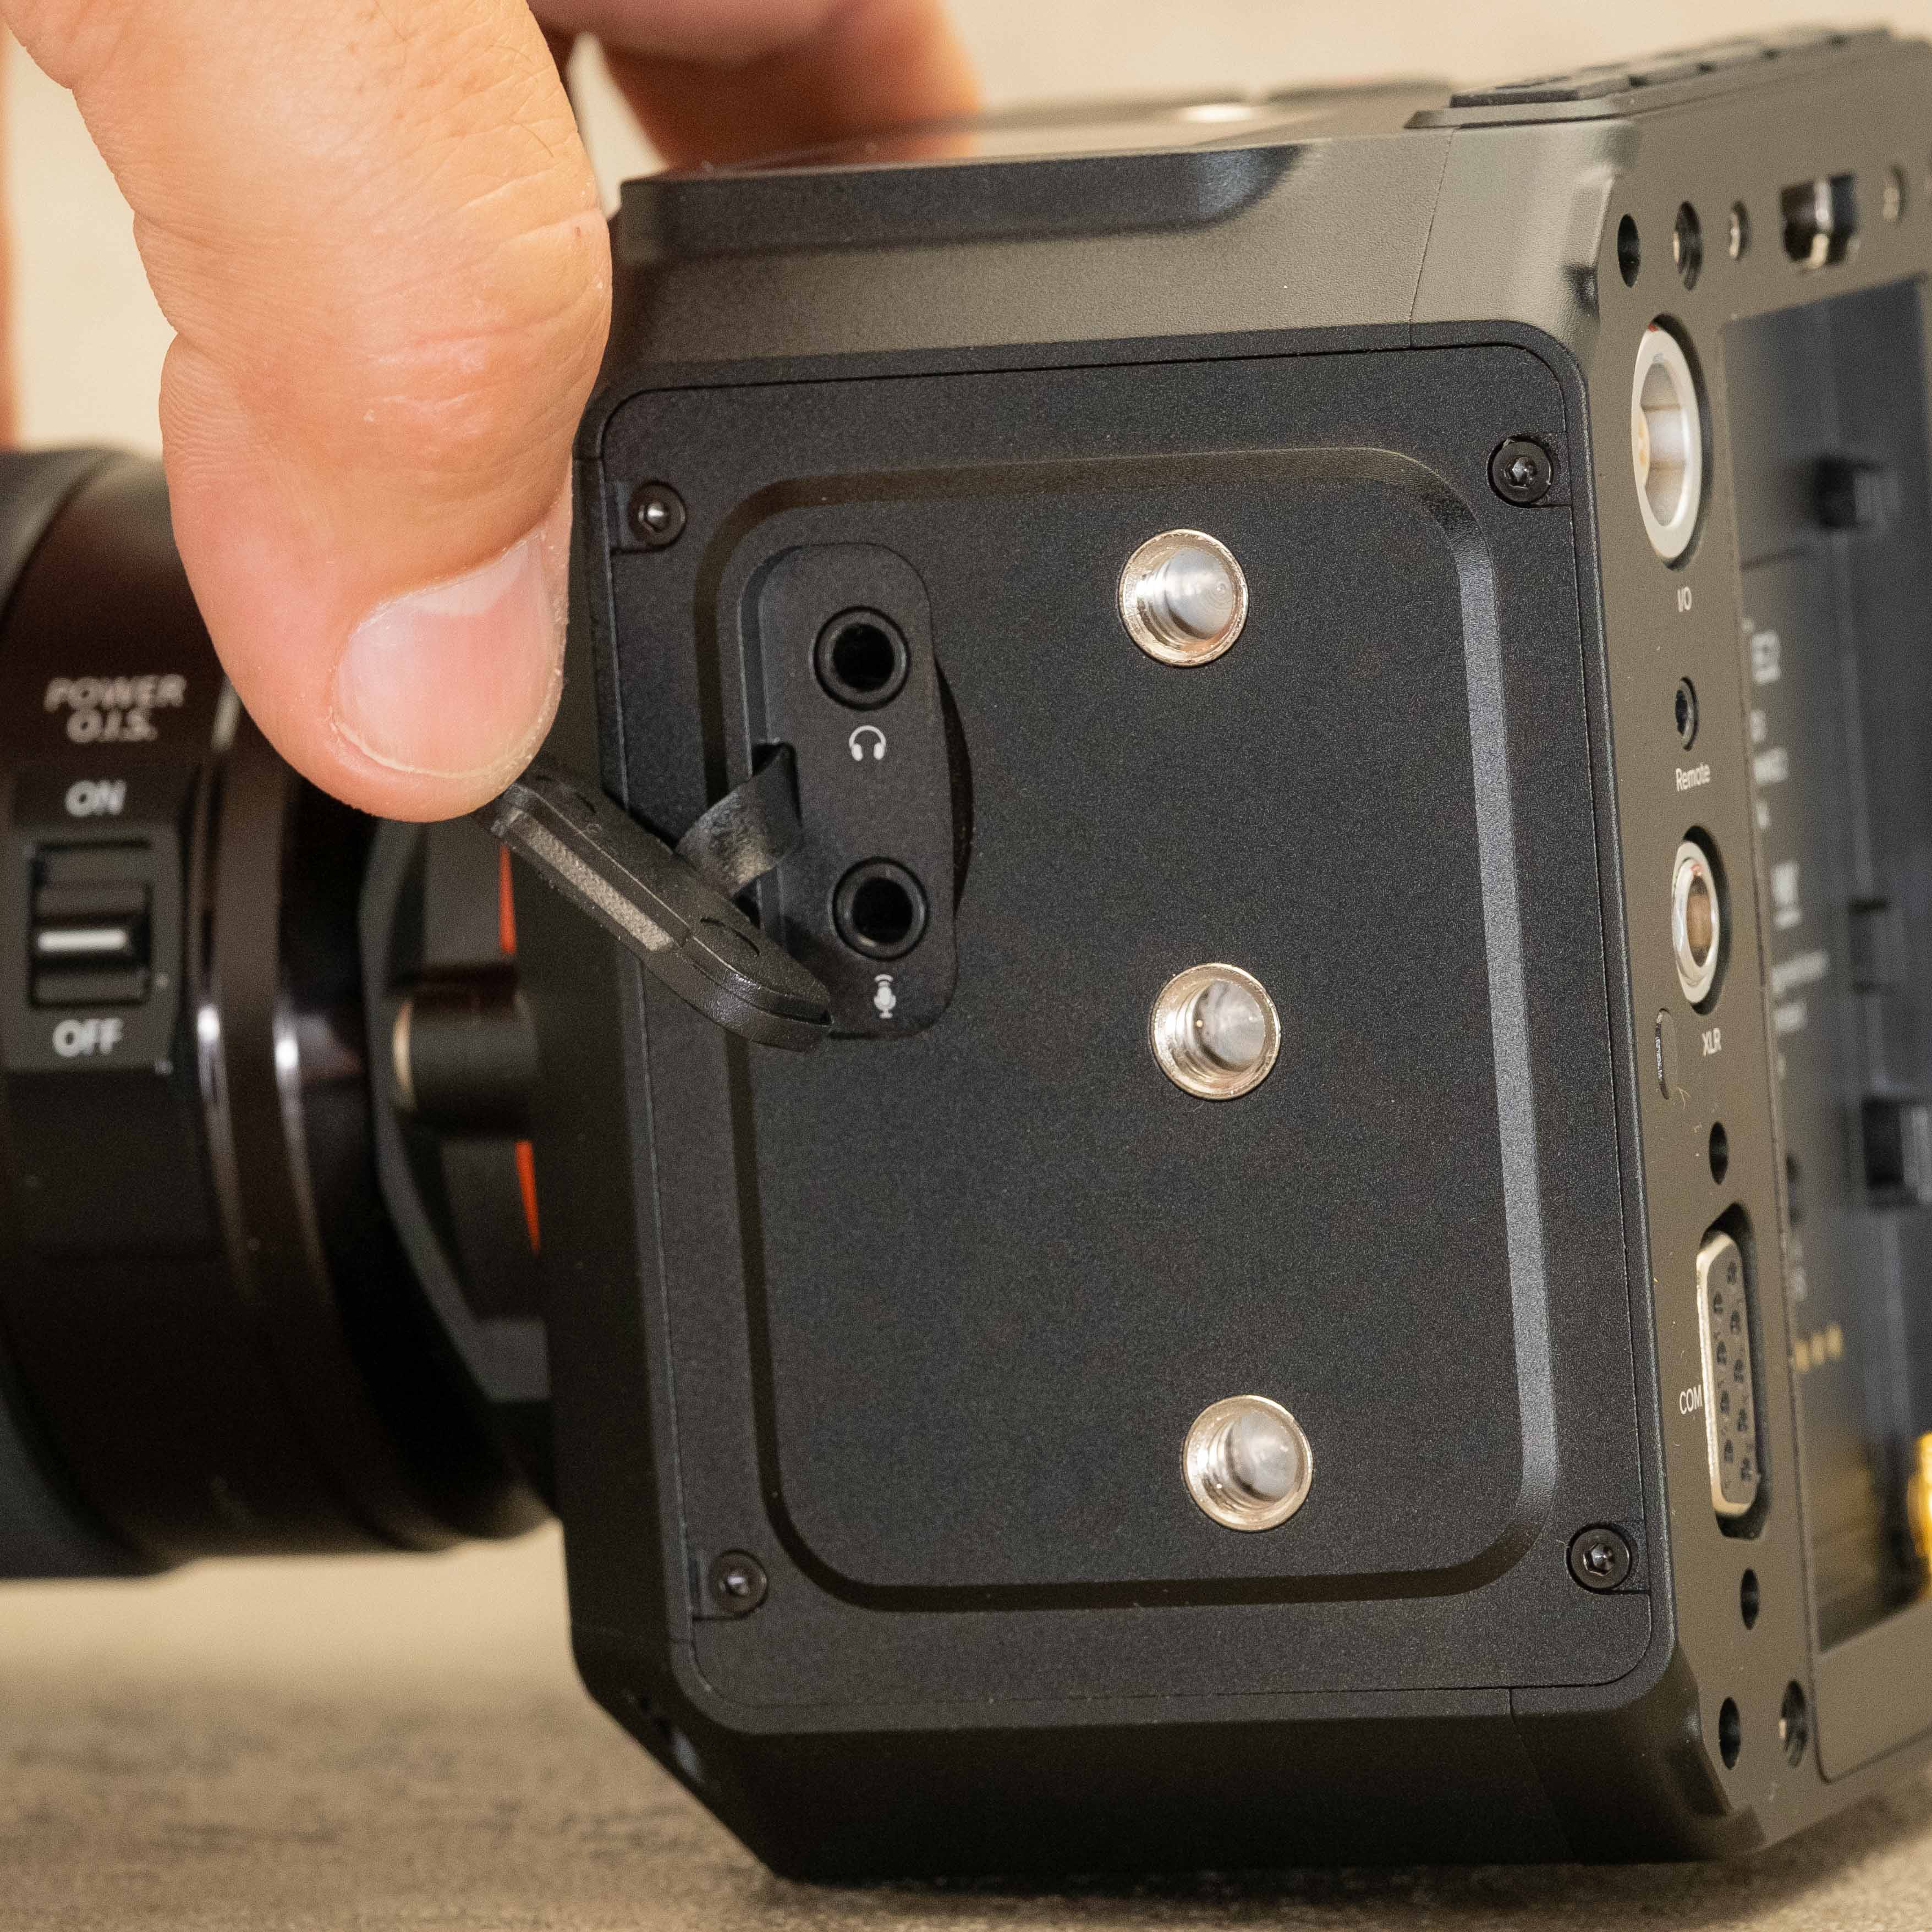
Hiding behind a plastic door on the left side are the headphone jack and 3.5mm mic input. It also has the plastic cover but this one is harder to open again if a cage is attached like the SmallRig E2 cage. Even with fingernails, I had a hard time. I have an EVF mounted and that made it even more difficult to get open. I really hate these plastic covers on cameras. They get in the way and are sloppy when open. I’m tempted to yank them out but an open CFast slot scares me. The headphone/mic input cover on the other hand just might be gone soon.
Video Output
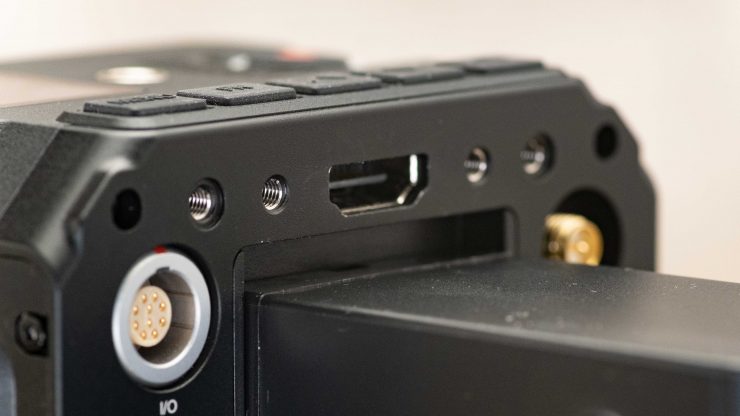
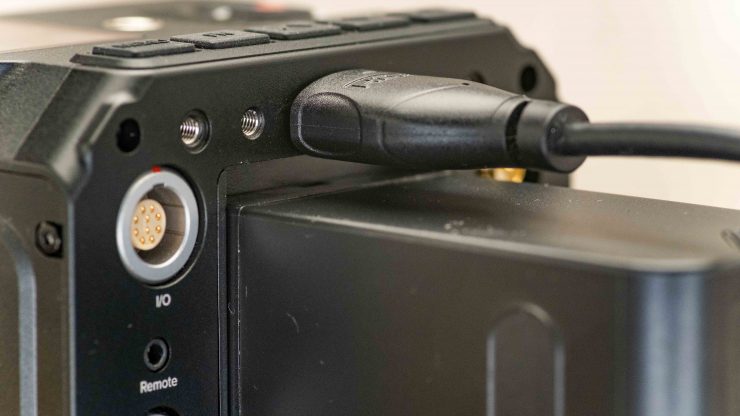
For video out the E2 has an HDMI port, however, no SDI out is available. Z Cam is creating an SDI adapter that will use the HDMI port but, I’m not clear on how it will work as most require power. The HDMI 2.0 Type A port outputs up to C4K @60fps 10 bit 4:2:2.
The placement of the HDMI input is above where the battery is placed. I had to unplug the HDMI when the battery needed to be swapped out. It’s not a big deal but a little odd. On the bright side, the battery somewhat protects the connector since it sticks out farther than the HDMI does.
Function Buttons
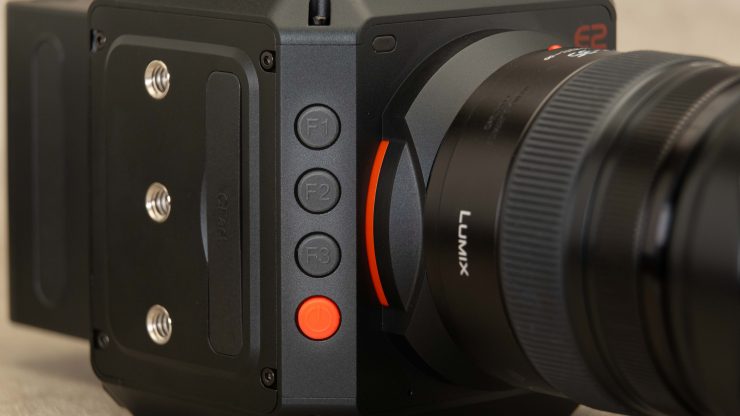
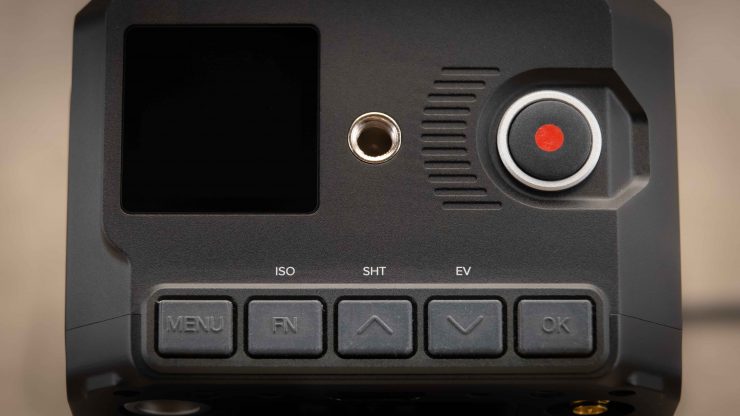
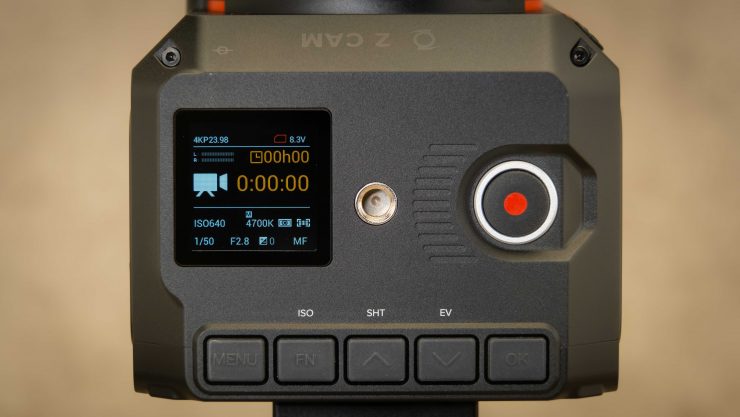
With such a small body, buttons had to be carefully planned out. On the front are three programmable buttons and power on/off, and on top are five more. The “MENU” button isn’t programmable. The main top functions buttons are as follows from left to right.
Main Top Function buttons
- MENU
- FN/ISO
- Up/Shutter
- Down/EV
- OK (for menu settings or exiting function selection) /AF
Above each button, there is small print with the default settings or ISO, Shutter, and Exposure. If you change them and want to have a visual of the new setting there’s enough room to add a strip of gaffe tape or a label maker sticker with the custom functions you set.
As I mentioned in the Menu section of this review, these top buttons are a little tough to get used to. The default settings are not ones I would use. I do find the front three very user-friendly and programmed my favorite settings into them like taking a custom white balance, focus punch in and exposure tools.
A lot of very good assist tools are available on my Zacuto Gratical HD as well as the Portkeys BM5, therefore, using the cameras onboard tools are not as important to me. Having shortcuts to camera settings is a good way to use the function buttons.
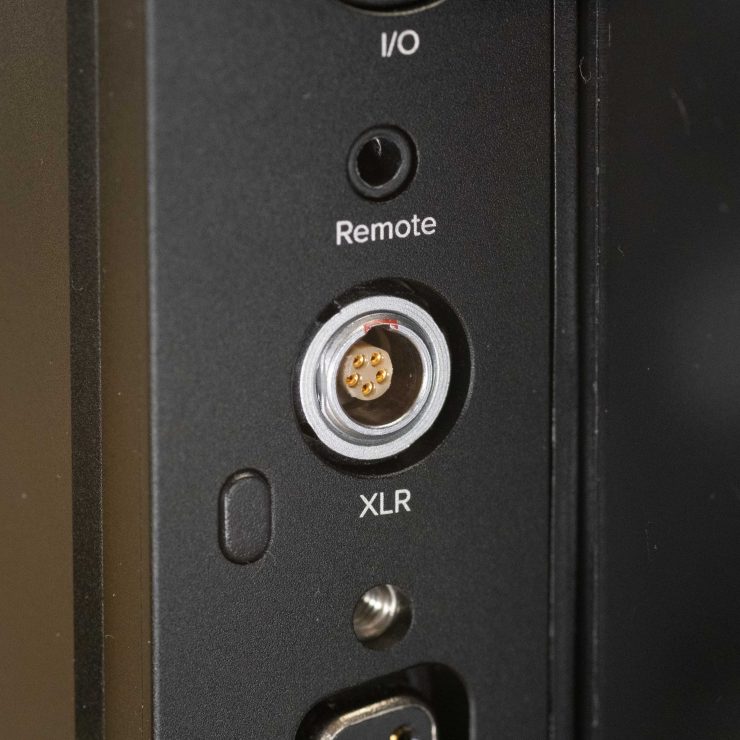
Audio Input
For audio, the E2 uses the same connector that’s found on the ARRI Alexa Mini. It’s an ARRI 5-pin LEMO mini that supports dual mono and phantom power. I purchased this angled connector the Uonecn ARRI Alexa Mini Camera Cable Two XLR 3-pin Female Plug to 00 Right Angle 5 pin Male lemo Audio Input Cable for around $50. Another option with a straight connector is Alvin’s Cables split XLR cable for the E2. Retails for $64. The Alvin’s Cable is only 10cm as opposed to the longer 100cm Uonecn cable.
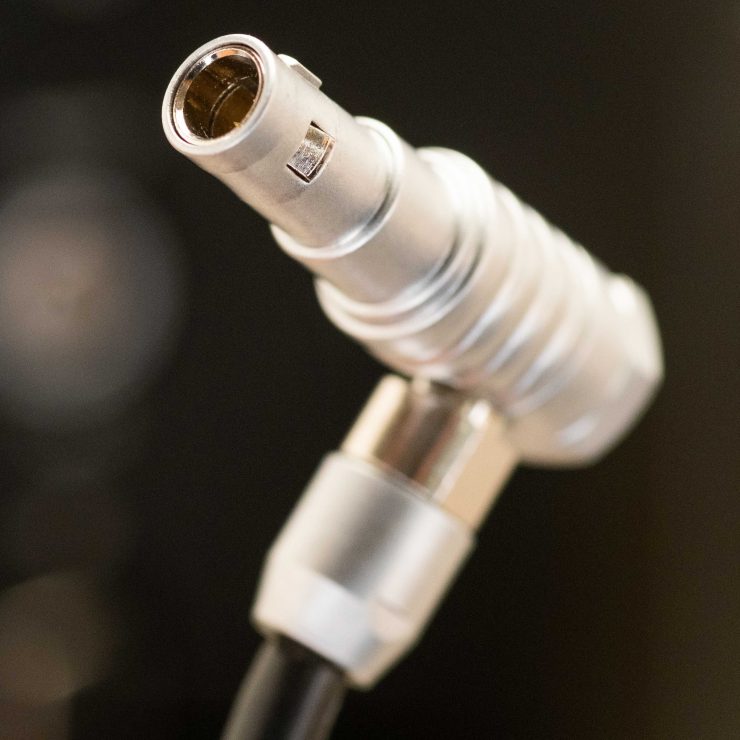
These two are less expensive models. Most were around $150. The LEMO connector clicks into the tiny input and sort of locks in. This connector is a bit flaky for constant use. While the miniature ARRI 5-pin LEMO connector is designed to lock it doesn’t lock in securely. I could give a tug, and it would pop off. If this was my primary camera, and I required audio at all time, I would look into a more secure way to use it. It’s a good idea to also take some strain off the small connector by securing it with a tiedown when a microphone is attached. Again, I’m not sure how robust the connector is but prefer not to have a lot of strain on any port and that Mini XLR is tiny. While being small and potentially dangerous having a true dual channel XLR input with phantom power is sweetness!
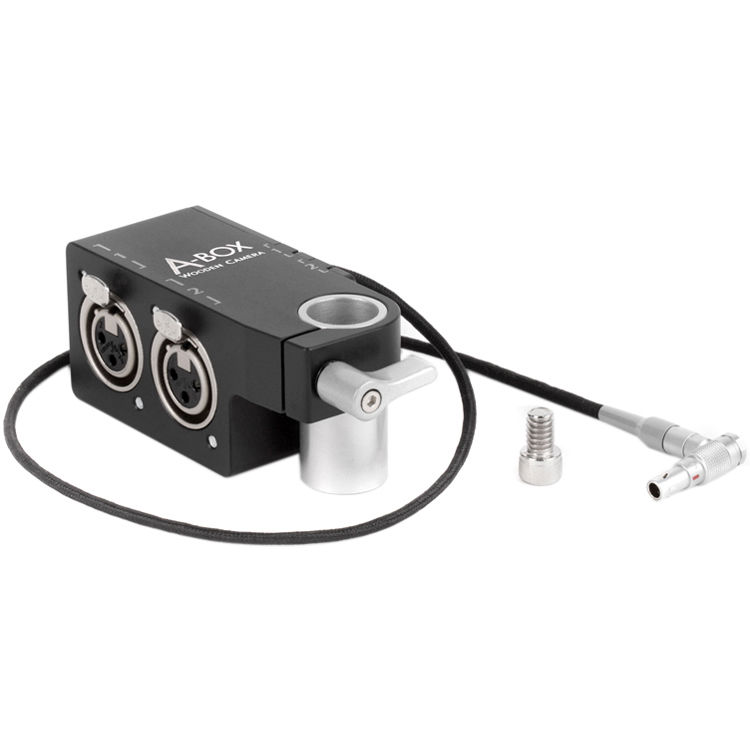
The Wooden Camera A-Box Audio Distribution Adapter Box for ARRI ALEXA Mini is a good fit for the Z Cam E2. It mounts on a 15mm rail and passes phantom power to both inputs. It retails for $250. The A-Box mounted to a rail helps take the strain from the tiny XLR input and connector.
To set the audio record levels you have to go into the menu. This is a slow process since it requires some navigating to get too. I have to say I don’t like having to enter a menu to change the level.
A big fix with V. 0.86 firmware is the audio record levels and how the input handles the level of the microphone. For example, the Sanken COS-11D is a hot mic to begin with, and the Z Cam E2 didn’t handle it very well. The audio was clipping even in the lowest record settings and required the use of an inline attenuator to drop the DB down. With the update, this is now fixed. With the level set to -16db I was getting clean record levels and didn’t need to use the inline attenuator. I record my audio internally more often than with an external audio recorder so clean audio capture is a feature I need.
Timecode I/O & Jamming
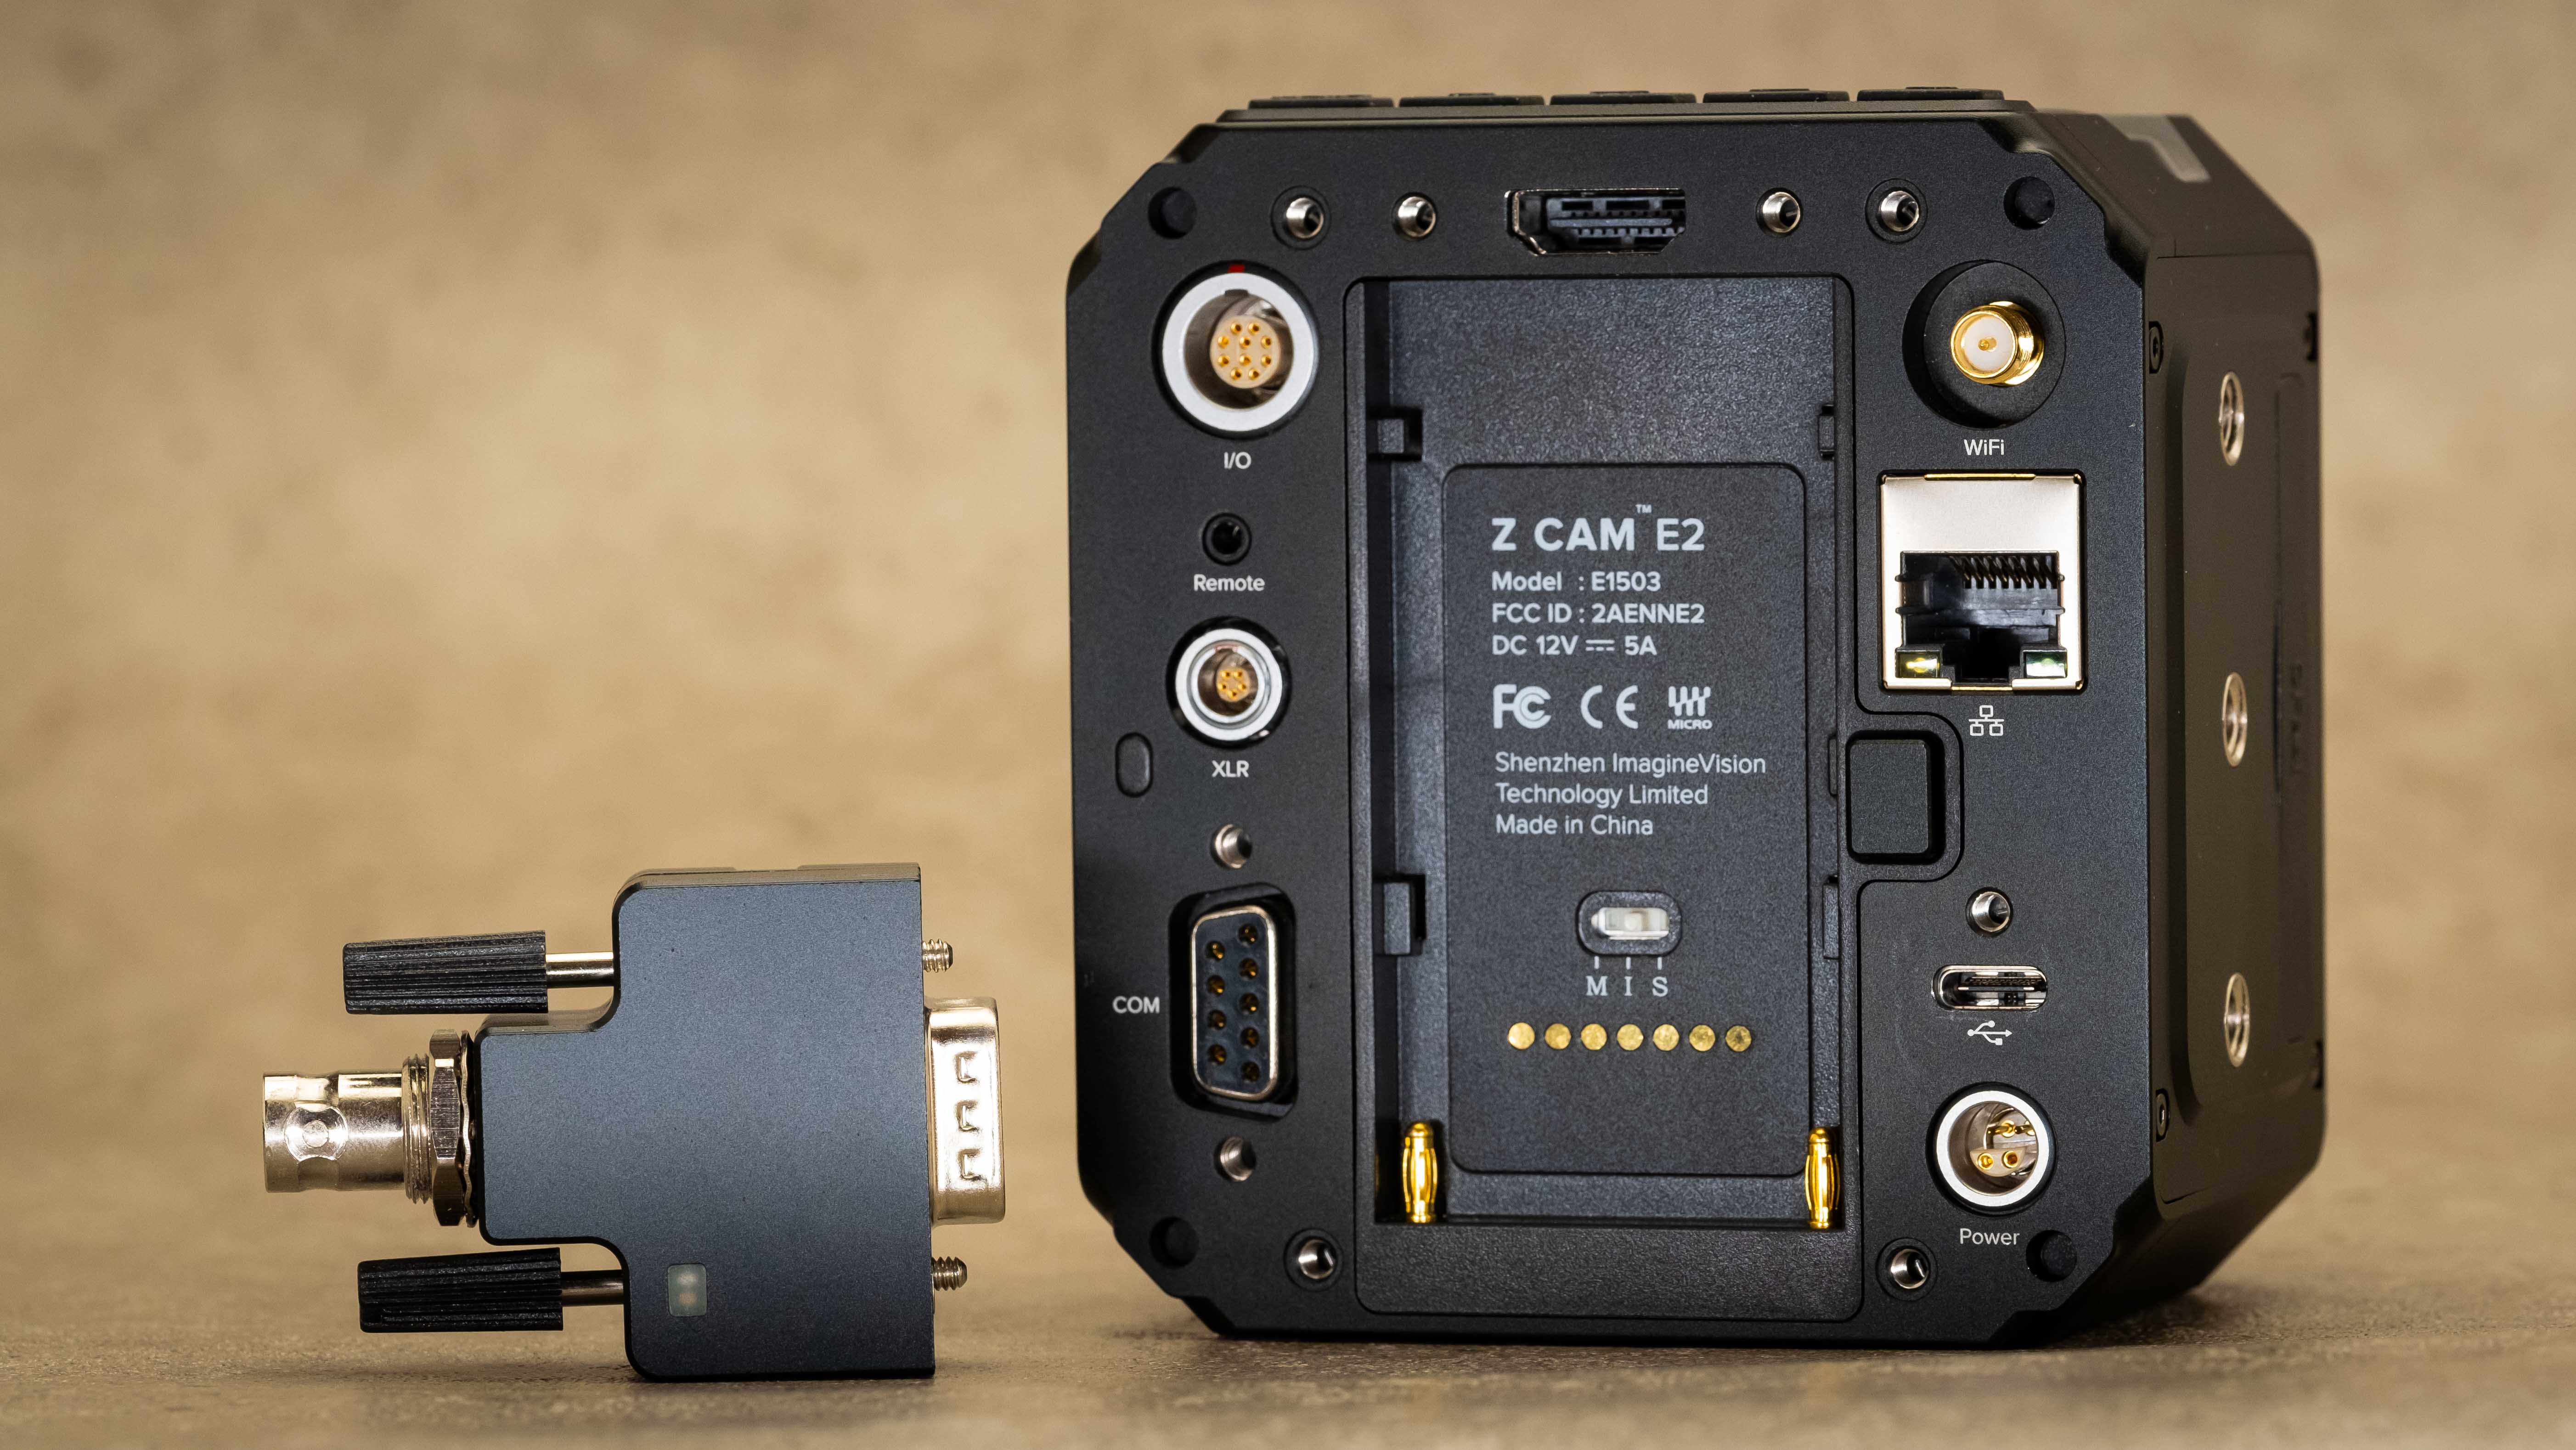
The E2 is capable of receiving external timecode with the Z CAM Timecode Adapter. The adapter retails for $100 and is available now. It can be paired with other cameras that send out time code. however, the E2 doesn’t have a TC output feature. It connects to the COM Port on the back of the E2. When attached the camera automatically recognizes the device.
Simply go to “Record” in the menu. “Timecode” and set to “External”. This option isn’t available without the TC adapter plugged in and sending TC. At this time there is no way to jam timecode and unhook the generator. You have to have a live external TC feed to the E2. Z Cam is working on adding the feature.
While this is an excellent feature it would be great to have a simple one-time jamming option and disconnect the generator. Cameras like the C300 and URSA Mini do have this feature. While jamming does give a quick and accurate timecode the moment it’s set it can drift over time depending on the camera.
Options for timecode are taking a feed from another camera or using an external timecode device like the Ambient Recording NanoLockit Pro or Tentacle Sync generator. The module does get very close to the mini XLR input making the angled connector I have no longer usable. Alvin’s Cables makes a split XLR cable for the E2 for $64.
Powering The E2
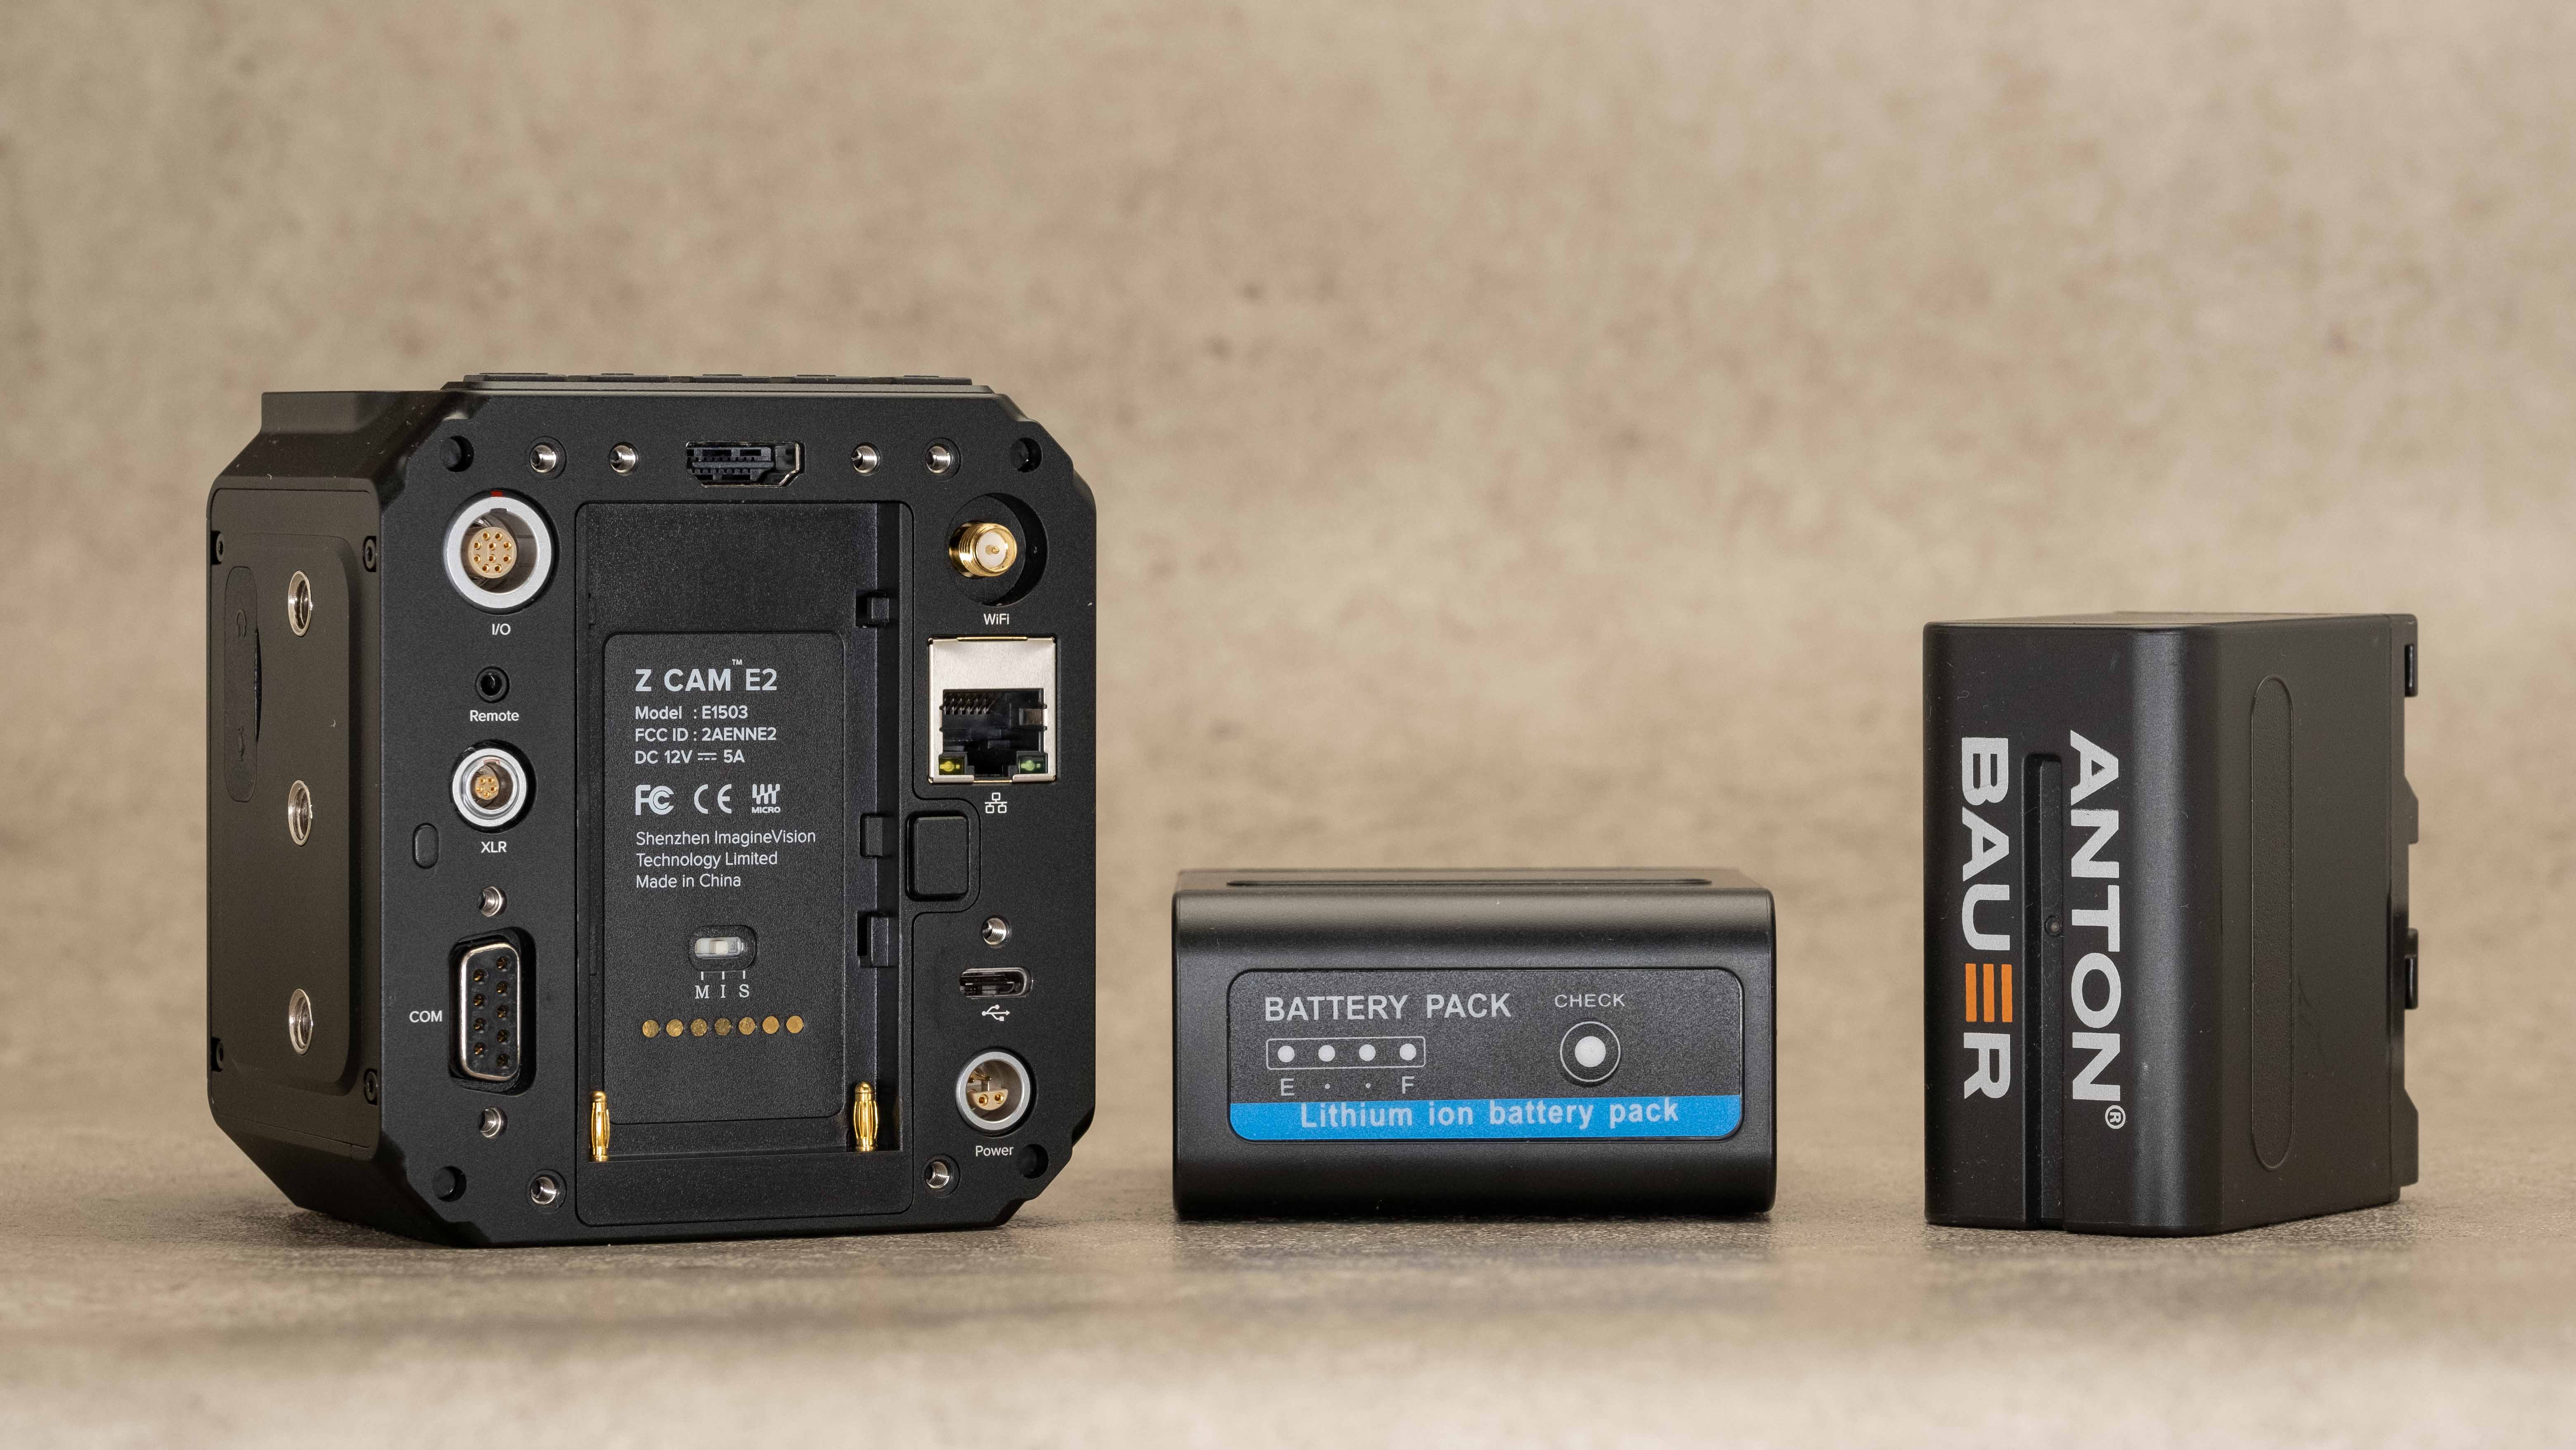
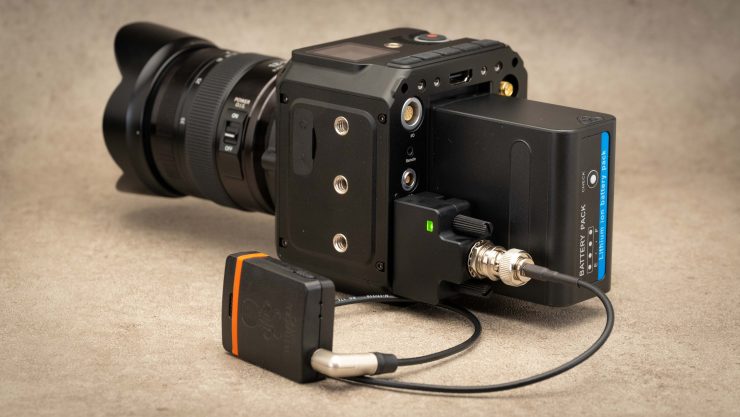
The Z cam E2 isn’t a power-hungry camera. It uses the Sony NPF or L type batteries. I have a lot of these as a lot of users do. I was getting several hours of use with one large NP-F970. This is a good thing as batteries can be an expensive add-on when purchasing a new camera.
A good option for powering the E2 and some low power using accessories is the Powerextra NP-F950. It has a 5V USB and 6 – 8.4v DC out power plug. I was able to power a Nucleus Nano with the 5V USB however if you stop using it for a few minutes the power shuts off to the Nano. While it is a little strange it powers up with a simple tap of the fuel gauge on the back of the Powerextra battery. The battery is a little longer than the high capacity NP-F970. All in all a great option to power the E2.
Onboard Tools
The E2 has many of the exposure tools you would find in most cinema cameras. One thing to keep in mind is when “Display” is turned on in the menu the tools will be outputted from the HDMI together with the image. If using an external recorder the tools will also be recorded. but the E2 with such good codec options like ProRes an external recorder isn’t a must.
- Zebra / Zebra1 Setting (55~100) / Zebra2 Setting (0~50)
- False Color
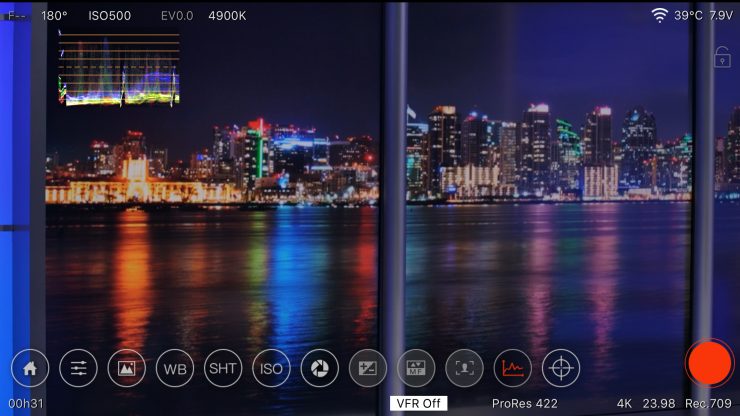
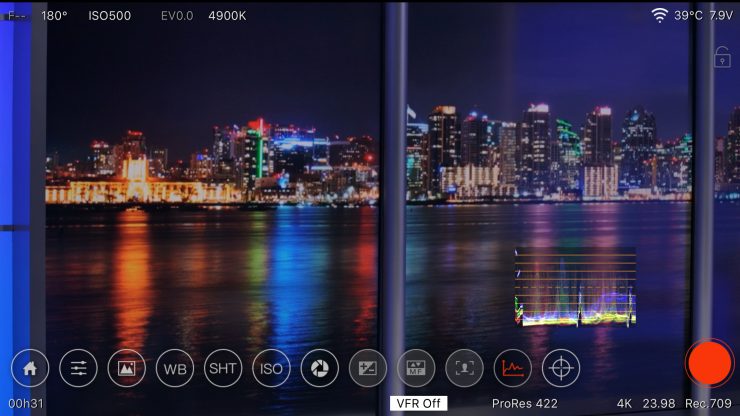
- Waveform
- Peaking: Enable (On / Off) / Color (Red, Green, Blue, Orange, White). To enable/disable the Peak tool and set the color of peaking focus.
- De-squeeze Display: 1x / 1.33x / 1.5x / 2x. When the camera is using an anamorphic lens.
Auto Focus
Not a lot to talk about here as the autofocus performance isn’t something that I would consider a strength of the E2. I tested with a Panasonic Lumix 12-35mm f2.8 and found it to be okay for a simple one-shot AF, but continues AF isn’t good and for the most part unusable.
Cameras today are getting a lot better with continuous autofocus but no cinema camera other than Canon and its DPAF has really impressed me. Yes, mirrorless cameras from Sony, Nikon, Fujifilm, and Panasonic have improved a lot with continuous AF, however, Canon is the king of the hill with their DPAF (dual pixel autofocus) on the C300, C200 cameras. Hopefully, the performance could be improved with future updates however I wouldn’t expect it to be at the level of Canon.
CODECS & Media Options
CFast and SSD Drives
For media, the E2 uses CFast 2.0 or USB-C SSD drives. At this time Z Cam recommends the Angelbird SSD2GO PKT 512 GB. I haven’t tested the SSD option but will recommend to always use a CFast card as well just for safety. I don’t fully trust the SSD drive connection with any camera that offers the option. While I’m sure other brand SSD drives will work until Z Cam says it’s compatible use at your own risk.
I Love ProRes
The Z Cam E2 is nothing short of loaded when it comes to internal codecs. With a recent update, the popular ProRes codec was added. Having ProRes 422, HQ, LT, and Proxy flavors make working with native files so much easier. No transcoding necessary. Another advantage of internal ProRes is no need for an external recorder. You can record to ProRes up to 4K 60p. With higher frame rates the option is H.265 or H.264. Z Cam has stated a RAW option as well will be coming.
True 24p is available in all resolutions. I mainly shoot for broadcast and choose 23.98 as the frame rate. It was strange that in HD 23.98 fps wasn’t available however this is now included with the new 0.86 updates.
Gamma Settings
The Z Cam E2 has four different gamma settings. I feel the E2’s dynamic range is pretty good, however, most cameras these days are performing so much better in the DR department it’s almost a non-issue anymore. Yes, you can get 15 stops from a camera but when you balance the shot those 15 stops end up more like 11 or 12. The good news is again. We are seeing really good dynamic range in modern cinema cameras now.
- Rec709
- Flat
- Zlog2
- WDR
- HLG (added in firmware 0.86)
ZlogColor Plugin
Before I dive into the gamma options I want to mention the ZlogColor Plugin available for FCPX, DaVinci Resolve, and Premiere Pro. The plugin is a very useful tool to get the flat gammas closer to Rec709 and then you can go crazy from there It has a lot of functionality and if you want you can use it to do a full grade.
It’s very impressive. I wish more camera companies would include a plugin like this as it makes it so much easier to work with the log clips.
To go with the plugin are several LUTs that can be used to create a look or just bring the image to a normal state.
Rec709
Rec709 is an all-arounder that will be good for low contrast shooting situations. I like the look a lot as it’s still a little flat with room in the shadows and highlights for grading plus the saturation is low, giving you some room for grading. You can adjust the look in camera more if the saturation isn’t to your liking. This is an excellent gamma choice if you are handing the footage off to someone that doesn’t want to work the image much. It really is a nice look and the one I used the most.
Zlog2
Zlog2 is flat but I don’t feel is crazy flat. I exposed a color chart with middle gray at 50IRE and brought it into FCPX placed the Zlog2 LUT on grading is very easy. Shooting Zlog2 will give you more dynamic range since the shadows are lifted with an overall flatter image giving you the advantage of seeing more in the shadows.
Flat
The Flat gamma is basically Zlog2 with a Rec709 LUT applied in camera. You can really see the saturation pop with the Flat gamma setting when the ZlogColor plugin is applied.
WDR
WDR or Wide Dynamic Range is exactly that. This gamma is going to give you the most dynamic range possible with the E2. It does require you to expose higher by about two stops when compared to Rec709. I’m not saying you have to overexpose but when using WDR more light, wider f-stop or a boost in the ISO will be needed.
HLG – Hybrid Log-Gamma
Higher dynamic range can be achieved with the HLG setting.
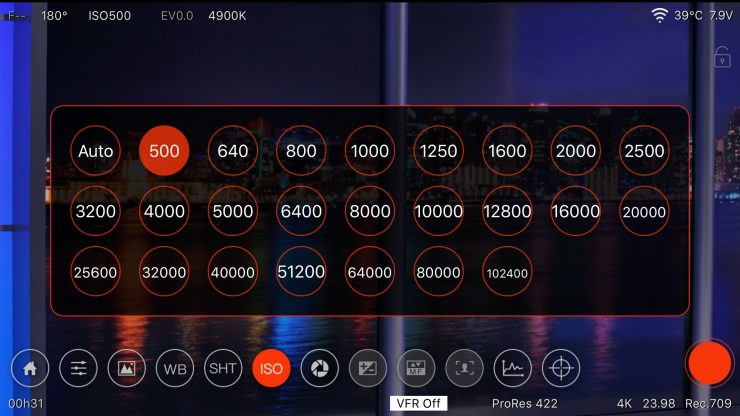
Sensor & ISO
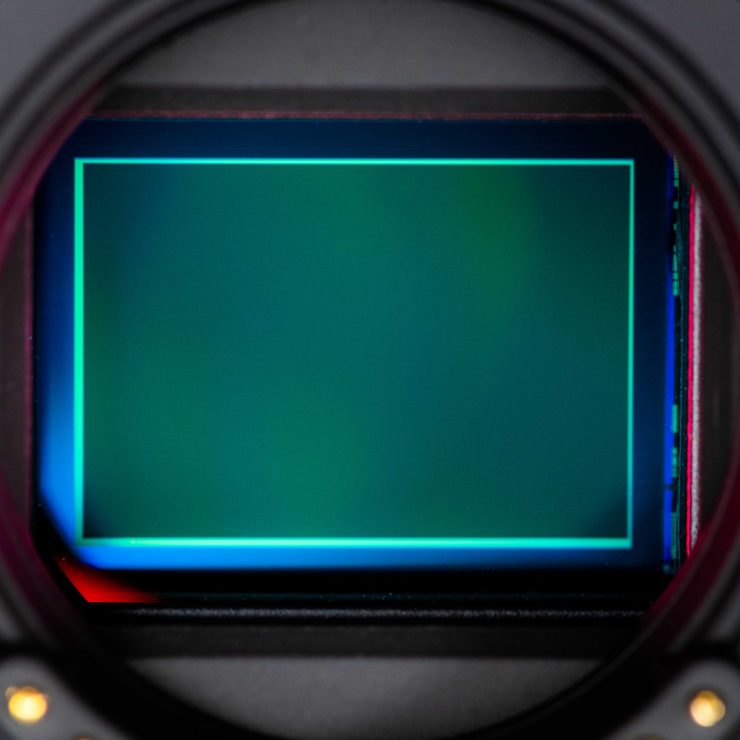
Before the 0.86 firmware update, I noticed the ISO values seemed to be lower than what I’m used to seeing from a cinema camera. With the new 0.86 firmware, the ISO values have changed to be in line with the industry standard. While the values have changed the performance is the same.
Dual Native ISO
The Z Cam E2 Micro Four Thirds Sensor has Dual Native ISO. You have three options. Auto, Low and High. This feature, in theory, should yield a cleaner image as it switches circuits from Low to High. When shooting with 2500 ISO, it would be best to change to High with normal gamma; however, in WDR 1250 ISO should be used for a cleaner image. In WDR, the image gets very flat and requires more light or increased ISO to get exposure.
Dual Native ISO
| Rec 709 Z-log2 Flat HLG | Auto 500 – 102,400 / Low 500 – 2500 / High 2500 – 102,400 Low 500 – 2500 / High 2500 – 102,400 Low 500 – 2500 / High 2500 – 102,400 Low 500 – 2500 / High 2500 – 102,400 |
| WDR | Auto 250 – 51,200 Low 250 – 1250 High 1250- 51,200 |
In the ISO test video, I put a fuzzy textured camera case divider in the frame to see if any noise reduction would soften or smooth it. I didn’t notice any negative effect and that’s impressive. Over all the noise isn’t ugly and could easily be cleaned up in post. To keep the exposure correct through the ISO range I had to do a combination of lower the lighting and closing the iris. therefore, the depth of field does change as I step down in ISO levels.
I ran a test using all three Dual Native ISO settings and couldn’t see a difference in the noise levels when using Auto versus Low and High in Rec709. For simplicity, you could leave the E2 in “Auto” so you have the full range available without going into the menu. To get the cleanest image the Low settings of 500 – 2500 ISO would be the choice.
As for low light performance, the E2 does pretty well. I like that the camera doesn’t appear to be adding any aggressive noise reduction in the higher ISO levels and that’s a good thing because cameras like the GH5s does and when you get in the upper range the image loses detail. I’m not seeing this with the Z Cam E2.
Rolling Shutter
After the review went live some readers asked about how the rolling shutter performance is on the Z Cam E2. Well, here is the results of a quick test I just performed side by side with a GH5.
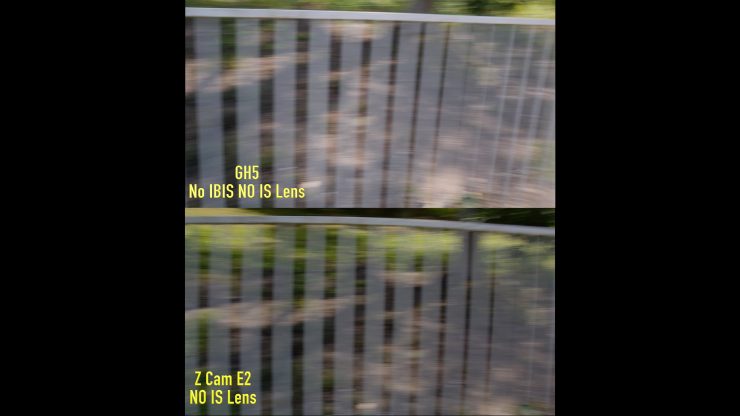
I mounted the GH5 on top of the E2 and used a 14mm pancake lens on the GH5. The E2 had the Lumix 12-35 attached set to 14mm. It’s pretty close but not perfect. The results are negligible. They both are so close it’s splitting hairs but it does bring the end to the idea that the rolling shutter is worse than the GH5.
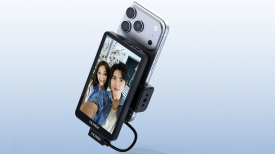
Z Camera App
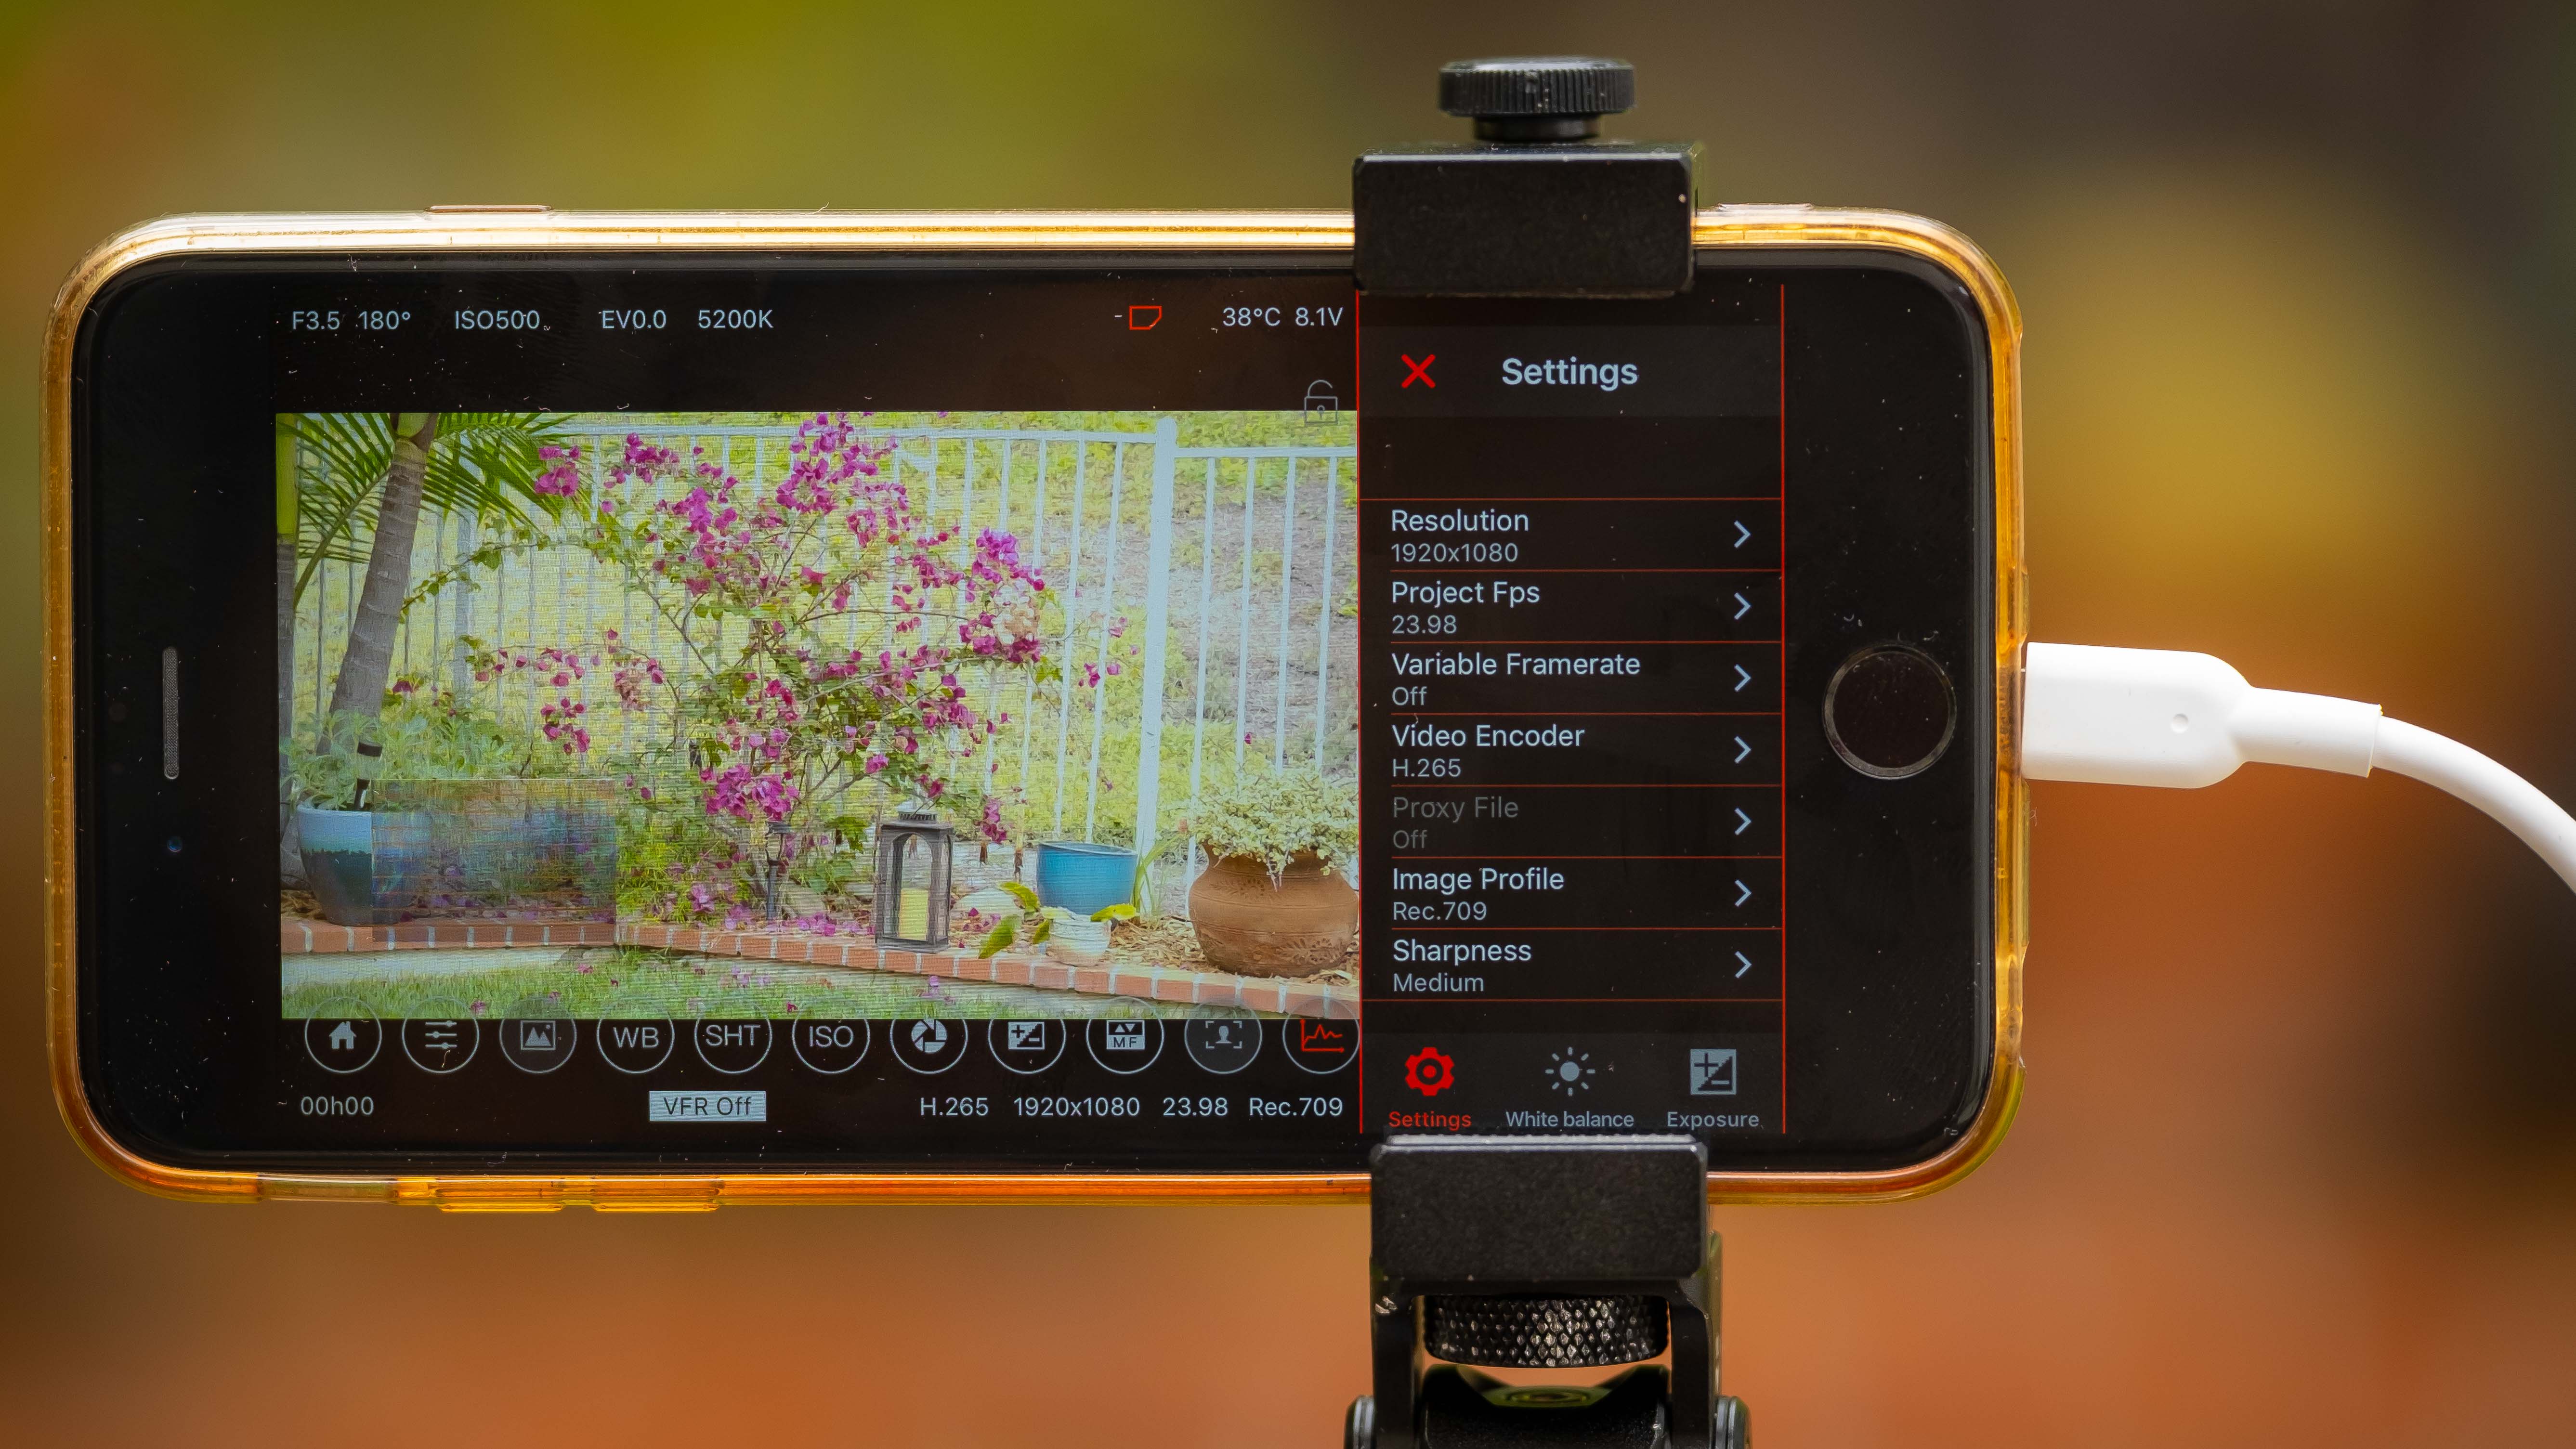
Controlling a camera remotely is a nice feature. Having access to the menu without digging into the physical camera settings has advantages. The Z Cam App is surprisingly good and can do a lot more than what I’ve seen from other cameras. You can use an iPhone or Android smartphone to connect with. The new Apple iPod Touch will be a great option if you don’t want to tie up your phone with a camera. I’m thinking about getting one since so many devices now us iOS for control.
Z Cam App Features
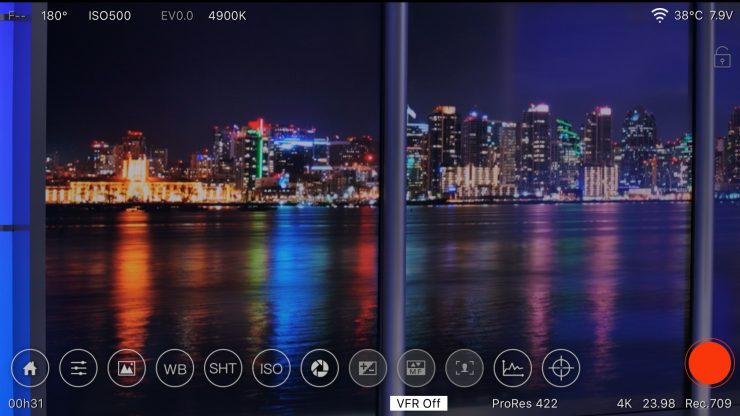


You have two options. Either WiFi or direct connect via a Lighting cable with USB-C on the other end. The phone also charges when plugged into the E2. I’ve used many mirrorless cameras that have apps, but usually, they are limited. The Z Cam app is quite good with a lot of camera functions that can be changed. The performance over WiFi without the included antenna can be spotty so attach it if you’re going to use WiFi. With the Lighting to USB C cable, it’s much more stable.
For live view one downside is latency. The other is the connection to the iPhone isn’t secure and comes loose easily. On the E2 SmallRig cage is a USB-C lock. I didn’t have a cold shoe mount on the body so the iPhone was a little high on the handle making the cable a little longer than I liked. With a little work, this could be a much tighter, cleaner setup with the mount directly attached to the E2 cage or added cold shoe.
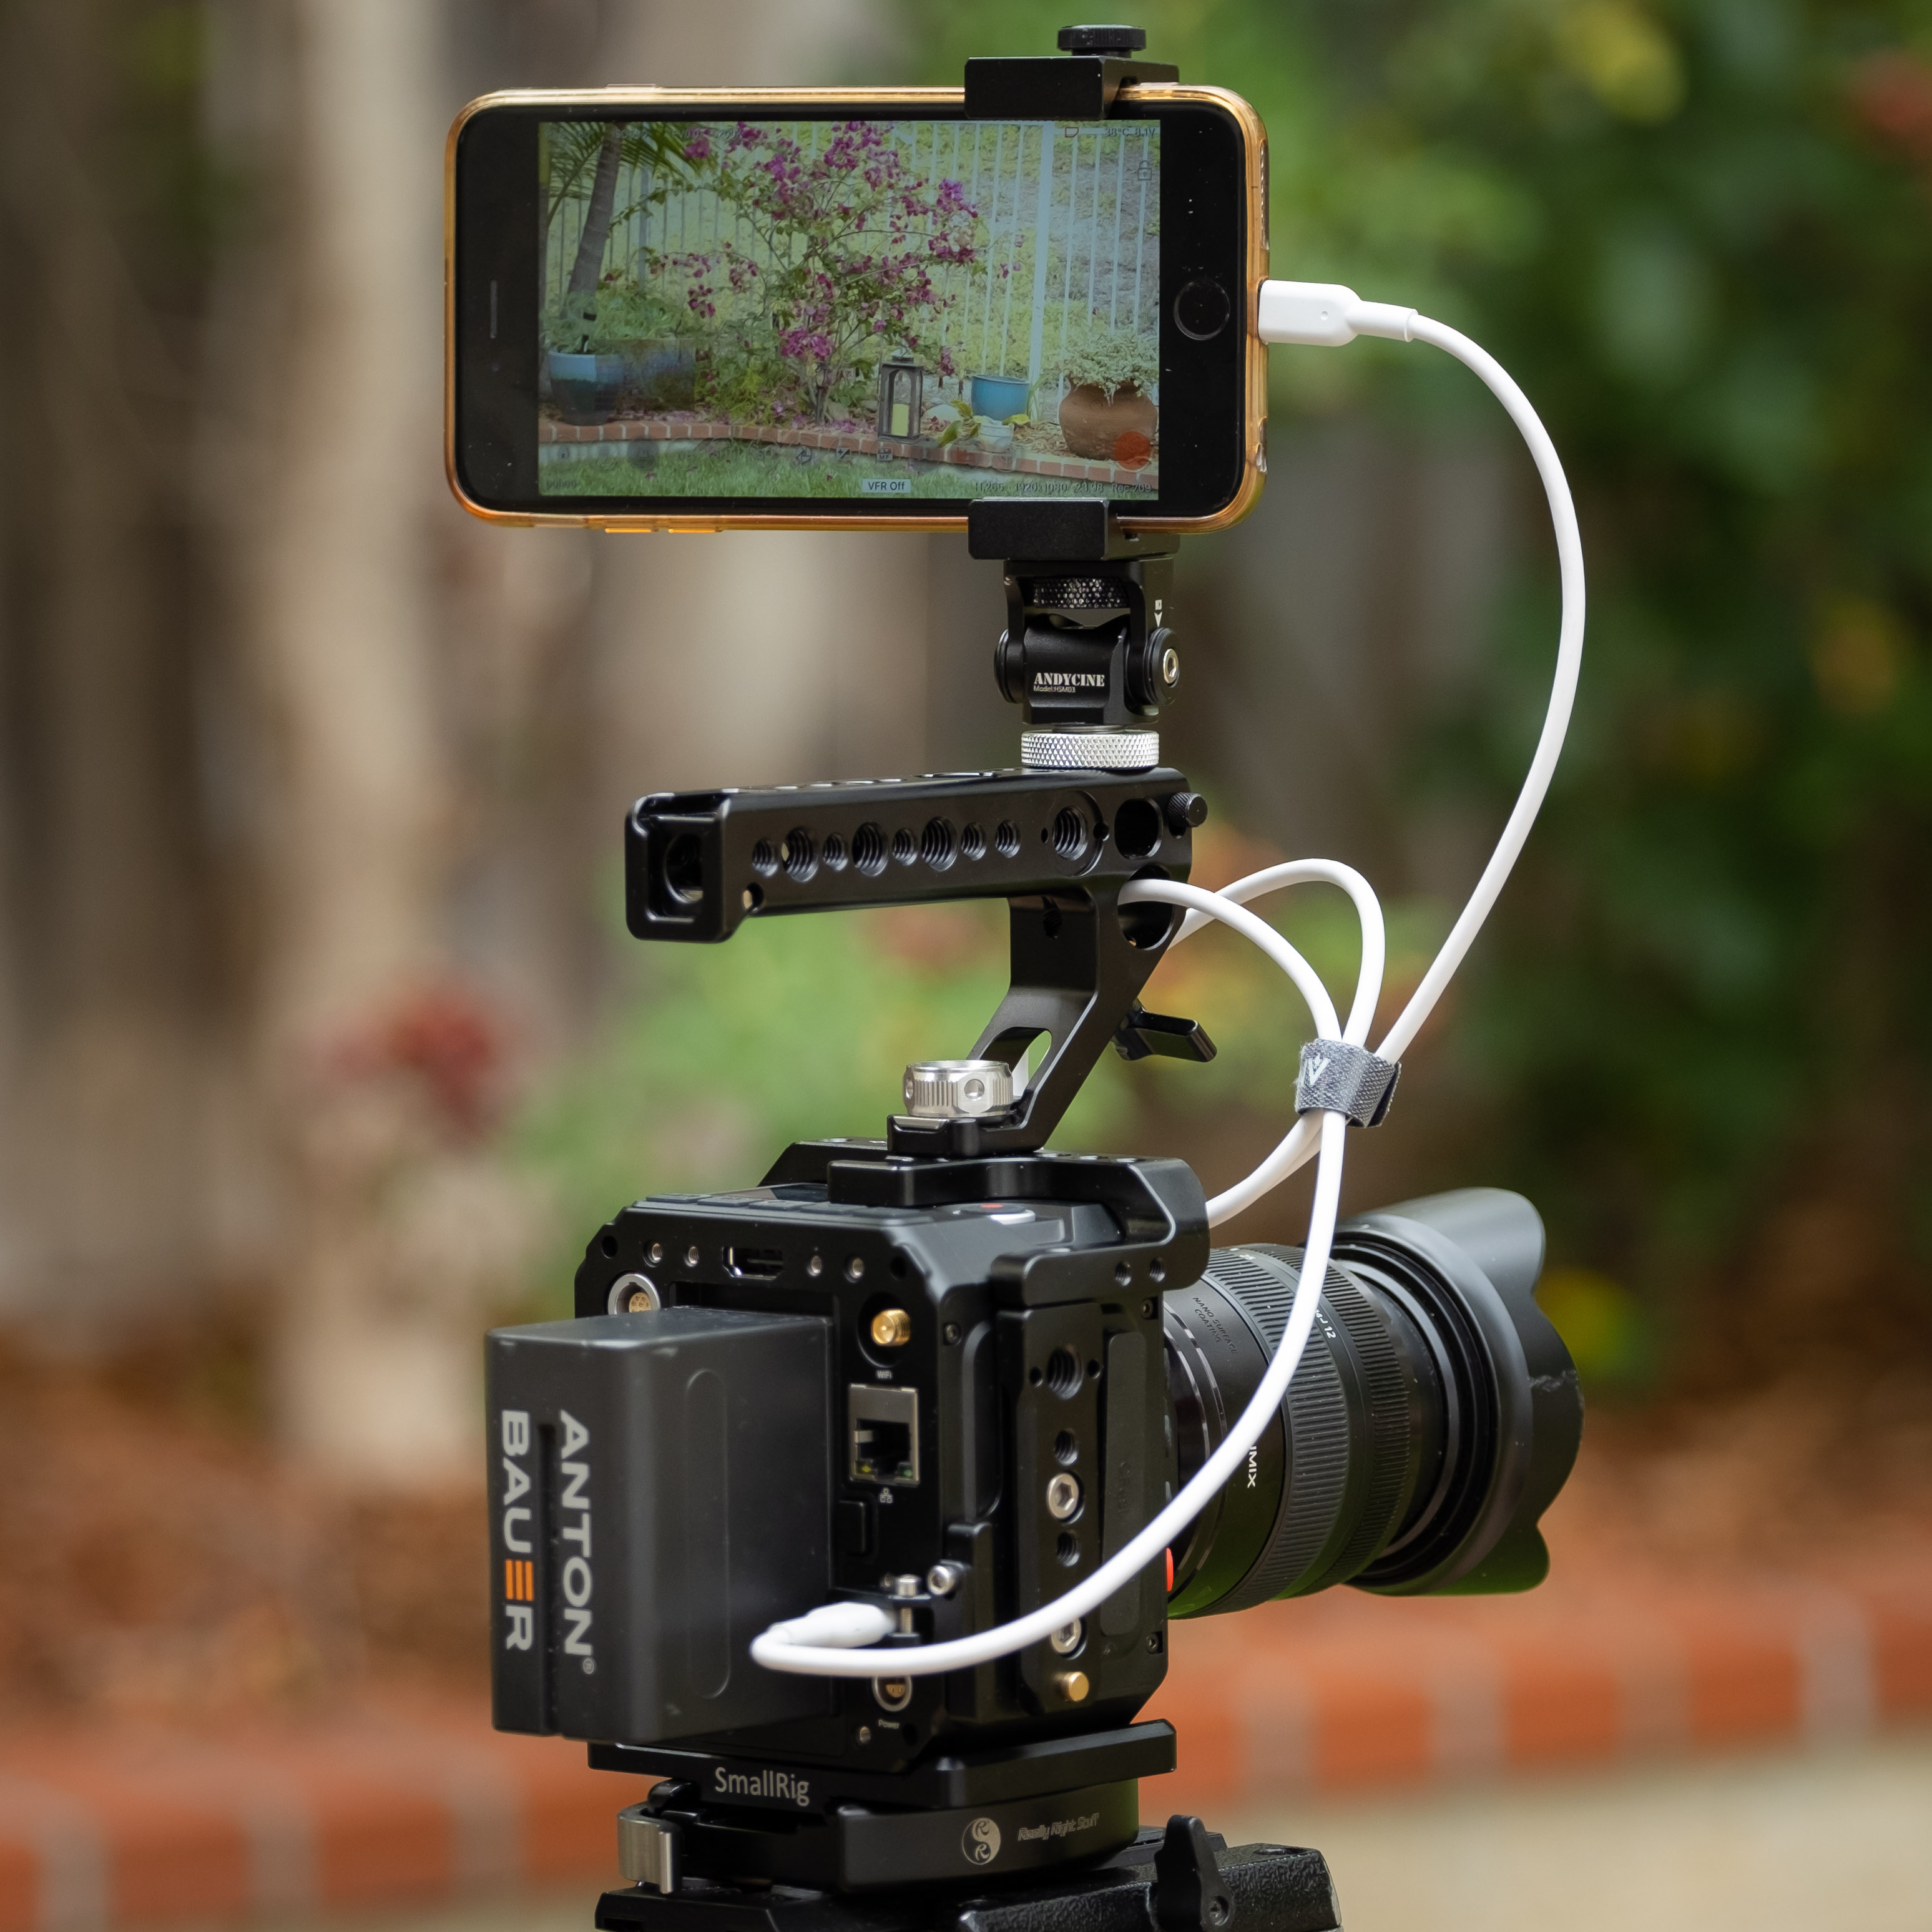
With the App, you have a live feed from the camera and menu functions that can be changed. When connected with the cable the latency is less. Not perfect but watching an interview wouldn’t drive you crazy with the lipsync being off a little. I don’t think pulling focus on a moving subject would work very well using the App in WiFi mode but directly connecting to the camera would be depending on the situation.
I tested the latency using WiFi and a Lighting cable direct into the camera.
- 171 milliseconds using WiFi
- 138 milliseconds using Lighting to USB-C cable
- 33 milliseconds difference
While 33 milliseconds isn’t that much it does make a noticeable difference when shooting. I like the option of using the iPhone as a monitor and a camera interface. It’s pretty slick.
With the App, you can change pretty much all the cameras parameters making it a useful tool that I feel is faster to use than the E2’s menu system.
As a DP I don’t see myself messing around on my iPhone to make camera menu changes while shooting. It’s a lot to manage with two hands. Yes the direct connection is faster to establish than the WiFi but pulling it out and using it might not be the fastest. Having an iPod Touch mounted to a tripod or on the camera would make it much more usable.
The Z Cam E2 Usability
You have to learn how to use a camera in order to properly evaluate it. I shot two promos and a lot of test footage and I have to say I’m impressed with the performance of the E2. The color looks very good and the noise is very low for a micro four-thirds sensor. If needed too I would use 10,000 ISO without hesitation. We all have our own tolerances for noise. I shoot people most of the time and noise reduction does bad things on skin so I avoid high ISO that requires a lot of clean up. It’s amazing what manufacturers are able to do to get sensors to perform so well these days.
The Z CAM Body
The Z Cam E2 is small. A cage makes the camera much easier to use. Yes, you can go minimalist with only a NATO rail and a couple of cold shoe adapters, but a dedicated cage will make setting up the camera with kit so much better. Adding an EVF like the Zacuto Gratical or a bright monitor with at least a 2000 nit screen will make shooting in all environments much better.
Fortunately, I have both at hand and it makes a big difference. If I had to pick just one, I would take the Graticle EVF over a monitor due to its usability in all environments. Judging focus and exposure is easier for me with an EVF than a 5″ or 7″ external monitor. Having an external monitor is always a good idea as others on the crew can see what you’re shooting. Just get both!
An EVF requires a mounting system to work right and the inexpensive SmallRig works really well. The left side of the cage has a built-in NATO rail so I used a smallRig NATO mount arm with ARRI rosette to mount the Zacuto Graticle HD to the cage.
Caging The Mini Beast

As I mentioned earlier the Z Cam E2 requires a cage. I didn’t look into which one to get too much. At NAB Z Cam had the E2 in a SmallRig cage and it looked like a good fit. It’s also inexpensive at $89 for the cage alone. I added a SmallRig 2165 handle ($59) that I also use on the X-T3 cage. It’s nice because it has the ARRI accessory mount that prevents twisting and no screws to lose when not using it. This is a nice clean setup that makes using the Z Cam E2 easier.
Time Lapse Feature
A nice bonus is the time lapse feature. The Blackmagic URSA Mini Pro has this and I liked it a lot. Very easy to use and the results are very good. The timelapse is a video recording so no assembly is required in post. So easy even I can use it.
Front Function Buttons
On the plus side, the front shortcuts are easy for me to find and use. Mainly because they perform a tool that I need to use as opposed to making changes to ISO or white balance. I programmed the first to punch in, Second to peaking, third to turn the HUD on and off, I wish the fourth was another function button but it’s for powering the camera on.
Lens Choices
The Micro Four Thirds mount is very adaptable. Your options for lenses are vast. Since the E2’s autofocus isn’t a key factor manual fast lenses will be an excellent choice. You need fast lenses to get more shallow depth of field on a micro four-thirds sensor so native fast options like the Leica DG Nocticron 42.5mm f/1.2 ASPH are a good choice.
Using a Metabones Speedbooster ULTRA for S35 and XL model for full frame lenses will open up a lot of options with Canon EF. I used the Tokina Cinema Zoom 50-135 and 16-28 a lot with the E2. Even PL adapters work great with an MFT mount opening up more possibilities but, the key for shallow depth of field is using fast glass wide open. F4 doesn’t bring in that soft background we all like so much on an MFT sensor.
Accessories For The E2
Since the E2 is basically just a brain it requires a monitor or EVF. I found the E2 to be easy to configure with both. I used a Zacuto Graticle HD mounted on the SmallRig cage with a SmallRig EVF mount. Nothing fancy with minimal adjustments available.
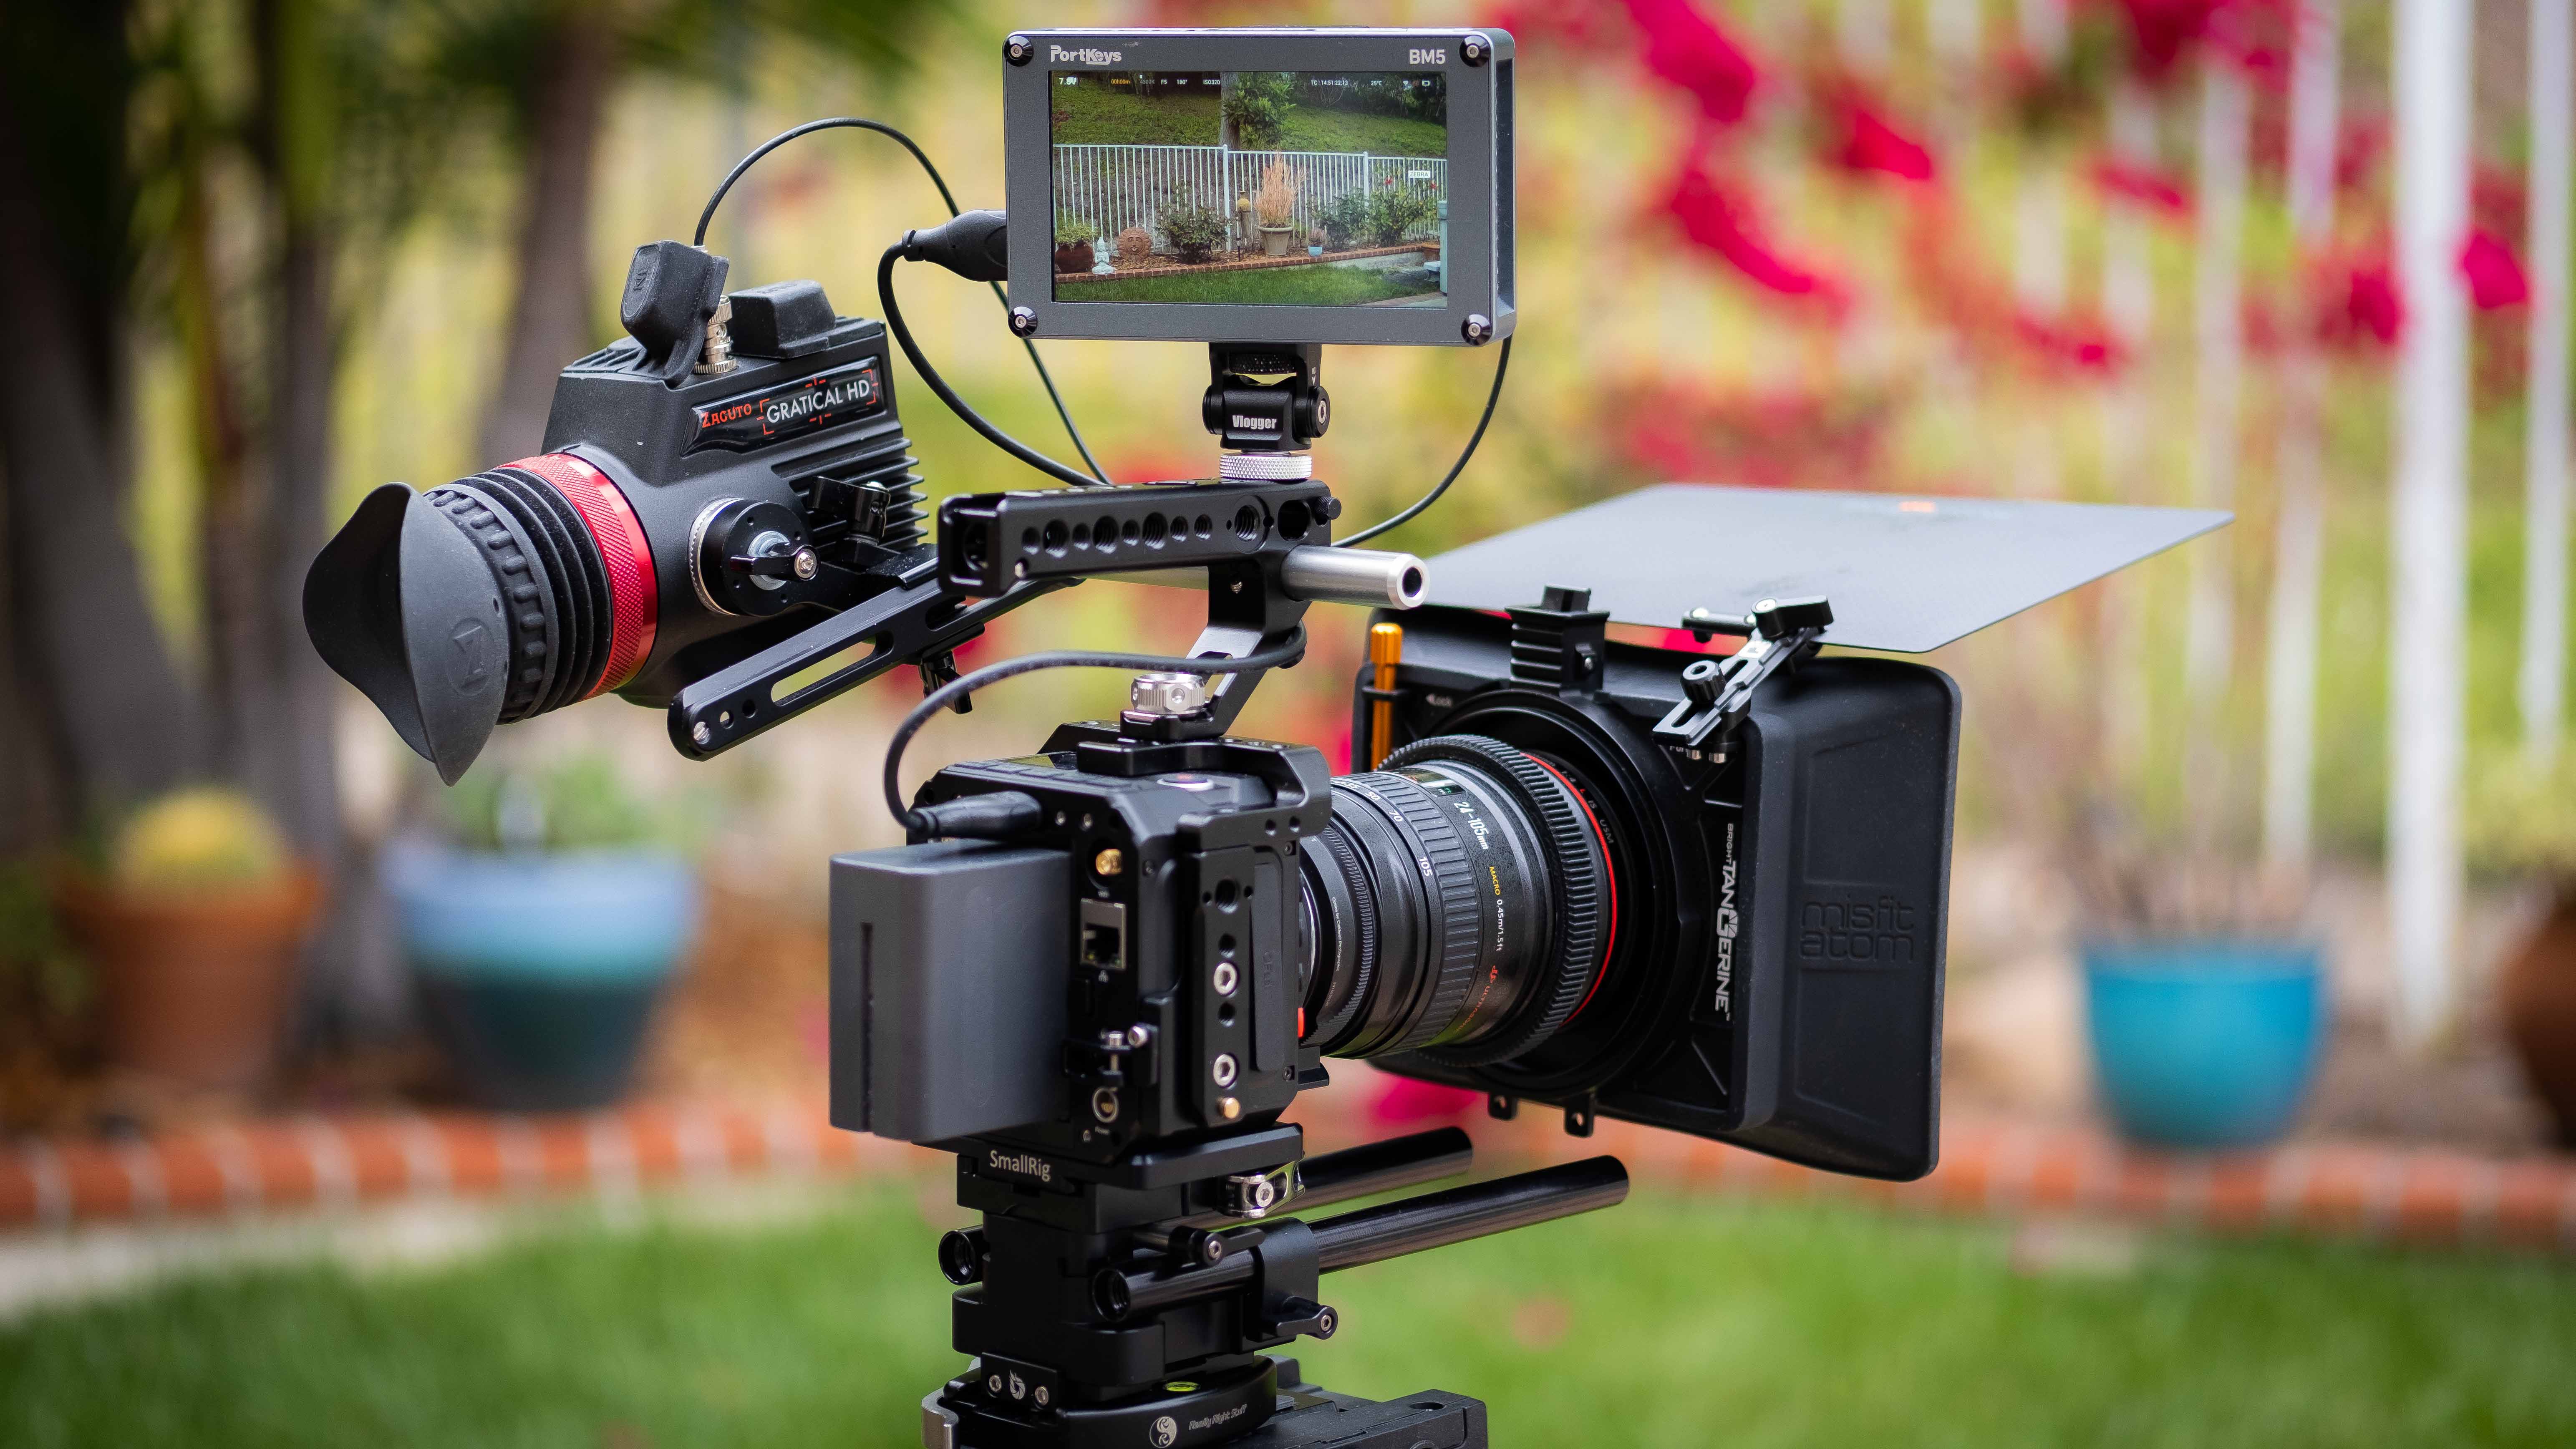
For a monitor, the new Portkeys BM5 is a very good choice. It’s a 5″ monitor and includes a camera control feature that actually works very well.
The monitor is also color accurate and is tunable. Check out my full review of the Portkeys BM5. If keeping it small is the goal the Atomos Shinobi is another great choice.
Would you buy a GH5s or E2?
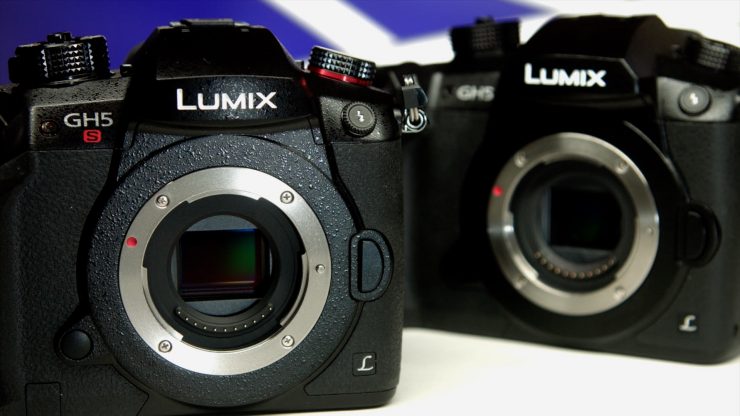
I figured you would ask me that since both are around the same price and have an MFT sensor. I would go for the Z Cam E2 personally. I like the color and skin tone on the E2 a lot. Not that the GH5 color isn’t good. Defiantly the best so far for the GH series. I prefer the look of the E2.
I have what I need to make the E2 into a full-on cinema camera so the added expense of an EVF and or monitor isn’t a factor. The GH5s LCD and EVF are both usable so the camera doesn’t require an external viewing option. Adding a cage is a good idea for a cinema camera setup. The GH5 is usable right out of the box as the E2 does require some sort of monitoring.
I do feel the E2 noise reduction in higher ISO is superior to the GH5. I found the GH5 noise reduction a little heavy handed and it smooths skin and detail more than I like. If you need stills the hybrid GH5 with IBIS is the choice. E2 and internal ProRes for the win! The GH5 10-bit All I is a PITA to edit and I had to transcode it.
While this isn’t a complete list of one over the other it is a choice many will be making and your needs are going to be different from mine making the decision to pick one over the other different. I do feel you can’t go wrong either way as both have nice color science.
How about the Pocket 4K?
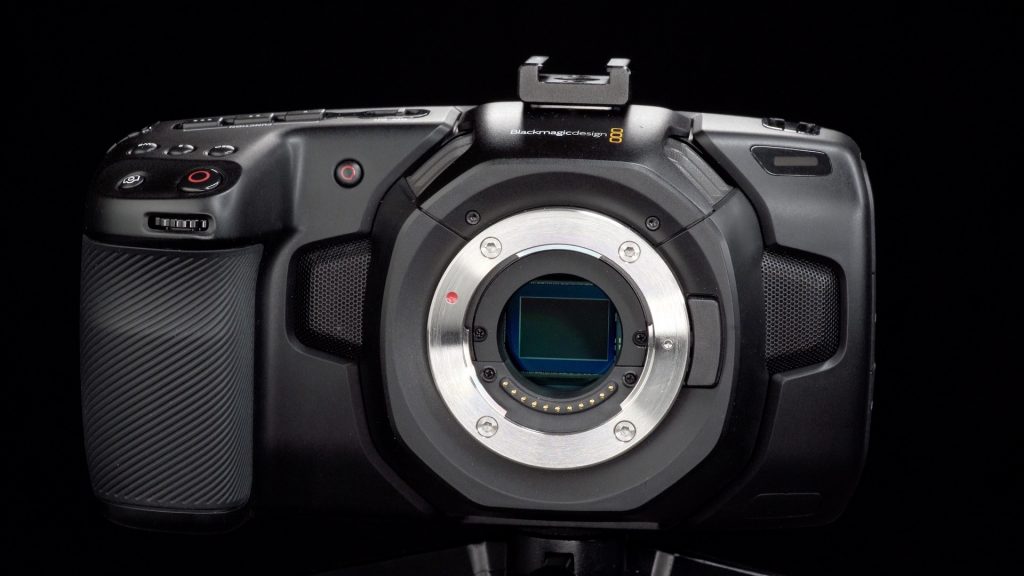
The Blackmagic Design Pocket Cinema Camera 4K does have a lovely image and also handles noise very well. I reviewed the Pocket 4K when it was first released and had some issues. The camera eats through batteries and it shut down when the battery had more charge left. BMD addressed these issues with a firmware update.
The color science is very good with the Pocket 4K, and it records in 4K ProRes internally. That’s a big deal! The cameras do share a lot in common. However, I still would lean towards the E2. The build quality alone is much better and battery life is crazy good. With the Pocket, you do have BRAW if Raw capture is important to you. Z Cam is developing a Raw codec for the E2. The image coming from the Pocket 4K is very nice. I prefer it over the GH5.
What’s exciting is we have a few choices in the Micro Four Thirds sensor market, and those choices are all excellent. It’s important to do your homework and find the features that work best for the type of shooting you do. Take the emotion out of it and you will find the right camera. All three cameras are very capable of delivering great images.
Conclusion
I like it! The Z Cam E2 has a very pleasing image with nice color and skin tone. Color science is the most important thing I look for in a camera. The E2 has it. Due to the small size of the E2 adding devices can be a challenge. When in a cage mounting your accessories is fairly easy depending on how much you need. Adding a riser with rails is a great way to add more kit on the back of the camera. I found my Zacuto Gratical HD fit nicely on the side with minimal kit.
Micro four-thirds isn’t my favorite sensor size. I like S35. It gives me a nice balance of shallow depth and f-stop options. Full Frame can be harder to work with due too the shallow depth of field being so prevalent and closing the iris to control it. With MFT you need fast lenses to get more shallow depth.
Noise
The Z Cam E2 does an excellent job controlling noise. They have created sophisticated noise reduction algorithms to keep the image clean while not softening it. This isn’t easy to do because noise reduction in camera generally makes textured items smooth and that looks really bad especially on the skin. It looks like plastic. Yuck! Very impressed with the low noise when operating in normal ISO levels with controlled lighting. Even when the ISO is high at 10,000 the noise isn’t bad. Yes, it’s present. I personally don’t need super low light cameras since all my work is in controlled environments with for the most part proper lighting but I do feel you can get great images when you have to push the ISO, also it cleans up easily in post.
Codecs
Codecs. Seems every camera that comes out has its own flavor. I appreciate getting the easy to work with Internal ProRes options. So many codecs are hard to edit with especially the newer 10-bit options in newer cameras. You have to transcode or have a proxy workflow to edit smoothly with them. Also having the ProRes option makes an external recorder unnecessary.
The Price is Right
At $1999 for the micro four-thirds camera, the price is amazing. Yes, you will need to add on an EVF and or a monitor to have a usable camera, but many DP’s already own at least an external monitor. I prefer an EVF and those costs as much as the camera does. The Z Cam E2 has its quirks, but once you learn the camera it’s not difficult to use. A cage really is a good idea.
The new 0.86 update, shows how Z Cam is improving the camera over time. It’s very positive to see a company that is continuing to make advancements and fix bugs plus listen to users feedback on what they would like to see implemented. Z Cam does this. They have a very active Z Cam E2 Facebook Group where they engage with E2 users.
Z Cam has an S35 and full frame camera in the works and I can’t wait to try them out.