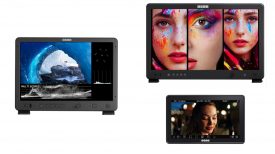
At NAB 2019, I visited PortKeys to cover their new EVF, the OEYE-3G EVF. I also had a look at the new competitively priced PortKeys BM5 5″ field monitor that is now shipping and retails for $499 USD.
The BM5 is the second monitor in the BM series, following the BM7 that is a 7″ version. Both are bright, daylight viewable 2000 nit IPS displays. My first impressions of the BM5 are positive. It has an excellent, bright display that is sharp with accurate color and controls to manually calibrate. The toolset is solid and also has a trick up its sleeve that I haven’t seen in other monitors in this price range.
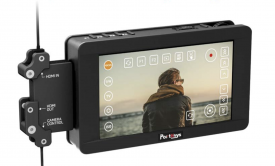
The BM5 can connect directly with a compatible camera and control some camera functions via the touch screen. Very interesting, indeed. Let’s dive in and go over the build, features, and usability of the PortKeys BM5 5″ SDI/HDMI field monitor. Quick side note. The color of the retail version is now black, not the seafoam green in the images I took with the early prototype.
What’s Included
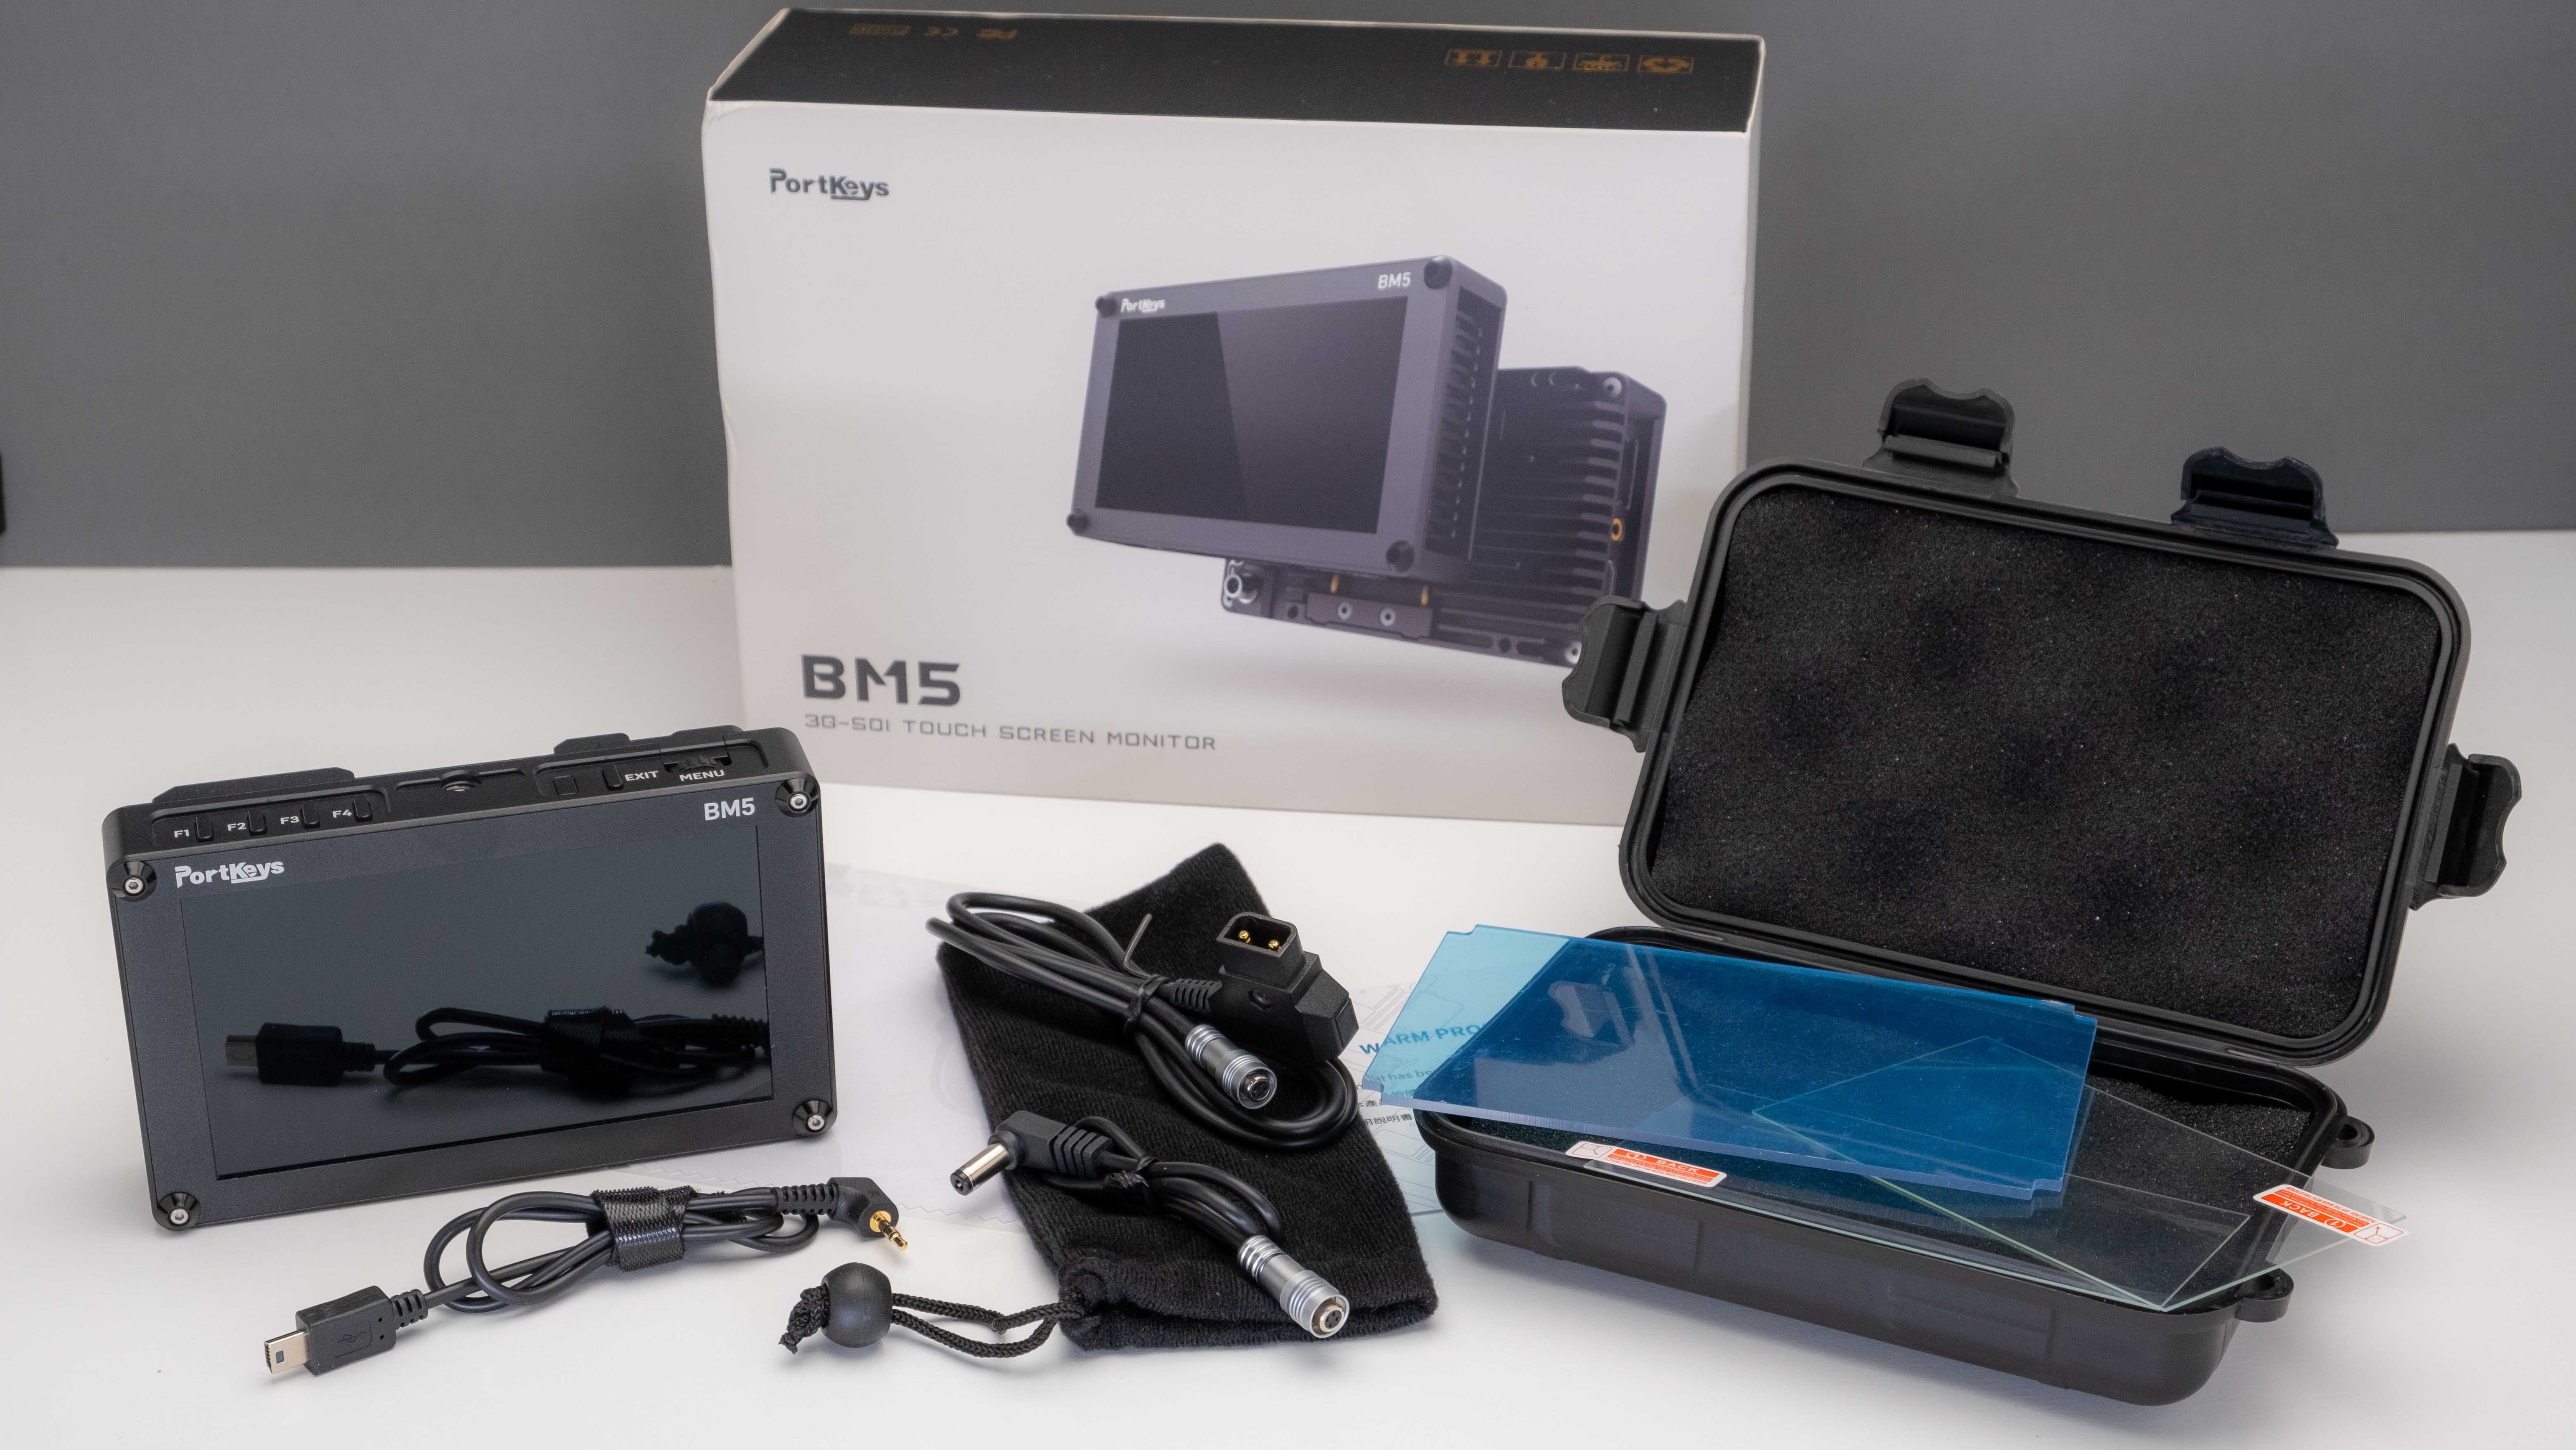
The Portkeys BM5 comes with a few accessories. Notably, the camera control cable for the camera you selected when ordering and two power cables. Also, included is a hard shell plastic case with foam inserts on both the lid and bottom. The BM5 fits nice and snug in the hard case. This is a nice included item. It’s still small so it won’t take up much more room in your bag and will protect it from dents and possible scratches on the screen. Two smaller LCD protectors and a full Gorilla Glass cover are also included.
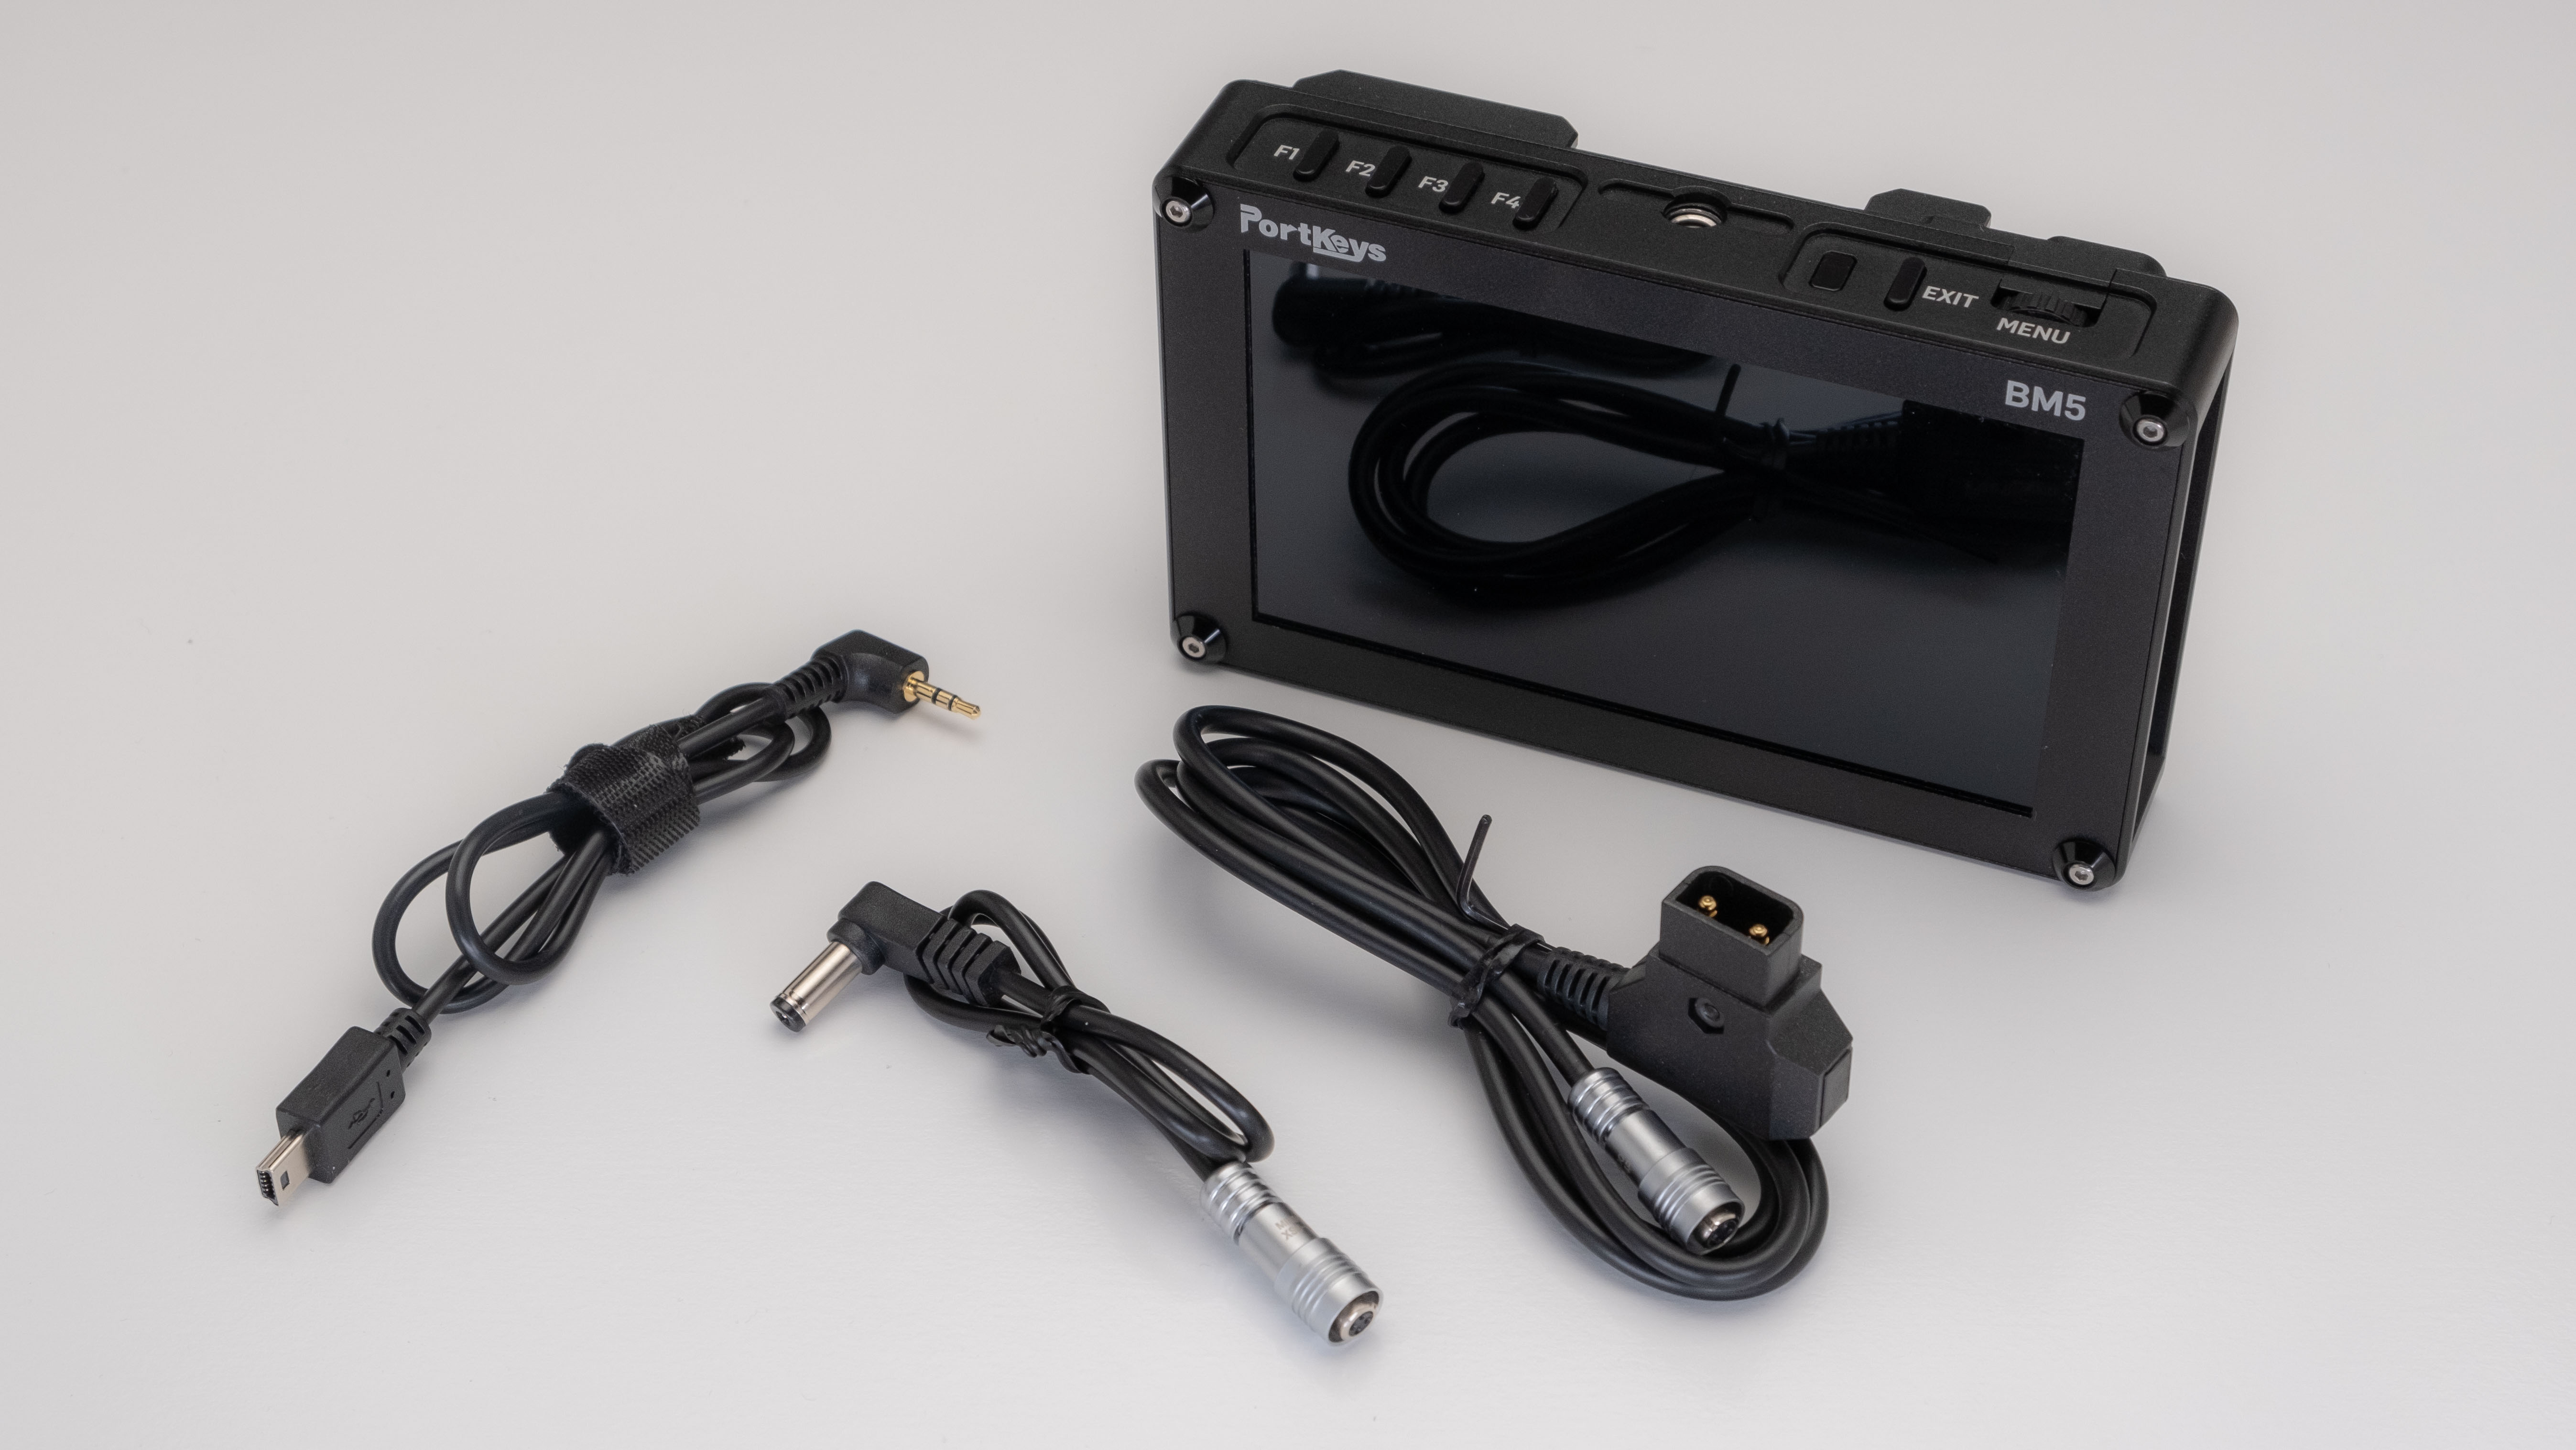
For powering options Portkeys includes two power cables. A D-Tap to LEMO and DC plug to LEMO. More on powering the BM5 coming up.
Portkeys BM5 Main Features
The PortKeys BM5 is loaded with features. The main one is the 2000 nit screen that is daylight viewable. It is a touchscreen but doesn’t use it exclusively to interact with the monitor. I like that as touching the screen a lot puts fingerprints all over it.
You have four preset buttons on top of the BM5 that are programmable.
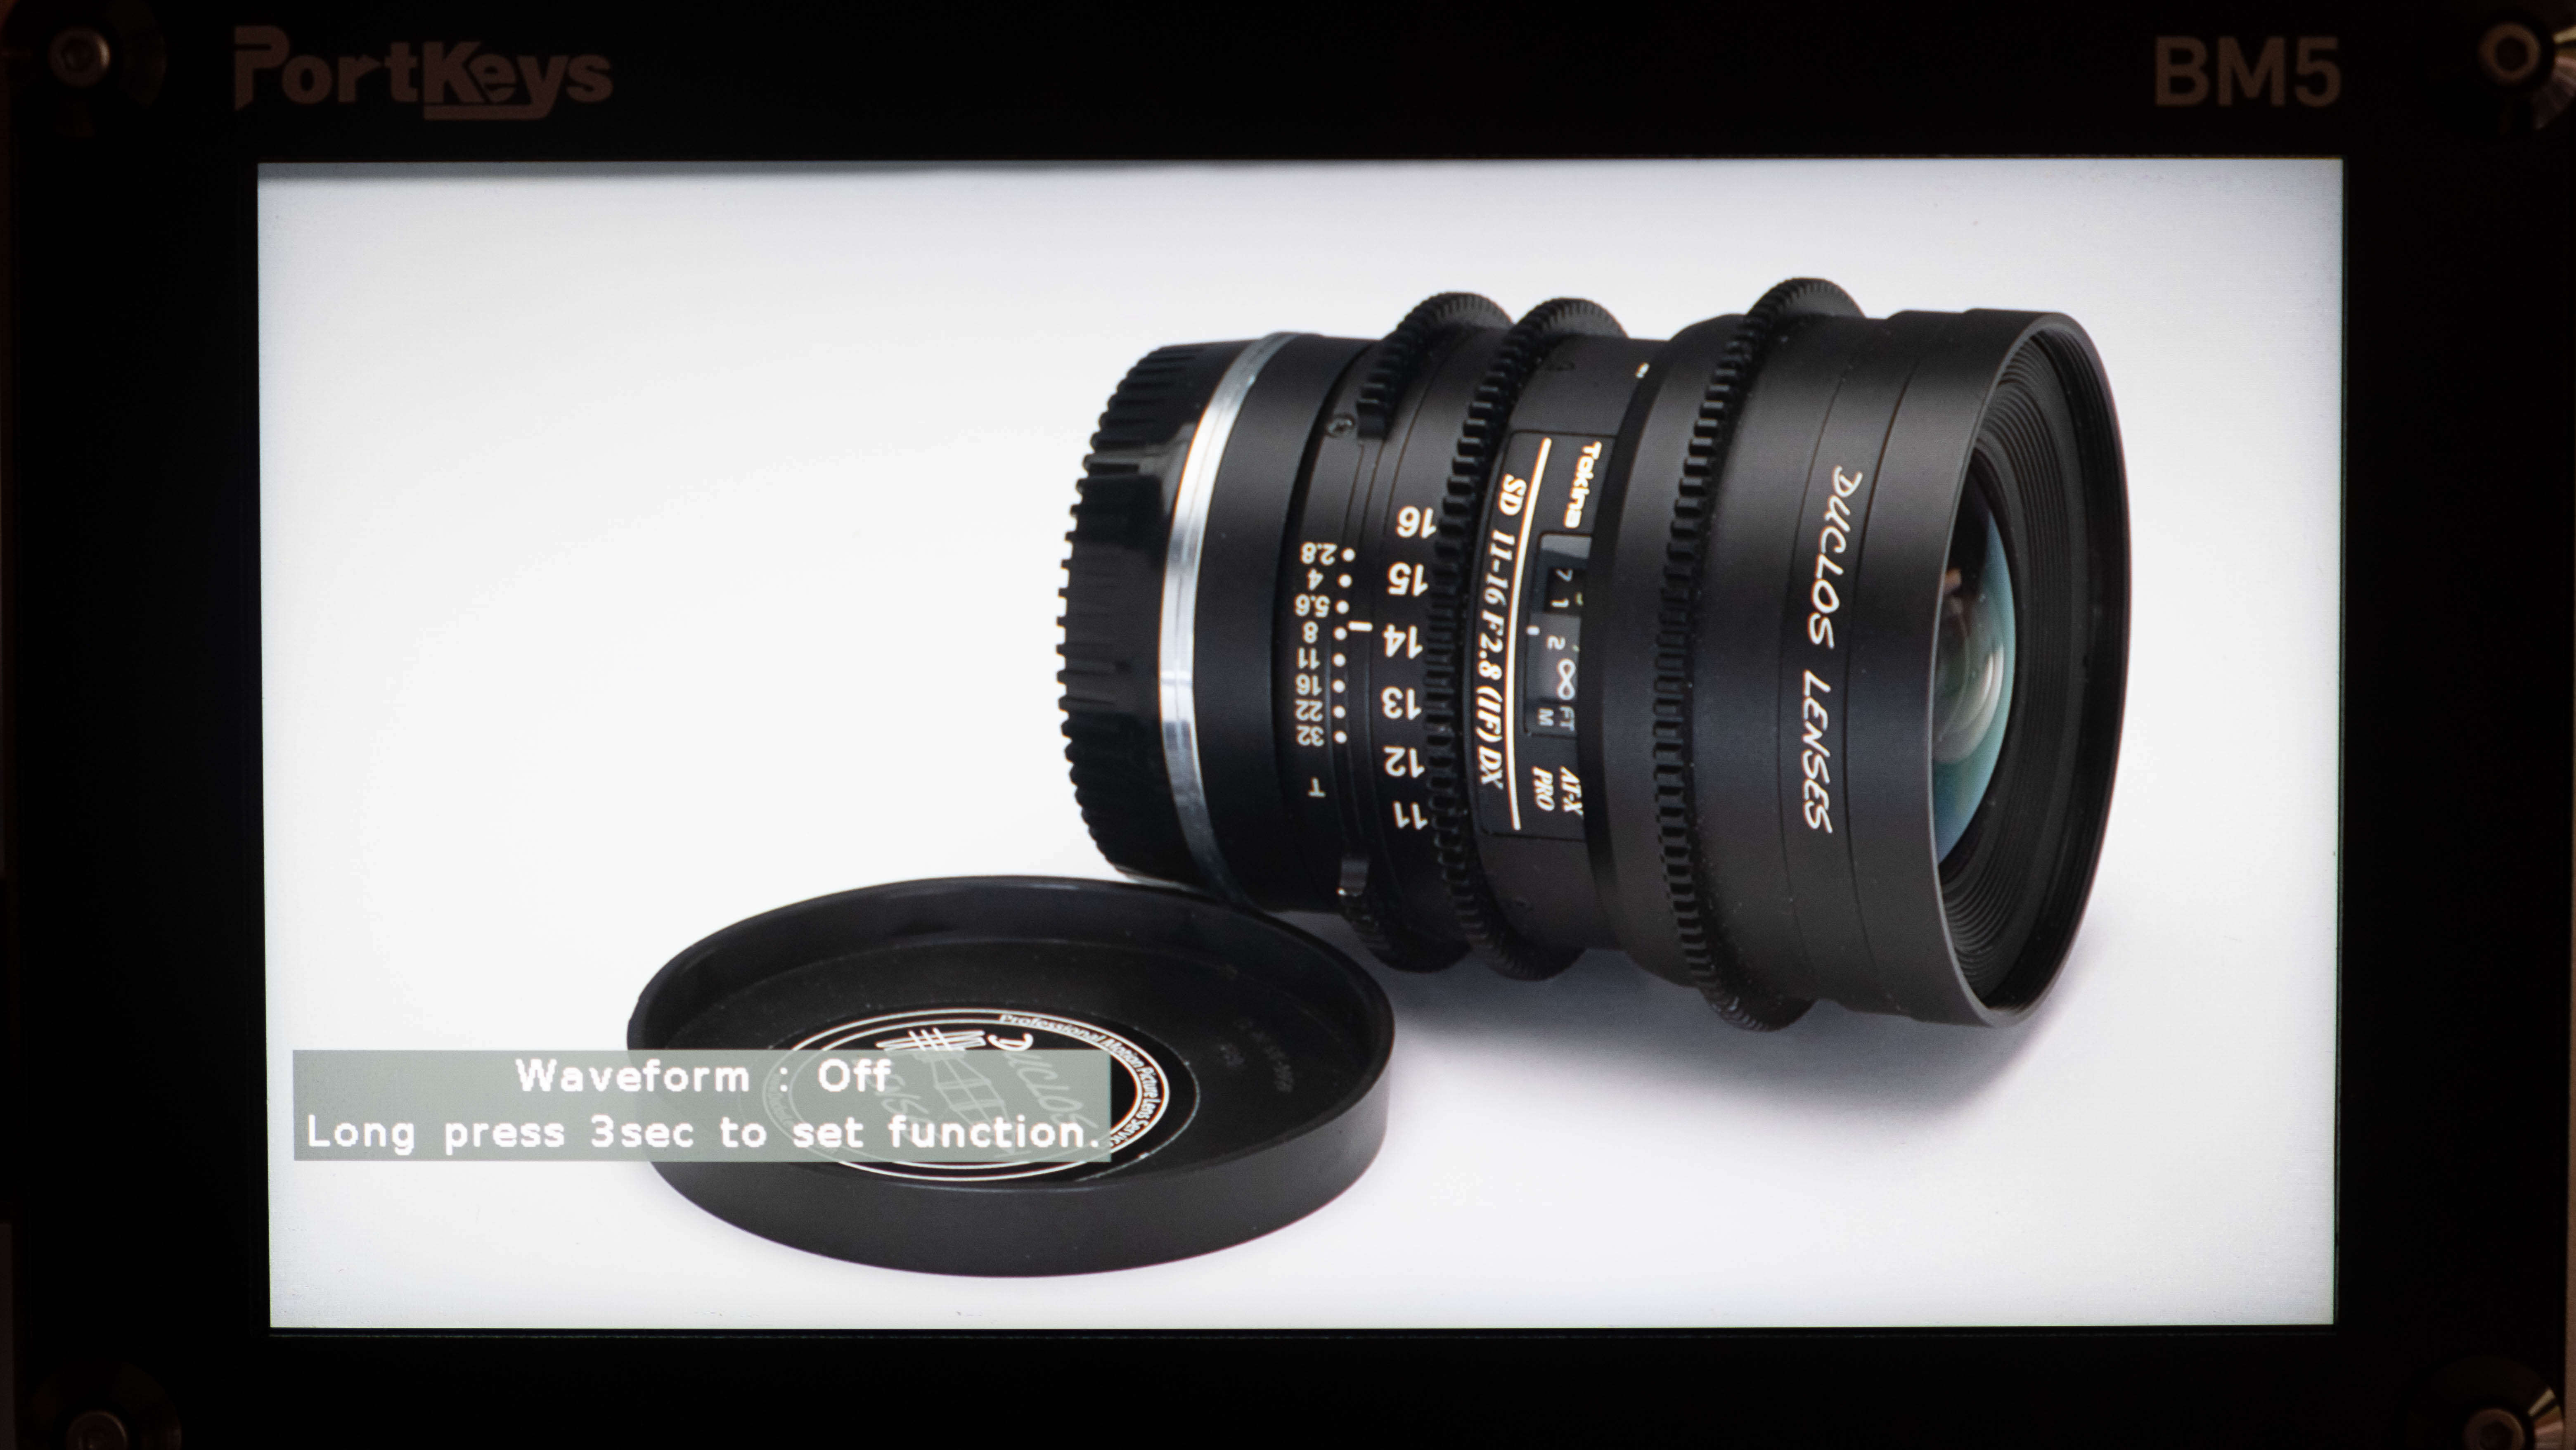
One thing I found slightly annoying is a message appears every time you press a shortcut button reading “Long press 3sec to set function”. While it was helpful the first time every time becomes annoying. I want to turn it off, please!
Portkeys BM5 features
- 2000 nit full HD IPS screen
- 3D LUT upload via USB
- Waveform, RGB Parade, False Color, Vectorscope, Zooming, Zebra, Peaking, Zoom
- Waveform SDI Output
- Guides, Check Field, Grids
- Audio Meters
- Image Flip
- Backlight – Low, Medium, High
- Color Temperature, Custom RGB (Manual temperature calibration with RGB controls)
- Display Flip, OSD Flip
- Cross Hair
- Camera Control
- SDI TALLY
- HLG
- H/V Delay
- Aspect
- Brightness, Contrast, Chroma, Sharpness, Tint
- UnderScan
- 3D LUT SDI Output
- Fan Control – Low, Medium, High
Waveform preset options
| Full Screen | * Choose one RGB parade Luma waveform Vectroscope LUMA Histogram RGB Histogram |
| Four Screen | Live View Luma waveform Vectroscope RGB parade |
| All Types | Live View Audio Meters RGB Histogram Histogram RGB parade Vectroscope Luma waveform |
| User Mode | *Add up to 4 tool options below plus location on Luma Waveform RGB Waveform Luma Histogram RGB Histogram |
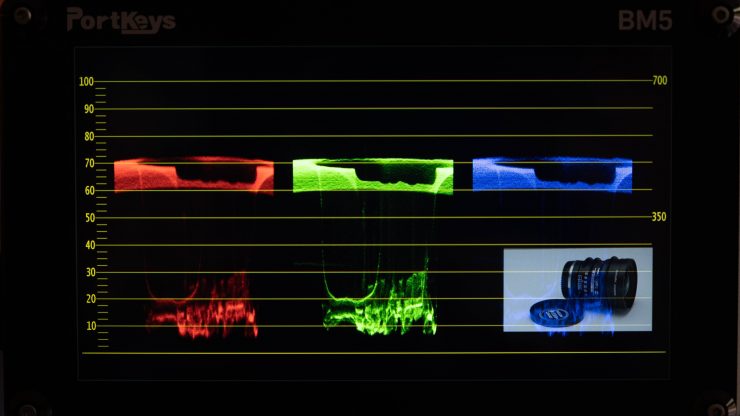
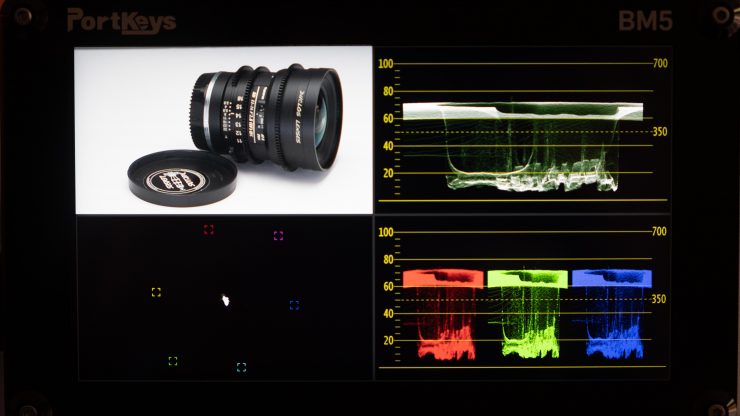
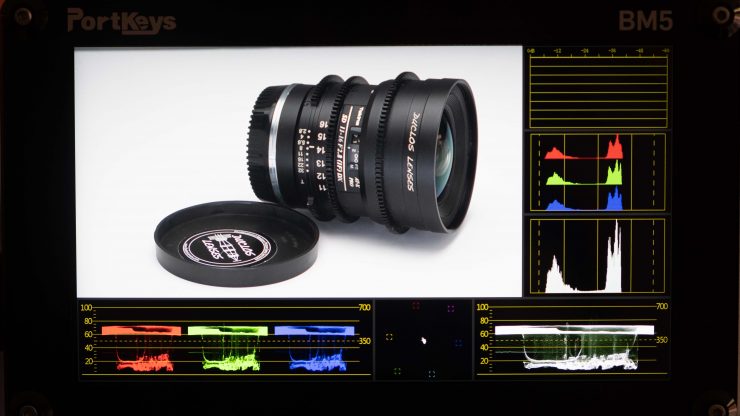
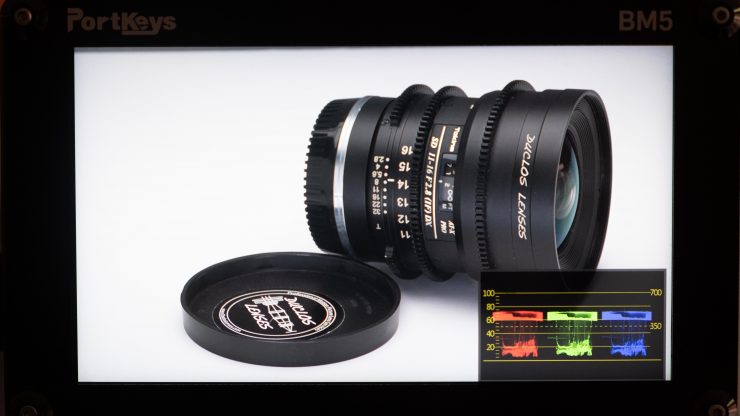
The waveform shortcut option includes four different look pages. The first and last that appears is programmable. You can set it to be RGB parade, Luma Waveform, Vectorscope, LUMA Histogram or RGB Histogram. A downside is you can’t use the shortcut for only one tool. It has pages and each tap of the shortcut opens a Full Screen, Four Screen layout then All Type followed by User Mode that allows the user to add up to four tools one in each corner of the screen. I would like to be able to have just one waveform tool option as well so I don’t have to go through all four when I just want to see one.
Menu System
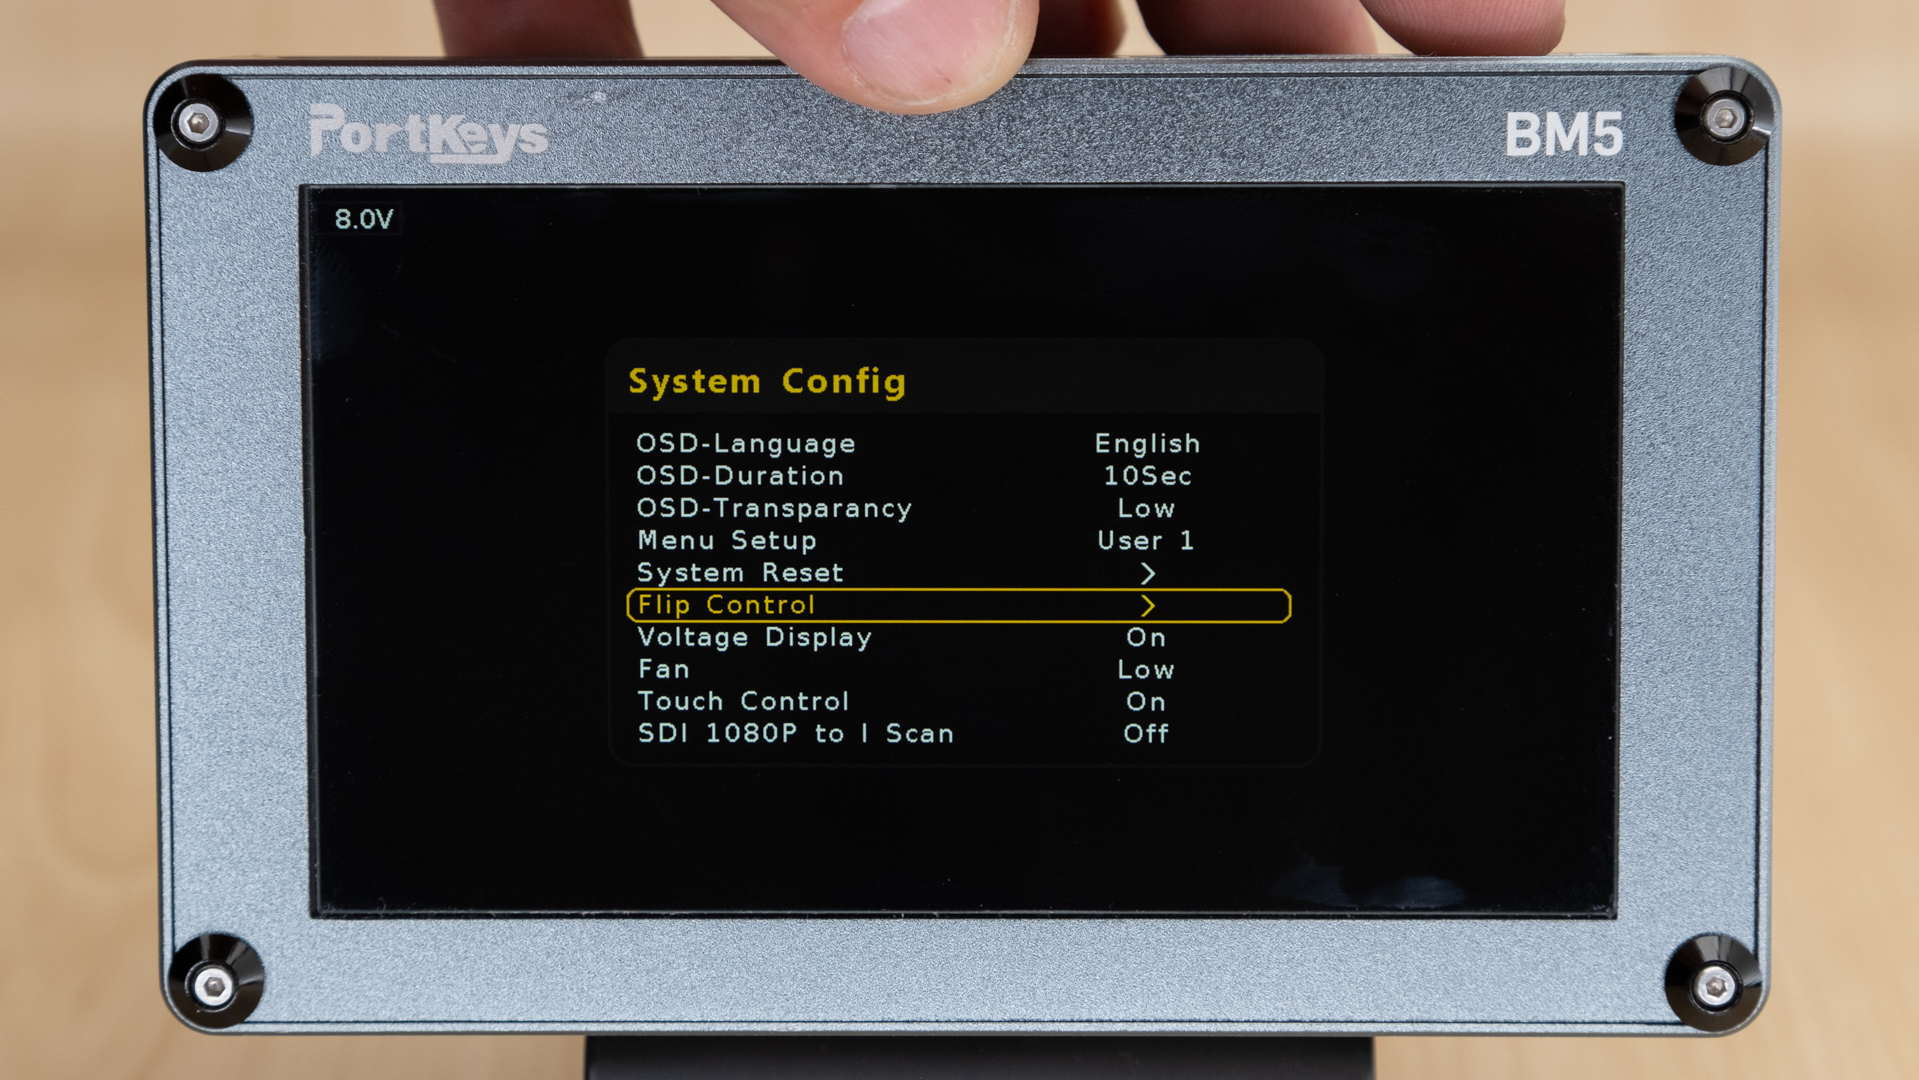
While the toolset is broad, the menu system is nothing to be excited about. The software seems to be an afterthought in a lot of products. Atomos and SmallHD both do an excellent job in creating an easy solution in changing settings and fast access to tools. While the BM5 isn’t horrible by any means it does have a lot of room to improve and has some very cool tools namely the camera control functions.
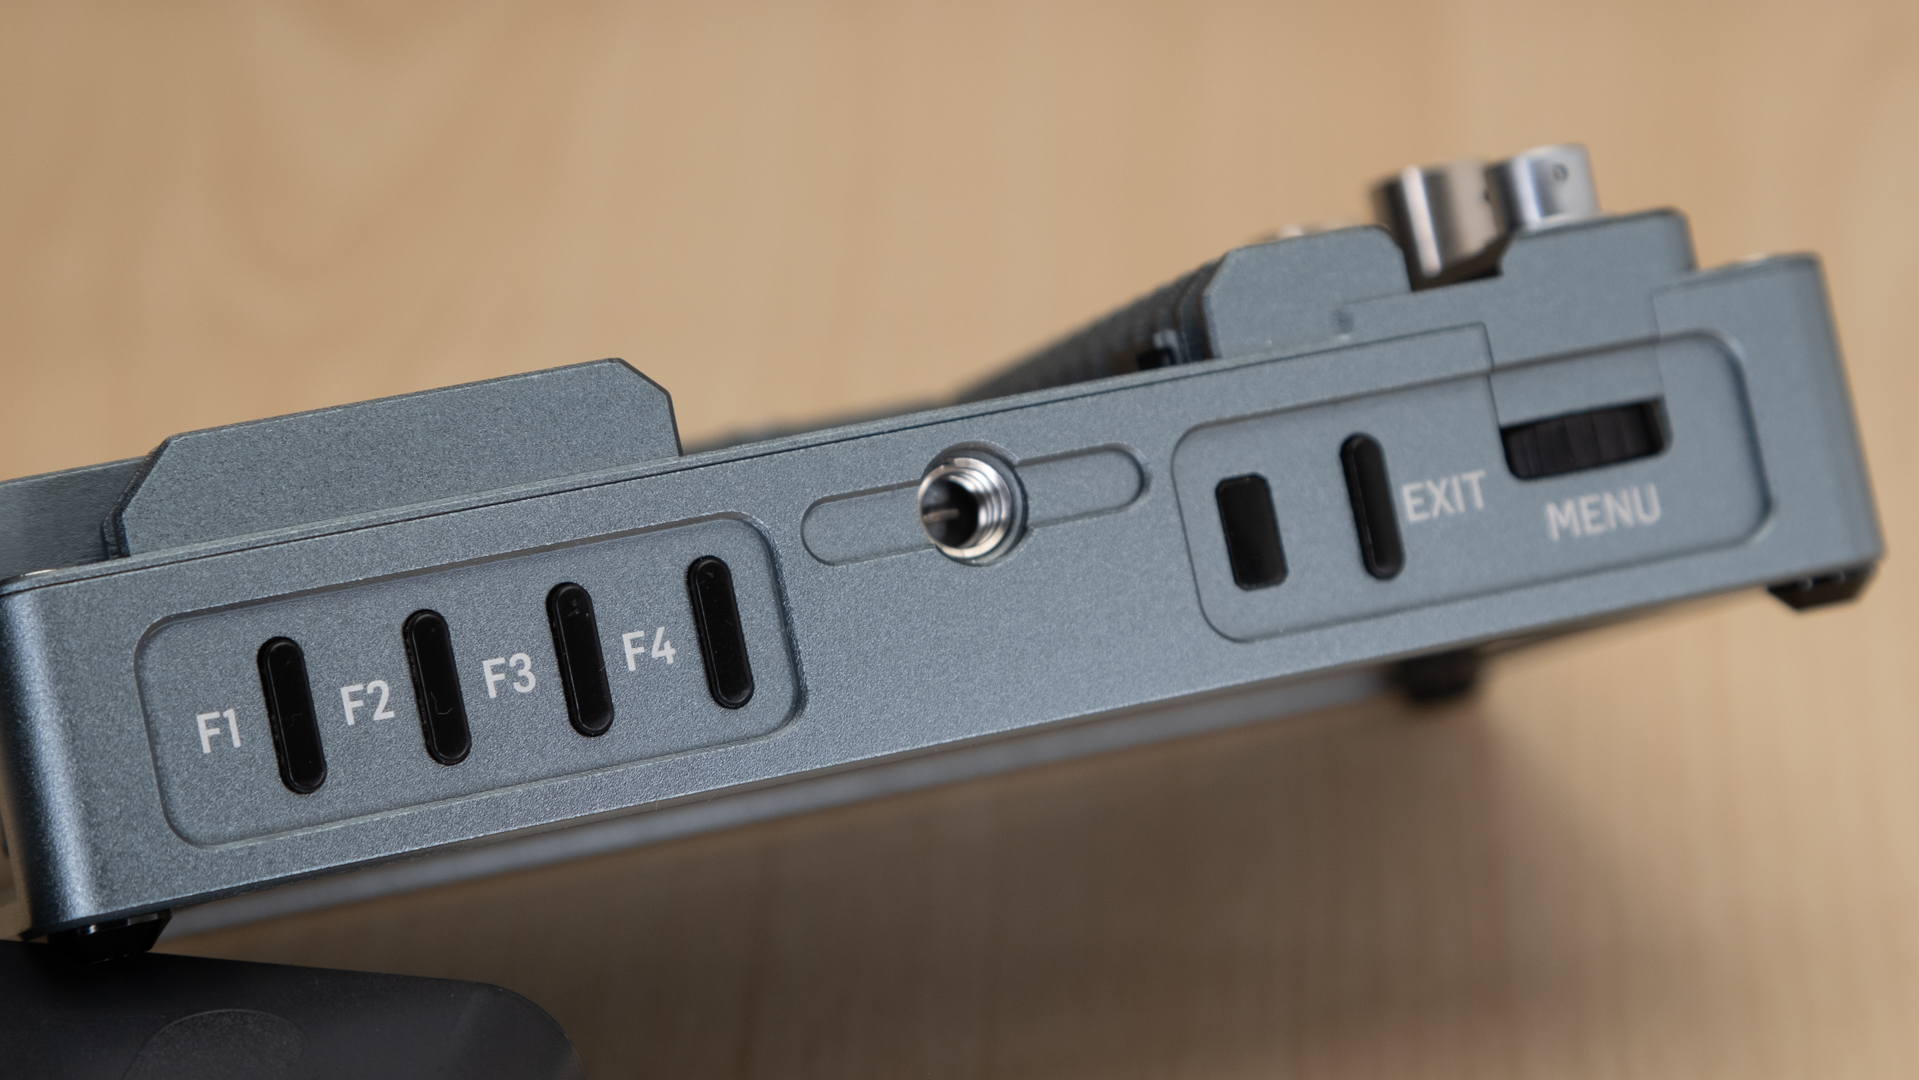
A dual-scroll wheel/button is how you access the menu. I’ve seen this style many times before. Push the wheel in and the menu pops up with options. To make a quick exit an EXIT button is available.
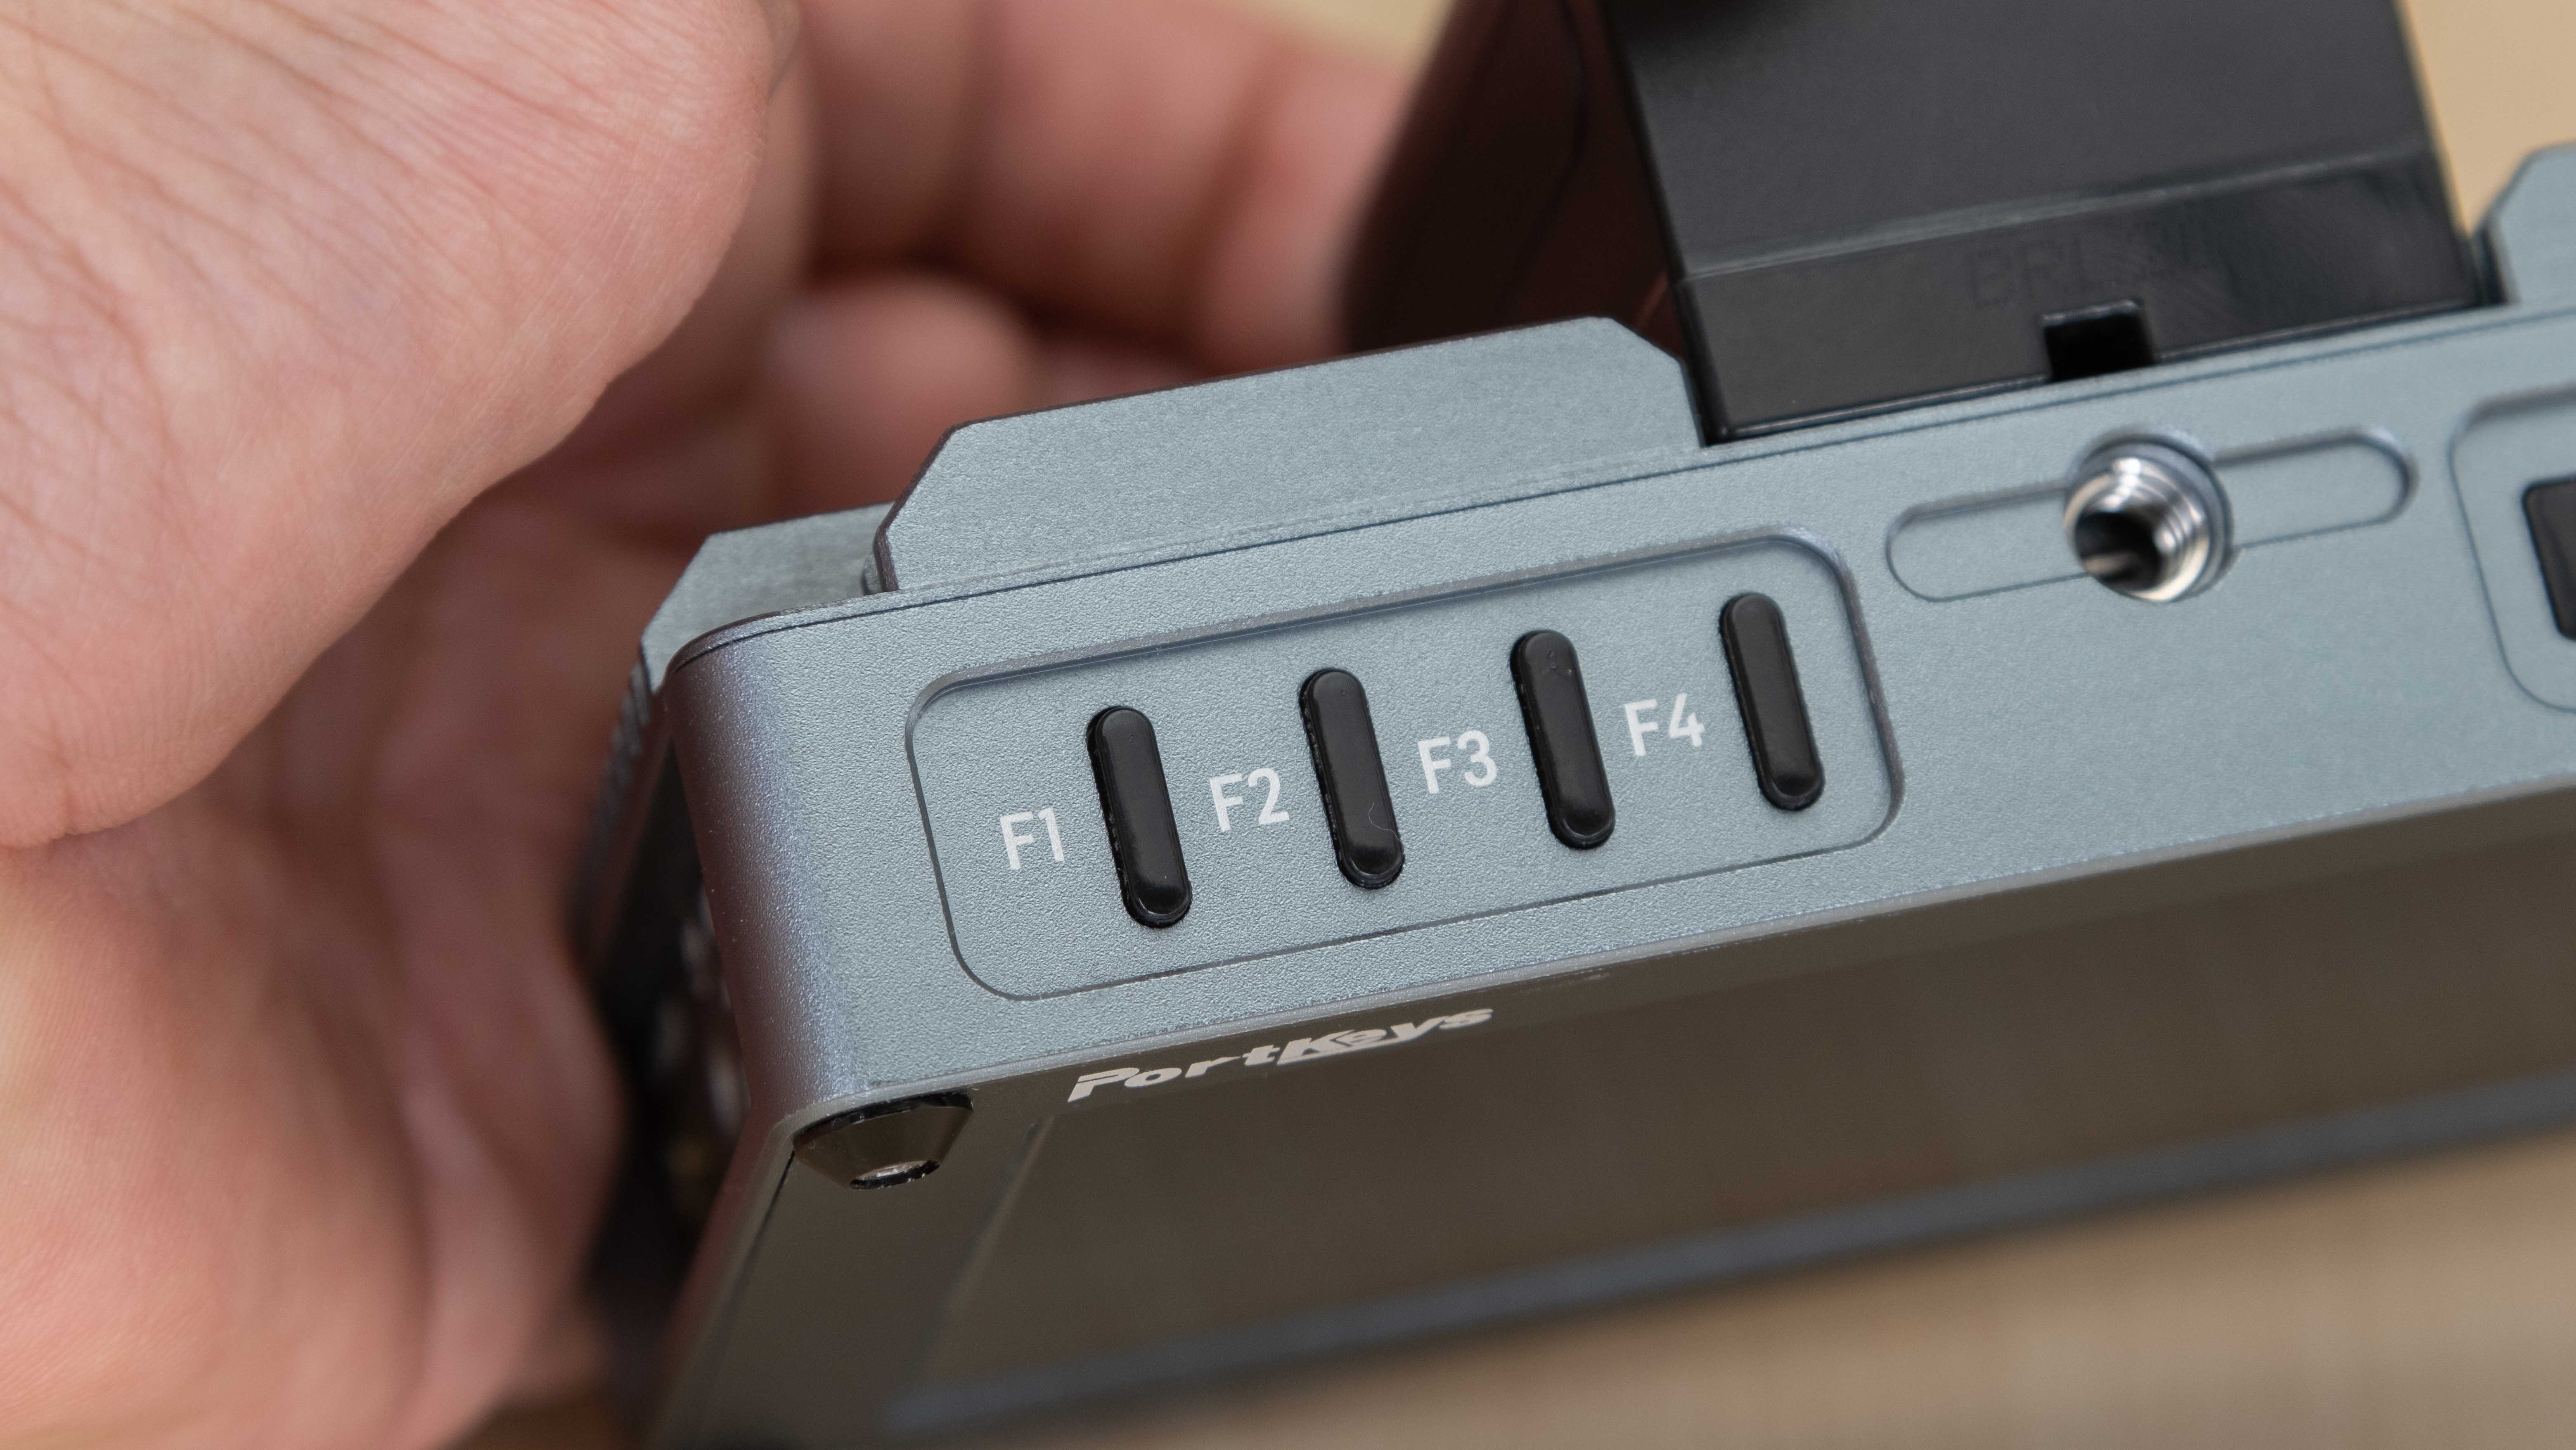
On top of the BM5, you have four programmable presets. They can be programmed in the main menu. As I mentioned earlier some tools have custom settings. In order to change the setting you hold down the shortcut button for 3 seconds and it can now be programmed with the options for the tool that works best for you like the color or strength of Peaking. Easy enough! The tools available are nice for a $499 monitor.
Assist tools
- False Color with IRE scale
- Peaking
- Waveform
- Histogram
- RGB Waveform
- Vectorscope
- Audio level
- 3D LUT
- Guides
- Zebra
- Check Field
- Grids
- Image Flip
- Zooming
- Cross Hair
- Waveform SDI Output
- SDI TALLY
- Display Flip
- OSD Flip
- H/V Delay
- Aspect
- Custom RGB
- UnderScan
- 3D LUT SDI Output
Updating Firmware and Camera Control
Both the Camera Control function and main firmware can be updated via the USB input. The updates are done separately. For firmware, the update is selected in the main menu. Camera Control is done inside the feature by holding the shortcut button down and selecting update.
Portkeys uses a .RAR compressed file that requires a 3rd party to unpack. I’m on OSX and used a free RAR Extractor Lite app from the App Store.
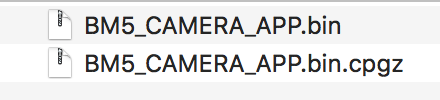
After opening the BM5 Control FW 1.2.rar I had to double click the BM5_CAMERA_APP.bin and it now adds another file with the extension .cpgz added. This is the file to add to a USB thumb drive to perform the update. It took a little patience to figure it out but in the end, it all worked just fine.
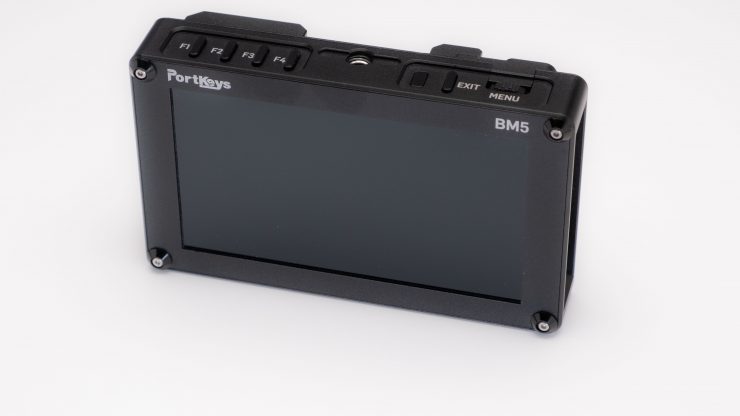
Build Quality
The all aluminum build quality of the BM5 is impressive. It has a solid feel to it and a little chunky in the hand. This can be a good thing as well as a potential problem as a solid build tends to add weight. The BM5 is not heavy, coming in at only 12 oz or 340 g. It weighs a little more than an Atomos Ninja V at 11 oz. however, it’s heavier than an Atomos Shinobi at 7.1 oz or 200 g. The Shinobi chassis is all plastic helping it to be feather light.
The BM5 comes with a Gorilla Glass protective cover that is installed by removing the screws on the front frame of the monitor and placing the Gorilla glass in place. An issue I found is tightening the frame down over the glass adds pressure to the screen causing a slight yellow color in the corner. It goes away if you back the screw out a little but I worry the screw will come loose and fall out over time. This issue was compounded by me tightening the screws and putting too much pressure on the glass and cracked it. Oops! I think PortKeys should redesign the Gorilla Glass cover as I really didn’t overtighten the frame.
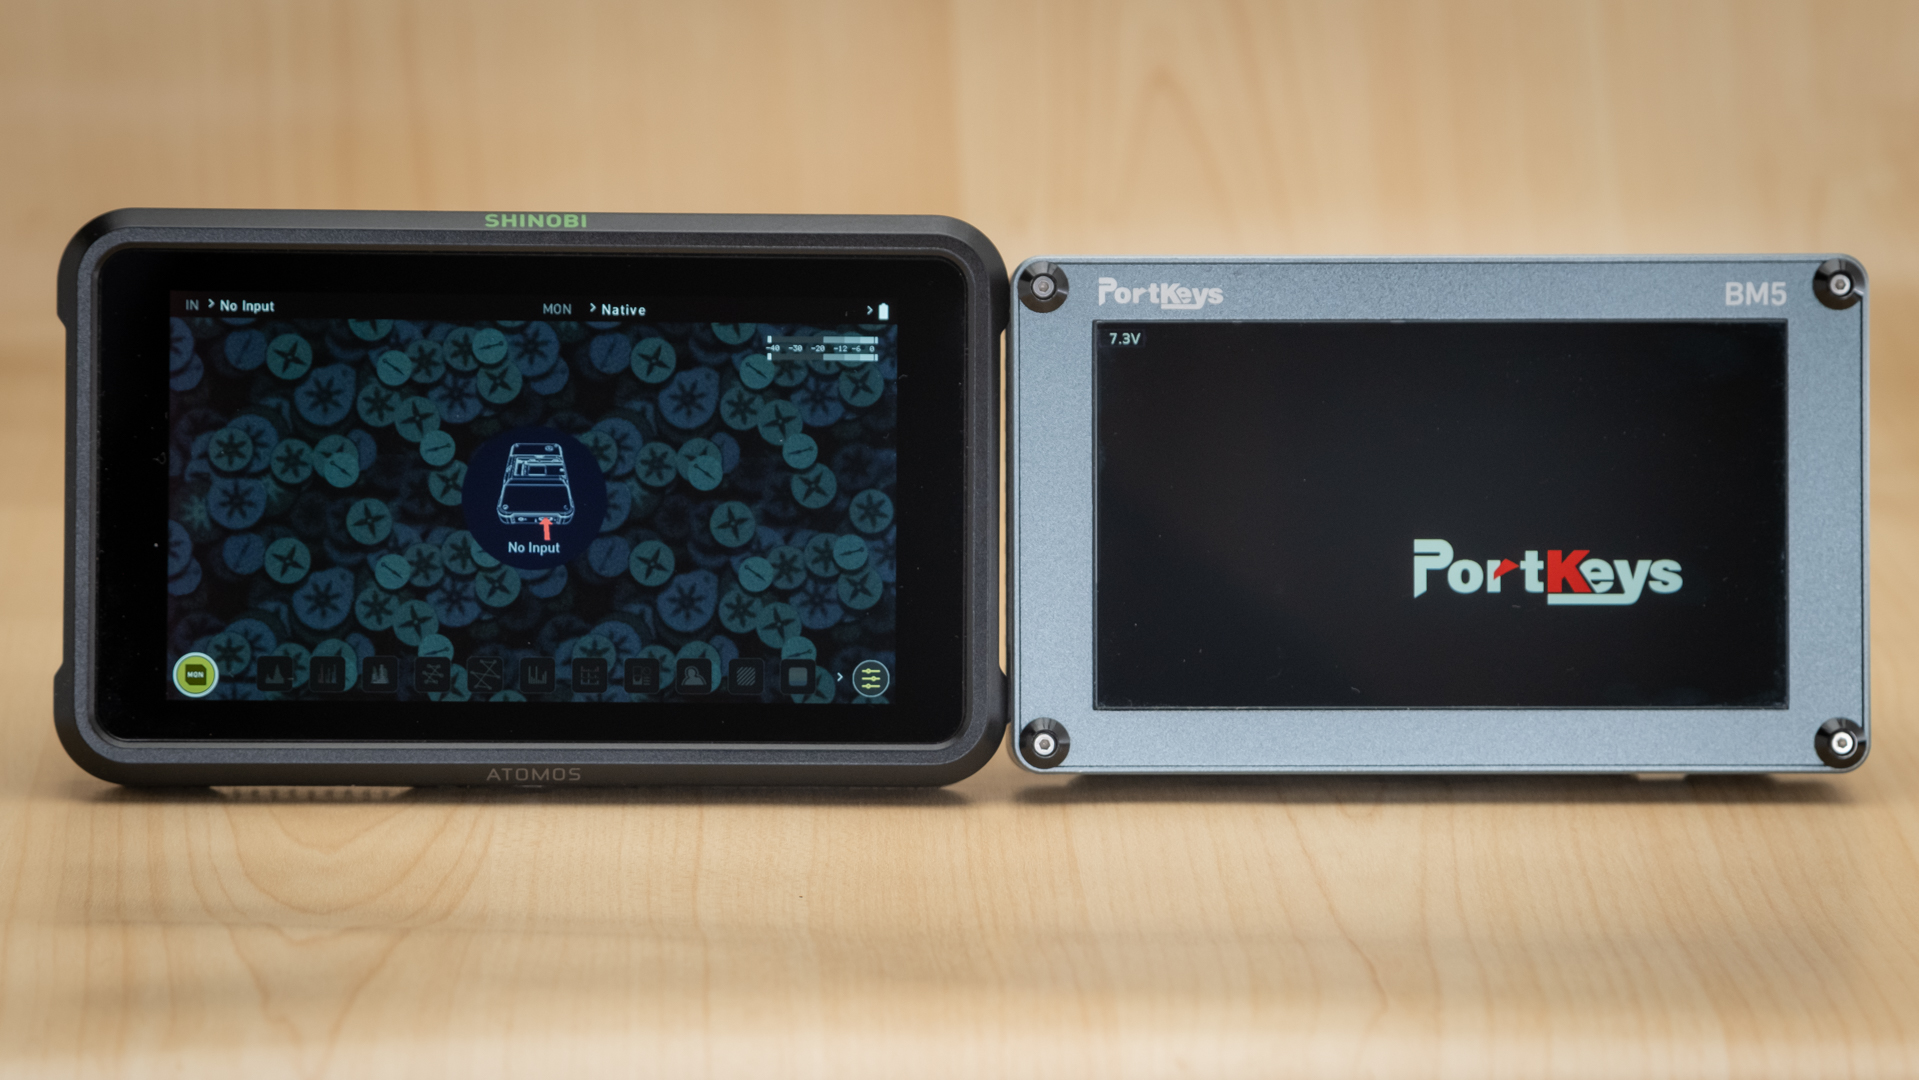
At first glance, I thought the IPS screen was smaller than 5″ and that’s due to the chassis and the bezel or frame that covers the display. With some monitors, the bezel is smaller and doesn’t cover the display’s edges as much leaving a glass black frame around the LCD. With the BM5 the chassis goes right to the edge of the viewable area of the LCD panel. It doesn’t block the 5″ viewable image at all and is actually smaller in overall size than the Atomos Shinobi.
On the back are heat sinks to keep the BM5 cool. The monitor does get hot, however, all monitors do. I didn’t experience any overheating issues.
On the side

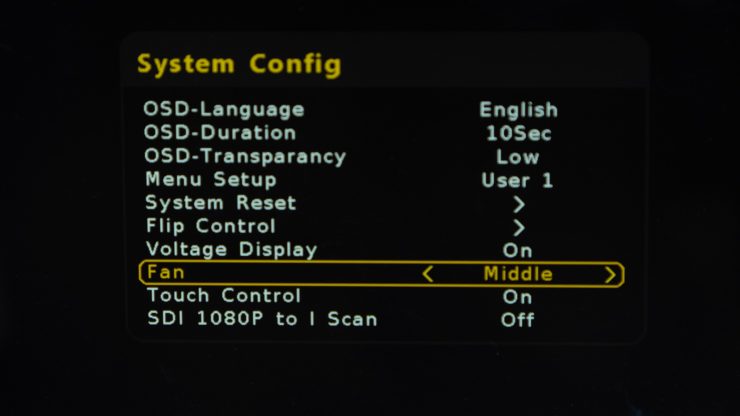
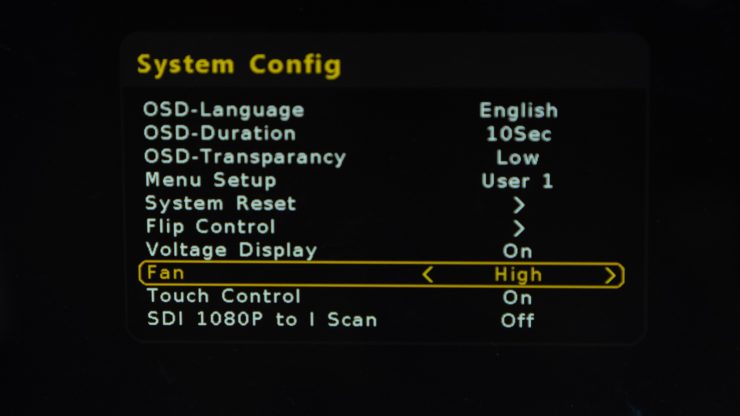
The good news is the fan can be controlled in the menu with three settings. Low, Middle and high. At the low setting, the monitor is very quiet and won’t interfere with audio capture. In fact, I can’t hear it at all in the low setting. In middle and high it’s very audible. I didn’t experience any overheating issues with the monitor set to Low.
For mounting 1/4″ 20 taps are available on top and bottom.
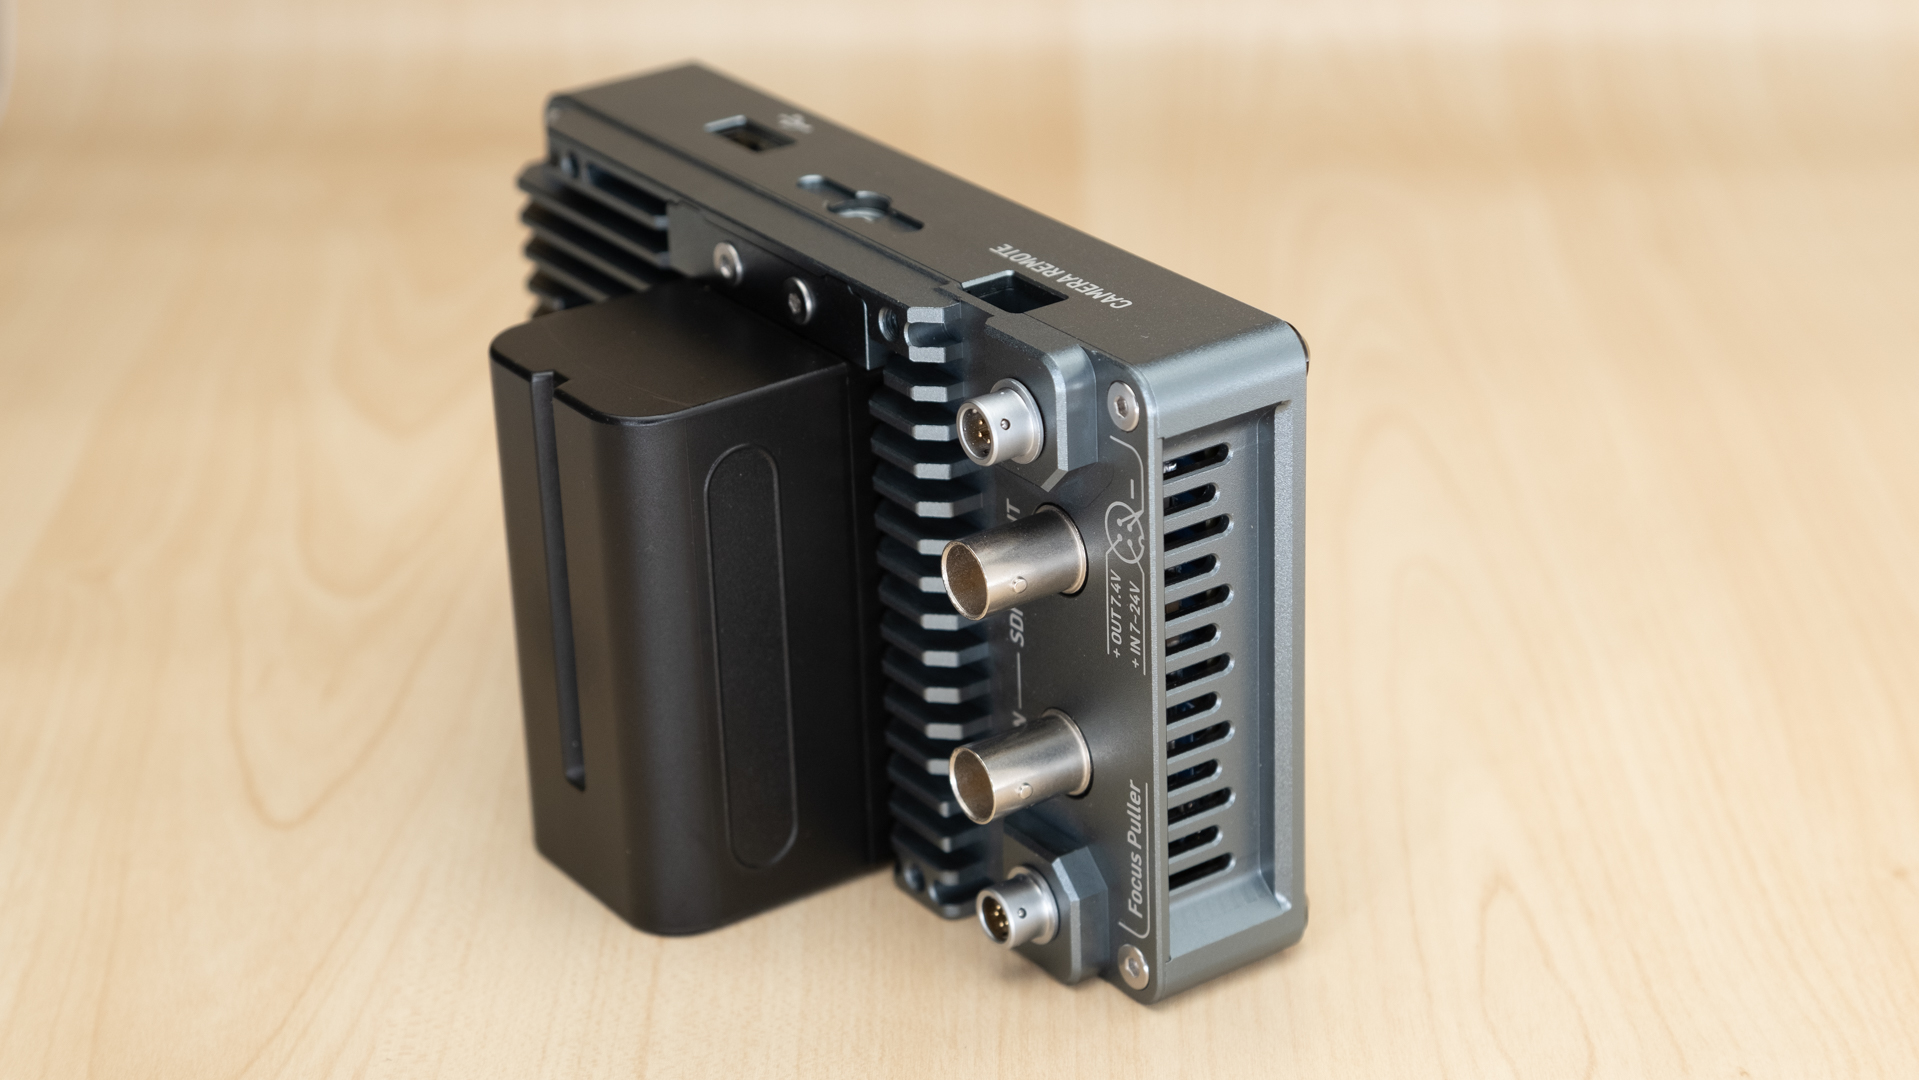
Powering and IO
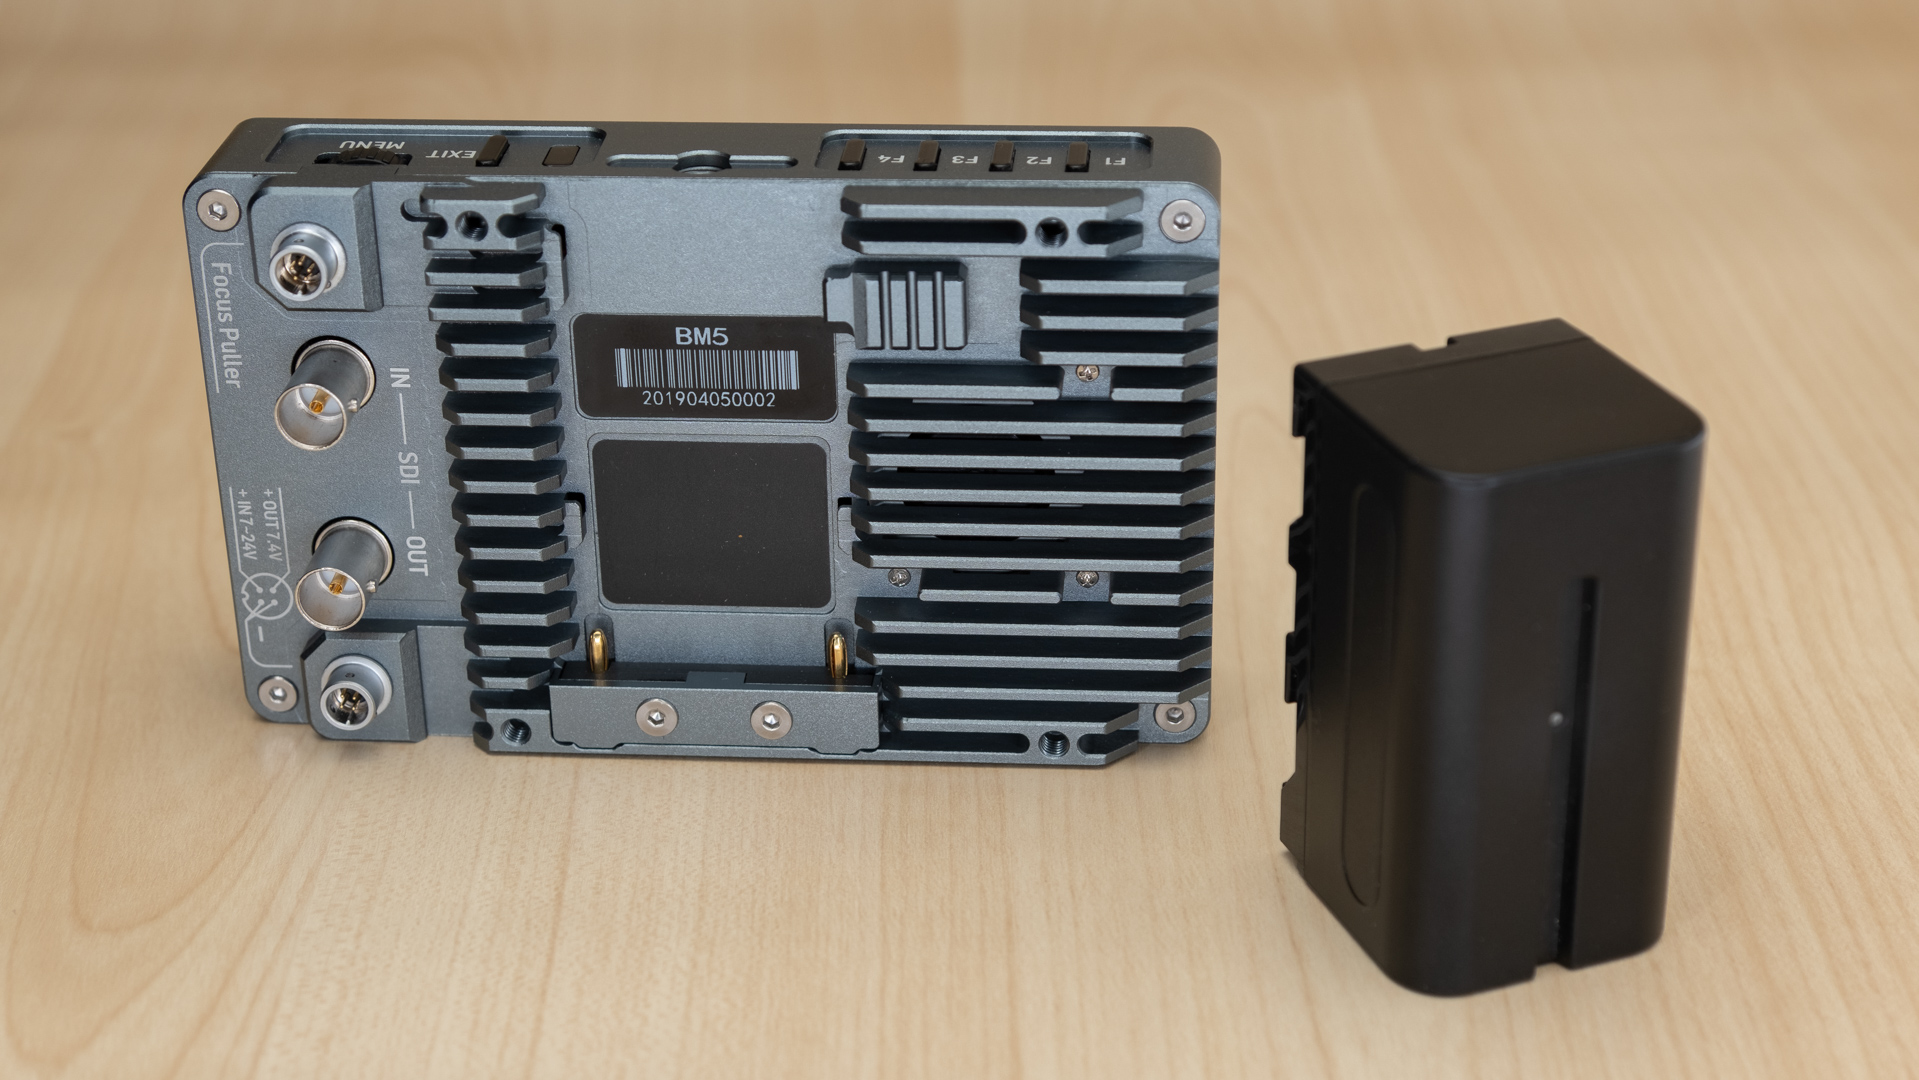
Batteries
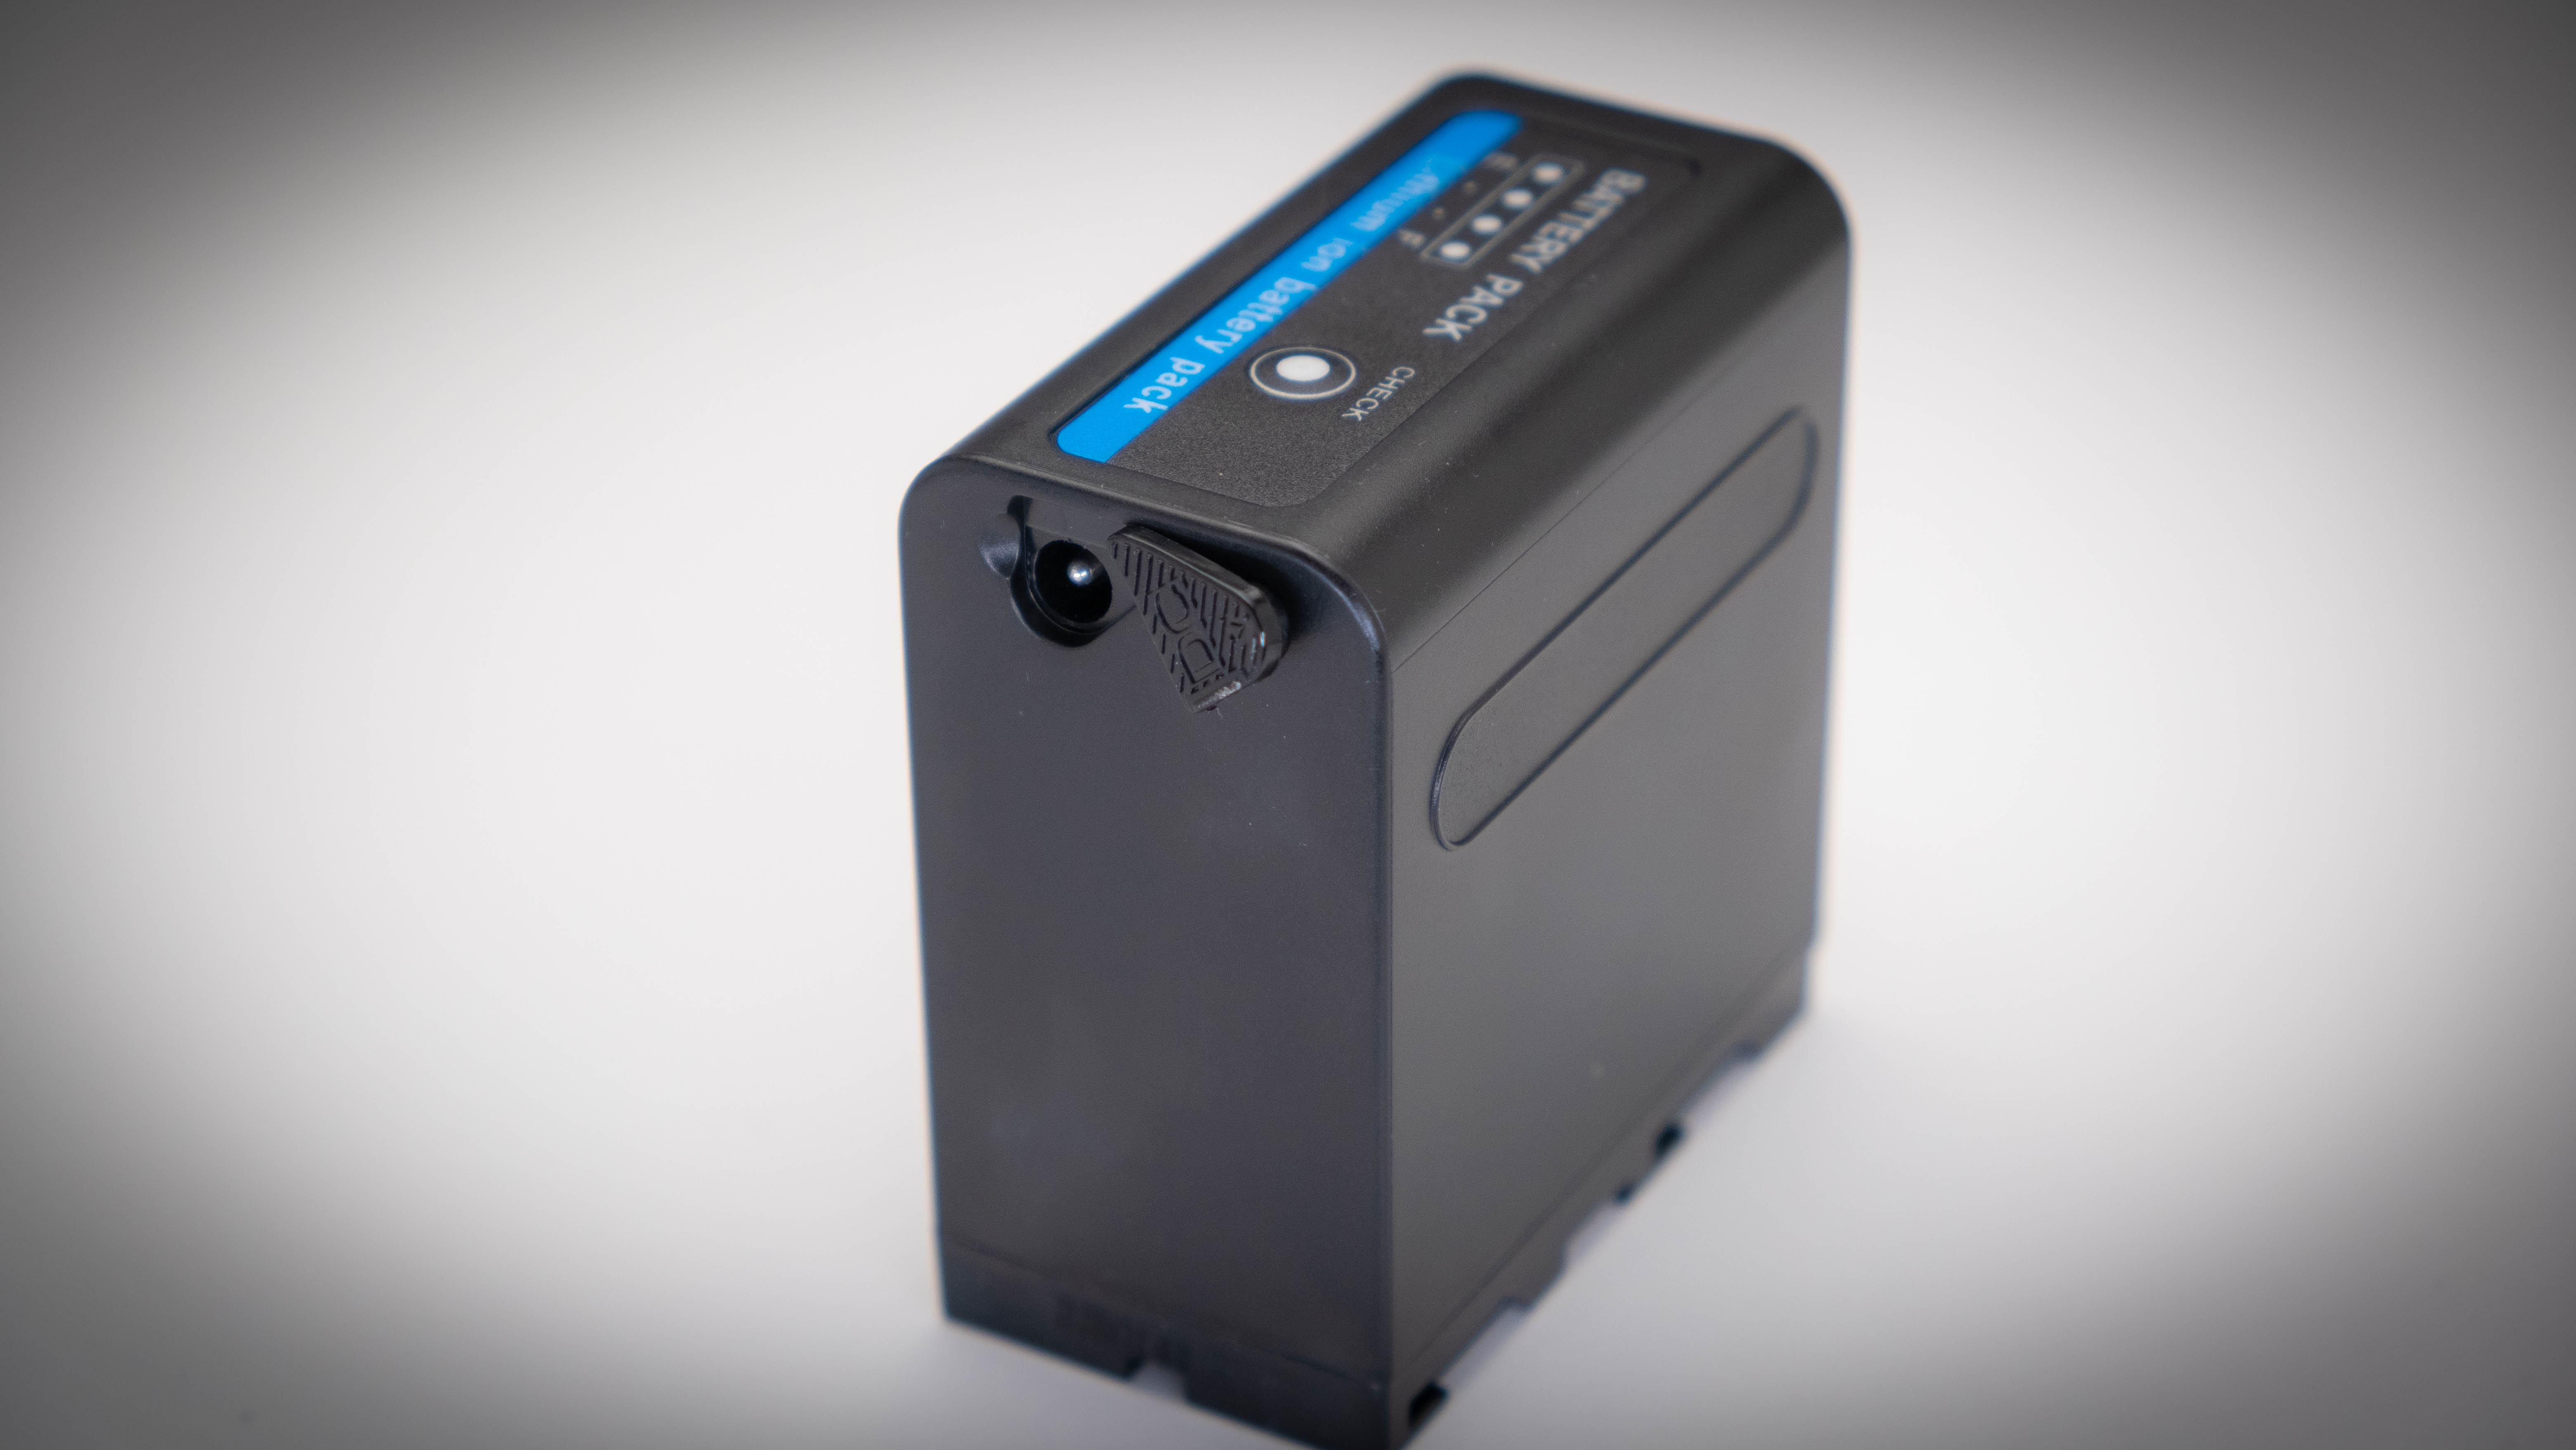
The Portkeys BM5 uses Sony L type NPF batteries. These are very common and inexpensive. I actually like them a lot since many other devices I have also use them. A side not on a new L battery option. Hawk-Woods has a high capacity versions available with a lot more output than the average Sony NP-F970 L-Series at 6300mAh. Their Hawk-Woods DV-F990 is 10,200mAh. Wow right? I need these.
With a 4900mAh 35.3Wh Wasabi Power BTR-NPF750-JWP, I got three hours and forty-five minutes with the backlight set to low. On high it ran approximately two hours thirty minutes.
External Power
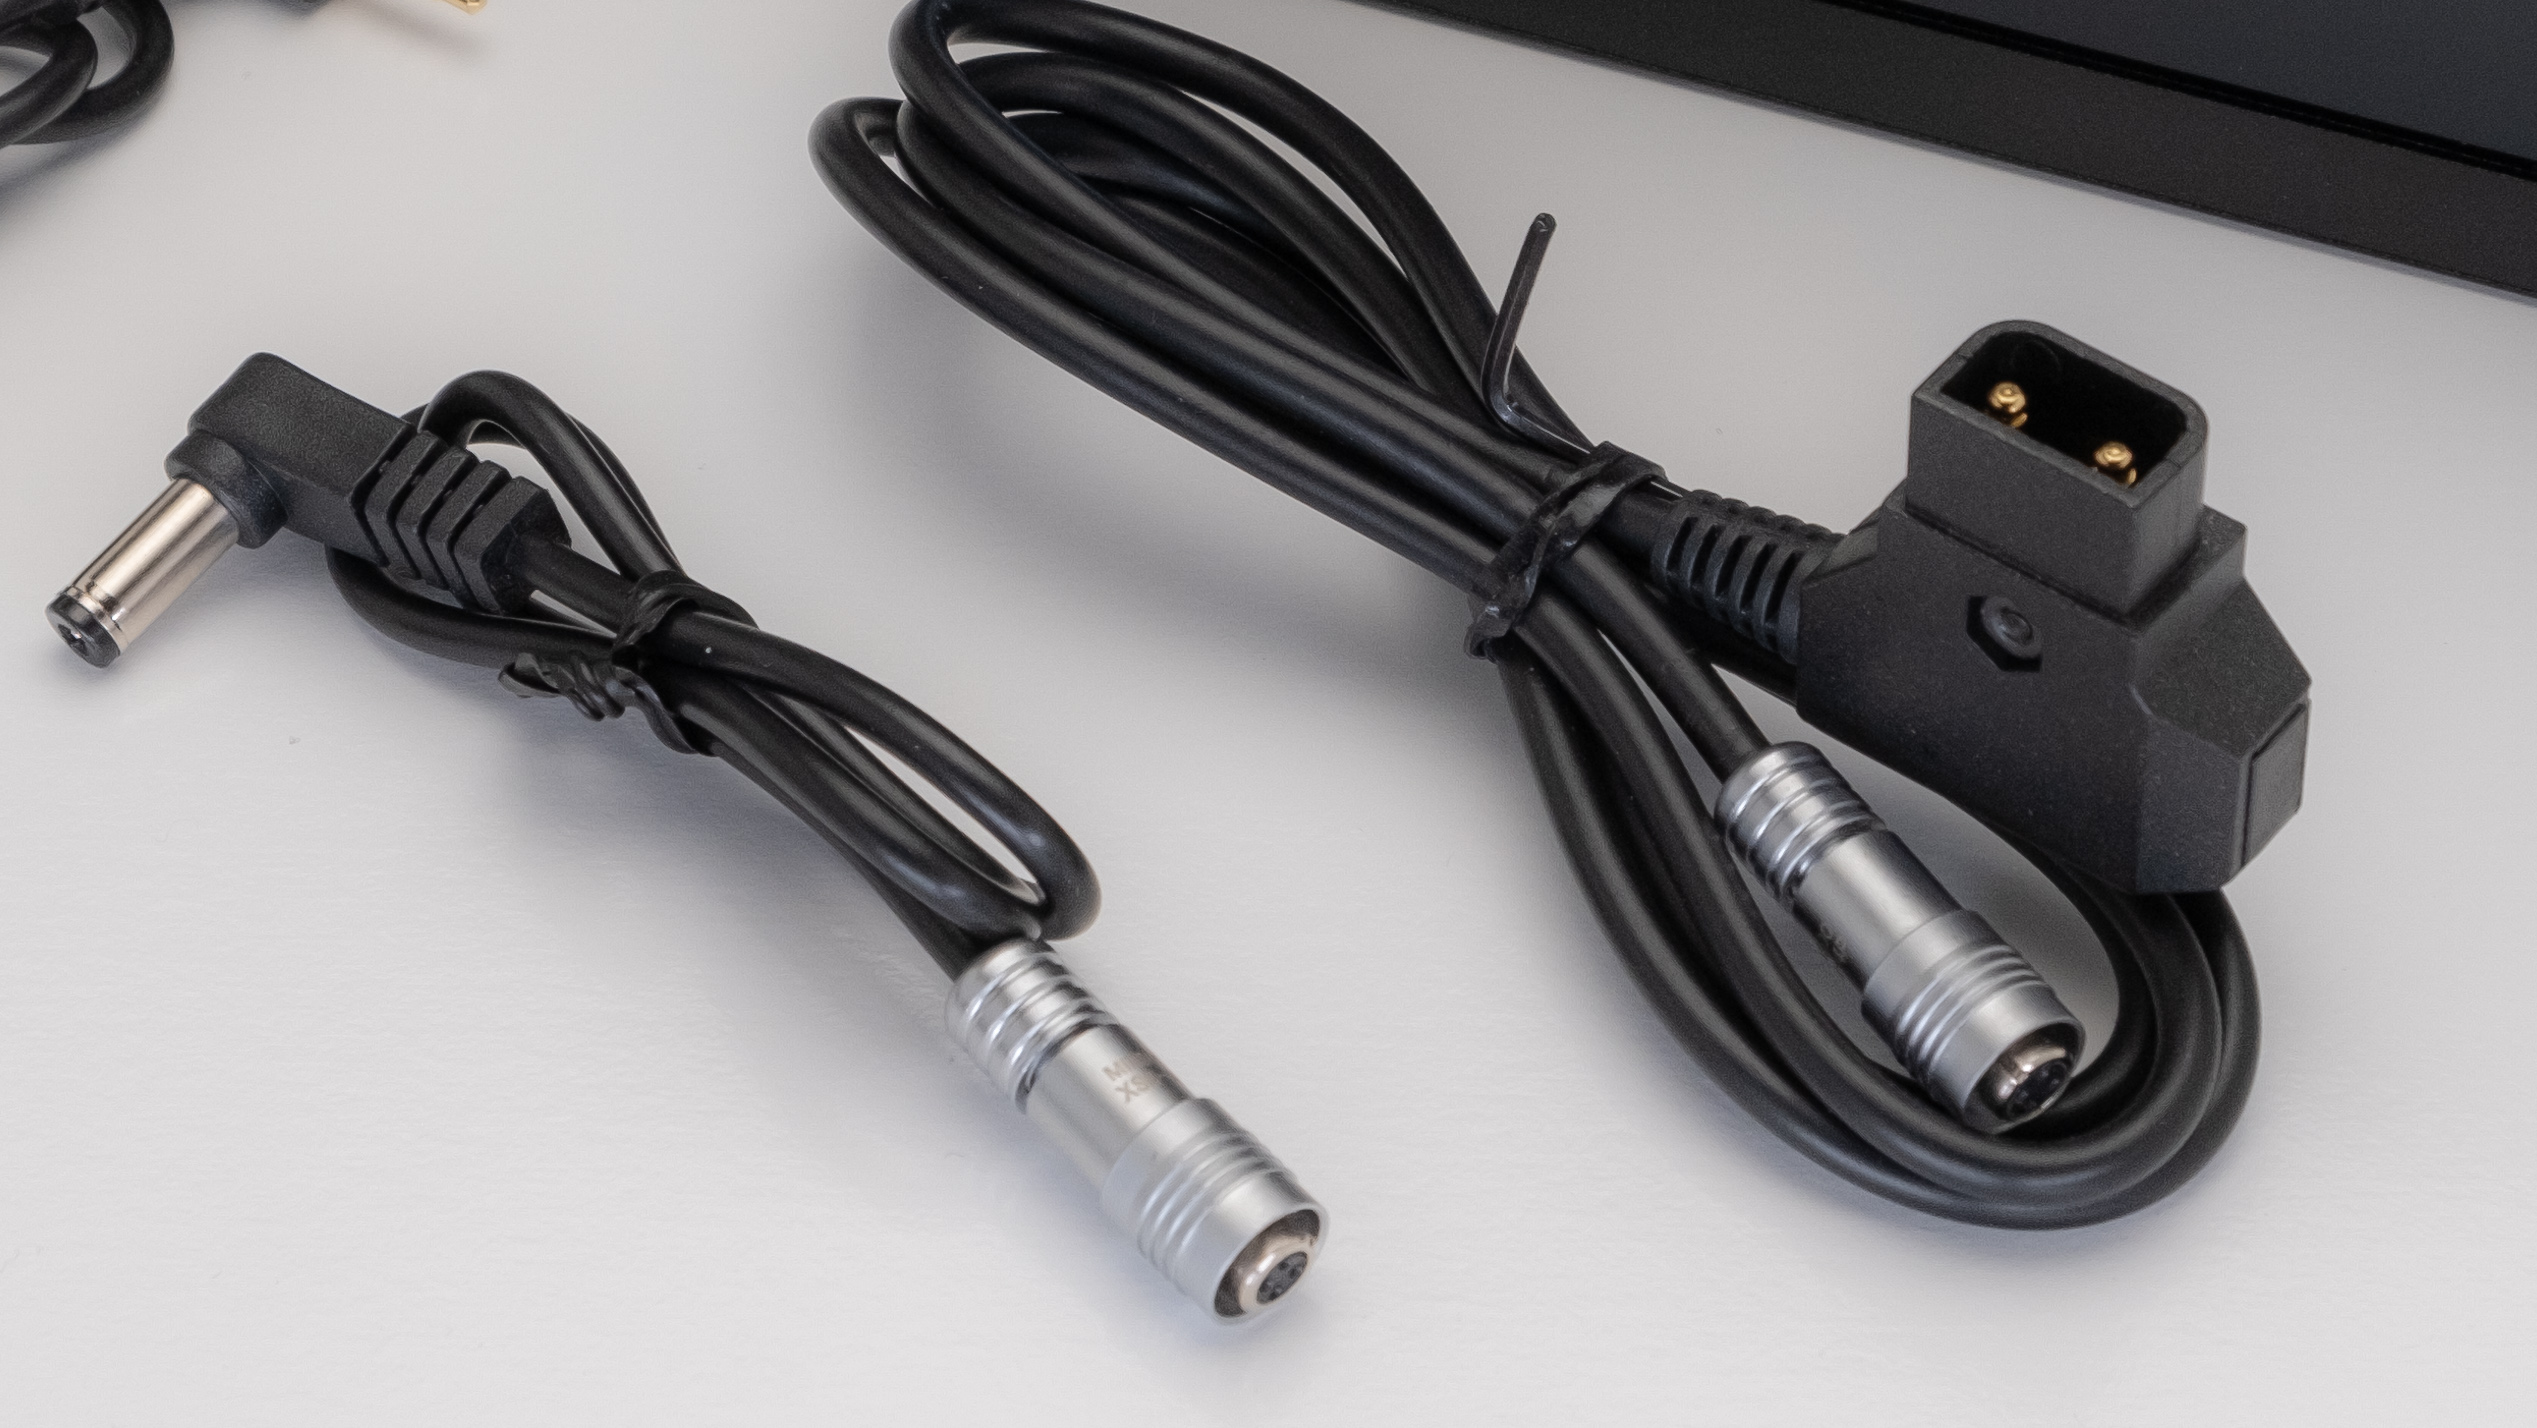
The kit comes with two power cables. One DC Plug and D-Tap. The BM5 has a dual purpose connector for external 7-24V in for powering with a D-Tap to Lemo cable and a feature I like a lot is the ability to power a camera or other devices with a regulated 7.4V output. Simply add a dummy battery with a cable and 4-pin female connector. Not only can you power a camera you can also use the Focus Puller Lemo in for powering and controlling the Tilta Nucleus-M and Nucleus-N wireless follow focus.
Finding a dummy battery with a Lemo connector for some cameras could be a little difficult as this type of connector is not as popular in that configuration. Alvin’s Cables is a good resource.
If you are using a Sony L battery to power a camera like the Z Cam E2 then using the Powerextra battery that has a DC Plug 6-8.4v out on board so you can power the BM5 or use it to power the monitor and use the power out options for other devices. One less battery but more cables. Pick your poison.
Input and Output
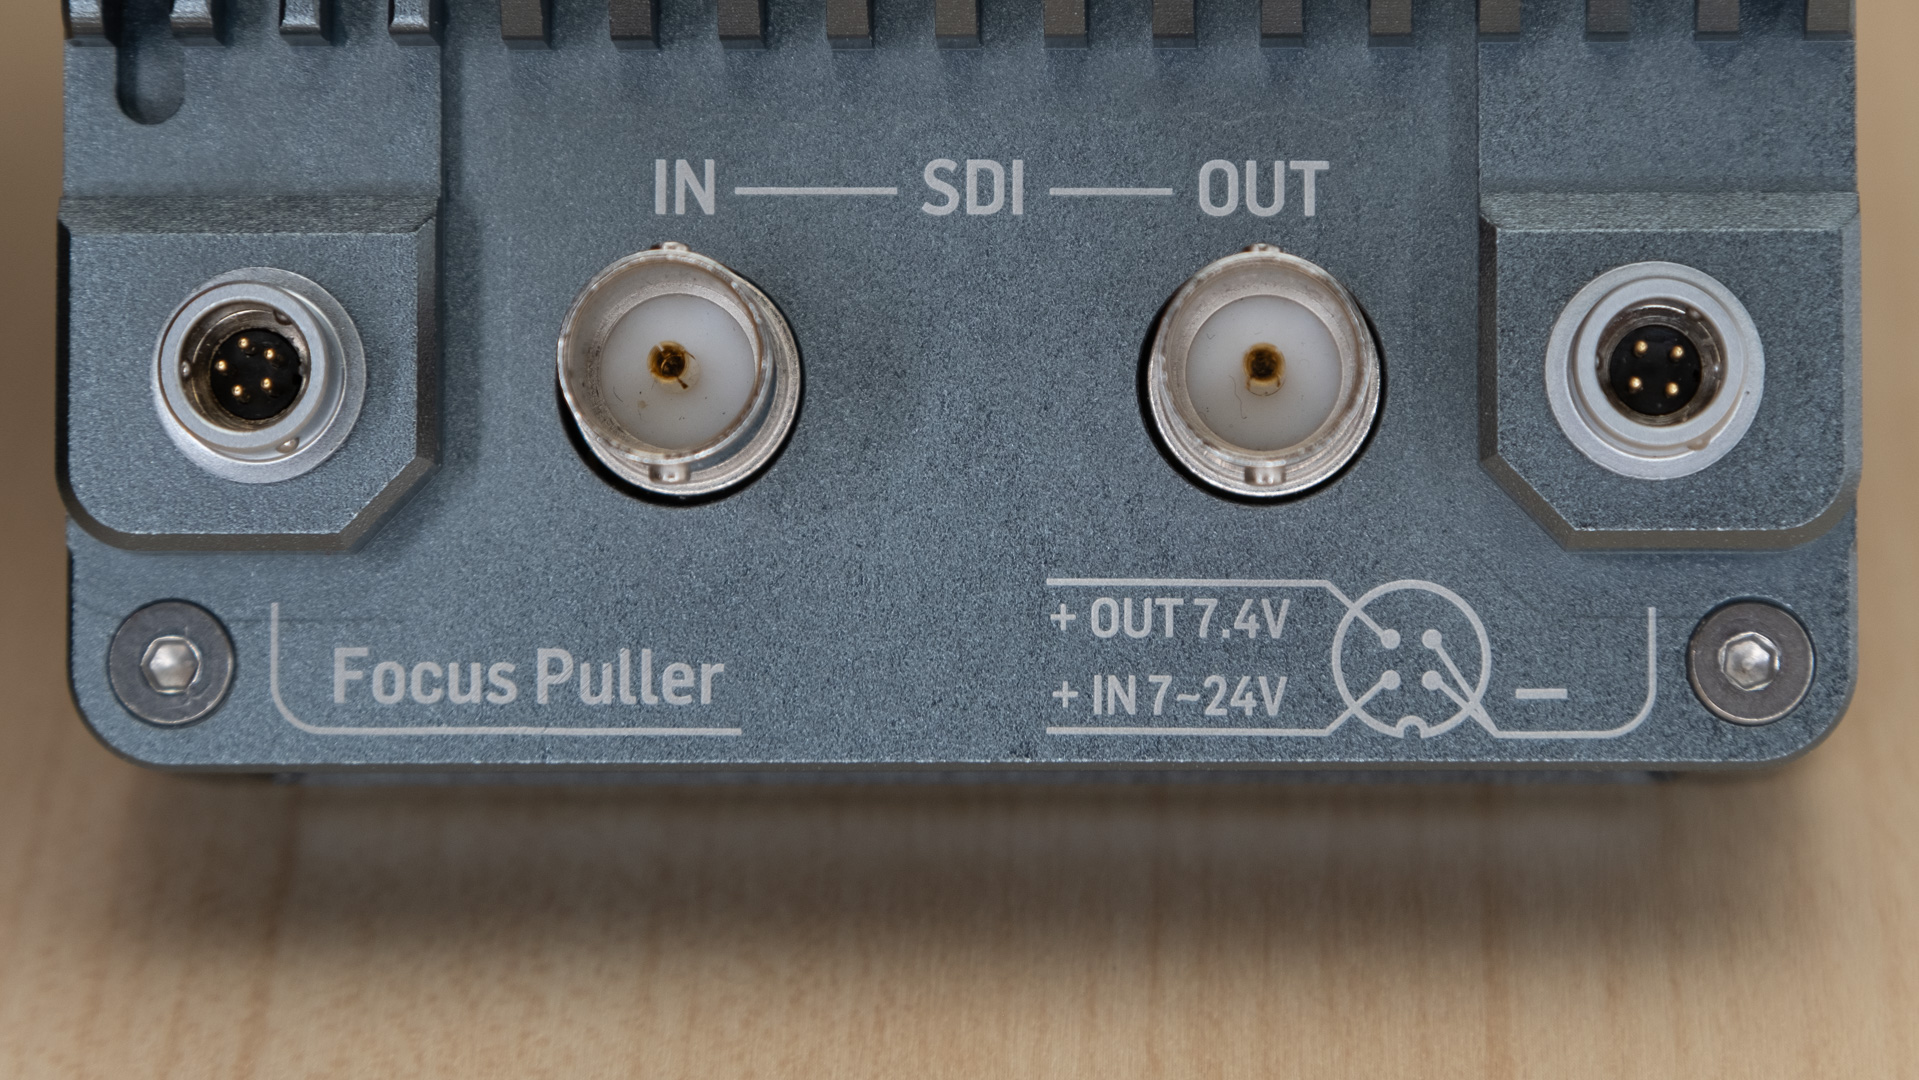
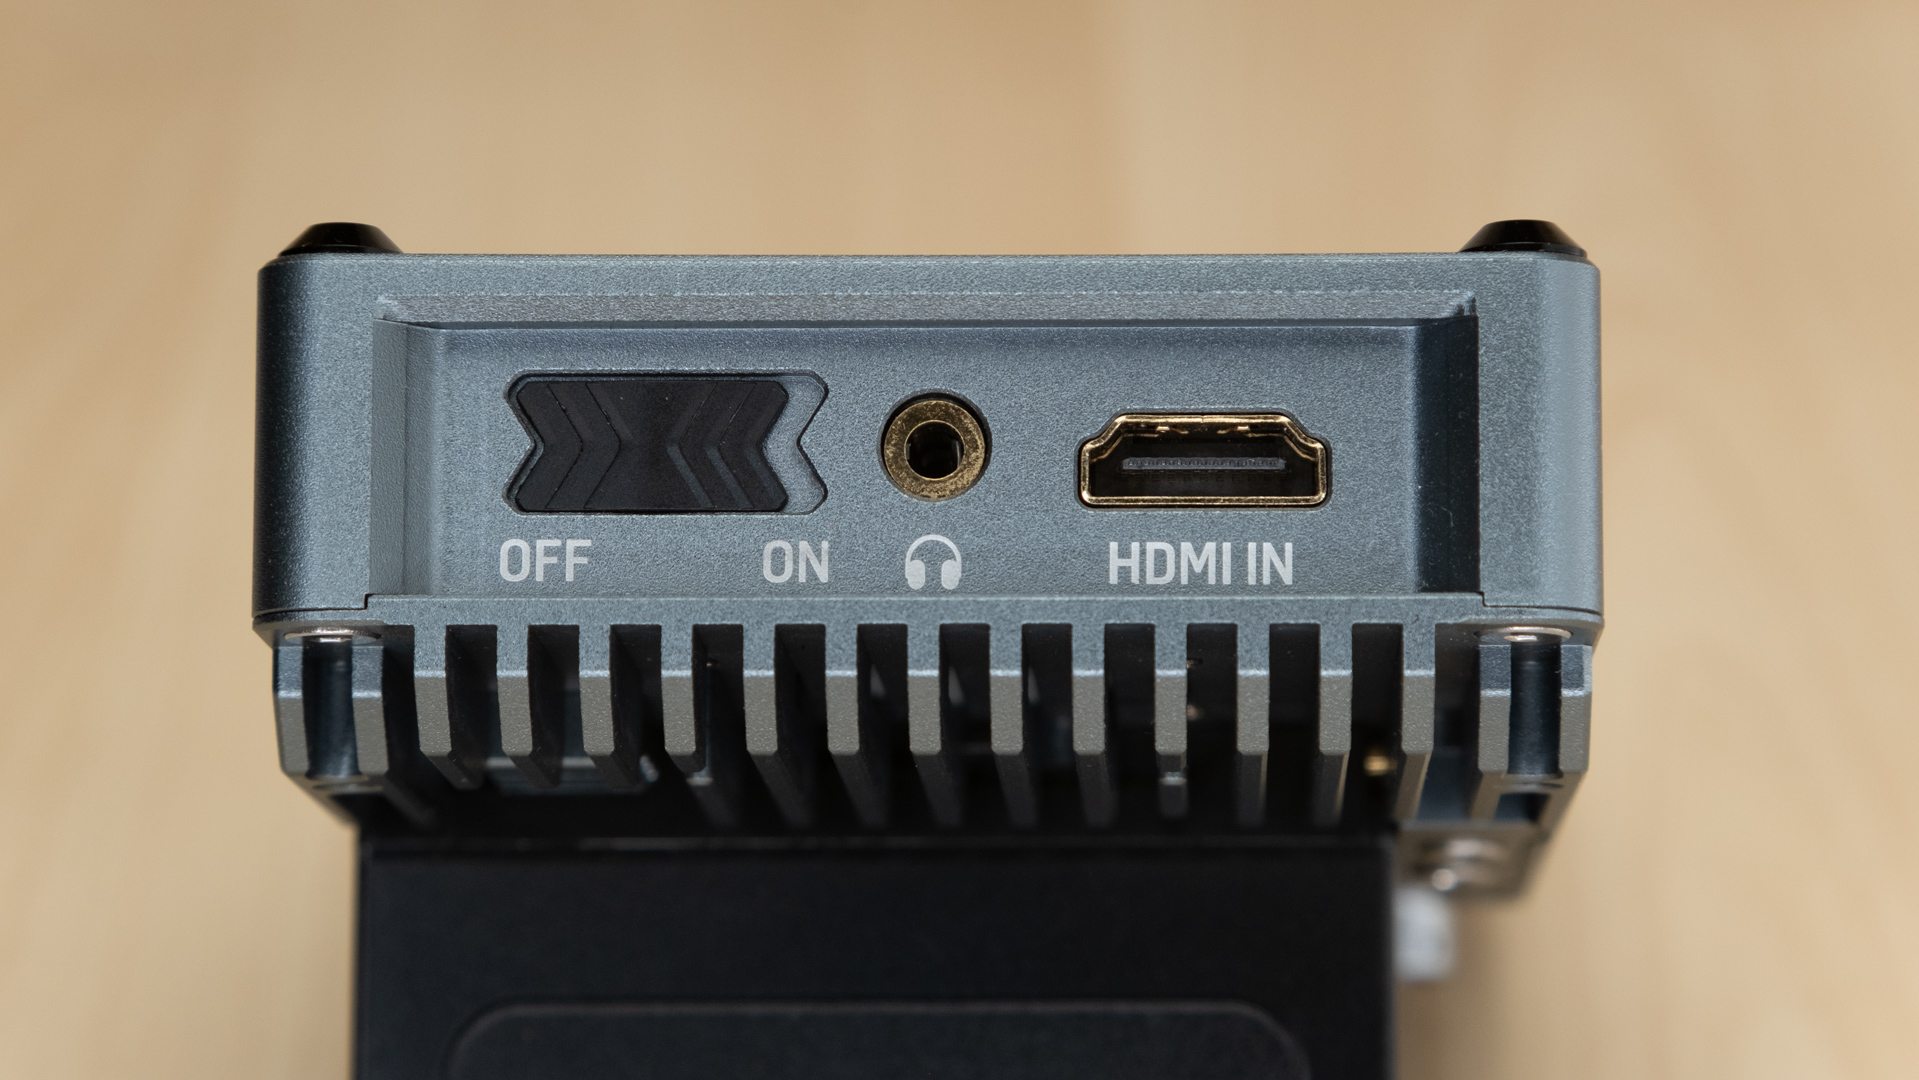
The BM5 has both an SDI in and out and an HDMI in but no out. A nice feature I like a lot is the HDMI in loops through SDI output making daisy-chaining to an SDI compatible monitor or EVF possible. I do wish it had an HDMI out as well however there really isn’t a lot of room left on the monitor and at $499 it’s amazing it has SDI.
HDMI SIGNAL Supported
- 1920×[email protected],24Hz,25Hz,29.97Hz,30Hz,50Hz,59.94Hz,60Hz
- 1920×[email protected],24Hz,25Hz,29.97Hz,30Hz
- 1920×1080i@50Hz,59.94Hz,60Hz
- 1280×720p@50Hz,59.94Hz,60Hz
- 720×576p&720×576i@50Hz
- 720×480p&720×480i@50Hz,59.94Hz,60Hz
SDI SIGNAL supported
- 1920×1080p@50fps,59.94fps,60fps
- 1920×1080p@50Hz,59.94Hz,60Hz YUV422
- 1920×[email protected],24Hz,25Hz,29.94Hz,30Hz YUV444/YUV422/RGB444
- 1920×[email protected],24Hz,25Hz,29.97Hz,30Hz YUV444/YUV422/RGB444
- 1920×1080i@50Hz,59.94Hz,60Hz YUV444/YUV422/RGB444
- 1280×720p@50Hz,59.94Hz,60Hz YUV444/YUV422/RGB444
- 720×[email protected] YUV422
- 720×576i@50Hz YUV422
The BM5 does not support a 4K signal over either SDI or HDMI. Some might find an issue with this however most cameras have an option to send HD out while recording in 4K or above.
Camera Control
The camera control feature was introduced on earlier PortKeys monitors namely the LH5 as an add-on module. PortKeys integrated the feature into the BM7 and BM5 monitors so the module isn’t needed. More cameras are going to be added with the appropriate cables. Since the BM5 has preset for the specific cameras and controls a firmware update will be needed to add those cameras to the menu. Here is a good example of the camera control with the Long Arm adapter on a PortKeys LH5T monitor.
A feature I haven’t seen before in a monitor is the ability to control many camera functions via a touch-screen. By default, the F1 button is the shortcut however it can be reassigned to one of the four available.
As of now Z Cam, Sony, Blackmagic Design, Canon and Panasonic cameras can be controlled with more being added via a firmware update. I recently updated to BM5 Control FW 1.2 that included a lot of performance improvements for the Z Cam E2. PortKeys is working on FS5, FS7, C200, C300 RED, and Arri support.
I tested the camera control feature on the Z Cam E2 and It works extremely well for certain features like record trigger, changing ISO values and setting iris. Even focusing works well with native lenses.
Touch Focus with Camera Control Function
With the Z Cam E2, I was very surprised that touch focus works. On the second page is where all the main settings live. Next to the F3 touch button is the auto/manual focus setting. With a native MFT lens attached you can use the BM5 touchscreen to select the focus point. Simply tap the area on the screen and the camera focuses. It’s not as responsive as a C200 touchscreen but it is accurate. This is an impressive feature to have in a 3rd party monitor. I don’t know of any other monitor that can do this let alone for $499 product.
Some Custom Settings Don’t Work
I did find one of my custom settings using a Z Cam E2 was not working. With so many camera options available I’m sure a few of the custom ones will be problematic. Again Portkeys is continuously working on making the camera control function perform better via updates.
I have a shortcut assigned to F1 for taking a white balance. Holding the F1 button down on the camera activates a WB reading. When the button is released, the white balance is locked. On the BM5 the F1 button put the camera in Kelvin mode, and the up and down touch buttons don’t respond since the monitor will have the last active function set. On the second page is were the Kelvin option lives. I can live with this as white balancing the camera is easy and fast with the F1 preset on the camera.

The camera control feature is available for several cameras. When ordering select the camera you have to get the proper cable. Additional cables for different cameras are available to purchase separately.
The BM5 camera control feature can be updated separately from the monitor’s firmware and should improve over time. For certain settings, using the camera is quicker. In the situation where the camera is in an awkward position or out of reach using the BM5 camera control will be very helpful.
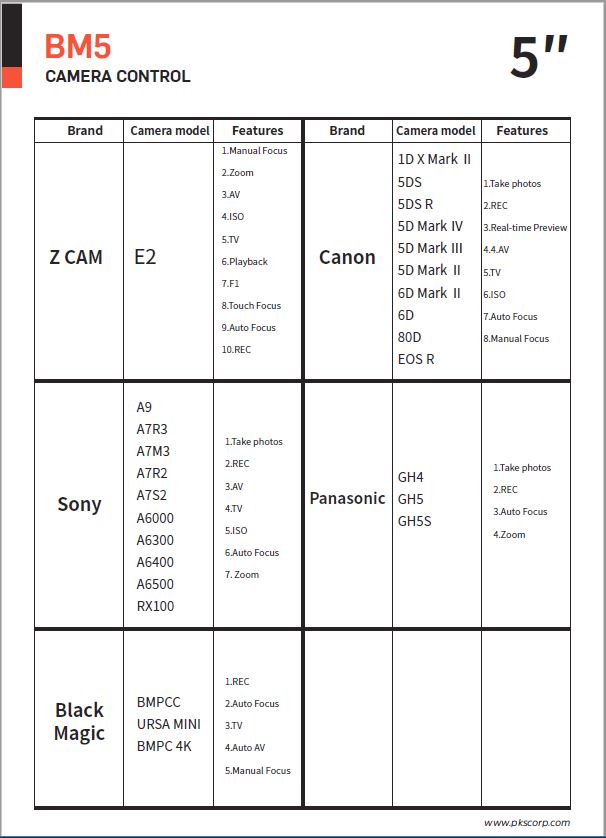
Current Compatible Cameras for Control Feature
- Z CAM E2
- Sony: A9, A7RIII, A7III, A7RII, A7SII, A6000, A6300, A6400, A6500, RX100
- Canon: 1D X Mark Ⅱ, 5DS, 5DS R, 5D Mark Ⅳ, 5D Mark Ⅲ, 5D Mark Ⅱ, 6D Mark Ⅱ, 6D, 80D, EOS R
- Blackmagic Design: BMPCC, URSA MINI, BMCC 4K
- Panasonic: GH4, GH5, GH5S
Display
The BM5 5″ ISP display is sharp and bright with good color. Out of the box, the color settings are pretty good. If you want to dial it in a little more to your liking you can do this easily.
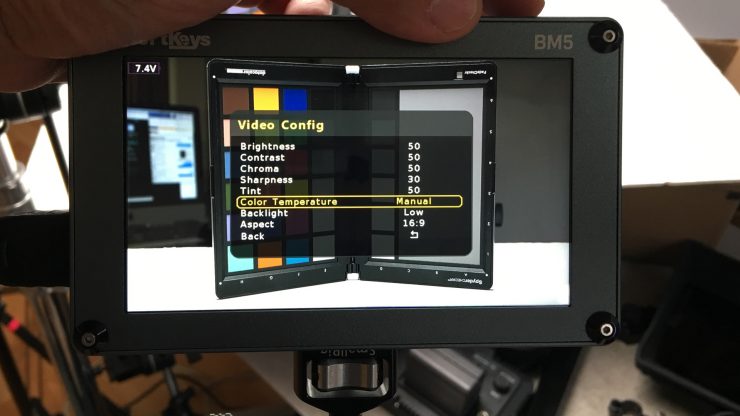
I went into the menu and changed the parameters for color temperature by selecting the Manual option. The BM5 has three preset Color Temperatures to choose from. 5600K, 6500k and 7500k. Manually setting up a monitor can be challenging if the monitor has poor color representation, to begin with.
Fortunately, I was able to dial it in easily using a properly white balanced camera and a color checker. The results while being suttle made a big difference.
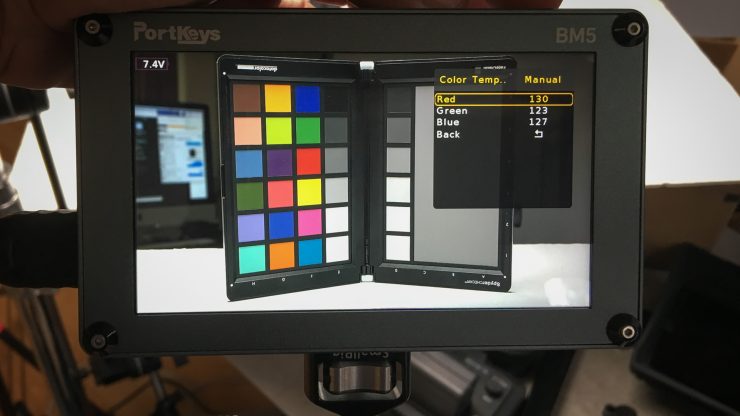
My Custom Calibration Values
While these settings worked well on this particular BM5 I don’t know if they will work on others. Give it try and see. Chances are good they will be very close. I don’t recommend using a Log profile while calibrating or LUT. Feed Rec709 to the monitor.
- Red 130
- Green 123
- Blue 127
The screen is bright at 2000 nits. It does hold up in direct sunlight. I think this is the entry level for outdoor use as my SmallHD 702 Bright at 1000 nits can struggle in direct sunlight.
Latency
The BM5 performs pretty well regarding latency. I tested with a Canon C200. Results as follows.
- C200 LCD – 0.05
- BM5 HDMI out from C200- 0.18
Daylight Viewable
To test just how bright the monitor actually is I white balanced the camera and shot a white card at 100 IRE and took readings with a Sekonic C700-U. With the BM5 set to Manual Color Temperature and Bright setting, I got a reading of 2,100 LUX which is basically 2,100nits. The BM5 delivered the specifications of 2,000 nits plus a little more.
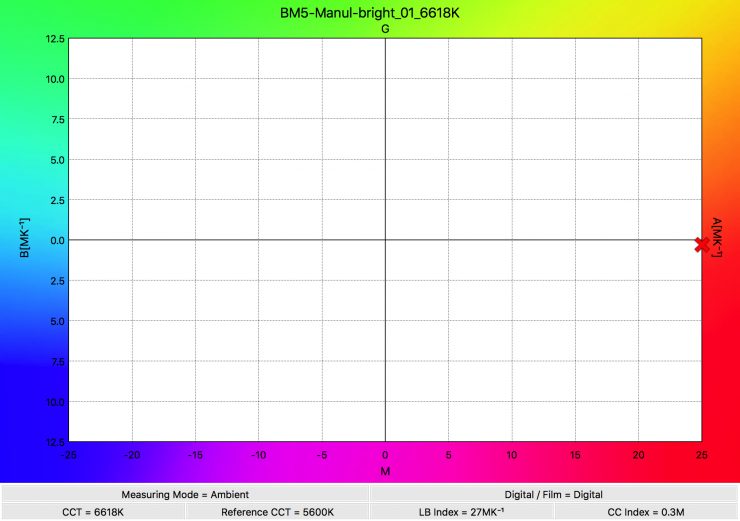
As for white balance in my manually calibrated settings, it came to a CC Index of 0.3M. This is a good panel. I think you will be able to match it up to other monitors or cameras EVF easily. This is important if you’re using a monitor to make critical color decisions.
For good measure here is the preset test results.
5600K Color TEMPERATURE
- 5313K
- 1790 nits
- CC Index 0.2M
6500K COLOR TEMPERATURE
- 6132K
- 1900 nits
- CC Index 0.1G
7500K COLOR TEMPERATURE
- 6855K
- 1970 nits
- CC Index 0.1G
Competition
Monitors have had a nice quality jump in the past year and prices are coming down with brighter options. The key to comparing them is how bright is it and what tools are available.
SmallHD Focus 5″ SDI and Atomos Shinobi SDI are in the price range but the BM5 beats them both with the 2000 nit screen. The software will be better on the latter monitors. Ikan & Feelworld also have offerings in this price range.
Usability and Conclusion
While features and inputs are important actually using a product is too. I found the Portkeys BM5 a solid and easy to use monitor despite the menu system. I like the fact that I can have four presets and customize them as I wish. The tools are very usable and the camera control feature is really slick.
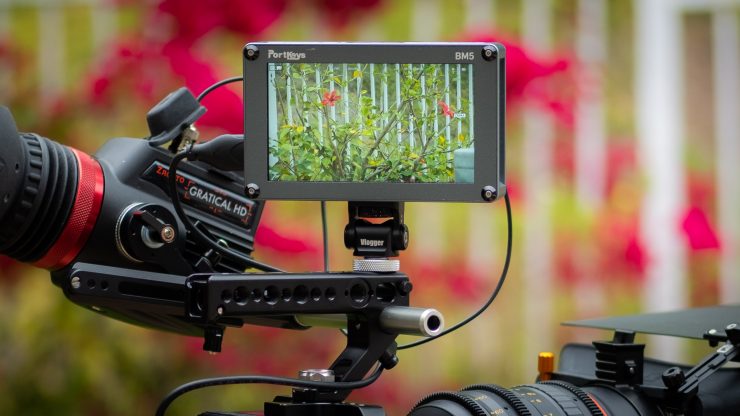
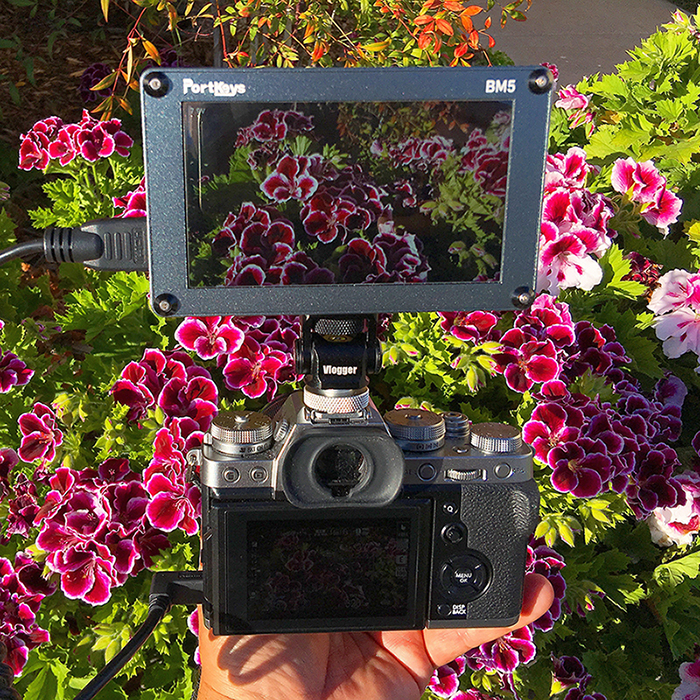
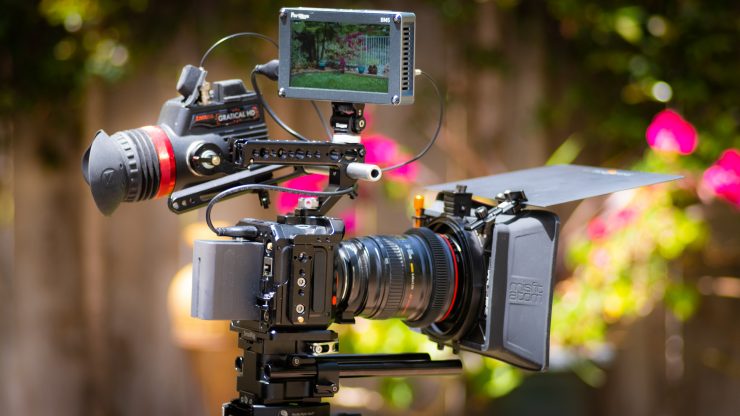
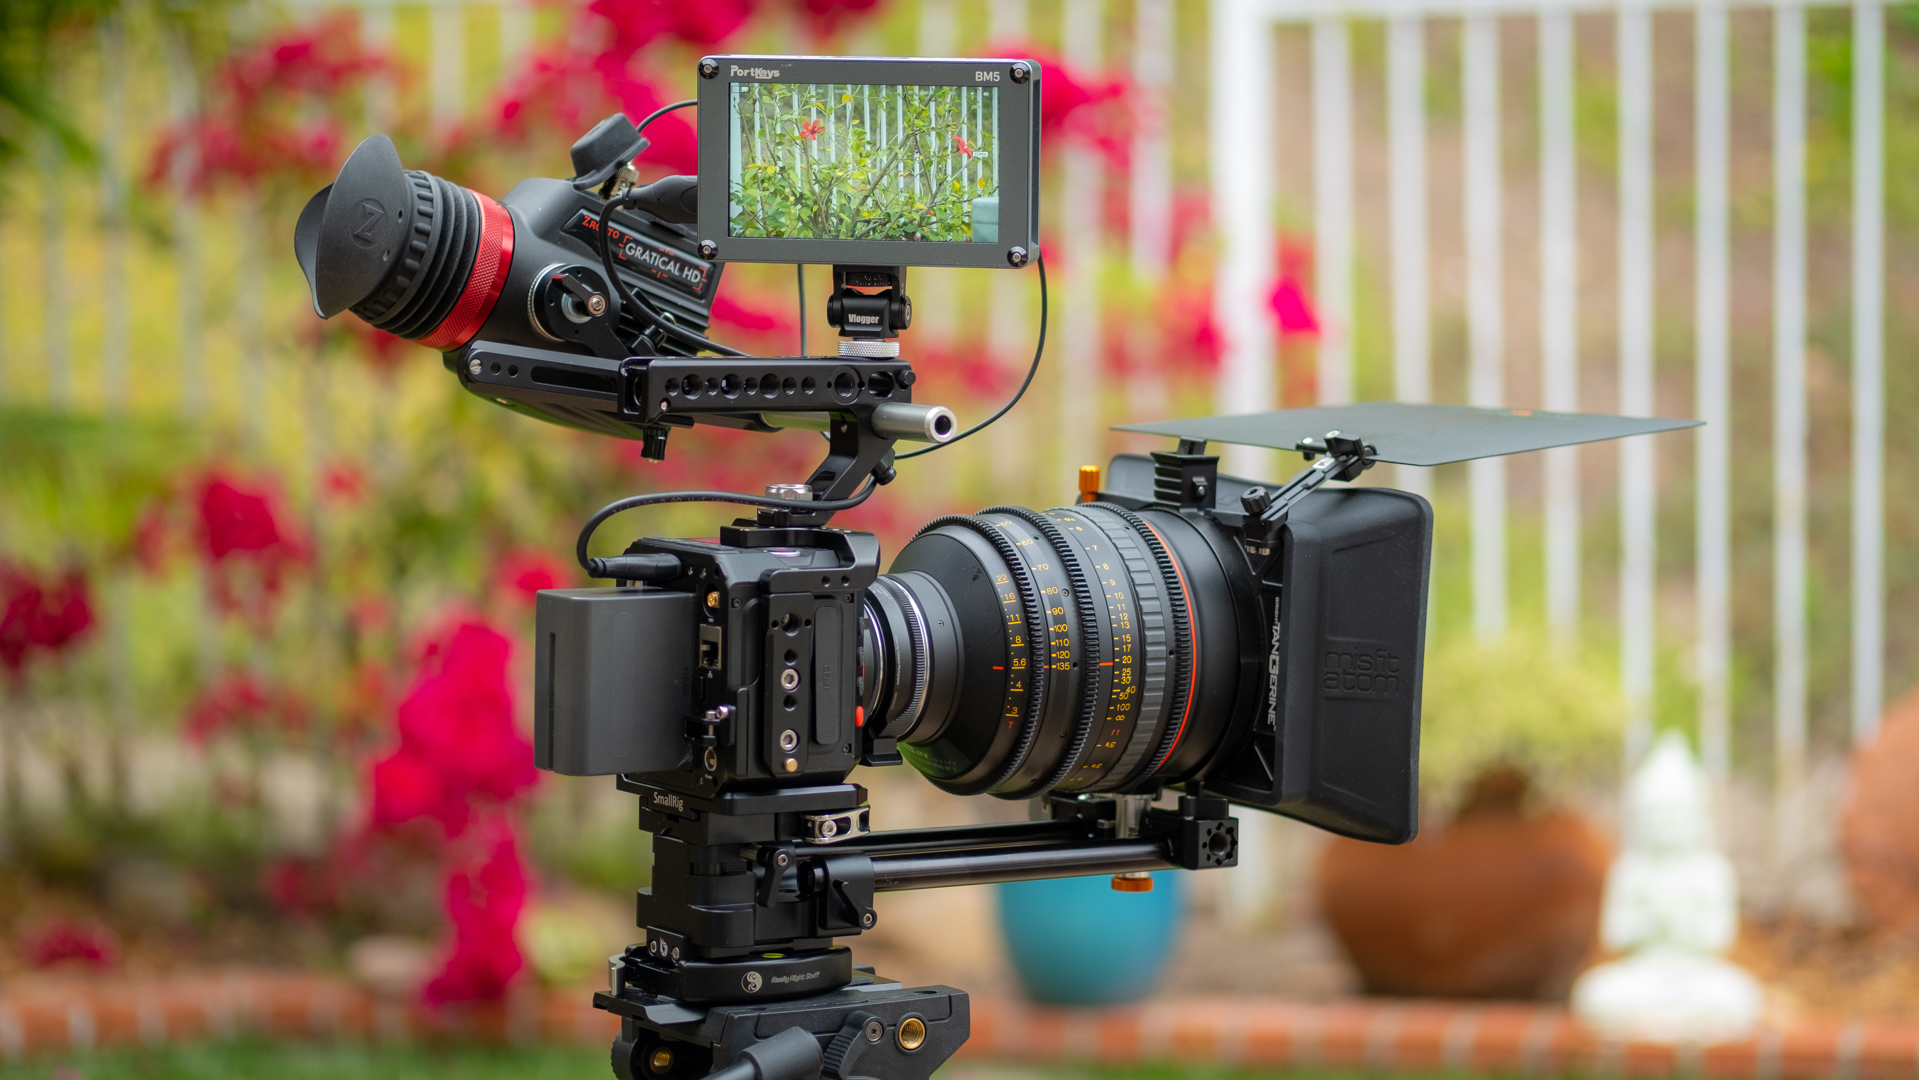
Not having to use the touchscreen is a good thing to avoid those fingerprints. For most of my testing, I used the Z Cam E2 that requires a monitor or an EVF. With the Z Cam E2 in a SmallRig cage and handle. The setup looked like a tiny RED camera. It was really easy to shoot with plus I didn’t have to use the cameras assist tools and the BM5 outdoors worked very well with the 2000 nit screen.
Battery life is pretty good for a bright 2000 nits monitor. When not outdoors bringing the backlight down to low or medium is a great way to save power and you get a much more realistic representation of the exposure too.
The touch Focus feature with the Z Cam is impressive and that camera isn’t known for AF performance. I wasn’t able to test other cameras however, it looks like the function would perform as good as the cameras AF works. This is a very cool feature.
The Z Cam E2 alone has fourteen control options making the BM5 a very good fit for the powerful little camera. Portkeys will be updating the BM5 to improve performance and add more cameras that can be controlled. All in all, it’s an impressive monitor and the price at $499 makes it a very good value. If you are Z Cam user the BM5 is a must have monitor with the very slick camera function interface.