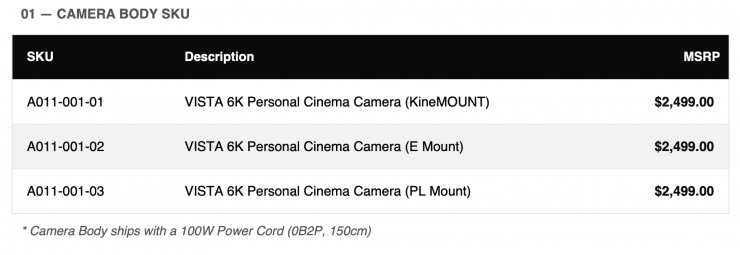
The Kinefinity VISTA has finally been officially announced, and it will retail for $2,499 USD. However, B&H is selling it for $1,999 USD ($500 USD off) up until the 19th June.
I have access to a pre-production version of the camera, so I can give you some impressions and thoughts. I am not going to show any footage, as there are still a lot of features and functionality that haven’t been enabled via firmware, so it would be a disservice to do so. I know there are some YouTube videos out there, but there’s no way you can do anything close to a proper review of this camera, as the current pre-production firmware makes the camera barely operational. I can understand that Kinefinity wanted to officially announce it before Cine Gear, but it’s still far from ready.
“VISTA finally gives individual filmmakers a complete professional filmmaking experience, without asking them to choose between quality and portability. From concept to reality — this is what a personal cinema camera should be.”
Jihua Zheng, CEO of Kinefinity
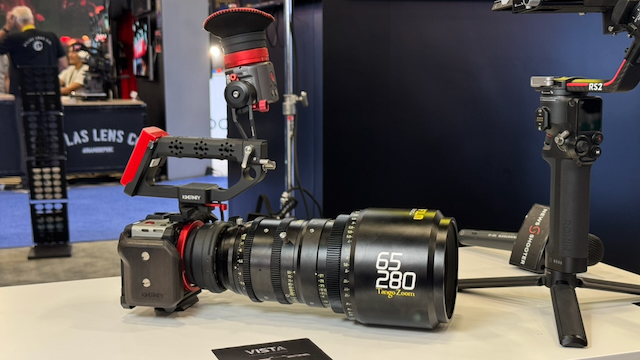
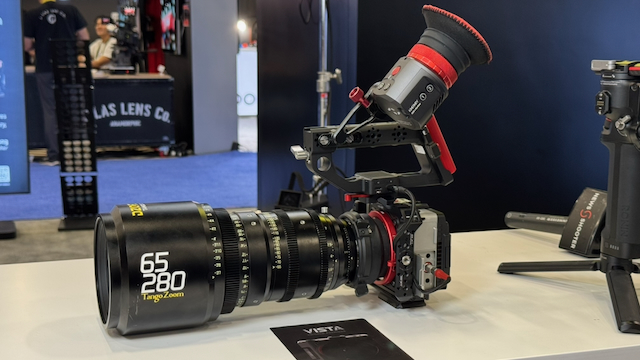
The Kinefinity VISTA was first shown at NAB 2026 in Las Vegas. I have seen prototypes of this camera since the start of its development.
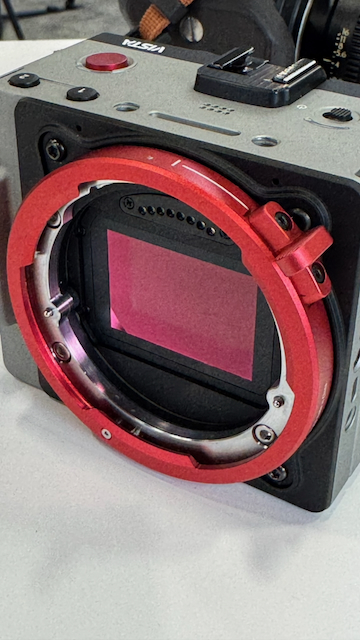
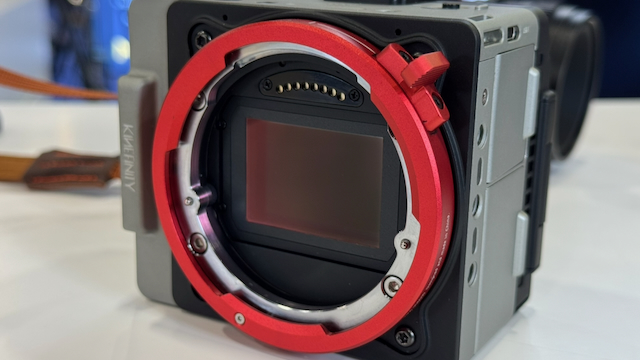
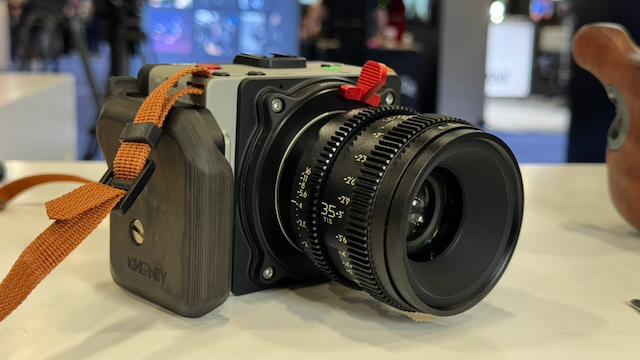
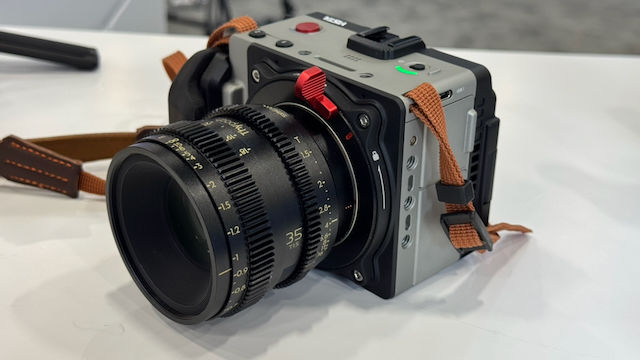
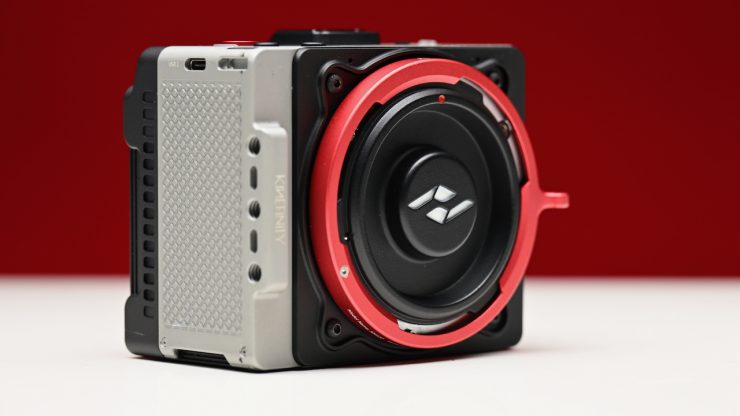
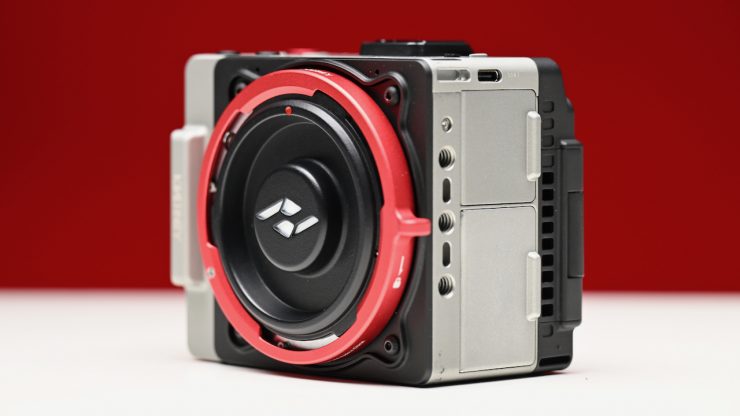
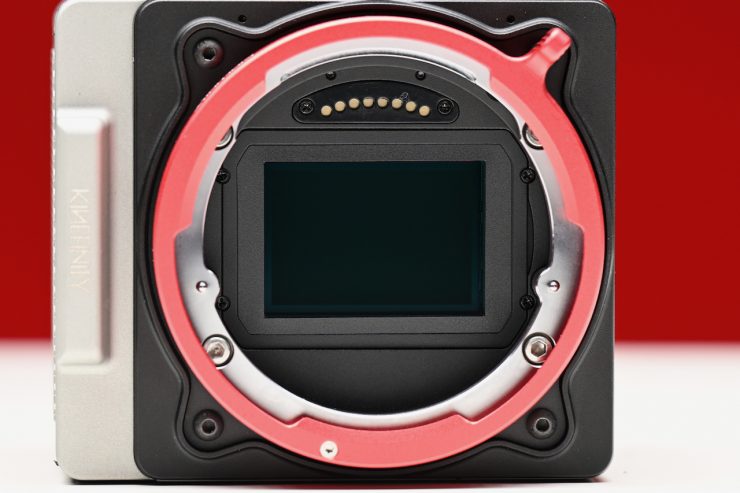
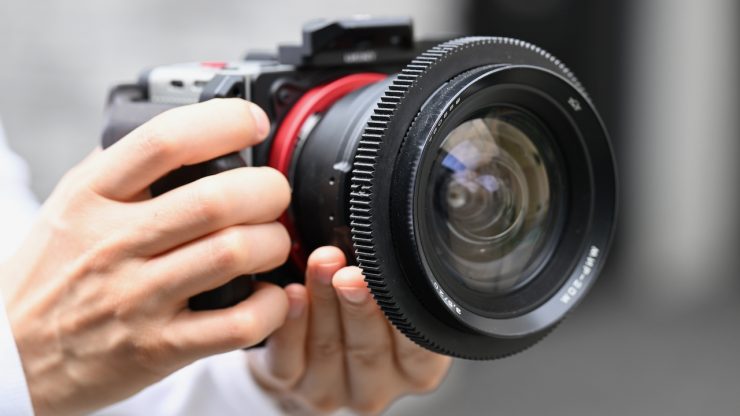
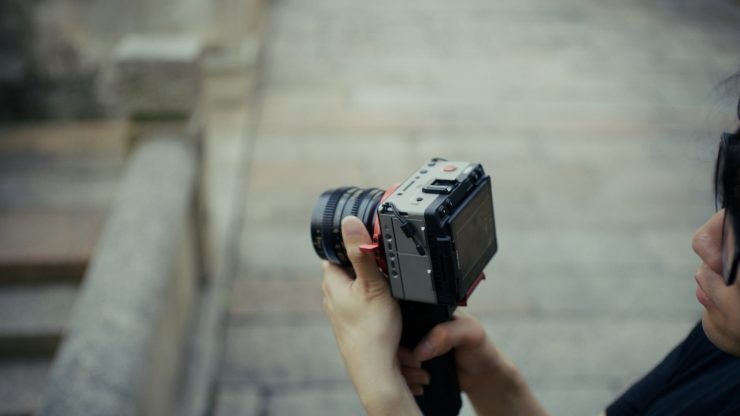
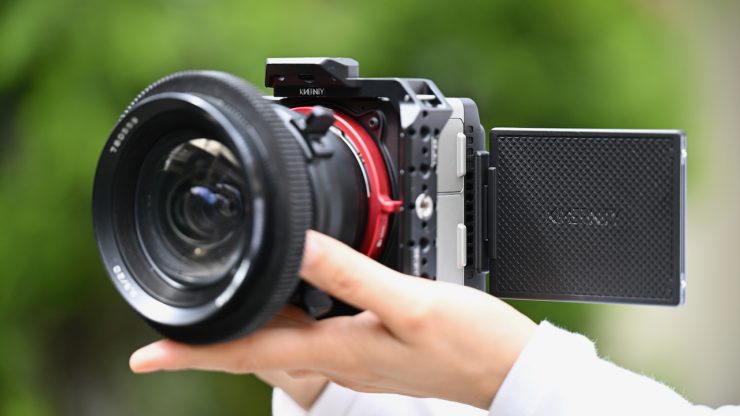
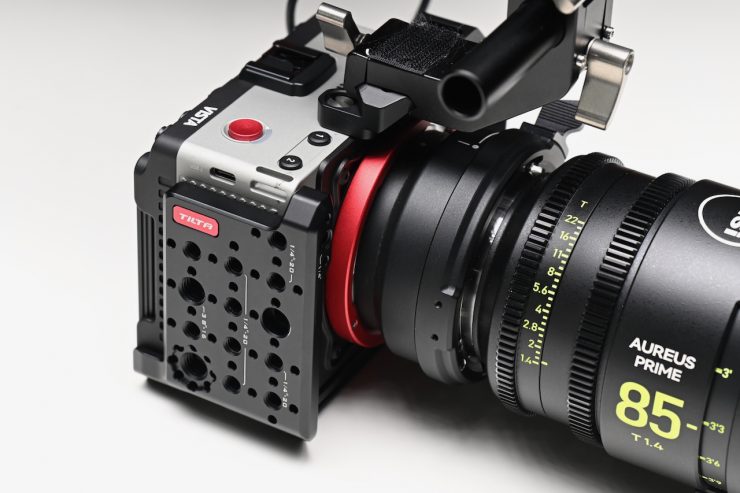
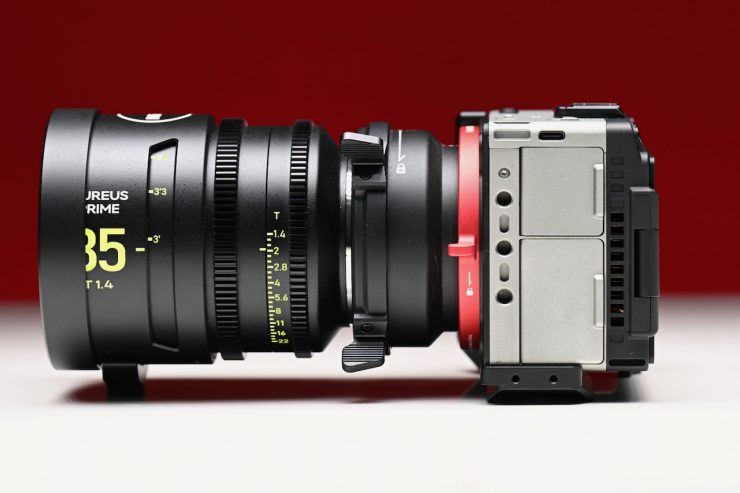
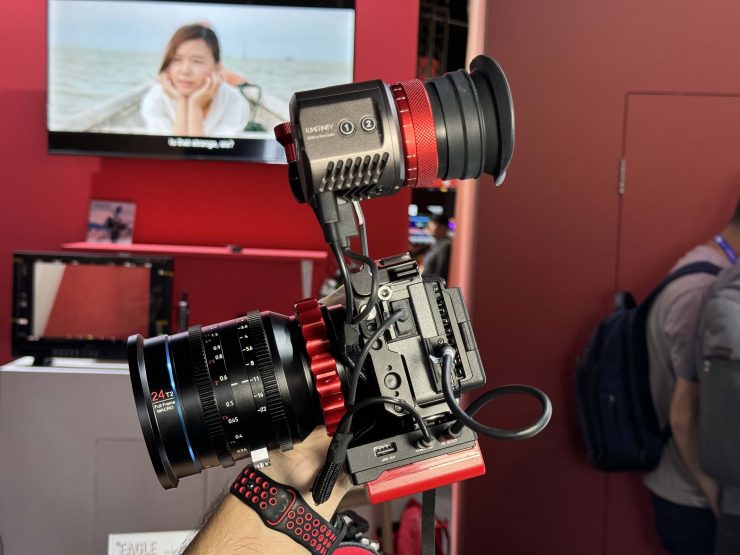
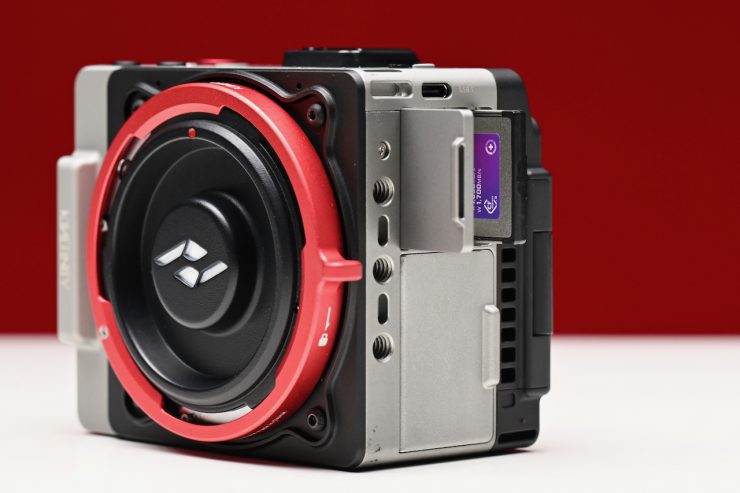
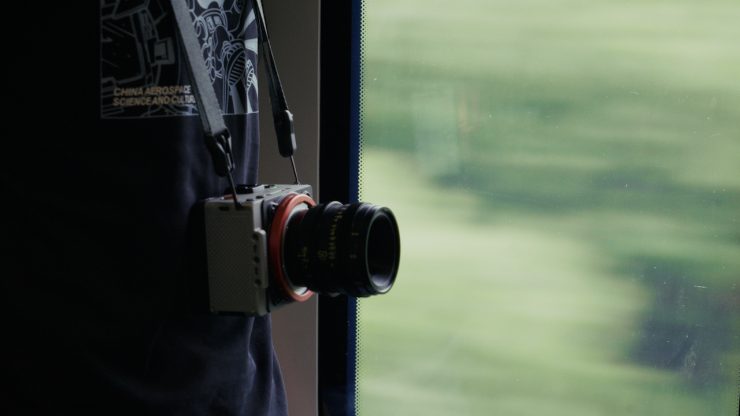
The VISTA is a very small camera with a full-frame 6K sensor that is capable of shooting in open gate.
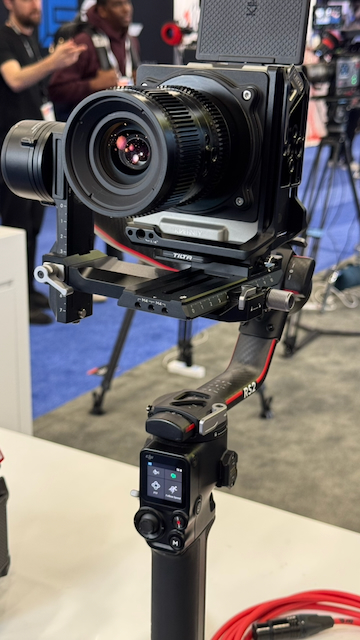
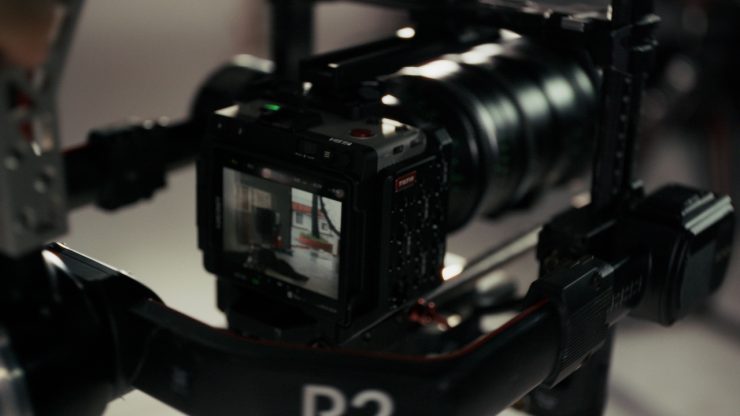
The form factor makes it suitable for handheld shooting or for being placed on a small-sized gimbal. It is also very easy to mount for vertical shooting.

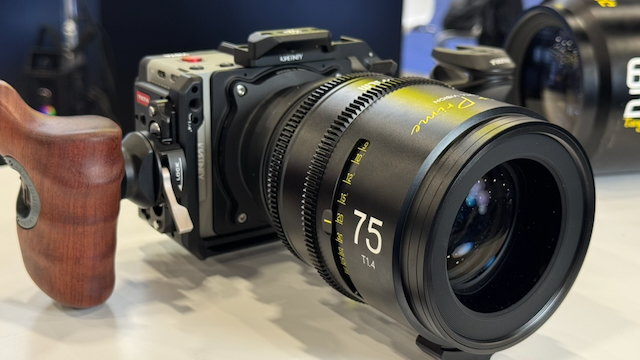
Kinerfinity has worked with Tilta to provide a cage solution as well as a nice little side handle. There are also options for larger side handles.
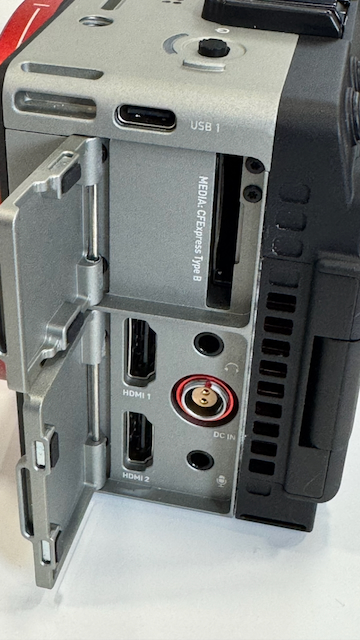
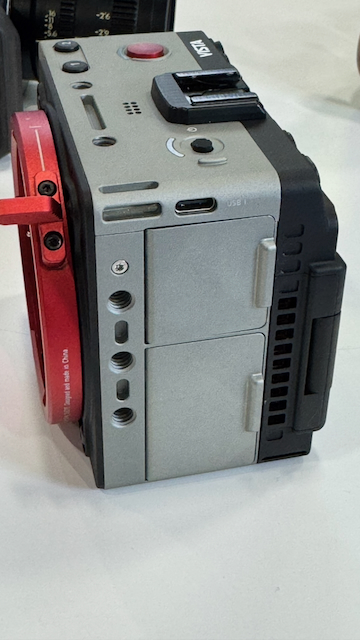
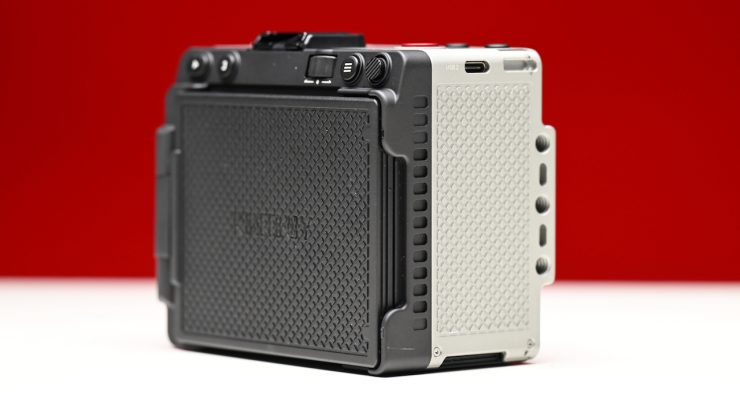
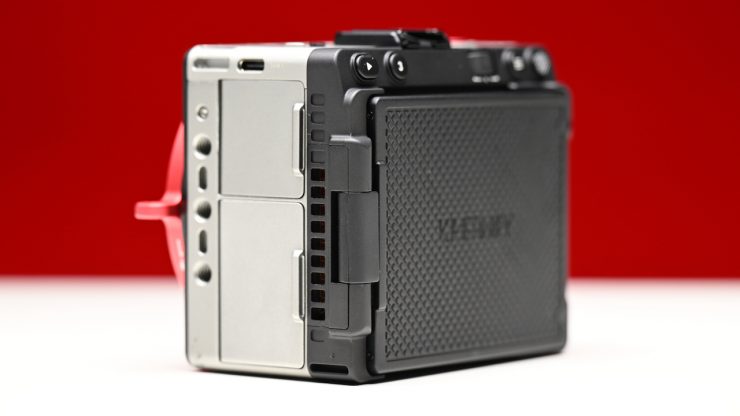
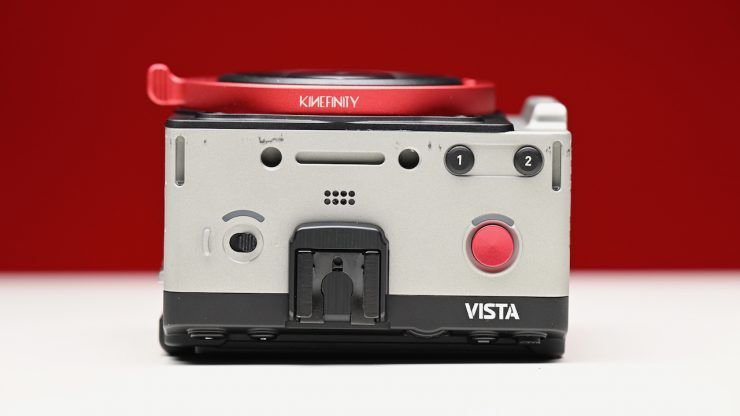
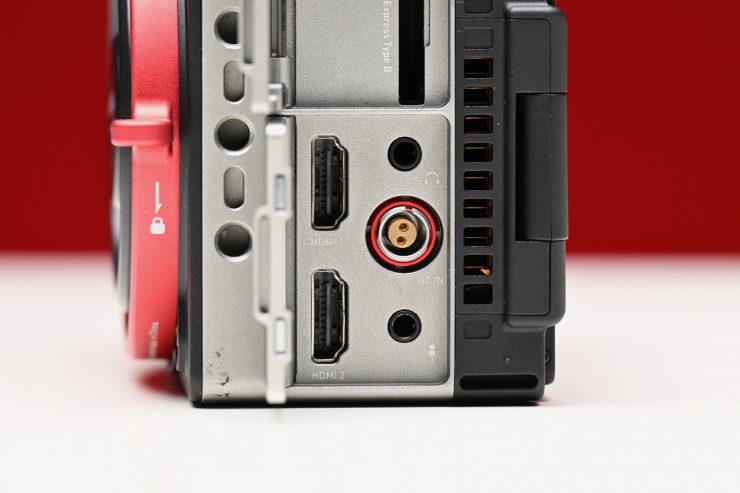
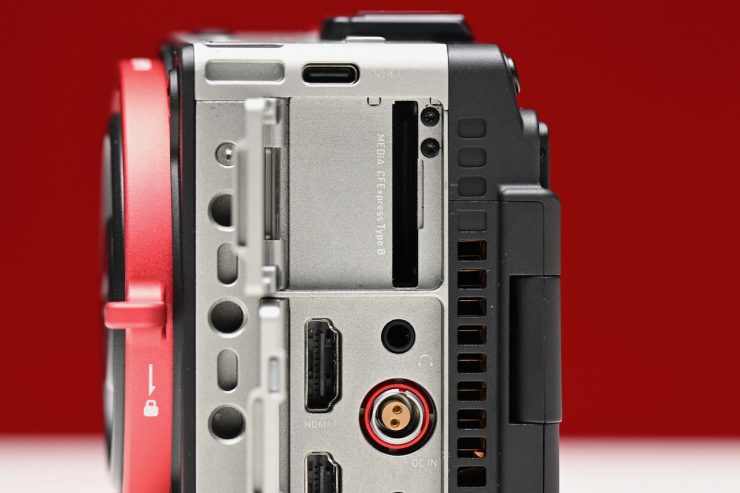
Despite being so small, Kinefinity has still managed to equip it with a good amount of inputs and outputs. There are two full-sized HDMI outputs, a 3.5mm microphone input, a 3.5mm headphone jack, two built-in stereo mics, a speaker, and a 2-pin LEMO. The camera records to a single CFexpress Type B card slot, and it has a built-in 240GB SSD drive. Footage can then be offloaded via one of the USB-C ports. You can also use one of the two USB-C ports to record externally if you want to. Additionally, you can also use one of the USB-C ports for audio.
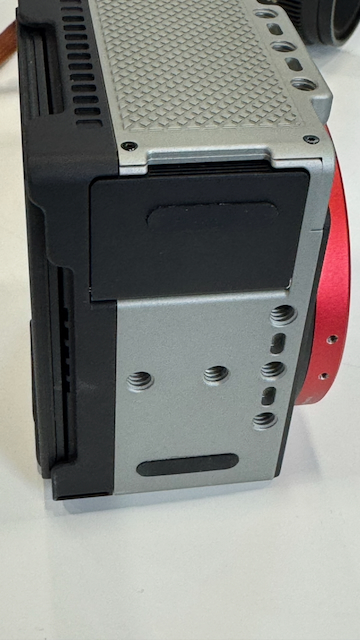
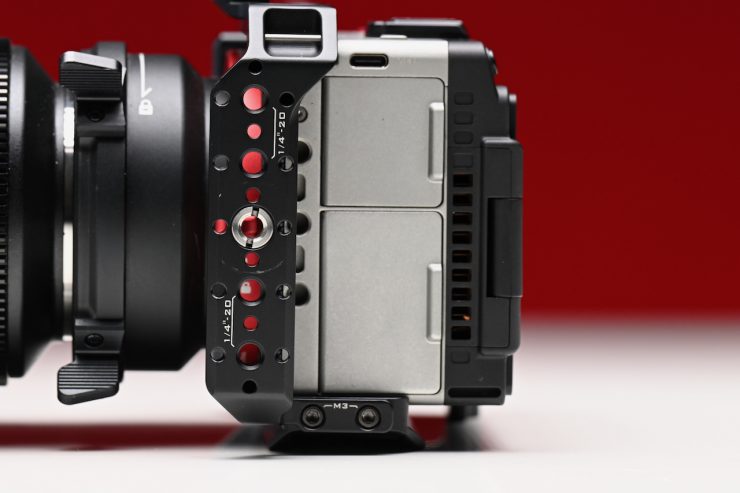
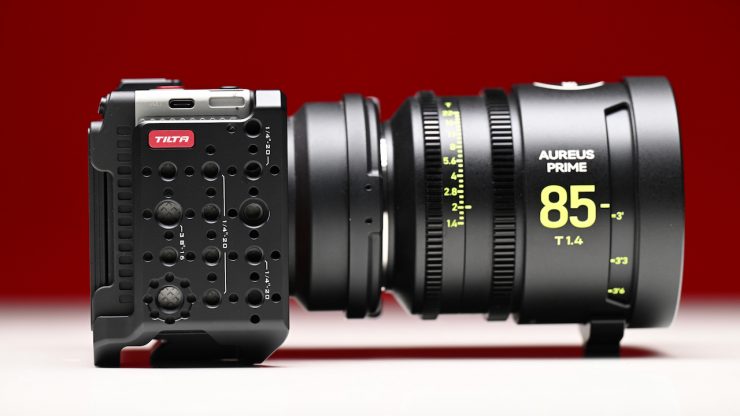
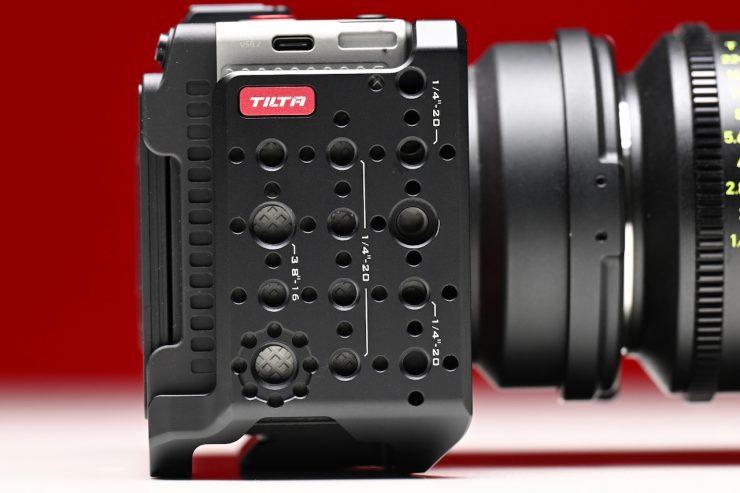
The camera has 12 1/4-20″ mounting points, which gives you a lot of versatility when using it for different shooting applications.
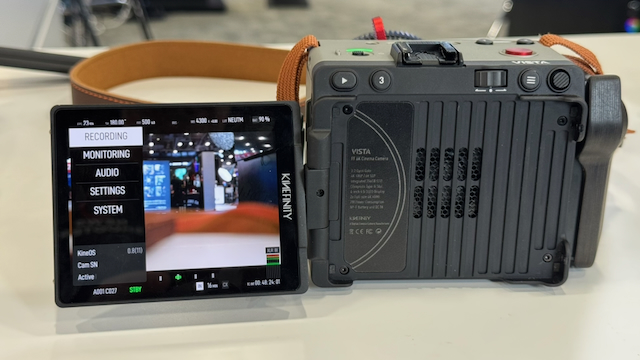
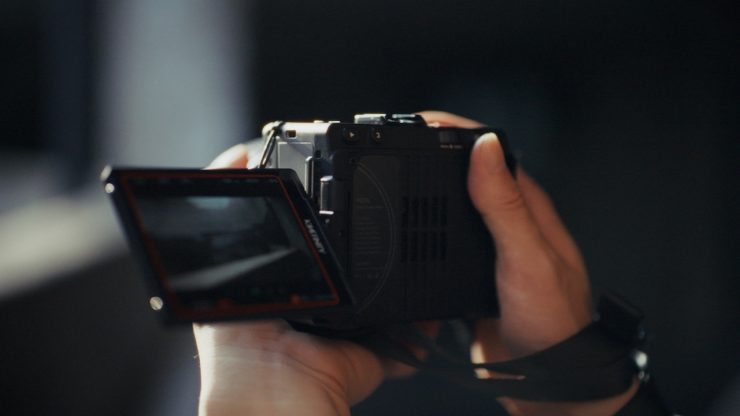
The camera has a large articulating 4-inch 6:5 Retina OLED Screen (700 nits).
Kinefinity has historically offered features and functionality in a lot of its cameras that no other manufacturer was doing for a lot less money. However, times have changed, and now most camera companies are offering impressive full-frame digital cinema cameras that are very competitively priced. This has made it harder and harder for smaller companies such as Kinefinity and Z CAM to compete.
As Kinefinity is a very small company compared to its competitors, it makes perfect sense for them to come up with something that is different from what everyone else is doing.
Pre-Production Unit
The VISTA camera I was reviewing is still an early engineering sample intended for basic hardware evaluation and preliminary function testing. There were a lot of features and functions that weren’t working.
As the hardware and firmware are rapidly iterating, there are current pre-production variances between the sample and the final shipping version
The engineering sample I have features temporary pre-production styling. The final production units will address and optimize quite a few mechanical and hardware issues.
Size & weight
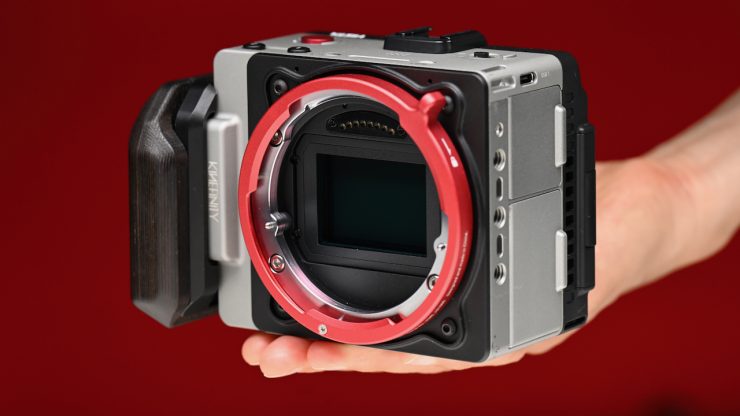
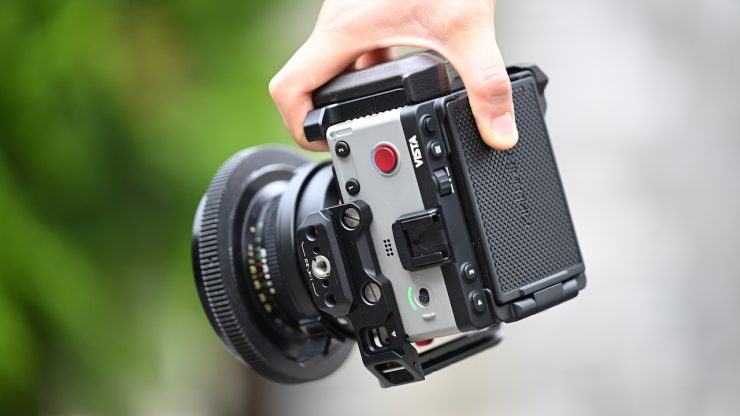
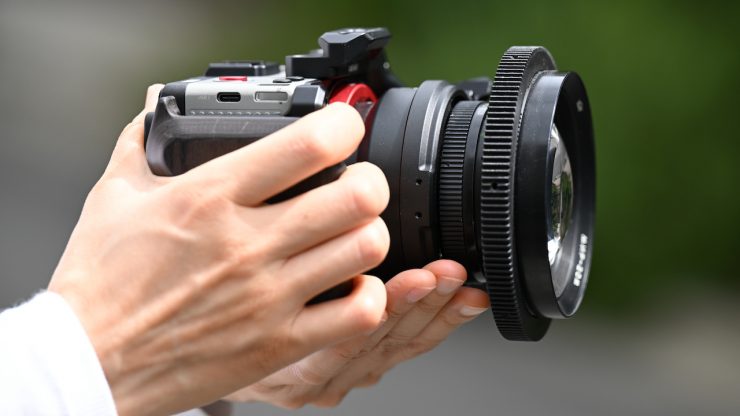
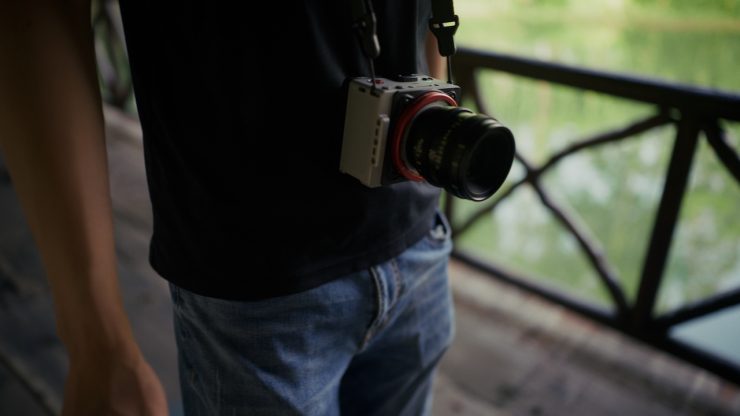
The VISTA really is tiny, and it can literally fit in the palm of your hand. It weighs 600g / 1.32 lb (KineMOUNT, no battery); 700g / 1.54 lb (with GripBAT-2Si), and it has dimensions of 101 x 87 x 65mm / 4.0 x 3.4 x 2.6 in (excluding protrusions) for the body alone. It really is impressive that Kinefinity has been able to fit so many features in such a small camera body.

The other positive aspect of the camera being so light is that it’s easy to switch it from a tripod to a gimbal or even a drone. This flexibility is what a lot of shooters are looking for in a camera, and it’s why we are now seeing so many cameras coming to market that have been designed with this in mind.
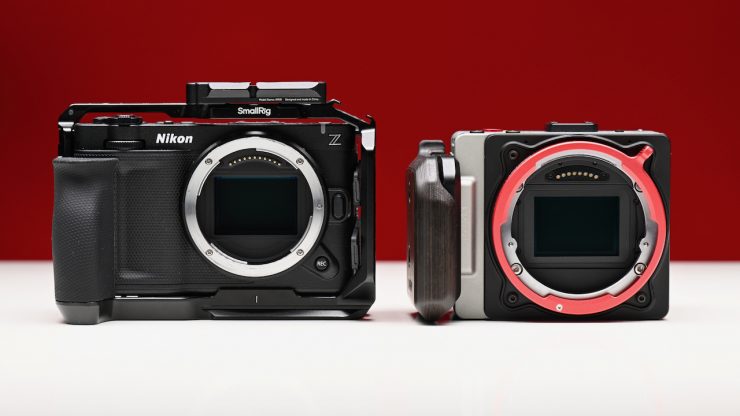
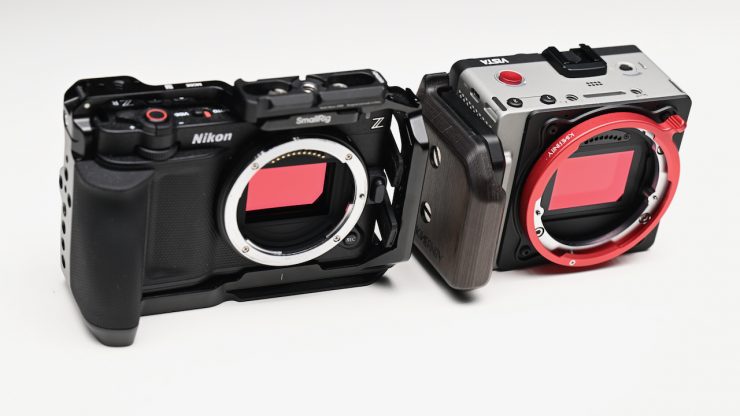
Above, you can see how it compares size-wise to the Nikon ZR.
Here is what some of the other digital cinema cameras and mirrorless hybrids on the market weigh (body only):
| WEIGHT | |
| Kinefinity VISTA | 1.32 lb / 600g (Body only) |
| Canon EOS R6 V | 24.3 oz / 689g (Body only) |
| Canon EOS C50 | 23.5 oz / 665g (Body only) |
| Nikon ZR | 1.19 lb / 540g (Body only) |
| Sony FX3A | 1.4 lb / 640g (Body only) |
| Sony FX2 | 1.3 lb / 594g (Body only) |
| Sony FX30 | 1.2 lb / 562g (Body only) |
| Sony ZV-1 | 10.37 oz / 294g (With Battery, Recording Media) |
| Ricoh GR IV | 8.0 oz / 228g (Body only) |
| Leica D-Lux 8 | 14.0 oz / 397g (With Battery) |
| Sony Cyber-shot DSC-RX100 VII | 10.65 oz / 302g (Body only) |
| Panasonic Lumix S9 | 0.9 lb / 403g (Body only) |
| Panasonic Lumix S5 II | 1.45 lb / 658g (Body only) |
| Panasonic Lumix S5 IIX | 1.45 lb / 658g (Body only) |
| Panasonic Lumix GH7 | 1.6 lb / 721g (Body only) |
| FUJIFILM X-M5 | 12.5 oz / 355g (Body only) |
| FUJIFILM X-T5 | 16.8 oz / 476g (Body only) |
| FUJIFILM X-T50 | 0.9 lb / 389g (Body only) |
| FUJIFILM X-H2S | 1.3 lb / 579g (Body only) |
| Nikon Z8 | 1.8 lb / 820g (Body only) |
| Nikon Z6 III | 23.6 oz / 670g (Body only) |
| Nikon Z50 II | 17.46 oz / 495g (Body only) |
| Nikon Zfc | 13.8 oz / 390g (Body only) |
| Nikon Z30 | 12.3 oz / 350g (Body only) |
| Sony FX6 | 2.0 lb / 890g (Body only) |
| Canon EOS C80 | 2.87 lb / 1.30 kg (Body only) |
| Canon EOS C70 | 2.58 lb / 1.17 kg (Body only) |
| Blackmagic Design PYXIS 6K | 3.85 lb / 1.75 kg (Body only) |
| Blackmagic Design PYXIS 12K | 3.5 lb / 1.6 kg (Body only) |
| Blackmagic Design Pocket Cinema Camera 6K Pro | 2.49 lb / 1.13 kg (Body only) |
| ARRI ALEXA Mini LF | 5.7 lb / 2.6 kg (Body only) |
| RED V-RAPTOR | 4.03 lb / 1.82 kg (Body only) |
| RED V-RAPTOR XE | 4 lb / 1.8 kg (Body only) |
| RED KOMODO | 2.1 lb / 952g (Body only) |
| RED KOMODO-X | 2.62 lb / 1.19 kg (Body only) |
With the VISTA, you can literally put on a lens and a battery, and you are ready to go. However, in saying that, if you want to add audio and other accessories, there is limited space to do so, but the cage certainly helps with that.
Build quality


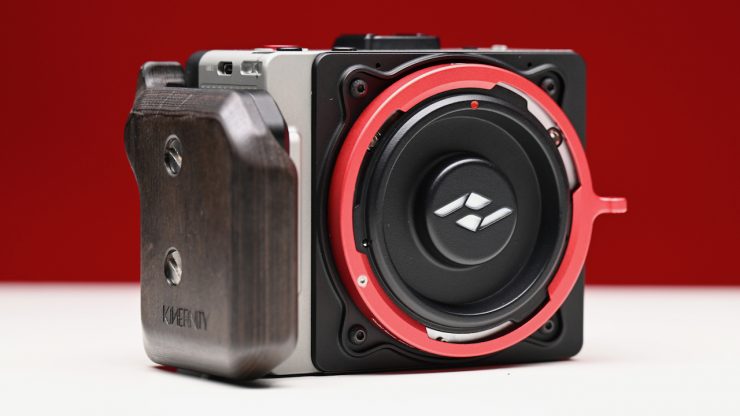
The VISTA is lightweight, but it is very solidly made. It has been nicely designed, and it is made out of CNC-machined Aviation-grade Aluminum Alloy. It doesn’t have the plastic feel of some offerings from Sony, Panasonic, and Canon. The overall build quality of the camera, given its price point, is very good.
Even though the camera I was reviewing wasn’t a production shipping version, the build quality was still good. As I mentioned at the top of the article, there will be some small improvements and cosmetic changes to the shipping version.


The camera certainly feels a lot more solidly made than any of the offerings under $2,500 USD from Sony, Canon, Nikon, and Panasonic.
4″ 700nit OLED Screen
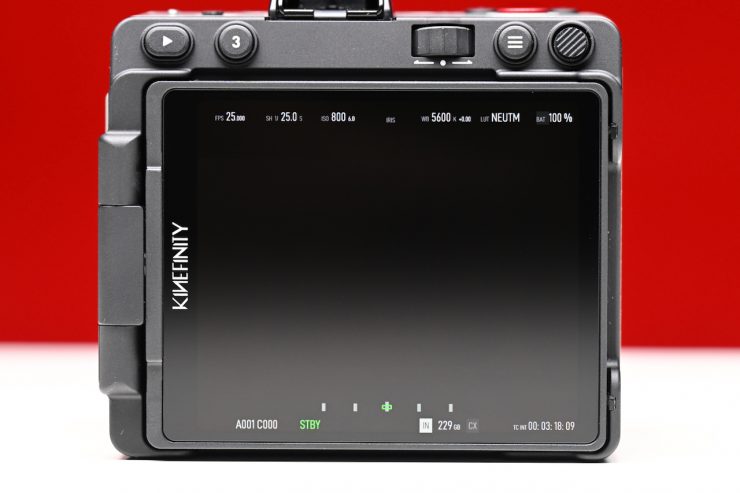
The 4″ 700nit OLED Screen is one of the standout features. It is large and bright, and you can totally use it outdoors. Although, in saying that, I still prefer to use an EVF in bright conditions outdoors, but that’s just my preference.
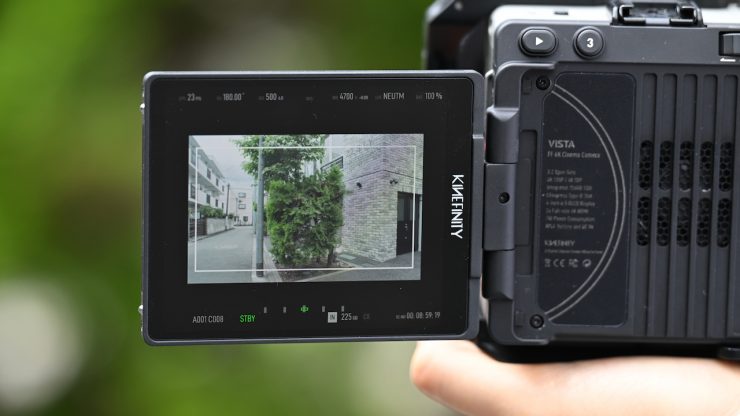
Even thought is is claimed to be 300nits less than the Nikon ZR’s screen, I found it to be almost as bright in the real world.
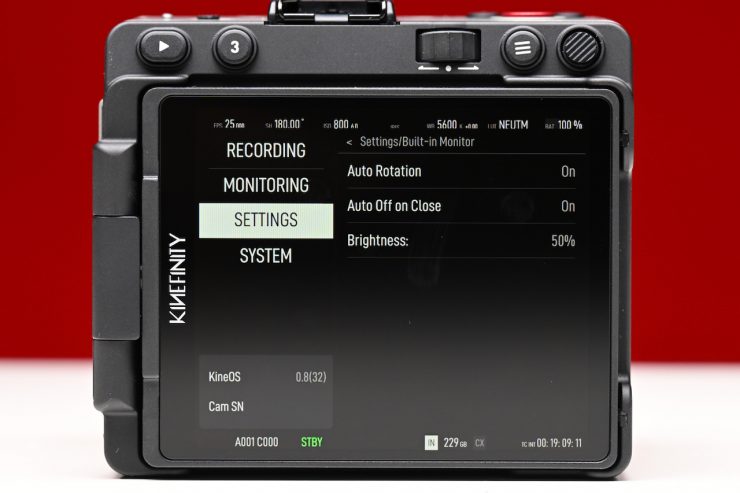
In the menu, you can change the brightness setting (10-100% in 10% increments) as well as turn auto rotation on/off, and turn the Auto Off on or off when you close the screen.
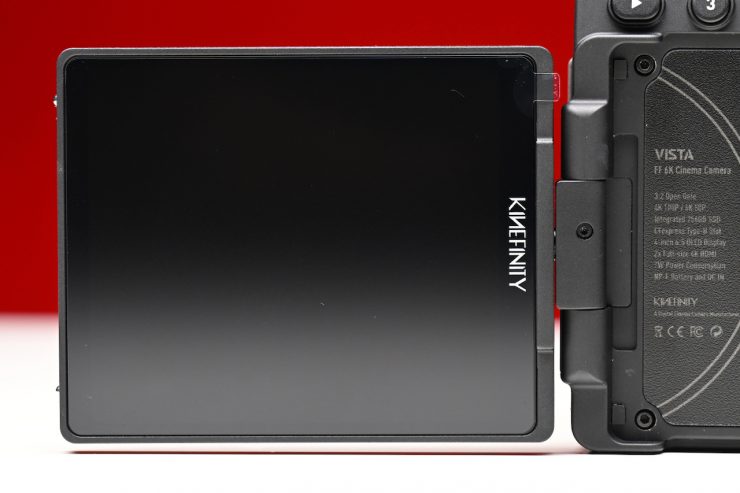

The screen articulates, and it offers a good amount of adjustment. My only giggling issue with the screen, and this may be because it is a pre-production unit, is that when you fold it out, it doesn’t sit completely square, and it’s on a slight angle. This may be a small complaint, but I personally find it hard to shoot when a screen isn’t aligned straight.
A lot has changed in the last 14 years
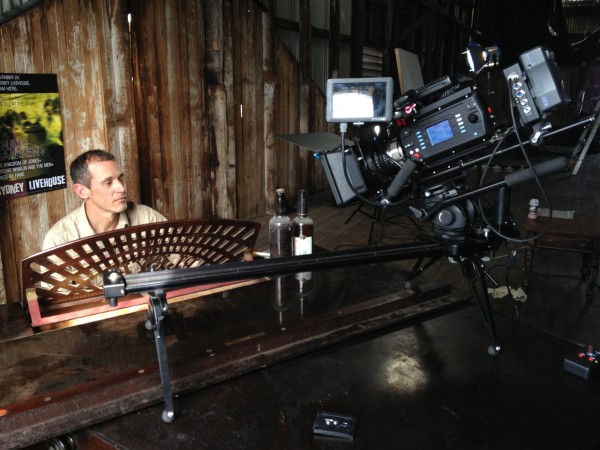
Kinefinity holds a rather niche, but important place in the digital cinema camera space. They are a small company that has been around for almost 15 years. I actually shot with their first-ever prototype camera, the KineRAW S35, way back in 2012.
The company has come a long way since 2012, and its cameras have continued to get better and better over the years. The last Kinefinity camera I reviewed was the MAVO Edge 6K, and that was a very capable camera given its capabilities and feature set. Kinefinity has arguably reached a point where they are no longer thought of as “That Chinese camera“, but rather, as a legitimate alternative to other, more well-known brands. You should never judge a book by its cover.
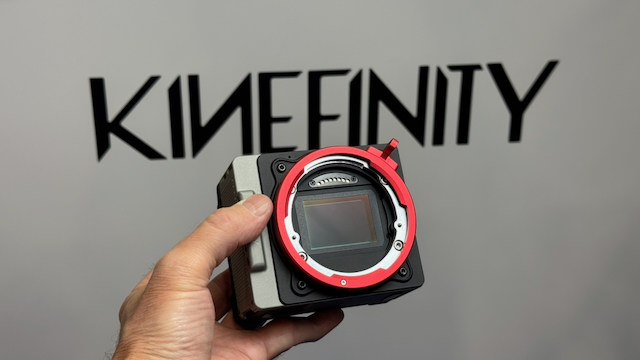
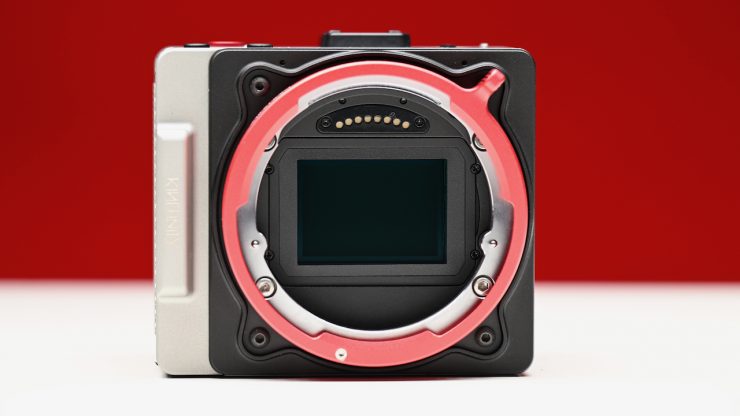
6K Full Frame Sensor
VISTA 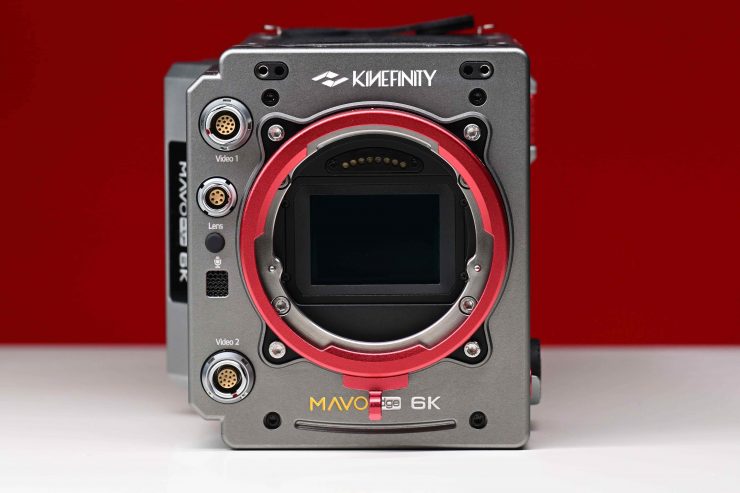
MAVO Edge 6K
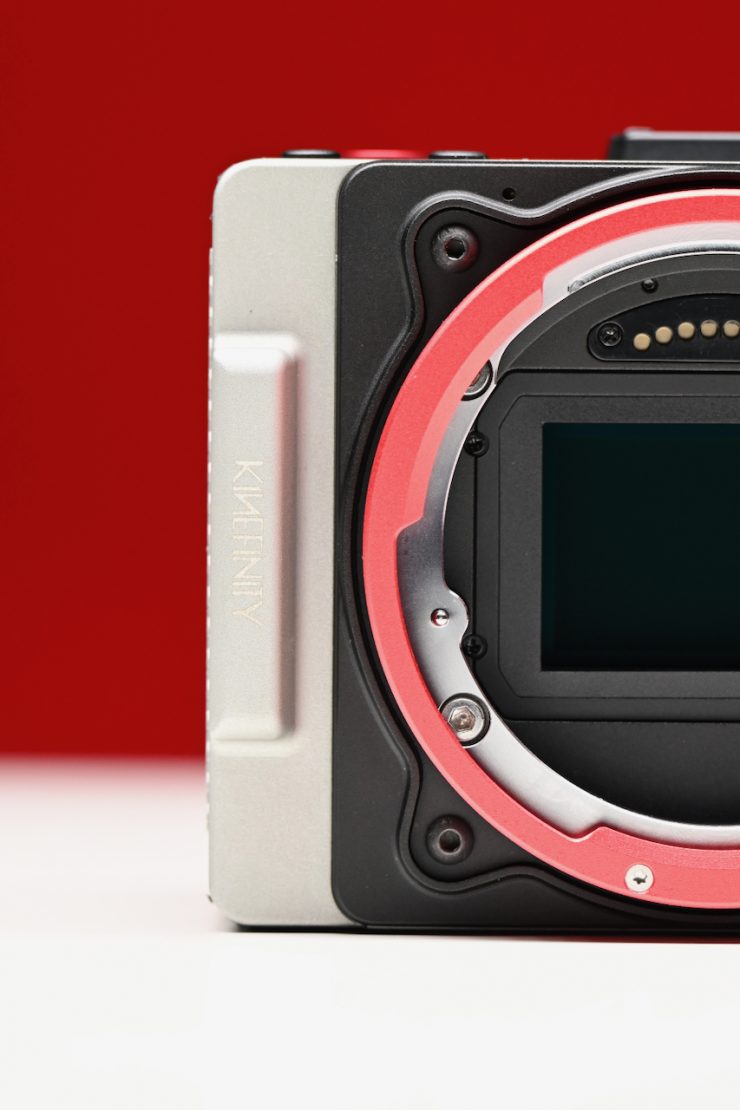
The VISTA features a 6K 3:2 Full-Frame CMOS sensor. The physical size of the sensor is 36x24mm ø 43.3mm. From my understanding, the sensor is the exact same sensor that was used in the MAVO Edge 6K.
VISTA 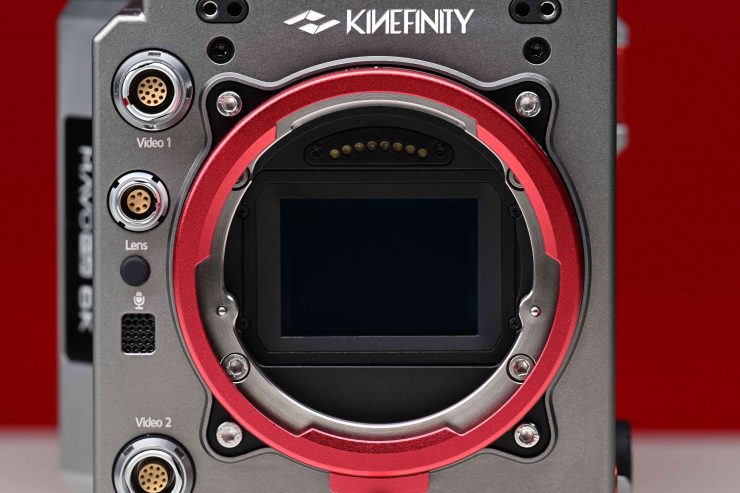
MAVO Edge 6K 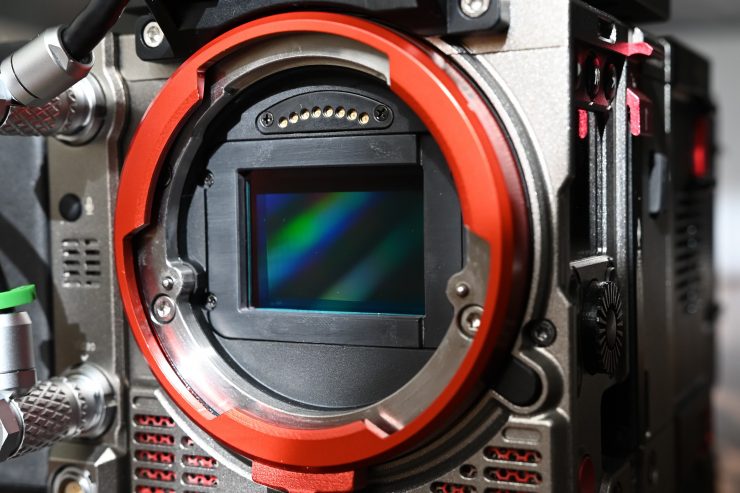
MAVO LF Sensor 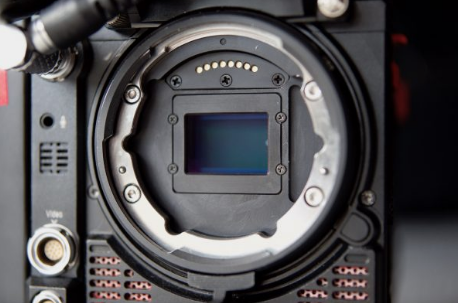
MAVO S35
Above, you can see the sensors used in the VISTA, MAVO S35, MAVO LF, and MAVO Edge 6K.
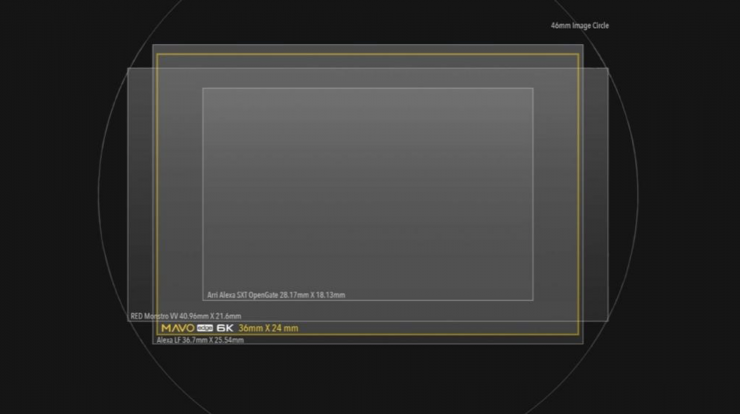
When shooting in the full frame mode, the VISTA can shoot in a maximum resolution of 6016 x 3984 (3:2 Open Gate).
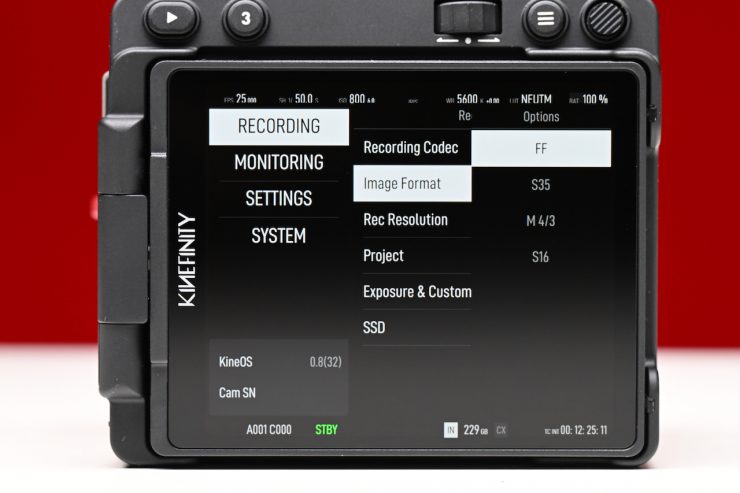
The sensor on the VISTA can also be cropped or oversampled to shoot in M4/3, S16, and S35 modes. There is also a multitude of frame rates you can record at, depending on what resolution or image format size you are shooting in.

In the FF mode, the highest resolution you can shoot at is 6K OG 6016 x 3984.
In the S35 mode, the highest resolution you can shoot at is 4K 6:5 4096 x 3432.
In the M4/3 mode, the highest resolution available is 3K DCI 3072 x 1620.
In the 16mm mode, the highest resolution available is 2K DCI 2048 x 1080.
In the real world, I did find that the M4/3 and S16 modes don’t have a ton of sharpness, but they are still usable.
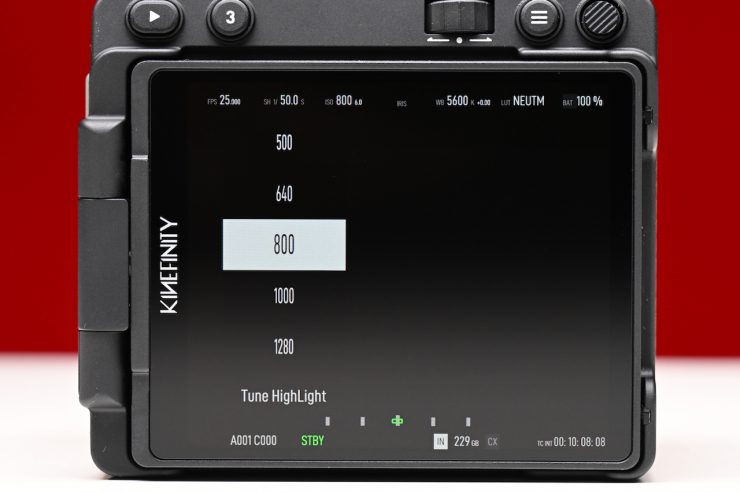
Dual Native ISO
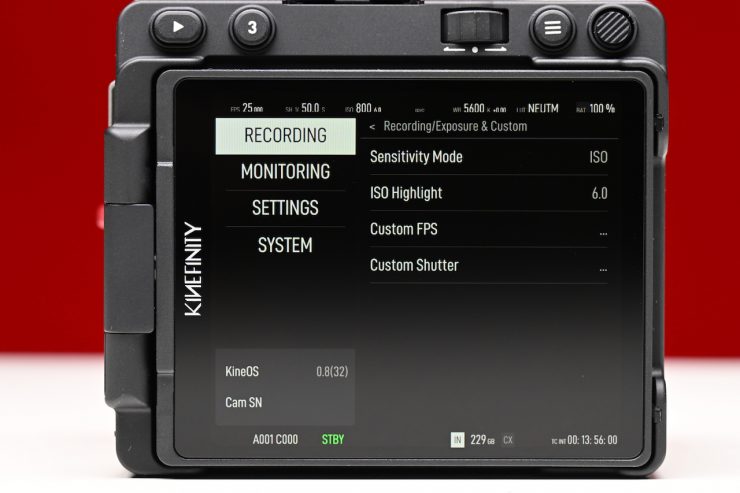
The VISTA has a dual ISO of 800 and 5120. When you set highlight stops to 6.0, the native ISO range is 250 to 2560 on the 800 base. The 5120 base is for the range from 3200 to 20480 ISO.
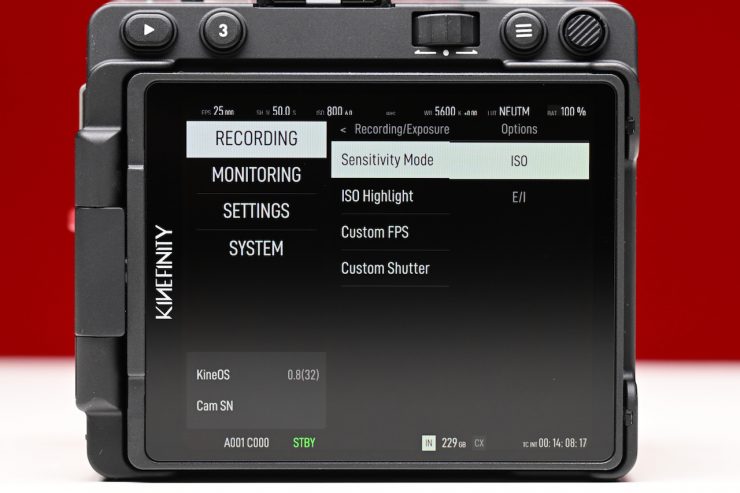
The VISTA supports both ISO and EI modes. More on those in a minute.
ISO Mode
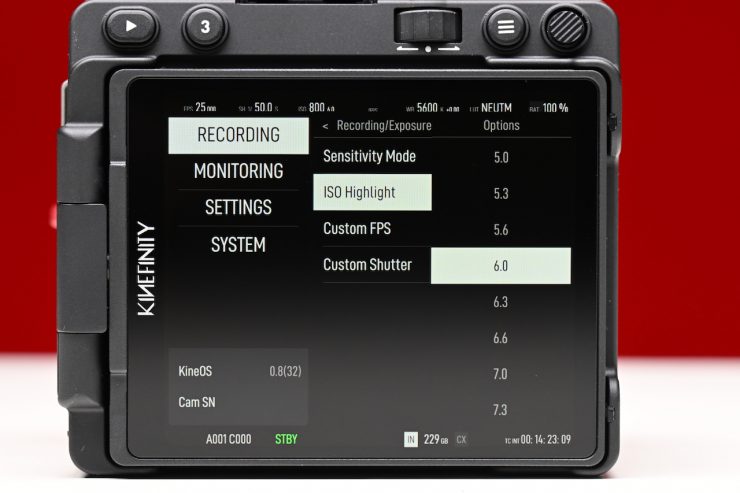
The nominal value of ISO is ISO ASA, which takes effect on the RAW data, applying different gain to the CMOS imaging sensor. The default mode is ISO mode, ISO 800. The highlight level (Highlight means stops from 18% gray to ADC Clip) is 6.0 stops.
As the name suggests, more highlight stops mean fewer shadow details and more noise. If you want to retain more highlight details, the recommended setting is 6.0 stops and above, or you can just use the EI mode. Changing ISO will not change highlight stops. However, the highlight stops are able to be changed from 4.3 to 7.3 stops in the menu. There is a caveat, though: depending on the number of highlight stops you choose, the minimum ISO value will change. For example, when the highlight stops are set to 6.0, the minimum ISO is 500; while for 4.3 stops, the minimum ISO is 160.
| HIGHLIGHT STOPS | MIN ISO | MAX ISO |
| 4.3 | 160 | 10240 |
| 4.6 | 200 | 12800 |
| 5.0 | 250 | 16000 |
| 5.3 | 320 | 20480 |
| 5.6 | 400 | 25600 |
| 6.0 | 500 | 32000 |
| 6.3 | 640 | 40960 |
| 6.6 | 800 | 51200 |
| 7.0 | 1000 | 64000 |
| 7.3 | 1280 | 81920 |
Above, you can see what the minimum and maximum ISO values are for different amounts of highlight stops. You need to think very clearly before changing highlight stops in ISO mode. What you are effectively doing if you move off 6.0 stops is losing dynamic range. You might end up protecting your highlights, but conversely, you lose a lot of information in the mids and shadows. The opposite is true if you set the highlight stops too low. While you may get more information in the mids and shadows, you will lose information in the highlights. Depending on what you are shooting, altering the highlight stops can work well, but only in certain situations.
EI Mode
The nominal EI value is similar to the settings in traditional Cine Cameras. The highlight stops follow the change of the EI value, but image brightness is adjusted by digital gain while the analog gain of the CMOS imaging sensor remains unchanged.
Changing the EI will change the highlight stops and image brightness, while sensitivity and dynamic range remain unchanged. All that is happening is that the dynamic range stops above and below middle grey gets shifted. For example, the highlight stops at EI 800 are 6.6 stops, and at EI 5120 they are 7.0 stops. In this mode, you can set the camera from EI 100 up to EI 12800.
The ISO and EI values can be a bit confusing. The simplest way to think about it is that when you are in ISO mode, you can change the highlight stops, regardless of what the ISO value is. With EI, the highlight stops are defined by the ISO you are using.
| EI VALUE | HIGHLIGHT STOPS |
| 100 | 3.6 |
| 125 | 4.0 |
| 160 | 4.3 |
| 200 | 4.6 |
| 250 | 5.0 |
| 320 | 5.3 |
| 400 | 5.6 |
| 500 | 6.0 |
| 640 | 6.3 |
| 800 | 6.6 |
| 1000 | 7.0 |
| 1280 | 7.3 |
| 1600 | 7.6 |
| 2000 | 8.0 |
| 2560 | 6.0 |
| 3200 | 6.3 |
| 4000 | 6.6 |
| 5120 | 7.0 |
| 6400 | 7.3 |
| 8000 | 7.6 |
| 10240 | 8.0 |
Above, you can see what the highlight stops are for the various EI values. What is interesting is that you can clearly see when the dual native ISO changes values, even when in EI mode. At EI 2000, it is at 8.0, and then when you switch to EI 2560, it drops back to 6.0. This tells me that when you are in the EI mode, EI 500 and EI 2560 are the two base EI settings. If you really need to protect highlights, then, in theory, EI 2000 would be the best setting to use.
Resolution, Frame Rates & Codecs
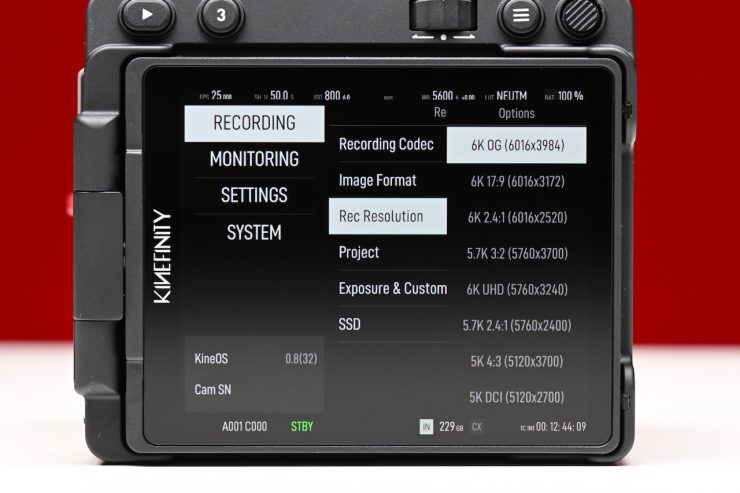
The VISTA can record in resolutions of 6K, 5K, 4K, 3K, and 2K.
In 6K Open Gate (6016 x 3984), you can record up to 36fps, and in 6K DCI (6016 x 3172), you can record up to 50fps.
As a comparison, on the Kinefinity MAVO Edge 6K, when shooting 6K Open Gate (6016 x 3984) can record up to 48fps, and in 6K DCI (6016 x 3172), you can record up to 60fps.
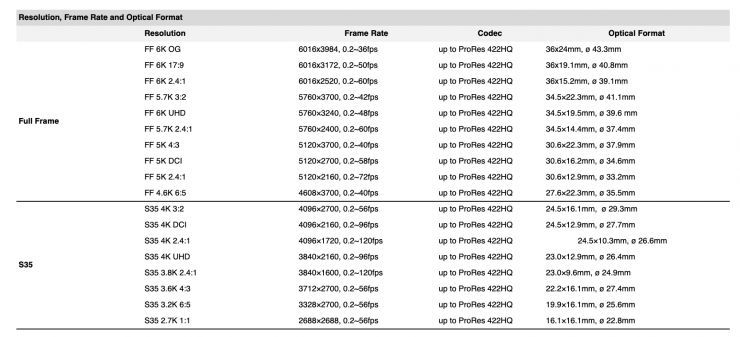
Below you can see what resolutions and max. frame rates that are available in various recording modes.
FULL FRAME
| FORMAT | RESOLUTION | MAX FPS |
| 6K 2.4:1 | 6016 x 2520 | 60 |
| 6K 17:9 | 6016 x 3172 | 50 |
| 6K Open gate | 6016 x 3984 | 36 |
| 6K UHD | 5760 x 3240 | 48 |
| 5.7K 3:2 | 5760 x 3700 | 42 |
| 5.7K 2.4:1 | 5760 x 2400 | 60 |
| 5K 4:3 | 5120 x 3700 | 42 |
| 5K DCI | 5120 x 2700 | 58 |
| 5K 2.4:1 | 5120 x 2160 | 72 |
| 4.6K 6:5 | 4608 x 3700 | 42 |
From what I understand, the VISTA doesn’t have FF oversampling modes that allow you to record in 4K like the Mavo Edge 6K.
There are a ton of resolution and frame rate options available when shooting in full frame. Some of the maximum frame rates are a little odd, such as 36 and 42.
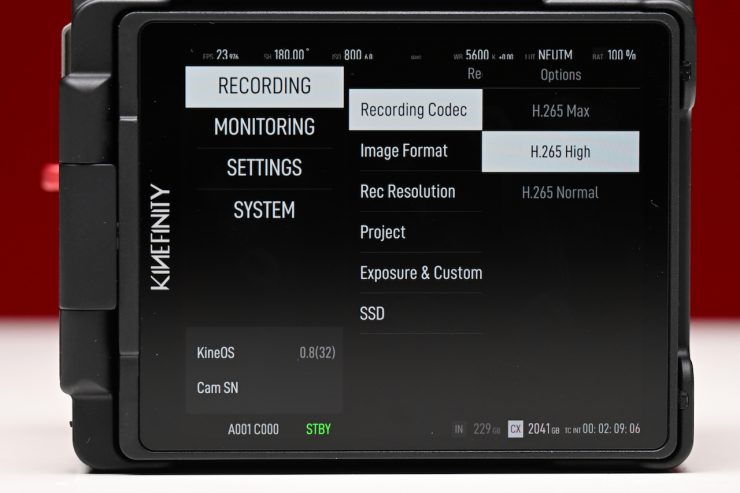
The VISTA will be able to record in ProRes and H.265.
All of these resolutions and frame rates can currently be captured in the following versions of H.265:
- H.265 Max
- H.265 High
- H.265 Normal
The biggest issue with the H.265 codecs is that they are all only 4.2.0 10-bit. As far as the bitrates are concerned, here is what Kinefinity told me:
H.265 Codec, under 4K UHD 25fps
- H.265 Normal: Max 80Mbps, range 20-80 Mbps
- H.265 High: Max 200Mbps, range 60-200Mbps
- H.265 Maximum: Max 400Mbps, range 100-400Mbps
Having three flavors of H.265 to choose from is nice, especially if you need to record for long periods of time on a single CFexpress Type B card or to the internal SSD.
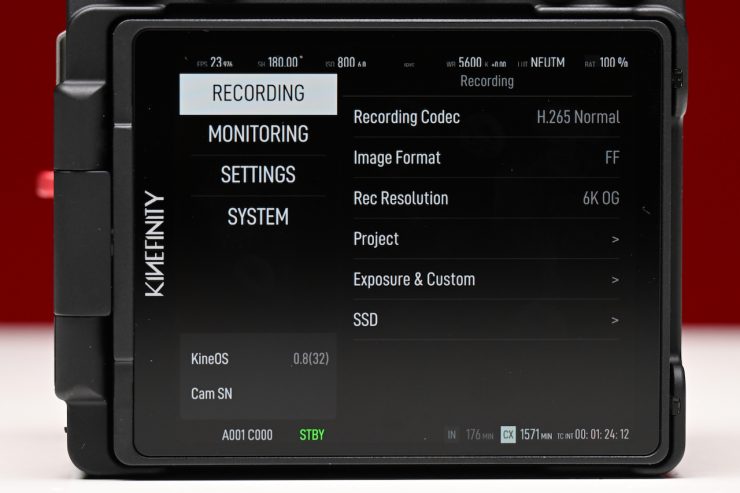
When I set the VISTA to record 6K OG at 23.98p in H.265 Normal, a 2TB CFexpress Type B card allowed me to record for 1571 minutes, which equates to just over 26 hours. The internal 240GB SSD gave me an additional 176 minutes.
Unfortunately, with the current pre-production firmware, it wouldn’t display how much recording time I had available if I chose H.265 Max or H.265 High. It would only show the remaining GB available.
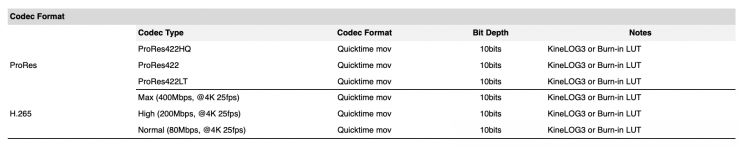
The VISTA will also be able to record in the following flavours of ProRes:
- ProRes 422HQ Quicktime .mov 10-bits
- ProRes422 Quicktime .mov 10-bit
- ProRes LT Quicktime .mov 10-bit
This is a decent range of options to choose from; however, you don’t get ProRes 4444 or ProRes 4444XQ options. I am a big fan of ProRes because it is very robust, and most importantly, it is an easy codec to deal with.
S35
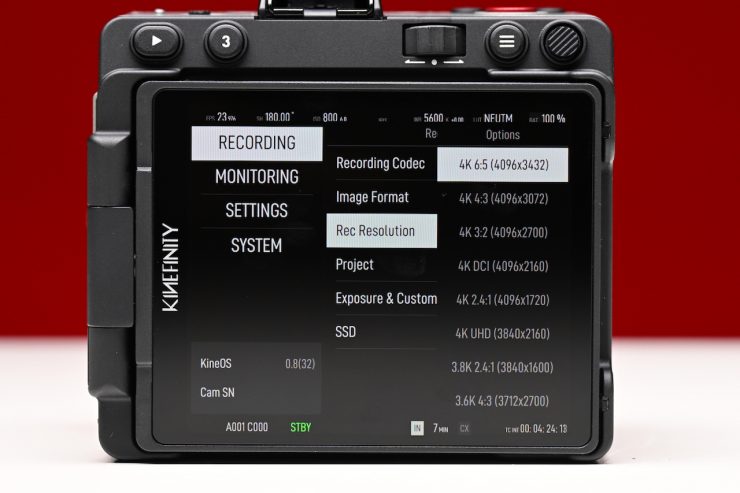
| FORMAT | RESOLUTION | MAX FPS |
| 4K 6:5 | 4096 x 3432 | 46 |
| 4K 4:3 | 4096 x 3072 | 46 |
| 4K DCI | 4096 x 2160 | 72 |
| 4K 2.4:1 | 4096 x 1720 | 90 |
| 4K UHD | 3840 x 2160 | 72 |
| 3.8K 2.4:1 | 3840 x 1600 | 96 |
| 3.6K 4:3 | 3712 x 2700 | 58 |
| 3.2K 6:5 | 3328 x 2700 | 58 |
There are plenty of recording options if you move to the S35 mode. Having the ability to shoot 4K Wide up to 90fps and 4K DCI up to 72fps is a nice option. There are also 4K, 3.6K, and 3.2K 6:5 and 3:2 options available.
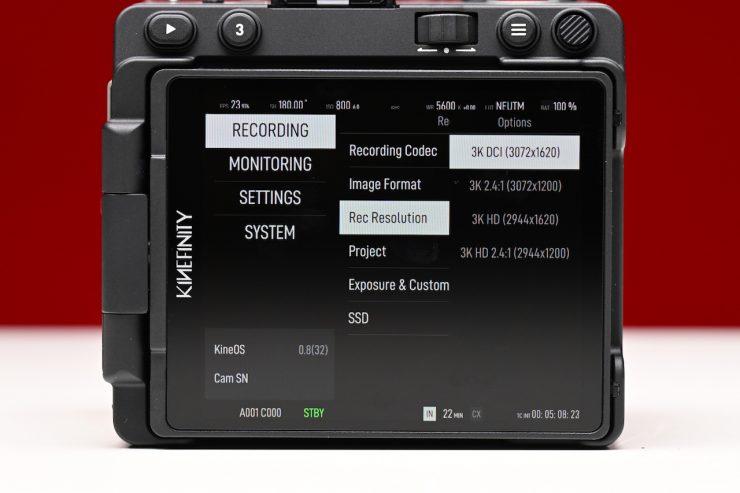
M4/3
| FORMAT | RESOLUTION | MAX FPS |
| 3K DCI | 3072 x 1620 | 95 |
| 3K 2.4:1 | 3072 x 1200 | 128 |
| 3K HD | 2944 x 1620 | 95 |
| 3K HD 2.4:1 | 2944 x 1200 | 128 |
S16
| FORMAT | RESOLUTION | MAX FPS |
| 2K DCI | 2048 x 1080 | 138 |
| 2K 2.4:1 | 2048 x 860 | 172 |
| 2K HD | 1920 x 1080 | 138 |
| 2K HD 2.4:1 | 1920 x 800 | 172 |
No RAW
While ProRes 422 HQ and H.265 are going to be more than sufficient for most shooting requirements, a lot of potential buyers are now expecting internal RAW recording.
Anamorphic Shooting
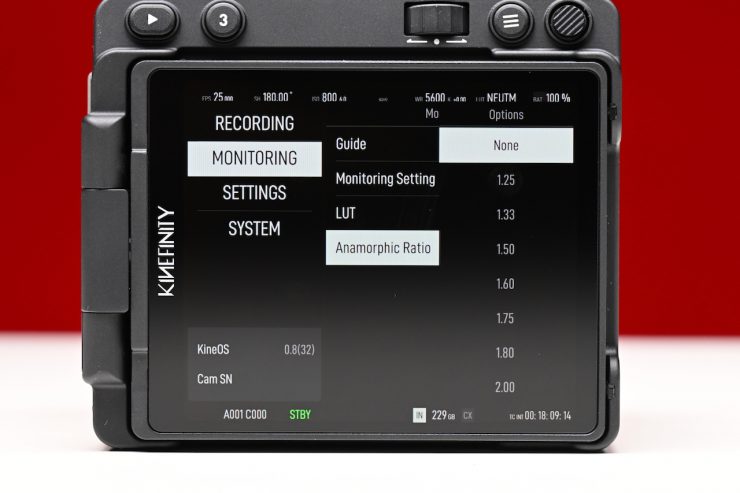

Kinefinity cameras such as the VISTA, MAVO Edge 6K, MAVO Edge 8K, MAVO LF, MAVO, and TERRA 4K are good choices for anamorphic shooting, as the CMOS imaging sensors are all 3:2.
The 36x24mm full-frame CMOS imaging sensor of VISTA is a pretty big canvas that allows users to easily work in a variety of anamorphic modes:
- S35 anamorphic
- Full frame anamorphic, obtaining a field of view equivalent to 65mm
- Open Gate: 6016×3984. All pixels of the CMOS imaging sensor are captured, leaving maximum space for post-processing.
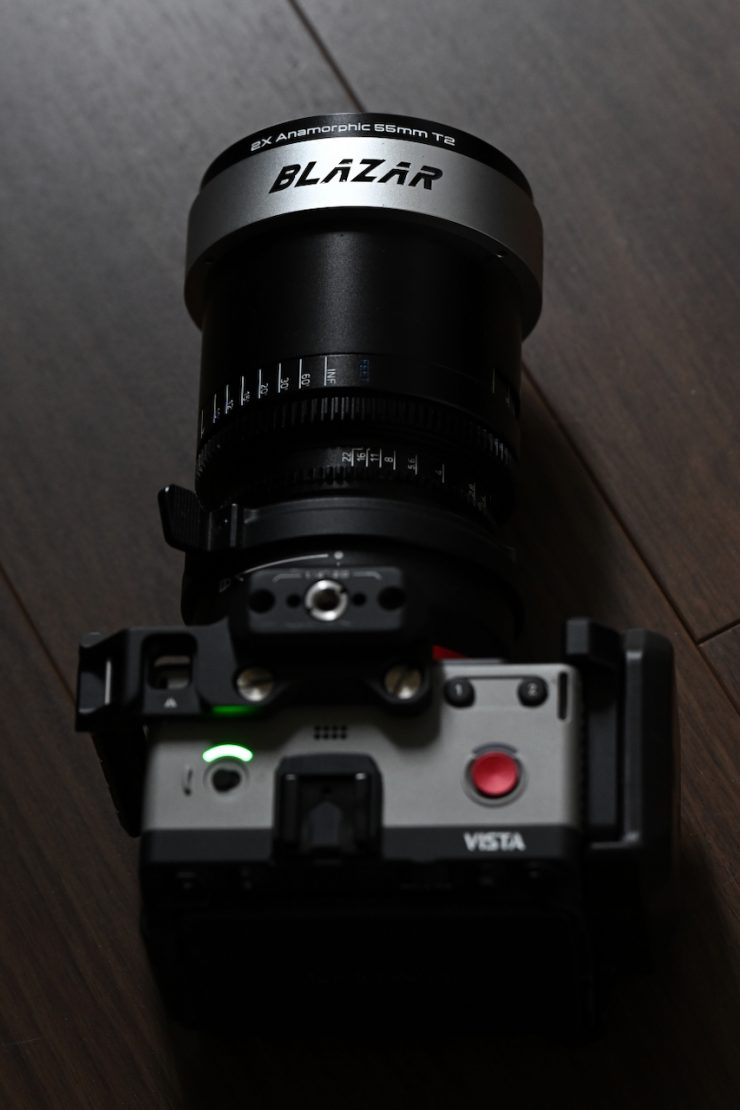
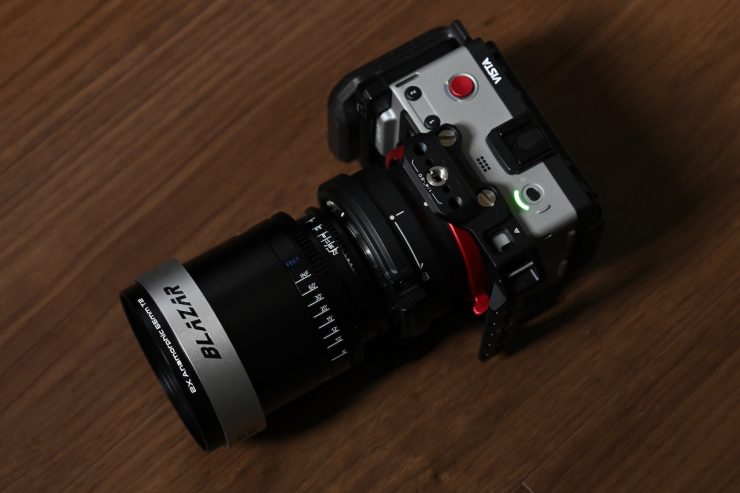
The camera supports 2x, 1.8x, 1.75x, 1.6x, 1.5x, 1.33x, and 1.25x anamorphic shooting, which covers almost all anamorphic lenses on the market.
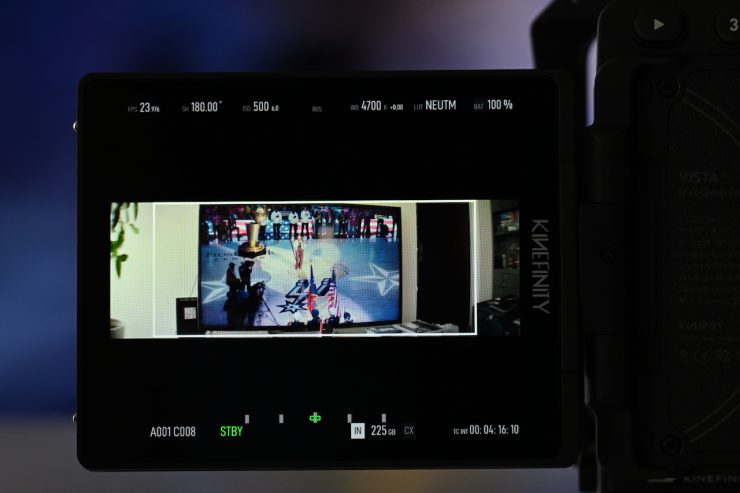
What does it output over HDMI?
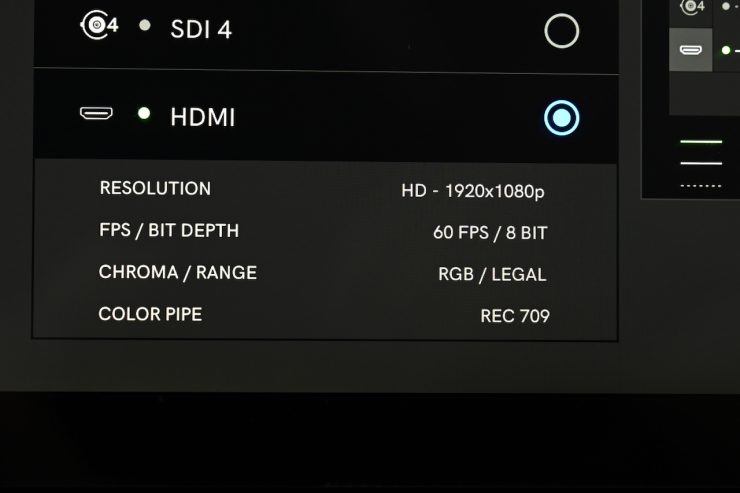
When I hooked the VISTA up to a monitor via HDMI, it was interesting to see that it is only capable of outputting a 1920 x 1080 422 8-bit signal.
What is perhaps a little disappointing to see is that even though the camera has two HDMI outputs, you can’t individually customize what goes out over HDMI.
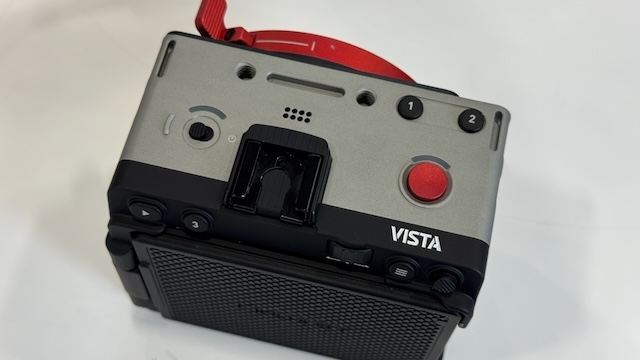
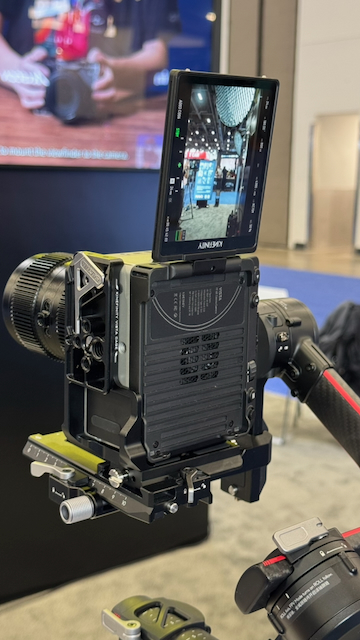
How does the camera stay cool?
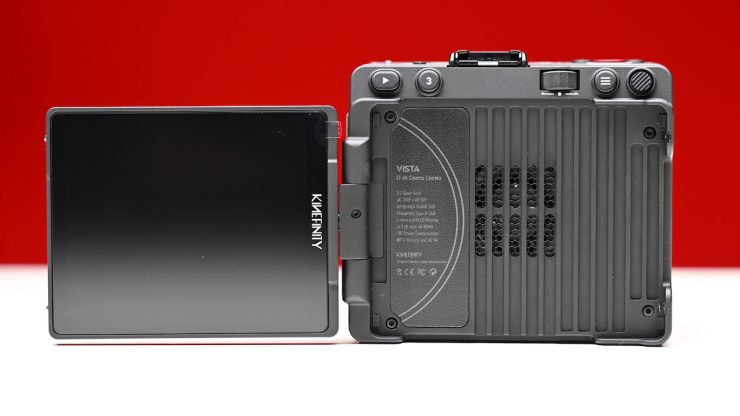
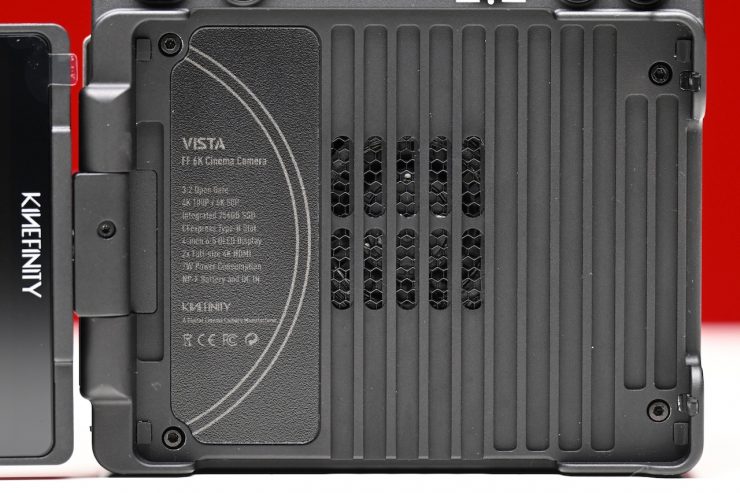
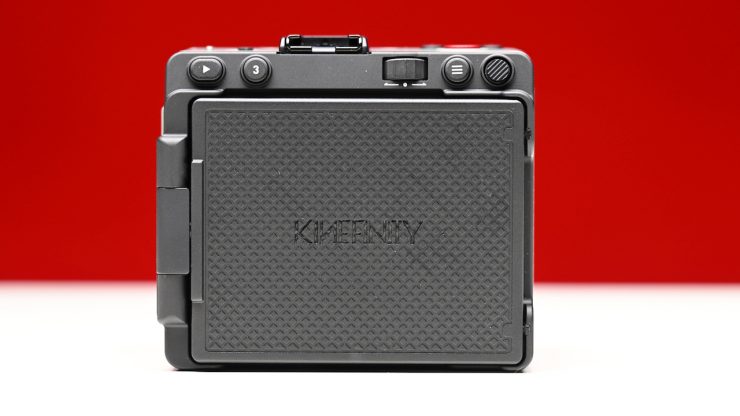
Like any modern-day camera capturing high resolutions and high framerates, they generate a lot of heat. That heat needs to be dissipated, and the VISTA has a large fan on the back of it behind the OLED screen to keep the camera cool.
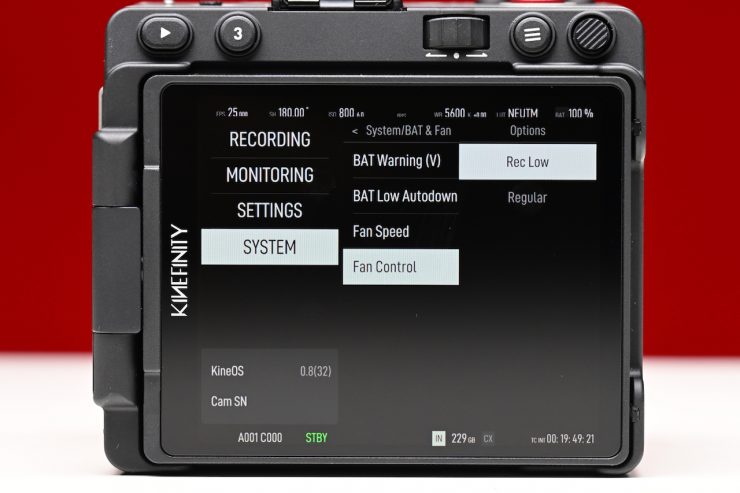
In Fan Control, you have the ability to choose from Rec Low or Regular.
The Core Temperature is the real-time temperature of the core processor. When the core temperature reaches up to 75 degrees, the camera will be cooled down automatically by the fan at full speed until the core temperature goes down to 70 degrees or below. Once that happens, the fan speed will return to its normal setting.
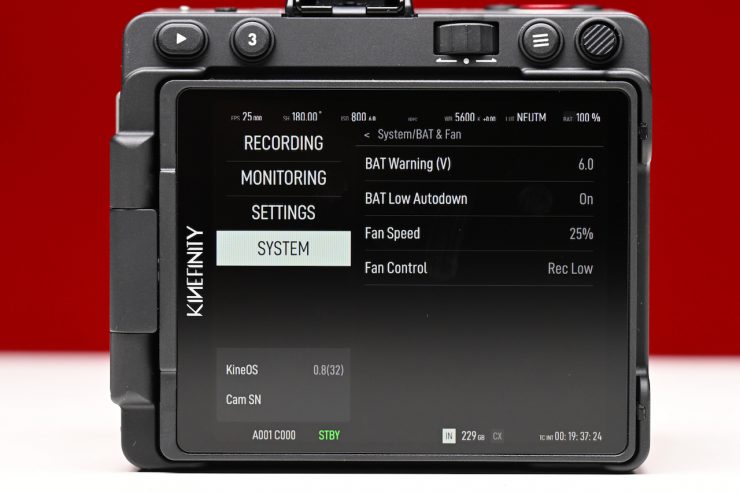
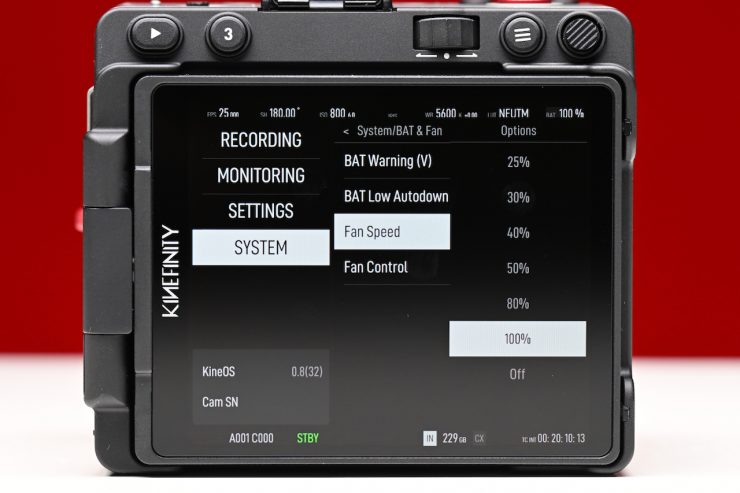
You can adjust the fan speed from 25% to 100% or even turn off the fan completely. By default, the fan is set at 25% when the camera is turned on. You can turn the fan completely off, but I wouldn’t recommend doing that unless you are in a cool environment.
Now, the fan inside the camera is very loud unless you have it at 25 or 30%. As I mentioned earlier, there is an option in the menu in Fan Control to set it to Rec Low. In theory and with previous Kinefinity cameras, once you hit record, the noise got drastically reduced to basically nothing. However, in the pre-production version of the camera I was testing, setting it to Rec Low didn’t seem to make any difference at all, but I am fully expecting that will be fixed by the time the camera ships.
In all honesty, the fan noise is pretty annoying. Even with the fan set at 50%, it is pretty loud. At 100%, it sounds like a small hair dryer is on. Above, you can hear what the fan sounds like if it is running at its 100% max setting at a distance of 1m / 3.3′ with the screen open and the screen closed. Again, I just want to reiterate that the fan isn’t going to be running at 100% unless it is very, very hot, but I just want you to be aware of it.
Look, I get it, it’s a very small-sized camera, but companies such as Nikon have been able to make cameras that don’t overheat and that are completely weather sealed.
Despite the fan being pretty loud, it certainly works well, and the camera never gets very hot. I didn’t have it overheat, and I was shooting in temperatures above 30 °C.


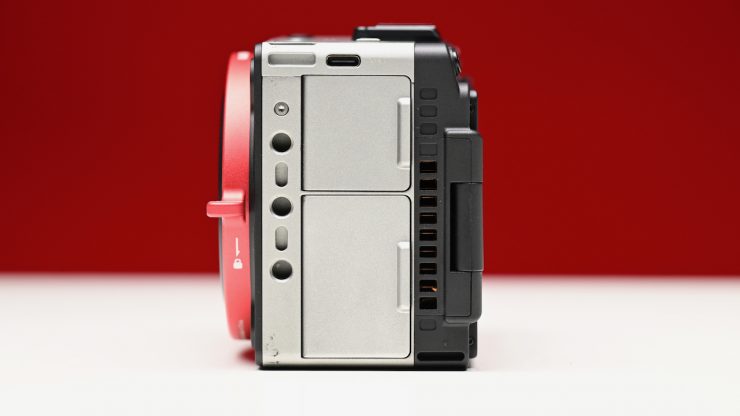
You can still have the rear OLED screen closed against the fan, and it still works well without any issues, as there is a vent on the left-hand side of the camera that pulls the air in, and then the hot air can go out on the bottom of the screen.
No Built-in eND
Unlike the MAVO Edge 6K, which features a built-in e-ND that can be set to clear or anywhere from 0.6-2.4, the VISTA has no ND.
While having e-ND would have been great in VISTA, there simply isn’t enough room to put it.
Kinefinity does have an optional e-ND adapter that you could use with the VISTA. This is great, but because it is an adapter, you always have a minimum of 0.6 dialed in when using it. This means that you are constantly having to swap the adapter in and out when moving into different lighting conditions.
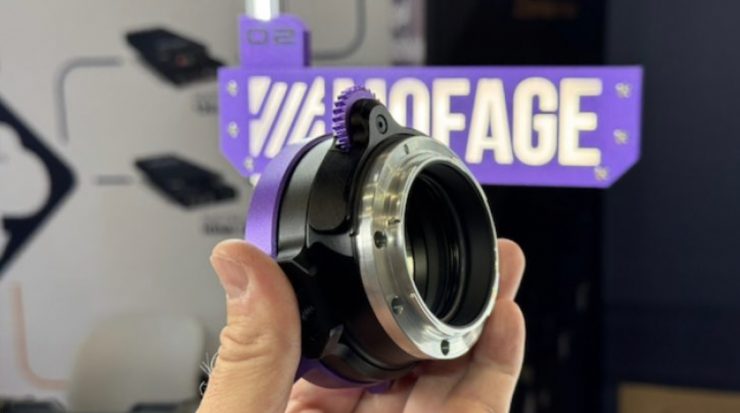
You could also buy the Mofage POCO II, which is available in a Kine Mount option that supports a wide range of drop-in filters:
- Variable ND 0.3–2.4
- Pure Clear
- Circular Polarizer
- Orange Streaks
- White Mist (1/4, 1/8)
- Black Mist (1/4, 1/8)
- Pro Duo Series: FSND 0.3 / 0.6 / 0.9 / 1.2 & Glimmer 1/4 / 1/8
The POCO II is available in the following camera mounts:
- Sony E
- Canon RF
- Leica L
- Nikon Z
- Fujifilm X
- Kine Mount
What will the footage look like?
As I stated at the top of the article, I am not including any footage yet. I will do so in my full review. If you want to see what type of footage you will be able to get, below is material shot with Kinefinity cameras that utilize the exact same sensor.
Above, you can see some example footage I shot with the MAVO Edge 6K. All of the footage was taken at 800 ISO. I shot in the 6016 x 2520 wide mode at 23.98fps and 59.98fps and captured material in ProRes 422HQ.
If you want to see more material that was shot with the Kinefinity MAVO LF (which uses the same sensor), you can see that above.
Who is the Vista aimed at?
This isn’t a straightforward question to answer, as the VISTA could be used for a wide variety of applications. There is no reason why you couldn’t use the camera for anything from small jobs, all the way up to large productions. It could be a crash cam, a vehicle cam, placed on a lightweight gimbal, used as a second camera, or even as your main camera.
Kinefinity is calling the VISTA a “Personal cinema camera”, and I personally think it is an attempt to get more people interested in the brand. Making an affordable, lightweight, and compact cinema camera ticks a lot of boxes for a lot of shooters. For those looking for AF and IBIS, etc, then this isn’t the camera for you.
Dynamic range & sensor response
For me personally, I’m not that interested in dynamic range numbers. I’m not so concerned about the number of stops, but I’m more interested in where those stops are allocated and how the highlights roll off. There is a big difference between the usable dynamic range and the actual dynamic range. Kinefinity claims that the VISTA has more than 14 stops of dynamic range.
The dynamic range of the VISTA is reasonably good, and in the real world, it actually looks better than a lot of the chart testing would suggest.
What I wanted to do is compare the highlight handling of the MAVO Edge 6K against the ARRI Amira, because ARRI’s ALEV III sensor is, at least in my opinion, a good camera for dynamic range and highlight handling. It is also supposed to have the same amount of DR as the VISTA.
I set up a test with a color checker chart. I exposed the ARRI Amira for middle grey, and then I had a bright window that was just below clipping. The camera was set at 800 ISO. This was my benchmark for the test.
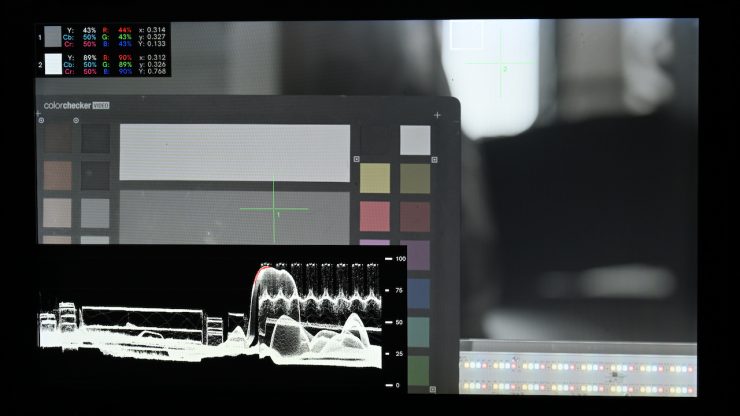
ARRI C-Log 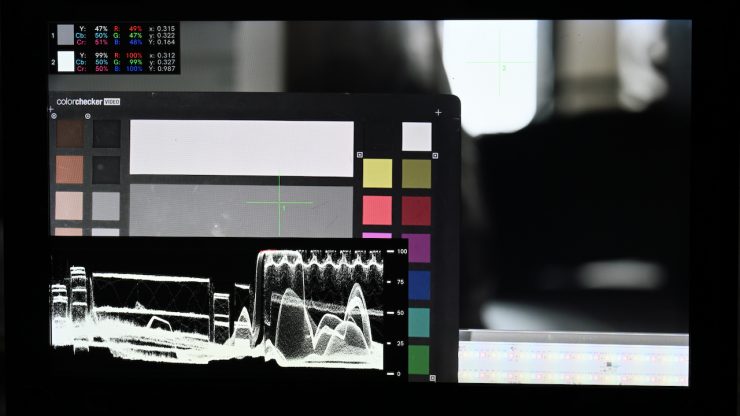
REC.709 LUT applied
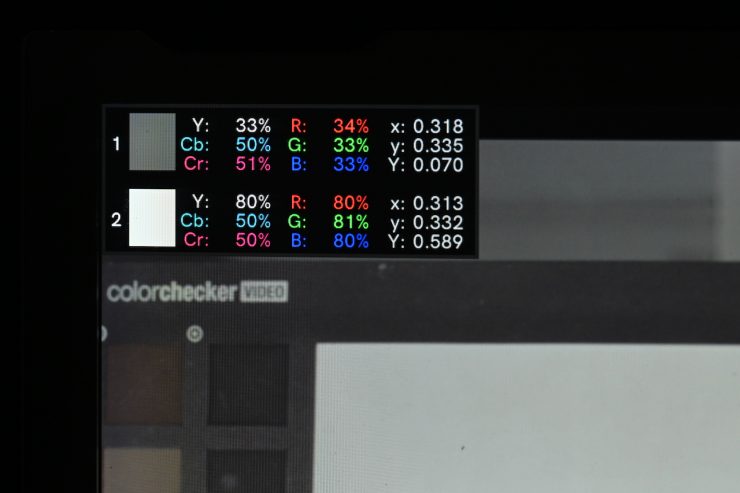
Above, you can see the ARRI C-LOG and the REC.709 images for the ARRI Amira. You can also see the IRE values for middle grey and for the brightest part of the image, as well as the waveforms. Middle grey was set at 43%, and the brightest point in the image was registering at 89%.
KineLog3 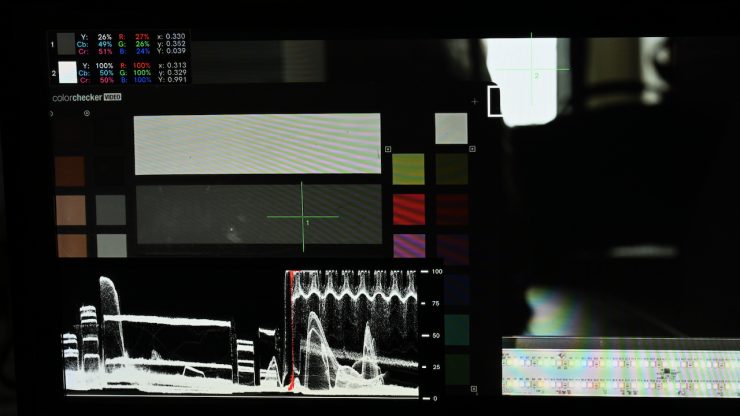
REC.709 LUT applied
Ok, so now let’s do that exact same test with the VISTA set at 800 ISO with the highlight stops at 6.0. What I am looking at here is how much lower I had to set middle grey to avoid highlight clipping.
Above, you can see that I had to set middle grey to 33IRE to have the highlights at the same level as the ARRI Amira.
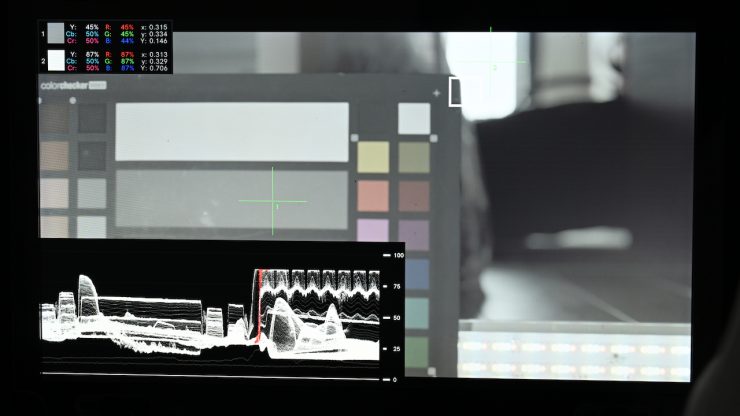
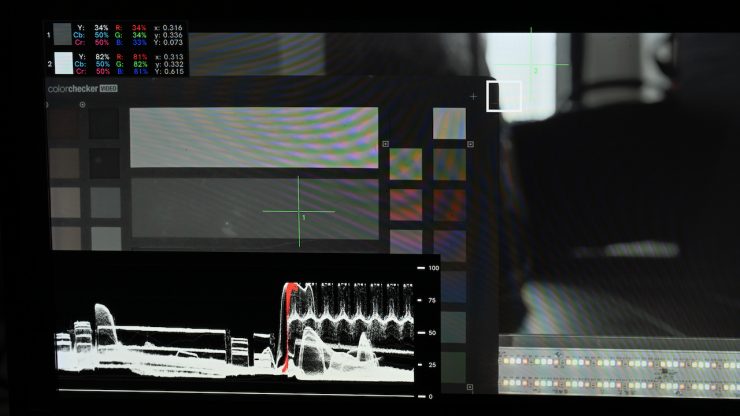
KineLog3 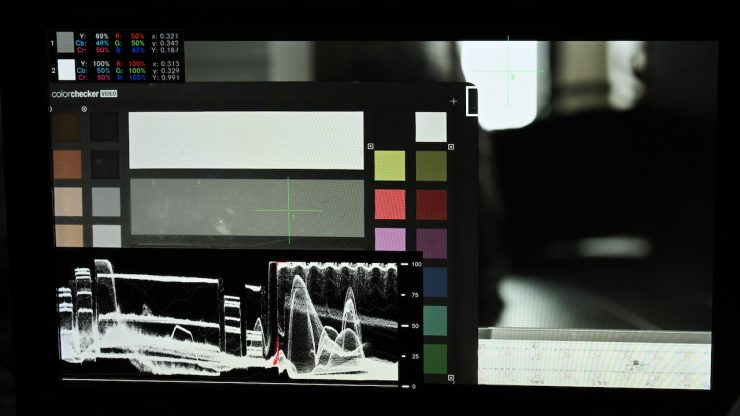
REC.709 LUT applied
Above, you can see that if I set middle grey on the VISTA at 45 IRE, my highlights have been hard clipped.
Now, the VISTA has the ability to adjust the number of highlight stops. So you can actually gain more information in the highlights to produce a better result; however, the caveat with doing this is that you are going to lose a lot of information in the mids and shadows because you are allocating so many stops above middle grey. If you really want to protect your highlights, you would be better off using EI mode.
Even when using the 7.3 stops of highlight handling, the highlights didn’t roll off as smoothly as those of the ARRI, and the ARRI didn’t have to compromise its mid and shadow information to do it.
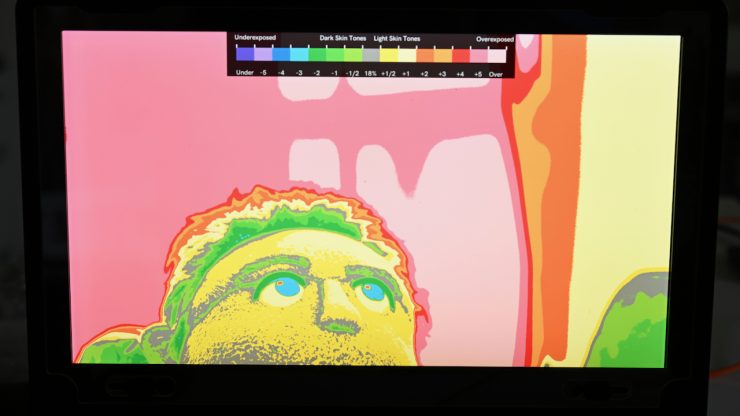
ARRI Amira 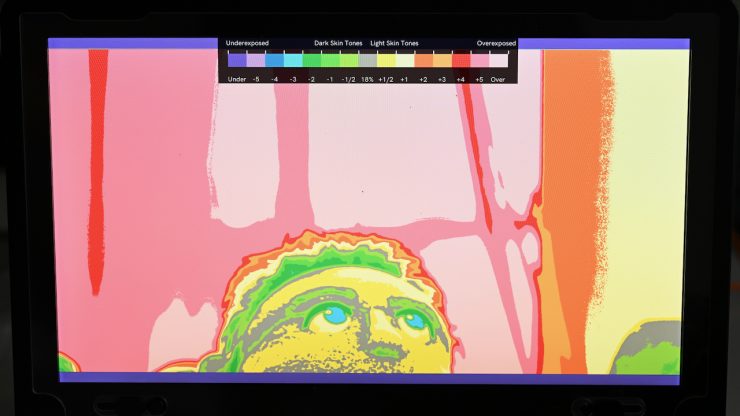
Kinefinity VISTA
As another test, above you can see a shot from the ARRI Amira and the Kinefinity VISTA (both set at 800 ISO), where I am feeding their LOG images into a SmallHD Cine 13 and then using EL Zone. While this isn’t a great test, it does show you that if you expose for 1 stop over middle grey on a face, what the differences are.
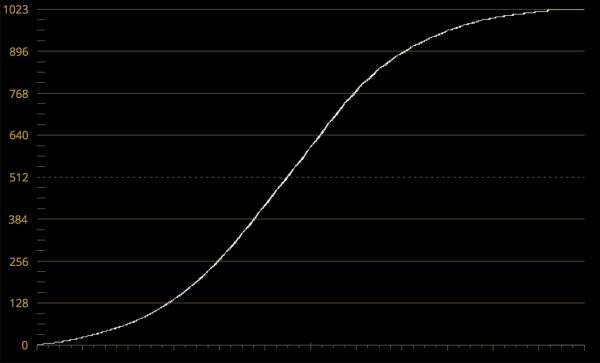
Above, you can see what the KineKC_NEUTM LUT looks like on a waveform. Below you can see how it compares to a standard ARRI REC.709 LUT.

While the VISTA isn’t as good as the ARRI when it comes to handling highlights (few sensors, if any, are), it was still pretty impressive. Kinefinity has done a good job with this sensor, and it shows impressive amounts of dynamic range. With the curves between the ARRI and the VISTA being fairly similar, I found I could also get pretty decent results by using some of the ARRI LUTs.
Ergonomics
The form factor of the VISTA is very similar to a lot of the smaller-sized mirrorless hybrids that are on the market. It was designed to be handheld, put on a tripod, gimbal, etc. This is not a camera you are going to try to shoulder mount. If you are thinking of doing that, there are better options out there.
The VISTA is nice and compact, and it could almost be described as a self-contained camera; however, for certain shooting situations, you would need to add accessories.
Kinefinity works very closely with third-party companies such as Tilta and SmallRig, and there are a ton of accessories that you can use to configure the VISTA into whatever combination best works for you. More on the accessories later on.
The other problem when using really small cameras like the VISTA is that it’s very easy to quickly run out of room to mount accessories such as wireless video transmitters, an assistant’s monitor, remote FIZ control units, and anything else you may need.
Mounting Options
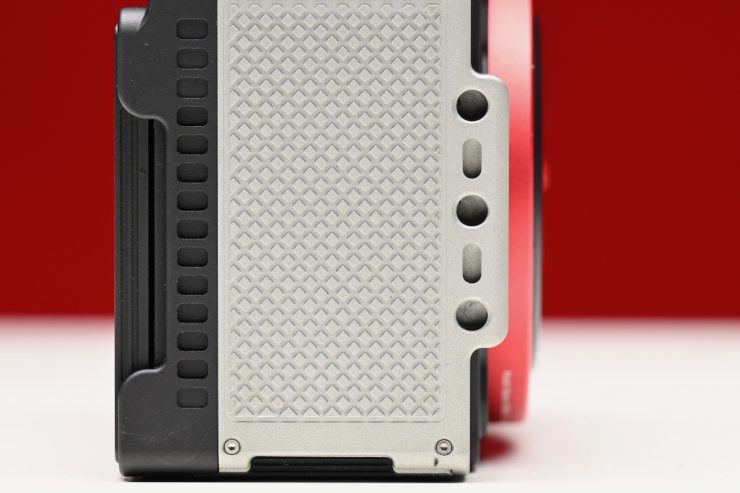
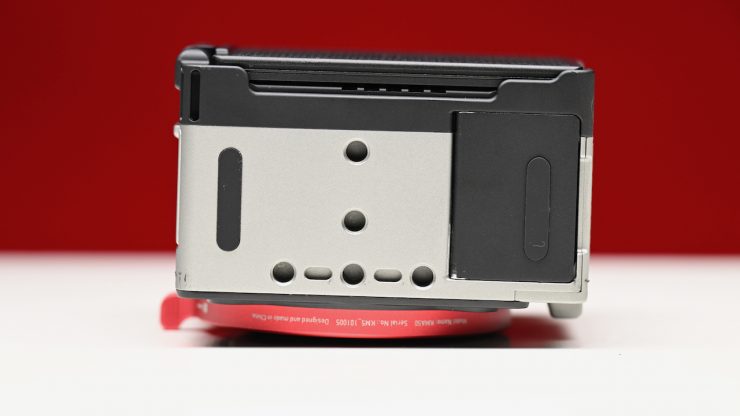
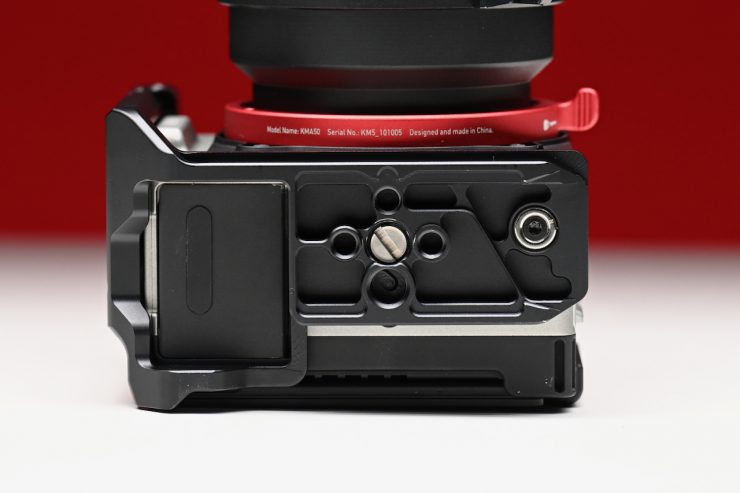
The VISTA has 12x 1/4′-20 threaded holes, 1x 3/8″-16 threaded hole, and 1x Cold Shoe.
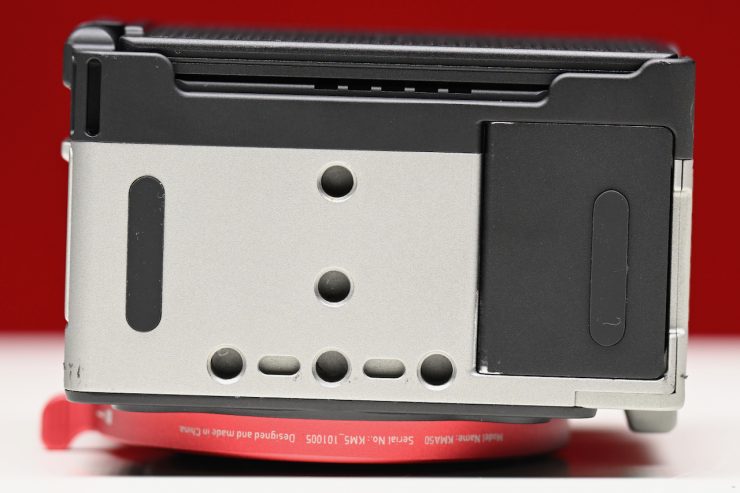
It’s especially nice to see so many mounting holes on the bottom of a camera.
KineOS & Touchscreen Operation
Kinefinity has continued to slowly get better with the ease of use and operation of its cameras. I really think that they turned the corner with the MAVO Edge 8K, and that same ease of use has carried over to the VISTA. I’m a stickler for wanting to use cameras that are easy to control and operate. There is nothing worse on a camera than confusing menus and badly labeled or placed buttons and switches. So how does the VISTA fare?
Just like all of the other current Kinefinity cameras, the VISTA runs on KineOS, which is a unified platform that makes it very easy to transition between different Kinefinity models. The true test of a well-designed operating system is that users should be able to turn the camera on and get up and running within 5 minutes of using it for the first time. Operating the VISTA is pretty straightforward and fairly intuitive. Even without a manual, you can work it out quickly.

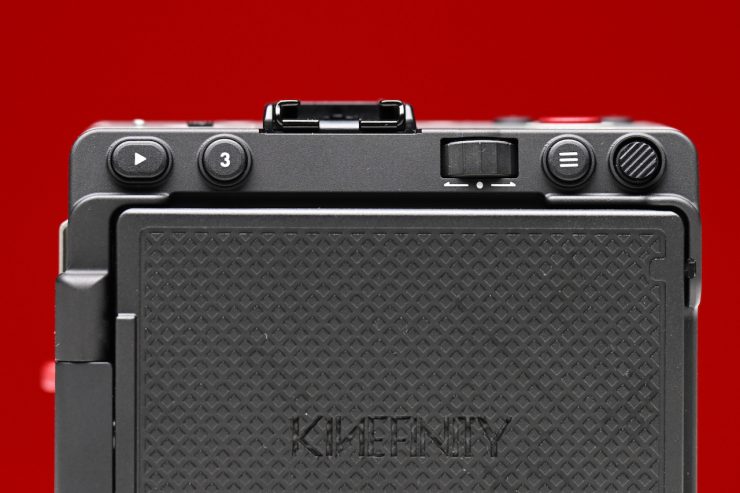
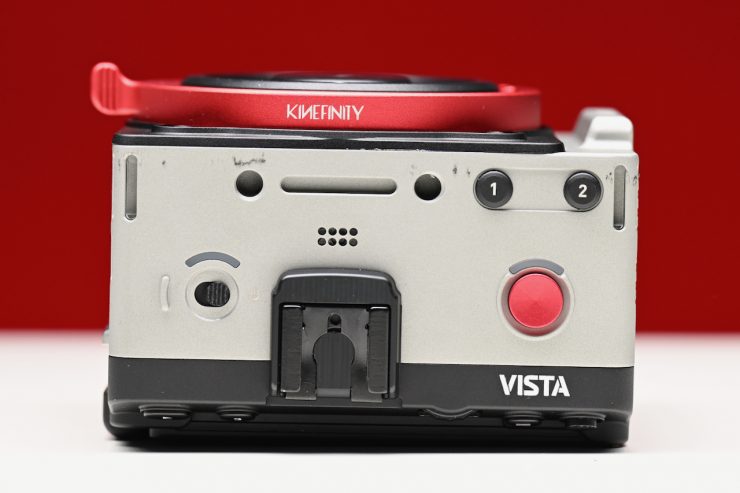
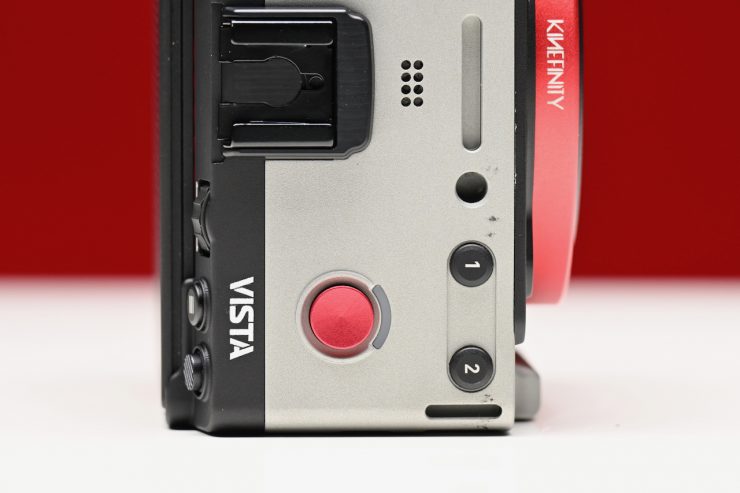
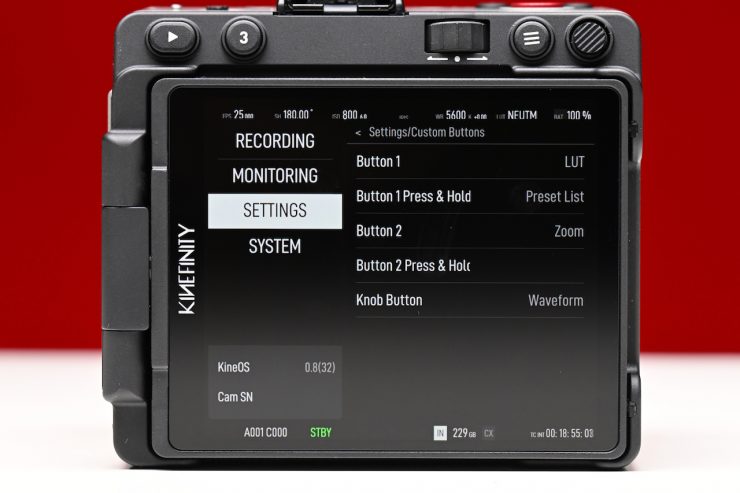
The VISTA doesn’t have a lot of physical buttons on the body of the camera, which I actually like. I personally don’t like cameras with tons of buttons. You only have three user-assignable buttons, a menu button, a scroll wheel, a joystick, a playback button, a record button, and an On/Off switch

Making changes is mostly done through the touchscreen, but having physical buttons also helps if you are wearing gloves or don’t want to put fingerprint smudges on the screen.
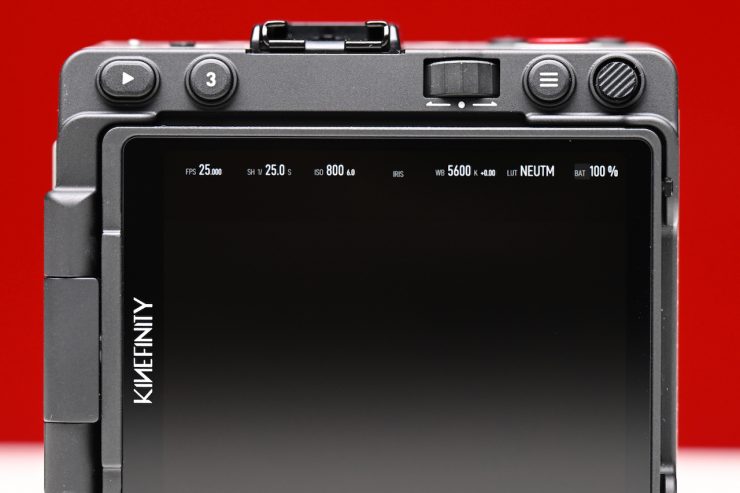
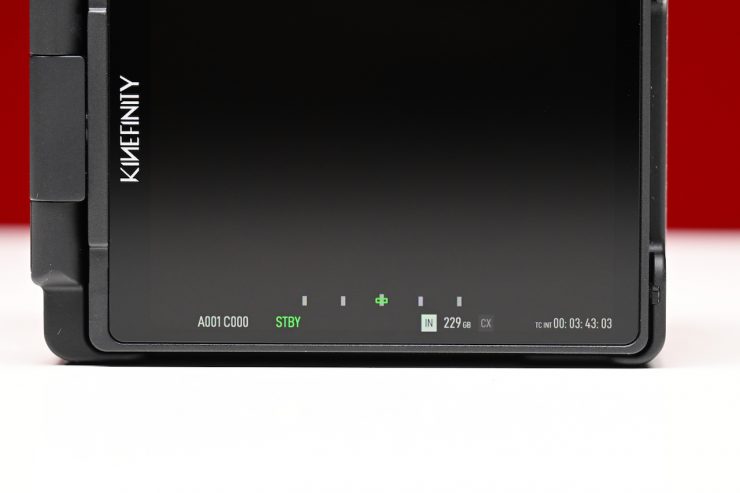
This screen is a nice size, and it clearly displays all of the camera’s relevant key information.
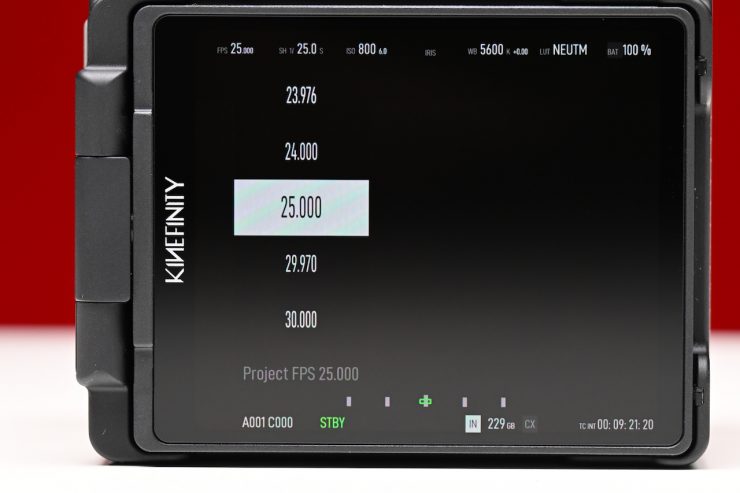
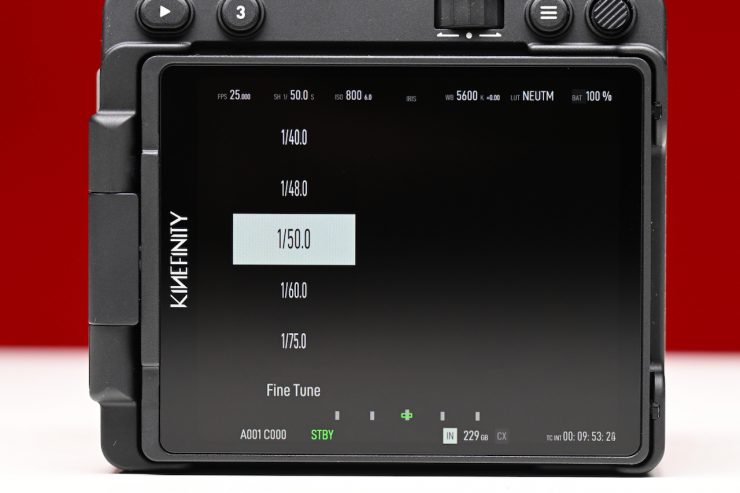

You can make changes to the key parameters below very quickly without having to go into any menus:
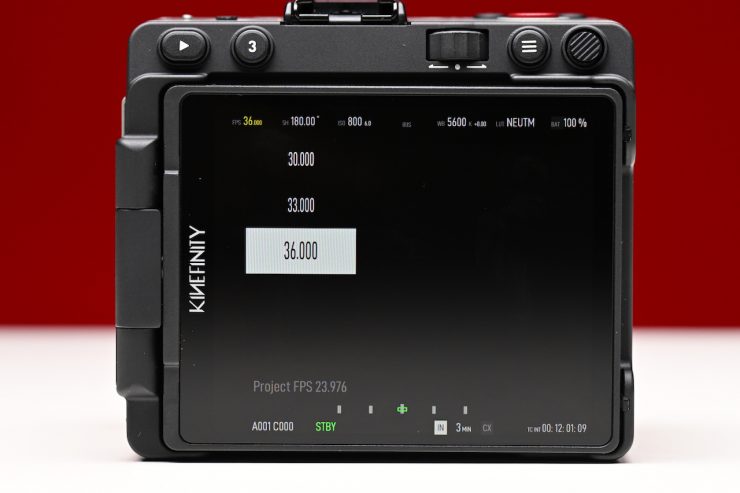
- FPS
- SHUTTER
- ISO
- WHITE BALANCE
- LOG PROFILE

The three custom preset buttons can have two functions per button, so you can effectively have a total of six.
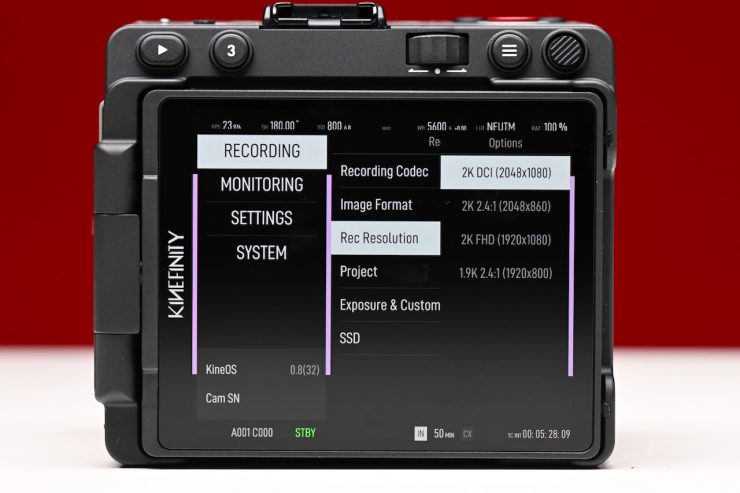
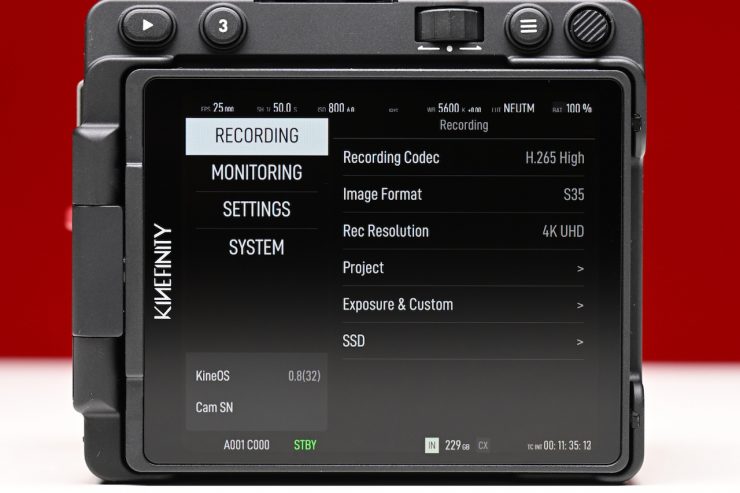
Menu System
The menu system certainly is a lot less complicated than some of the offerings from Sony, Canon, and Panasonic. If you are familiar with Kinefinity cameras, then you will be right at home with the operating system. For first-time users, it is pretty straightforward to work out.
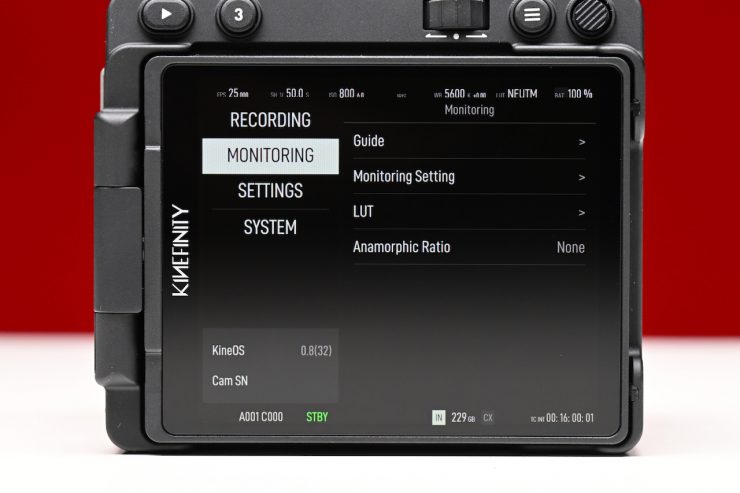

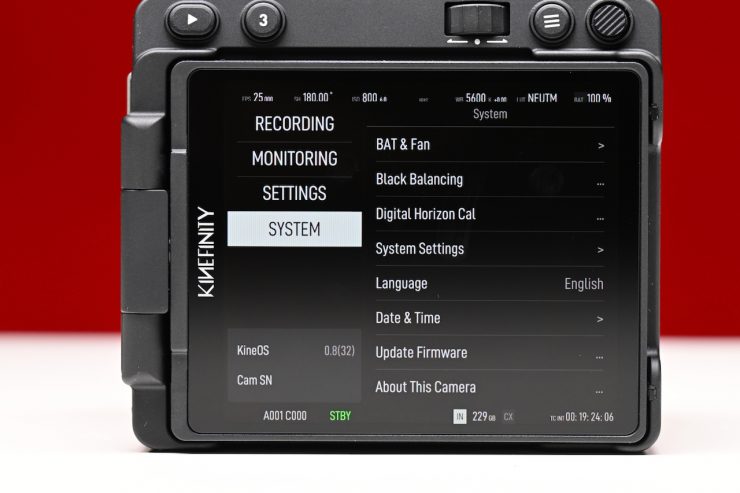
The Menu is divided into 4 categories:
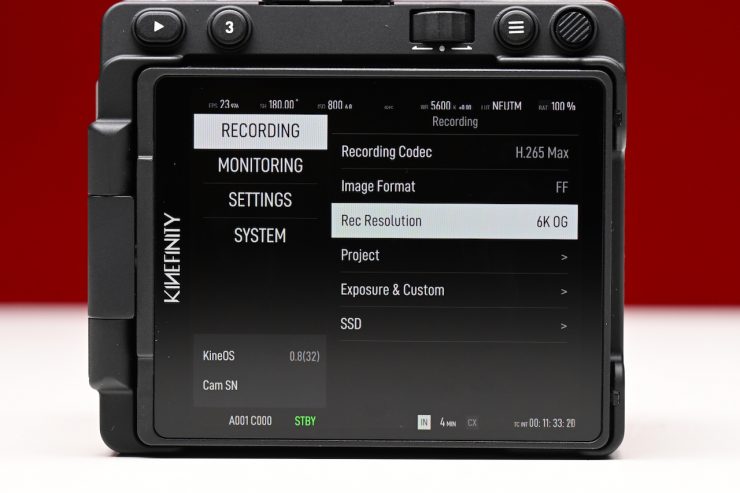
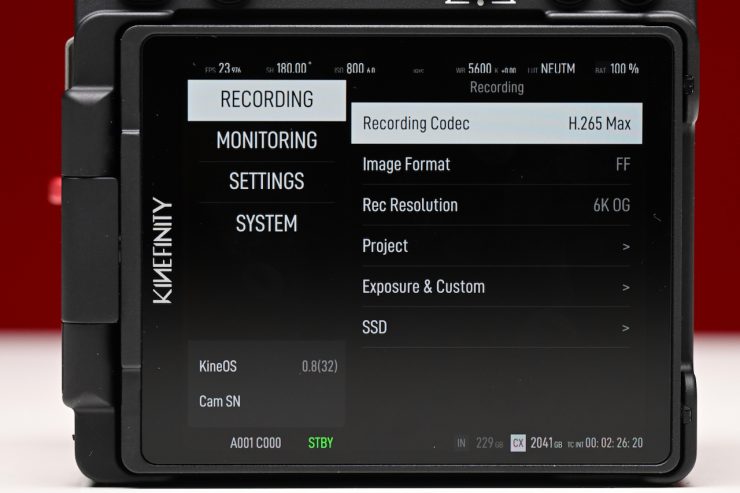
- RECORDING
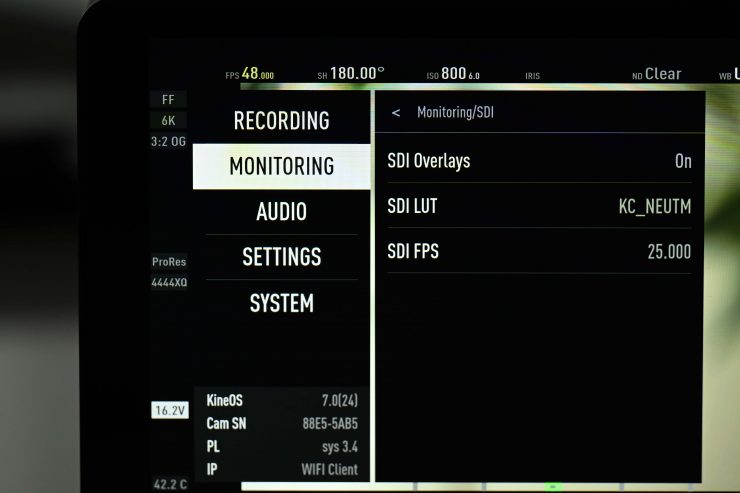
- MONITORING
- SETTINGS
- SYSTEM
Making changes in the menu is pretty straightforward, and as I previously mentioned, it is so nice to be able to do it directly from the 4″ screen.
One of the nice things I found is that you can save camera presets. You do this by going into the Menu and choosing SETTING, then Save Preset List. These camera presets (there are 8 you can use) enable you to set the following parameters:
- Image Format
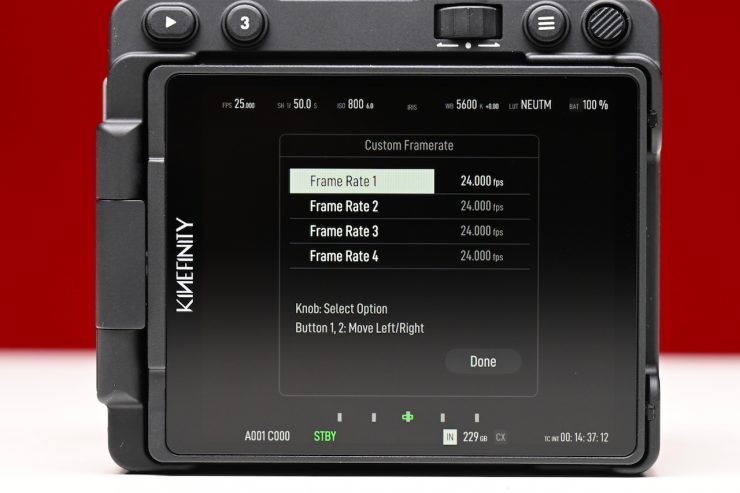
- Resolution
- FPS
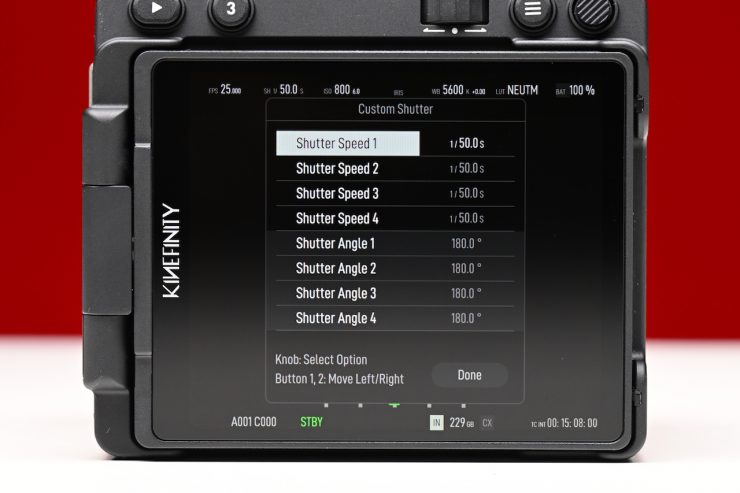
- Shutter Speed
- Record Format
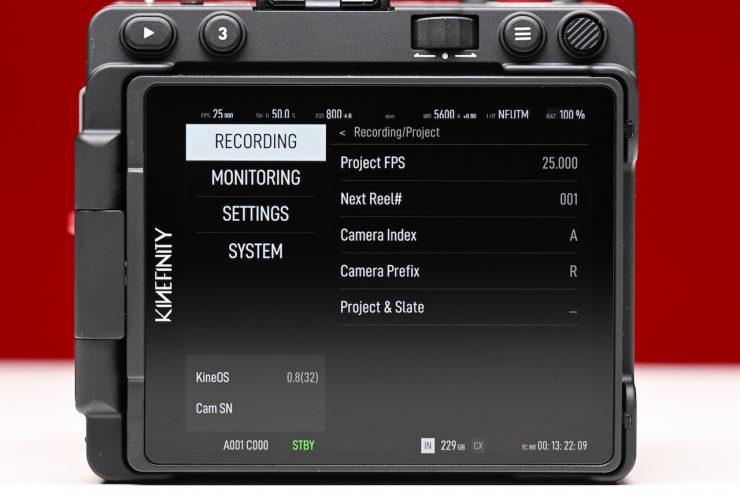


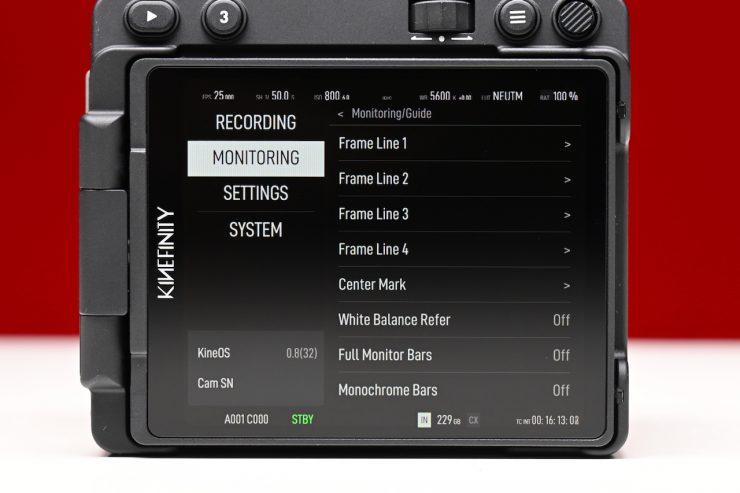
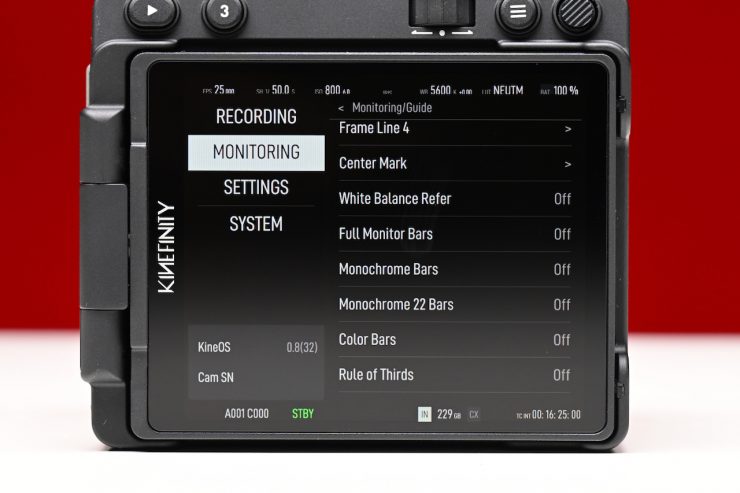

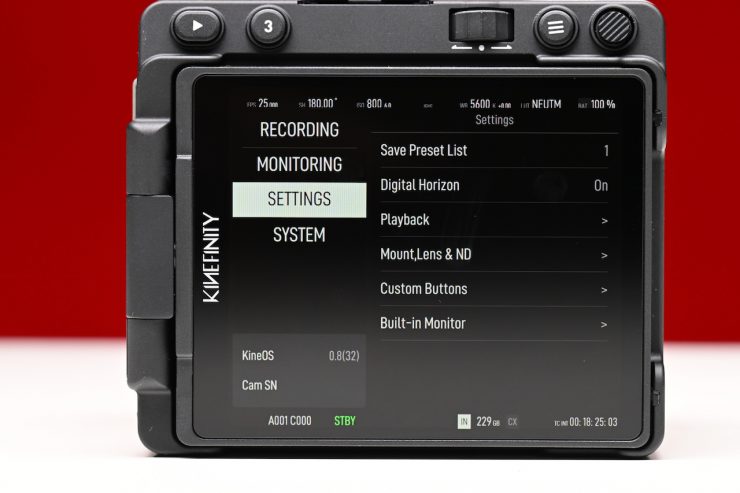

Above, you can see some of the other options that are available in the menus.
Remote Camera Control
You will eventually be able to use the Kinefinity App to control and operate the VISTA. The App will display the video stream from cameras in real-time with super-low latency, if the iOS devices and camera are in a stable and good WIFI environment.
This wasn’t available to test at the time of this review.
Power
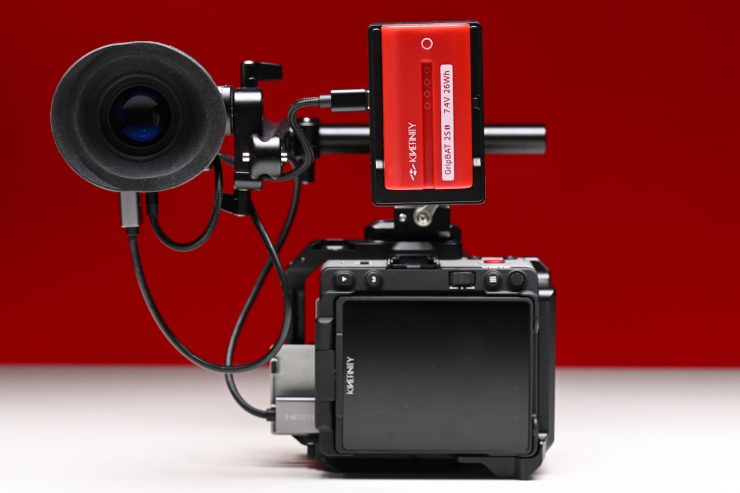
The VISTA has a single Sony NP-F style battery slot that can power the camera for around 3 hours. Additionally, there is also a 2-pin LEMO.
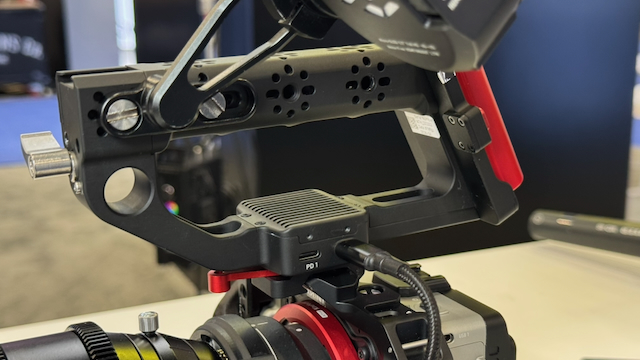
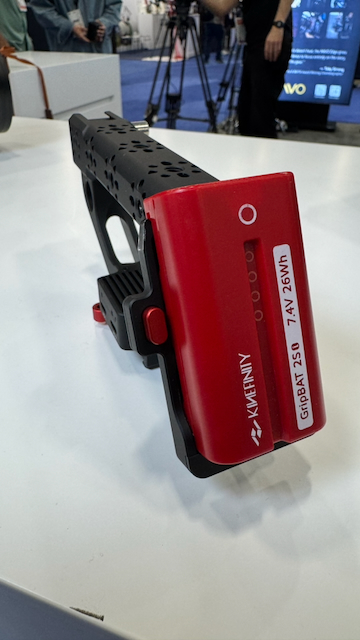
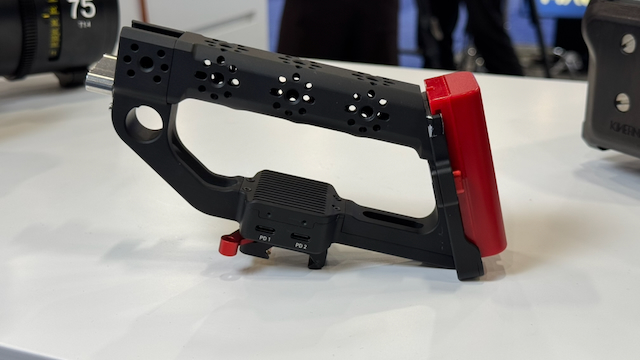

You could also use the Kinefinity Active Top Handle that has two USB-C PD ports and a Sony NP-F battery plate with a USB-C to LEMO adapter cable to extend the run times and provide hot-swapping capabilities.
The great thing about the VISTA is that it has a very low power draw and allows for long run times on small batteries. The camera draws just 7.5W when shooting 4K 25p, Liveview, with the monitor brightness set to 400 nits.
Boot-up Time
The VISTA boots up a lot quicker than other Kinefinity cameras. It takes around 7 seconds from the time you power it on until you get a picture up and can start to record. As a comparison, the MAVO Edge 6K takes around 45 seconds.
Whether a quick boot-up time is important or relevant to you will depend on what type of work you do.
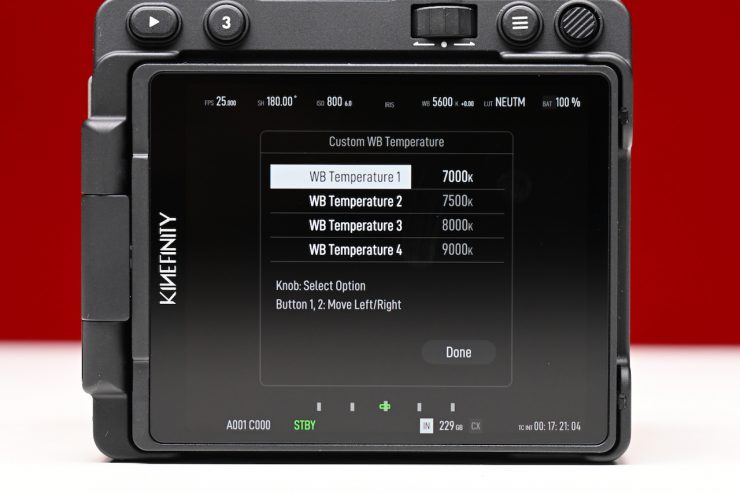
White Balance
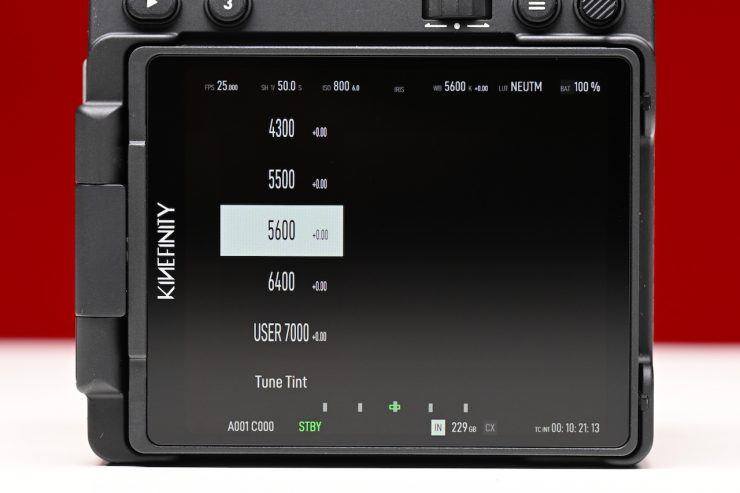
The camera has preset white balance values that range from 2800K to 10800K (depending on whether you are in the Simple List or Complete List).
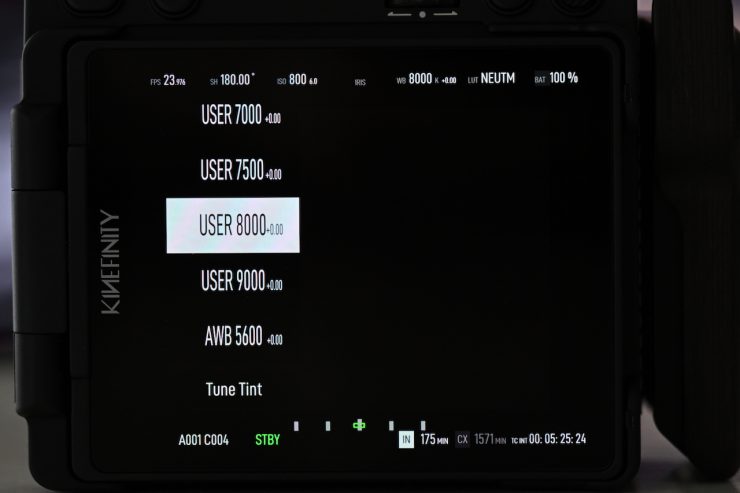
There are four USER WB settings, which are very handy.
The white balance and the color temperature are tuned by directly adjusting RGB channels of the sensor to change the original RAW data, rather than applying a digital LUT. Although you can modify the white balance of the RAW data or change color temperature during post-processing, all the modifications are based on the data you have shot.
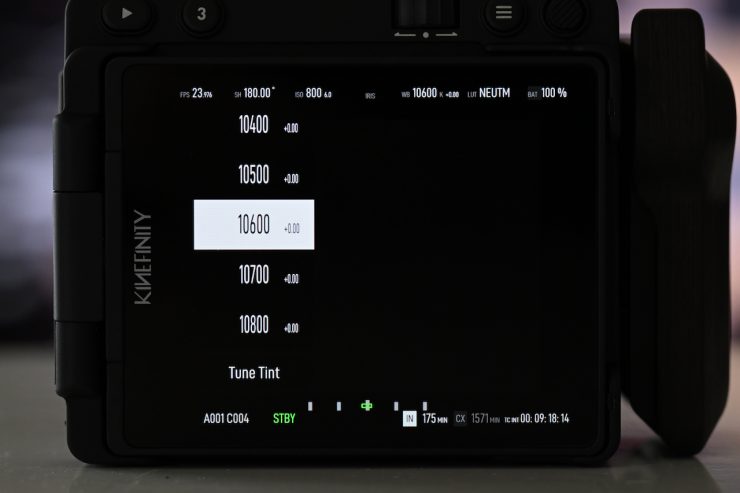
The camera has two types of color temperature lists for white balance: Simple List and Complete List.
Simple List: This features typical color temperatures such as 2800K, 3200K, 4300K, 5500K, 5600K, 6400K, and User WB. User WB is a user-defined value, automatically generated when you do an Auto WB manually.
Complete List: This mode gives you precise control of Kelvin color temperatures in steps of 100K.
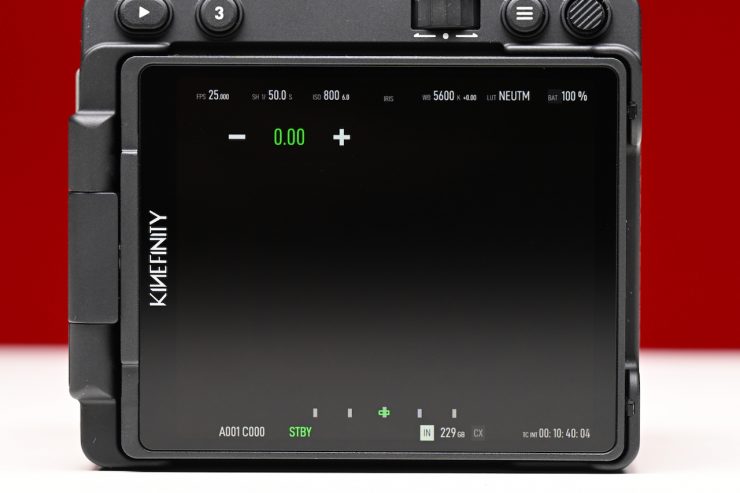
You can also adjust the +/- G/M tint of your white balance values.
The manual WB functionality hasn’t been implemented yet, but it will work in the same way as other Kinefinity cameras.
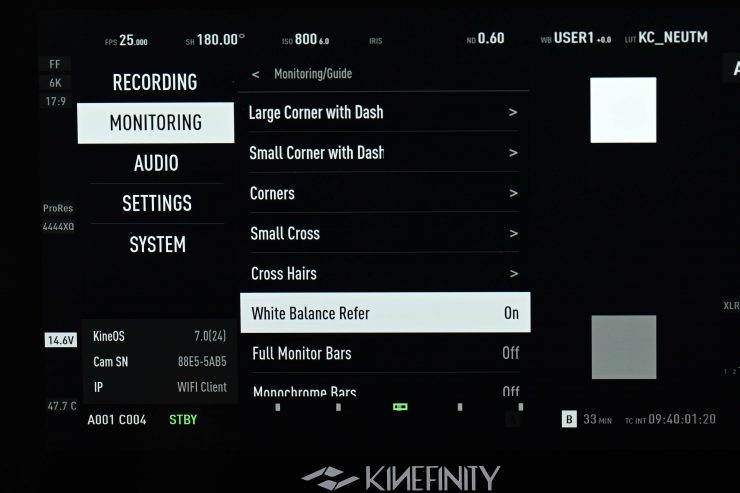
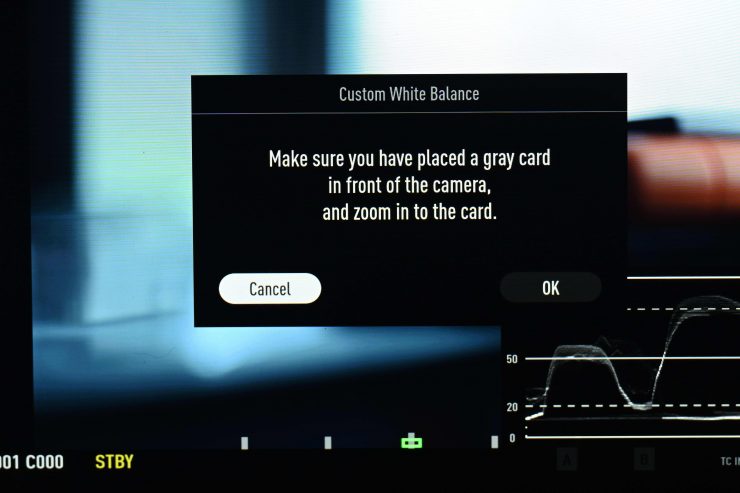
What I also like is that you will be able to bring up a white balance reference that places white and middle grey squares on the screen. This will give you a nice, easy-to-see reference so that you can check if you have your white balance correct.
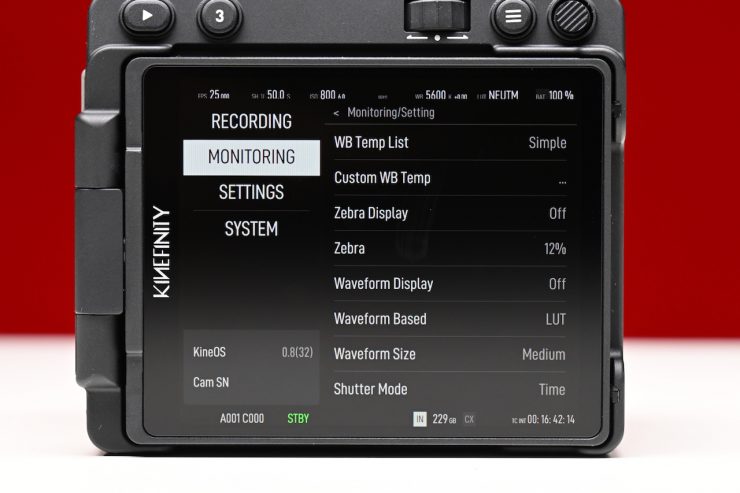
Waveform & Zebras
You will eventually be able to bring up a waveform on the display. The waveform will be displayed across the bottom of the screen and indicates the brightness of images over the horizontal direction. By default, the waveform shows the LUT KC-Neutral. The waveform will change according to whatever LUT is being used. You can also change it to show the values for LOG if you choose to.
Now, again, with the pre-production version, none of these functions were available to test.
You can also change the waveform to display LOG. When this is set, the waveform shows the distribution based on the LOG image.
For example, if you have the waveform set to LUT, then if your waveform goes over 100% you will still probably not be clipping your image (as the VISTA only records in KineLog3. If you set the waveform to LOG, then if the information is exceeding 100% then you will definitely be clipping your image. Kinefinity recommends that the main image should exceed over 50% to avoid noise.
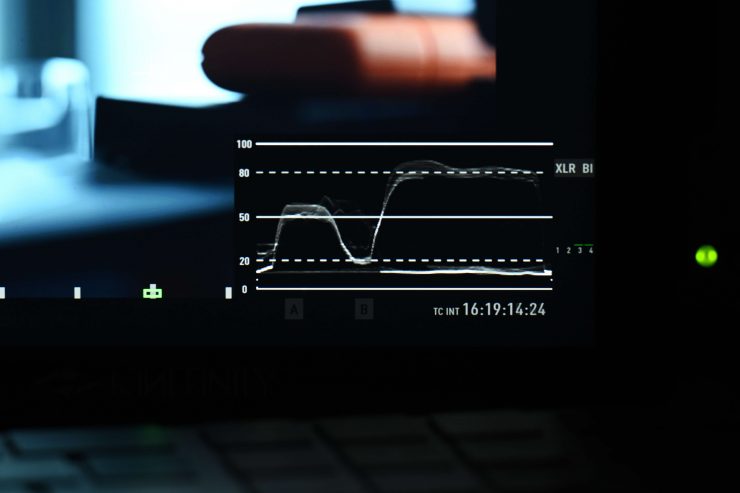
The waveform has two key lines marked on it. The first shows where an 18% grey card should be exposed correctly, and the other shows where 90% should land on a grey card.
On the VISTA, the zebra calculation is based on RAW data. This means that when your zebras are set to 90%, if you see zebras appear, your image is getting close to being overexposed.
You can set the zebras anywhere from 12% to 99%.
Shutter
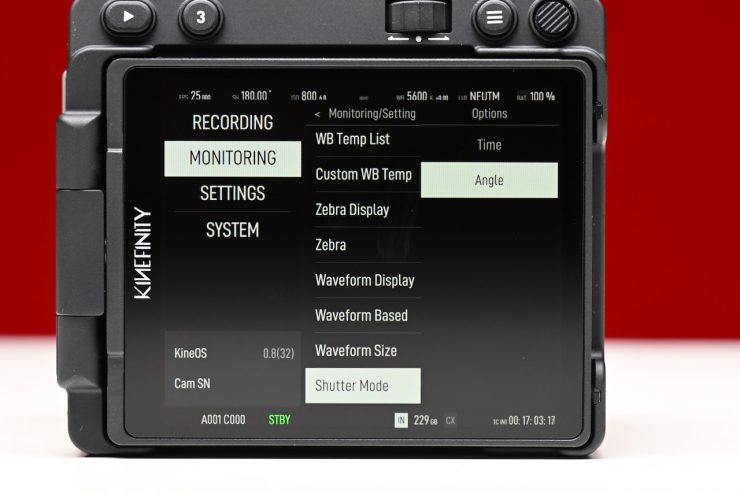

With the shutter, you can choose to set it to display Angle or Time.
Inputs & Outputs
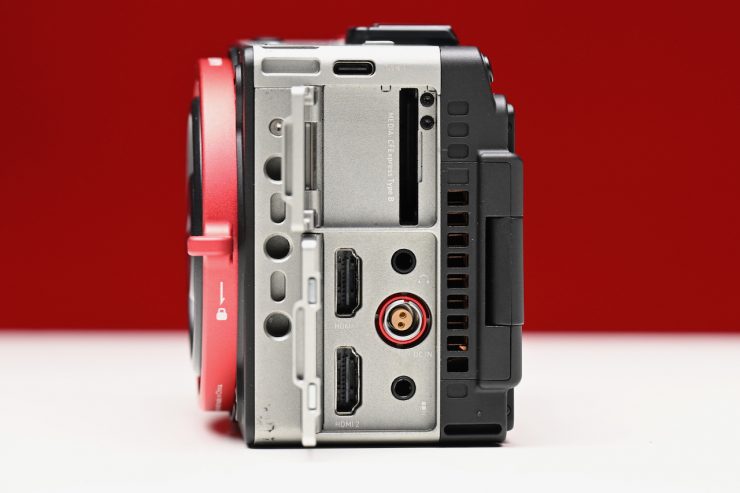
Despite being so small, the VISTA has a decent amount of inputs and outputs:
- 2x Type-A Full-size 4K HDMI
- USB Type-C: direct iPhone connection for live streaming, monitoring, and full camera control via Kinefinity App
- 10V~19V (Push-pull 0B2P connector)
- Built-in Stereo MIC
- 3.5mm Stereo MIC, supports TC
- USB Type-C, supports USB-C wireless MIC with UAC protocol
- 3.5mm Stereo Headphone
- Built-in Speaker, 2W
HDMI
There are no SDI or mini SDI ports on the VISTA. While it arguably would have been nice to have seen them, at least there are two full-sized HDMI outputs, which you don’t see on small-sized cameras like this.
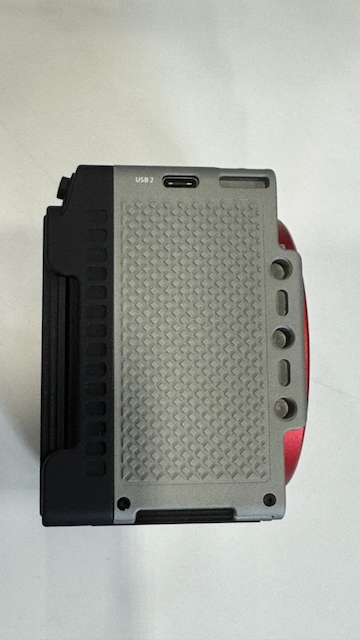
Below you can see what the USB-C ports are capable of.
USB-C1
USB 2.0; Camera as Host
- iPhone Integration: Direct connection for live streaming, monitoring, and full camera control via the Kinefinity App.
- Audio Input: Supports USB-C wireless microphones via UAC protocol.
- Maintenance: Primary port for Firmware Upgrades.
- Power Output: 5V/2A (Non-PD) to power iPhone or Eagle EVF.
USB-C2
USB 2.0; Camera as Device
- Data Transfer: Connect to PC/Mac to export media directly from the internal SSD.
- UVC Mode: Functions as a Plug-and-Play webcam for iPhone, Mac, or PC hosts.
- Power Output: 5V/2A (Non-PD) to power iPhone or Eagle EVF.
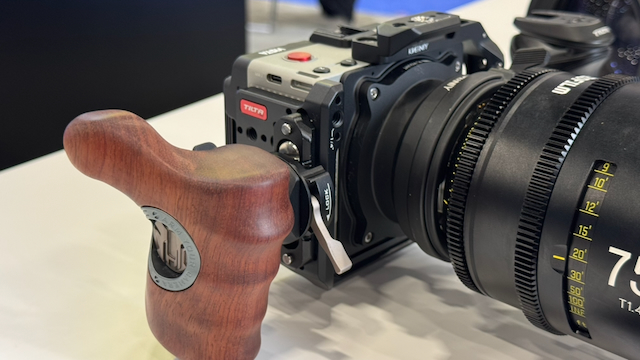
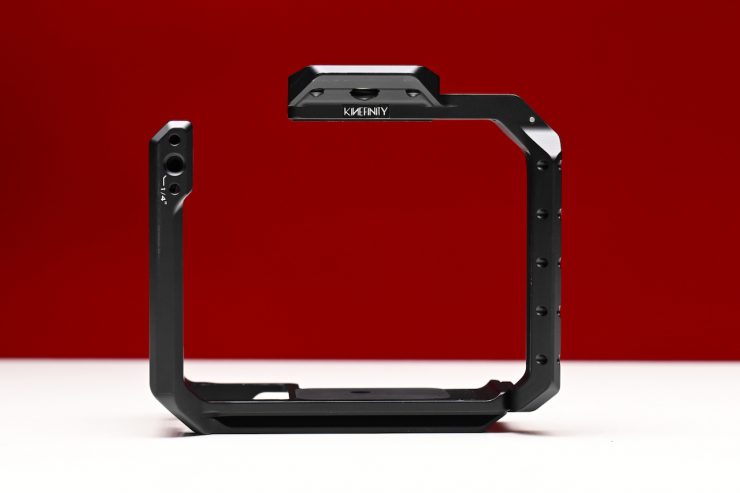
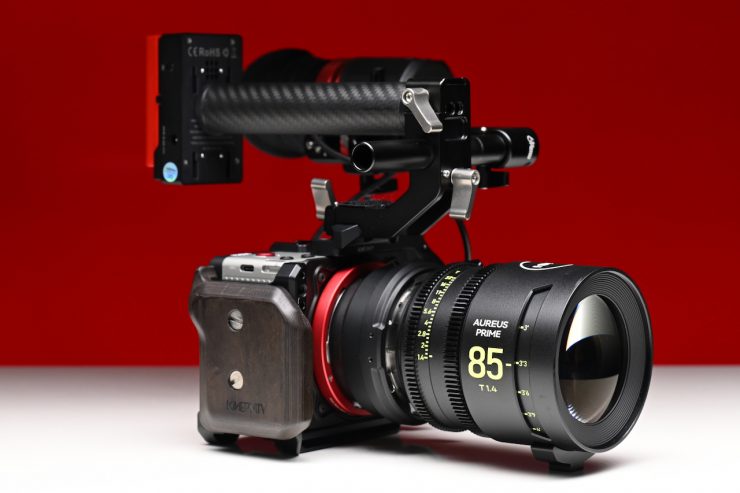
Tilta Cage
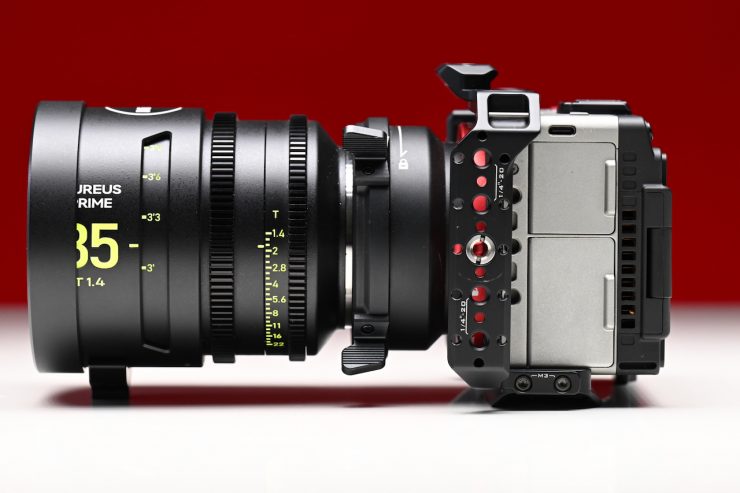
There is a nice cage for the VISTA that is made by Tilta.
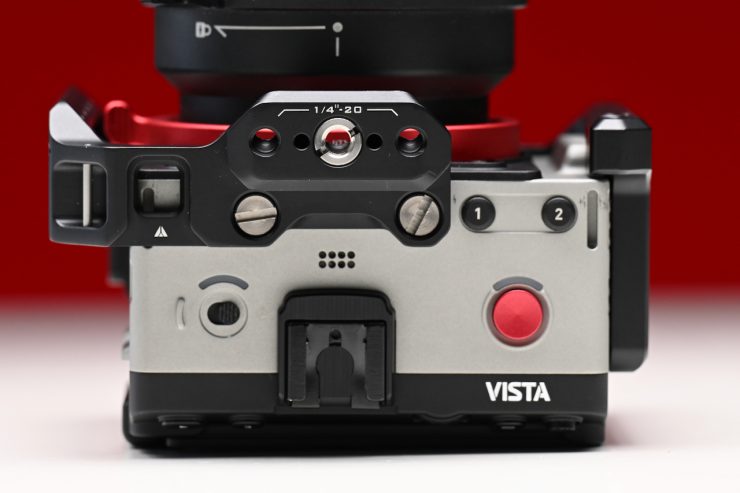
On top of the cage, there is a NATO rail for attaching accessories.

I used the NATO rail to run Kinefinity’s Eagle HDMI e-Viewfinder.
On the side plate of the cage, you can attach the VISTA Side Handle.
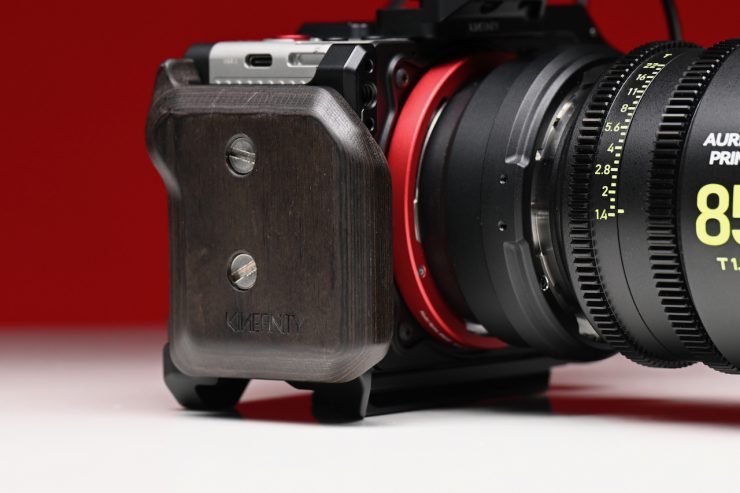
If you don’t want to run the top plate, it can be removed, so you just have a base and mounting points on one side.
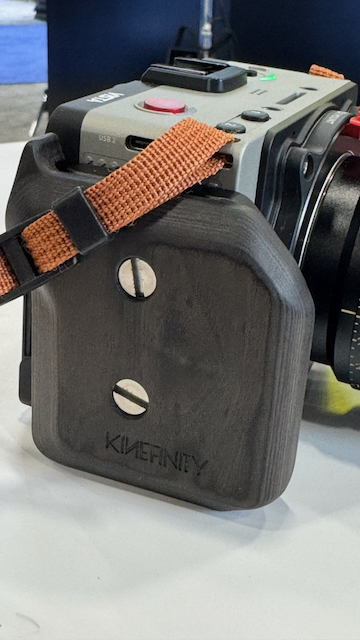
VISTA Side Handle


The VISTA Side Handle is a nice compact accessory that makes the camera easier to hold.
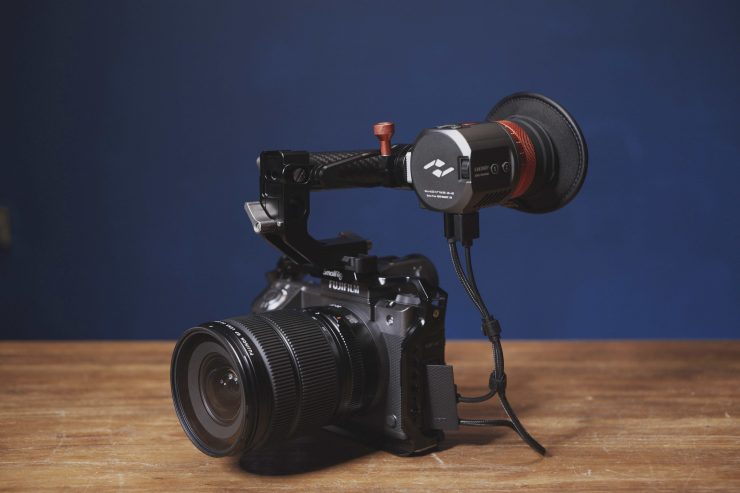
Eagle HDMI e-Viewfinder
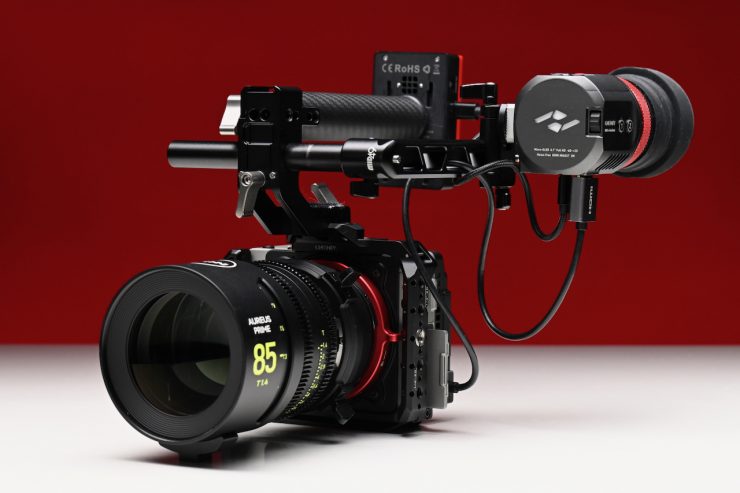
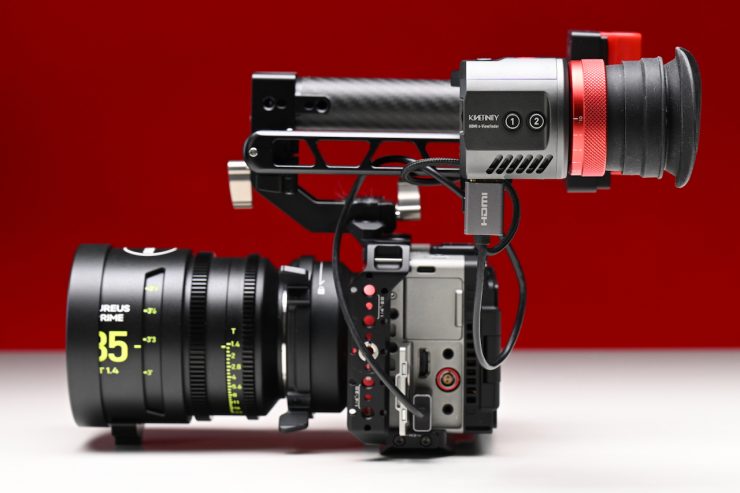
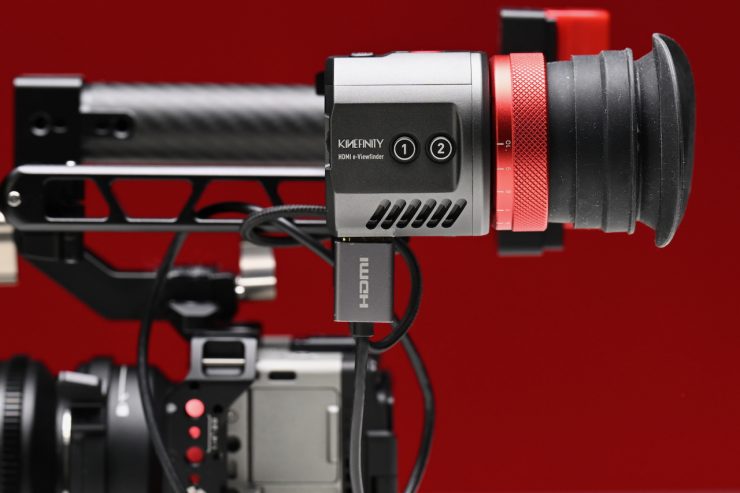
The Eagle HDMI e-Viewfinder is based on the Eagle SDI e-Viewfinder that I previously reviewed on the site. While that is a great EVF, it only has an SDI input and wasn’t suitable for use with a lot of smaller digital cinema cameras or mirrorless hybrids. The HDMI version works really well with the VISTA. I reviewed this EVF previously on the site, and you can see that review here.
The Eagle HDMI e-Viewfinder is a great option for anyone using smaller-sized cameras that only feature HDMI outputs. It retains many of the features of the SDI version, equipped with a full HD 0.7″ Micro-OLED display and excellent optical design. The viewfinder includes advanced 10-bit color processing to ensure accurate, sharp, and clear images. The EAGLE uses an innovative FPGA-based hybrid processing architecture for quick startup, rapid response, extremely low power consumption, and no additional image delay. Additionally, its fanless design allows the EAGLE HDMI to operate silently, enabling filmmakers to work in quiet environments without distractions.
The Kinefinity Eagle HDMI e-Viewfinder is available in the following kits:
- EAGLE HDMI e-Viewfinder $1,199.00 USD
- EAGLE HDMI e-Viewfinder Core KIT $1,349.00 USD
- EAGLE HDMI e-Viewfinder Pro KIT $1,649.00 USD
As a reference, the EAGLE SDI e-Viewfinder retails for $1,299 USD.
This is what you get in the kits:
EAGLE HDMI e-Viewfinder Body
- Kinefinity EAGLE HDMI e-Viewfinder x1
- E-Viewfinder Cord CH25 (Type-C, 25cm) x1
EAGLE HDMI e-Viewfinder Core KIT
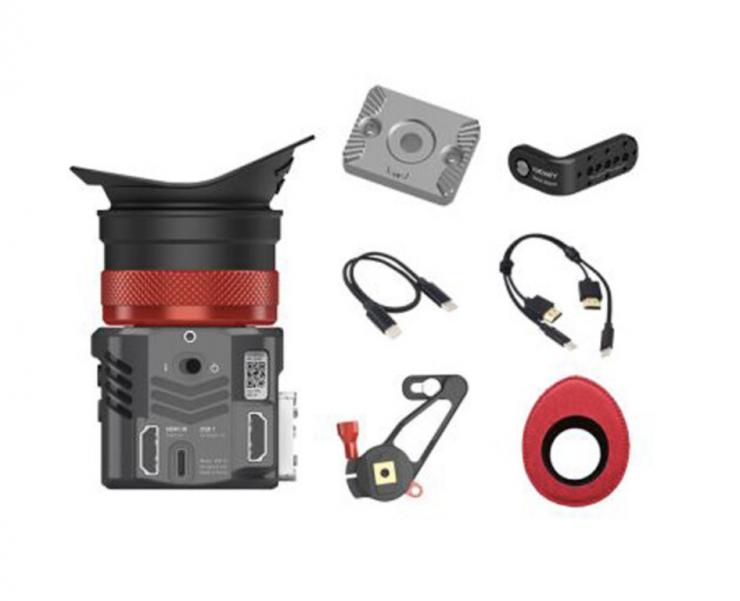
- Kinefinity EAGLE HDMI e-Viewfinder x1
- E-Viewfinder Cord CH25 (Type-C, 25cm) x1
- USB-C Cable C25 (C2C, 25cm) x1
- E-Viewfinder Mini Mount x1
- E-Viewfinder Rosette (1/4″-20) x1
- Kinefinity Bracket Adapter x1
- Accsoon Toprig Battery Plate x1
- E-Viewfinder Eye Cushion x1
- 1/4″ to 3/8″ Screw Adapter x1
EAGLE HDMI e-Viewfinder Pro KIT
- Kinefinity EAGLE HDMI e-Viewfinder x1
- E-Viewfinder Cord CH25 (Type-C, 25cm) x1
- USB-C Cable C25 (C2C, 25cm) x1
- E-Viewfinder Mini Mount x1
- E-Viewfinder Rosette (1/4″-20) x1
- Kinefinity Bracket Adapter x1
- Accsoon Toprig Battery Plate x1
- E-Viewfinder Eye Cushion x1
- 1/4″ to 3/8″ Screw Adapter x1
- E-Viewfinder Cord CH50 (Type-C, 50cm) x1
- E-Viewfinder Cord BH50 (D-Tap, 50cm)x1
- Movcam Carbon Fiber Handgrip x1
- Kinefinity NATO Rail x1
- GripBAT 2Si x2 + PD Hybrid Dual Charger Pack x1
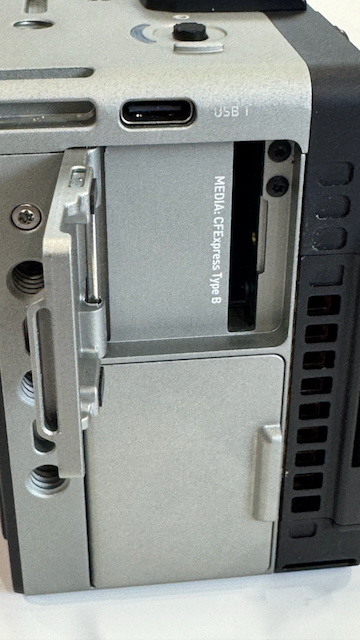
Recording media
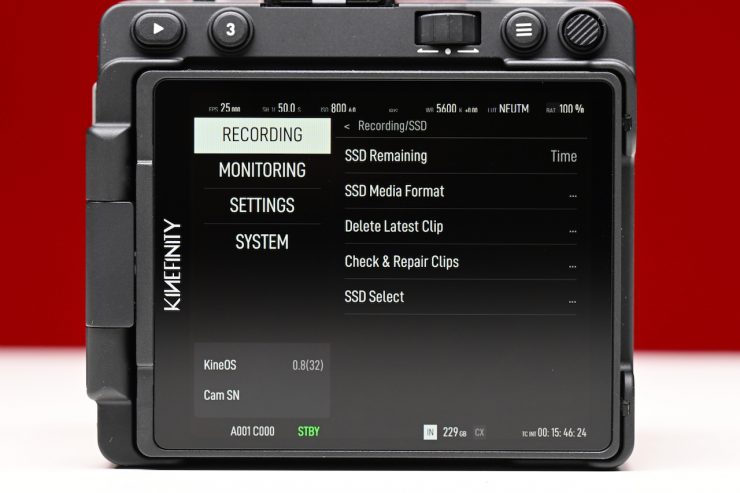
Unlike previous Kinefinity cameras that used standard 2.5″ 7mm SSD SATA 3.0 recording media and KineMAG Nano SSDs based on NVMe M.2 SSD, the VISTA uses a single CFexpress Type B card slot and a 240GB internal SSD.
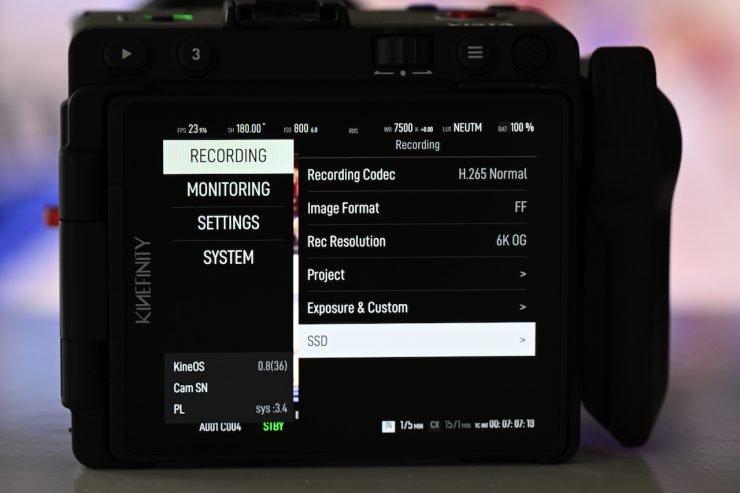
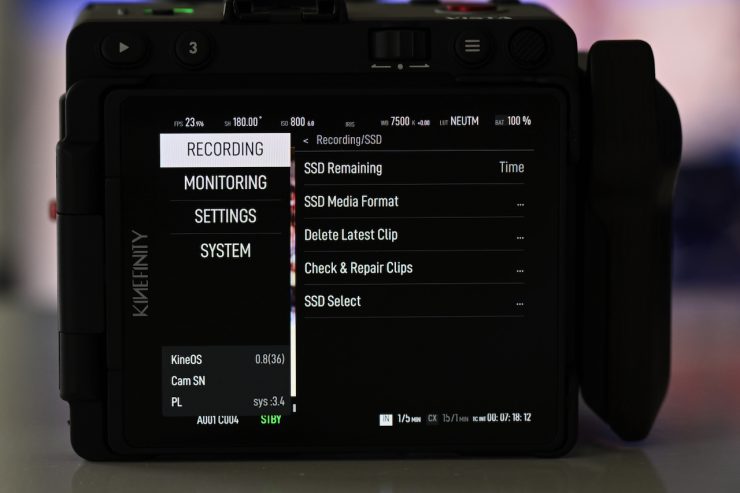
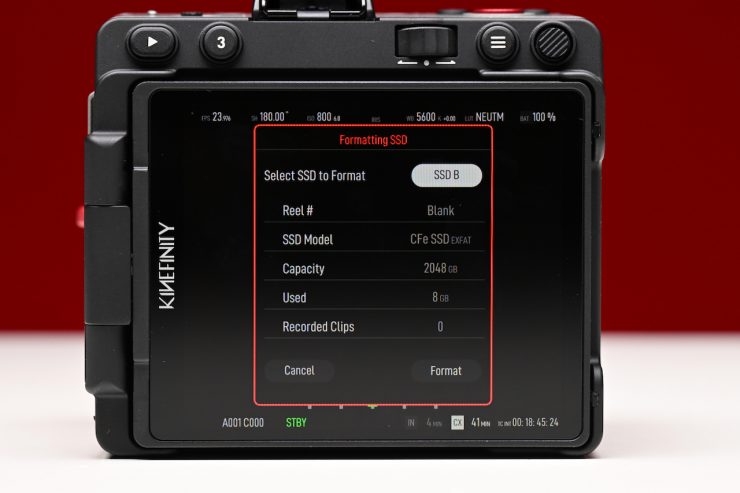
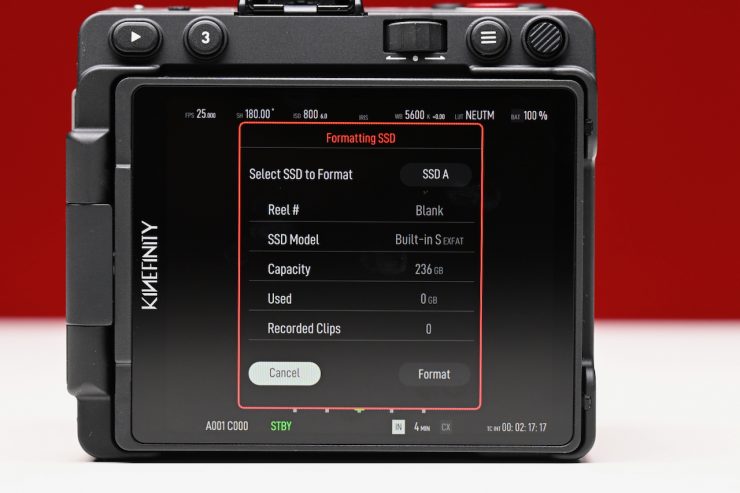
In the Menu under RECORDING, you can go to SSD, and then you have options to change the SSD display from Time to Capacity, format the SSD Media, Delete the last clip, Check & Repair Clips, and select the SSD.
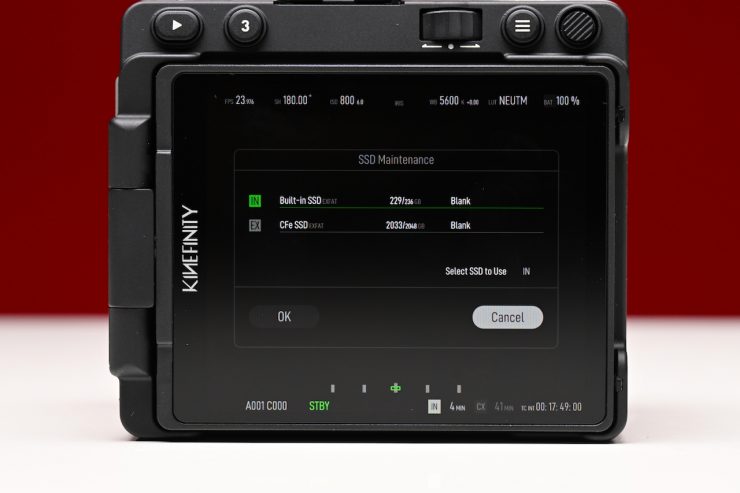
SSD Select could probably be made a bit clearer. This is where you choose whether you want to use the internal SSD or the CFexpress Type B card slot.
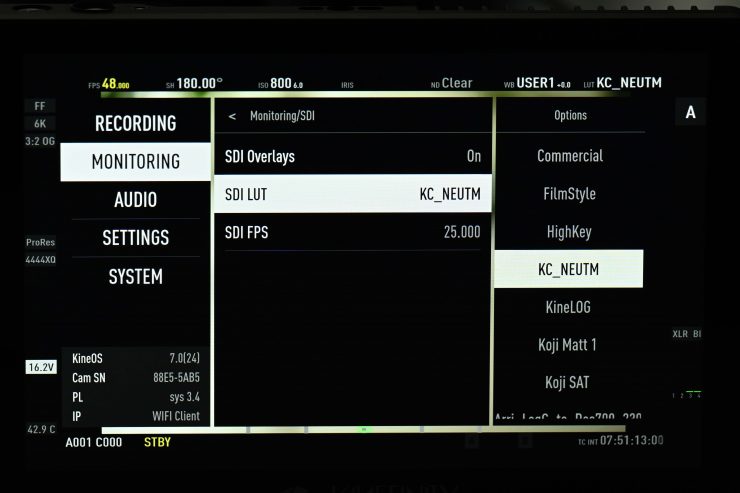
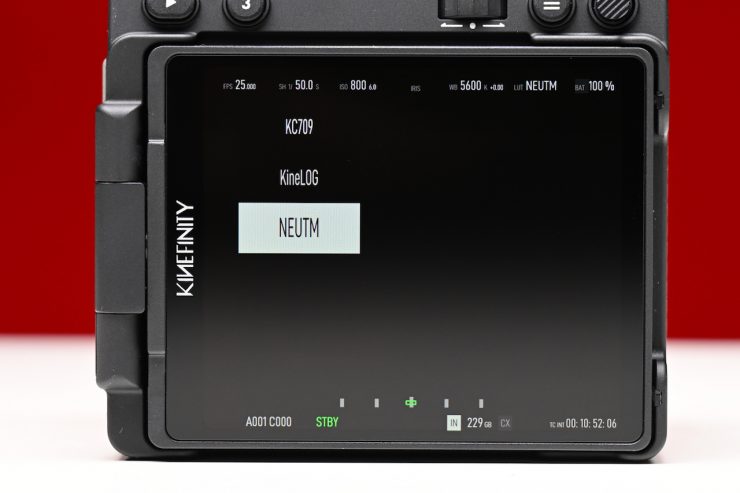
Custom in-camera LUTs
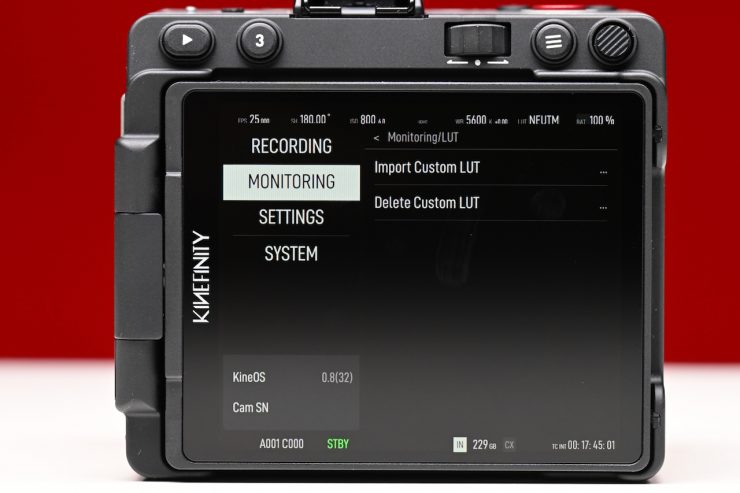
The VISTA allows you to upload a LUT to the camera. On the pre-production version of the camera, the LUT gets burnt into the footage. That won’t be the case with the production version, as the footage will always be recorded in a Log image (KineLOG3). Whatever LUT you are using at the time of recording gets saved to the same folder. This is a really nice feature because the editor or whoever is dealing with the footage knows exactly what LUT you were using and therefore has an idea of how the cinematographer intended the footage to look. The size of the 3D LUT is from 8x8x8 up to 33x33x33.

Once you upload them and you reboot the camera, you can see all of the new LUTs.
Currently, there are two LUTs in the camera, the KC_NEUTM.cube and the KC709. A few years ago, I had Ben Allan ACS CSI create a LUT that doesn’t so aggressively crush the blacks and mid-tones. I found this LUT was a lot nicer to use than Kinefinity’s own LUT.
It’s the little things that matter
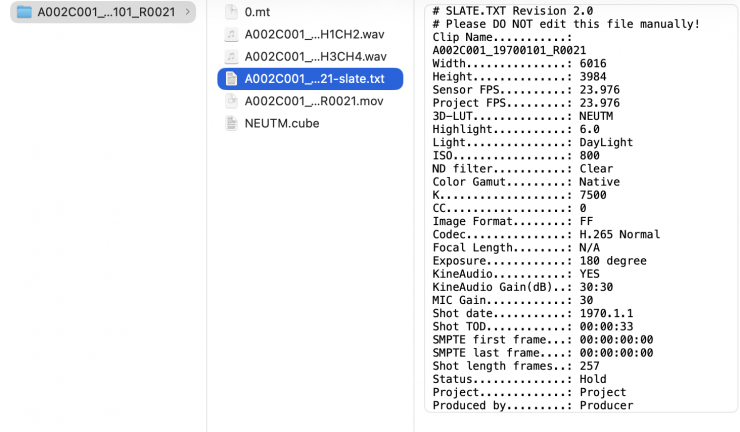
I love how Kinefinity includes extra information that gets recorded into your files. There is .txt file that contains all the information about your clip and camera settings, and the .cube LUT file you were using.
It is nice having all of this information available. The only downside is when you import your files into an NLE, and you get all of these files showing up instead of just a single clip.
Slate
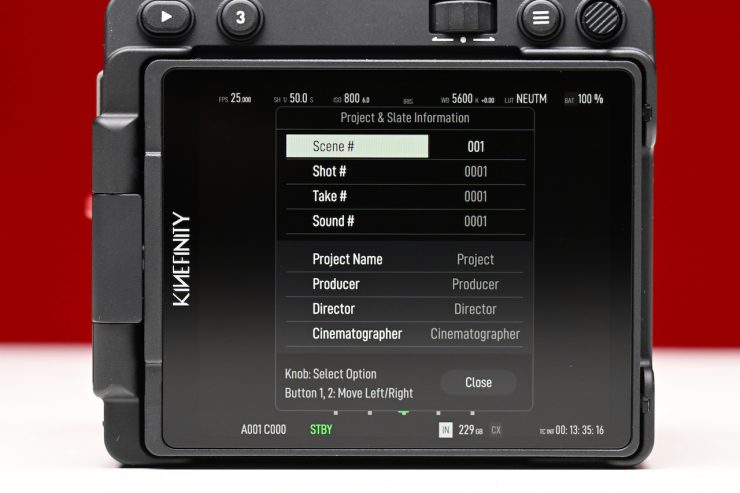
Along with all the information, such as the LUT you were using that gets recorded with your clips, Kinefinity also gives you the option to fill out a full slate with all of your shooting details and information. This can be done directly on the touchscreen of the monitor. I will warn you, it is a fiddly system to use, and it takes considerable time to fill out.
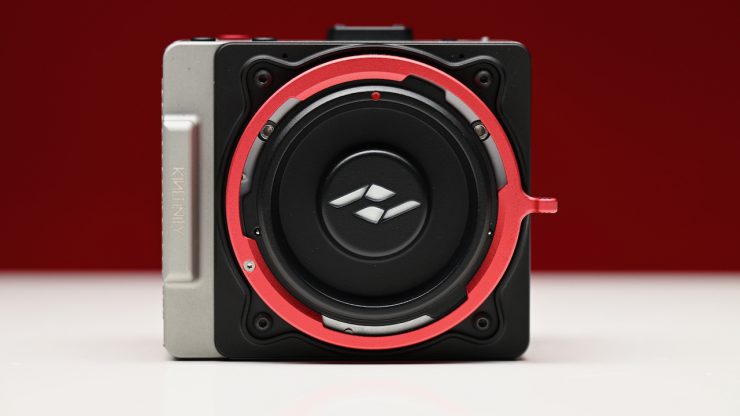
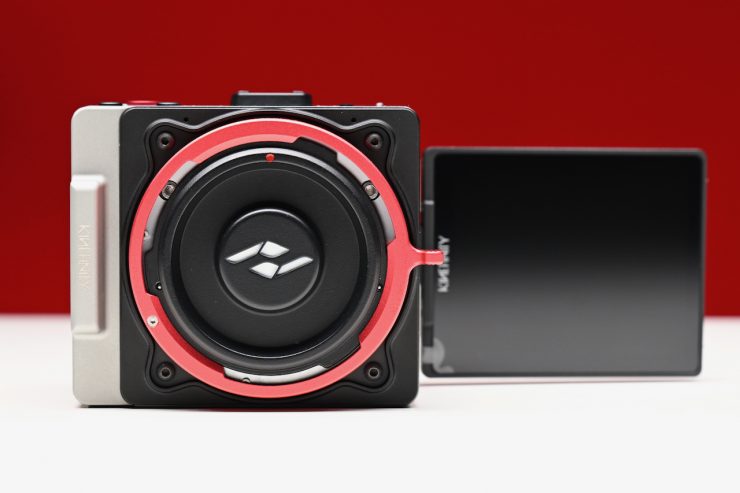
KineMOUNT

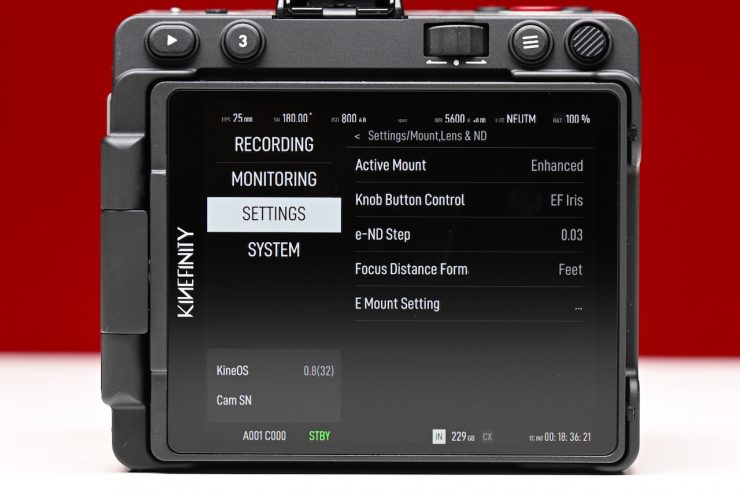
The VISTA uses the KineMOUNT that has an electronic contact (active) in order to support a PL mounting adapter with /i tech. This mount has to be one of the most versatile systems on the market. It allows you to put a vast array of mount adapters, including Sony E Mount, PL mount, Canon EF mount, and ARRI LPL mount. Kinefinity is one of the few cameras on the market that has a Sony E-mount option, making it compatible with a wide variety of glass (manual focus only).
If you use the Canon EF mount, the iris can be adjusted using the control wheel or directly on the screen. The iris will adjust in 1/3 stop increments. If you are using an EF lens on the VISTA in the standard setting, the iris transition is not smooth, and the brightness level jumps when you make changes. Changing the aperture during recording means your shot will be unusable. If you try to change apertures very quickly, you just end up with this massive delay while you wait for the lens to catch up with what you are doing. To solve this problem, you need to activate the mode called “Enhanced Mode”. This makes the iris transition a lot smoother. You can only get to this mode by resetting the camera to its default settings.
If you are using mounts with electronic connection pins, Kinefinity strongly recommends that you power off the camera when swapping different adapters to avoid damage to the camera.
Firmware Updates
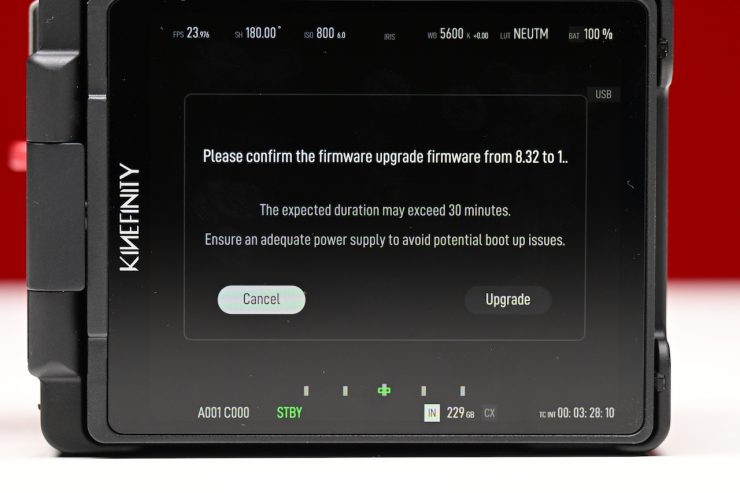
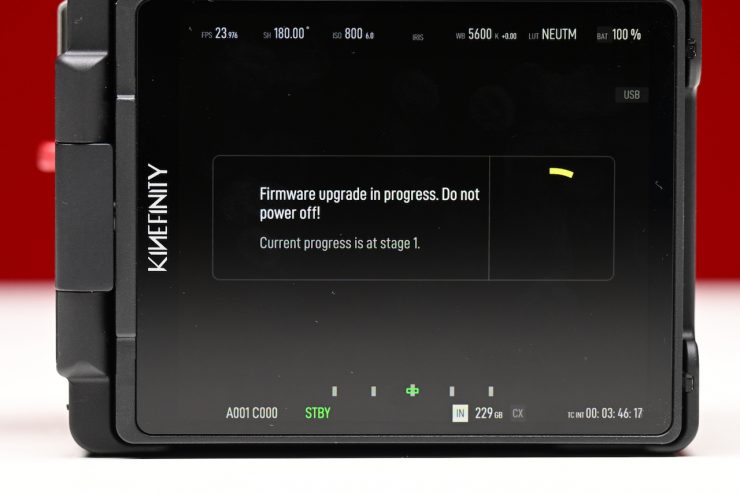
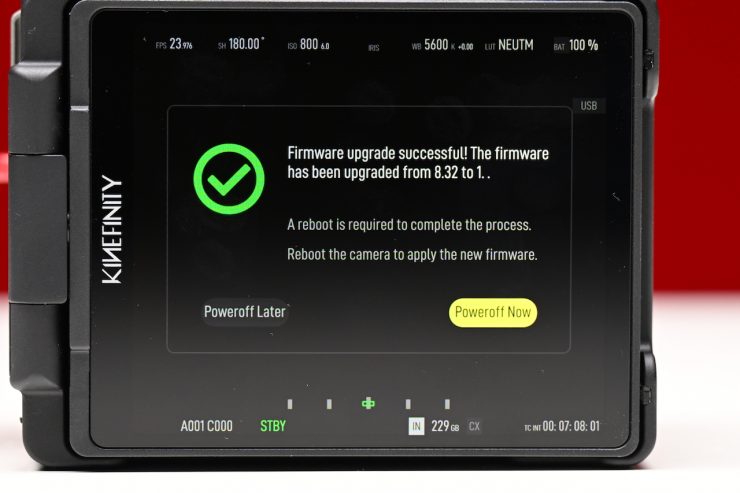
Kinefinity has historically released quite a few firmware updates for its cameras over the years. The VISTA is going to get new firmware updates fairly regularly after launch.
Audio

On-board audio recording options have been an issue with Kinefinity cameras in the past, and that probably turned some potential customers off. The VISTA only has a single 3.5mm Stereo MIC input, but you can also utilize one of the USB-C inputs to support a wireless MIC with a UAC protocol.

Kinefinity has also put in two built-in microphones, but they are realistically only good enough for recording scratch audio.
It would have been nice for Kinefinity to have either come up with some sort of audio top handle or partnered with a third-party company to create one. With small-sized mirrorless cameras such as the Sony FX3/FX30/FX2, some of the Panasonic LUMIX solutions, and cameras like the Canon C50 having dedicated XLR inputs and audio modules, this does somewhat put the VISTA at a disadvantage.
Currently, there are no Audio options in the menu on the pre-production version of the camera. Kinefinity will have complete audio I/O processing. They will also expand Timecode configurations beyond the current Free Run limitation to support External LTC input and Jam Sync.
Rolling shutter
The VISTA does suffer from some rolling shutter, like most other CMOS sensor cameras. It is pretty pronounced when shooting 6K Open Gate and using an anamorphic lens.
Rolling shutter performance is hard to generalize. It really comes down to what you are shooting as to whether you find the amount of rolling shutter acceptable or not.
Price
The VISTA is now available for preorder on www.kinefinity.com and authorized dealers. The first production cameras are scheduled to start shipping on the 20th of June.
The Kinefinity VISTA retails for $2,499 USD. As I mentioned at the top of the article, B&H is selling it for $1,999 USD ($500 USD off) up until the 19th
This is a very competitive price for the camera’s feature set. It is available in KineMOUNT, Sony E mount, and PL mount.
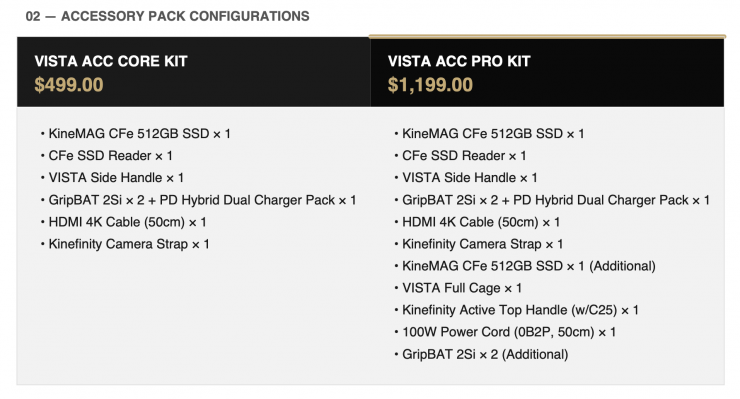
You can also get accessory packs for the VISTA. The Core Kit costs $499 USD, while the Pro Kit is $1,199 USD.
So how does that price compare to the competition? Below you can see.
| PRICE | |
| Kinefinity VISTA | $2,499 USD* |
| Canon EOS R6 V | $2,499 USD |
| Nikon ZR | $2,196.95 USD |
| Canon EOS C50 | $3,899 USD |
| Canon EOS C80 | $5,499 USD |
| Canon EOS C70 | $3,499 USD |
| Canon EOS R5 C | $2,999 USD |
| Canon EOS R50 V | $569 USD |
| Canon PowerShot V1 | $849 USD |
| Canon PowerShot G7 X Mark III | $879.99 USD |
| Blackmagic Design PYXIS 6K Cinema Box Camera (Leica L) | $3,389 USD |
| Blackmagic Design Pocket Cinema Camera 6K Pro | $2,835 USD |
| Sony FX3A | $4,298 USD |
| Sony FX2 | $2,698 USD |
| Sony FX30 | $2,098 USD |
| Sony ZV-1 | $798 USD |
| Ricoh GR IV | $1,496.95 USD |
| Leica D-Lux 8 | $1,915 USD |
| Sony Cyber-shot DSC-RX100 VII | $1,498 USD |
| Panasonic Lumix S9 | $1,297.99 USD |
| Panasonic Lumix S5 II | $1,697.99 USD |
| Panasonic Lumix S5 IIX | $1,897.99 USD |
| Panasonic Lumix GH7 | $1,797.99 USD |
| FUJIFILM X-M5 | $899 USD |
| FUJIFILM X-T5 | $1,895.95 USD |
| FUJIFILM X-T50 | $1,499 USD |
| FUJIFILM X-H2S | $2,699.95 USD |
| Nikon Z8 | $3,396.95 USD |
| Nikon Z6 III | $1,996.95 USD |
| Nikon Z50 II | $1,006.95 USD |
| Nikon Zfc | $1,065.96 USD |
| Nikon Z30 | $606.95 USD |
*B&H is selling it for $1,999 USD ($500 USD off) up until the 19th June.
So, should you buy one?
It really depends on what your needs and requirements are. As I previously mentioned, if AF, IBIS, and good onboard audio recording options are of paramount importance, then thi sisn’t the camera for you. If you are looking for a very compact, small-sized digital cinema camera and want to use manual focus lenses, then the VISTA is worth looking at. It would also make for a good option if you need to get some discreet shots, need a very portable B or C camera, or even as a crash cam or vehicle cam.
It would also make a pretty good scouting camera, especially given its full frame, S35, M4/3 and S16 shooting modes and the ability to do various open gate formats.
The biggest stumbling block for owning a Kinefinity camera is arguably when it comes to after-sales service and support. If you buy one of their cameras in China, Europe, or a select few other countries, there is someone you can turn to for information and support. Unfortunately, in many other places in the world, there is no easy way of getting repairs done or receiving after-sales service. For many potential owners, this is probably the primary reason that they shy away from buying a Kinefinity camera. This really is a shame, because I think the company makes good cameras that are a nice alternative to what’s on offer from other manufacturers.
What should certainly help Kinefinity is that their cameras are available from B&H.
For many owners and prospective users, the Kinefinity Facebook group is one of the quickest ways to have your questions or issues about the camera answered. Kinefinity’s own Jihua Zheng is frequently posting updates and answering questions in the Facebook group.
As I have mentioned previously in Kinefinity reviews, the problem you may well encounter is that clients may have no knowledge about the camera. In some cases, clients will either request a particular type of camera or want to know what you are shooting on. In the case of owning a Kinefinity, you may well be met with some resistance because the client has never heard of that camera before and could be reluctant to use it. These are real-world situations that you have to think about carefully before investing in a Kinefinity camera.
The VISTA is also a great option if you already own a larger Kinefinity camera, or even if you want a small-sized B camera that would work well with some of the older ARRI cameras that use the ALEV III sensor. I have had great success in the past utilizing ARRI LUTS and color workflow with the MAVO Edge 6K and MAVO LF.
There is a lot to like about the camera, and it’s good to see something that is arguably a little different come to market.