The new Tilta Nucleus-M II is a follow-up to the original Nucleus-M. Tilta introduced the Nucleus-M way back at NAB in 2017. It was designed to be an affordable FIZ system for the masses and at $1,199 USD it was considerably more affordable than anything else on the market at the time. It took quite a while for Tilta to sort out some issues and bugs, and a lot of what they learned carried over to the Nucleus Nano and Nano II, and now the Nucleus-M II.
The new Nucleus-M II looks to be a big improvement over the original.
Core Upgrades
- Compatible with First Generation’s Ecosystem– Seamless integration of the focus ring, data interface, and lens control motor—no need to replace your existing gear.
- Built on a Classic Design- Retains the damping adjustment and shortcut layout for easy operation—zero learning curve for existing users.
- New Electronic Focus Ring Added– Featuring a detachable design that preserves first-gen physical focus ring markings. Mark manually when removed, or switch to on-screen digital markings when attached.
- 2.4-inch Touchscreen Display– Quick access to focus, aperture, ISO, etc. with instant on-screen controls.
- Upgraded PID 2.0 algorithm and motor optimization for the Nucleus M II lens control motor—0.02s fast response and ultra-smooth focus adjustments, which are claimed to be free from stutter and delay.
- Four-way Multi-channel Series Connection– Directly control the Nucleus-M II lens control motor with the hand wheel, supporting up to 4 channels in series.
- Replaceable Gears– Modular design for quick assembly and long-term maintenance.
- Compatible with Multiple Mounting Rod Options– Nucleus-M II includes 15mm and 19mm rod adapters
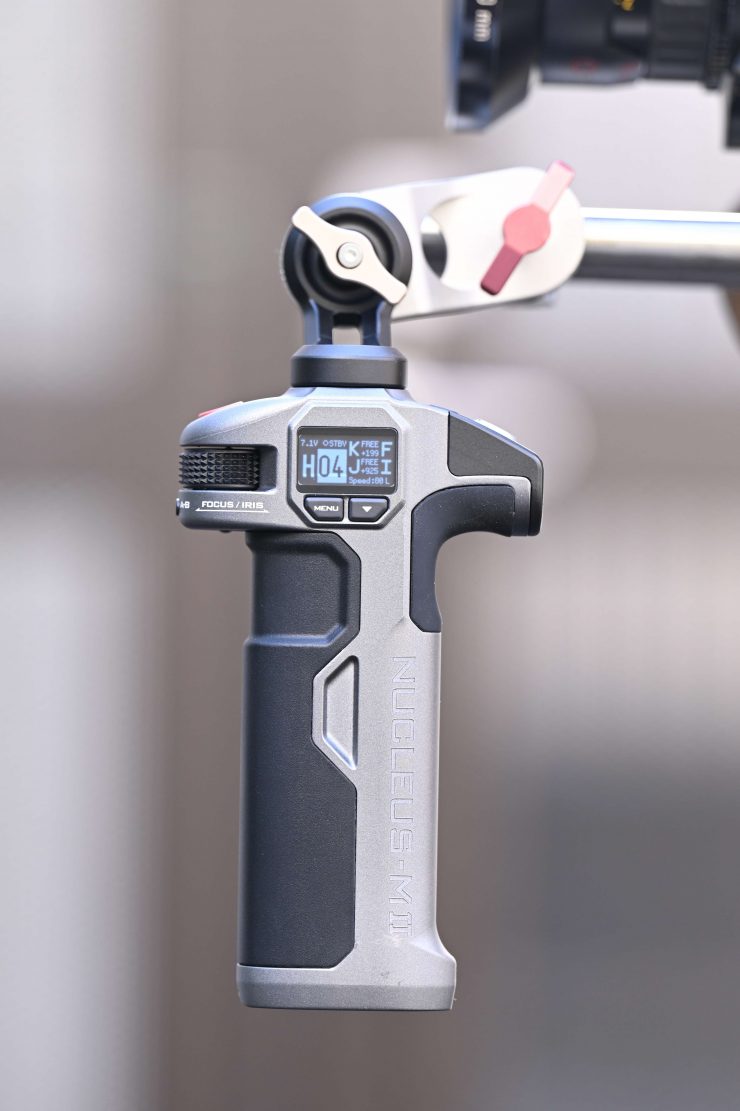
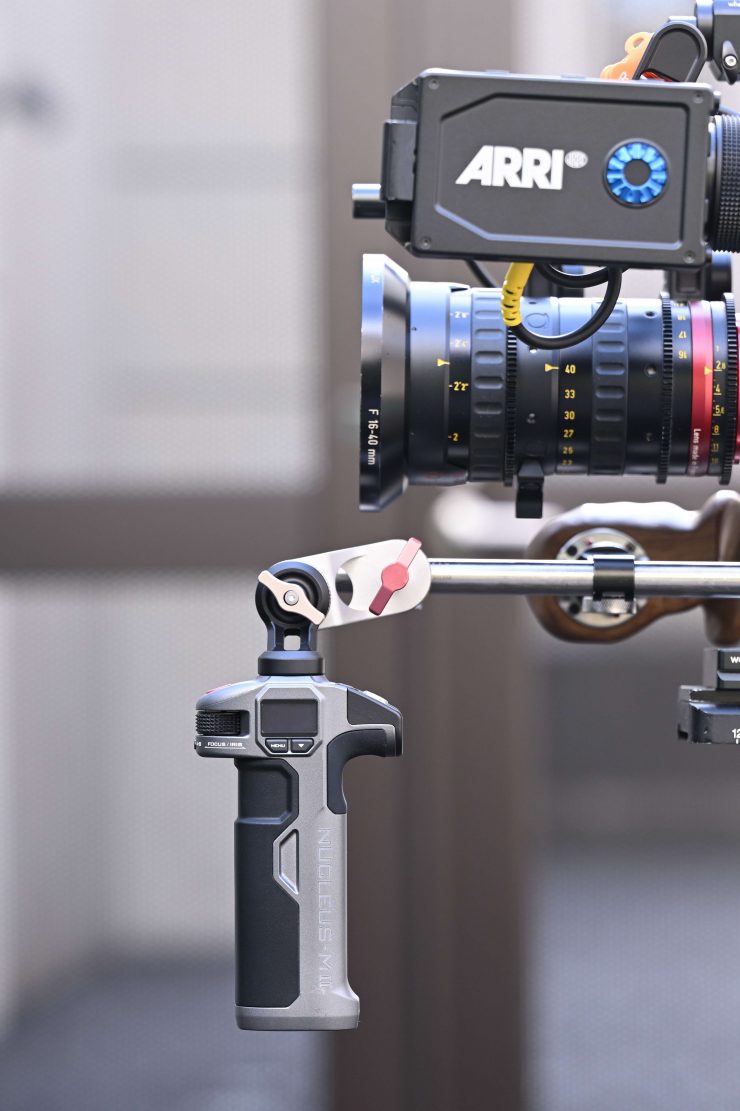
- Nucleus-M II Wireless Control Handle– Versatile control system with seamless switching between primary and secondary functions.
- Compatible with NP-F Batteries– Powered by NP-F550 batteries.
- Supports Storage of up to 128 Lens Data Presets– The Nucleus-M II hand unit features built-in data storage, allowing one-touch access to saved settings for fast and convenient adjustments.
- MARK Point & RANGE Memory– Power loss protection keeps your settings intact, even after a power outage.
- Nucleus-M II Left Hand Mode– Customizable hand wheel position for all users.
- Robust Anti-Interference with Four Independent Channels– Upgraded channels for stronger signal, stable transmission, and precise focus.
- Modular Hand Unit with Zoom Modules– Customizable mounting on either side of the wireless control handle. Accommodate both left and right-hand users.
Nulceus Series Specification Comparison Table
|
| Nucleus M (First-gen) | Nucleus-M II | Nulceus Nano II |
| Number of Hand Unit Controls | Control up to 3 channels directly with the hand wheel. | Control up to 4 channels directly with the hand wheel. | Control up to 4 channels with the power handle; hand wheel supports up to 2 channels. |
| Hand Unit Display | 1.3” black and white display | 2.4” color touchscreen display | 1.6” color touchscreen display |
| Power Supply | 18650 rechargeable lithium-ion battery |
NP-F550 universal battery.
Universal NP-F battery compatibility with extended runtime on a single charge.
| Built-in 1800mAh high-capacity lithium battery |
| Focus Ring | Physical focus ring | New removable electronic focus ring, easily converted to a physical focus ring, with manual marking capability. | – |
| Hand Wheel Damping | Constant | Adjustable damping | Constant |
| Mark Power Loss Memory | ❌ | ✔️ | ❌ |
| Lens Data Presets | ❌ |
✔️(128 lens data presets)
| ✔️ |
| Depth of Field Indicator | ❌ | ✔️ | ❌ |
| Camera Setting Control | ❌ | ✔️ | ✔️ |
| Hand Wheel with Left-Right Hand Switch | ❌ | ✔️ | ❌ |
| Compatibility with DJI Lens Control Motor (Stabilizer) | ❌ | ✔️ | ✔️ |
| Motor Size | 114*92*30.7mm 4.49 x 3.62 x 1.21 in | 103*78*30mm 4.06 x 3.07 x 1.18 in | 83*46*31mm 3.27 x 1.81 x 1.22 in |
| Motor Gear Replacement | ✔️ | ✔️ | ❌ |
| Motor Gear Direction Adjustment | ❌ | ✔️ | ✔️ |
| Motor Torque (14.8V) | 0.39Nm | 0.48Nm | 0.13Nm |
What do you get?
- 1x FIZ Controller Unit
- 2x Nucleus-M II Motors
- 2x Wireless Handles
- 1x Laynard Strap
- 1x USB-C to 7-pin LEMO Cable
- 1x P-Tap to 7-pin LEMO Cable
- 2x 7-pin to 7-Pin LEMO Cables
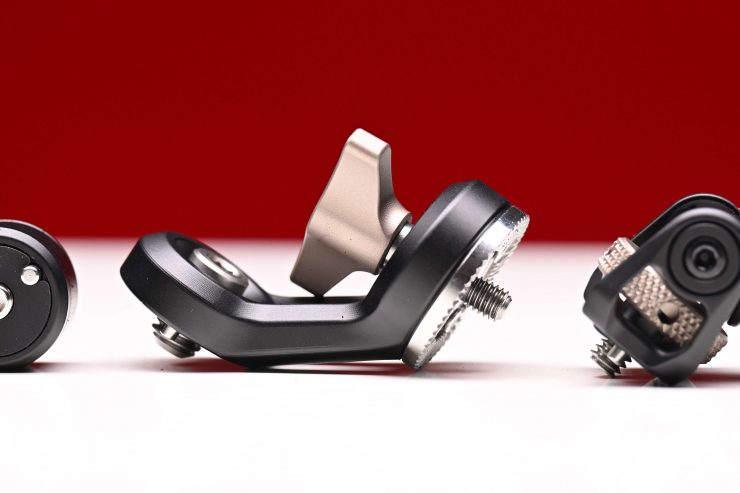
- Set of Follow Focus Marking Disks
- 2x 15mm Motor Rod Mounts
- 2x 19mm Motor Rod Mounts
- 1x Spare Motor Gear
- 1x Stills Lens Adjustable Gear Attachment
- 1x Monitor Bracket
- 2x 90 degree 3/8″ ARRI Rosette Adapters
- 1x Baby Pin Adapter
- 1x Hard Case
The kit comes with two motors and three controllers. If you want to have control of a zoom lens as well as iris and focus, you can purchase an extra motor and cable.

The Nucleus-M II comes in a reasonably nice hard case.
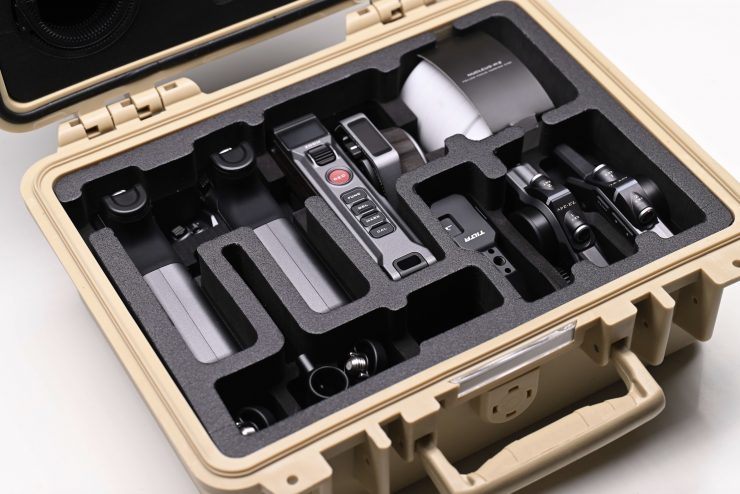
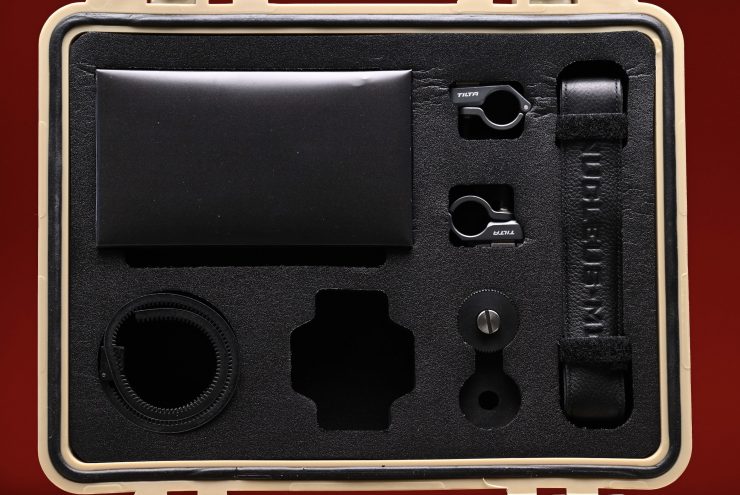
Inside, everything is laid out nicely.
Batteries Not Included

Unlike the Nucleus-M, which used non-standard 18650 Lithium-ion batteries, the Nucleus-M II utilizes NP-550 batteries. I am glad they changed this because the 18650 Lithium-ion batteries could be difficult to source and not overly common.
Tilta doesn’t include any batteries in the kit, so you will need to source or use your own. I can understand why Tilta didn’t include any as there can be complications when shipping products with Lithium-ion batteries. In saying that, it is always frustrating for the end user when buying camera accessories that don’t come with any batteries.
There are plenty of NP-550 batteries on the market, at a range of different prices.
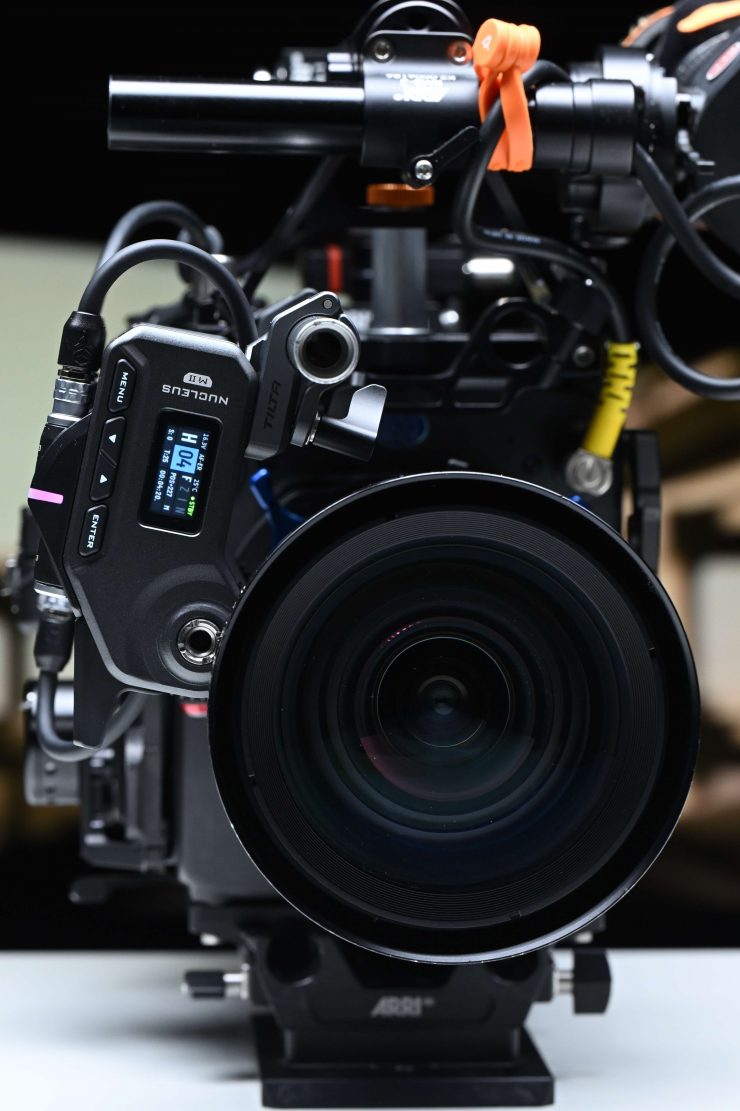
Build Quality


The overall build quality of the system is good. All of the individual components are solidly made and tactile.
There was nothing I came across that overly concerned me.
No Lidar
The Tilta Nucleus-M II doesn’t feature any Lidar capabilities, like competing systems from DJI. While Lidar can be a little hit and miss and it is far from perfect, it does offer a big advantage for solo operators or small-sized crews who are using cine or manual focus lenses. One of the issues with the current Lidar systems is that they are fiddly to set up and use.
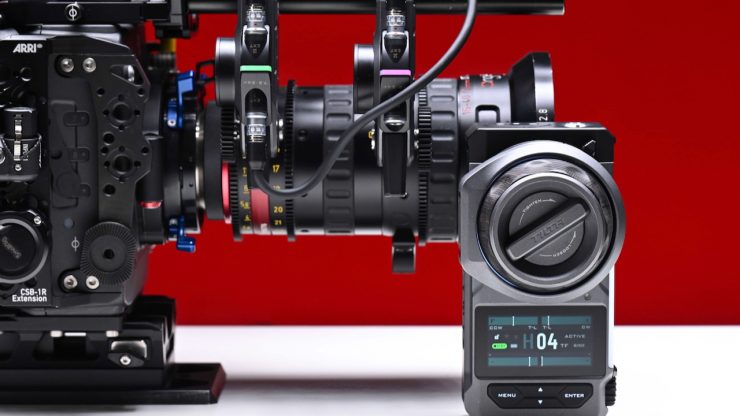
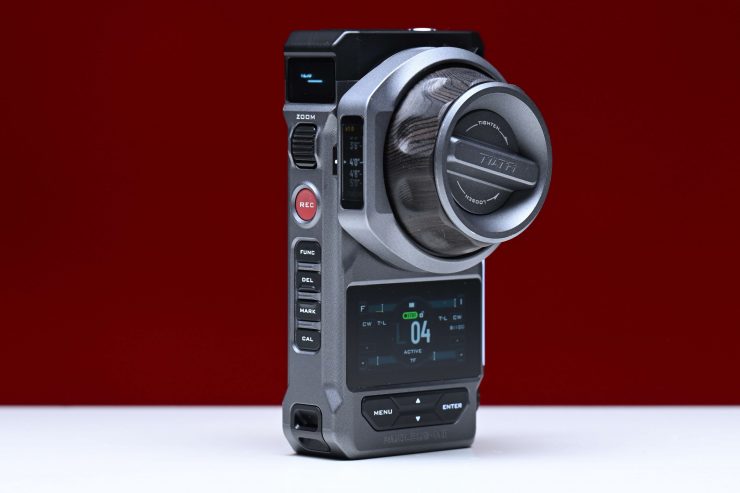
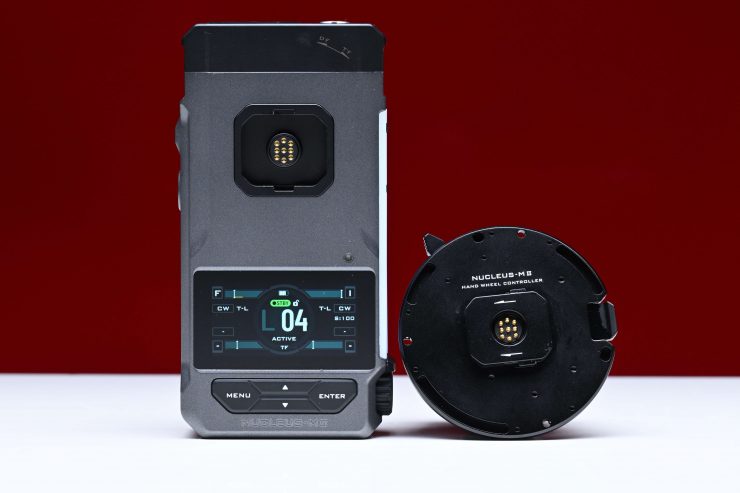
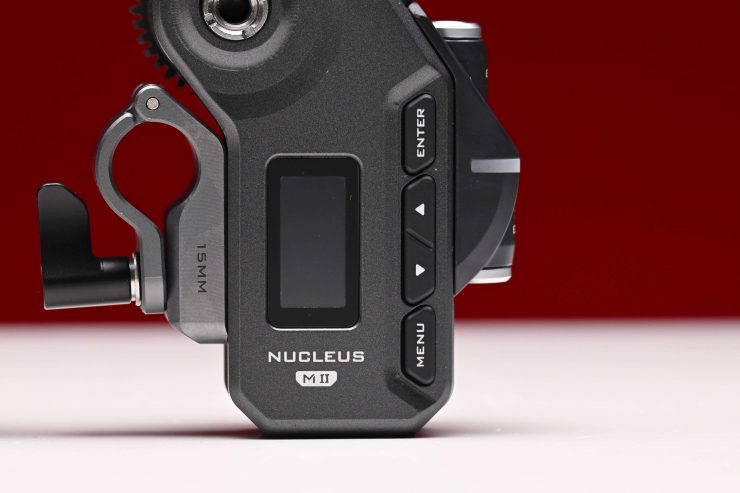
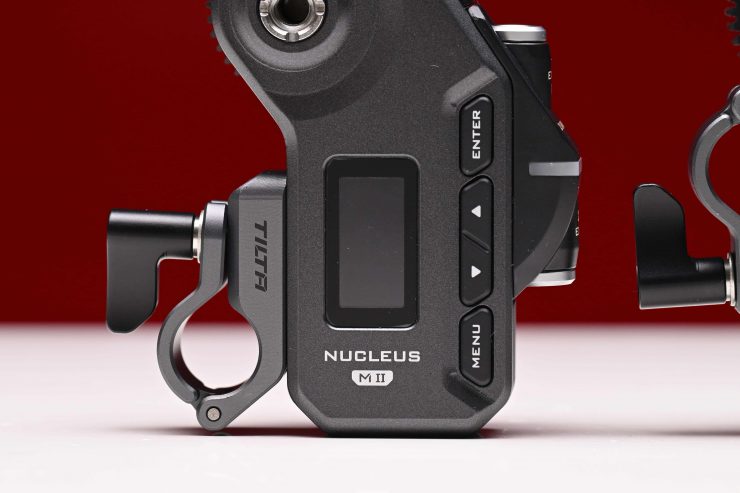
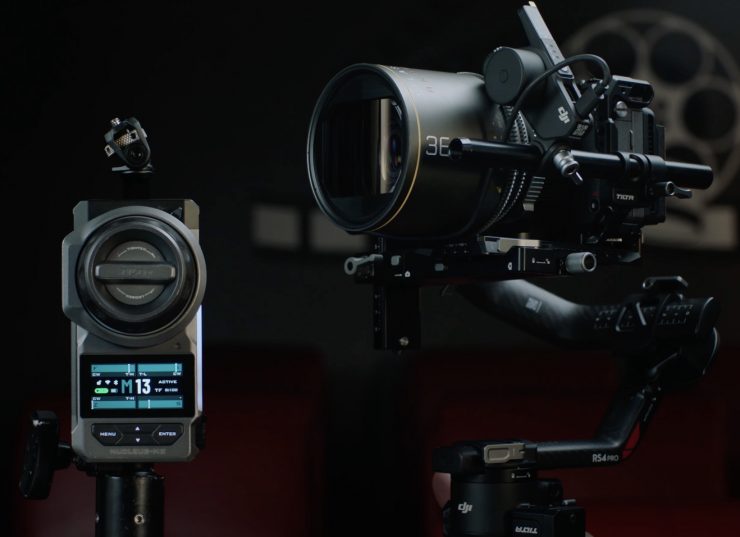
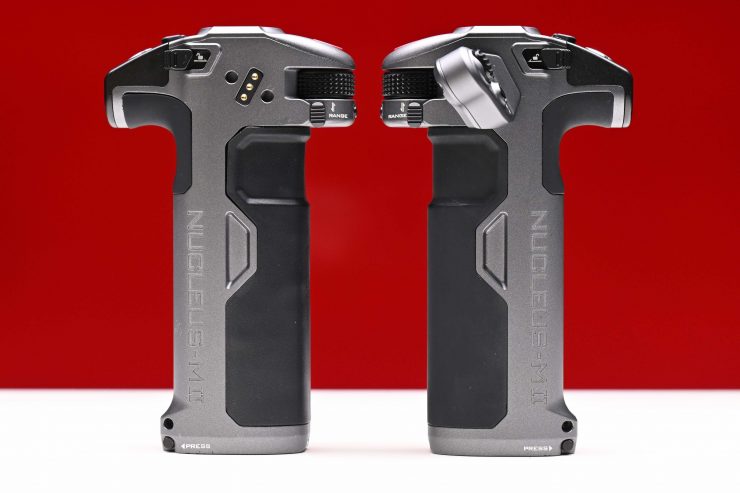
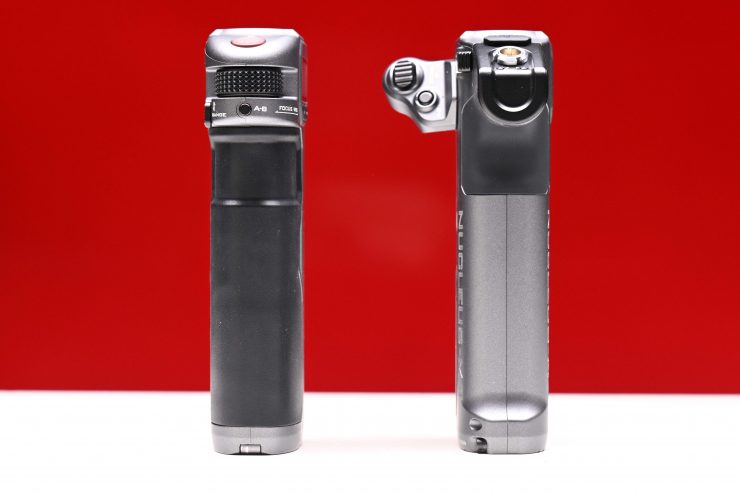
Controller
Nucleus-M II 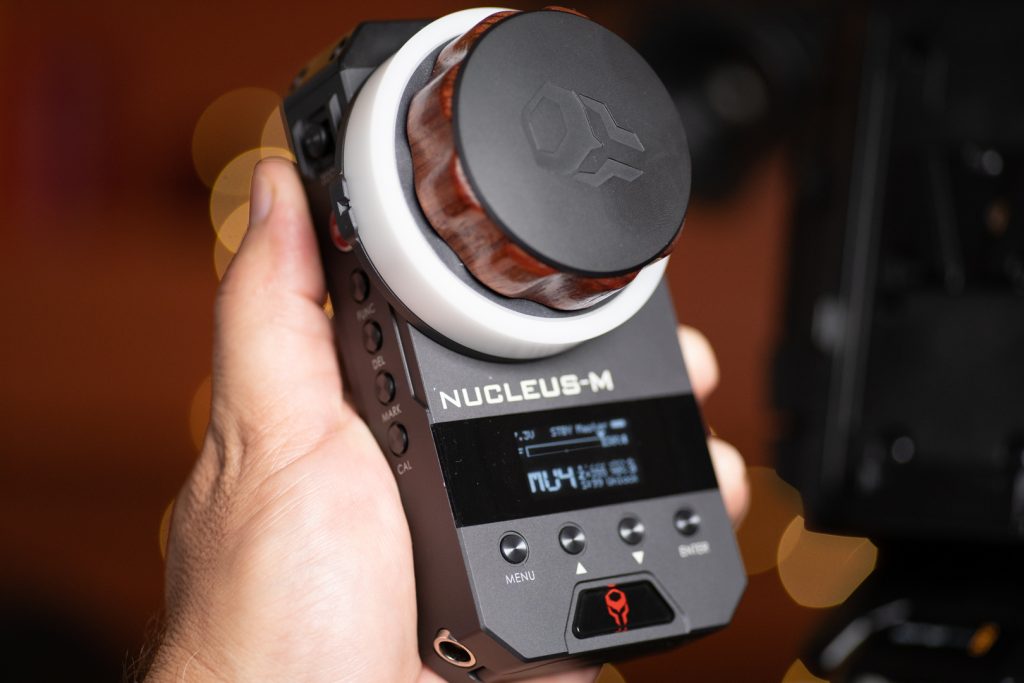
Nucleus-M
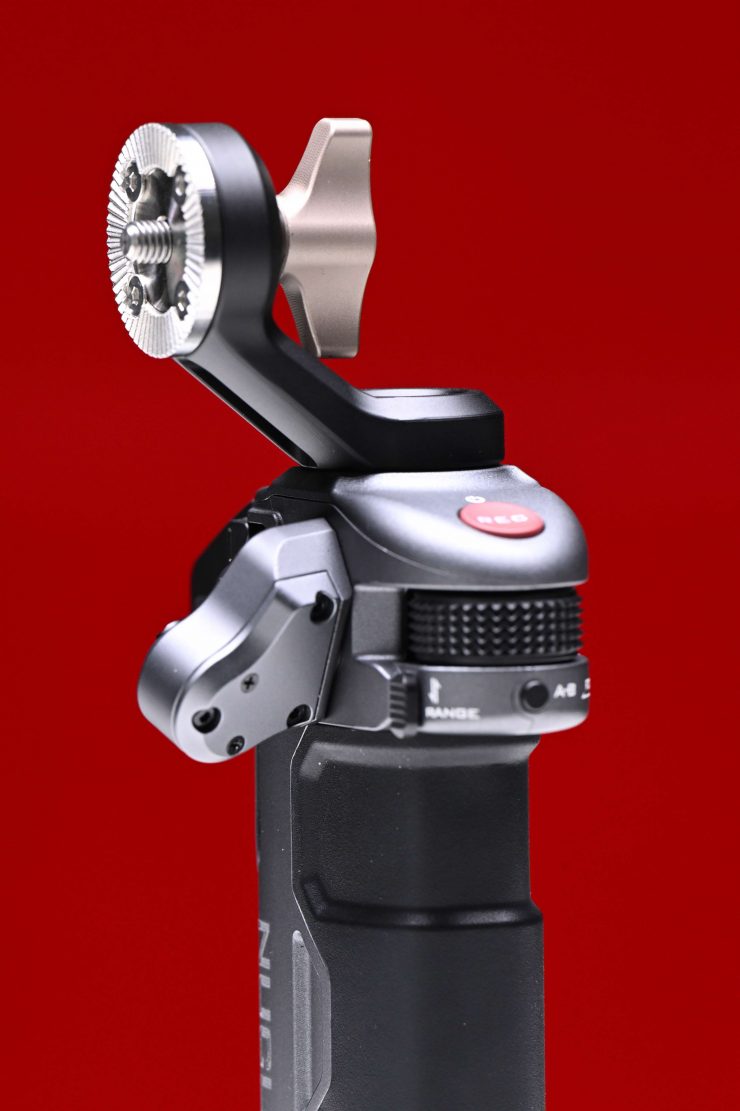
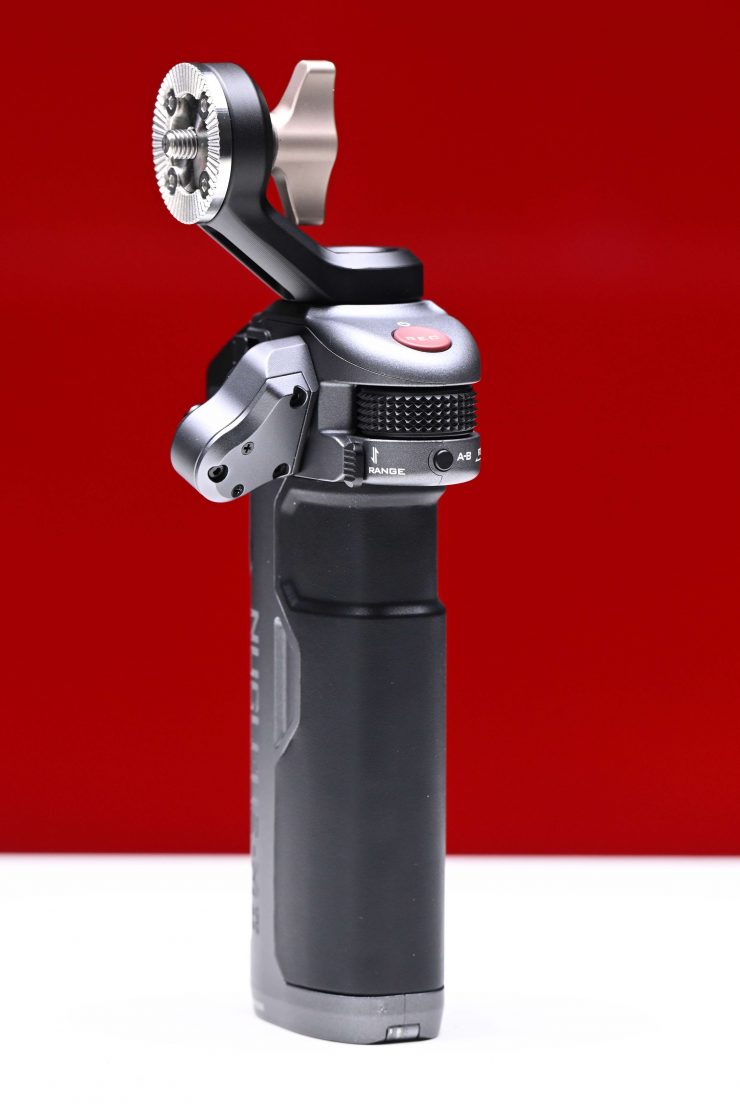
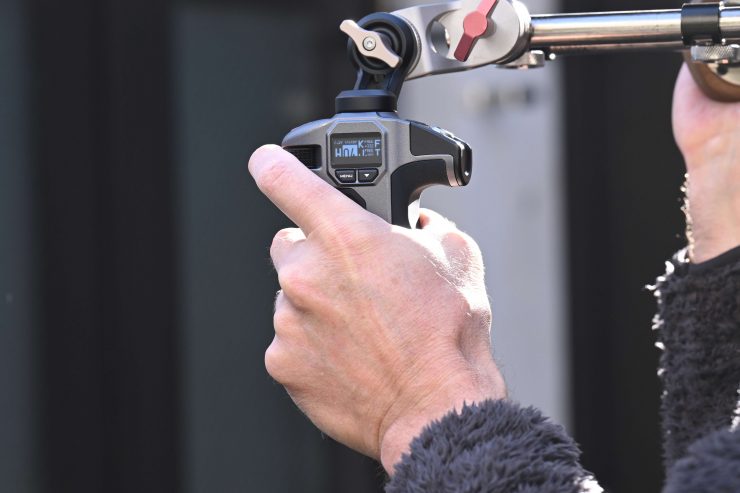
The hand controller is solidly made and it is a little different from the original.

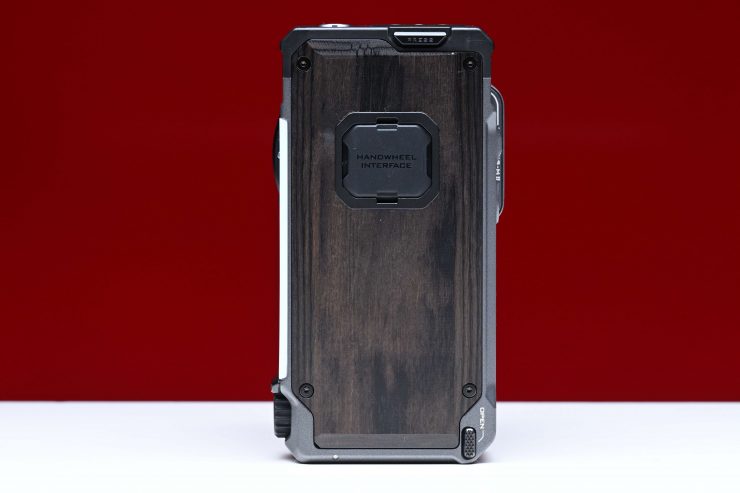
The basic shape hasn’t changed much from the original, however, Tilta has changed up the buttons and made some other improvements. I personally would have liked to have seen Tilta move away from the wood finish, as it looks a little old-fashioned and dated.
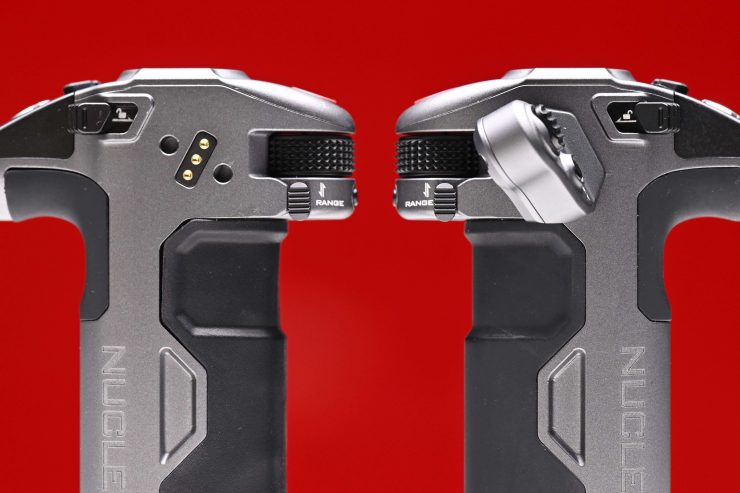
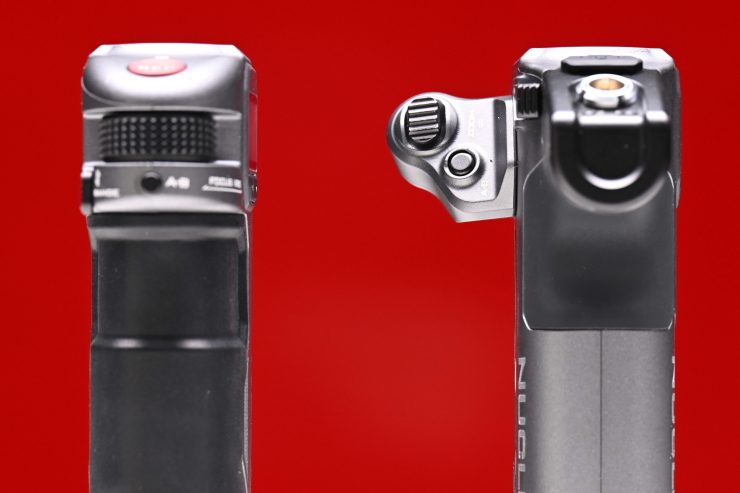
Nucleus-M II 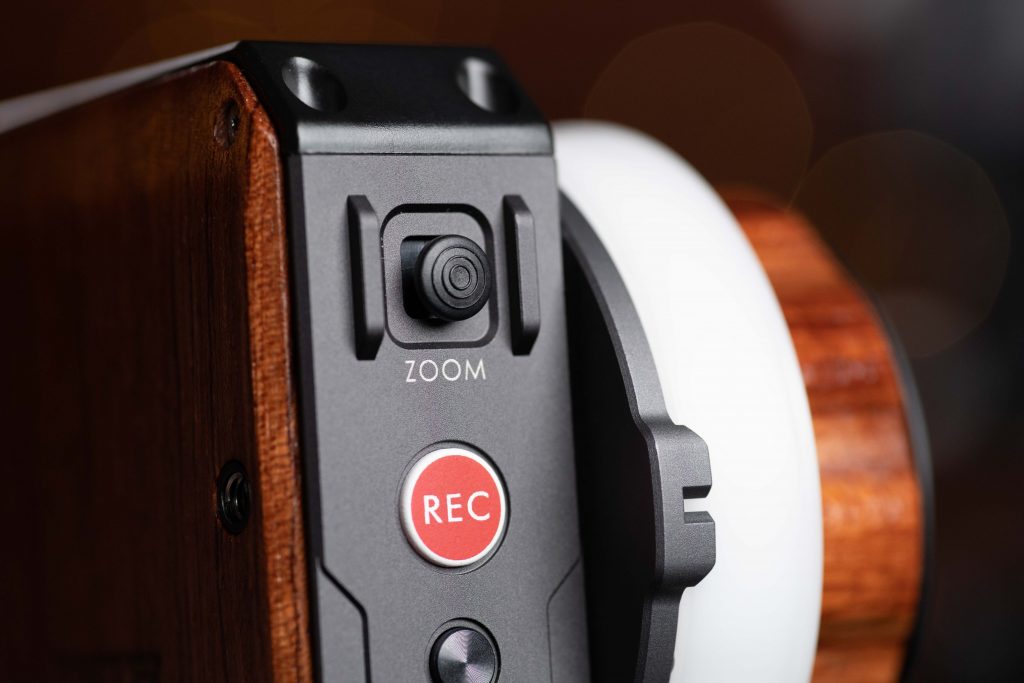
Original Nucleus-M
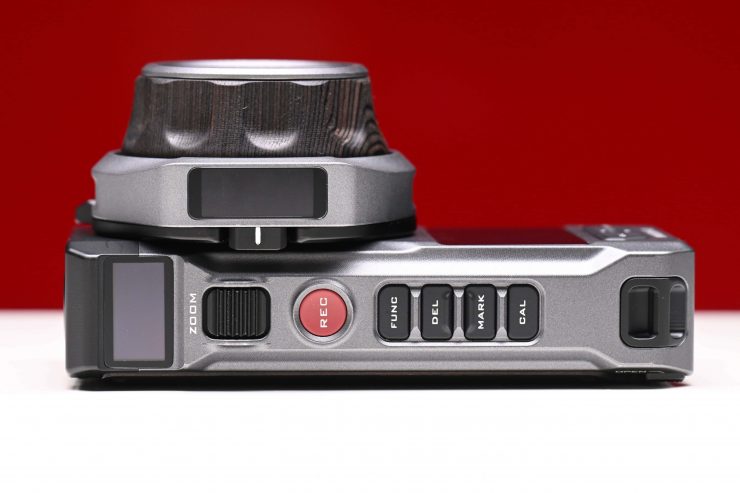
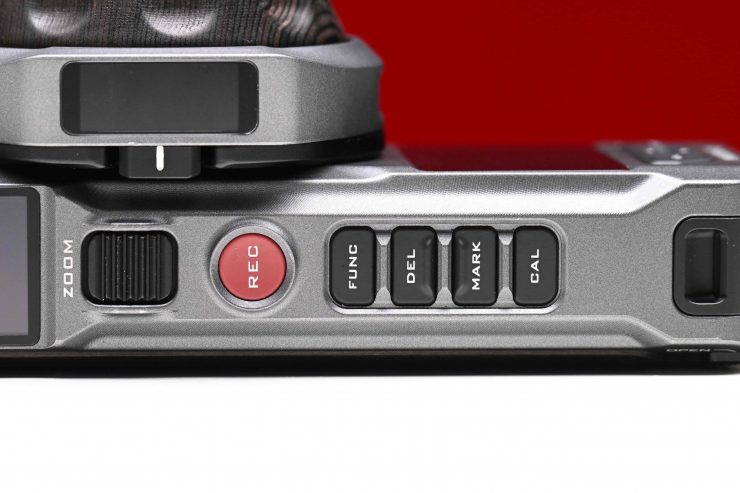
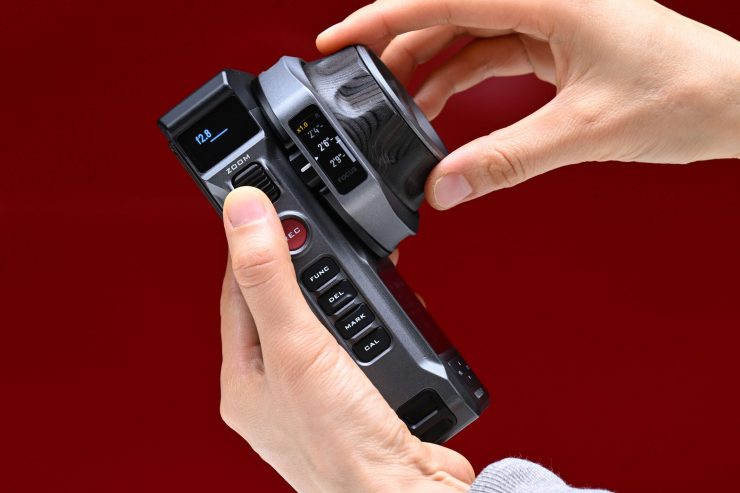
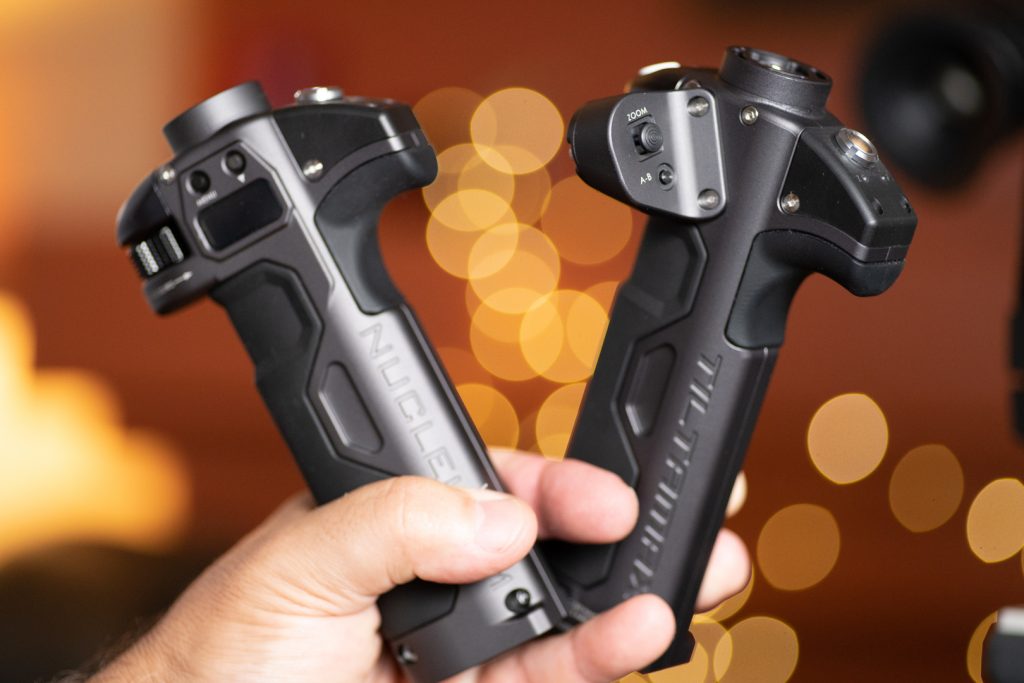
There is a zoom switch now instead of the previous small joystick.
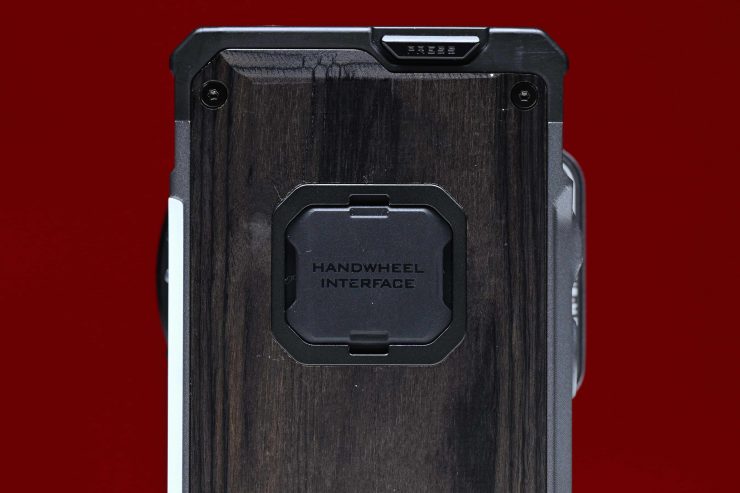
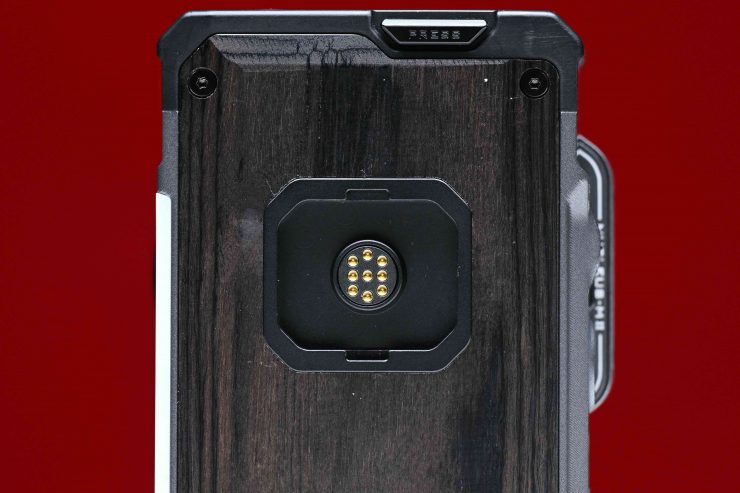
One of the biggest new features is the ability to move the hand wheel to the other side of the controller.
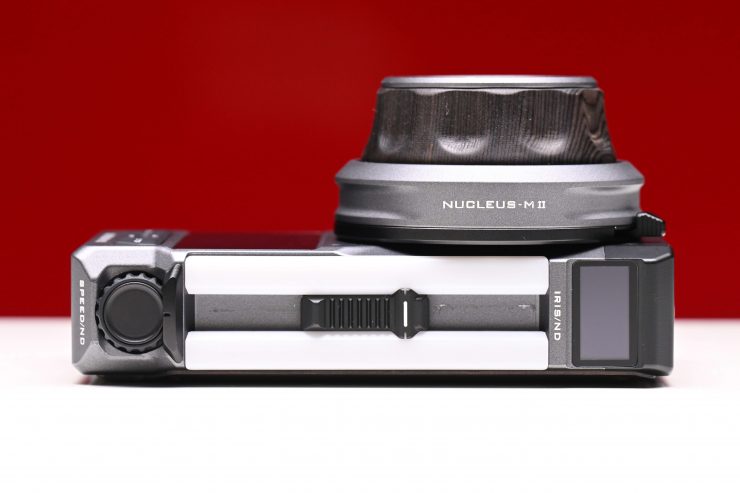
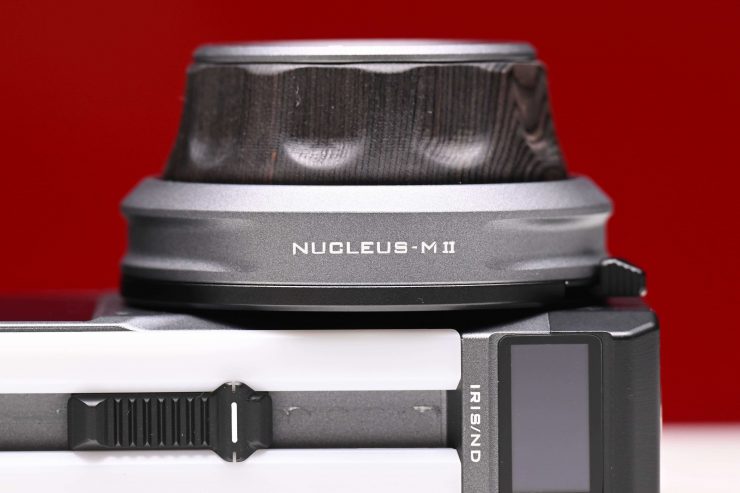
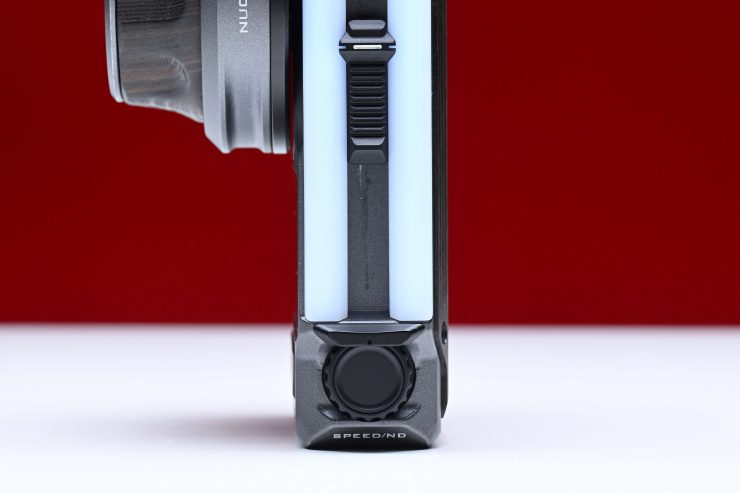
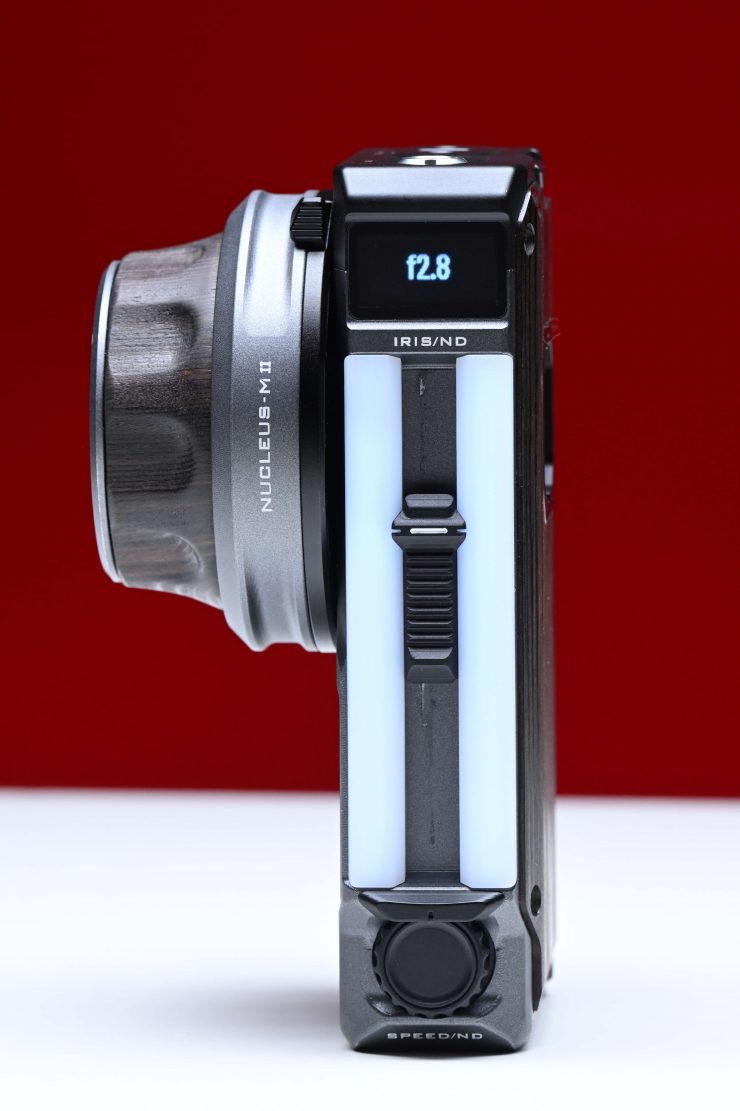
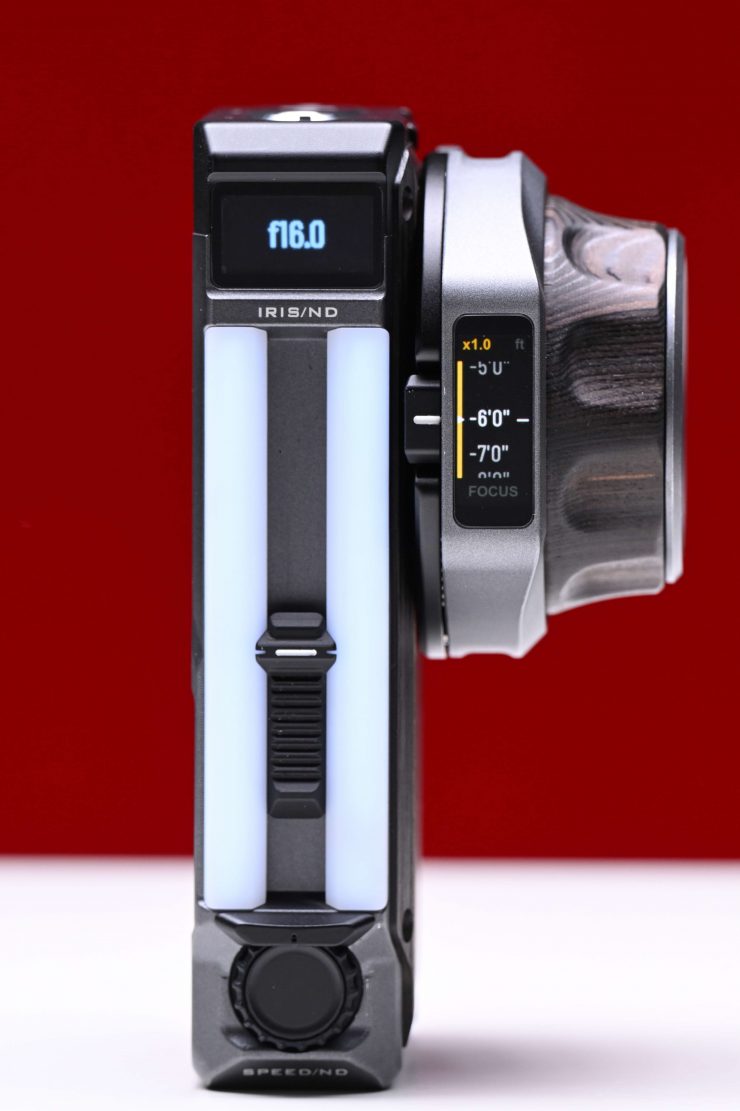
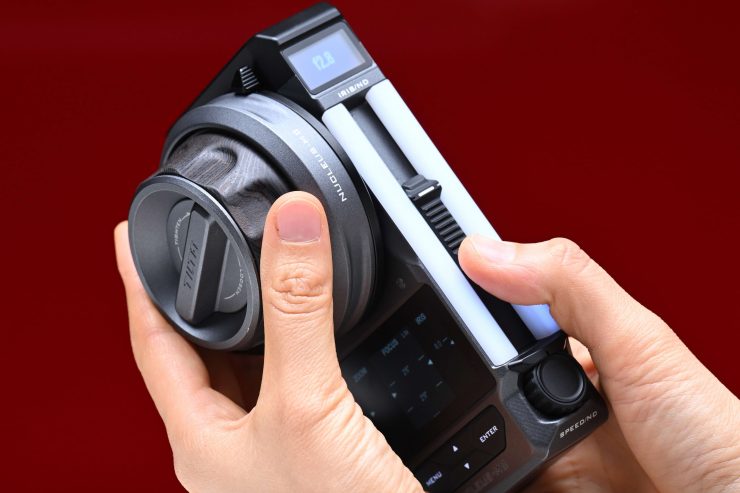
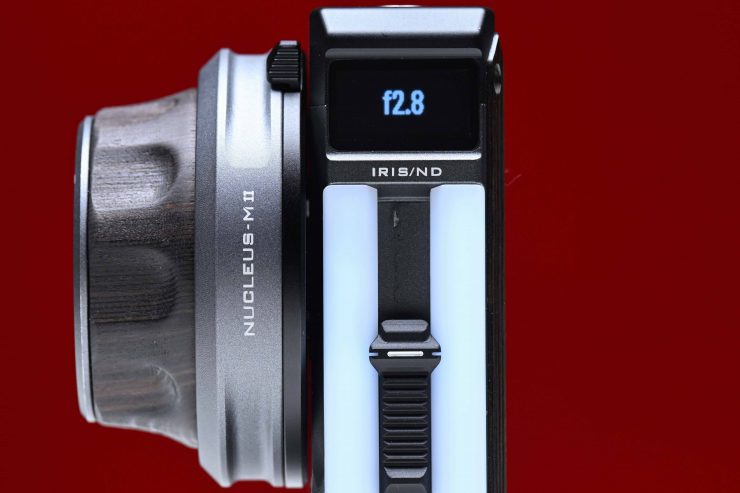
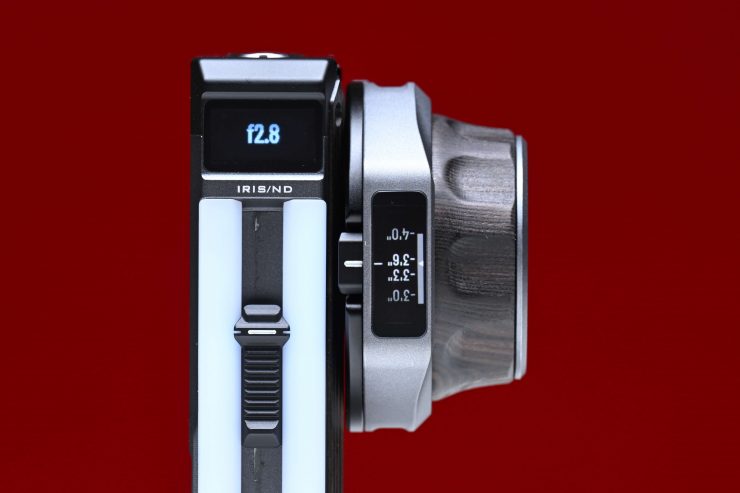
On the opposite side of where the main controls are, there is a slider mechanism that you can use to control the motor that is attached to the aperture, or a variable ND filter.

Below the slider mechanism is a dial you can use to control the speed.
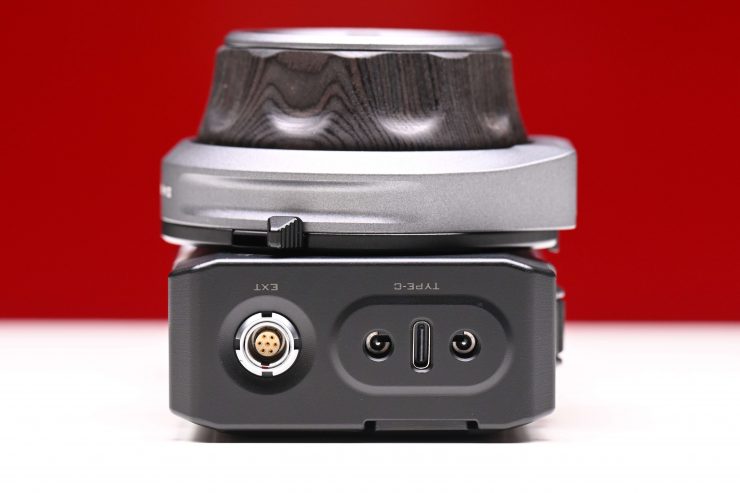
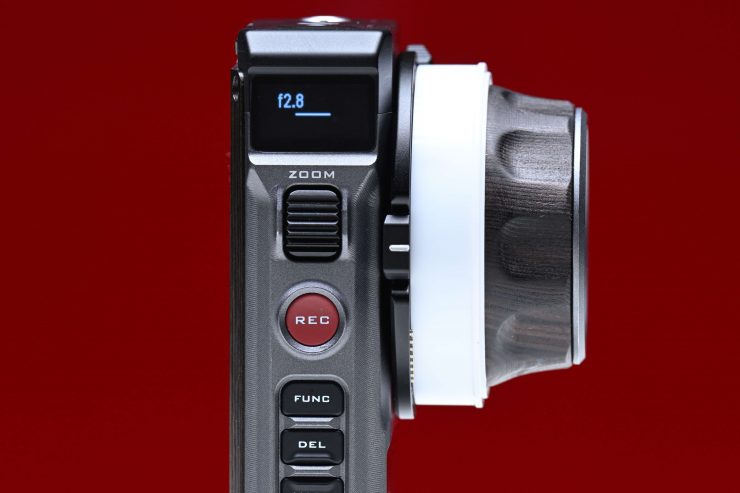
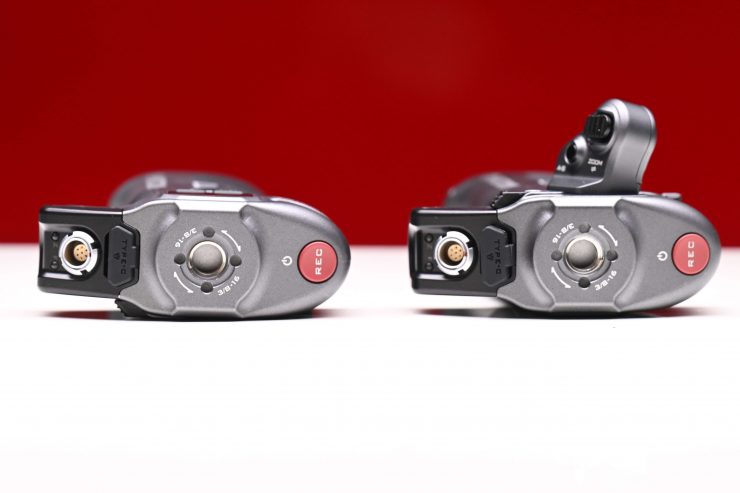
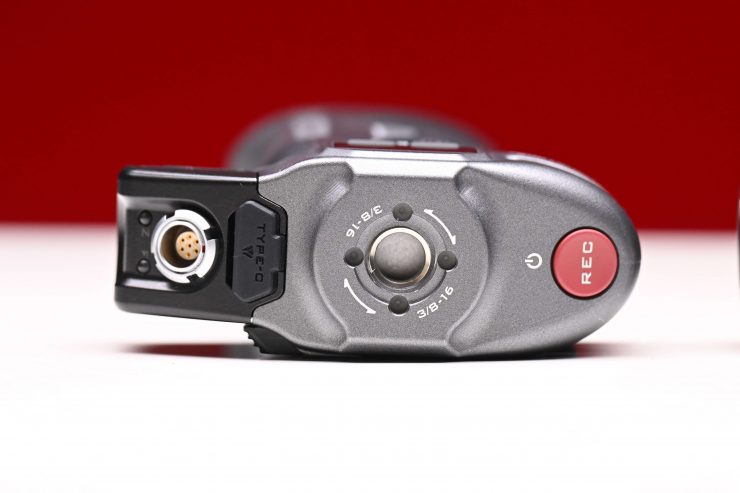
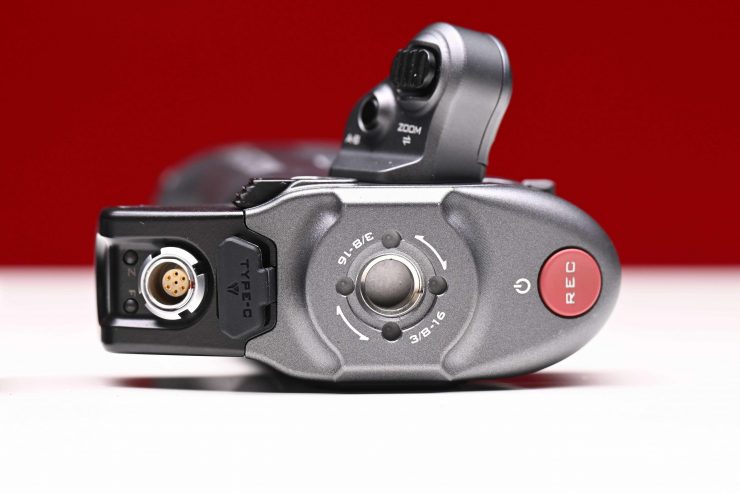
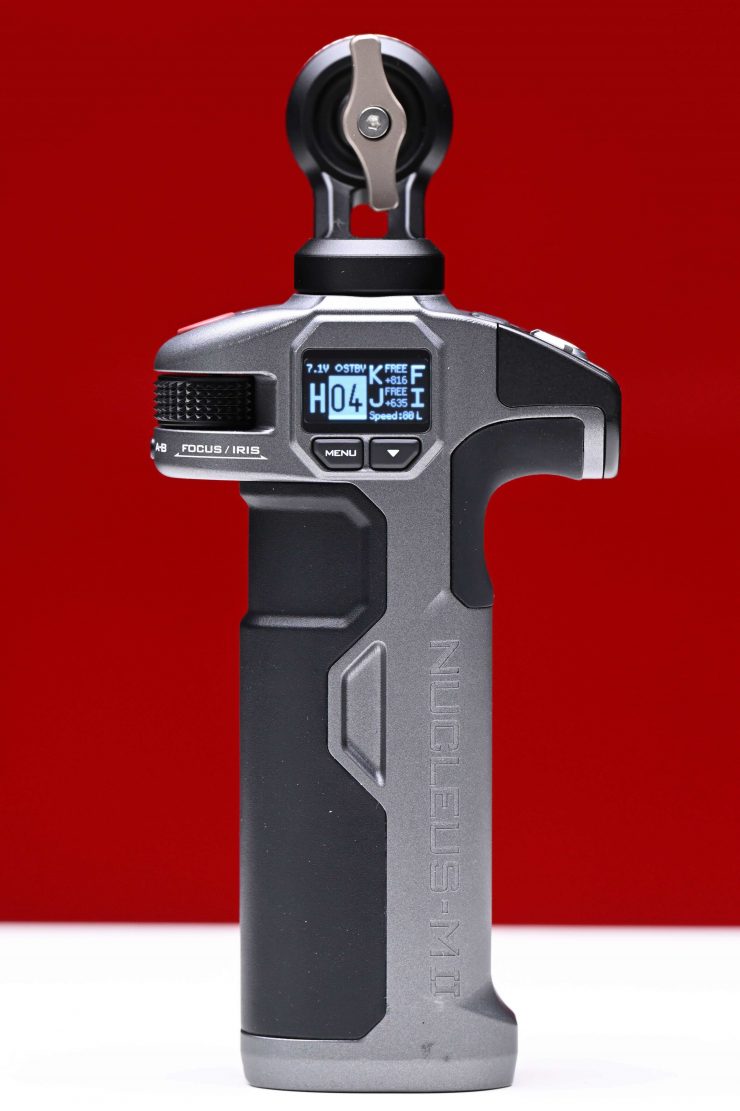
On top of the controller, there is a 7-pin port for external powering and communication in/out. Next to the port is a USB-C port for data transferring and firmware updates.
The controller sits comfortably in your hand and your fingers can access most of the controls fairly easily.
By not having everything on the front of the controller, it can be a little tricky if you need to access the IRIS/ND slider and still see the main display.
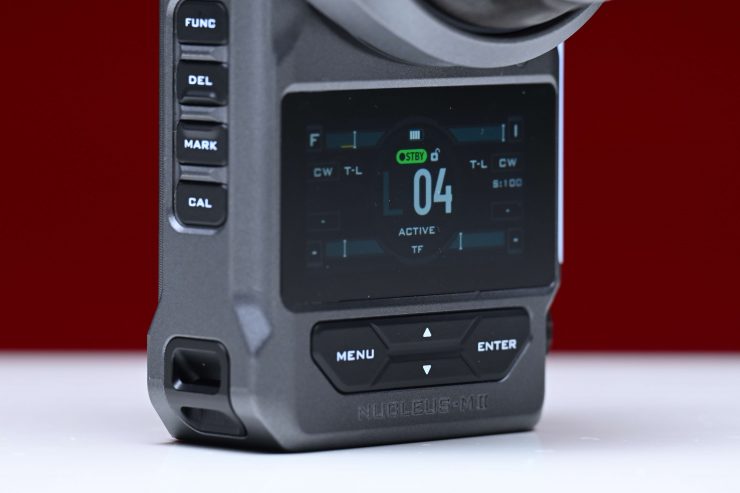
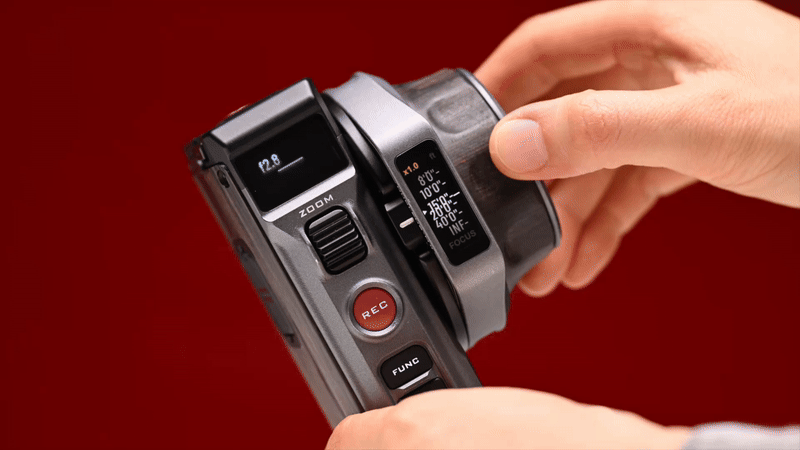
On the front of the controller, there is a Menu button, an Enter button, and two directional arrows.
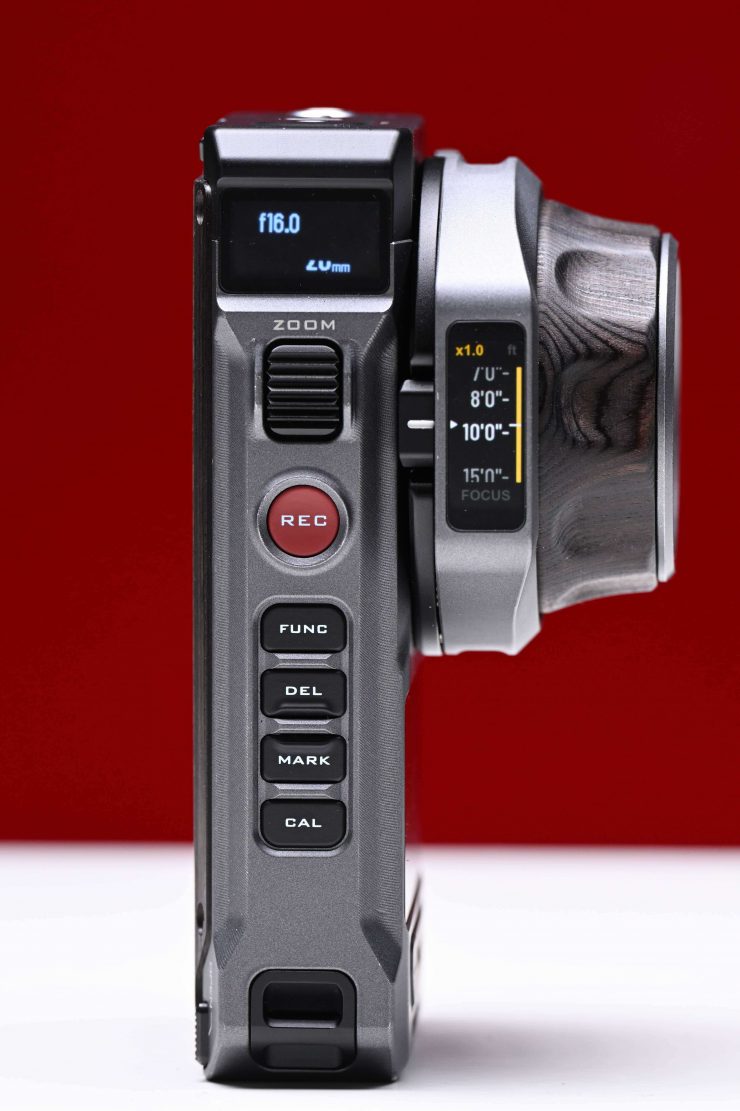
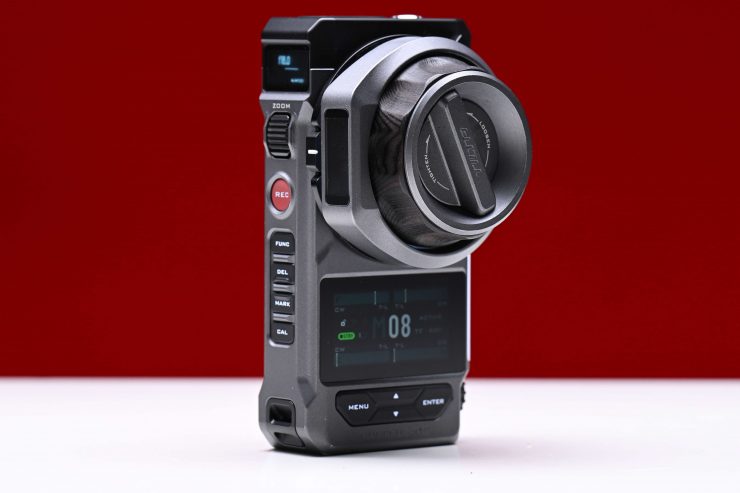
On the left-hand side of the controller, you will find 5 buttons and the Zoom scroll wheel.
Here is what the buttons do:
FUNC – Changes the FIZ from Master to Slave
DEL – Used for removing A-B stops and Range Stops
MARK – For setting A-B stops and Range Stops
CAL – A quick way to calibrate all the motors at the same time with cine lenses or lenses that have a hard stop on both ends of the range. You hold the CAL button down until the options appear on the screen. You can calibrate all the motors at the same time or pick a single motor by its number.

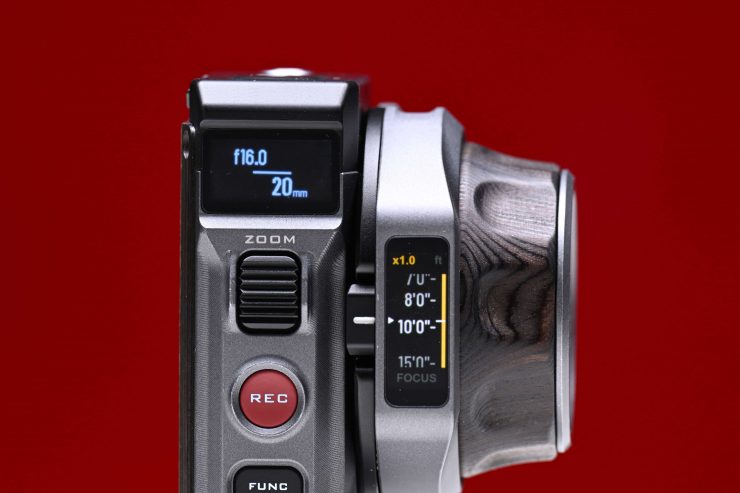
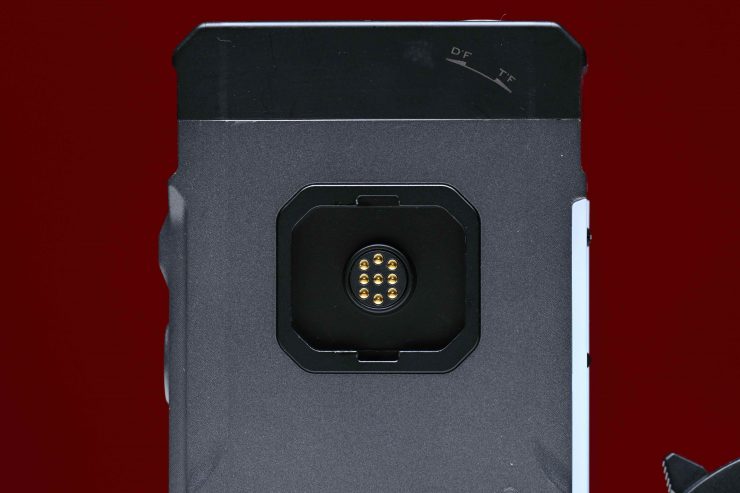
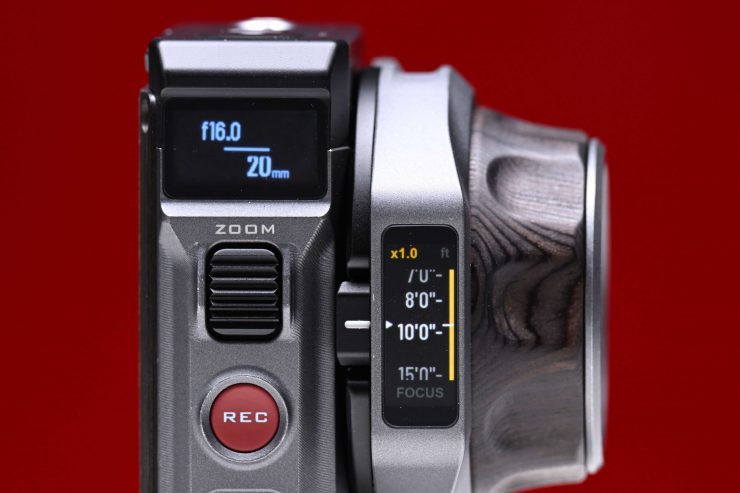
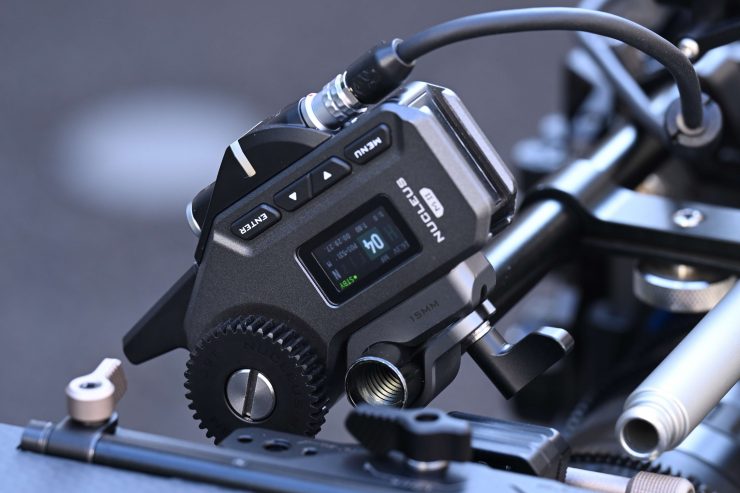
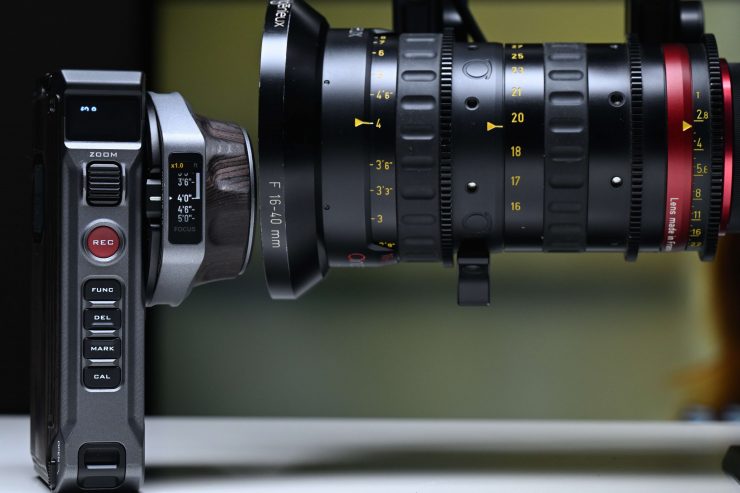
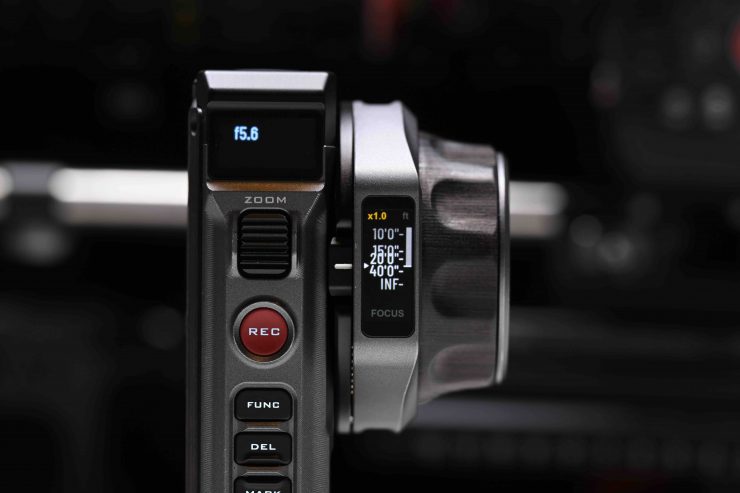
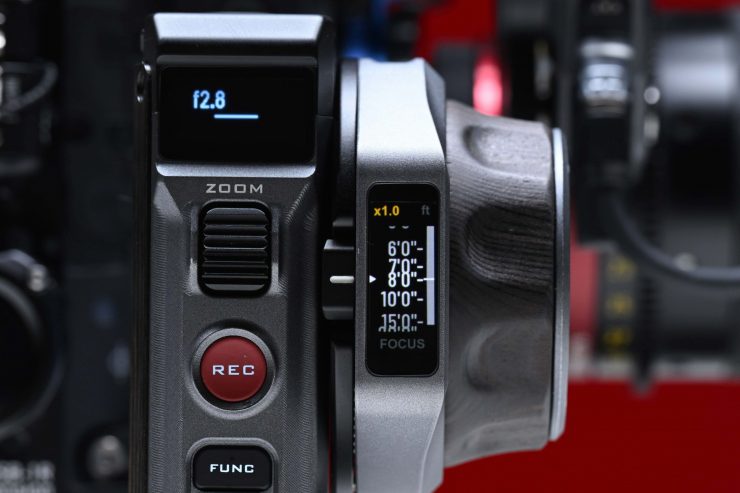
There are also small displays on both sides of the controller and a removable digital display on the handwheel.
Just under the Zoom toggle is a bright red Record Button that will trigger record with compatible cameras. These cables aren’t included and cost $40 to $60 USD depending on the type needed.
When purchasing, it is a good idea to pick the appropriate camera cables or cables that the Nucleus-M II will be used with.
You plug the 7-pin end of the cable into one of the motors and the other end into the R/S port of the camera. These cables are specifically designed for the Nucleus-M and Nucleus M II, so the R/S function only works with the Nucleus-M’s own hand unit and handles. As of writing this, I don’t believe 3rd party cables are available that will work.
Tilta Nucleus-M LANC Run/Stop Cable for Select Z CAM, Panasonic, Sony & Blackmagic Cameras $60 USD

Key features
- 27″ Long Run/Stop Cable
- Compatible with Sony FS5/FS7/FX6/FX9
- For Blackmagic URSA Mini Pro, BMCC
- For Panasonic EVA1, BGH1
- For Select Z CAM Cameras
- 7-Pin Connector to LANC Connector
Record trigger Compatible cameras
- Blackmagic Cinema Camera
- Blackmagic URSA
- Blackmagic URSA Mini Pro G1/G2
- Panasonic EVA1
- Panasonic BGH1
- Sony FS5
- Sony FS7
- Sony FX9
- Sony FX6
- Z CAM
There are also the following cables available:

- Tilta Nucleus-M Run/Stop Cable for ALEXA Mini/Mini LF Camera Cage $60 USD
- Tilta Nucleus-M D-Tap to 7-Pin Motor Power Cable $80 USD
- Tilta Nucleus-M 7-Pin Motor to Motor Cable (7″) $80 USD
- Tilta Nucleus-M RED DSMC2 Run/Stop Cable (27″) $60 USD
- Tilta Nucleus-M Run/Stop Cable for RED KOMODO (27″) $39 USD
- Tilta Nucleus-M Run/Stop Cable with USB-C (27″) $54 USD
- Tilta Nucleus-M 7-Pin Motor-to-Motor Connection Cable (21.65″) $80 USD
- Tilta Nucleus-M Run/Stop Cable for Canon EOS C200/C300 $60 USD
- Tilta Nucleus-M Run/Stop Cable for Sony F5/F55 Cameras $60 USD
- Tilta Nucleus-M Run/Stop Cable for Sony a6/a7/a9 $60 USD
- Tilta DC to 7-Pin Nucleus-M Motor Power Cable $30 USD
- Tilta Nucleus-M Run/Stop Cable for FUJIFILM X-T3 (27″) $60 USD
- Tilta Nucleus-M Run/Stop Cable for RED Camera Sync Port Type II (27″) $60 USD
- Tilta Nucleus-M Run/Stop Cable for Panasonic GH5S Series (27″) $60 USD
- Tilta Nucleus-M Run/Stop Cable for Canon DSLRs (27″) $60 USd
- Tilta Nucleus-M Run/Stop Cable for RED DSMC1 Cameras $60 USD
- Tilta Nucleus-M Run/Stop Cable for Canon 5D Series Cameras (27″) $60 USD
- Tilta Nucleus-M Run/Stop Cable for Kinefinity $60 USD
- Tilta Nucleus-M Run/Stop Cable for FUJIFILM X-T3 (27″) $60 USD
- Tilta Nucleus-M Run/Stop Cable for ARRI ALEXA Mini with Tilta Cage $60 USD
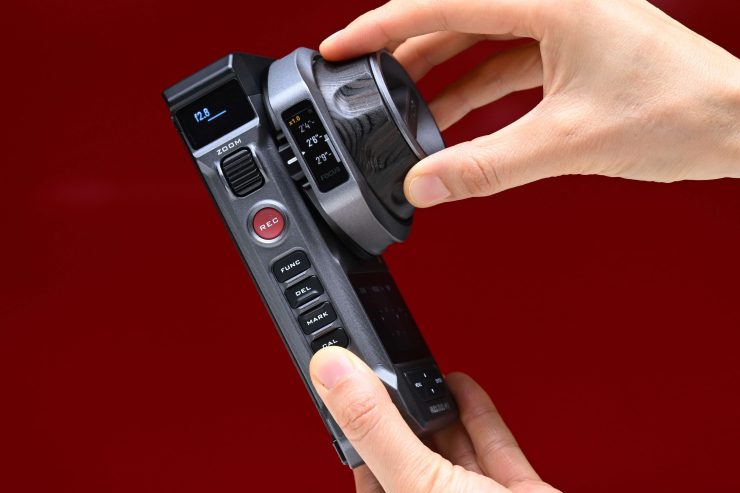
The handwheel on the controller is removable and you can switch it to the other side.
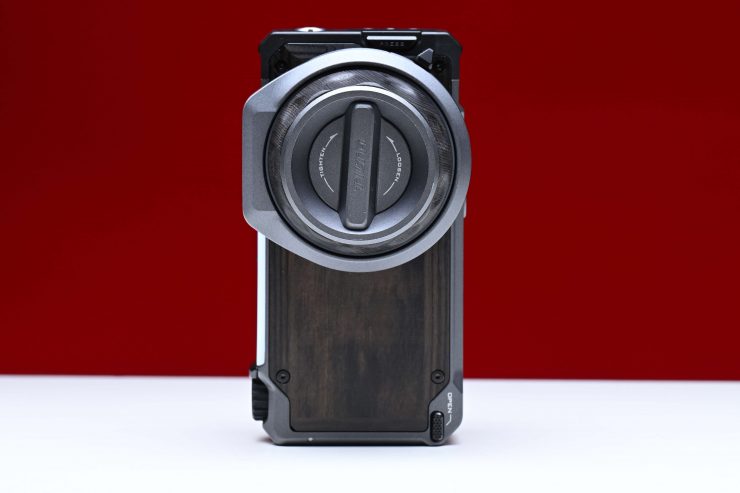

This is handy if you are left-handed.
When you switch the handwheel to the opposite side of the controller, the display screen is shown upside down.
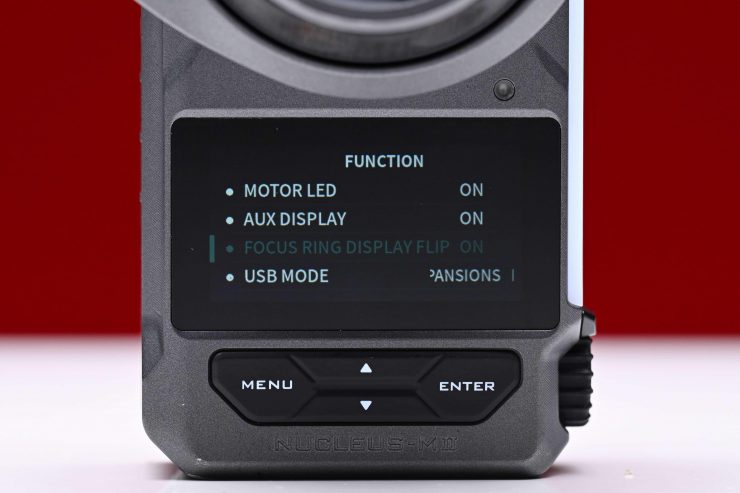
But you can go into the menu and select Focus Ring Display Flip ‘ON’ to change this.
This will then correct the display.
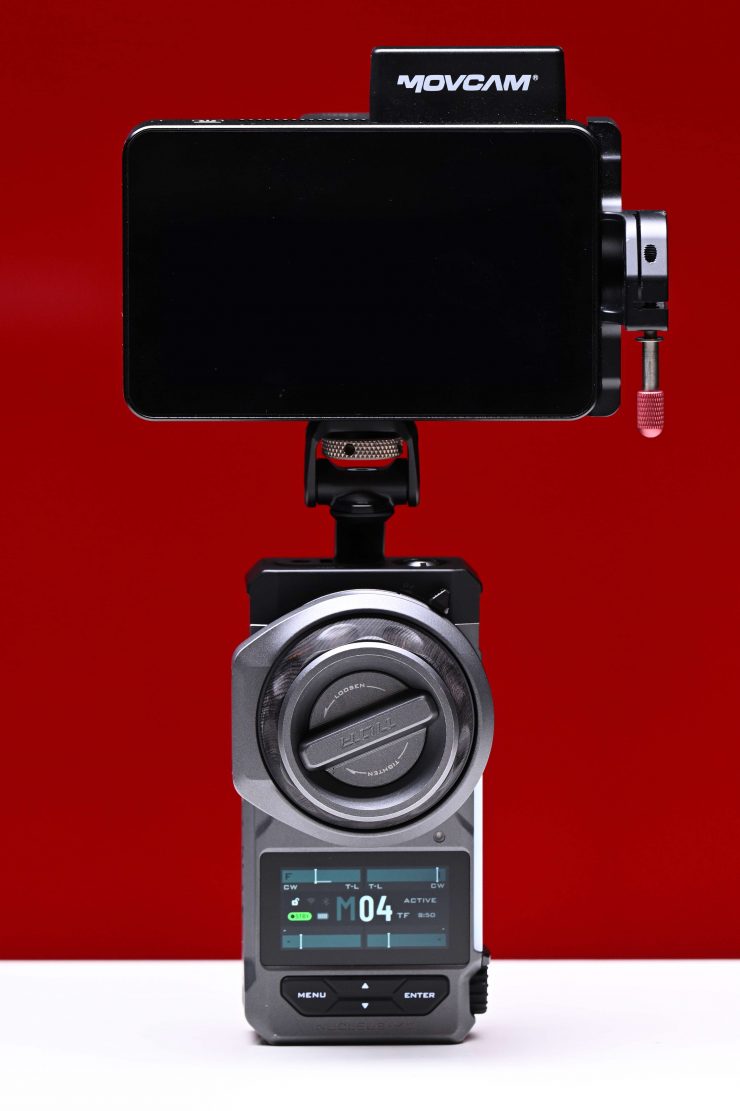
What is nice, is that Tilta gives you a monitor mounting bracket that you can attach to the opposite side of where the handwheel is. This lets you run a wireless RX monitor. Speaking of wireless monitors, Tilta is currently working with Hollyland on a solution where you will be able to get real-time focus overlay information on one of their wireless monitors.
You can also adjust the tension of the handwheel to your liking.
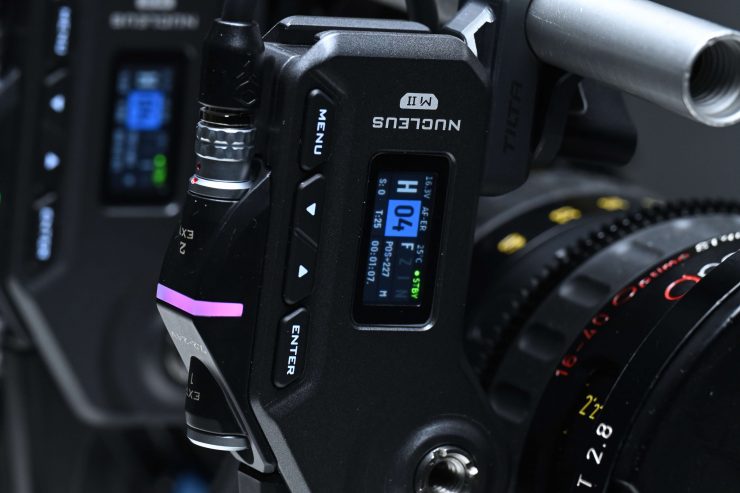
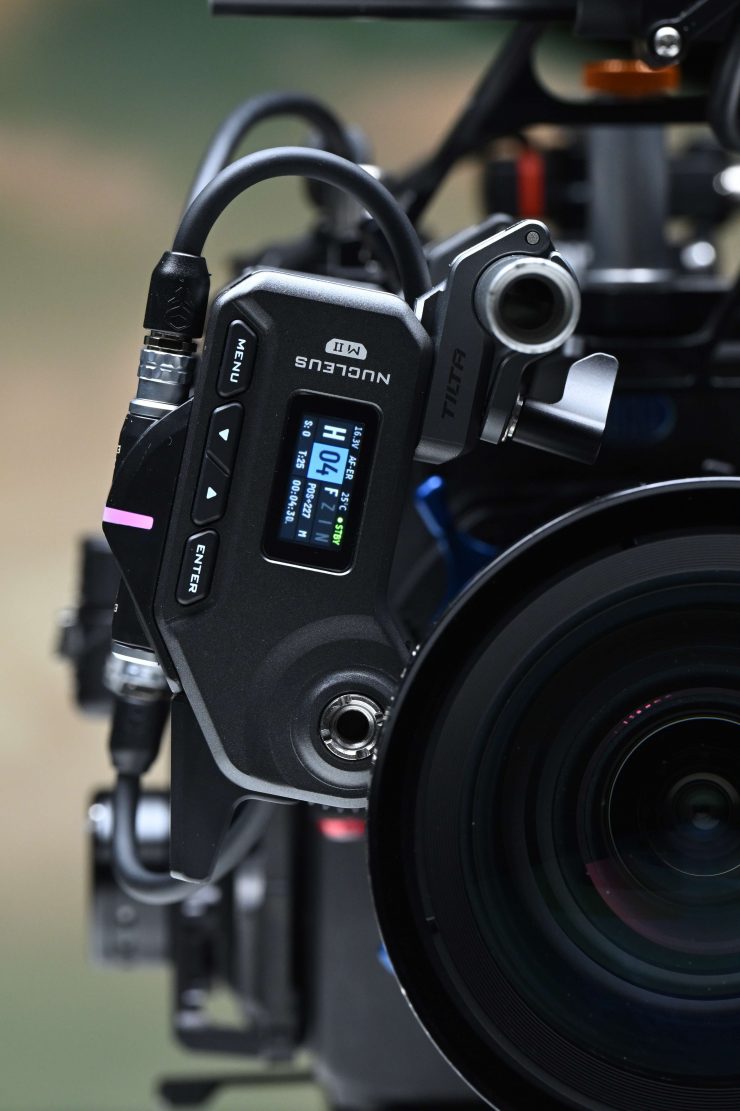
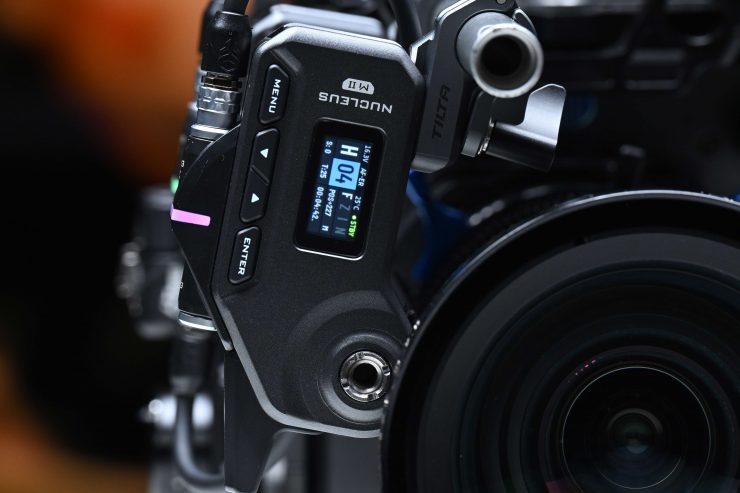
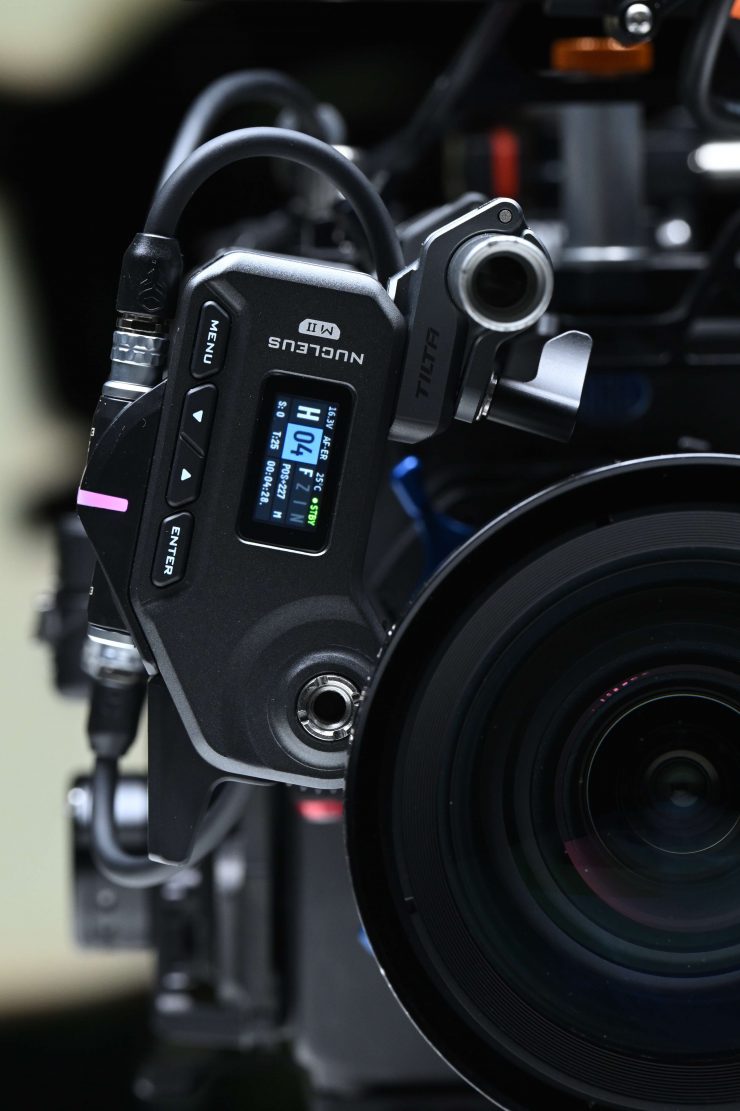
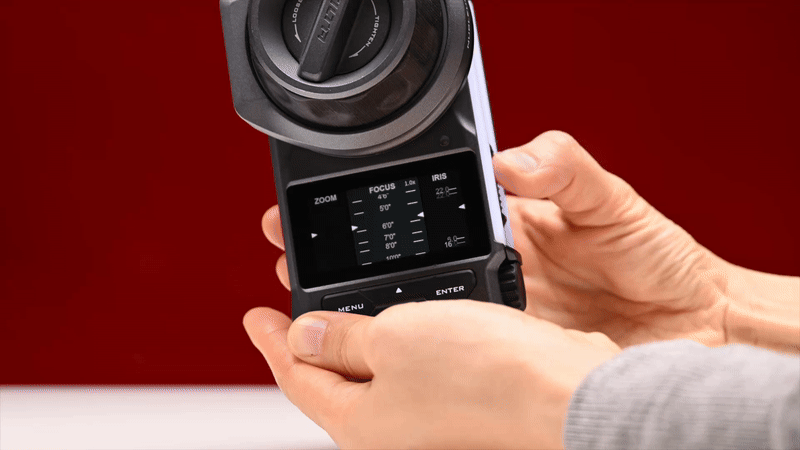
UI
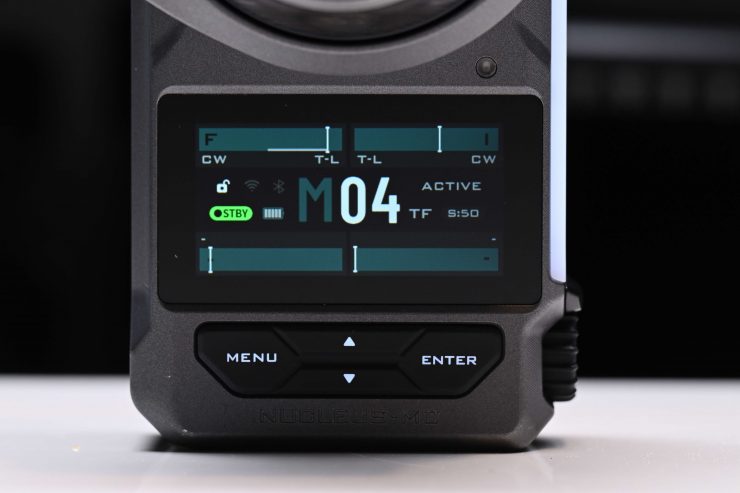
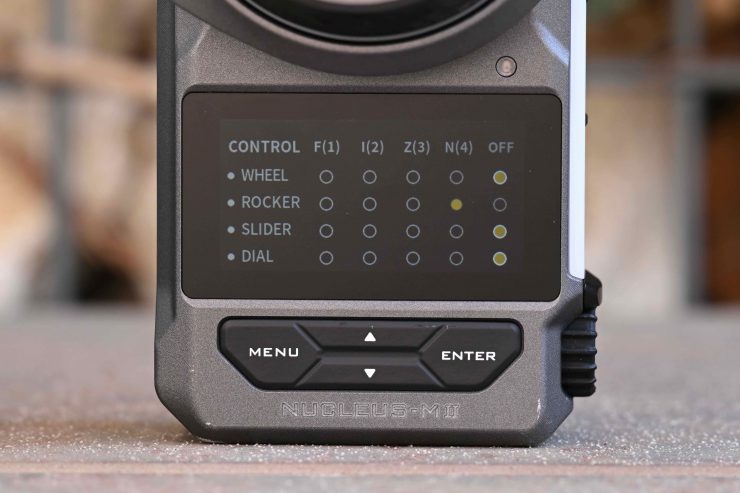
To turn the Controller on, you need to hold down the REC button for a few seconds. You will then be greeted by the main display screen. You can make changes to the controller via the buttons or directly on the screen. I didn’t find the touchscreen functionality to be overly responsive, and that is something that could be improved.
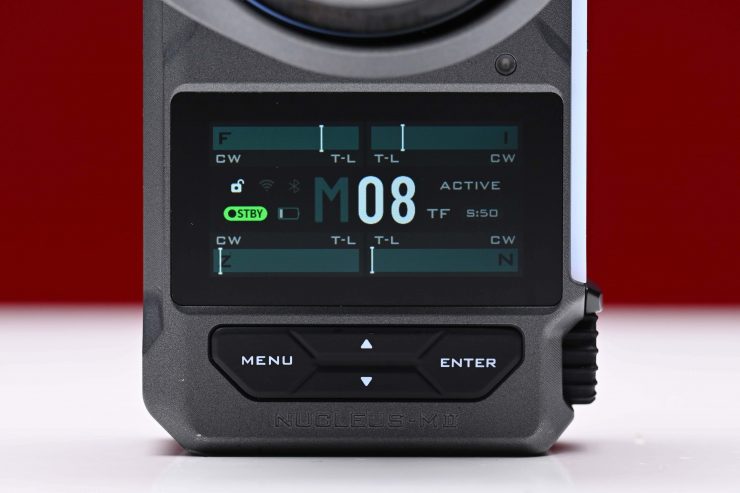
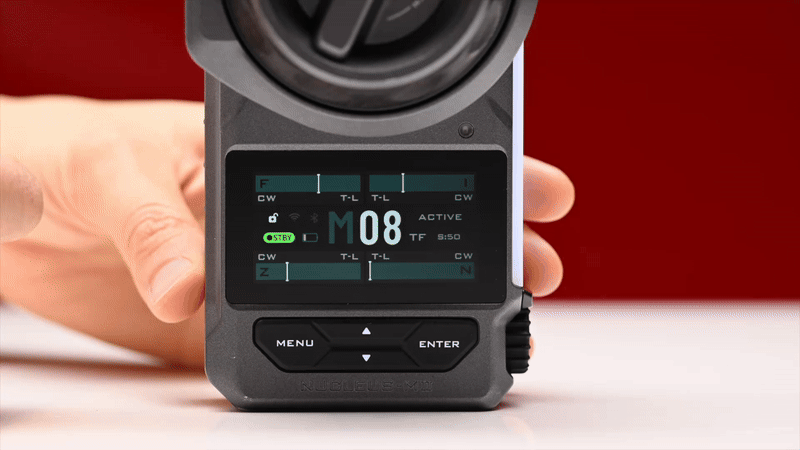
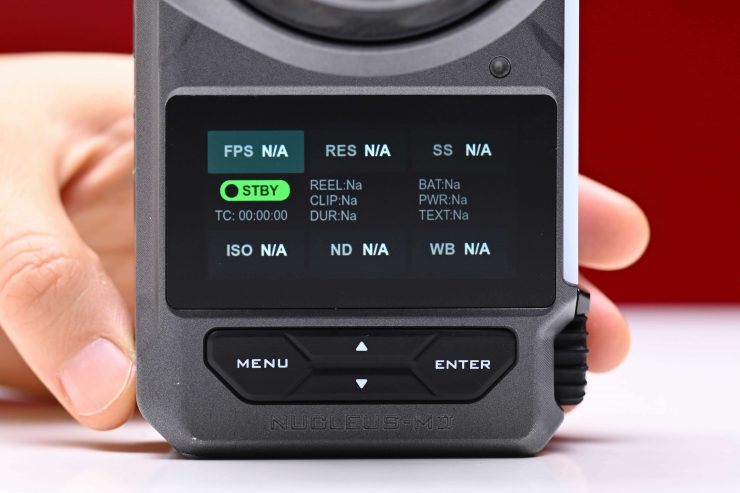
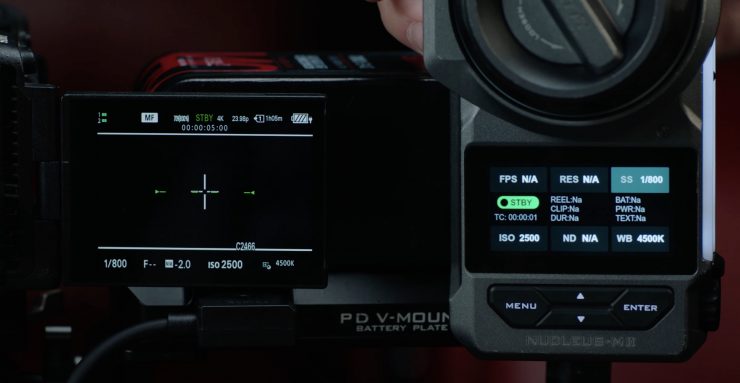
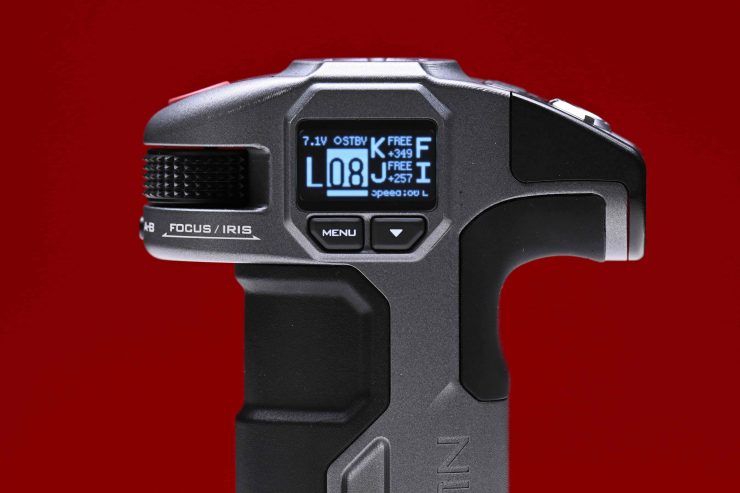
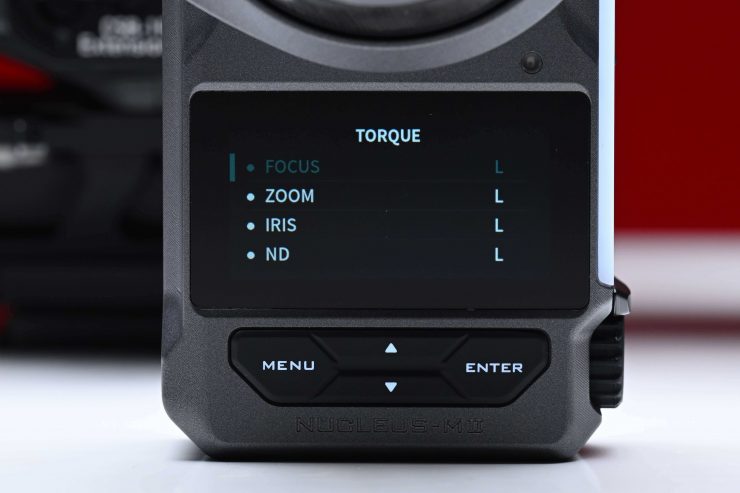
The first time you look at the main UI screen, it doesn’t appear to be overly intuitive, and it can be a little confusing at first, however, once you understand how to use it, I didn’t find it to be too bad. The M stands for Medium and this indicates the transmission strength. This can be set to Low, Medium, or High. O8 is telling the channel it is on. T-L is indicating the motor torque is set to low. CW tells me that the motor is set in a clockwise direction. S:50 indicates that the iris slider speed is set at 100. ACTIVE refers to the FIZ sharing its control with the handles.

By touching on the screen, you can make lots of changes, including what function you want the motors to provide.
You can also swipe between a few main screens, which makes it quicker to access key features without having to dive into the menu.
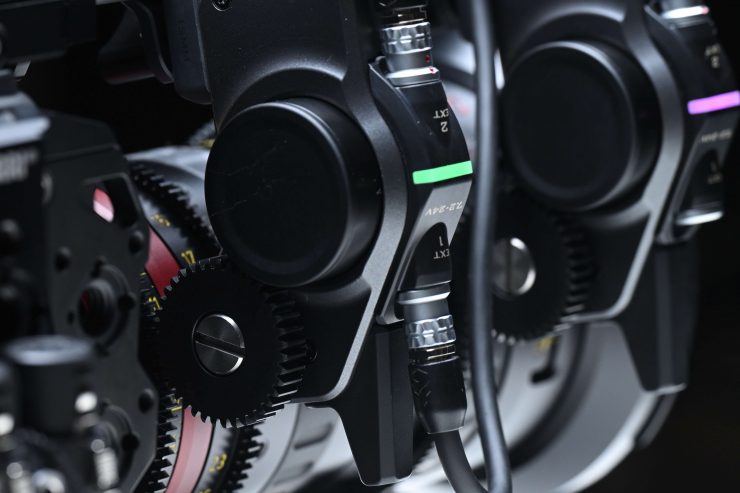
The only issue I had with the UI was that it was initially confusing to work out which motor I was making changes to as the UI labeling is a little small and it doesn’t specify what motor it is. The axis a motor has been set to control is indicated by a color.
- Green-IRIS
- Blue-ZOOM
- Purple-FOCUS
- Yellow-ND

As the motors have different colored LED indicators, I am not sure why Tilta didn’t take advantage of that and color-code the UI to reflect what motor was being changed. For instance, the bar for the focus motor could be displayed in purple so you know exactly which is which.
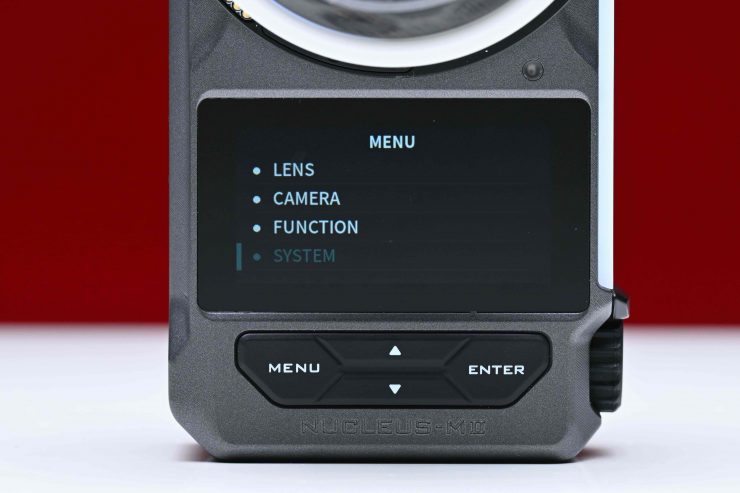
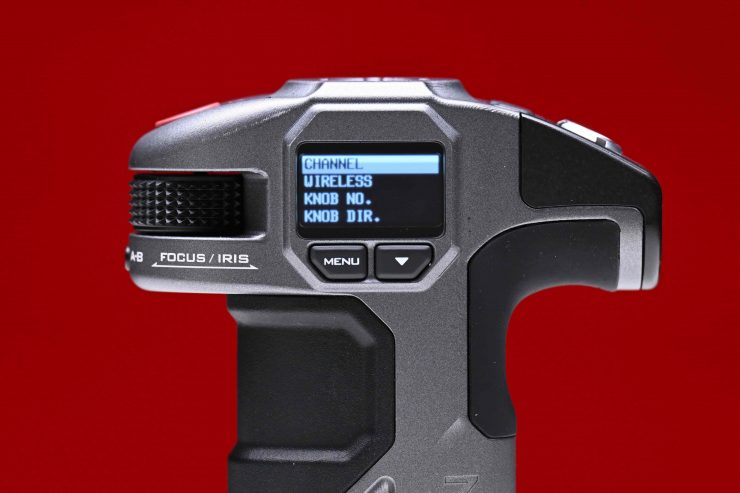
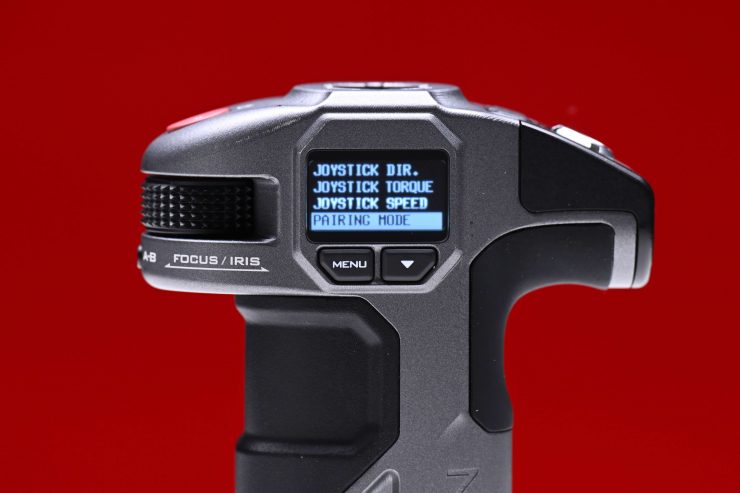
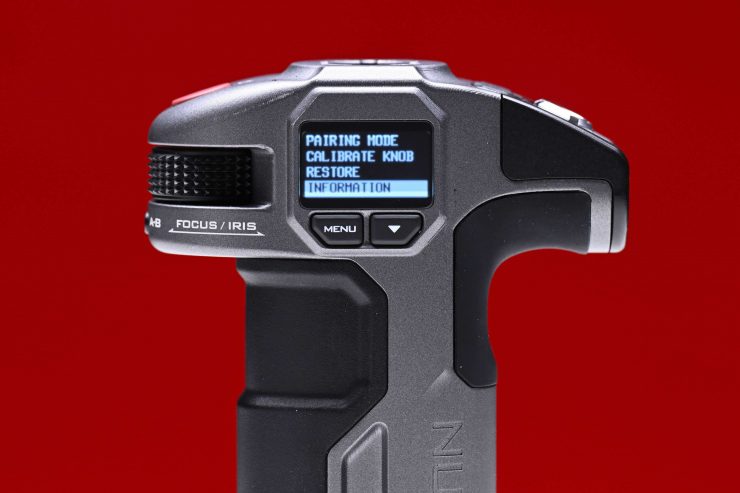
On the main Menu page, you can access the following settings:
- Lens
- Camera
- Function
- System
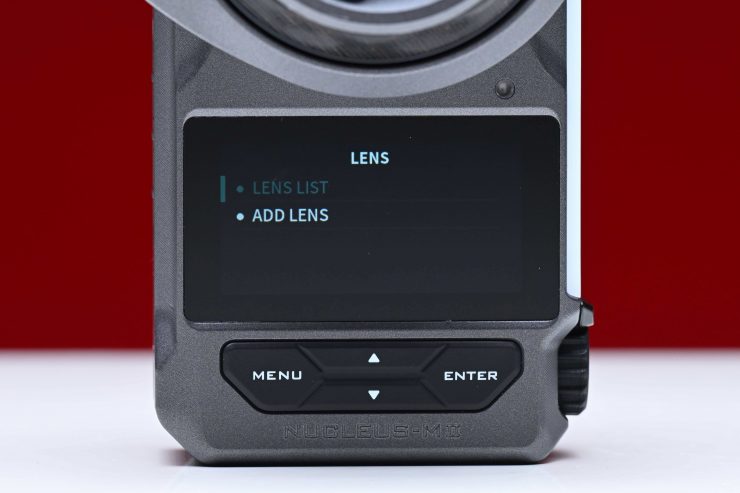
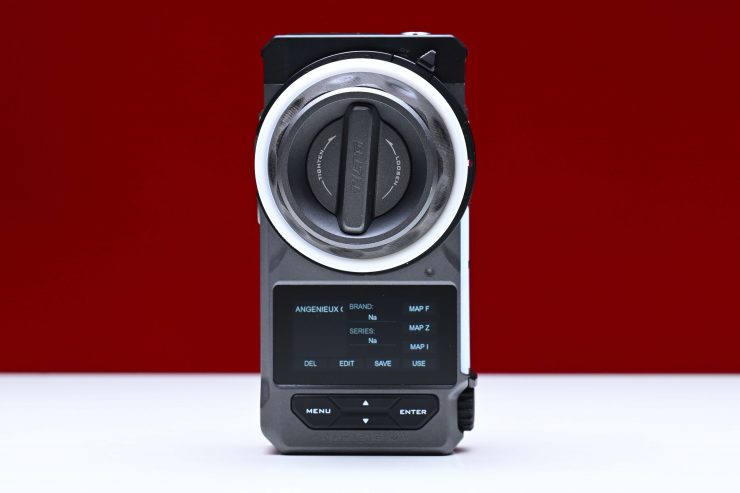
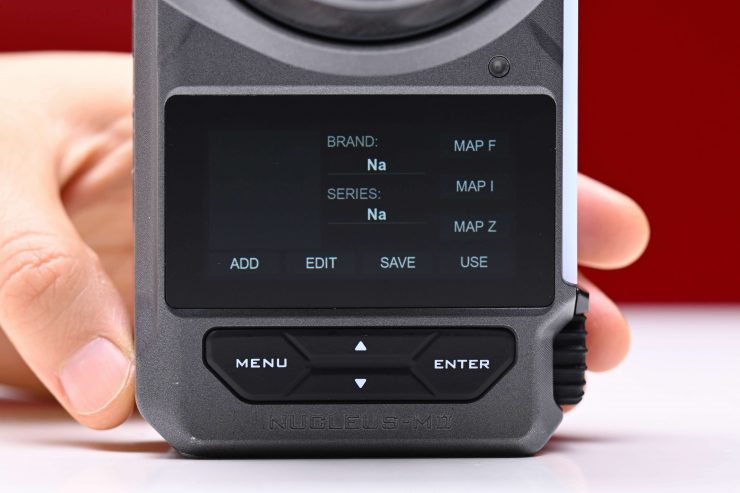
In Lens, you can access lenses that you have already mapped or add new lenses.
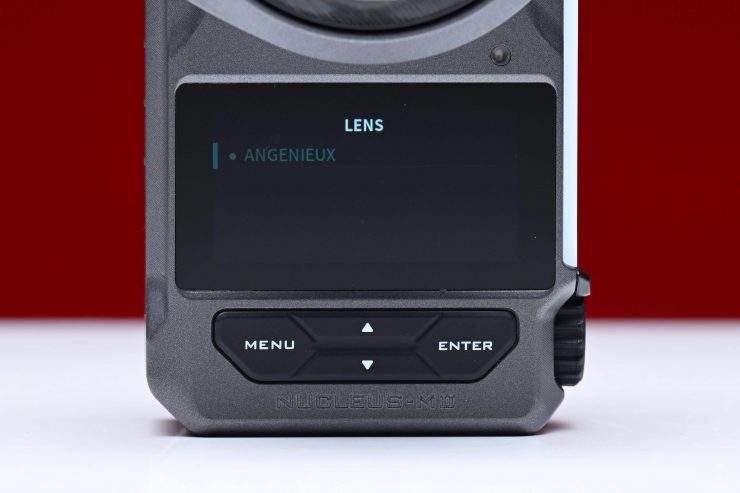
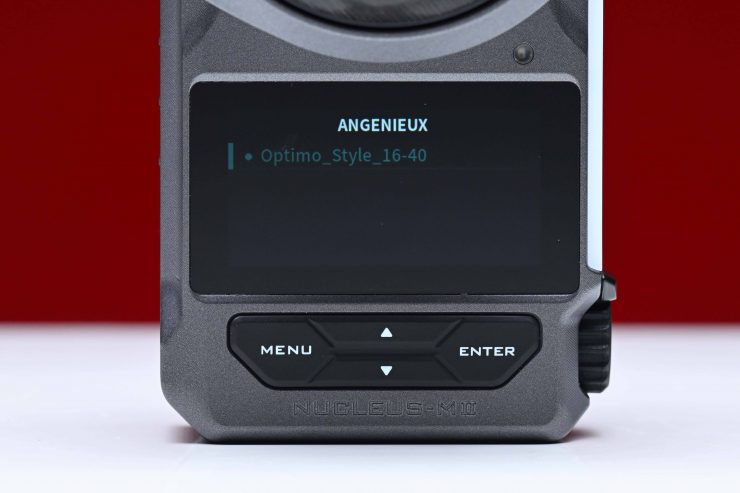
If you have already added a lens, you can see it listed via brand and then series.
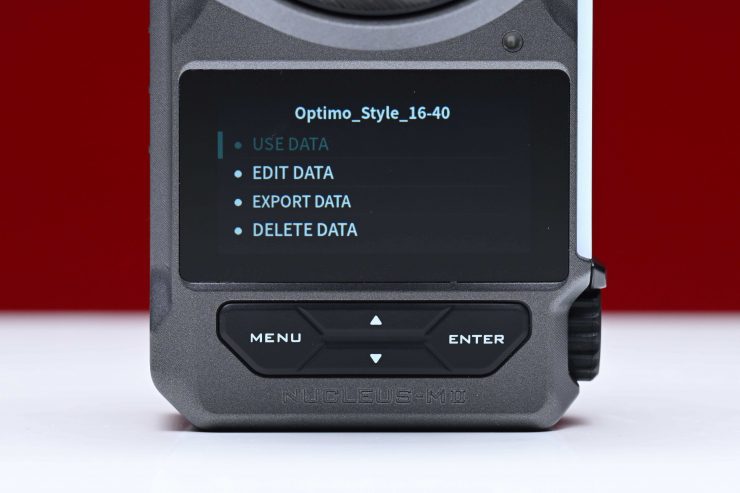
Once you select the lens, you can then choose to use the data if you have saved it, edit that data, export that data, or delete it entirely.

If, for example, I click on use data, and I go back to the main screen, I will see the above display.
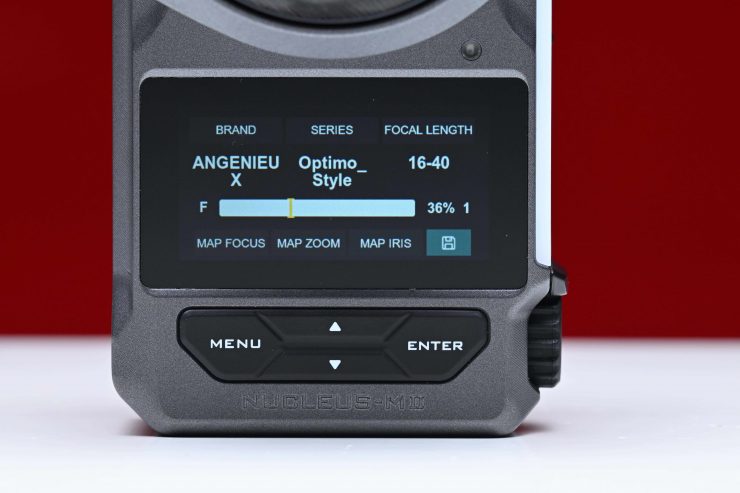
If I want to add a lens, I need to enter the brand and series, and then the focal length. I will then get taken to the above screen. I can then map the focus, zoom, and iris.
You can then manually map the lens. Anyone who has mapped a lens before knows what a tedious process it is. At least Tilta has made it reasonably easy to do this compared to some other systems I have previously used. Once you have entered all the information, you can click on the green icon that you can see in the previous image and it will save the lens data.
The only issue I had with the lens mapping, is that if you have mapped a lens and for example, you want to reverse the direction of the FIZ controller handwheel, it won’t reflect the values correctly as they will all be reversed. Maybe there is a way of fixing this, but I couldn’t work out how to do it.
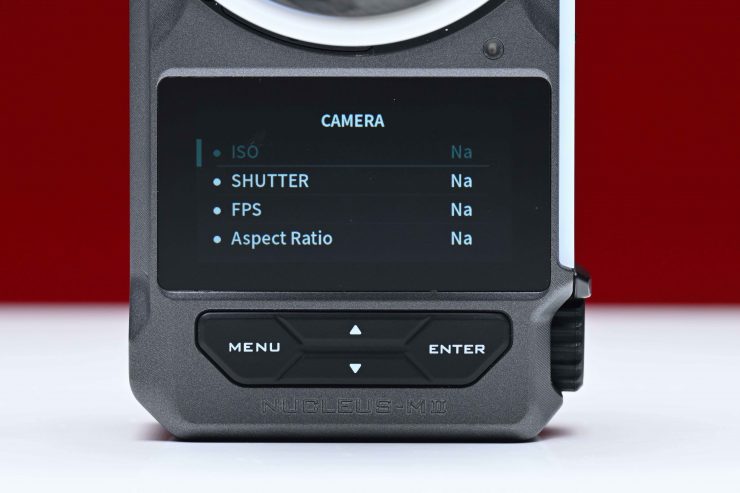
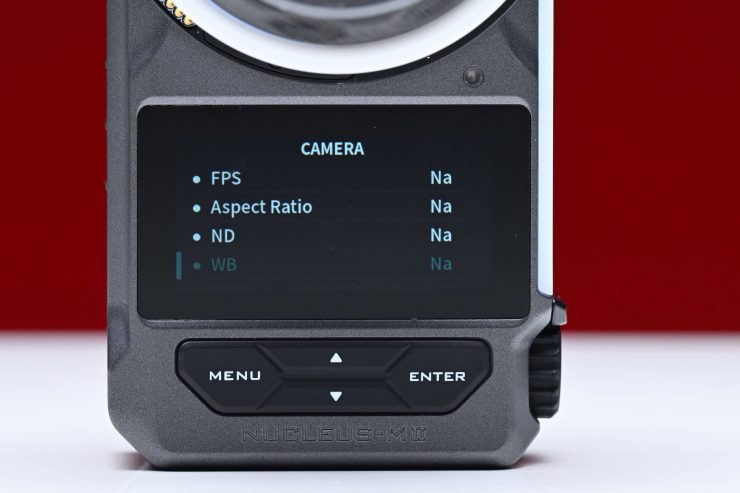
In Camera, you can change various operating parameters (but this does depend on the camera you are using and if you have the correct cable).
If you do have a camera connected, you would be able to see the camera’s information on the above screen.

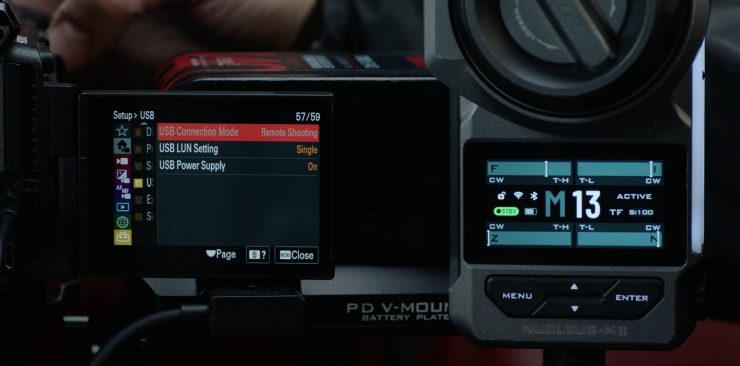
You can get camera control (with select cameras) by connecting a motor to the camera using the included 7-pin motor to USB-C cable.
Once everything is set up you can make direct changes to your camera from the FIZ controller.
With cameras like the new Blackmagic Design PYXIS, you can do wireless Bluetooth control from the FIZ controller.

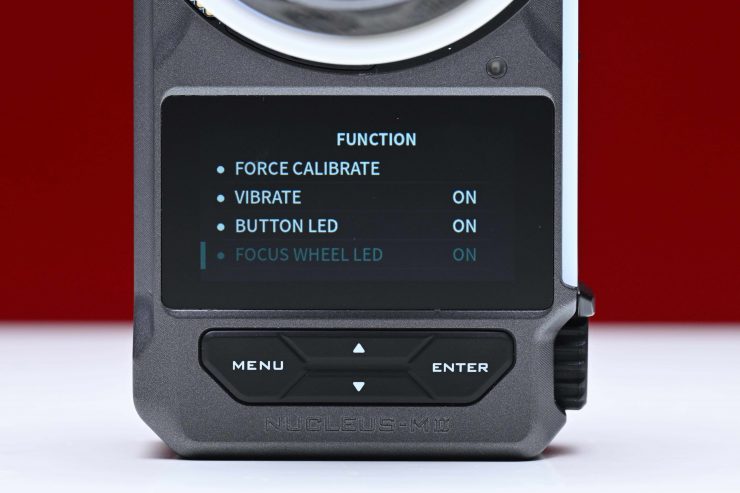
In Function, you can do a manual lens calibration, calibrate the focus wheel and the slider, and change the screen brightness. Additionally, you can do a force calibrate, turn the vibrate function on/off, and turn the buttons, focus wheel LEDs on/off
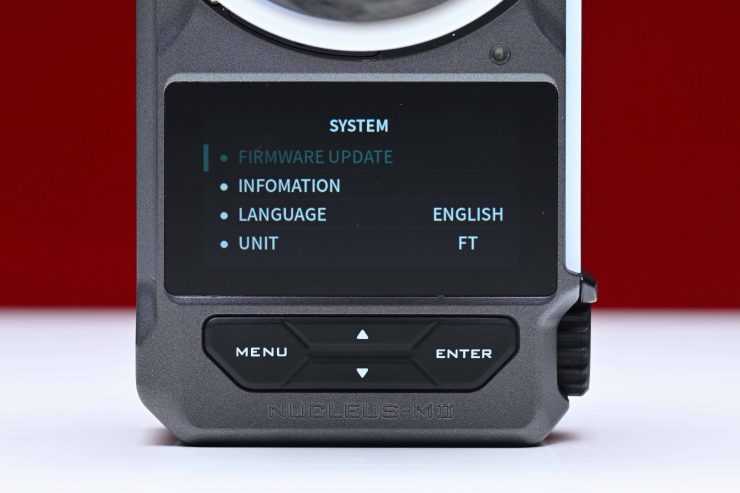
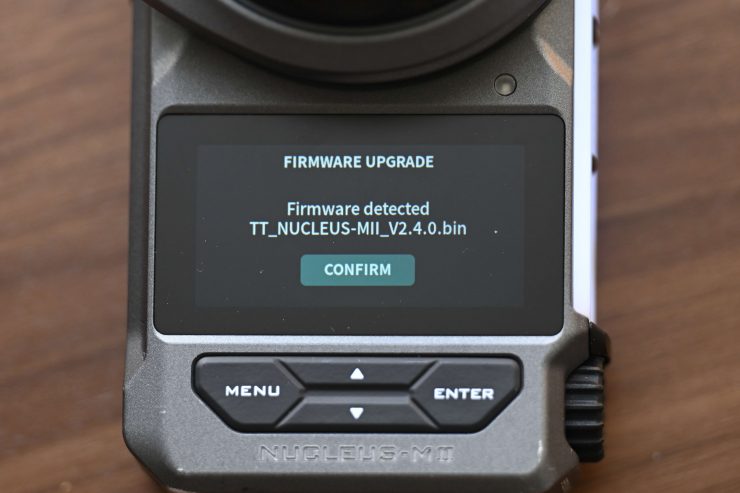
In System, you can update firmware, look at information about the Nucleus-M II, change the language, etc.
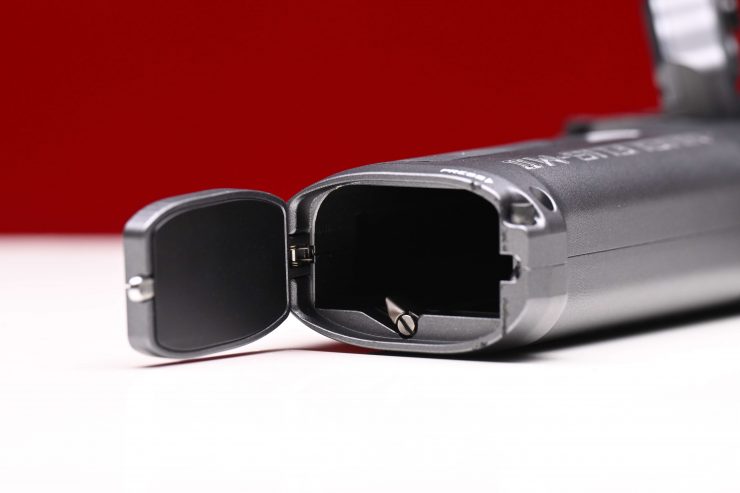
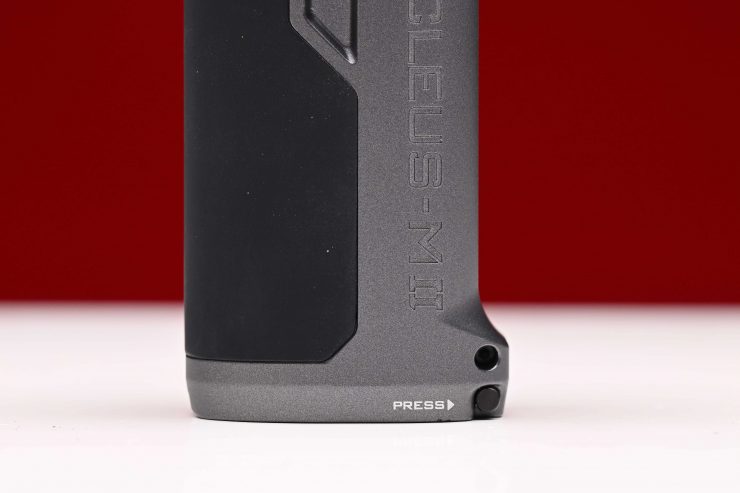
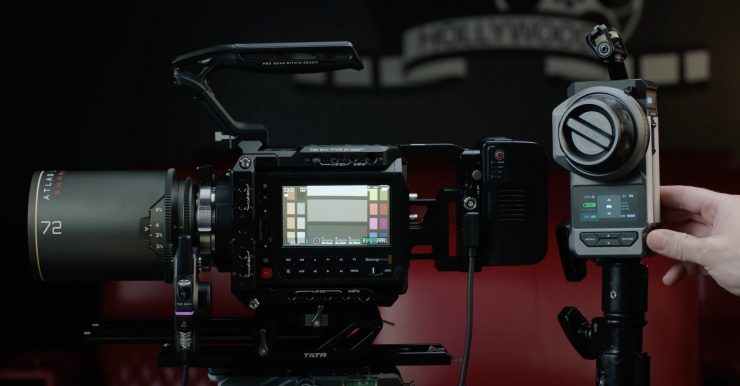
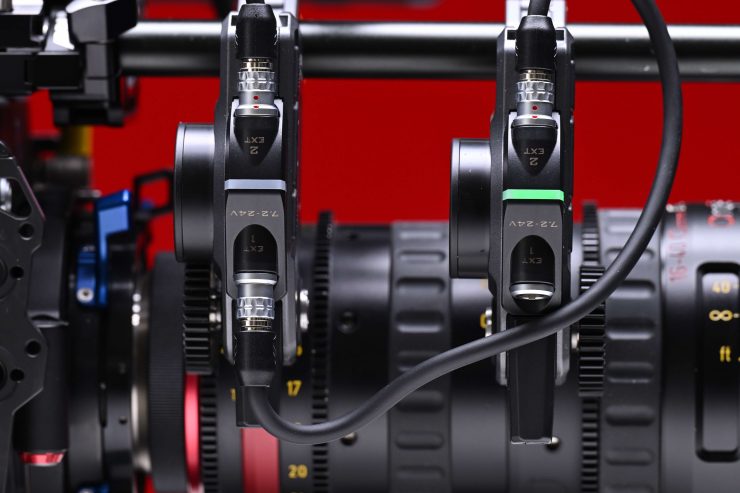
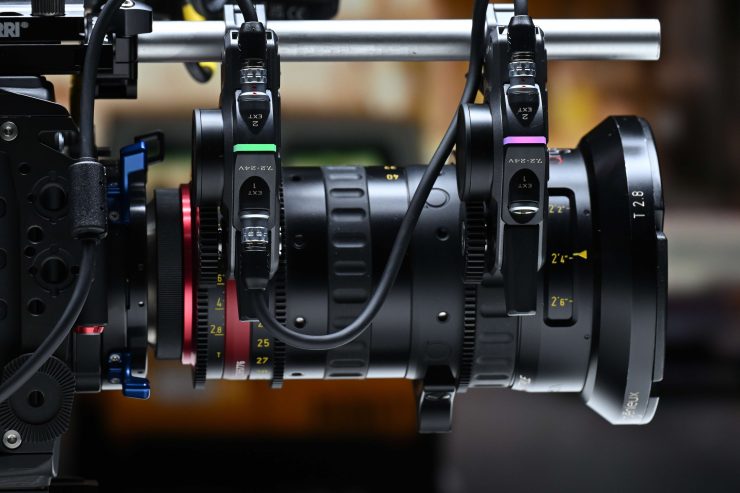
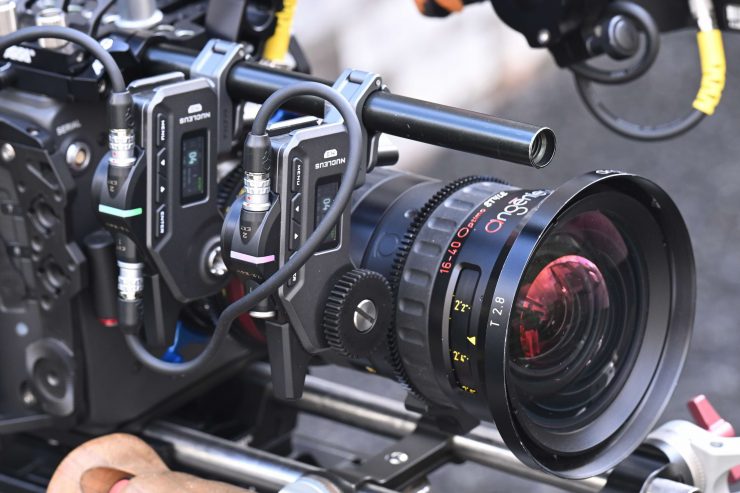
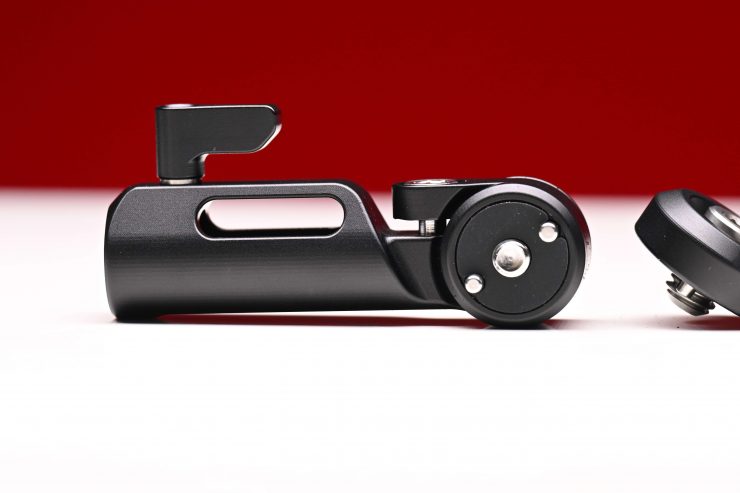
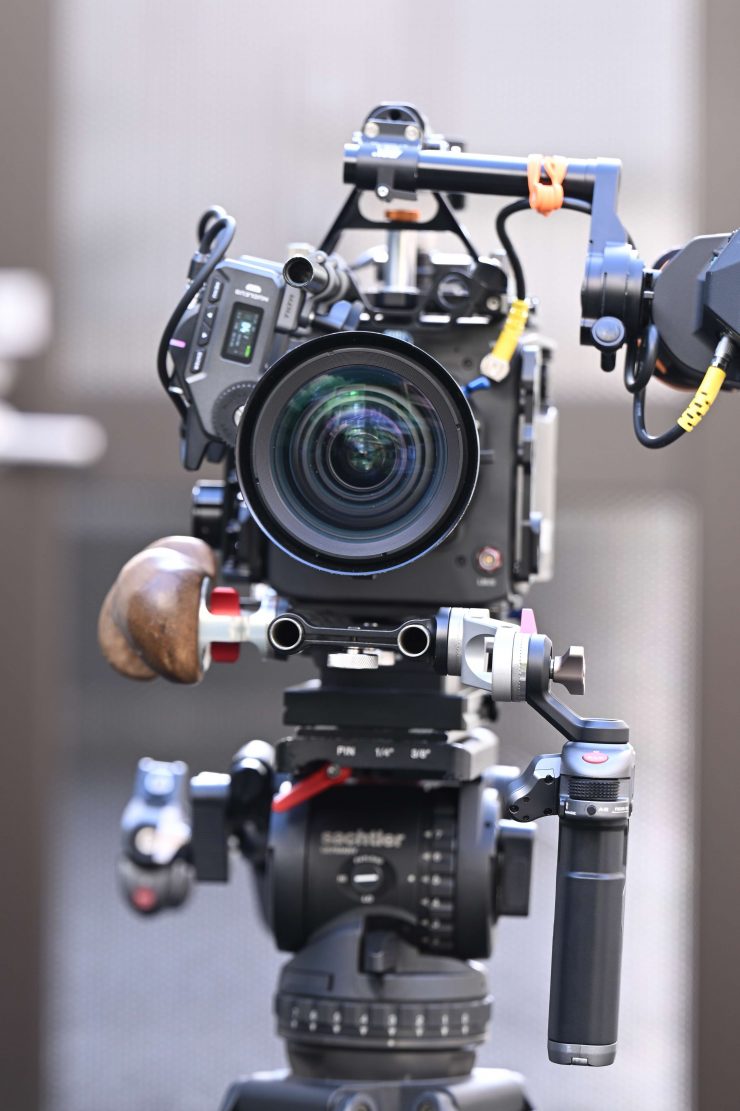
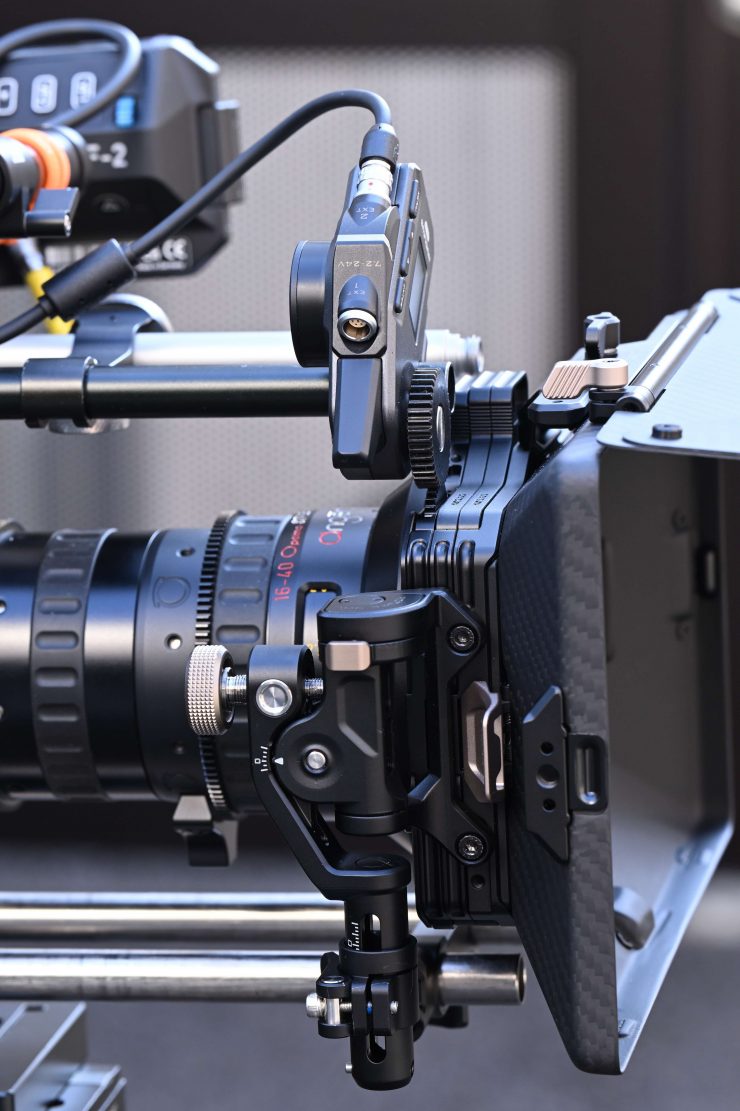
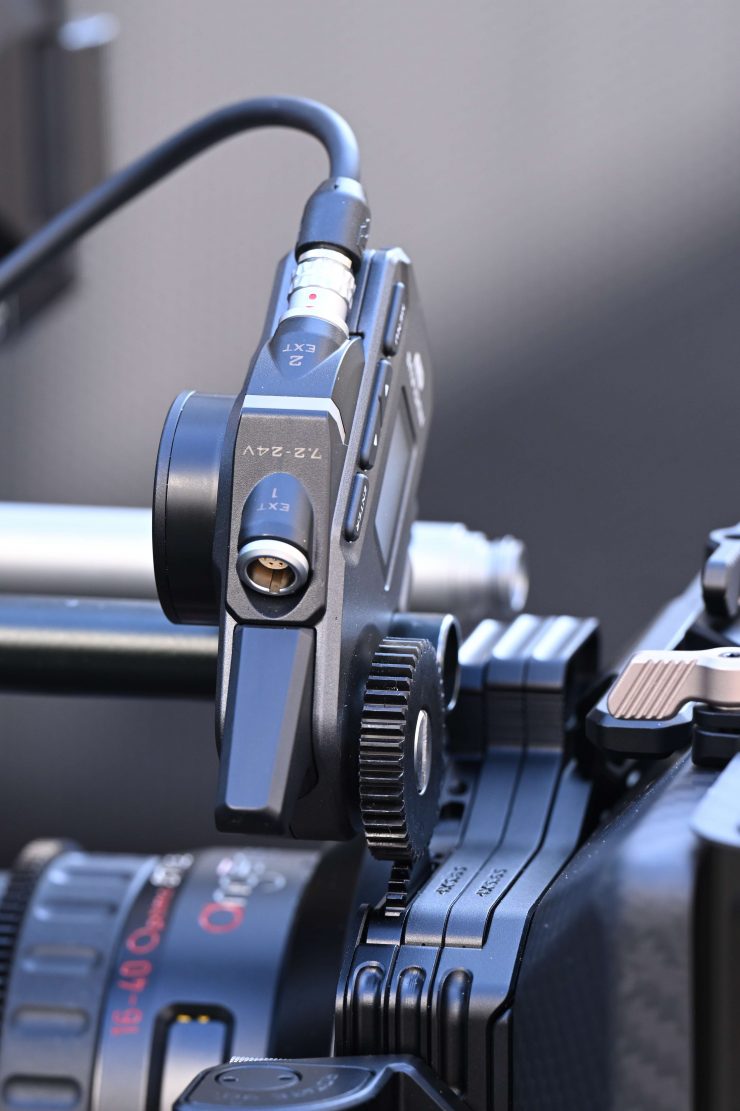
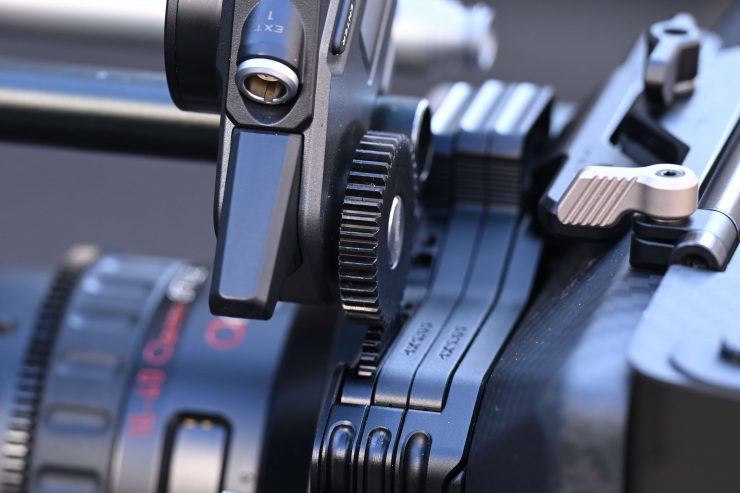
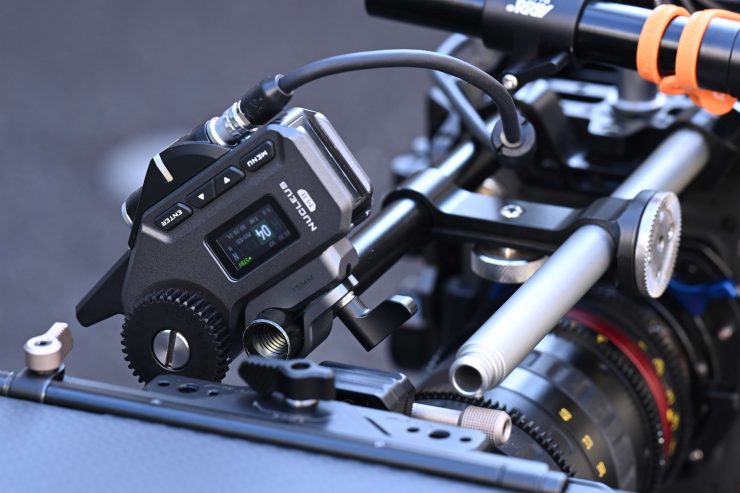
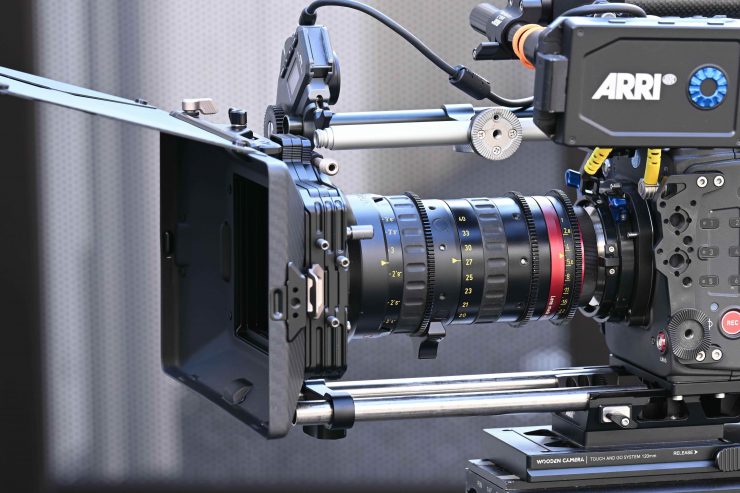
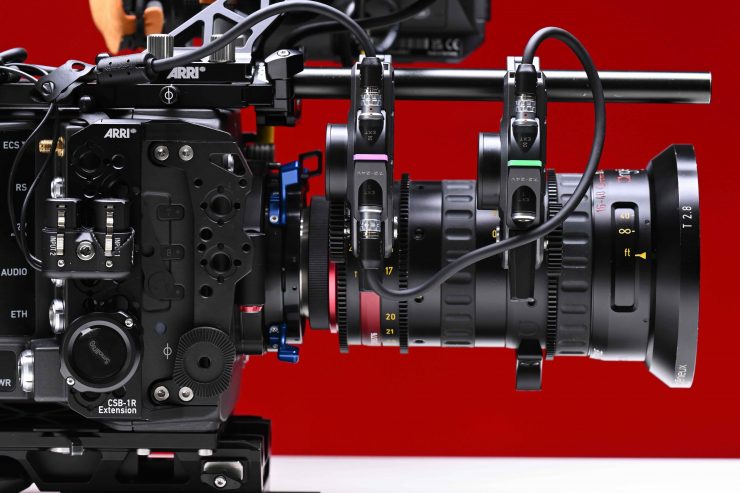
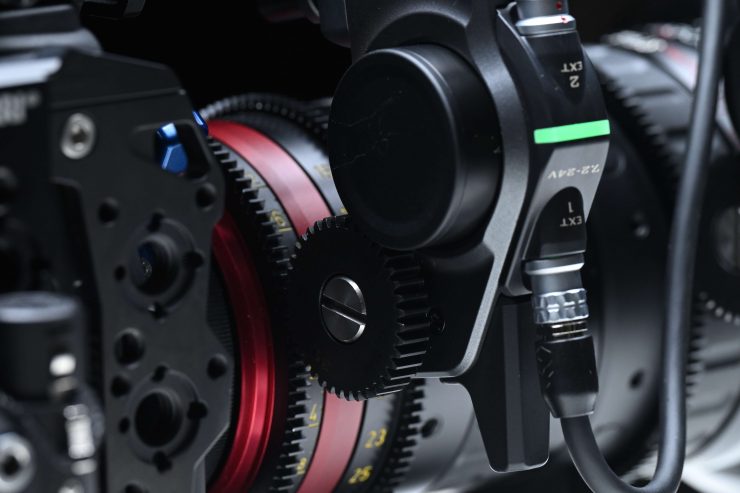
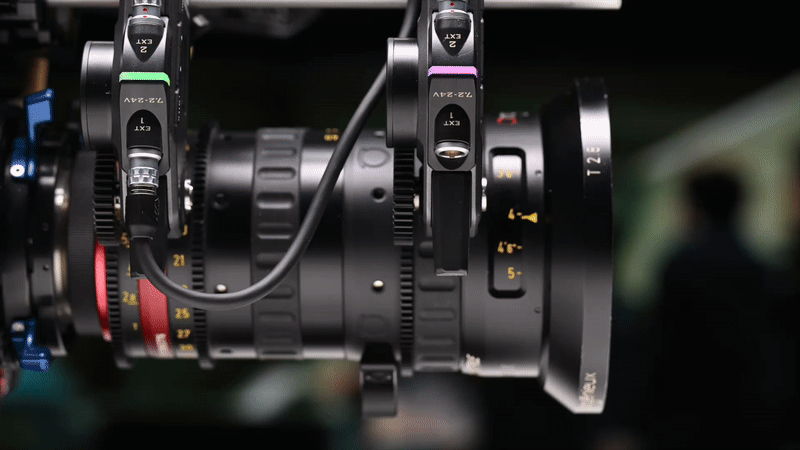
Motors
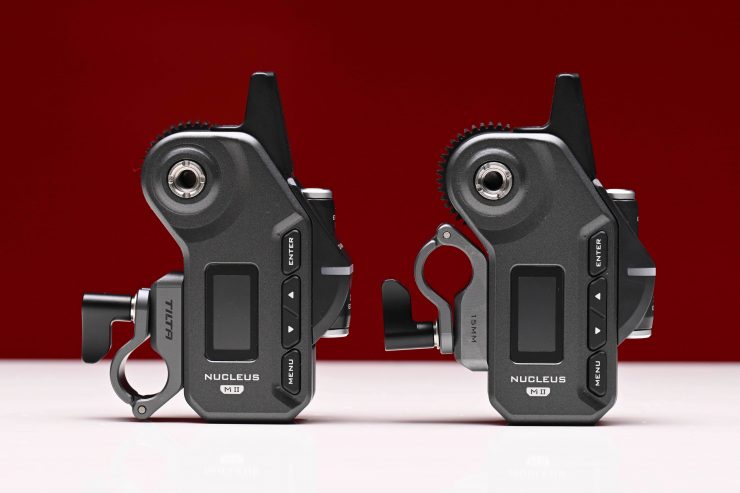
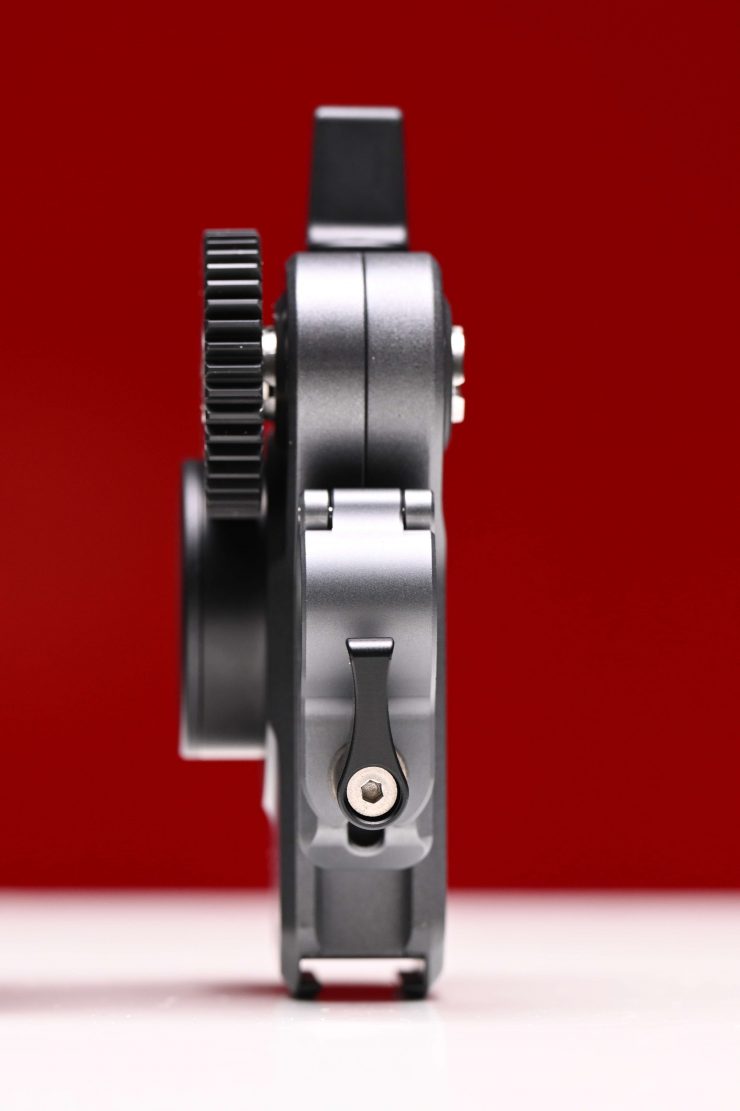
The Nucleus-M II comes with two motors in the kit. These are a little on the large side and they weigh around 195g / 6.87 oz. You need to keep that in mind if you plan on using the Nucleus-M II with a small-sized camera.
Nucleus-M II 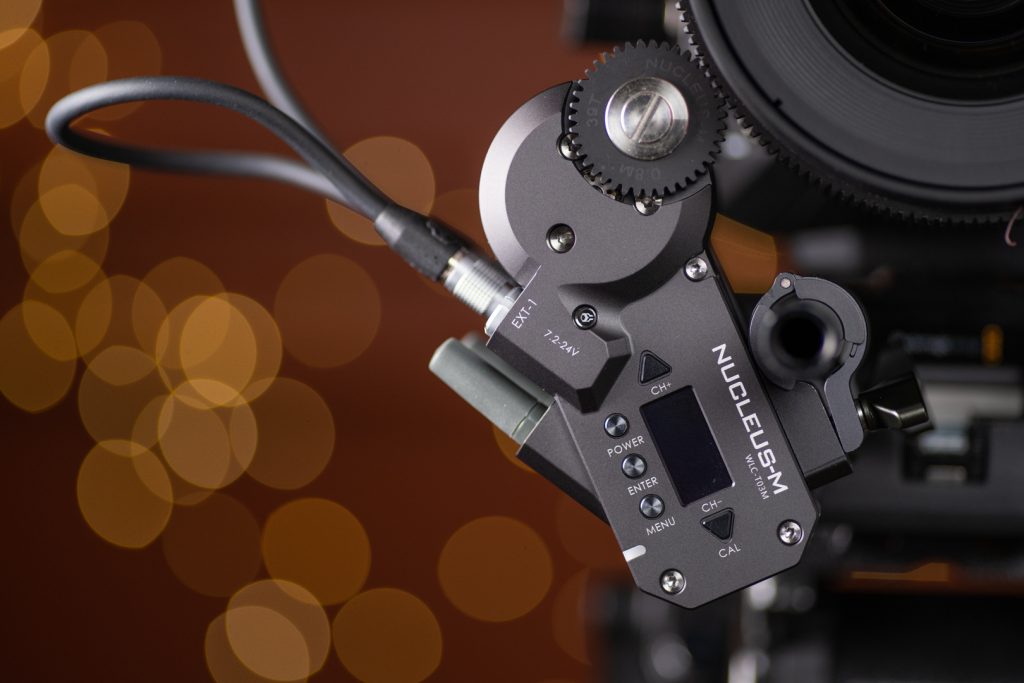
Nucleus-M
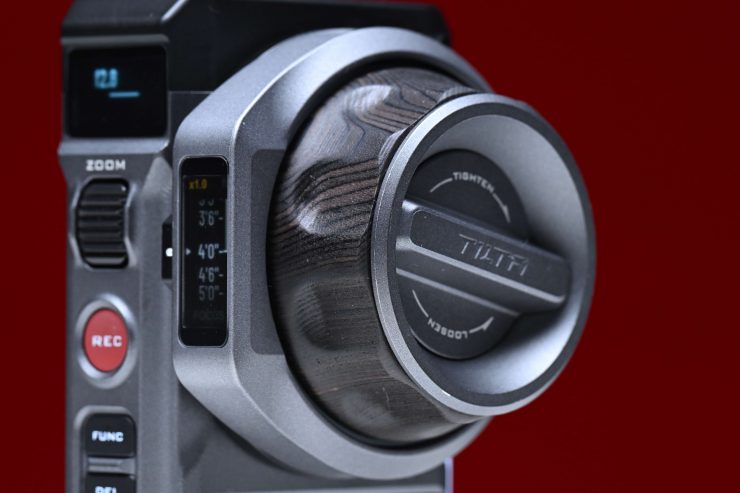
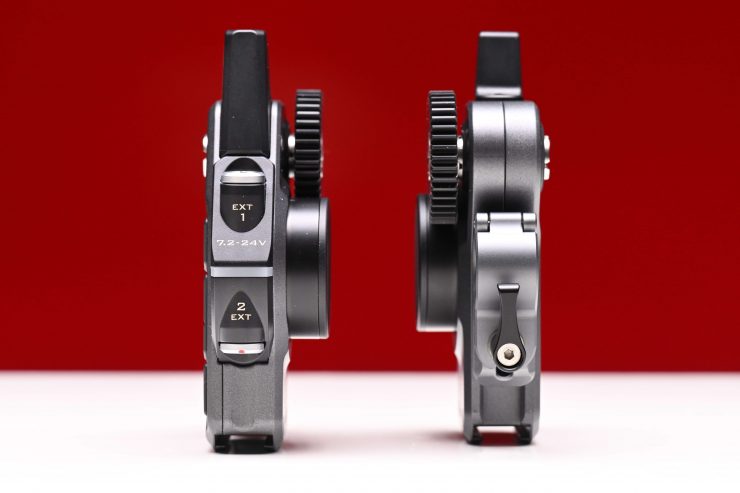
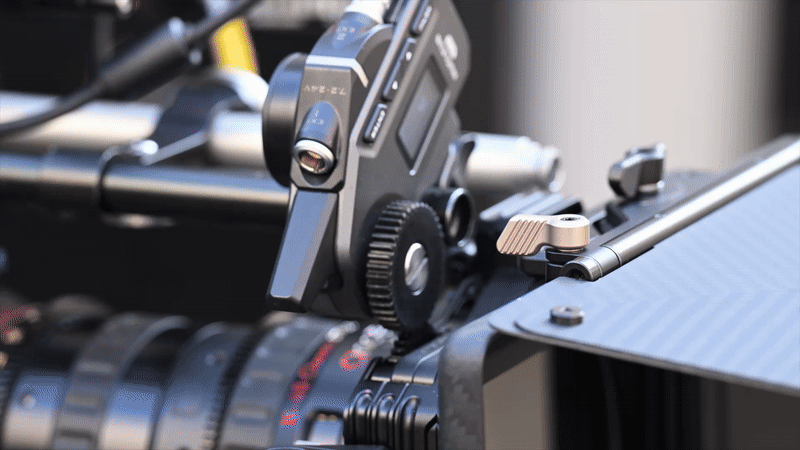
Design-wise, they look reasonably similar to the original Nucleus-M motors, but there are a few key differences.
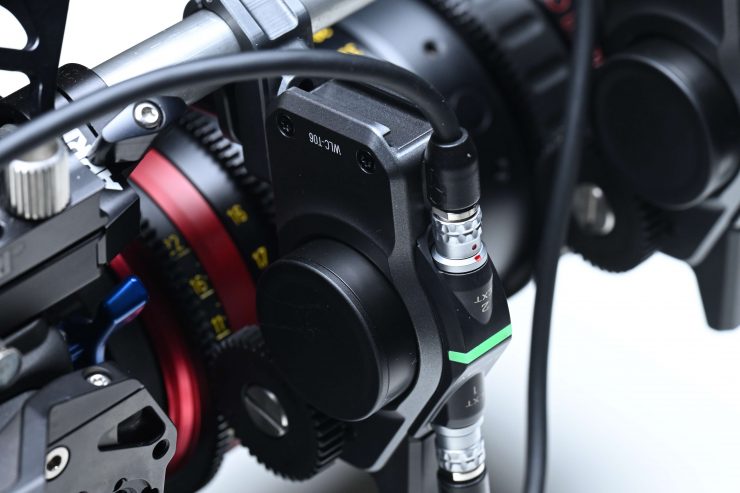

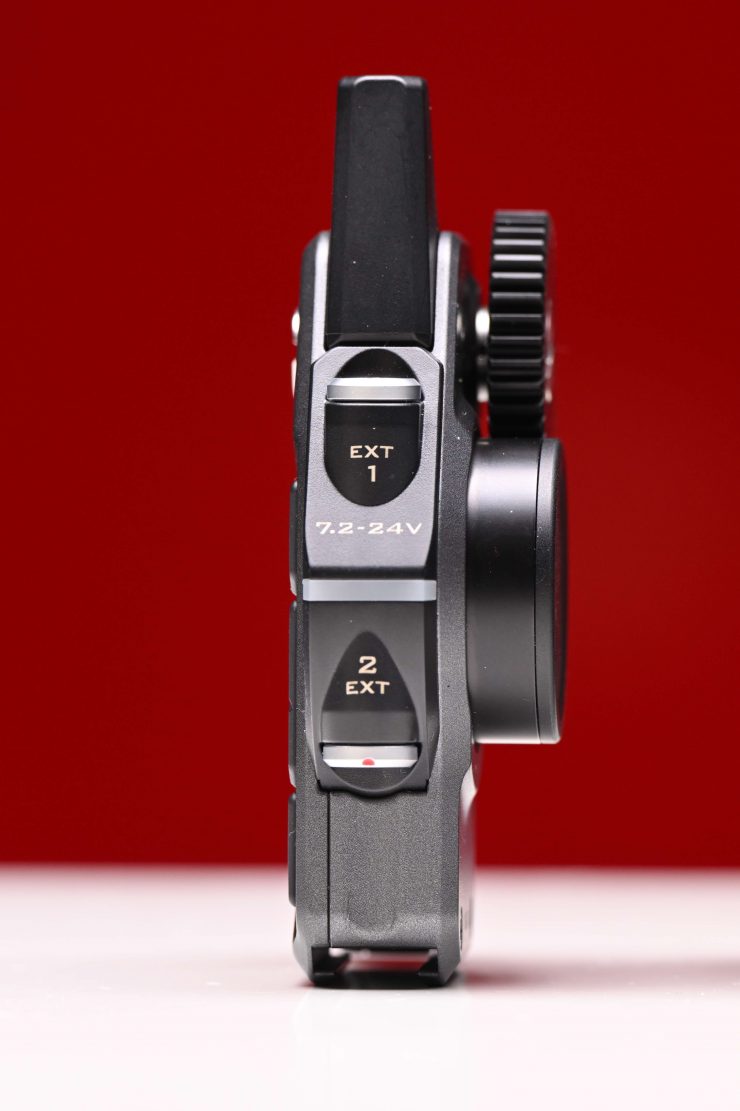
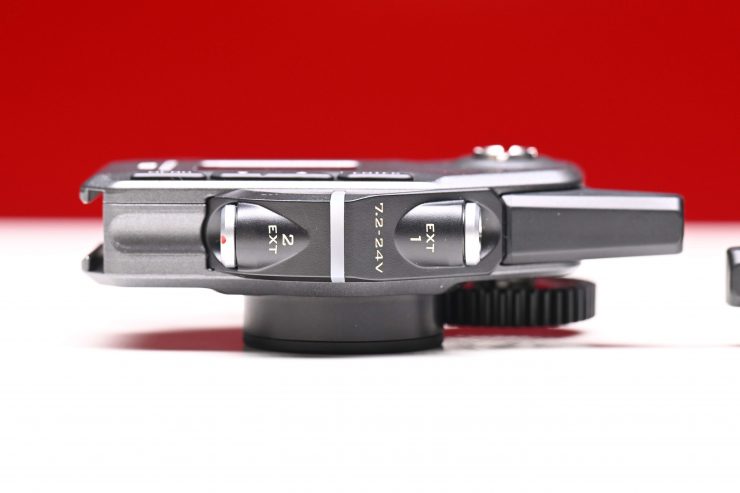
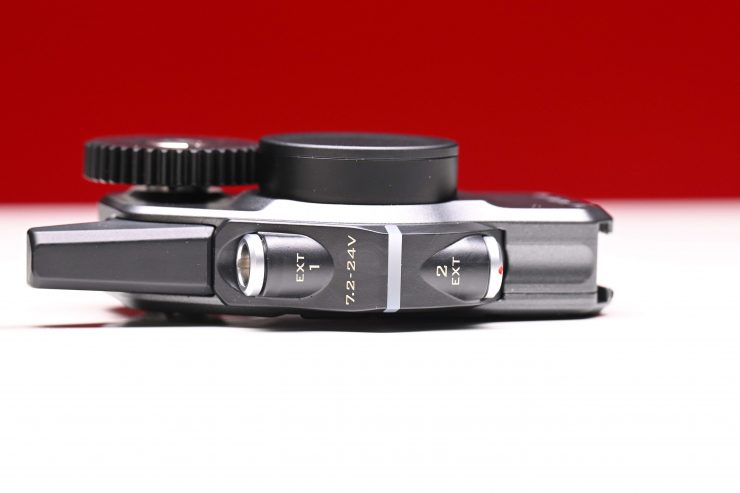
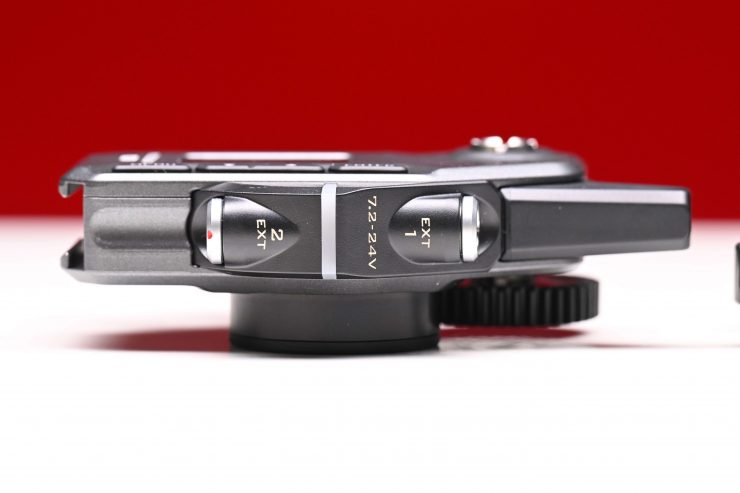
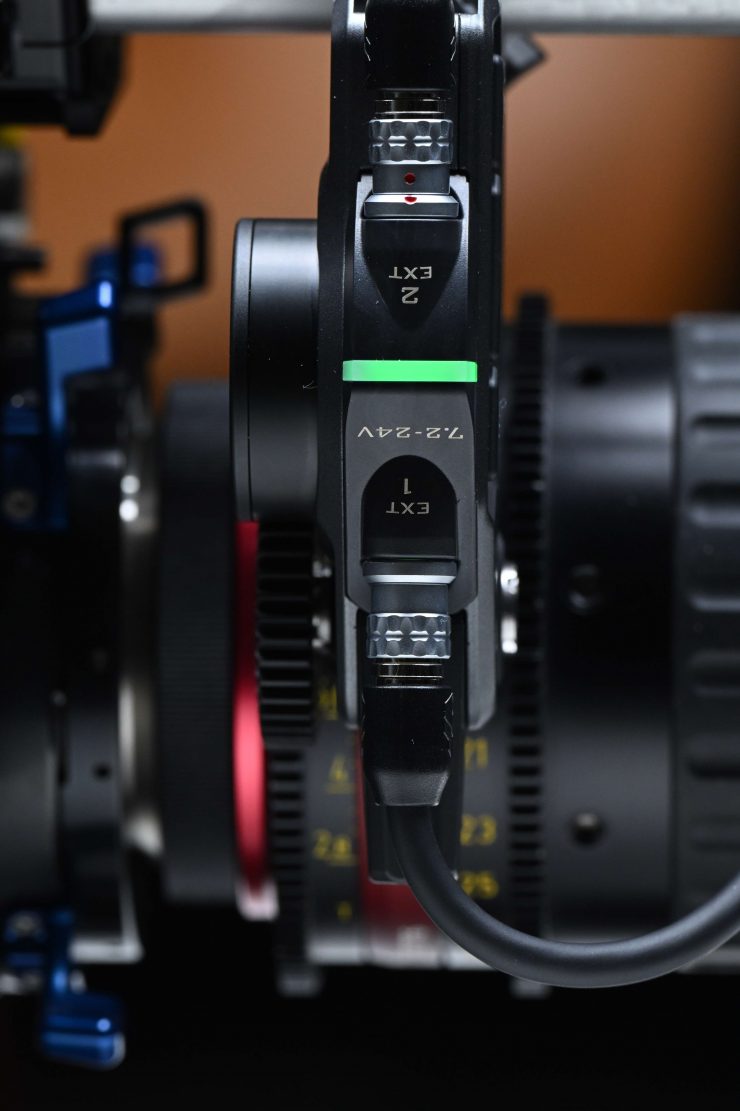
The display and associated buttons have now moved to the opposite side of where the pitch gear motor is, and instead of having two EXT ports next to each other, there is one that faces up and one that faces down.

You can change the pitch gear to the opposite side of the motor if you need to.
Above you can see that is exactly what I have done with this set-up.
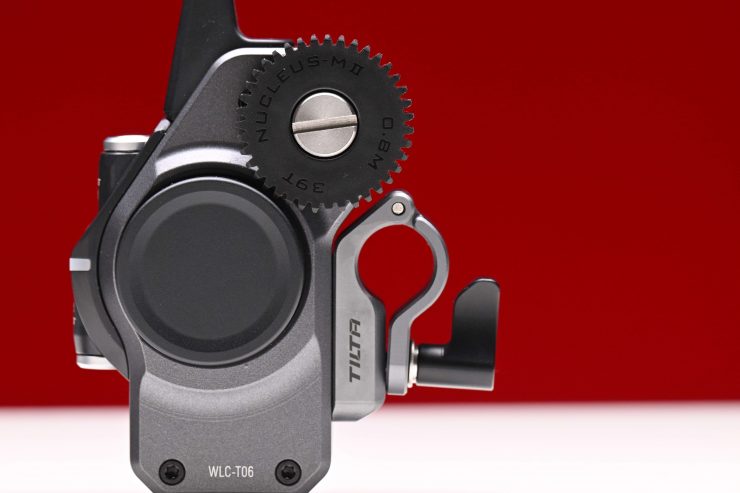
The motors come with interchangeable 15mm and 19mm rod mounts. You can completely open the clamps, so there is no need to slide them all the way from the end of a rail. This is handy as you don’t need to take off items like a matte box or lens support.
You can also reverse the clamp so the lockdown screw is positioned higher or lower, which you need to do if you are running motors from top rods.
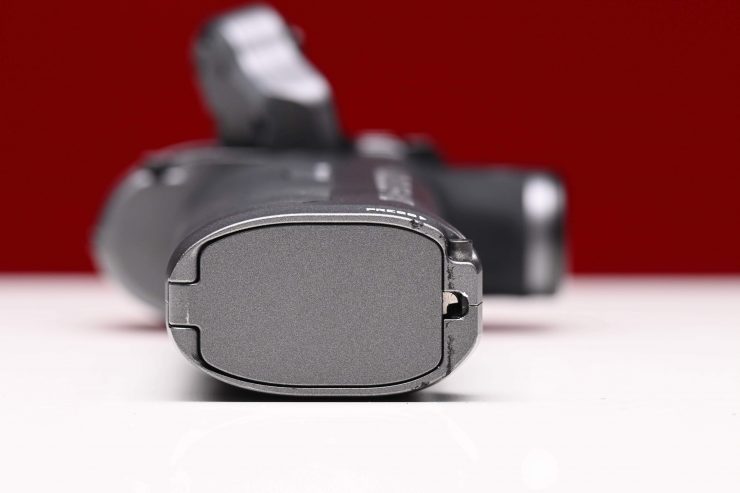
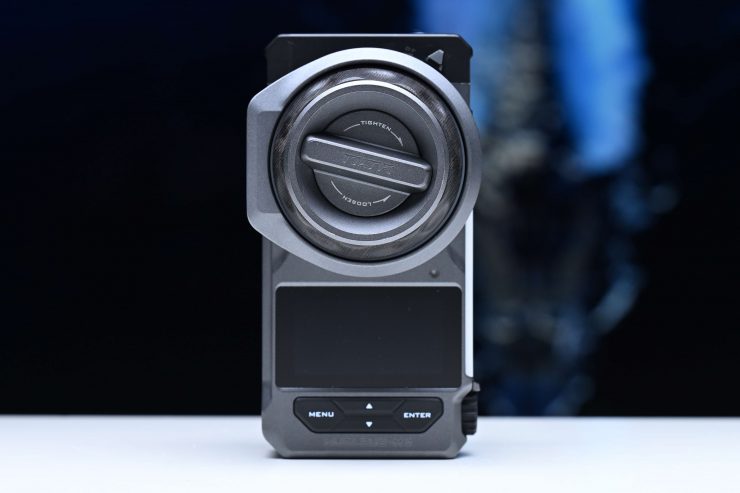
The motors have a small information screen and you can access a menu to make changes.
The motors need external power. They need to be powered via the included D-Tap to 7-pin cable. The motor power requirements are 7.2-24 Volts. Having a D-tap cable for the power is ok, but I would have preferred to have seen Tilta use an industry-standard LEMO power cable. In saying that, considering this is an affordably priced FIZ system, it is likely to be used by a wide array of people on different camera systems, and that is presumably the rationale for going with a D-tap power solution.
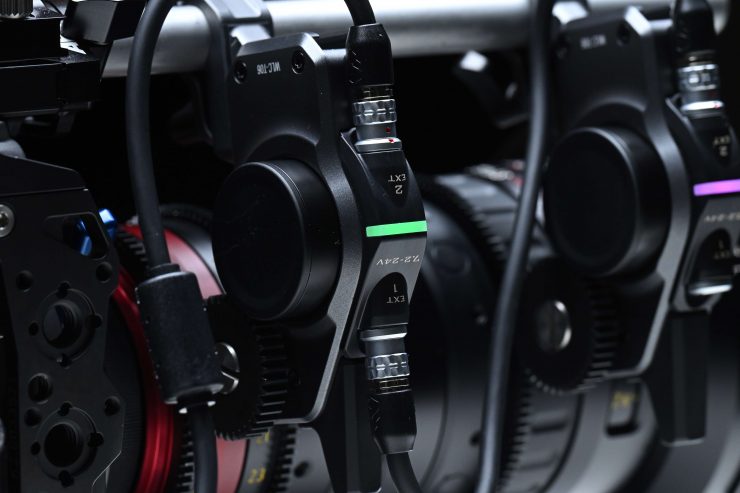
When using more than one motor you simply daisy chain them together with one of the supplied 7-pin EXT cables.
I found the motors to have plenty of torque and strength, and for the most part, they are pretty responsive.
The Nucleus-M II is also compatible with lens control motors, including those from DJI and TILTA ecosystems.
List of Compatible Lens Control Motors
| Tilta Nucleus Ecosystem | First-gen Nucleus M Lens Control Motor Nucleus-M II Lens Control Motor Nucleus Nano Lens Control Motor |
| DJI Ecosystem | Control DJI motors directly via the DJI RS stabilizer with Nucleus M II’s built-in DJI RS protocol support. |
It is nice that you can use the Tilta Nucleus-M II controller to control focus with a DJI motor when it is connected to an RS gimbal such as the RS4 Pro. You would need the Tilta Remote Control Receiver Module for DJI Ronin to be able to do this.
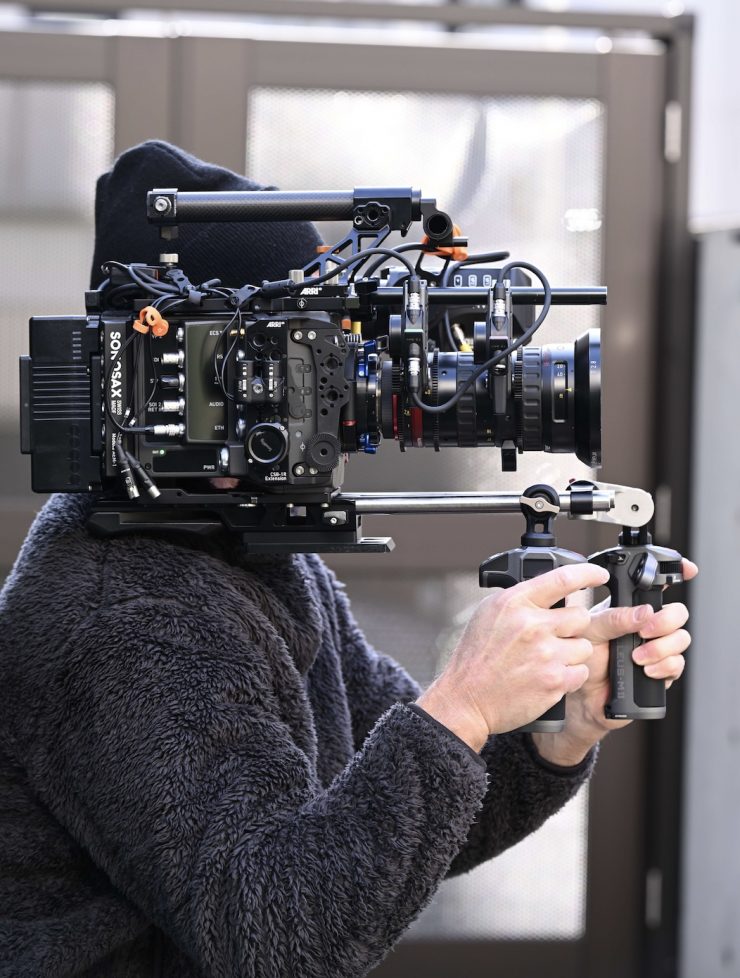
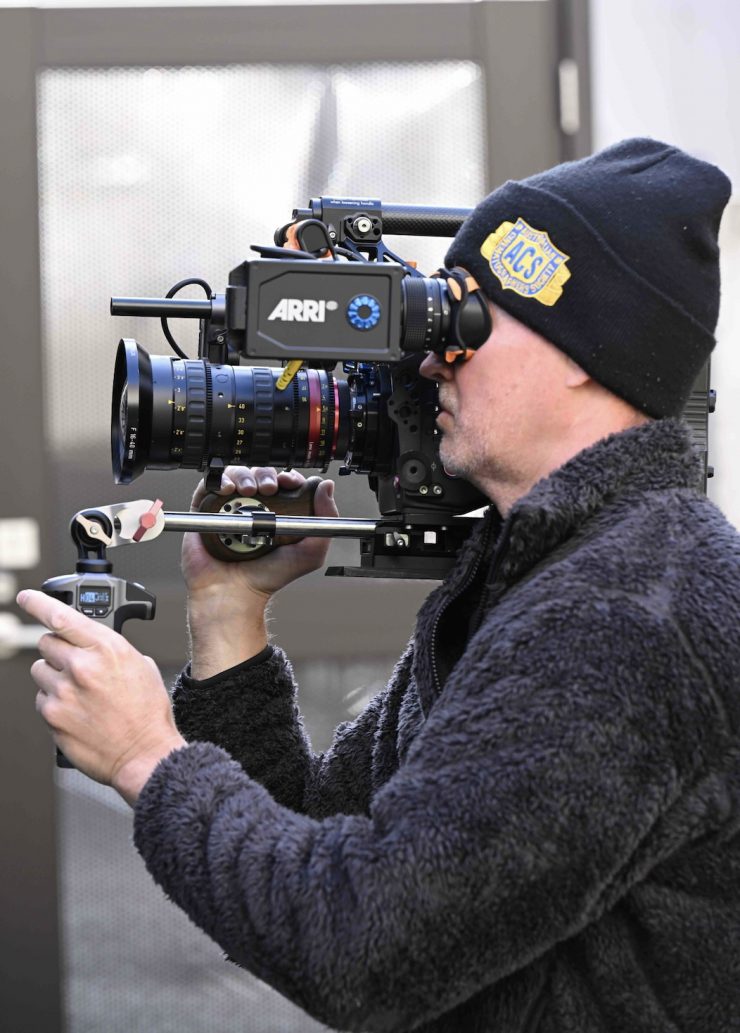
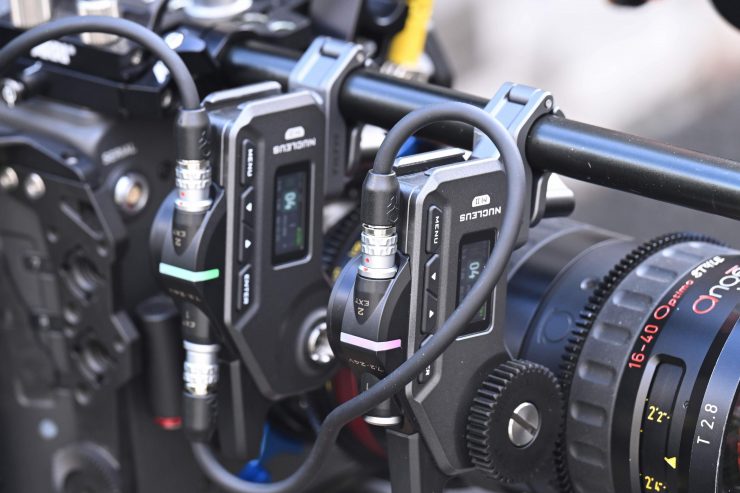
Handle Controllers
Just like with the original Nucleus-M, the Nucleus-M II comes with two handles with one having a zoom rocker on it to control 2-motors.
The rocker can be programmed to control zoom, focus, or iris functions. Again, these share a very similar design and feature set to the originals.
The handles have their own LED displays and menu system. Making changes is not overly intuitive, but you get used to it. Tilta gives you lots of options for making changes to how they behave.

To use the handles, you have to put the Controller in INACTIVE mode from ACTIVE. You do this by double-clicking on the FUNCTION button on the FIZ controller. I found having the handle powered up before making the change to INACTIVE on the FIZ is a good idea.

The kit comes with two handle controllers that can be mounted to a gimbal or to a camera rig with the included handles to ARRI Rosette adapter.
You also get a Baby Pin adapter so you can mount the FIZ controller directly to a C-stand, etc.
Tilta also has a rod mounting system in both 15mm and 19mm. The 15mm LWS / 15mm Studio Dogbone and 19mm LWS / 19mm Studio Dogbone. Both models cost $150 US.
The handles are relatively easy to mount, but at least for my personal use case, I preferred to offset them slightly from 15mm rails.
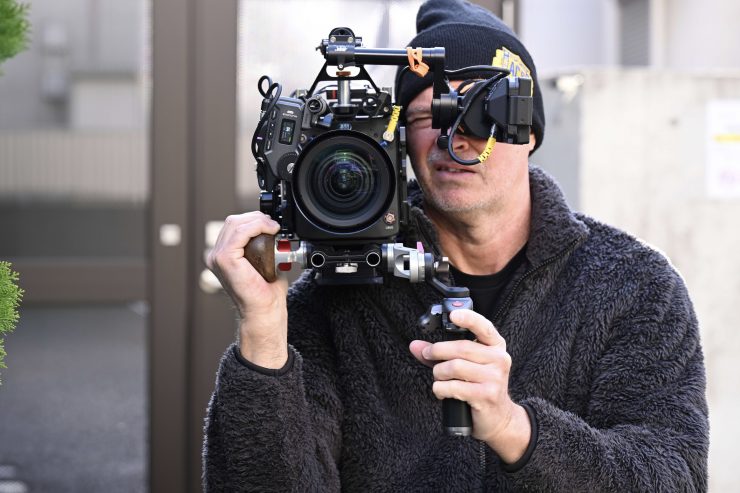

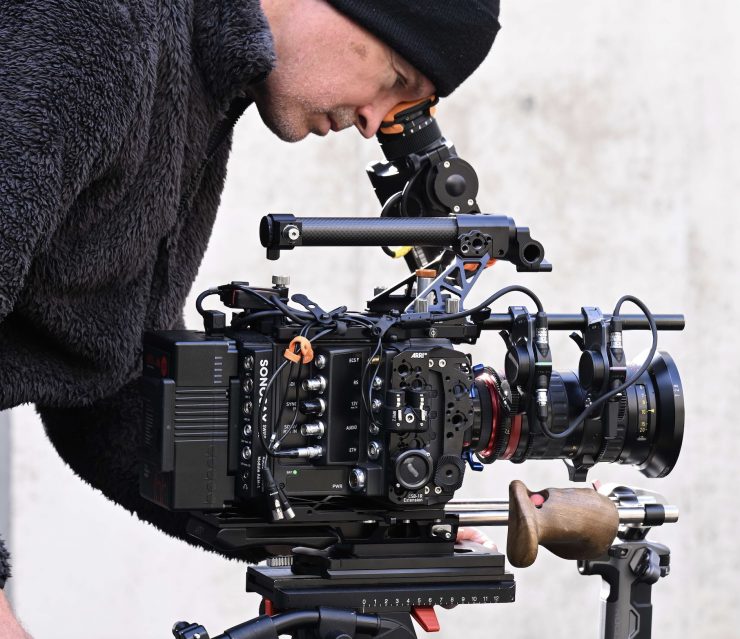
It is nice to have the option of using one or two handles. The Left side handle has both zoom and focus. This makes for a great grip replacement for certain cameras as you can add in the proper cable for Record Trigger and you have a nice handheld setup.

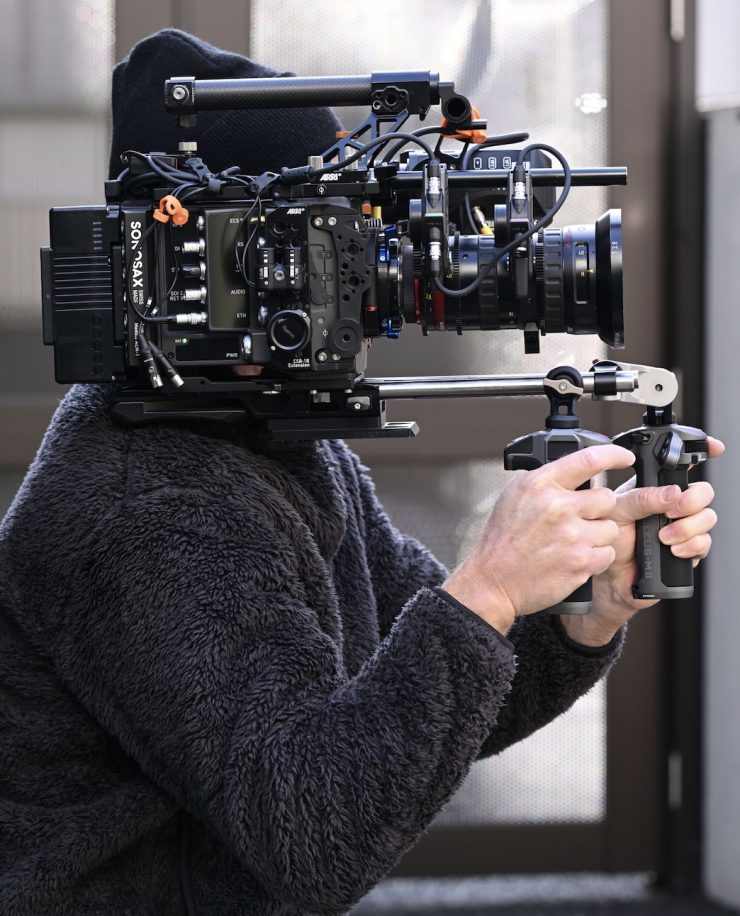
Even if you are using two handles, you can just have one turned off if you just want to control everything from the left-hand side. I found this to be pretty comfortable for shoulder-based shooting, but it will depend on what camera platform you are using.
I thought I might be able to set up the Nucleus-M II system so that I could put one handle controller on the camera and the other on a tripod. That way I could set both the controllers to control focus. This would give me the ability to go seamlessly from a tripod to a handheld operation.
In theory, this sounds ideal, but unfortunately, it doesn’t work! The two hand controllers end up interfering with each other, and the motor will end up doing funny things. According to Tilta, it is not recommended to have a motor controlled by more than one controller. In other words, don’t have focus applied on both handles at the same time.
If you want to still do this, I did find a small workaround, but it is hardly ideal. If you are operating the focus motor using the hand controller on the tripod handle, you just make sure that the other hand controller on the camera is turned off. When you want to switch to handheld, you can turn the controller on the tripod off and turn the controller on the camera on. This is fiddly, to say the least, and you need to remember to do it to avoid issues.
Using the system to control ND
You can assign one of the motors to ND, and then use it to control a matte box-mounted variable ND filter, polarizer, etc.
Installing the motor to work with a VND filter, in this case, the Tilta VND that comes with the Mirage PRO Matte box, wasn’t that easy to do.
What I found is that when you go to calibrate the motor, it would easily jump off the gear on the VND. One of the issues was that the motor pushed the filter tray down slightly in the matte box. To get it to calibrate, I had to keep pressure on the matte box tray from underneath while the motor calibrated. I suggested to Tilta that they should add a much slower and softer calibration mode when using a motor for the ND, and that is something they are looking into.
I also found it was better to use two top-mounted rods and a rod mount in the middle to avoid any flexing.
It is also tricky to position the motor in the exact right position, and depending on the camera you are using and top-mounted rods, you may need to find a rod that is a specific length so it won’t hit the matte box. The Universal Motor Adapter can be mounted to the 114mm Variable ND Filter for the Mirage Pro Matte Box. The adapter features a 15mm rod that supports small wireless motors. to control the Variable ND Filter wirelessly.

With the accessory attachment on the Mirage Pro Matte Box, you could buy the Universal Motor Adapter for Tilta Mirage Pro Matte Box, which would solve this issue.
Once everything is set up, it works well. I assigned the VND motor control to the rocker, but you can assign it to the wheel, slider, or dial if you prefer.
Above you can see how it works.
With certain digital cinema cameras that don’t have built-in ND, this could be a decent way of controlling ND or making exposure adjustments without needing to change the aperture if you are transitioning between different scenes with varying brightness. It would also be handy if the camera cannot be physically accessed, such as when on a steadicam or crane.
Calibrating
The side you have the motors on will affect the direction of rotation of the lens. The Nucleus-M II out of the box is set for clockwise rotation from the operator side of the lens. If you prefer having the lens control on the opposite side, a simple change in the menu is required to reverse the direction to counter-clockwise.
To ensure proper setup of the motor to the lens, calibration is required. If you have a cinema lens or stills lens with gears that have hard stops, this is easy to do.
Tilta has made it by default that as soon as the motors are connected to power, they will auto-calibrate within 3 seconds (you can turn this off in the menu). You need to be aware of this, especially if you are just running the motors via a camera battery. As there is no on/off switch, they will still draw power as long as they are connected to a battery. If you have a D-tap port on your camera, then this won’t happen as the motors will only power on when the camera is turned on. This is another reason why I would have preferred to have seen a LEMO power cable option.
You can also calibrate the motors by holding down the CAL button on the controller. This activates calibration, and the process automatically starts. The motor goes to both ends of the focus rotation and sets the range. The same can be done with an iris that also has hard stops.
You can also go into the menu, as I previously mentioned,d and calibrate all the motors or do them individually.
Calibrating Stills Lenses
I can’t personally see many people using a FIZ system with lenses that don’t have hard stops or AF capabilities, but you can do it if need be.
If a stills lens without hard stops is used, calibration using the controller is required. This is a little more involved but not difficult, plus once it’s set, you can power the unit down, and when powered back up, the settings will be recalled and ready to go. One setting that you will probably have to adjust is the rotation direction, depending on the side of the lens you have the motor attached. As I mentioned earlier, the default position is with the motor on the operator’s side. Since I primarily had the motors on the non-operator side, I had to change the rotation to clockwise; however, when I Auto-Calibrate by holding the Calibrate button on the motor, the rotation changes, and I have to set it to counter-clockwise.
To fix this issue, I reversed the manual calibration to avoid having to make another menu change. When the controller in the settings calls for the minimum setting, I move the lens to infinity, and for the furthest setting, I take it to its closest focusing point. If this is confusing, you can just change the rotation direction in the FIZ menu.
Usability
Usability is arguably the most important requirement of any FIZ system. It has to be easy to use and reliable. Nobody wants to use a FIZ system if it’s frustrating to set up and operate, and if it is plagued by reliability issues.
Now, I need to reiterate that the Nucleus-M II I was testing was more than a month out from being announced, so Tilta was still sorting out some bugs and improving the firmware.
The functionality and reliability of the system increased greatly from the first firmware I tried to the current firmware.
Setting up the controller and motors was pretty straightforward and easy to do. As I mentioned earlier, as soon as you plug power into the motors, they will auto-calibrate by default. I didn’t have any issues with calibration or the motors jumping off lenses, but this will depend on the lenses you are using and how well you have everything set up.

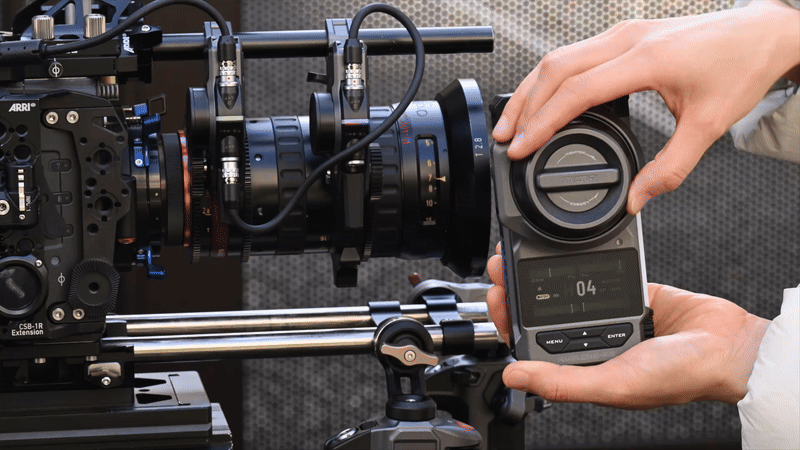
Above you can see it in use. There is very little delay.
You can change the speed for the Iris/ND slider so that the values get spread out further, so you can do a more gradual or faster iris change, depending on what speed you set. I did find that the Iris/ND slider was a little sticky and difficult to move. If you are only using 2-axis (iris and focus) I would assign the Iris/ND to the zoom wheel on the controller.
There doesn’t seem to be any way of changing the iris values from F-stops to T-stops.
I didn’t have too many issues when it came to reliability. On one occasion, when using the hand controllers and the FIZ unit, I couldn’t return control to the FIZ unit no matter what I tried. Eventually, I had to do a factory reset to fix it, which was hardly ideal.
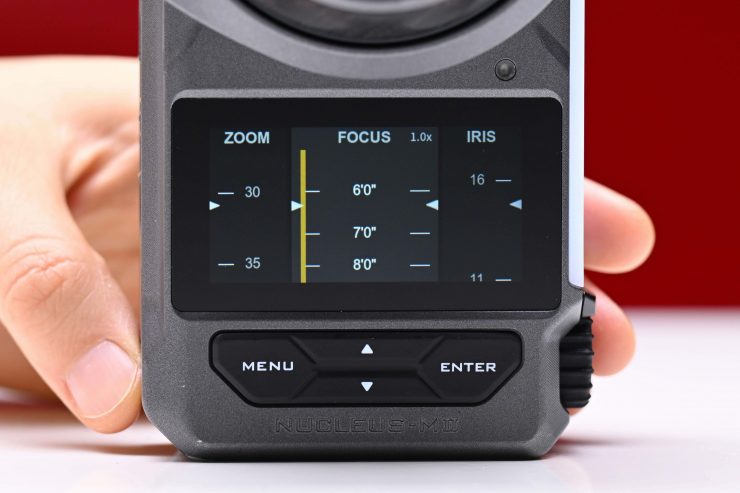
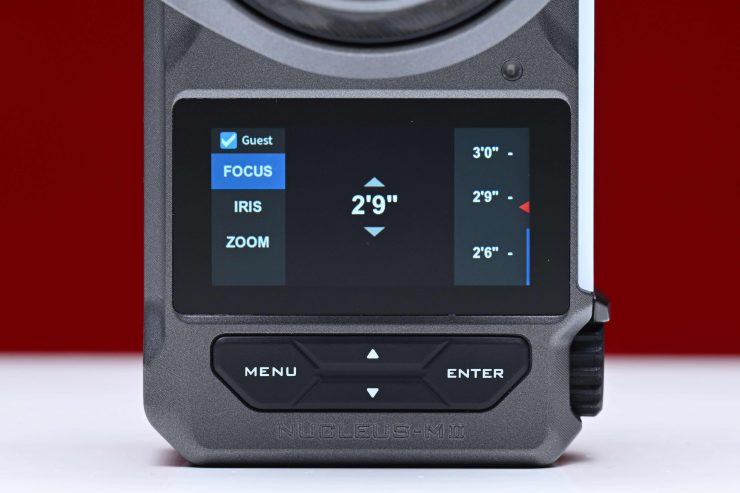
Setting A and B focus limit points was pretty straightforward to do. You need to go to the starting position you want and then hold down the Mark button and move to the next position. Once you release the Mark button, you will see a visual white bar indicator on the digital display on the handwheel. To release the marks, you need to hold down the DEL button.

On the main UI, when you are using a mapped lens, there is a small visual indicator that A and B marks have been set. This is shown by a white line on the axis where it has been set.
Above you can see the operation when A and B marks have been set.
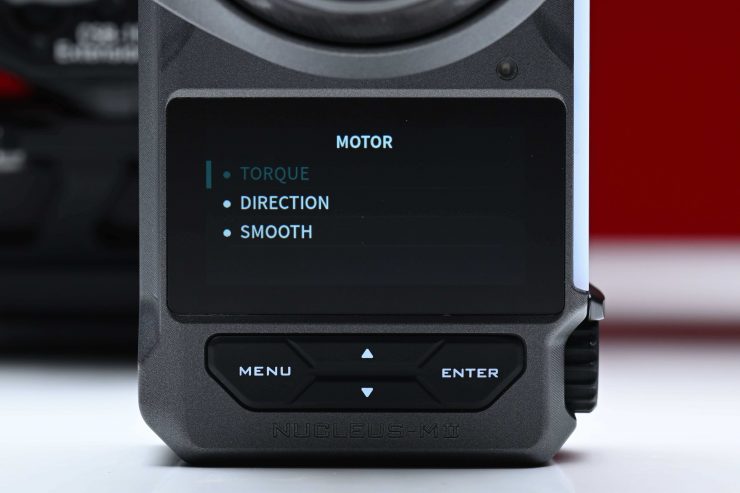
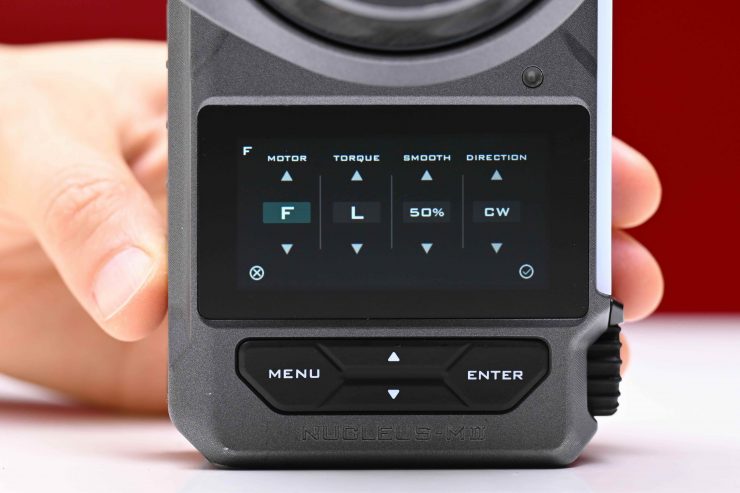
You can change the torque, direction, and smoothness settings of the motors on the controller.
I found the motors to be pretty strong and I had the torque settings set to Low.

As I mentioned earlier in the review, by default, the motor direction is set to clockwise.

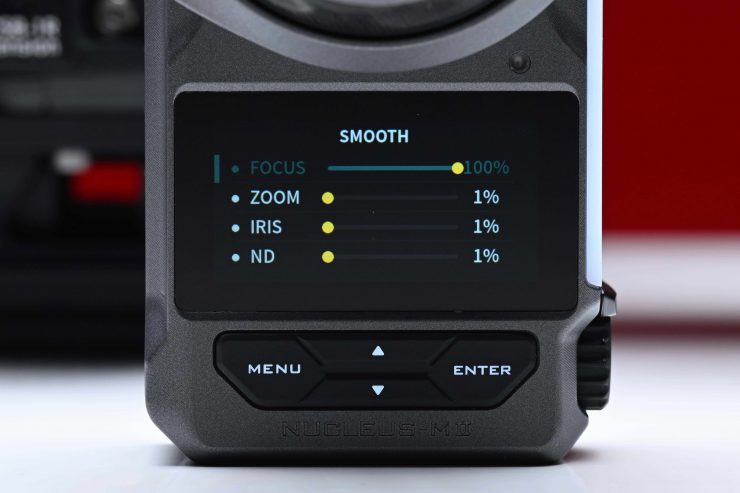
The Smooth setting lets you change the smoothness of the focus, zoom, iris, ND. The smoothness refers to how fast or slow the motor starts or stops when you move it. I personally found that it was better to have this setting between 1-20%, but it really depends on what you are doing.


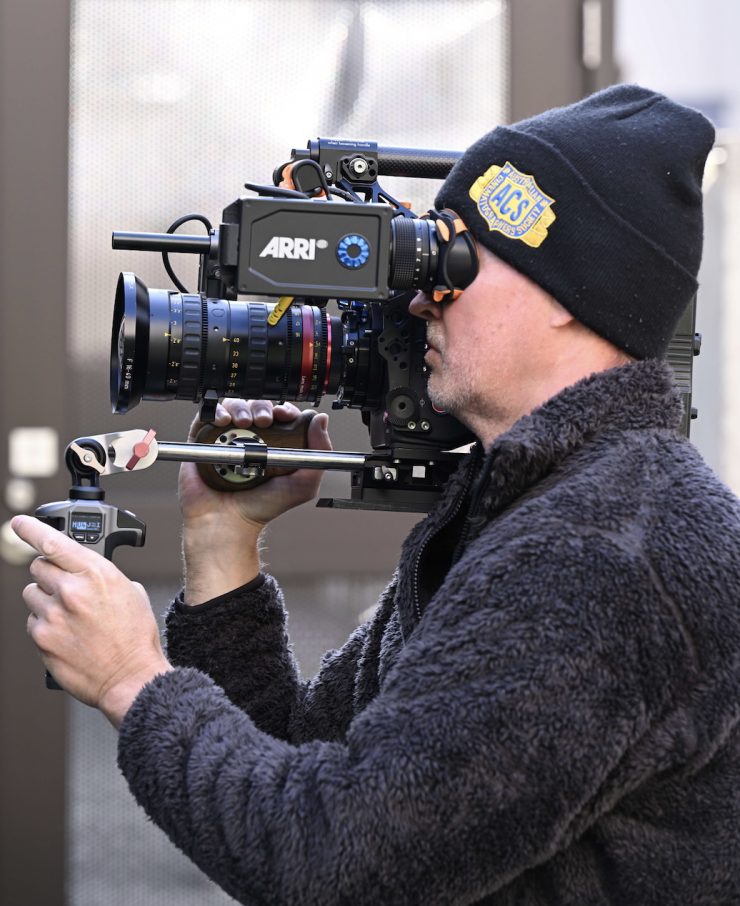
I found the system to work well if you are shooting on the shoulder and want to adjust the focus and iris/zoom without needing to physically touch a lens. If you are not used to doing this, it does take some practice to build up muscle memory.


I also liked to just use a hand controller on the back of a tripod to adjust focus for certain shooting situations. You could also just use a hand controller instead of the main FIZ controller for certain situations as well.
Price & Availability
The Tilta Nucleus-M II retails for $1,999 USD, but Tilta has a pre-order deal where you can get it for just $1,299 USD. This pre-order price makes it a very appealing proposition, especially given its feature set and capabilities.
Competition
The Tilta Nucleus-M II doesn’t really have any direct competition at the price point. You could make an argument that systems like the DJI Focus Pro All-In-One Combo ($1,849 USD) and other systems like the SmallRig MagicFIZ Wireless Follow Focus Two-Motor Kit, PDMOVIE Live Pro Three-Channel Focus/Iris/Zoom Control System (Updated), PDMOVIE PDL-AFX-RA-SP LIVE AIR 3 Smart LiDAR Wireless Focus Lens Control Kit (Deluxe) could be considered competition, but they are a little different from the Tilta system.
Conclusion

The Tilta Nucleus-M II is a very solid system for the price, and it is a big improvement from the original. It is amazing to think that you can get a FIZ controller, two wireless hand grips, two motors, and a bunch of accessories for under $1,300 USD. Equipment keeps getting more and more affordable, and the quality and performance gap between more affordable products and higher-end products continues to get closer and closer.
The original Tilta Nucleus-M certainly had its issues, but this is a much-improved system that will appeal to solo operators and small teams. While it isn’t going to necessarily have rock-solid 100% reliability or the millisecond response that you will find on high-end systems, for a lot of users it will certainly be good enough. This is not a system that is being targeted at super high-end productions, and there is nothing wrong with that. However, that’s not to say the system couldn’t be used in those scenarios.
Set up is pretty straightforward, and it is easy to operate and control. The system is solidly built, and the hand controllers make shoulder operation easy. I am pretty picky when it comes to reliability, and I only want to use rock-solid products that don’t have issues. For the most part, the Tilta system exceeded my expectation,s and it worked well for what I needed it to do.
It is good to see companies like Tilta continuing to make affordably priced products so that more people can get access to equipment that was previously out of reach.