In the middle of 2022, ARRI unveiled the ALEXA 35, a new Super 35 digital cinema camera with 17 stops of dynamic range and a host of new features that were all aimed to provide the best possible image quality.
The ALEXA 35 had big shoes to fill as it is the first ARRI camera to feature a sensor that isn’t based on the ALEV-III. The ALEV-III has been used in various forms in every single ALEXA camera since 2010. The ALEXA 35 represents the next big step for ARRI in the evolution of the ALEXA family.
If you were looking for the next big evolution in sensor performance, you could strongly argue that is exactly what ARRI has done. The dynamic range is the best I have ever seen from any camera, period.
The sequel needs to be better than the original
Nobody wants to make Speed 2 when they can make The Empire Strikes Back. For ARRI, the sequel had to be better than the original. Having to come up with a sensor that was better than the ALEV-III was certainly no easy task. It took a long time to develop and refine the ALEXA 35 before ARRI thought it was good enough to be released. ARRI is not the sort of company that is just going to rush a product out the door.

Setting a new standard for Super 35
When ARRI set out to develop the ALEXA 35 it had to meet the following requirements:
- Native 4K
- Best image quality
- More creative control
- Fast and easy operation
- Complete new accessory range
- Comprehensive workflow tools
- Robust and reliable
Best Image Quality
ARRI has always prioritized image quality over resolution. At the end of the day, it’s the image quality that matters the most, and ARRI’s philosophy has always been to create the best image quality with no compromises.

You don’t mess with something people already like, you just improve on it. If there is one thing ARRI does well, it is listening to the end-user. By getting feedback from DPs around the world ARRI was able to come up with a camera that becomes yet another arrow in its impressive quiver. No camera is ever going to be exactly what every user wants, and that is why we have so many options available in the market. There is no such thing as the perfect camera and there probably never will be.
There is absolutely no doubt that certain streaming service mandates were one of the reasons behind the development of the ALEXA 35, ALEXA LF, and Mini LF. With DPs not able to use the ALEXA Mini or AMIRA for certain productions, ARRI did need to bring out a Super 35 camera that could meet streaming mandates, to compliment the ALEXA LF and Mini LF.
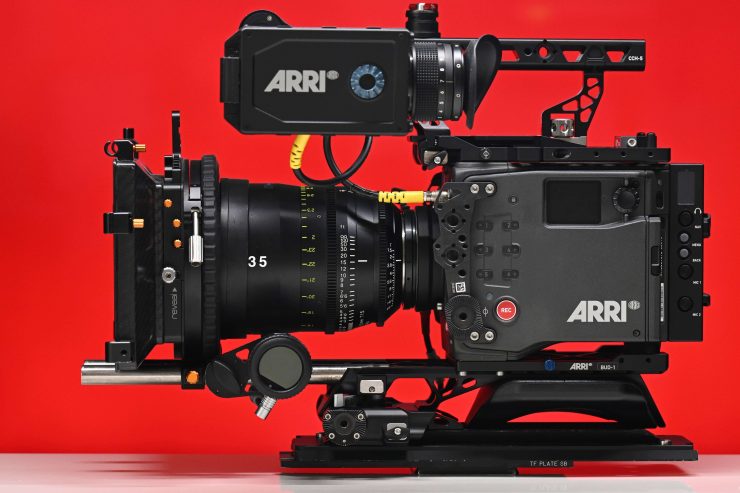
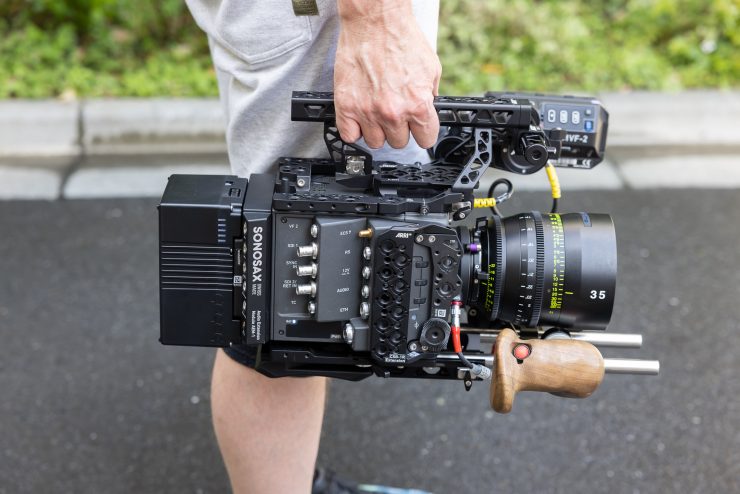
Hands On
When the camera was first announced I only got a relatively small amount of time to use the ALEXA 35. The camera I had wasn’t a shipping version and it was still using quite early firmware, so I wasn’t able to test some of the features because they weren’t available. There was no ProRes recording, no Textures, and no Looks available. I also didn’t have the tools to correctly process the footage because of the new color science and the way in which you need to grade the material. Despite these issues, I was still extremely impressed with the results I could obtain.
A lot of time has passed since I first saw the camera and I have now become very familiar and comfortable with it. This review is the result of almost a year of working with the ALEXA 35.
This is a top tier high-end digital cinema camera that will be used on major Hollywood theatrical releases, episodic television, commercials, music videos, high-end documentaries, etc. For this review, I’m primarily interested in seeing how the ALEXA 35 fares when used by a single shooter or small crew.
You would think that the ALEXA 35 is not necessarily going to be a camera that a lot of owner/operators are going to buy, although, just like the Mini LF, there have been far more owner-operator preorder customers worldwide compared to rental houses than there was for the original ALEXA Mini. In saying that, for a lot of people, this is going to be a camera that you will rent.
If you ever plan on renting or buying an ALEXA 35 then I hope this will give you a good insight into how to use the camera and what its strengths and weaknesses are, from someone who is using it day in and day out. This is not only a review, but also a complex guide that also tells you everything about the camera’s features and functionality.
Key features
- Best Image Quality at native 4K and 120 fps
- More dynamic range: 17 stops can handle any situation on set and is best for HDR
- More contrast: Sophisticated stray-light suppression to accurately capture the full contrast range and character of each lens
- More sensitivity: Lower noise, EI 6400 and optional Enhanced Sensitivity Mode
- More accurate colors: REVEAL Color Science for better color reproduction, cleaner edges and faster grading
- More Creative Control
- The camera supports all S35 and LF lenses while fulfilling all 4K mandates
- ARRI Textures: A new way to define grain and contrast in-camera, giving control back to the cinematographer
- New look handling: View SDR and HDR of the same look on set, set Look Intensity, use in-camera LogC4 Look Library
- Fast and Easy Operation
- The smallest fully featured ALEXA
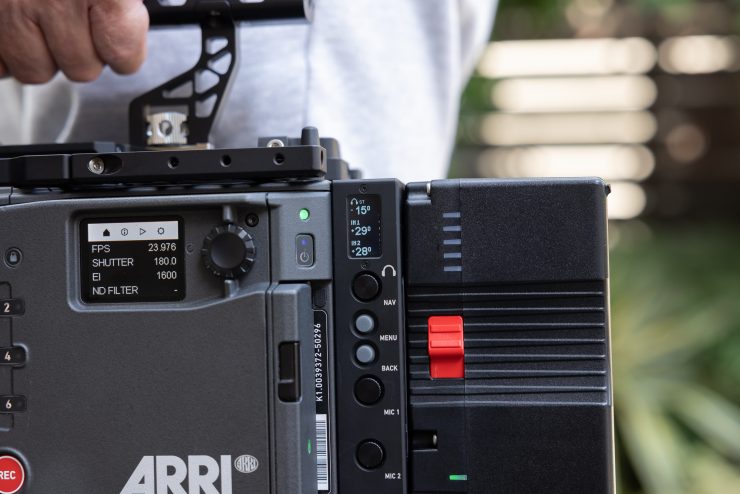
- New left side display
- Familiar MVF-2 viewfinder (now also in HDR), menu structure, Compact Drives 1TB & 2TB
- 19 recording formats for all requirements
- Advanced Color Match (ACM)
- Streaming metadata for virtual studios
- Comprehensive Workflow Tools: ARRI online tools, stand-alone apps & 3rd party tools
- Robust and Reliable: For dependable working on set, a long product cycle, and a safe return on investment


Above are some of the films that were commissioned by ARRI.
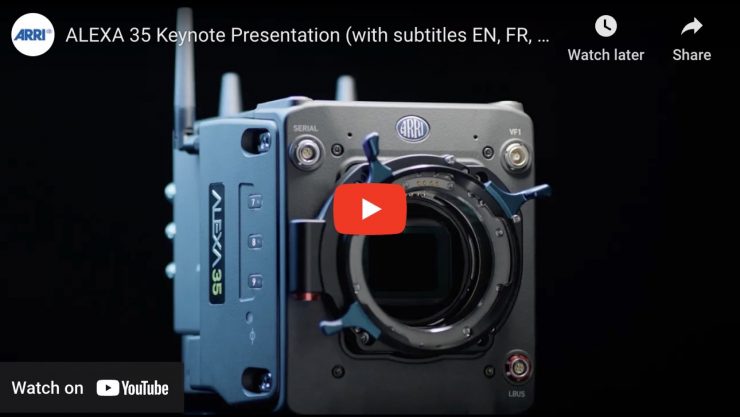
Above you can see a video with the teams responsible for those films discussing how they found using the ALEXA 35.

Above, you can watch an interview with Adam Suschitzky, BSC, who recently completed shooting “Orphan Black: Echoes” with the ALEXA 35 for AMC in Toronto.
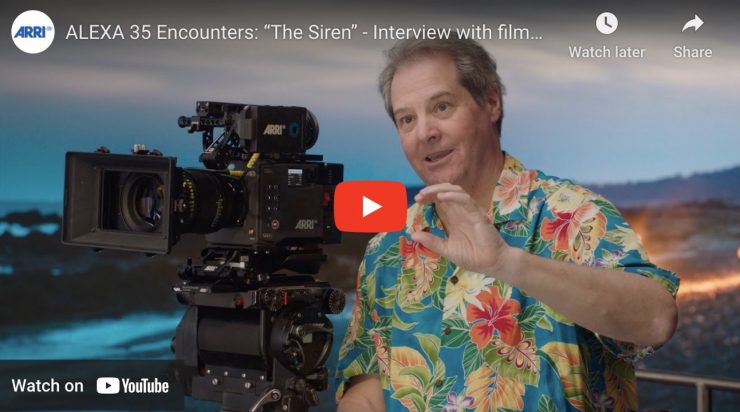
Above, you can watch a video where James Friend BSC and Mike Valentine BSC talk about using the ALEXA 35 on their short film “Siren.” Siren was shot with ALEXA 35, the K445 Default and L345 Shadow ARRI Textures, ARRI Signature Prime and ARRI Master Anamorphic lenses.
Sensor & Dynamic Range
There was immense pressure on ARRI to come up with an entirely new sensor that was better than the ALEV-III. The ALEV-III exceeded ARRI’s greatest expectations and if you think that every ARRI camera released in the last 12 years has used a variation of the original ALEV-III sensor that is the ultimate testament to just how good it is.
In an age where technology continues to move rapidly, the fact that the ALEV-III sensor is still revered in the industry as the gold standard shows you just how right ARRI got it back in 2010. Because that sensor was so good, that is why ARRI continued to use it for so long.
You can’t just magically pluck a sensor out of thin air and expect it to be better than the ALEV-III. ARRI tried numerous sensors until they eventually found the right one. The new ALEV-IV sensor is made by a third-party to ARRI’s design.
The development of the camera started way back in 2016 when ARRI first saw the basis of what is now the new sensor, the ALEV-IV. From there it was a long process and it wasn’t till 2019 that they really started to put together and design what is now the ALEXA 35.
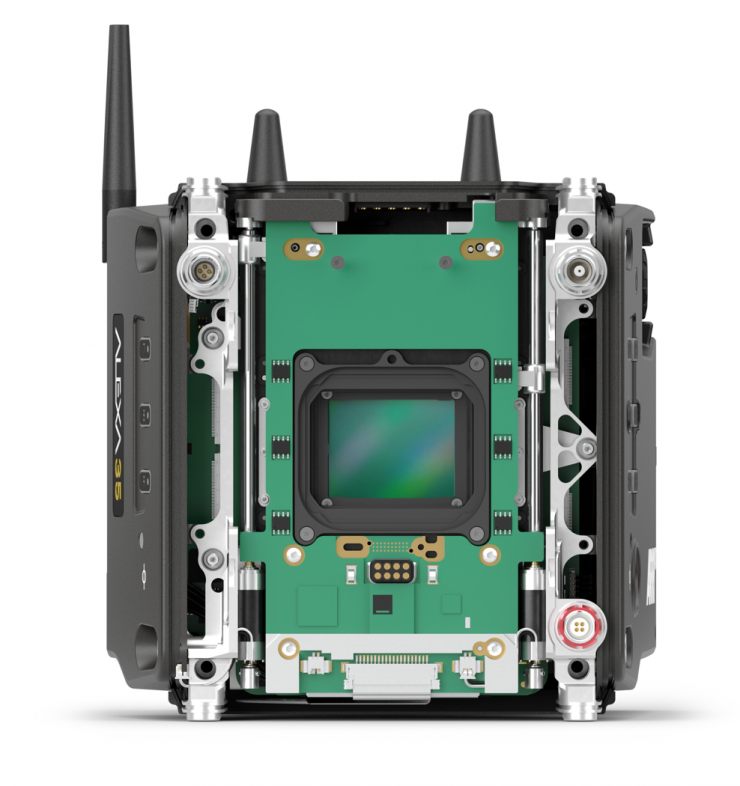
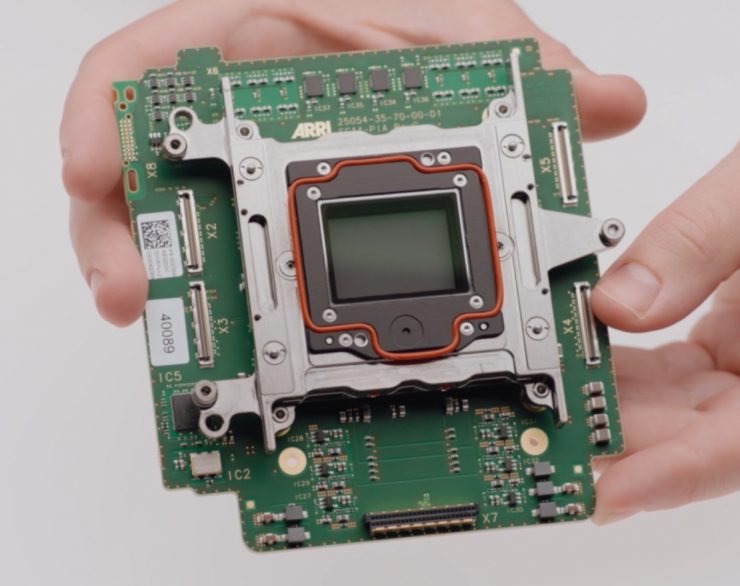
The new ALEV-IV sensor that is in the ALEXA 35 was developed specifically for the Super 35 format and it utilizes a technology where the analog to digital converters actually sit on the sensor board. Previously ARRI always had two boards, a sensor board and a separate board that housed the analog to digital converters. Having the analog to digital converters actually sitting on the sensor board allows ARRI to shorten the high-frequency analog lines which in turn allows you to create a cleaner image with less line noise, and less fixed pattern noise. The caveat to doing this is that you can’t stitch a sensor board like this anymore, which is what ARRI was doing in the past with cameras like the ALEXA 65, ALEXA LF, and Mini LF. What this means is that ARRI can’t just stitch this new sensor to create a larger sensor.
Creating a good-looking roll-off in the highlights is probably one of the most difficult tasks for any sensor designer and ARRI uses considerable resources to ensure exceptional highlight handling. The ALEXA 35 sensor’s wide exposure latitude translates into a “thick” digital negative; which provides tremendous flexibility when color grading. The sensor’s ability to retain definition, even when extremely under or overexposed, provides that extra bit of security in post. Its high dynamic range makes the images from the ALEXA 35, from day one, future-proof for high dynamic range (HDR) display technologies. The unique design of the sensor ensures wide exposure latitude and low noise at all sensitivity settings without making any compromises in image quality.
ARRI cameras have always had a high dynamic range that allows images to be rendered with a soft, film-like roll-off in the highlights, and provides the
exposure latitude needed in challenging situations. When it comes to these attributes, ALEXA cameras have set the benchmark against which all others are measured.
The New Super 35 format native 4K 3:2 sensor allows you to shoot at up to 120 fps and it has 17 stops of dynamic range. No, that is not a typo! 17 stops is a whopping 2.5 stops more than previous ARRI cameras and more than any other digital camera on the market today. These are actual stops of dynamic range and not claimed dynamic range numbers that some manufacturers like to throw around. ARRI has a history of accurately, or rather conservatively, measuring the dynamic range of its sensors.
The tonal values in an image are, put in physical terms, surfaces in the scene reflecting or emitting more or less light. The brightness of surfaces is measured as àluminance and its SI unit is candela per square meter (cd/m2). In the US, the term nits are generally used. Another unit is
foot-lamberts (fl). When the brightest object has a luminance of 4096 cd/m2 and the darkest object has a luminance of 0.5 cd/m2, the contrast ratio or dynamic range in the scene is 8192 (4096:0.5). Photographers and cinematographers measure this ratio in stops, which in this example is 13 (213 =8192). As the physical quantity of a spot meter is measured in luminance. When the two objects have twice the luminance, 8192:1 instead of 4096:0.5, the contrast ratio stays the same. Closing the aperture by one stop will yield the same result in terms of tonal range. The relative luminance of the elements in the scene translates linearly to exposure on the sensor. The photosites receiving the most light will receive 8192 times as much light as the photosites receiving the least light.
A sensor with a high dynamic range isn’t only able to capture a large contrast ratio, but also a large ratio between the RGB channels, which
represents very saturated colors. A red LED taillight of a car, for example, may yield an almost saturated red channel and a much lower signal in the other channels.
So how is dynamic range measured? The procedure to measure the dynamic range of a camera isn’t complicated. You simply capture a series of
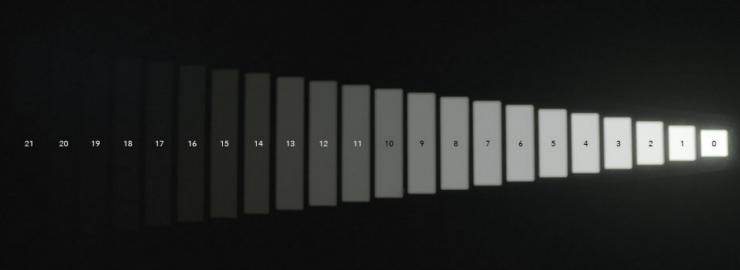
images starting from black (no light) and increase exposure until the signal is saturated. You can either place the camera in front of an illuminated surface and control its brightness or you can use a test chart like the DSC Labs Xyla chart, which yields a range of exposure spanning 20 stops within one frame. Now, you shouldn’t try to count the barely visible patches in the dark region of the test chart.
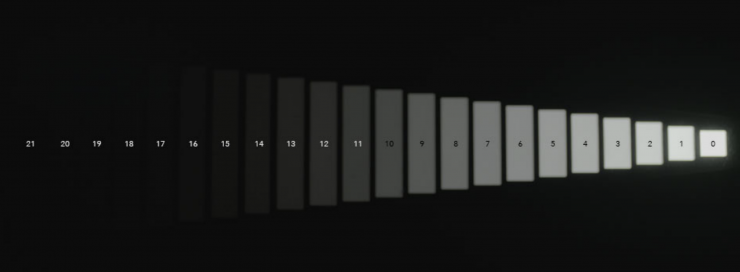
Above you can see the dynamic range of the ALEXA 35 (LogC4 image) when used at EI 800 EI. Depending on the monitor and the viewing conditions, you may be able to recognize patches 18 or 19, however, these stops are not counted by ARRI and they specify a dynamic range of 17 stops for the ALEXA 35. If you use the last, barely visible patch as the lower threshold, you will overestimate the dynamic range of the sensor. It is instead necessary to determine the SNR for each exposure. The true dynamic range is the ratio of the exposure where the signal saturates to the exposure where the signal has an SNR of 1.
While engineers measure the dynamic range of a sensor based on the linear raw signal values, cinematographers are more interested in the dynamic range of a camera. It is like measuring horsepower at the flywheel of a car instead of at the wheels! Therefore, you need to include the image processing of the camera. Most cameras process images into a log-like RGB encoding (ARRI uses the LogC3 and LogC4 curves). This creates another issue when you are trying to do a visible examination of a test chart to derive the dynamic range. All vendors use different encoding curves, even in different versions, which makes results extremely difficult to compare. To get an accurate measurement of SNR, the resulting images need to be converted into a linear domain. The dynamic range values of ALEXA cameras published by ARRI are measured in this way. The images are processed into LogC3 or LogC4 and then the inverse of the respective curve is used to linearize the image data. With this linear data, you can now calculate the SNR of each exposure and determine the sensitivity threshold and the point of saturation.
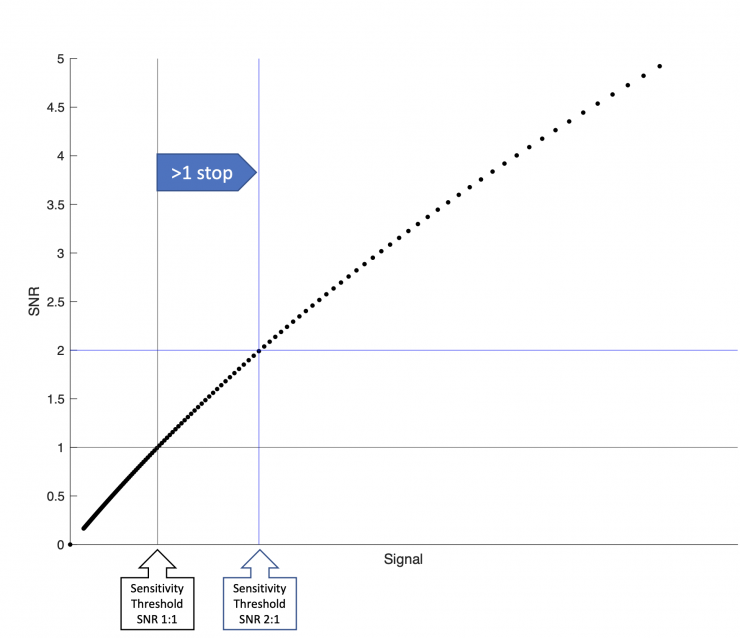
The sensitivity threshold is what engineers regard as the lower bound of the signal, however, this high relative noise level may not be acceptable for a cinematographer. Because this noise level may not be acceptable, characteristics other than the dynamic range of the photosites also need to be considered. Ultimately you don’t want the camera to show line noise in the shadows, and the shadows shouldn’t exhibit any unwanted coloration. Some people prefer to use an SNR of 2 as the lower threshold when measuring the dynamic range, however, that yields a value that is at least 1 stop lower than the one reported for an SNR of 1. The relation between signal and SNR isn’t linear because adding more light increases the shot noise too. While all this technical analysis is fine, at the end of the day, it’s ultimately the responsibility of the cinematographer to determine the minimum exposure needed to produce the image quality you want.
Now, having used this camera for a while now I can tell you that I have never seen or used another camera that comes anywhere near what the ALEXA 35 is capable of when it comes to dynamic range. The sensor in this camera is simply phenomenal. I have used the AMIRA and other ARRI cameras that have the ALEV-III sensor for years, and the new ALEV-IV sensor makes a big difference to what I am now able to get away with when working in difficult high dynamic range environments.
The new sensor in the ALEXA 35 has 1.5 stops more in the highlights while still retaining that renowned ARRI highlight roll-off. Additionally, you also get 1 more stop in the shadows as well. All of this while still maintaining a base sensitivity of EI 800.
At every EI value, you are getting 17 stops (except at EI 6400, where you lose one stop in the highlights). The only difference is where those stops are getting allocated depending on what EI value you are using. Neither varying the exposure nor the exposure index changes the dynamic range of the sensor.
In the ALEXA 35, an encoding limit in LogC4 is reached when the EI is above 3200. When the maximum value of the LogC4 function becomes greater than 1, it can’t be encoded in a 12 or 16-bit integer number. This means that no tonal value higher than 11 1/3 stops above mid-gray can
be encoded. ARRI regards this limitation as acceptable because the advantage of being able to select a high exposure index outweighs the possible disadvantage of clipping highlights more than 11 stops above mid-gray.
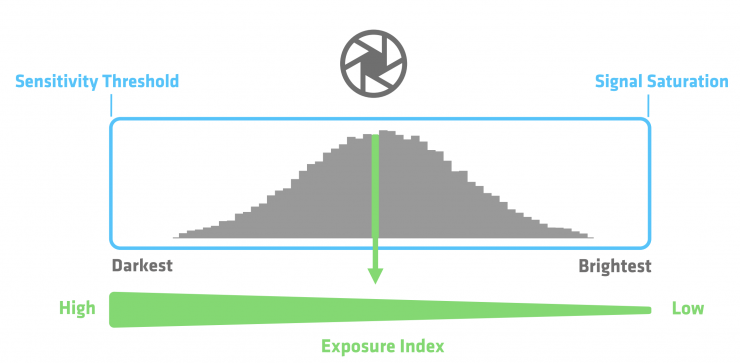
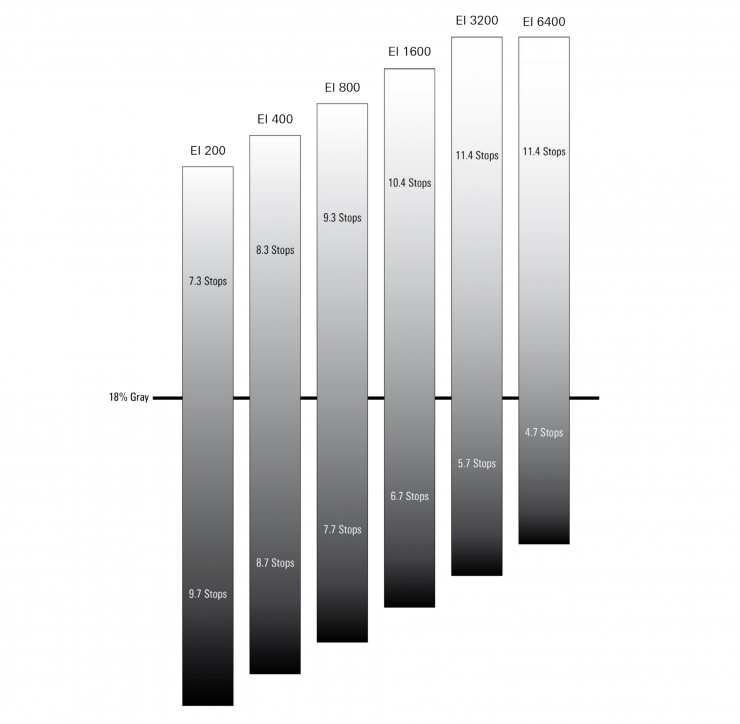
In the above diagram, the width of the histogram symbolizes the contrast ratio of the scene. The left end represents the darkest part of the scene, and the right end represents the brightest part. For simplicity, middle gray is shown as the center of the scene contrast range by a vertical green line, even while the tonal range in a scene may not be symmetrically distributed.
The blue rectangle represents the dynamic range of the sensor, which is constant. Exposure can be controlled by the aperture, ND filter, and shutter. The combined effect of all three of these parameters is represented by the aperture symbol shown on top of the blue rectangle. The exposure changes the mapping of the tonal values in the scene to the sensor signal. The exposure index selects which sensor signal becomes middle gray in the Log C image and consequently in the monitor image. The exposure index matching the exposure is shown by the arrow that extends the middle gray line in the histogram. The value of the exposure index is inversely proportional to the exposure.

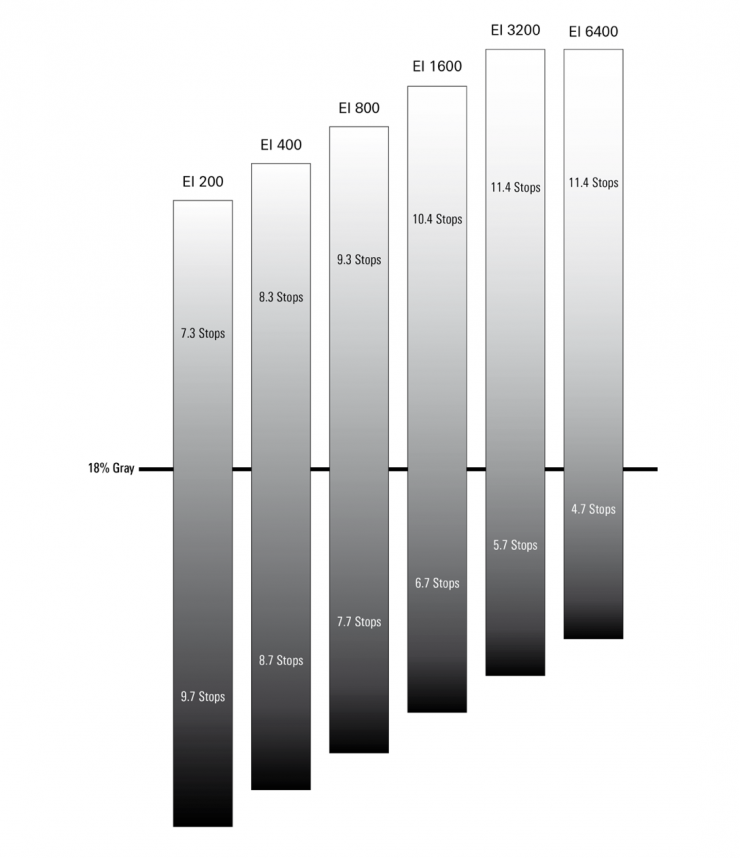
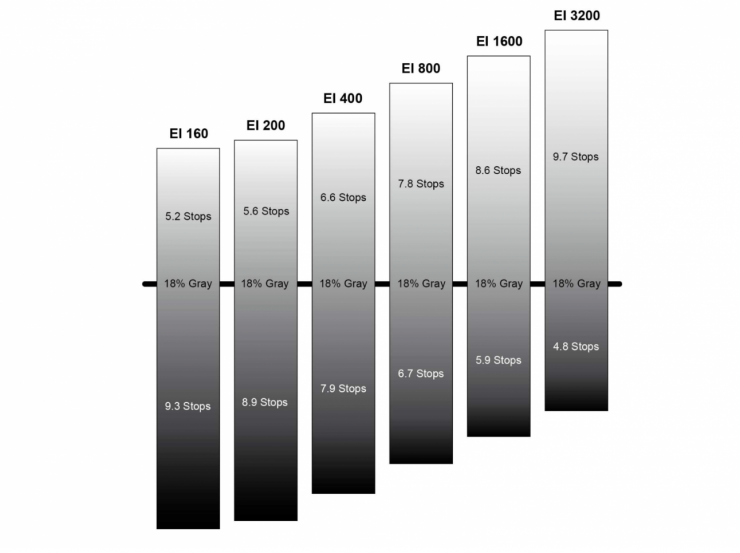
Above you can see the differences between how many stops you get above and below middle grey when comparing existing ARRI cameras that utilize the ALEV-3 sensor and the ALEXA 35 that uses the ALEV-4 sensor.
The fact that you can still get 7.3 stops above middle grey when shooting at EI 200 is astounding. If you use EI 3200 or 6400 you are getting a whopping 11.4 stops above middle grey. That’s more stops than some cameras have in total. With the Alexa 35 at EI 250, you get more stops above middle grey than the Alexa Mini LF has at EI 800. That is hard to wrap your head around.
As a comparison, above you can see the stop distribution above and below middle grey for the ALEV-III sensor
So what does having 17 stops really mean in the real world? Well, not only do you end up with a camera that can handle just about any lighting conditions you can throw at it, but it gives you so much flexibility and room in post for manipulating and stretching your image. In conditions where you may have previously had to ND windows, there will be situations where you won’t need to do that anymore. If you are working on HDR projects this is a camera you will want to use.
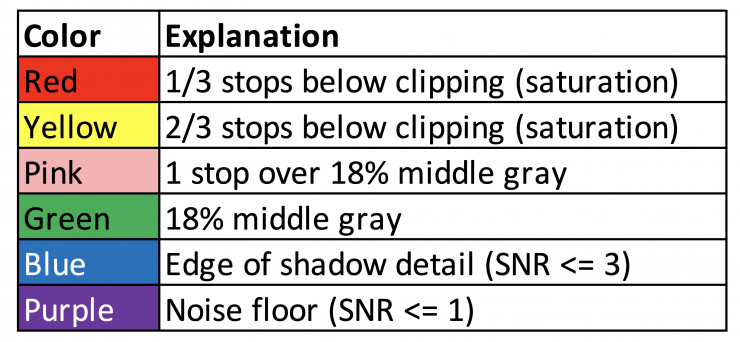
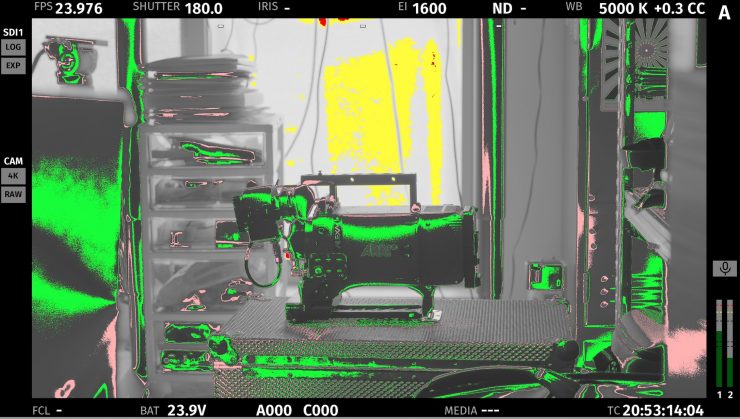
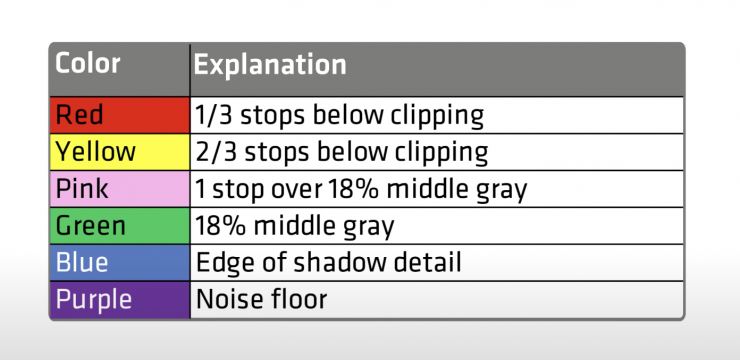
ARRI’s false color tool is a very good way to help users find the optimal exposure. The way it works is that a Log C image is converted into a grayscale image and certain signal regions are indicated in color. The first purple zone shows where the signal has an SNR of 1 or lower.
When a gray card is used (or another object in the scene with a similar reflectance level), the exposure can be set such that the card is in the green zone. At the same time, the purple and red zones will indicate when the limits of the sensor are exceeded. There is a subtle difference between the purple and red zones. I use false colors all the time to determine optimum exposure. Not only are false colors a good way of seeing what is being clipped and where middle grey should fall, but they are also very helpful in seeing how much contrast you have in your scene.
In the past, you really needed to help out digital sensors by adding more light to help match bright backgrounds, but with the ALEXA 35, we have arguably reached a point where the highlight handling is so good that we have now far exceeded that of film.
I wouldn’t be the only one to say this, but the ALEXA 35 has so much dynamic range that you can almost shoot what your eye sees. You can match bright backgrounds without having to worry about hard clipping and you can shoot in situations and environments that were previously very tricky to attempt without large lighting setups.
I have shot projects with the ALEXA 35 in conditions that I wouldn’t have been able to with other cameras unless I used a lot more lighting. This ability alone saves you a ton of time and it lets you shoot wider shots where it may have been very difficult to hide lights.
It was very evident from the first time I turned the camera on that the amount of highlight retention is far better than any camera I have ever used or seen, and that includes the Mini LF (by some considerable margin). I could see details in the highlights that I couldn’t see with other cameras. The usable latitude that the camera has is extremely impressive and it raises the bar for what every other digital sensor needs to be compared to.

ARRI ALEXA 35 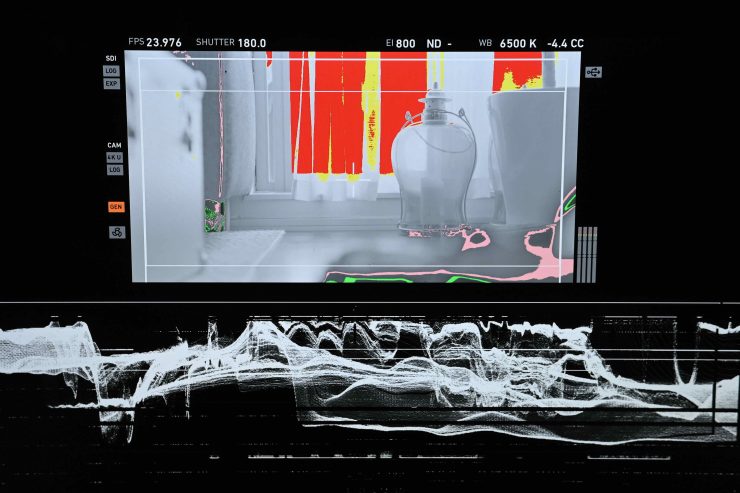
ARRI AMIRA 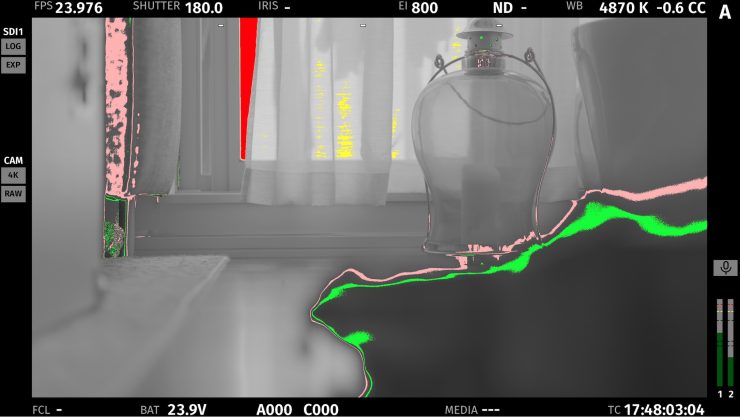
ARRI ALEXA 35 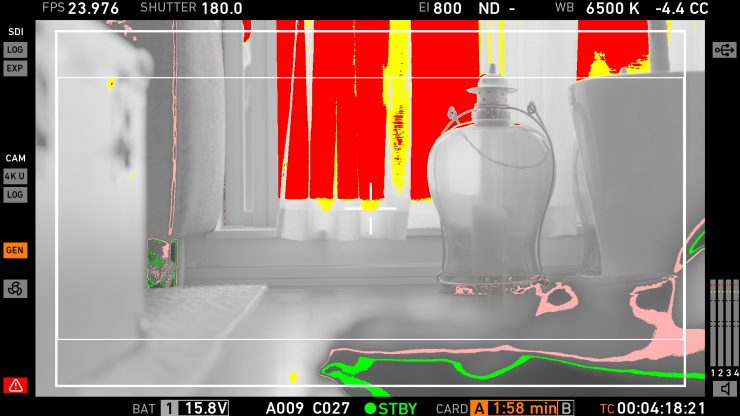
ARRI AMIRA
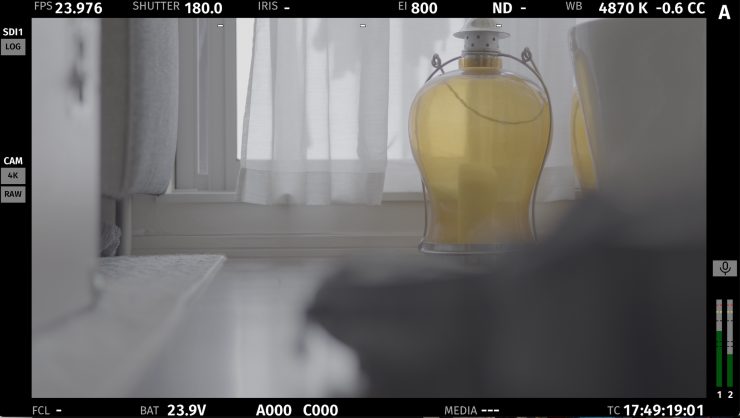
You don’t need to shoot dynamic range test charts to see the difference, you can clearly see it with your own eyes. Above you can see comparison images between the ALEXA 35 and the AMIRA. Both cameras were set at EI 800 and the exact same lens and T-stop were used. I set the ALEXA 35 to a point where clipping just started to appear in the absolute brightest part of the scene. False color for both cameras is being sent out over their respective SDI outputs. These may be crude examples but light but they were done so that you can clearly see the difference between the new sensor and the old sensor when it comes to highlight handling.
I did this test and my jaw dropped to the floor. The amount of highlight retention the ALEXA 35 has is ridiculous. It is so hard to clip highlights unless you are literaly shooting the sun or a very, very bright direct light source.
ARRI ALEXA 35 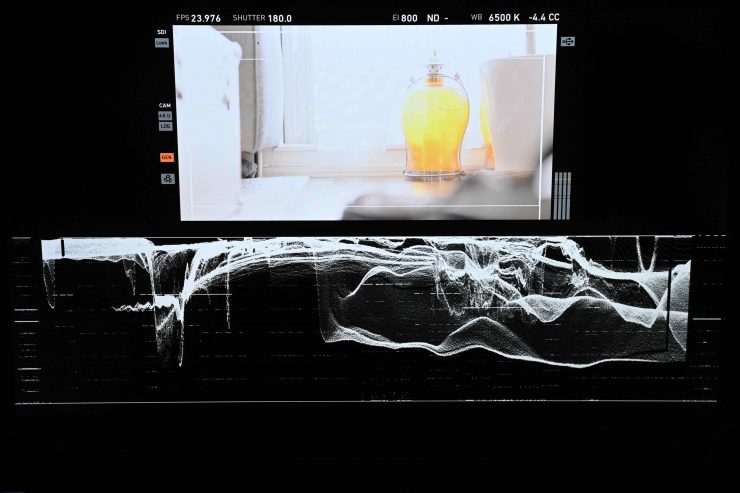
ARRI AMIRA
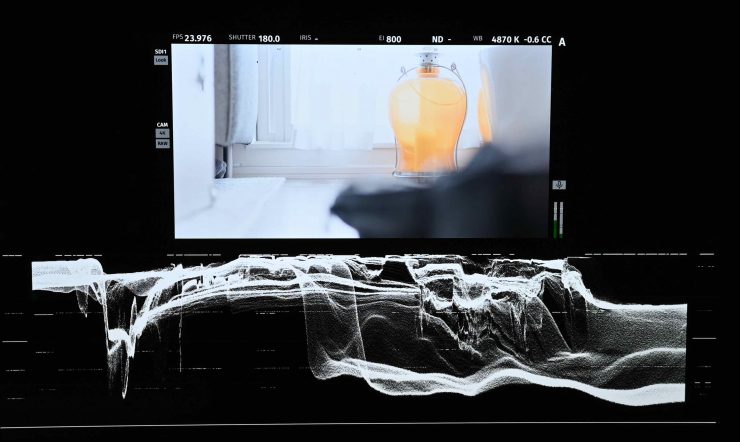
If you look at the same image from both cameras with a Look applied you can see how heavily they both appear to be clipped. However, the LogC4 image from the ALEXA 35 retains so much information, that everything is still there.
LogC4 image 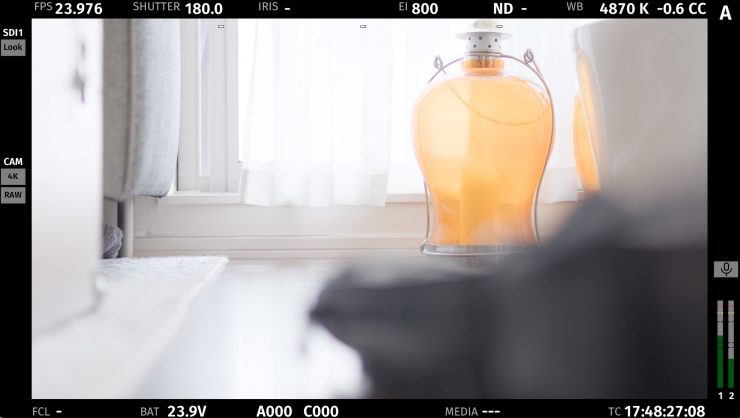
Look applied
Just as another comparison, above you can see the LogC4 image from the ALEXA 35, and the same image with a Look applied. This clearly shows you just how much latitude this camera gives you with highlight retention. You can comfortably shoot with a Look applied with the knowledge that your highlights won’t be clipped.
The nice aspect of how False Color works on the ALEXA 35 is that it is LOG based and not Look based. That means that when you activate False Color you are looking at what the camera is capturing and not a reference for the Look that has been applied. This totally makes sense to do it this way, because the camera isn’t capable of recording footage in anything other than LOG or RAW.
False color CLog4 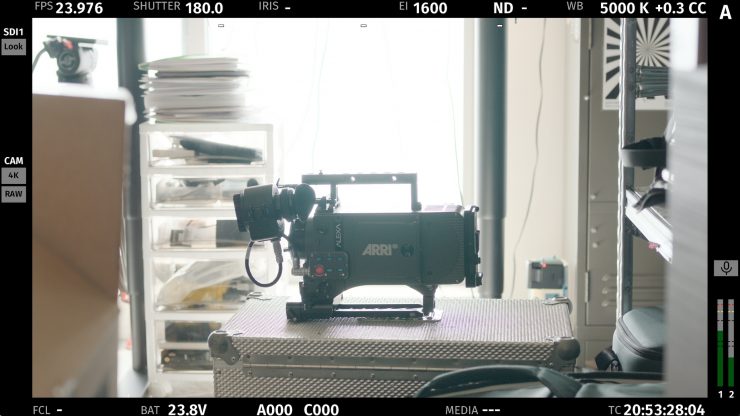
Look applied 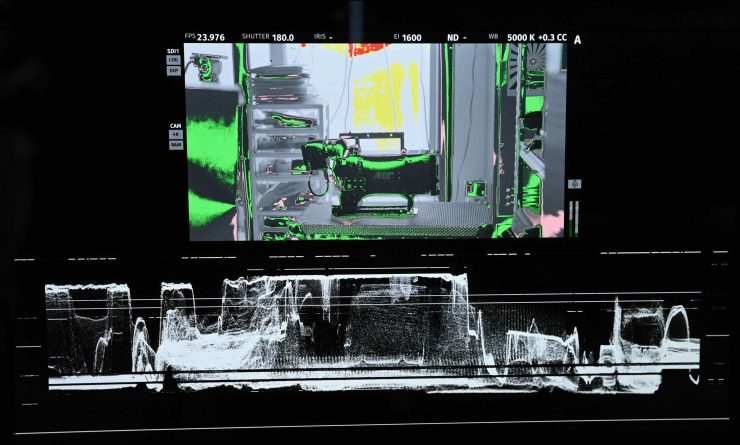
LogC4 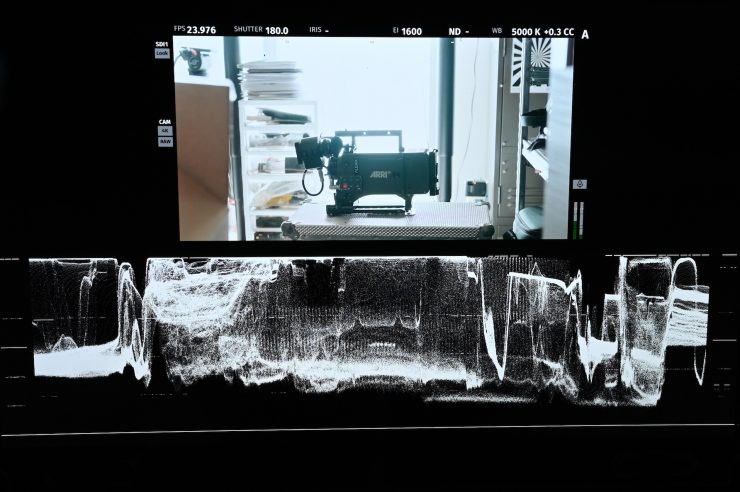
Look applied
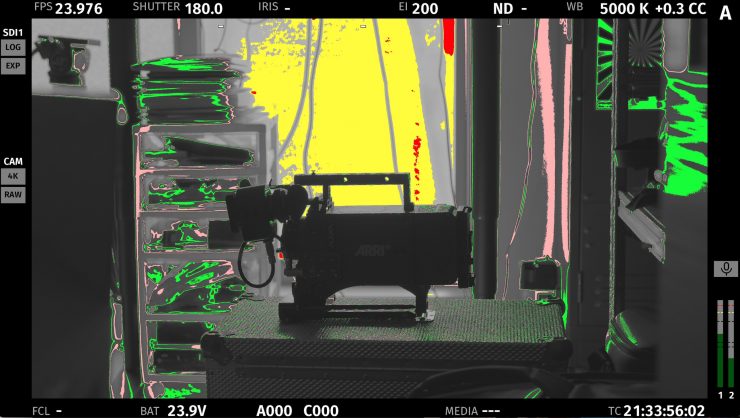
If you want to go a step further, here is the ALEXA 35 set at EI 1600, where you get 10.4 stops above middle grey. Direct sunlight is hitting the back window and there is no light on in the room.
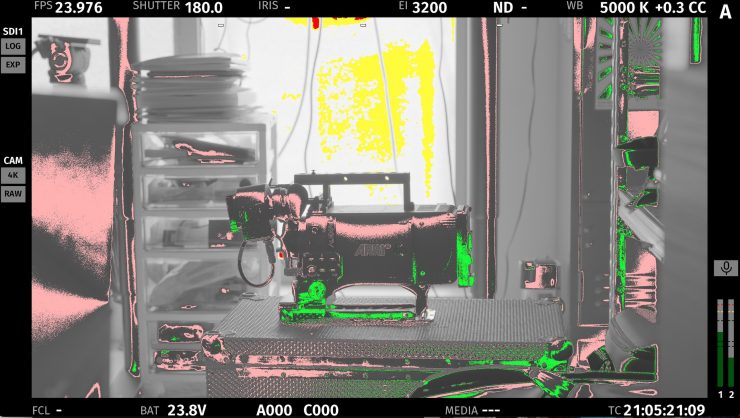
False color CLog4 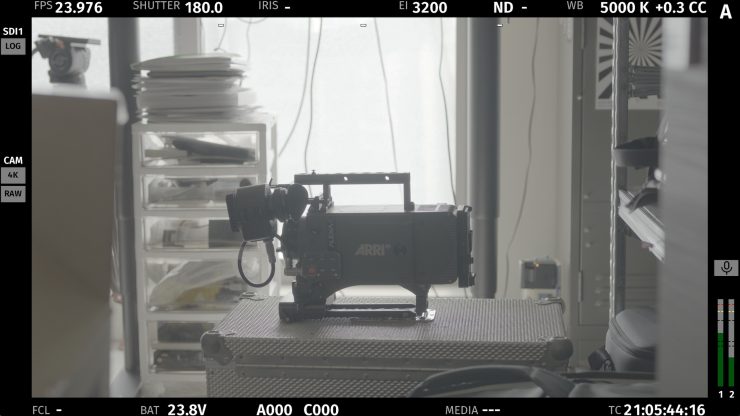
LogC4 Image 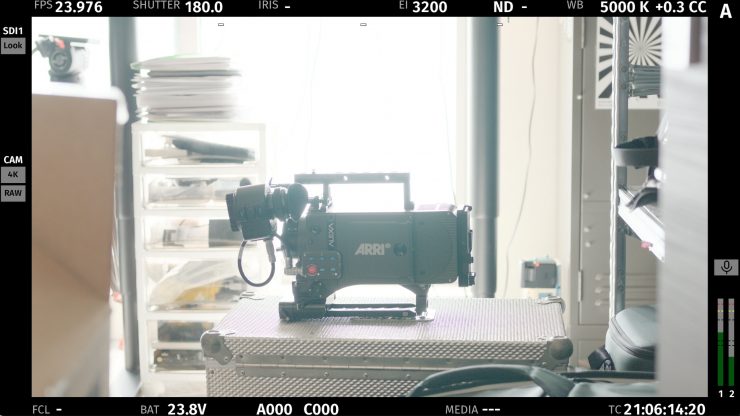
Look applied 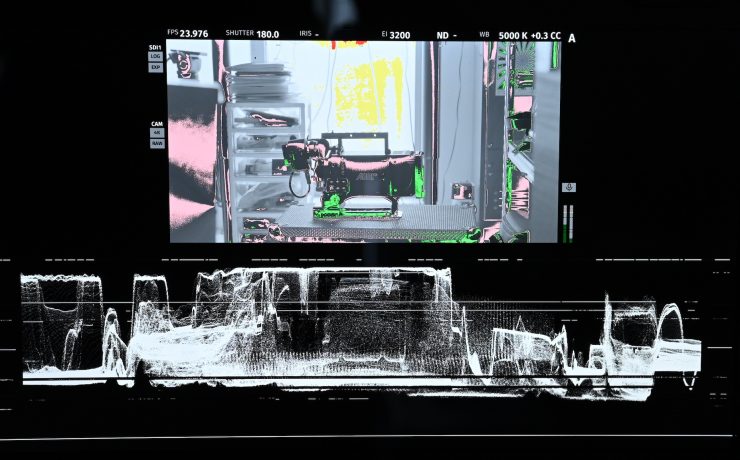
LogC4
Ok, let’s step it up one more level and have a look at EI 3200 where you get a whopping 11.4 stops above middle grey. I could almost expose correctly for middle grey on the camera that had no direct light on it while not blowing out the window behind that had direct sunlight hitting it. Again, while this is a crude example, it illustrates the point I am trying to make.
LogC4 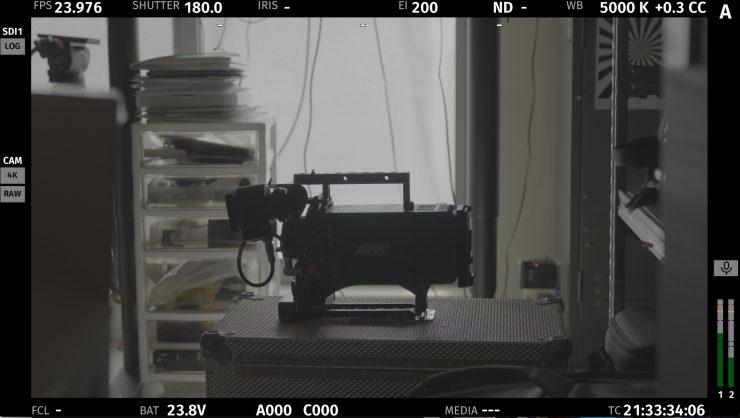
LogC4 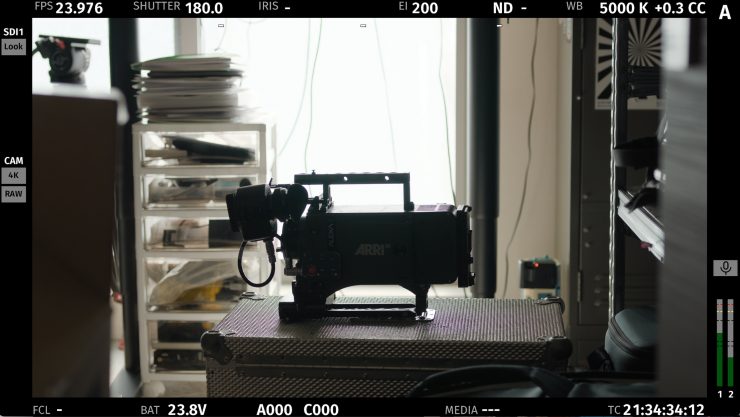
Look applied 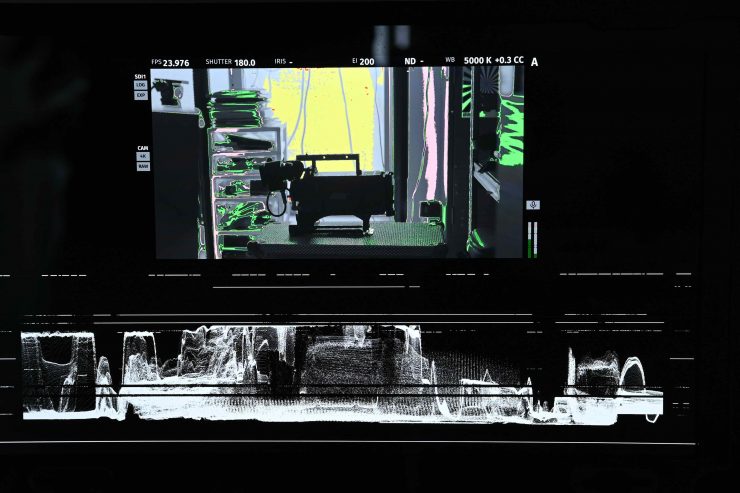
LogC4
If we go to another extreme we can look at how the camera behaves at a very low EI setting of 200. Here, you get 7.3 stops above middle grey. This is almost comical because there are a lot of cameras on the market where even if you shoot as their base ISO you won’t see 7.3 stops above middle grey.
You can recover details in very bright windows very easily. The dynamic range of the camera is so impressive.
The true test of any camera’s sensor is to do under and over exposure tests. Now, the whole purpose of doing a test like this is to see how much flexibility we have with various exposures. If you are shooting something that is 5 stops under or overexposed you have probably chosen the wrong occupation!
Tests like these have nothing to do with total dynamic range because we are testing to see the camera’s Useable Exposure Lattitude. There is a big difference between the two.
Exposure latitude testing is a tried and true method of building an understanding of an imaging system, whether it’s film or digital.
Some cinematographers have been unsure about how to interpret exposure latitude tests because so much focus in recent years has fallen on the Total Dynamic Range issue. This can be traced back to the early days of the shift to digital where cameras like the F900 had a total dynamic range of less than ten stops (7.5 out of the box for the F900) and this was an easy way to explain the superiority of film with its dynamic range of more than 14 stops.
All serious professional digital cinema cameras now have a dynamic range that is comparable if not greater than film, so the significance of this measure has been vastly reduced. However, there is still a lag, where the industry is more focused on the total dynamic range and the more useful latitude testing has often fallen by the wayside.
The world’s top cinematographers usually begin each film by doing latitude tests of their chosen imaging chain. This includes the camera, lenses, LUT and post path to see how this combination responds to different exposure levels, both corrected and uncorrected.
Doing definitive camera tests is incredibly complex and difficult but doing proper exposure latitude tests of your own chosen imaging chain for a project is one of the easiest and most useful things you can do to increase the level of control and creative freedom you have in your work as a cinematographer.

Above you can see over and under exposure tests using the ALEXA 35.

At this point in time, it is still game, set, and match ARRI. There is no other camera on the market that can recover 7 stops overexposed with no visible issues. The ALEXA 35 is playing in a league of its own.
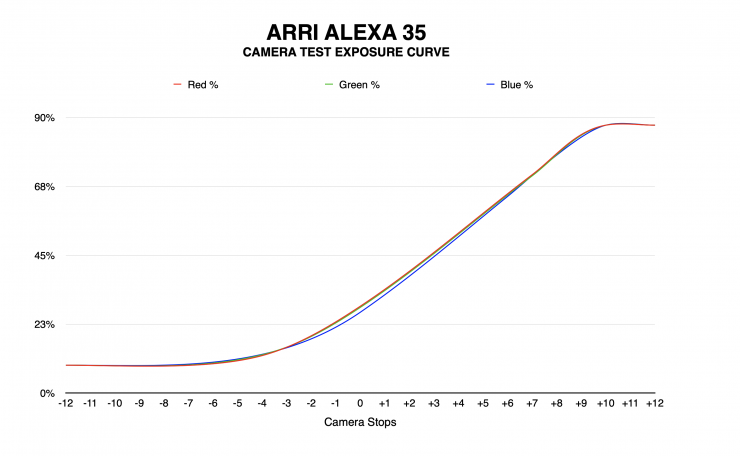
Above you can see the test exposure curve for the ALEXA 35 that was mapped based on the data from the exposure tests we conducted. The graph shows you the red green and blue channels. This is the same way Kodak measured film exposure curves. This exposure curve graph basically confirms what ARRI claims when it comes to dynamic range.
When shooting high dynamic range scenes or scenes where you need to protect your highlights, the ALEXA 35 provides a large safety net. Calling it a safety net is probably an understatement, it is more like having a parachute.
The actual physical size of the sensor used in the ALEXA 35 is fairly comparable to that of the ALEXA Mini. It is a 4.6K (4608 x 3164) 3:2 sensor and it has physical dimensions of 27.99 x 19.22mm.
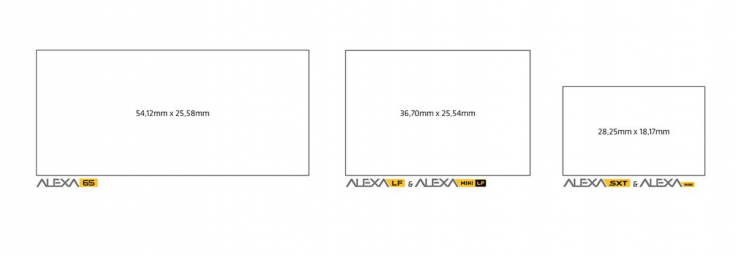
Above you can see the comparative sensor sizes of the ALEXA 65, ALEXA LF and Mini LF, as well as the ALEXA SXT and ALEXA Mini.
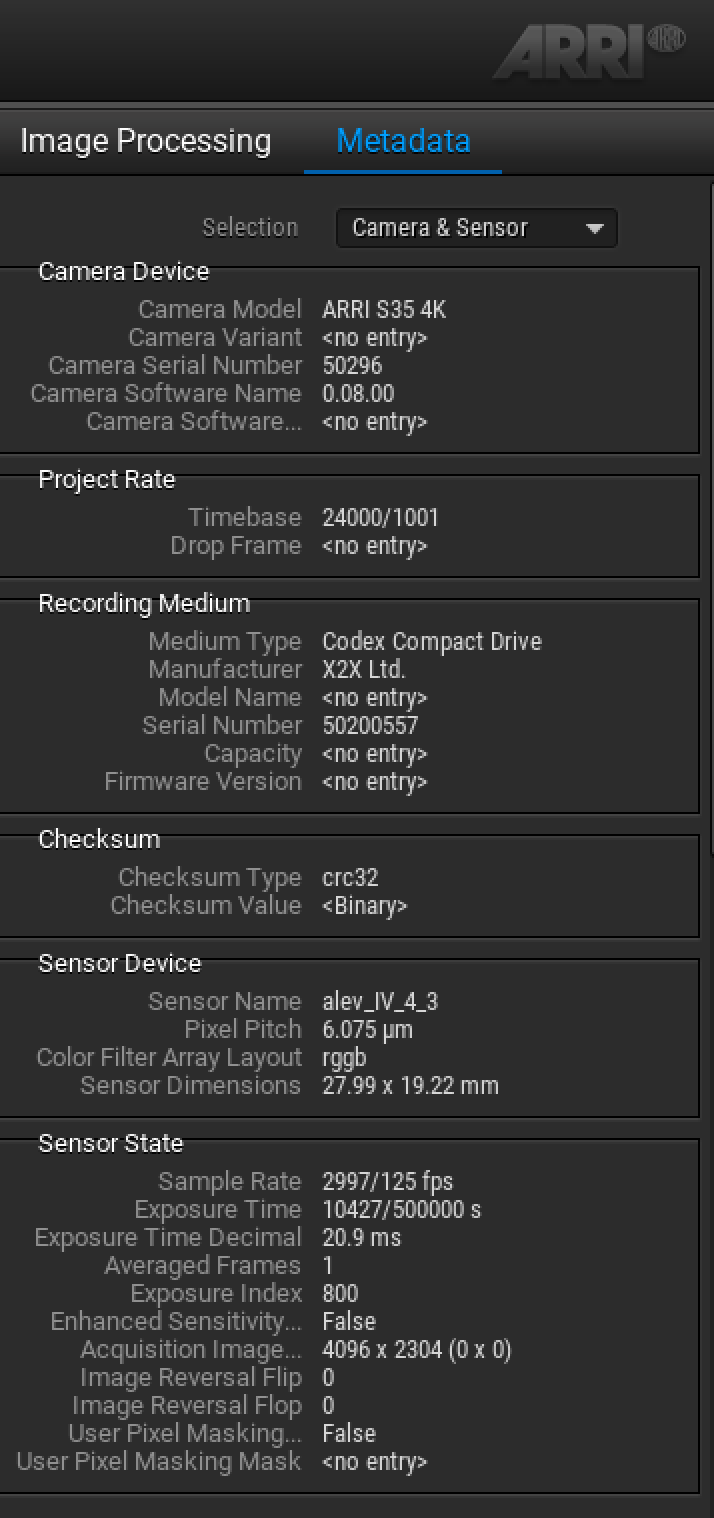
The ALEV-IV 4:3 sensor has a pixel pitch of 6.075 μm.
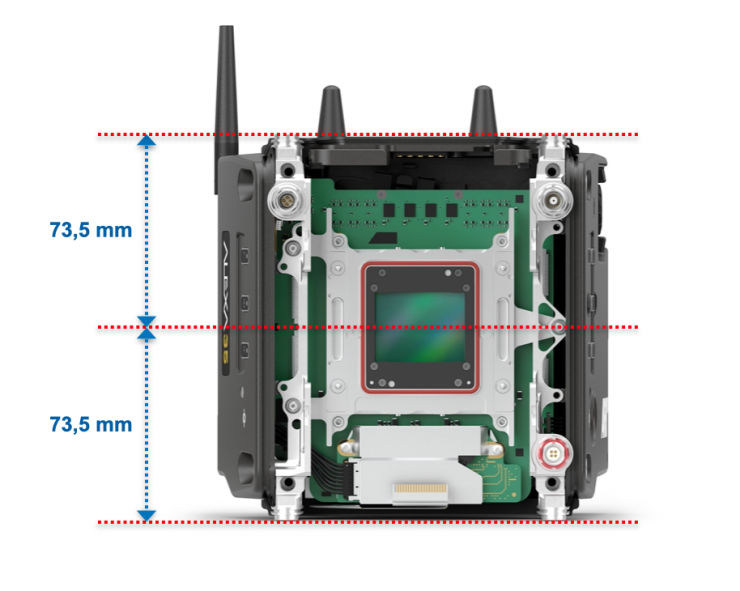
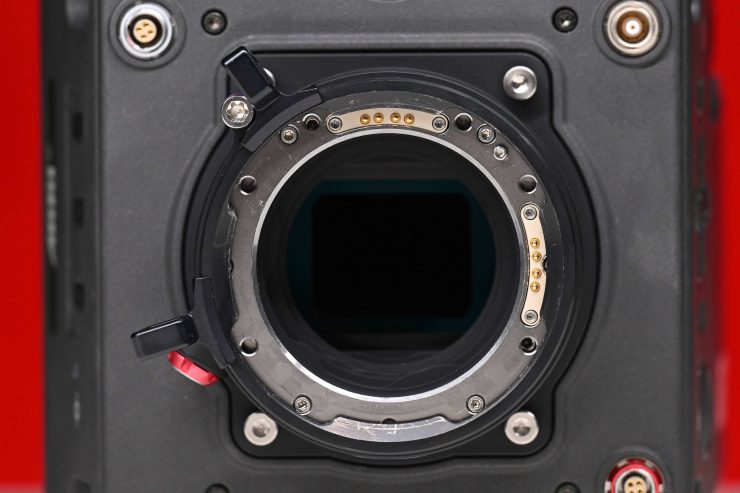
ARRI has also made sure that the sensor has been optimally centered in the camera body. This allows you to flip the camera upside down and get the exact same result.
ARRI is also utilizing a special calibration that is applied to the sensor during manufacturing. This allows them to make sure that the images from every sensor in every ALEXA 35 look identical. The servicing department can also access this calibration if need be.
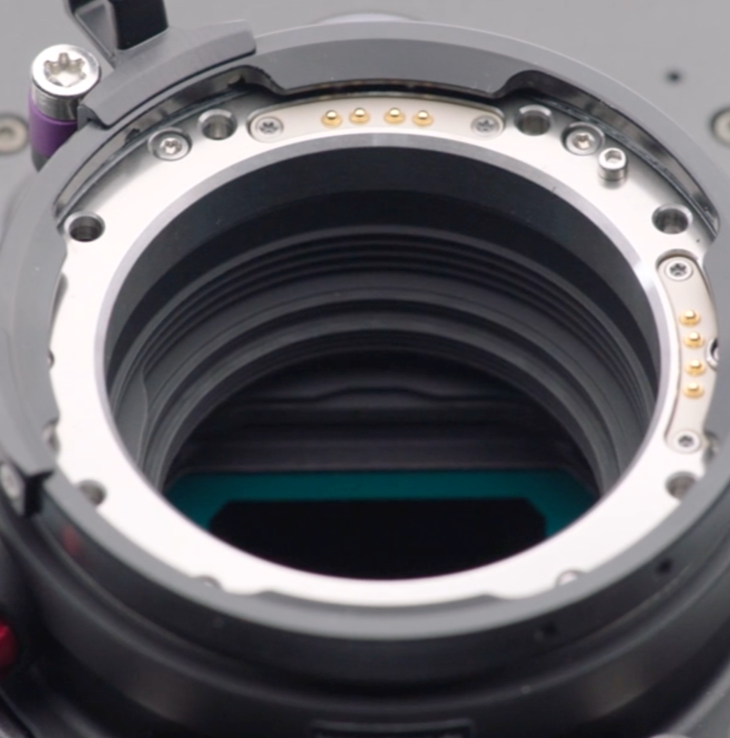
The front of the sensor board also features ARRI’s motorized FSND filters.
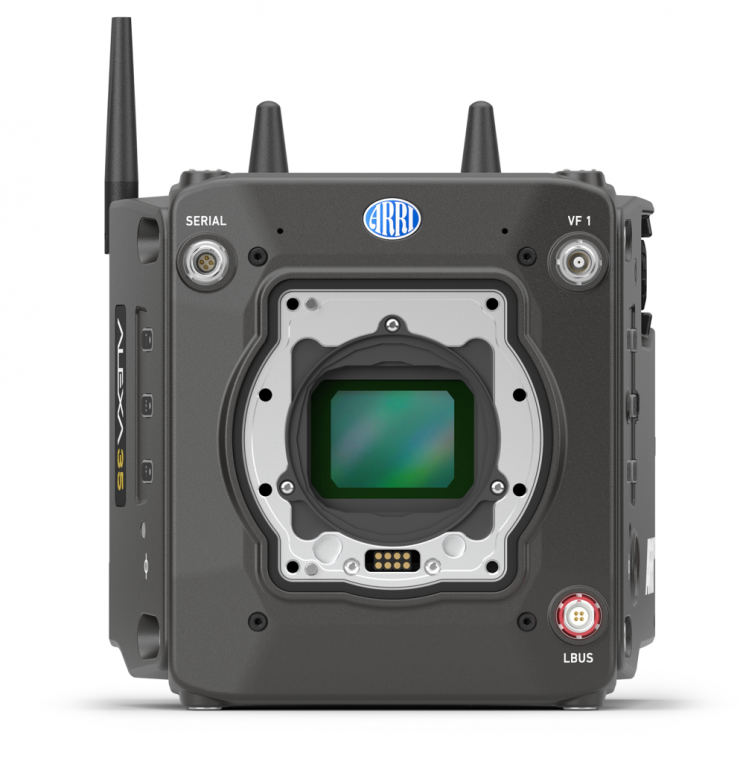
The ALEXA 35 can read lens metadata and it supports ARRI LDS-1, ARRI LDS-2, Cooke /i, Canon EF mount and ENG (Hirose connector).
What I found interesting is that if I was using a Fujinon XK zoom, I needed to rotate the PL to LPL adapter to get the proper communication pins lined up. This is something that is mentioned in the manual if you dig deep enough, but I just thought I would mention it in case anyone couldn’t work out why they weren’t getting zoom control on an XK lens.
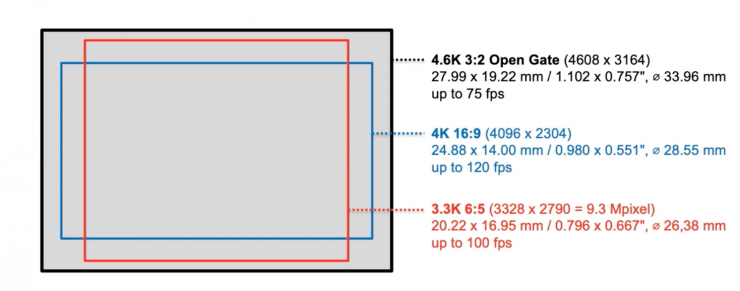
The new sensor in the ALEXA 35 allows you to record in quite a few different frame sizes depending on your needs. This allows you to meet all of the 4K mandates imposed by certain streaming services. Now, you may be thinking, hold on, how does a 3.3K 6:5 recording mode meet 4K streaming requirements? Well, I am glad you asked. The minimum 4K mandate for using 2x anamorphic lenses is 4K UHD, which is 3840 x 2160 pixels (8.29 MP). It is not the resolution or aspect ratio that matters, but the number of megapixels that dictates the requirement. When shooting 3.3K 6:5 on the ALEXA 35 you are actually capturing 9.3 MP.

Some other streaming services actually require more than 8.29 MP when shooting 2x anamorphic so what has ARRI done to meet these requirements? Well, you can also shoot in 4.6K 3:2 Open Gate and use custom 3.8K 6:5 frame lines to get a 3796 x 3164 12MP image to meet those requirements.
As it is a Super 35-sized sensor DPs have the ability to use both S35 and LF lenses on the camera. This allows for a lot of creative freedom and if you already own existing S35 lenses you can use them on this camera. That is great for anyone who has an ALEXA Mini and is thinking of upgrading to the ALEXA 35.
In a lot of ways, the original ALEXA and its sensor were a make-or-break moment for ARRI. If they hadn’t gotten it right, who knows where they would be today. I don’t think you would be able to find any modern-day camera that is utilizing the same sensor or variation of that sensor 10 years later. This was a big part of what made the ALEXA family of cameras so successful. This new sensor looks to continue that strong legacy that was forged more than a decade ago.
This is just the third camera (if you don’t count the rental only ALEXA 65) that ARRI has released with a sensor that is capable of recording 4K images without the need for upscaling.
More Contrast
The unexpected issue that ARRI ran into is that because the sensor in the ALEXA 35 is capable of so many stops of dynamic range they found that there was so much light bouncing around inside the camera and lens mount that it was affecting contrast. This led to the shadows and dark areas in the image looking milky. The veiling light that bounces around and makes the blacks milky actually takes away from the dynamic range. You ideally want rich deep blacks and not milky blacks.
What ARRI needed to do is to find a way of suppressing this stray light and this was a project that took more than a year to solve. Most light-suppressing coatings are not very robust and they rub off easily. This means that they weren’t suitable for use in a lens mount. After a lot of trial and error, ARRI eventually came up with a very sophisticated stray light suppression technology that involved using a very expensive coating in combination with special ridges and light masks that are placed inside of the camera cavity.
What this ultimately achieves is that it lets the camera accurately capture the full contrast range and character of each lens while also providing deep and rich blacks. The other benefit of reducing this stray light is that now you can more clearly see the difference between lenses. This allows you to see a much more accurate representation of what the lens is actually capturing. This means that the camera isn’t going to alter the characteristics of the lens that you are using. For cinematographers, this is a big deal.
After trying this out with the camera I certainly did notice more contrast and richer blacks than what I usually see on my AMIRA. One of the downsides of the camera is that I personally feel that it isn’t as forgiving with optics as other cameras. I found that I could see chromatic aberration and other imperfections when using certain lenses with the ALEXA 35 that weren’t as evident when using other platforms.
This stray light suppression in camera will help any lens and lens mount combination, however, for the absolute best contrast ARRI recommends using their own stray light optimized lens mounts:
- Existing ARRI LPL Mount (LBUS)
- Existing ARRI PL-to-LPL Adapter
- Existing ARRI EF Mount (LBUS)
- New ARRI PL Mount (LBUS)
- New ARRI PL Mount (Hirose)
All of the above lens mounts have been optimized using these new stray light suppression techniques.
All the existing lens mounts that work on the ALEXA Mini, Mini LF, and AMIRA will fit on the ALEXA 35, however, they are not going to offer the same light suppression capabilities.
More Sensitivity & Less Noise
ARRI is actually calling the ALEXA 35 a ‘High ISO’ camera. Not only does it have less image noise than any previous ARRI camera, but you can also now set the exposure index up to EI 6400. Previously the maximum EI available on any ARRI camera was EI 3200. Calling the ALEXA 35 a ‘High ISO’ camera is probably bound to draw a few giggles from some of our readers as 6400 isn’t exactly high in 2023. I personally think calling it a ‘High ISO’ camera might be a bit of a stretch, especially when you compare it to some other digital cinema cameras on the market. However, for ARRI users, the ability to now be able to double the amount of ISO you can use is a big deal.
EI settings on the ALEXA 35 range from EI 160 to EI 6400.

ARRI has also added a secondary EI setting called Enhanced Sensitivity Mode. Essentially this is a mode where more noise reduction is applied. This mode is available from EI 2560 to EI 6400 and it is denoted by the EI value having the letters ES after it. ARRI hasn’t made the Enhanced Sensitivity Mode for lower EI values because at settings under EI 2560 it didn’t make a big difference
These Enhanced Sensitivity Mode settings are available in the same place where you find the regular EI values.
What is important to know, is that anytime you shoot in the Enhanced Sensitivity Mode, the noise reduction is getting baked into both ARRIRAW and ProRes files.
So how does the Enhanced Sensitivity Mode actually work and what is it doing? Well, I am glad you asked. If, for example, you are shooting at 24fps and 180° shutter angle, half the time the camera is capturing an image, and half the time it isn’t. So what ARRI has done is utilize that time when the camera isn’t capturing an image to have the camera capture a second image. They are then just taking the noise reduction that is being applied to that second image and combining it with the noise from the first image to reduce the noise of the image that is actually being recorded. The second frame is then thrown away because there is no need to process it. This may all sound complicated, but it is actually a very smart way of applying noise reduction without affecting the image in an overly negative way. There is a lot of processing power required to do this in real time.
The issue with noise reduction is if you just have one frame, the algorithm that is being used can have a hard time trying to differentiate between fine image detail and noise. Because noise is random, the moment you have two frames, it becomes a lot easier to distinguish between noise and fine image detail. Essentially the algorithm has double the amount of information to work with so it makes its job easier.
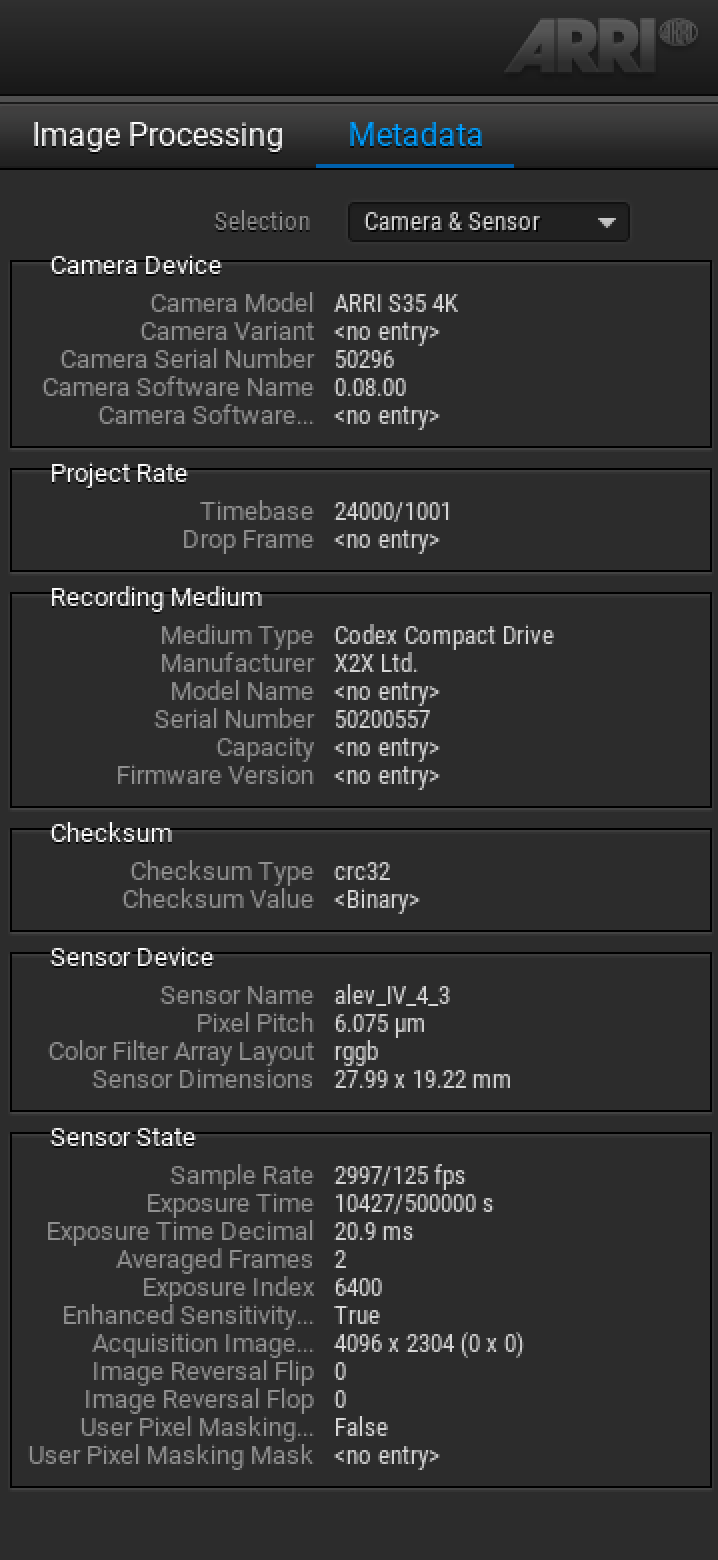
Above you can see from the camera metadata that the averaged frames are listed as 2 instead of 1 when using the Enhanced Sensitivity Mode. This does not mean that the image data of the two frames are being merged, but rather just the image noise. The motion blur is not affected in this process.
Now, there are some caveats when using the Enhanced Sensitivity Mode because there’s no such thing as a free lunch. Because this is a form of temporal noise reduction it is possible to see some faint ghost trails with fast movements or if a really large flash goes off. It can take a couple of frames after a big change happens in certain images for the noise reduction to react. ARRI is being very upfront about this because they want customers to be very aware of these potential issues.
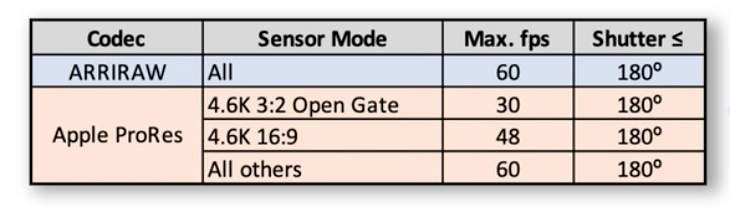
There are also limitations when it comes to frame rates because the camera is having to run at twice the nominal framerate. Above you can see that the maximum frames per second when using a 180° shutter angle drops to 60fps when shooting ARRIRAW, 30fps when shooting 4.6K 3:2 Open Gate ProRes, 48fps when shooting 4.6K 16:9, and 60fps in all other ProRes recording modes.
You also need to be aware that the shutter angle needs to be 180° or less for the Enhanced Sensitivity Mode to work.
The ES works well and for the first time ever when using an ARRI camera I was comfortable shooting at higher ISO levels above 2500. From my experience, I would say that the ALEXA 35 noise and EI 1600 is similar to the noise you get at 800 EI when using other ALEXAs. The noise is well-controlled and it’s not ugly noise that you so often see from some digital cameras.
The only small issue I have with the ALEXA 35 when it comes to the EI is that you can’t change it once you hit record. This is something you can do with the ALEXA Mini, Mini LF, and Amira.
Major Overhaul of ARRI Color Science
Having extra dynamic range, better contrast and better noise suppression are only parts of the puzzle. Image processing is the next big step and this ultimately goes a long way toward determining what your images will look like. The sensor is just one piece of the puzzle. and you can’t complete a puzzle if you don’t have all of the pieces.

Over the last few years, ARRI color scientists have looked closely at the processing and spent a lot of time talking to DPs, colorists, and post supervisors to get a better picture of what could be improved.
This led to the creation of what ARRI calls the Reveal Color Science. Yes, this is just a marketing term, but what it actually does is a very important step in the overall creation of the image.
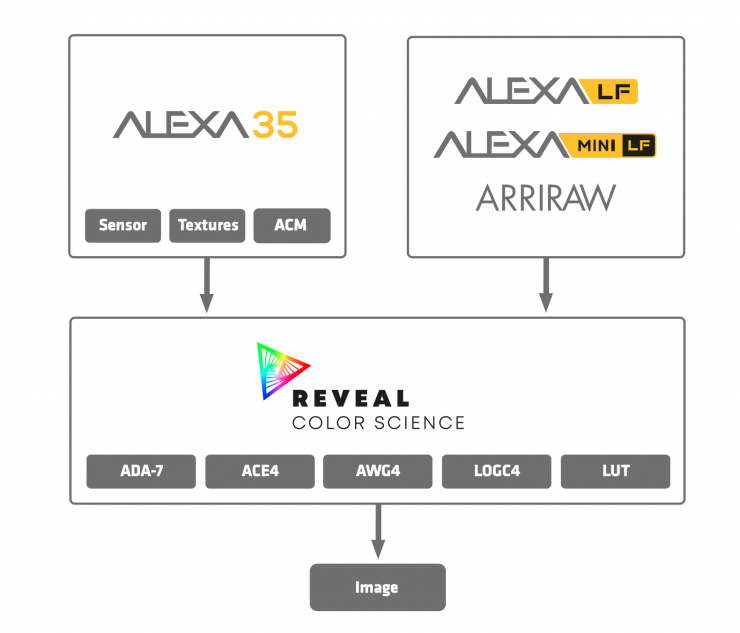
So what is the Reveal Color Science and what does it do? The Reveal Color Science happens in the camera. ARRIRAW goes through the Reveal Color Science pipeline and then the ProRes recordings are created and the various outputs can be displayed in the viewfinder, SDI outputs, and frame grabs. Now, if you shoot ARRIRAW, you will be seeing images processed with Reveal Color Science on your monitor, but the heavy lifting is done later on. You can then utilize the new ARRI Reference Tool (ART) software or programs like DaVinci Resolve, FilmLight, Colorfront, etc. to process your images with Reveal.
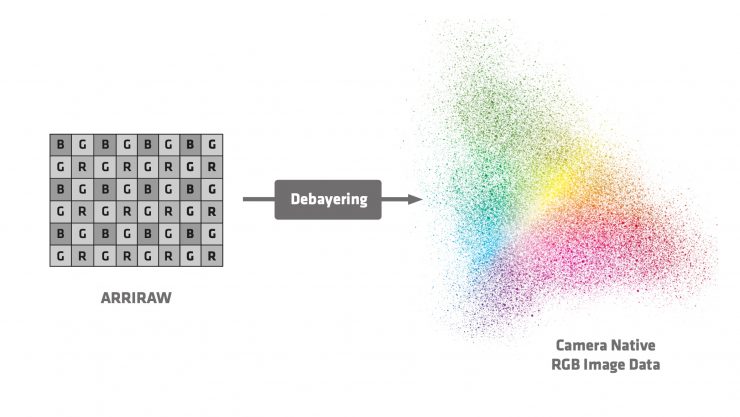
So what exactly is it? Well, Reveal Color Science consists of quite a few different processes. The first is a new ARRI Debayer algorithm called ADA-7 which converts ARRIRAW into camera native RGB image data. ADA-7 is a much more powerful algorithm than ARRI has used before and this is only possible because of the increased processing power in the ALEXA 35. ADA-7 now provides cleaner images and cleaner edges when working with green or blue screens.
When the ARRIRAW is Debayered into RGB image data it is literally just a cloud of points of color values that represent what parts of the spectrum the sensor is sensitive to. You can’t do anything with this information, yet, because this is just the first step. So what comes next?
Well, now that you have this representation of what the sensor is seeing, you need to do something with it, and that means converting it into a color space. Ideally, you want to put it into a color space that is a good representation of what the human eye sees.
With this in mind, ARRI has come up with what they call ARRI Color Engine ACE4. This is not a traditional matrix and what that means is that it is able to more accurately recreate nuanced colors. It also allows for better skin tone reproduction and better chroma tracking across different exposure levels. If you underexpose or overexpose your image, once you correct that footage the colors remain true without skewing and changing. This is where other cameras fall over.
The ARRI Color Engine ACE4 also helps with creating more deeply saturated colors when shooting objects like neon signs, brake lights, or anything else that has very strong colors. Usually, these are the type of things that never quite look right when you are shooting with a digital camera. All of these processes make a huge difference in the real world, however, nobody ever talks about them in clickbait videos on YouTube where someone compares an iPhone with an ALEXA.
The other benefit of the new color engine is if you are filming in low key scenes such as overcast days you can get better colors and better color differentiation. This is very evident when using the camera. Saturated colors still stay nice and saturated regardless of the conditions you are shooting in. Even in mixed lighting conditions, you get accurate color rendition without things starting to look wrong.
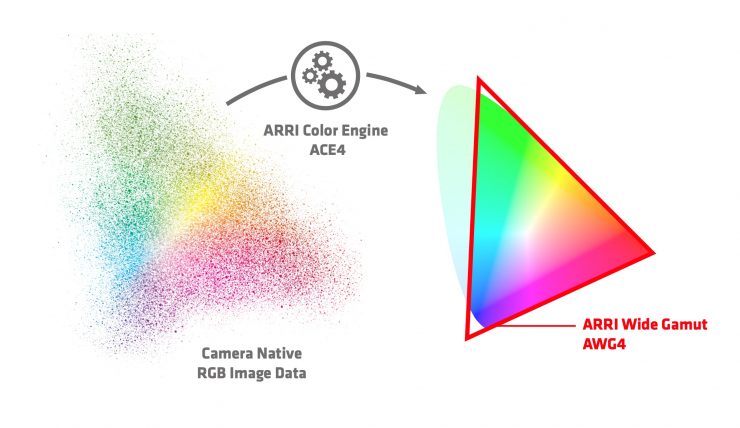
So how does this new color engine work? Well, the RGB image data is placed in a new color space called ARRI Wide Gamut AWG4. If you are not familiar with what a color space is, it is a method for writing down colors as numbers in order to store, process, and display images. There are two different types of color spaces, scene-referred color spaces, and display-referred color spaces. Display referred color spaces you may be familiar with are Rec.709, P3, and Rec.2020. Scene-referred color spaces are not limited by display technologies and they are optimal for capturing more color information. Scene-referred color spaces are spaces like ARRI Wide Gamut and ACES.
You would think that the bigger the scene-referred color space, the better, but this is not the case. The trouble with scene-referred color spaces is that they contain ‘virtual’ colors that are outside of the human spectrum and we can’t actually see them. The other problem with ‘virtual’ colors is that they can result in negative values and some post-production programs see these negative values and then just place them at a value of zero which results in gamut clipping. This is why capturing ‘virtual’ colors is not ideal. Bigger isn’t always better.
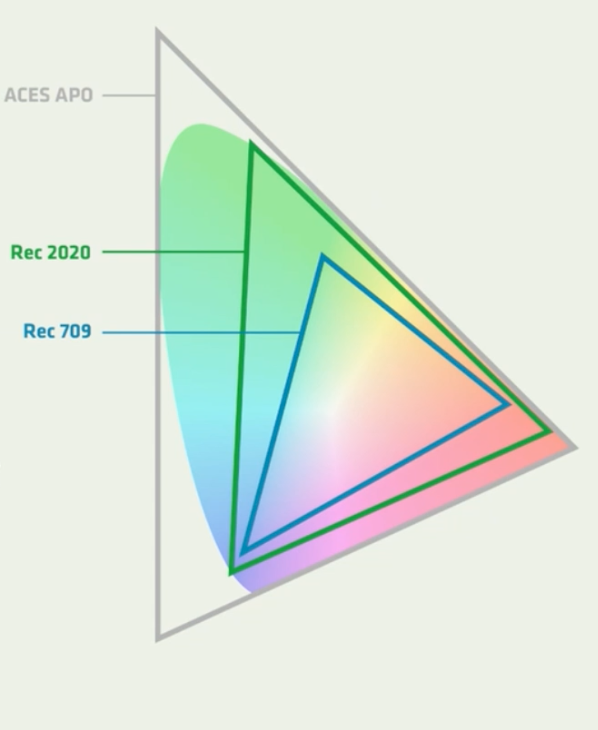
Above is the spectrum of colors we can see (the horseshoe shape) and how that compares to color spaces like ACES, Rec.2020, and Rec.709.
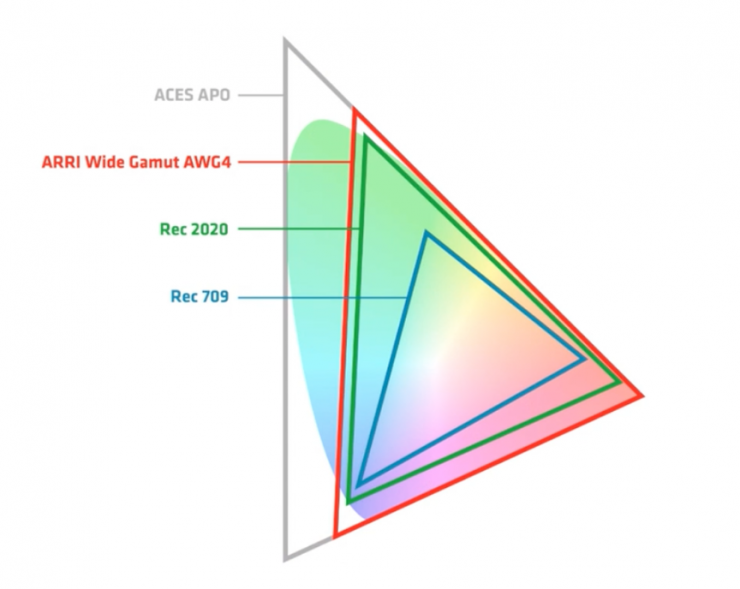
Now, if we look at ARRI Wide Gamut AWG4 you can see that it is slightly larger than Rec.2020, but not too large that it introduces too many ‘virtual’ colors that can’t be seen by the human eye. One of the main reasons you don’t want to capture too much extra blue/green color information that the human eye can see is that it makes it harder for a colorist to grade footage. Eyes are not cameras and cameras are not eyes. What they both see is different and it is a fine balancing act to get a good compromise that works well for both.
ARRI Wide Gamut AWG4 is fully enclosed and compatible with ACES. ALEXA Wide Gamut, used on all previous ALEXA cameras, was not fully enclosed by ACES and required extra processing steps to prevent strange color processing.
The camera captures really accurate colors straight out of the box. I found that in a lot of cases all I had to do it to apply the Rec 709-D65 LUT to get a great-looking base image. I use the term ‘Base Image’ because that is essentially all a default LUT is supposed to be. It is designed to get you in the ballpark and then you create your look from there. We shouldn’t confuse accurate with the film look, because they are not the same thing. A filmic look isn’t really a naturalistic or accurate look and that is why so many people like it. The ALEXA 35 was designed so that the colors and image were more neutral than they were on previous ALEXA cameras. On previous ALEXA cameras, the default look (color science) was designed to be more filmic and not so neutral. This is the look we all know and love and have been accustomed to seeing for so many years. I think this is the reason that when people first see ALEXA 35 material that just has a standard LUT applied they come to the assumption that it doesn’t look like an older ALEXA. I think what ARRI has done with the ALEXA 35 is to give colorists a more neutral starting point to go in any direction you want. If you prefer the older look of the previous ALEXAs you can create a look that emulates that almost identically. The point I am trying to make is that the look is whatever you want it to be. You also have to remember who the target market is for this camera. The majority of footage shot on the ALEXA 35 is going to go through post production and end up in the hands of an experienced colorist.
Now, what I will objectively say is that I personally don’t think that the ALEXA 35 default LUT looks as good as the default LUT for the ALEXA Mini or ALEXA Mini LF, Amira, etc. I tend to make and use my own LUTs with the ALEXA 35.
I would actually like to see ARRI make a LUT for the ALEXA 35 that mimics the look of the older ALEXAs.
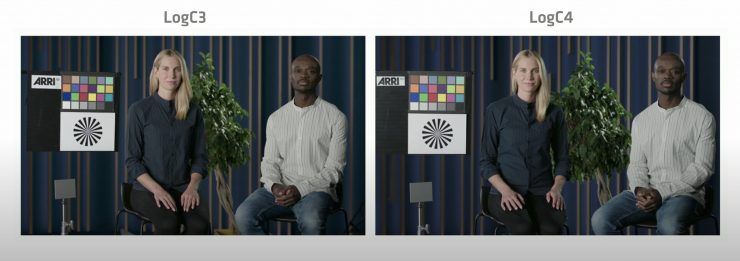
I was interested to see how different the colors looked between an ARRI camera shooting in LogC3 and the ALEXA 35 shooting in LogC4.
I set up a test where I shot a color checker chart using the exact same lighting conditions and the exact same lens. I white-balanced both cameras using an 18% grey card.
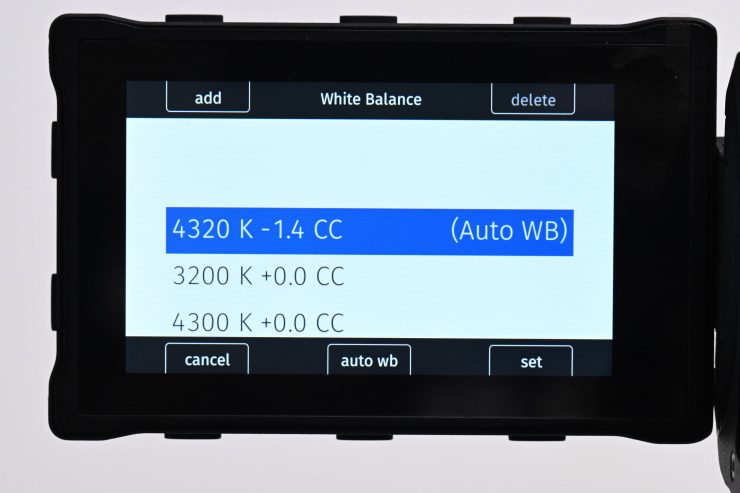
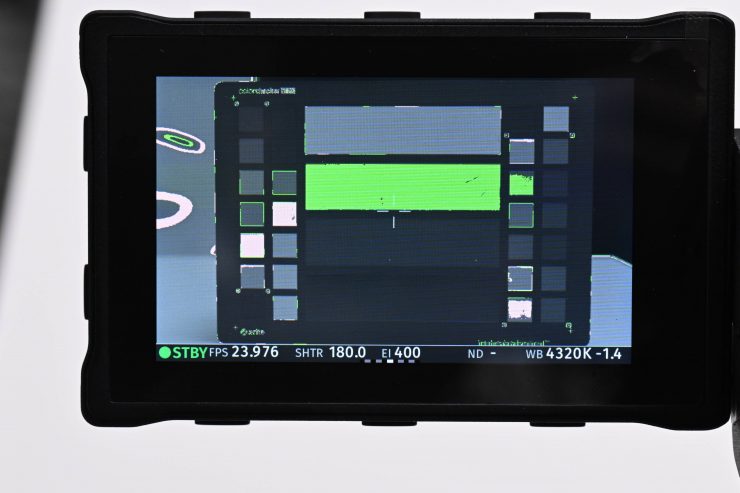
ALEXA 35 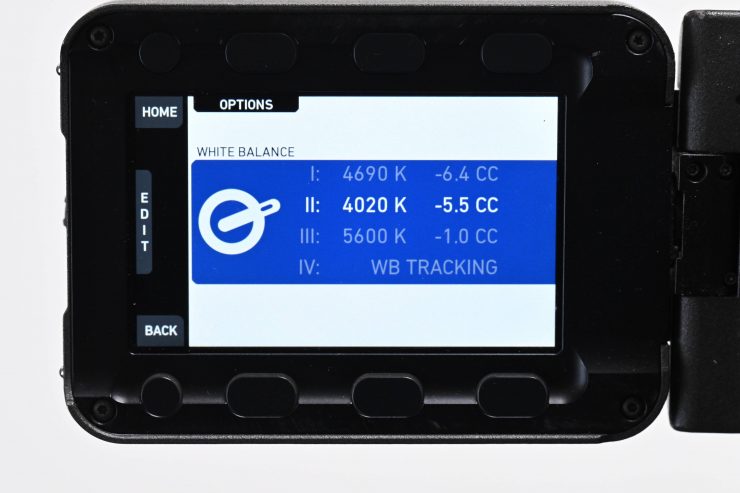
AMIRA
What was interesting is that the white balance I got from both cameras was quite different, even though they were white balanced under the exact same lighting conditions using the exact same method. The ALEXA 35 gave me a reading of 4320K -1.4 CC, while the AMIRA gave me a reading of 4020K -5.5 CC.
ALEXA 35 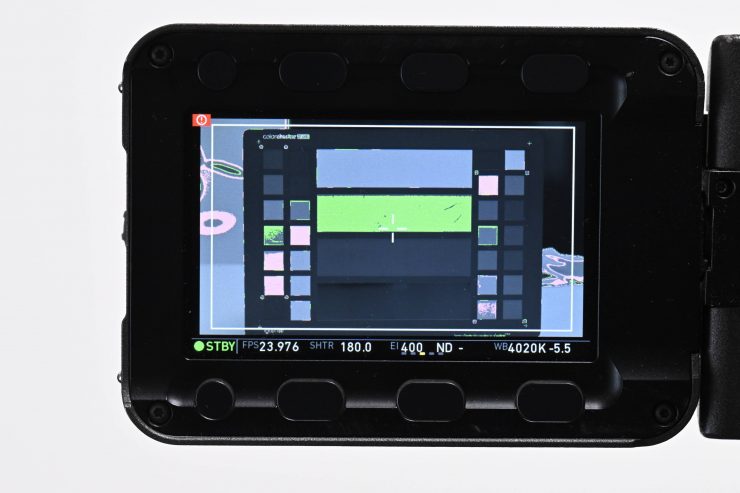
AMIRA
I made sure that the exposure for middle grey was accurate for both cameras by using false colors.
Above you can see the results of the test. All I have done is apply each camera’s default LUT. Both images were processed individually using their recommended methods in DaVinci Resolve. The AMIRA is leaning slightly magenta, while the ALEXA 35 produced a lot more neutral image.
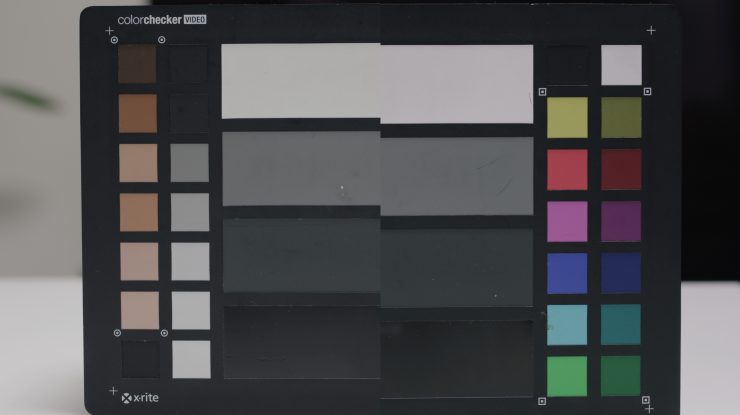
If we look at a split screen of both images we can clearly see the difference.
ALEXA 35 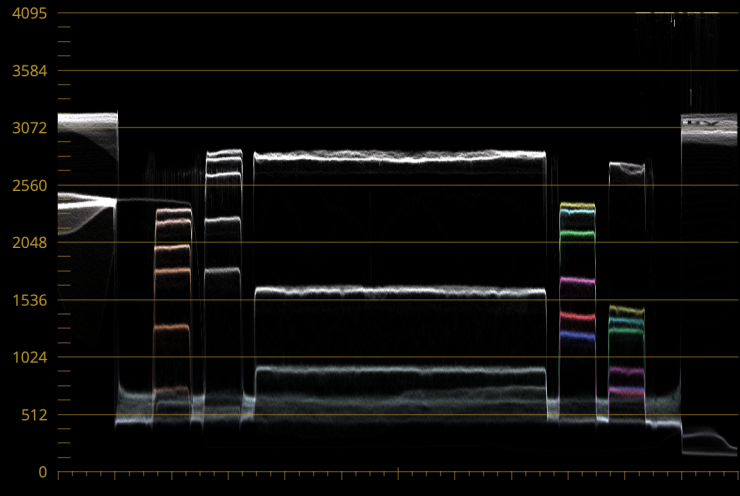
AMIRA
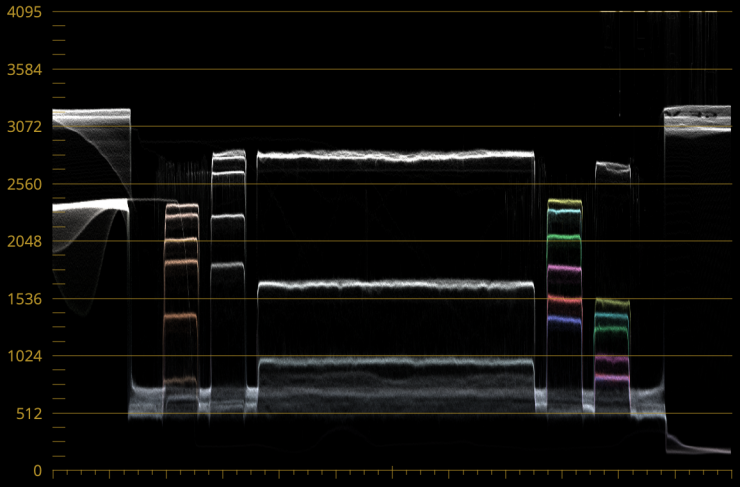
Above you can see both images on a waveform.
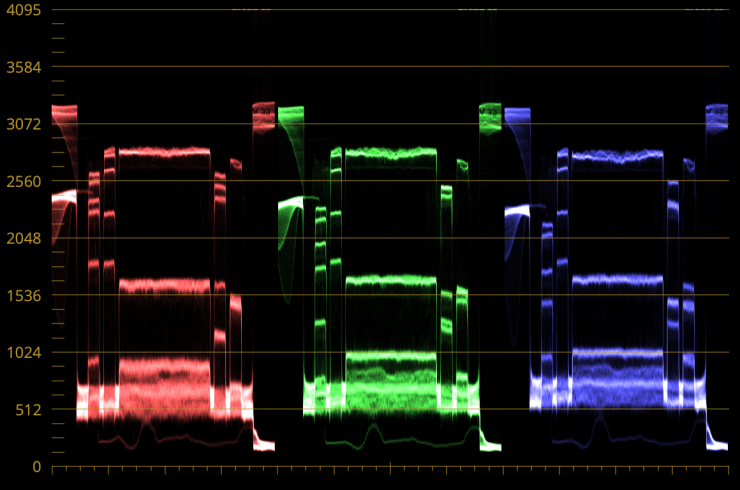
ALEXA 35 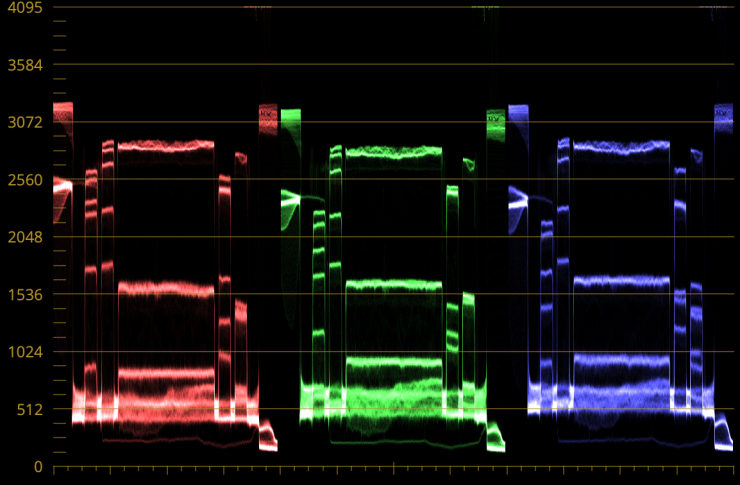
AMIRA
Above you can see the differences on a RGB parade. The AMIRA RGB parade shows that the camera is reducing the green channel in the highlights but adding more green in the mids and shadows. This is resulting in the AMIRA having an image that isn’t as neutral as the ALEXA 35.
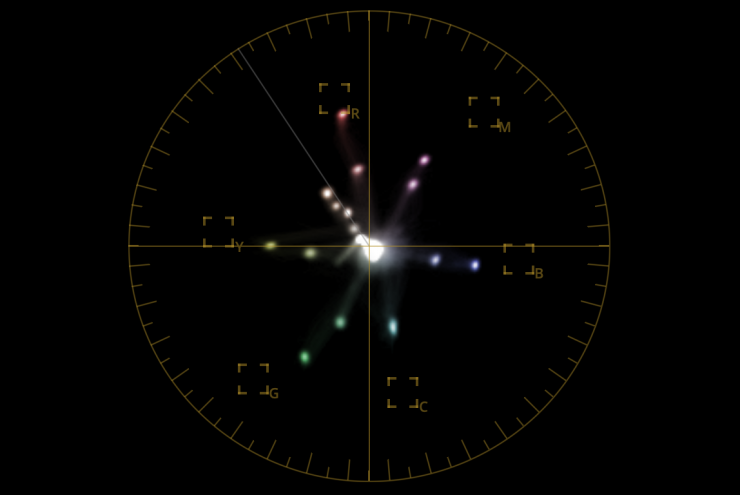
ALEXA 35 
AMIRA
Above you can see the very slight differences on a vectorscope.
Alexa 35 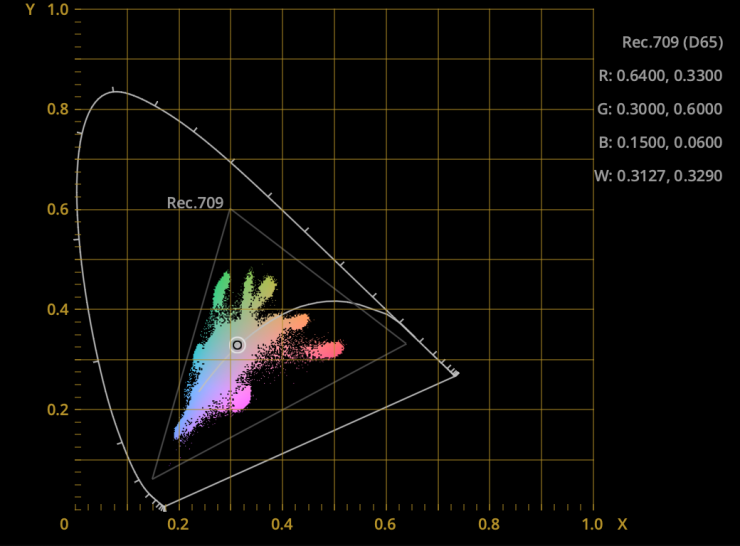
AMIRA
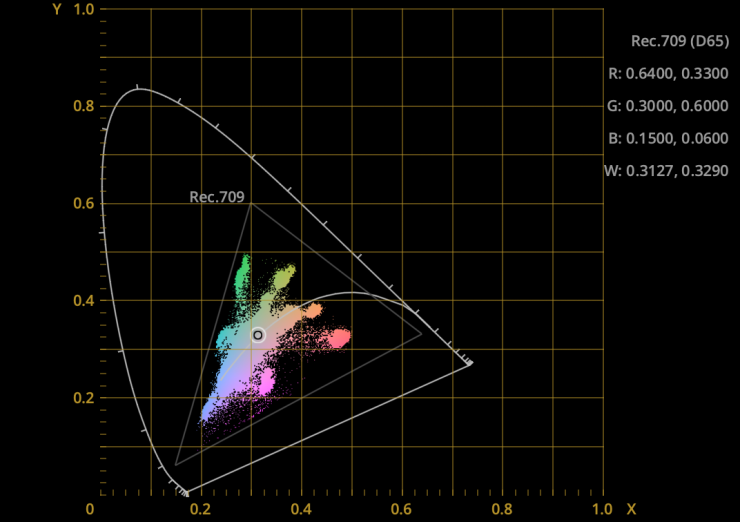
If we look at CIE Chromaticity for both images we can see that the ALEXA 35 is producing a different result.
Yes, with a bit of tweaking you could get these two cameras to match, but you can get them to be pretty close if you are using both in an ARRI LogC4 Color Space project.
The color rendition of the ALEXA 35 is very good. The camera accurately portrays colors even in extreme lighting conditions where other cameras would fall apart.
Any camera can be made to look good in nice lighting conditions. The true test of a good camera is how well it deals with mixed lighting. This camera is brilliant in mixed-lighting scenarios.
I will stress this again, accuracy is not necessarily what you ultimately want, however, at least from my perspective, it is better to start with accurate colors and color rendition and then work from there.
Some people are going to like the Reveal Color Science and others won’t. If you are used to previous ALEXA and ARRI cameras it does take some getting used to.
New LogC Curve
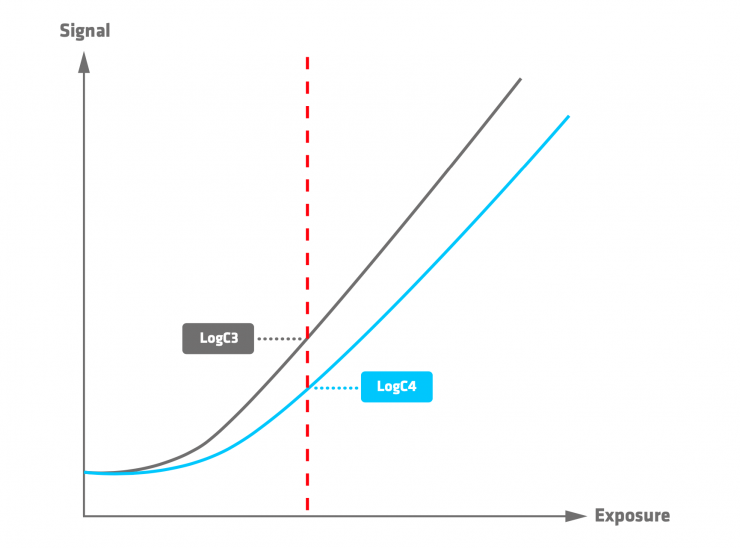
Because the sensor in the ALEXA 35 is capturing more dynamic range, ARRI needed to come up with a new Log curve (LogC4). ARRI LogC4 is a direct successor to the prior LogC v3 encoding definition that has been in use since 2011.
Above you can watch a Tech talk that talks about ARRI LogC4.
The LogC4 encoding maintains a fixed relation between signal values and the relative exposure stops in the scene. For example, a signal value of 10% represents an exposure of 1.5 stops below mid gray (which is at a signal level of 28%). A signal value of 40% represents 2 stops above mid gray. These relations stay constant regardless of the exposure index. Because the number of stops above mid gray that can be captured increases with decreasing exposure, the maximum of the LogC4 function will change with the exposure index.
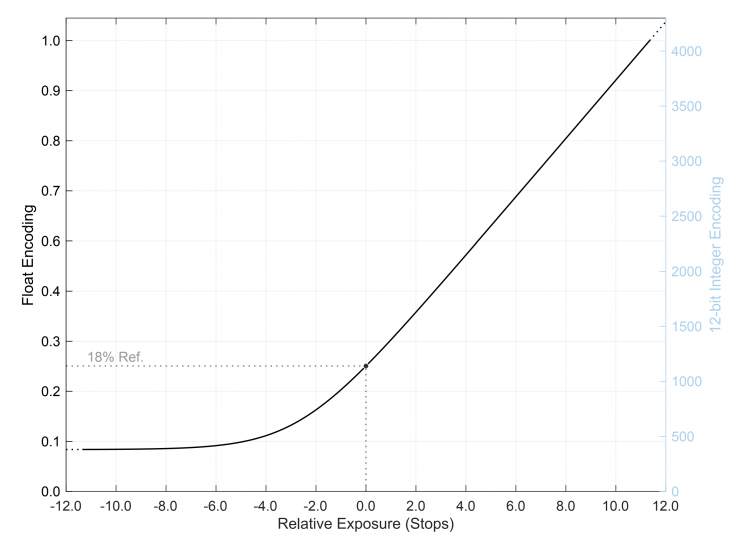
What is interesting, and this is hard to get your head around at first, is that middle grey with LogC4 is 27.8%, which is considerably less than the 39.1% of LogC3 (the current version of LogC). Yes, the image looks dark if you are viewing LogC4, but once you apply one of the new LUTs which I will talk about further in the next section, the image will look correctly exposed.

Above you can see the big difference when exposing for LogC3 as opposed to LogC4 when looking at a Log image.
Once you add a LUT to both images you can see that the exposure looks almost identical.
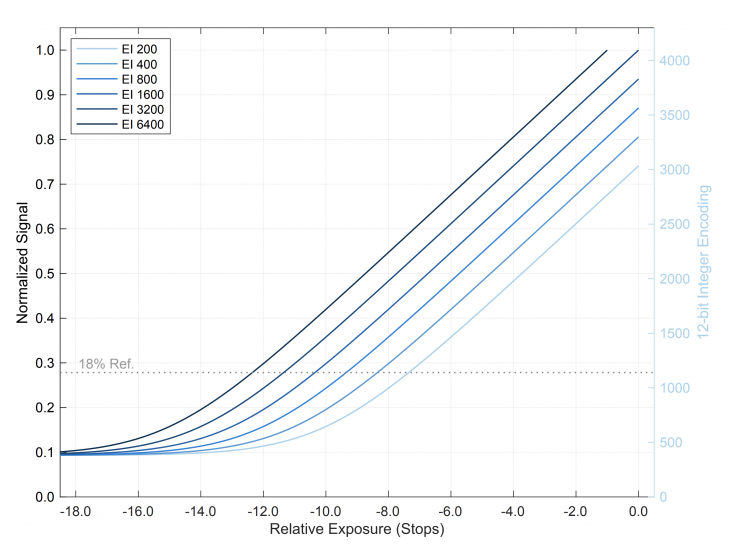
The exposure index selects which sensor signal becomes mid gray in the LogC4 image and consequently in the monitor image. Mid gray is encoded as 28% in the LogC4 signal. When the output is set to Rec. 709 and no look file is loaded that modifies the signal, mid gray becomes 40% in the video signal.
The LogC4 signal is exposure normalized. That means when you close or open the aperture and increase or decrease the exposure index by an equivalent amount, mid gray stays at the same value. Neither varying the exposure nor the exposure index changes the dynamic range of the sensor. By exposing the sensor differently, the distribution of the tonal range below and above mid gray changes. Essentially by changing the EI value you are just changing where those 17 stops are being distributed above and below middle gray.
I usually monitor with a LUT, but occasionally I want to have a quick look at the Log image. This took some getting used to with the ALEXA 35 because the image looks dark and you think you are underexposing. I found the best way to set exposure when using the ALEXA 35 is with false color.
Now, if you are like me and like to use false color, the false color indicators are exactly the same for LogC3 as they are for LogC4. So when you use false color to set exposure levels, you still do it in exactly the same way with the ALEXA 35 as you would with any other ARRI camera.
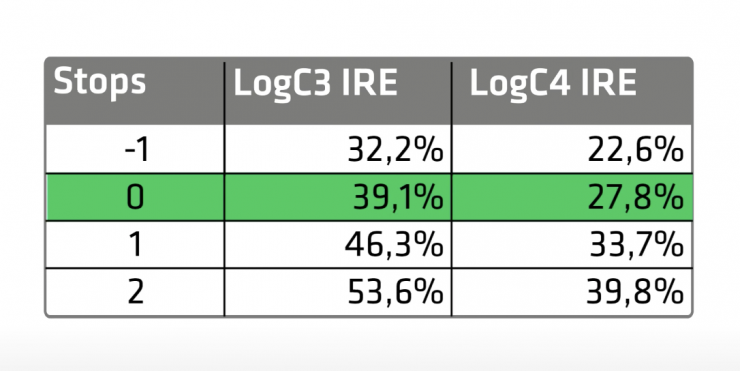
The only thing that has changed is the values for the colored indicators. Above you can see that 1 stop over middle grey (which is indicated by the color pink) when using an older ARRI camera with LogC3 is 46.3%, while on the ALEXA 35 with LogC4 it is 33.7%.
1 stop over with LogC4 has an IRE value that is almost the same as 1 stop under when using LogC4. This shows you that the ALEXA 35 has 2 stops of extra latitude in the highlights of previous ARRI cameras.
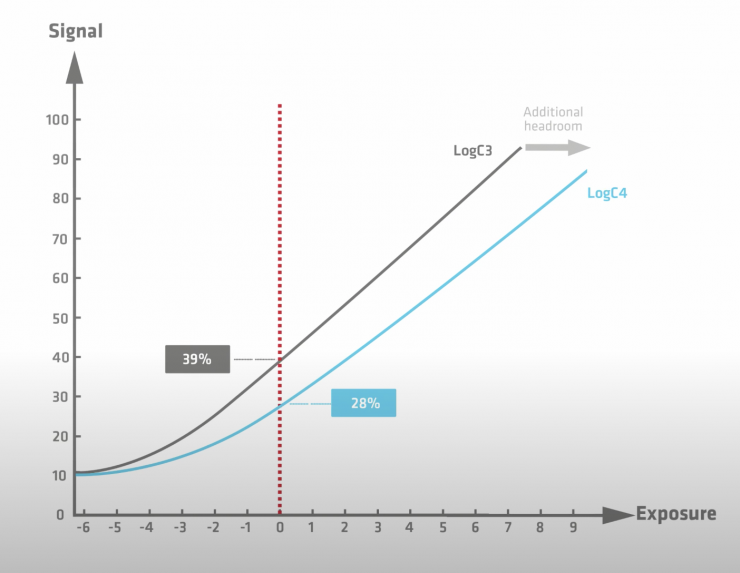
Now, the reason for this is that because of the additional latitude in the highlights the ALEXA 35 is capable of producing, middle grey needed to be moved down to make enough room. If middle grey had been kept at 39.1% for LogC4, you run out of room to place those extra highlight stops. That is why the LogC4 curve is positioned where it is.
As you can now see, it isn’t just a simple case of taking a new sensor and dropping it into a camera. ARRI had to go back to the drawing board and come up with a completely different processing and capture backend to what they had previously been using. You shouldn’t underestimate or take for granted how much work and how many years this takes to do.
With the existing LogC3 curve, there was a different curve depending on the ASA setting. Now, with LogC4 it is the same curve for all ASA settings as you can see above.
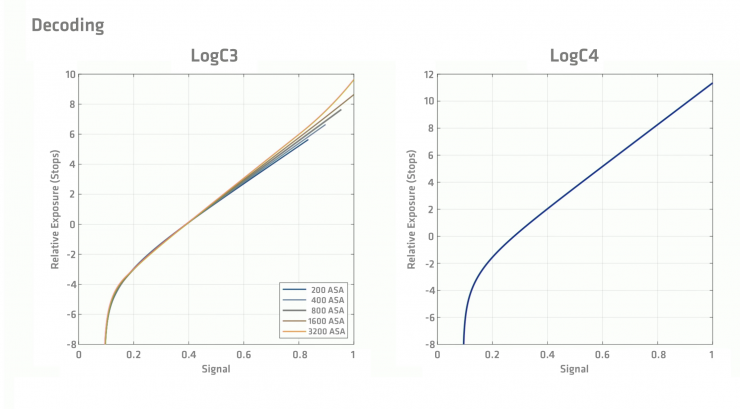
Above you can see the decoding curves for LogC3 and LogC4. With LogC4, as I just mentioned, it is the same regardless of the EI value.
LogC4 will be the curve used with all new ARRI cameras going forward.
The LogC4 Hardware Encoding Curve represents the logarithmic transform applied to linear sensor data in-camera. The most notable change from LogC3 is that the constant gamma of the logarithmic curve does not vary with the exposure index, only the linear gain factor changes. In Laymen’s terms, the ARRI LogC4 Curve is exposure index independent, meaning, the correct linearization of LogC4 encoded images does not depend on the user-selected EI. This is a notable change from LogC3 and simplifies the decoding of LogC4 encoded footage.
As I have already mentioned, the logarithmic encoding used by ALEV4 based cameras for LogC4 was optimized for 12-bit encoding, this allows for greater precision at each stop of the sensor signal when compared to the 10-bit LogC3 encoding. The hardware encoding curve is defined as follows:
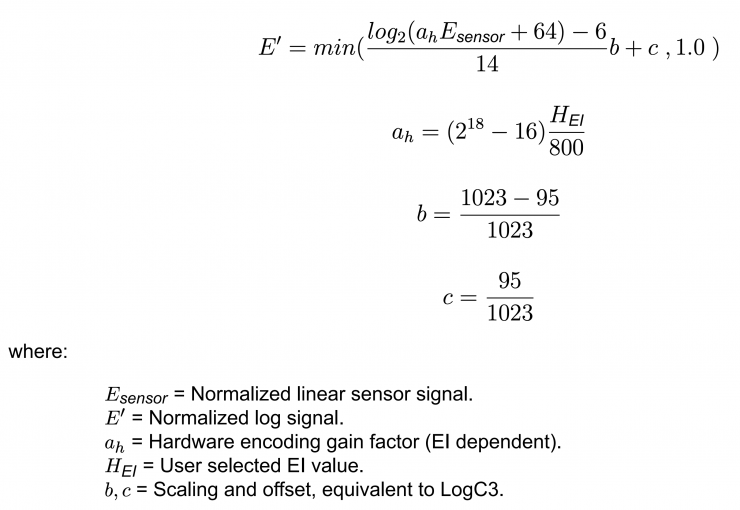

ARRI Wide Gamut 4 (AWG4) is the name of the color primaries used in ARRI LogC4. All chromaticity values are defined with CIE 1931 2 Degree Standard Observer Colorimetry.

The White Point of ARRI Wide Gamut 4 is the CIE Standard Illuminant D65.
LogC4 LUTS
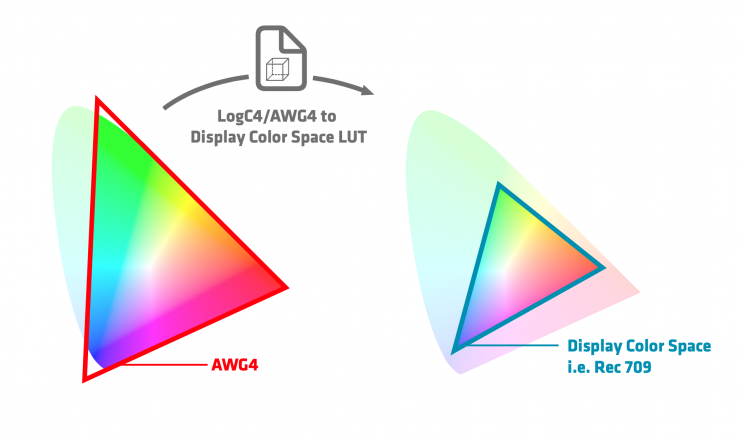
An image in a new color space with a new Log curve also requires new LUTs. The new ARRI LUTs for LogC4 are able to take full advantage of the new sensor’s dynamic range, color space, and Log curve to provide optimal results for DPs and colorists. The LogC4 LUTs have more saturation and more contrast than previous LogC3 LUTs. Now, as I previously mentioned the default LUTs are quite different between the ALEXA 35 and older cameras using LogC3 LUTs.
These new LUTs are free and they are available for a wide range of different color space transforms. ARRI highly recommends that you use these new LUTs because if you try and just grade a LogC4 image without doing a color transform first you will run into issues. It isn’t the same as working with a LogC3 image.
Older 3D LUTs that were used for ARRI LogC3 (e.g. for ALEXA, AMIRA, ALEXA Mini, ALEXA LF and ALEXA Mini LF) should not be used for screening or post-production workflows together with the ALEXA 35 footage.
Can you intercut images from other ARRI cameras with the ALEXA 35?
Because this is an entirely new sensor, with a new Log curve and new color science, the ALEXA 35 isn’t going to be an exact match with existing ARRI cameras. Since the sensor and color science was created by the same people who created the ALEV 3 sensor and the color science on all previous ARRI digital cameras, you will still get a reasonably close match, and intercutting should be possible. Even better, with the ALEXA LF and the Mini LF if you are shooting ARRIRAW you can take that footage and utilize the new Reveal Color Science. This way your footage can be processed in the same way as the ALEXA 35. You can then utilize all of the benefits of the new processing including the same Debayering technique, ARRI Wide Gamut AWG4, LogC4, and the new LUTs. Just to be crystal clear you are not going to get the extra dynamic range, the ARRI Textures, or the Advanced Color Match of the ALEXA 35 by doing this, however, this all helps in matching the ALEXA LF and Mini LF with the ALEXA 35 if you are using them together.
More Creative Control

I know we have already talked a lot about the new sensor and image processing, but ARRI has also put a lot of other items in the ALEXA 35 that enable DPs to have more creative control over how they use the camera. So let’s have a closer look at what these new items in the ALEXA 35 are.
ARRI Textures
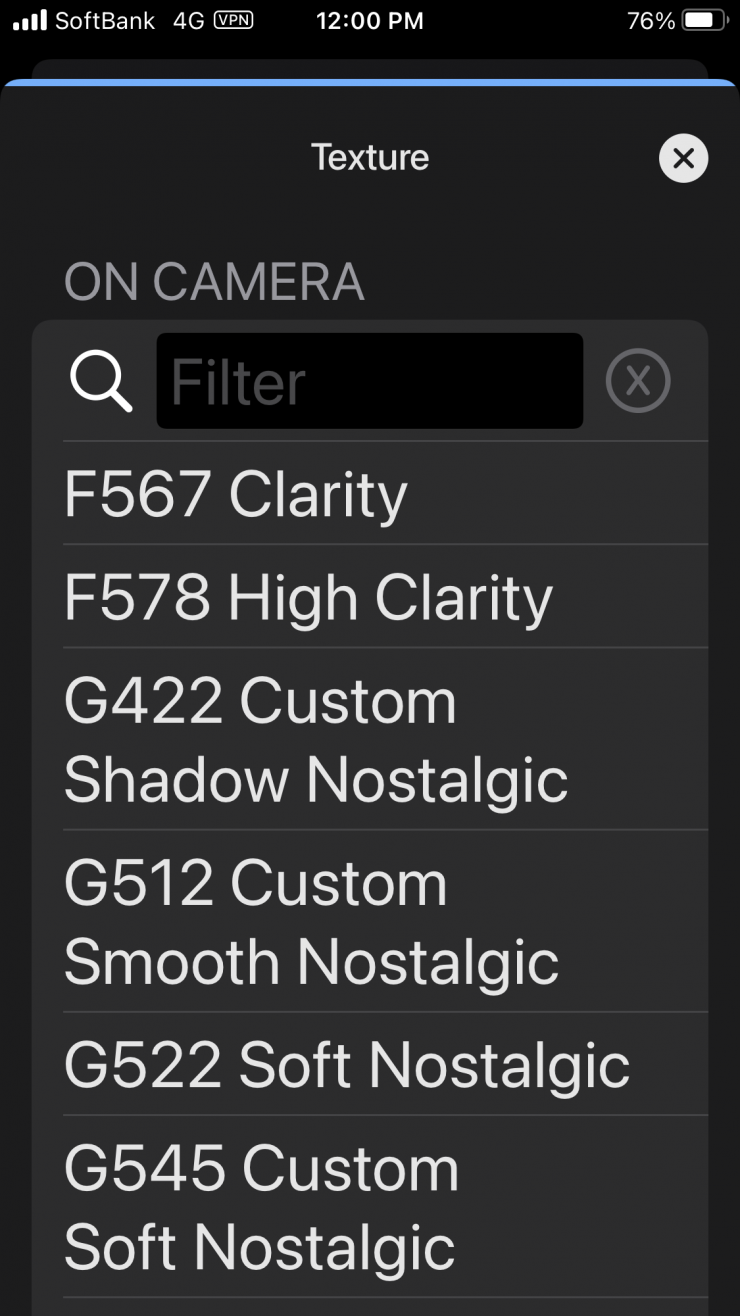
ARRI has added a new feature called ARRI Textures where users of the ALEXA 35 can choose from a wide array of different image settings.
An ARRI Texture file is a combination of 30 image settings. ARRI Textures are chosen in-camera like Look files or a film stock. The ALEXA 35 comes with several ARRI Texture files pre-installed. I would imagine that over time we will see more of these being added.
Again, ARRI is doing something different from everyone else, and by adding the ability to use these Textures, it lets cinematographers have more control over their artistic intent.

There are different textures for different shooting situations. These range from options for shooting skin tones, vintage looks, higher contrast looks, and for night scenes, etc.
What you clearly need to be aware of when using ARRI Textures is that it is an in-camera process and they are always baked into ProRes and ARRIRAW files.
You can test and choose an ARRI Texture in pre-production in exactly the same way as you would with a show LUT.
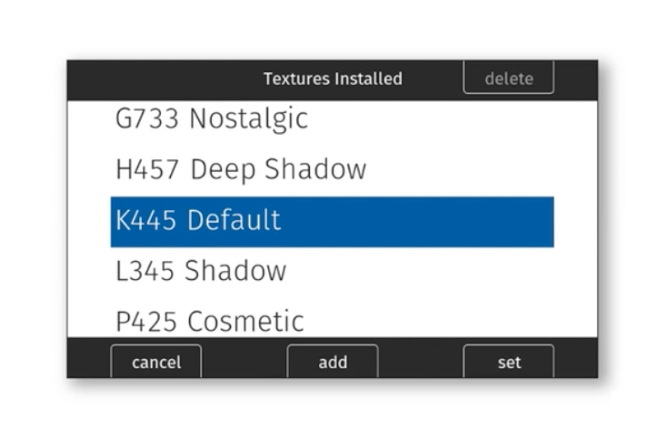
The default texture is called K445 Default. This is what you would get if there was no ARRI textures feature. The other Textures are merely an option and they are not something that you have to use.
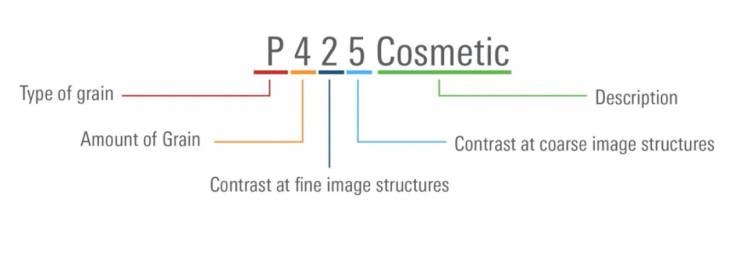
Now, if you are wondering what the letter and number combinations of the different Textures mean, above you can see what they represent and below there are more detailed descriptions.
Type of grain
The type of grain can vary in quite complex ways, e.g. more or less color, fine/coarse, etc. The grain of the default Texture K445 Default complies with a letter in the middle of the alphabet. The bigger the variations in color, size, etc., are from the default grain, the further away the letter is from another ARRI texture. The closer the letters are in the alphabet, the more similar the impression will be regarding the type of grain.
Amount of grain
This is a number indicating the amount of grain. The higher the number, the more grain there is (0 to 9).
Contrast at fine image structures
This number indicates the amount of contrast for fine image structures
(high spatial frequencies). The higher the number, the higher the contrast (0 to 9).
Contrast at coarse image structures
This number indicates the amount of contrast for coarse image structures (low spatial frequencies). The higher the number, the higher the contrast (0 to 9).
Description
This is simply a descriptive name of the texture.
ARRI Textures are visible on both the viewfinder and the SDI outputs. They have been designed to be quite subtle and ARRI recommends that they are best viewed on a high-quality large HDR screen. However, if you have a decent monitor you can zoom in on the image and clearly see the difference between the various textures. Some are more subtle than others. They have been purposely designed so that they don’t push the look too far.
What you do need to be careful of is if you set a texture that has more grain and then you combine it with a custom LUT that also has grain you end up with a very stylized look. While the ARRI Textures are subtle, they can be quite pronounced depending on what you decide to do with your footage in post.
ARRI Textures in the ALEXA 35
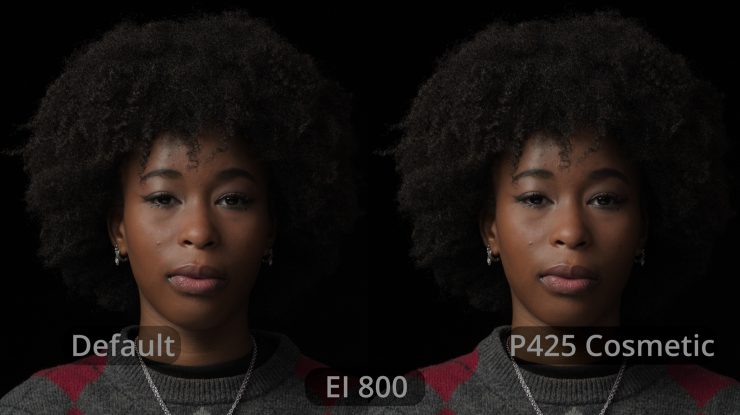
K445 Default
The K445 Default texture is designed to work well for most situations while still making the most of the camera’s cinematic strengths. It is forgiving on skin, but also renders images with exceptional clarity and detail, which makes it also a perfect texture for green screen shots. This is also the texture to use when shooting with ALEXA 35 and previous ARRI digital cameras, as it closely matches those camera’s textures. It has low to moderate grain and is perfect for use at all EI settings.
I like the K445 Default texture and it is the one I find myself using the most.
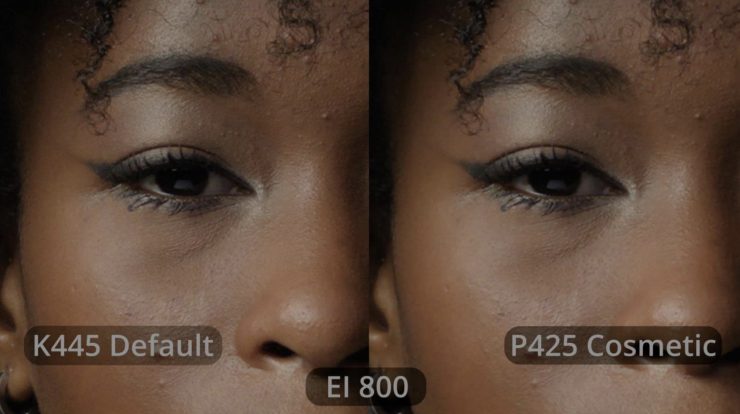
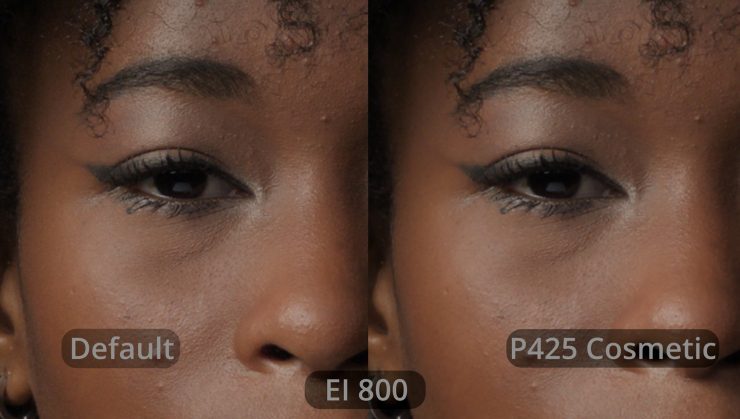
P425 Cosmetic
This is a softer texture, and it is very close to the cinematic K445 Default. This Texture is especially recommended for rendering skin tones. It is more forgiving on the skin while keeping structures and highlights pronounced. It has low to moderate grain but is a bit softer compared to K445 Default. Again it can be used at all EI settings.
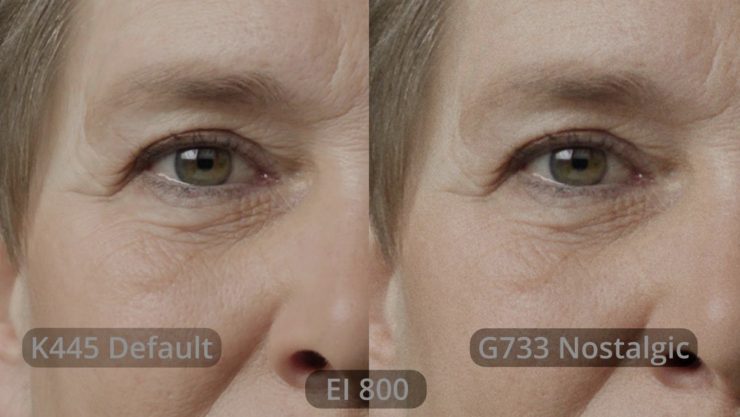
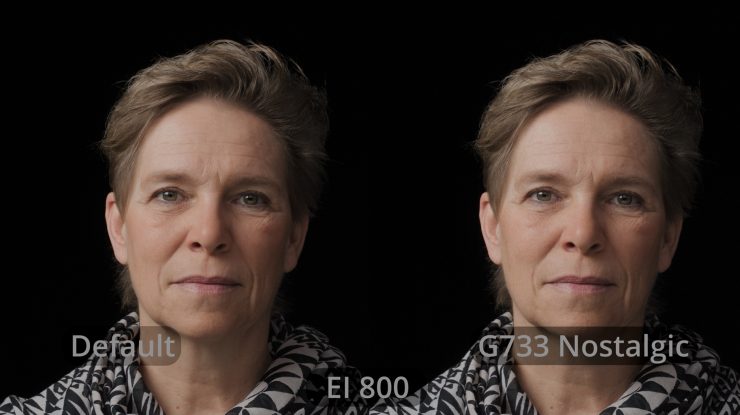
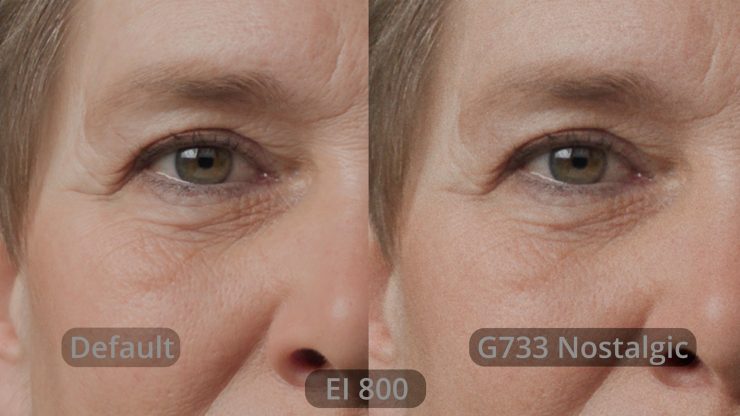
G733 Nostalgic
This is a grainy texture with a vintage feel, and it was designed to render a lot of grain and have a soft character. The unsaturated grain emphasizes the nostalgic film emulation. It can be used at all EI settings.
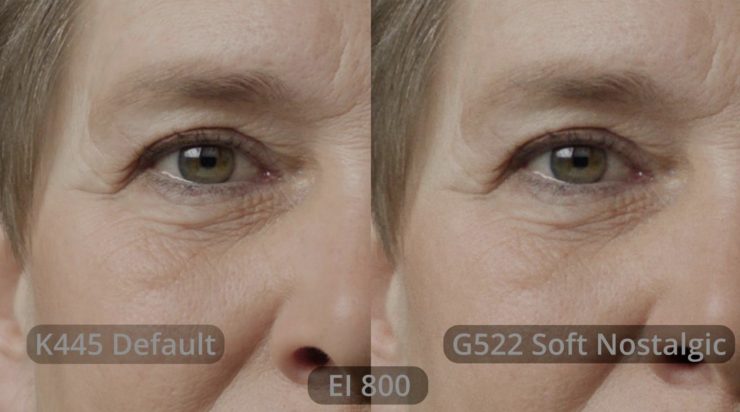
G522 Soft Nostalgic
This is a grainy texture that has a subtle vintage feel. It was designed to render some unsaturated grain and a softer character. It has a little softer vintage texture with less grain and less contrast than G733 Nostalgic. Again, it can be used in all EI settings.
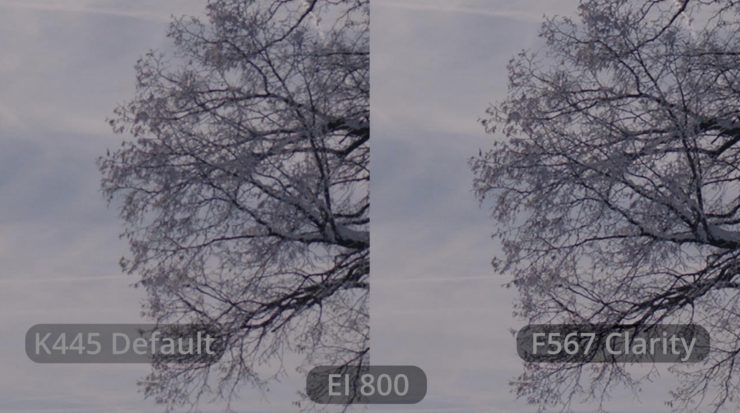
F567 Clarity
This is a texture designed to work for any kind of footage. It has increased sharpness and detail compared to the K445 Default texture. The Clarity textures are a perfect choice for landscape shots. This texture works best for low to mid-EI settings. It is not recommended for high EI settings because it might accentuate the grain.
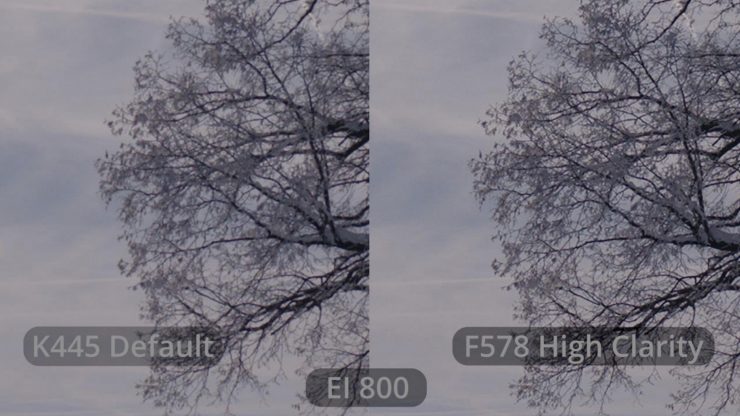
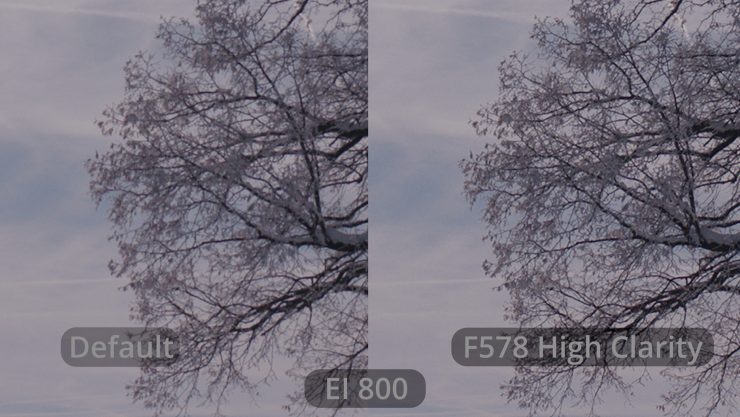
F578 High Clarity
This texture was designed to work for any kind of footage, and it has even more detail compared to the F567 Clarity texture. The Clarity textures are a perfect choice for landscape shots. Again, this texture works best for low to mid-EI settings, and it is not recommended for use with high EI settings, because it might accentuate the grain.
I like using the F578 High Clarity texture when shooting things like food and nature shots.

L345 Shadow
This texture is based on the K445 Default texture, but it has lower noise and grain optimized for images with a lot of dark content. The visible grain emulates the look of grain in the toe of color negative film and it is more pleasing in darker scenes, as the color of the grain has been desaturated. The Shadow textures are optimized for mid to high EI settings of the sensor and therefore work best in this exposure range.
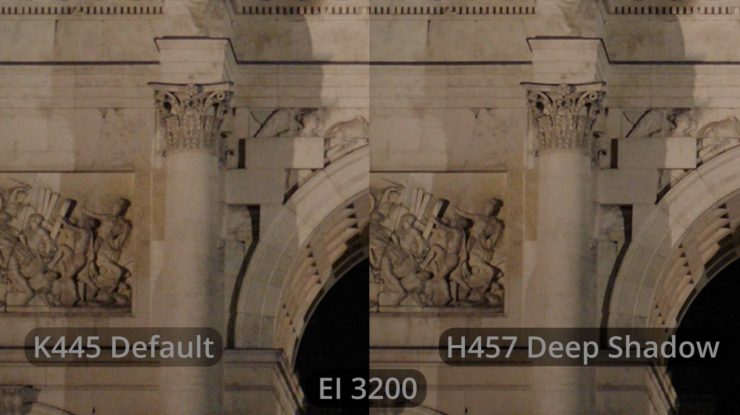
H457 Deep Shadow
This texture is designed to be used with really dark shots. It has low grain, and the color of the remaining grain is less saturated. It has higher clarity (more contrast) and even more shadow detail retention than the L345 Shadow texture. The Shadow textures are optimized for mid to high EI settings of the sensor and therefore work best in this exposure range.
Above you can see a quick test where I swap between the various textures so that you can get a basic understanding of what they are doing to the image. I have also done some 300% crops so you see more clearly what is being affected.
Because ARRI Textures is a new feature, to avoid bad images resulting from unintentionally chosen bad combinations they have purposely kept the textures subtle. Sure, it would have been great to have more extreme options, however, because the Textures are baked into your recordings this could easily lead to mistakes being made. You also need to be careful when using some of the Textures that have quite a lot of grain, because again, this is baked in and can’t be changed later on.
Again, how much an ARRI Texture is visible depends greatly on your viewing setup. Something that will be clearly visible on a 7″ on-board monitor will be ugly and way too strong on a large, high-quality HDR
display. Conversely, something that looks great on a large, high-quality HDR display will be barely visible on a 7″ onboard monitor. ARRI highly recommends that users test ARRI Textures in pre-production with large, high-quality HDR displays, so they know what they will be getting.
Once ARRI has received more feedback from the field about what other types of textures are desired, they will create new ones and post them on the ALEXA 35 website. You can then download them and load them into the
camera, just like you do with ARRI Look Files.
One thing to know is that you can’t currently create your own ARRI Textures like you would a LUT. The reason for this is that an ARRI Texture is created by a combination of around 30 image processing settings that are
complicated and interact with each other. ARRI has not yet figured out how to simplify them so a person that is not an ARRI color scientist can use them. Until they do this, you can only use the textures included in the camera and those ARRI has uploaded to the website.
If you are wondering what ARRI Texture is best to use if you want to match the ALEXA 35 with another ARRI camera, ARRI recommends that you stick to the K445 Default texture. ARRI also recommends that you also stick to the K445 Default texture when working with blue/green screens.
Are there any caveats when using Textures? Yes, there are. ARRI
Textures influence the noise in the image in different ways, which will affect the SNR. Some textures will decrease the measured dynamic range by a ¼ stop, while others will increase it by a ½ stop. The effects of textures are dependent on the image content.
ARRI also recently released new Textures for the ALEXA 35. These new textures are G422 Custom Shadow Nostalgic, G512 Custom Smooth Nostalgic, G633 Custom Nostalgic, and G545 Custom Soft Nostalgic.
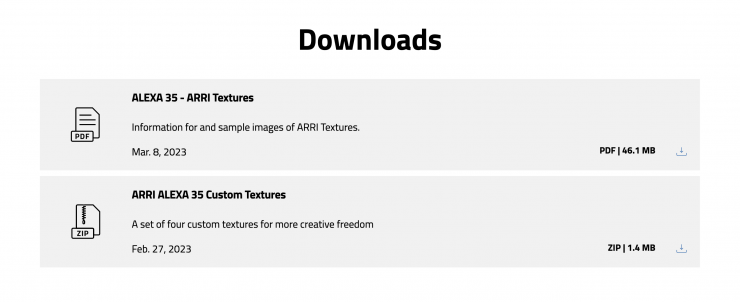
ARRI received a lot of feedback from users of the ALEXA 35 about Textures and they found out that almost everyone’s favorite was the G733 Nostalgic. This lead them to create the four new Textures that are now available to download for free.
Again, just like with the sensor, ARRI is doing things that no other camera manufacturer is. Who else gives you the ability to set textures in the camera like this? No one.
New Look Handling
The ALEXA 35 also has new look handling features.
- New Log-to-Log look file (ALF4)
- Ability to set the Look Intensity on set
- Built-in LogC4 Look Library
So let’s have a look at these a little more closely.
Log-to-Log look file (ALF4)
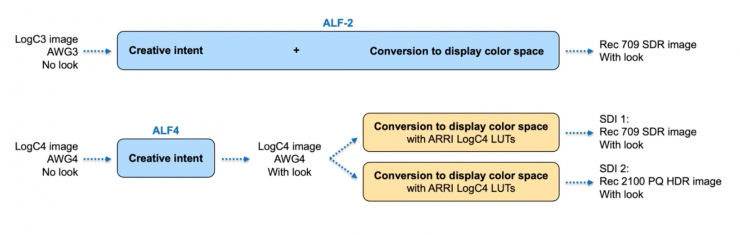
The ability to create a Log-to-Log look file without first converting to a color display space has been something you have been able to do in postproduction for a while. ARRI now gives you the ability to do this in camera as well. Essentially a Log-to-Log look file allows for the separation of creative intent from the conversion to a display color space.
With the ALEXA 35, you can take a LogC4 image and then apply a LogC4 LUT without a conversion color display space happening at the same time. In the next step, you can then choose what color display space to convert it to. This allows you to simultaneously send out a Rec. 709 image and a Rec 2100 PQ HDR image over two different SDI outputs.
Look Intensity
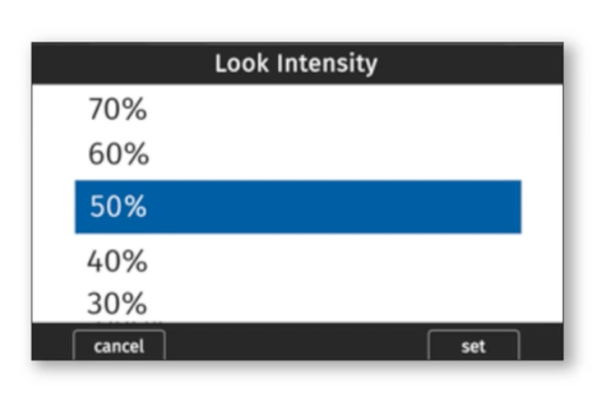
Another new addition to the ALEXA 35 is the ability to set the intensity of any LUT you select. ARRI gives users the ability to change the intensity from 10-100% in steps of 10%. This means you can change how the LUT behaves which is great for making subtle or larger changes to the look. I really like this feature, because you can dial in the exact amount you like.
If you would set the intensity to 0% you would just be getting the LogC4 image, however, the lowest it can be set is 10% (because otherwise, it would be LogC4 and that would be confusing).
It is important to remember that the camera ALWAYS records a LogC4 image, it can’t record an image with a baked-in look. Looks are simply recorded in the camera’s metadata along with the chosen intensity. This allows dailies to be made with the same look and intensity that was being used on set. The preserves the creative intent and lets others know exactly the look you were going for.
New Look Library
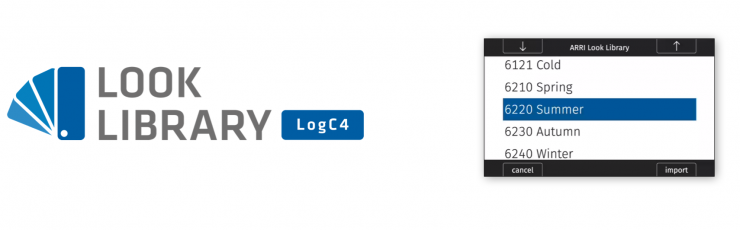
ARRI is now including a new version of the Look Libray for free. This features the same looks that were previously a paid option for the ALEXA Mini and Amira. However, they have all now been upgraded to work with the new Reveal Color Science and LogC4. Logc3 and LogC4 Look Libraries are also available in the new ARRI Reference Tool.
Workflow for creating an ALF4 look file inside DaVinci Resolve Studio
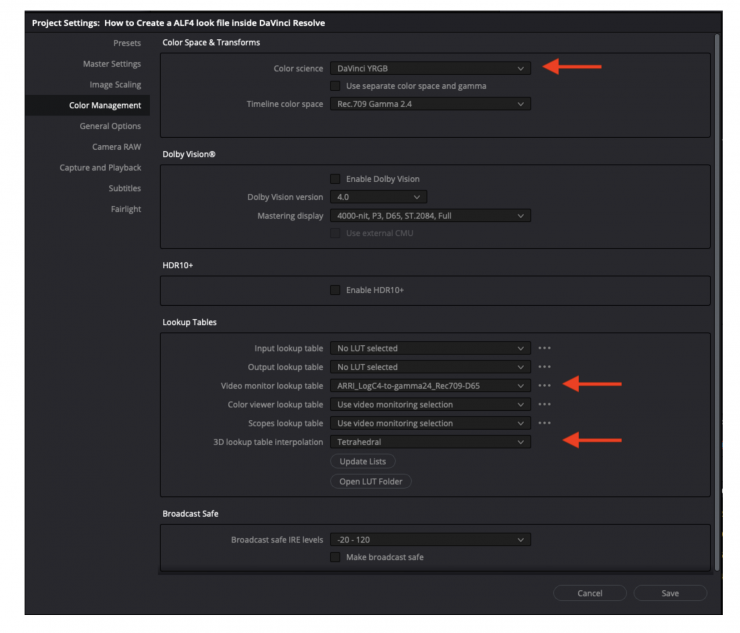
Open a new project inside DaVinci Resolve Studio. Open up the Project Settings and go to the Color Management page and set the Color science, Video monitor lookup table, and 3D lookup table interpolation according to the screenshot above.
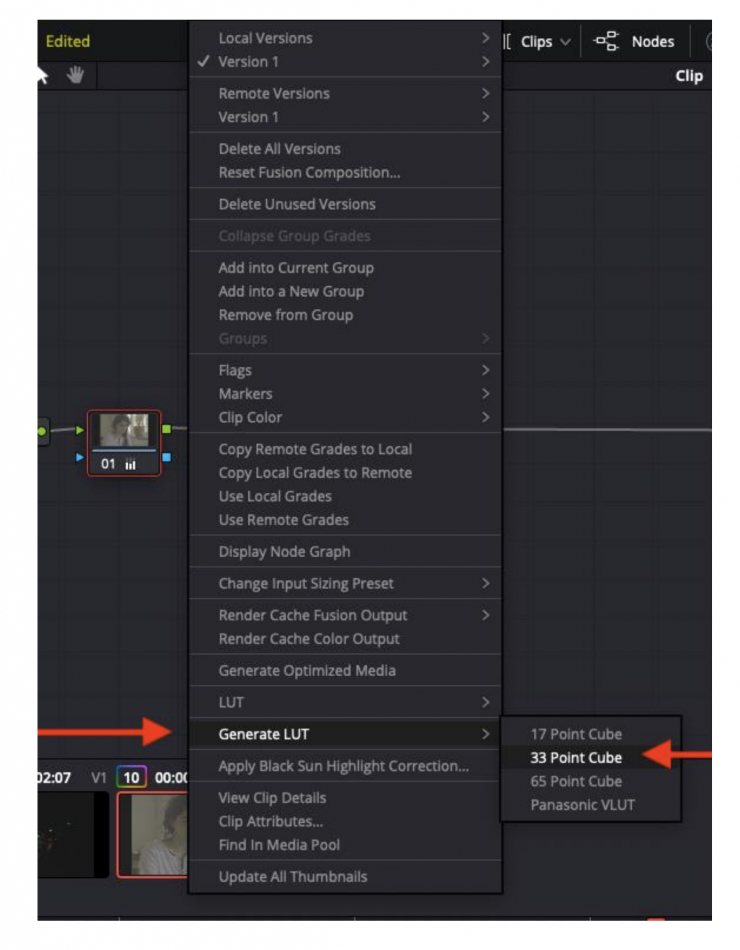
Load your footage into a timeline and grade your desired custom look using all tools except spatial tools, since they can not be incorporated inside a 3D LUT. You then right-click on the clip in the thumbnail timeline you wish to export and choose Generate LUT and 33 Point Cube.
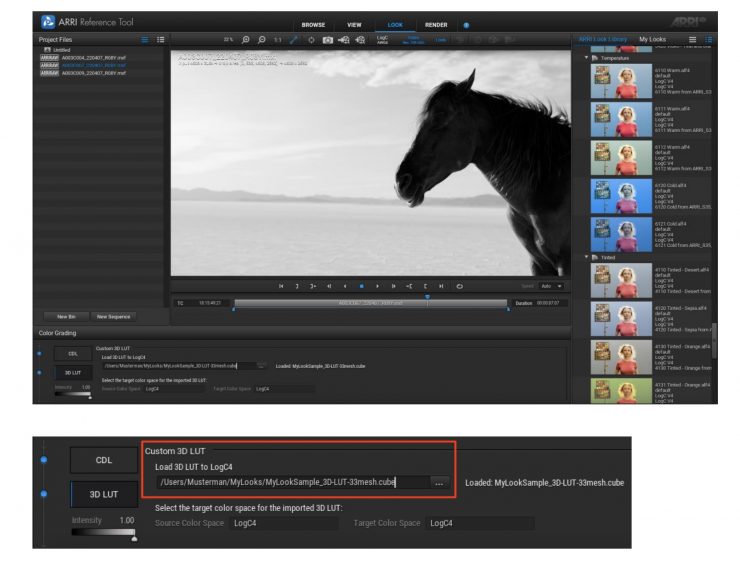
Once you have saved that 3D LUT you then need to convert the 3D LUT file into an ALF4 file using the ARRI Reference Tool (ART) Software.
How to Grade LogC4 Footage

This is where I originally ran into trouble when I was doing my first look at the camera. I didn’t have a lot of clear knowledge or information about how to deal with the footage and I probably made some mistakes along the way.
The new logarithmic curve (LogC4) is not backward compatible with older
versions e.g. LogC3. Therefore, it is very important to set up the workflow for ALEXA 35 files according to this guide and not use existing LUTs or color management for other ARRI cameras. Using older LogC3 LUTs will make the image look underexposed and all colors will be off.
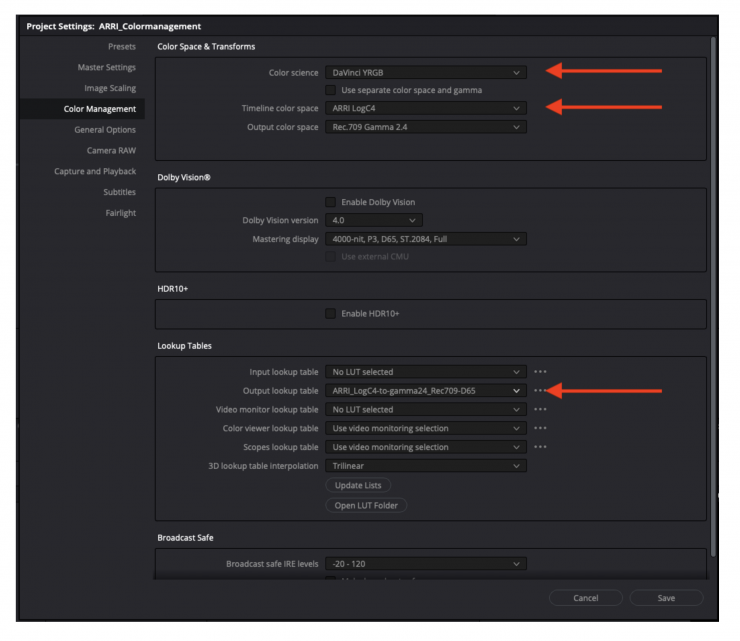
If you are using DaVinci Resolve ARRI recommends that you set the Color science option to DaVinci YRGB and select the right Output lookup table for the grading monitor you are using on the Color Management page in your Project Settings. This will ensure that all grade settings are applied in the LogC4/AWG4 color space and the image is rendered as the last step using ARRI’s Color Science REVEAL.
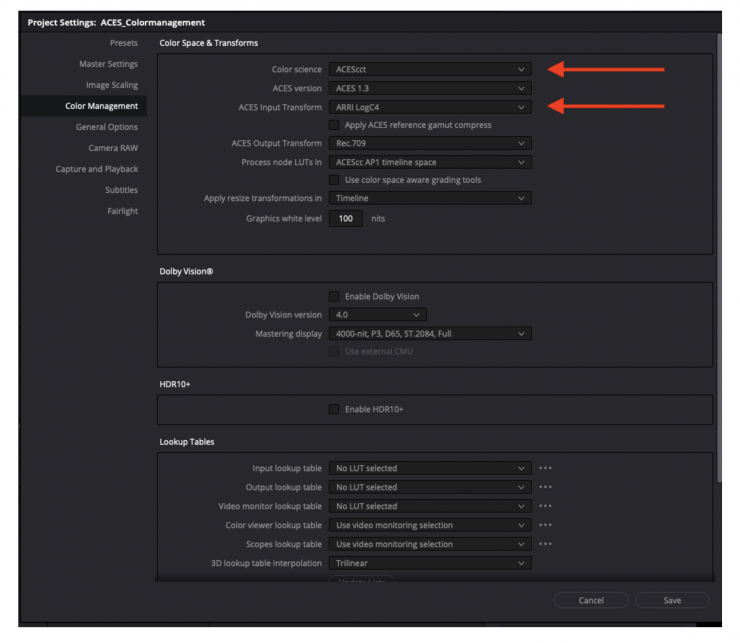
Now, if you choose to set up DaVinci Resolve using ACES Color management
you clearly need to be aware that in this workflow you will not get all the benefits of the REVEAL Color Science, since the image is not rendered using ARRI’s REVEAL Color Science but ACES Color Science to the selected Output-Device.
ARRI also doesn’t recommend setting up DaVinci Resolve using DaVinci’s Color management. Using this workflow will also not give all the benefits of the REVEAL Color Science, since the image is not rendered using ARRI’s REVEAL Color Science but Blackmagic’s Color Science to the selected Output-Device.
Recording Codecs
MXF (Material eXchange Format)
Both ARRIRAW and Apple ProRes files are recorded in an MXF (Material eXchange Format) container. An MXF container file can “wrap” different types of video and audio material along with associated metadata. The internal structure of these files is defined by the Operational Patterns (OP). ARRI cameras create MXF files with OP1a structure, which packages picture, sound, and metadata into a single file. This structure is ideal for both camera acquisition and archiving since the audio, video, and metadata are always kept together and virtually no data gets lost if the recording is unexpectedly interrupted. OP1a also is a streaming format, which means that even incomplete files can be repaired and accessed up to the last recorded frame.
ARRIRAW
ARRIRAW data delivers unencrypted, uncompressed, and uncompromised image quality. It offers the highest achievable resolution, the camera’s natural color response, and exposure latitude as uncompressed and unprocessed sensor data. ARRIRAW images have only one channel. A color
reconstruction algorithm calculates the missing components of each pixel based on the type and position of the array of colored filters (Bayer pattern) on the camera sensor.
ARRIRAW de-bayering is available through the ARRI Imaging SDK only, which is implemented in the ARRI Reference Tool (ART) and most of the major post-production tools for dailies processing and mastering. The camera will automatically calculate a CRC32C checksum for the image data inside each ARRIRAW frame. This checksum is recorded as part of the image header and can be used by software like the ARRI Reference Tool, to verify that the ARRIRAW image content has not changed during any copy step. Note that this checksum does not validate the entire file, only the image data. You should also be aware that during the download from the Compact Drive to a computer or afterward it is possible to reduce the size of ARRIRAW files by up to 40% using Codex High Density Encoding (HDE) technology with the ARRIRAW HDE Transcoder app. I’ll talk a little bit more about this a little further down in the review.
Apple ProRes
Recording in Apple ProRes is a cost-efficient alternative to shooting ARRIRAW, as it requires less storage space and no further processing in post. Apple ProRes is a variable bit rate (VBR) codec. Depending on the content of your images the remaining recording time on the recording media can be shorter or longer than indicated by the camera.
So, what does ARRI recommend you use for certain types of productions? Well, below you can see.
Apple ProRes 422 HQ 12-bit LogC4 YCbCr
Use for high-quality TV production. Suitable for creative color correction.
Apple ProRes 4444 12-bit LogC4 YCbCr
Use for high-quality TV and cinema production. Very suitable for creative color correction and visual effects work such as pulling mattes.
Apple ProRes 4444 XQ 12-bit LogC4 YCbCr
The ideal choice for productions that are shooting for premium image quality, are looking for extreme color grading, and want to preserve the superior tonal range of ARRI’s Log C signal.
ARRIRAW 13 bit log : This is recommended for high-quality TV, cinema production, and visual effects. It is the best format for creative color correction, visual effects work and archiving.
High Density Encoding (HDE)

CODEX High Density Encoding (HDE) is a lossless, variable bit rate encoding scheme, optimized for Bayer pattern images, such as ARRIAW. The file size of a high density encoded ARRIRAW clip, on average, is 50 to 60% of its original size, depending on the image content. Once decoded, the images deliver a bit-exact match to the original uncompressed ARRIRAW images.
HDE was originally introduced by CODEX to support ALEXA 65 productions, as the amount of camera data created per day was massive. Today, HDE is used in all sorts of ARRIRAW productions with cameras such as the ALEXA 65, LF, Mini LF, Mini, SXT, etc.
Previously, the only tool you could use to apply on-the-fly HDE to ARRIRAW data was the CODEX Device Manager. However, due to changes in the file format that is recorded by ALEXA 35, this workflow is currently unavailable. While CODEX is working on an update to their solution, ARRI has gotten around this problem by offering the ARRIRAW HDE Transcoder as an alternative to apply HDE to ARRIRAW data from an ALEXA 35.
To reduce the overhead per frame, increase performance, and add flexibility for possible extensions, ARRI had to completely restructure the metadata in the ALEXA 35 MXF container. As a consequence, single-frame sequence processing of ARRIRAW (.ari) or HDE-encoded ARRIRAW (.arx)
is only supported for earlier camera models. This means that the current CODEX Device Manager (6.1) cannot present ALEXA 35 ARRIRAW as .arx file sequences. Therefore the ARRIRAW HDE Transcoder is needed to convert ALEXA 35 ARRIRAW data to MXF/HDE files. This is only possible because CODEX agreed to license the HDE encoder component to ARRI. What you need to be aware of is that ARRIRAW data from other ARRI cameras can only be encoded with the CODEX Device Manager, you cant use the ARRIRAW HDE Transcoder.
The ARRIRAW HDE Transcoder is available with a simple user interface for macOS and Windows and as a command line tool for macOS, Windows, and CentOs 6. The UI version can be pointed to a source folder, which can either contain clips or further folders containing clips. The command line version can also encode individual MXF files.
At the output, the Transcoder mirrors the file structure from the source folder. With a checksum option, the Transcoder generates an ASC Media Hash List containing xxHash64be or MD5 checksums for each MXF/HDE
file. These can be used to detect modifications or file corruption down the line.
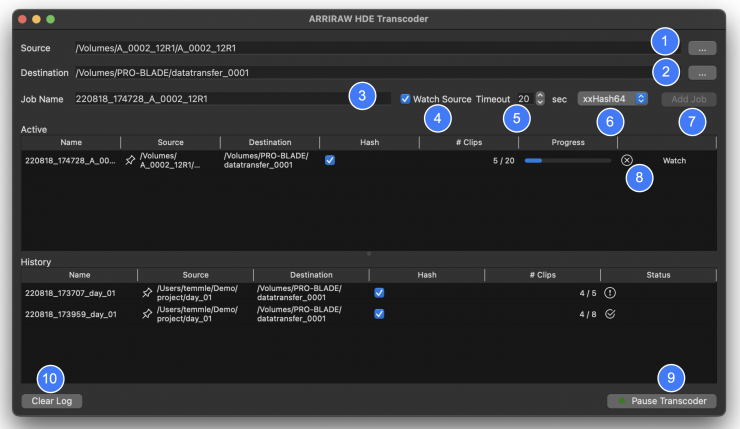
So, how do you use it? Well, below are the steps.
- Select a ‘Source’ folder that may contain clips or a folder containing more than one reel of clips. Non-camera files will be ignored. The .ale and .bin file will be copied over.
- Select a ‘Destination’ folder where the encoded output will be written.
The software will recreate the directory structure it finds in the source folder. - The ‘Job Name’ is automatically created based on the source folder name, but can be changed.
- Activate ‘Watch Source‘ and the software will encode any clips already present in the source folder and then wait for new files to show up. ‘Watch Source’ jobs are shown with a pin in the ‘Active’ job list. Click on the X icon (8) to cancel the job and proceed to the next job, if present.
- Some file systems may cause problems for the ‘Watch Source’ option, so the Transcoder may show an error message like ‘not enough data’ and fail to encode a clip. If that happens, increasing the Timeout (up to 120 secs) may resolve the issue.
- Use the selection box next to the Timeout to choose if the Transcoder will create an xxHash64be checksum, an MD5 checksum, or no checksum for each file it creates.
- When everything is set, clicking on ‘Add Job’ will start the Transcoder or add the job to the list of pending jobs.
- Click the ‘X’ icon in the ‘Active’ job list to abort a running job or cancel a ‘Watch Source’ job.
- If you want to temporarily stop the Transcoder, e.g. to free up CPU resources, click ‘Pause Transcoder’. The encoder will finish processing the current clip and then wait until you click the button again to ‘Resume’ the job.
- Click on ‘Clear Log’ to clear the jobs shown in the job ‘History’ list. Restarting the Transcoder also will clear this window. ‘Clear Log’ has no effect on the Transcoder’s log file.
- In the application menu, ‘File > Show Log File…’ will present a verbose log output which is rotated once a day.
Files processed by the ARRIRAW HDE Transcoder get “_hde” appended before the file extension.
The Transcoder can generate an ASC Media Hash List containing a list of xxHash64 (big endian) or MD5 checksums for each file that is created in an active job. This MHL will be placed in an ascmhl folder at the selected destination directory.
It is important to remember that the ARRIRAW HDE Transcoder does not perform a copy checksum verification. Encoding ARRIRAW files results in new files, not a copy. The checksums provided in the ASC MHL, therefore, are new source checksums that can be used to verify the downstream file integrity. The file integrity can be verified using the ascmhl command line tool. Installation and use of the ascmhl tool can be found here: https://ascmhl.readthedocs.io/
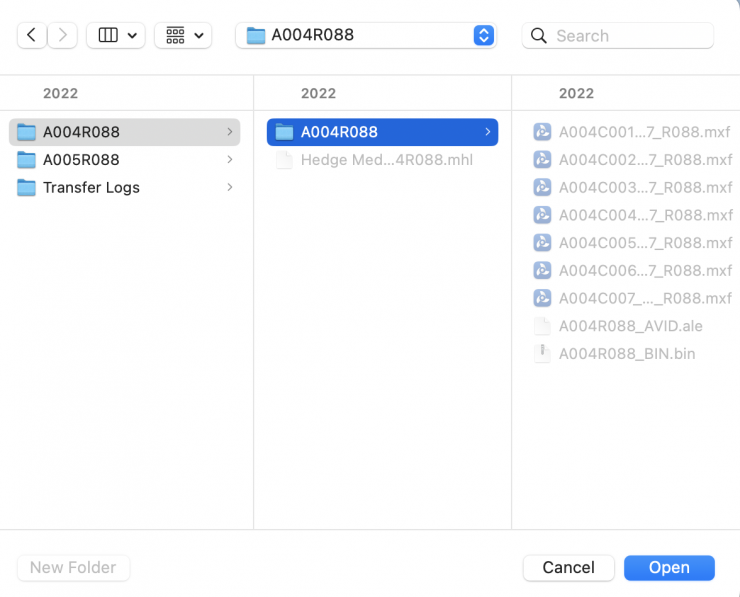
One thing you need to be aware of when using the ARRIRAW HDE Transcoder is you can only select entire cards, you can’t select individual files.

The Transcoder is super easy to use and it is able to massively reduce the file sizes of ARRIRAW. The speed of the transfers depends on lots of factors such as what computer and drives you are using.
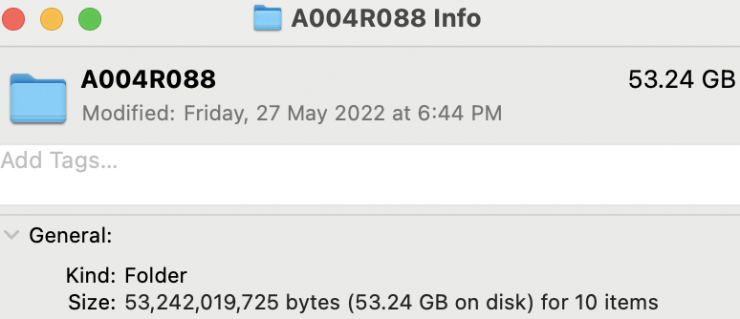
Before using ARRIRAW HDE Transcoder 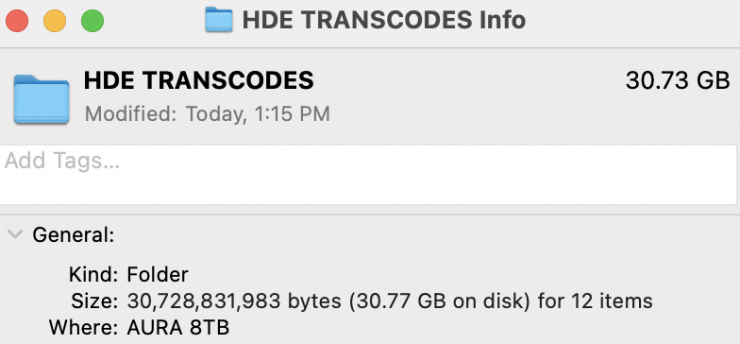
After using ARRIRAW HDE Transcoder
I found that a 53.24 GB file of ARRIRAW clips got reduced to 30.37 GB. That’s a 42.2% decrease in the original file size.
What can the ALEXA 35 Record?
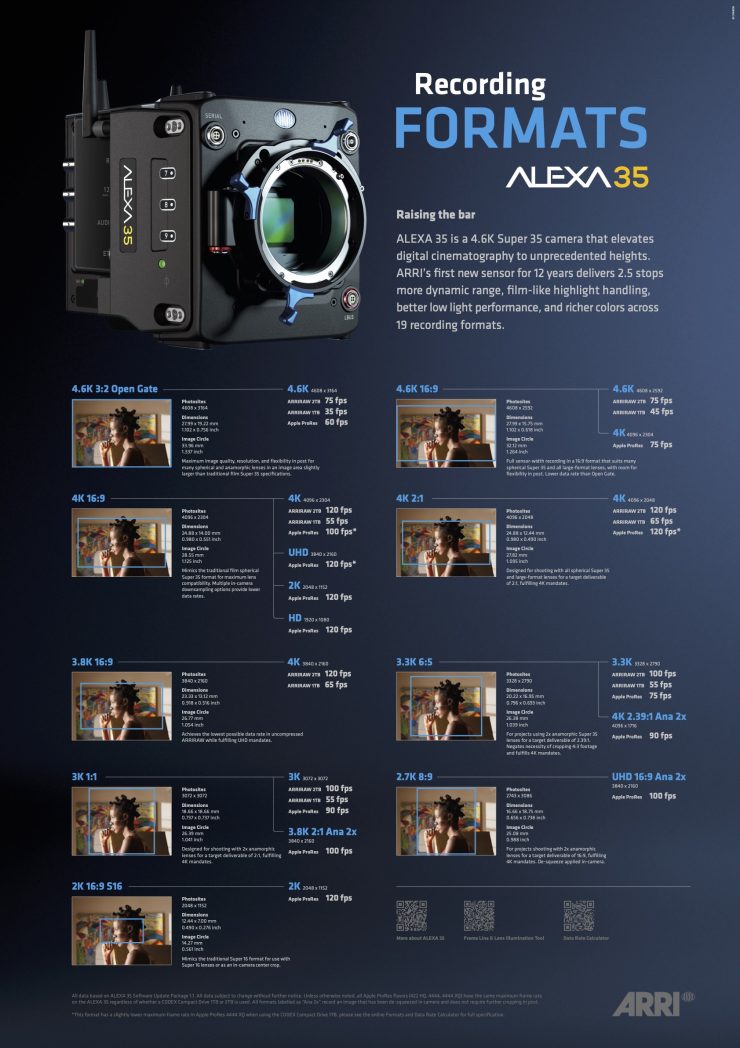
On paper, there is nothing that jumps out at you as far as recording resolutions and frame rates are concerned. There are no 6K or 8K, or extremely high frame rates. There is a huge range of much more affordable cameras out there that have far better specifications on paper. This is the problem with specifications, they rarely tell you the true story about any camera. Judging any camera based on some listed specifications is like reading the synopses of a movie and coming to a conclusion without actually watching it.
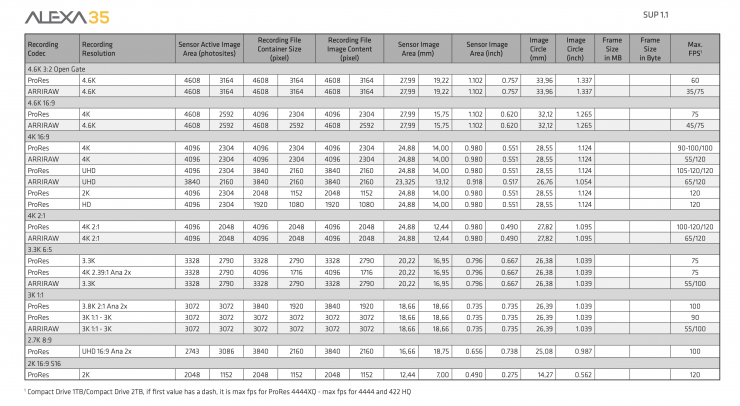
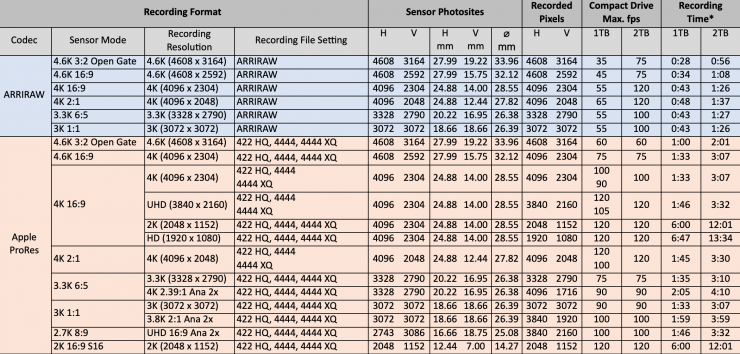
With ARRI, it is never about the specifications, it is about usability, reliability, image quality, and creating a whole ecosystem. There is so much more to a camera than specifications and fancy marketing.

The ALEXA 35 has a wide array of recording options available. As I already mentioned, you can record in either ARRIRAW or ProRes 422HQ/4444/4444 XQ.
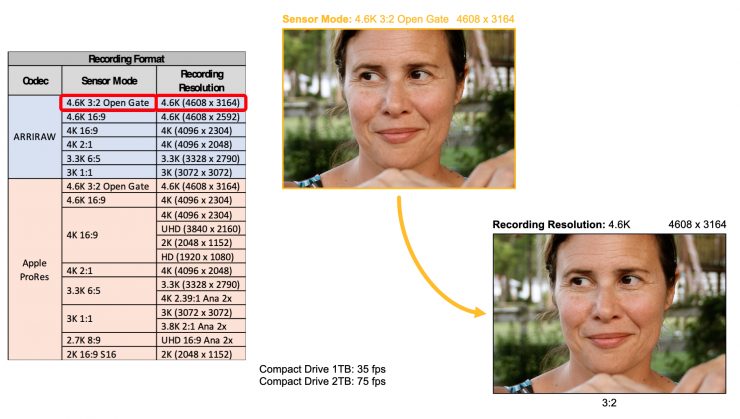
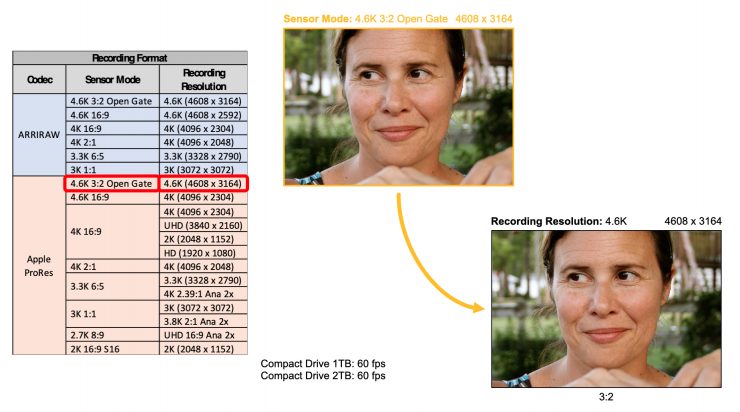
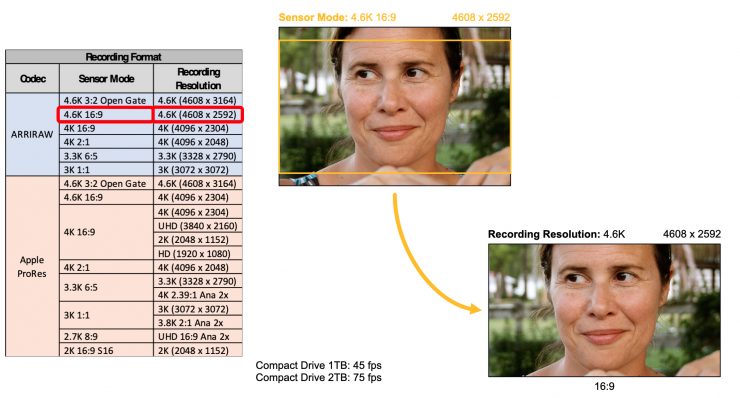
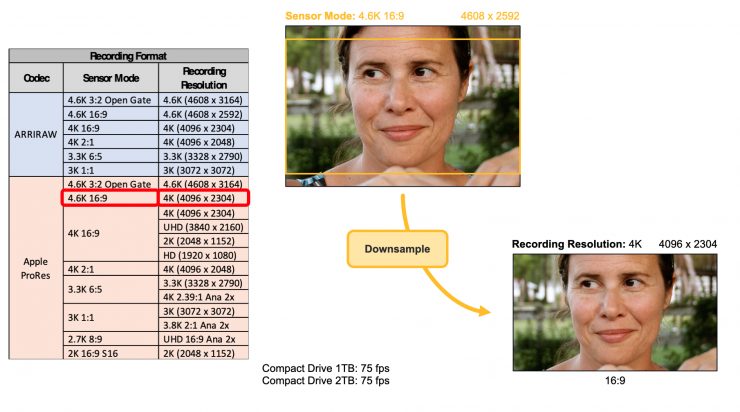
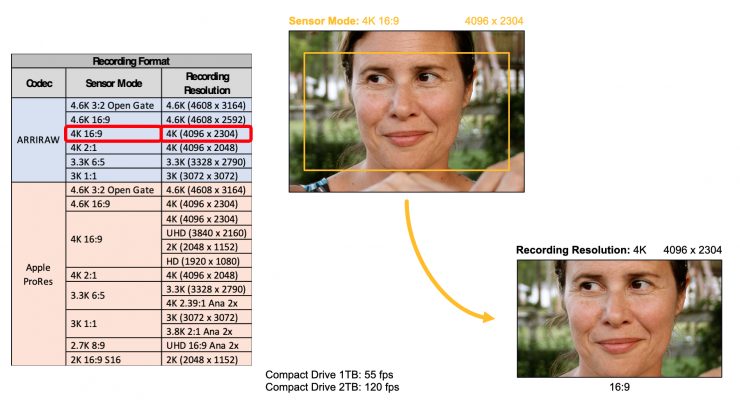

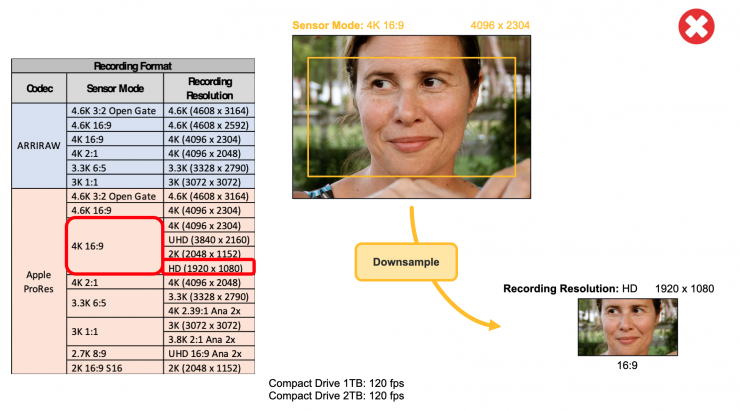
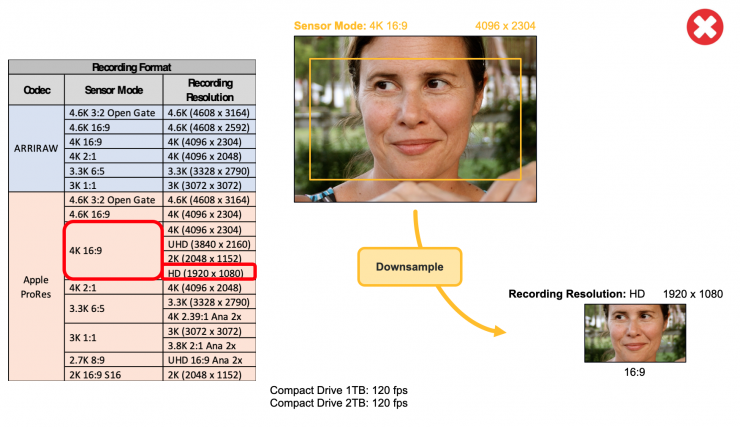
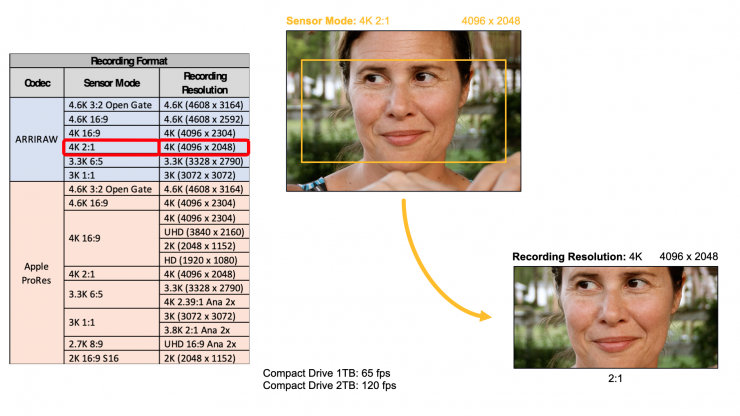

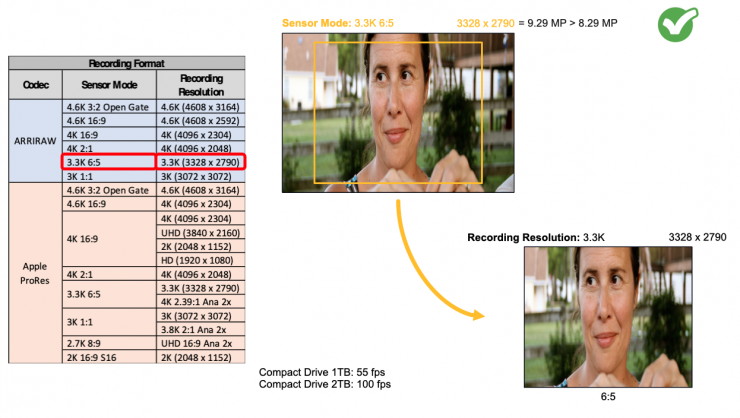
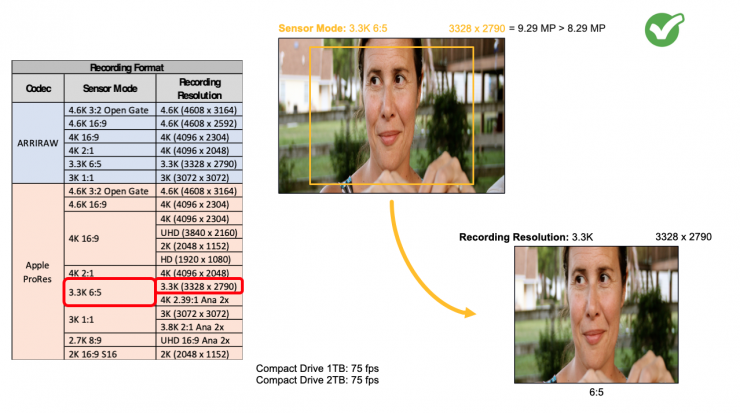
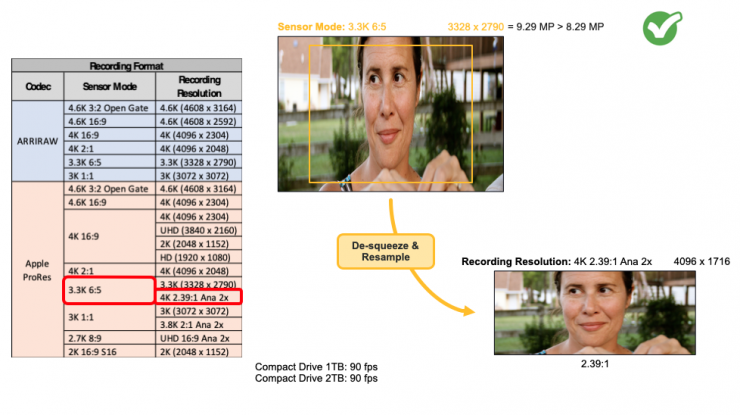

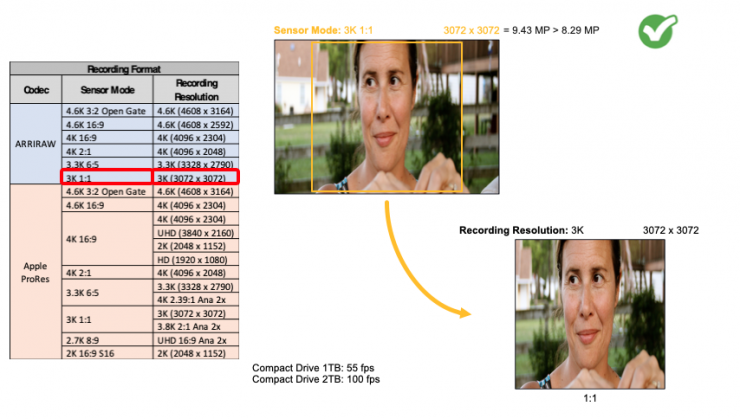
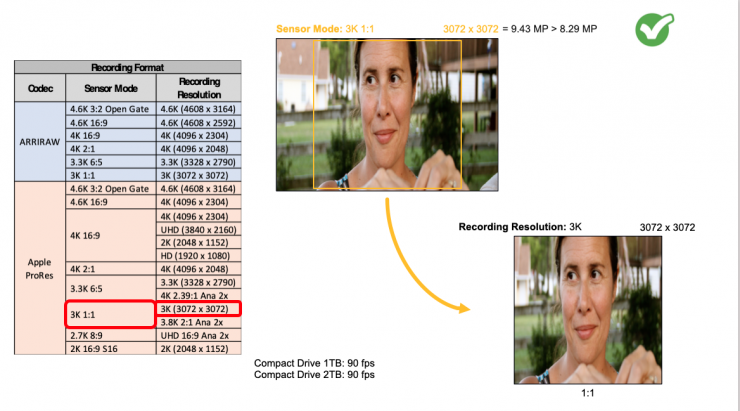
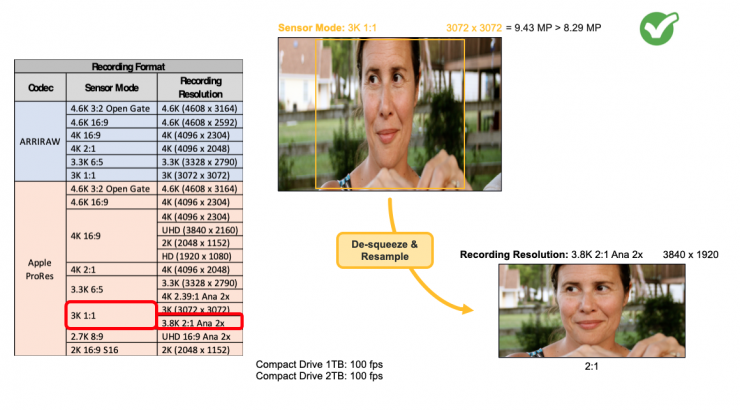
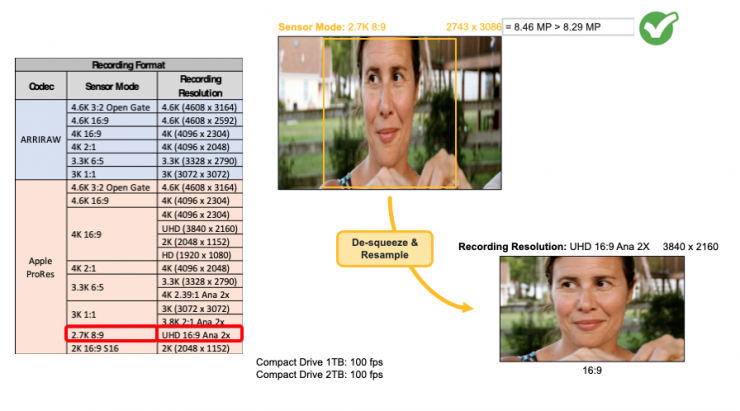
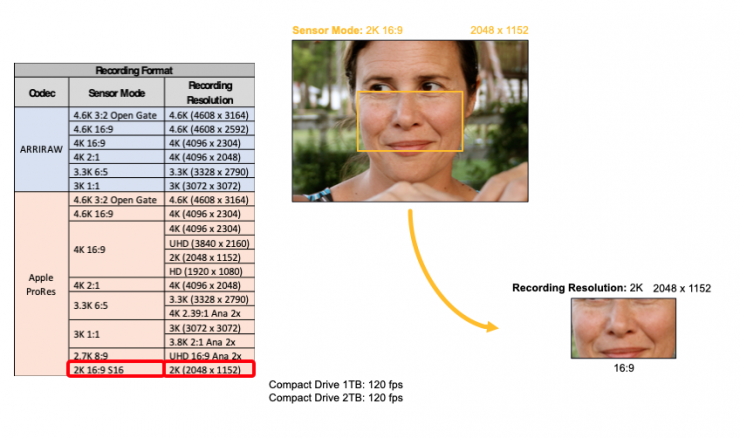
There is a whopping 19 different recording format combinations to choose from.

ARRI ALEXA SUP 1.1 added another recording mode called 3.8K UHD ARRIRAW.
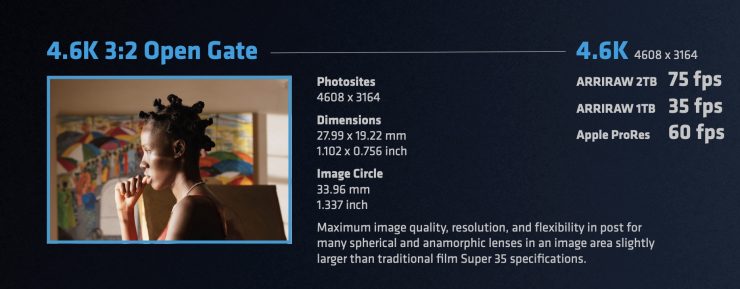
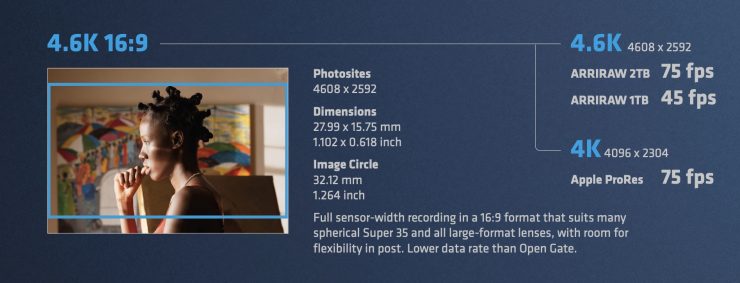
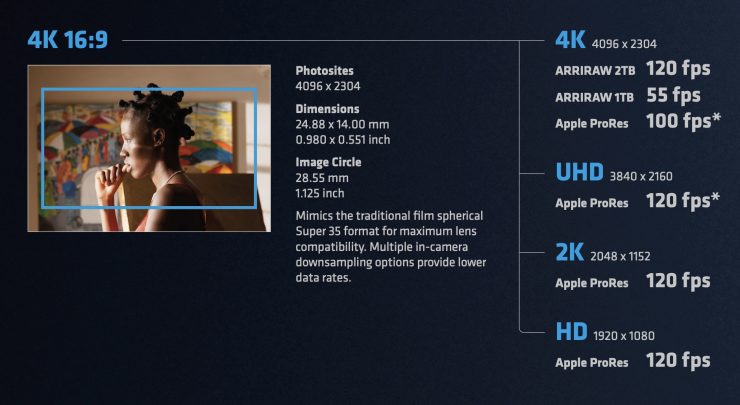
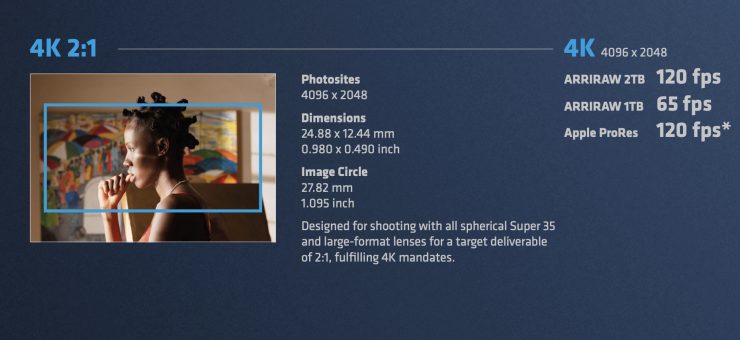
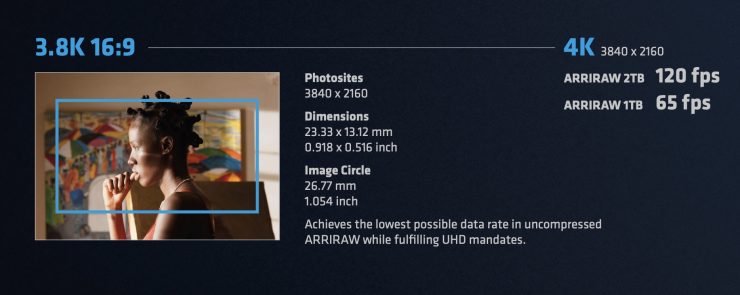
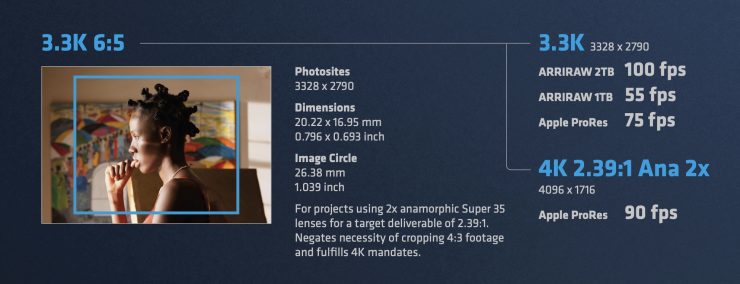
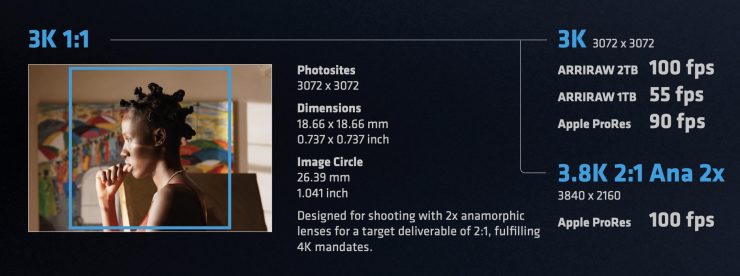
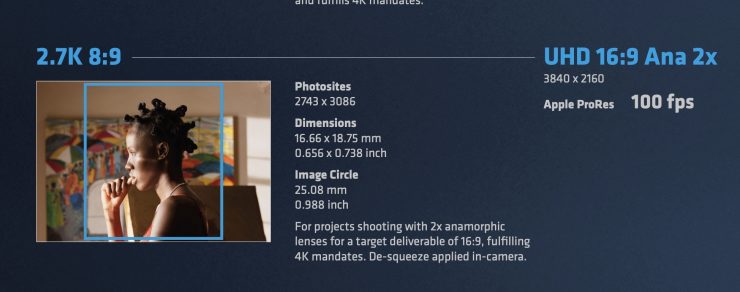
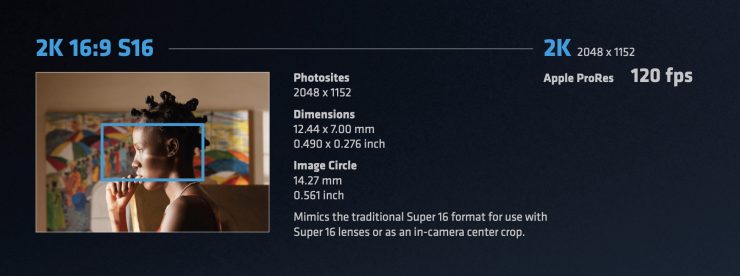
Why so many recording options? Well, ARRI did an extensive industry survey only to find that everyone wanted something different, so that is why they decided to give users so many options. There are also options for in-camera down-sampling and in-camera anamorphic de-squeezing when shooting ProRes.
ARRI has listed all of the image circle coverage requirements for the various shooting modes so you can clearly see what S35 lenses will work.
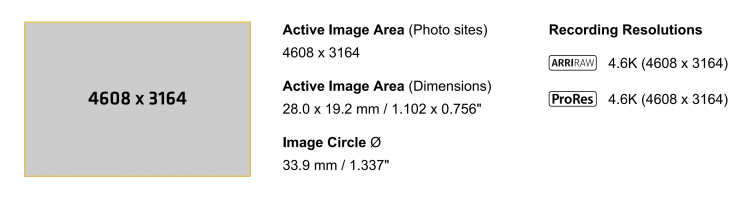
If storage and money aren’t an issue for you, then shooting ARRIRAW 4.6K 3:2 Open Gate will provide you with the best results. This will not only provide you with the absolute best image quality, but it will also give you the greatest flexibility in post, and the safest archiving solution. The 18-bit (linear) RAW data stream from the sensor can be recorded as 13-bit (log) ARRIRAW files. Nothing is “baked” into an ARRIRAW image. Image processing steps like de-Bayer, white balance, sensitivity, up-sampling, or down-sampling, which are irreversibly applied in-camera for compressed recording, HD-SDI outputs, and the viewfinder image, are not applied to ARRIRAW. All these parameters can be applied to the image in post.
ARRIRAW is also an excellent future-proof archiving format. ARRIRAW is uncompressed and unencrypted, which means that anyone can access their ARRIRAW data with standard software tools in the future without any proprietary decryption or decompression.
While the creation of ARRIRAW inside the camera is relatively straightforward, the creation of color images for compressed recording, SDI outputs and the viewfinder is more complex, as the camera has to create multiple streams of full color images from the raw image data in real-time. Not only that, but the viewfinder image, the recorded image, and a number of SDI outputs can have different resolutions and possibly different looks, and different output gamma settings. To achieve this, a powerful image processing engine de-bayers the raw image data, applies white balance and sensitivity, and up/down-samples the images depending on the required recording/output format.
To achieve the tremendous processing power for all those steps, ARRI cameras’ image processing hardware consists of the latest generation of FPGAs (Field Programmable Gate Array), which are re-programmable processing chips. FPGAs not only have the horsepower to deliver multiple streams of the highest image quality, but their re-programmable nature ensures that improvements in processing can be made long after the camera has been released.
Anamorphic shooting
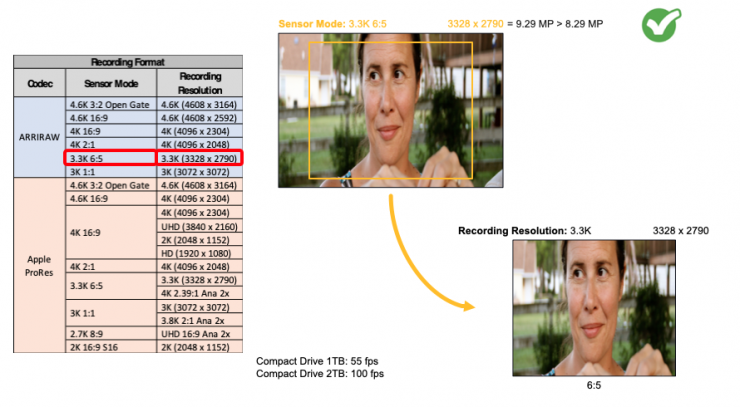
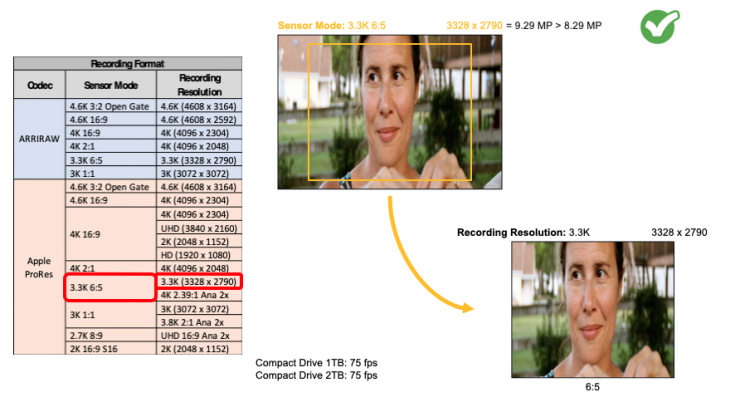
For anamorphic shooting, along with 4.6K 3:2 Open Gate, ARRI gives you a few options such as 3.3K 6:5 which can be recorded in either ARRIRAW or ProRes.
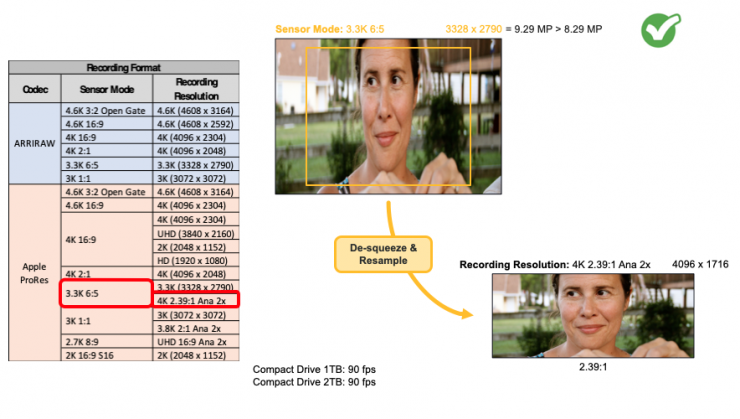
There is also the ability when using the 3.3K 6:5 sensor mode to have the camera de-squeeze and resample the image for you, so you end up with a 4K (4096 x 1716) 2.39:1 image. This can only be done when shooting ProRes.
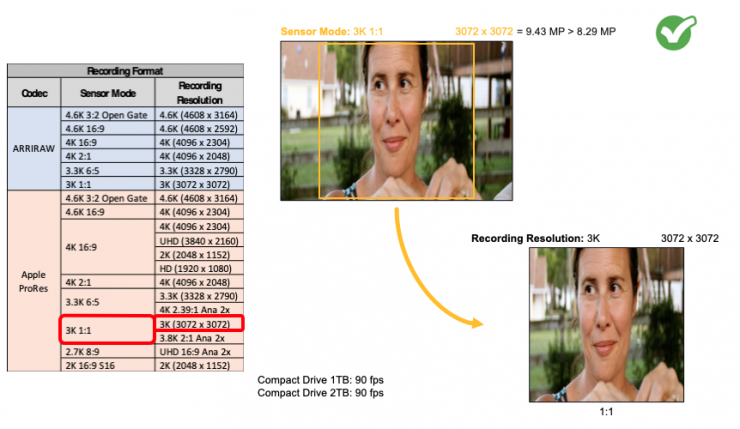

There is also a 3K 1:1 sensor mode and you want to use a 2x anamorphic lens for a 2:1 aspect ratio result. Again, just like with the 3.3K 6:5 mode, you can have the camera de-squeeze and resample the image for you, so you end up with a UHD (3840 x 1920) 2.39:1 image. This de-squeeze and downsample can only be done when shooting ProRes.
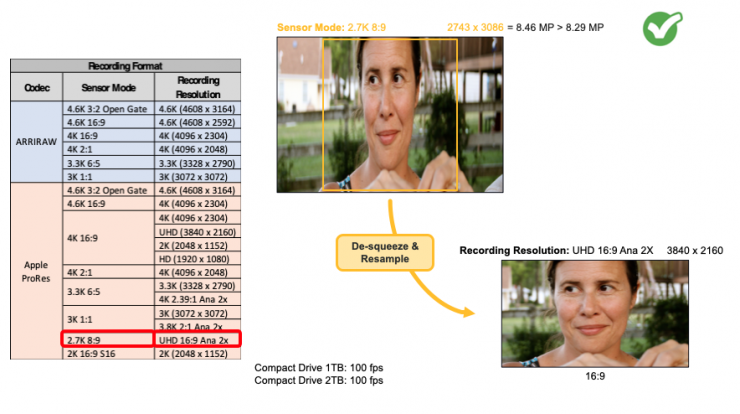
If you want to go another route you can also choose to shoot 2.7K 8:9 where the camera will de-squeeze and resample the image so you end up with a UHD 16:9 frame. Again this is only available in ProRes.
The lens squeeze factor determines the factor that is used for anamorphic de-squeeze on EVF/Monitor and SDI. This value is also written into the metadata of the clip and allows video players and editing software to automatically de-squeeze clips that have been shot with anamorphic lenses.
The ALEXA 35 supports a wide variety of squeeze factors.
The following lens squeeze factors are available:
- 1.00 for all spherical lenses
- 1.25 e.g. Ultra Panavision 70 Lenses
- 1.30 e.g. Vantage Hawk Lenses
- 1.50 e.g. P+S Technovision, Iscorama, Kowa
- 1.65 e.g Panavision Ultra Vista Anamorphic lenses
- 1.80 e.g Cooke Anamorphic/i Full Frame Plus lenses
- 2.00 for classic 2x squeeze CinemaScope S35 lenses
There is still a bug when you use the VF Zoom or SDI Zoom with an anamorphic lens attached, as the image loses its desqueeze factor.
Frame Rates
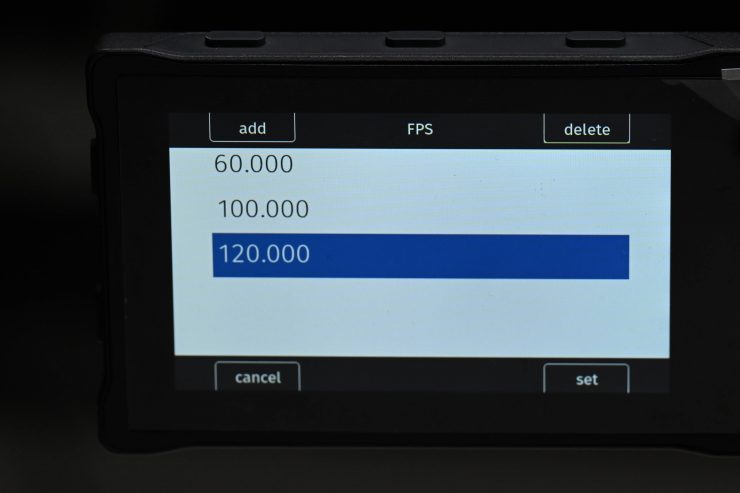
The maximum frame rates the camera can record depend on whether or not you are shooting in ARRIRAW or ProRes and also whether you are using a 1TB or 2TB Codex Compact drive. The new 2TB Codex Compact drive which is being introduced along with the ALEXA 35 allows for capturing higher frame rates when shooting ARRIRAW. I will talk more about this further down in the article.
| SENSOR MODE | RECORDED RESOLUTION | MAXIMUM FPS |
| 4.6K 3:2 Open Gate | 4.6K (4608 x 3164) | 75fps |
| 4.6K 16:9 | 4.6K (4608 x 2592) | 75fps |
| 4K 2:1 | 4K (4096 x 2048) | 120fps |
| 3.3K 6:5 | 3.3K (3328 x 2790) | 120fps |
| 3K 2:1 | 3K (3072 x 3072) | 100fps |
Above you can see the maximum framerates when recording in ARRIRAW in the various recorded resolutions and sensor modes.
| SENSOR MODE | RECORDED RESOLUTION | MAXIMUM FPS |
| 4.6K 3:2 Open Gate | 4.6K (4608 x 3164) | 60fps |
| 4.6K 16:9 | 4K (4096 x 2304) | 75fps |
| 4K 16:9 | 4K (4096 x 2048) UHD (3840 x 2160) 2K (2048 x 1152) HD (1920 x 1080) | 100fps 120fps 120fps 120fps |
| 4K 2:1 | 4K (4096 x 2048) | 120fps |
| 3.3K 6:5 | 3.3K (3328 x 2790) 4K 2.39:1 Ana 2x | 75fps 90fps |
| 3K 1:1 | 3K (3072 x 3072) 3.8K 2:1 Ana 2x | 90fps 100fps |
| 2.7K 8:9 | UHD 16:9 Ana 2x | 100fps |
| 2K 16:9 S16 | 2K (2048 x 1152) | 120fps |
Above you can see the maximum frame rates when recording in ProRes in the various resolutions and frame sizes. Now, you need to be aware that some of these maximum frame rates are not available when recording in ProRes 4444XQ.
The project rate determines how many frames the timecode counts per second, and also determines the frame rate at which clips are played back.
Changing the project frame rate will automatically change the sensor frame rate and the SDI frame rates to the same frame rate. It is still possible to have different frame rates for these settings by changing the sensor frame rate or the SDI frame rates individually.
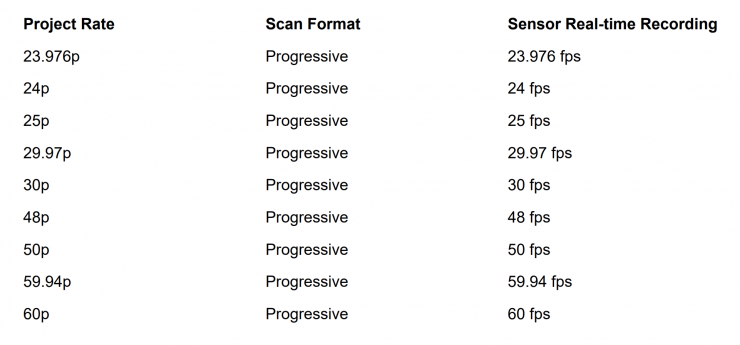
Above you can see the project rates that are available.
It would have been nice to have seen some higher frame rates, even if it was just in HD.
Bit-depths & Data Rates
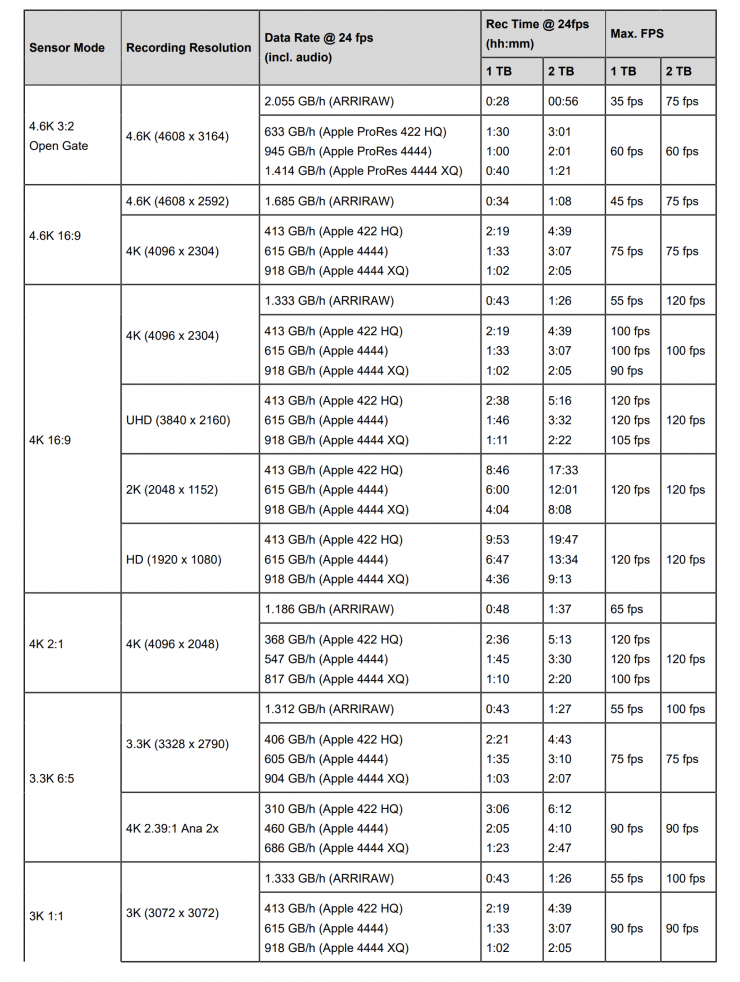
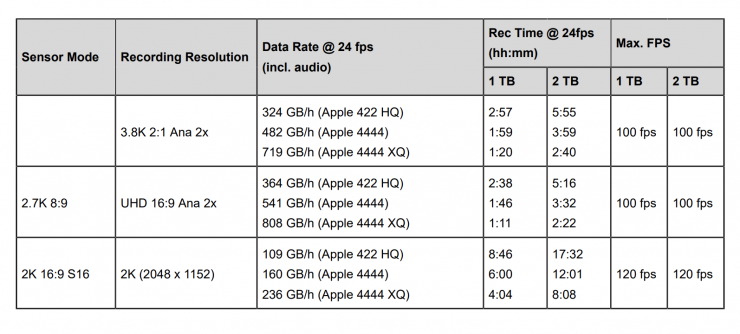
Here is where things get very interesting. Because of the increased dynamic range that the ALEXA 35 is able to capture, the existing ARRIRAW and ProRes 422 HQ bit-depths weren’t big enough to keep all of the information. In Layman’s terms, it is like having a glass that only takes 500ml of milk, but you want to put 750ml of milk in it. The only solution is to get a bigger glass, and that is essentially what ARRI did.
The ALEXA 35 uses 18-bit linear processing in-camera. With previous ALEXA cameras, it was 16-bit linear saved as 12-bit Log.
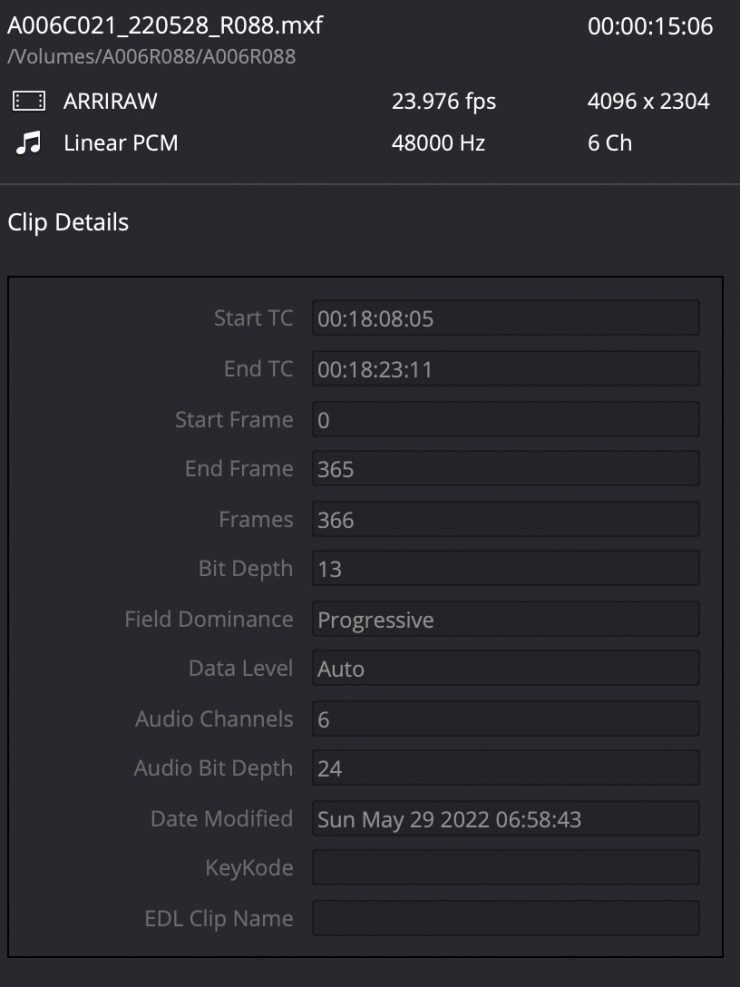
So what else has changed? Well, ARRIRAW recording has now changed from 12-bit Log to 13-bit Log. Additionally, Apple ProRes 422HQ recording has also changed from 10-bit LogC3 to 12-bit LogC4. This means that all ProRes recordings regardless of what you choose will be 12-bit. The reason for this is that you can’t technically fit 17 stops of dynamic range into a 10-bit container.
Now, you may be saying rubbish! ProRes 422HQ is only 10-bit! I thought so too, but that is simply not the case. Neither ProRes 422HQ nor ProRes 4444/4444XQ actually has a bit-depth. All it knows is that somebody fed it an image that had 10 or 12 bits. What ARRI is doing is that they are only feeding the compression 12-bit images and that is what it is being recorded as. If NLE and color grading systems correctly show ARRI’s metadata they will show 12-bit. Some programs may be hardcoded and they won’t read the ARRI metadata and they will by default just always show ProRes 422HQ as 10-bit.
These increased bit-rates mean that the ALEXA 35 has a slightly higher data rate than the ALEXA Mini LF.
Pre-Recording
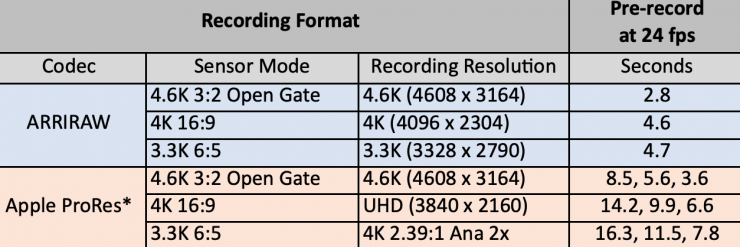
ARRI has also included increased pre-recording capabilities in the ALEXA 35. Above you can see how many seconds of pre-record are available when shooting various resolutions as 24fps. Pre-record will work in all frame rates, but the times will vary depending on what you choose.
These new extended pre-recording times will be welcomed by wildlife and documentary shooters.
SUP 1.1

In May 2023 ARRI released SUP 1.1 for the ALEXA 35, the first major firmware update for the camera. Most of the new features in this update are based on direct customer requests, including the new ARRIRAW UHD recording format for the lowest ARRIRAW data rate while fulfilling 4K mandates, playback control from the side display, four new handy user buttons (VF Check HDR, VF Processing, FPS Preset, Audio Solo), and SDI clone mode.
Overview of New Features
- Wireless Video Optimized LogC4
- 3.8K UHD ARRIRAW
- Status Overlay Icon for ARRI Texture
- Playback on Side Display
- User Buttons 1: VF Check HDR
- User Buttons 2: VF Processing
- User Buttons 3: FPS Preset
- User Buttons 4: Audio Solo
- Automatic WiFi Host Channel selection
- SDI Clone Mode
- Lens Data Depth of Field Display
- New Default Framelines
- Sync Shift Improvements
- Warning Message: Default WiFi Password
- Info Pane 1: FPS Menu
- Info Pane 2: Playback
- Green Bubble when Camera is Level
- LAN Gateway Setting
- SUP Version on Side Display
- Keep SDI Frame Rate when changing Sensor Mode
- Software Update for MVF-2 with changed Hardware Component
- Bugfixes and stability improvements
Wireless Video Optimized LogC4
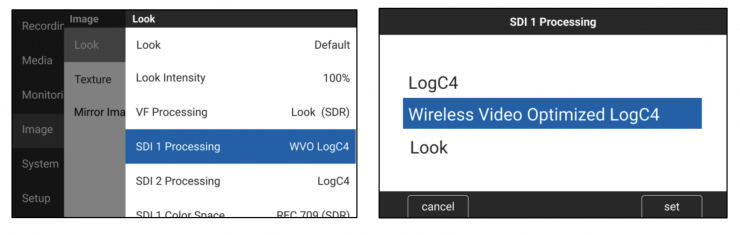
MENU > Image > Look > SDI 1 Processing
MENU > Image > Look > SDI 2 Processing
Wireless Video Optimized LogC4 (WVO LogC4) is an intermediate encoding for ALEXA 35 SDI outputs that is designed to improve image quality when transmitting LogC4 over wireless video transmitters. The WVO encoding is an option built into the ALEXA 35 from Software Update Package SUP 1.1 on. A matching WVO decoding LUT must be used after signal reception to reconstitute regular LogC4.
WVO LogC4 can be helpful if you are sending the LogC4 signal from the camera wirelessly for color grading on set and are seeing banding artifacts in the image. In the following situations, you should not use WVO LogC4:
- If you do not see any artifacts
- If you are simply looking at the SDI signal without color grading on set
- If you are using the “Look” SDI processing, which means that you are applying a look file in camera
- If you are viewing the SDI signal output from the ALEXA 35 via a direct BNC cable
When SDI Processing is set to “Wireless Video Optimized LogC4”, the indication in the SDI status overlays will show “WVO”, where normally “LOG” or “Look” are shown. A technical note describing WVO LogC4 in detail can be downloaded here: www.arri.com/alexa35-wvotechnote
The WVO decoding LUTs can be downloaded here: www.arri.com/alexa35-wvoluts
3.8K UHD ARRIRAW
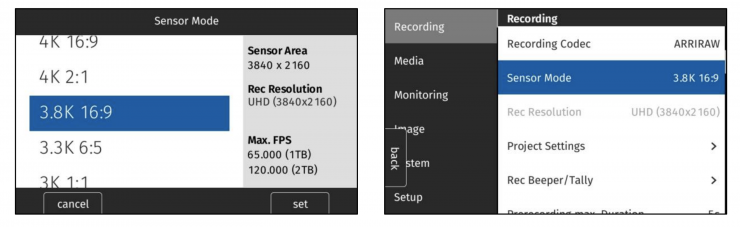
MENU > Recording > Recording Codec > ARRIRAW
MENU > Recording > Sensor Mode > 3.8K 16:9
ARRIRAW 3.8K 16:9 – UHD (3840 x 2160) is a new recording format that is useful when you want to achieve the lowest possible data rate in uncompressed ARRIRAW while fulfilling 4K UHD mandates. The maximum frame rate is 120 fps for Compact Drive 2TB and 65 fps for Compact Drive 1TB. The recording time at 24 fps is 1:38 for Compact Drive 2TB and 0:49 for Compact Drive 1TB. This new recording format can be processed with the ARRI Reference Tool version 1.1.0 or later and is compatible with the ARRIRAW HDE Transcoder software 1.00 and later.
Status Overlay Icon for ARRI Texture
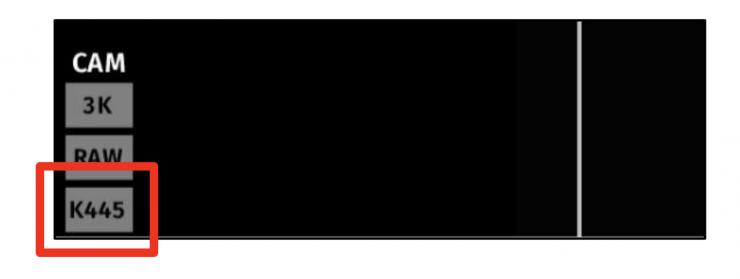
The four-digit code for the currently selected ARRI Texture is now also shown on the status overlays in the CAM section. The currently selected ARRI Texture will be shown in standby and recording.
Playback on Side Display
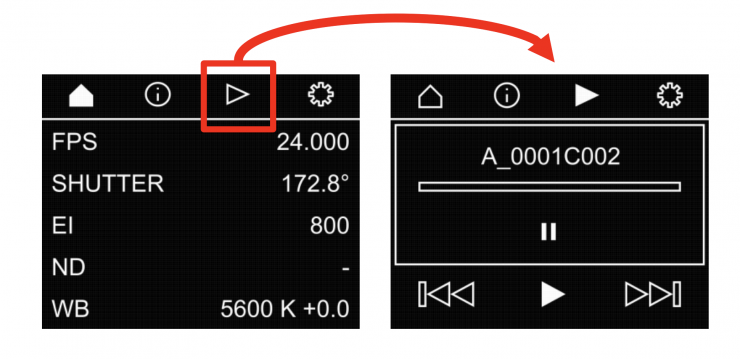
The side display has gained a new screen: Playback. This is very handy when operating the camera without a viewfinder and you want to quickly review the last take. On the side display are options to control playback speed and for selecting clips. The side display does not have a clip list; for that, you must look at the menu of the MVF-2 viewfinder.
User Buttons 1: VF Check HDR
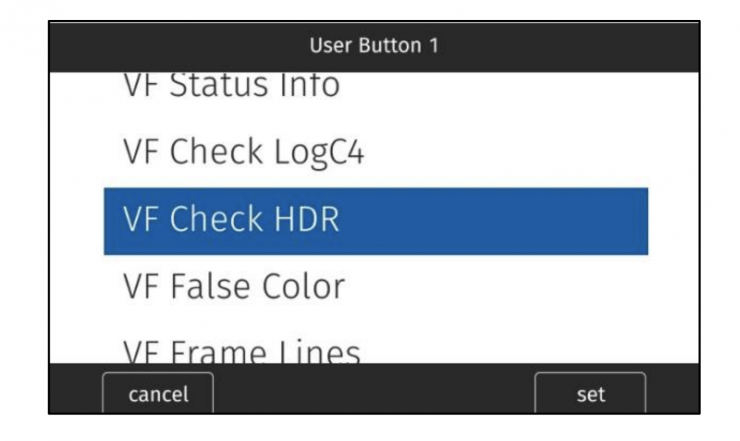
MENU > User Buttons
“VF Check HDR” is a new function that can be assigned to a user button. When the user button “VF Check HDR” is briefly pressed and released, the viewfinder processing (MENU > Image > Look > VF Processing) is switched to “Look (EVF: HDR, Mon: SDR)”. This means that the currently chosen look is shown in the viewfinder eyepiece in High Dynamic Range (EVF: HDR) and on the flip-out monitor in Standard Dynamic Range (Mon: SDR). Pressing and releasing the user button again will switch the viewfinder back to whatever VF Processing was set before.
Optionally, the user button “VF Check HDR” can be pressed and held down. In this case, VF Processing will be switched to “Look (EVF: HDR, Mon: SDR)” only as long as the button is held down. When the button is released, VF Processing will switch back to whatever VF Processing was set to before. This is an efficient and fast way to quickly check the appearance of the image in HDR and then get back to the normal VF Processing.
If you want to toggle between LogC4, SDR and HDR in the viewfinder, you can use the new user button function “VF Processing”.
User Buttons 2: VF Processing

MENU > User Buttons
“VF Processing” is a new function that can be assigned to a user button. Each time the user button “VF Processing” is briefly pressed and released, the camera will toggle through the three options in MENU > Image > Look > VF Processing:
- LogC4
- Look (SDR)
- Look (EVF: HDR, Mon: SDR)
If you just want to quickly switch the viewfinder to HDR and then back to your previous VF Processing setting, you can use the new user button function “VF Check HDR”.
User Buttons 3: FPS Preset
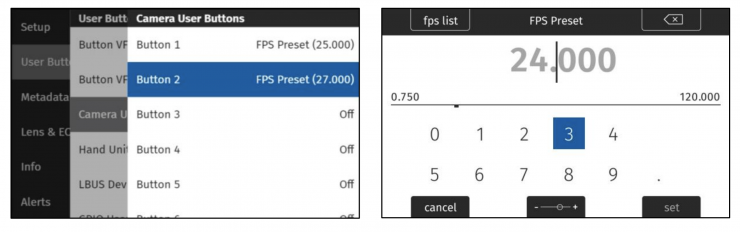
MENU > User Buttons
“FPS Preset” is a new function that can be assigned to a user button, where a specific fps value is assigned to that user button. When the user button is briefly pressed and released, the camera will switch to the assigned frame rate.
Pressing and releasing the user button again will switch the camera back to the previously set frame rate. Different user buttons can be assigned different frame rates.
User Buttons 4: Audio Solo
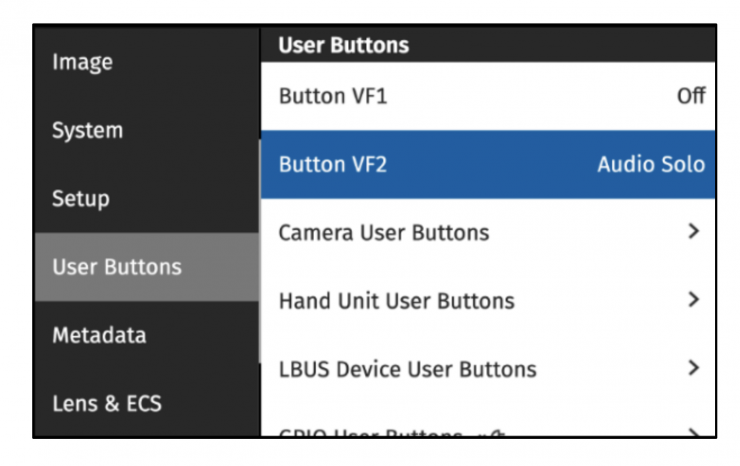
MENU > User Buttons
“Audio Solo” is a new function that can be assigned to a user button. When the “Audio Solo” user button is briefly pressed and released, the camera will output only one audio channel through the headphone connector. Each time the user button “Audio Solo” is pressed and released, the camera will toggle through which channel is bein monitored: Off, Ch 1, Ch 2, Ch 3, Ch 4. Channels that are not assigned to an audio input are skipped. This user button also works in playback.

When Audio Solo is active, the selected channel is marked with an ear symbol in the audio bars status overlays of the viewfinder and SDI outputs as well as on the HOME screen. Audio Solo only affects the headphone output, not the audio embedded in SDI.
Automatic WiFi Host Channel Selection
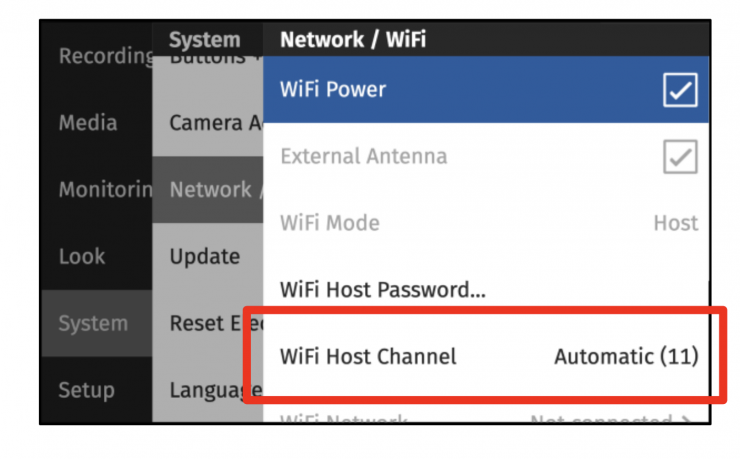
MENU > System > Network > WiFi Host Channel
The menu item “WiFi Host Channel” has now a new option: Automatic. When set to Automatic, each time the camera is booted or WiFi is turned on, the camera will look for the strongest WiFi channel while avoiding conflicting ARRI Electronic Control System (ECS) channels. The number in brackets after the word “Automatic” shows the channel chosen by the camera. The “Automatic” selection is the new factory default.
SDI Clone Mode
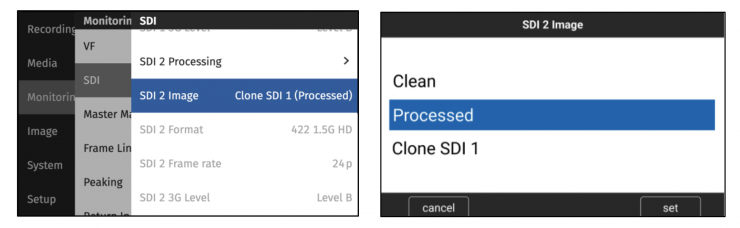
MENU > Monitoring > SDI > SDI 2 Image > Clone SDI 1
When “Clone SDI 1” is selected, the following SDI 1 settings will be copied to SDI 2: Format, Surround View, Overlays, Status Info, Hide Messages, Color Space, Frame Rate, Surround Mask, Frame Lines (on/off), Status Components, Outside Shading, 3G Level, Image (clean/processed), Magnification, Center Mark, Overlay Brightness, and Processing (LogC4/WVO LogC4/Look). Please note that this setting does not, as in previous cameras, output SDI 1 on both SDI outputs, but instead maintains two separate image paths, just with identical settings, allowing you more flexibility in usage.
As long as “Clone SDI 1” remains selected, SDI 1 settings changes will automatically be applied to SDI 2. If then SDI 2 Image is set to something other than “Clone SDI 1”, the SDI 2 settings will remain what they are and will not be altered anymore when an SDI 1 setting is changed.
To quickly transfer all SDI 1 settings to SDI 2, switch SDI 2 Image to “Clone SDI 1” (which will copy all SDI 1 settings to SDI 2) and then switch back to your previous SDI 2 Image setting. The text in brackets will helpfully show if SDI 1 is set to “clean” or “processed”. SDI 1 and SDI 2 user buttons remain
functional for their respective outputs.
Lens Data Depth of Field Display
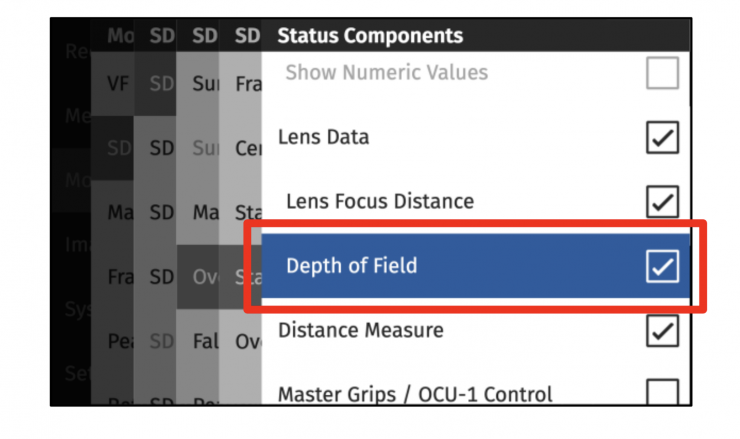
MENU > Monitoring > SDI > SDI Processing > Overlays > Status Components > Lens Data/Depth of Field
The current depth of field as calculated by the camera can now be displayed in the SDI status overlays to the left (near depth of field) and the right (far depth of field) of the lens focus distance. Additionally, if a distance measure device is attached and “Distance Measure” is turned on, the measured distance is displayed.
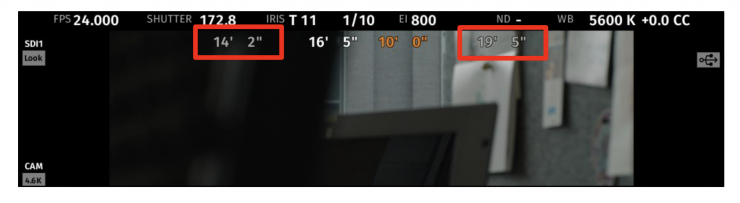
The measured distance turns orange if it is outside of the depth of field. Please note that the calculated depth of field is dependent on the circle of
confusion, which you can set in the new menu item MENU > Lens & ECS > Circle of Confusion.
New Default Framelines
Default framelines are now available for all sensor modes. A new ARRI 0.56 (9:16) default frameline has been added to the 3K 1:1 sensor mode.
Sync Shift Improvements
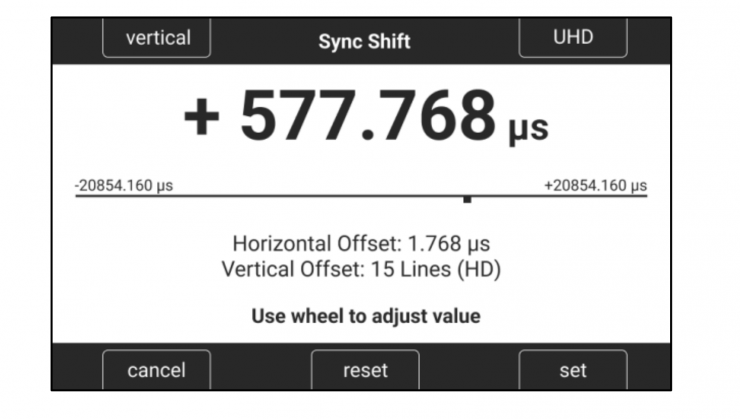
MENU > System > Sensor > Sync Shift
To easier match the SDI output to a reference signal in virtual production or multicam situations, the Sync Shift user interface has been greatly improved. It now supports adjustments vertically (lines) and horizontally (μs). The lines are automatically calculated for the desired output format, which can be switched between UHD and HD.
Warning Message: Default WiFi Password
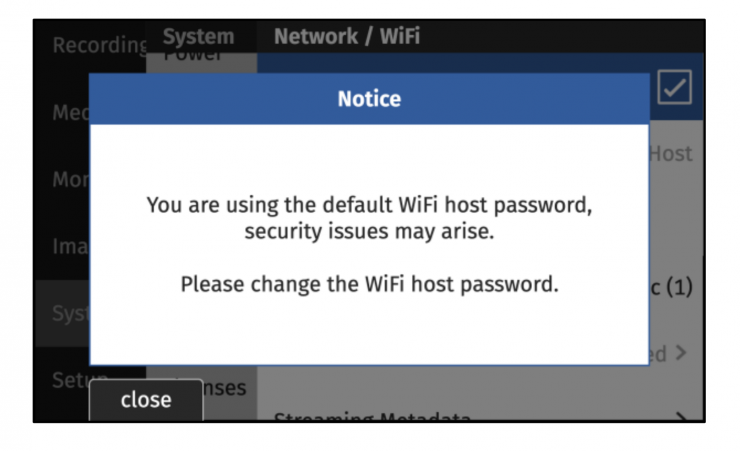
MENU > System > Network > WiFi Mode > Host
A warning message is displayed when activating WiFi host mode for the first time if the factory default password is still in use. For greater security, ARRI recommends changing the factory password when using WiFi host mode.
Info Pane 1: FPS Menu HOME > FPS
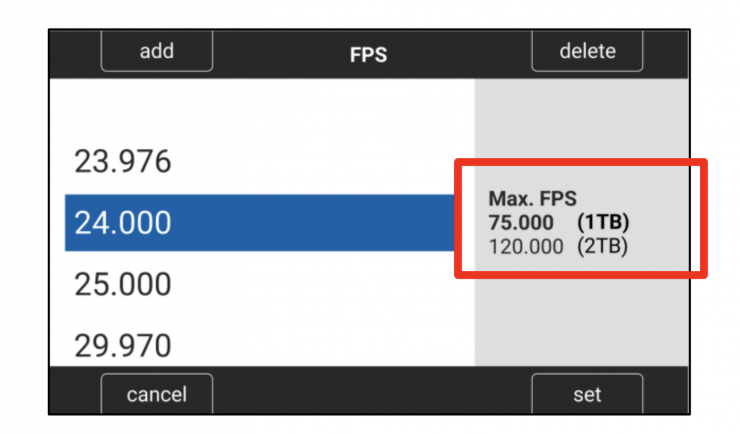
The FPS menu now has an info pane, showing the maximum fps for the current sensor mode and drive combination. The text in the line representing the currently inserted drive is bold.
Info Pane 2: Playback
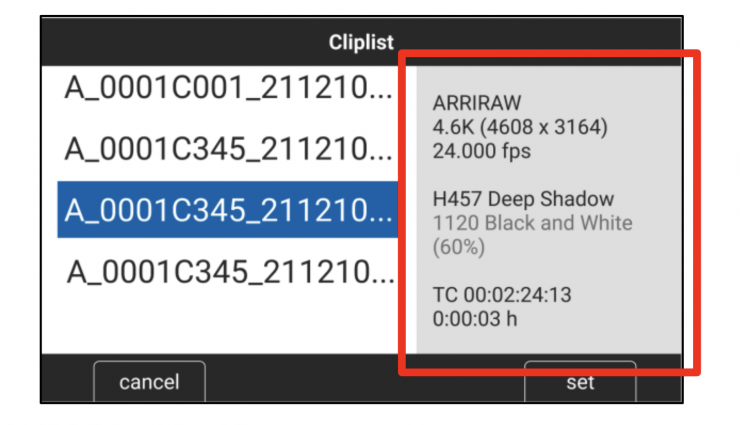
VF PLAYBACK BUTTON > cliplist
The Playback clip list now has an info pane that displays additional information about the currently selected clip:
- Recording Codec (ARRIRAW or Apple ProRes)
- Recording Resolution
- Recording frame rate
- ARRI Texture
Note: this will also be the Texture used for playback.
Name of Look and Look Intensity (Look Intensity in percent in brackets)
If the look currently set on the camera is not the look used for recording the clip, the look used for recording the clip will be shown, but in grey text.
Caution: during playback the currently set look will be applied to the playback image, NOT the look in the clip’s metadata.
Green Bubble when Camera is Level
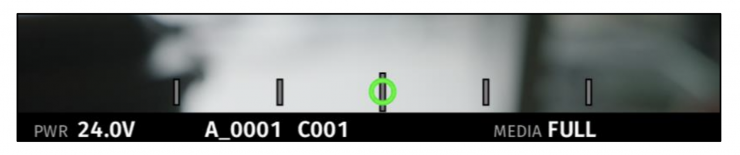
MENU > Monitoring > VF > EVF Overlays > Status Components > Electronic Horizon
MENU > Monitoring > VF > Monitor Overlays > Electronic Horizon
MENU > Monitoring > SDI > SDI 1 Processing > Overlays > Status Components > Electronic Horizon
MENU > Monitoring > SDI > SDI 2 Processing > Overlays > Status Components > Electronic Horizon
When the electronic horizon overlay is turned on and the camera is level, the bubble will change its color to green.
LAN Gateway Setting
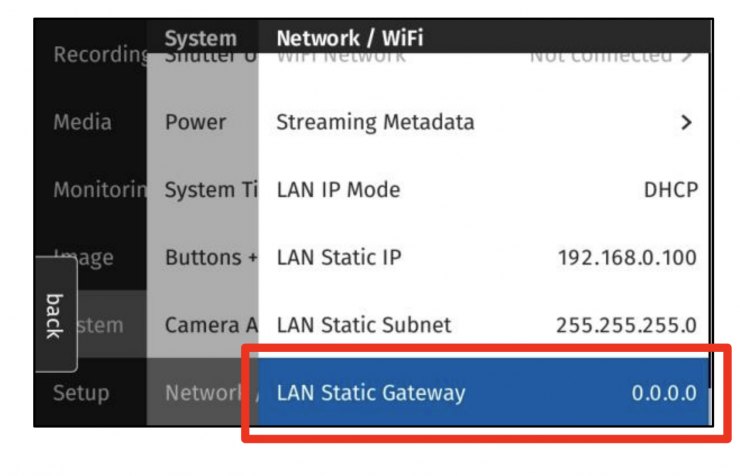
MENU > System > Network/WiFi > LAN Static Gateway
In certain setups, especially for virtual productions, there is a need to define a network static gateway. The default static gateway is a router that forwards network packets when no other route matches the destination of a packet. In a local network, the default gateway is typically the host that is one hop closer to the internet. The IPv4 address of the gateway typically is the first address in a subnet, e.g. 192.168.0.1. As a factory default the Gateway is set to 0.0.0.0.
SUP Version on Side Display
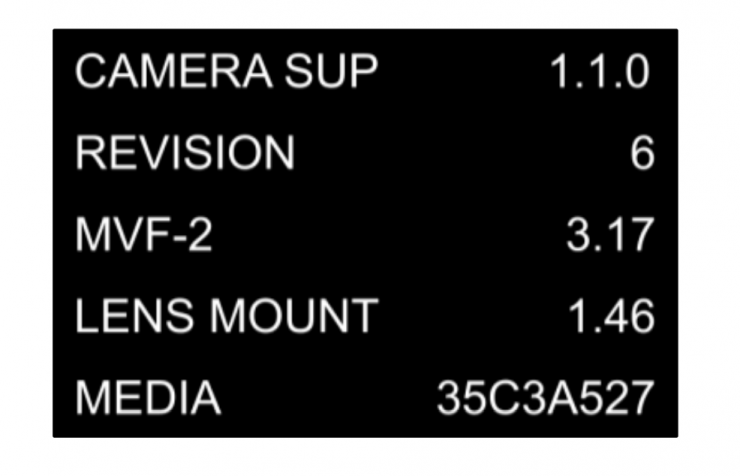
SIDE DISPLAY > SETTINGS (gear symbol) > VERSION INFO
The firmware version of the camera and all attached devices (viewfinder, lens mount and inserted media) can now be seen in the VERSION INFO screen in the SETTINGS section of the side display. This is handy when operating the camera without the viewfinder.
Keep SDI Frame Rate when changing Sensor Mode
When changing sensor modes, the camera will not change the SDI frame rate. In the past, the camera tried to change the SDI frame rate by making an educated guess. This could lead to unsupported output formats for certain display devices.
Software Update for MVF-2 with changed Hardware Component
The software of MVF-2 viewfinders with a changed component (starting with MVF serial number 6850, see release notes to ALEXA 35 SUP 1.0.3 Revision 7) can now be updated by the camera.
Bugfixes & stability improvements
This release contains many bugfixes and stability improvements, including the following:
• Correct timecode offset when using Jam Sync and Enhanced Sensitivity
• Improvements in Codex drive recovery
• Improvements in Codex drive detection
• Stricter thresholds for warnings when timecode source does not match project frame rate
• ALE files do now contain fractional CC values
• Focus tracking on Hi-5 activates quicker
• SDI ZOOM remains active when recording is started
• Improvements on WiFi reconnection after connection loss
• ‘Go To’ shortcuts in outdated components warning is functional
• Look intensity for Default Look is functional
• Update screen no longer displays version 0.0.0 when update is started
• It is now possible to assign a function to GPIO User Button #8
• ‘Turn lens ring’ overlay appears when using LDS Lenses
• Improved WiFi electronics handling that reduces chances of Error #105
• More accurate Roll & Tilt metadata
• The MXF wrapper of ARRIRAW and Apple ProRes files has been updated to fix a bug in the Material Package
UID value. This should have no effect on processing the images of SUP 1.1 or images generated by previous
Updating Camera, Viewfinder & Lens Mount
This SUP can be installed on all previously shipped ALEXA 35 cameras. ARRI does not recommend updating in the middle of a production. When connected to the camera, the MVF-2 viewfinder and the lens mount will also be updated automatically. When you encounter a camera in rental or on set where MVF-2 or lens mount has older software installed, the camera will make you aware of this. ARRI recommends to then perform a component update of the MVF-2 or lens mount (MENU > System > Update).
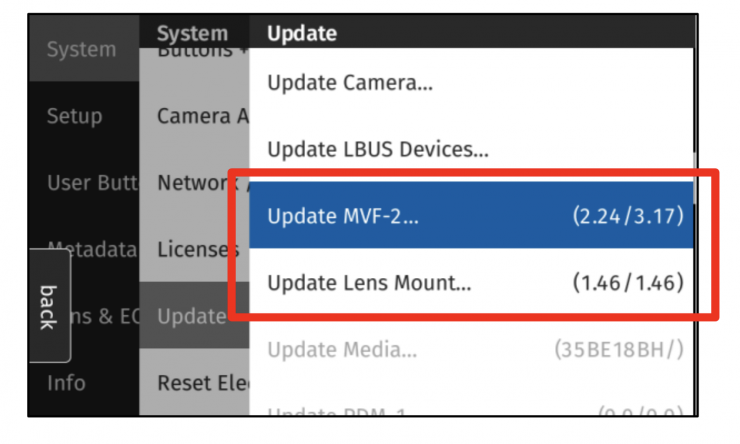
The following versions are included with ALEXA 35 SUP 1.1.0:
- MVF-2: 3.17
- LPL Mount: 1.46
- PL Mount LBus: 1.95
- PL Mount Hirose: 1.95
- EF Mount LBus: 1.13
Codex Compact Drive 1TB Update
All existing Codex Compact Drive 1TB must be updated to continue to function with ALEXA 35. New drives are shipped with updated firmware. If a drive that needs a firmware update is inserted into the camera, an update prompt will be displayed. After the drive has finished updating, the camera will remain in update mode so that multiple drives can be updated. To restore normal operation, reboot the camera. Caution: All data on the drive will be irreversibly erased when updating the drive firmware. Please back up your data before the update!
Updating
ALEXA 35 SUP 1.1.0 can be installed on all previously shipped ALEXA 35 cameras, and we recommend updating from any previous ALEXA 35 SUP to SUP 1.1.0. However, we do not recommend updating to a new SUP in the middle of a production. Please read through the release notes, which contain detailed update instructions, before you update your camera.
Downdating
It is possible to downdate from this SUP to an older SUP. However, MVF-2 viewfinders with serial numbers above 6849 and Compact Drive 2TB units with serial numbers starting with ‘273xxxxx’ require ALEXA 35 SUP 1.0.4 or newer. Since ALEXA 35 SUP 1.x requires a different sensor calibration from any of the field test SUPs (0.8.x), please do not downdate the camera from SUP 1.x to any of the field test SUPs.
ARRI has also updated our online tools like the Format and Data Rate Calculator and the Frame Line and Lens Illumination Tool. Updates to the Camera Simulator are in progress and should be completed soon.
Metadata
An ARRI camera automatically collects metadata when shooting. This metadata is stored in the header of recorded MXF/Apple ProRes and MXF/ARRIRAW files. The data is also stored in separate Avid Log Exchange ALE files, which keep track of all statics that are recorded on one recording media. Additionally, ARRI cameras can record lens data dynamically frame-by-frame. Metadata can be accessed, visualized and exported directly in the ARRI Reference Tool.
Post Production Compatability
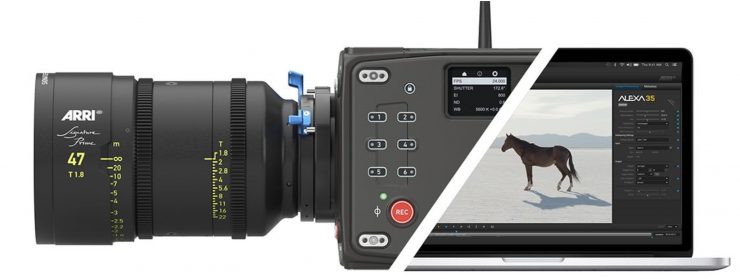
The biggest problem for any manufacturer is that when they introduce a new camera that has a new Log curve and new color science there needs to be post-production compatibility.

As of early 2023, the above programs are compatible with the ALEXA 35 footage.
Electronic Shutter
The electronic shutter of the camera can be adjusted from 5° – 356° shutter angle or 1 to 1/8000 seconds (depending on the set frame rate).
The maximum exposure time with a given frame rate is 1/fps, with a limit of 1/1 seconds. When the selected exposure time is no longer possible because you changed the frame rate, the camera uses the longest exposure time possible. For example, if you configured 1/25 s at 25 fps and you change the sensor fps to 50, the camera will use 1/50 s.
What you need to be aware of is that the camera’s sensor hasn’t been optimized for exposure times shorter than 1/24 s and image artifacts like individual overexposed pixels may appear when using longer exposure times.
Small in size but big on features
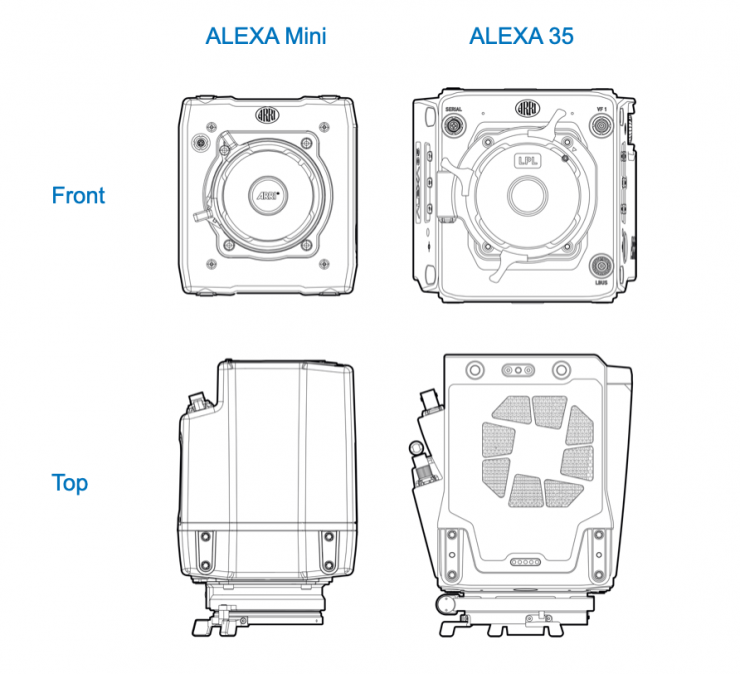
The ALEXA 35 is fairly similar in size to the original ALEXA Mini, however, it is slightly wider.
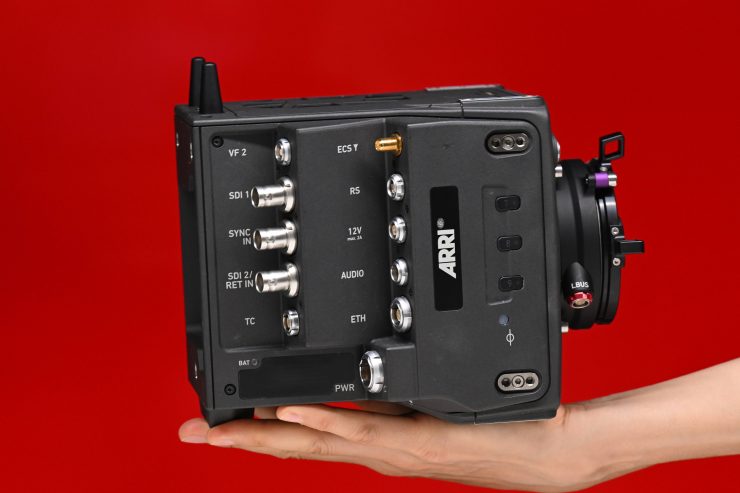
The ALEXA 35 with an LPL lens mount weighs 2.9 kg / 6.4 lb, as a comparison, the ALEXA Mini LF with an LPL mount weighs 2.6 kg / 5.7 lbs
ALEXA 35 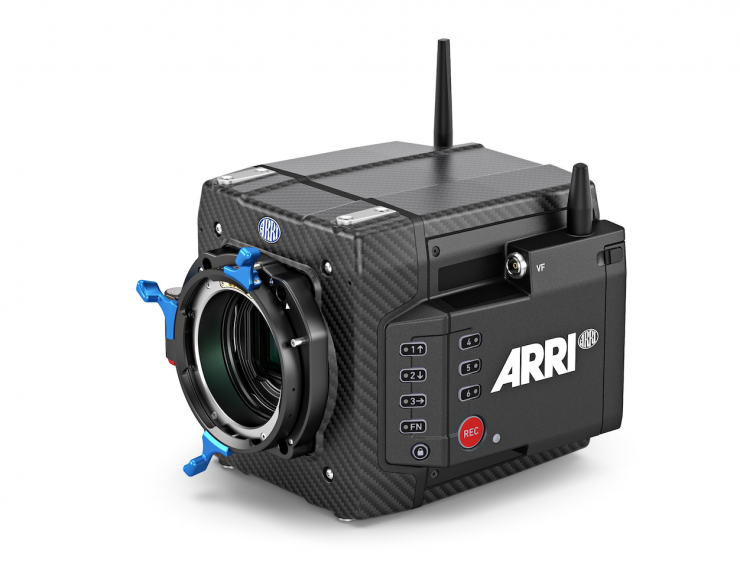
ALEXA Mini LF
The ALEXA 35 shares a similar design to the ALEXA Mini LF. This design and form factor has proven to be popular with users
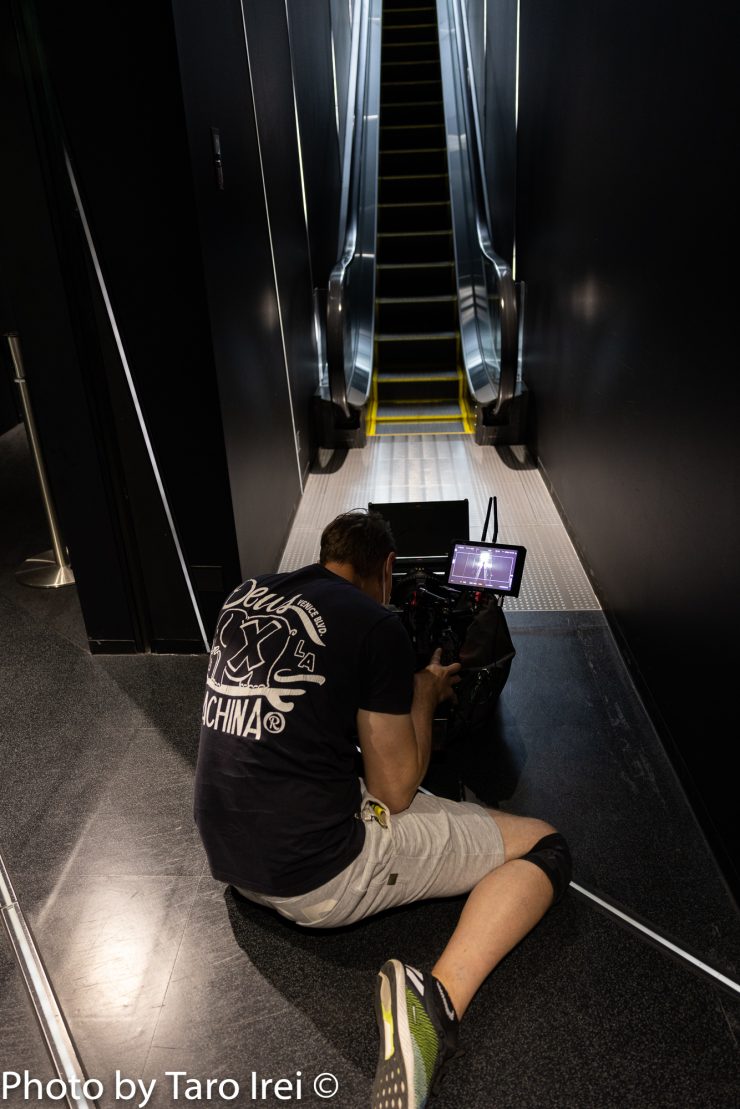
The camera itself is pretty small, but like any camera that comes in this form factor, you have to add a few parts to make it usable.
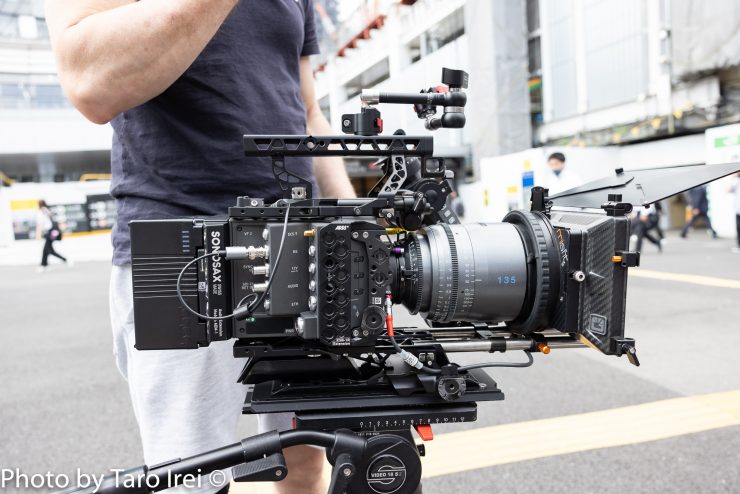
In the past, ARRI tended to have one large and fully-featured ALEXA and one small and lightweight ALEXA that had reduced features. The ALEXA 35 is the first small-form-factor ALEXA with all of the high-end features and no compromises. If you want to simplify things, the ALEXA 35 is essentially a supercomputer with a sensor on the front.
What about the heat?

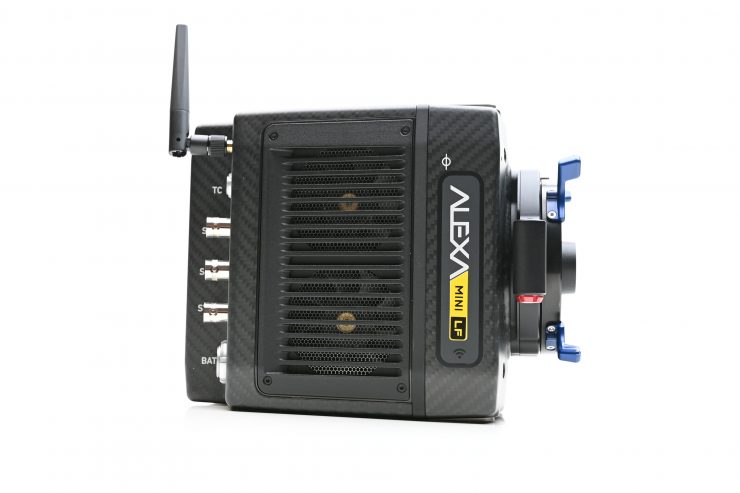
ALEXA Mini LF
The ALEXA 35 has a massive cooling fan and exhaust vent on top of the camera. This is completely different to the ALEXA Mini LF which has two fans on the right-hand side of the camera.
ARRI cameras are stabilized at exactly 40 degrees and because of this they never require black shading. I’m pretty sure this is unique among cameras. Every camera must pass a full image quality test at -20 and +45 degrees celsius before it ships.
The ALEXA 35 uses a Peltier element that keeps the image sensor at a stable temperature. Keeping the image sensor at a stable temperature is key to maintaining constant image quality. There is a reason digital cinema cameras use very large cooling systems and fans! The warmer the sensor, analog amplifiers, and digital processing units get, the more dark current they will generate. The more dark current generated, the more recorded image noise you will see.
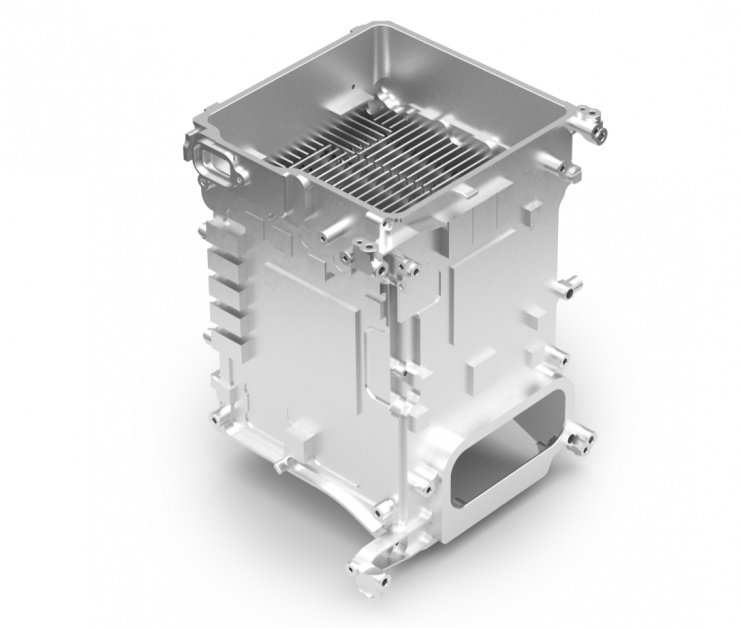
Now, because ARRI hasn’t compromised on features but they have gone with a smaller form factor which means more processing power is required. With more processing power comes more heat. To deal with this heat ARRI has designed a cooling core that essentially acts as a vertical chimney.
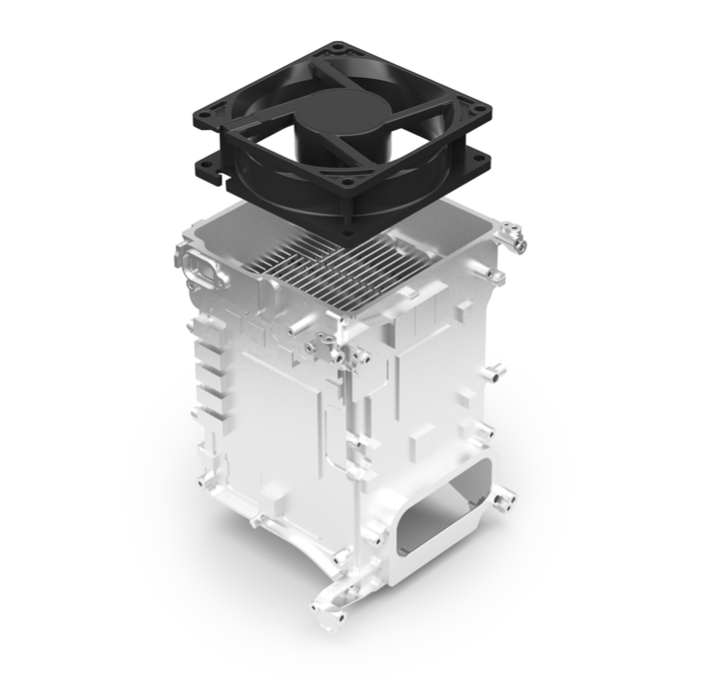
This central vertical chimney has a large fan that sits on top of it.
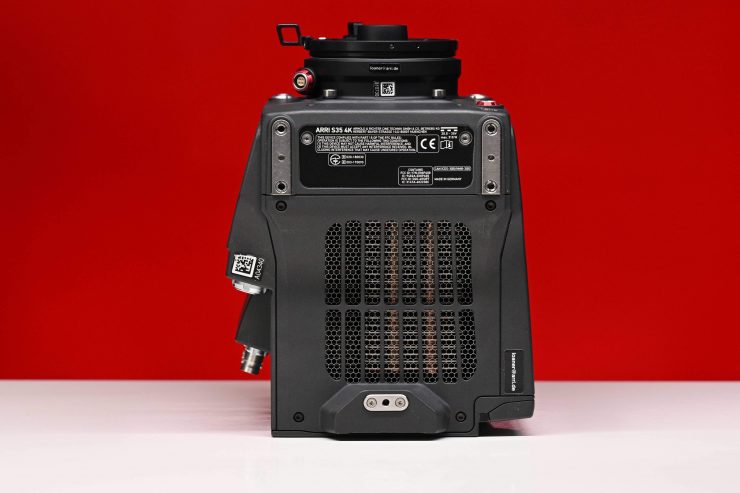
The bottom of the camera 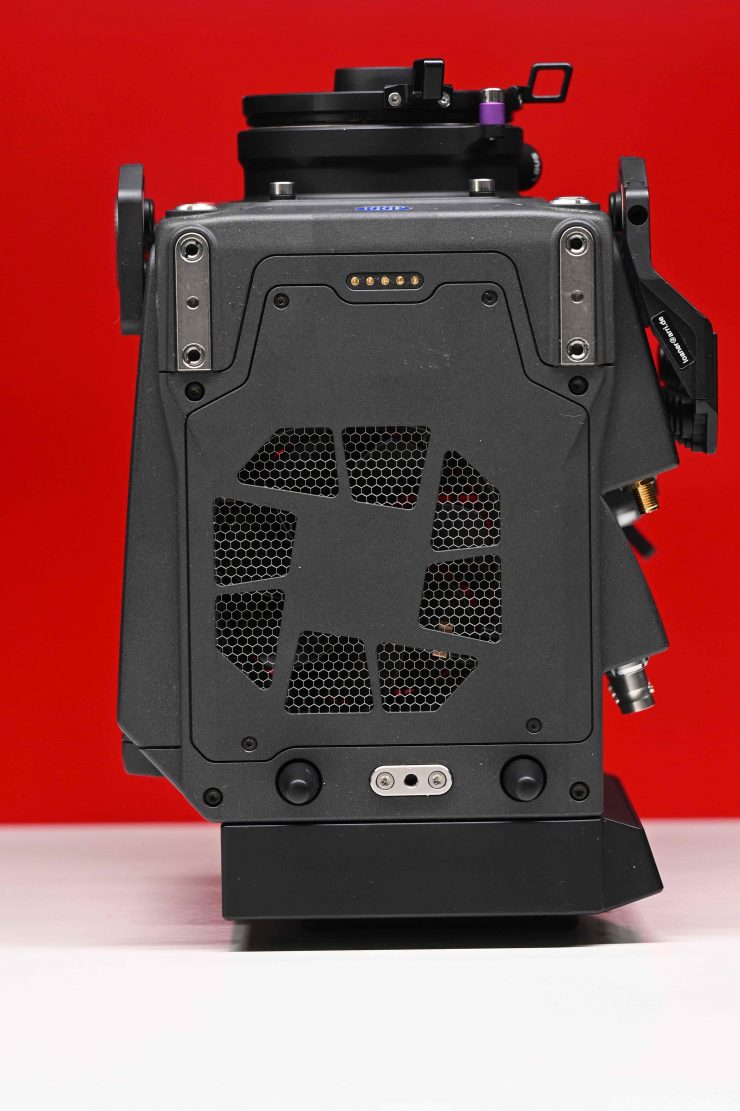
The top of the camera
This fan pulls the air from the bottom of the camera and then exhausts it out of the top.
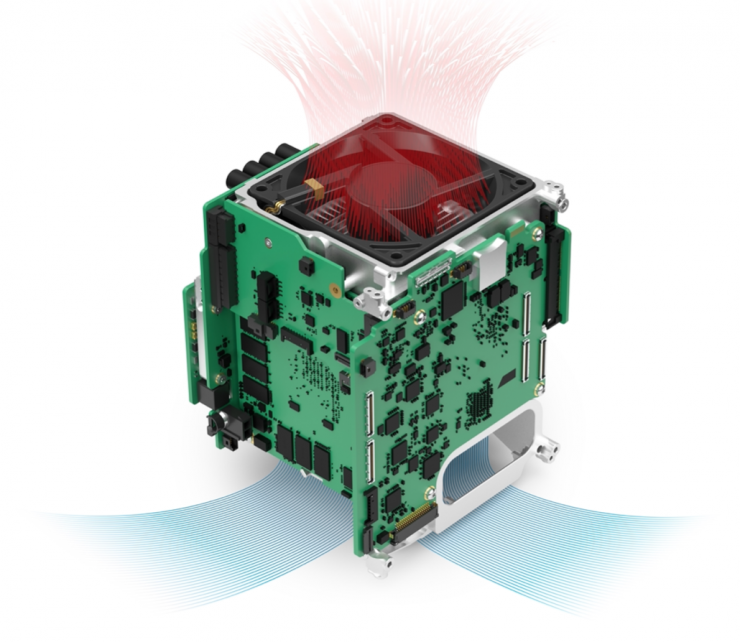
What ARRI has done to further help with cooling is to cluster all of the electronic boards around the core for the closest possible heat transfer. The electronic boards and actually right up against radiator fins so that the air that gets sucked up through the chimney from the fan goes directly over them.
ARRI has also chosen materials and shapes that have been optimized for low weight and high heat conductivity.
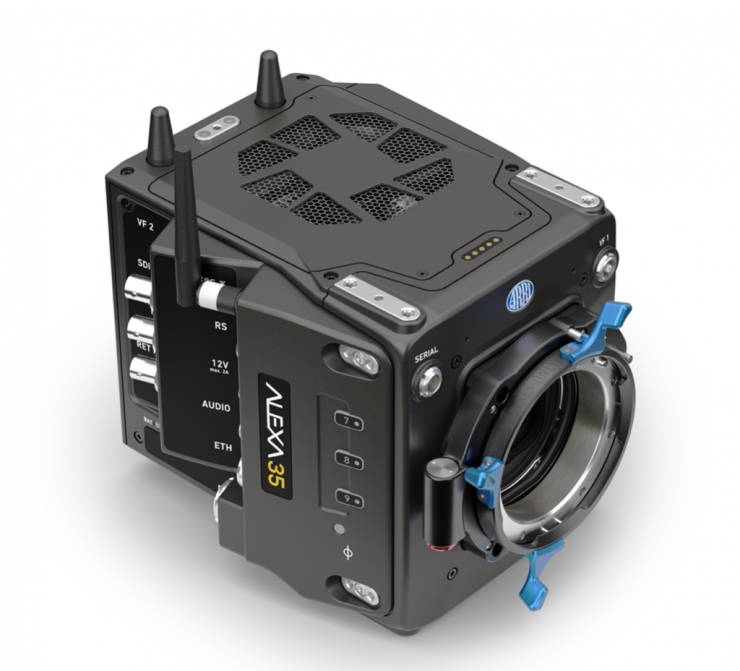
ARRI states that the cooling in the ALEXA 35 is twice as efficient as that of the ALEXA Mini.
ARRI has also been careful to make accessories that don’t obstruct the airflow.
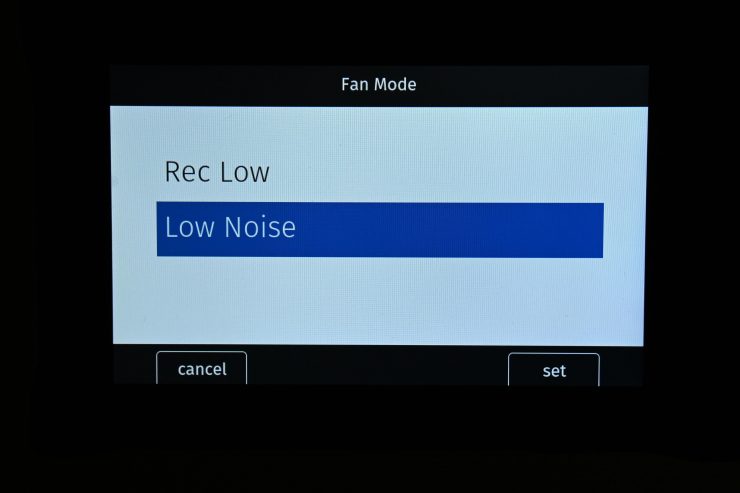
You can choose in the menu settings to set the fan to Rec Low or Low Noise.
Rec Low– Increases fan speed during standby to cool the camera. Minimizes fan speed/noise during recording.
Note: Ideal in an environment warmer than 30 °C (86 °F).
Low Noise– Minimizes fan noise during standby and recording.
Note: With data rates above 100 MB/s (due to fps/codec setting), the fan
speed automatically increases to prevent the recording media from overheating.
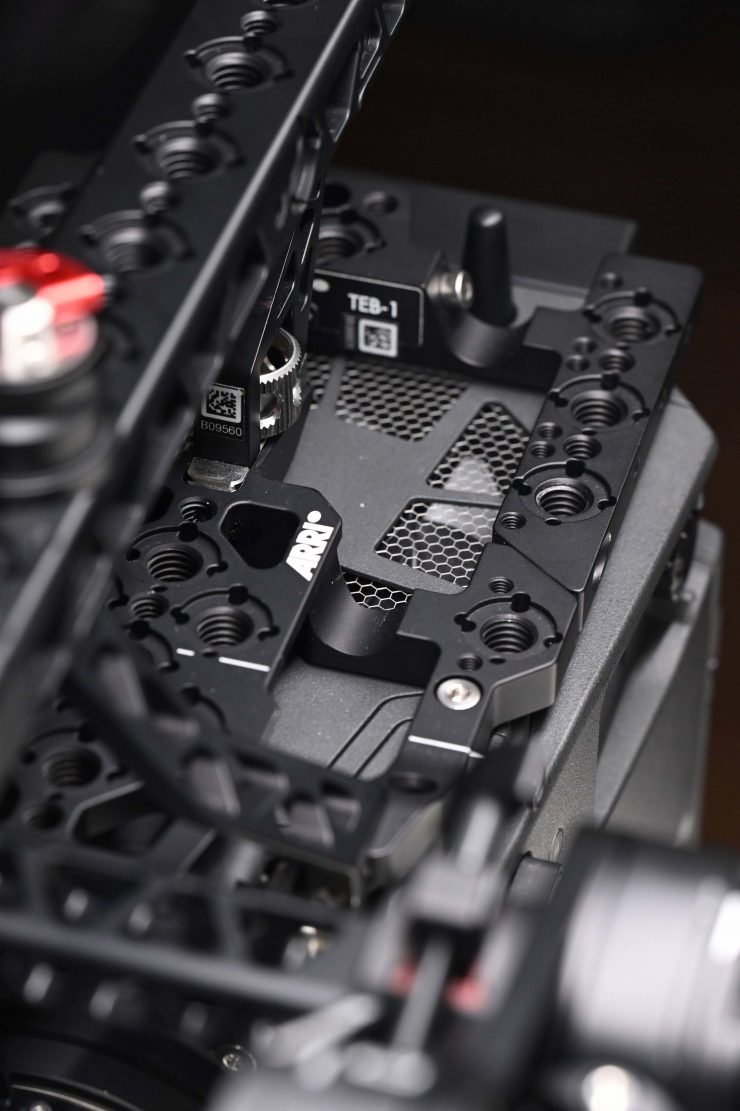
The fan is relatively quiet and I don’t think it will be of much concern to most users. It certainly works well and you can feel the air getting exhausted out of the top of the camera.
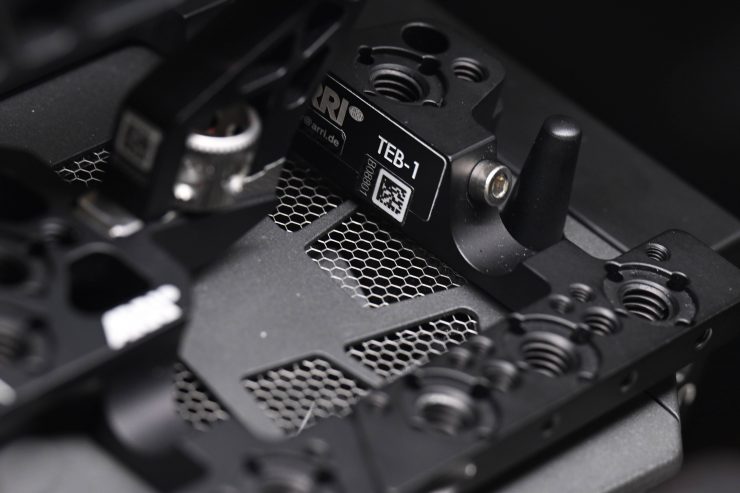
What did slightly bother me was that when you have the camera on your shoulder you do get the fan noise and some airflow going straight into your ear. I think this could be because the exhausted air is hitting some of the top plate and then getting pushed left.
Usability
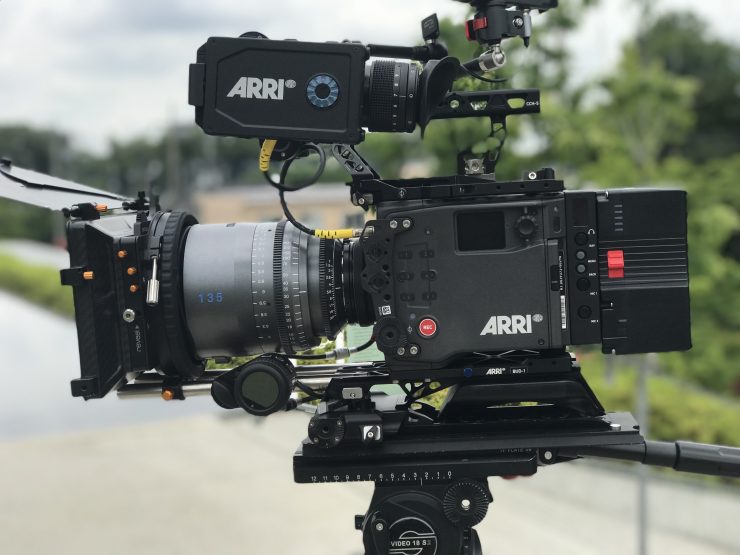
Image copyright Newsshooter 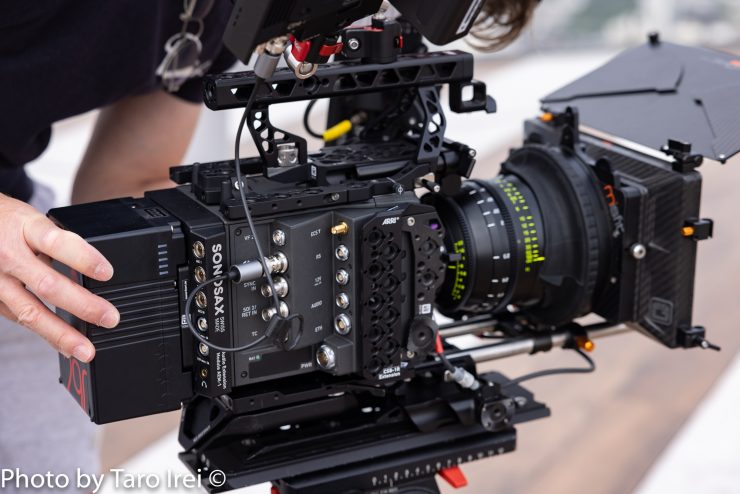
Usability is a big part of what makes ARRI cameras so desirable and ARRI has designed a whole range of new accessories for the ALEXA 35.
These new accessories allow you to create many different camera configurations, large and small.
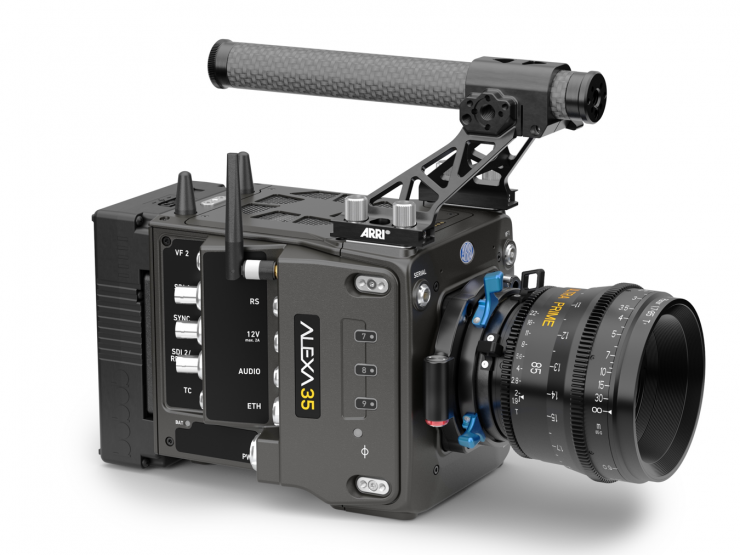
Unlike the ALEXA Mini LF, the on-board battery for the ALEXA 35 can attach directly to the back of the camera. This is because of the new cooling system and where it is located within the camera. With previous ARRI cameras like the ALEXA Mini and Mini LF this wasn’t possible because of the way those cooling systems had been designed.

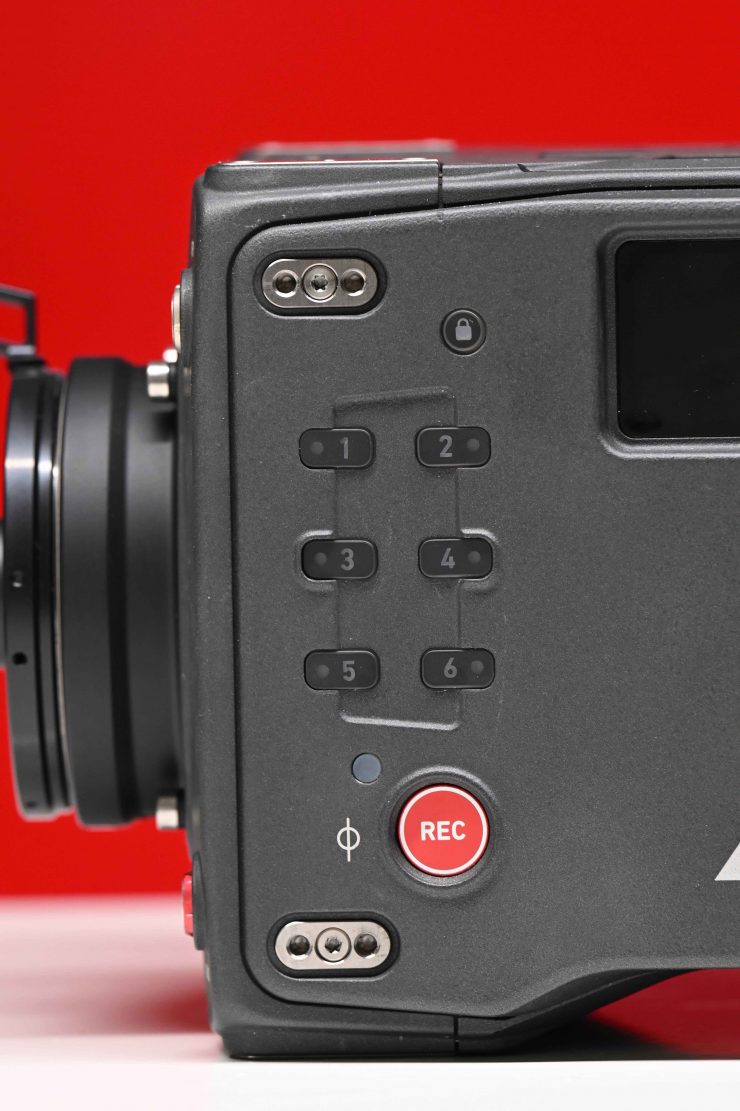

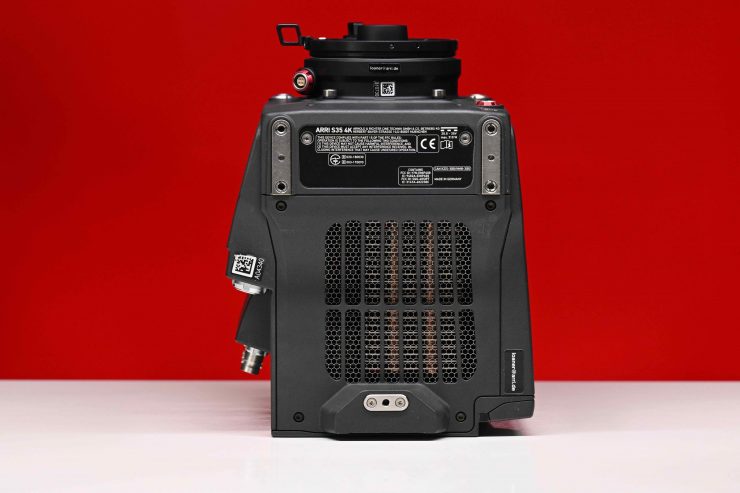
There are attachment points on the top, bottom, left, and right sides of the camera.

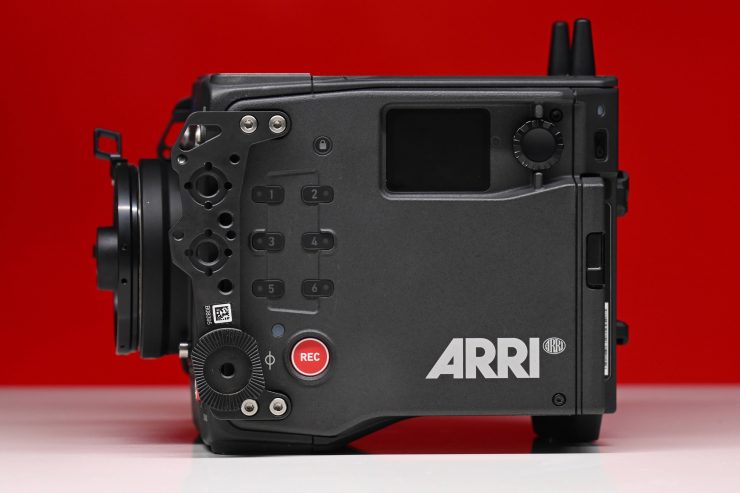
You can also independently attach and remove second layer side, top and bottom accessories without needing any tools. What is a welcome change is that all of these new accessories can be attached independently of each other. This allows users a lot more flexibility and versatility when deciding how they would like to configure their camera. Please note, that you still have to physically screw in the LMS-4 top plate with an Allen key if you are going to use that accessory.
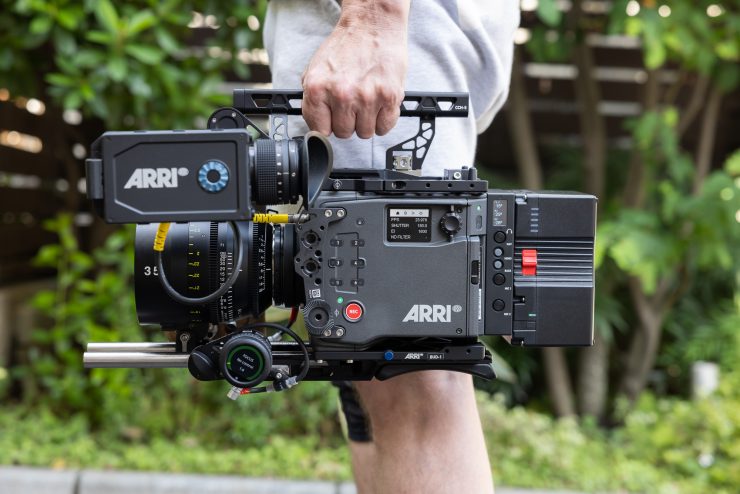
The user buttons can be set to do just about anything you like. I love this aspect of ARRI cameras. It gives you the ability to customize how you like to work and operate. You don’t have locked-in buttons like so many other cameras do. If you add an OCU-1 or Master Grips to the camera, you can add even more custom user buttons to your setup.
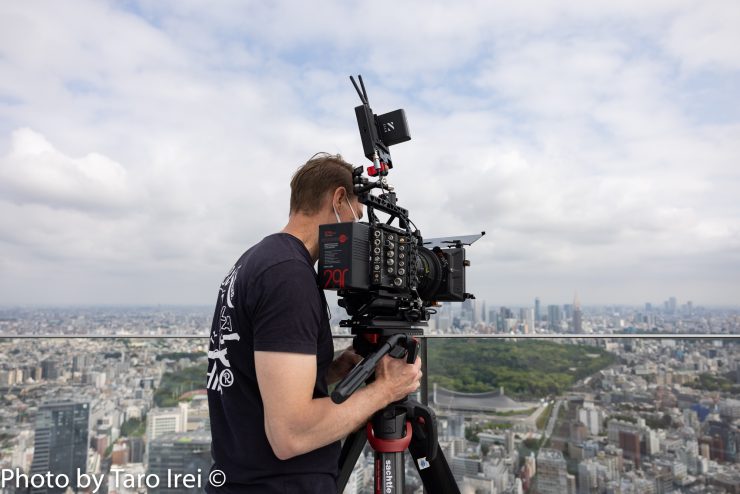
You can literally set up the ALEXA 35 so you don’t have to go into the menu to make the main operational changes. This vastly speeds up productivity when you are shooting.
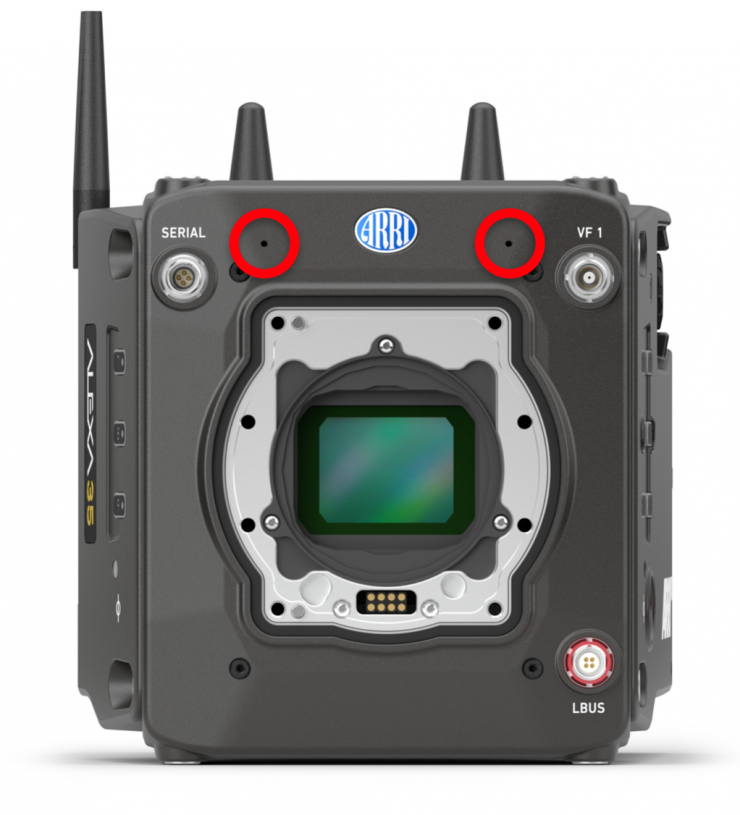
Just like the Mini LF, the ALEXA 35 also features two scratch microphones on the front of the camera. I will talk more about these and audio further down in the article.
Ergonomics
One of the things that are hardly ever talked about when it comes to cameras is ergonomics. Creating an ergonomic camera that is well thought out and can be used equally as well on a gimbal, Steadicam, tripod, or shoulder-mounted without having to turn it into a Frankerig is no easy task.
ARRI understands ergonomics and they create accessories that allow you to do all of this very easily. The ALEXA 35 is well thought out and I find it a breeze to use the camera in so many ways.
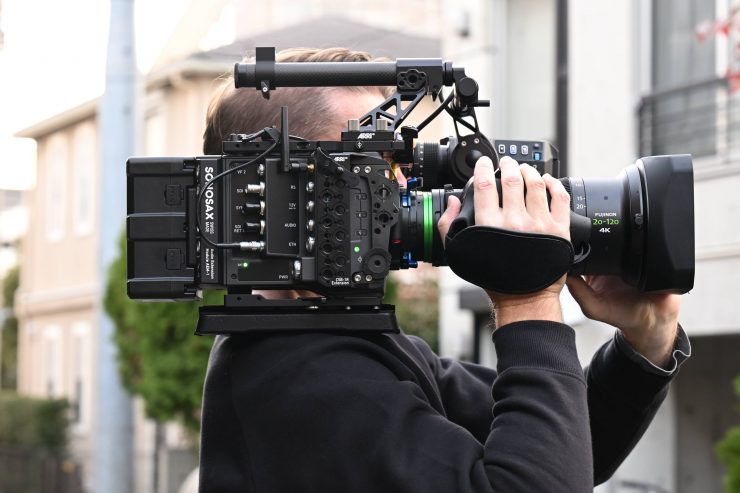

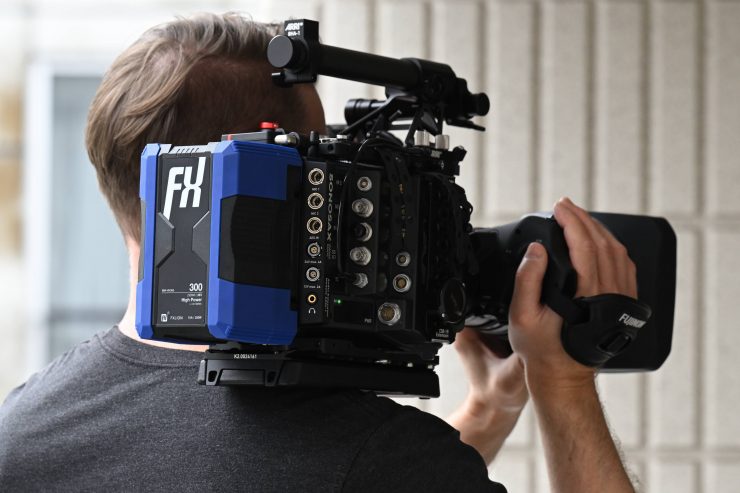
The ALEXA 35 balances on the shoulder really well. You can achieve really good weight distribution and the CSP-2 Compact Shoulder Pad allows you to keep a nice low center of gravity.
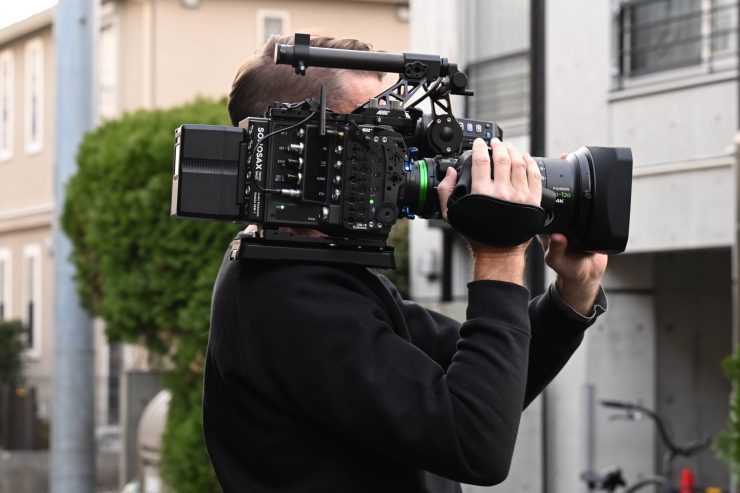
With a servo zoom lens such as the Fujinon Cabrio series, I can set the camera up so that my arm is nice and straight and the center of gravity is sitting directly on my shoulder.
Camera Tour
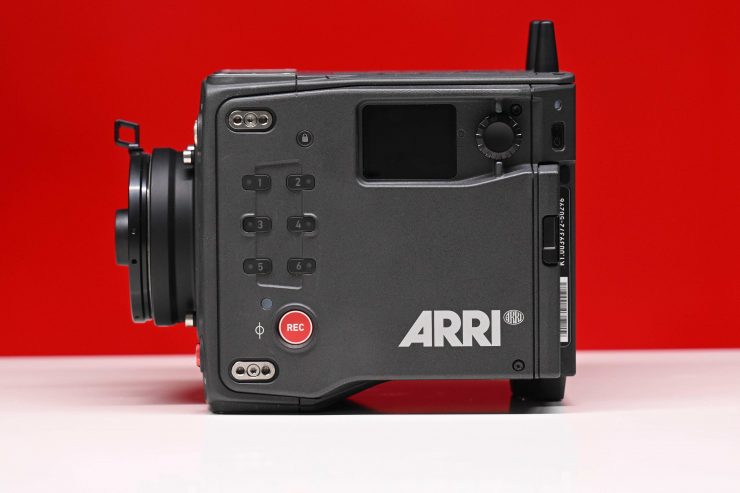

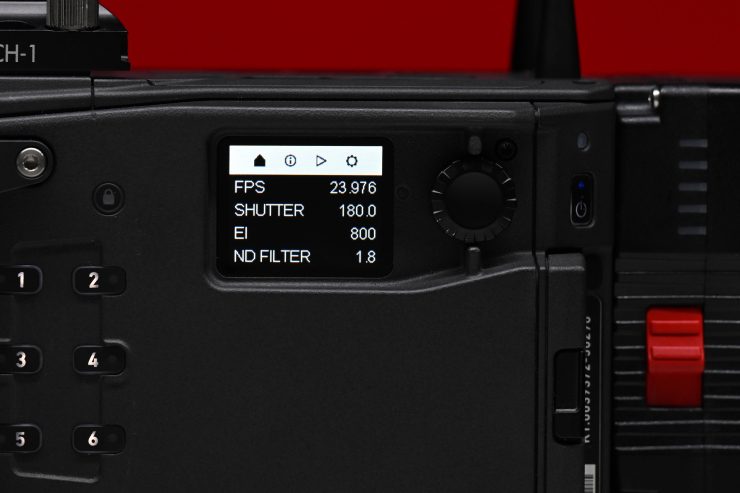
So let’s now have a look at the camera itself. On the operator’s side, you will see 6 user-assignable buttons, a record button, power on/off button, lock button, and a display screen with a multi-purpose dial. The ALEXA 35 features a very clean layout and you are not confronted by buttons and switches all over the side of the camera.
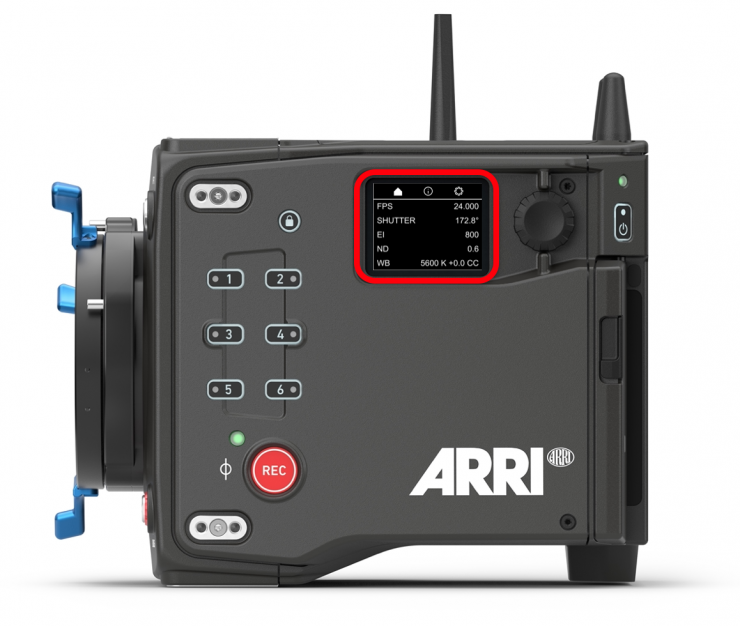
This new side display panel allows you to see the status of the camera, but more importantly, it allows you to change settings without needing to use the viewfinder.
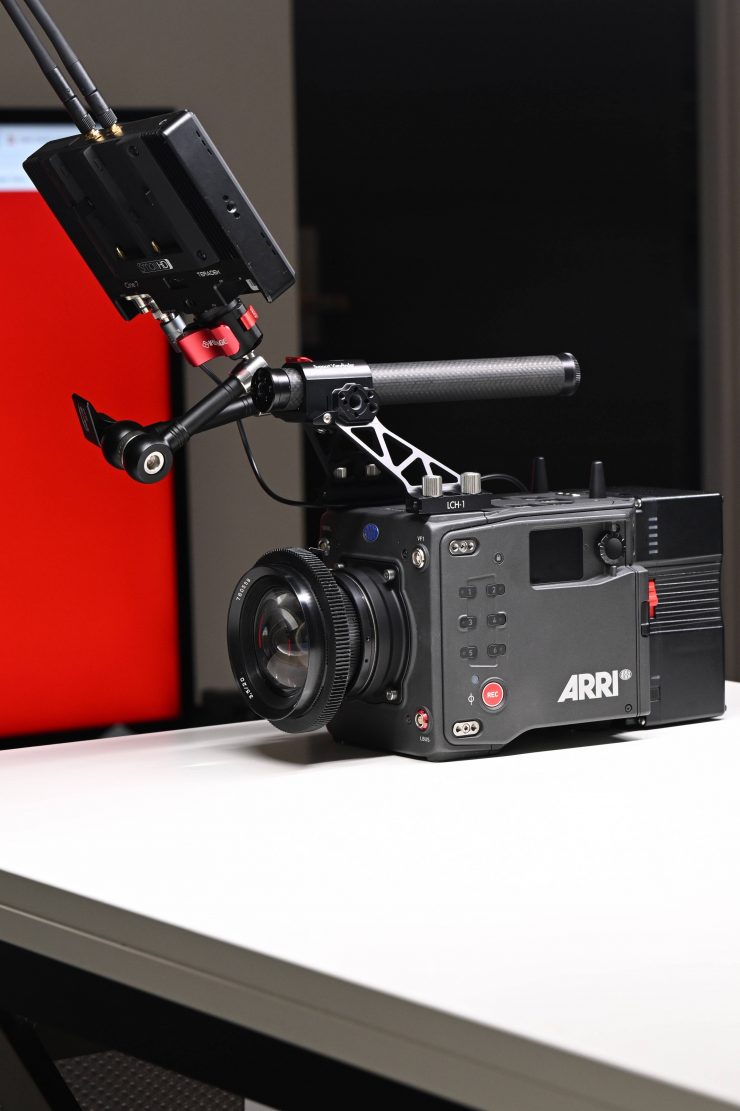
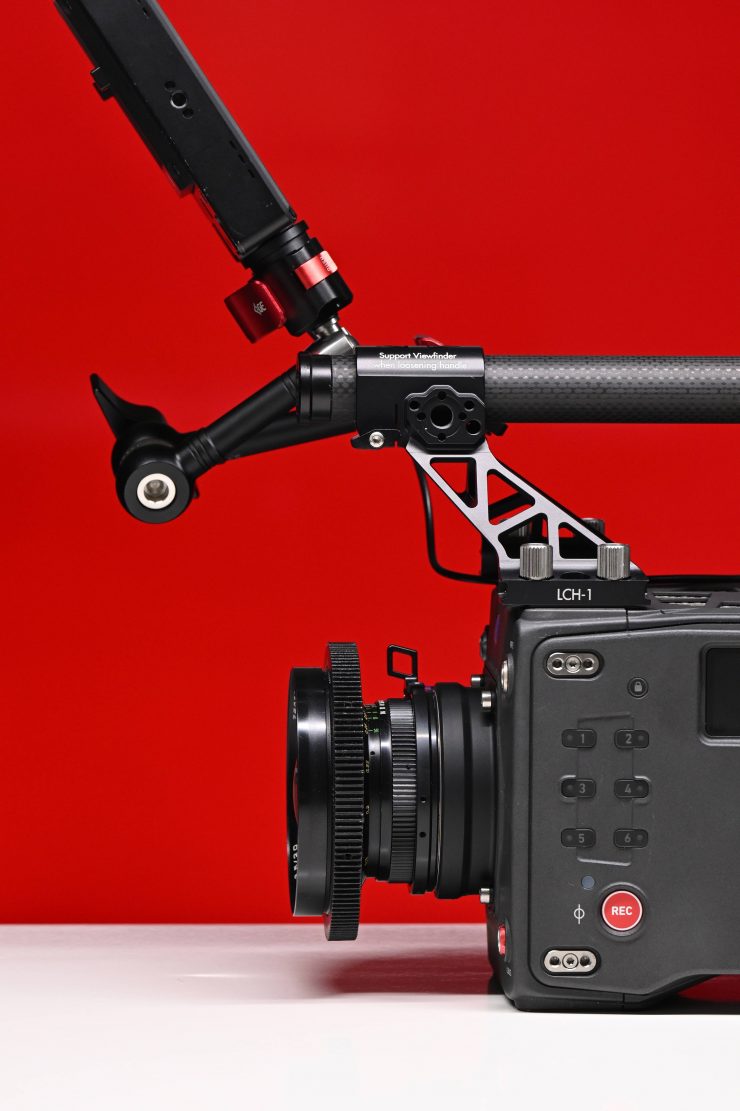
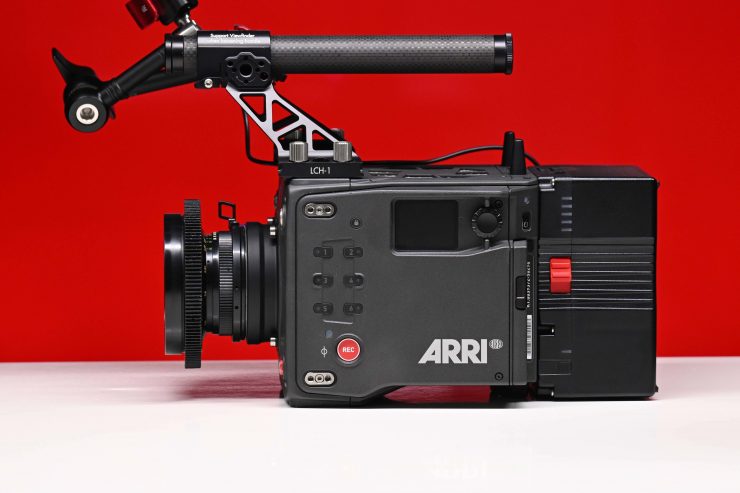
This allows you to use smaller, lighter camera configurations. Above you can see I have just used the lightweight handle and attached a monitor to it.
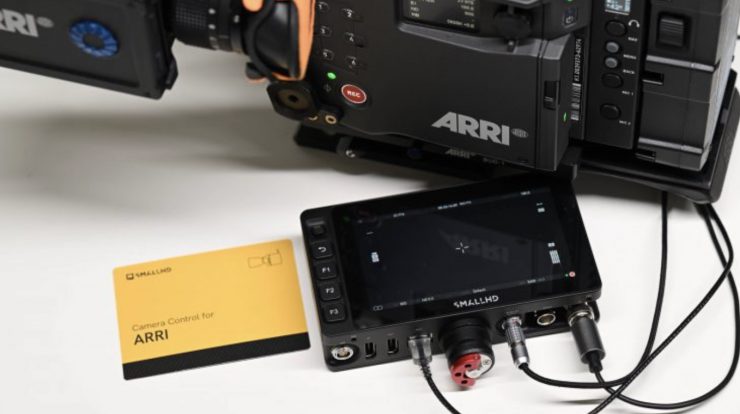
If you wanted to go a step further you could use the ALEXA 35 with a SmallHD monitor that has ARRI camera control. This would be a good option if you wanted to control the camera without having to use the EVF or the side screen.
The SmallHD Ultra 5 and Cine 7 both have an ethernet port which is used to communicate with a compatible camera.

ARRI Companion App 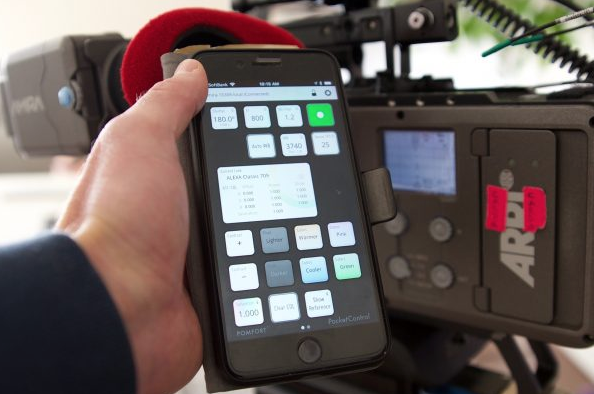
Pomfort Pocket Control for ARRI cameras
I can already make changes on the ALEXA 35 through a smartphone or tablet, so why would I need camera control on a monitor? That is a good question! The first reason is that I can eliminate having to use another device. I don’t need to fire up my smartphone or tablet, join the camera’s WiFi network and then open an app. As the camera control on the Ultra 5 or Cine 7 is done via ethernet, once it is connected and configured it will always be accessible every time you turn the camera and monitor on.
As it is being done via ethernet there is no delay and there is no chance of losing the connection. I have had instances in the past where certain wireless video systems have interfered with the wireless signal being generated from my camera.
By taking away the need for having to use a smartphone or tablet for camera control it certainly simplifies things.
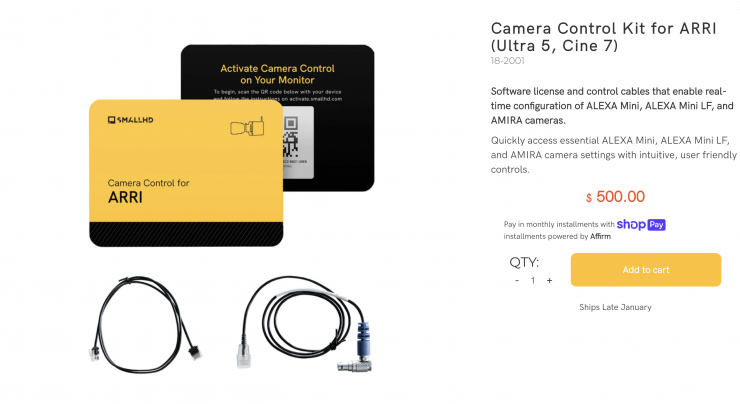
This all does come at a cost. The license for camera control is $500 USD which is certainly a steep price to pay considering you can obtain the same functionality on your smartphone or tablet for free.
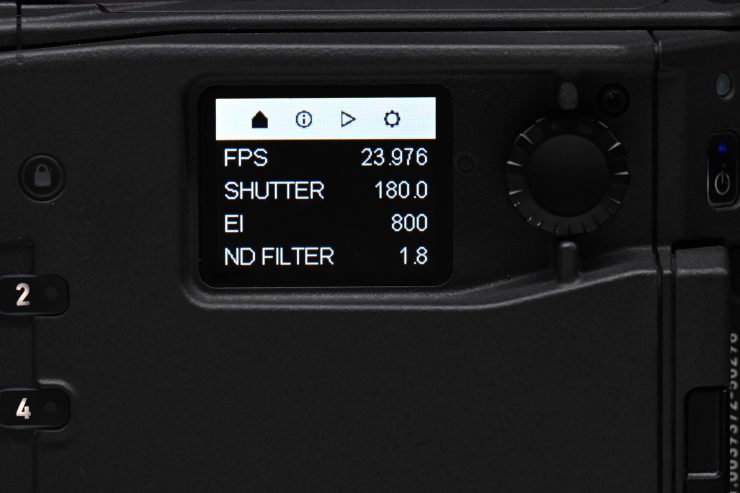
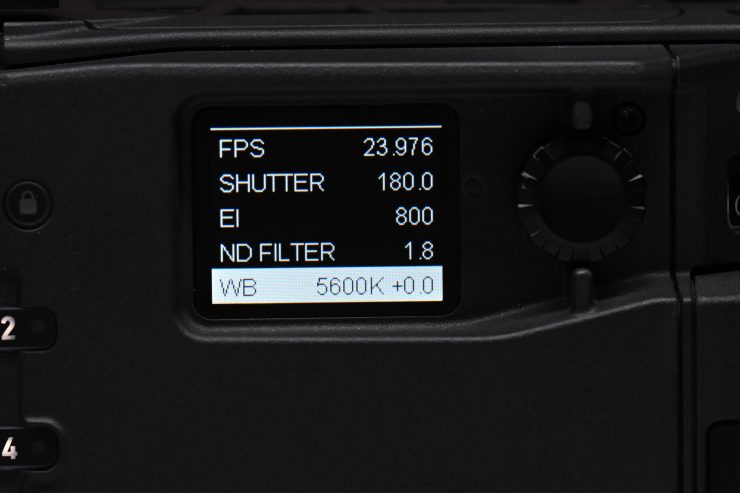


The side screen is a welcome addition and I think a lot of users of the camera will be happy to see it included. While I personally didn’t find myself using it very often, It is nice to know that it is there if you need it.
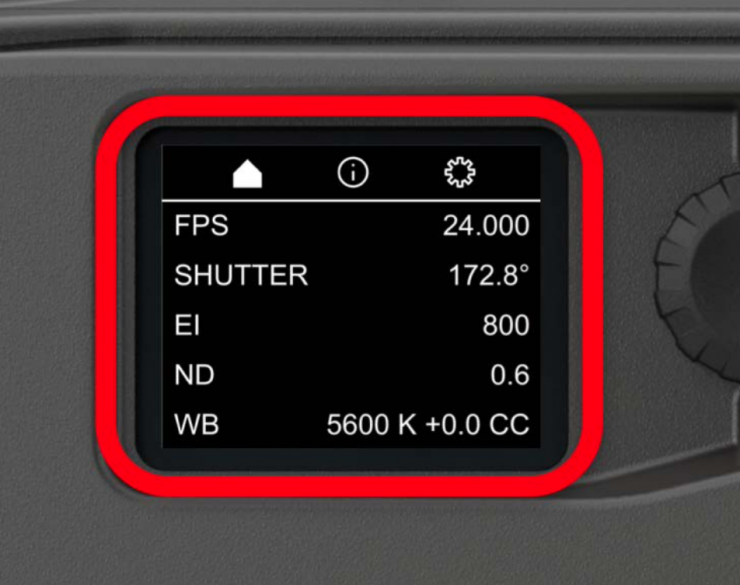
Home 
Info 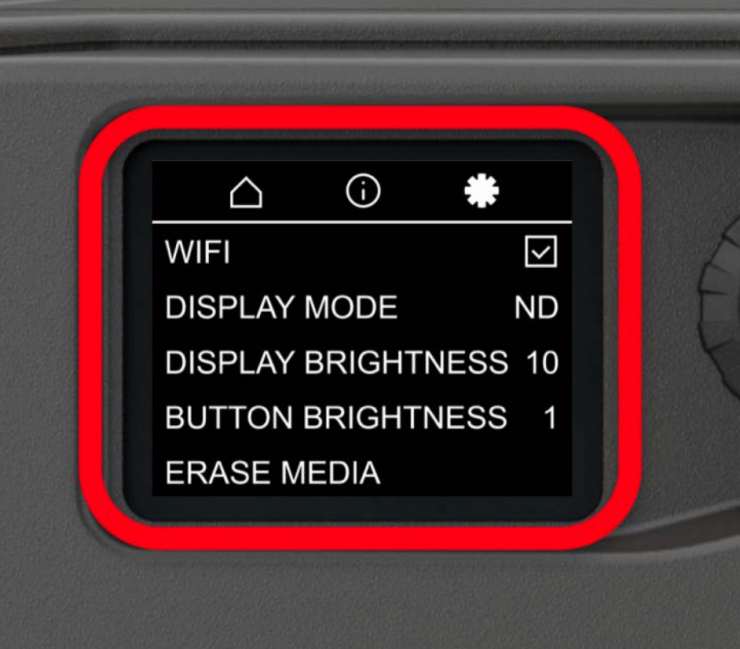
Settings
The display screen has three main sections:
- Home
- Info
- Settings
When Enhanced Sensitivity Mode is turned on, the EI value will be followed by an “ES”.
Note that the BAT battery status shows two numbers. This is because there are two onboard batteries attached to this camera, the second on the back of the first. The B-Mount is smart enough to recognize this, and the camera will show capacity for both batteries and will drain the one furthest out first, so it can be exchanged and the first battery will act as a buffer, to keep the camera powered up.
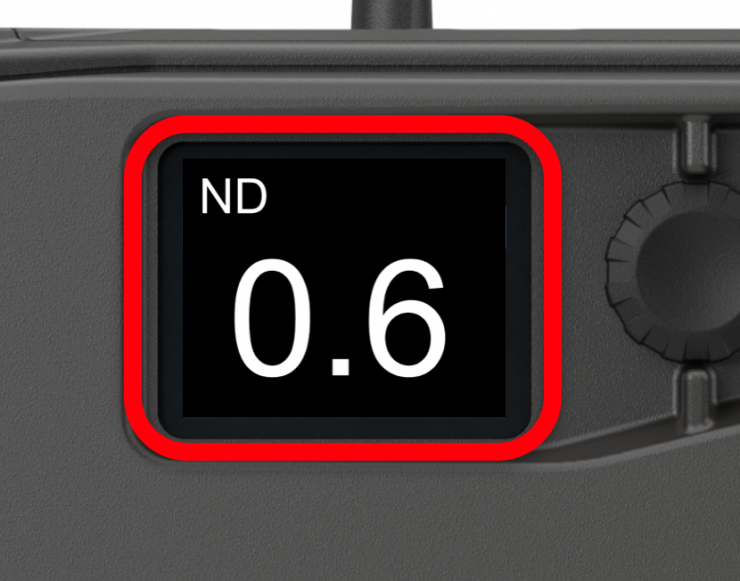
If you don’t use the screen for more than 60 seconds it defaults to show your ND setting, like a filter tag. There are several default screen options available.
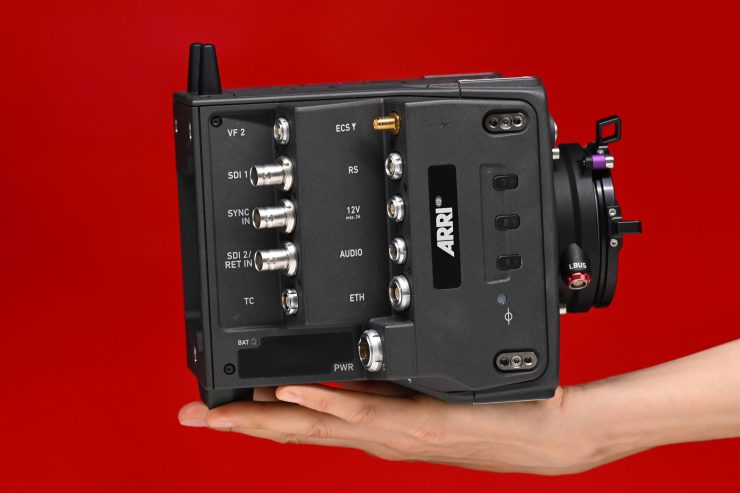
Image copyright Newsshooter 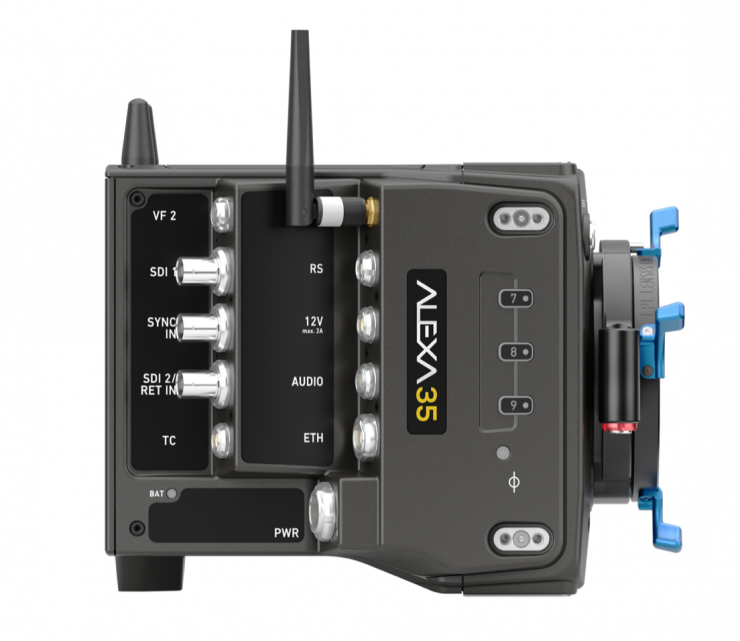
On the non-operator side of the camera, you will find three more user-assignable buttons and most of the inputs and outputs.
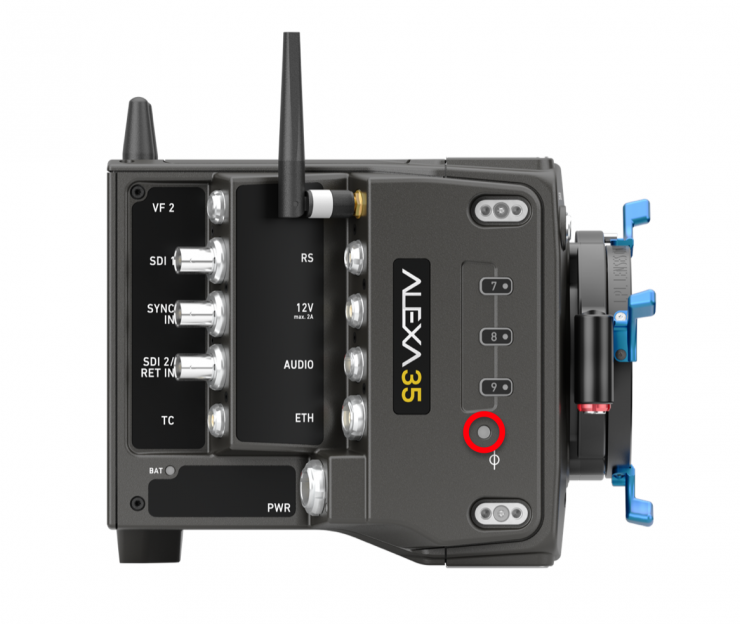
There is also a small record light that is located just under the user buttons.
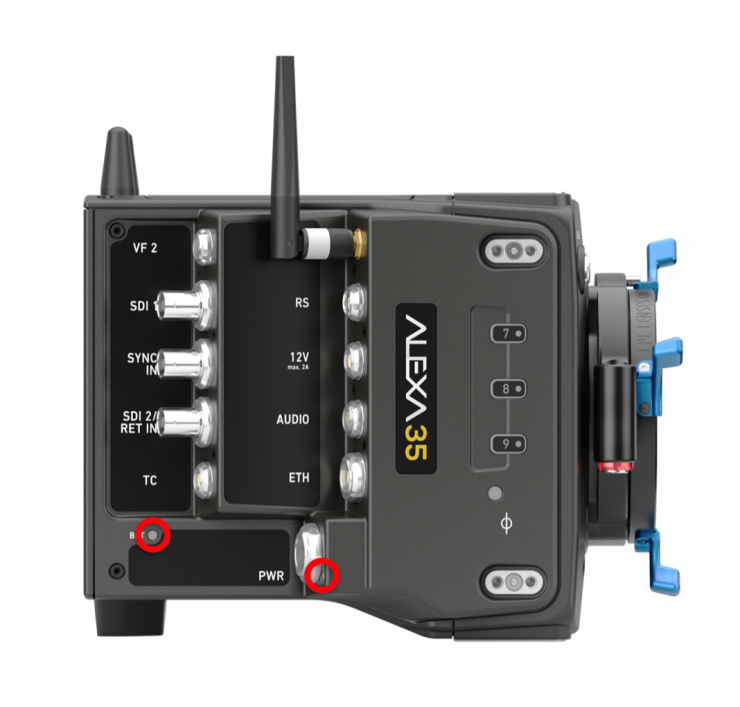
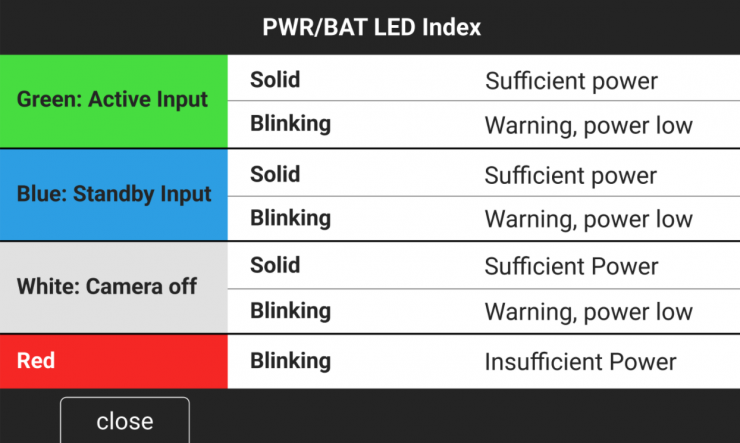
Additionally, ARRI has also placed two BAT/PWR LEDs on the side of the camera. You can see in one of the above images what the various colors represent.
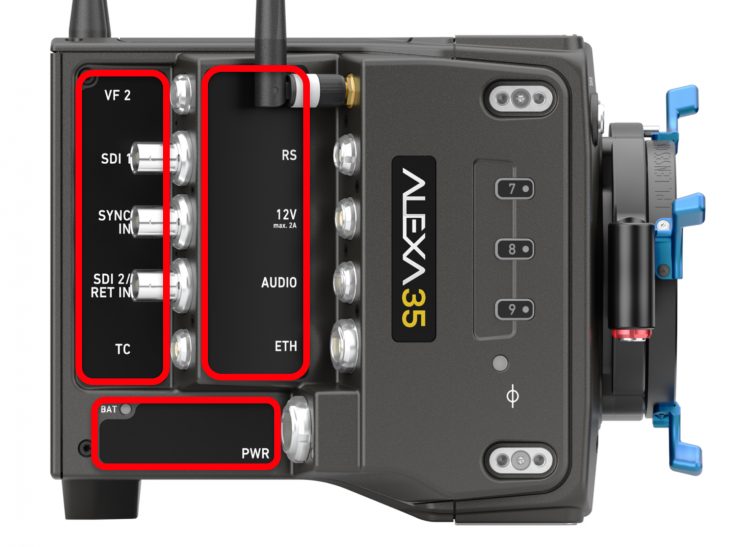
In a nice touch, ARRI has equipped the ALEXA 35 with removable and replaceable industrial scratch-resistant foils on critical surfaces near where cables and connectors are plugged in. This helps to protect the camera from getting scratched.

There was only one foil on the original test camera I had and for obvious reasons, the ALEXA 35 signage was also missing.
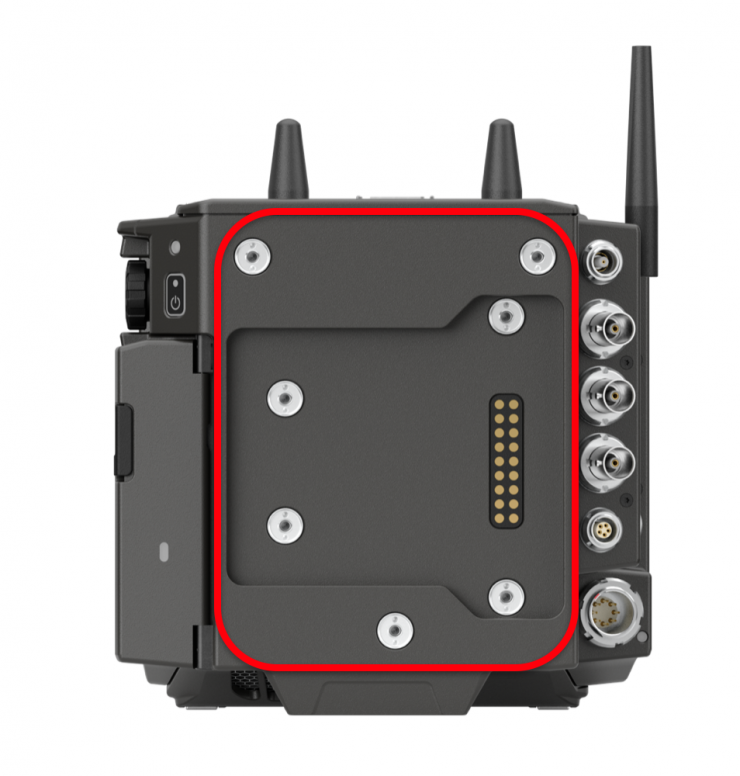
On the back of the camera, there is a 15-pin Pogo connection interface for power and electronic accessories.
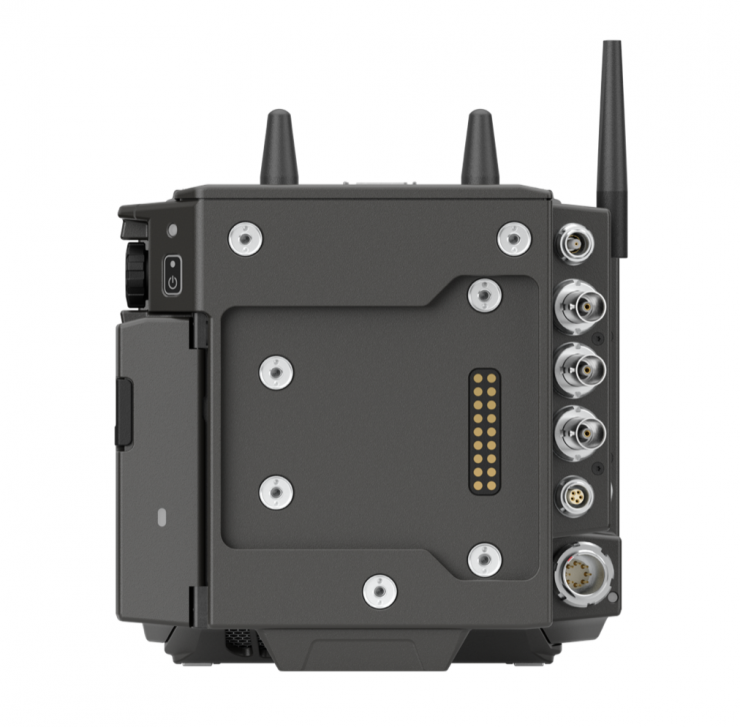
There are also two WiFi antennas that enable you to use third-party remote apps, ARRI Webremote, and the new ARRI Camera Companion App.
Companion App
Speaking of the ARRI Camera Companion App, it allows you to remotely control and configure your camera and it offers multi-camera support. The interface is also customizable and it has been designed to be easy and intuitive to use.

The ARRI Camera Companion App is supported by the following devices
- iPhone, iPad (iOS/iPadOS ≥ 15.0)
- M1 Mac (macOS ≥ 12.0 “Monterey“)
- Apple Watch
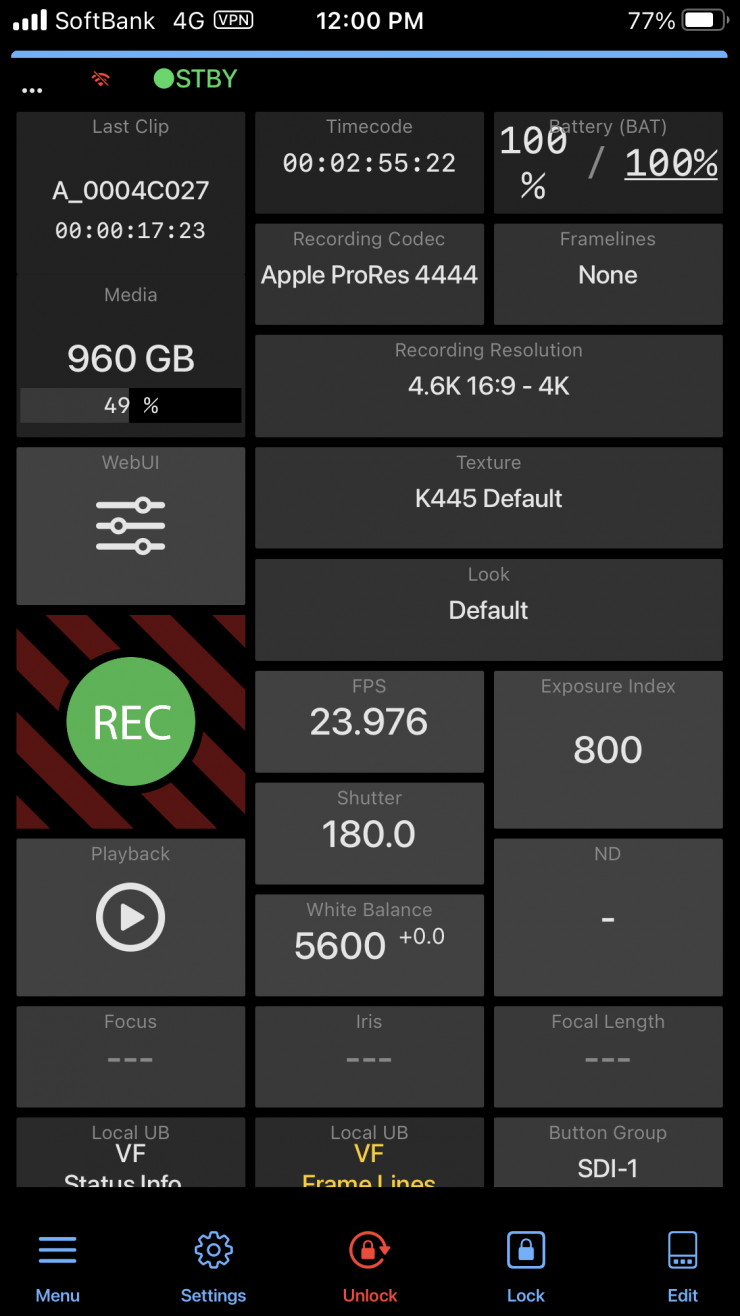
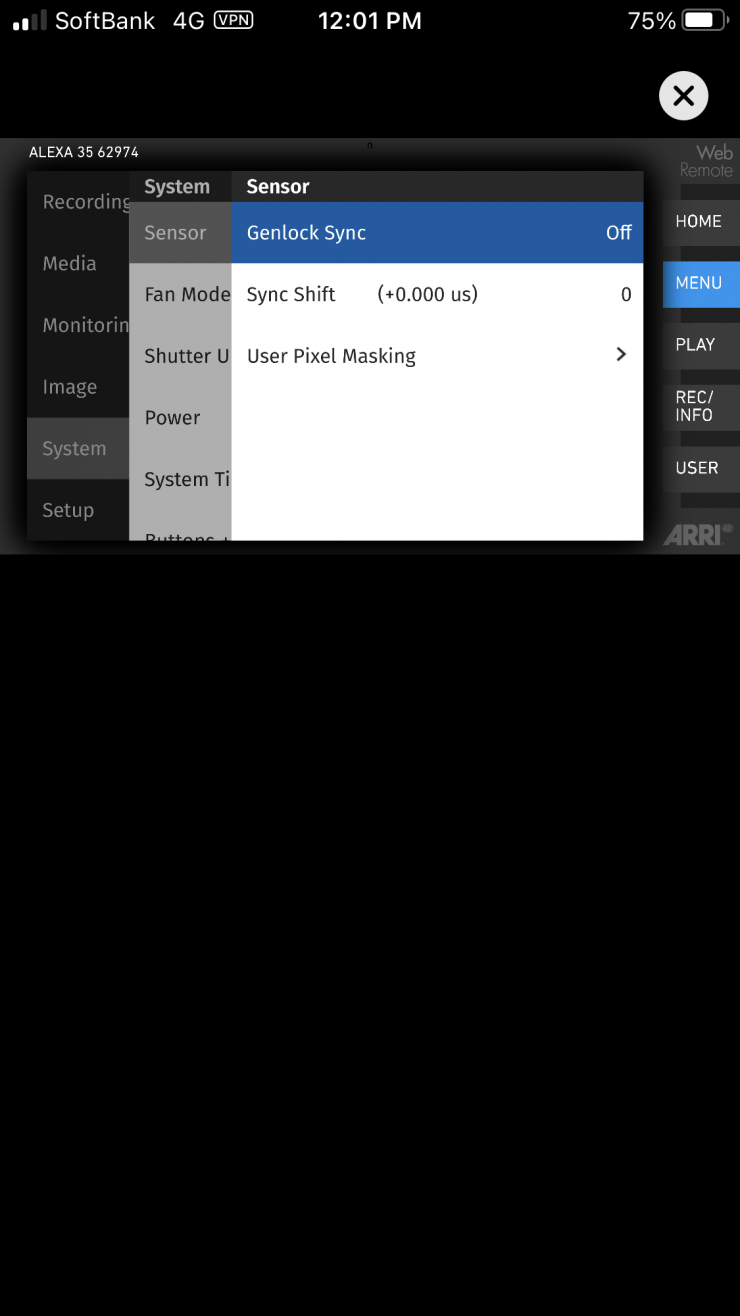
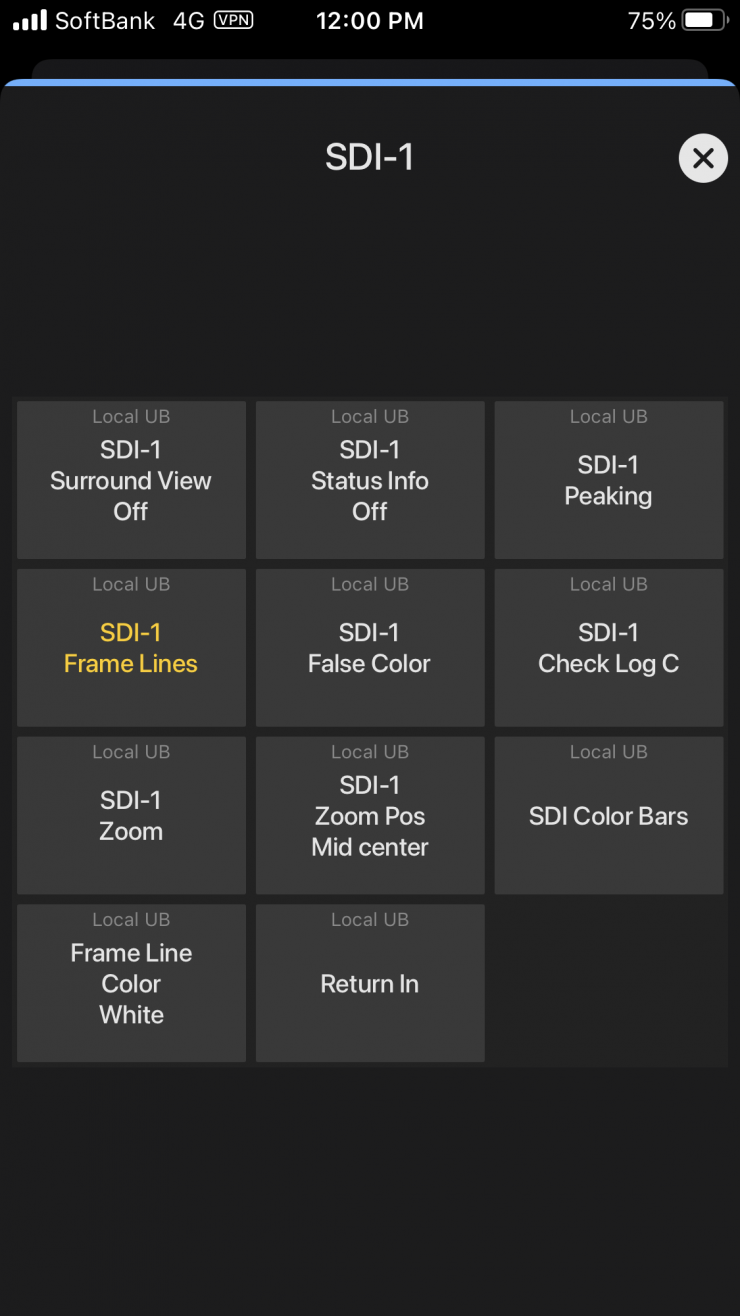
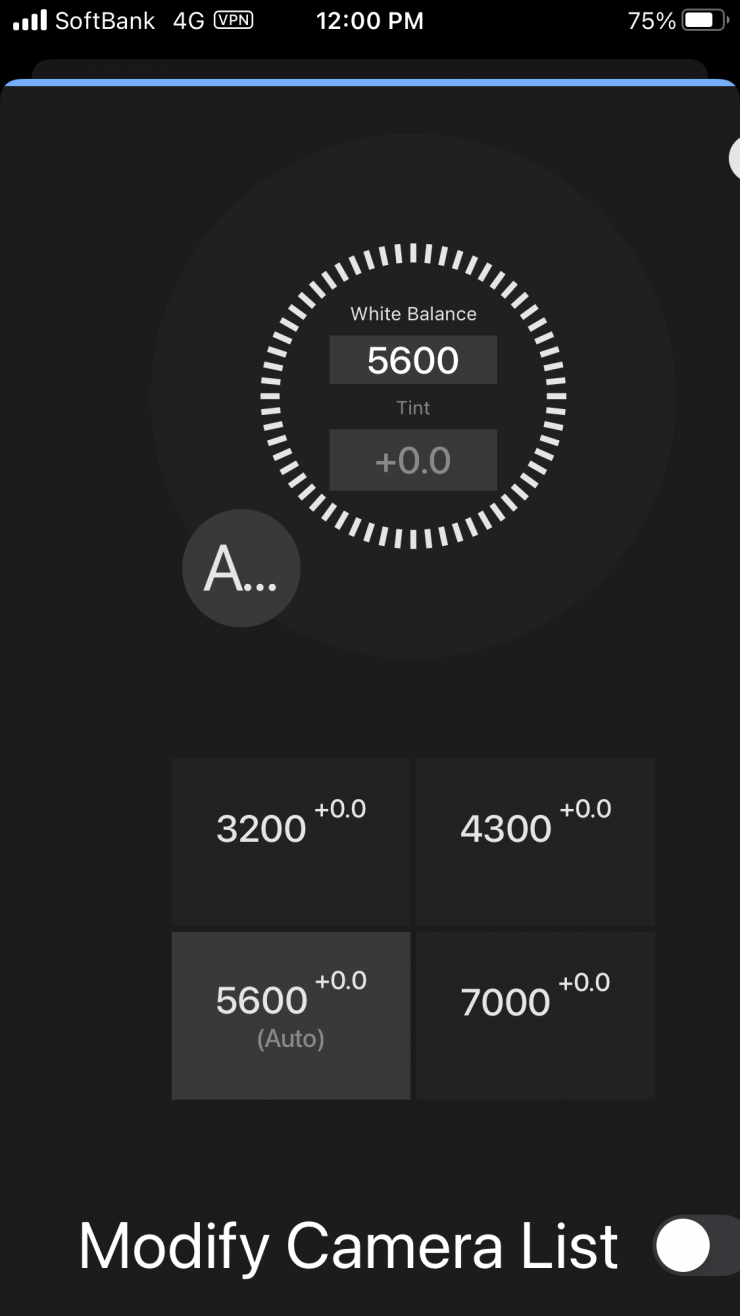
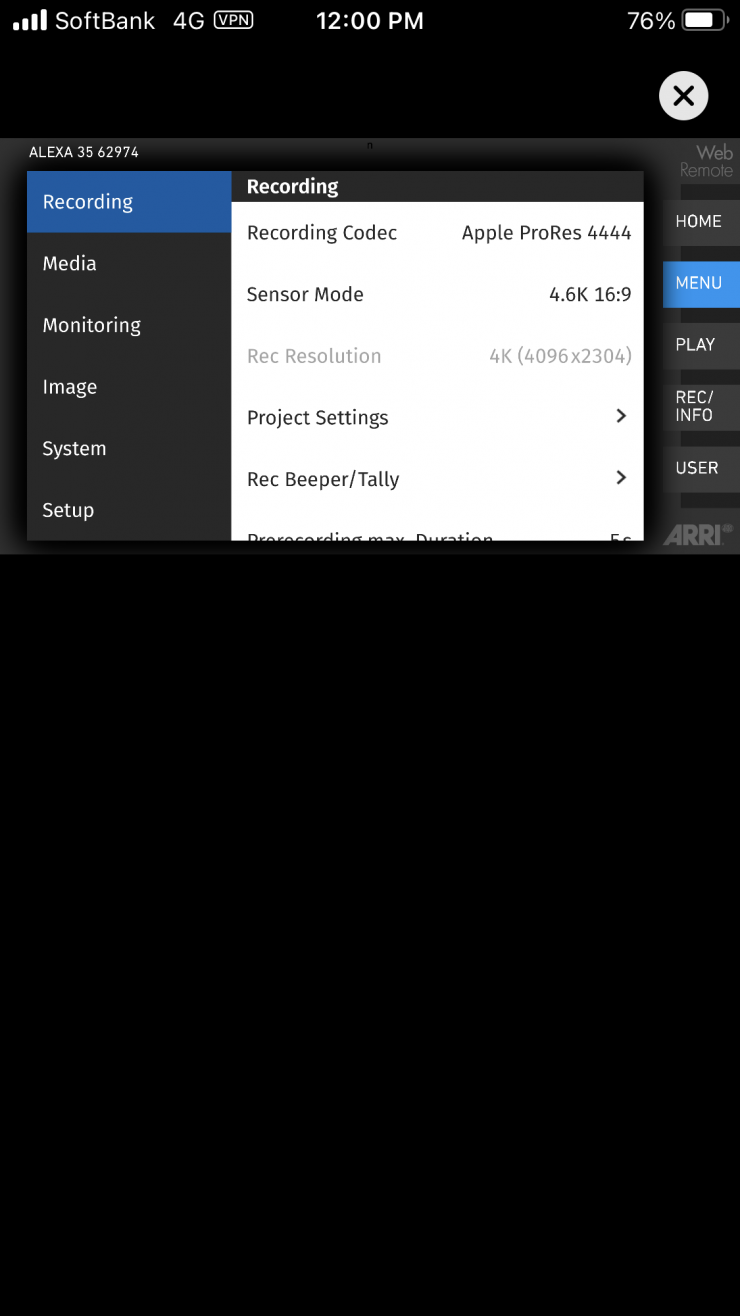
The ARRI Camera Companion App not only works with the ALEXA 35, but also the ALEXA Mini LF, ALEXA Mini, and the AMIRA.
The new ARRI Camera Companion App is far more intuitive and easy to use than previous ARRI and third-party versions.
You can literally control and make changes to the exact same parameters that are available on the camera. I really like the app. It is intuitive, well laid out, and very responsive.
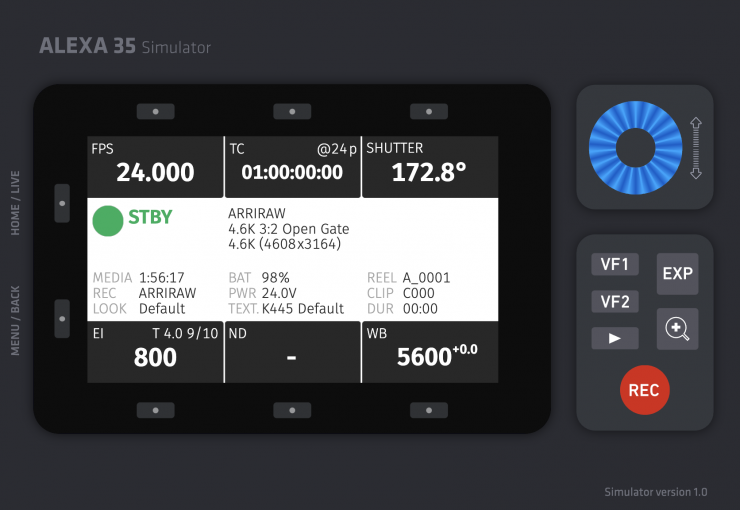
ARRI also has an ALEXA 35 camera simulator on its webpage where you can get a feel for how to operate and make changes to the camera.
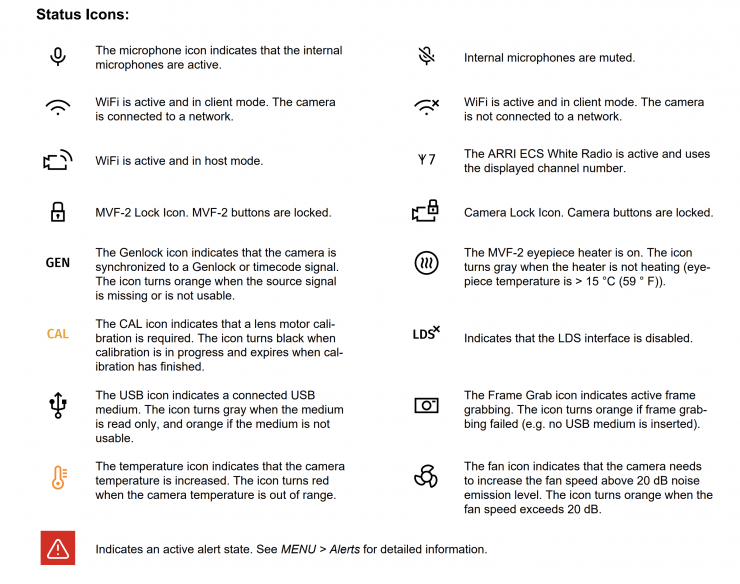
Above you can see a list of status icons that are displayed and what they mean.
Inputs, Outputs & Connectors
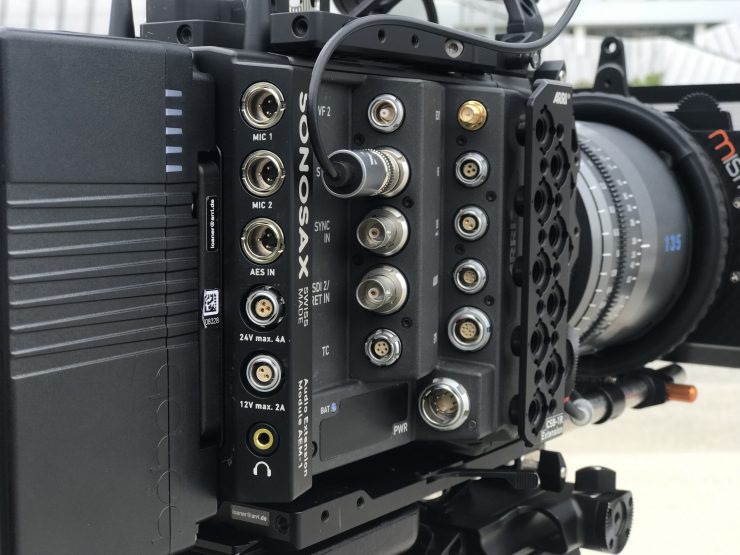
Image copyright Newsshooter
As far as connections on the camera are concerned, ARRI gives you a lot of options. On the front of the camera, there is:
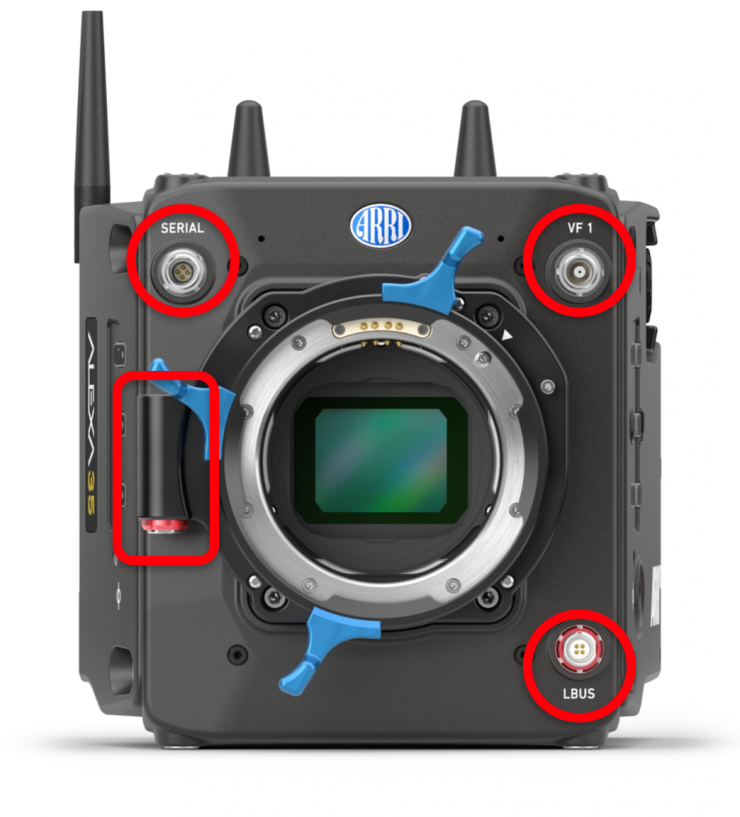
- LBUS On camera: for ARRI ECS accessories
- LBUS On LPL Mount: for ARRI ECS accessories
- SERIAL L-CUBE functions: for UDM-1, Focusbug Cine RT, CE CTM, Ward Sniper)
- VF 1: First viewfinder connector
SERIAL Connector (4-pin LEMO)
The SERIAL connector is used to connect distance measurement devices such as ARRI UDM-1, CE CineTape Measure or Focus Bug directly to the camera and receives data from and provides power to the distance measuring device. The SERIAL connector outputs regulated 12.0 V with a maximum current of 200 mA.
VF 1 Viewfinder Connector (CoaXPress)
The camera uses an industrial CoaXPress interface with an ARRI custom connector to connect the MVF-2 viewfinder with the camera. The interface transmits power, video and control data. The VF 1connectors supports cable lengths of up to 5 m (16.4 ft). The VF connector supports hot plugging and
comes without a key, so the viewfinder cables plug in regardless of the connector’s orientation.
LBUS Connector (4-pin LEMO)
The LBUS connector is used to connect daisy chainable LBUS devices of the ECS Electronic Control System (lens motors, ARRI Master Grips, ARRI OCU-1) to the camera and supplies regulated 24.0 V with a maximum current of 4.0 A.
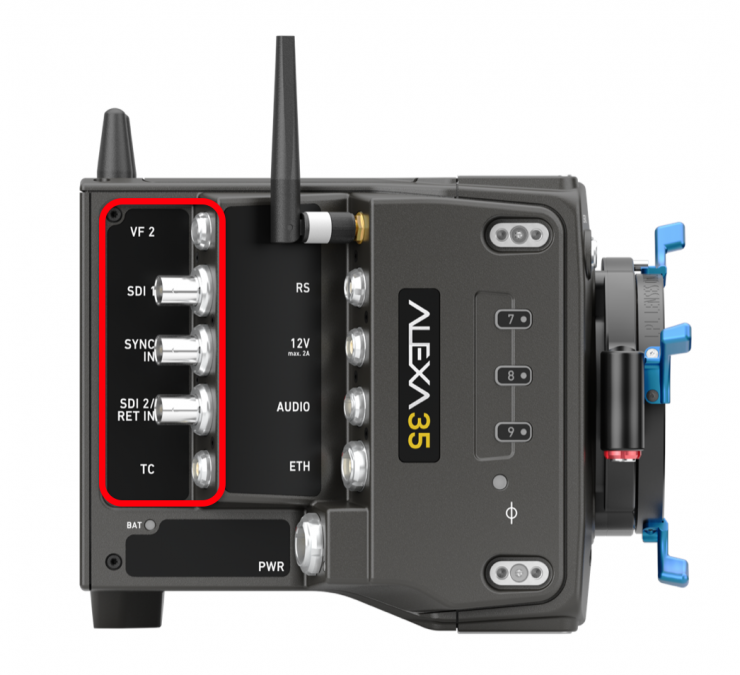
On the right-hand side of the camera, you will find most of the key inputs and outputs. Towards the back of the camera you will find the following:
- VF 2 Second viewfinder connector
- SDI 1 Completely independent (1.5G, 3G, 6G, or 12G)
- SYNC IN Genlock: analog black burst or tri-level
- SDI 2/RET IN Completely independent (1.5G, 3G, 6G, or 12G)
– or return in (1.5G or 3G) - TC Timecode in/out (this uses the same cable as the Mini LF)
VF 2 Viewfinder Connector (CoaXPress)
VF 2 is the second viewfinder port. The camera uses an industrial CoaXPress interface with an ARRI custom connector to connect the MVF-2 viewfinder with the camera. The interface transmits power, video and control data. The VF 2 connector supports cable lengths of up to 10 m (33 ft). The VF connector supports hot plugging and comes without a key, so the viewfinder cables plug in regardless of the connector’s orientation.
SDI 1 & SDI 2 / RET IN (BNC)
Both SDI BNC connectors can be configured to output the following video signals:
- 422 1.5G HD: (23.976, 24, 25, 29.97 and 30 fps progressive or psf) according to SMPTE ST 292-1:2012
- 422 3G HD: (48, 50, 59.94 and 60 fps progressive) according to SMPTE ST 425-1:2014
- 444 3G HD: (23.976, 24, 25, 29.97 and 30 fps progressive) according to SMPTE ST 425-1:2014
- 422 6G UHD: (23.976, 24, 25, 29.97 and 30 fps progressive) according to SMPTE ST 2081-10:2015
- 422 12G UHD: (48, 50, 59.94 and 60 frames fps progressive) according to SMPTE ST 2082-10:2015
- 444 12G UHD: (23.976, 24, 25, 29.97 and 30 fps progressive) according to SMPTE ST 2082-10:2015
The SDI 2 / RET IN connector can be configured in the camera menu to function either as SDI output or as a Return In input, accepting 1.5G and 3G SDI signals.
SYNC IN (BNC)
The SYNC IN connector is a BNC connector for input of reference signals and accepts analog black burst signals and tri-level HD signals for camera synchronization.
TC (5-pin LEMO)
The TC connector accepts and outputs LTC (Longitudinal Timecode) signals.
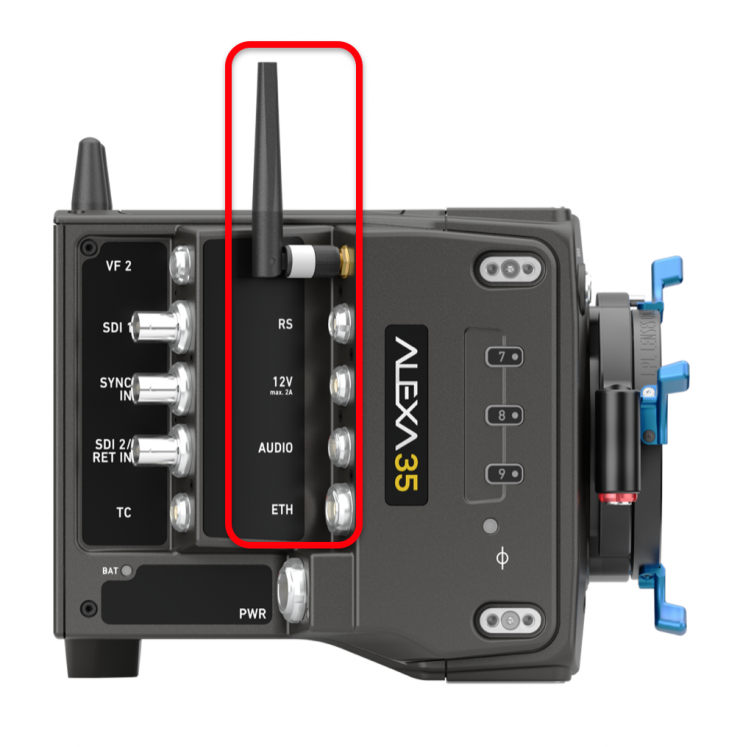
Then if you move slightly forward you have the following:
- ECS Antenna for ARRI ECS radio (Hi-5, WCU-4, SXU-1)
- RS Regulated 24V accessory power out
- 12V Regulated 12V accessory power out
- AUDIO 2x LINE audio inputs
– 12V accessory power out
– Like the Mini LF, uses the same cables
– Camera has 4 audio channels - ETH Service, ARRI Webremote, etc.

The ETH connector can also be used for real-time streaming metadata which is handy if you are using the camera for Mixed Reality Productions (MRP). This metadata includes all relevant frame-based lens and camera metadata and it can be received by ARRI’s Live Link Metadata Plug-in for Unreal Engine.
White Radio Antenna Connector (Female RP-SMA)
White radio allows for wireless lens control, lens data communication and remote control of camera functions using the hand units of the ARRI Electronic Control System.
RS (3-pin Fischer)
The RS connector outputs regulated 24 V accessory power and can supply external devices with a load of up to 3.0 A. Additionally, the RS connector outputs a shutter pulse signal and can be used to send a remote start/stop signal to the camera.
12V (2-pin LEMO)
The 12 V output with a 2-pin LEMO connector supplies accessories with regulated 12.0 V with a maximum current of 2.0 A.
PWR (8-pin LEMO)
The PWR connector is the main power input for the ALEXA 35 and accepts an input voltage range from 20.5 to 33.6 V DC. You can use power cables KC50-S (K2.75007.0) or KC50-SP-S (K2.0001275) to power the camera from an external source.
ETH (10-pin LEMO)
The ETH Ethernet connector is used for camera remote control, metadata streaming and service purposes. It supplies regulated 24 V with a current of 0.5 A. Use the ALEXA Ethernet Cable KC 153-S (K2.72021.0) to connect the camera to a standard RJ-45 Ethernet port.
AUDIO (6-pin LEMO)
The AUDIO connector is a 2-channel +24 dBu line level audio input with an additional regulated 12 V power output with a current of up to 0.5 A. Use the ALEXA Mini LF Audio connector with cable (K2.0023988) to connect audio sources.
PWR and BAT Status LEDs
The BAT LED indicates the status of the power source connected to the BAT interface on the back of the camera used for onboard batteries, the PWR LED indicates the status of the power source connected to the PWR connector.
User Buttons 7-9
The camera right is equipped with three freely assignable user buttons (11). Each button can be customized with individual functions. Once a user button is assigned with a function, press the button to trigger its function. An LED on each user button reflects the functional status.
Lens & Electronic Control System (ECS)
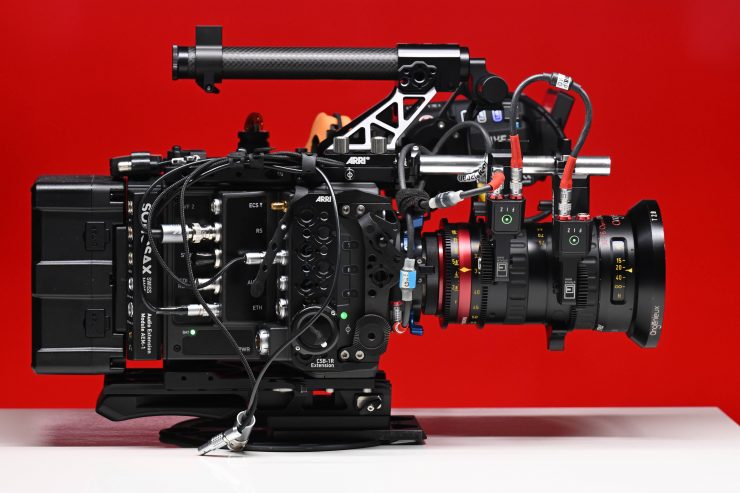
The camera has an integrated radio unit via which the ARRI HI-5, WCU-4 and SXU-1 hand held units can be connected to the camera. It enables wireless lens control, lens data communication and remote control of basic camera functions. The radio system is referred to as white radio. The connector for the white radio antenna is located on the right side of the camera. In order to assume a correct wireless operation, you need to ensure
that the white radio antenna is installed correctly on the camera.
The camera also supports the use of cforce mini, cforce plus and cforce mini RF lens motors. Lens motors are connected to the LBUS connector of the camera and/or the lens mount and can be daisy chained.
When connecting a cforce plus motor to the camera, you need to check if the LBUS connector(s) on both motor and lens mount are equipped with a silver washer placed below the red nut of the connector. If the LBUS connectors on either cforce plus motor or lens mount (or both) miss the silver washer, the cforce plus motor needs to be supplied with external power (e.g. D-Tap from a battery adapter plate) in order to ensure proper performance. cforce mini motors are not affected and can always be powered through the lens mount.
You can also use the ARRRI ZMU-4 Zoom Command directly with the ALEXA 35.
The ZMU-4 takes the same radio modules as the Hi-5 and it can act as a wireless transmitter or receiver depending on how you want to configure it. It also allows you to turn other devices into wireless devices.
Key features
- Easy switch between wired and wireless operation
- Camera and lens motor control combined in one unit
- Exchangeable radio modules for challenging environments
- Wireless expansion for other devices
- Easily readable status display with lens data
- Robust, weather-proof, ergonomic design
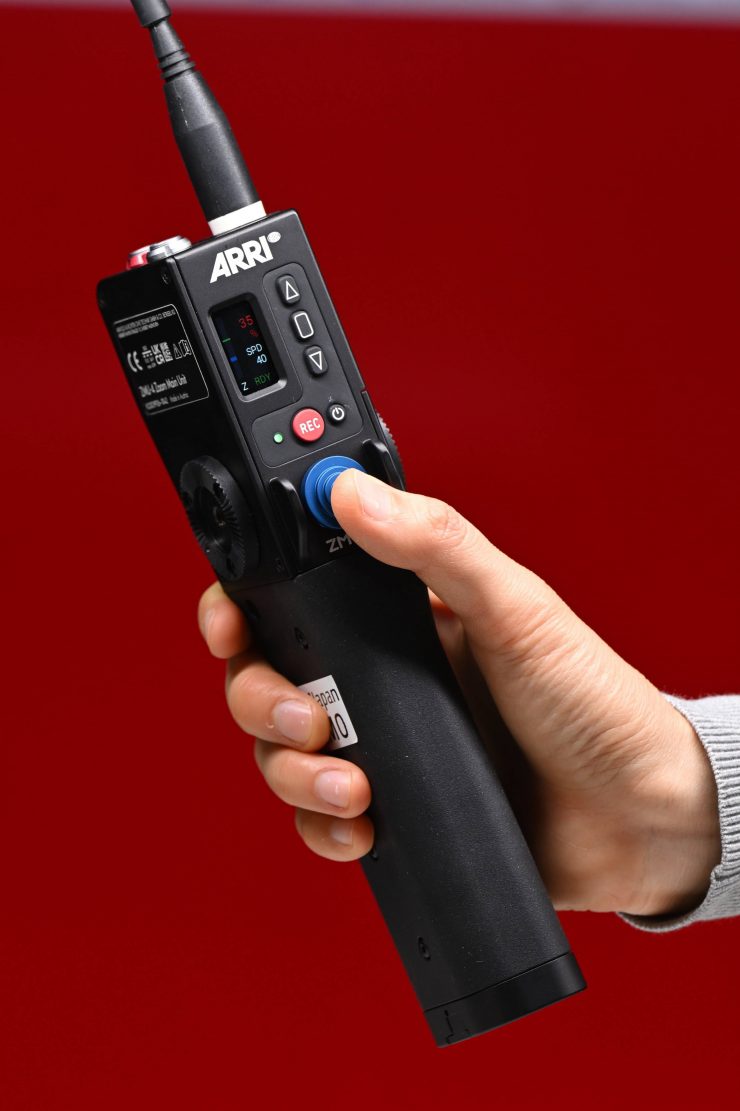
You can use the ZMU-4 as a completely self-contained stand-alone wireless zoom controller, or you can use it to turn other devices into wireless devices. So, for example, there is a bracket for the OCU-1 which you can attach to the ZMU-4, and then by plugging in an LBUS cable, you can turn it into a wireless device.

ARRI RIA-1
You can also use the ZMU-4 as a wireless receiver. What this means is that because the top of the ZMU-4 is essentially an RIA-1, it shares the same capabilities. This means you can use it for remote focus, iris, and/or zoom control and camera run/stop and tally functions.
You could mount the ZMU-4 to handgrips, although it probably isn’t going to be used by most people in that configuration. This would allow you to hook up lens motors directly to the ZMU-4 and then you could still have everything talk directly to the Hi-5 as well.
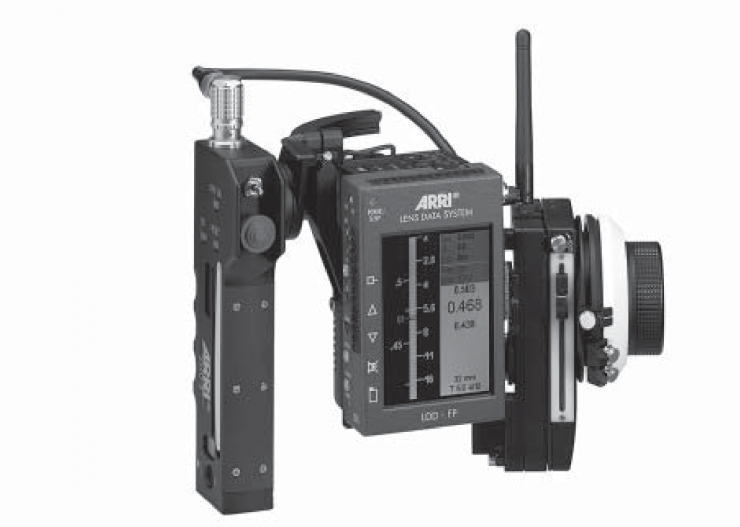
Back in the day, the ZMU-3 could be attached to the WMU-3 Wireless System using the KC105-S and WZB-3.
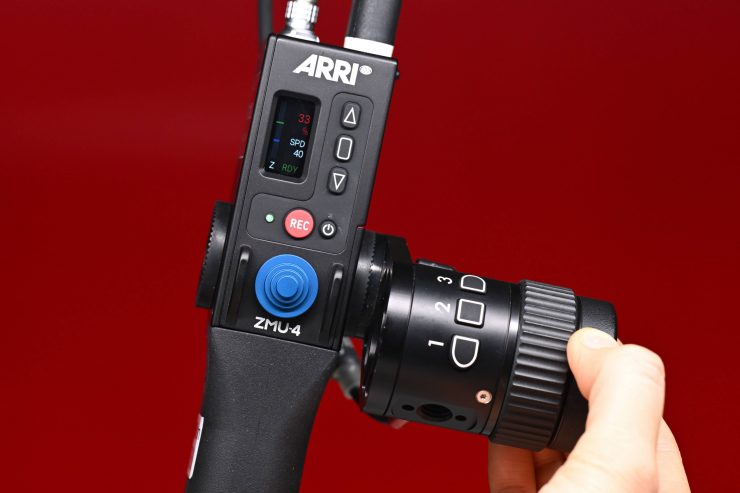
What ARRI has done with ZMU-4 is to modernize this same approach. As I mentioned earlier, by utilizing the ZMU-4 and an OCU-1, you can create a 2-channel system. Because ARRI currently doesn’t make a WCU-1 replacement and they only have the Hi-5, this becomes a good in-between solution.
By combining the ZMU-4 and the OCU-1 and placing that combination with or on a monitor, you can create a nice 2-axis system for controlling zoom and focus, or zoom and iris.
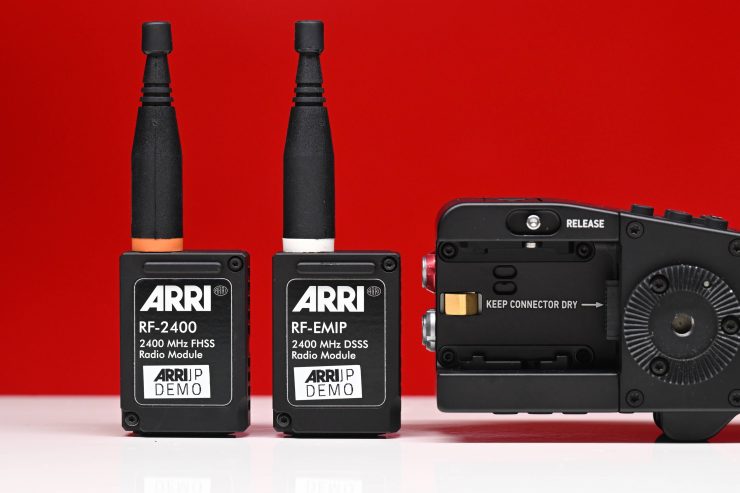
Just like the RIA-1, you can interchange the ARRI RF radio modules depending on your requirements.
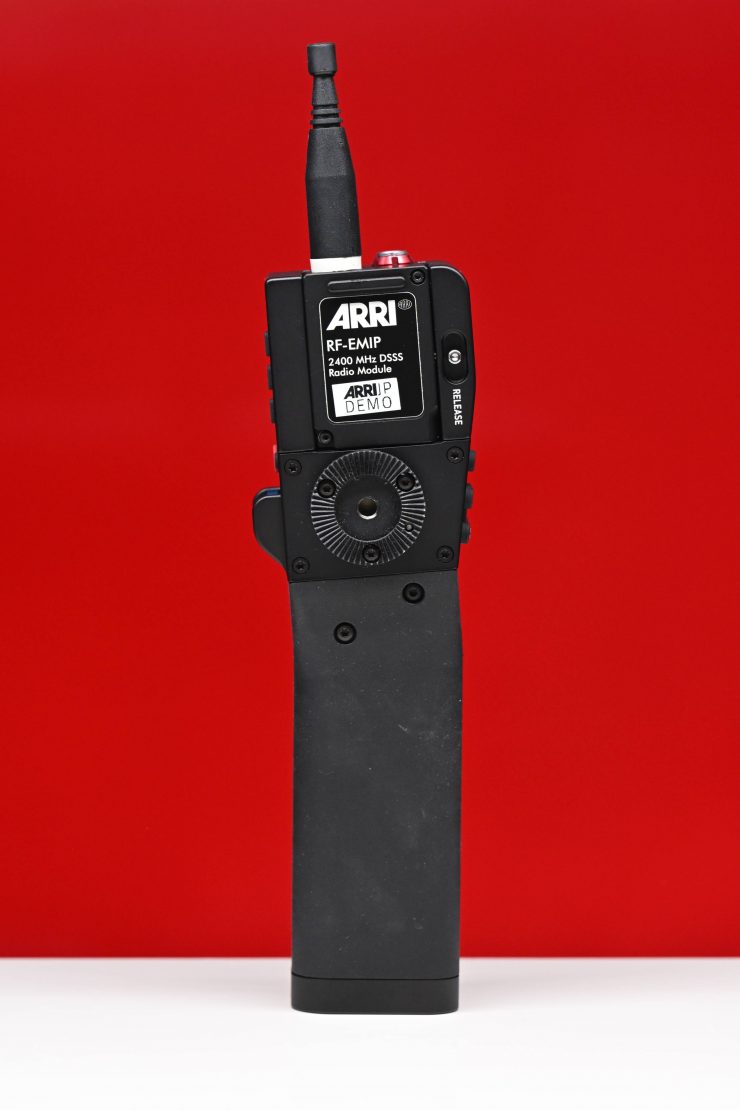
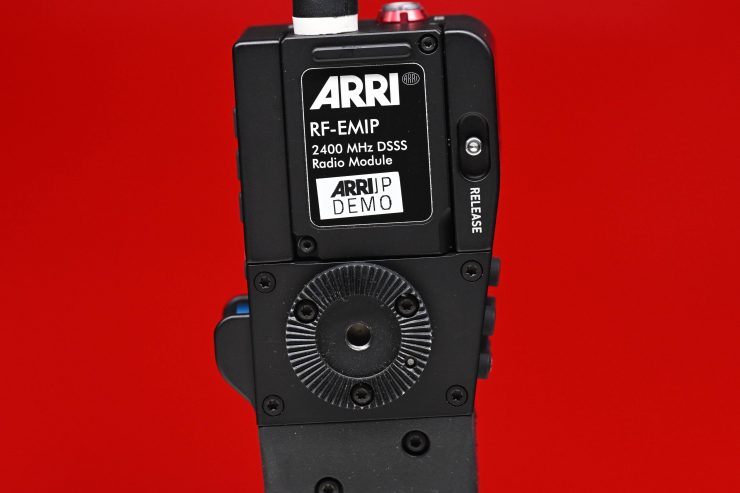
The ARRI RF radio modules simply clip into the top of the ZMU-4.
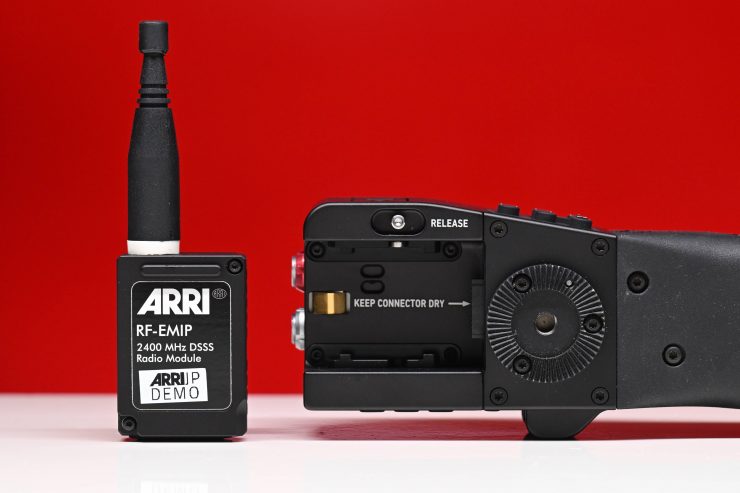
ARRI RF-EMIP Radio Module 2400 MHz DSSS
If you are using the ZMU-4 with the ALEXA 35, because the ALEXA 35 has the same integrated radio module as the ARRI RF-EMIP Radio Module 2400 MHz DSSS everything will communicate without the need for any additional components. This also means that you don’t need a cforce mini RF Motor Unit because the ZMU-4 is talking directly to the camera and not the motor. This allows you to plug lens motors directly into the camera and then control them through the ZMU-4.
Another way you could also use it is by attaching it directly via an LBUS cable to motors. This is handy for certain applications and just adds to the overall versatility of the product.
Why make a Super 35 Camera?
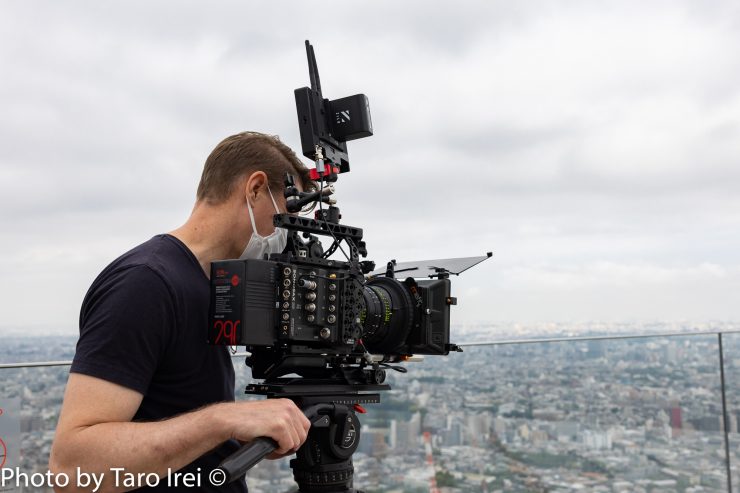
Some people may well be wondering why ARRI would release a Super 35 camera in 2022 when the industry push has been towards larger-sized sensors. Well, ARRI firmly believes there is still a market for Super 35 sensor-sized digital cinema cameras.
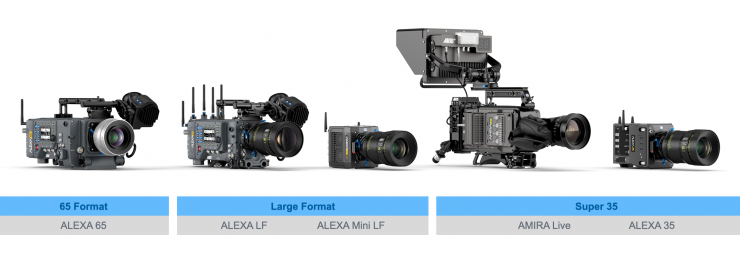
For the foreseeable future, ARRI now has the ALEXA 65 for 65, the ALEXA LF and ALEXA MINI LF for large format, the ALEXA 35 for Super 35, and the AMIRA Live for live and broadcast applications. This is just like in the days of film, where you had the choice of shooting 65mm, 35mm, or 16mm, ARRI is giving you three different choices in digital.
Build Quality

As you would expect from ARRI, the build quality of the ALEXA 35 is superb. When you pick up an ARRI camera there isn’t any plastic, there aren’t any flimsy parts, and there aren’t dials and buttons that feel like they may break. ARRI cameras are built to withstand anything you can throw at them. The ALEXA 35 has been put through rigorous field testing around the world in the most extreme of conditions. ARRI sent cameras out to DPs and purposely told them not to go gentle. Getting feedback from the field from the end-user is an important part of designing any camera and to check if there are any potential flaws that need to be addressed.
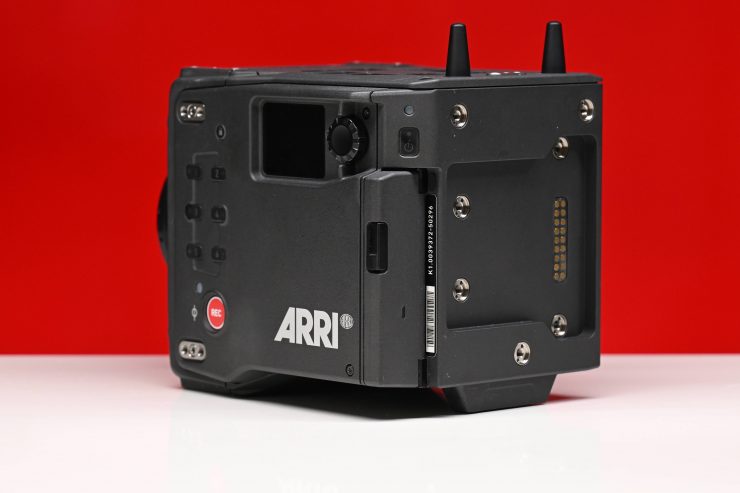
Just like previous ARRI cameras, the design is understated, and that is a good thing. ARRI is more interested in functionality and reliability than they are in style. You won’t see any skulls or eject switches on the ALEXA 35 ;). The ARRI philosophy and always been about functionality, usability, and reliability. They are not in the business of trying to make something that looks cool. And no, there aren’t any white versions of the camera available!
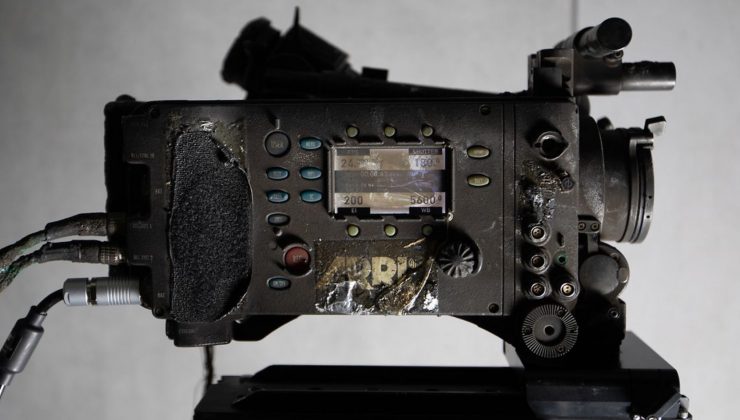
ARRI cameras are designed to be as robust as possible. The entire ALEXA 35 is spray and dust-proof. The camera has the largest operating temperature range in the industry: -20º C to +45º C / -4° F to +113° F. ARRI also told me that the splash and dust proofing was even better than on previous ARRI cameras.
The ALEXA 35 was specifically designed with future hardware and software upgrades in mind. This was done to provide a long product cycle and a safe return on investment.
The electronic boards are made by third-party suppliers to ARRI’s specs under very tight quality control. The sensor bonding (the high-tech and tricky marrying of the sensor to the sensor board) is actually done in-house in a super clean room. This allows ARRI to also repair sensors in-house and to deal with any sensor-related manufacturing issues in-house.
The camera assembly is a modern process done in-house. ARRI has designed its assembly process to be very flexible, so the same people can build the ALEXA 35, ALEXA Mini LF, ALEXA LF, and AMIRA. That way ARRI can quickly react to changes in customer demand.
ARRI has also now moved into a new, modern building and they now have their very own, Amazon-style automated robotic parts warehouse.
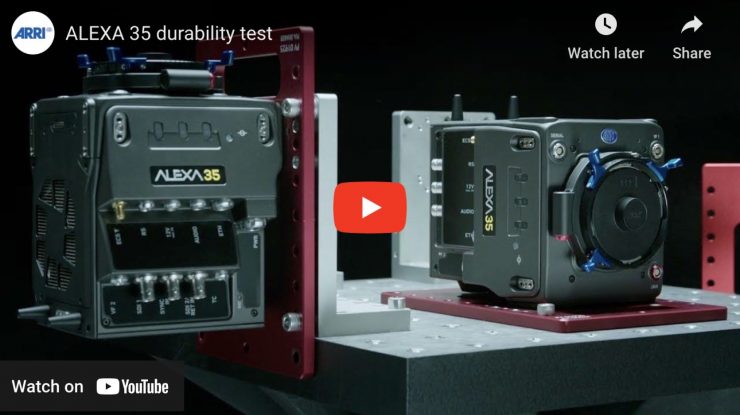
ARRI cameras undergo an extensive testing and burn-in phase, that includes frequent image quality and camera functioning checks including a “shake and bake”, where the camera is put in different temperature environments and is shaken by an industrial shaker. What ARRI is doing here, is essentially simulating one week of rough use on the set. ARRI has learned that most things that fail tend to fail in that first week, so they simulate it to catch these things before a customer has an issue on set.
To my knowledge, no other camera company does this.
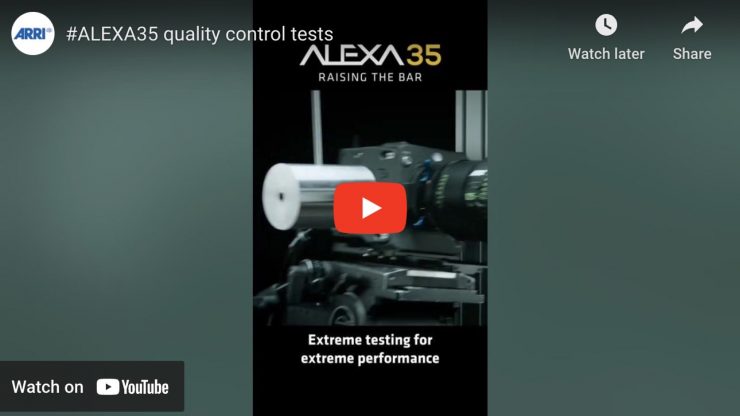
ARRI cameras are designed to maintain their quality, even decades after they have been released. Yes, they are expensive, but customers profit from this value in two ways: as a camera owner, they can be assured of a high resale value for their equipment, and as a prospective buyer of second-hand equipment from ARRI, you know that you are getting a proven camera that won’t let you down.
Design
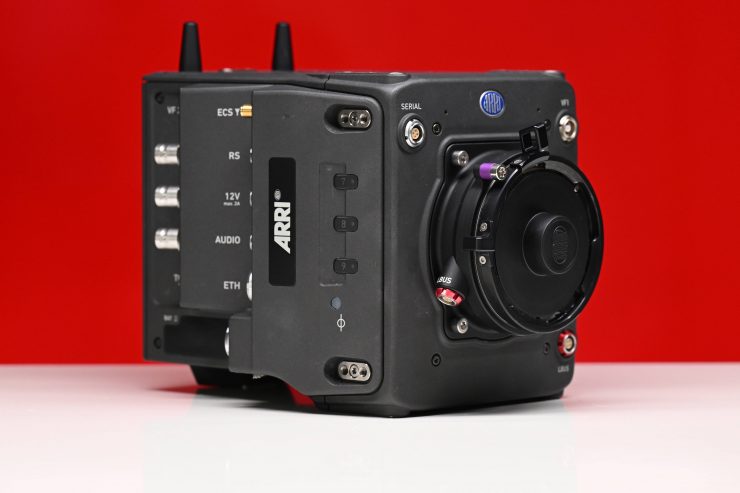
Like so many of today’s digital cinema cameras, the ALEXA 35 is a square box. I have a love/hate relationship with this type of camera design. I love how you can break the camera down and just use it in a small configuration, but sometimes you have to build it up to the point where it increases in size and weight immensely if you want to shoulder mount it.
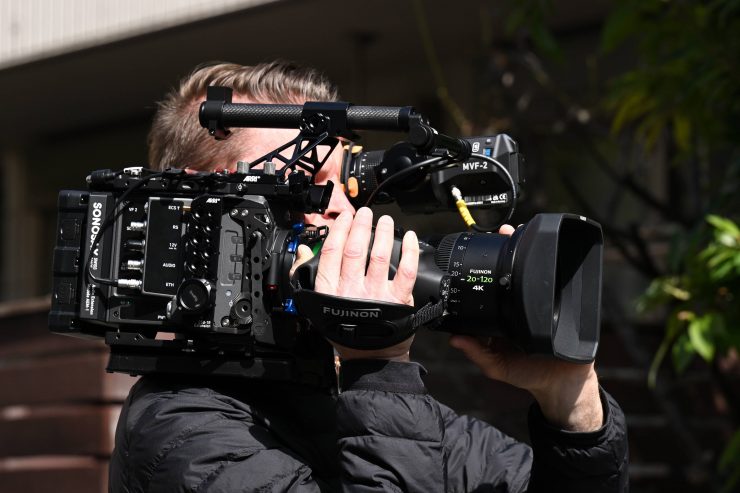
I actually found the ALEXA 35 was easier to configure and use on the shoulder than the Mini or Mini LF. You don’t need as many accessories with this camera as you previously did with some other models.
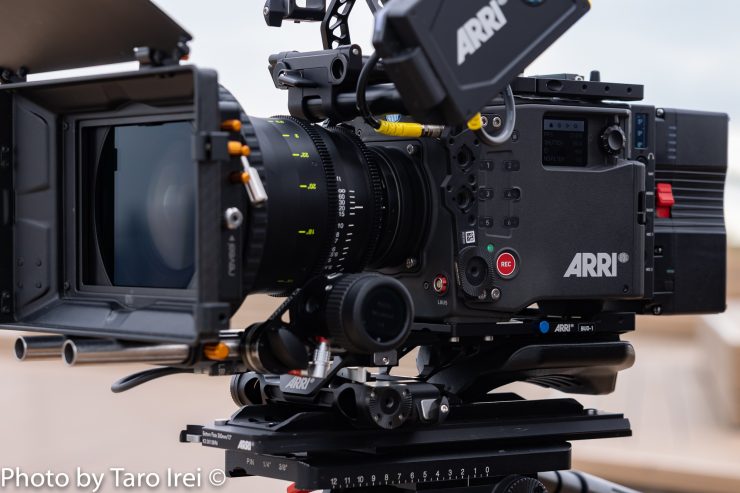
ARRI really has done a great job of making accessories for its cameras. It is amazing to think that there are only a few mounting points on the body, yet you can build up whole systems depending on what you are doing. ARRI accessories are generally well thought out and designed. Having an entire ecosystem of accessories is one of the key factors as to why their cameras are so popular on large productions.
There are countless ways you can build up or strip down the ALEXA 35 depending on your requirements.
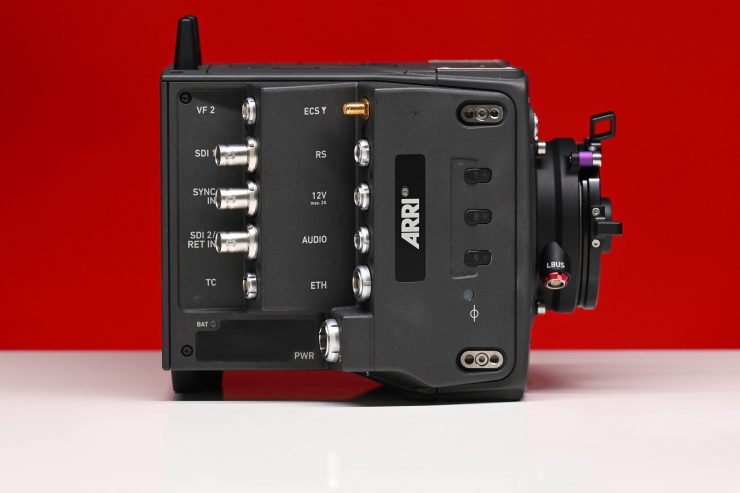
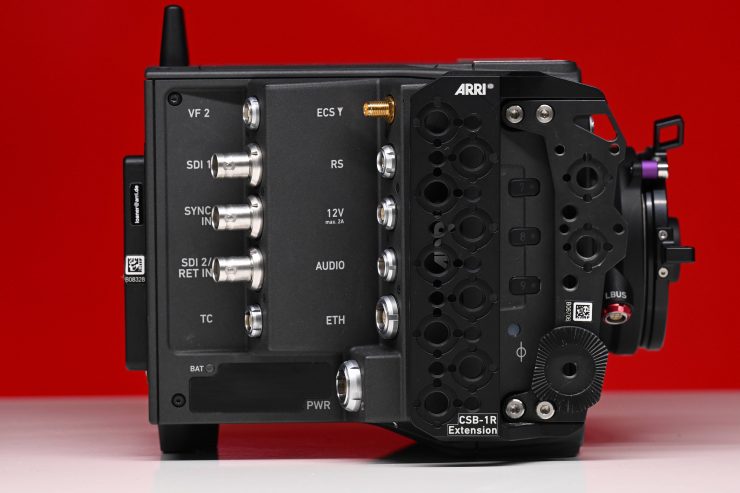

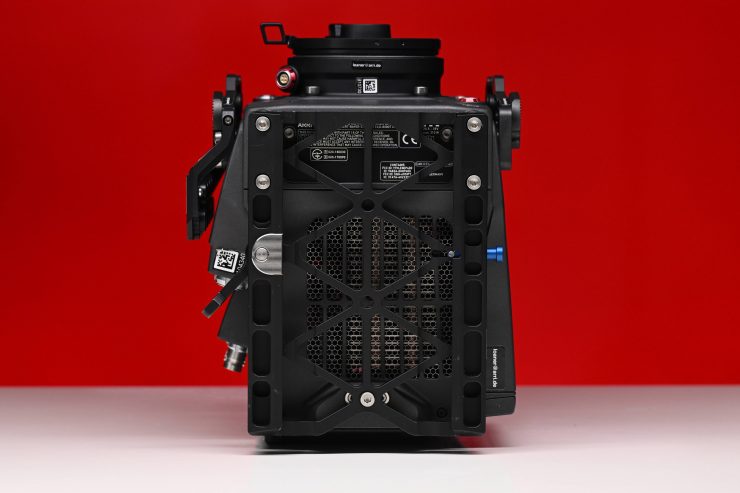
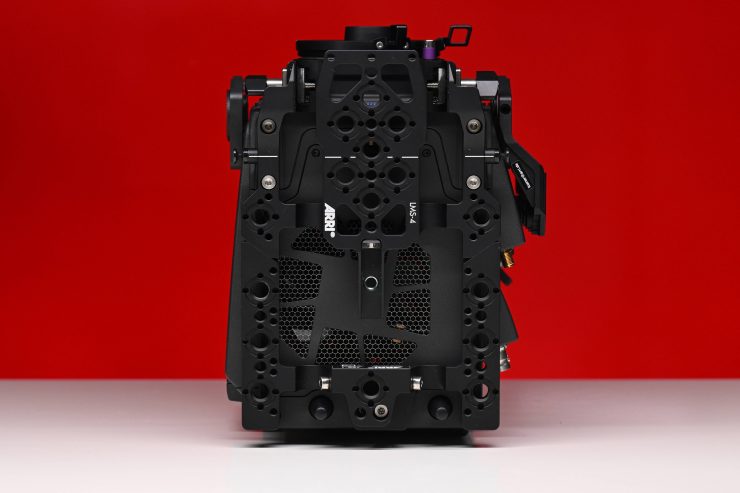
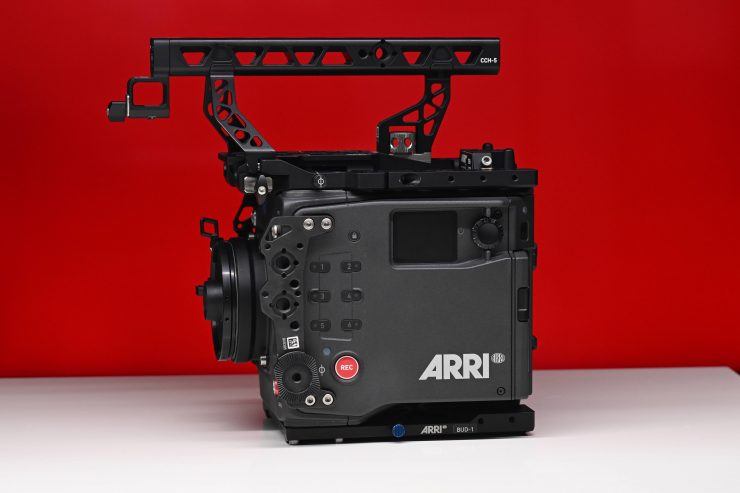
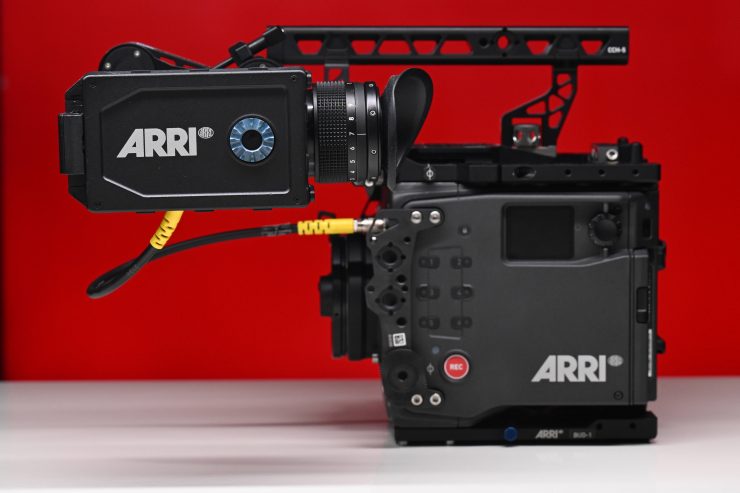
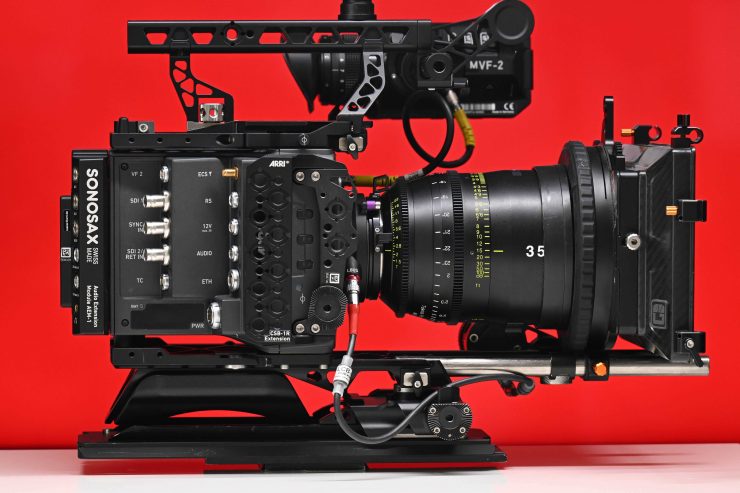
Above you can see a photo gallery showing the base camera being built up into a workable system for tripod and shoulder mount use.
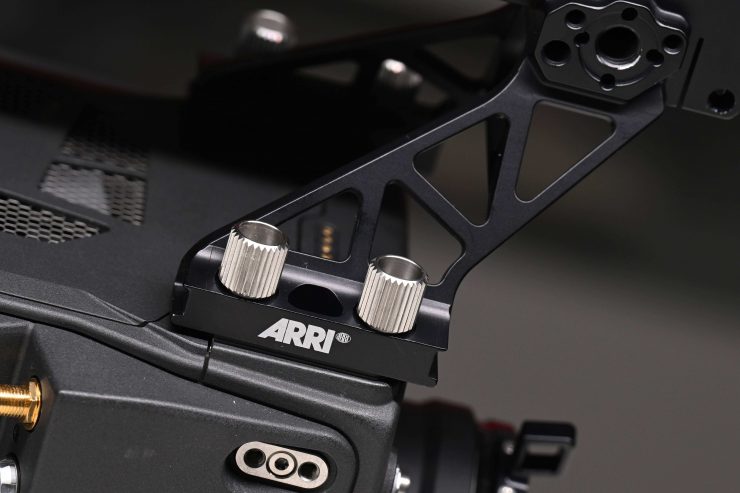
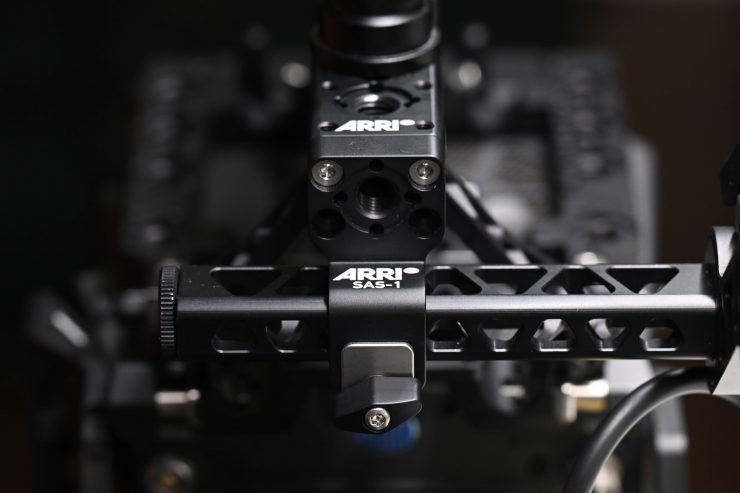
Once you have constructed everything you don’t need any tools to make adjustments.
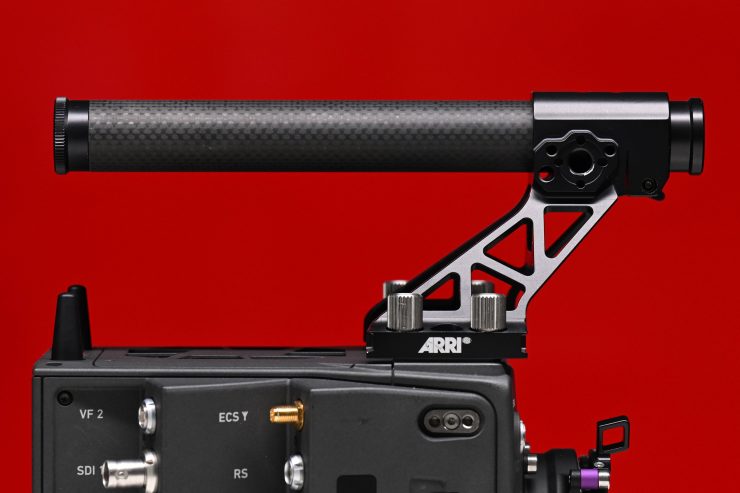
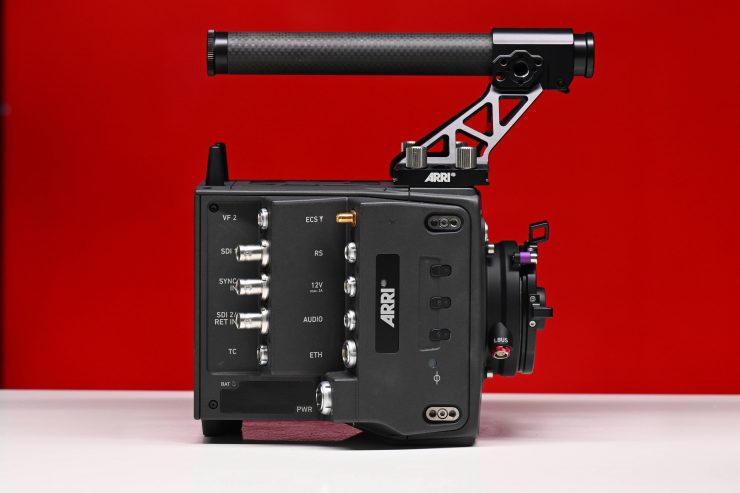
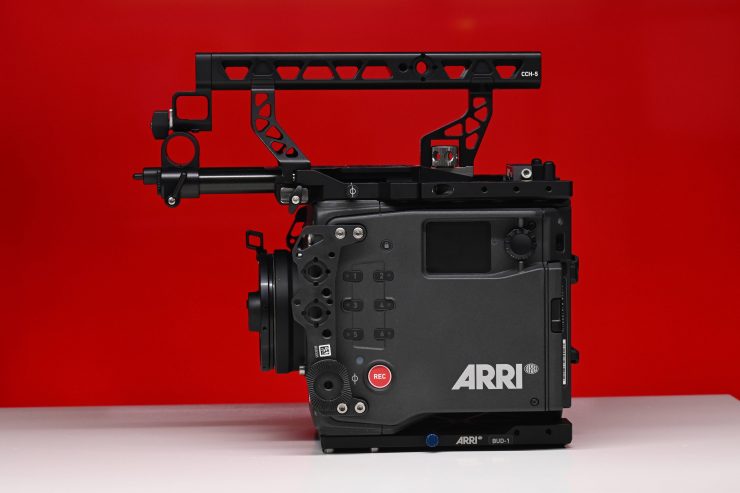

What I like is that there are so many different accessories that you can really tailor the camera to your exact needs. There are different top handles, different viewfinder mounting brackets, and a host of other accessories for just about any scenario you can think of.
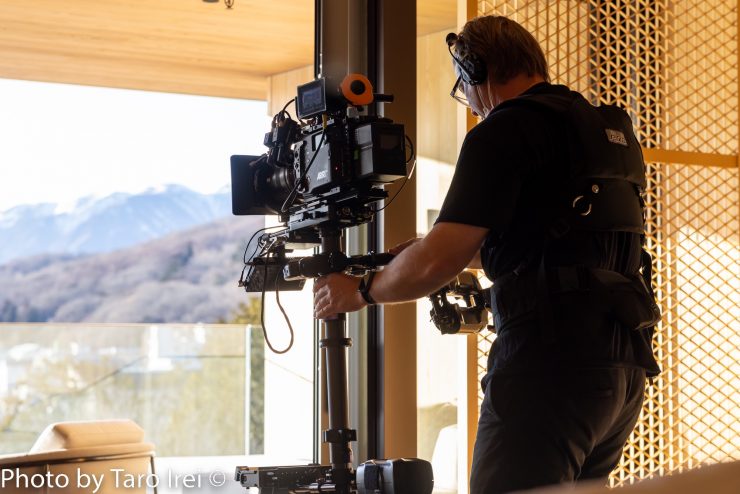
As I mentioned earlier in the review, the ALEXA 35 is also very quick and easy to set up on a Steadicam.
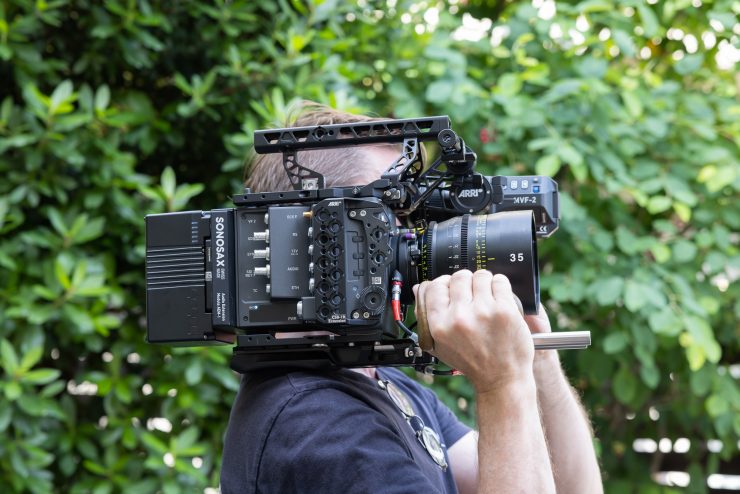
If you are going to shoulder mount the ALEXA 35 you do need a few additional accessories to make that work if you are not using a servo cine zoom. I would highly recommend the OCU-1 or the Mastergrips if you plan on using this camera in any type of one-man-band scenario where you need to do your own focus, camera control, etc.
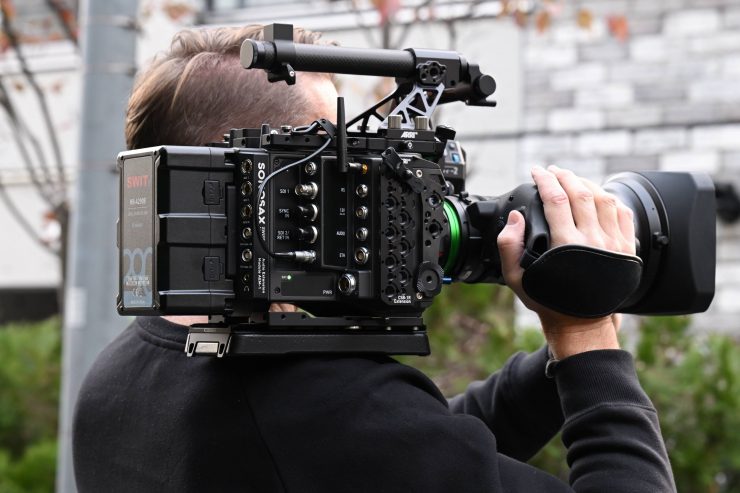
I did find that the camera was easier to shoulder mount than the Mini LF, because the battery is physically attached to the camera. If you are using very heavy or larger lenses and you can’t get the balance right, you can get an additional accessory called the RAB-2 that places the battery further back on a bracket.
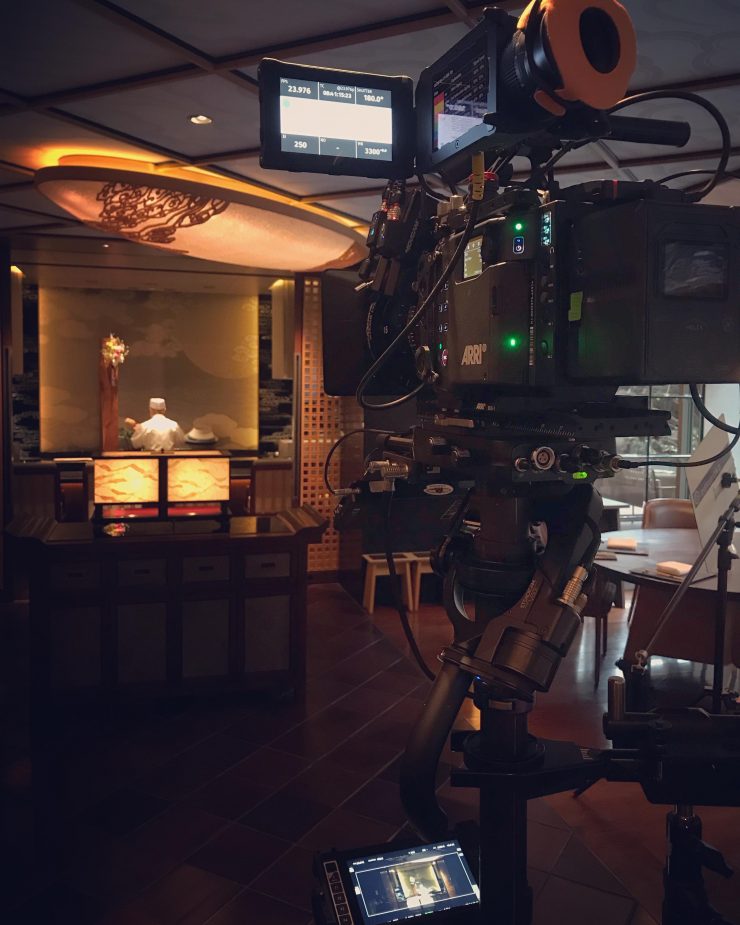
The camera is also very quick to place on a Steadicam and balance up. On a recent project, we were able to go from tripod to Steadicam in a matter of minutes. The SAM-8 plate on the Steadicam makes this very easy to do.
Given this camera is being targeted as a high-end digital cinema camera, it makes sense that it is in this form factor. Just look at movies like 1917 for example, the Mini LF which features a similar design, allowed Deakins to configure the camera so that it could be used in small spaces and also placed on large techno cranes. It is this type of versatility that cinematographers want. ARRI certainly wasn’t the first company to make smaller-sized box-style digital cinema cameras, but after the success of the Mini and Mini LF, it is no surprise that the ALEXA 35 has the same form factor.

Even though the camera wasn’t designed for solo operators, ARRI has made a lot of accessories that do make it easy to use for that exact purpose. I personally find the camera intuitive and easy to use. The ALEXA 35 isn’t a hard camera to operate. If you have ever used an ARRI camera before, the learning curve is very quick.
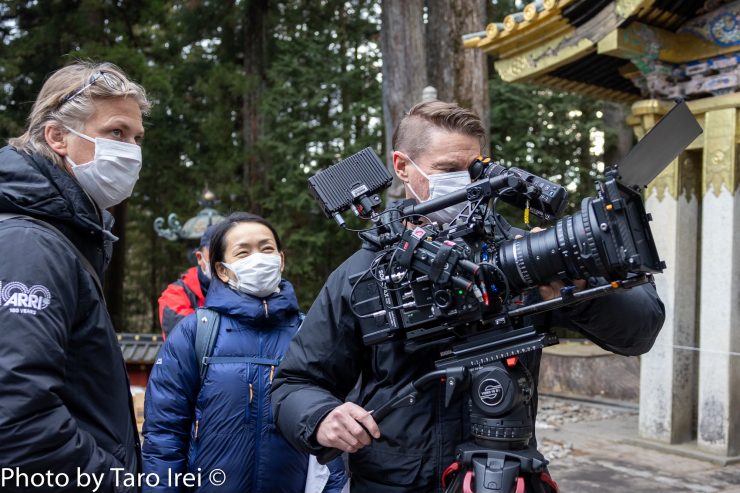
The ARRI ALEXA 35 Lightweight Set is what I would recommend for solo operators or small-sized crews. If you combine that with the AEM-1 Audio Module you have a pretty comprehensive set-up.
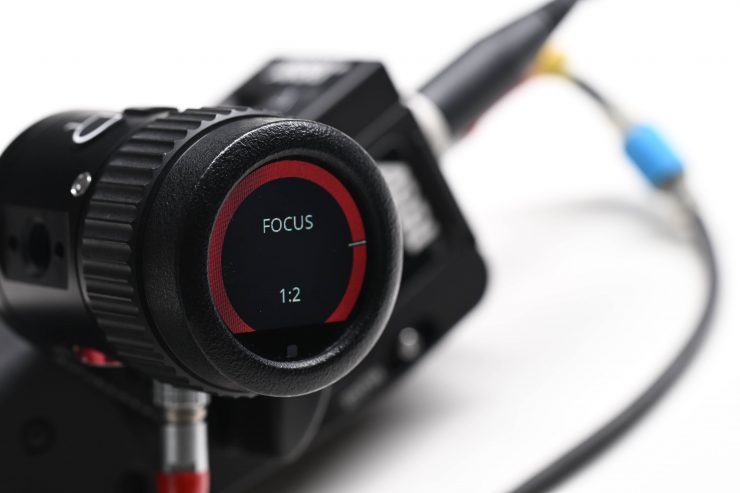
I would also highly recommend the OCU-1. Not only does it allow you to control Cforce lens motors, but you can also use it for camera control. I’ll mention a few features below, but I have already done an in-depth review of it on the site previously that you can read here.
Even though the OCU-1 was primarily designed to enable camera operators to override and return focus, iris, and zoom controls from the Hi-5 and WCU-4 Wireless Compact Unit, it can also be used as an electronic follow focus by solo shooters. This makes it a lower cost option than going with a full ARRI Master Grip setup.
OCU-1 Key features
- Override Function: Prioritizes OCU-1 wheel over wireless control with Hi-5 & WCU-4
- Versatile Controls: Full lens control, advanced camera control
- Flexible Design: Can be mounted in various ways
- Easy to Use: three assignable user buttons, multi-lingual touch display
- Control of Canon EF lenses
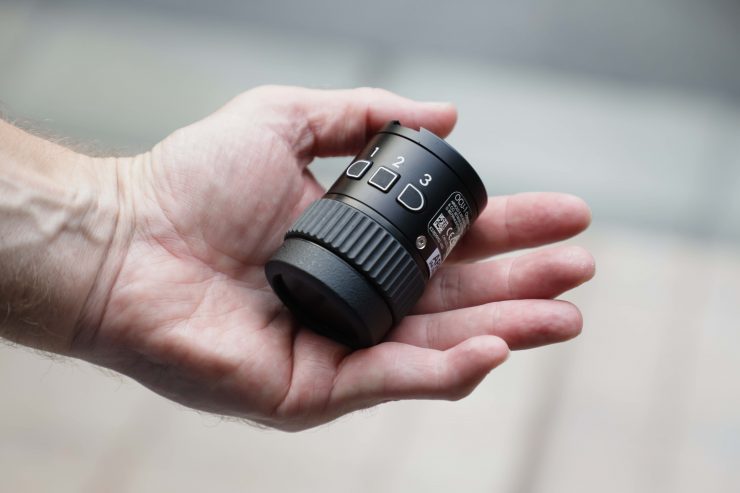
The OCU-1 is small and lightweight. It tips the scales at just 165.5 g / 5.84 oz.
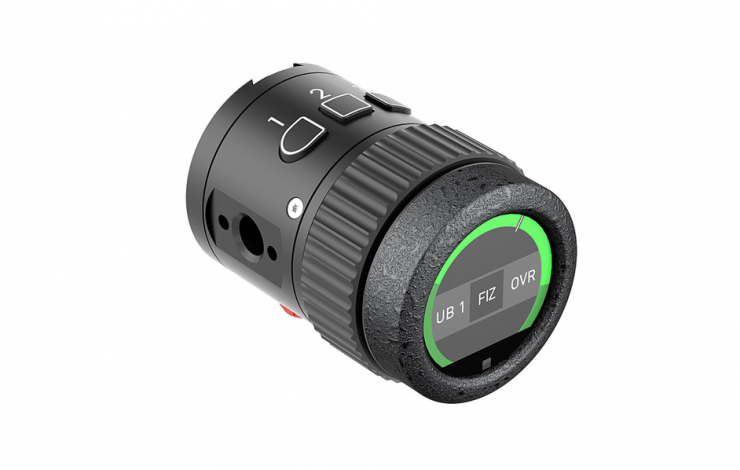
ARRI OCU-1 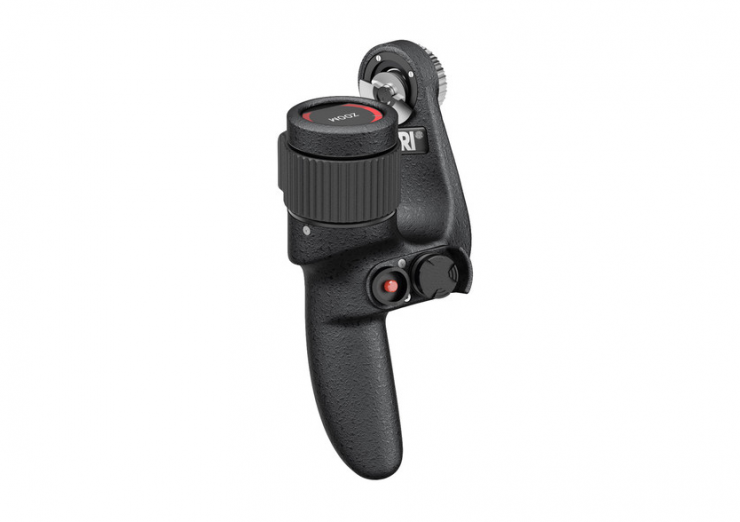
ARRI Master Grip
It features the same control wheel, display, and LBUS integration as you will find on the ARRI Master Grips.
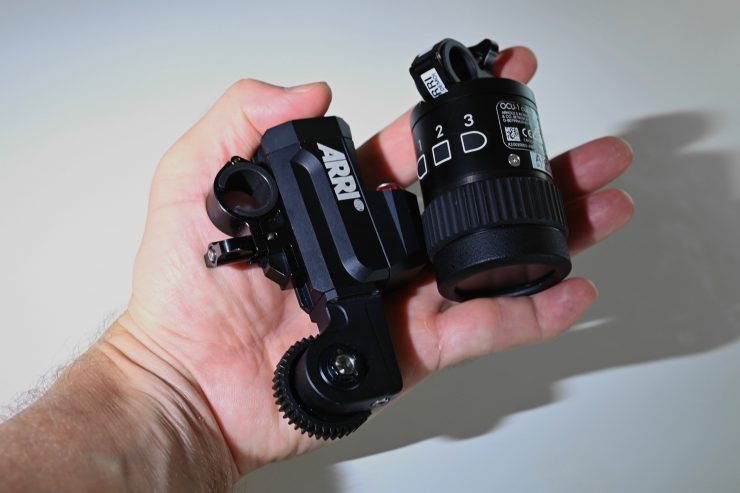
To give you an indication of size, here is the OCU-1 and a cforce Mini motor in my hand.
This low weight and small size make the OCU-1 a very streamlined follow focus solution. If you compare it to the size of a manual follow focus unit, it is tiny.
In a nice touch, by using the LBUS to LBUS cable, it not only powers the OCU-1 and the Cforce Mini motor, but it also allows me to control aspects of the functionality of my camera.
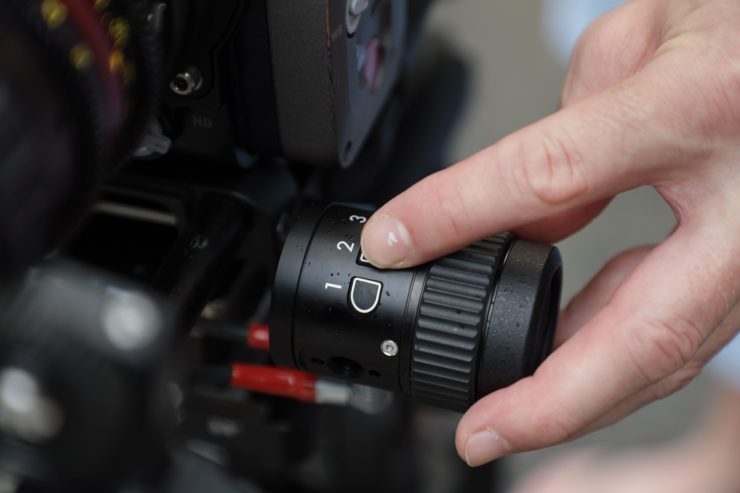
There are 3 user-assignable buttons on the OCU-1 that can be programmed.

All I had to do is go into the menu of my camera and select User Buttons, and then LBUS Device User Buttons. There I could assign any function that I chose to one of the OCU-1 user buttons.
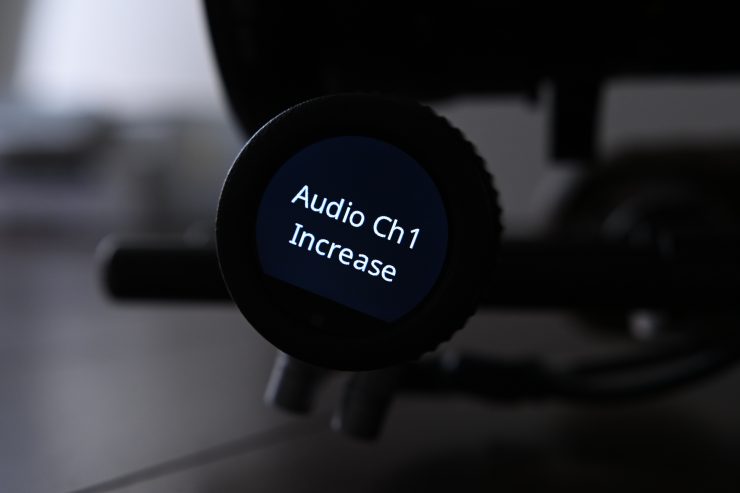
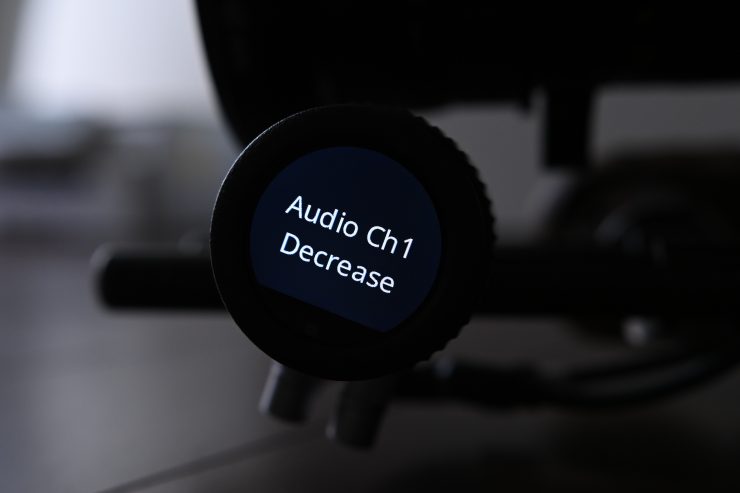

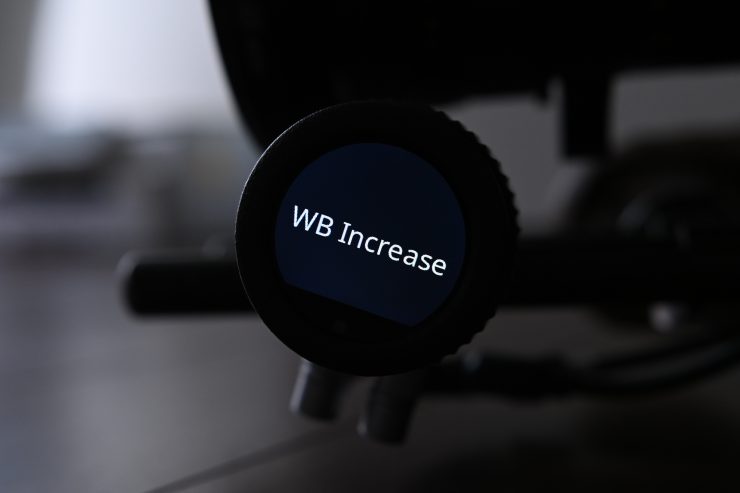
This is really handy. As a solo shooter, I could assign items such as EVF+Monitor Zoom and even Audio Increase or Audio Increase. This allows me to access key functionality without my hands ever leaving the camera.
This ability alone makes the OCU-1 a very good accessory for solo shooters using ARRI cameras.
You can also use the OCU-1 with the ZMU-4.
For me personally, one of the best features of the ZMU-4 is its ability to turn the OCU-1 into a wireless controller.
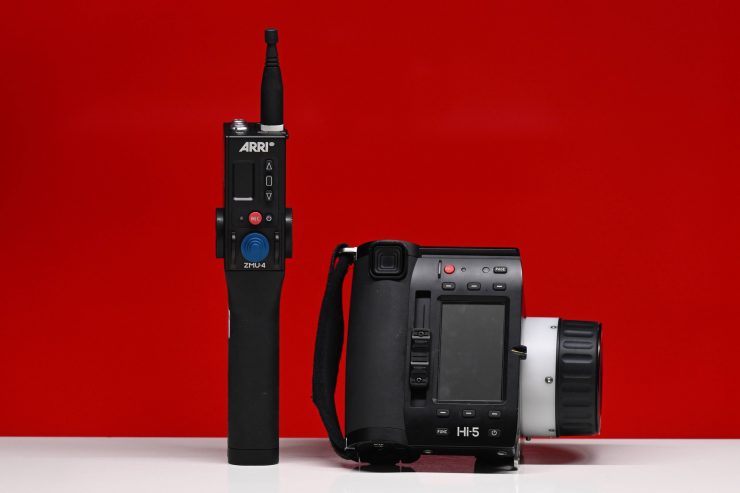
If you don’t need a Hi-5 and are looking for something a little bit more affordable then the combination of the ZMU-4 and an OCU-1 is a great option.
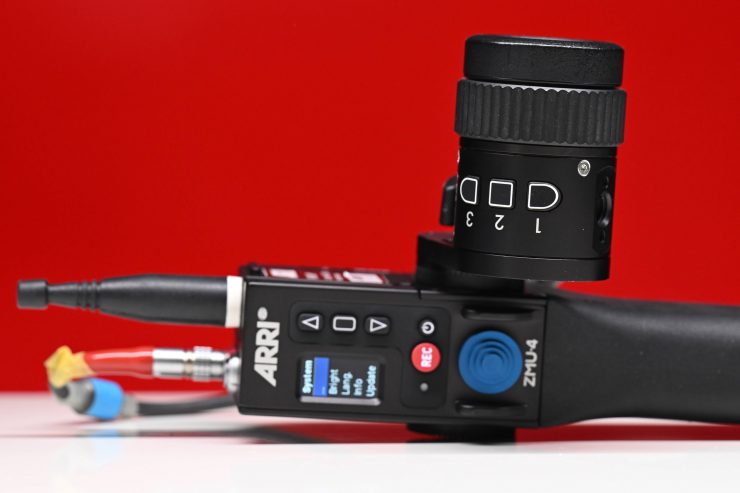
All you need to do is attach the OCU-1 to the side of the ZMU-4 and connect it up using a short LBUS cable.
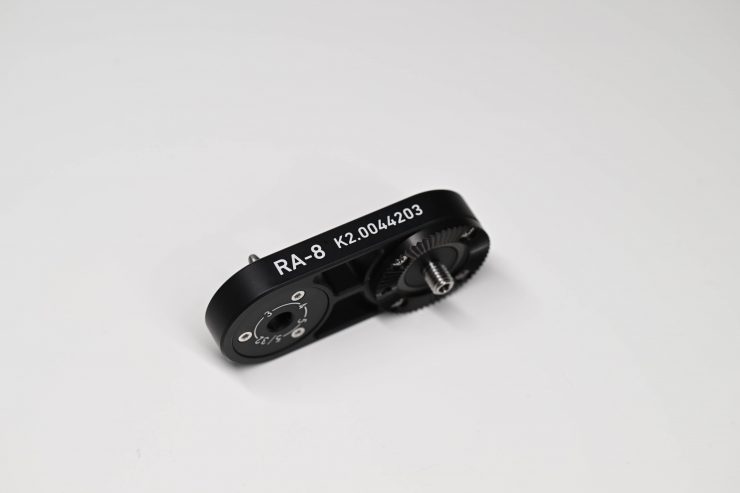
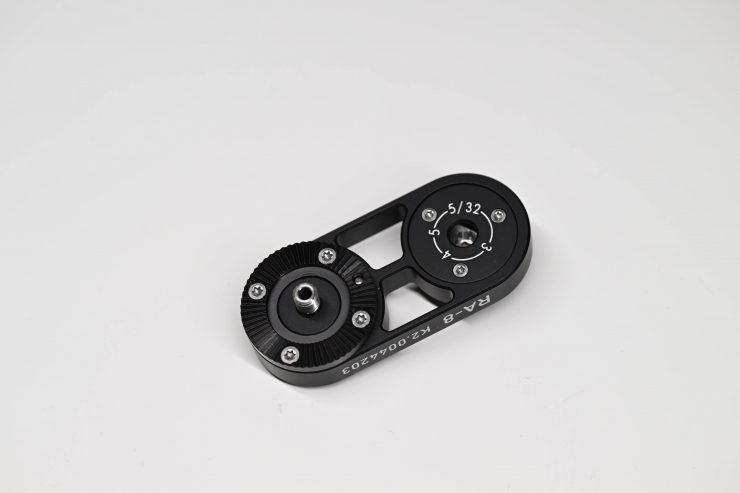
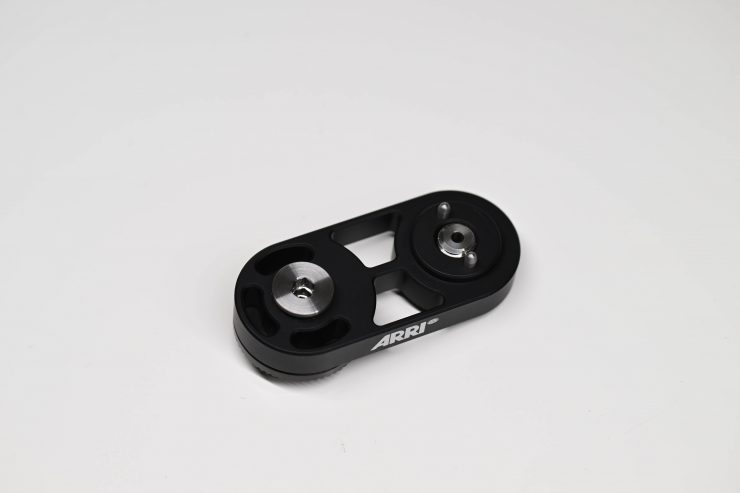
Now, ARRI does make a little adapter bracket specifically for this called the RA-8, but if you already have the ARRI OCU-1 Rosette Bracket, that works just as well.
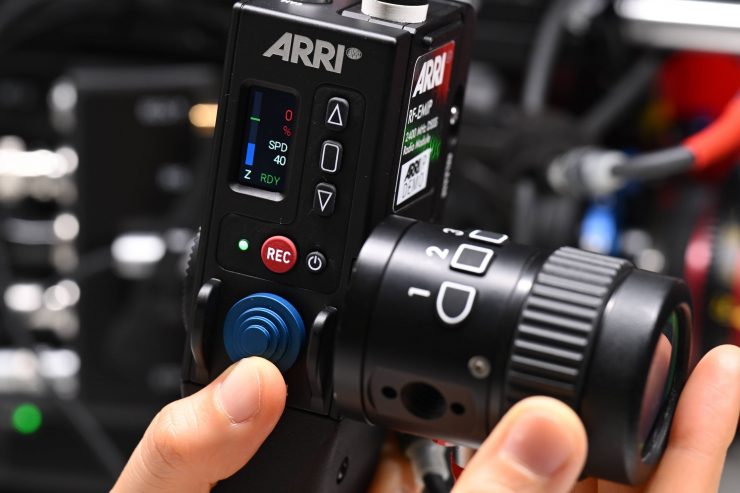
Once you have the OCU-1 connected it automatically powers up once the ZMU-4 is turned on.
You don’t have to do anything in the ZMU-4 menu as the OCU-1 will act exactly as it would if it was hard-wired to the camera.
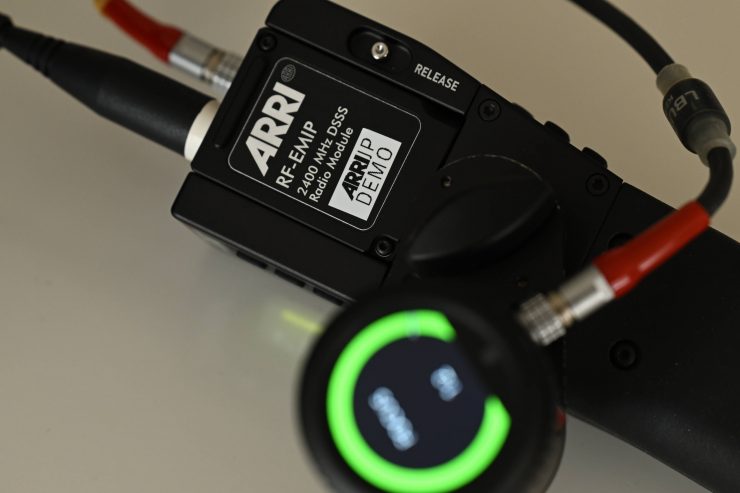
Because the ZMU-4 is using an RF radio the OCU-1 is able to independently piggyback onto that signal and send its information directly to the camera.
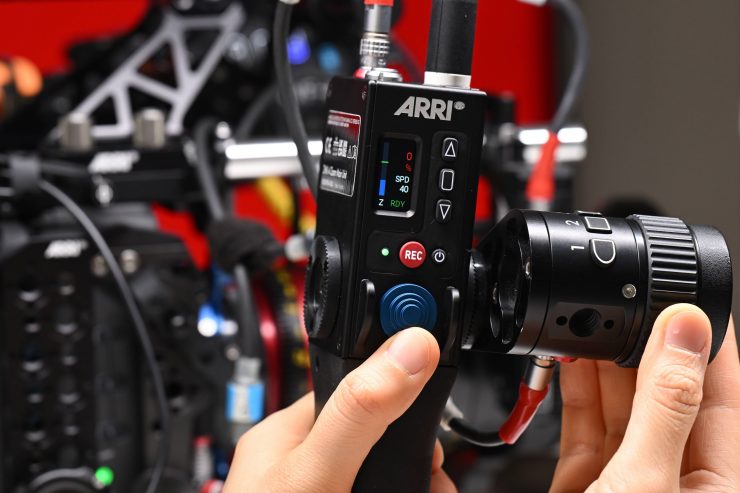
This massively increases the versatility of the OCU-1 as it turns into a very capable wireless follow focus (it can also control multiple other axis if set up that way).
Above you can see a quick demonstration of the combination in action.
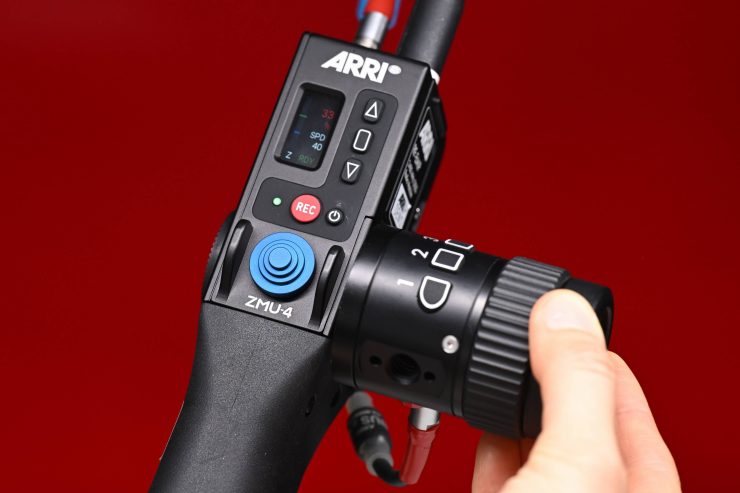
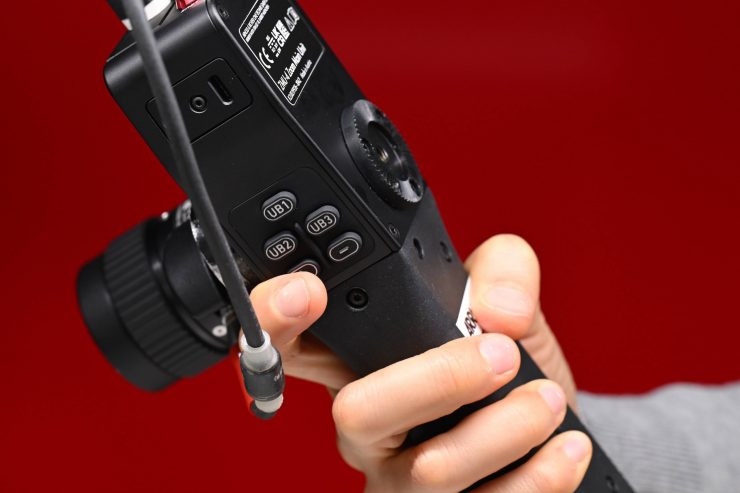
This combination is a joy to use and it creates a very capable and simple-to-operate 2-axis wireless controller.
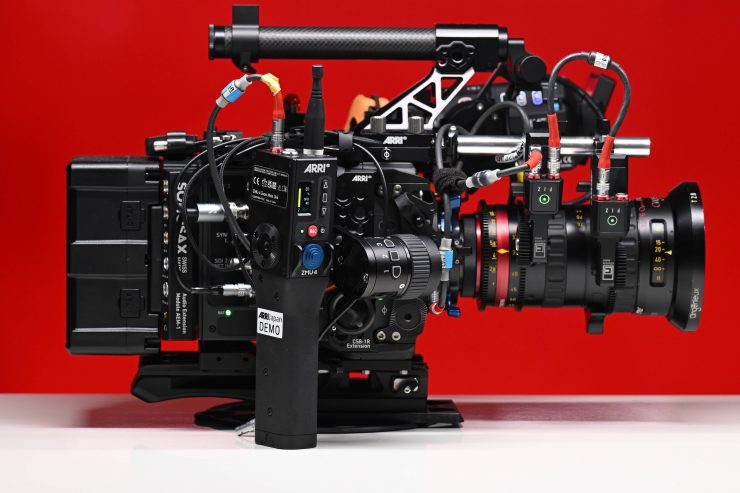
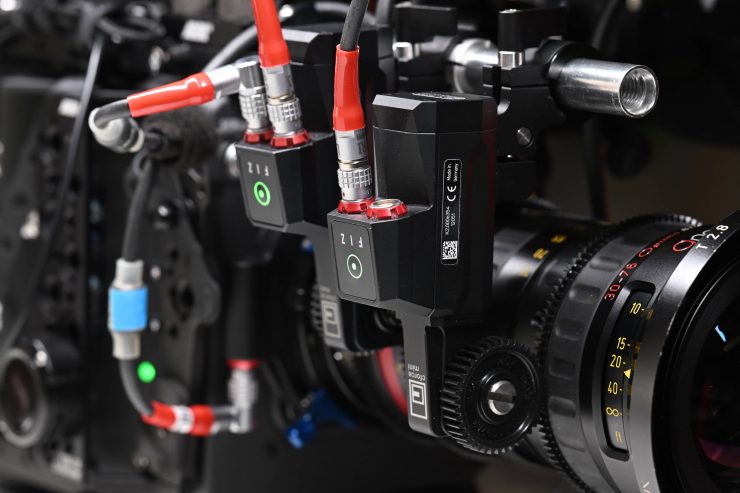
Having the ability to control 2-axis on an ARRI camera without needing to purchase a Hi-5 will certainly suit certain users’ needs more than others.
ARRI Camera Control Monitor CCM-1
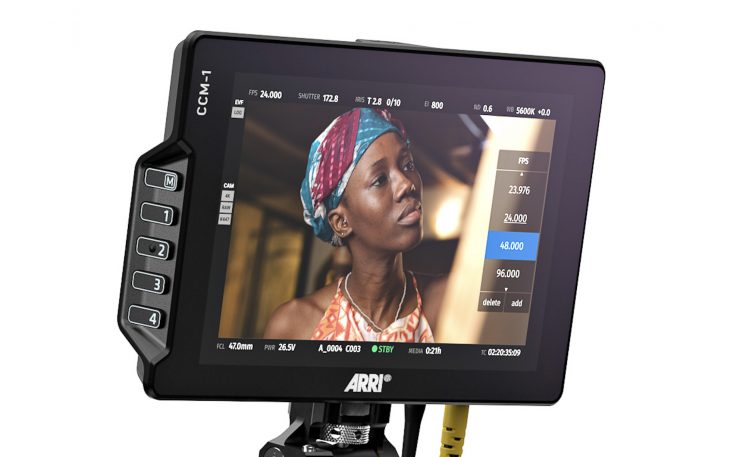
Another good accessory for the ALEXA 35 is the ARRI Camera Control Monitor CCM-1. The CCM-1 was made in collaboration with SmallHD as ARRI felt that they were the best company to team up with when it came to making an on-camera monitor.
The benefit of utilizing the new CCM-1 is that you end up with a much cleaner solution as you don’t have to run power and SDI cables from your camera to the monitor, as that is now all handled by the CoaXPress cable.
You also free up power and SDI outputs for other accessories.
As the ALEXA 35 has two VF ports, you can utilize one of them to directly attach the CCM-1. This allows you to send video, audio, power, and camera control protocols all through a single CoaXpress cable. You can also use the CCM-1 with the ALEXA Mini LF as well.
If you are not familiar with a CoaXPress cable, it features a spring-loaded locking collar like a Lemo connector but is not keyed which almost makes it a hybrid between a Lemo and a BNC. It is the cable that is used with the ARRI MVF-2 viewfinder.
ARRI hasn’t just made the monitor proprietary as it still features SDI In/Out ports as well as a Lemo power option. This is handy if you want to use it with other ARRI cameras or any other camera for that matter. However, you won’t get full camera control without the CoaXpress cable. You will get some limited camera control when using the monitor through an SDI connection. For this reason, I don’t personally see anyone buying it who isn’t using an ALEXA 35 or ALEXA Mini LF.
If you need to remove the monitor from the camera, it will still work up to a distance of 10m / 32.8′ using a longer optional CoaXpress cable. This will be handy for anyone working with cranes, car rigs, etc. Now, the caveat is that if you are just using a CoaXpress cable you will need to attach an additional power cable if you want to run the monitor at full brightness, otherwise you are limited to just 100 nits. This is a pretty big caveat and it essentially means you will need to run both the CoaXpress cable and the RS – RS/PWR IN (0.5m/1.6ft) at the same time.
The ALEXA 35 and the ALEXA Mini LF will require a firmware update for the CCM-1 to work.

Key features
- Rugged yet sleek 7” onboard monitor combines the expertise of ARRI and development partner SmallHD
- Bright display with color-accurate ARRI image quality
- Full ARRI camera and menu control gives operators freedom and new configuration options
- Can replace or work alongside the MVF-2 viewfinder
- Customizable touchscreen and physical controls
It mimics the ARRI MVF-2
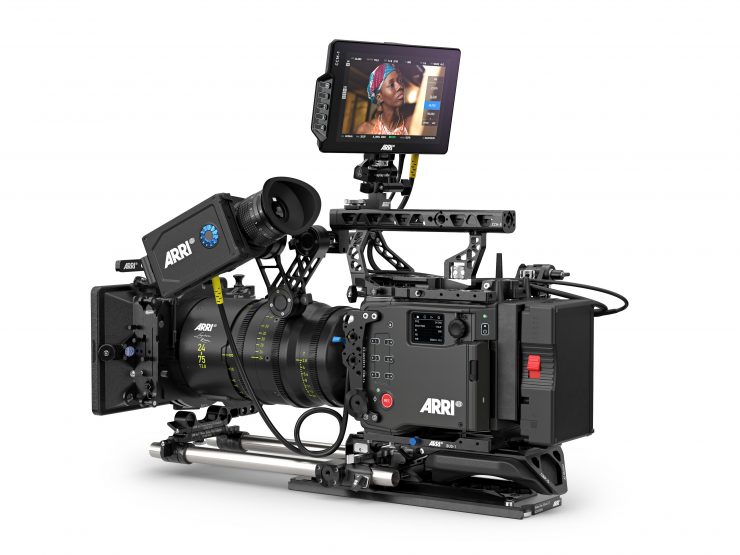
The CCM-1 is essentially a direct representation of the ARRI MVF-2 viewfinder but in the form of a monitor. Anything you can do on the ARRI MVF-2, you can do on the CCM-1.
As a lot of younger operators don’t use a VF, ARRI wanted to give users the choice to have the exact same functionality that is offered with MVF-2 in a monitor.
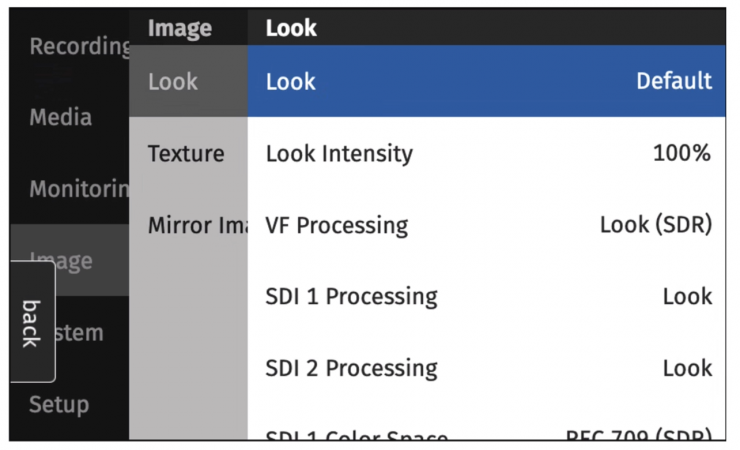
The exact same menus that can be brought up on the MVF-2 are available on the CCM-1. This familiarity is what people are looking for. Nobody wants a separate system with different menus, they want to know exactly where everything is located. Having the same menu system shared between two devices means that there is no learning curve.
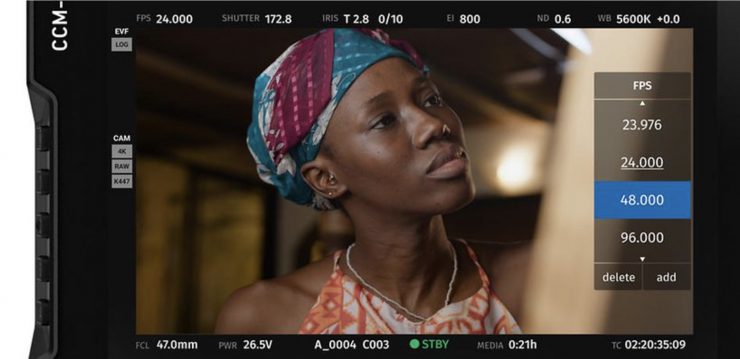
While the CCM-1 offers all of the same functionality as the MVF-2, ARRI has made a few small changes to make it easier to change key parameters such as FPS, Shutter, EI, ND, and WB. All of these parameters can be accessed and changed directly on the screen without going into any menus. As soon as you tap on one a menu appears where you can make direct adjustments. Whatever is selected is highlighted in blue to avoid confusion.
Having the ability to make these adjustments on the CCM-1 is handy, as a lot of the time, the key settings are the only ones you need to access when you are shooting.
For 1st ACs, they will also appreciate the ability to use the monitor for making direct changes to the camera without having to use the MVF-2 or an app.
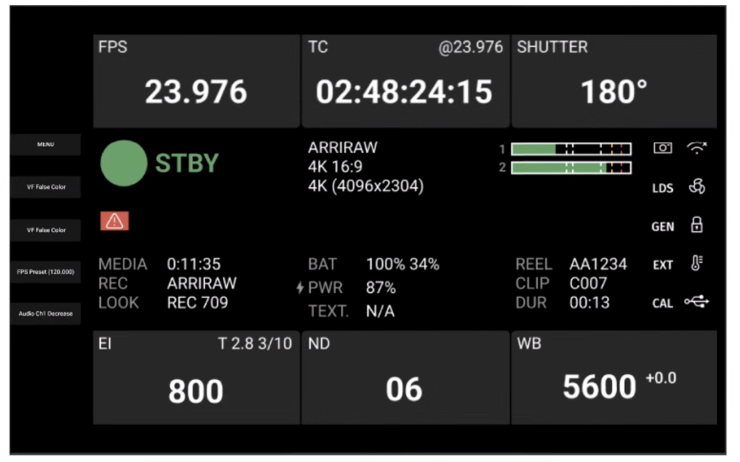
The home screen on the CCM-1 is very reminiscent of what you will find on the MVF-2, except ARRI has made it slightly cleaner. What you will notice is that there are direct indications on the left-hand side of the screen that show you what is being mapped to the user buttons.
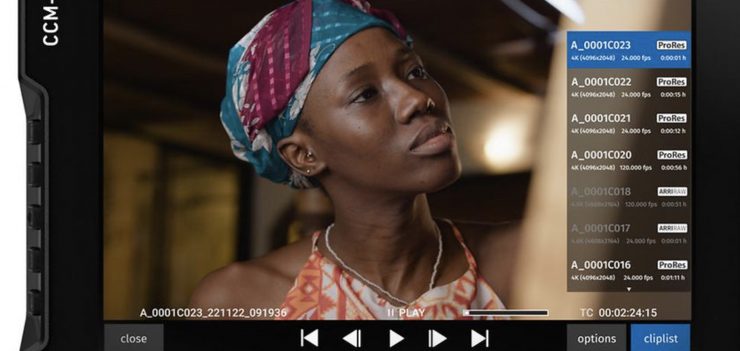
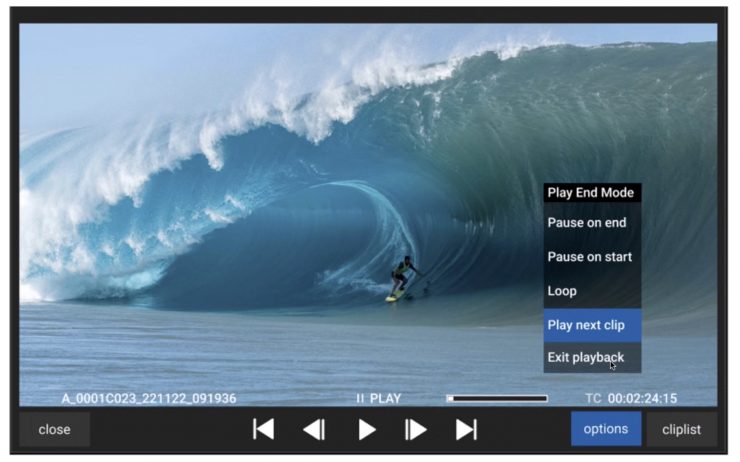
The playback screen has also been slightly changed from what you see on the MVF-2. There are now two direct touchscreen settings for quickly accessing the Cliplist and for changing playback options.
What is also interesting is that the control functionality could be expanded in the future and it could very well be possible to control other ARRI products or accessories directly from the CCM-1.
A proper 1:1 zoom is already included in the first software, but the ability to control the area of interest using touch will not be. So the classic zoom to a designated area exists as a User Button.
Screen
The CCM-1 utilizes a 7″ 1920 x 1080 LCD touchscreen with a claimed brightness of 1300 cd/m². It covers 100% DCI-P3 and it has a contrast ratio of 1200:1. I believe this is a brand new display, as at least to my knowledge, no other 7″ SmallHD monitor on the market is 1300nits.
How does this brightness compare to some other 7″ monitors on the market? Below you can see:
| BRIGHTNESS | |
| ARRI CCM-1 | 1300 cd/m² |
| SmallHD Cine 7 | 1800 cd/m² |
| SmallHD INDIE 7 | 1000 cd/m² |
| SmallHD 702 Touch | 1500 cd/m² |
| Atomos Shinobi 7″ | 2200 cd/m² |
| TVLogic F-7HS | 1800 cd/m² |
| SWIT 7″ Super-Bright Compact HD LCD Monitor | 3000 cd/m² |
The 1300nits of the CCM-1 is arguably enough for use in bright conditions outdoors, although I am actually surprised that ARRI didn’t go with a slightly brighter screen.
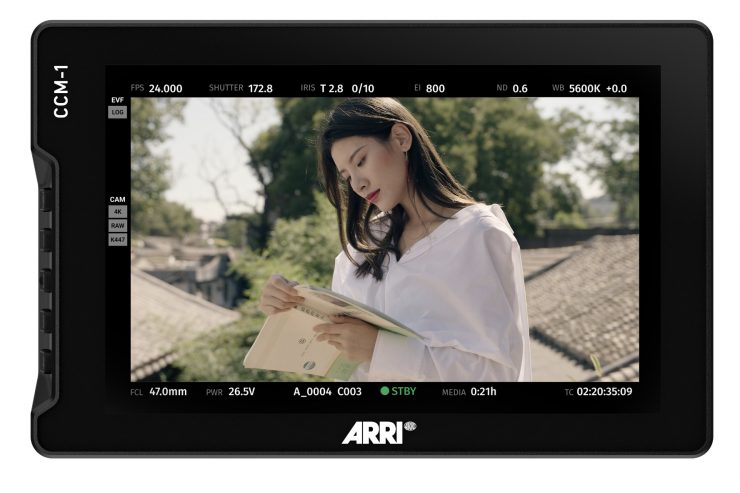
The screen is listed as 10-Bit, but it isn’t a true 10-bit display, instead, it features the commonly used 10-bit (8+2). Some potential buyers may find this a little disappointing given the high cost of the monitor. However, what you should clearly know is that no panels with true 10-bit color exist in this size, everyone just uses dithering to achieve the 10-bit target. 10-bit (8+2) is pretty much imperceptible to 99% of people.
A lot of companies list their monitors as 10-bit even though they are really using a 10-bit (8+2 FRC) panel. FRC stands for Frame Rate Control Technology and an 8+2 FRC panel is basically a way of trying to approximate the color reproduction of a true 10-bit panel. A true 10-bit monitor can display 1024 shades of color, whereas a 10-bit (8+2 FRC) panel can only truly display 256 shades. So what a 10-bit (8+2 FRC) panel does is artificially create in-between shades of color by quickly shifting the pixels to go between certain shades of colors.
For example, you would show the main shade of one color for 75% of the time and then another one for 25% of the time. This creates an illusion for the viewer that they are actually seeing more colors than what can actually be displayed.
8+2 FRC can be very hard to distinguish from an actual 10-bit panel. As I already mentioned, most people couldn’t tell the difference between an 8+2 or a true 10-bit display.
The monitor has 323 ppi (pixels per square inch) which is a common amount for a 7″ sized display. As a comparison, if you want to put that ppi figure into perspective, below you can see what other 7″ monitors have:
| PPI | |
| ARRI CCM-1 | 323 ppi |
| SmallHD Cine 7 | 322 ppi |
| SmallHD INDIE 7 | 323 ppi |
| SmallHD 702 Touch | 322 ppi |
| Atomos Shinobi 7″ | 325 ppi |
| TVLogic F-7HS | 323 ppi |
| SWIT 7″ Super-Bright Compact HD LCD Monitor | 323 ppi |
Basically, every monitor of this size has an almost identical number of PPI.
Touch screen & physical buttons
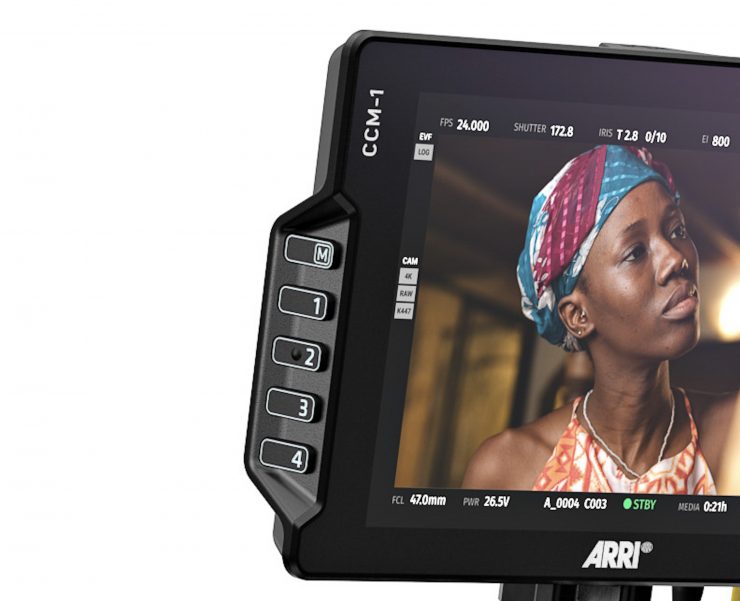
ARRI recognizes that while touch screen operation is going to be the preferred method of control for a lot of users, it is not always the best solution depending on the conditions you are working in. That is why they have also included physical buttons if you happen to be wearing gloves, working in adverse weather conditions, or you simply don’t want to get fingerprint marks on your screen.
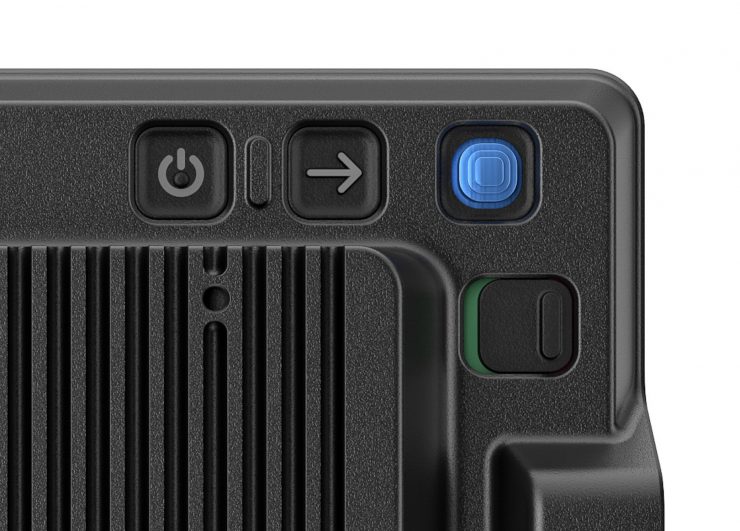
There is a navigation joystick, a power on/off button, a select button, and five user buttons that can be mapped to either SmallHD monitoring assist tools or ARRI user buttons. The top user button, by default, is set to Menu.
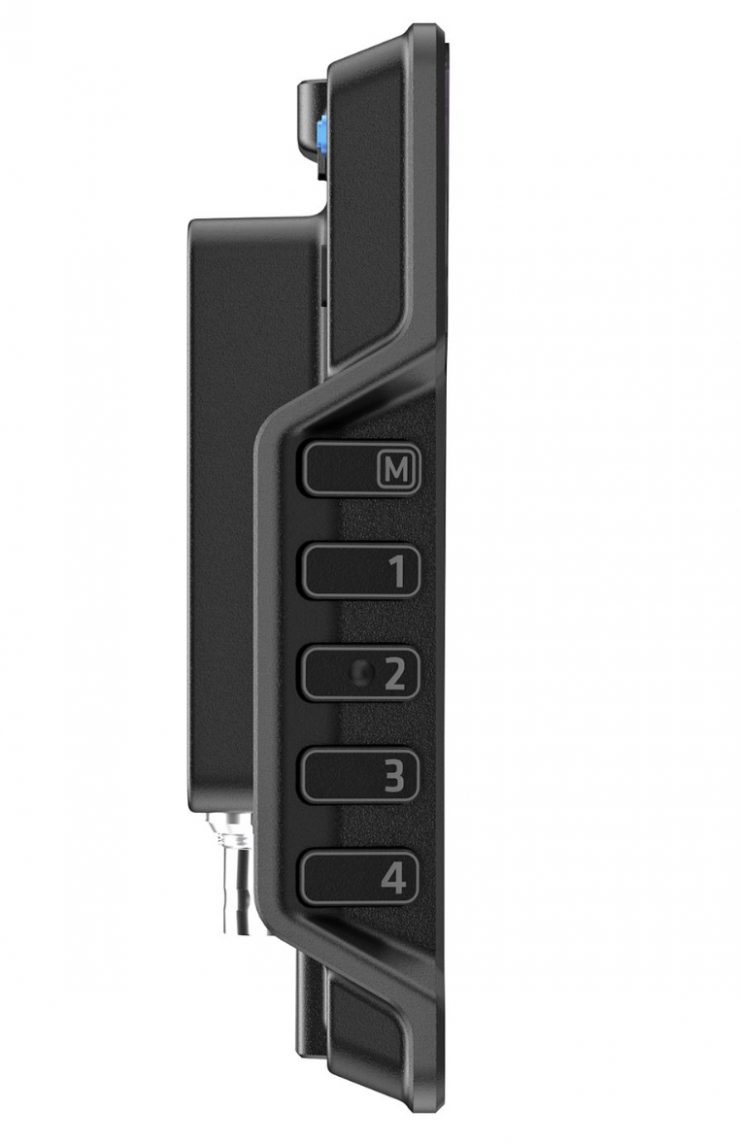
This allows you to map any tool from your camera and place it onto a user button on the CCM-1. This could be anything from adding ND to doing a manual WB, to changing the EI value, etc.
Appearance-wise, the CCM-1 looks a little bit different from other 7″ SmallHD monitors we have seen in the past. It is also a lot thinner than some of the recent SmallHD 5″ offerings.
The black finish and understated design point to the philosophy of keeping things clean and simple. Professional monitoring solutions need to be well-made and stand up to the rigors of field use. This is especially true when ARRI wants to attach its name to a product.
The CCM-1 features an anodized aluminum chassis with an exchangeable steel bottom interface. The overall build quality appears to be excellent, especially if you compare it to most other competing monitors in this space. Everything has been well thought out and it certainly looks like it was designed to stand up to the rigors of field use.
The CCM-1 is durable, weather-sealed, and temperature-resistant, embodying ARRI’s reputation for rugged, set-ready equipment.
The build quality of a lot of monitors these days leaves a lot to be desired, however, in saying that, if you are only forking out $200 USD for a monitor then you shouldn’t expect the build quality to be good in the first place. You could certainly make the argument that if you buy a cheap monitor and it breaks then you just buy another one. However, do you really want your monitor breaking in the middle of a crucial shoot? I know I don’t. As the old saying goes, buy once, cry once.
ARRI and SmallHD have paid close attention to the small details and they have thought about how professional users’ needs. It is rare to see properly recessed SDI ports. So many monitors have totally exposed SDI ports that stick out from the body. The first thing you are likely to break apart from the screen if you drop a monitor is the SDI ports, especially if they are sticking out of the side or back of the casing.
Now, some users may prefer having the ports on the back, but I personally prefer having them on the bottom.
Mounting Points
The CCM-1 has multiple mounting points with locating pin holes. On the top and right-hand side of the CCM-1, there are 1/4-20″ mounting holes with locating pins.
On the bottom, there is a removable block that features 1/4-20″ mounting holes with locating pins.
To use it with the MAC-1 (which I will talk about later) you can mount it on all ¼” ARRI Pin-Lock interfaces directly.
Cinematographers want mounting flexibility with on-camera monitors, and giving them as many options as possible is a smart move. You can’t just assume that everyone will want to mount their monitor the same way.
Viewfinder Adapter VFA-4
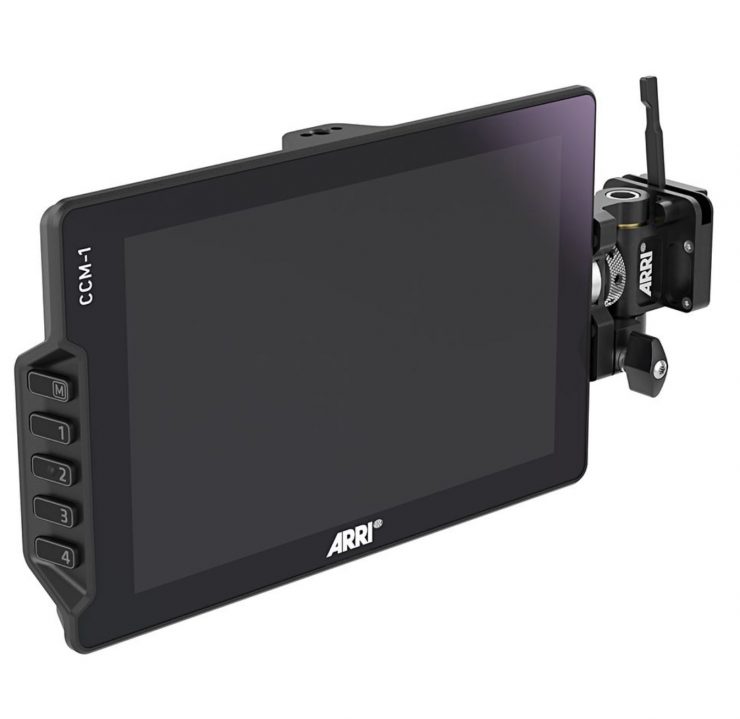
The VFA-4 enables mounting of the CCM-1 to standard ARRI viewfinder brackets without tools, and comes with inserts for ARRI Pin-Lock and SmallHD mounting standards. A folding mechanism allows quick repositioning and flat storage.
Size & weight
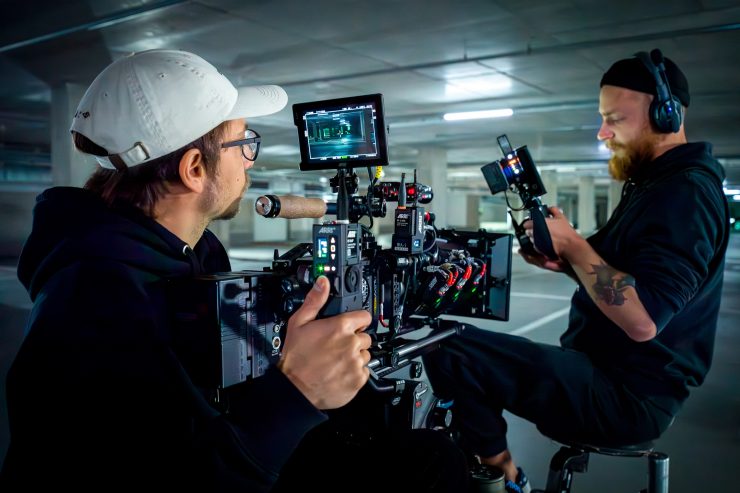
The CCM-1 weighs 594g / 20.95oz and it has physical dimensions of 187 x 120 x 29 mm / 7.36 x 4.72 x 1.14″. This weight is reasonably good for a 7″ monitor. As a comparison, below you can see what some other 7″ monitors weigh:
| WEIGHT | |
| ARRI CCM-1 | 20.95 oz / 594g |
| SmallHD Cine 7 | 20 oz / 567 g |
| SmallHD INDIE 7 | 26 oz / 737 g |
| SmallHD 702 Touch | 18.9 oz / 536 g |
| Atomos Shinobi 7″ | 1.3 lb / 577 g |
| TVLogic F-7HS | 1.8 lb / 800g |
| SWIT 7″ Super-Bright Compact HD LCD Monitor | 17.64 oz / 500 g |
Operating System
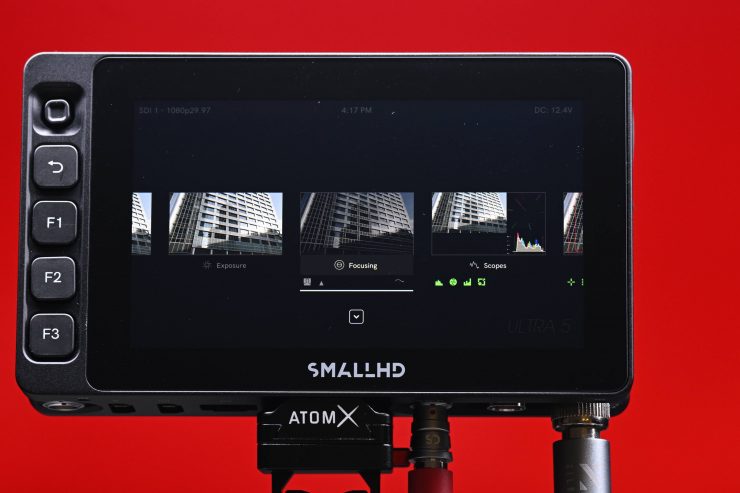
In my opinion, SmallHD monitors have the easiest OS system to use and operate and that was one of the reasons ARRI decided to partner with them. There is so much more to a monitor than just image quality, and a good operating system is what often sets monitors apart. Usability and operability sometimes get overlooked by people looking at monitors, but to me, they are right up there with image quality. I own a few different SmallHD monitors and I like being able to go between all of them and using the exact same menu and operating system. This makes going from one to the other seamless.
Lots of monitors have pretty good-looking images, but a lot of them are let down by poorly designed operating systems and monitoring assist tools that are not in any way accurate.
Like all modern SmallHD monitors, the CCM-1 uses the same PageBuilder OS graphical user interface (GUI). SmallHD built the PageBuilder OS to make menus less confusing. PageBuilder is a very customizable system as it allows you to selectively apply monitoring tools such as waveform, vectorscope, multiview, LUTs, and focusing aids on different “pages”.
At least, in my opinion, the PageOS 5 operating system is far superior to any other operating system on the market, especially the ones that you will find in competing 7″ monitors. The customization and features that are available, put a lot of other operating systems to shame.
SmallHD’s PageOS 5 was released back in September 2022 and it added quite a few new features and enhanced functionality. Below you can see what some of those key new additions were:

Since the initial release, there have already been two new firmware updates for PageOS 5. SmallHD’s Page OS v5.2.0 firmware update adds a couple of nice new features.
One of the main reasons I personally like SmallHD monitors is that they continually update and add features and improvements to their monitors. With almost all of the cheaper monitors on the market, what you buy is what you get and it is very rare to see firmware updates or new features added.
If you haven’t used a S
Having the ability to assign just one, or many tools to a single page makes it very quick to access a monitoring assist tool or make a change. It also allows you to customize what you actually need instead of being forced to use what a manufacturer gives you.
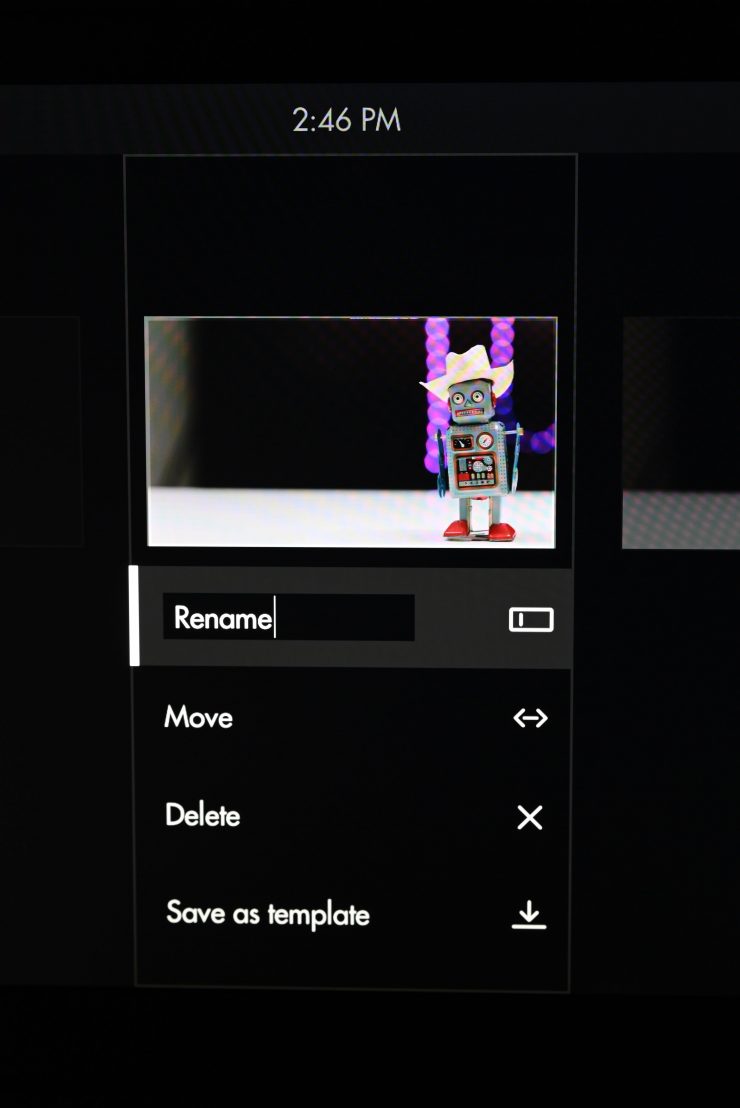
You can also rename and customize the individual pages you create.
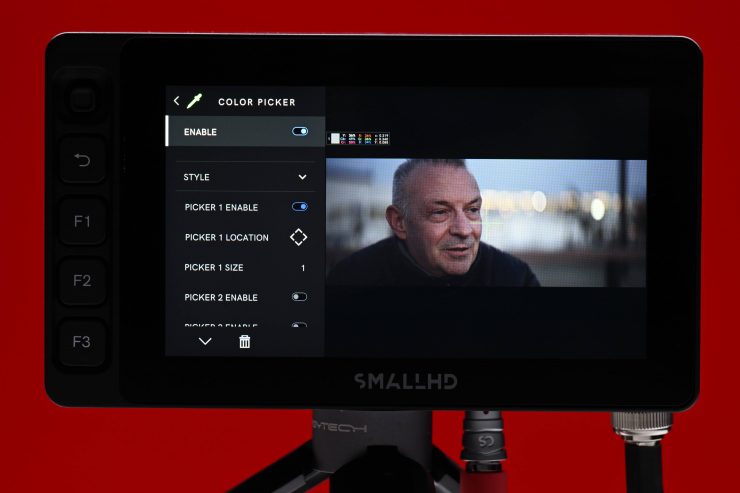
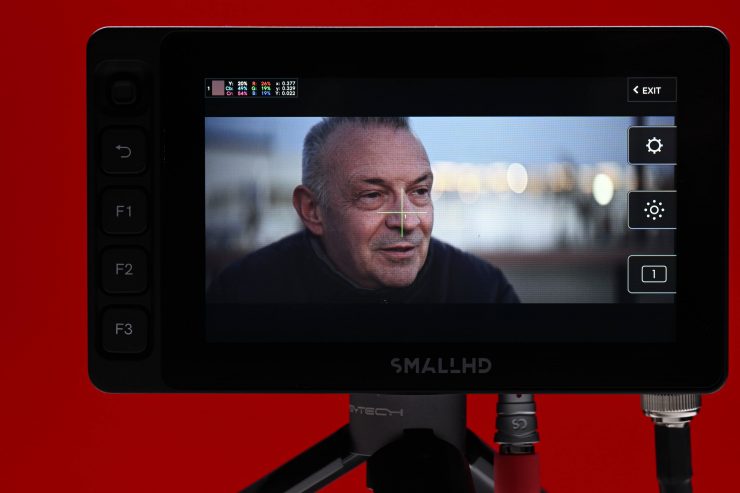
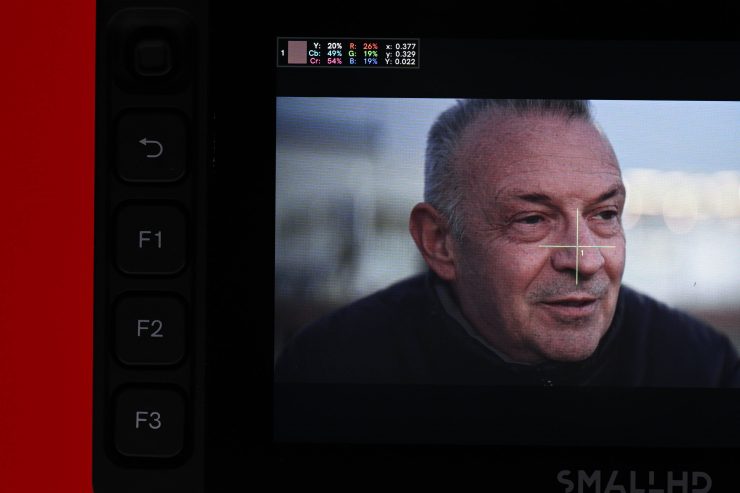
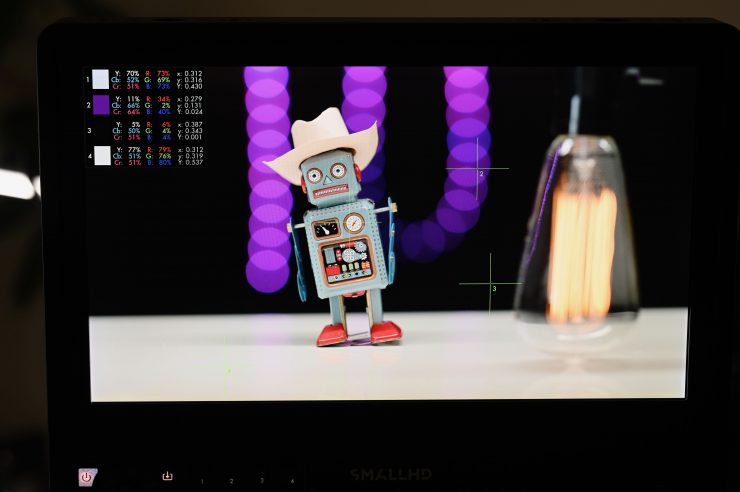
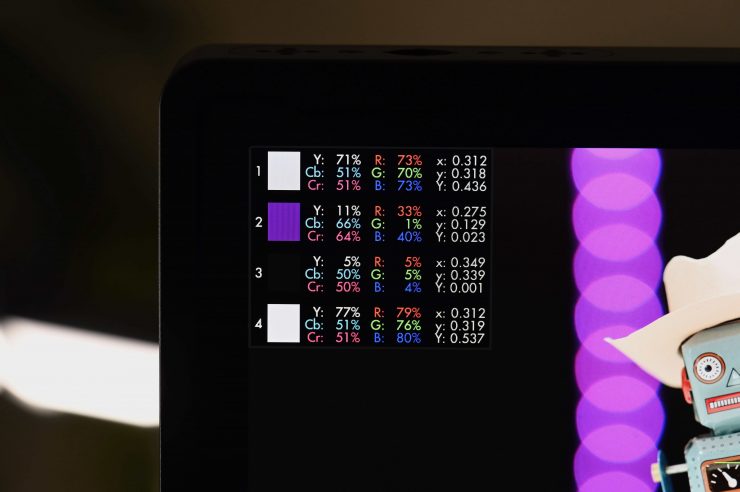
I especially like the Color Picker function where you can move a target icon around and it will display color values for you. On the CCM-1, you can set up to four different reference points which are extremely handy for making sure you get accurate exposure and colors.
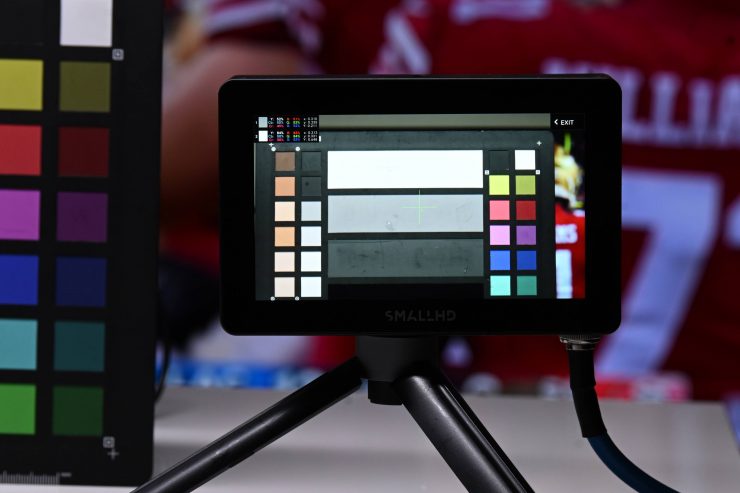
By setting multiple color picker points on a color checker chart you can make sure that your colors and exposure are as accurate as possible. Above you can see this on the Cine 5, but it is exactly the same on the Ultra 5 and the CCM-1.
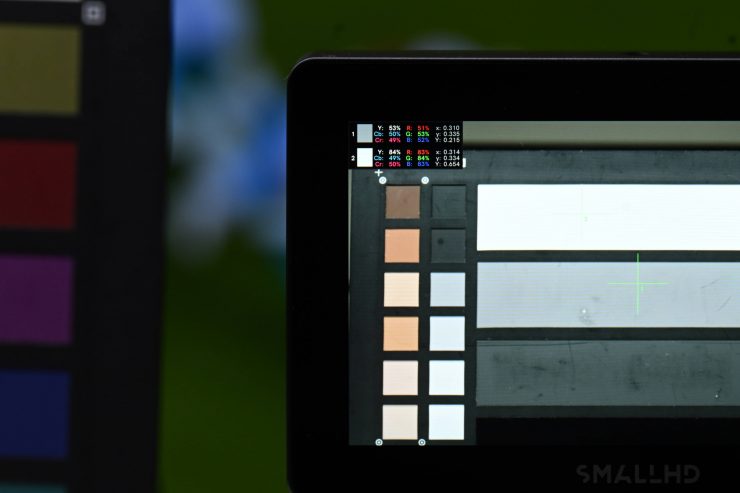
As the color picker gives you representations for Y, Cb, Cr, and R, G, B you can clearly see exposure levels and RGB values. This way you can be sure that white is actually white and you can make adjustments so that midle grey exposure is accurate. As you can see above, my white is white, but my IRE for middle grey is too high, so I can use this to adjust my exposure down to the correct range.
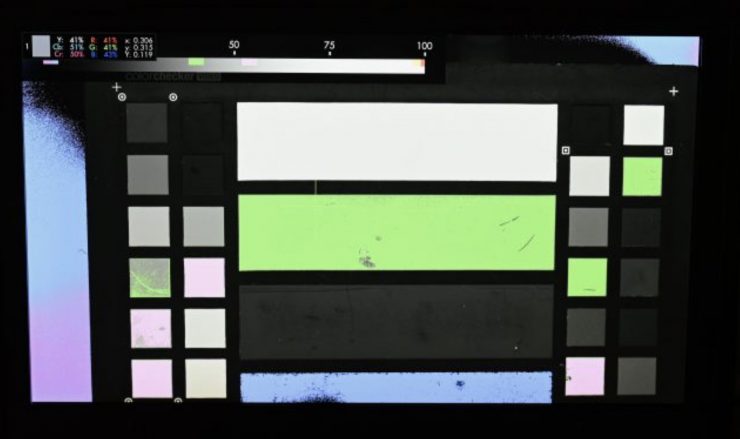
You can also use the color picker in conjunction with false color for making sure middle grey exposure is accurate.

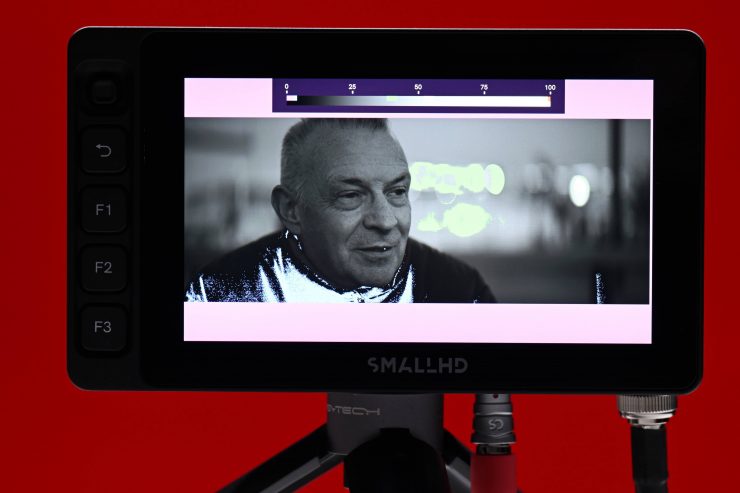
One of the other nice aspects of PageBuilder OS is that SmallHD has actually bothered to standardize the false-color functionality. As a default, the false colors are mapped directly to ARRI cameras, but you can also customize them to whatever camera you are using. This is a big deal. A lot of other monitors just have false color with no scale or markings and you have no idea what you are actually seeing. As the false color indicators on the CCM-1 accurately reflect what I am seeing in my EVF I know I can rely on them.
As I own a few SmallHD monitors it is nice to be able to go between them and have the OS system be exactly the same.
SmallHD doesn’t just release an operating system and then never change it. The PageOS system is constantly being updated and improved.
Inputs & outputs
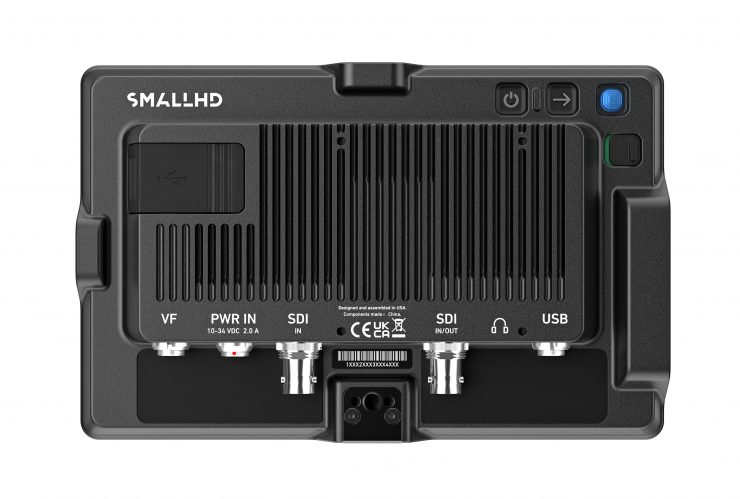
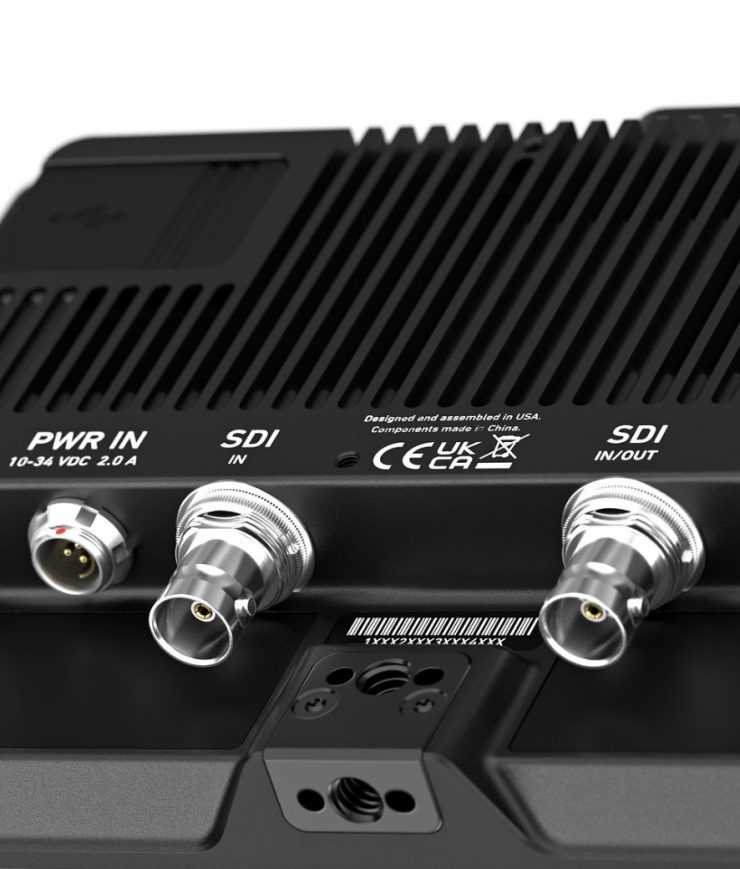
The monitor includes the following inputs and outputs:
- 1 x BNC (3G-SDI) Input
- 1 x BNC (3G-SDI) Input/Output
- 1 x ARRI VF input
- 1 x x 3-Pin Fischer connector 10-34V DC 2.0A input
- 1 x 1/8″ / 3.5 mm Headphone Output
- 1x 1 x LEMO 5-Pin 2.0 Output
The CCM-1 offers you a good array of inputs and outputs for a monitor of this size.
Power
Although you can power the CCM-1 through the CoaXpress cable, the brightness will be limited, so you will need to use the 3-Pin Fischer connector (10-34V DC), 2A Input. The monitor doesn’t come with a battery plate like a lot of other monitors. This isn’t really a big deal considering that the monitor was made specifically for the ALEXA 35 and ALEXA Mini LF. In saying that, there are four M3 mounting points on the back of the monitor where you can attach third-party micro battery plates from companies such as bebob and Anton Bauer. This is handy if you want to power the CCM-1 if you are running it a long way from where the camera is. You would need to run an optional d-tap to RS cable from the battery plate to the CCM-1.
While the CCM-1 does come with an RS – RS/PWR IN (0.5m/1.6ft) in the kit, ARRI does have other cables available for D-tap, etc.
You cannot power accessories from the CCM-1. The 5-Pin Lemo is a USB that can be used for Camera Control through Ethernet. This allows using SDI, Power, USB to also do camera control (no menu access though). Basic control of a few parameters of ALEXA Mini and AMIRA will also be possible.
ARRI doesn’t list how much power the CCM-1 draws.
Heat
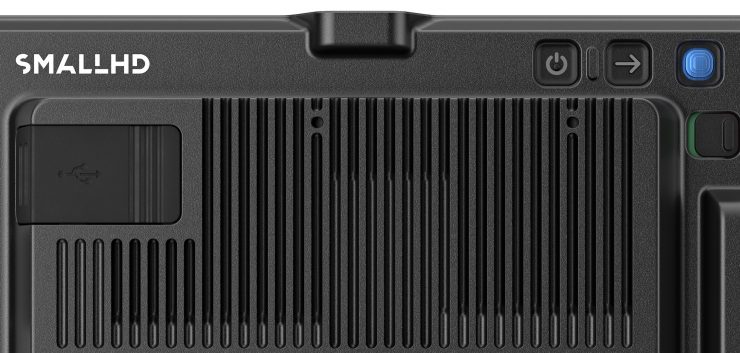
The CCM-1 doesn’t have an inbuilt fan, and it runs completely silent. The monitor does have a couple of reasonable-sized cooling vents on the back.
Color Pipe
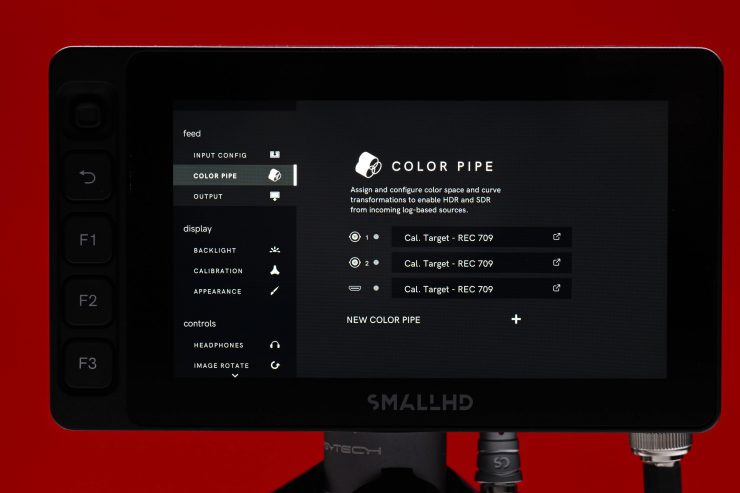
SmallHD’s Color Pipe allows you to assign and configure color space and curve transformations for the different inputs. This is found on the ARRI CCM-1.
Calibration
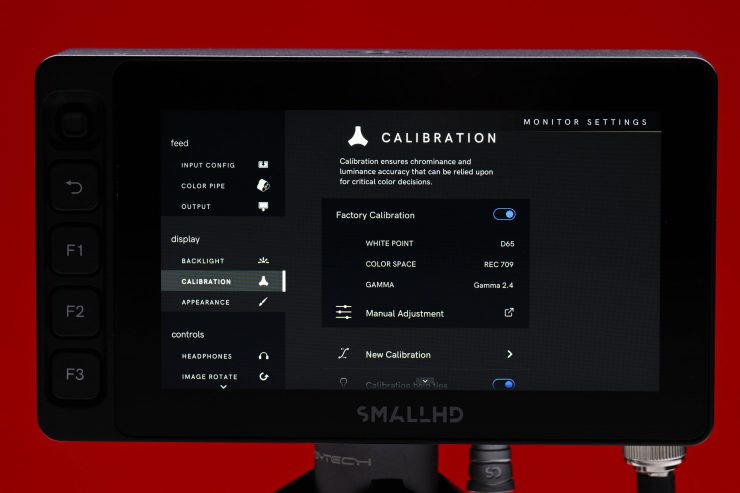
On the calibration page, you can choose to use the factory calibration or you can make manual adjustments. You can also do a new calibration by choosing CalMAN but you need to hook up the monitor to a computer that has the licensed CalMAN software on it. The other option is to choose Generic Calibration where you can choose from some presets or create your own custom one.
Is 7″ the right size for an on-board monitor?
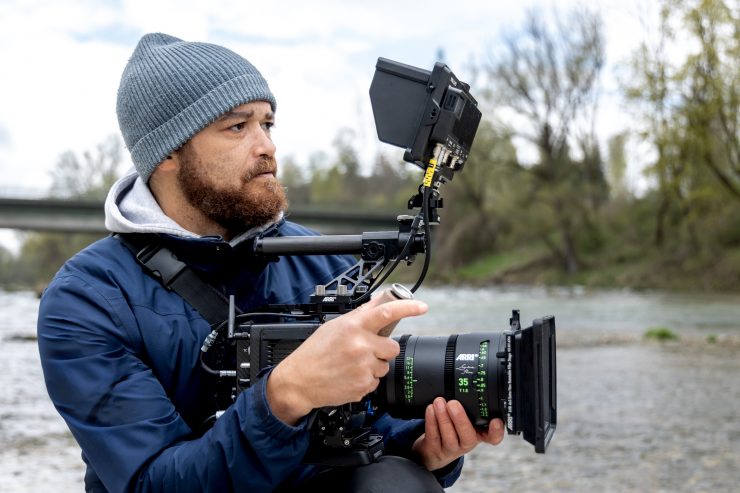
Whether or not a 7″ display is too big for use as an on-camera monitor really depends on what your intended use is. Personally if I was running a monitor and an EVF, then I think 5″ is a good size, but if I am not running an EVF then 7″ makes more sense. There really is no correct answer to this question, as everyone has different needs and requirements. ARRI obviously did their homework and worked out from user feedback that users of their cameras preferred a 7″ monitor over a 5″ monitor.
No HDR
The CCM-1 isn’t an HDR-capable monitor. While the CCM-1 reaches 1,300 nits, it doesn’t do so dynamically as to technically meet the HDR spec (for contrast ratio). However, it can still be used to monitor HDR.
According to SmallHD, their view is that on the monitoring side, relying on the picture alone, even a true HDR picture in anything other than a studio environment is not ideal and would result in improper exposure adjustments since the perceptions of what is on screen changes so drastically along with the viewing environment. For example, if monitoring on a bright sunny day, any subtleties in the darkest areas of an HDR picture will be completely lost to the eye and may not be accounted for – in this case, you actually would want a boosted black point so that issues can be spotted due to the environmental constraints.
In this methodology, reliance on exposure tools and scopes is even more important than before when speaking of HDR because, in a proper viewing environment, any issues at the extremes of a camera’s dynamic range get magnified much further than with SDR.
When people ask how to best shoot for HDR, SmallHD normally recommends using a waveform set to RGB or parade (so if one individual color channel gets clipped you can pick it up before the luma waveform would see the same issue) or to set a custom exposure assist (false color) to the points in the image where clipping occurs. If shooting in log and at least 10-bit (12 bit+ preferred) and the extremes of the exposure range are managed, you’ll be capturing future-proof HDR-ready material. Now what to do with that footage next is a whole new issue with all the competing standards, and a surge of HDR10+ across manufacturers, etc. help demystify for the shooter while treading carefully not to further complicate this already complicated world.
Sun hood
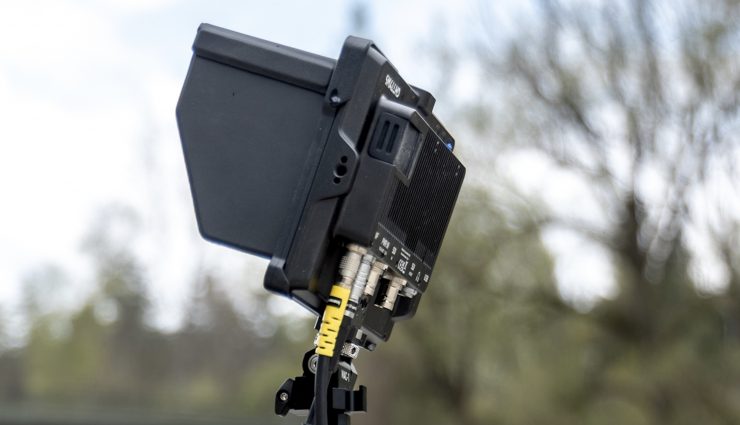
ARRI has designed a nice sun hood for the CCM-1 which is similar to an iPad cover. It uses small magnets to stay together so it won’t sag or droop.
What is also nice is that it folds completely flat so you can leave it on the monitor when you are not shooting so it is protected.
The monitor also comes with a cover which for added protection you can also slip over the monitor and sun hood.
MAC-1 Two-Axis Monitor Arm
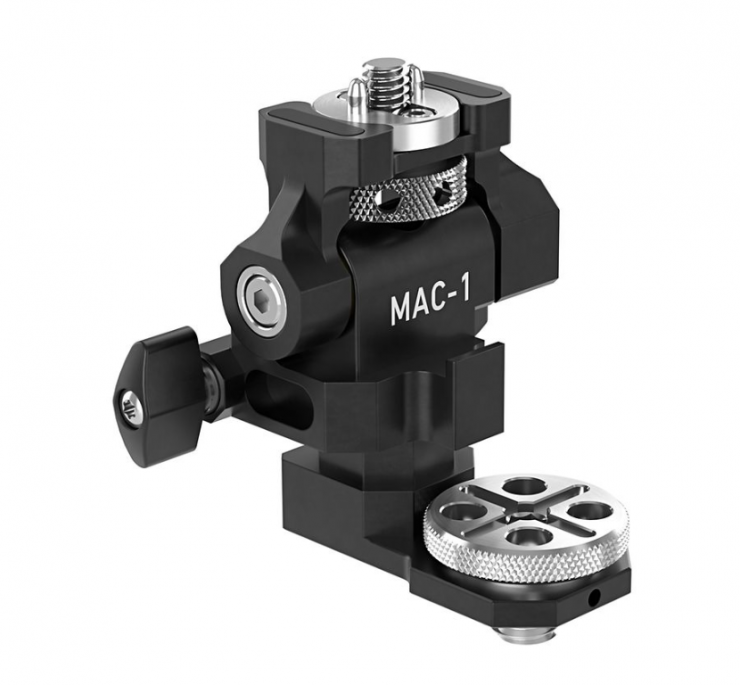
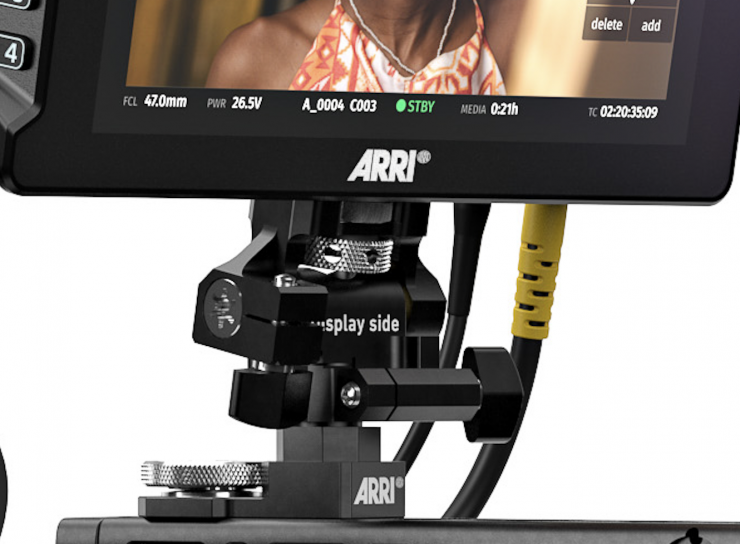
ARRI wasn’t happy with any of the available monitor arms that were on the market so they came up with their own. The MAC-1 is a small-sized two-axis monitor arm that was designed to be compact and lightweight.
From user feedback, ARRI found that most of its users prefer to have a monitor mounted in a fixed position where they only need to adjust two axis.
You can set the MAC-1 to a friction level you are happy with so you can quickly adjust the tilt and pan position of the monitor without having to loosen and retighten anything. The concept behind this is speed and ease of use as you can make adjustments with a single hand.
Now, of course not everyone will want to use a two-axis monitor and that’s fine because ARRI isn’t locking you into doing so. You can use any monitor arm you like with the monitor.
Price
The CCM-1 is available to order now and will be supported in the upcoming ALEXA 35 SUP 1.2 and ALEXA Mini LF SUP 7.3 software update packages. The CCM-1 (KK.0048851) retails for €4,950. This is roughly 50% of the cost of the ARRI MVF-2 Viewfinder Set. It comes with the following items:
- Camera Control Monitor CCM-1
- CCM-1 Foldable Sunhood,
- CCM-1 Screen Protector
- CCM-1 Storage Pouch
- K2.0048394 1x Monitor Arm for Camera MAC-1
- K2.0023943 1x Cable VF (0.5m/1.5ft)
- K2.0001637 1x Cable RS – RS/PWR IN (0.5m/1.6ft)
It is only available as a set. It will also be included in new ALEXA 35 packages so people can buy it together with a camera.
This is certainly a lot of money for a 7″ monitor, however, you are getting a lot of functionality and features that you don’t get with any other monitor that you could use with the ALEXA 35 or ALEXA Mini LF. This is also a monitor that is being targeted at a very specific user base and I think anyone who owns an ALEXA 35 or ALEXA Mini LF will be looking very closely at it.
Camera Control Monitors are nothing new
Having a monitor that has the ability to do camera control is not a new concept. Companies such as RED and Kinefinity have offered solutions for years, and third-party on-camera monitor manufacturers such as SmallHD and Portkeys also provide solutions.
It is a little surprising that it has taken ARRI so long to come out with its own camera Control Monitor.
Technical Specifications
- Power Input Range: 10-34 V
- Display Type: Thin Film Transistor Liquid Crystal Display (TFT LCD) with LED backlight
- Resolution: 1920 x 1200
- Pixel Density: 322 ppi
- Aspect Ratio: 16:10
- Screen Luminance: 1300 nits
- Colors (Typical): DCI-P3
- Viewing Angle: 160° all axes
- Dimensions: 187 x 120 x 29 mm / 7.36 x 4.72 x 1.14″
- Weight: 594g / 20.95oz
- Material: Anodized aluminum chassis with exchangeable steel bottom interface block
- Mechanical Interfaces: 4x ARRI Pin-Lock 1/4″ (1x bottom, 1x rear, 1x right side, 1x top)
- Operation Temperature: 0°C to 45°C / 32° F to 113° F
Why only 4.6K?
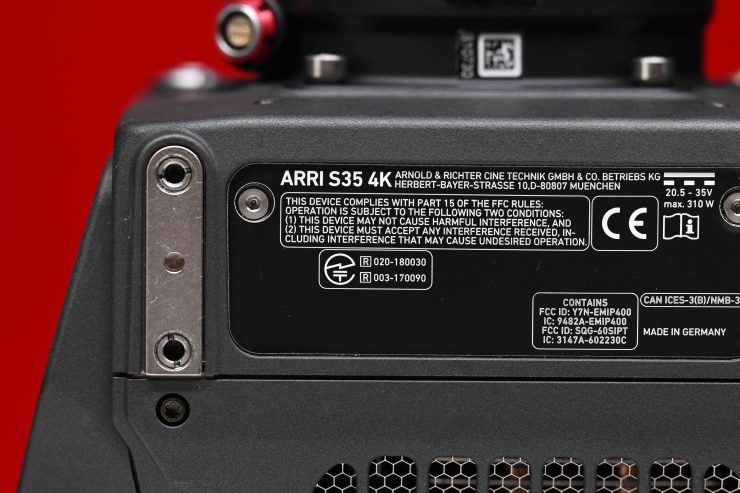
Despite the industry trend of pushing for higher and higher resolutions, ARRI is still releasing cameras that can only record in resolutions no higher than 4.6K. Sony, RED, Panasonic, Canon, Blackmagic, Nikon, Kinefinity and Z Cam all offer cameras that are capable of capturing images in higher resolutions than the ALEXA 35 and MINI LF.
ARRI has never been about more pixels, they have always strived for better pixels. ARRI currently believes that 4K is enough for the foreseeable future is that if you need higher resolutions they already have the ALEXA 65. Plus the ALEXA 35 has way more useable dynamic range than any other camera on the market, which can’t yet be conquered with smaller photosites 😉
What you have to remember is you don’t need a camera that can record 6K or 8K to produce fantastic imagery. Nobody goes to watch a movie in the cinema and complains that it wasn’t shot in 4K, 6K or 8K. ARRI cameras that can only capture in 2.8K or 2K still look great today.
Codex Compact Drives

ALEXA 35 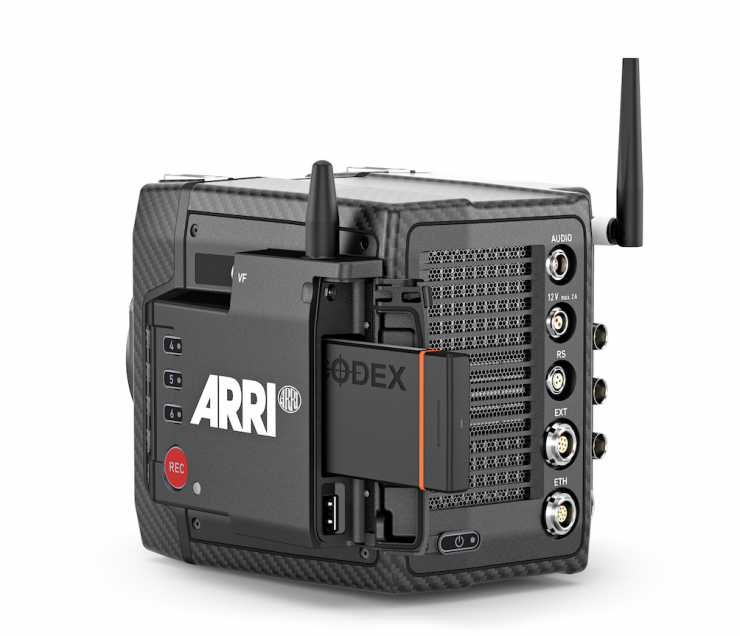
ALEXA Mini LF
Unlike the older ALEXA Mini which uses CFast 2.0 the ALEXA 35 records to Codex Compact Drives just like the Mini LF. The drives are formatted by the ALEXA 35 in the UDF format for ARRIRAW and ProRes. Therefore, both ARRIRAW and ProRes can be recorded onto the same media without reformatting or switching drives. ARRI said quite some time ago that all future cameras will also use this media. This is another aspect of ARRI cameras that I like. You can switch between RAW and ProRes or change your project base settings and you don’t need to reformat or change cards.

Codex High Density Encoding (HDE) uses sophisticated, loss-less encoding to reduce ARRIRAW file sizes by around 40% during downloading or later in the workflow.
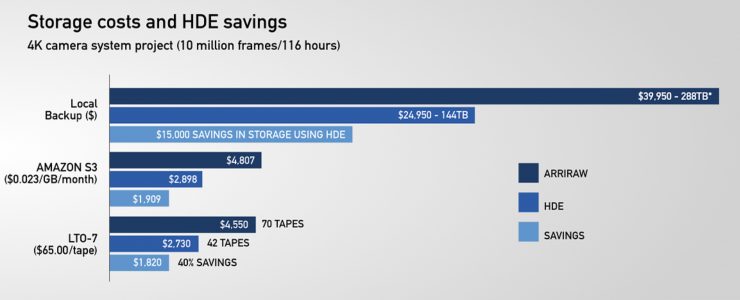
This lowers storage costs, shortens transfer times, and speeds up workflows, which translates to a direct 40% saving in time and money. HDE is free-of-charge for use with Codex Capture or Compact Drives, openly shared, and fast. ARRIRAW Open Gate 4.6K can be encoded at 24 fps on a modern MacBook Pro.
ARRIRAW data from an ALEXA 35 can be encoded to HDE MXF clips using the free ARRIRAW HDE Transcoder software. It is available for macOS, Windows, and CentOS 6 from ARRI’s Tools & Apps.
CFast 2.0 cards or some other forms of media wouldn’t have been fast enough to use for some of the resolutions and frame rates that the ALEXA 35 can record in. Yes, Codex Compact Drives are expensive, but they have been purposely designed to meet the requirements of ARRI cameras. A 1TB Codex Compact Drive costs $2,480 USD.
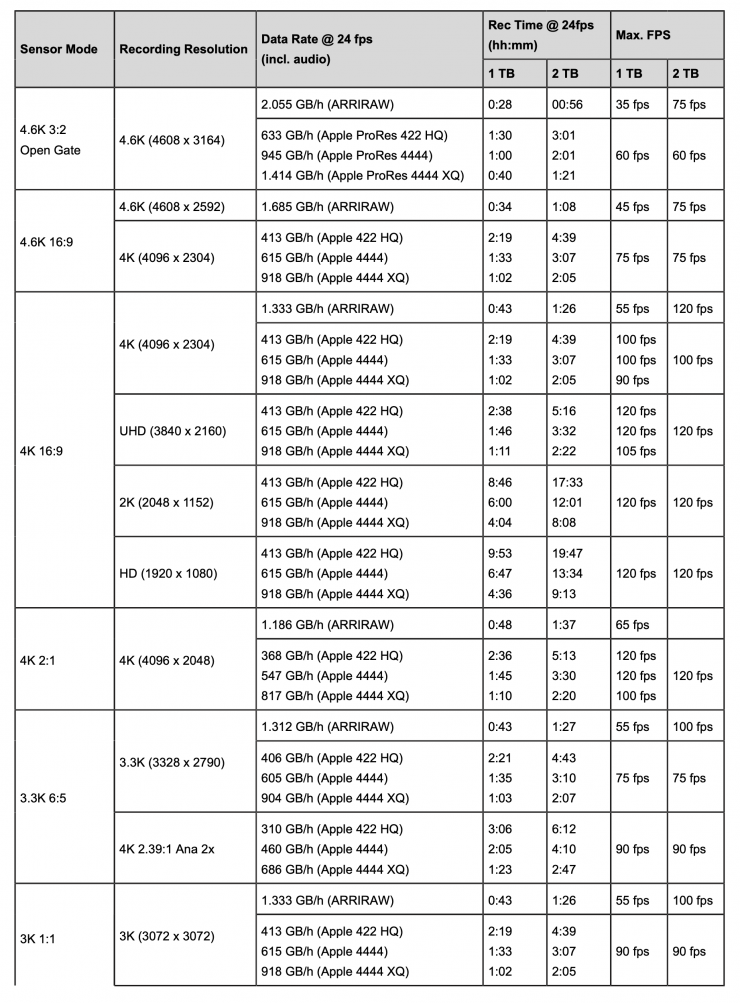
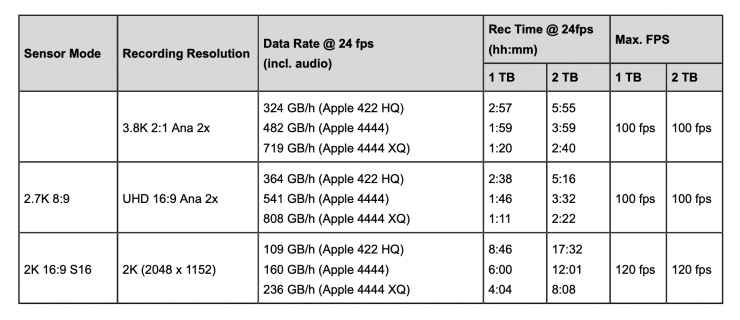
Above you can see the recording times and data rates for the various resolutions and frame rates when shooting in ARRIRAW and ProRes. If you want to record 3 hours of 4.6K 3:2 Open Gate in ARRIRAW without having to back up any cards, you have to spend a whopping $13,500+ USD on media. Media cost is something you certainly need to consider carefully if you are thinking about buying an ALEXA 35.
In saying that, a 512GB CFast 2.0 for my AMIRA cost more than $1,000 USD a few years ago. The Angelbird 256GB cards that are certified for the Mini and AMIRA are $610 USD each, so the compact drives are actually cheaper per GB.
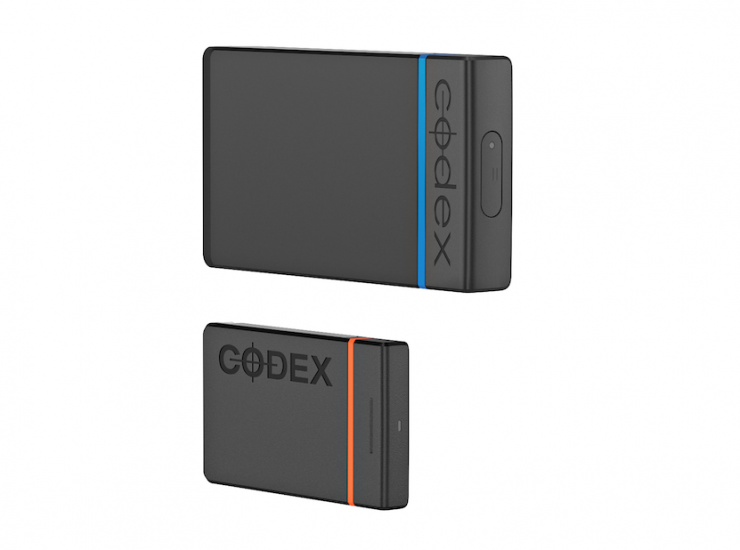
Codex Compac Drives are seen by ARRI as an upgrade to a more professional, robust recording media. The Codex Compact Drives are enclosed in a rugged aluminum housing. The drives are well-made and feel a lot more robust than most other media. According to Codex, the Compact Drives offer strong mechanical protection, efficient cooling, and a robust connector. Inside the Compact Drives, there is a high-performance NVMe SDD. Now, Codex doesn’t disclose what NVMe they are using.
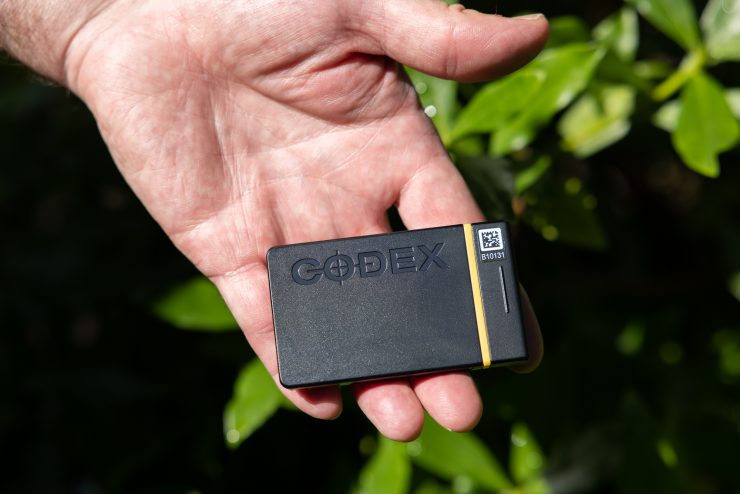
The Codex Compact Drives were only available in 1TB sizes, but now ARRI has introduced a new 2TB version ($4,240 USD). The 2TB has write speeds that are almost twice as fast as the existing 1TB drive. There is no sugarcoating it, the Codex drives are very expensive, but you don’t have any choice but to use them. If you can afford the Alexa 35, then I am sure you can afford the media for it.
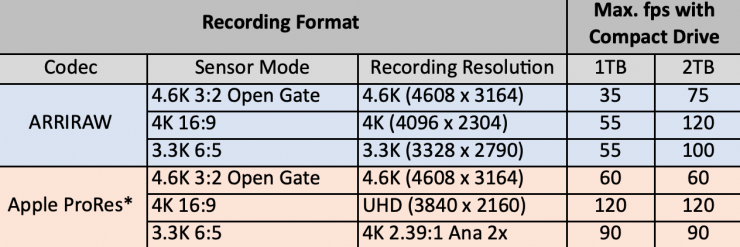
The 2TB version not only allows you to record for longer periods of time but it is also required when using certain frame rates when recording in ARRIRAW. Above you can see that the maximum frame rates when recording in ARRIRAW are essentially almost double if you are using the 2TB drive. With Apple ProRes recordings, there is almost no difference because the limitation isn’t affected by the drive write speed, but by how fast the image can be processed. For three recording formats, the Apple ProRes 4444 XQ flavor has a 5 to 10 fps lower maximum than with 4444 or 422 HQ.
The drives have transfer speeds of 8Gbps and the new 2TB Drive can capture approx. 56 minutes of 4.6K 3:2 Open Gate in ARRIRAW, or 3 hours and 7 minutes of 4K (4096 x 2304) ProRes 422 HQ.
A maximum of 400 clips can be recorded on a drive. When the maximum of 400 clips is reached, the recording media will be declared as full and further recording onto the media is not possible.
It is also important to note that when erasing the recording medium, all data is completely erased and cannot be recovered afterward. You need to make sure that all data has been copied from the medium before erasing.
ARRI recommends the following when using Codex Compact Drives:
- Always insert the recording media as described in this document.
- Keep the media door closed to prevent dirt and moisture from entering the camera.
- Do not put any labels or adhesive tape on the recording media. The metal surface is used for cooling. A hot medium can have reduced performance. The plastic surface can easily be broken off when a label is removed.
- Never remove a drive while recording – this may damage the recorded clip.
- If the recording process is interrupted by power loss or drive removal, transfer all the data from the drive and format it before using it again.
- While ARRI does do everything they can to assure reliable functioning of different recording media such as Codex Compact Drives, and while the mean time before failure (mtbf) for drives is excellent, a failure that results in loss of data may occur at any time. Therefore, you are obliged to implement and maintain at any time adequate and necessary data security measures and back up drive content as soon as possible. ARRI assumes or accepts no liability or responsibility for data loss or data corruption, or any other damages, loss or harm due to malfunction of recording drives.
Compact Drives are specified for a temperature range from 0 °C to 70 °C (32 °F to 158 °F). When inserting the drive with a temperature below 0 °C, the camera will go into an alert state and prevent access to the drive until such time that the media reaches its minimum operational temperature. Once the media is within specified temperature range, the camera will complete loading the media and resume regular operation.
You don’t need any software or drivers to read the footage from the Codex Compact Drive Reader.
The Drive Reader does make quite a lot of noise, especially when you are reading from a card.
There are two options for downloading data from the Compact Drive
- The new Compact Drive Reader (USB-C) is an affordable reader that works with MacOS or Windows without extra software or licenses. Use your preferred data management application to copy data from the drives. To add HDE capability, use the free-of-charge ARRIRAW HDE Encoder from ARRI. The Compact Drive Reader offers download speeds of up to 8 Gb/s. The Compact Drive Reader uses the USB 3.1 Gen 2 interface (backwards compatible) and is powered via the USB-C connector.
- For MacOS users, the new Compact Drive Adapter accepts the Compact Drive and fits in all SXR Capture Drive Docks (Thunderbolt 2 or 3). The Compact Drive Adapter maximizes download speed for Compact Drives up to 15 Gb/s. The host computer must have the free-of-charge Codex Device Manager software installed, which will also provide HDE capabilities.
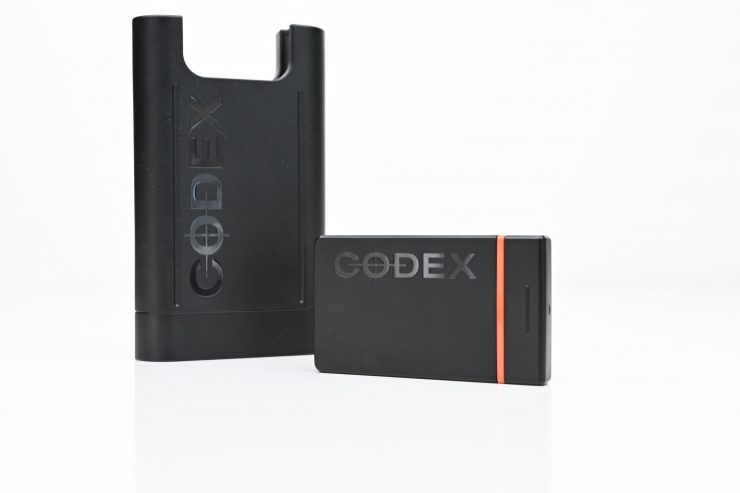
The Codex Reader is very fast and I was able to copy 130GB of material from the card to my hard drive in under 90 seconds. With that speed, I could copy an entire 1TB card in under 12 minutes.
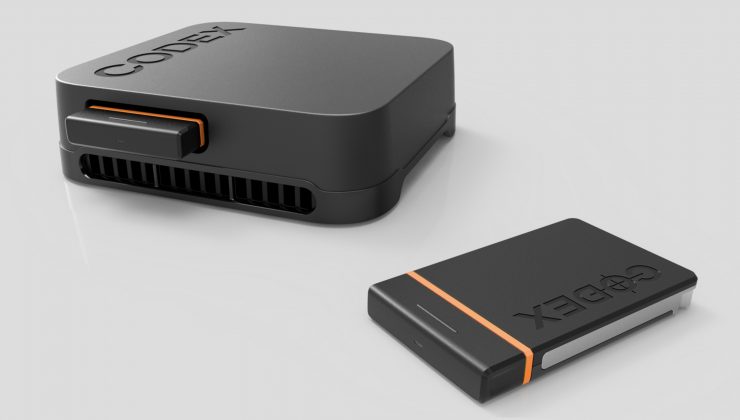
ARRI also has a faster version of the Compact Drive Reader that is called the “Compact Drive Dock” which interfaces through Thunderbolt 3, however, this is very expensive and costs $1,850 USD.

Now, the Codex drives to get very hot, and above you can see the warning that ARRI issues when handling them.
USB-C
The camera saves data such as user setups and frame grabs to a USB-C
memory stick. Look files, frame lines and software updates can be loaded into the camera from the memory stick.
The camera supports FAT 32 and exFAT formatted memory sticks using one partition within a Master Boot Record (MBR) partition table and a maximum capacity of 256 GB. A special folder structure is used in order
to work with the camera. On Mac OS use SM-DOS (FAT) with scheme
“Master Boot Record” to format the USB stick.
You can use the USB-C to save and import looks, frame lines, user setups and lens tables.
All lists have a maximum number of entries they can hold. Whenever a list is full, the ADD button is grayed out and a message is shown. You need to delete entries from the list first in order to add new ones.

Above you can see how many entries you can save for the various functions.
You also use the USB-C to save HW (HardWare) Info files that are required to generate licenses in the ARRI License Shop or may be requested by camera service to get detailed information on the camera’s hardware and components revisions.
The HW Info file will be exported to the USB medium in the ARRI/ALEXA35/LICENSES folder.
Logfiles are also saved through the USB-C and they help ARRI camera service to analyze potential problems. In normal circumstances, logfile export is not required. Export Logfiles combines the camera logfiles, HW Info file, current user setup and other diagnostic files into a .zip archive and stores the archive in the ARRI/ALEXA35/LOG folder on the USB medium. Privacy sensitive information such as WiFi password and look files are not exported.
Why does the ALEXA 35 record MXF/Apple ProRes instead of QuickTime/Apple ProRes?
ARRI has switched all recording formats to the MXF (Material eXchange Format) container because MXF is an open standard that is widely supported and allows for more flexible access to metadata. Using the same container also allows ARRI to record ARRIRAW and Apple ProRes to the same drive without reformatting.
Apple is supporting MXF/Apple ProRes and they have published the “SMPTE RDD 44: Mapping of ProRes into MXF”. ARRI cameras that currently support QuickTime/Apple ProRes will continue to use QuickTime.
Apple already has an MXF plug-in available for MacOS X 10.14.3 or later that you can download as part of Apple’s “Pro Video Formats”. This allows the MacOS QuickTime Player, FCPX, Motion, Compressor, VLC and other ARRI software to play MXF/Apple ProRes. There is also support for Windows machines.
Speaking of MXF, the ALEXA 35 actually records in a new MXF wrapper. This wrapper allows the camera to record a new extensible, flexible metadata structure for future expansion. It includes:
- New metadata for new processing steps like Enhanced Sensitivity Mode and ARRI Textures
- It can also be used for ARRIRAW, ProRes and ARRIRAW frame grabs (User Pixel Mask and CAP)
Power Draw

The ALEXA 35 isn’t a 14V camera, it requires voltages from 20.5 to 33.6 V DCV. Therefore, it needs to be powered via a high-voltage onboard battery or an external DC power supply.
The advantages of 24V are that it is a more efficient power supply, and provides more accessory power. It works well with a smaller-sized camera like the ALEXA 35 because there is less to cool.
Yes, some people are bound to be annoyed because they will have to change over batteries and battery charger systems that they already own, and that is a valid complaint. Buying a whole new set of batteries and chargers will cost quite a lot of money. In ARRI’s defense, moving to 24V was the only way to build the ALEXA 35 without compromising on performance.
The camera’s input power range is 20.5V – 33.6V. The ALEXA 35 draws between 85 W and 135 W while recording, depending on the set recording
resolution and sensor frame rate (with MVF-2 connected, but no further accessories attached). The camera will switch off at 19.5V supply level.
As a comparison, the ALEXA Mini LF draws between 69W and 89W while recording, with the MVF-2 connected, but no further accessories attached.
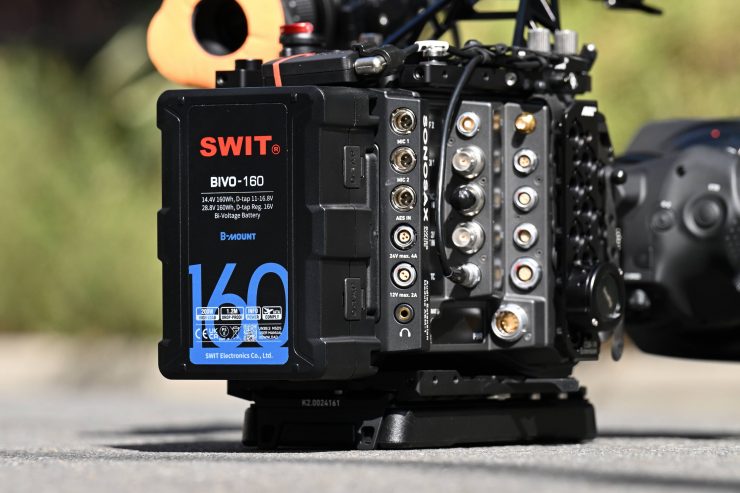
Yes, this is quite a high power draw and you need to carefully think about how many batteries you would need to get through a day of shooting.
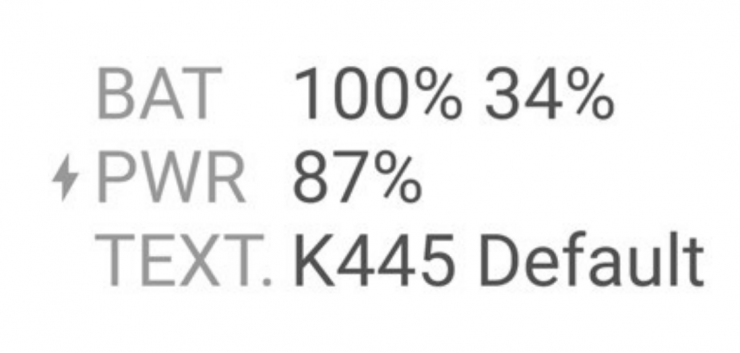
The status of the power inputs is displayed on the HOME screen of the MVF-2 and the side display as well as in the Status Info. When power is supplied through both the PWR and BAT input, a current symbol on the HOME screen indicates which input is being used. The preferred input to be used can be set in the camera menu. The BAT entry can display two values when two B-mount batteries are used together (e.g. a hot swap unit and a main unit). The first value refers to the battery that sits directly on the battery adapter (usually the hot swap unit), the second value refers to the stacked battery. The camera will always draw power from the stacked battery first.
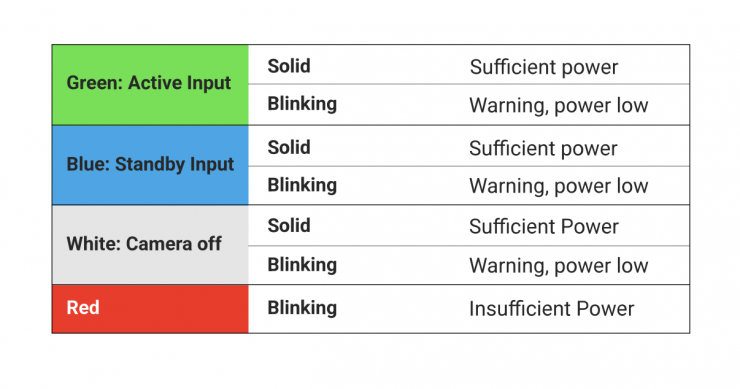
Additionally, the battery status can be read directly from the camera body via the two status LEDs. The LEDs indicate which input is in use and
whether sufficient power is available. A green LED indicates that the input is in use, a blue LED indicates that there is power at the input, but it is not
in use. The power low warning is issued when the supply voltage is lower than 22.0 V.
When the camera was switched off due to a power cut, it automatically boots up as soon as power is present again. This behavior is optional for the BAT input, e.g. to avoid power cycling with flat batteries.
The ALEXA 35 is able to deliver up to 290W of power as long as the power source being used can supply that much. This 290W is distributed as follows:
- Up to 140W for camera and viewfinder
- Plus, up to 100W 24V accessory power (including PDM-1 and AEM-1)
- Plus, up to 50W 12V accessory power (including PDM-1 and AEM-1)

The main accessory outputs of the camera are the RS output and the 12 V output. In addition, appropriate accessories can be powered via the LBUS sockets, the ETH socket, the SERIAL socket or the AUDIO socket. The optional Power Distribution Module PDM-1 adds seven additional power
outputs (4x 24 V, 2x 12 V, 1x 12 V Twist D-Tap) to the camera.

ARRI gives you multiple ways to power the camera. You can use battery adapters that mount directly to the camera, including a low-profile B-Mount battery adapter.
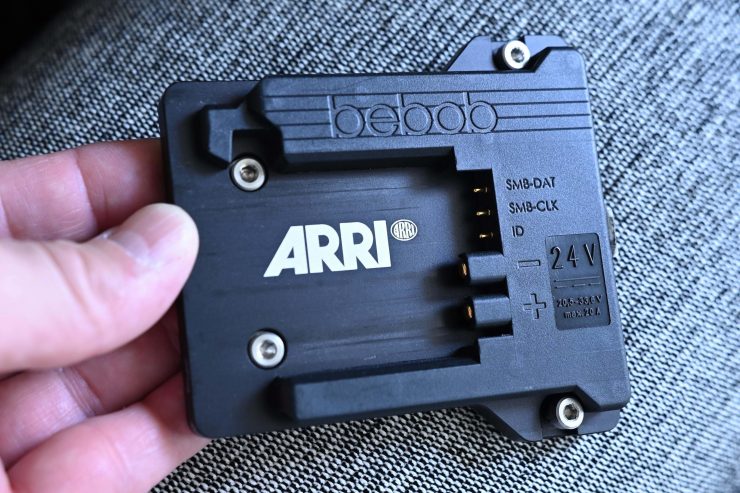
The low-profile B-Mount battery adapter is really small and lightweight. You also have to use this if you are running the ALEXA 35 with one of the additional modules. I’ll talk about the optional modules in a little bit.
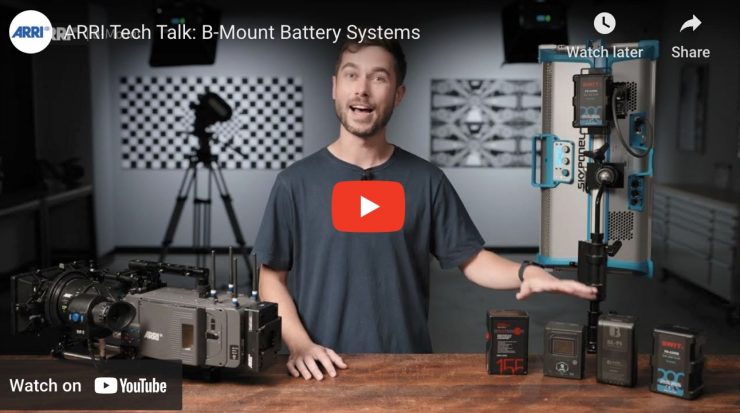
If you are not familiar with B-mount it is a 24V global open standard for high-power batteries. It has been designed as one standard for cameras and lights. As I already mentioned, 24V provides power more efficiently and the B-mount gives you a very solid mechanical mounting solution.
B-Mount is capable of supplying up to 15A at 24V. B-Mount will be the standard ARRI uses going forward for all of its cameras, lighting gear, and stabilizers.
Most battery manufacturers such as SWIT, Core SWX, Anton Bauer, bebob, IDX, Hawk-Woods, BlueShape, and FXLION have all introduced or will be introducing B-Mount batteries in 2022/2023.
Now, you may be wondering, well hold on, what happens if I need to travel on aircraft with 24V batteries?
You don’t need to worry, most battery manufacturers are already making 24V batteries that are under 160Wh for this very reason.
Battery companies will also be making stackable battery solutions and dual B-mount plates that you will be able to use. There is no difference for flight safe capability between 12V and 24V batteries of the same Wh.
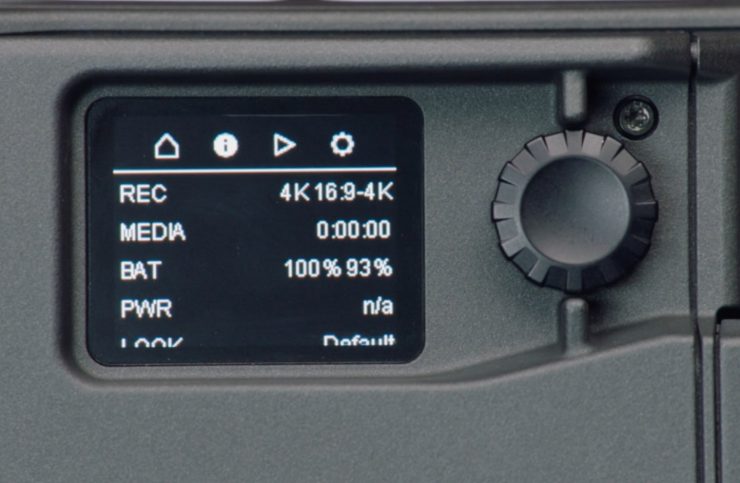
What is nice is that if you use two batteries at once the camera will detect this and display the remaining battery time for both batteries.

So what happens if you don’t have B-mount batteries? ARRI also has an accessory called the Battery Adapter Back BAB-LF which emulates the back of an ALEXA LF. This allows you to attach third-party power solutions that can convert 12V to 24V, such as Hawk-woods 26V Reel Power batteries or Shark-fins. ARRI recommends against using 12V to 24V up-converters (even though they are in the market), as they get very hot.
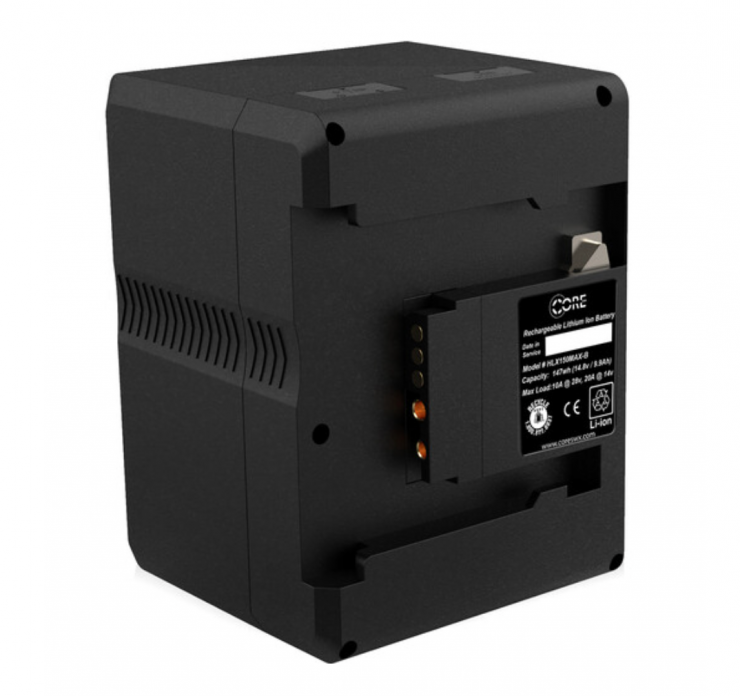
You also have the ability to use third-party 26V battery adapters. Some of the options that are available can be seen below, but they will all add a little more length and weight to the camera compared to the B-Mount adapter.
- Anton Bauer (camera to 26V Gold Mount Plus batteries)
- Hawk-Woods (for Reel Power 26V batteries)
- CORE SWX Helix MAX batteries
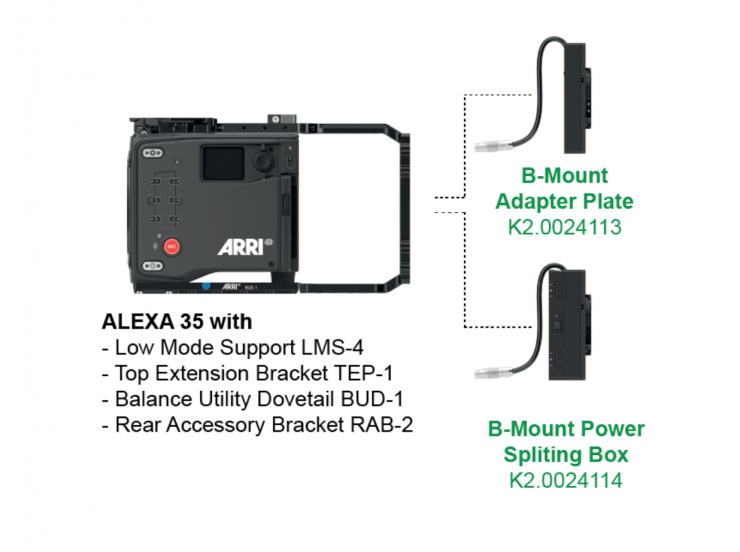
Additionally, if you want to place the battery further back from the camera body for better weight distribution ARRI also has a B-Mount Adapter plate and a B-Mount Power Splitting Box. You can attach these to various support brackets to offset the battery from the camera.
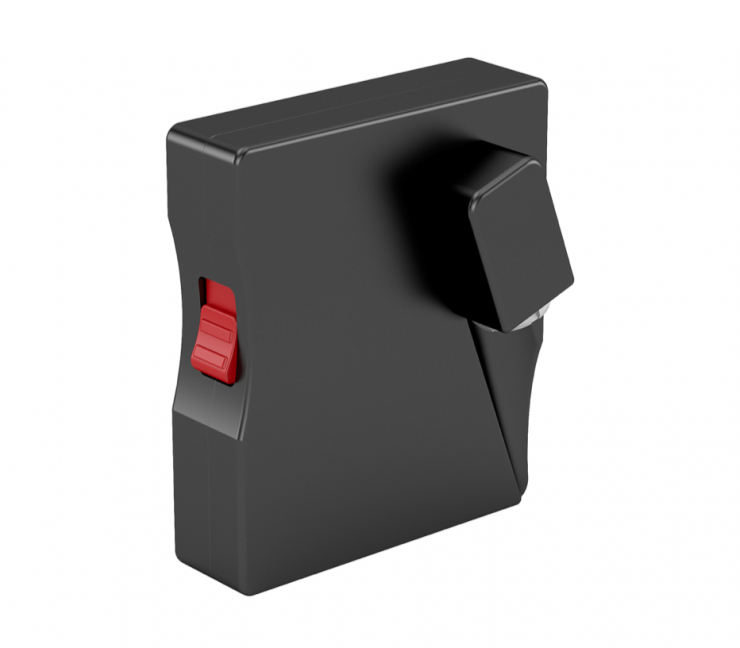
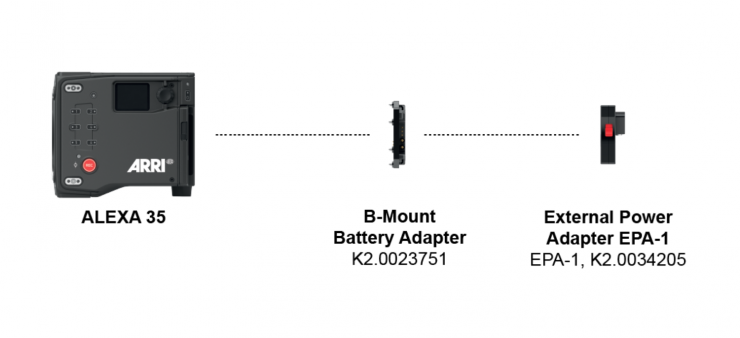
But hold on, we aren’t done with power options just yet! ARRI also has the EPA-1 External Power Adapter that attaches to any B-Mount. This has been specifically designed for Steadicam. Usually, you would have the Steadicam battery powering the camera, but once you are having a break and you turn the Steadicam off the camera is going to drain the Steadicam battery. With the EPA-1 you can connect the camera up to external power and change the power input priority menu so you don’t drain the Steadicam battery.
The ALEXA 35 uses quite a lot of power and you need to factor this in when shooting so you know how many batteries you need. I only had one battery to use with the camera, so I was constantly having to charge it in a vehicle to and from different locations.
In a nice touch, if the power supply is interrupted with the camera switched on, the camera will automatically repower and boot up on reconnection. Speaking of boot-up time the camera is reasonably slow at around 24 seconds from the time you turn it on until you get a picture and are able to record.
Just to make it easier for you, I have compiled some of the battery solutions that are available for the ALEXA 35.
CORE SWX
Core SWX has a range of B-mount Helix Max Batteries for the ARRI ALEXA 35. The Helix Max series is capable of handling the most demanding power builds in the cinema industry. They are available in 98Wh and 147Wh models. Both of these batteries are flight safe.
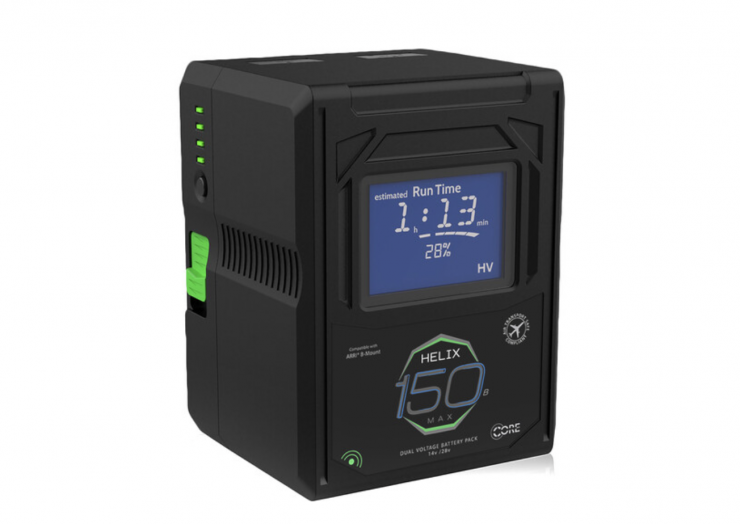
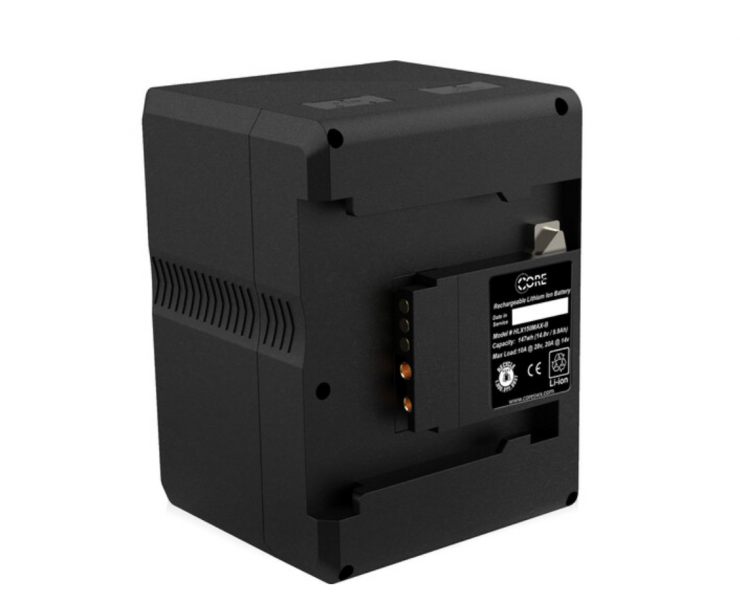
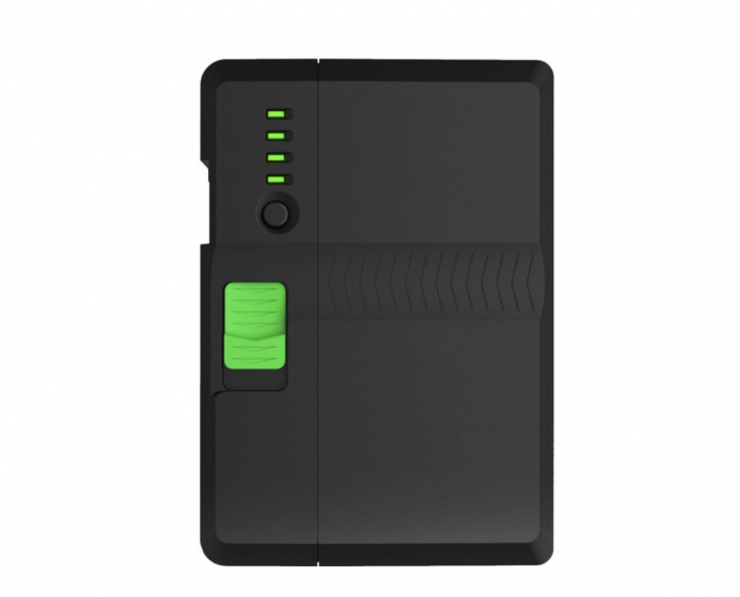
The Helix Max Batteries encompass all the features of Hypercore NEO, with the added function of dual 14v/28v simultaneous voltage output, which makes them a good solution for the ARRI ALEXA 35.
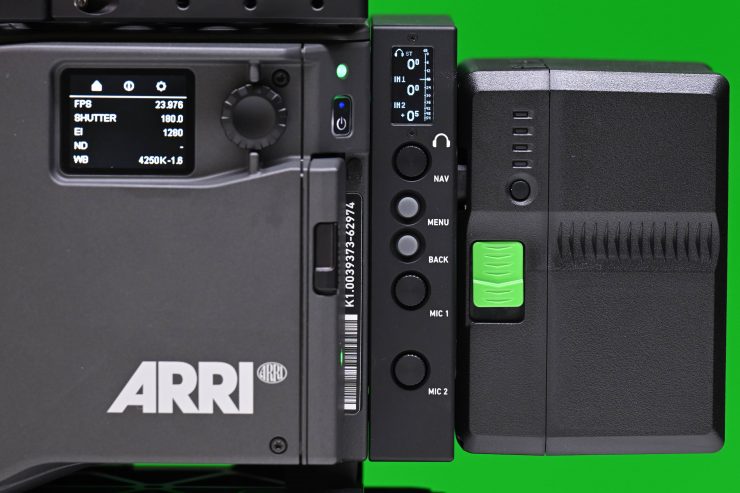
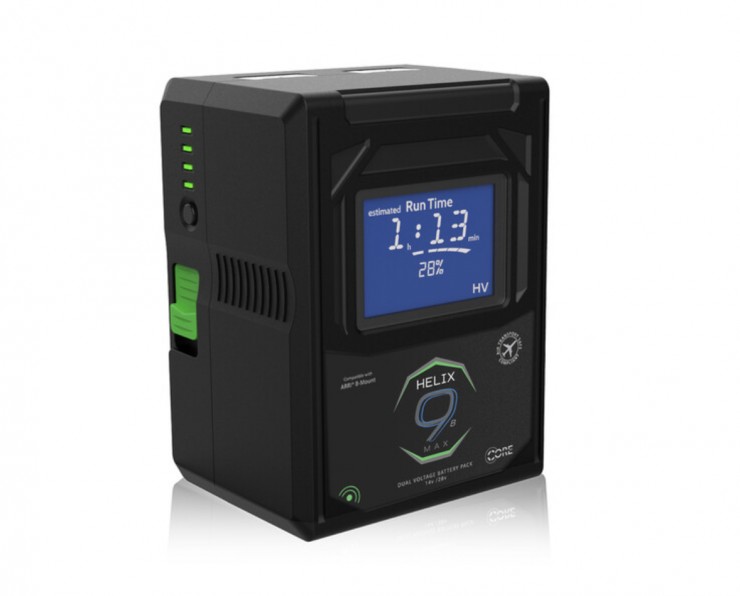
Leveraging proprietary, patented technology, Helix is claimed to be ultra-efficient, providing nearly lossless power transmission at a 99% efficiency rate to high voltage operating equipment. Helix’s unique design allows it to output up to 33.6v, within the top range of high voltage acceptance, thus drawing less current, creating less heat and extending both operational runtime and product longevity.
The batteries have a maximum output of 20A (10A at 28.8v HV). the Helix Max series is capable of handling the most demanding power builds in the cinema industry.
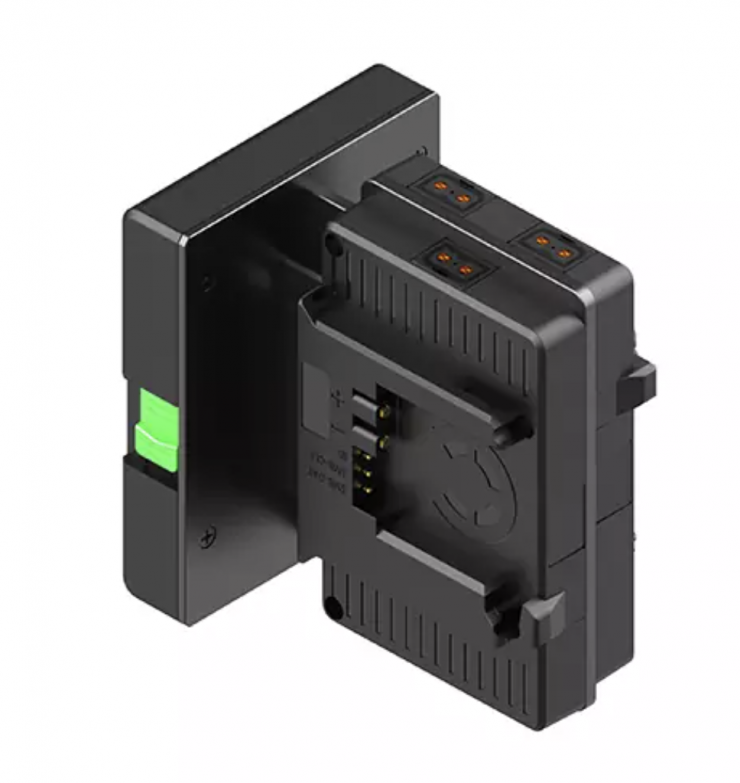
The batteries will provide ample runtime in most camera and lighting applications but can also be used in conjunction with a Helix Hotswap plate ($349 USD) to double the available battery capacity and extend runtimes.
The Core SWX Helix Max 98Wh and 147Wh Lithium-Ion Dual-Voltage Battery (B-Mount) are available for the following prices:
- Core SWX Helix Max 98Wh Lithium-Ion Dual-Voltage Battery (B-Mount) $599 USD
- Core SWX Helix Max 147Wh Lithium-Ion Dual-Voltage Battery (B-Mount) $749 USD
- Core SWX Helix Max 275 Lithium-Ion Dual-Voltage Battery (275Wh, B-Mount) $825 USD
- Core SWX Helix Max 360 Lithium-Ion Dual-Voltage Battery (367Wh, B-Mount) $975 USD
Specifications
Core SWX Helix Max 98Wh Lithium-Ion Dual-Voltage Battery (B-Mount)
Capacity: 98Wh (14.8v, 6.6Ah)
Operational Voltage: Dual Voltage, DC 11v-16.8v/DC 22v-33.6v
Size: 3.54″ x 4.65″x 2.38″
Weight: 1.8lbs.
Load: 20A @ 16.8v, 10A @ 33.6v
Core SWX Helix Max 147Wh Lithium-Ion Dual-Voltage Battery (B-Mount)
Capacity: 9.9Ah, 147wh
Operational Voltage: Dual Voltage, DC 11v-16.8v/DC 22v-33.6v
Size: 3.54″ x 4.65″x 2.72″
Weight: 2.2lbs.
Load: 20A @ 16.8v, 10A @ 33.6v
SWIT
SWIT’s 98/160/200/290Wh Bi-Voltage B-Mount Batteries are now available. The new BIVO-98, 160, 200, and 290 for the ARRI ALEXA 35 and join the existing 26V HB-A290B battery as part of SWIT’s powering solutions for ARRI’s latest camera.
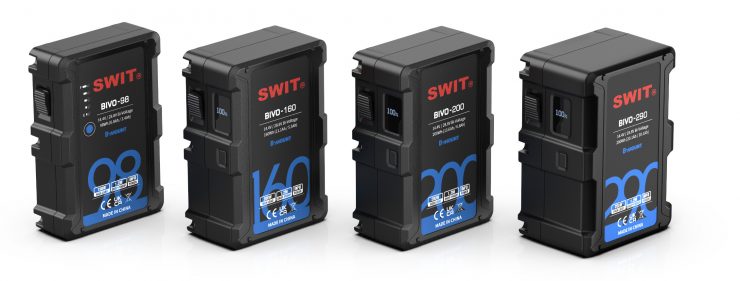
The new BIVO series adopts the 14.4V/28.8V standard, and in addition to 290Wh, three capacity options have been added: 98Wh, 160Wh, and 200Wh. Among them, the addition of 98Wh and 160Wh allows you to hand-carry the batteries on a plane.
The BIVO series all feature an OLED display, except for the BIVO-98 due to its smaller size. The 200Wh and 160Wh versions have the same thickness, and BIVO-290 has the same volume as the previous HB-A290B.
The BIVO series continues the compact and sturdy design of HB-A290B, and they adopt a bi-voltage switching system with automatic identification of the plate.
With SWIT’s B-Mount accessories, BIVO can be applied to cameras, lighting, monitors and other equipment, providing a unified equipment power supply solution for the professional film industry.
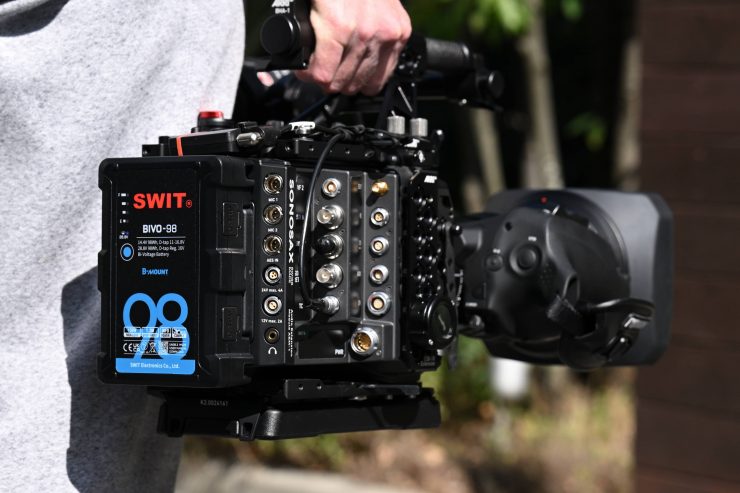
The new batteries match the size of ALEXA 35, and the anti-mistouch push button prevents the possibility of power shutdown. The newly added real-time voltage display can help DOP and AC quickly understand the battery status.
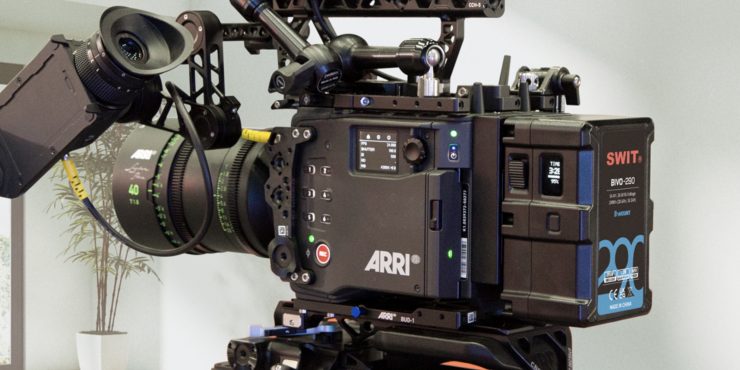
Since the digital ID interface of the B-Mount can intelligently identify the voltage, the dual voltage design of the BIVO series 14.4V/28.8V meets any future B-Mount application. Except for the BIVO-98, all three of the other batteries have an output power of at least 200W.
SWIT also has a variety of B-B, V-B, B-V swapping plates.
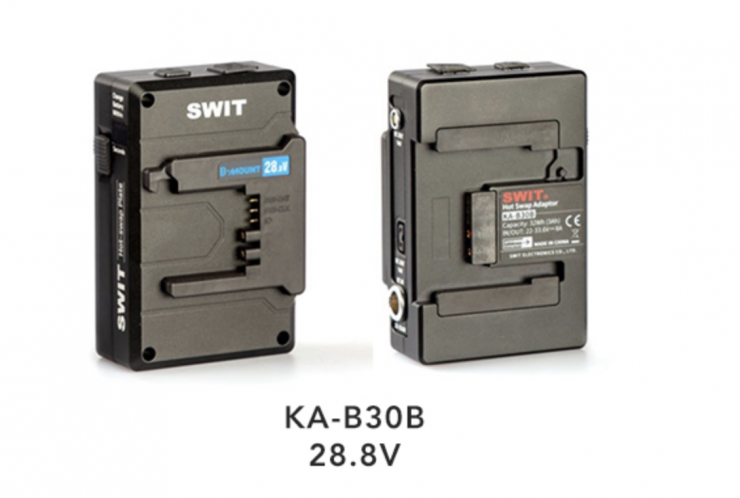
The KA-B30B hot-swap plate provides high voltage (28.8V) and it gives you 120 seconds of battery change time.
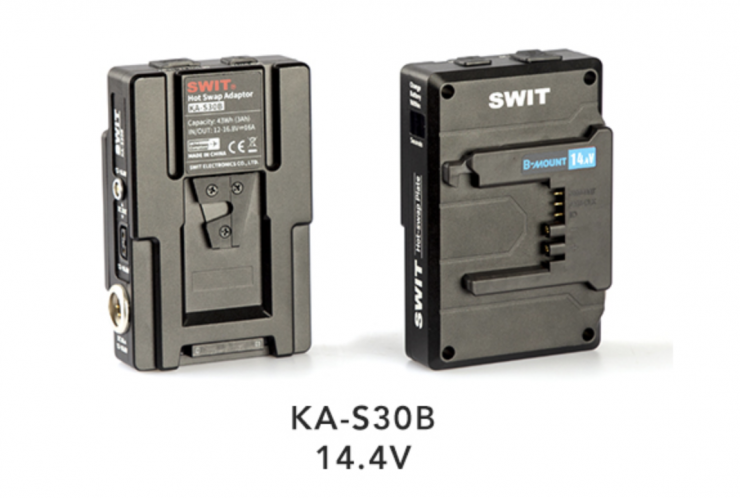
KA-S30B hot-swap plate provides a B-Mount battery-powered solution for standard voltage cameras on the market. It also provides 120 seconds of battery change time.
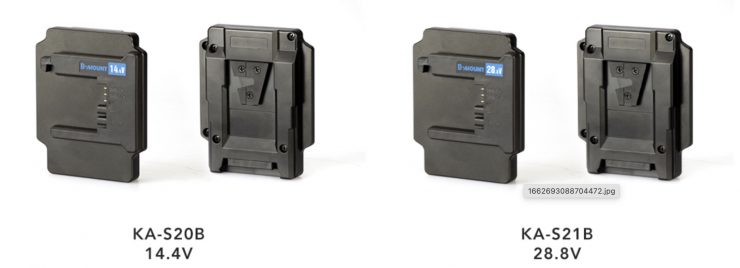
The KA-S20B/KA-S21B conversion plates provide direct B (batteries)-V (devices) conversion of 14.4V standard voltage and 28.8V high voltage respectively. This allows the BIVO series batteries to be used directly on different devices. The charging and maintenance problems of multi-interface batteries can then be avoided.
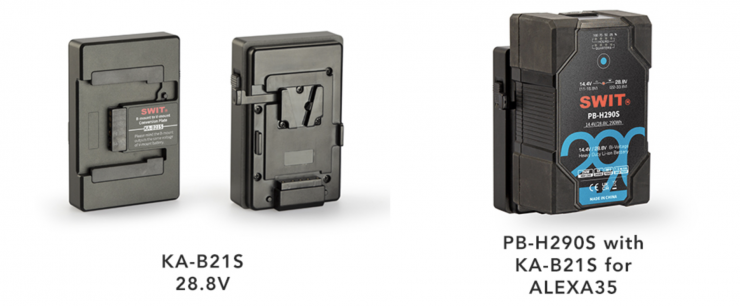
The KA-B21S conversion plate supports the use of high-voltage V-mount batteries on native B-Mount devices, which makes the drop-proof high-voltage battery PB-H290S a good solution for the ALEXA 35.
Fxlion
The Fxlion BM-HV300 293Wh B-Mount Lithium-Ion Battery was designed specifically for the ARRI ALEXA 35.

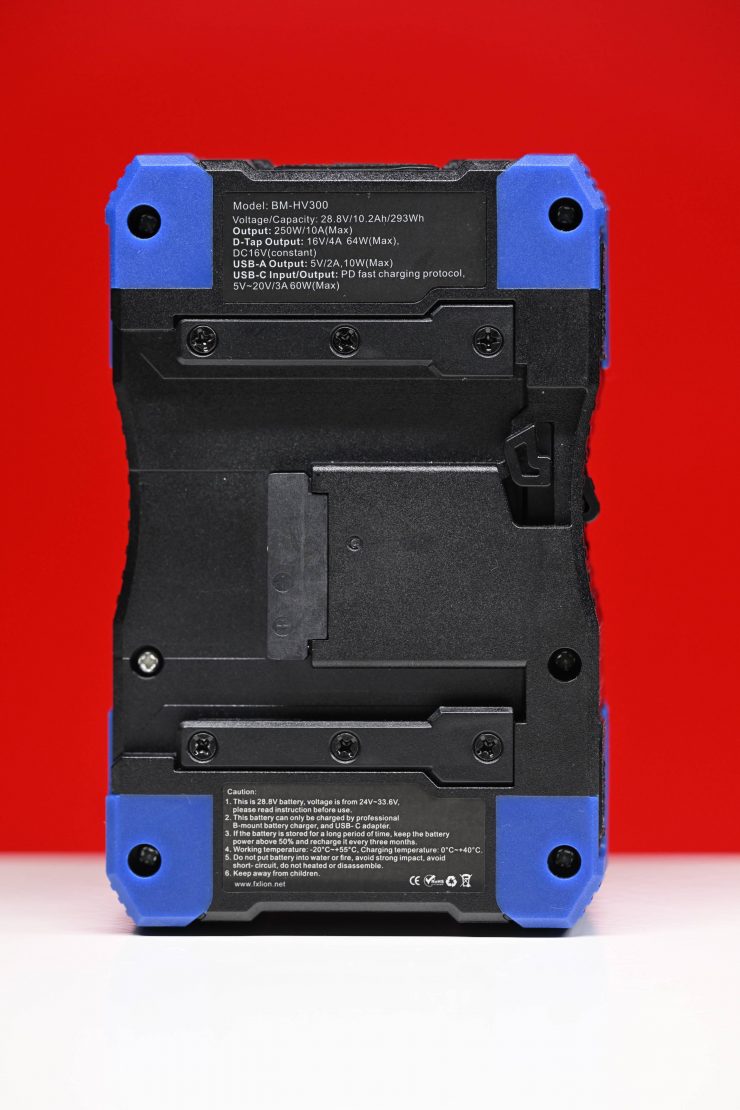
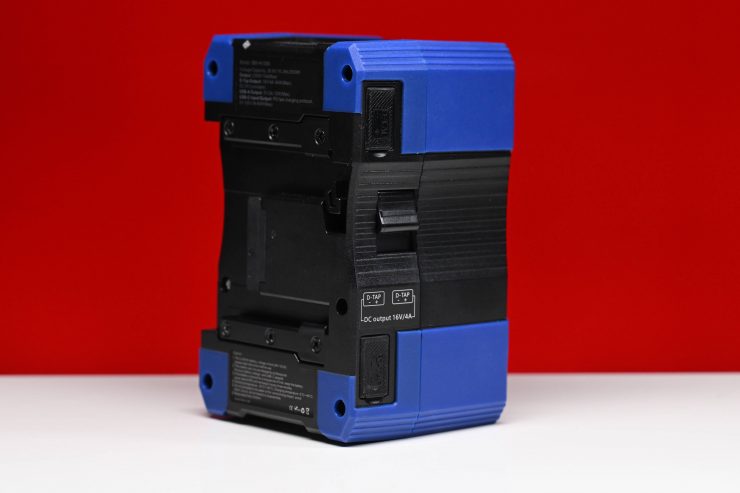
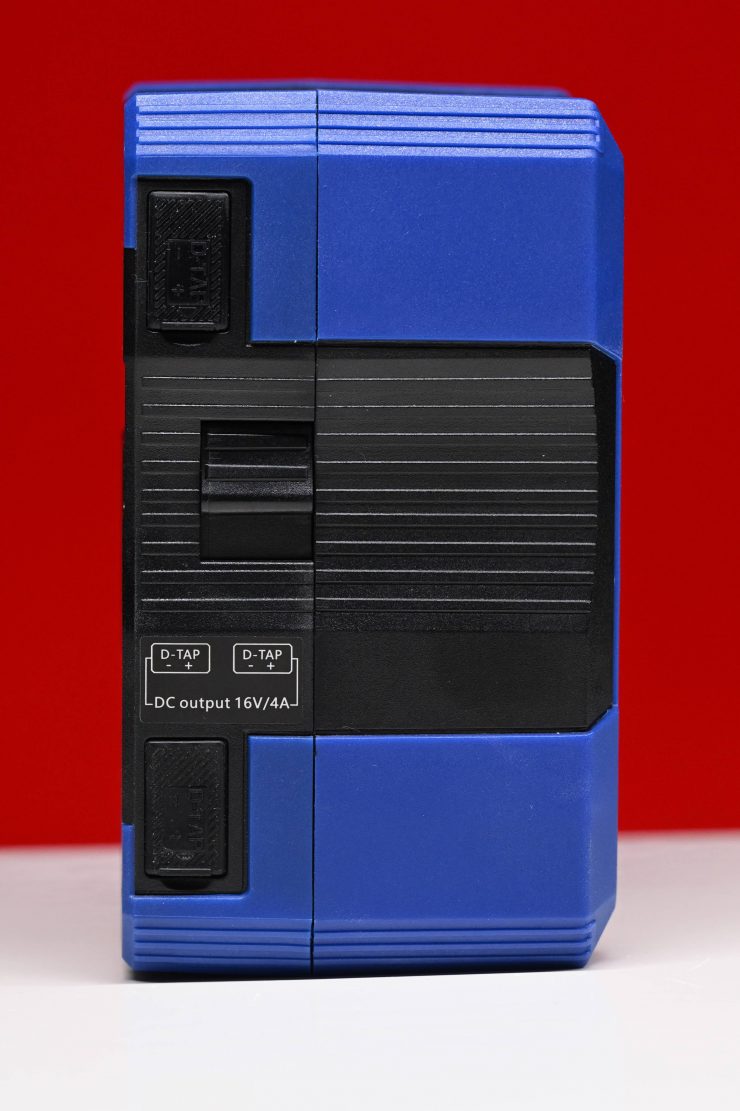
Key features
- 28.8V for ALEXA 35
- B-Mount Interface, SMBus Communication
- 10A Maximum Load
- 2 x D-Tap Ports: 16V, 60W Maximum
- 2 x USB Ports: 1 x USB-A & 1 x USB-C
- 5-LED Status Indicator
- Contoured, Easy-to-Grip Form
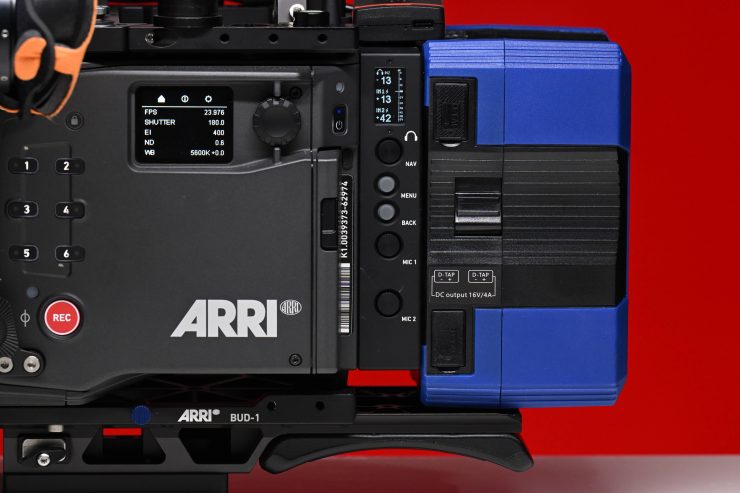
Now, there are a lot of dual voltage battery solutions on the market that will work with the Alexa 35, so you may be thinking why go with a native 28.8V battery? Well, while there is certainly nothing wrong with dual-voltage batteries, you may well prefer to just go with a native 28.8V B-mount battery if you are buying it specifically for the ALEXA 35. Sure, you could buy a dual-voltage B-mount battery, but then you would also need to buy an adapter plate to use it on select cameras and some lights. Currently, there are no products or cameras apart from the ALEXA 35 that natively use B-mount.
The voltage operating range for the ALEXA 35 is 20.5-33.6V. The Fxlion BM-HV300 has a voltage of between 24-33.6V. What this means is that it can keep powering the ALEXA 35 even when it drops to its lowest voltage and is almost fully discharged. This is not the case with a battery like the Anton/Bauer Dionic 26V Lithium-Ion Battery as its voltage range is 17.5-28.9V. Once it reaches a certain level of discharge it will actually cause the ALEXA 35 to shut off even though it may still be showing that it has 20% capacity left. With the ALEXA 35, you really need to use a battery that has a minimum operating voltage of above 20.5V.
If you want to buy batteries that you can use on multiple platforms, at least in my opinion, it probably makes more sense to go with a dual voltage V-mount or AB-gold mount and use an adapter plate. Although, in saying that, you can also purchase B-mount plates that allow you to run dual-voltage B-mount batteries on other cameras and equipment.
The downside to a 28.8V B-mount battery as I just mentioned, is that you can currently only use it natively on the ALEXA 35. That does somewhat limit its versatility.
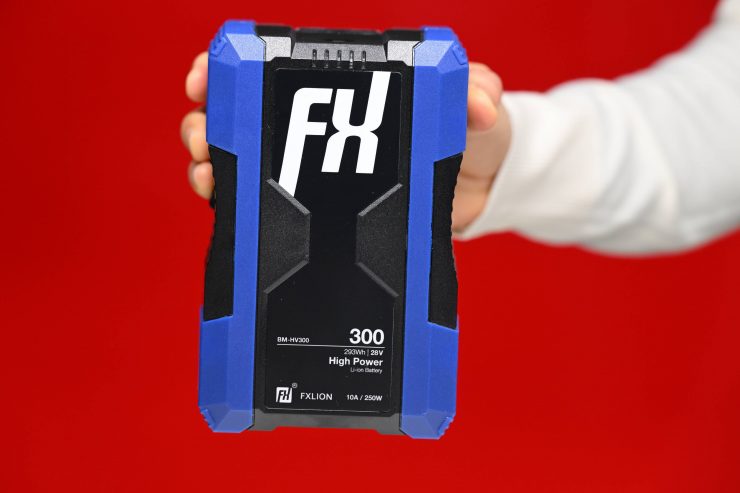
The Fxlion 293Wh B-Mount battery tips the scales at 1.68 kg / 3.7 lb. This is slightly higher than some other competing batteries.
| WEIGHT | |
| Fxlion BM-HV300 293Wh | 3.7 lb / 1.68 kg |
| SWIT HB-A290B 290Wh 28.8V | 3.35 lb / 1.52 kg |
| Core SWX Helix Max 275 Lithium-Ion Dual-Voltage Battery | 3.1 lb / 1.4 kg |
| bebob B290CINE 14.4/28.8V 294Wh | 3.35 lb / 1.52 kg |
| Anton/Bauer Dionic 26V Lithium-Ion Battery (240Wh, B-Mount) | 3 lb / 1.36 kg |
How does this weight compare to the competition? Well, above you can see B-mount batteries with similar capacities. All of the available batteries have pretty similar weights.
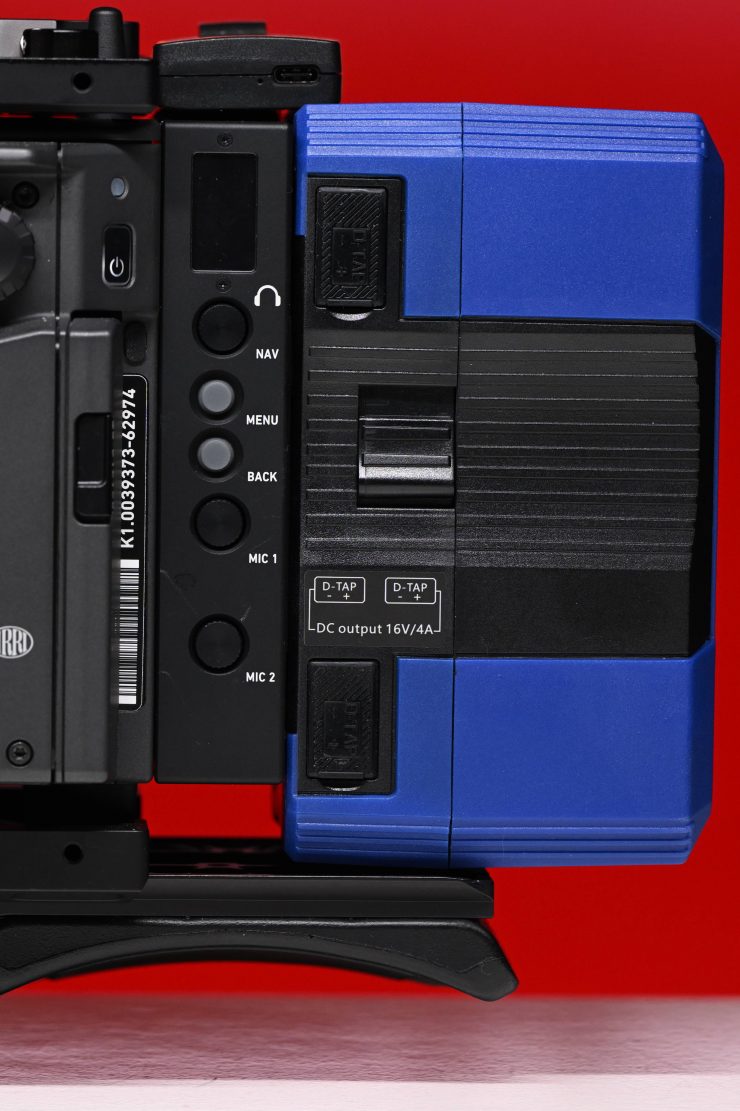
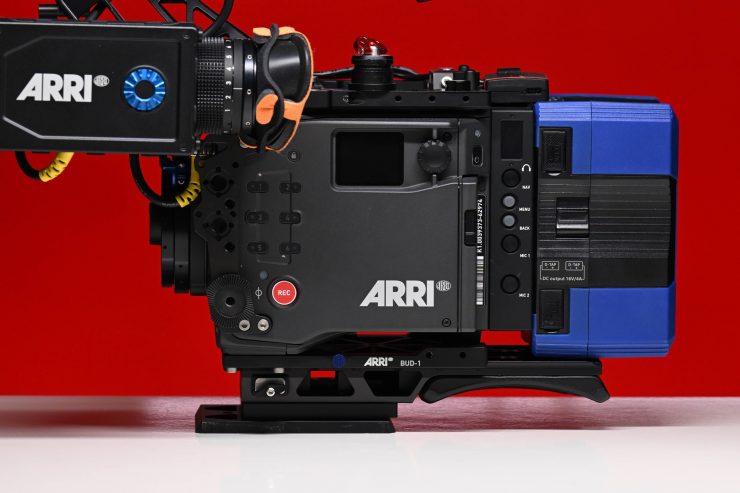
It has physical dimensions of 15.4 x 10 x 8.7cm / 6.06 x 3.93 x 3.42″. The size suits the Alexa 35 reasonably well and the battery contours to the shape of the camera.

The Fxlion 293Wh 28.8V B-mount Battery Pack features a 10.05Ah high capacity, and a 10A constant load at 250W.
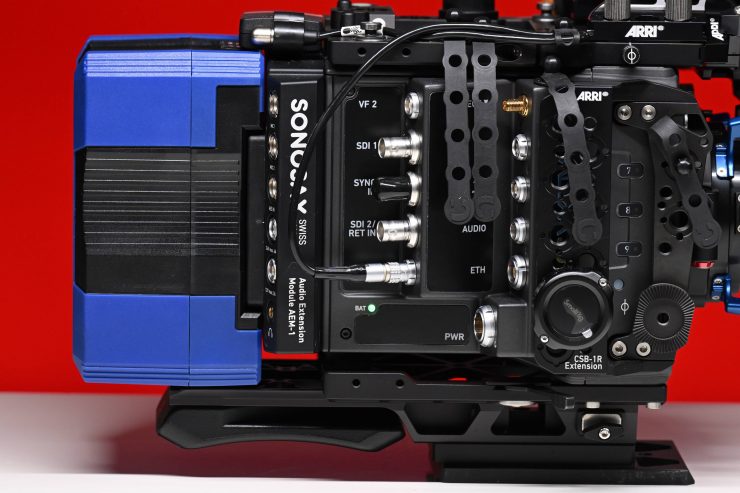
Early on, ARRI recognized a B-mount power issue (mainly because of the original LF) and recommended a minimum of 10A load for HV on B-mount. Since that time, ARRI has softened its stance on B-mount minimum specifications because they need B-mount adoption. The only slight concern with this is that if you don’t use a higher amperage pack, you may end up with a shorter service life for the battery packs since they could be continually overstrained depending on how you are using them. Luckily the Fxlion battery provides 10A.
It supports 20V/3A 60W(max.) fast charging via USB-C and it offers a good array of outputs.
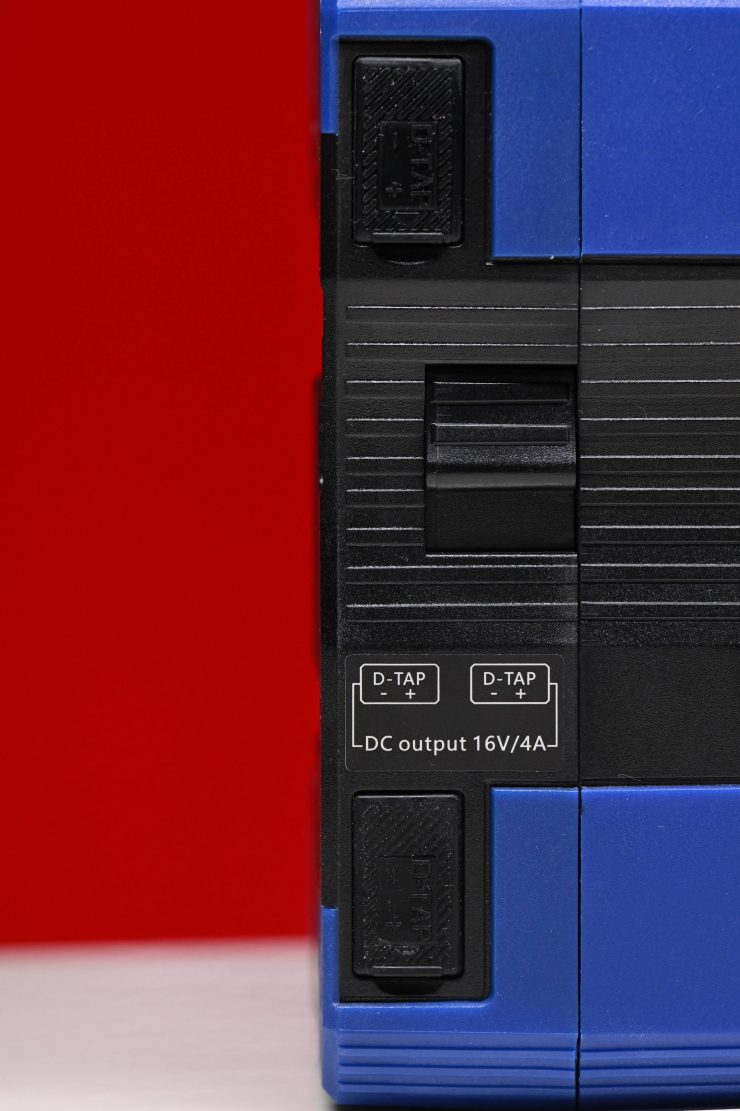

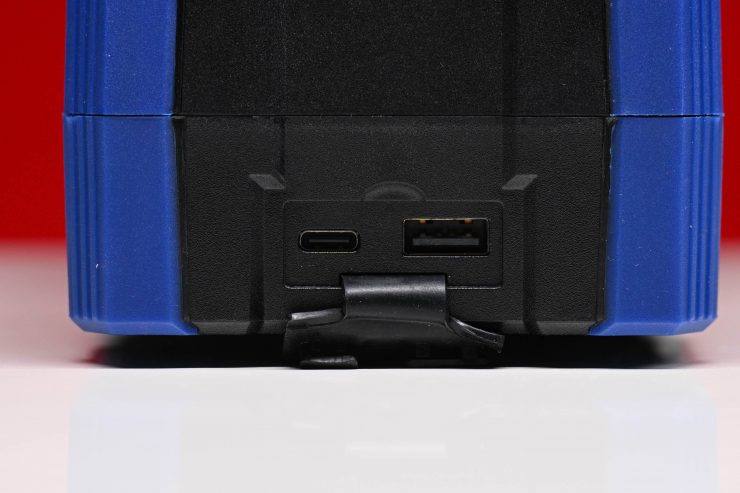
As far as outputs are concerned this is what the battery has:
- 2x D-Tap Outputs 16V/4A 64W (max.)
- 1 x USB-A Output: 5V/2A 10W (max.)
- 1x USB-C Output: 5V~20V/3A 60W(max.) / Input: 20V/3A
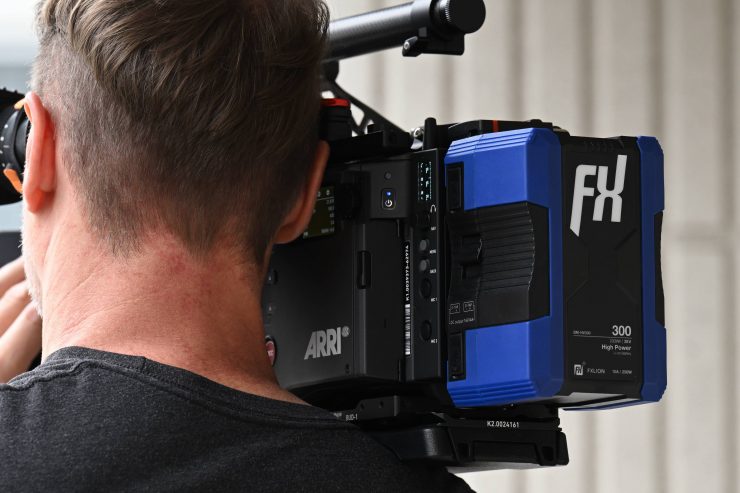
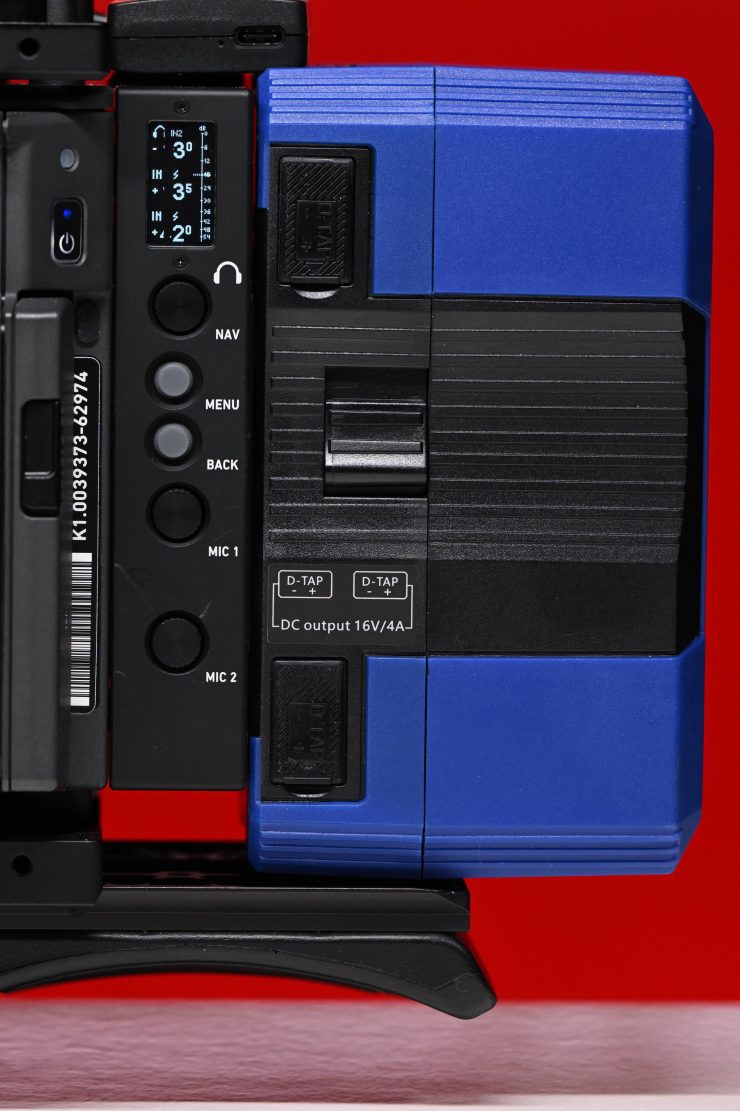
I did find it a little strange that the D-tap ports are located on the left-hand side of the battery. It would have made more sense to have placed them on the right-hand side as that keeps them out of the way of the operator.
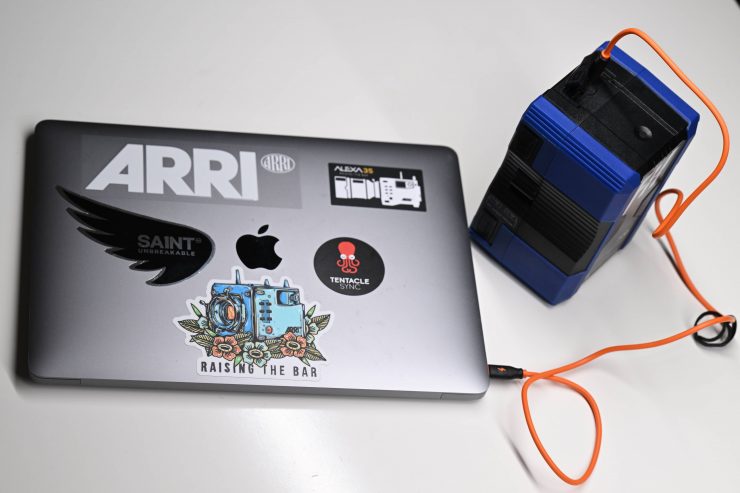
Having a USB-C 60W input and output is really handy. It allows you to power a laptop or other device from your battery, or conversely, you can charge the battery through a Macbook power supply (although this is relatively slow).
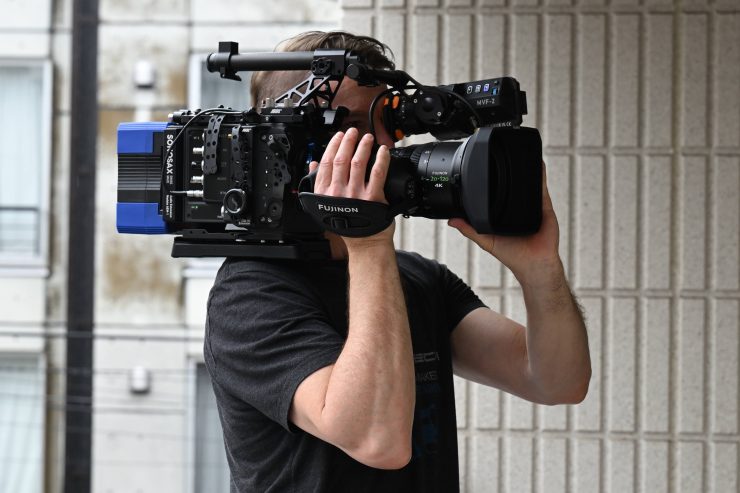
The Fxlion 293Wh 28.8V B-mount Battery offers a high capacity, has lots of outputs, and it is well-made. The battery is easy to grip and hold and I like that it has a USB-C input/output so you can use the battery to charge other devices as well as charge the battery without needing to carry around a large B-mount charger.
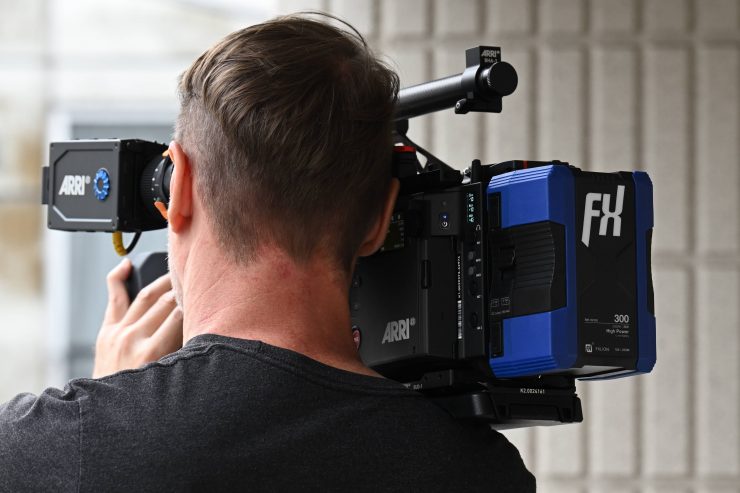
The negative aspects of the battery are that there is no LCD display and that the D-tap outputs are on the left-hand side of the battery and not the right.
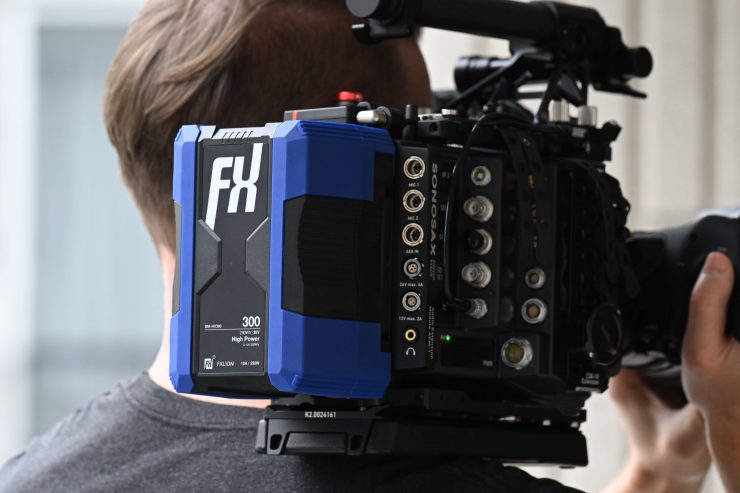
The ALEXA 35 balances really nicely on the shoulder and the Fxlion battery adds a nice amount of weight at the back of the camera, especially if you are using a larger lens. In saying that, all of the B-mount batteries I have tried to date work well when you want to shoulder mount the camera.
The Fxlion BM-HV300 293Wh B-Mount Lithium-Ion Battery will be shipping shortly for $719 USD.
| PRICE | |
| Fxlion BM-HV300 293Wh | $719 USD |
| SWIT HB-A290B 290Wh 28.8V | $789 USD |
| Core SWX Helix Max 275 Lithium-Ion Dual-Voltage Battery | $825 USD |
| bebob B290CINE 14.4/28.8V 294Wh | $975 USD |
| Anton/Bauer Dionic 26V Lithium-Ion Battery (240Wh, B-Mount) | $1,025 USD |
Above you can see how this price compares to the competition.
Internal ND Filters
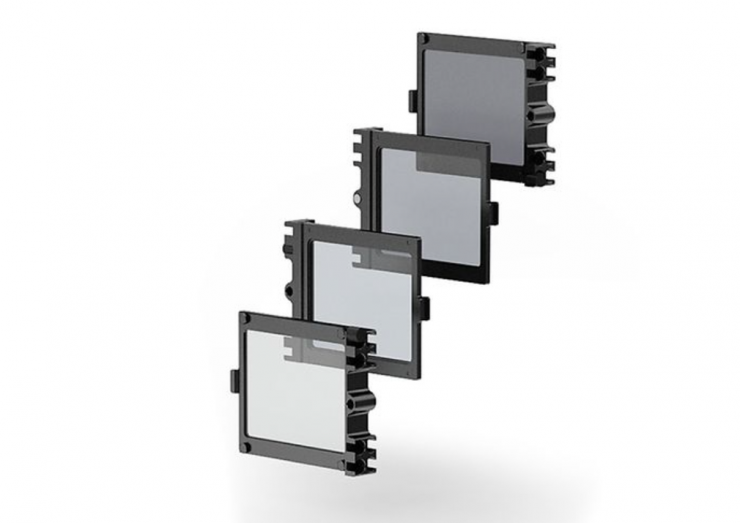
As I have previously mentioned, the ALEXA 35, just like the Mini LF features three internal motorized FSND filters. Here are the filters the Mini LF has:
- 0.6
- 1.2
- 1.8
The FSND filters work really well and it is easy to activate them. I had them set up on User Buttons 5 and 6.
It would have been nice to see even stronger internal ND implemented into the camera. 1.8 is often not enough if you are shooting in bright conditions and you want a very shallow depth of field. I constantly found myself having to add additional ND.
When I asked ARRI if there were discussions to possibly increase the amount of ND in the camera they said that they did look at that closely, but because the camera has a base ISO of 800 they decided to keep the maximum at ND 1.8. On the ALEXA Mini and AMIRA, the maximum was ND 2.1 and not ND 1.8, however, a lot of users complained because they prefer to use increments of 2 stops.
What is nice about the ARRI FSND filters is that they use the exact same glass as the internal filters, so you won’t get any color shifts. I don’t know of any other camera company that has its own ND filters that were made to specifically match the internal ND.
In comparison to IRND filters, which have an uneven spectral behavior, or to an ordinary ND filter, which opens up at about 675 nm, the FSND filters offer a true, even light attenuation over the whole spectrum. This prevents artifacts from infrared wavelengths and the need for additional IR filters.
I must admit that I would have preferred to have seen stronger ND in the camera.
Timecode
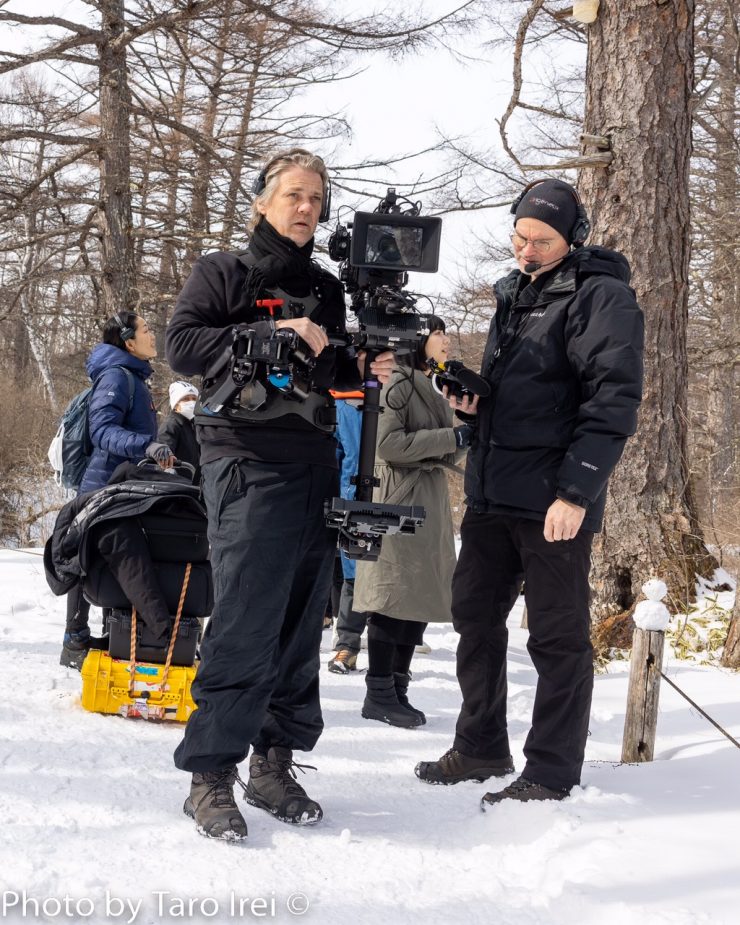
Timecode ensures that each frame of recorded material can be identified with a unique value and synchronized with the appropriate media, such as audio or the second camera in a multicamera application. In conjunction with other metadata, such as reel names, all recorded media retains its unique identity. There are a few different ways of doing timecode on the ALEXA 35:
Timecode Run Mode
Rec Run timecode is often used on single camera productions that are either MOS or use a dumb slate to synchronize picture and sound. Rec Run timecode guarantees continuous timecode on all recorded data. The timecode increments only during recording, by one frame for each image generated by the sensor. Rec Run timecode also works with over- and undercranking.
Free Run
Free Run timecode is often used on multi-camera productions with sync sound, picture/sound timecode match and allows for easy syncing in post.
The camera can be set to timecode mode Jam Sync, in which it samples the timecode value once from the timecode connector and then continues counting based on its own high precision crystal clock. The timecode source can be disconnected from the camera after jamming in Jam Sync mode. This mode ensures stable timecode with an offset of less than one frame for each eight hours, after which the camera has to be re-jammed. Alternatively, the camera can be set to timecode mode Regen (regenerate).
Free Run timecode is only possible if the sensor frame rate matches the project rate. If the camera is over- or undercranking, the timecode frame rate will no longer match the sensor frame rate, and timecode values would either be duplicated or dropped. To prevent this, the camera will
automatically switch to run mode Rec Run when the sensor frame rate is changed. When you set the sensor frame rate back to equal the project frame rate, the timecode will recall the previous free run timecode.
Regen mode
In Regen mode, the camera uses the timecode value of the external timecode source. This ensures correct timecode for an infinite duration, but the timecode source must remain connected to the camera. Please note that while recording, the camera ignores external timecode and uses its internal clock to avoid potential timecode jumps, which can occur due to connection problems such as a faulty timecode cable for example.
Synchronization
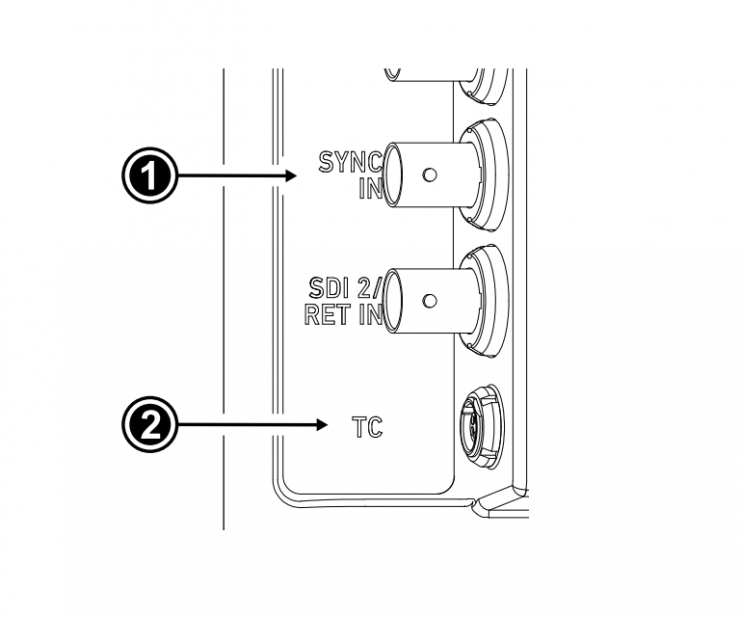
The camera’s sensor and SDI outputs can be synchronized to either a genlock signal (a tri-level HD signal or an analog black burst signal) present at the BNC SYNC IN connector (1) or a timecode signal present at the 5-pin LEMO TC connector (2). The camera’s sensor needs to run at equal or double the frame rate of the reference signal to establish synchronization.
Simultaneous use of the timecode mode Jam-sync and Genlock Sync is not supported.
The Sync Shift setting can be used to apply an offset to the reference signal at the input. The minimum step size is 52 ns and the maximum correction is +/- 20 ms (= 384000 steps), depending on the sensor frame rate.
Mirroring the Sensor Image
You can mirror the sensor image in horizontal and vertical directions.
Horizontal mirroring is applied on all monitoring paths and internally recorded material. Vertical mirroring is only applied to the monitoring outputs; internally recorded material is not vertically flipped, but the information is written into metadata.
Lens Data
The Lens Data System (LDS) allows ARRI cameras and accessories to identify connected lenses and exchange dynamic lens data reflecting the current lens settings. It works with cine lenses using ARRI LDS or LDS-2 technology, lenses using Cooke /i technology and even cine lenses without lens data capabilities. LDS also offers basic support for most B4 or PL ENG lenses and Canon photo lenses when used with the appropriate mount. Available lens information can be displayed live on lens control units like the Hi-5 or WCU-4, in the camera’s viewfinder and on the monitoring outputs. It is sent with very low latency via Ethernet for use in mixed reality/virtual production environments and embedded as ancillary data in the SDI output. Post production benefits from frame accurate dynamic (per frame) and static (per clip) lens data in all original camera files.
Most ARRI lenses following the ARRI/Zeiss Ultra Prime LDS have built-in LDS functionality. This offers basic lens information and accurate lens tables for the Focus, Iris, and Zoom axis (if applicable). LDS lenses have integrated encoders for each axis and therefore deliver lens metadata even if the lens is adjusted manually. LDS-2 is the latest generation of the lens data system. It was introduced with the LPL mount and ARRI Signature Prime and Signature Zoom lenses. LDS-2 offers more bandwidth, higher precision and faster communication. LDS-2 requires no calibration turn to the end stops of each lens ring to deliver data. LDS-2 is prepared for future applications and is being licensed to other lens and camera manufacturers.
Many lenses, cameras, and lens control system manufacturers rely on /i Technology, which was designed and developed by Cooke Optics as an open lens metadata protocol. Every ALEXA camera with an LDS capable lens mount, including the original ALEXA “Classic”, supports basic /i Technology. Please note that some older Cooke lenses may be running on outdated firmware. This is likely to cause incompatibilities with the LDS. Please contact Cooke Optics directly for more information about checking the lens firmware version and available updates.
To get the FIZ information for a lens without lens data capabilities, the LDS can derive the lens ring positions based on end-to-end calibrated lens motor positions and a lens file that is used as a look up table. These files are available from the Lens Data Archive (LDA), a local library of lens files, which can also be extended by the user. The LDA exists in ARRI cameras or accessories like the UMC-4, RIA-1, or cforce mini RF or in the ECS sync app for iOS. To create a new lens file, you need a camera, lens motors, a HI-5 or WCU-4 wireless lens control unit and the lens. First, the motors are calibrated to the end stops of their lens rings. Then, axis by axis, the lens control is used to drive the lens to each marking on the lens barrel and to set markers for the corresponding motor (encoder) position. Finally, the lens file can be stored by e.g. model, focal length and optionally lens serial number. Programming a lens file takes a while, but is time well spent, as it can be shared between LDAs and therefore only needs to be done once.
Certain non-LDS lenses can be retrofit with an ARRI Lens Data Mount (LDM-2), which is programmed with the lens file. Using a Lens Data Mount instead of the LDA is more practical where one lens may be used on many cameras, such as a camera rental operation. It also saves time in production as the LDS automatically uses the file when the lens is attached. The LDM-2 is available for Angénieux Optimo 24-290, Angénieux 17-102, Angénieux 25-250, Cooke 25-250, Cooke 18-100 and Zeiss Apo Tessar 300.
Lens data can be displayed as camera status overlays in the viewfinder and the SDI outputs. Single overlays for focus distance, iris and focal length are displayed. The camera can be set to display either metric or imperial readings.
Optional Modules
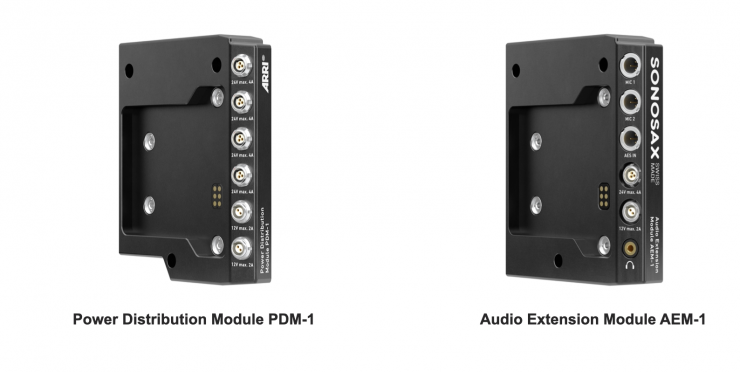
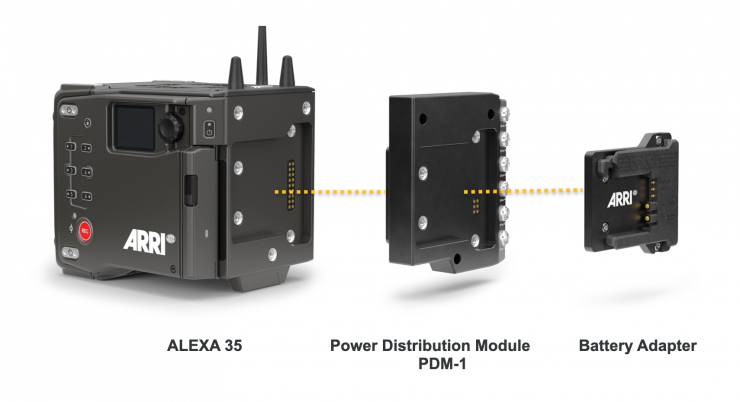
If you need more power outputs or better onboard audio capabilities, ARRI now has a couple of modules that can attach directly on the back between the camera and the B-mount battery plate.
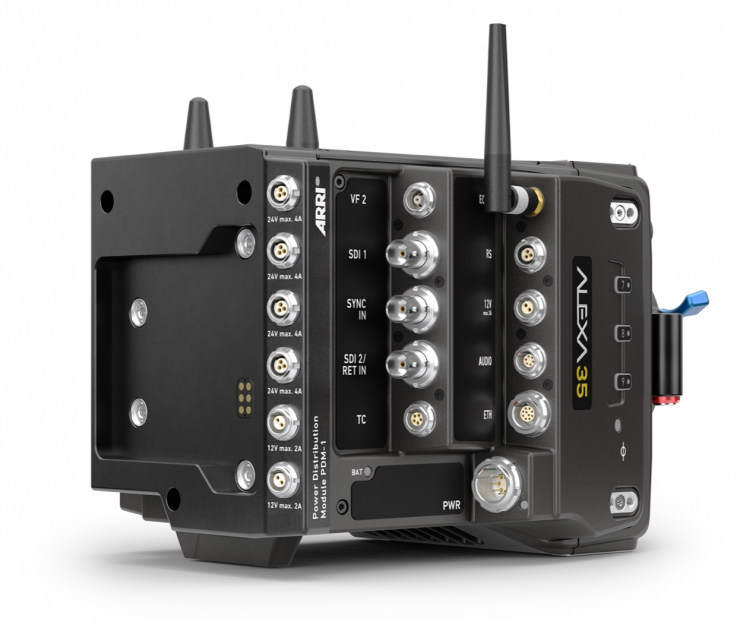
The first is the PDM-1 Power Distribution Module. This is a streamlined module that is internally powered so it requires no cables or extra brackets to use. It is nice and compact and streamlined and it adds the following power outputs:
- 4x Regulated 24 V power out
- 2x Regulated 12 V power out
- 1x 12 V D-Tap power out underneath
- Twist
- with a recessed positive pin
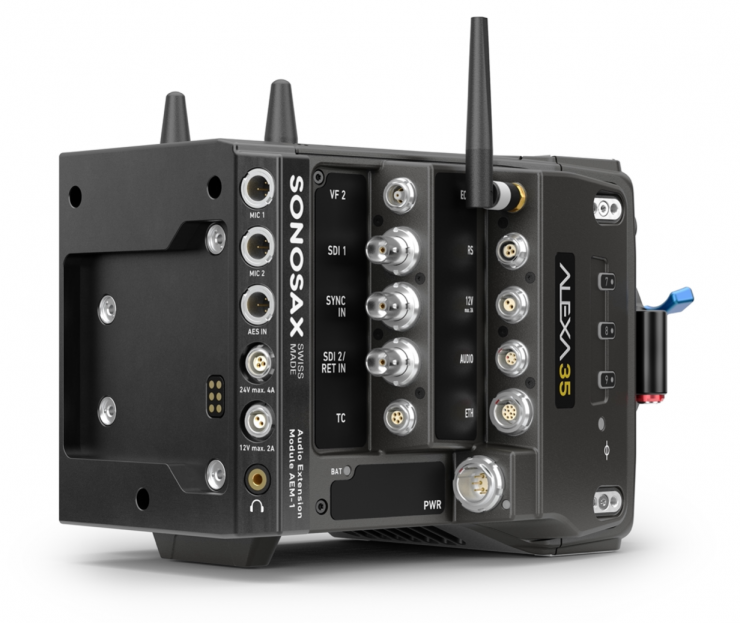
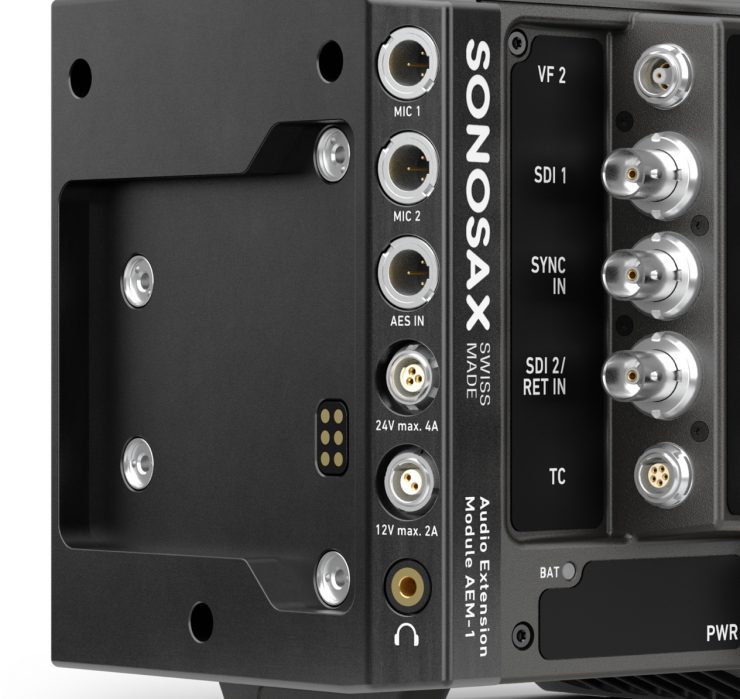
The second module is the AEM-1 Audio Extension Module ($2,170 USD). This is made specifically for ARRI by Sonosax. This adds a lot more audio capabilities to the ALEXA 35. Just like the PDM-1 Power Distribution Module, it is a streamlined module that is internally powered so it requires no cables or extra brackets to use.
You can only use one module at a time. You can’t use both the PDM-1 Power Distribution Module and AEM-1 Audio Extension Module at once due to an existing patent held by another company.
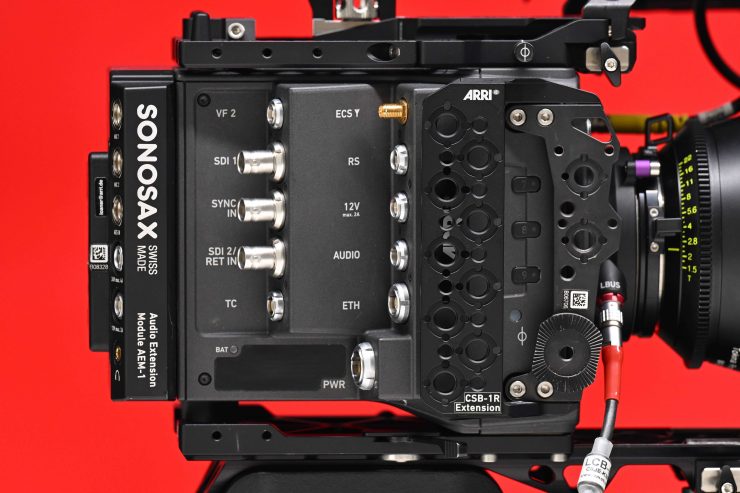
The AEM-1 features the following:
- 2x Mini-XLR for analog MIC/LINE in with optional 48 V Phantom power for MIC in, and Phase reversal, adjustable low-cut filter, gain and limiter
- 1x Mini-XLR for AES stereo digital audio in
- 1x Headphones
- 1x Regulated 12V accessory power
- 1x Regulated 24V accessory power
- Dynamic range: 129 dB (MIC), 135 dB (LINE)
- Total Harmonic Distortion (THD): < 0.001%
- Best studio audio quality to match the best image quality
The user interface on the AEM-1 Audio Extension Module is fairly straightforward and easy to use once you get the hang of it. My biggest complaint is that you don’t get a manual for it and I couldn’t find one online either.
The AEM-1 displays the audio levels and the values you have set for input 1 and input 2.
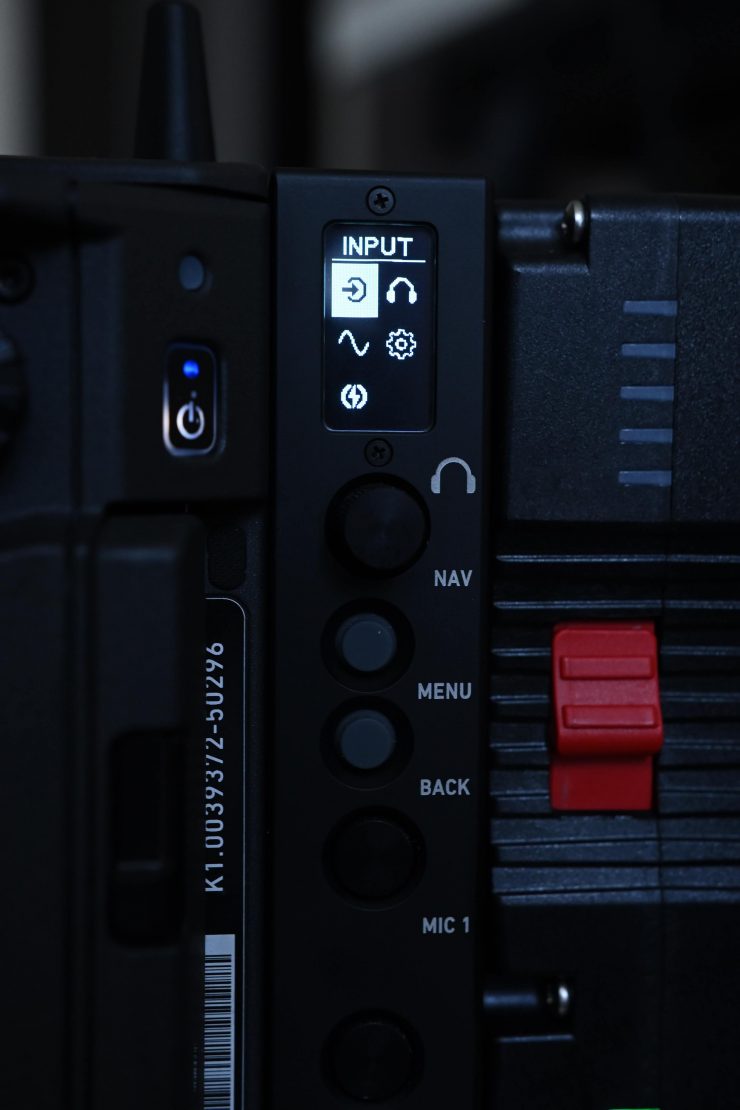
When you press the MENU button you get a graphic user interface and here you can go into the following sections:
- INPUT
- PHONE (Headphones)
- TONE
- SETUP
- POWER
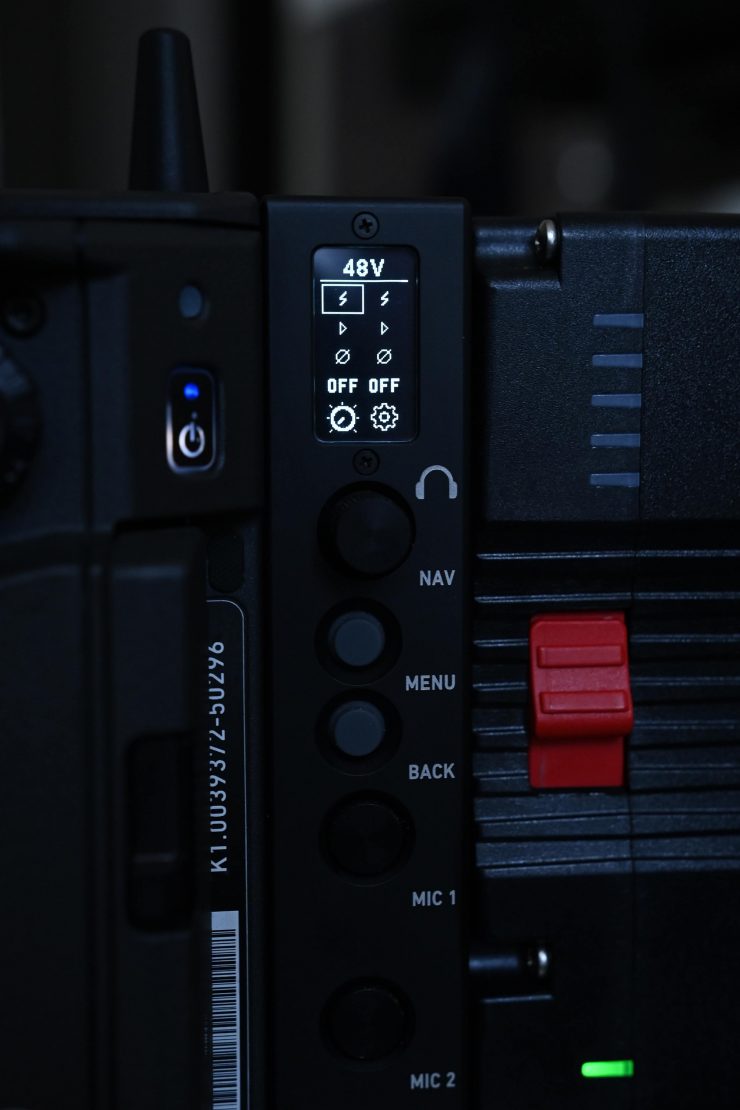
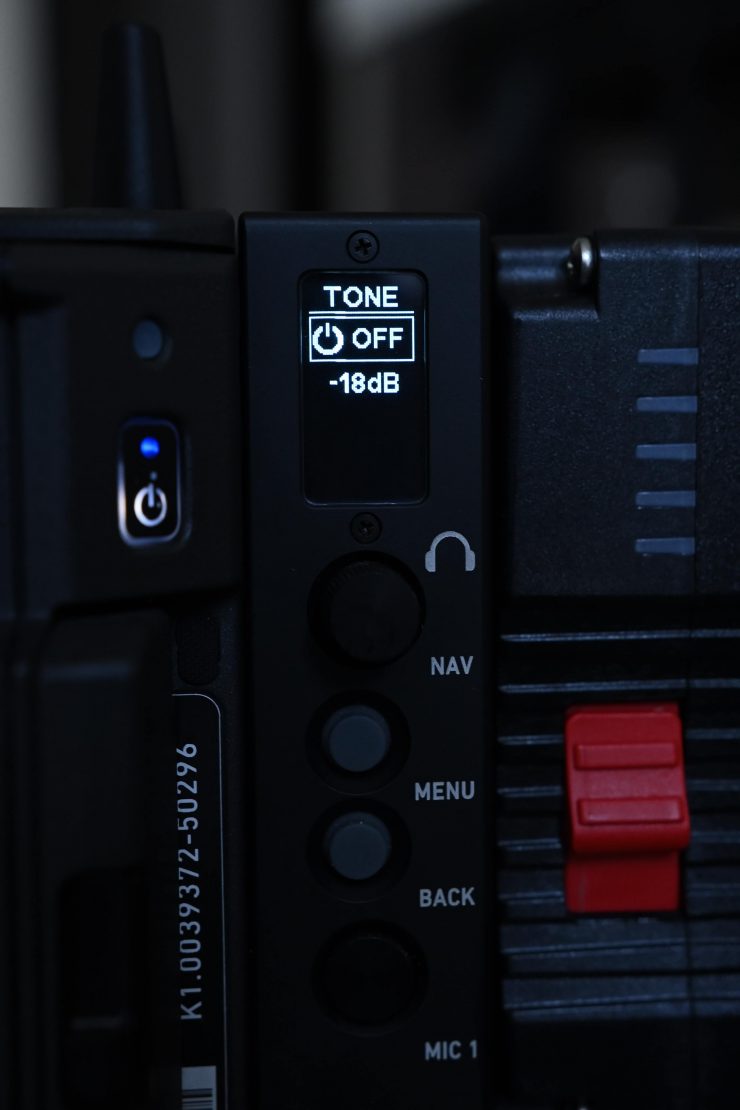
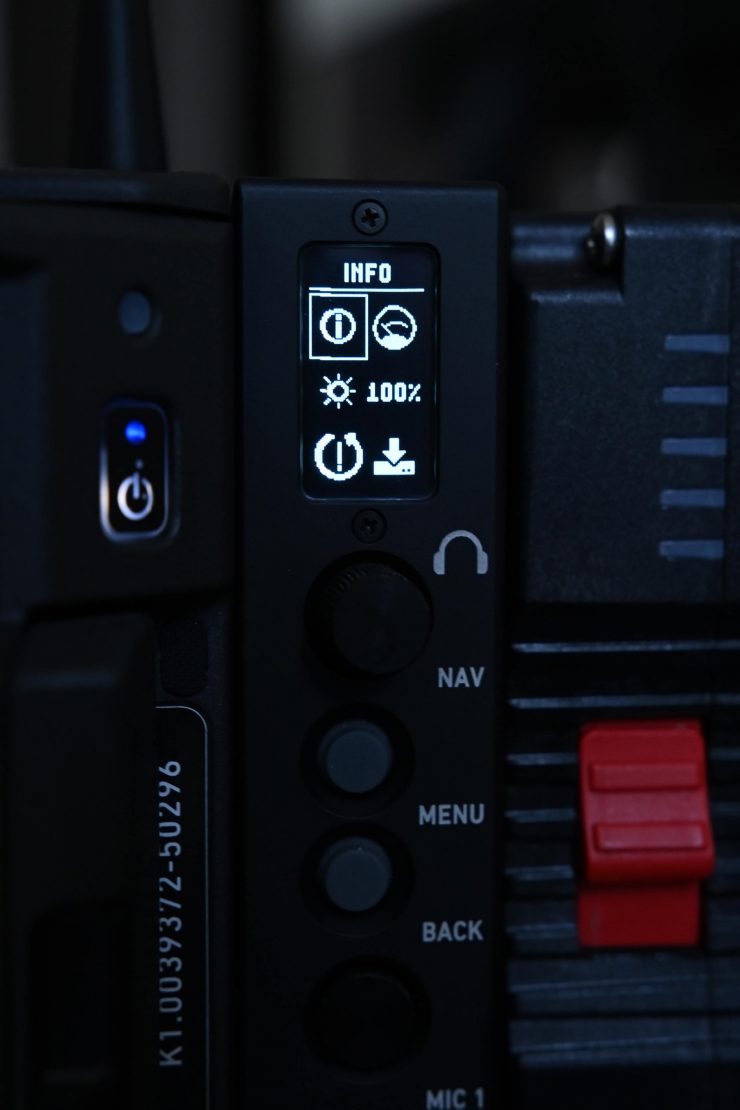
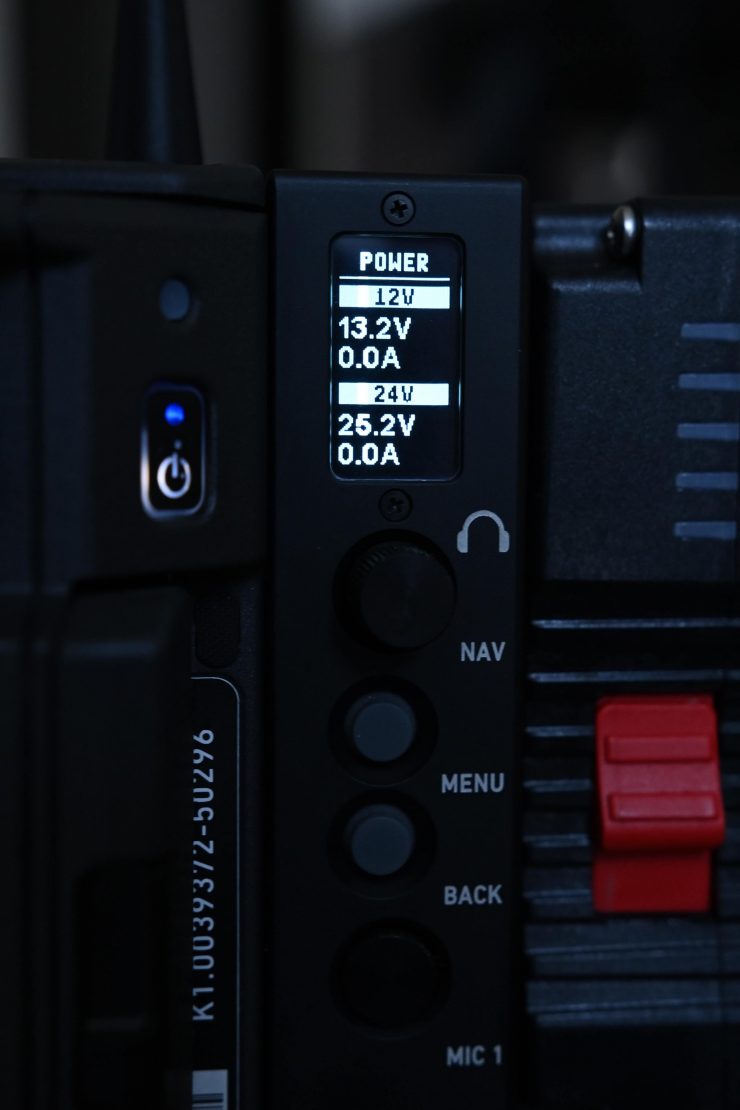
You can go between and navigate the menu and settings by using a recessed NAV button. You press on it and it pops out. When you want to change a selection you press the MENU button again and then that item is highlighted. You then use the NAV button again to toggle the settings.
When you are done using it you just press on it again and it pops back in.
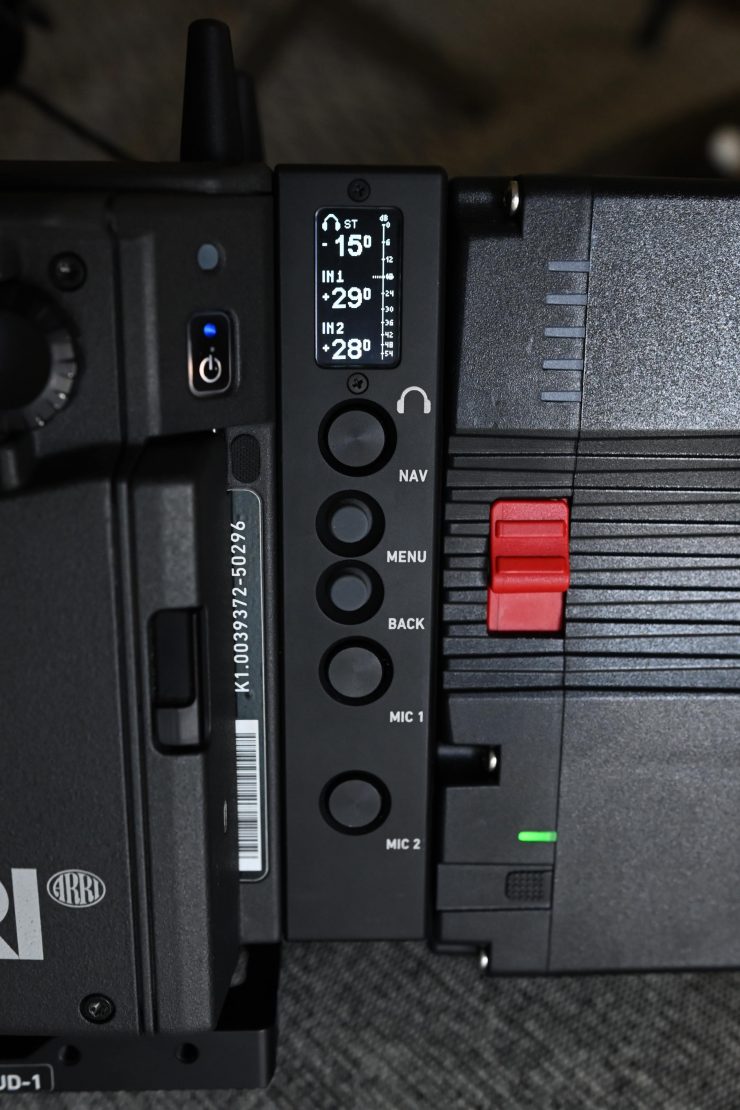
There are also two individual-level controls for input 1 and input 2.
What is also nice is that there are options that allow you to just monitor certain channels. Here are the options available:
- IN 1
- IN 2
- MONO
- ST (Stereo)
- REV ST (Reverse Stereo)
- M/S
I was very interested in the AEM-1 Audio Extension Module because with it looking increasingly more unlikely that we will ever see a new version of the AMIRA, the ALEXA 35 and the audio module may be the best ARRI solution for doing your own audio or working in small crews without a sound recordist.
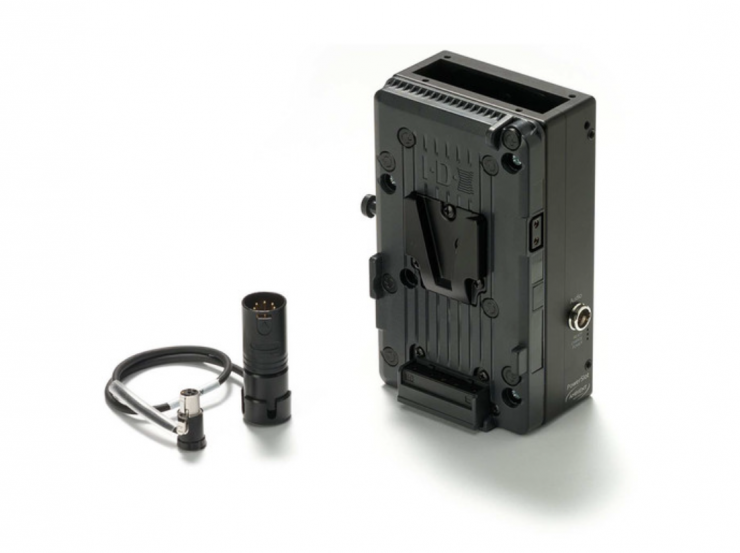
On my AMIRA I can easily record and adjust four channels of audio. I use an ARRI Ambient Power Slot for AMIRA (V-Mount) with a Lectrosonics SRc Dual-Channel Slot-Mount ENG Receiver inside it. This is an excellent combination and it has served me well over many years.
So how do the ALEXA 35 and AEM-1 Audio Extension Module compare?
Well, while it works well and the audio quality is great, it isn’t as intuitive or as easy to use as the audio options that are available on the AMIRA. I missed the simple aspect of just being able to plug in full-size XLR connectors straight into the body and being able to assign a Solo monitoring function to a user button where you can toggle between what channel you want to listen to. In my honest opinion, the AMIRA is still a far better camera for audio if you are a solo operator or in situations where you are doing your own audio.
The quality of the pre-amps is exceptionally good and the AEM-1 allows you to capture very high-quality audio. From what I understand, the pre-amps used in the AEM-1 are the same ones found in Sonosax’s high-end mixers.
To use the AEM-1 Audio Extension Module you will need to find some cables because it doesn’t come with any. The AEM-1 requires female mini XLR to female XLR cables which are not the easiest to come by. ARRI should really include a set with the AEM-1, or at the very least, sell them. I eventually tracked some down through Amazon, although they tend to come in lengths that are too long to use with the ALEXA 35.
The other small issue with mini XLR cables is that they don’t come in angled versions. This means that they do stick out of the side of the AEM-1 and could potentially get snagged on something and break. When using certain batteries, the mini XLR cables may end up obscuring the P-tap (D-tap) port.
Arguably it would have been nice to have seen an audio module with full-size XLR inputs, but I think because ARRI’s design brief was to keep components size to a minimum, mini XLR was the only real viable option.
Audio
If you don’t need the advanced audio capabilities of the AEM-1 Audio Extension Module, then you can use the single 6-pin AUDIO connector that is the same one that is found on the MINI LF.
This 6-pin AUDIO connector allows the ALEXA 35 to provide 12V accessory power to external pre-amplifiers or wireless audio receivers. Those accessories can use just one cable to transport audio and power, leaving the other accessory power outputs on the camera still available for other uses.
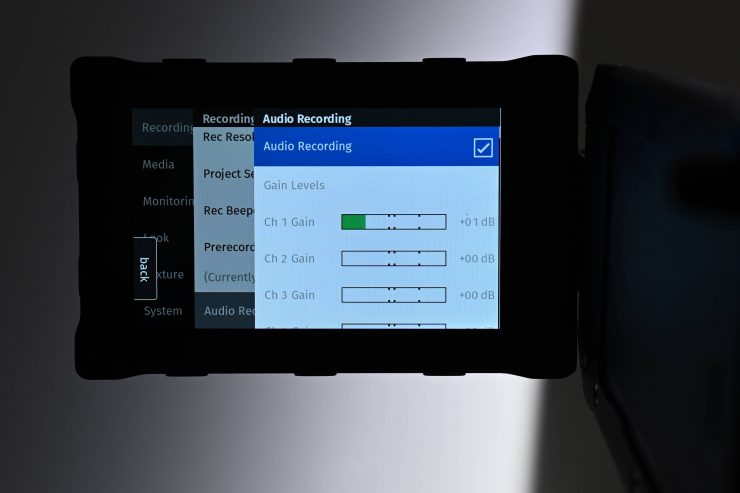
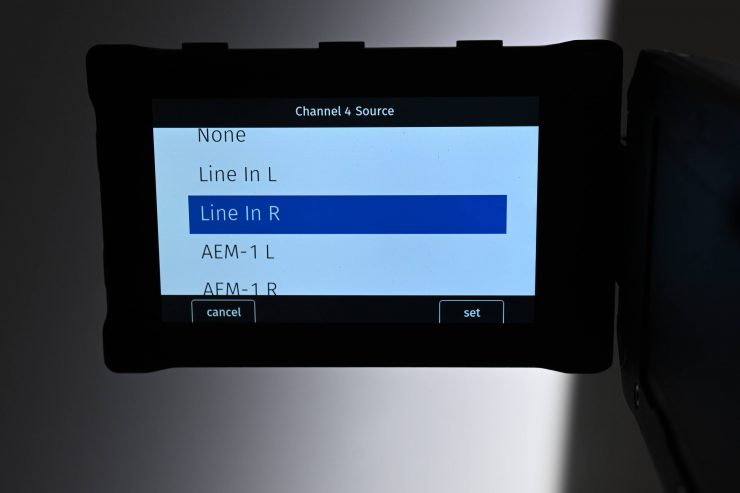
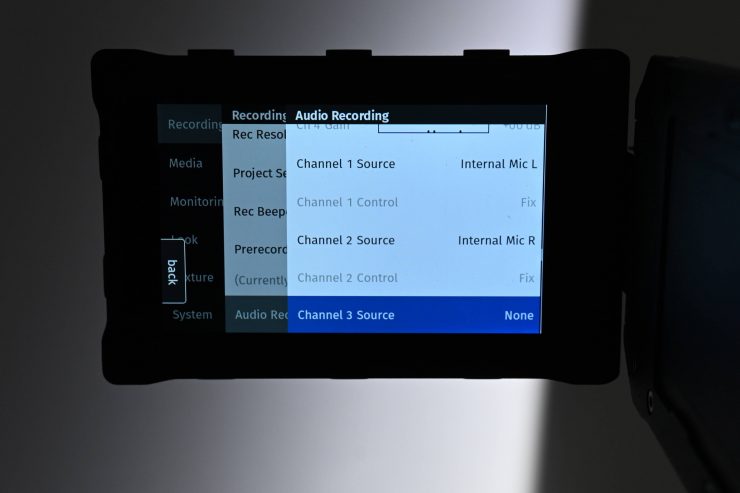
Just like the ALEXA Mini LF, the ALEXA 35 can record up to four audio channels. You can choose to record the following on any of the four tracks:
- NONE
- Line in L
- Line in R
- AEM-1 L*
- AEM-1 R*
- Internal Mic L
- Internal Mic R
*These can only be used if you have the AEM-1 Audio Extension Module connected to the camera.
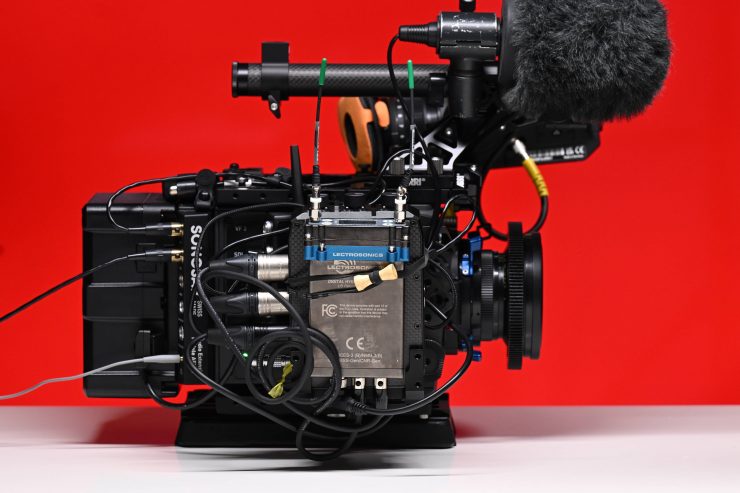
I tested recording to four channels by using both the AEM-1 with microphone channels assigned to Ch1 and Ch2 and the Beachtek DXA-ALEXA with two of its inputs assigned to channels 3 and 4.
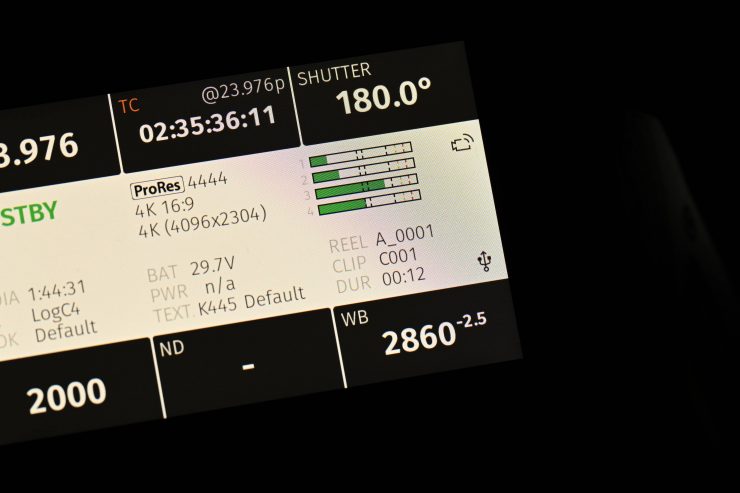
The camera displays four channels of audio and you are able to choose what channels to monitor in the headphone routing menu. In SUP 1.1 ARRI added the Solo function which alows you to assign a user button that toggles through all of the audio channels so you can listen to the one that you want. This is a feature I use all of the time on the Amira.
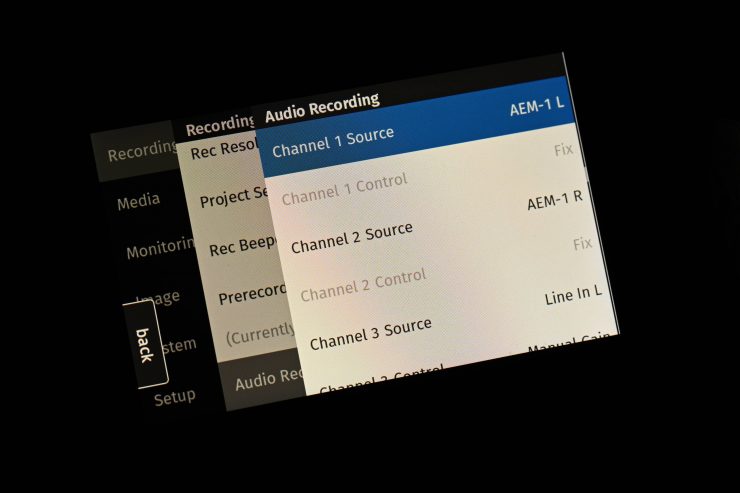
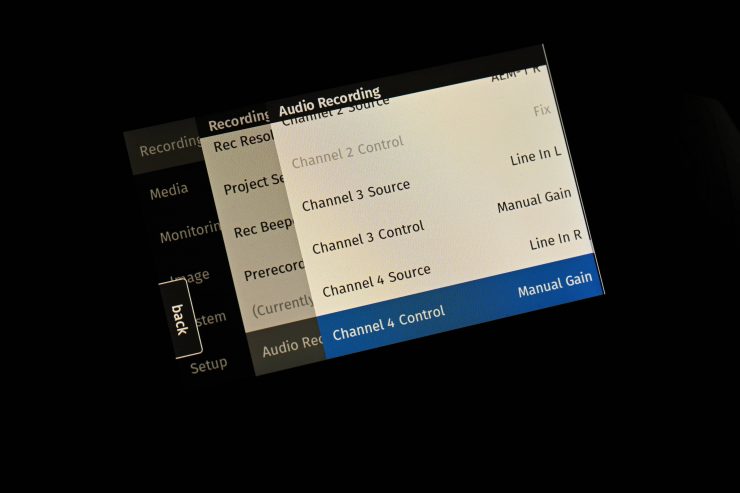
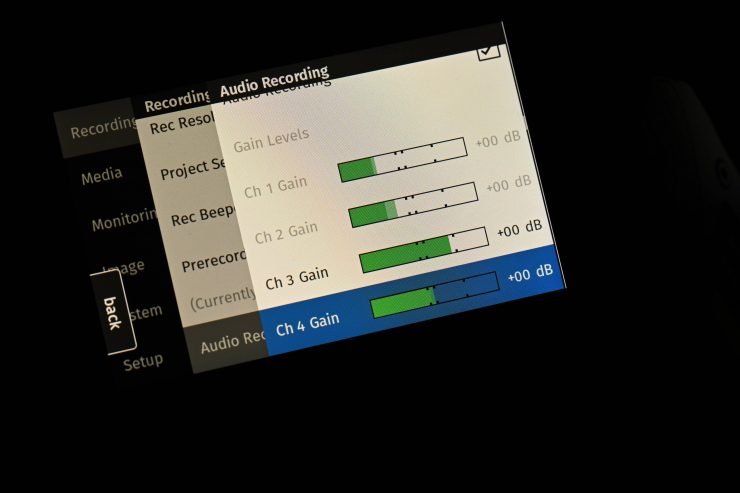
In the Recording Menu under Audio Recording, you will find options for assigning audio channels and selecting items such as Manual Gain or Auto. You need to be aware that if you are using the AEM-1 you can’t set any of the levels or make any changes through the Alexa 35’s menu. They have to be done on the AEM-1 itself.

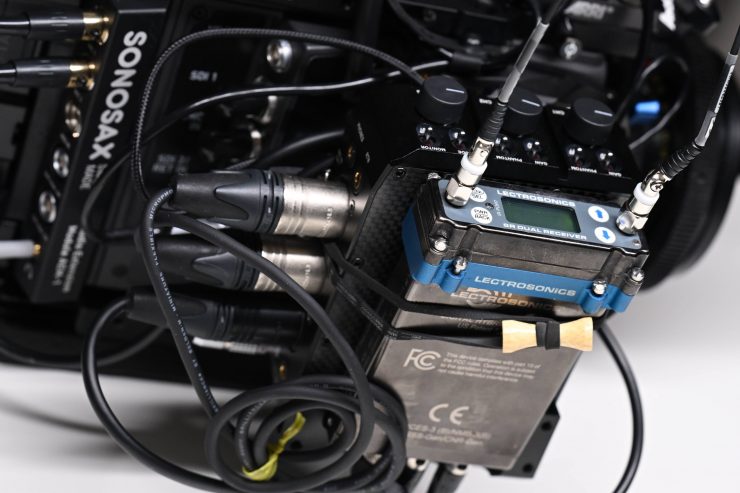
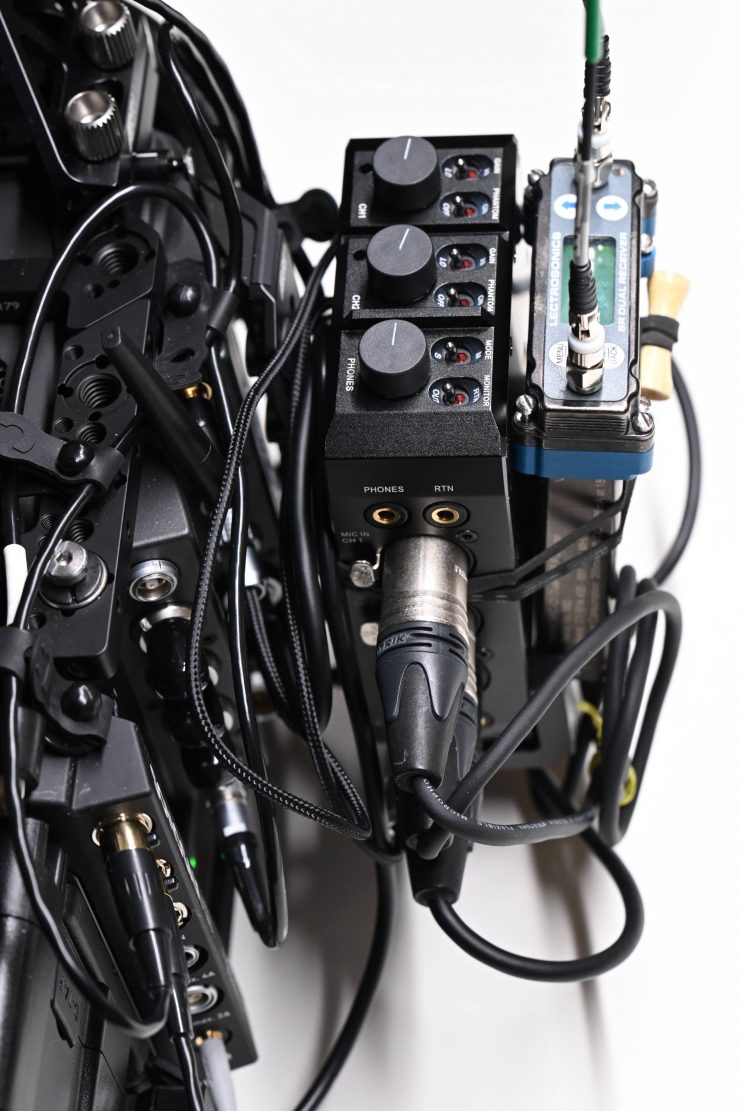
The issue you will face if you want to record four channels of audio yourself without inputting a feed from a mixer is that you can end up with a real spaghetti mess of cables and the camera starts to turn into a bit of a Frankenrig. Yes, my example may be a little extreme, as I am also using a Lectrosonics SRC-C1 Dual UHF Receiver that needs to be powered and has two cables attached to it, but it is a good indication of what is required to do this.
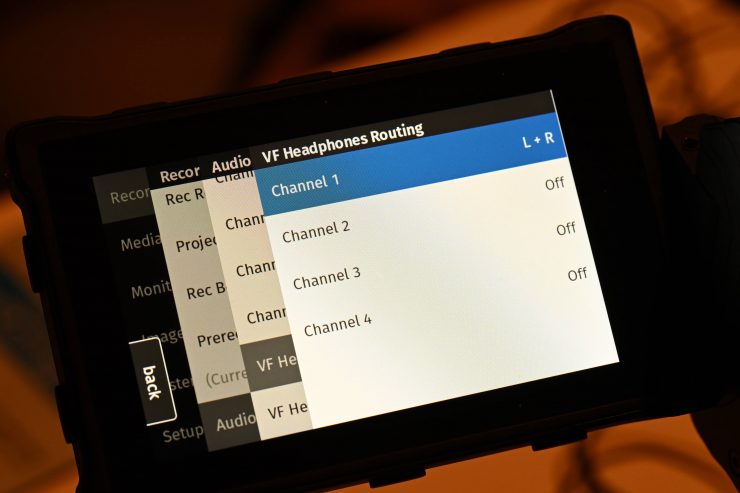
MVF-2 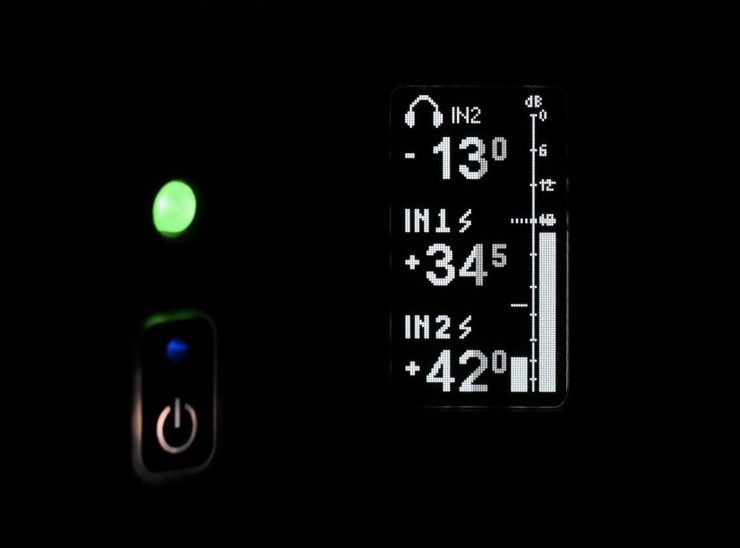
AEM-1
Now, the audio monitoring quality through the headphone output on the MVF-2 viewfinder is ok, but it is far better using the headphone out from the AEM-1. The trouble with this is that you can only monitor the audio from the AEM-1 if you do this. To be able to switch and monitor all four channels you need to use the headphone jack on the MVF-2.
The ALEXA 35 is certainly a better option than the Mini LF if you need to record your own audio. As an AMIRA owner, it is very easy to capture your own audio in-camera. While it can still be done on the ALEXA 35 it requires additional hardware and you need to go into the menus to make changes to audio settings. If you do use the optional AEM-1 Audio Extension Module and you can also assign Audio Increase and Audio Decrease to User Buttons which can help.
Built-in Microphones
Because the camera has built-in microphones there is no need to attach an additional scratch microphone. It is nice to have scratch microphones built into the camera, as a good proportion of users will be recording sound separately when using this camera. The microphones are dual-mono and they record at different fixed gains.

ARRI does have a little microphone icon that you will see in the viewfinder if the internal scratch microphones have been activated.
The audio recording level of the internal microphones is fixed, with the left microphone (channel 3) using a +18dB higher gain than the right microphone in order to cover a wide range of audio levels.
This microphone quality is ok, but it is not a substitute for having a decent on-camera microphone. In ARRI’s defense, they were designed as a scratch recording device for syncing only.
The two microphones in the front are protected by Gore-Tex membranes that let sound in but protect from water ingression.
New Accessories
ARRI has come up with a vast array of new accessories that were specifically designed for the ALEXA 35. A lot of these accessories were based on feedback ARRI got about Mini & Mini LF accessories.
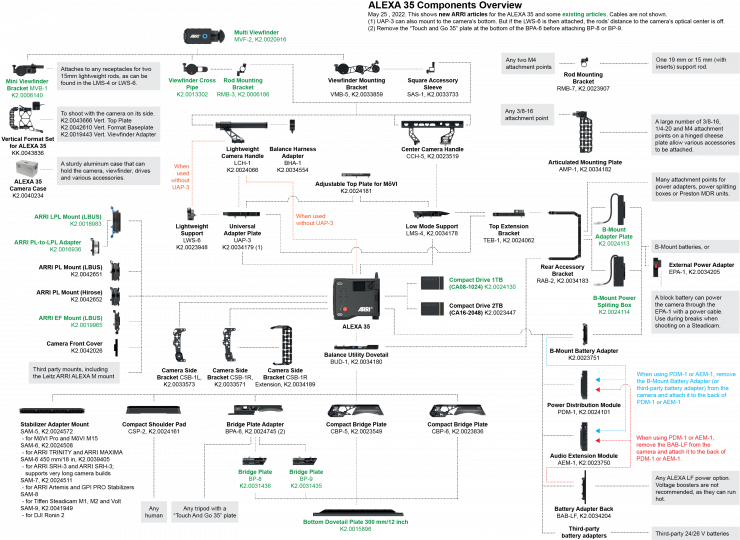
These new accessories were designed to not only expand the camera’s capabilities but also to help maximize speed and flexibility on set. The bad news is, that none of these new accessories are compatible with the ALEXA Mini or Mini LF.
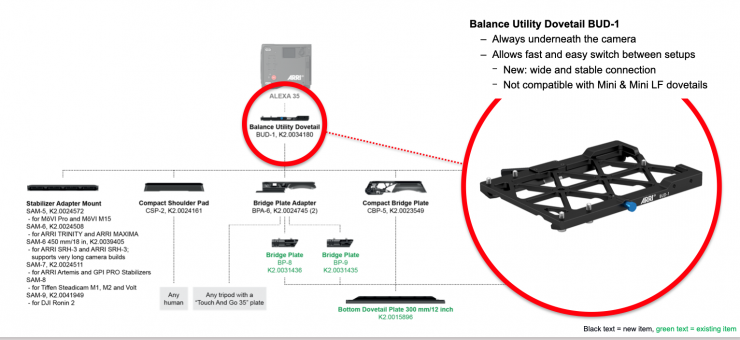
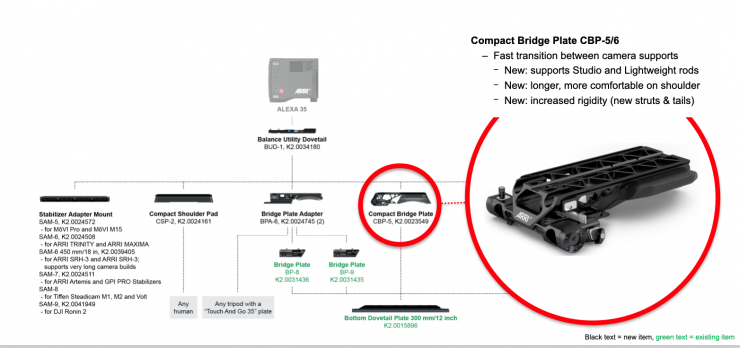
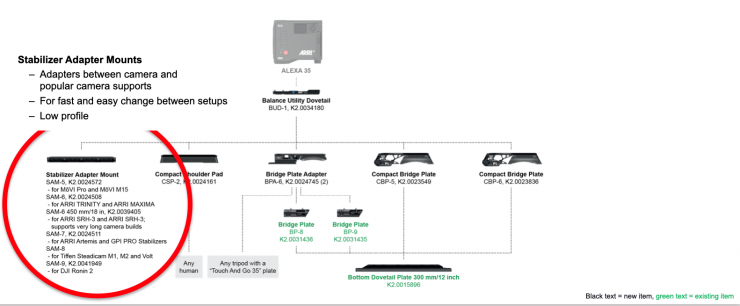
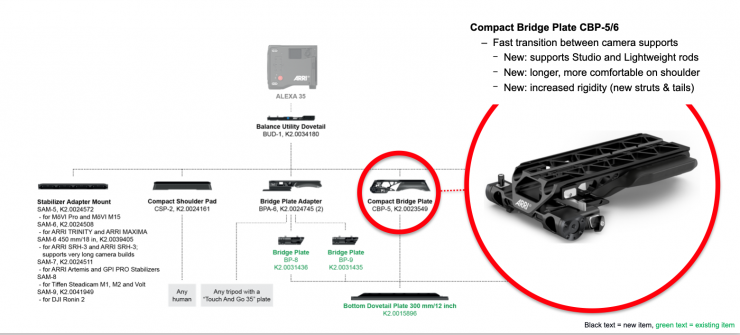
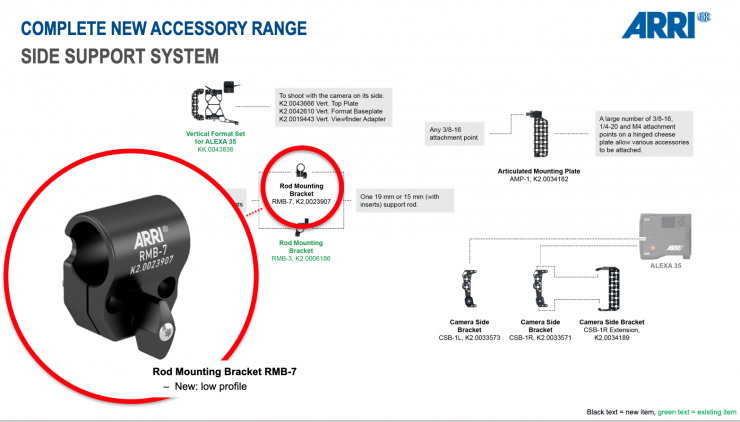
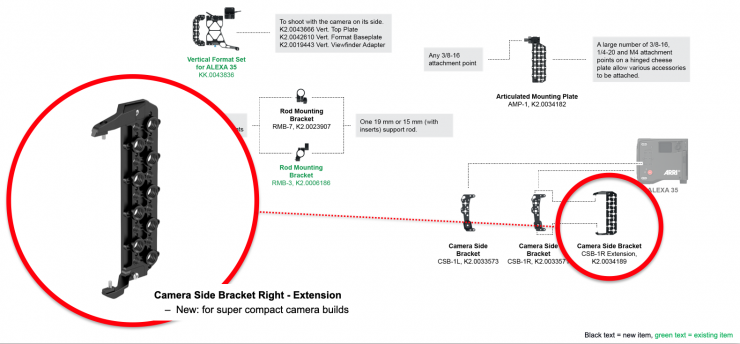
Future Accessories
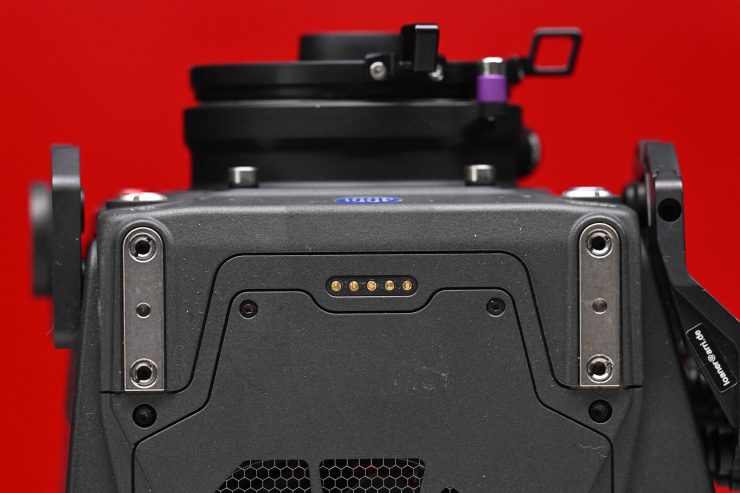
On top of the camera, there are some Pogo Pins and these are meant for future accessories that will be announced at a later stage.
You don’t have to worry about them being exposed (they don’t feature any type of cover), because unless a properly coded accessory is attached they remain inactive with no power, or signal being passed through.
ALEXA 35 Set Options
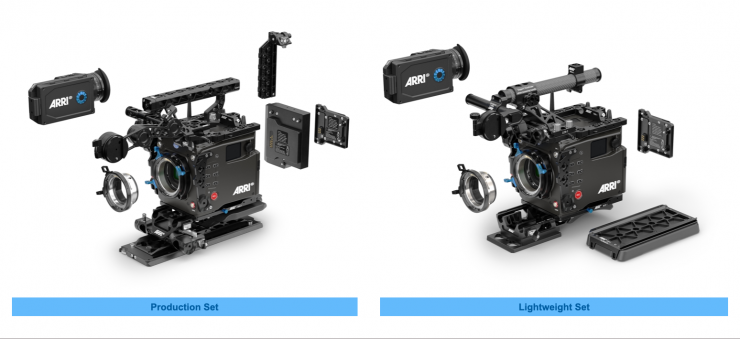
Along with buying the camera and accessories separately, ARRI will also be selling the ALEXA 35 in two different set configurations.
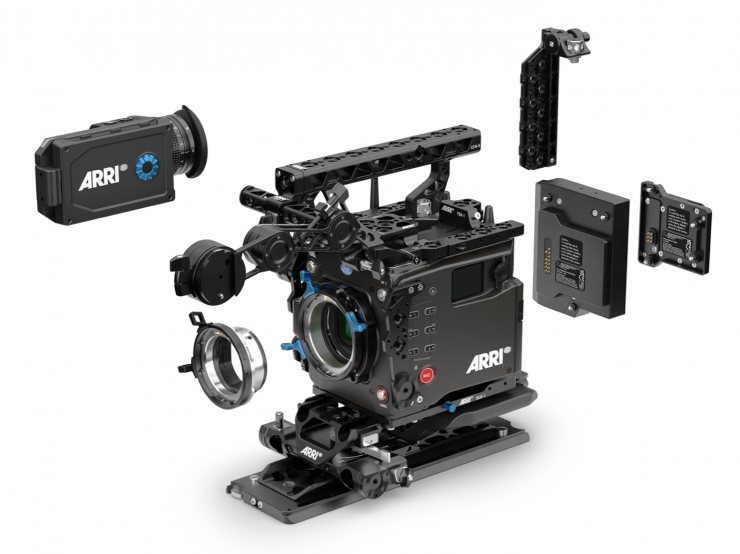
The first is the Production Set which gives you:
- K1.0039373 1x ALEXA 35 camera body
- 10.0043678 1x ALEXA 35 Cine License
- K2.0018983 1x ARRI LPL Mount (LBUS)
- K2.0016936 1x ARRI PL-to-LPL Adapter
- K2.0034180 1x Balance Utility Dovetail BUD-1
- K2.0023751 1x B-Mount Battery Adapter
- K2.0020916 1x Multi Viewfinder MVF-2
- K2.0042857 2x Cable VF Right Angle (0.5m/1.5ft)
- K2.75007.0 1x AMIRA Power Cable Straight 2m/6.6in KC-50
- K2.0024101 1x Power Distribution Module PDM-1
- KK.0041533 1x Production Support Set – Top
- K2.0034178 1x Low Mode Support LMS-4
- K2.0024062 1x Top Extension Bracket TEB-1
- K2.0023519 1x Center Camera Handle CCH-5
- K2.0033733 1x Square Accessory Sleeve SAS-1
- K2.0033859 1x Viewfinder Mounting Bracket VMB-5
- KK.0041534 1x Production Support Set – Side
- K2.0033571 1x Camera Side Bracket CSB-1R
- K2.0033573 1x Camera Side Bracket CSB-1L
- K2.0034189 1x Camera Side Bracket CSB-1R Extension
- K2.0023907 1x Rod Mounting Bracket RMB-7
- K2.0034182 1x Articulated Mounting Plate AMP-1
- KK.0041535 1x Production Support Set – Bottom (19mm)
- K2.0023549 1x Compact Bridge Plate CBP-5 (19mm)
- K2.0015896 1x Bottom Dovetail Plate 300mm/12in
Note: This set does not include recording media, media dock/reader, batteries or lenses, which should be ordered separately.
There is also an ALEXA 35 Production Set (15mm Studio) –this is the same as above, but it comes with 15mm studio CBP-6
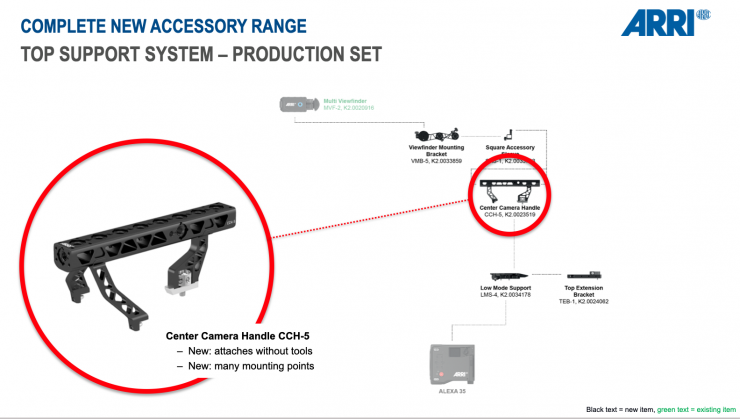
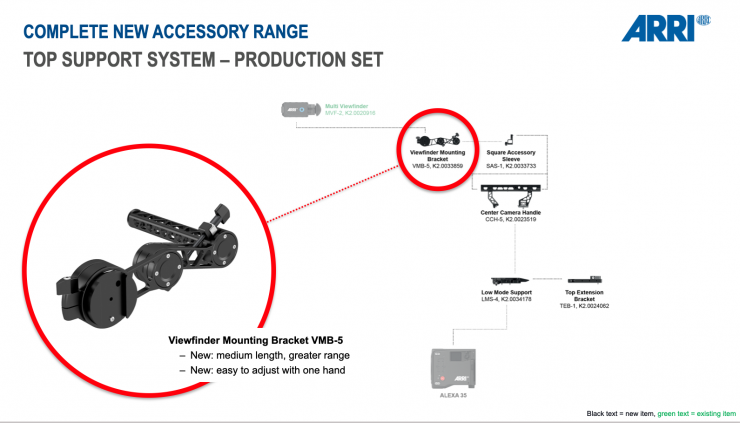
There are also additional sets of accessories that are meant to complement the Production Set.
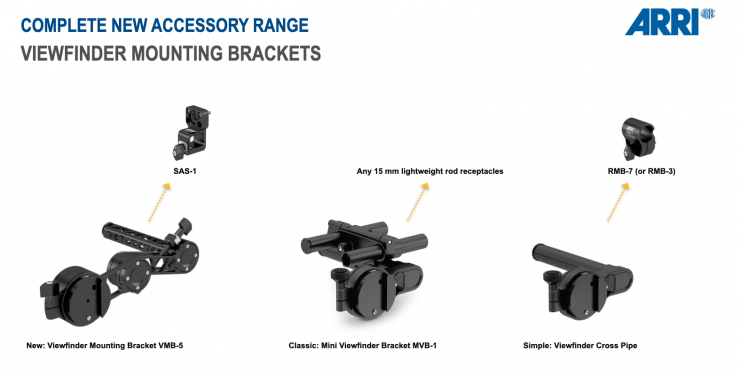
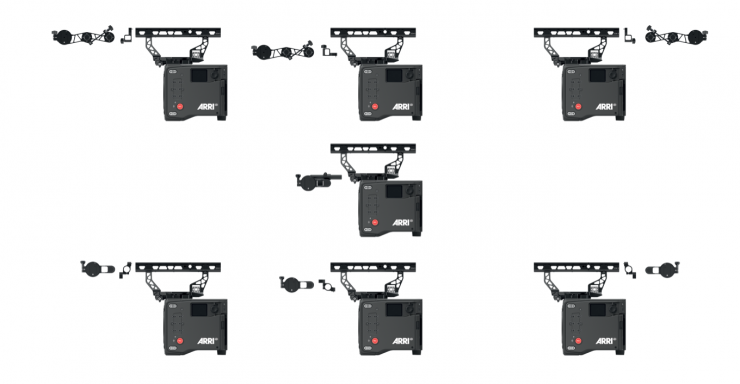
ARRI also has new viewfinder mounting options available.
I know this all sounds. a little confusing, but that’s because there are so many accessories and options that are available.
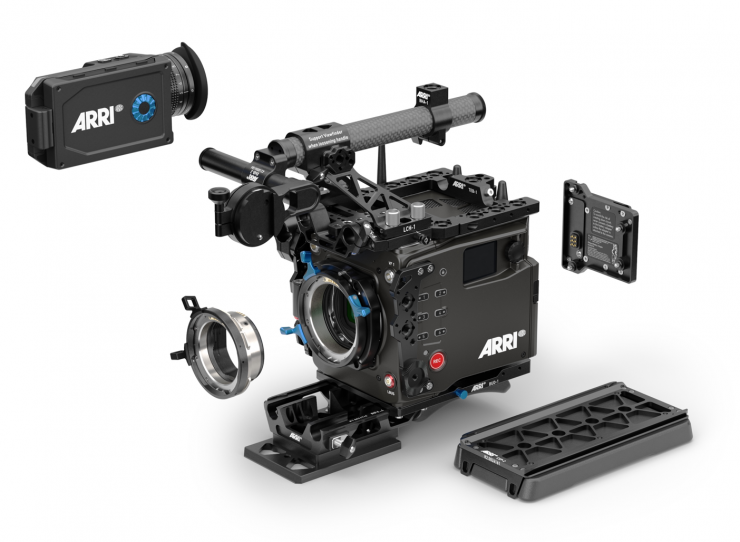
The second is the Lightweight Set which includes:
- K1.0039373 1x ALEXA 35 camera body
- 10.0043678 1x ALEXA 35 Cine License
- K2.0018983 1x ARRI LPL Mount (LBUS)
- K2.0016936 1x ARRI PL-to-LPL Adapter
- K2.0034180 1x Balance Utility Dovetail BUD-1
- K2.0023751 1x B-Mount Battery Adapter
- K2.0020916 1x Multi Viewfinder MVF-2
- K2.0042857 2x Cable VF Right Angle (0.5m/1.5ft)
- K2.75007.0 1x ALEXA Power Cable Straight 2m/6.6in KC-50
- KK.0041537 1x Lightweight Support Set – Top
- K2.0034179 1x Universal Adapter Plate UAP-3
- K2.0024062 1x Top Extension Bracket TEB-1
- K2.0024066 1x Lightweight Camera Handle LCH-1
- K2.0034554 1x Balance Harness Adapter BHA-1
- K2.0023948 1x Lightweight Support LWS-6
- K2.0006186 1x Rod Mounting Bracket RMB-3
- K2.0013302 1x Viewfinder Cross Pipe
- KK.0041538 1x Lightweight Support Set – Side
- K2.0033571 1x Camera Side Bracket CSB-1R
- K2.0033573 1x Camera Side Bracket CSB-1L
- K2.0034189 1x Camera Side Bracket CSB-1R Extension
- K2.0023907 1x Rod Mounting Bracket RMB-7
- KK.0041539 1x Lightweight Support Set – Bottom
- K2.0024745 1x Bridge Plate Adapter BPA-6
- K2.0024161 1x Compact Shoulder Pad CSP-2
Note: This set does not include recording media, media dock/reader, batteries or lenses, which should be ordered separately.
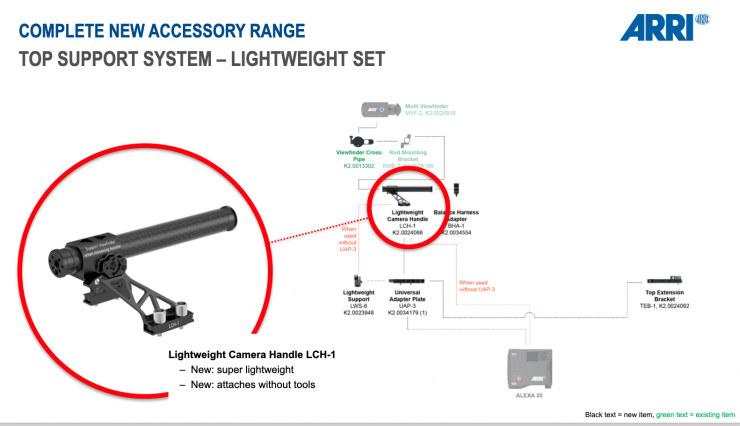
There are also additional sets of accessories that have been designed to complement the Lightweight Set. All of these items can be purchased separately.
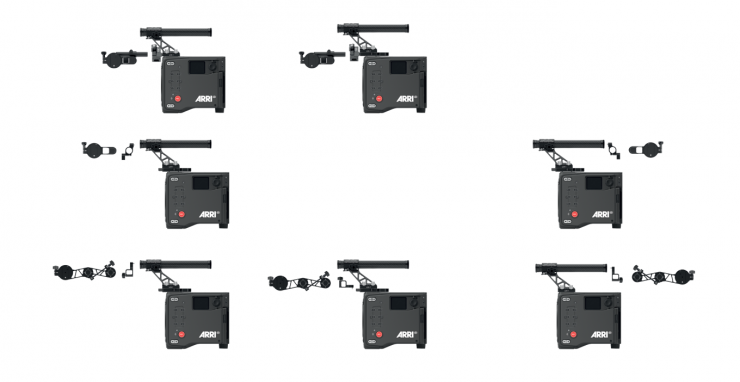
Additionally, there are also different viewfinder mounting options available for the Lightweight Set.
Above you can watch some videos showing how to set the camera up depending on whether or not you are using the Production Set or the Lightweight Set.
LPL Mount
Just like the ALEXA LF and ALEXA Mini LF, the ALEXA 35 comes with
PL-to-LPL Adapter
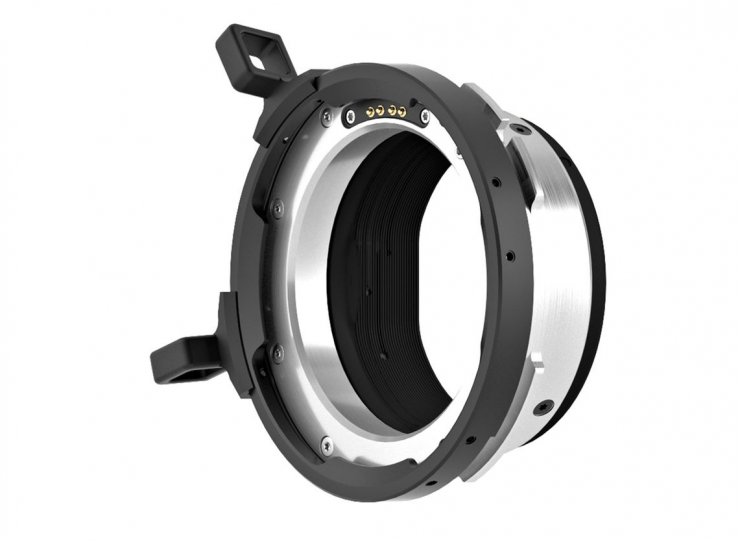
The ALEXA 35 doesn’t ship with a PL-to-LPL Adapter, it is an optional extra, but you can purchase it as part of an ALEXA 35 package. The adapter features black earlobes, while the LPL mount includes blue earlobes. You can set the mount and adapter to 12:00 or 3:00 to accommodate either LDS or /i lens data. The adapter passes LDS protocol and is LDS-2 compatible.
To avoid damage or injury when using LPL mount lenses or PL mount lenses (with PL adapter on LPL mount), ARRI recommends that you only use lenses that do not exceed the following dimensions:
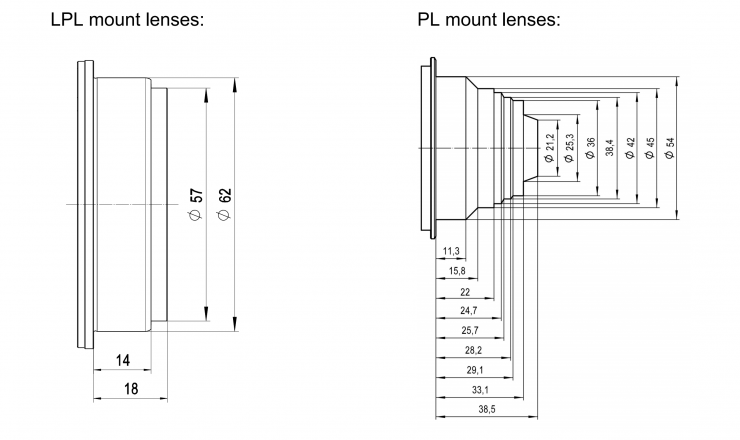
Two New PL mounts
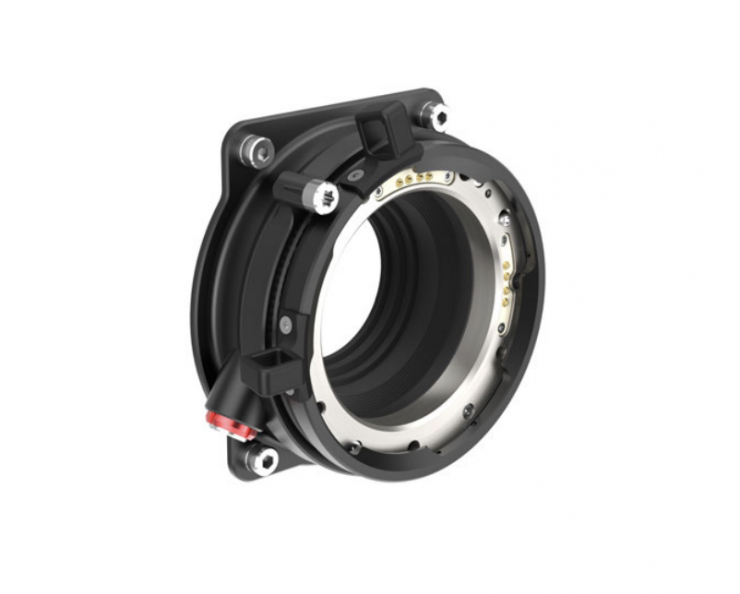
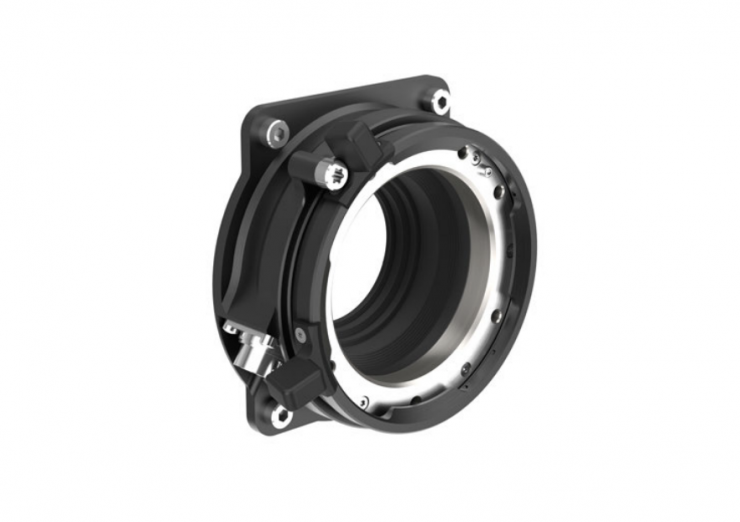
Since the older PL lens mounts from Mini LF, Mini and AMIRA are not stray-light optimized, ARRI offers two new stray-light optimized PL lens mounts for the ALEXA 35, which can also be used on the other three cameras.
Using lenses above 3 kg / 6.6 lbs without a proper lens support can put stress on the lens mount and affect the flange focal depth. ARRI recommends that you always use a suitable lens support for lenses weighing more than 3 kg / 6.6 lbs.
Changing the lens mount
The ALEXA 35 is equipped with a universal lens mount base that uses the same camera to lens mount interface as used on the ALEXA Mini LF, ALEXA Mini and AMIRA, so all lens mounts that fit on these cameras will physically also fit on the ALEXA 35.
Required Tools and Precautions
- 3.0 mm Allen key
- Camera switched off and power source disconnected
- Lens removed and properly stored
- Make sure to protect all optical surfaces when changing a lens mount
Viewfinder
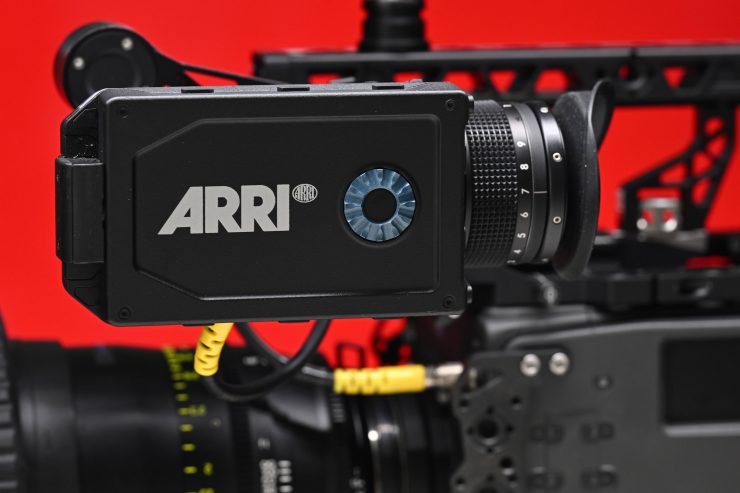
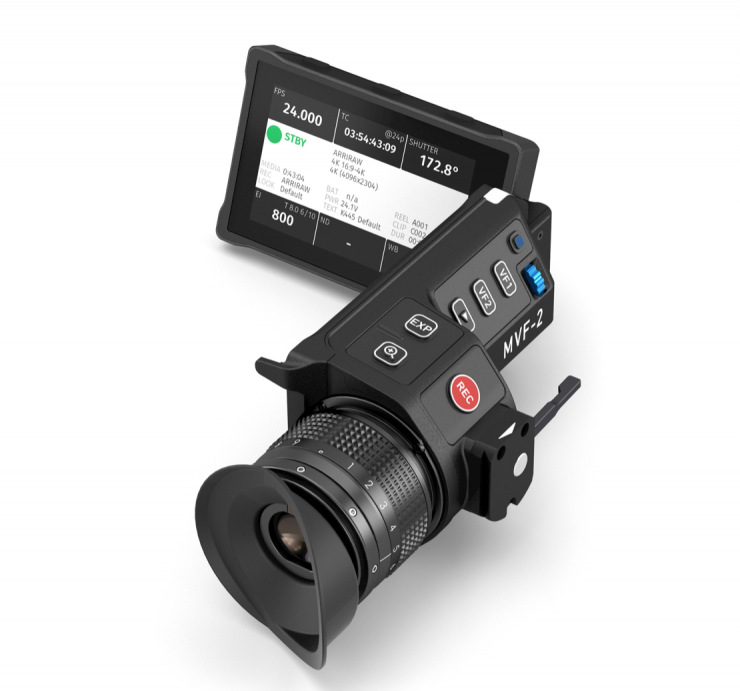


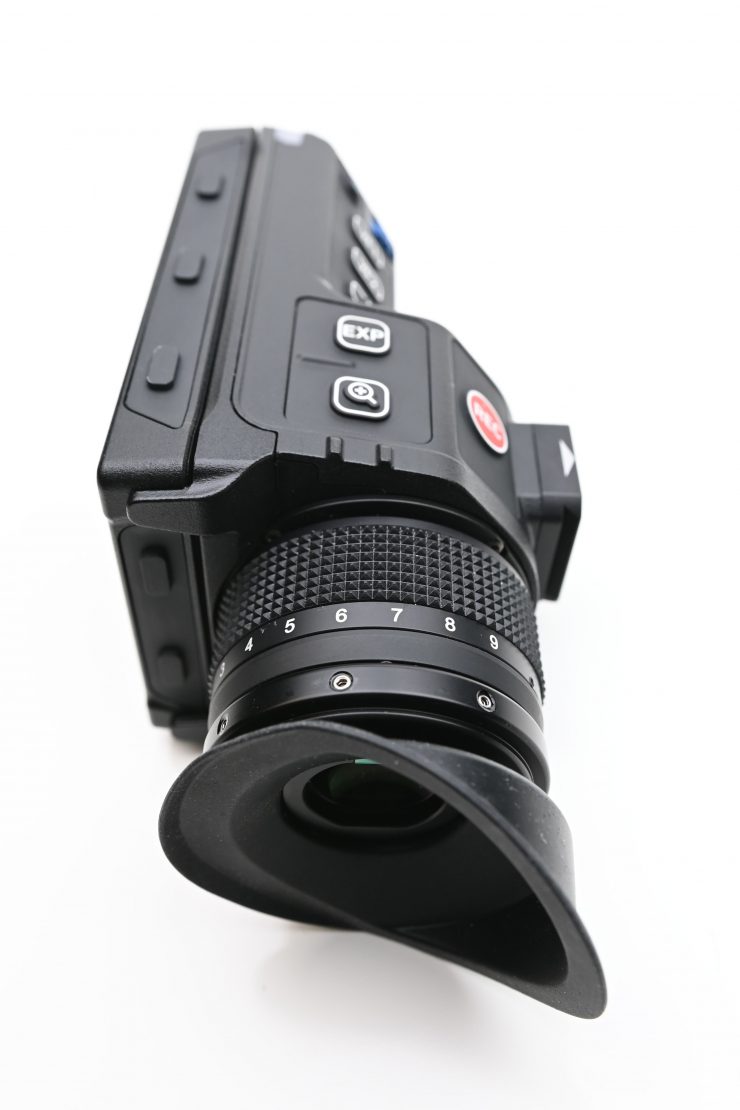
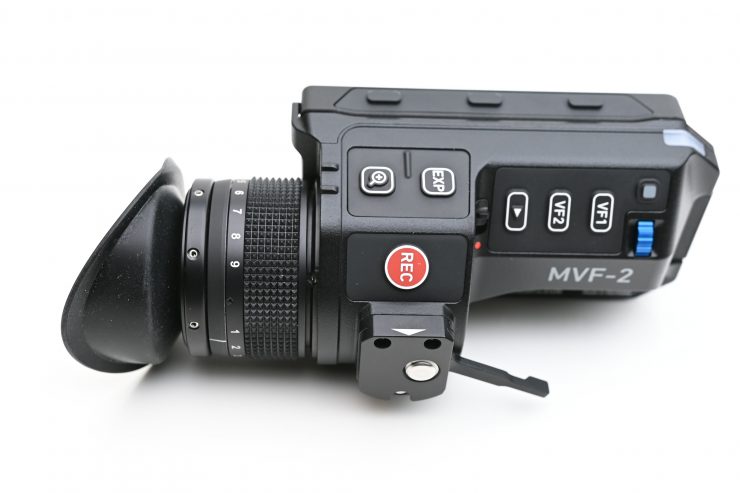

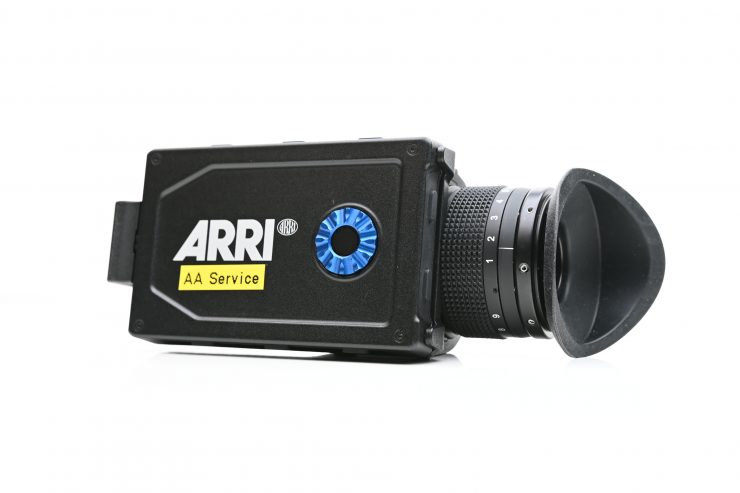
The ALEXA 35 uses the exact same
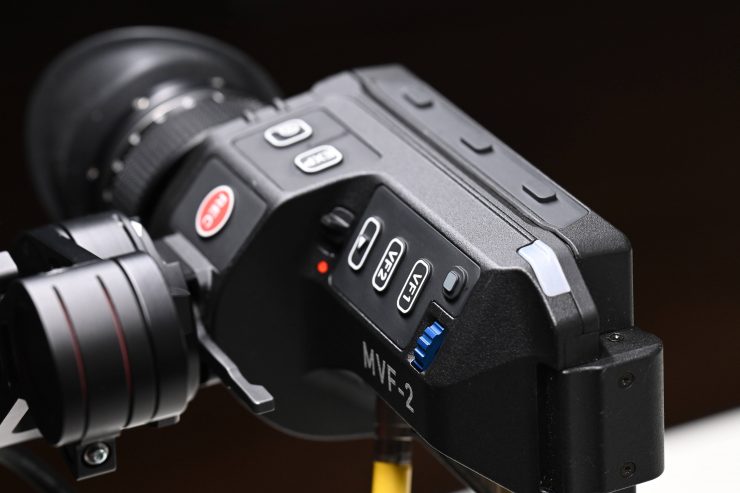
The MFV-2 is a lot higher quality than the previous ALEXA Mini viewfinder. It also features a 4″ instead of a 3″ LCD screen. I found the extra inch to be a welcome addition, and in my opinion, this increase in size makes it a lot more usable.
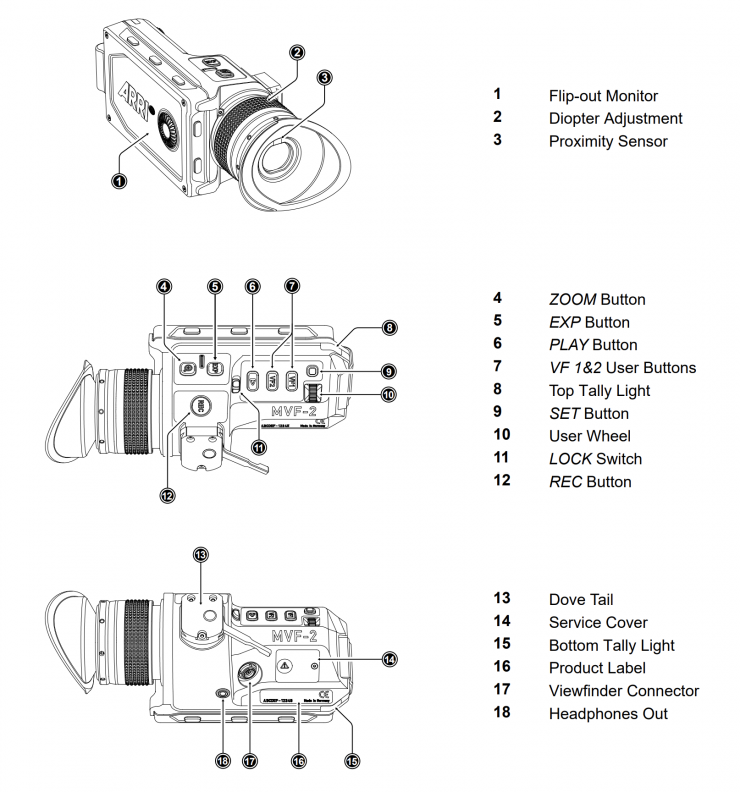
The MFV-2 features a lot of functionality and there are numerous buttons and some that can be user assigned.
What is interesting is that even though this is the exact same viewfinder that works with the Mini LF, on the ALEXA 35 it is capable of displaying 500 nits. This is only possible because of the extra processing power that the ALEXA 35 has. This allows you to more accurately monitor HDR in the viewfinder. Now, you may be thinking 500 nits, that’s going to be way too bright for a viewfinder. Well, don’t worry, that 500 nits are only going to be shown as peak brightness for spectral highlights. If ARRI was to just make it 500 nits across the whole viewfinder they would blind people!
The eyepiece is based on the ARRICAM design and according to ARRI, it offers high contrast, low distortion, and an evenly illuminated viewing area for a clean image and a wide exit pupil for greater freedom of movement for the operator.
The eyepiece has a diopter that has a really nice range. My eyes are not so great these days and with a lot of other EVFs, I find that I already have the diopter at its maximum range.
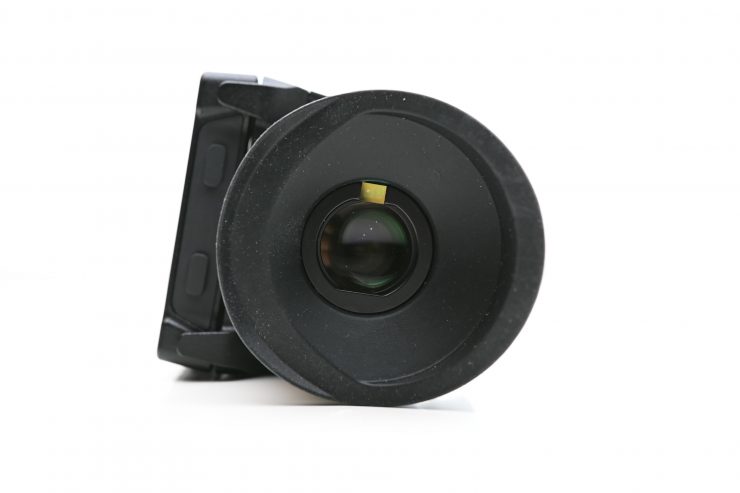
The MVF-2 is a low latency (≤1 frame delay) electronic color viewfinder with 1920 x 1080 high contrast OLED display and 4″ IPS/LCD flip-out monitor. ARRI states that the image exhibits high resolution, high contrast, low distortion, and an evenly illuminated viewing area. It includes a state-of-the-art OLED engine, which has a high screen refresh rate, plus an ARRI optical design that employs the highest quality coated glass optics. Reliable color reproduction at all temperatures is assured through the auto-calibrating, temperature controlled ARRI LED light engine.

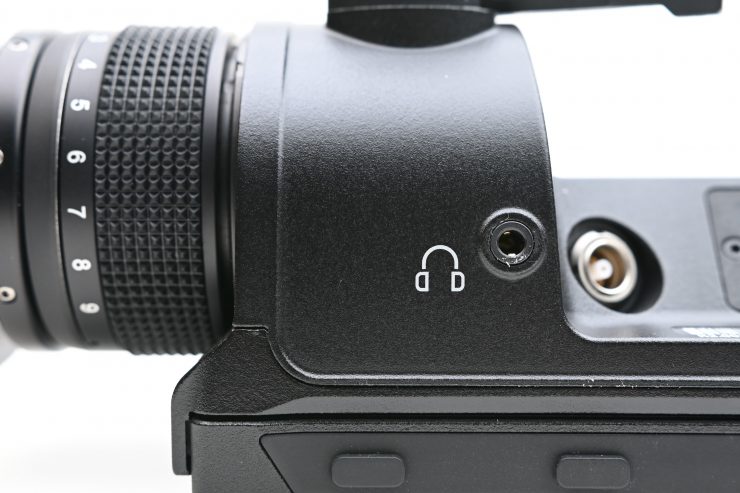

The MVF-2 uses reliable and flexible VF cables and features a built-in eyepiece lens heater for de-fogging and a built-in 3.5mm headphone connector.
The headphones out is a 3.5 mm TRS connector (headphone jack), which outputs all four audio channels with a maximum power of 2.5 dBm.
The built-in eyepiece heater prevents fogging of the eyepiece when shooting in cold environments. The eyepiece heater can be activated in the camera menu and only becomes active when the eyepiece has a temperature of 15 °C (59 °F) or below. In extremely cold environments ARRI recommends the use of the Heated Eyecup HE-7

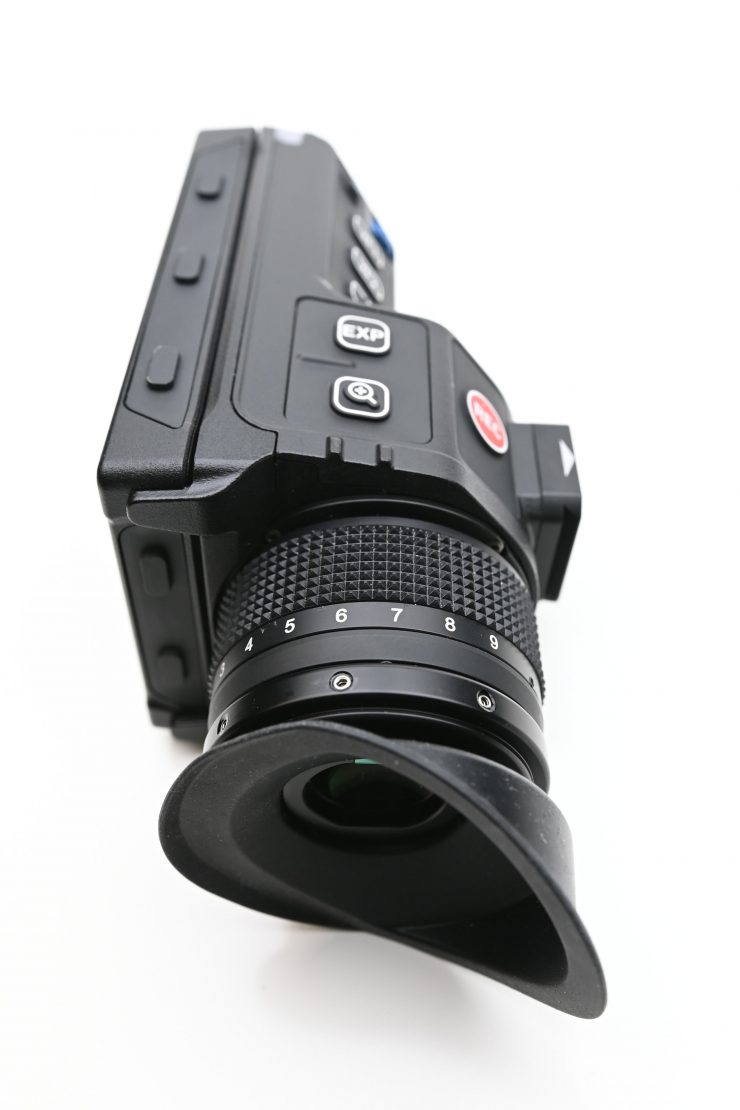
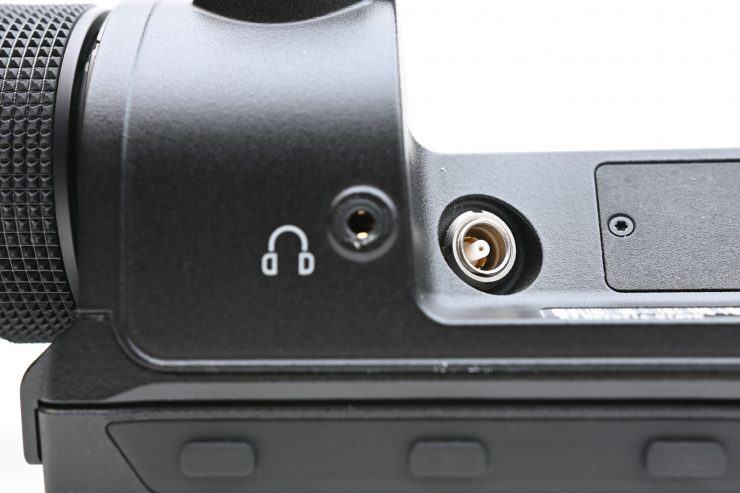
There are a ton of buttons on the MVF-2. You have 8 buttons (3 on the top, 3 on the bottom, and two on the side) of the flip-out screen.


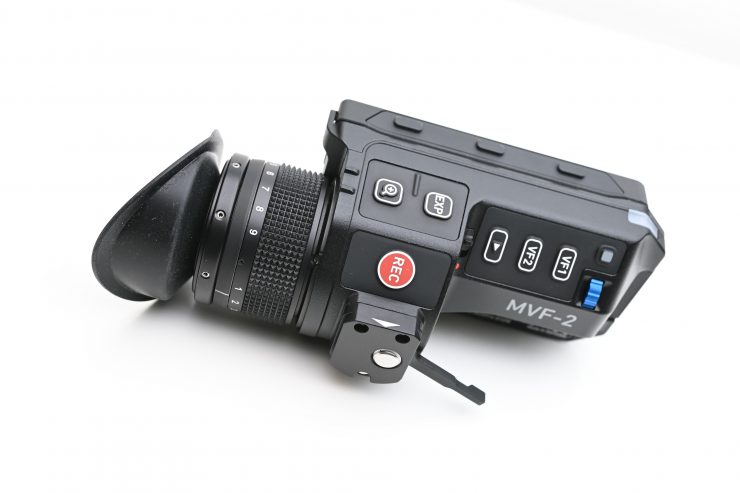
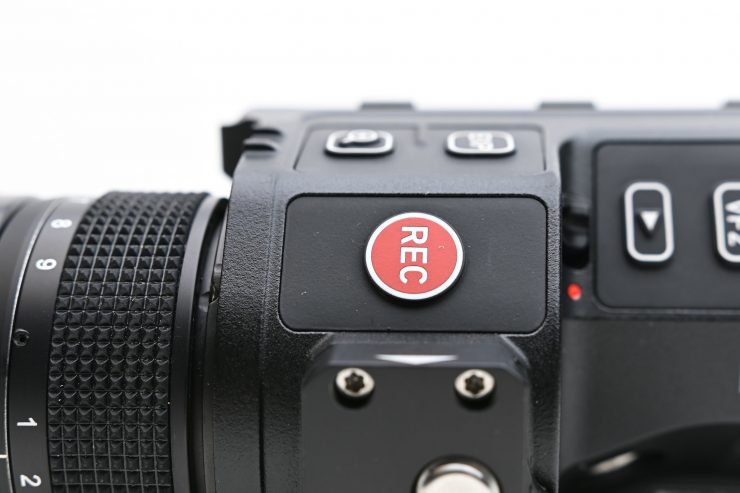

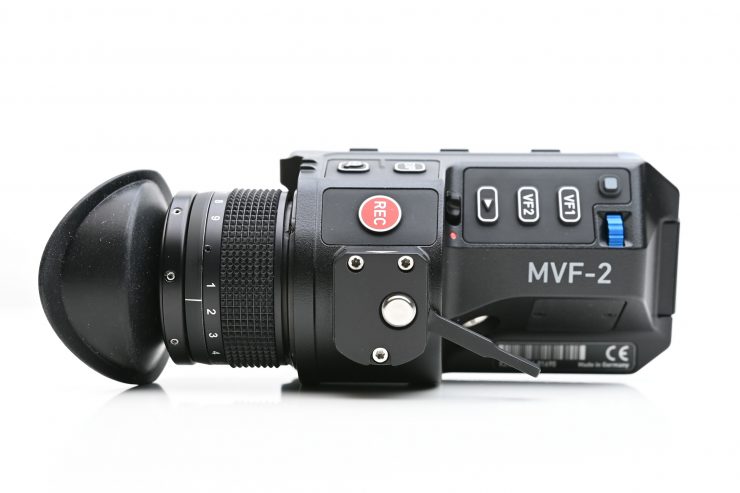
On the actual EVF you have an Image Zoom button, EXP button (this can be set to False Color or Zebras), REC button, Playback button, VF1 and VF2 buttons (these can be set to do a variety of things), and a 2nd Control Dial.
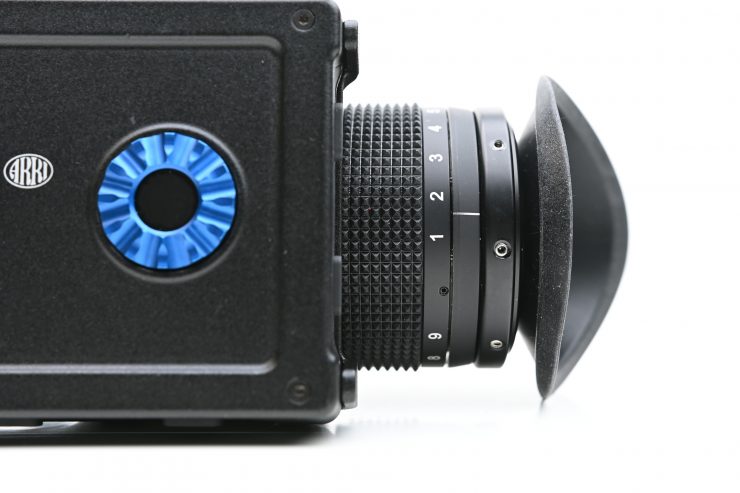
Originally I wasn’t sure if I liked the placement of where ARRI put the main jog wheel on the MVF-2. However, after using the camera for a few days I quickly became comfortable with using it in the position where it is located.
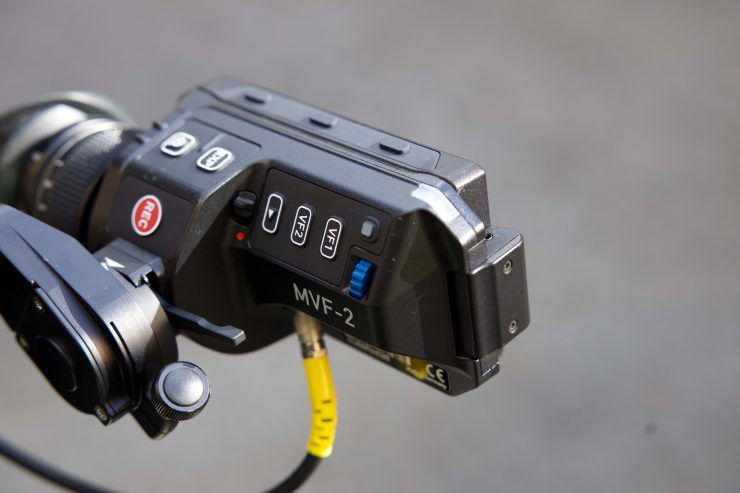
As I mentioned earlier, ARRI has made the MVF-2 HDR compatible so you will be able to monitor your images in HDR. when using it with the ALEXA 35.
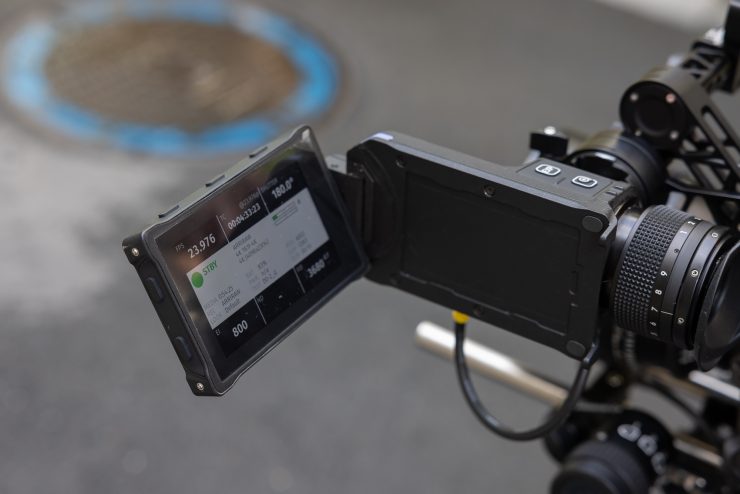
The flip-out LCD screen is really good quality and it is nice and bright. It also makes it very quick to look at all of your key settings and make menu changes.
The nice aspect of the ALEXA 35 is that if you are using the Lightweight Set you can move the MVF-2 to the back of the camera by reconfiguring the top handle. Also, because there is a second VF connector at the back of the camera you can plug in the cable without needing an additional longer one.
You can also take the MVF-2 off the camera and then use a 10-meter extension cable if you want to control the camera via a hard-wired connection. ARRI also makes a multitude of different viewfinder brackets which is also handy.
MVF-2 viewfinder cables are available in the following lengths:


You may have also noticed that there is a strange area on the inside of the MVF-2. What is this for? Well, ARRI noticed that crews like to tape critical information, like the lens’ close focus distance or the names of actors and characters, to the side of their cameras. So, on the MVF-2 there is an empty space with a slot for a business size card.
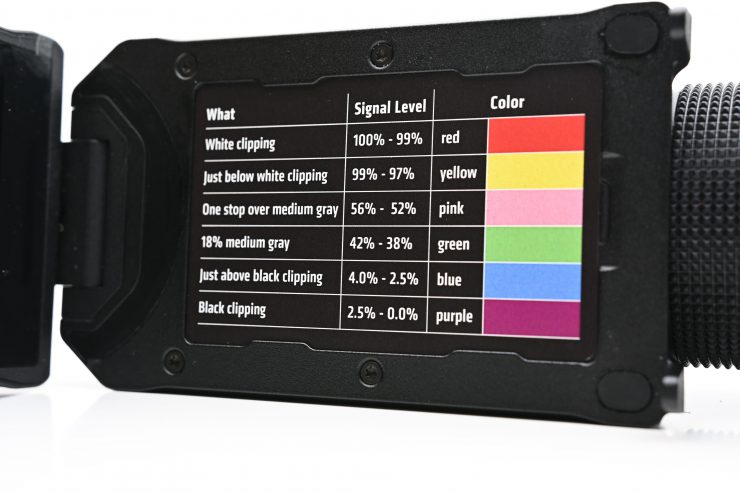
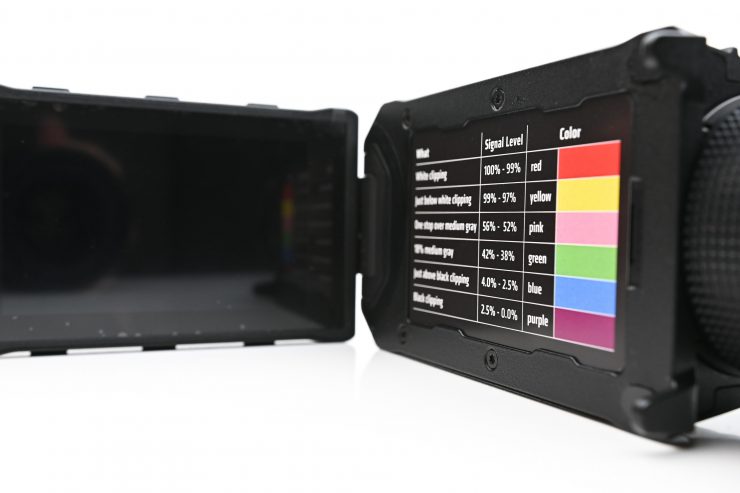
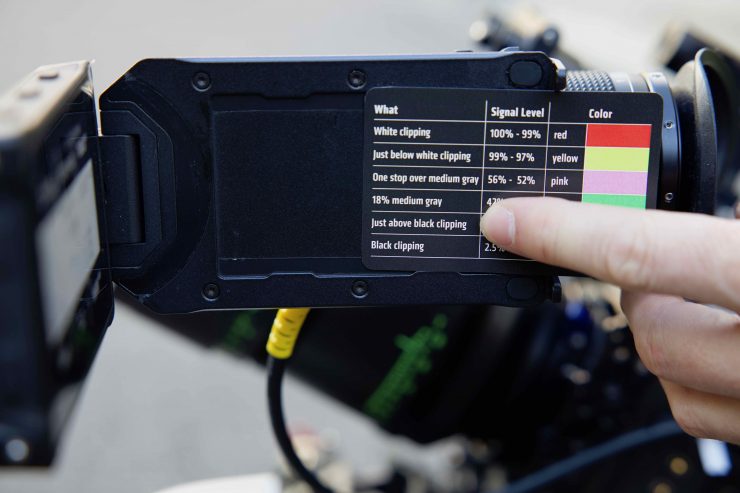
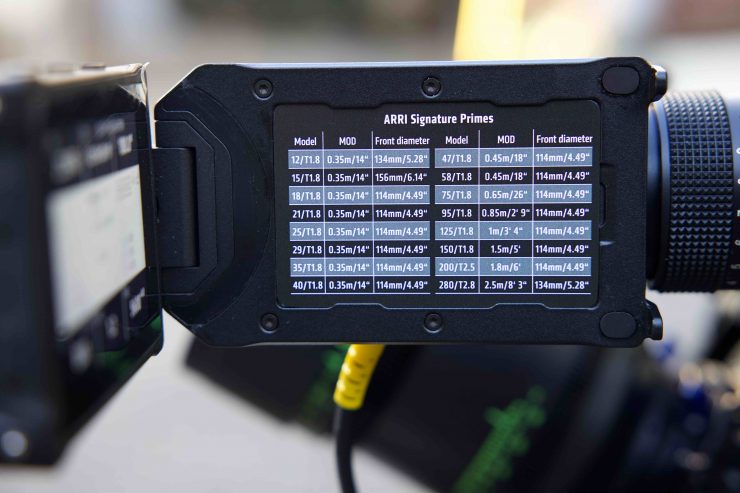
With the ALEXA MINI LF ARRI includes a card illustrating the false color system on one side and the Signature Prime information on the other. Templates for making your own (DIN A-4 and US Letter/8.5 x 11) can be downloaded below:
ARRI is including a new version of this card with new false color information for the ALEXA 35.
This may be a small thing, but what other camera manufacturer has thought about doing this?
When using False Color with the ALEXA 35, it only looks like you can view it as Log-C based. On the ALEXA Mini LF, you have the choice between viewing False Color as Monitoring-based or LogC-based. I personally prefer to use False Color LogC-based monitoring even when I am using a LUT. As the ALEXA 35 can only record a LogC image and not a baked-in look, it makes sense to have the False Color reflect your LogC image and not that of a LUT.
In SUP 1.1 ARRI added a new feature where you can assign a uswr button to toggle through the VF’s Check HDR, Check LogC4, and its normal SDR setting.
MENU > User Buttons
“VF Check HDR” is a new function that can be assigned to a user button. When the user button “VF Check HDR” is briefly pressed and released, the viewfinder processing (MENU > Image > Look > VF Processing) is switched to “Look (EVF: HDR, Mon: SDR)”. This means that the currently chosen look is shown in the viewfinder eyepiece in High Dynamic Range (EVF: HDR) and on the flip-out monitor in Standard Dynamic Range (Mon: SDR). Pressing and releasing the user button again will switch the viewfinder back to whatever VF Processing was set before.
Optionally, the user button “VF Check HDR” can be pressed and held down. In this case, VF Processing will be switched to “Look (EVF: HDR, Mon: SDR)” only as long as the button is held down. When the button is released, VF Processing will switch back to whatever VF Processing was set to before. This is an efficient and fast way to quickly check the appearance of the image in HDR and then get back to the normal VF Processing.
If you want to toggle between LogC4, SDR and HDR in the viewfinder, you can use the new user button function “VF Processing”.
MENU > User Buttons
“VF Processing” is a new function that can be assigned to a user button. Each time the user button “VF Processing” is briefly pressed and released, the camera will toggle through the three options in MENU > Image > Look > VF Processing:
- LogC4
- Look (SDR)
- Look (EVF: HDR, Mon: SDR)
If you just want to quickly switch the viewfinder to HDR and then back to your previous VF Processing setting, you can use the new user button function “VF Check HDR”.
I found the MFV-2 to be really nice to use and after having experience using it with the Mini LF I was right at home. The flip-out LCD screen is a massive improvement over the one that was on the AMIRA and ALEXA Mini. The EVF itself is sharp and easy to see and I like the button positions.
Just like the menu dial, I did find the location of the buttons took some getting used to after years of knowing exactly where my fingers needed to go to make changes when using the AMIRA or ALEXA Mini.
One thing to note about the MVF-2 Viewfinder is that it can be used on ALEXA Mini LF and ALEXA 35, but not other ARRI cameras such as the original ALEXA Mini, or AMIRA. ARRI has said that the MVF-2 will be the viewfinder they will use for all future cameras to come, at least in the foreseeable future.

Above are some of the things you need to be aware of when using the MVF-2.
Menu System
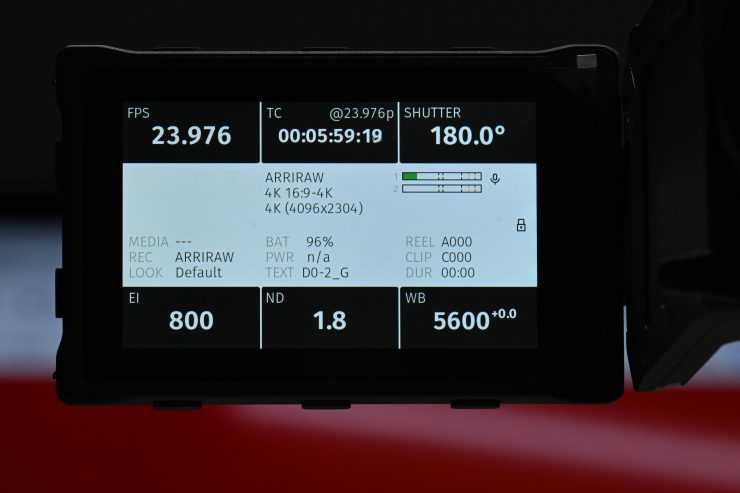
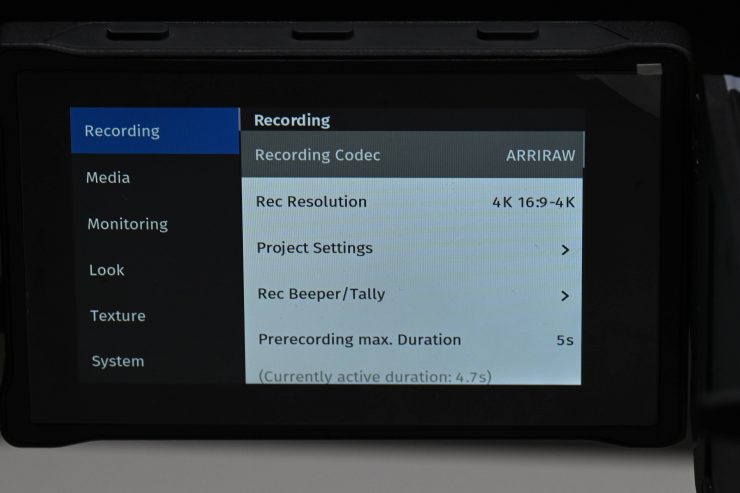
After almost a decade of the ALEXA user interface, ARRI changed things up when they announced the ALEXA Mini LF. They came up with an improved fresh look and better functionality for the menu and operating system. This same system carries over to the ALEXA 35, although ARRI has added quite a lot of additional functionality which I will talk about shortly.
It is ironic that you could teach someone how to use an ARRI digital cinema camera in far less time than most other cameras that are on the market.
The camera’s HOME screen and menus can be accessed through the flip out monitor on the MVF-2 viewfinder, which is larger and has a higher resolution than all previous menu displays on ARRI cameras.
Important settings can be quickly seen on the home screen:
- The location of a menu can be easily seen through overlapping menu levels
- Expanded and improved notifications and alerts
- Easier and faster text entry and list selection
I like the addition of the ND position to the home screen instead of in the EI section in the Mini. ARRI has also put the look settings in the menu instead.
I like the menu system on the ALEXA 35, it is very easy and quick to make changes. There aren’t countless menu pages that you have to navigate through. Menus don’t need to be complicated and that is something ARRI worked out a long time ago.
Having a simplified menu structure means you can make changes without having to scroll through endless pages or consult a menu.
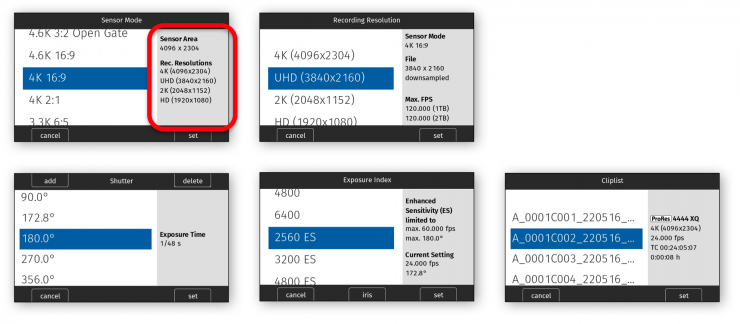
One of the biggest additions to the menu system is that you now have new information panels that display key information for the user. These are available when choosing the sensor mode, recording resolution, shutter angle/speed, exposure value, and on the cliplists.
In SUP 1.1 ARRI went a little bit further and added a new Info Pane in the FPS Menu and a new Info Pane in the Playback menu.
Info Pane 1: FPS Menu HOME > FPS
The FPS menu now has an info pane, showing the maximum fps for the current sensor mode and drive combination. The text in the line representing the currently inserted drive is bold.
Info Pane 2: Playback
VF PLAYBACK BUTTON > cliplist
The Playback clip list now has an info pane that displays additional information about the currently selected clip:
- Recording Codec (ARRIRAW or Apple ProRes)
- Recording Resolution
- Recording frame rate
- ARRI Texture
Note: this will also be the Texture used for playback.
Name of Look and Look Intensity (Look Intensity in percent in brackets)
If the look currently set on the camera is not the look used for recording the clip, the look used for recording the clip will be shown, but in grey text.
Caution: during playback the currently set look will be applied to the playback image, NOT the look in the clip’s metadata.
I really like this new addition because it provides clear, concise information. It also can take away some of the confusion when you are choosing sensor modes and recording resolutions.
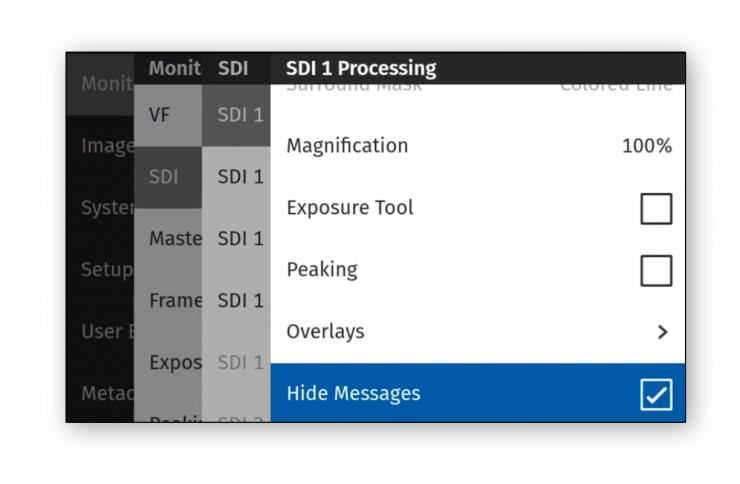
What ARRI has now added to the menu system is the ability to turn off warnings on SDI 1 and/or SDI 2. This is a great feature because directors, producers, etc. don’t need to see battery warnings popping up on their screen!
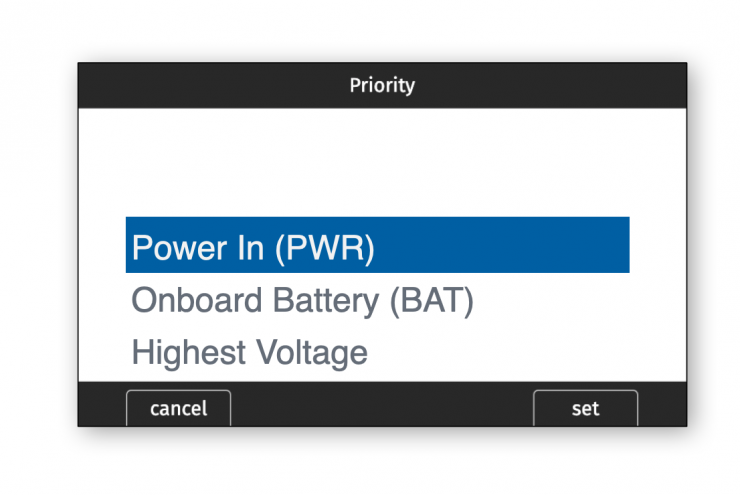
There is also now the ability in the menus to choose what power source has the priority. You can select from Power In (PWR), Onboard Battery (Bat), or Highest Voltage. Why has ARRI included this? Well, I am glad you asked. As the ALEXA 35 is a 24V camera, some 26V batteries have a higher voltage than some block batteries. What this means is that without having the ability to prioritize the power input, the camera would have just drawn power from the attached battery and not the block battery. This is why ARRI now gives you the ability to prioritize the power source you are using.
Other new additions include:
- Individual framelines can now be turned on/off in camera
- User button for Mirror Image
- Individually show or hide left/right/top/bottom SDI overlay
- SDI overlay: Adjust brightness
- SDI overlay: Show Master Grip status
Attention to detail
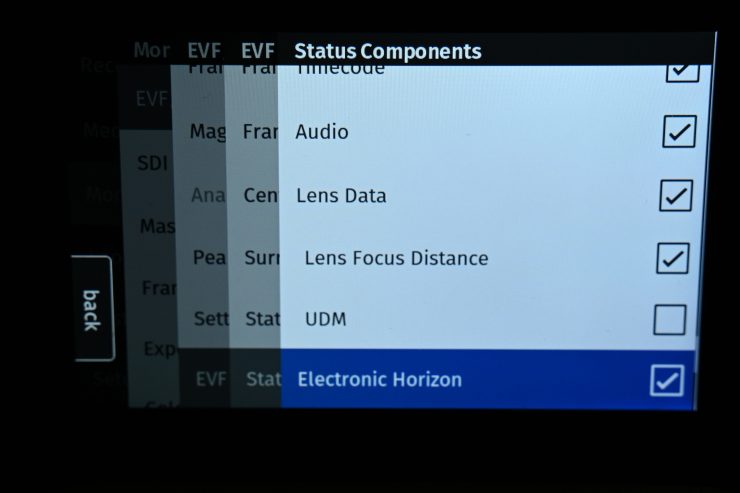
Just like with the Mini LF there is an Electronic Hiriozon that you can activate in the Status Components section of the menu. On the Mini LF It displays a horizon overlay representing the roll and tilt of the camera measured by the camera’s position sensor, however, on the ALEXA 35 (at least with the firmware I was using) it only shows the tilt and roll of the camera in degrees as measured by the camera’s position sensor This sensor can be reset, if it appears to have an offset.
This Horizon data doesn’t cover up your image, it is displayed on the outside. It is really quick to reference and you can tell instantly if your horizon is off. This works really well if you are shooting handheld. I found this feature to be incredibly useful. Again, it is a small detail, but this is why ARRI cameras stand out. Paying attention to details.
I imagine, in the shipping firmware that you will actually be able to see a horizon bubble and not just tilt and roll of the camera in degrees.
What I found very strange was the Overlay Menu (which is available on the AMIRA, ALEXA Mini, and ALEXA 35) that allows you to press a single button and then scroll through and make changes to all of your key components right from the viewfinder without having to go into any menu isn’t available in the ALEXA 35. I am not sure why this is.
There are also some user button functions that support smart behavior. For these, a short press (i.e. less than half a second) toggles the function, while a long press (i.e. longer than half a second) activates the function only temporarily, as long as the user button is pressed. This is good for items like image zoom, peaking or false color.
For example, assume a user button is configured with EVF Zoom:
Short press of user button: EVF zoom is activated and stays activated. Press again to deactivate.
Long press of user button: EVF zoom function is activated while you are pressing the button, the release of the button deactivates EVF zoom.
No Multicam
The camera can’t do Multicam as there is currently no fiber option, or multi-cam painting. ARRI is, however, looking into these things.
Mirroring the Sensor Image
You can mirror the sensor image in horizontal and vertical directions. This is a very handy function to have, especially if you are using the camera upside down on say a dolly or crane.
You have the following options on the ALEXA 35:
- Off Mirroring is inactive.
- V The sensor image is vertically mirrored.
- H The sensor image is horizontally mirrored.
- V+H The sensor image is vertically and horizontally mirrored (rotated by 180°).
Horizontal mirroring is applied to all output paths and internally recorded material. Vertical mirroring is only applied to output paths; internally recorded material is not rotated, but rotation information is written into metadata. Frame grabs of rotated images will be displayed upside down on a computer.
In a nice touch, ARRI now lets you assign one of the user buttons to do the sensor mirroring.
New Clip Names
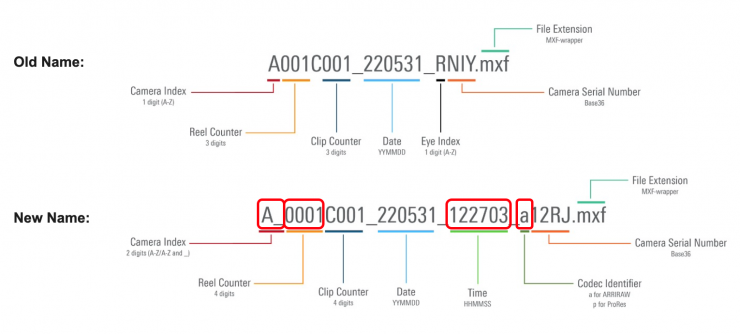
ARRI has also added new clip naming conventions to the ALEXA 35.
- Camera index: added one more letter for stereo shoots (eye index) or large productions with more than 26 cameras
- Reel counter: added one more digit for long-term TV series that continue to count reels across seasons
- Added time of day
- Added codec identifier (ARRIRAW or Apple ProRes)
- Frame grab name shows which SDI path it was captured from
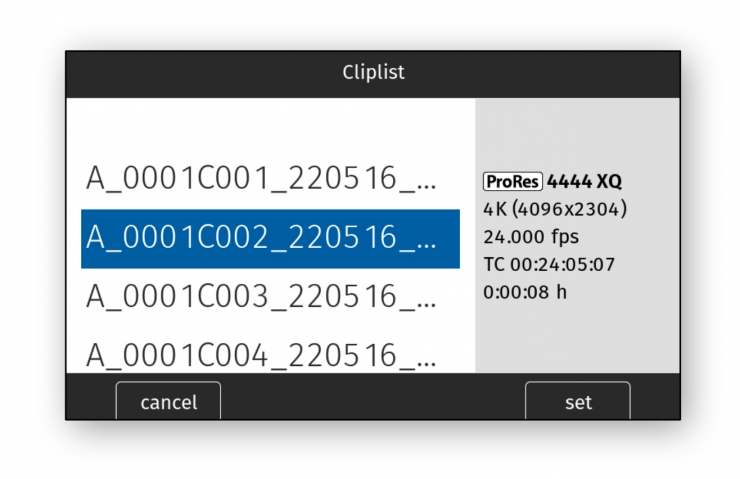
When you view the cliplists you now can also see the recording codec, framerate, timecode and duration of the clip.
New Workflow Tools
Along with the ARRI Camera Companion which I have previously talked about, ARRI also has a new Reference Tool and a ARRIRAW HDE Transcoder.
ARRI Reference Tool
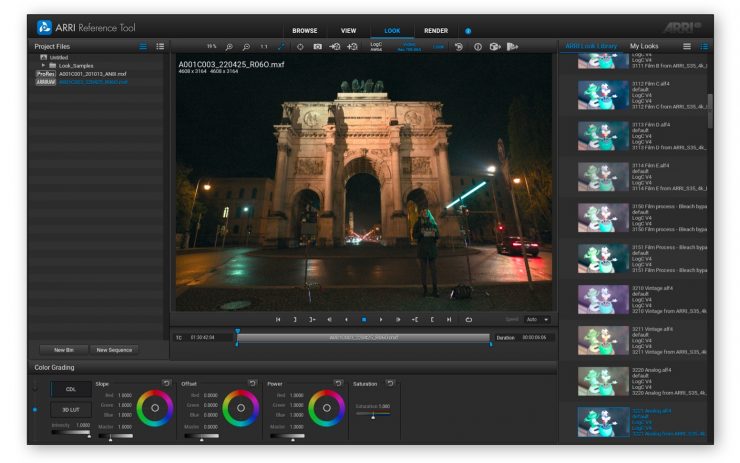
Below you can see an overview of what the ARRI Reference Tool does.
View Room
• Playback of ALEXA 35 MXF/ARRIRAW clips in LogC4 using the new ARRI Image SDK version 7.0
• Playback of ARRIRAW clips in LogC3 using the new ARRI Image SDK version 7.0
• Playback of ALEXA 35 Apple ProRes material in LogC4
• Playback of legacy Apple ProRes material in LogC3
• Conversion of LogC4 to all SDR and HDR video color spaces using the new color management for ALEXA 35
• Conversion of LogC3 to all SDR and HDR video color spaces using the existing color management
• Conversion of ALEXA LF or Mini LF ARRIRAW material to LogC4 for combining with ALEXA 35 footage
• Display camera metadata according to the ARRI MXF specification in RDD 54/55
• “Quick Render Clip” to all Apple ProRes codecs as MXF compliant with Apple RDD 44 and the new ARRI RDD 55
• “Save Viewer Snapshot” as single image in TIFF or JPEG format
New Look Room
• Create ALF4 look files (.alf4)
• Create ALF2 look files (.aml)
• Extract 3D LUTs to file (.cube)
• Apply and display embedded log-to-video looks from LogC3 footage
• New ARRI Look Library for ALEXA 35 footage (LogC4/.alf4)
• ARRI Look Library for LogC3 footage (LogC3/*.aml)
Redesigned Render Room
• Render to LogC4/LogC3 with or without applied looks:
– to Apple ProRes MXF file according to Apple RDD 44 and the new ARRI MXF specification RDD 55
– to OpenEXR or TIFF image sequences
• Render to AWG4/AWG3 or ACES Scene Linear formats as OpenEXR image sequence
• Export clip metadata in a new JSON scheme


Above you can watch a series of four ARRI Tech Talks that tell you all you need to know about the ARRI Reference Tool.
ARRIRAW HDE Transcoder
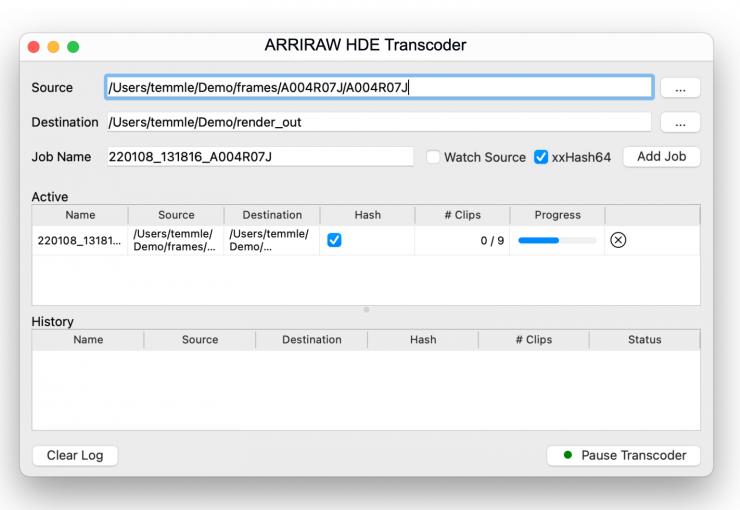
As the ALEXA 35 utilizes a new MXF wrapper it required a new HDE workflow.
- HDE with ALEXA 35 – option A: Transcode directly from Compact Drive to the destination folder
- HDE with ALEXA 35 – option B: Use third-party copy tool to copy ARRIRAW from Compact Drive to computer. You can also Transcode from copy destination to another folder.
Third-party tool makers are working on integration into their tools. The ARRIRAW HDE Transcoder is for macOS 10.15, Windows 10 and CentOs Linux 6 or later.
Electronic Control System (ECS)
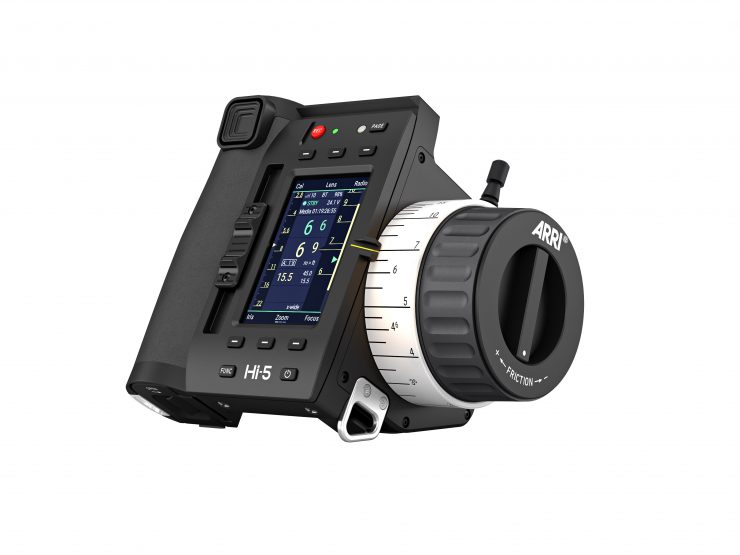
The camera contains a radio unit that allows for wireless lens control, lens data communication and remote control of basic camera functions in combination with the ARRI Hi-5, ARRI Wireless Compact Unit WCU-4 or ARRI Single Axis Unit SXU-1. The radio system is called white radio. The white radio antenna connector is located at the camera rear.
Lens Motors
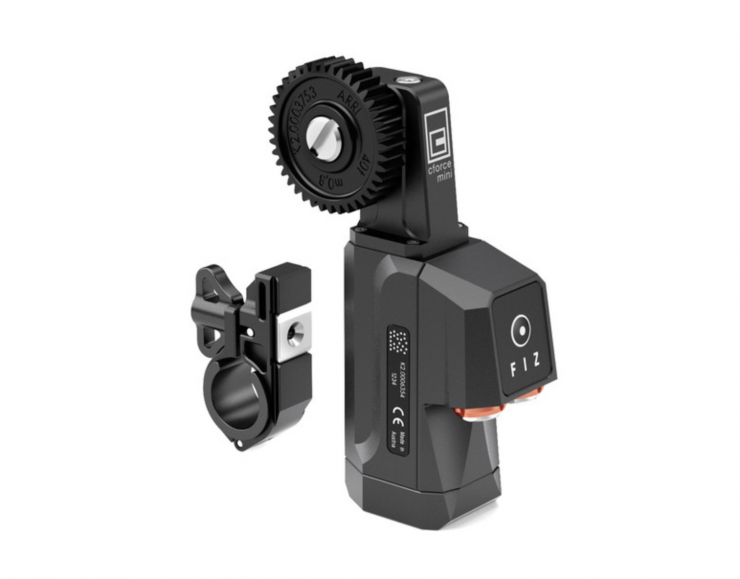
The ALEXA 35 supports the use of cforce mini and cforce plus lens motors. Lens motors can be directly connected to the LBUS on the lens mount and can be daisy-chained. The motors can be hot-plugged, no need to switch off the camera.
When connecting a cforce plus motor to the camera you need to make sure that the LBUS connector(s) on both motor and lens mount are equipped with a silver washer placed below the red nut of the connector. If the LBUS connectors on either cforce plus motor or lens mount (or both miss the silver washer, the cforce plus motor needs to be supplied with external power (e.g. D-Tap from a battery adapter plate) in order to ensure proper performance.
Shooting Vertical Video

Like it or not, often content that we create is required to be delivered in multiple different aspect ratios including vertical 9:16. In ARRI’s latest Tech Talk Sean explains how to make the most of using Open Gate recording formats as well as our specific Vertical Format Adapters to get high-quality, 9:16 footage.
- 0:00 Intro
- 1:26 Open Gate for 9×16 Delivery
- 3:49 Rigging a camera sideways
- 5:30 Vertical Format Adapters for ALEXA Mini LF
- 8:41 Vertical Format Set for ALEXA 35
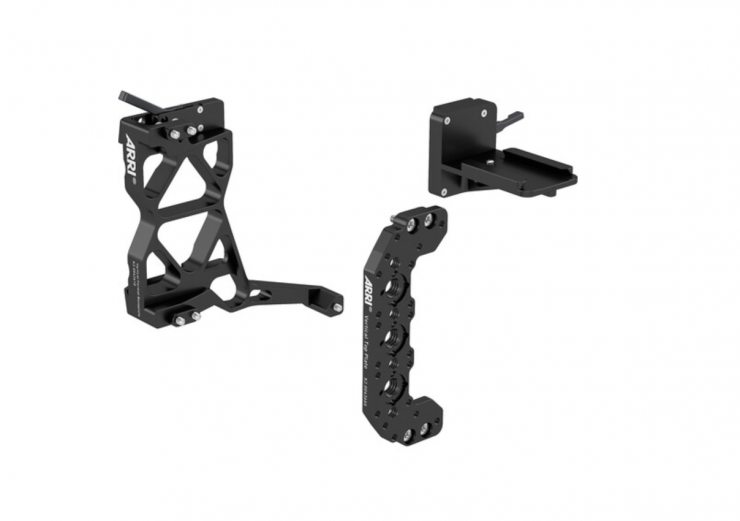
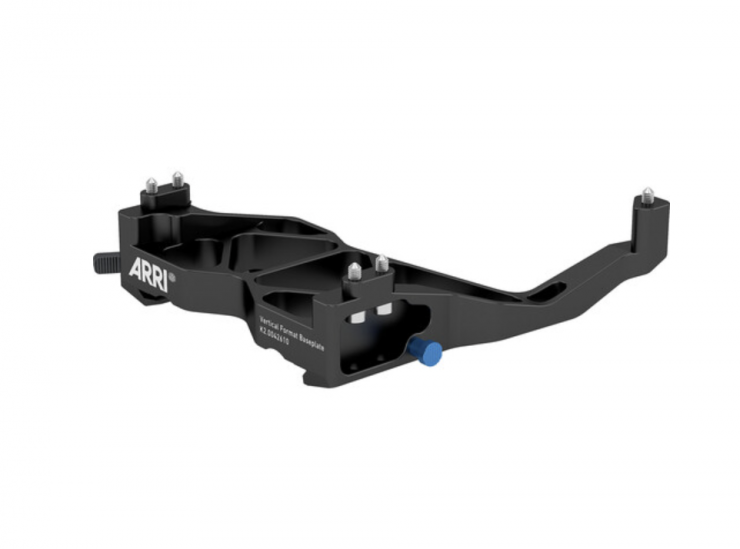
Low Light Performance
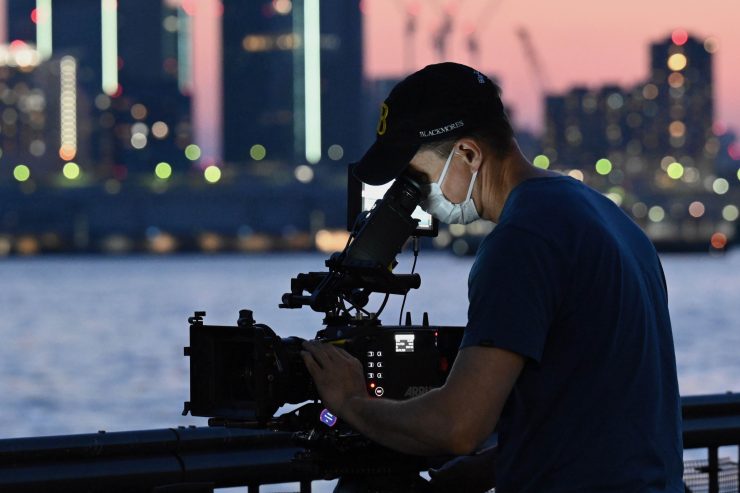
ARRI cameras have never been known as low light cameras. Considering the base sensor being used on previous ARRI cameras is 12 years old, ARRI was probably limited as to what they could do.
The Mini LF, just like the AMIRA, ALEXA Mini and the ALEXA LF can only shoot at up to 3200 ISO. In 2022, that is a very low ISO number and most other cameras can go far beyond 3200 ISO while still producing a limited amount of noise. The ALEXA 35 is certainly substantially better in low-light environments. The new sensor and the ES modes allow you to shoot in conditions that you previously couldn’t with ARRI cameras. It still isn’t a low-light beast, but for the types of productions this camera will primarily be used for I think everyone will be happy with the increased low light performance.
Above you can see an EI test where I exposed middle grey correctly for all EI values. I haven’t altered the images in any way or used any noise reduction. What you see is what you get. I have purposely shot a part of a color checker chart next to a dark case so you can see where the noise occurs. At least in my opinion, I find the levels of noise even up to EI 4800 ES to be perfectly fine. Even at EI 6400 EI, with a bit of noise reduction, you can get pretty clean images. I am glad that ARRI only put EI levels in the camera that they found acceptable when it came to noise. Could they have put higher EI levels in the camera? I’m sure they could, but what’s the point if that just produces bad imagery?
Shooting at higher EI values doesn’t always mean using a camera in conditions where there isn’t much light. Unless you are doing certain types of work, you will almost always be adding light in situations where it is dark. You will always see more noise when filming in conditions where almost everything is dark, but those types of tests, at least in my opinion, are pretty useless. Scrolling through ISO values standing outside in conditions where there is little available light doesn’t show much. If anything, it will show how much cameras start skewing colors once you start bringing the ISO up.
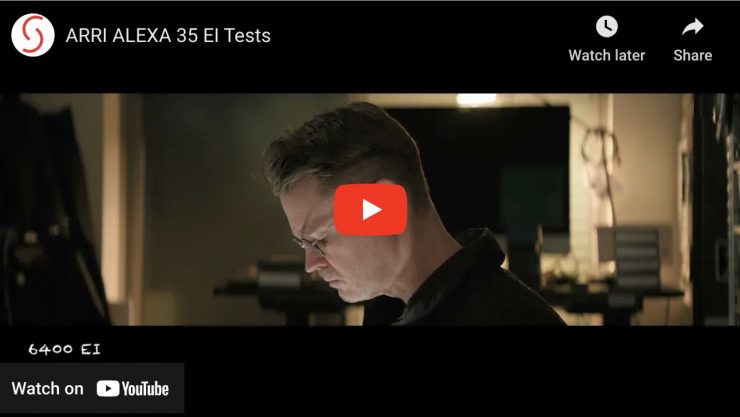
Above you can see a test where I shot myself at various EI levels using the Deep Shadow Texture. The H457 Deep Shadow is a texture designed for the darkest shots. This texture has low grain, and the color of the remaining grain is less saturated. It has higher clarity (more contrast) and even more shadow detail retention than the L345 Shadow texture. The Shadow textures are optimized for mid to high EI settings of the sensor and therefore work best in this exposure range. This would be my recommended Texture for shooting anything at higher EI levels.
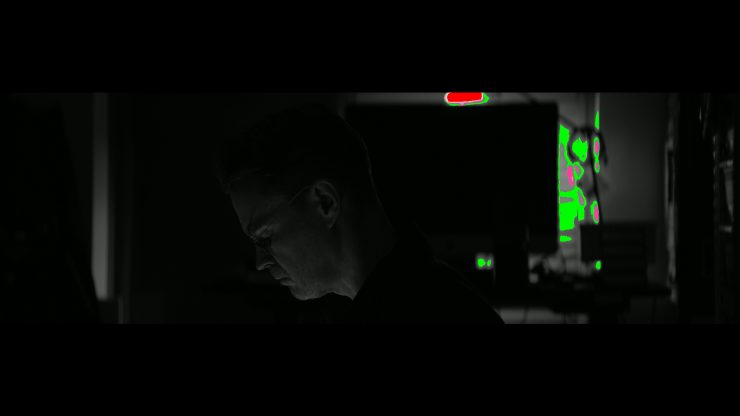
For this test, I have done a very moody exposure for 800 EI and then I have simply just bought the EI levels up. Nothing has been touched or altered. This is exactly as it came out of the camera. At the end of the test, I added a small amount of noise reduction to the ES clips so you can see how they clean up.
I also wanted to do a test to compare the ALEXA 35 against the AMIRA at various EI settings under the exact same conditions. I exposed middle grey correctly for both cameras and they were both individually white balanced at their base EI setting of 800.
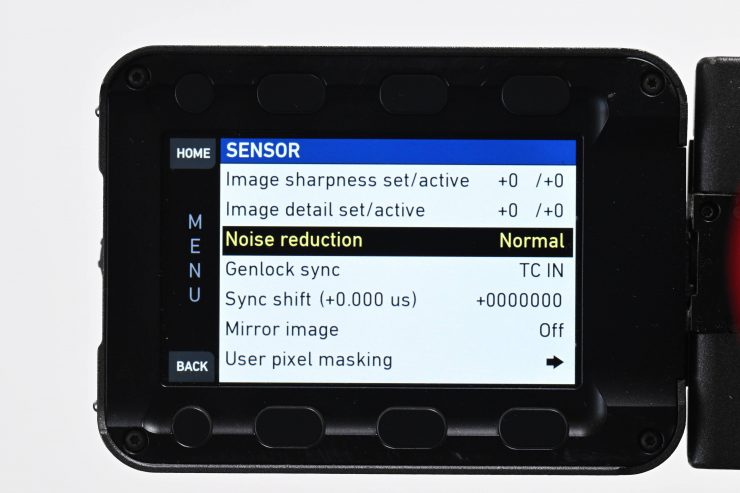
For the AMIRA the Noise reduction setting was on Normal.
I was interested in not only how the noise compared, but also how well they accurately tracked color at higher EI values.
What I found interesting is that the AMIRA at higher EI levels was certainly introducing magenta into the dark areas, however, the ALEXA 35 looked like it was leaning a little greener, especially when you look at white and middle grey. To be honest I didn’t think the noise was that much different between the two cameras. However, what you need to factor in is that the AMIRA was running Noise reduction which is recommended by ARRI when shooting in UHD.
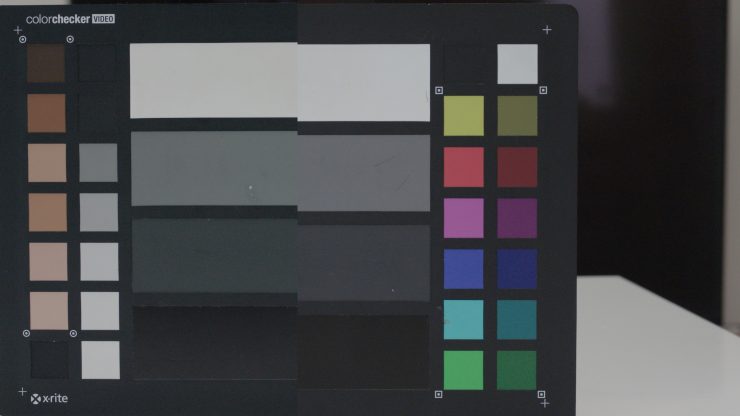
In the split screen above you can actually see that the ALEXA 35 was leaning a little green compared to the AMIRA. This actually surprised me.
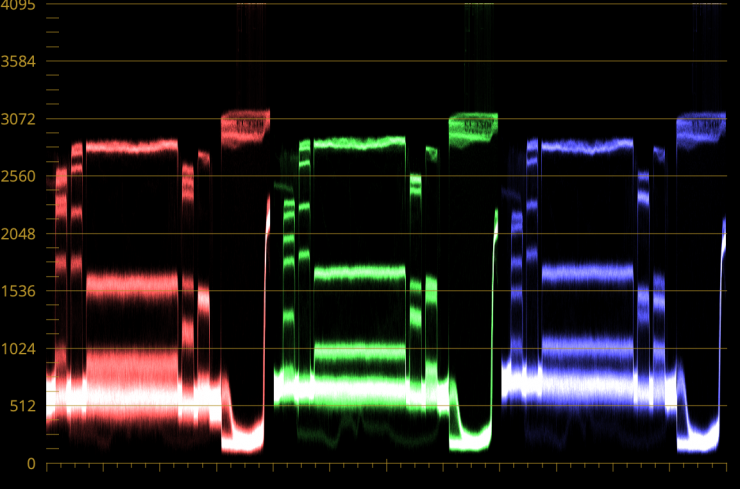
ALEXA 35 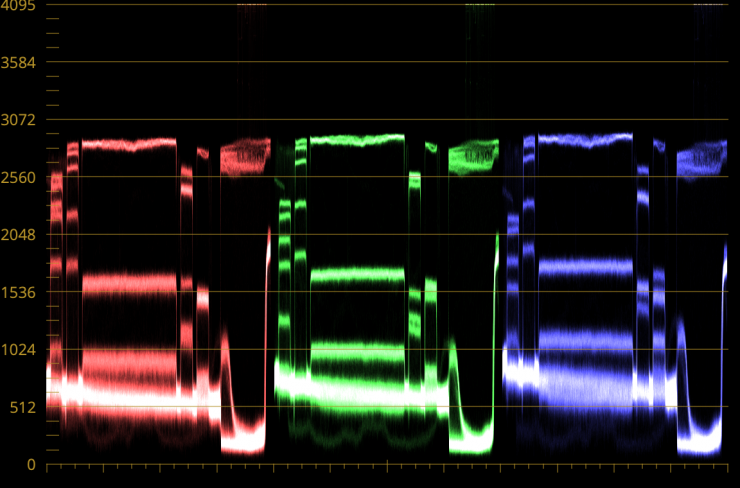
AMIRA
Above you can see the RGB parade for both cameras at EI 3200.
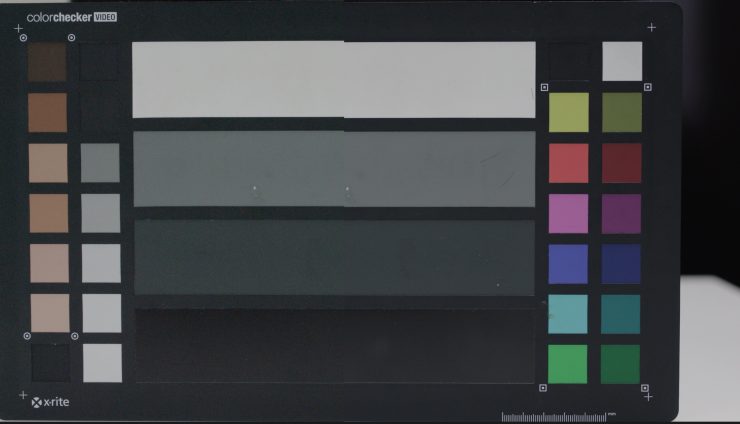
Above you can see a split screen between the ALEXA 35 at EI 800 and the ALEXA 35 at EI 6400 ES. The camera is able to accurately reduce colors with consistency across its EI range. This also shows me that using the ES setting doesn’t affect color reproduction.
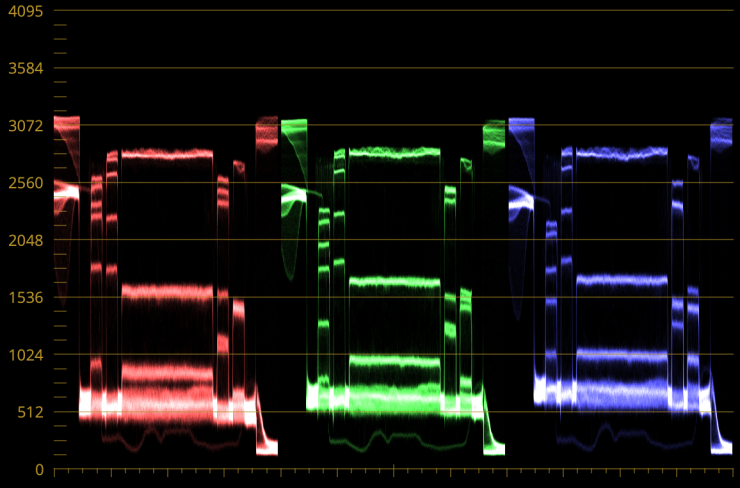
ALEXA 35 EI 800 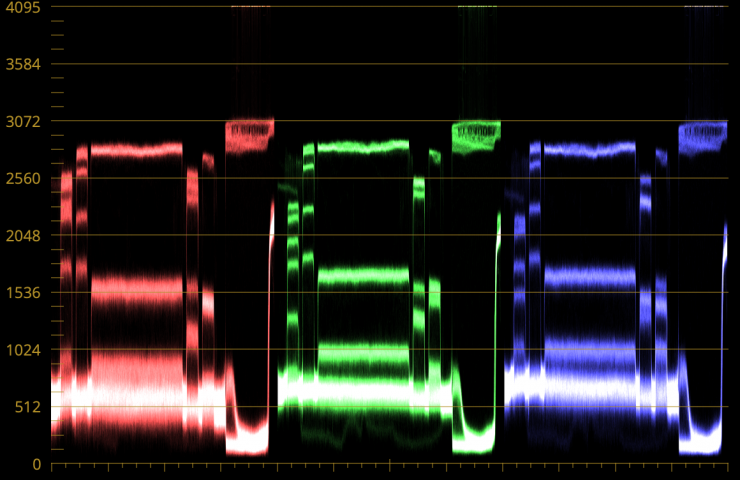
ALEXA 35 EI 6400ES
Above you can see the RGB parade for both images.
I also wanted to do another test where I compared the AMIRA against the ALEXA 35 when the ALEXA 35 was being used in its ES mode.
In this test, the ALEXA 35 clearly produced cleaner images.
Even if you are shooting in dark conditions, you are not going to be exposing the camera to a point where you have to use a very high ISO. Just because a camera can shoot at 50,000 ISO doesn’t mean you should shoot at 50,000 ISO. How many people do you know who shoot professionally capture footage at ISO levels that high? Maybe in certain run & gun news environments, or maybe in a documentary where you have no other choice, but in other types of work, you are not going to do this.
In certain situations, if you have to shoot above 5000, 6400 ISO then image noise may be the least of your problems. Again it really depends on what your intended goal is. If you do need to shoot at very high ISO levels, then there are other cameras out there that will be far better suited than the ALEXA 35.
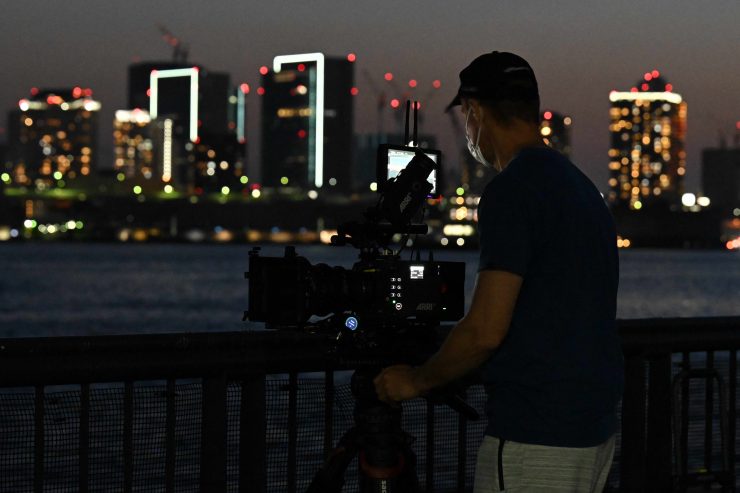
I shot material at various EI values and even quite a few shots at EI 6400 ES in conditions where there was almost no available light. The results you can obtain are pretty good at some of the higher EI levels, however, EI 4800 and EI 6400 can be pretty noisy. Yes, EI 6400 ES is really pushing it and you will need to use post noise reduction, but it allowed me to capture images that wouldn’t have been possible with previous ARRI cameras. Not many people are going to shoot at EI 4800 or EI 6400 with this camera, but it is good to know that if you have to you can.
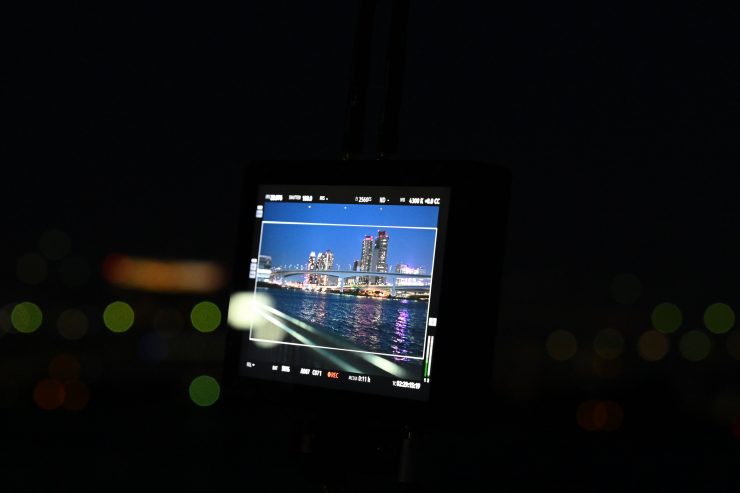
One of the reasons I like ARRI cameras so much is that you can shoot in very mixed lighting conditions and still get nice skin tones and color rendition, whereas a lot of other cameras would look horrible.
Thoughts after using the camera
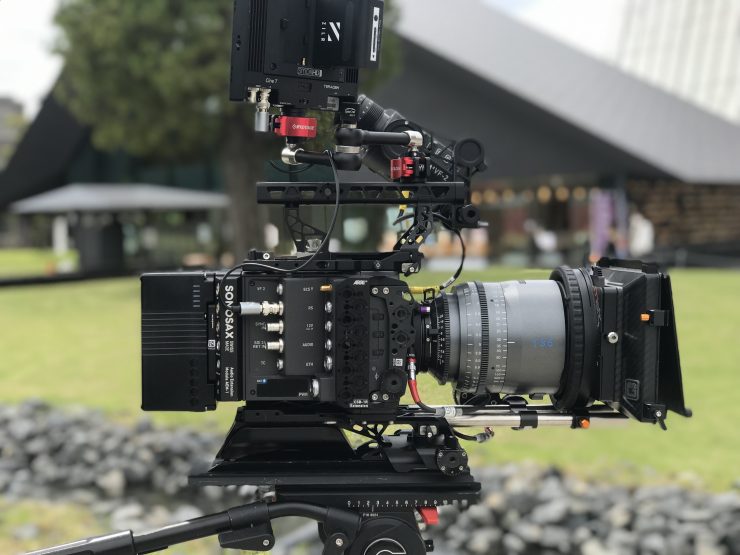
Image copyright Newsshooter 
It was very evident to me from using the camera over the last 10 months or so that the amount of highlight retention is better than any camera I have ever used or seen. I could see details in the highlights that I couldn’t see with other cameras. The usable latitude that the camera has is extremely impressive.
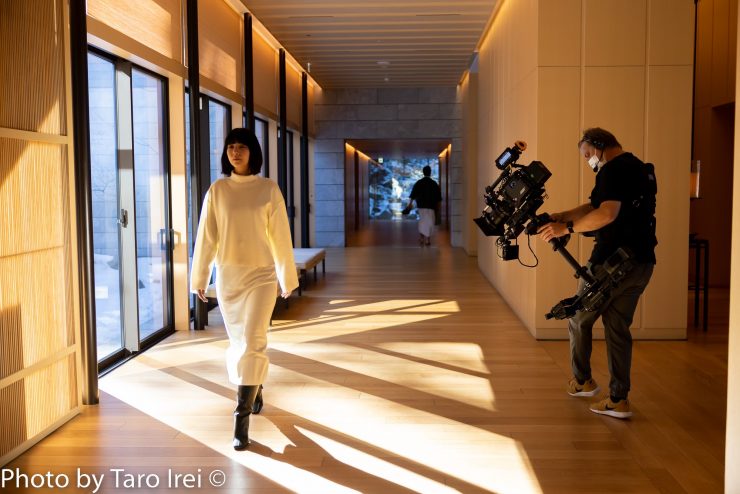
This allowed me to shoot in environments where previously I would have had to use more lighting to not blow out high-contrast scenes with bright windows. Look, not every scene is going to be so challenging as to require 17 stops of dynamic range, but it is nice having that additional headroom to work with.
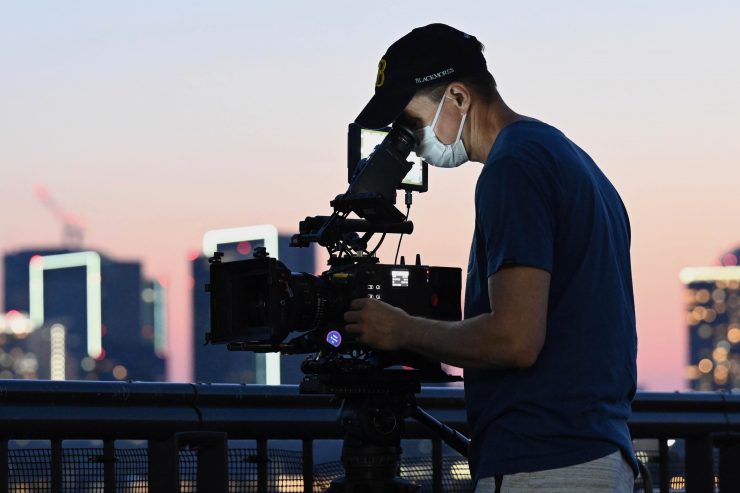
Any camera can look good in heavily controlled conditions, for me, the mark of a great camera is one where it can look good in any conditions, regardless of how much control you have. 1917 and the Revenant are prime examples of movies where they relied very heavily on natural lighting and shooting in conditions that weren’t always ideal. With the camera spending a lot of time moving and covering large distances in a single shot or being used in extreme environments, you are not going to be able to control the conditions regardless of the budget or the size of the crew.
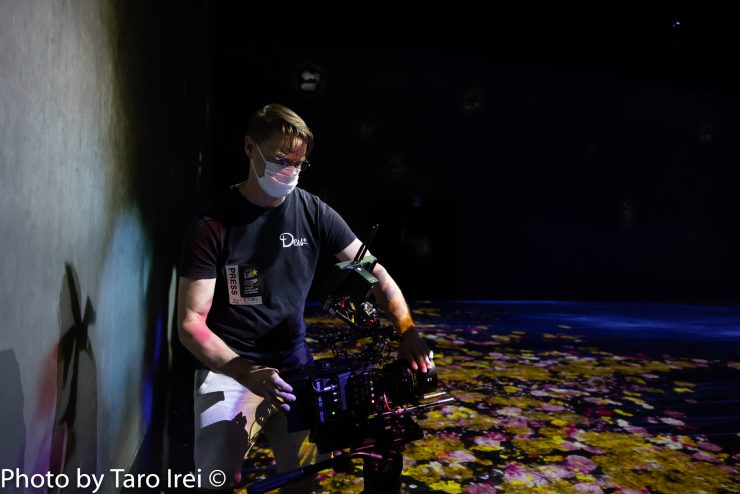
I like to take as much as possible out of the equation when evaluating the camera. I don’t want to shoot in super-controlled environments, I don’t want to use lots of lighting, and I don’t want to shoot with a ton of equipment and plenty of people to help me out. To test a camera I like to strip it down to the basics. In controlled environments, you can tailor the conditions to the camera you are using, but in uncontrolled conditions, the camera has to be able to perform no matter what you throw at it. This is where, at least in my opinion, the ALEXA 35 excels.
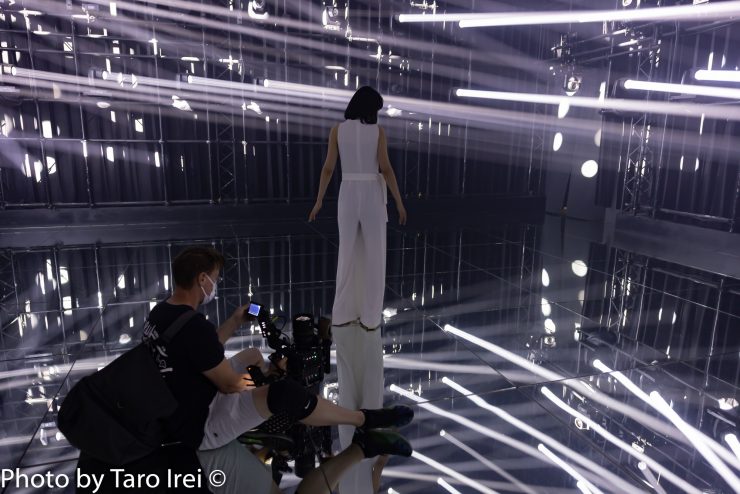

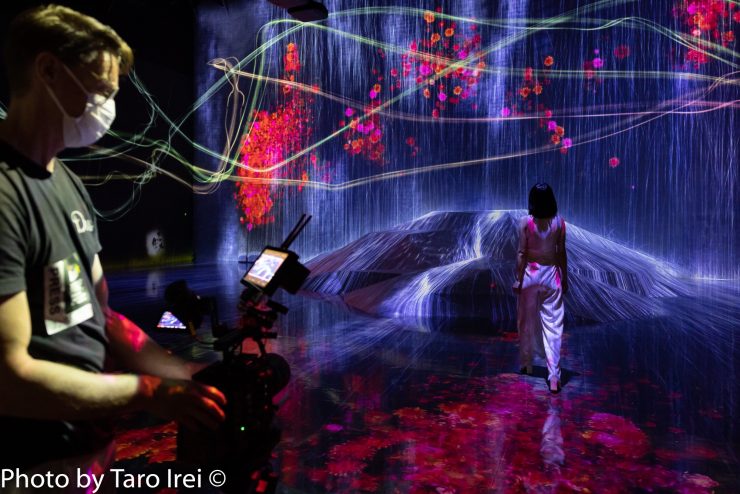
I used the ALEXA 35 for a couple of TVCs where I had to shoot a lot of the content in very challenging lighting environments where there were very high dynamic range scenes with a lot of mixed lighting. I was extremely impressed by the results I could obtain. This is a camera that you can throw anything at and still achieve excellent results.
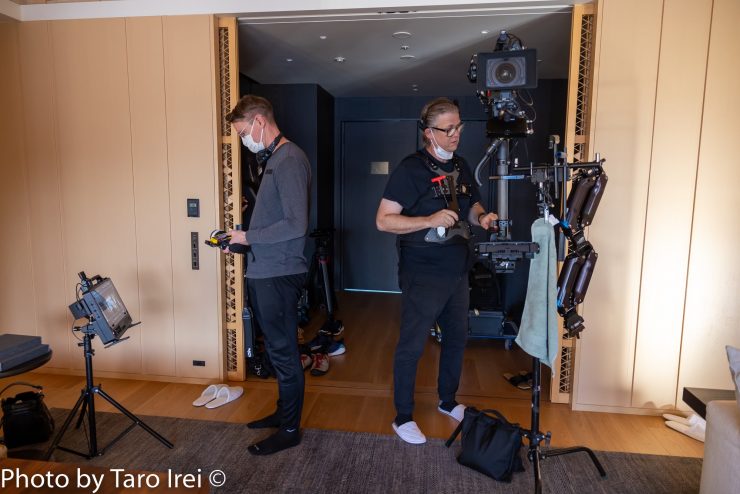
Now, I can’t show you any of this footage because I don’t have clearance to do so.
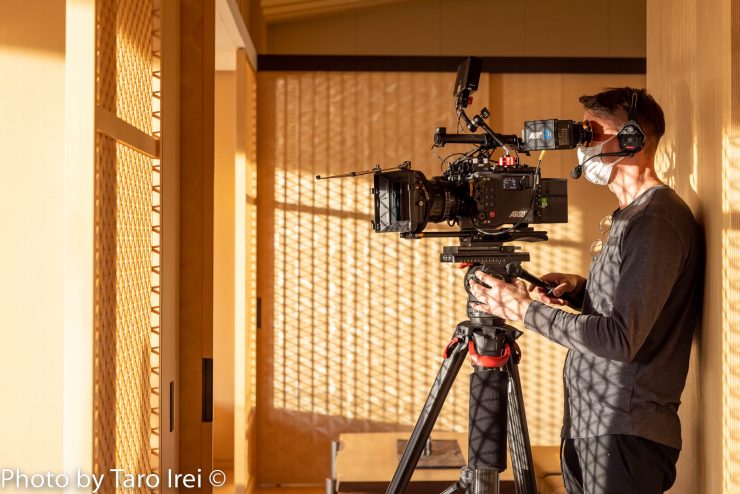
I think that it is going to take people a while to get used to the new look of the ALEXA 35 because it is different from that of previous ALEXA cameras. Even though the majority of footage from an ALEXA 35 is going to be color graded, I found that the pictures straight out of the box have a lot more accurate color rendition than other ARRI cameras if you are just using a LUT. Like any camera, you may not like the look of the ALEXA 35, because you are so used to seeing material from older ALEXA models over the last 13 years. If you don’t adapt you die. ARRI needed to change things up and coming up with an entirely new sensor after 13 years is no easy feat. You could arguably say that the ALEXA 35 may have lost some of that organic look that the previous ALEXA cameras offered, but I think some people have jumped to a lot of conclusions given the limited amount of material that has been shot on the camera.
At the end of the day, it is still just a camera
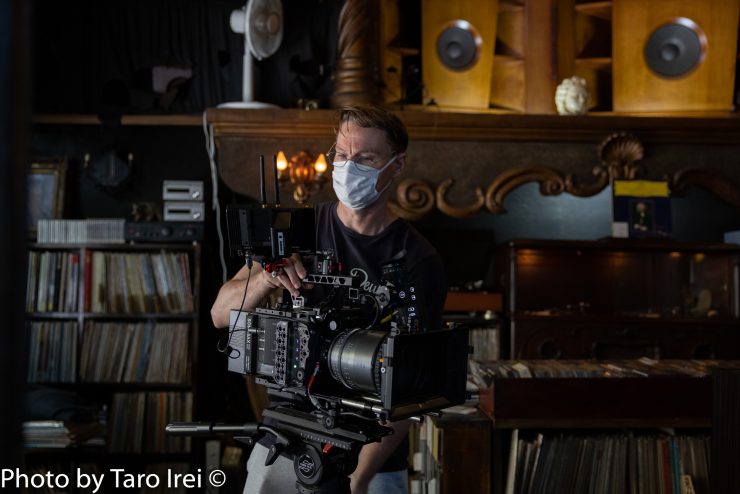
The ALEXA 35 is an extraordinarily good camera. Is it the perfect camera, of course not. This is not a camera that is going to suit everyone. At the end of the day, it up to the person using the camera to take the pictures. You could buy a race car, but if you’re not a race car driver you are not going to be able to win any races. A camera is just a tool. Having a good tool is always helpful, but it is still just a tool. You work within the confines of what equipment you are using.
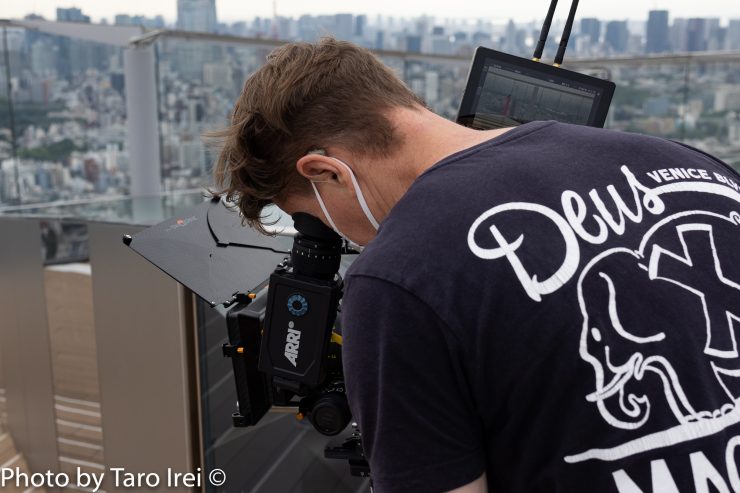
The additional latitude you get over the original Mini, coupled with a better design, more user buttons, better processing, and better low light performance, shows just what a few years of R&D can do. Anyone who thinks this is just a mildly updated ALEXA Mini is severely underestimating just how good the improvements are.
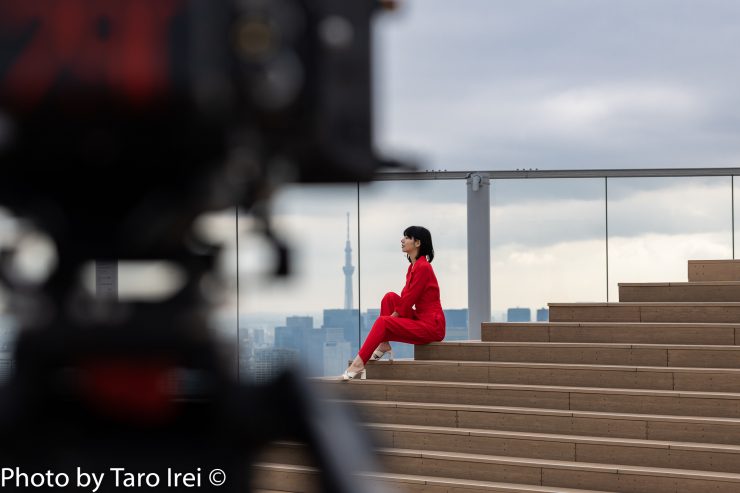
The ALEXA 35 is very easy to use and the results you get are impressive. It is far and away the best camera I have ever used when it comes to straight image quality, although the Mini LF certainly gives it a run for its money. The highlight retention, dynamic range, color accuracy, and usability are all excellent. No matter what you throw at it, the footage always seems to look good. It is also so easy to grade and deal with the footage after you have finished shooting once you know the right processes to use. I personally don’t tend to shoot RAW very often, and with this camera, I primarily shoot most of my material in ProRes 4444/4444 XQ.
If you can’t produce good results with any of today’s digital cinema cameras then you are probably in the wrong occupation.
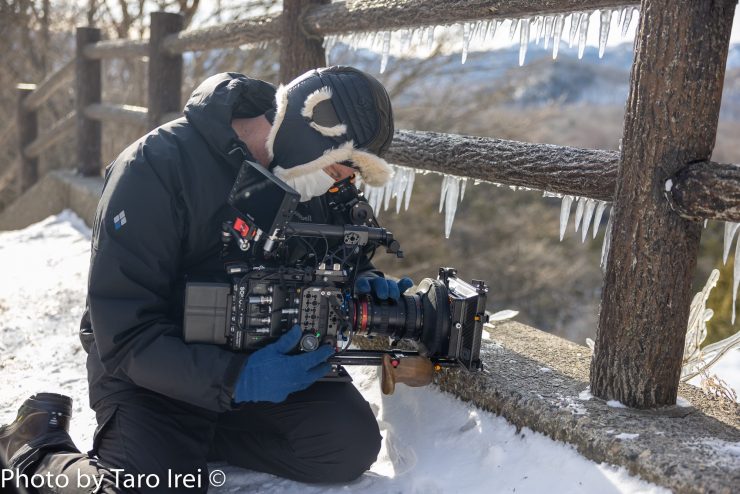
At the end of the day, a camera is just a tool, and it is up to the user to get the best results out of it. The camera doesn’t frame up a shot or capture material for you. Without having someone who knows how to use it, it is just an expensive doorstop.
Buying an ALEXA 35 or any high-end digital cinema camera isn’t suddenly going to make you a top tier cinematographer.
Almost any camera on the market today is capable of producing great results in the right hands. The gap between high-end digital cinema cameras and mirrorless hybrids, at least when it comes to image quality in good conditions, is not nearly as big as it once was.
Is shooting S35 a benefit or a hindrance?
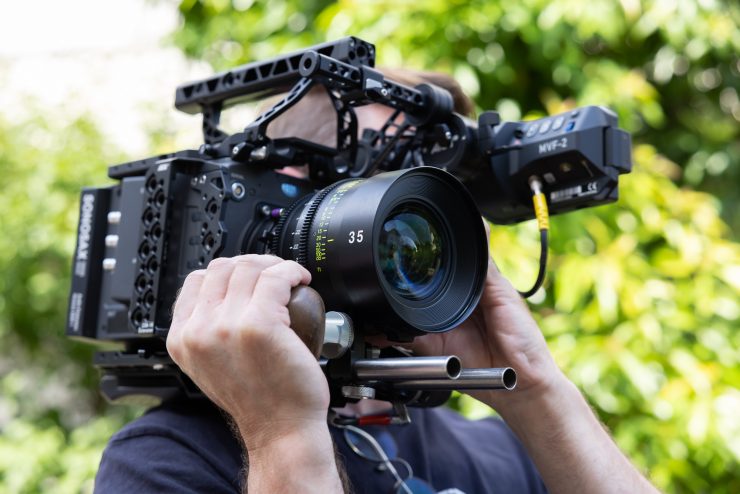
Well, it’s both. It really depends on what you are shooting. I love the ability to get ultra-wide, undistorted shots with a full frame or larger sensor, but on the other hand, I like the extra reach, and more affordable and lightweight lens options there are when shooting on an S35 camera. With the ALEXA 35, I was able to use all of my existing S35 zooms from Fujinon and Angeniuex, which is something I couldn’t do with the ALEXA Mini LF unless I put it into one of the S35 shooting modes.
There really aren’t that many full-frame cinema zoom lenses out there on the market that have a long reach. If you are shooting documentaries or wildlife on a full-frame sensor you are going to lose that added length you get when shooting S35.
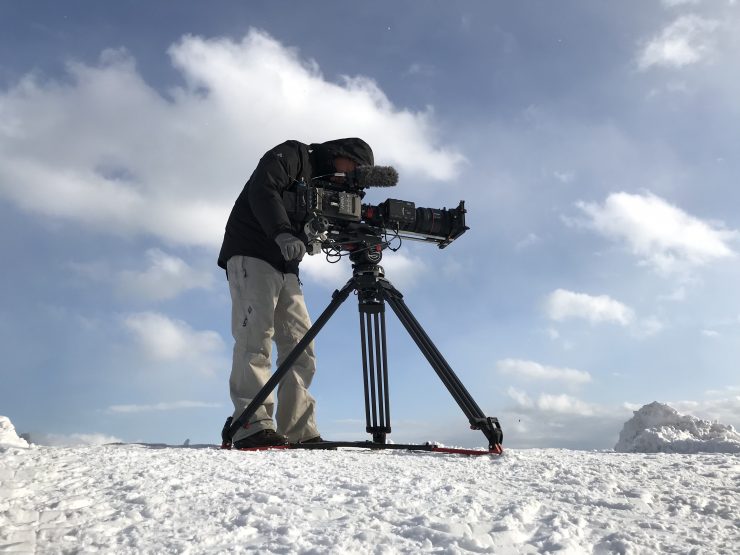
For instance, I can’t use the Canon Canon CINE-SERVO 50-1000mm without using some sort of adaptor or cropping the image in post. The benefit of some full frame cameras is that they do have dedicated S35 shooting modes so you could arguably get the best of both worlds.
The other problem with full-frame and shooting in 4K and above resolutions is your focus has to be spot on, otherwise, it looks horrible. It is very easy, especially if you want to shoot fairly wide open, to mess up the focus if you are not careful. I found that on occasion when I was using the ALEXA Mini LF I was getting images that were a little soft because I wasn’t checking the focus closely enough.
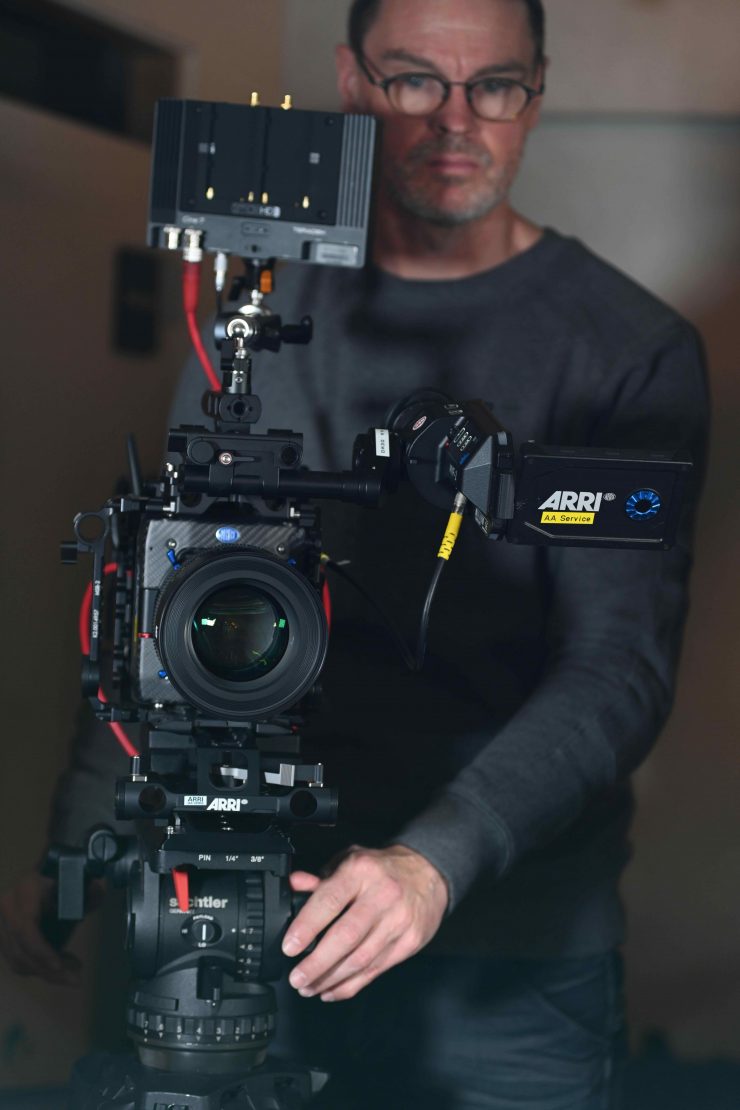
If you chose the ALEXA Mini LF over the ALEXA 35, you could, of course, use a smaller area of the sensor with certain S35 lenses if you need to, but the majority of S35 glass won’t cover that sensor. The Mini LF does have S35 modes now, since the release of Mini LF SUP 7.0. Below you can see what they are.
ALEXA Mini LF Super 35 Recording Formats
These Super 35 (S35) recording formats allow the use of an ALEXA Mini LF instead of or alongside an ALEXA Mini with identical recording formats. The same workflow can then be used for Mini LF and Mini (except that Apple ProRes has an .mxf container on Mini LF and a .mov container on Mini). If all you need is the S35 sensor area, these new formats also provide a lower data rate than the LF formats. Please note that these S35 recording formats, like their equivalents in the ALEXA Mini, are not Netflix 4K approved.
MXF/ARRIRAW 3.4K S35 3:2 – 3.4K
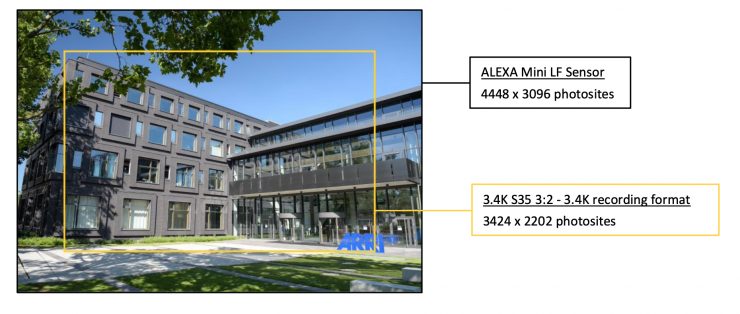
This format is great for shooting with many S35 lenses. This is the most flexible format for S35 projects and used by many feature films, drama series and commercials. The maximum frame rate of this Mini LF recording format (60 fps) is twice that of the same recording format on the ALEXA Mini (30 fps).
MXF/Apple ProRes 3.2K S35 16:9 – 3.2K

Very popular for drama series and commercials without a 4K sensor resolution mandate, this format is ideal for shooting with most spherical S35 lenses for a 16:9 target deliverable. Using fewer photosites than S35 Open Gate reduces the data rate by 76%. Various post workflows are possible: for instance, if cropping to an HD image, this format provides ample extra resolution for resizing, repositioning, rotating, stabilizing, or tracking in post. Alternatively, up-sampling to UHD in post is easy and delivers great results. The maximum frame rate of this Mini LF recording format (75 fps) is higher than the same recording format on the ALEXA Mini (60 fps).
MXF/Apple ProRes 2.8K S35 4:3 – 2.8K

This format is designed for shooting with anamorphic S35 2x lenses for a target deliverable of 2.39:1 or for shooting with spherical S35 lenses for a target deliverable of 1.85:1 with extra room above and below the image. This is a popular format for the S35 ALEXA cameras, and was chosen to be included in Mini LF SUP 7.0 instead of the S35 6:5 as it provides a lot more flexibility for only a slightly increased data rate. The maximum frame rate of this Mini LF recording format (75 fps) is higher than the same recording format on the ALEXA Mini (50 fps). Please note that the recorded file container (border of black pixels around the image) differs in this format in size from the equivalent ALEXA Mini format.
MXF/Apple ProRes 2.8K S35 16:9 – HD

This was the first recording format ever released with the ALEXA Classic EV in 2010. It allows for shooting with any spherical S35 lens (they all cover the sensor area of 2880 x 1620), with a target deliverable of 16:9 HD (1920 x 1080). This is your format of choice if you want the quickest way to an HD deliverable with a super low data rate and the assurance that the sensor area is covered by any S35 lens. The maximum frame rate of this Mini LF recording format (100 fps) is lower than that of the same recording format on the ALEXA Mini (200 fps).
Remote Control
The ALEXA 35 can be remotely controlled in a variety of ways:
- ARRI Camera Companion App
- The Hi-5 3-axis hand unit for wireless remote lens and camera control
- The Wireless Compact Unit WCU-4 is a sophisticated, feature-rich and user-friendly 3-axis hand unit for wireless remote lens and camera control. It includes an integrated lens data display and offers extended ALEXA camera control.
- The Single Axis Unit SXU-1 controls a single lens axis. On set the SXU-1 perfectly complements the 3-axis WCU-4 as a separate iris control unit, or it can be used on its own, offering a low cost option to productions that do not need multi-axis wireless lens control.
- By connecting the Multi Viewfinder MVF-2 with a 10 m/33 ft VF cable to the ALEXA 35 the viewfinder becomes a handy remote control for all camera functions as well as a monitor for the live image the camera is capturing.
- The ALEXA 35 can be controlled wirelessly (over WiFi) or by cable (ETH connector) from a computer, tablet or smart phone running a web browser with the web remote.
- The Operator Control Unit OCU-1 is an addition to the WCU-4 lens control system on ALEXA Mini, ALEXA LF, ALEXA Mini LF, and ALEXA 35 that connects to the camera via an LBUS cable. The OCU-1 enables operators to over-ride and return focus, iris, and zoom controls at the touch of a button.
- The Master Grips combine effective camera stabilization with comprehensive lens and camera control. They connect to the camera via LBUS cables.
Color Management & Image Processing
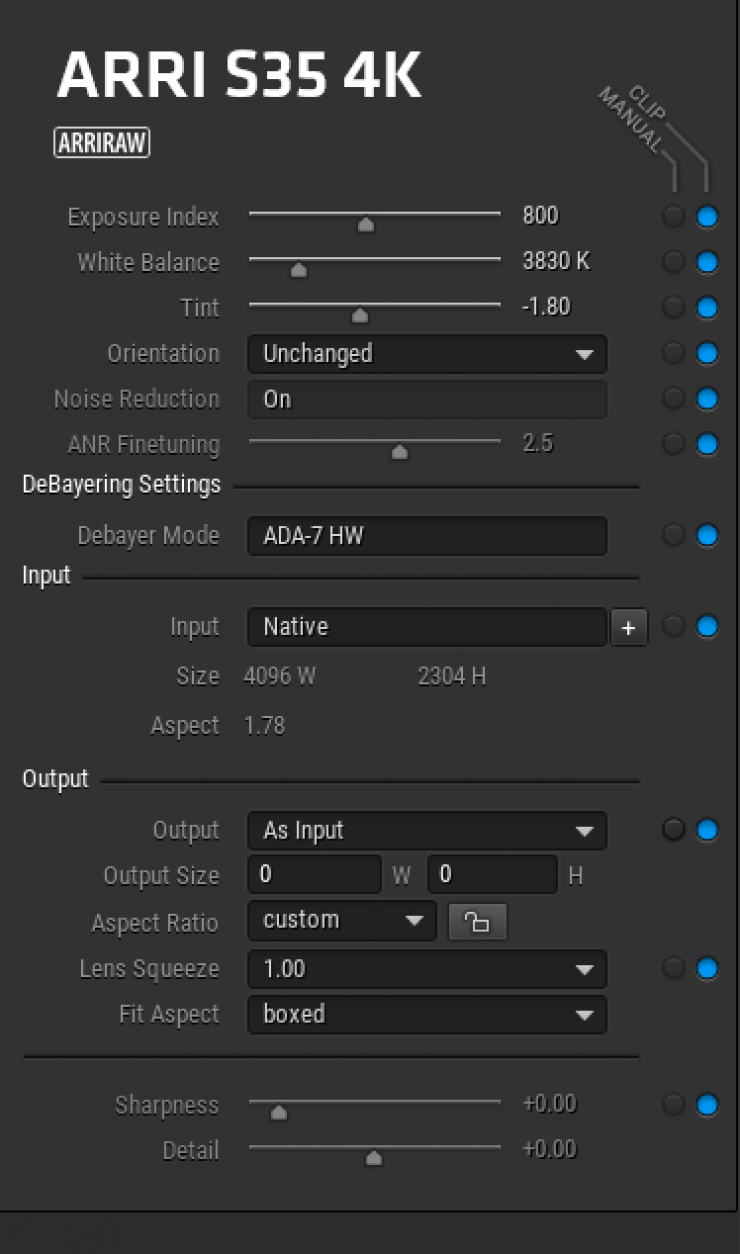
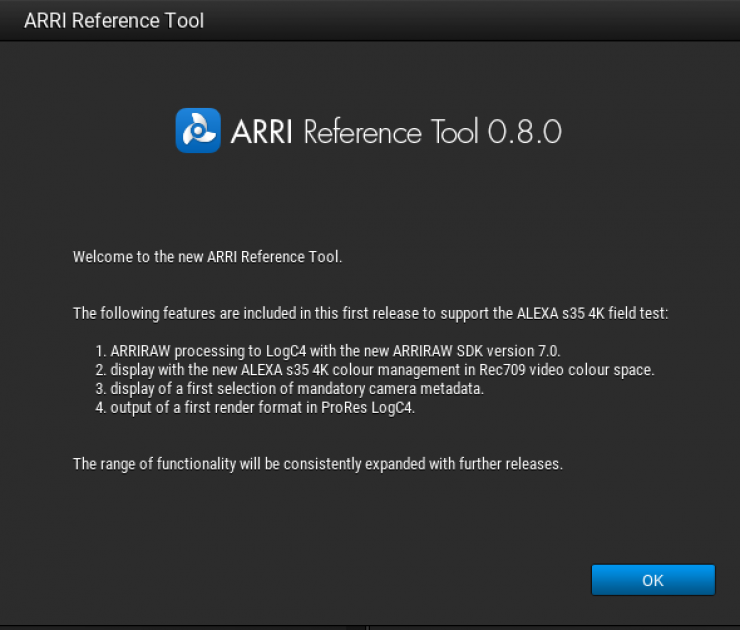
The camera supports ARRI Look Files available for SDR, HDR PQ, and HDR HLG. The ARRI ALEXA 35 offers 18-bit linear in-camera image processing
ARRIRAW and ProRes files are very straightforward and easy to use.
For ARRIRAW files you simply import them into the new ARRI Reference Tool, or you can use other compatible software such as Davinci Resolve or Baselight.
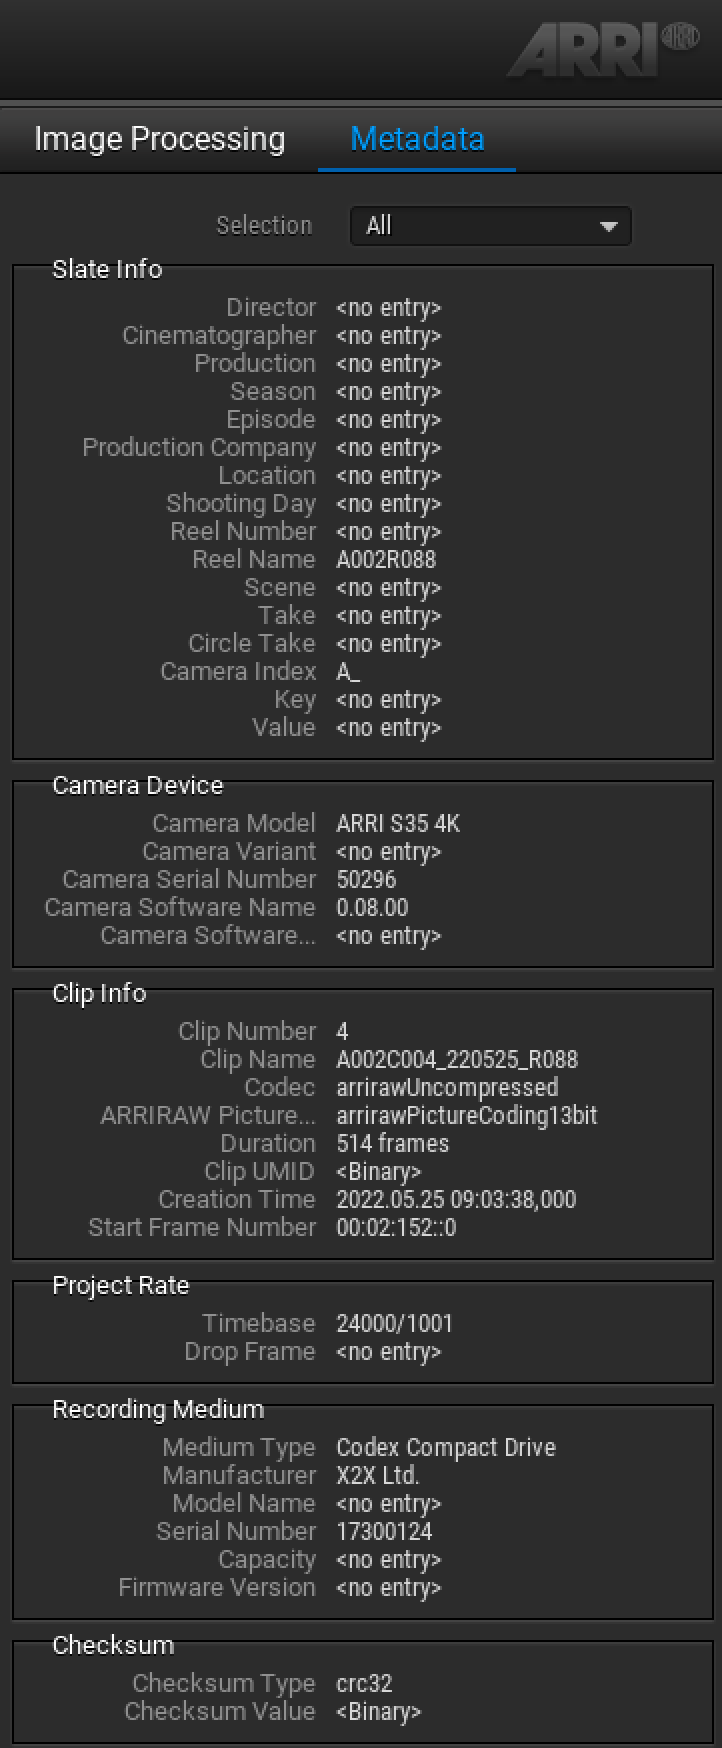
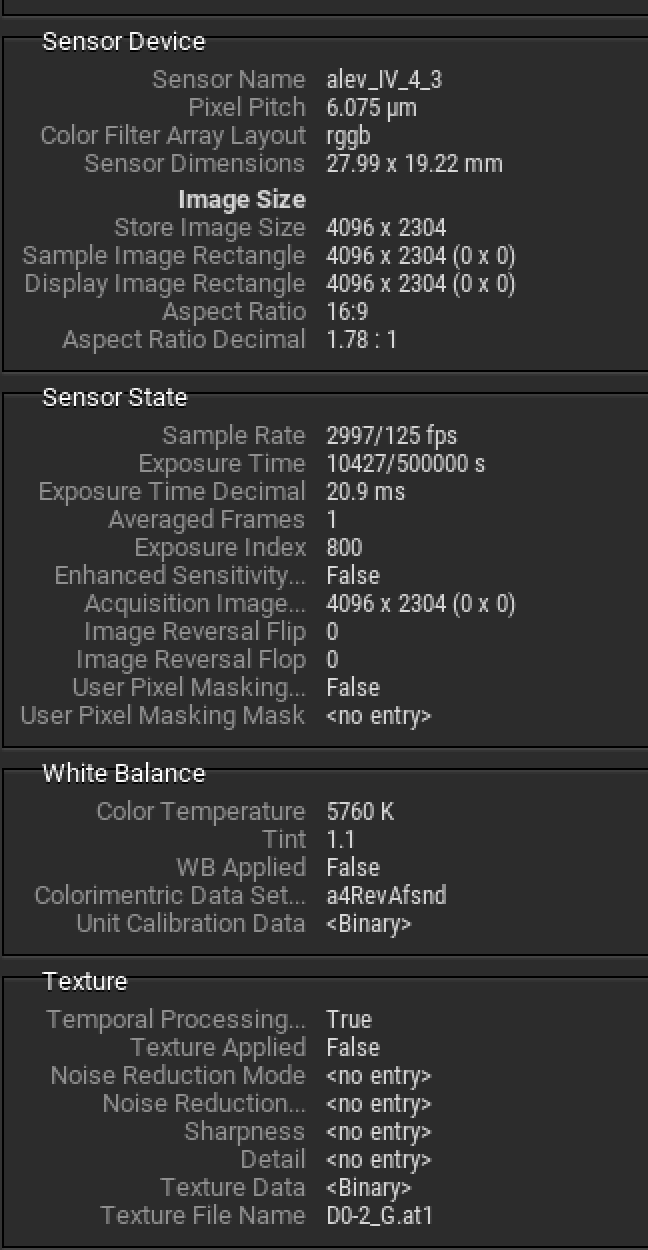
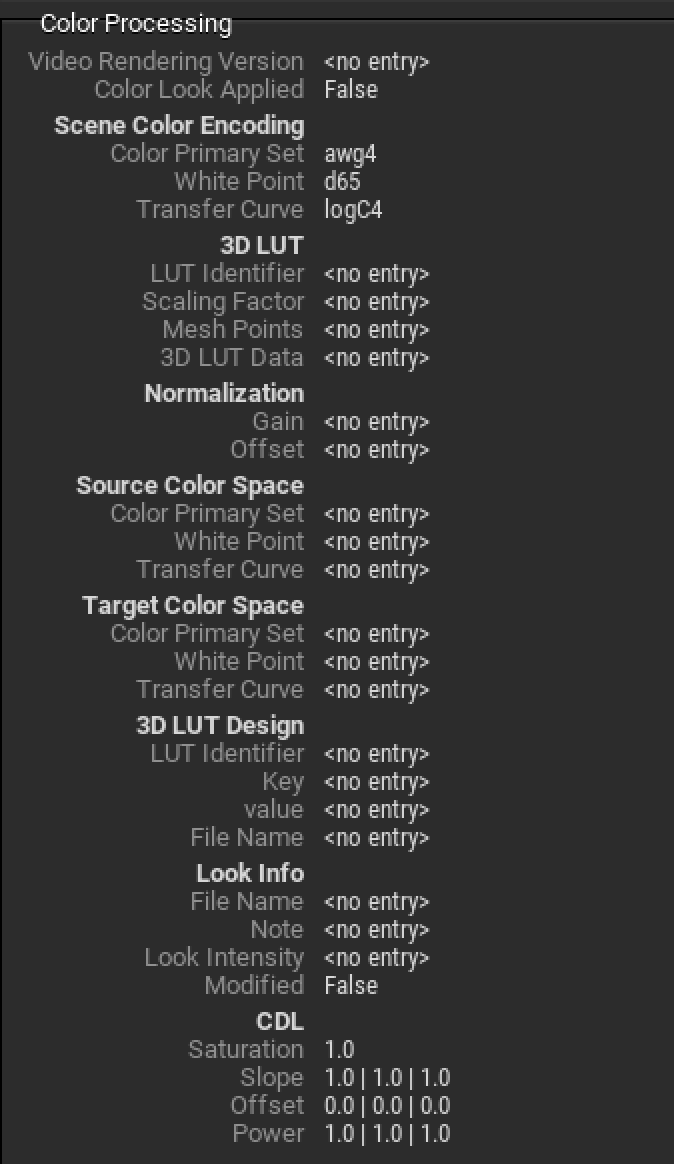
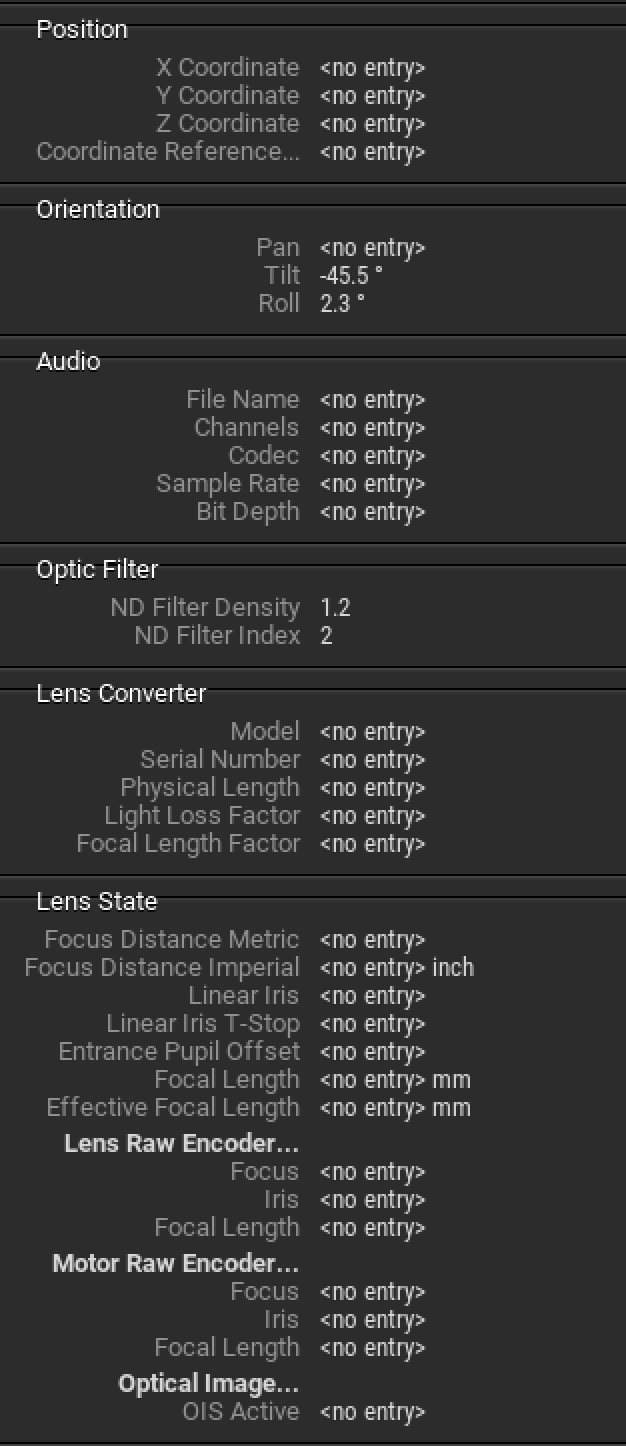
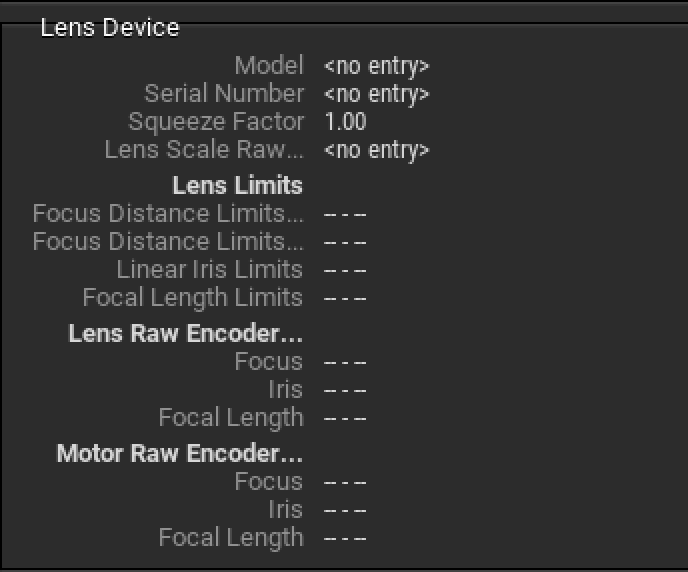
The camera is capable of capturing and storing a ton of different metadata.
The footage the camera produces is so easy to work with. I would go as far as to say that an ALEXA 35 file is incredibly easy to grade.
With the majority of footage I took, if I wanted to, I could literally just place the same viewing LUT I was using on the footage and it looks great. This is nice to be able to do if you need to turn material around quickly and it isn’t going to be graded by anyone.
This is an ALEXA Mini replacement
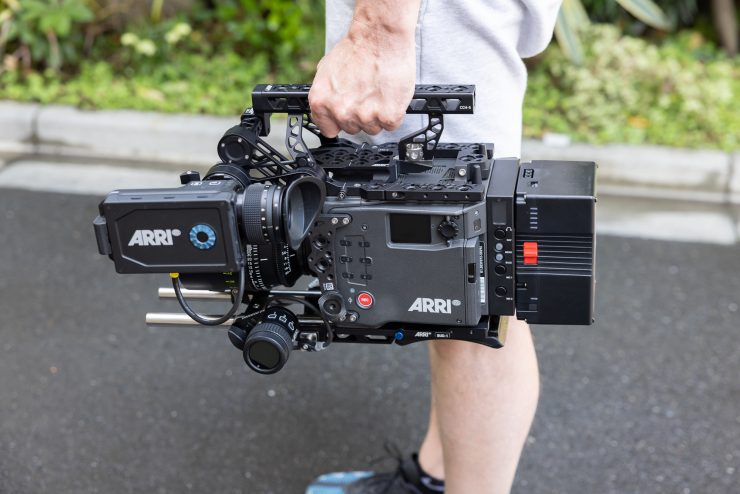
The ALEXA 35 is the ALEXA Mini replacement. ARRI is longer accepting orders for the ALEXA Mini. The camera has been superseded by the ALEXA Mini LF and the ALEXA 35.
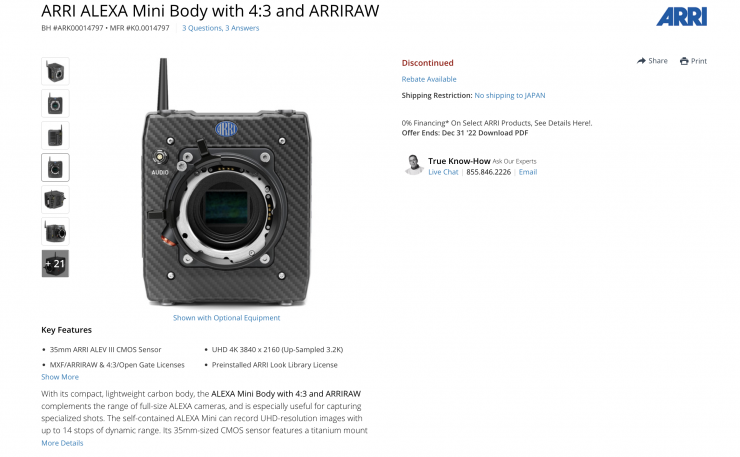
ARRI announced the ALEXA Mini back in 2015. It was a shrunken down version of the ALEXA with the same sensor with excellent dynamic range and fabled ‘ALEXA look’. The camera was designed with fast and flexible filmmaking in mind. At the time ARRI had no idea just how popular the camera would become. The ALEXA Mini was and is still being used on major productions all over the world.
What does this mean for existing ALEXA Mini owners?
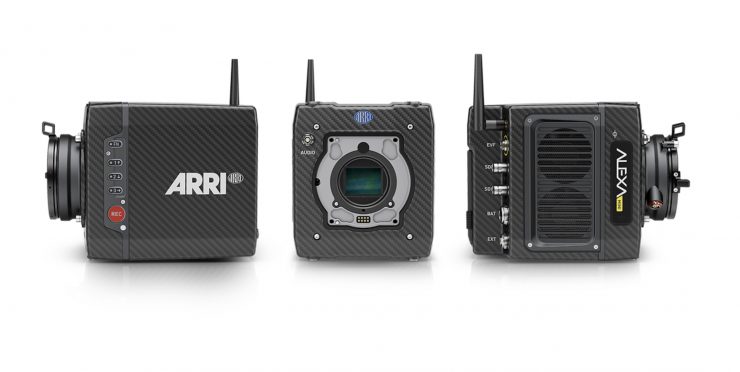
ARRI will still continue to sell the viewfinder, recording media, and licenses. They will also continue to manufacture spare parts and offer service for the camera, for many years. You don’t have to worry if you own any ARRI camera, the company can still repair, refurbish and calibrate the ALEXA Classic from 12 years ago.
Although you won’t be able to buy a brand new ALEXA Mini anymore, you will still be able to buy a refurbished or ex-demo one through ARRI CPO (Certified Pre-Owned).
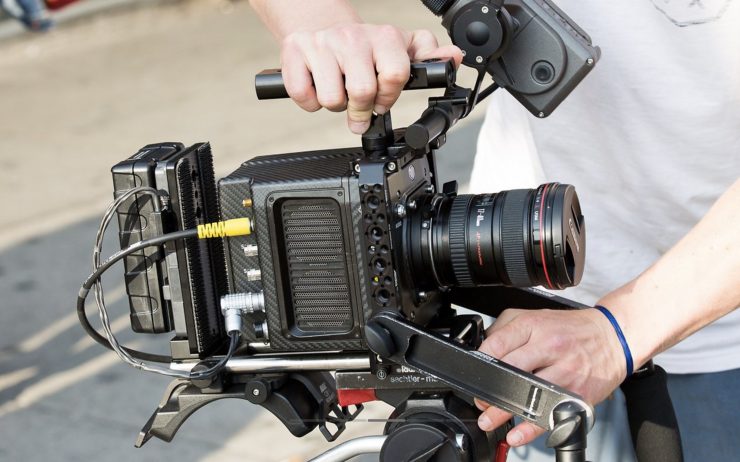
If you think you will suddenly be able to pick up a used ALEXA Mini for $10K you are sadly mistaken. The camera still holds its value incredibly well and most second versions still sell for upwards of $40,000 USD.
Do existing ALEXA Mini accessories still work?
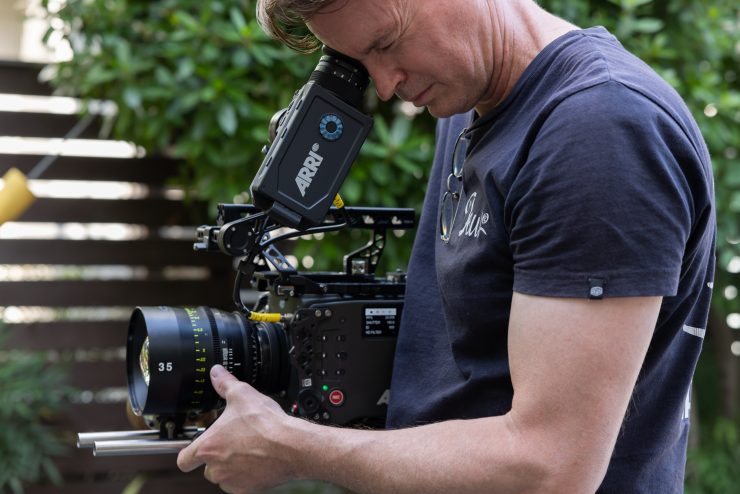
In short no. There are some ALEXA Mini accessories that will still fit and work on the ALEXA 35, but the majority of components won’t.
What does this mean for the AMIRA?
That is a good question. I have a strong feeling that we won’t see another AMIRA, especially since ARRI now has an audio module available for the ALEXA 35. I think the ALEXA 35 is both an AMIRA and an ALEXA Mini replacement.
I would love to see the new sensor in an updated AMIRA, but I don’t think that will happen. Even though at least in my personal opinion, the AMIRA features the best form factor for shoulder-mounted work, the industry trend has been to bring out smaller-sized box-style cameras and then build them up if they need to be shoulder-mounted.
History of the ALEXA
The original ALEXA was announced in April 2010 and 13 years later the camera system still stands on top of the perch when it comes to digital acquisition.

The ALEXA has become the modern digital industry standard in many ways. The camera has been used in high budget feature films, television shows, and commercials by some of the world’s leading cinematographers. Since 2010, a variety of ALEXA camera models have been introduced, including the ALEXA LF and ALEXA Mini LF, ARRI Rental’s exclusive ALEXA 65, and the ALEXA 35.
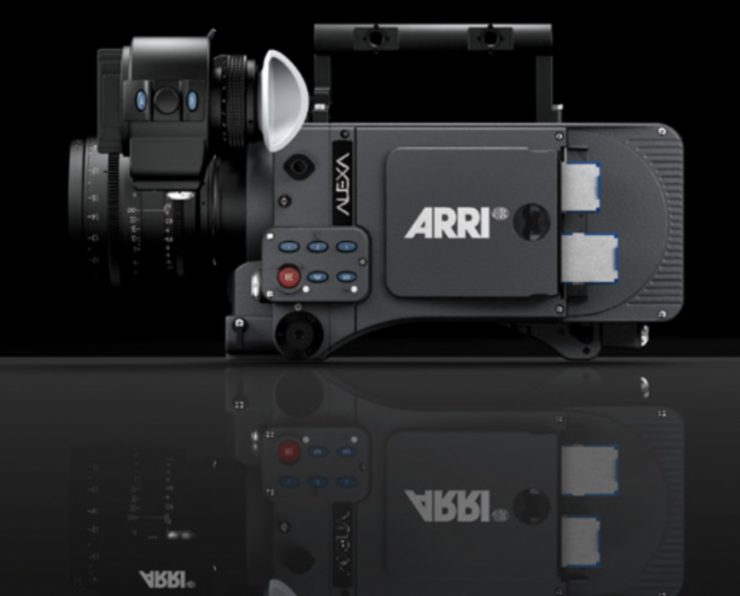
In April 2010 Arri released the ALEXA. The camera wasn’t ARRI’s first foray into digital cinematography, that came in the form of Arriflex D-20 and D-21. However, the ALEXA was a huge step up over the Arriflex D-21 and it combined a Super 35 sized CMOS sensor that could shoot in resolutions of up to 2880×2160 (2K) with the ability to capture uncompressed video or proprietary RAW (ARRIRAW) data.
Robert Richardson ASC was the first cinematographer to use ALEXA officially in 2010 on the feature film “Hugo.” Roger Deakins CBE, ASC, BSC first film using the ALEXA was 2011’s “In Time”.
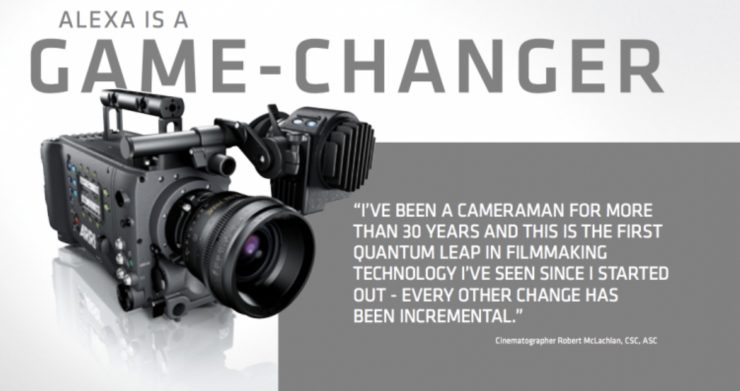
The Alexa was arguably the first camera that persuaded a lot of DP’s to make the switch from film to digital. Roger Deakins ASC BSC, said this after using the ALEXA on the James Bond film Skyfall- “The ALEXA’s tonal range, color space, and latitude exceed the capabilities of film. This camera has brought us to a point where digital is simply better.”
The science of the sensor
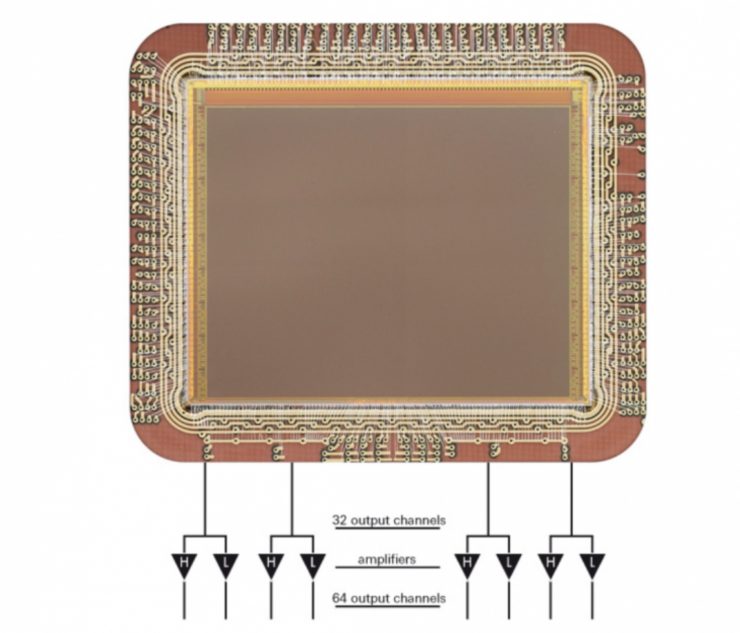
All ALEXA cameras (except for the ALEXA 35) feature a variation of the same sensor. The ALEXA ALEV III 3392×2200 (28.17×18.13mm) sensor has a pixel size of .00825mm, and even today, more than seven years after it was first announced, it’s still considered one of the best sensors on the market. This is a true testament to just how good this sensor is. The ALEV III sensor oversampled images intended for HD or 2K distribution. This oversampling has become commonplace amongst manufacturers who build sensors for digital cinema cameras.
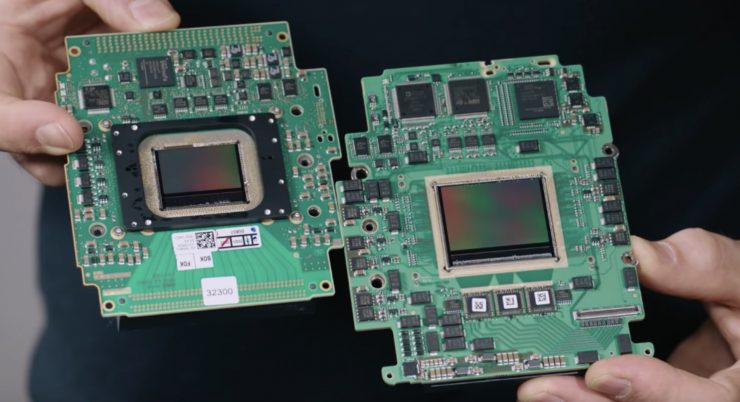
One of the reasons the ALEV III is slightly larger than a Super 35 frame, was so users could see 10 percent beyond the edges of the recorded frame. This capability is crucial so you can see what is going to come into frame. At the time this functionality was only available to optical viewfinders but was unheard of in any type of electronic viewfinder.
Unique for a digital sensor was the height of the ALEXA sensor, which allows a number of sensor modes only available in ALEXA cameras, including those needed for shooting with anamorphic lenses. The sensor’s 3.4K horizontal photosite count delivered unusually large photosites for an optimal balance between image sharpness on the one hand and high dynamic range, high sensitivity, and a low noise floor on the other.
Although the science behind the breakthrough performance of ALEXA’s custom-designed CMOS sensor is complex, the use of large photosites and a Dual Gain Architecture are its two main principles. By employing unusually large photosites (in today’s world of tiny cell phone sensors), ALEXA’s sensor exhibits high dynamic range, high sensitivity, and low crosstalk. The larger a photosite is, the more light it can capture, and the lower the noise.
The Dual Gain Architecture simultaneously provides two separate read-out paths from each pixel with different amplification. The first path contains the regular, highly amplified signal. The second path contains a signal with lower amplification, to capture the information that is clipped in the first path. Both paths feed into the camera’s A/D converters, delivering a 14-bit image for each path. These images are then combined into a single 16-bit high dynamic range image. This method enhances low light performance and prevents the highlights from being clipped, thereby significantly extending the dynamic range of the image.
The fact a sensor that is 13 years old is still considered by many to be the benchmark in the industry (up until the release of the ALEXA 35 in 2022) is a testament to just how good it was and continues to be.
A variety of ALEXA platforms
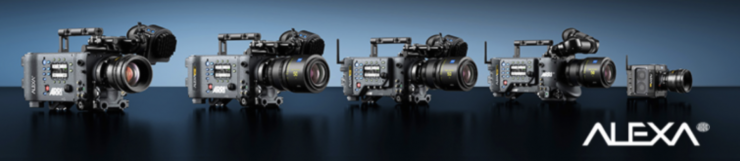
Since its introduction 10 years ago, the ALEXA has evolved and morphed into several different versions. In all, there have been 20 variations of the ALEXA, if you include the ALEXA 65.
There have been eleven different cameras in the ALEXA family introduced over the years, so let’s have a look at all of them. The ALEXA series can be broken down into 7 groups:
- ALEXA CLASSIC Cameras
- ALEXA XT Cameras
- ALEXA SXT Cameras
- ALEXA 65
- ALEXA MINI
- ALEXA LF cameras
- ALEXA 35
Here are all of the ALEXA models that have been released to date:
- ALEXA
- ALEXA Plus
- ALEXA Plus 4:3
- ALEXA M
- ALEXA Studio
- ALEXA HD
- ALEXA HD Plus
- ALEXA XT
- ALEXA XT Plus
- ALEXA XT M
- ALEXA XT Studio
- ALEXA SXT EV
- ALEXA SXT Plus
- ALEXA SXT Studio
- ALEXA SXT W
- ALEXA 65
- ALEXA Mini
- ALEXA LF
- ALEXA Mini LF
- ALEXA 35
ARRI ALEXA CLASSIC Cameras
First-generation ALEXAs are called ALEXA Classic cameras. They were released between 2010 and 2012. They have exceptional image performance and are simple to operate, reliable in the most extreme environments, and versatile enough to cover a wide range of workflows and budgets. They will empower you to tell your story with pictures of breathtaking richness and detail.
ALEXA Classic camera models are the:
- ALEXA
- ALEXA Plus
- ALEXA Plus 4:3
- ALEXA M
- ALEXA Studio
- ALEXA HD
- ALEXA HD Plus
The ALEXA HD and HD Plus are the basis for the ALEXA Fiber Remote and Fiber Remote Plus camera sets. All ALEXA Classic cameras are equipped with an SxS Module located on the left side of the camera with two slots for SxS PRO or SxS PRO+ cards.
ALEXA Classic cameras can be upgraded with the XR Module and other parts for most of the features of ALEXA XT cameras except Open Gate sensor mode.
ARRI ALEXA
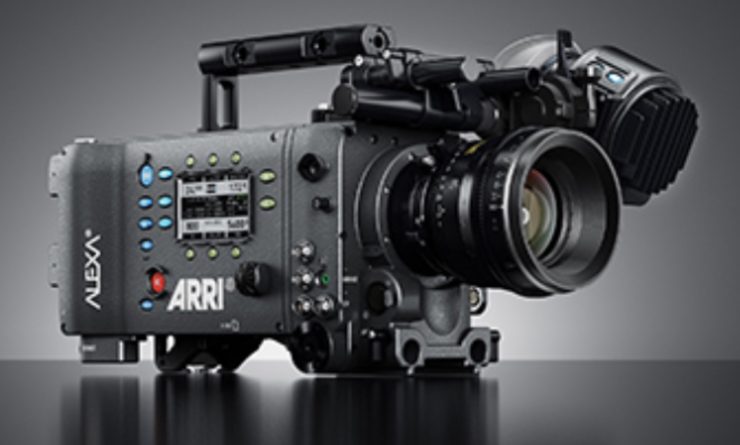
The ALEXA used the ALEV III CMOS sensor (3392×2200 effective pixels) and could shoot in resolutions up to 2880×2160. It had a PL mount and supported the recording of uncompressed video or proprietary RAW (ARRIRAW) data. The ALEXA’s CMOS Super 35mm sensor was rated at ISO 800. That sensitivity allowed the camera to see a full seven stops of overexposure and another seven stops of underexposure, an unprecedented 14+ stops of dynamic range, which at the time was unheard of for digital capture. The 14+ stops of dynamic range were available over the entire sensitivity range from EI 160 to EI 3200
ARRI ALEXA PLUS
The ALEXA Plus added integrated wireless remote control, the ARRI Lens Data System (LDS), additional outputs, lens synchronization for 3D, and built-in position and motion sensors.
ARRI ALEXA PLUS 4:3
The ALEXA Plus added integrated wireless remote control, the ARRI Lens Data System (LDS), additional outputs, lens synchronization for 3D, and built-in position and motion sensors and a 4:3 sensor which enabled the camera to shoot in a 2x anamorphic mode.
ARRI ALEXA M
The ALEXA M had its imaging and processing unit broken down into two parts to be small, compact, and lightweight for 3D rigs and to use in spots where a traditional ALEXA couldn’t go.
ARRI ALEXA STUDIO
The ALEXA Studio featured an optical viewfinder, mechanical shutter, and a 4:3 sensor.
ARRI ALEXA HD
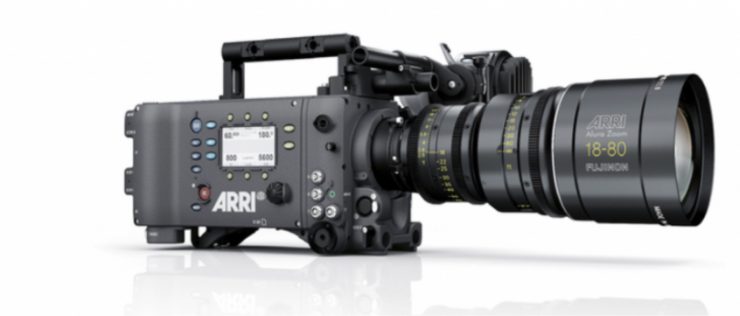
The ALEXA HD was a “budget” (well at least as far as ARRI cameras go) camera that shared the same 14+ stops of dynamic range, a native ISO of 800, SXS card capture, and C-log recording in 10-bit up to 120FPS. It used the same ALEV III CMOS sensor found in the standard ALEXA, but only allowed users to record in 1920×1080 resolutions.
ARRI ALEXA XT cameras
Second-generation ALEXAs are called ALEXA XT cameras (Xtended Technology). They were released between 2013 and 2016. In addition to all the features of the ALEXA Classic cameras, they are equipped with a Super 35 sensor (with Open Gate and 4:3 sensor modes), in-camera ARRIRAW up to 120 fps, ProRes 4444 XQ, ProRes 3.2K, internal ND filter, Lens Data System, integrated CDL capture and ARRIRAW checksum. In addition, they have a new viewfinder mounting bracket, include anamorphic de-squeeze and high-speed licenses as well as a new, super silent fan. ALEXA XT cameras are the ALEXA XT, ALEXA XT Plus, ALEXA XT M, and ALEXA XT Studio. The XR Module is on the left side of the camera. It has one slot for either an XR Capture Drive, the SxS Adapter for use with one SxS PRO or SxS PRO+ card, or the CFast 2.0 Adapter for use with one CFast 2.0 card.
ALEXA XT

In February 2013, ARRI unveiled the ALEXA XT (XT standing for extended technology). The XT was an upgraded version of the original ALEXA cameras. It added an XR module, which replaced the SxS module. This XR module allowed RAW recording without the need for an external recorder. Further improvements included an internal ND filter unit, a 4:3 sensor, and a quieter cooling fan.
ALEXA SXT cameras

Third generation ALEXAs, released in 2016, are called ALEXA SXT cameras (Super Xtended Technology).
ALEXA SXT cameras are the:
- ALEXA SXT EV
- ALEXA SXT Plus
- ALEXA SXT Studio
- ALEXA SXT W
While keeping the sensor and user interface of the original ALEXA design, the capabilities of ALEXA SXT cameras have been greatly extended. Equipped with the powerful electronics and sophisticated image processing from the ALEXA 65, SXT cameras can manage more recording formats and handle more processor-intensive tasks such as calculating looks with 3D LUTs or color space conversions to Rec 2020, all in real-time. Building on work done originally for the ALEXA Mini and AMIRA, the new ARRI looks management and optional noise reduction help creative filmmakers get their ideas across. And last but not least, the new media bay can accept a wide range of media, as well as the new, high-performance SXR Capture Drives.
the SXT line of ARRI ALEXA cameras which supports in-camera upscaling of Apple ProRes to 4K (UHD) resolution and Rec. 2020 color space. Arri also announced the SXR module which can upgrade XT, XT Plus, and XT Studio cameras with the SXT features.
The SXR Module is on the left side of the camera. It has one slot for either the XR Adapter for use with an XR Capture Drive, the SXR Adapter for use with an SXR Capture Drive, the SxS Adapter 2 for use with one SxS PRO or SxS PRO+ card or the CFast 2.0 Adapter 2 for use with one CFast 2.0 card.
ARRI ALEXA 65
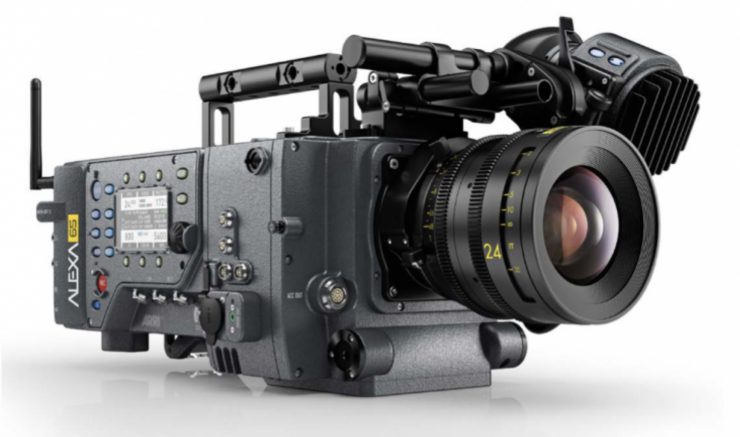
On 21 September 2014 at the Cinec convention in Munich, ARRI announced the ALEXA 65, a 6k 65mm digital cinema camera. The camera features a sensor that is slightly larger than a 65mm 5-perf film frame and is comprised of three ALEXA sensors that are arranged vertically and seamlessly stitched together.
The ALEXA 65 subsequently became the go-to large-format solution for high-end theatrical motion pictures. The cameras are only available through ARRI Rental. The ALEXA 65 has become so sought after that there is a long waiting list for anyone who wants to use one. The camera has been used on films such as The Revenant, Wonder Woman, Mission Impossible – Rogue Nation, Transformers – The Last Knight, Okja, Rogue One, The Dark Tower, War For The Planet Of The Apes, Life, and Thor – Ragnarok just to name a few.
ARRI ALEXA MINI
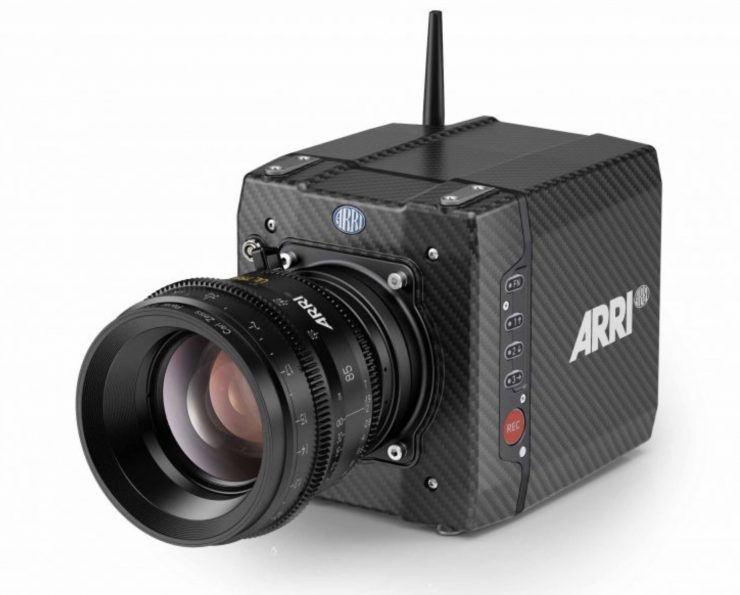
On 24 February 2015 Arri announced the ALEXA MINI. It has the same sensor as the other Alexa cameras but was a shrunken down version of the larger ALEXAs that was meant to be for drones, gimbals, and crane use. Little did ARRI know at the time, that the MINI has gone on to become probably the most widely used of all the ALEXA cameras. The MINI features in-camera recording to CFast 2.0 cards, the ability to record up to 200 FPS, and 4K UHD in-camera upscaling. It can also shoot at various resolutions, including 4:3 open gate.
ALEXA LF cameras
This consists of the ALEXA LF and the ALEXA Mini LF.
ALEXA LF

In early 2018, they announced the ALEXA LF, the company’s first large format sensor camera that you could buy.
The ALEXA LF’s A2X sensor wasn’t really new per se, it was based on two vertical ALEV-III sensors, which are stitched together to create a seamless large format image. This is the same principle of how ARRI created the ALEXA 65, which uses three AlLEXA sensors that are arranged vertically.
The ALEXA LF marked the first time (if you don’t count the ALEXA 65) ARRI had released a camera with a sensor that is capable of recording 4K images without the need for upscaling. The ALEXA LF can record in Open gate in a resolution of 4448 x 3096.
ALEXA Mini LF
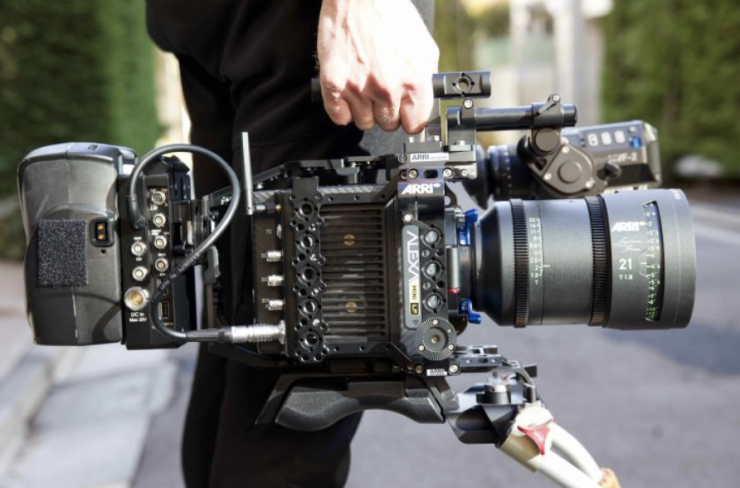
In March 2019, ARRI announced the ALEXA Mini LF. ARRI took everything people loved about the ALEXA Mini and improved on it.
While not identical to the current ALEXA Mini in terms of size, the Mini LF is very close. The Mini LF still shares the same basic design and form factor that users liked. The biggest difference, of course, was the sensor size.
I did a comprehensive review of the ALEXA Mini LF. You can read that review here.
With a highly upgradeable system architecture, the ALEXA has evolved through new models as well as software updates and hardware upgrades.
An impressive resume
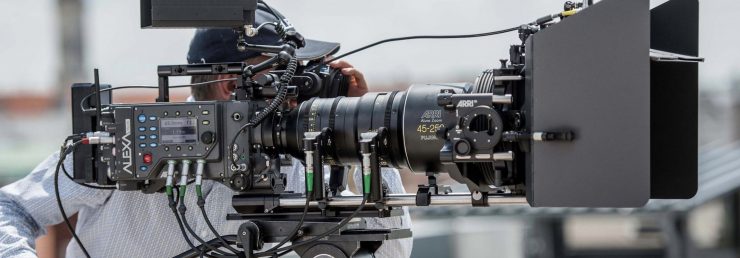
The ALEXA’s resume speaks for itself. The ARRI ALEXA was recognized with a Scientific and Engineering Award from the Academy of Motion Pictures Arts and Sciences and an Engineering Emmy from the Television Academy. More importantly, it has also helped innumerable filmmakers create award-winning work.


Movies shot on the ARRI ALEXA digital platform won the Academy Award for Best Cinematography 5 times in a row respectively for Hugo (2012), Life of Pi (2013), Gravity (2014), Birdman (2015) and The Revenant (2016).
Roger Deakins CBE, ASC, BSC won in 2018 for Blade Runner 2049. Alfonso Cuarón won in 2019 for Roma and Deakins won again in 2020 for 1917. In 2022 Greig Fraser won for Dune, and in 2023 James Friend won for All Quiet on the Western Front.
Variations of the ALEXA were used by cinematographers who won the award for Best Cinematography at the Oscars every year since 2012 except for 2017 and 2021.
Arri ALEXA cameras were also used on the following films that won the Academy Award for Best Picture:
- Hugo (2011)
- Birdman (2015)
- Spotlight (2016)
- Moonlight (2017)
- The Shape of Water (2018)
- Green Book (2019)
- Parasite (2020)
- Nomadland (2021)
- All Quiet on the Western Front (2023)
The ALEXA platform continues to be widely used throughout the industry by cinematographers who have the choice to use any camera system they want. The fact that a large proportion of cinematographers choose to use the ALEXA platform over other available options speaks for itself.
Price & Availability
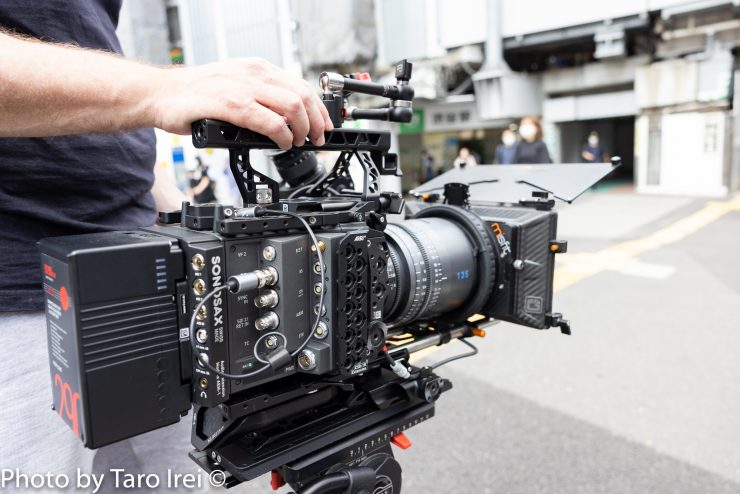
The price of the ALEXA 35 is not for the faint-hearted, but you have to clearly remember that this is a high-end digital cinema camera and it is not a product that will sell in huge numbers. Here are the prices:
K0.0041726 ALEXA 35 Production Set (19mm Studio): $77,940 USD (€71,500)
Includes:
- K1.0039373 1x ALEXA 35 camera body
- 10.0043678 1x ALEXA 35 Cine License
- K2.0018983 1x ARRI LPL Mount (LBUS)
- K2.0016936 1x ARRI PL-to-LPL Adapter
- K2.0034180 1x Balance Utility Dovetail BUD-1
- K2.0023751 1x B-Mount Battery Adapter
- K2.0020916 1x Multi Viewfinder MVF-2
- K2.0042857 2x Cable VF Right Angle (0.5m/1.5ft)
- K2.0024101 1x Power Distribution Module PDM-1
- KK.0041533 1x Production Support Set – Top
- KK.0041534 1x Production Support Set – Side
- KK.0041535 1x Production Support Set – Bottom (19mm)
K0.0041722 ALEXA 35 Lightweight Set: $75,100 USD (€68.900)
Includes:
- K1.0039373 1x ALEXA 35 camera body
- 10.0043678 1x ALEXA 35 Cine License
- K2.0018983 1x ARRI LPL Mount (LBUS)
- K2.0016936 1x ARRI PL-to-LPL Adapter
- K2.0034180 1x Balance Utility Dovetail BUD-1
- K2.0023751 1x B-Mount Battery Adapter
- K2.0020916 1x Multi Viewfinder MVF-2
- K2.0042857 2x Cable VF Right Angle (0.5m/1.5ft)
- K2.75007.0 1x Camera Power Cable Straight 2m/6.6in KC-50
- KK.0041537 1x Lightweight Support Set – Top
- KK.0041538 1x Lightweight Support Set – Side
- KK.0041539 1x Lightweight Support Set – Bottom
K0.0041724 ALEXA 35 Body & ARRI LPL Mount Set: $64,880 USD (€60.800)
- K1.0039373 1x ALEXA 35 camera body
- 10.0043678 1x ALEXA 35 Cine License
- K2.0034180 1x Balance Utility Dovetail BUD-1
- K2.0023751 1x B-Mount Battery Adapter
- K2.0018983 1x ARRI LPL Mount (LBUS)
- K2.0016936 1x ARRI PL-to-LPL Adapter
Please note that none of these sets include recording media, media dock/reader, batteries or lenses, which should be ordered separately.
As a comparison, below is what the ARRI ALEXA Mini LF costs:
- The ARRI ALEXA Mini LF Digital Cinema Camera Body $68,820.00 USD
- ARRI ALEXA Mini LF Camera & Lens Mount Set $70,300 USD
Accessory Costs
- The MVF-2 EVF costs $8,030 USD
- A 1TB Codex Compact Drive costs $2,490 USD
- Codex Compact Drive Reader (USB-C) $690 USD
- Codex Compact Drive Adapter $550 USD
You do need to factor in the cost of media, batteries, and battery chargers if you plan on purchasing an ALEXA 35. The cost of a reasonable amount of media and new batteries, along with the camera will run you north of $100,000 USD.
Real Cost Of Entry
As I always say, the price of the camera is never the price of the camera. On top of the cost of the Lightweight Set or the Production Set, you need to factor in having at least 3-4 1TB Codec Compact Drives, a Codex Compact Drive Reader, at least 4x 150WH dual voltage or 26V batteries, and quite possibly a new charger. On top of that, you will also definitely have to ensure the camera as well.
The realistic cost of entry for a working ALEXA 35 is going to be at least $100,000 USD.
Competition

As far as competition is concerned, that is a hard one. Apart from RED, nobody else is making a high-end S35 digital cinema camera, although cameras such as the Sony VENICE 2 and RED V-RAPTOR could also be viewed as competition.
RED recently announced an 8K S35 variant of V-Raptor XL.
Camera choice comes down to using the right tool for the right job. A VENICE 2 might be the right choice for one project and a RED V-RAPTOR could be the right choice for another. There is no such thing as the perfect camera and there is not one camera system that is perfect for every scenario.
How has the ALEXA 35 been received?
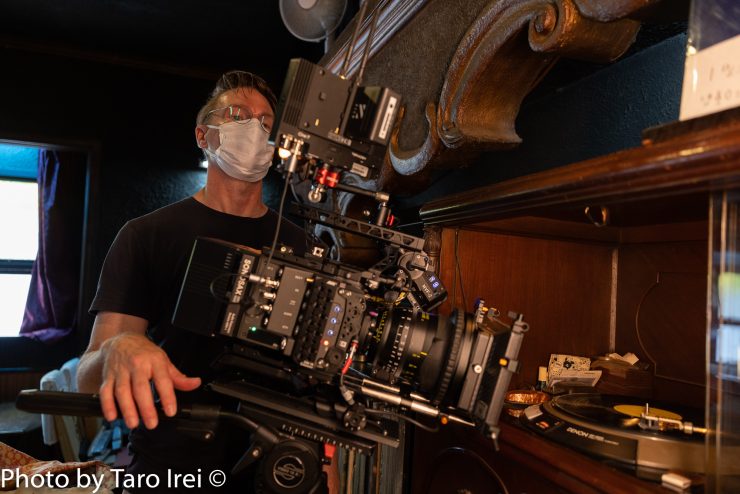
The ALEXA Mini LF has been an extremely popular camera and ARRI has struggled to keep up with the demand. They still have more orders than they can currently fulfill. The ALEXA 35 has also turned out to be just as popular. The ALEXA 35 is so heavily back-ordered that if you recently placed an order it could take up to a year for you to get your camera.
Everyone loves the image, reliability, and simplified operation of the ALEXA Mini and Mini LF, and I am sure those same people will like the ALEXA 35. ARRI’s goal with any camera is to make sure it has the same best image quality full stop. This is why they don’t chase resolution and have numerous shooting modes that don’t come with caveats.
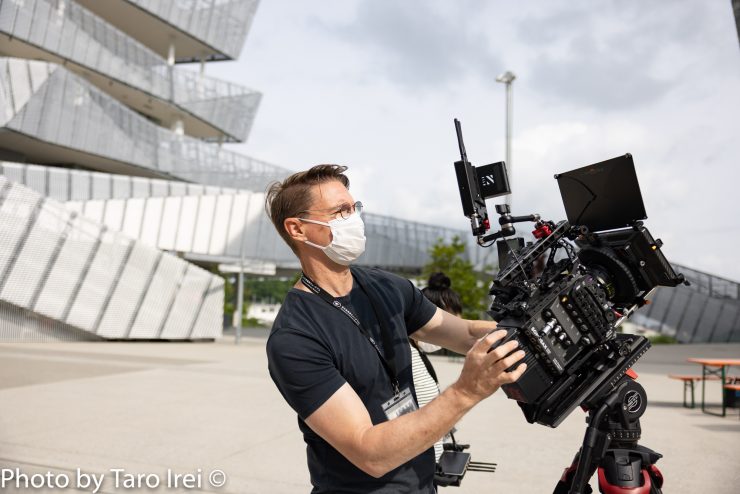
While a lot of people are likely to complain about the incremental improvement in resolution and the high asking price, the actual cinematographers and camera operators that will be using this camera won’t. ARRI has been successful because they know the market and they know what its users want. There is a reason the ALEXA Mini and Mini LF are such popular cameras and why ARRI dominates the high-end rental market. They don’t buy into the marketing BS, and they aren’t going to start following companies down the never-ending resolution road. As ARRI has always said, it’s about better pixels, not bigger pixels.
I have read lots of comments about the ALEXA 35 saying that it looks ‘digital’. There’s a lot of irony in statements like that because guess what, it is digital! Yes, the base look of the camera is different from that of previous ALEXA cameras, but it is just that, a base. You can create any look that you like and the look can also be further influenced by lens choice, lighting, and filters. The ALEXA 35 isn’t even capable of recording a baked-in look in camera. I think half the problem is that people are so familiar with the previous ALEXA look that it is hard to get used to something new. Because the ALEXA 35 replicates colors so much more accurately than previous ALEXA cameras it will take some time before people get used to it. Again, and I will keep stressing this, you have a RAW or a LOG image that you can manipulate and do whatever you want with it.
What do I like & what don’t I like
No camera is perfect and that is certainly true of the ALEXA 35. When making any decision about what camera to buy you need to look carefully and find the option that ticks the most boxes for you. It is impossible to find a camera that ticks all the boxes, but if you can get 75% of those boxes ticked you are doing well!
Below I have listed what I like and what I don’t like about the ALEXA 35.
LIKES
- Usability
- Build quality
- Ergonomics
- EVF
- Image Quality
- Image Control options
- Highlight handling
- Dynamic Range
DISLIKES
- Cost of entry
- Expensive media
- Audio options are not as intuitive or as easy to use as the AMIRA
- Would have liked to have seen higher frame rates, even if it was with an image crop
- Could be lighter
- Needs greater internal ND strengths
ALEXA 35 Specifications
| Sensor Type | ARRI ALEV IV 4:3 CMOS sensor with Bayer pattern color filter array |
| Sensor Size | 27.99 x 19.22 mm ⌀ 33.96 mm |
| Photosite Pitch | 6.075 μm |
| Sensor Frame Rates | 0.75 – 120 fps |
| Sensor Active Image Area (photosites) | ARRIRAW 4.6K 3:2 Open Gate : 4608 x 3164 4.6K 16:9: 4608 x 2592 4K 16:9: 4096 x 2304 4K 2:1: 4096 x 2048 3.3K 6:5: 3328 x 2790 3K 1:1: 3072 x 3072 ProRes 4.6K 3:2 Open Gate : 4608 x 3164 4.6K 16:9: 4608 x 2592 4K 16:9 Sensor Mode- 4K: 4096 x 2304 4K 16:9 Sensor Mode- UHD: 4096 x 2304 4K 16:9 Sensor Mode- 2K: 4096 x 2304 4K 16:9 Sensor Mode- HD: 4096 x 2304 4K 2:1 Sensor Mode- 4K: 4096 x 2048 3.3K 6:5 Sensor Mode- 3.3K: 3328 x 2790 3.3K 6:5 Sensor Mode- 4K 2.39:1 2x Ana: 3328 x 2790 3K 1:1 Sensor Mode- 3K: 3072 x 3072 3K 1:1 Sensor Mode- 3.8K 2:1 Ana: 3072 x 3072 2.7K 8:9 Sensor Mode- UHD 16:9 Ana 2x: 2743 x 3086 2K 16:9 S16 Sensor Mode- 2K: 2048 x 1152 |
| Sensor Active Image Area (dimensions) | ARRIRAW 4.6K 3:2 Open Gate : 27.99 mm x 19.22 mm (Ø 33.96 mm) 4.6K 16:9: 27.99 mm x 15.75 mm (Ø 32.12 mm) 4K 16:9: 24.88 mm x 14.00 mm (Ø 28.55 mm) 4K 2:1: 24.88 mm x 12.44 mm (Ø 27.82 mm) 3.3K 6:5: 20.22 mm x 16.95 mm (Ø 26.38 mm) 3K 1:1: 18.66 mm x 18.66 mm (Ø 26.39 mm) ProRes 4.6K 3:2 Open Gate: 27.99 mm x 19.22 mm (Ø 33.96 mm) 4.6K 16:9: 27.99 mm x 15.75 mm (Ø 32.12 mm) 4K 16:9 Sensor Mode- 4K: 24.88 mm x 14.00 mm (Ø 28.55 mm) 4K 16:9 Sensor Mode- UHD: 24.88 mm x 14.00 mm (Ø 28.55 mm) 4K 16:9 Sensor Mode- 2K: 24.88 mm x 14.00 mm (Ø 28.55 mm) 4K 16:9 Sensor Mode- HD: 24.88 mm x 14.00 mm (Ø 28.55 mm) 4K 2:1 Sensor Mode- 4K: 24.88 mm x 12.44 mm (Ø 27.82 mm) 3.3K 6:5 Sensor Mode- 3.3K: 20.22 mm x 16.95 mm (Ø 26.38 mm) 3.3K 6:5 Sensor Mode- 4K 2.39:1 2x Ana: 20.22 mm x 16.95 mm (Ø 26.38 mm) 3K 1:1 Sensor Mode- 3K: 18.66 mm x 18.66 mm (Ø 26.39 mm) 3K 1:1 Sensor Mode- 3.8K 2:1 Ana: 18.66 mm x 18.66 mm (Ø 26.39 mm) 2.7K 8:9 Sensor Mode- UHD 16:9 Ana 2x: 16.66 mm x 18.75 mm (Ø 25.08 mm) 2K 16:9 S16 Sensor Mode- 2K: 12.44 mm x 7.00 mm (Ø 14.27 mm) |
| Exposure Latitude | 17 stops |
| Exposure Index | Adjustable from EI 160-3200 in 1/3 stops EI 800 base sensitivity |
| Shutter | Electronic shutter, 5.0°- 356° or 1s – 1/8000s |
| Recording Formats | MXF/ARRIRAW MXF/Apple ProRes 4444 XQ MXF/Apple ProRes 4444 MXF/Apple ProRes 422 (HQ) |
| Recording Media | Codex Compact Drives |
| Recording Frame Rates | ARRIRAW 4.6K Open Gate: 0.75 – 75 fps 4.6K 16:9: 0.75 – 75fps 4K 2:1: 0.75 – 120fps 3.3K 6:5: 0.75- 120fps 3K 2:1: 0.75 – 100fps ProRes 4.6K Open Gate: 0.75 – 60 fps 4K: 0.75- 75fps 4K 2.39:1 2x Ana: 0.75 – 90fps UHD 16:9: 0.75 – 120fps UHD 16:9 2x Ana: 0.75 – 100fps 3.8K 2:1 2x Ana: 0.75 – 100fps 3.3K: 0.75 – 3K: 0.75 – 90fps 2K: 0.75 – 120fps HD: 0.75 – 120 fps |
| Recording Modes | Standard real-time recording Pre-recording |
| Viewfinder Type | Multi Viewfinder MVF-2 with 4″ flip-out monitor |
| Viewfinder Technology | OLED viewfinder display LCD fold out monitor |
| Viewfinder Diopter | Adjustable from -5 to +5 diopters |
| Viewfinder Resolution | 1920×1080 |
| Color Output | Rec 709 Rec 2020 LogC 4 Custom Look (ARRI Look File ALF-3) |
| Look Control | Import of custom 3D LUT |
| White Balance | Manual and auto white balance, adjustable from 2000K to 11000K in 10K steps Color correction adjustable range from -16 to +16 CC 1 CC corresponds to 035 Kodak CC values or 1/8 Rosco values |
| Filters | Built-in motorized ND filters 0.6, 1.2, 1.8 Fixed optical low pass, UV, IR filter |
| Image Outputs | VF 1: First viewfinder connector VF 2 Second viewfinder connector SDI 1 Completely independent (1.5G, 3G, 6G, or 12G) SYNC IN Genlock: analog black burst or tri-level SDI 2/RET IN Completely independent (1.5G, 3G, 6G, or 12G) or return in (1.5G or 3G) |
| Lens Squeeze Factors | 1.00 1.25 1.30 1.50 1.65 1.80 2.00 |
| Exposure and Focus Toolsr | False Color Zebra Zoom Aperture and Color Peaking |
| Audio Input | 1x LEMO 6pin balanced stereo line in with 12V power output (Line input max. level +24dBu correlating to 0dBFS) |
| Audio Output | SDI (embedded) 3.5mm stereo headphone jack (on MVF-2) |
| Audio Recording | 4 channel linear PCM, 24 bit 48 kHz |
| Remote Control Options | Hi-5 Hand Control Unit MVF-2 viewfinder can act as wired remote control with 10m/33ft cable Web-based remote control from smart phones, tablets and laptops via WiFi & Ethernet Camera Access Protocol (CAP) via Ethernet & WiFi GPIO interface for integration with custom control interfaces WCU-4 and Hi-5 hand-unit with control over lens motors and operational parameters via built-in white radio SXU-1 hand-unit with control over one lens channel OCU-1 and Master Grip control of lens and user buttons |
| Interfaces | LBUS On camera: for ARRI ECS accessories LBUS On LPL Mount: for ARRI ECS accessories SERIAL L-CUBE functions: for UDM-1, Focusbug Cine RT, CE CTM, Ward Sniper) VF 1: First viewfinder connector VF 2 Second viewfinder connector SDI 1 Completely independent (1.5G, 3G, 6G, or 12G) SYNC IN Genlock: analog black burst or tri-level SDI 2/RET IN Completely independent (1.5G, 3G, 6G, or 12G) or return in (1.5G or 3G) TC Timecode in/out (this uses the same cable as the Mini LF) |
| Wireless Interfaces | Built-in WiFi module (IEEE 802.11b/g) Built-in White Radio for ARRI lens and camera remote control |
| Lens Mounts | LPL lens mount with LBUS connector PL-to-LPL adapter PL adapter (LBUS) PL adapter (Hirose) EF Mount (LBUS) |
| Flange Focal Depth | LPL mount: 44 mm with PL-to-LPL adapter: 52 mm |
| Power Input | 20.5V – 33.6V RS Regulated 24V accessory power out 12V Regulated 12V accessory power out |
| Weight | 2.9 kg / 6.4 lb (camera body with LPL lens mount) |
| Operating Temperature | -20° C to +45° C / -4° F to +113° F @ 95% relative humidity max, non condensing, splash and dust proof through sealed electronics |
Final Thoughts
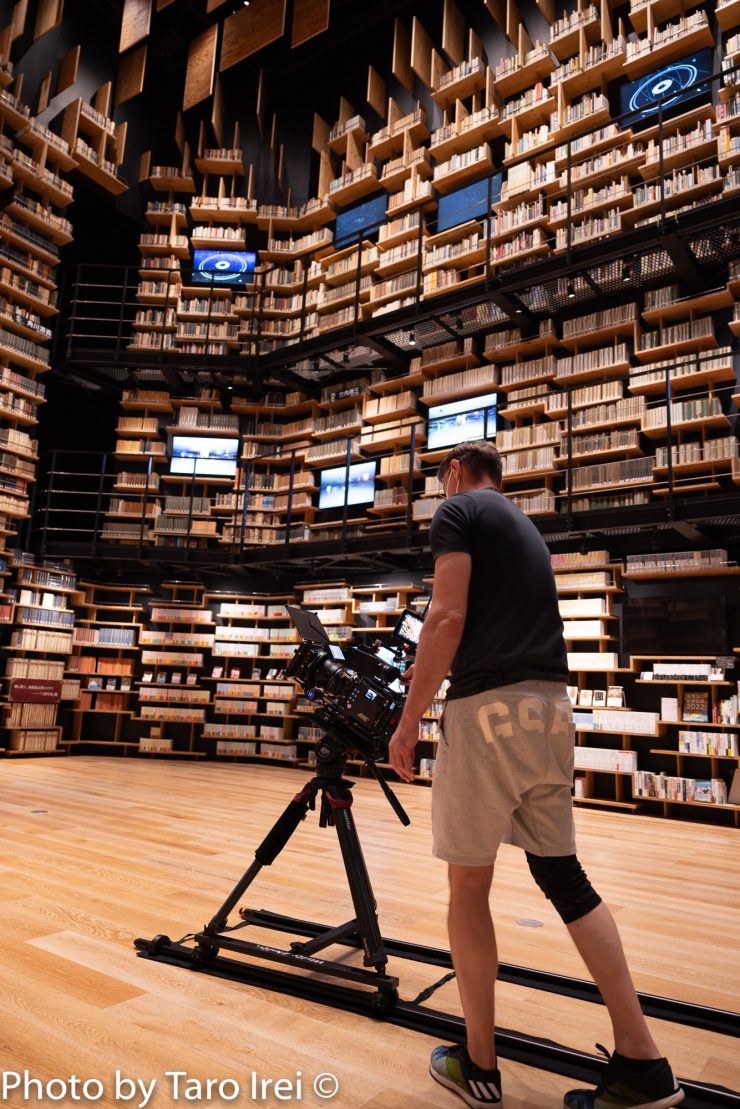
The ALEXA 35 is a very impressive camera and a prime example of why you should never judge a camera from specifications alone. There are plenty of cameras out there that cost considerably less money and have far better specifications on paper. While specifications are all good and well, they almost never tell you the full story about any camera. You have to actually use a camera in the real world in real shooting environments to see how it performs because usability is just as important as image quality.
There are plenty of great cameras out there, and yes, in a lot of controlled conditions, you can make just about any camera look good. Image quality alone is not what makes a great camera, it’s those intangibles that working professionals rely on that set the great cameras apart from the good ones. At the end of the day usability, reliability, customization, workflow, and ease of use; are all things you rarely hear people talking about, but these are the things that ARRI cameras excel at.
The color tonality and highlight rendition are at another level from any camera I have ever used or seen. I thought the Mini LF was superb at highlight handling until I used the ALEXA 35. The colors and overall look of the images you get are extremely pleasing and you don’t have to do much to get a great-looking image. The new sensor and processing provide a great base and all ARRI then had to do was to build a camera around them.
My biggest takeaway from using the camera is that it just looks good no matter what you throw at it. The camera produces such good results that you don’t need to spend much time in post fiddling with the image to try and get it to look nice. This alone is a huge time saver. It doesn’t matter what the lighting conditions are, it just looks good. The ability to shoot in highly contrasty conditions and not have to use as much lighting because the camera won’t clip the highlights gives you a huge safety net to work with. It allows you to spend less time having to solve lighting issues and more time to shoot.
Everybody loves to harp on about the ARRI look, and yes, while that is a huge reason why cinematographers choose ARRI cameras, they also choose them for a host of other reasons.
Cinematographers working on episodic television and feature films can usually choose to use any camera they like, so why do so many end up choosing ARRI? Well, mainly for all of the reasons I have mentioned.
In a world where marketing hype runs rampant and everyone wants to try and blind you with 8K, big specifications, and unrealistic dynamic range figures, the ALEXA 35 just re-iterates what ARRI has always been about, image quality, reliability, and usability. These are the key items DPs look for in a camera.
It is fairly easy to rest on your laurels when you are the predominant camera system being used on high-end episodic TV, commercials, and feature films. In some ways, you could argue that ARRI was only innovating at its own pace, but patience is key. When you had a sensor that was as good as the ALEV there was no point in bringing something out that was worse. Yes, all of the previous cameras were a rift on the same sensor, but if it ain’t broke, don’t fix it. ARRI has spent years and years getting to the point where they felt that they had a good enough new sensor and new color science to place in a new camera.
For ARRI to lose its position as the predominant high-end digital cinema camera choice competing companies can’t just make a camera that is close or just as good as an ARRI, it needs to be a lot better. Like it or not, that is the reality.
Again there is no such thing as a perfect camera and what camera you use is often determined by the type of work you do and what the project entails. Just because the ALEXA 35 is a great camera, doesn’t mean it is a suitable tool for everyone or every job. The best camera is the camera that is best for you.
ARRI has always been in a good position because once your cameras become a de-facto industry standard, everyone is familiar with how they work, how to use them, and what results they are going to get. There will always be a subconscious urge to use tools that we are familiar with and comfortable with. In saying that, DPs who choose to use ARRI cameras usually have the option to choose any camera system they want. Although, the streaming mandates forced a lot of DPs to use RED and Sony cameras because they couldn’t use a Mini or AMIRA.
The ALEXA 35 is a worthy successor to previous ARRI cameras and the amount of work that went on behind the scenes to create this camera was truly remarkable. I don’t know of too many companies in our industry that would have spent the time obsessing over small details and making sure that they got everything right. In a world where camera manufacturers are pushing out new models so frequently, ARRI takes its time and only releases a camera when they think it is ready.
It has its flaws and faults like any camera, but it offers those intangible elements that very few other cameras can. The dynamic range, color processing, image quality, user experience, and total ecosystem that ARRI provides make the ALEXA 35 a compelling option despite the high price tag.
The ALEXA 35 is a worthy new addition to the ALEXA family, and at least in my personal opinion, they have once again set a benchmark that now all other cameras will be judged by.
If anybody has any questions about the camera please leave a comment below and I will attempt to answer them for you.