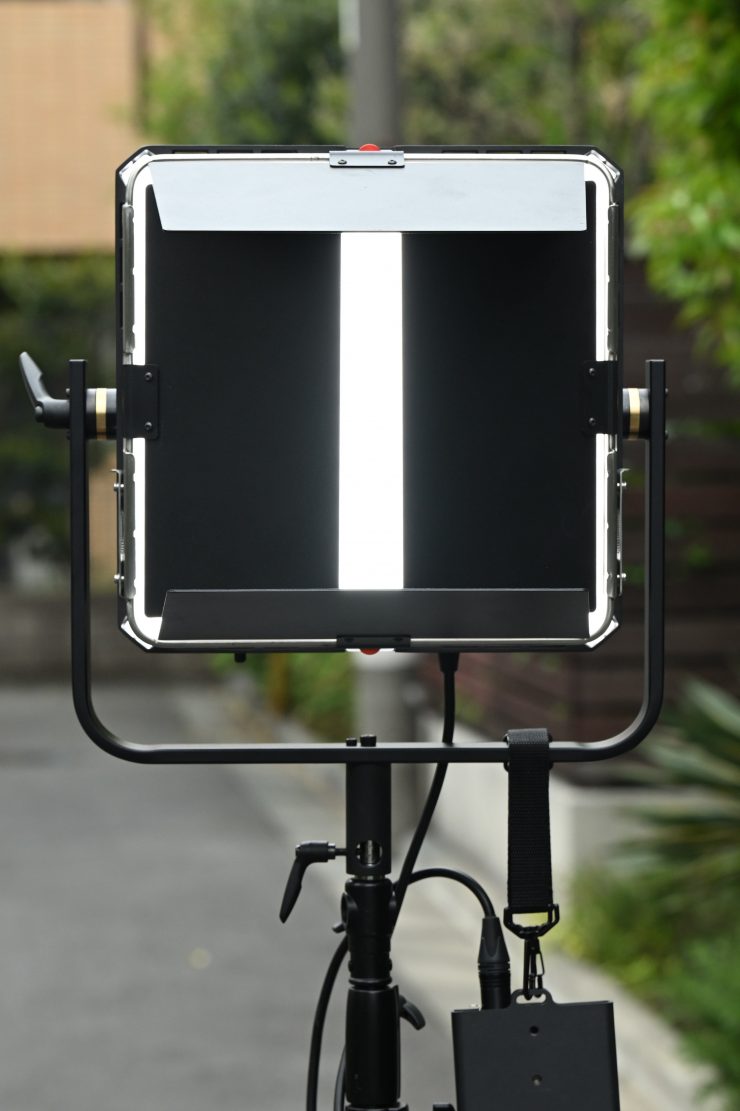
The Luxli Timpani² which has just been announced at NAB 2022 is a follow-up to the original Timpani that I reviewed way back in August 2018. The Timpani² shares a lot of traits with the original fixture, however, Luxli has made the light sturdier and stronger and they have increased the output, all while keeping the same power draw.
The original Luxli Timpani was one of the first 1×1 RGBW panel lights and when it was launched it was priced at under $1,000 USD, which at the time, made it very affordable, especially considering the light was made in Norway.
Luxli has garnered a strong reputation over the last 3-4 years with some very good offerings. All of the Luxli lights I have reviewed on the site have been excellent. All of Liuxli’s lights are named after musical instruments. A Timpani is a type of drum, that consists of a membrane called a head, stretched over a large bowl traditionally made of copper.
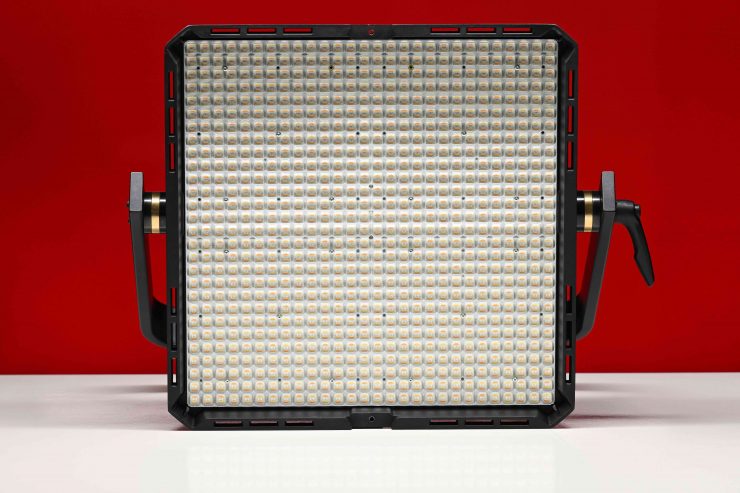
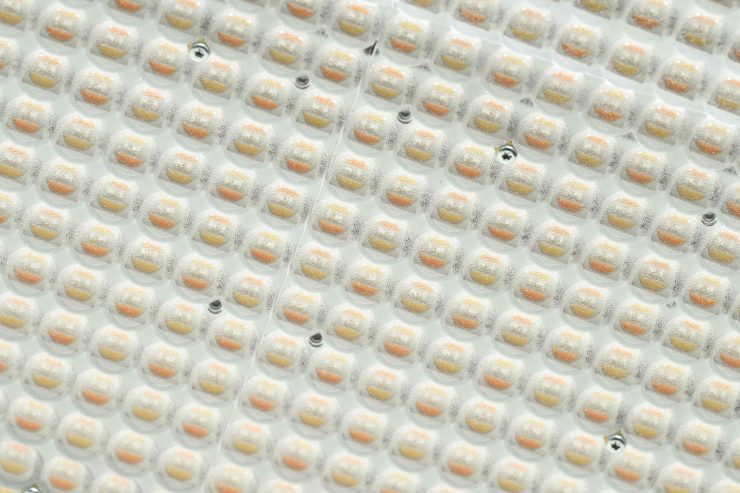
The Luxli Timpani² 1×1 RGBAW uses a 672 RGBAW LED array, and offers countless creative lighting options for professionals that require standard color temperature adjustability and color tuning across the RGB spectrum. So what exactly is RGBAW? The “A” and “W” in RGBAW stand for amber and white, 2800K and 5600K color temperature LED’s, respectively. The Timpani² mixes the output of these two LEDs to ensure what the company claims create an exact color temperature in CCT mode and accurate color reproduction in Gel mode.
In a nice touch, every Timpani fixture ships with its own photometrics calibration results. These tests are done by the manufacturer but don’t worry, I have done my own independent test which you can see further down in the article.
Size & Weight
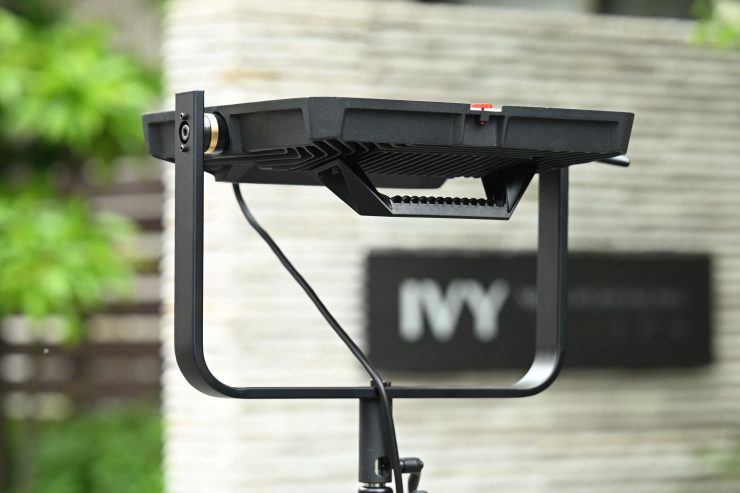
The Timpani² looks lighter than it actually is. At 4.4 kg / 9.14 lb (including the power supply) it is almost 1 kg heavier than the original Timpani (3.15 kg (6.96 lb). The light itself weighs 3 kg / 6.61 lb and the power supply weighs 1.4 kg / 3.08 lb.
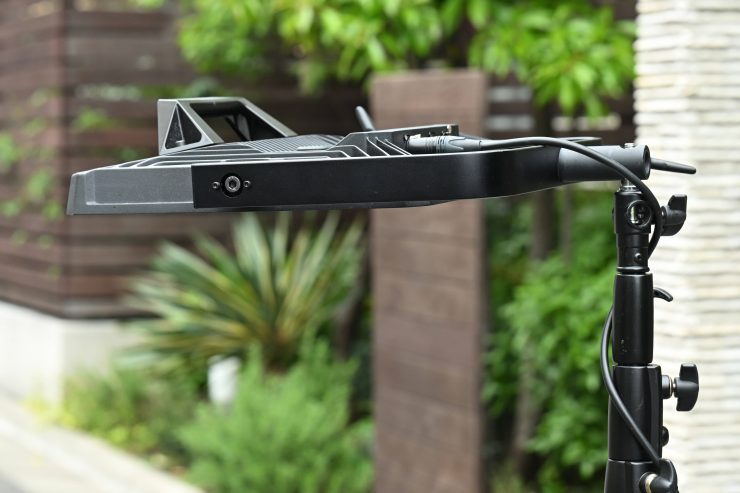
It is also quite a bit thicker than the original. Its depth is 3.5″ / 7.62 cm, whee as the original Timpani was just 1.4″ /3.5 cm. Most RGBW fixtures are large and heavy because they require a lot more cooling than a traditional LED light.
So how does this weight compare to some other 1×1 RGBW lights? Below you can see:
| Weight | |
| Luxli Timpani² | 4.4 kg / 9.14 lb* |
| Rotolight Titan X1 | 12.2 kg (including power supply) |
| Creamsource Vortex4 | 11.4 kg / 25.1 lb (Including Yoke) |
| ARRI S30-C SkyPanel | 10.3 kg (including power supply) |
| Litepanels Gemini 1×1 | 5.31 kg** |
| Rayzr 7 MC120 | 3.63 kg* |
| Lupo Superpanel 30 Full Color | 3.7 kg* |
| Luxli Timpani 1×1 RGBAW | 3.37 kg* |
| Aputure Nova P300C | 10.35 kg / 22.82 lb (Including Yoke, Cable, Frame, Mount, Receiver) |
* Including the weight of the power supply.
** This light has a built-in power supply
The Luxli Timpani² is still reasonably lightweight for a 1×1 RGBW fixture. Some of the offerings on the market weigh more than twice as much.
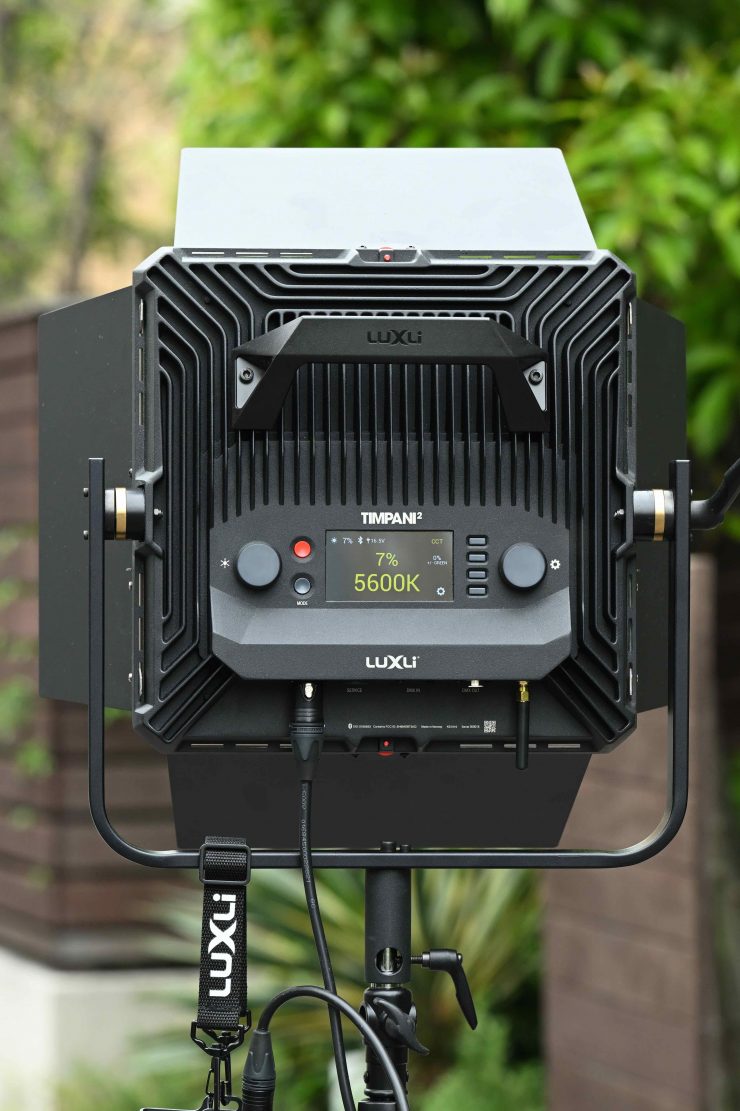
Build Quality


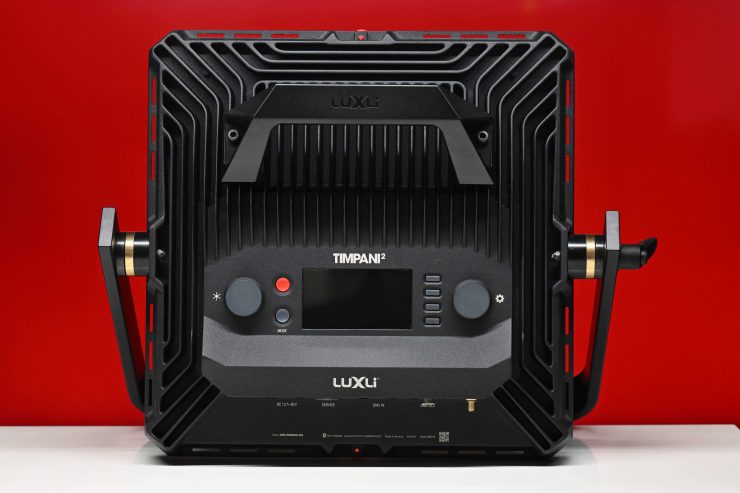
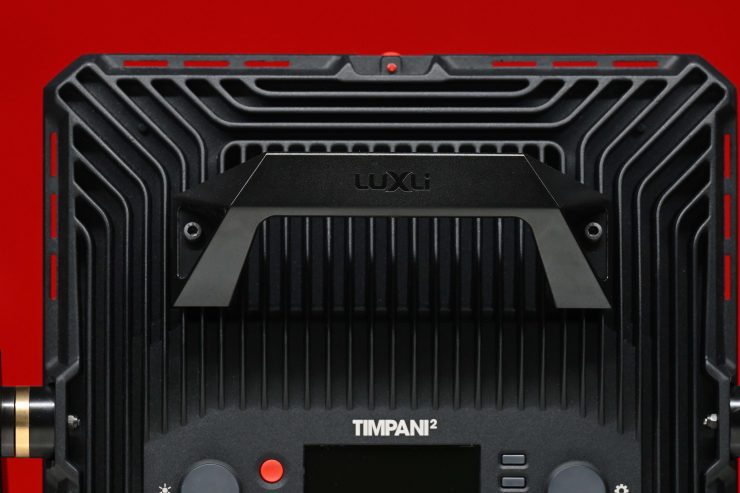
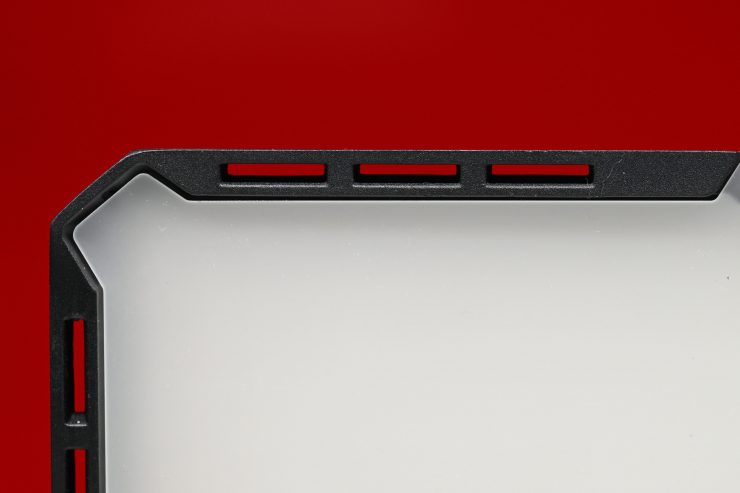
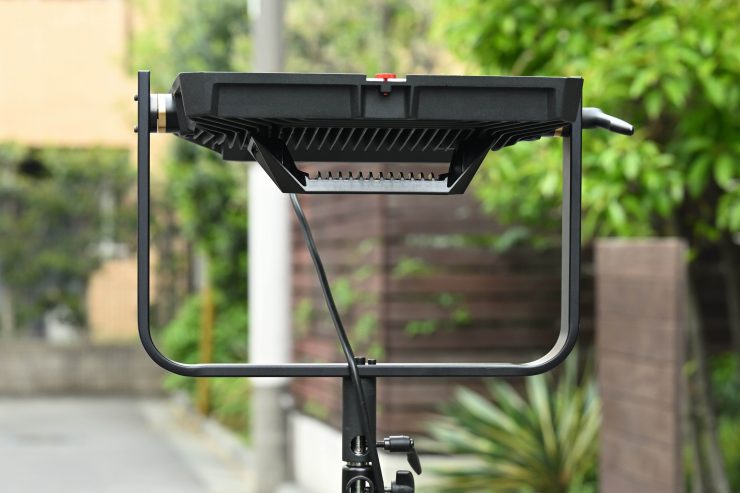
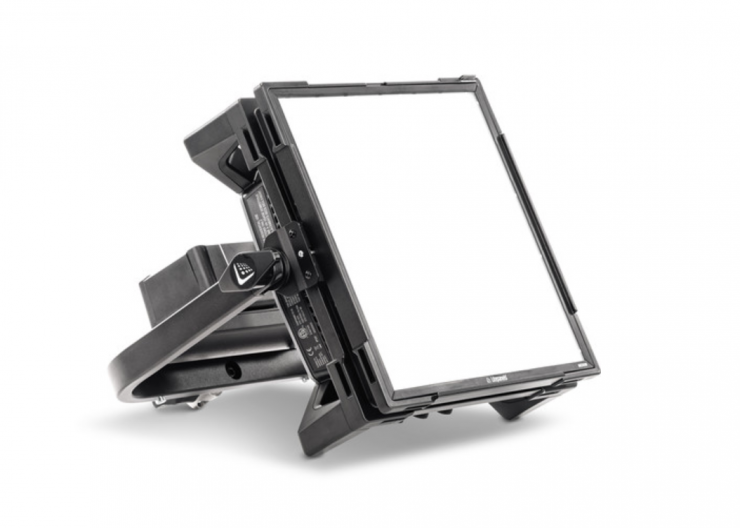
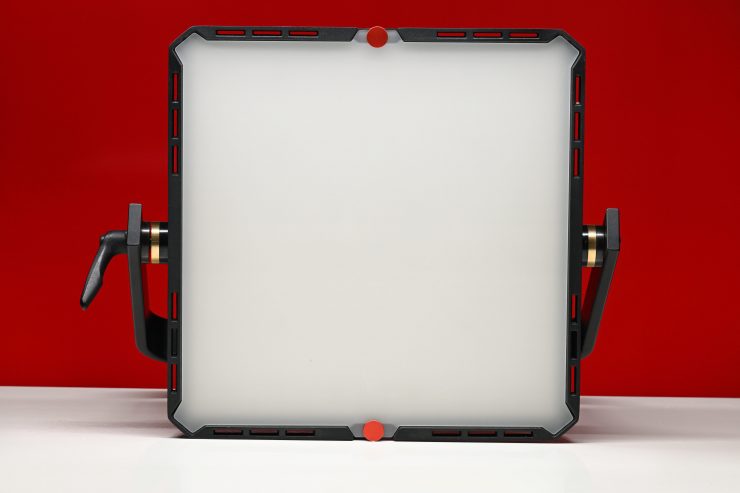
The physical appearance of the Timpani² has changed quite a lot and the light appears to be a little more robust than the original. The back of the fixture is basically one big giant heatsink.
Timpani² 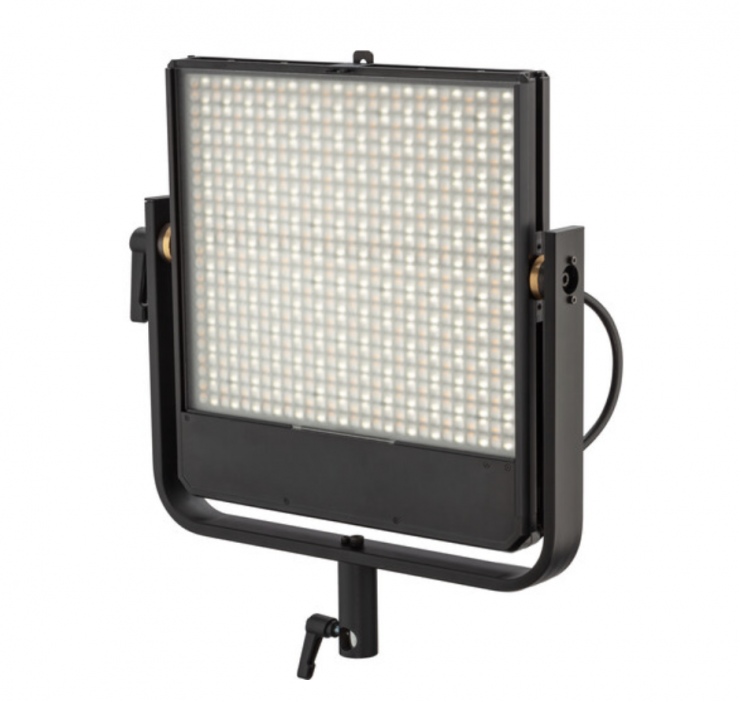
Timpani
The front of the original Timpani was a little less robust than the back as more plastic was being used. Luxli has now addressed that.
The overall build quality of the Timpani² is excellent and it is right up there with 1×1 RGBW fixtures that cost substantially more money.
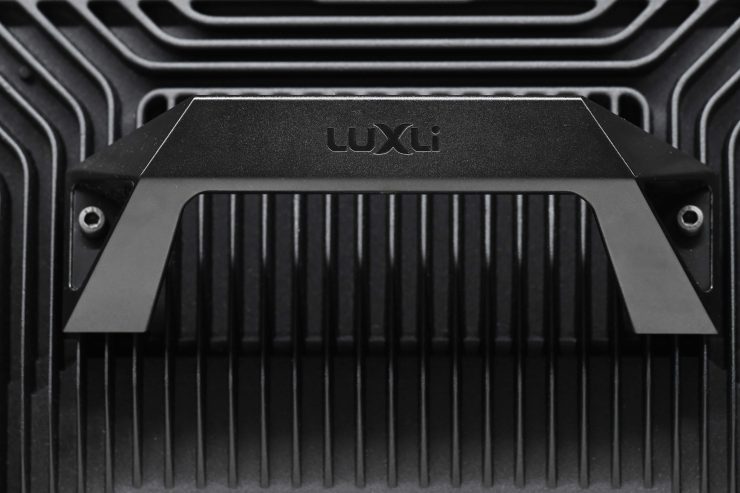
The only slight knock I have on the build quality is that the rear carry handle is plastic and not metal.
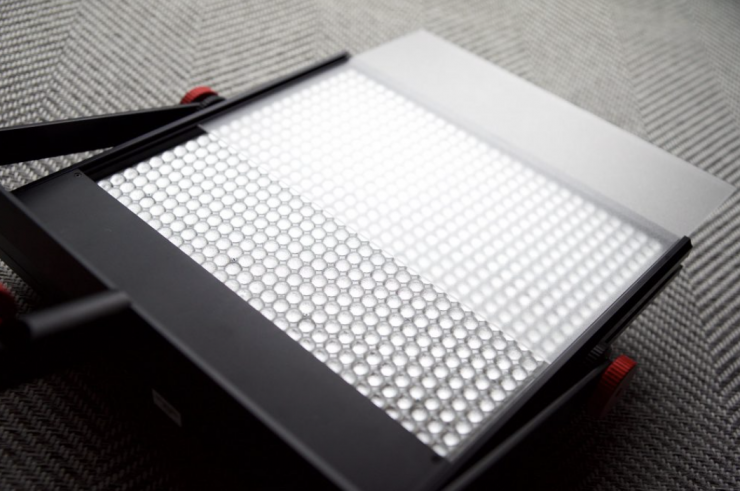
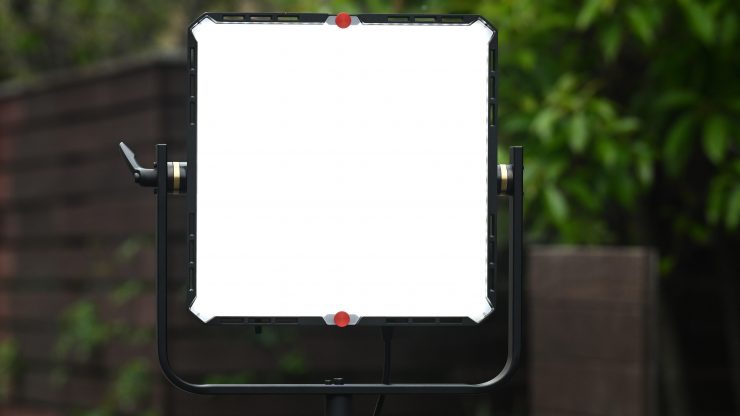
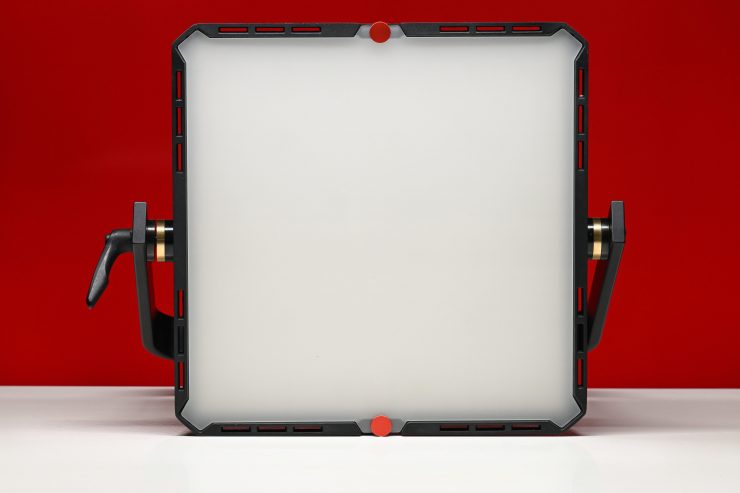
The perspex style cover on the original did act as a type of very light diffusion and it only reduced the light’s output by around 5%. Its main purpose was to try and reduce the multiple shadows you get from the LEDs, however, it didn’t do a great job at that.
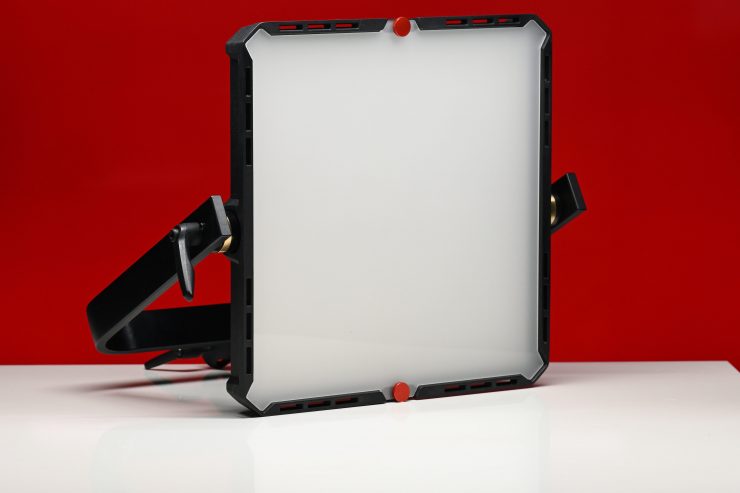
The new diffusion is a lot stronger and it reduces the output by around 65%. It also gets rid of those bad cross-hatched shadows that you used to get with the original light.
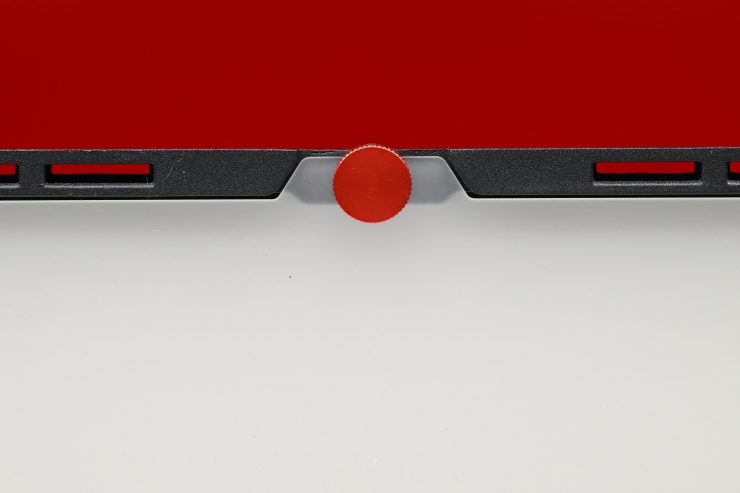
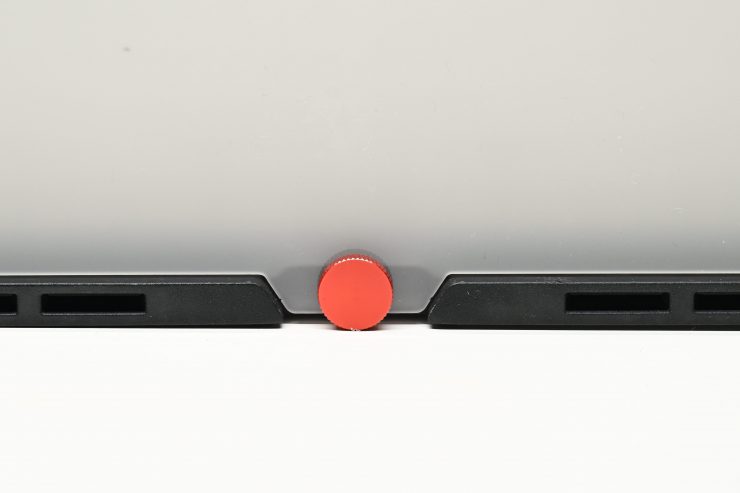
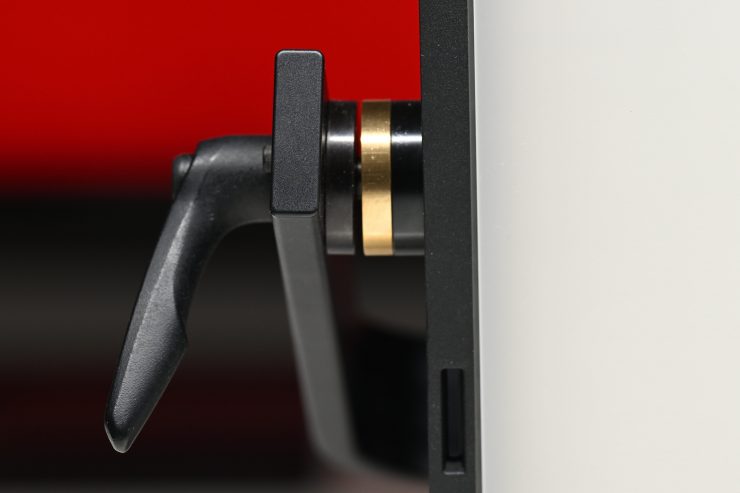
The diffusion cover is now actually secured in with two thumbscrews. It doesn’t wobble around and move as the original one did.
All the buttons and switches have a nice solid and tactile feel.
Power Draw
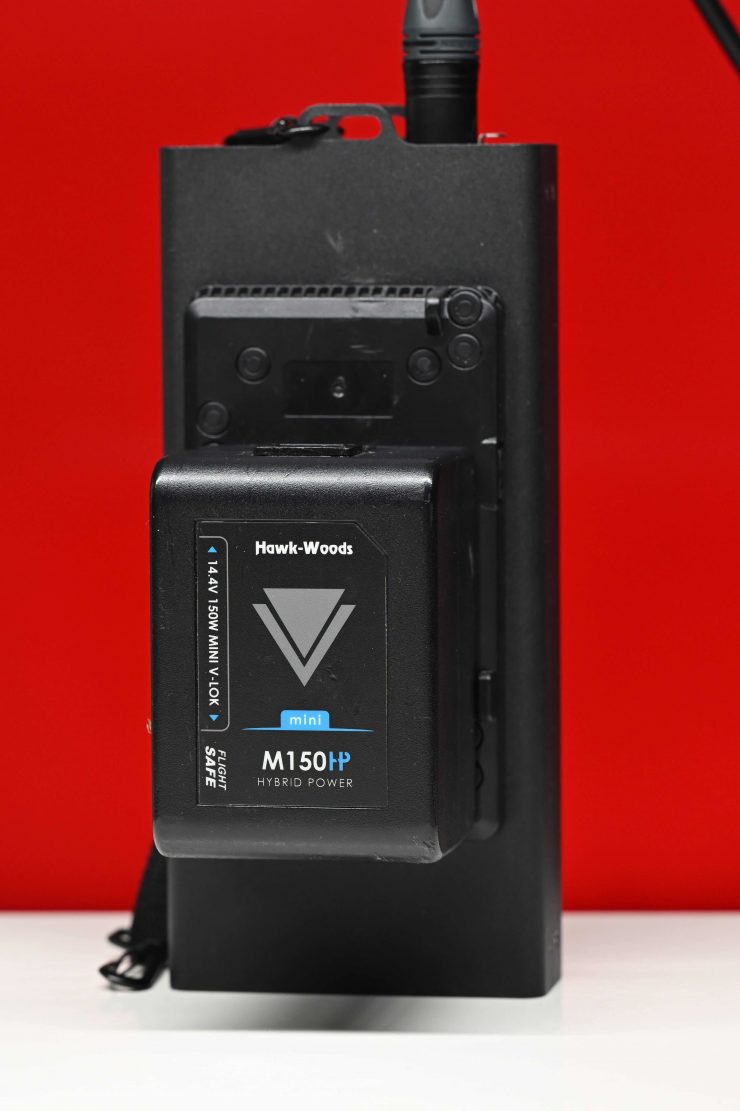
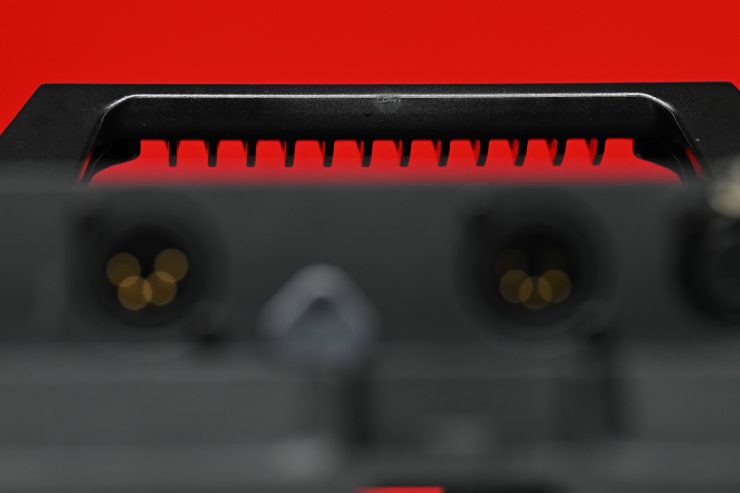
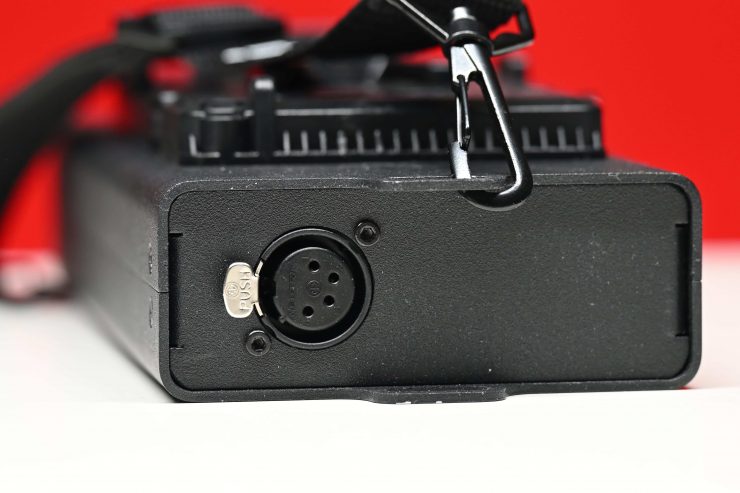
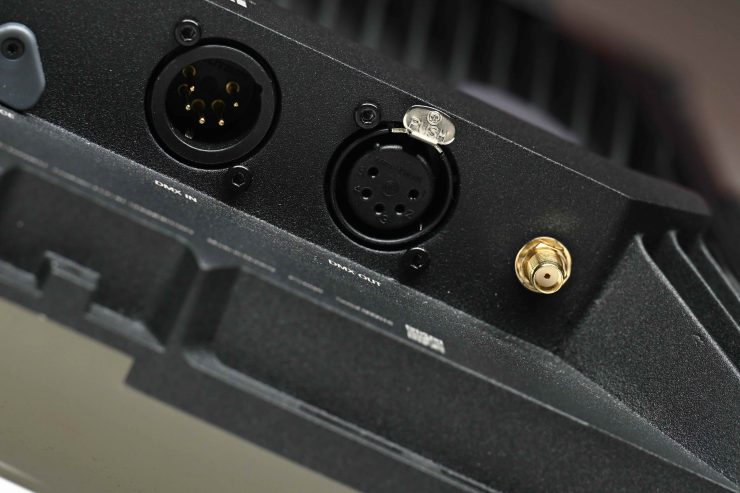
Traditionally RGBW lights have required a lot of power, but the Timpani² only draws 120W. In comparison, most other BGBW 1×1 panel lights draw north of 200W. With a 120W power draw the Timpani² can easily be powered off camera batteries that are below the 160Wh limit that airlines will allow you to travel with. This is a big deal if you are a traveling cameraman and are looking for an RGBW panel light. The fixture has a 4-pin XLR input, and a power supply is included.
What I was sad to see is that Luxli has removed the V-mount battery plate that was on the rear of the original fixture. It is now attached to an external power supply. The shipping version of the light will come with a 10′ cable that goes from the power supply to the light. I am glad they have changed this because the original light’s power cable was way too short. If you needed to place the light up above 4 feet it had to dangle in the air.
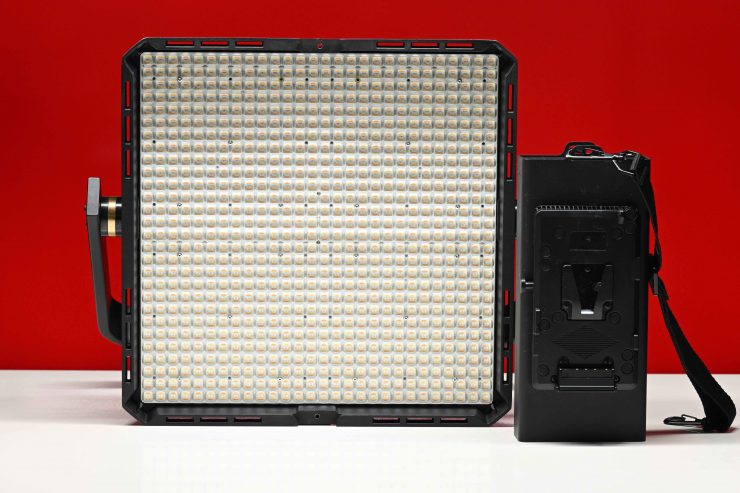
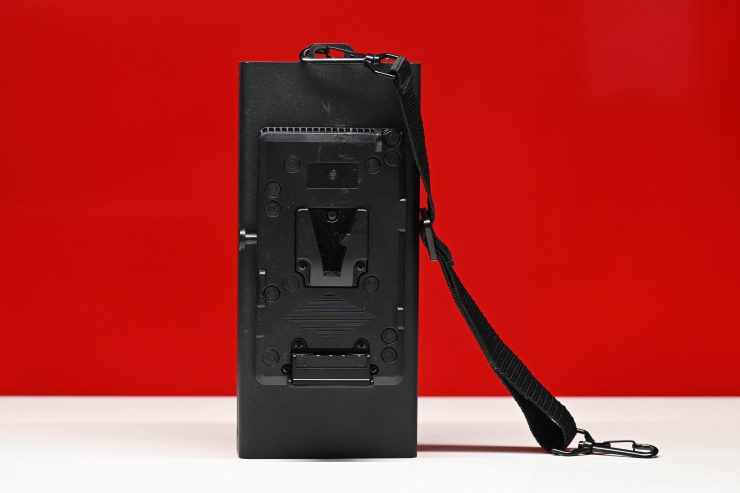
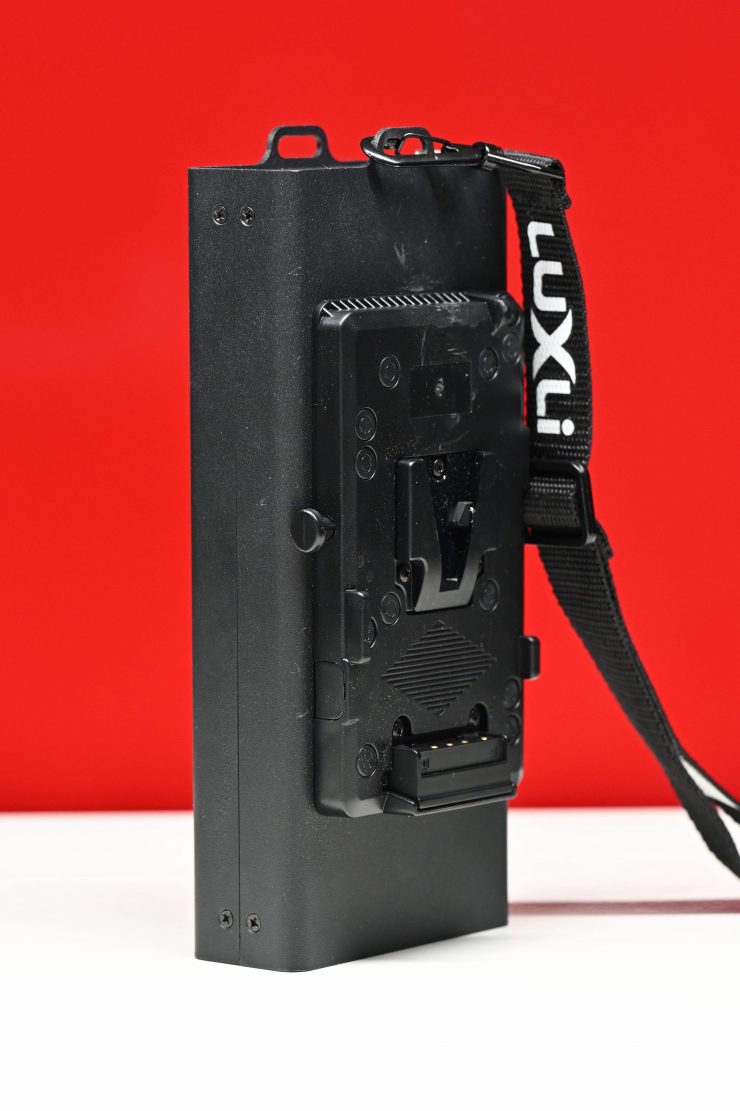
The power supply is pretty big. Above you can see how its size compares to the light itself.
The power supply does come with a strap so you can attach it to a light stand, etc. I would have liked to have seen Luxli come up with a solution so you could attach the power supply to the back of the light or at least to the yolk frame like Litepanels does. In this regard, I prefer how both Lupo and Litepanels create an all-in-one solution without needing to have a separate power supply. With 1×1 panels they should be super quick to set up and use.
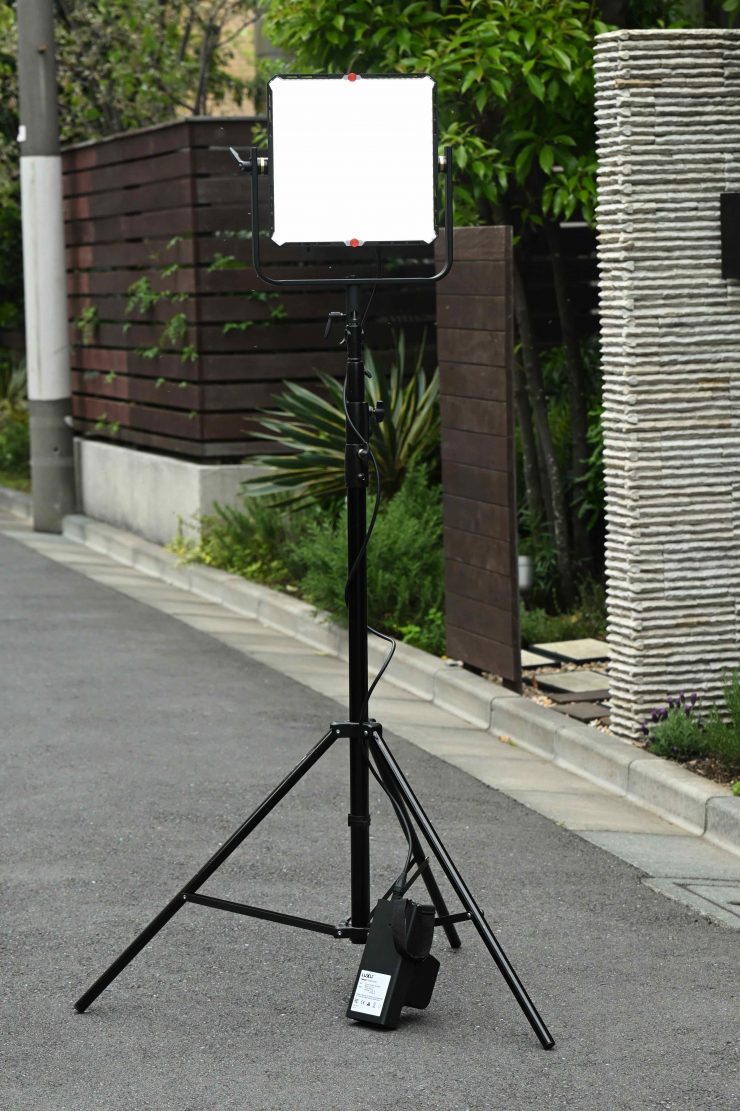
Yes, there are some advantages to separating the power supply from the light as you can use a slightly smaller lightstand. You can also use the power supply as a ballast further down the light stand if need be.
So how does the power draw of the Luxli Timpani² compare to other similar fixtures? Below you can see:
| Power Draw | |
| Luxli Timpani² | 120W (nominal) |
| Rotolight Titan X1 | 230W (nominal) |
| Creamsource Vortex4 | 325W (nominal) |
| ARRI S30-C SkyPanel | 200W (nominal) |
| Litepanels Gemini 1×1 Soft | 200W (nominal) |
| Litepanels Gemini 1×1 Hard | 200W (nominal) |
| Rayzr MC 100 | 98W (nominal) |
| Lupo Superpanel 30 Full Color | 200W (nominal) |
| Luxli Timpani 1×1 RGBAW | 120W (nominal) |
| Aputure Nova P300C | 360W (nominal) |
This is where the Luxli Timpani² has an advantage over most other 1×1 RGBW offerings. The ability to power it at 100% via a single flight safe battery is a big deal. On the flip side, because it doesn’t draw a ton of power it also won’t have as much output as some other fixtures.
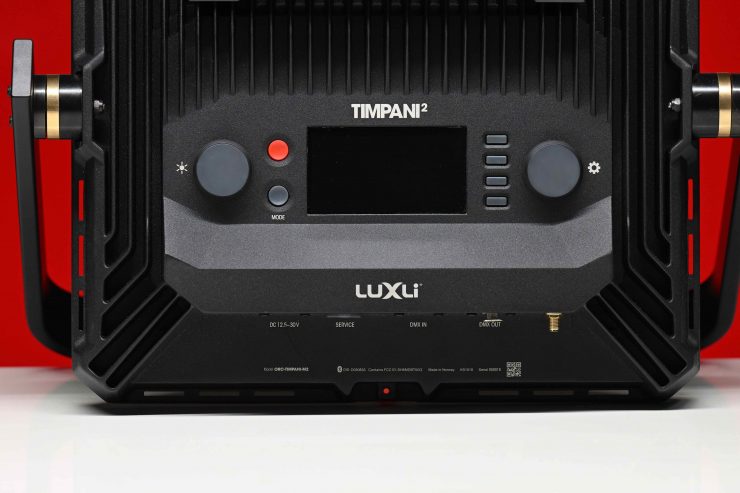
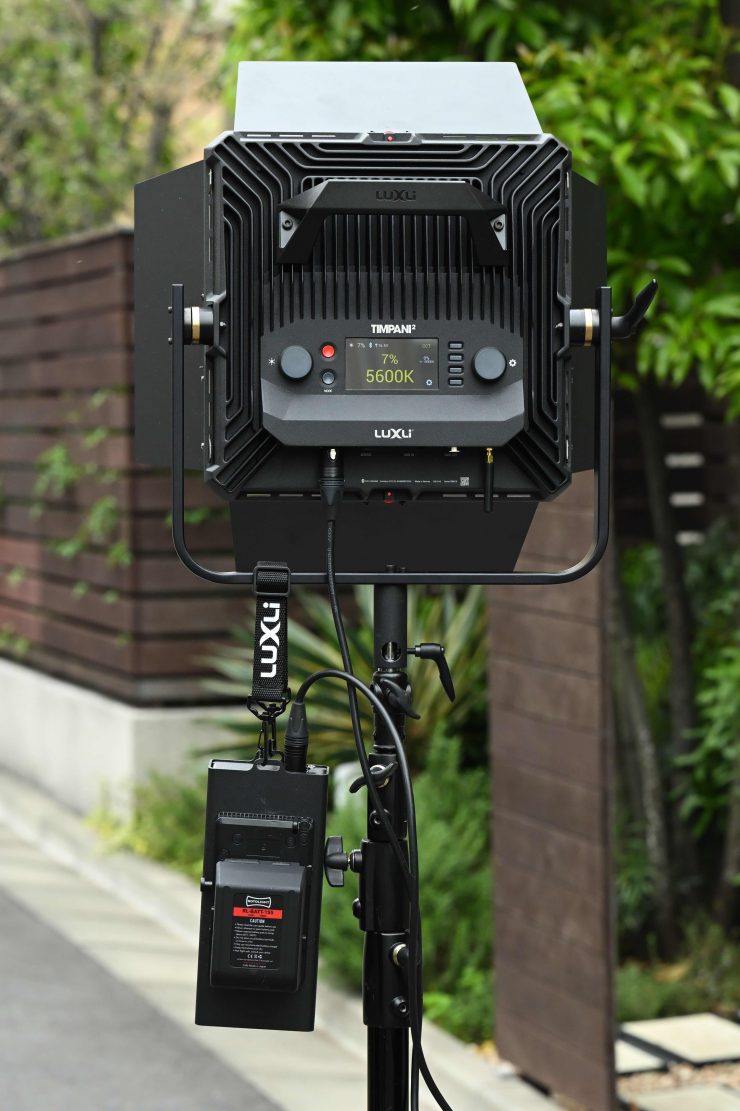
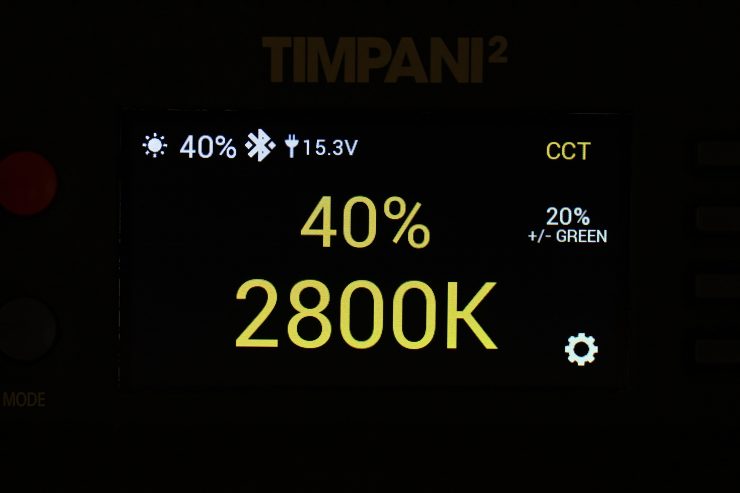
Display & Controls
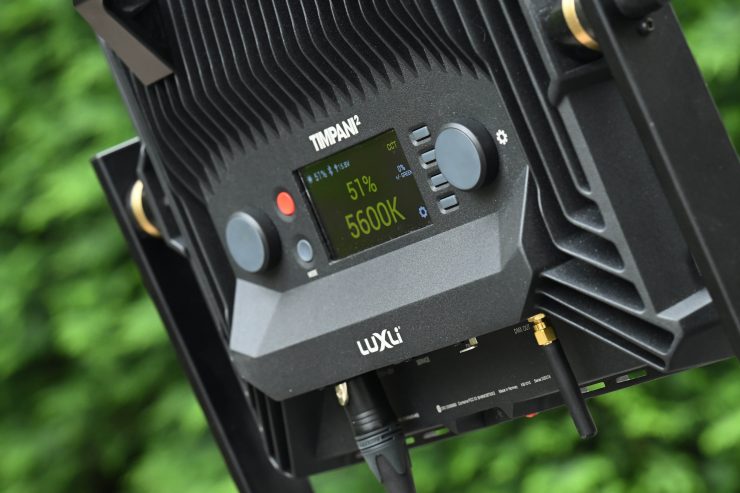
The built-in LCD display lets you adjust brightness and color with the dedicated knobs, and switch between the RGB, filter, CCT, and special effects modes with the touch of a button. The display is the best I have ever seen on any light. It’s clear, concise and it makes it very easy to see what you are doing.
Being able to see all the relevant information about your light without having to walk up really close to it is always nice. All the operating modes can be accessed through the pushing of a single button, and each mode is clearly and concisely shown on the LCD screen.
So many other manufacturers have now moved to better and easier to control operating systems and it is likely that some of that inspiration came from Luxli.
No Fan
The Timpani² doesn’t have a fan but uses a passive cooling system. RGBW lights generate a lot more heat than conventional LED fixtures and therefore they need to be cooled. A lot of other 1×1 RGBW lights I have tested use fans. Because it doesn’t have a fan it certainly does get slightly hotter to touch than those fixtures that do.
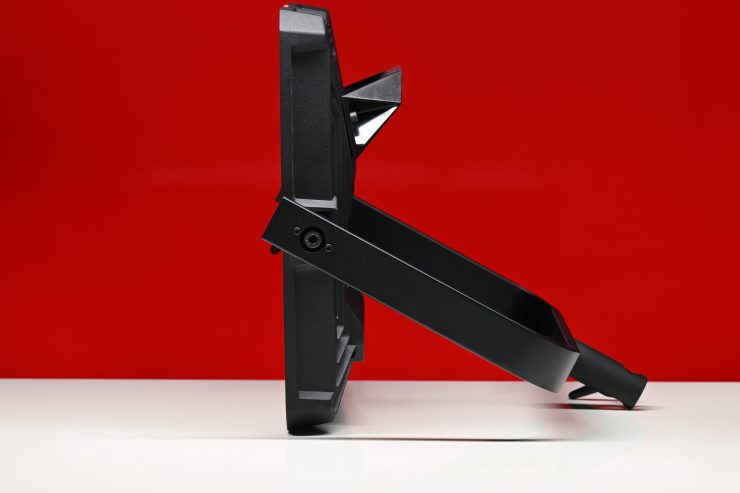
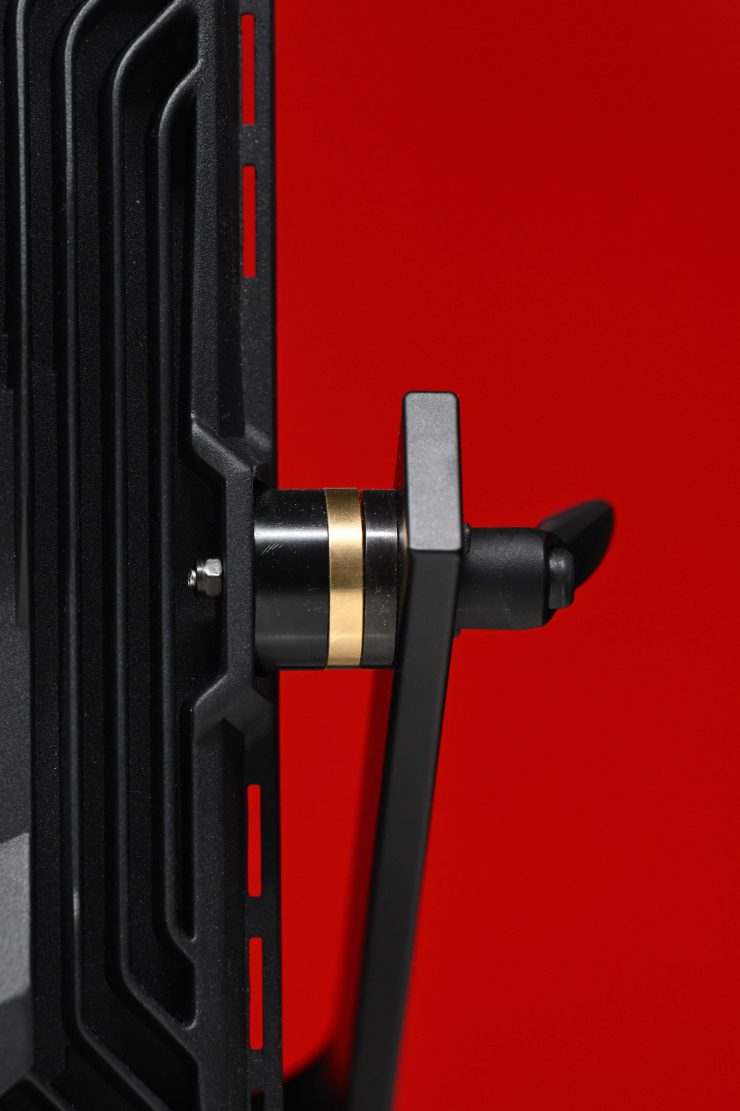
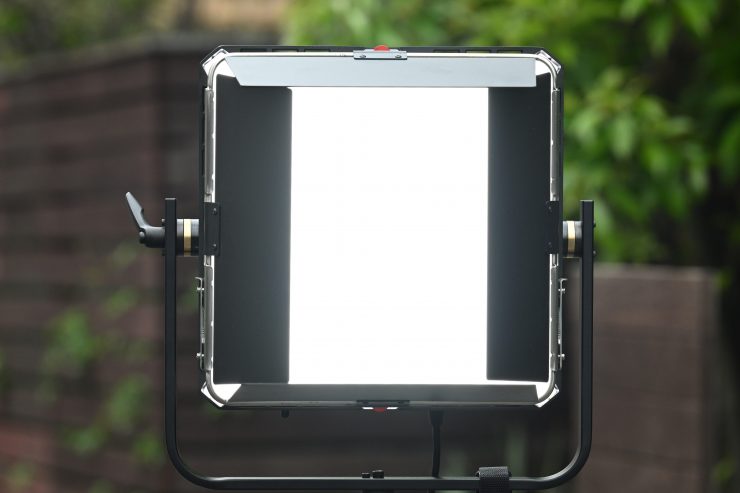
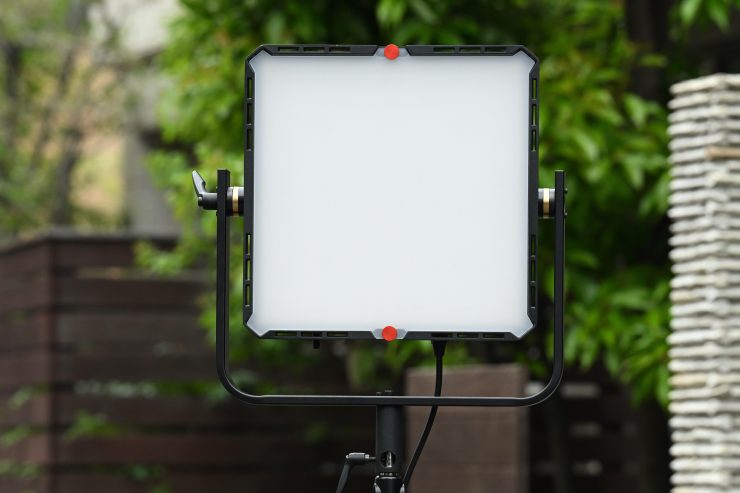
Yoke Frame
The Timpani² has a nice solid, well-made yoke frame.
It secures down very tightly and allows for a full range of movement. It is also fairly easy to remove the yoke frame for transport and it is also handy to remove it if someone is going to be using the light by holding onto the handle.
Barn Doors
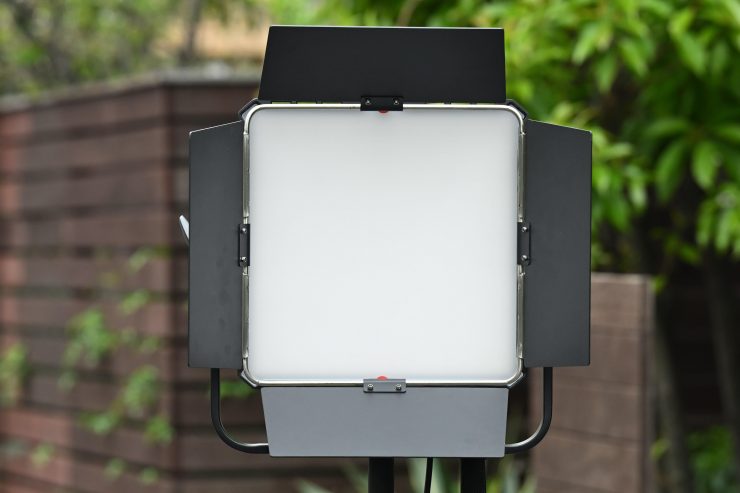

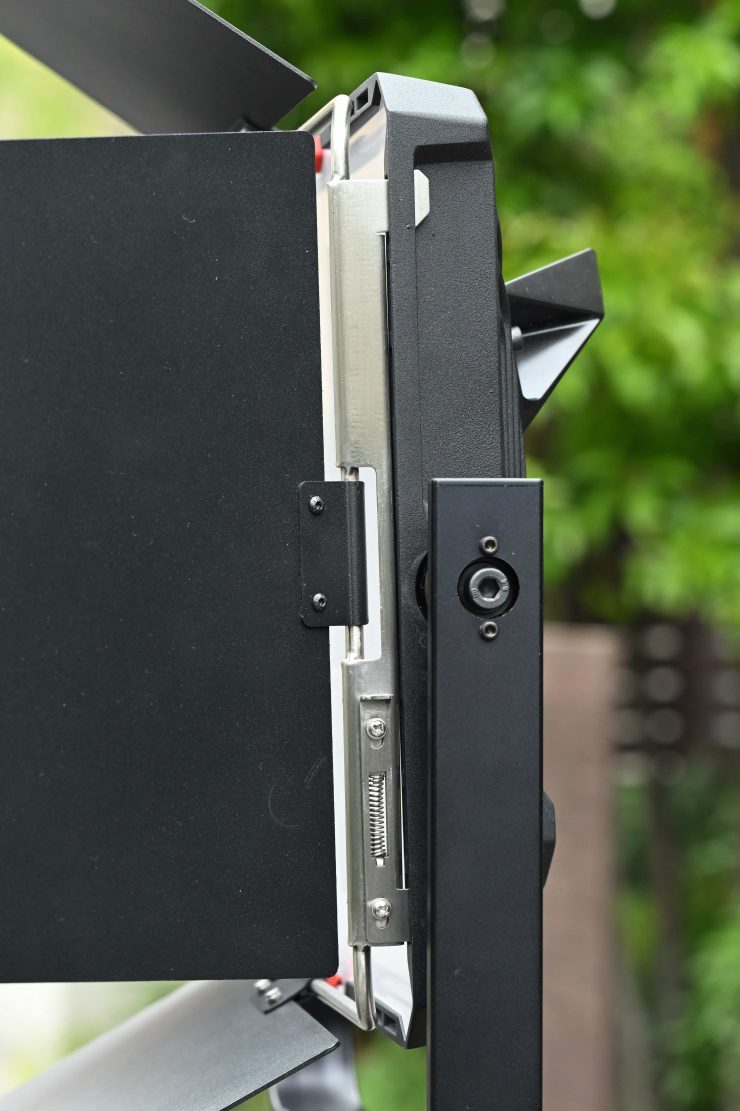
The optional barn doors are nicely made and they attach to the frame of the Timpani² using a spring-loaded mechanism.
The barn doors are a good accessory to get if you need to control spill or you want more control over where you are directing the light.
Beam Angle
The Timpani² has a beam angle of 78° when used with the diffusion panel. This is fairly uncommon for a 1×1 panel light. Normally they have either a very tight beam angle or a very wide beam angle. Although there are exceptions to this rule such as the Rotolight Titan X1 and Ceamsource Vortex4 where you can adjust the beam angles.
If you remove the diffusion panel from the Timpani², the beam angle does get tighter, but not by a massive amount. Luxli doesn’t list what the beam angle is when the diffusion panel isn’t used, but I was pleasantly surprised that it wasn’t as tight as I was expecting.
Below you can see what the beam angle is of other competing lights:
| Beam Angle | |
| Luxli Timpani² | 78° |
| Rotolight Titan X1 | 68° to 150° |
| Ceamsource Vortex4 | 20° |
| ARRI SkyPanel S30-C | 110° |
| Litepanels Gemini 1×1 | 95° |
| Razyr 7 MC120 | 120° |
| Lupo Superpanel 30 Full Color | 40° |
| Lupo Superpanel 30 Full Color Soft | 115° |
| Luxli Timpani 1×1 RGBAW | 78° |
| Aputure NOVA P300c | 120° |
With lights such as the ARRI SkyPanels, you can put accessories such as honeycomb grids, benders, and intensifier panels that will change the beam angle. Other lights also have the ability to change the beam angle through the use of various light modifiers.
I quite like having the 78° beam angle because it strikes a nice common ground between having something that is too wide or too spotty.
Operating Modes
The Timpani² features 6 different operating modes that you can use the light in.
CCT Mode
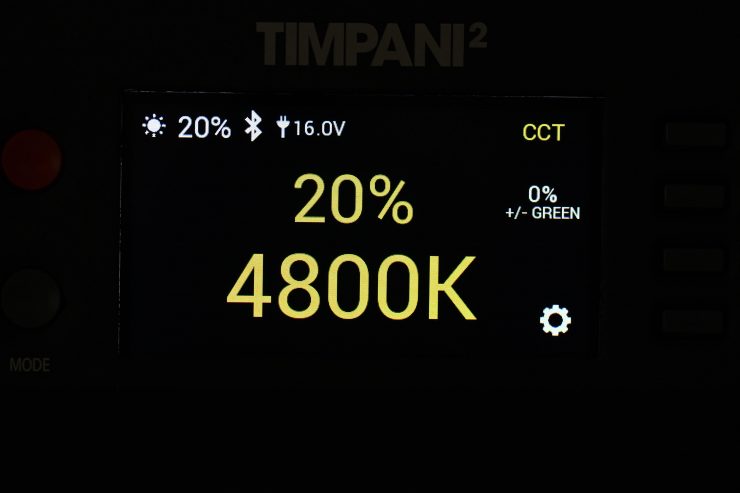
The traditional correlated color temperature (CCT) mode allows you to adjust your color temperature from 2800 to 10,000K in 50K increments. This lets you emulate any lighting condition, from the cool hues of bright sunlight to the warmth of a tungsten bulb.
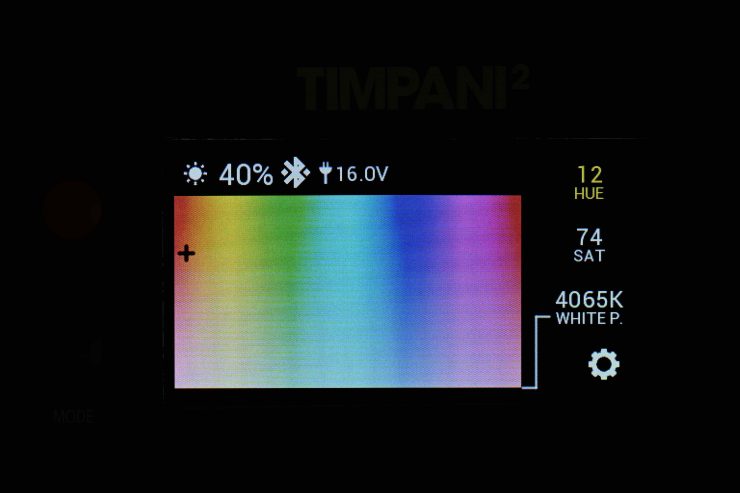
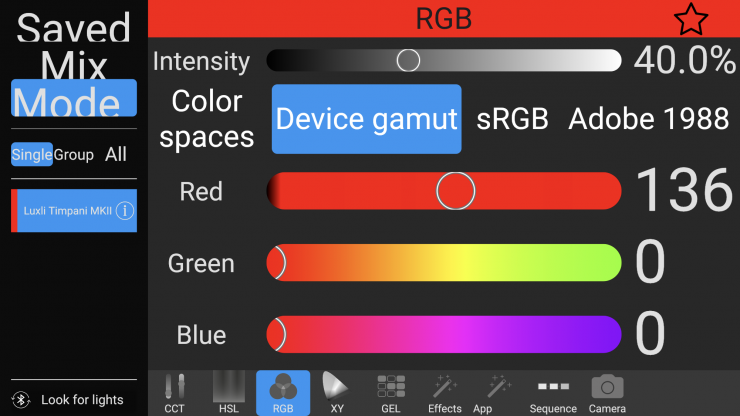
RGB Color Mode
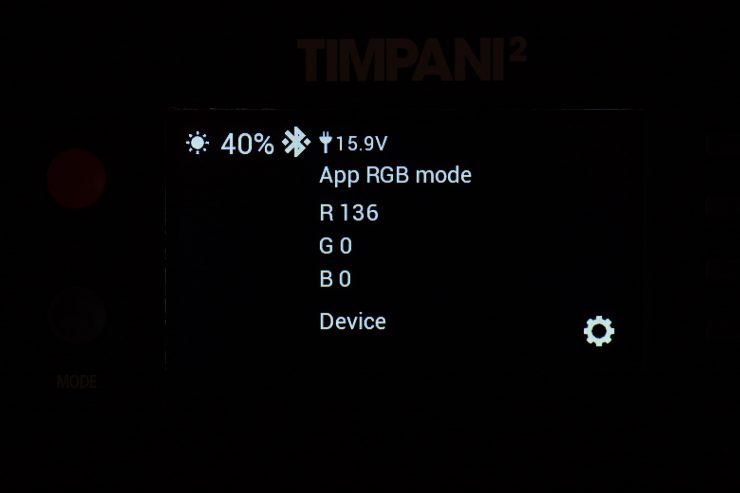
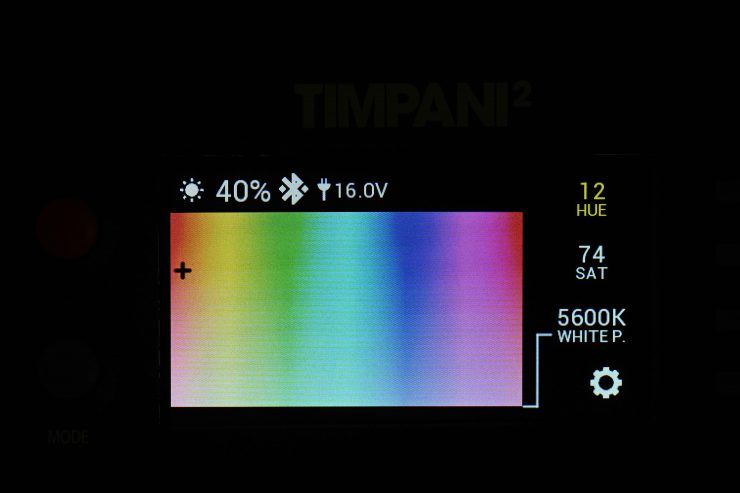
In the RGB Color Mode, you can scroll through the RGB color wheel in 1° increments. This allows you to dial in nearly any color in the visible spectrum.
Even if you don’t need the RGB color modes, the white light output by the Timpani² can be adjusted from 2800K to 10,000K in CCT mode and it has a claimed CRI of 95 and TLCI of 97 at most color temperature settings. The Dimming and color temperature can be adjusted in fine increments, 50K for color temperature, and 1% for dimming.
It’s important to note that when the white-balance temperature is changed in this mode, the temperature in CCT mode is also changed to this temperature setting. If the temperature setting is changed in CCT mode, the Timpani will set the same white-balance temperature here.
Filter Mode

If you select the Gel Filter Mode you can select from up to 150 filters to customize the white light output. Any color temperature available in the CCT mode can be modified by the filter samplings. Included in the filters are useful items such as Chromakey Green and Blue. This filter mode was originally introduced by Luxli in their Cello, but it didn’t have anywhere near the number of filter options that are found in the Timpani².
Effects Mode
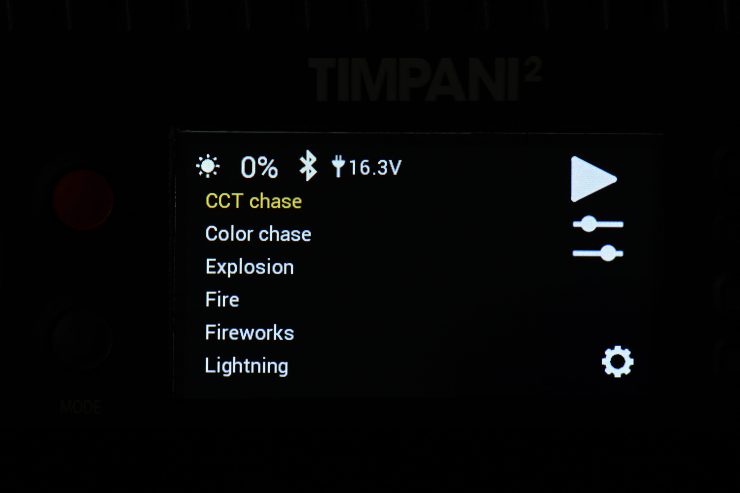
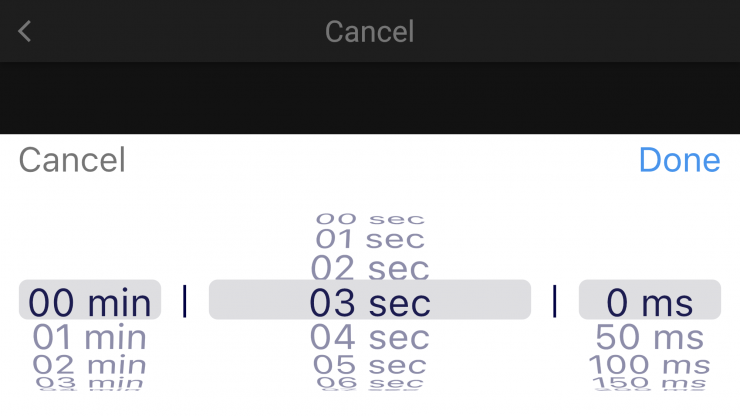
The Timpani² also features a range of special effects, from strobing that imitates lightning strikes and explosions to orchestrated timed color shifts and warning lights. Each effect is adjustable in timing and color temperature. These special effects are nice to have, but realistically they are not something most shooters will use that often. If you are interested, you can read what they all do further down in this review.
High Frame Rate (HFR) Mode
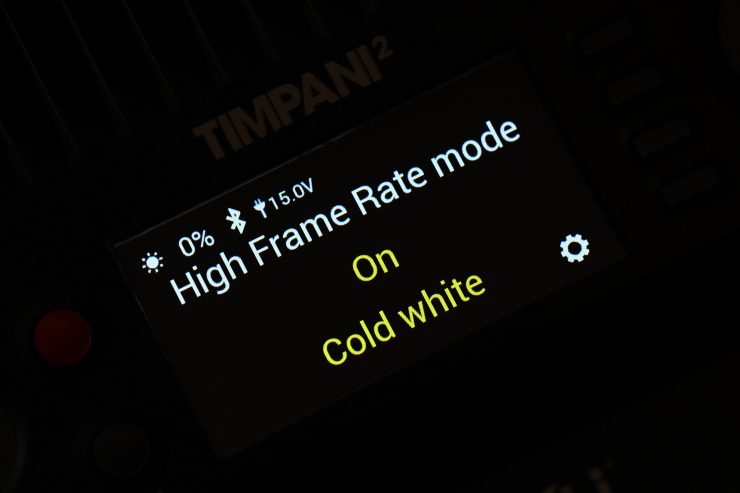
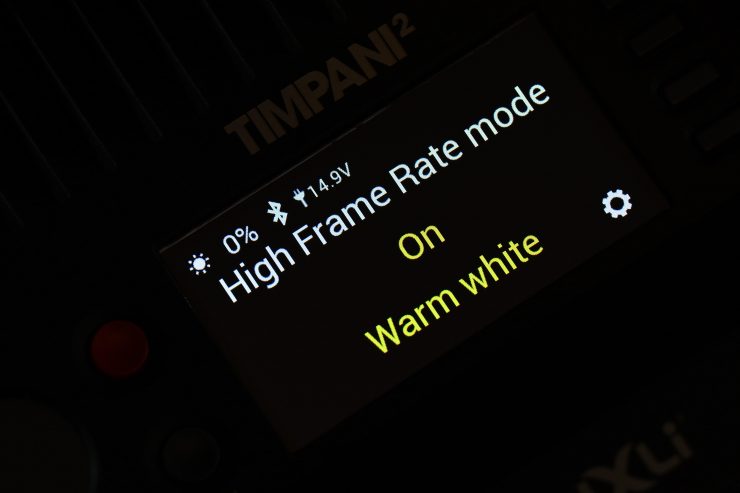
This is a new mode that has been added to the Timpani². It allows users to shoot at high frame rates without any unwanted banding, HFR Mode sets one of the five diodes to remain constantly on, so you don’t have to stop to calculate frame rates when you are shooting slow-motion footage. In this mode, you can change from Cold white, to Warm white, or use Red, Blue, or Green.
This mode can only be accessed on the light itself. You can’t currently bring it up on the app.
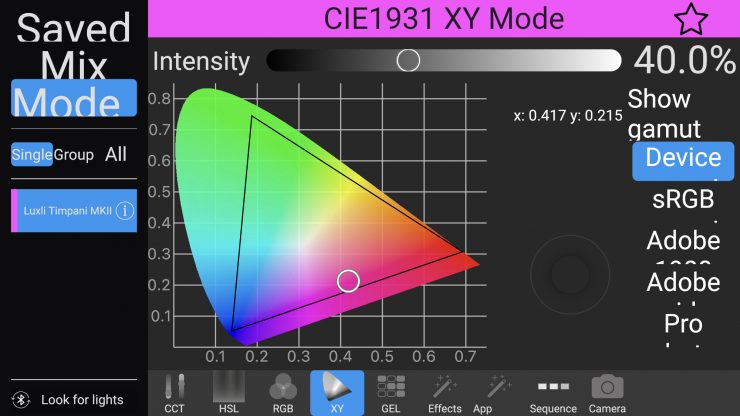
CIE XY Mode
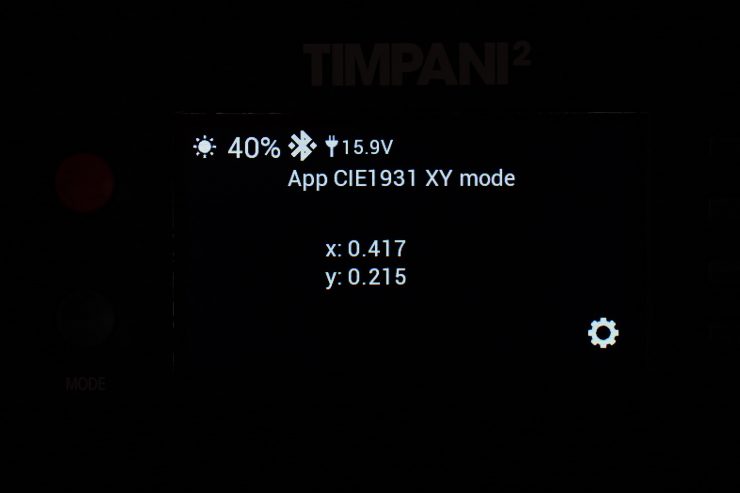
This mode can only be accessed when using the Luxli Composer App. It allows you to dial in exact coordinates along the X and Y axes of the CIE 1931 color space. This lets you match other lighting fixtures with great accuracy.
This mode can also only be accessed using the Composer App.
Description of the Special Effects Modes
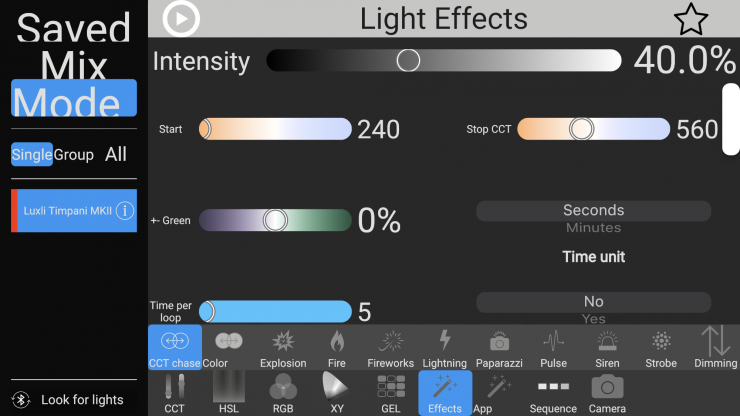
CCT Chase
A continuous loop that changes between two preset color temperatures. Good for simulating a sunrise, sunset, or a change from cloudy to sunny weather in real time. Since the sequence loops, you can shoot multiple takes without reprogramming the light.
CCT Start: Selects the color temperature at the beginning of the sequence (2400 to 10,000 K). CCT Stop: Selects the final color temperature of the sequence (2400 to 10,000 K).
+/- Green: Sets the green/magenta (tint) saturation level in 1% increments from +100% (green) to -100% (magenta).
Time Unit: Select between seconds and minutes for the time loop. Time/Loop: Select how many seconds or minutes the loop will last (1 to 160).
Color Chase
A continuous loop that moves through the color wheel between two selected colors. Since the sequence loops, you can shoot multiple takes without reprogramming the light.
Hue Start: Selects the color at the beginning of the sequence (0° to 360°).
Hue Stop: Selects the final color of the sequence (0° to 360°).
Saturation: Determines the color intensity from 100% (full color) to 0% (white light). Time Unit: Select between seconds and minutes for the time loop.
Time/Loop: Select the duration in seconds or minutes for each loop (1 to 160).
Explosion
Simulates the light from explosions. The Timpani generates random-length pulses and strobes within a range of the red to amber section of the color wheel.
Explosions/Minute: Sets how many separate explosions occur each minute (1 to 360). Duration (%): Set the percentage of time the light is illuminated for each pulse or strobe (5% to 95%).
Fire
Simulates the light of a candle, campfire, or bonfire in various wind conditions. Fire Type: Select candle, campfire, or bonfire.
Wind Type: Select between no wind, breeze, windy, or storm.
Fireworks
Simulates the light from fireworks. Colors and timing of each flash are random. Explosions/Minute: Sets how many flashes will occur per minute (1 to 50).
Duration (%): Determines the percentage of time the light is illuminated in each cycle. Select from a range of 5% (shortest duration) to 95% (longest duration).
Lightning
Simulates lightning by creating random short and long bursts.
CCT: Selects the color temperature of the lightning flashes (3000 to 10,000 K) in 50 K increments. Interval(s): Sets the interval of seconds between lightning flashes (1 to 60).
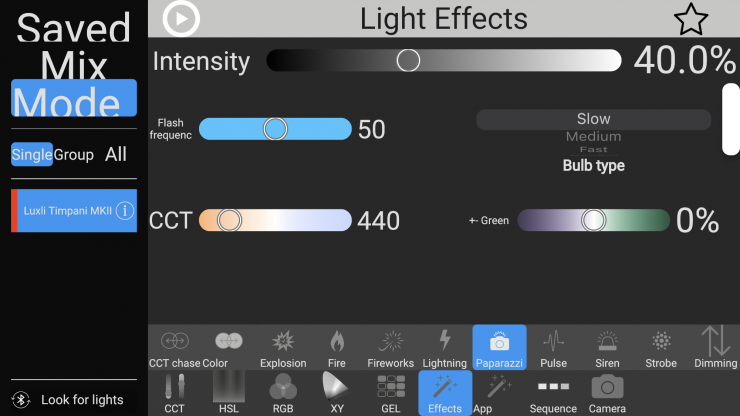
Paparazzi
Simulates the random firing of multiple camera flashes.
Intensity: Higher intensity increases the number of random flashes per second (0 to 100).
Bulb Type: Determines the length of each flash. Slow is the longest duration. Modern is the shortest duration. Choose from Slow, Medium, Fast, and Modern.
CCT: Sets the color temperature of the flashes from 2800 to 10,000 K+/- Green: Sets the green/magenta (tint) saturation level in 1% increments from +100% (green)
to -100% (magenta).
Pulse
Offers a steady pulse at a programmable rate. Similar to the Strobe special effect (below), but the light fades on and off.
Hue: Selects the light color (0 to 360).
Saturation: Determines the color intensity from 100% (full color) to 0% (white light). Pulses/Minute: Sets how many times the light will pulse each minute (1 to 200).
Siren
Simulates the flashing lights of an emergency vehicle, like a police car or ambulance.
Colors: Select the color combination of flashing lights. Choose red, blue, and white; red and blue; red and white; blue and white; blue; red; or SAE Amber.
Flash/Cycle: Set the number of times each individual color will flash within the cycle. Choose from 1 to 4 times per cycle.
Cycles/Minute: Determines how many repetitions of the cycle will occur each minute. Choose from 10 to 360.
Duration (%): Determines the percentage of time the light is illuminated in each cycle. Select from a range of 10% (shortest duration) to 90% (longest duration).
Strobe
Offers a steady flashing light at a programmable rate.
Hue: Selects the light color (0 to 360).
Saturation: Determines the color intensity from 100% (full color) to 0% (white light).
Frequency: Changes the number of flashes per second (1 to 25).
Duration (%): Determines the percentage of time the light is illuminated in each cycle. Select from range of 10% (shortest duration) to 90% (longest duration).
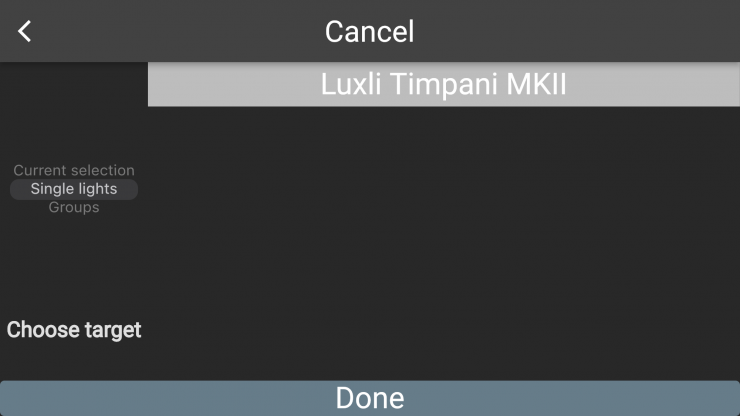
Luxli Composer App
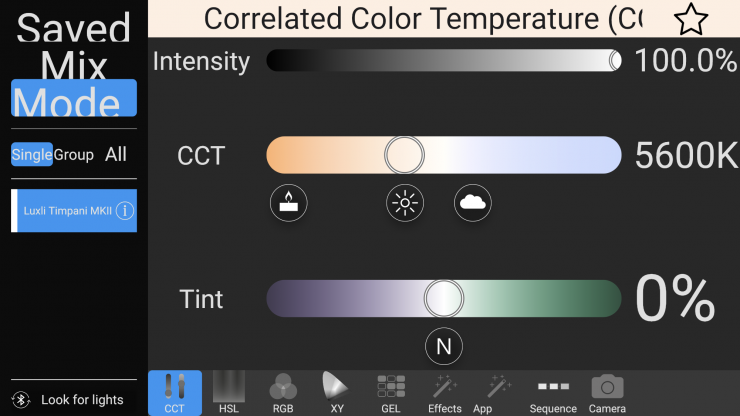
By using the free Luxli Conductor app on iOS or Android you can control the Timpani² and other Luxli lights via Bluetooth at a distance of up to 30′ (9.14 m) away.
Several of the modes that the Timpani² has can only be accessed via the app.
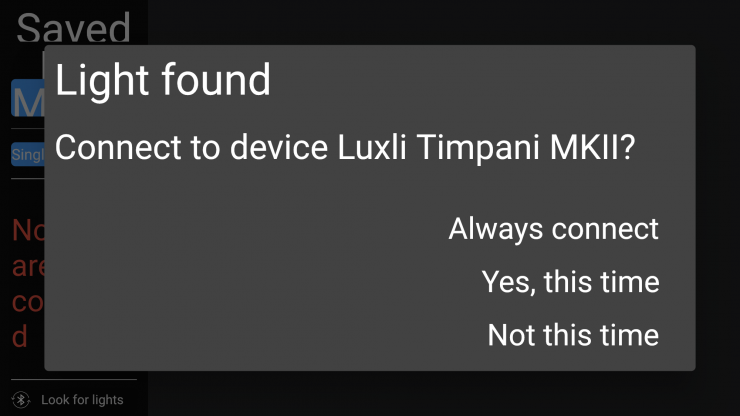
The app is nice because it uses Bluetooth and not Wi-fi, so you don’t need to join any networks. All you do is launch the app once the light is turned on and it automatically finds your light and gives you connection options.
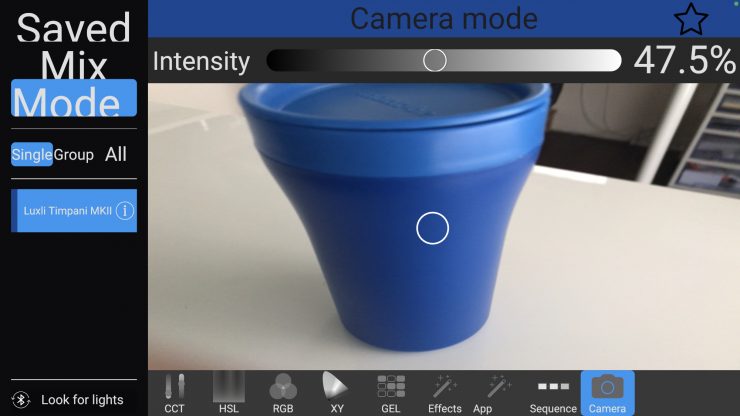
The color sampler feature in the app works really well. You can use your smartphone’s camera and then position the circle over any color you want. The Timpani² was then able to replicate that color fairly accurately. You can also choose colors from any previous photo or video that you have on your smartphone.
The ability to sample and replicate colors was quite groundbreaking at the time it was first introduced by Luxli and they were doing it way before anyone else was.
The Conductor app also gives you a range of preset white balance reproductions that you can quickly access. Although these are limited to 3200K, 5600K and 7000K.
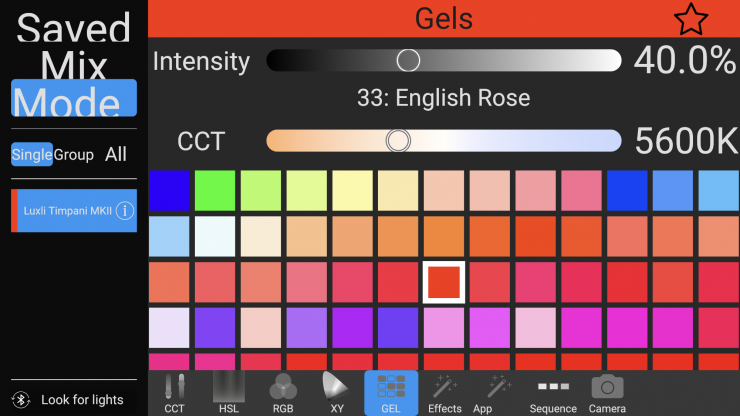
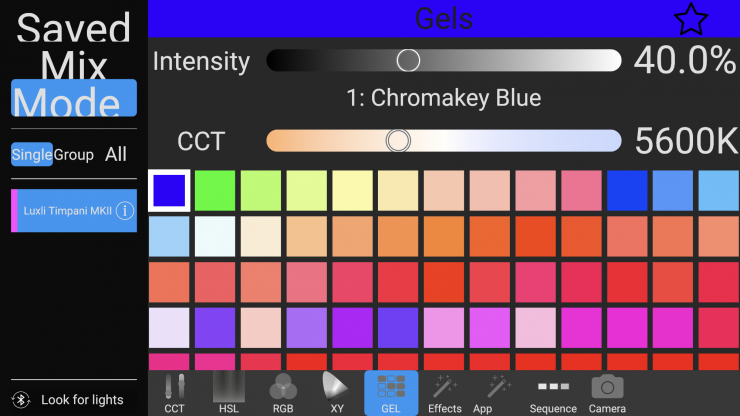
You can also choose to activate any one of the 150 filters that are available.
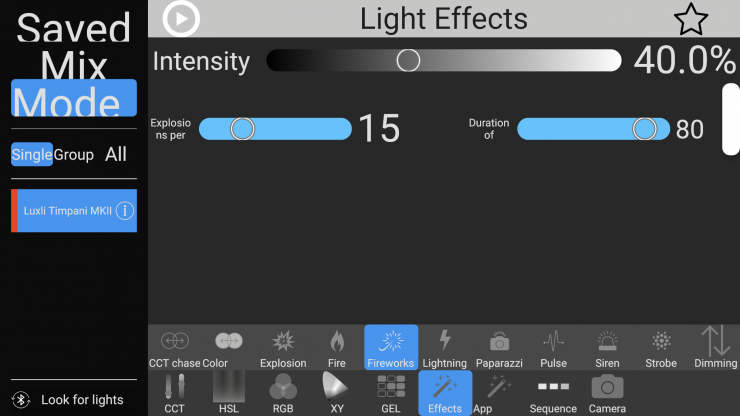
In the special effects mode, you can make a range of changes.

The Conductor app uses Bluetooth 5 and lets you create just about any hue of light you can imagine. There is also the ability to create customized lighting animation effects. If that wasn’t enough, you can combine multiple Luxli Orchestra units and synchronize them to operate all at once. The Timpani² can also be controlled via DMX.
The app is straightforward and easy to use. Everyone is laid out in a simple, clear interface.
For me personally, the ability to be able to control all of these aspects of the light from a smartphone or a tablet is a big deal. It lets me make adjustments to the light while I’m still standing behind the camera so I don’t need to go over to the light, adjust it, and then walk back to the camera to see how it looks. Almost all of the lights coming out these days feature some type of app control.
Control Green & Magenta Color Shifts
The Timpani² lets you adjust +/-green values from 0-100%. This is an incredibly useful feature that lets you get rid of color casts and makes it easier to match other lights that you may be using. If you are using lights from different manufacturers they are all going to behave differently. By being able to offset green or magenta you can get the Timpani² to closely match another source. For instance, if you happen to be shooting in an office building with overhead fluorescent lights, they may well have a color cast, if you can’t turn them off, you may want to replicate that same look with the Timpani². By playing with the +/-green values you can.
Unlike some other lights that have +/- green adjustment, on the Timpani² you aren’t limited to a certain amount of adjustment. The Timpani lets you go fully magenta or fully green if you need to.
The only negative aspect about the way Luxli has set up the +/-green values is that they have chosen to use values in a percentage form and not in the normal CC values you find in a lot of cameras and some other lights.
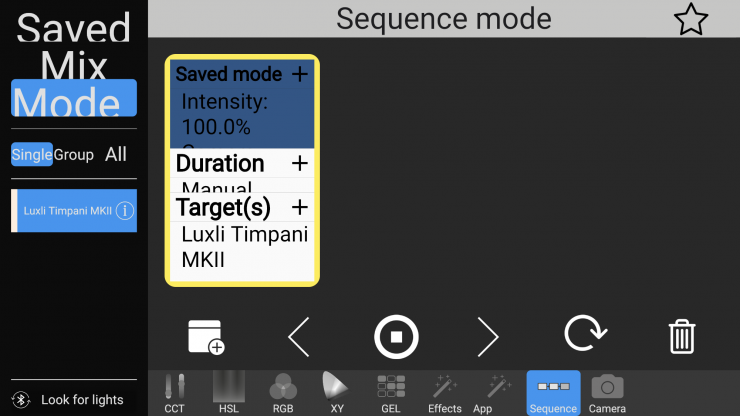
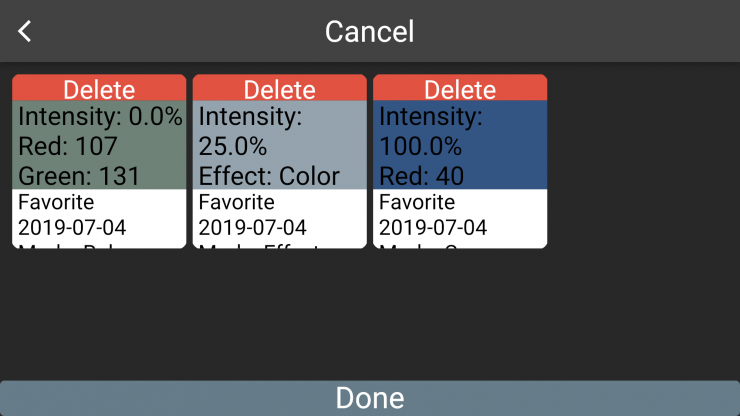
Saving Presets
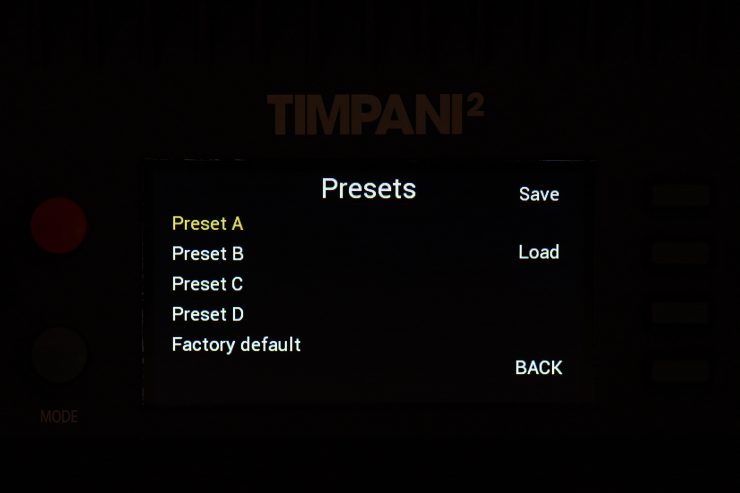
You can save your CCT, RGB, Filter, and Special Effects mode settings as presets, and these settings can be recalled from the presets menu. The Timpani² allows you to save four presets per mode.
DMX
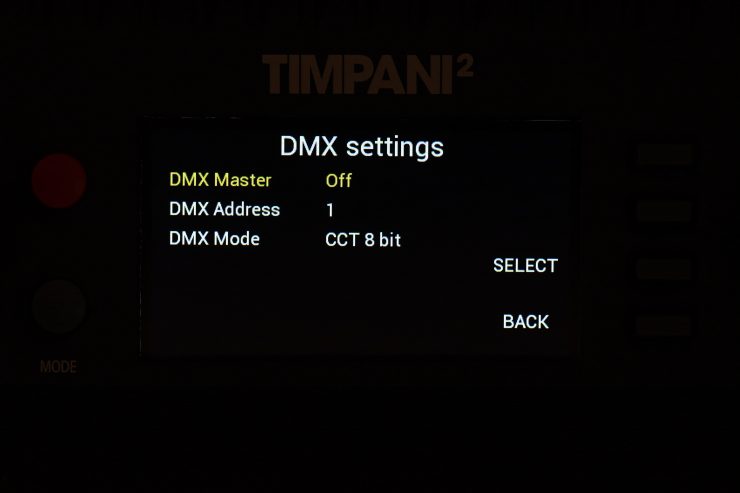
The Timpani² offers 8-bit and 16-bit modes. The 8-bit modes should be used with basic DMX controllers such as dimming consoles. 16-bit modes are best for use with virtual DMX control from a computer or advanced 16-bit DMX controllers.
DMX Modes for the Timpani² include:
CCT mode: ( 8 bit and 16 bit) Corresponds to the CCT mode described above. The DMX controller can adjust the color temperature from 2800 to 10,000 K and set the green/magenta saturation level.
HSL mode: ( 8 bit and 16 bit) Corresponds to the RGB mode described above. This mode controls the hue and saturation levels. The DMX controller can scroll through the entire color wheel in 1% increments.
GEL mode: ( 8 bit and 16 bit) Corresponds to the Filter mode described above. GEL mode allows the DMX controller to apply any of the 150 preset colored gels to any CCT setting.
Photometrics
So now let’s get to the photometric results. I always test lights in this way so that I get a reference to how they compare to other fixtures. Results only tell part of the story and should never be used alone to judge a light. I have found from extensive testing over the years that certain lights that have good photometric results don’t always look good, and lights that have worse photometric scores can sometimes look better than their results indicate. It is important that you don’t judge a light from one individual result. You have to gather all the data to make a comprehensive conclusion.
Different lights can also look different depending on what camera you happen to be using.
In a nice touch, every Timpani² light comes with its own individual photometric results. Not many companies do this and it is nice to see that Luxli does. It shows attention to detail and that lights are not just pushed off some assembly line and thrown in a box.
Output & Kelvin Color Temperature Accuracy
I tested the Luxli Timpani² at a variety of Kelvin color temperatures with a Sekonic C-800 Spectrometer to find out how much output the light had and how accurate the Kelvin color temperature reproduction was. All readings are taken at a distance of 1m (3.28ft) in a controlled environment.
5600K (Diffusion Panel)
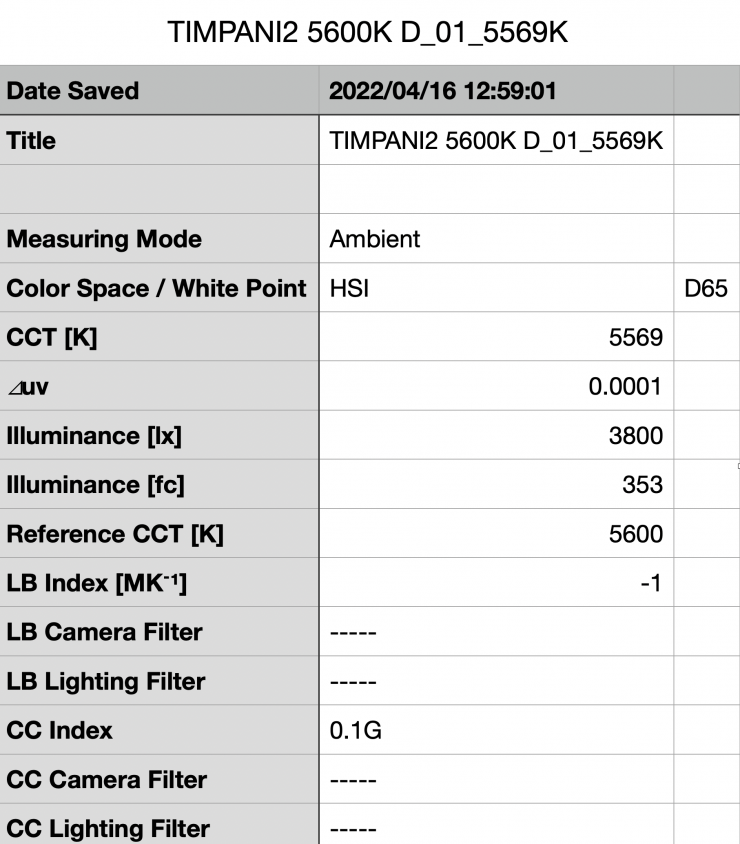
Above you can see the light recorded an output of 3800 lx (353 fc) when set at 5600K with its diffusion panel and run off mains power. As a reference, the original Timpani recorded 3380 lx (314 fc).

The light recorded a Kelvin color temperature of 5569K which was very accurate. This was better than the 5367K I recorded from the original Timpani when using its diffusion panel.
3200K (Diffusion Panel)
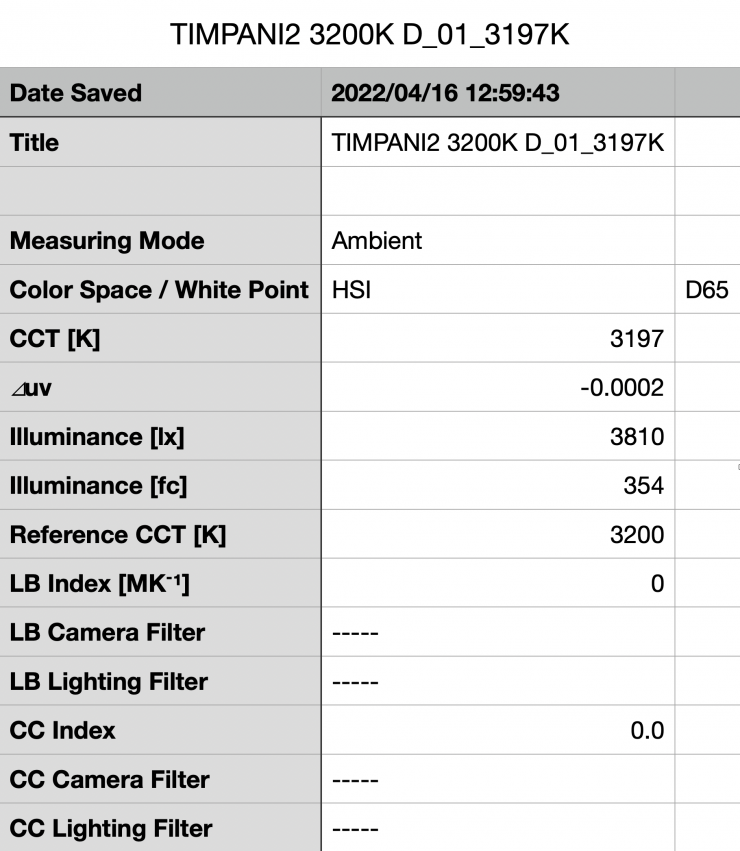
Above you can see the light recorded an output of 3810 lx (354 fc) when set at 3200K using its diffusion panel and running off mains power. This was just 0.26% more than it recorded when used at 5600K.
As a comparison, the original Timpani recorded a reading of 3480 lx (323 fc).

The Luxli produced a Kelvin color temperature of 3197K which was almost perfect. As a comparison, the original Timpani recorded a reading of 3131K.
5600K (No Diffusion)
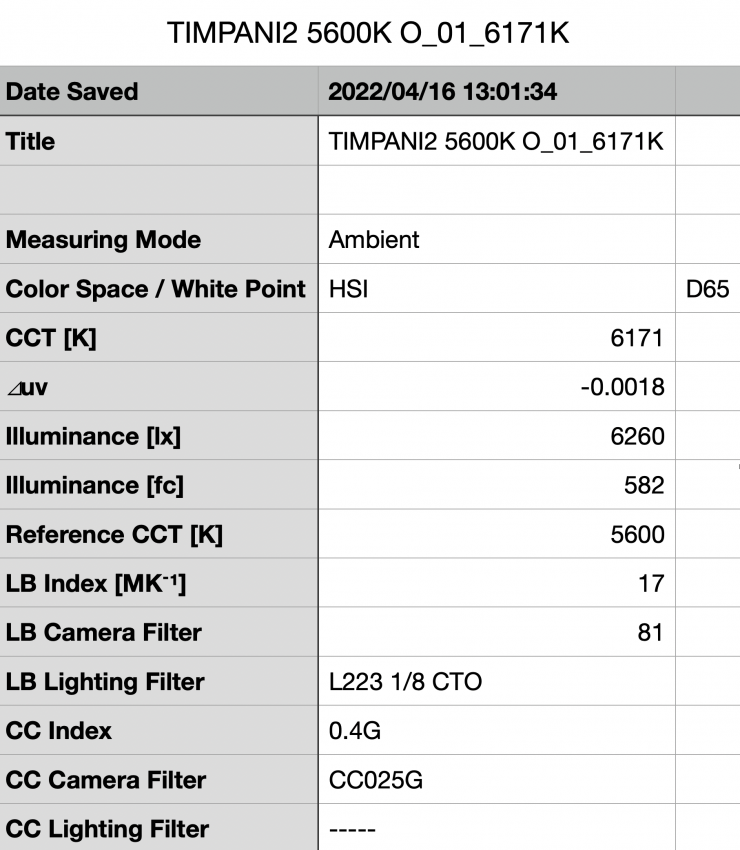
Above you can see the light recorded an output of 6260 lx (582 fc) when set at 5600K with the diffusion panel removed and run off mains power. This was 64.7% more output than when it is used with its diffusion panel. This tells me that the diffusion panel is actually doing quite a lot. With the original Timpani, the diffusion panel did almost nothing and it didn’t make much of a difference to the output.
As a reference, the original Timpani recorded 3840 lx (310 fc). It seems that Luxli has managed to squeeze a lot more output out of the new model. This is good to see because the original Timpani was a little underpowered compared to a lot of the competition that was released after it.
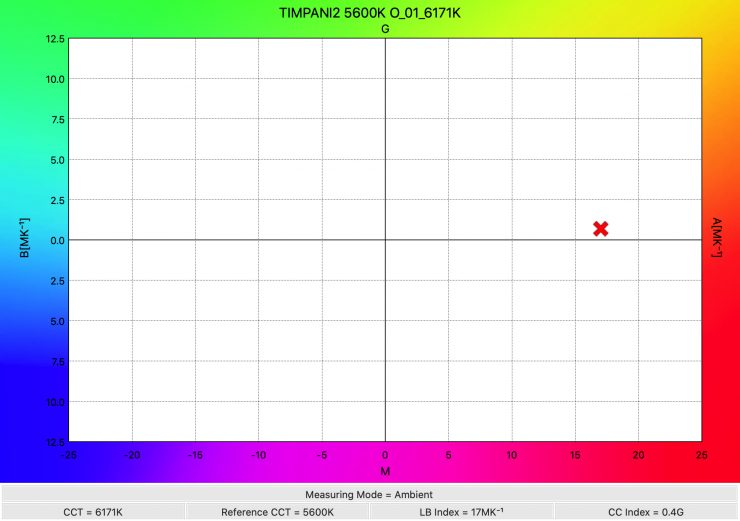
The light recorded a Kelvin color temperature of 6171K which was way off being accurate, and almost 600K higher than when you used the light with its diffusion panel. This clearly shows me that the light has been calibrated to provide the best accuracy when using the diffusion panel.
As a reference, the original Timpani when used without its diffusion panel recorded a reading of 5358K.
3200K (No Diffusion)
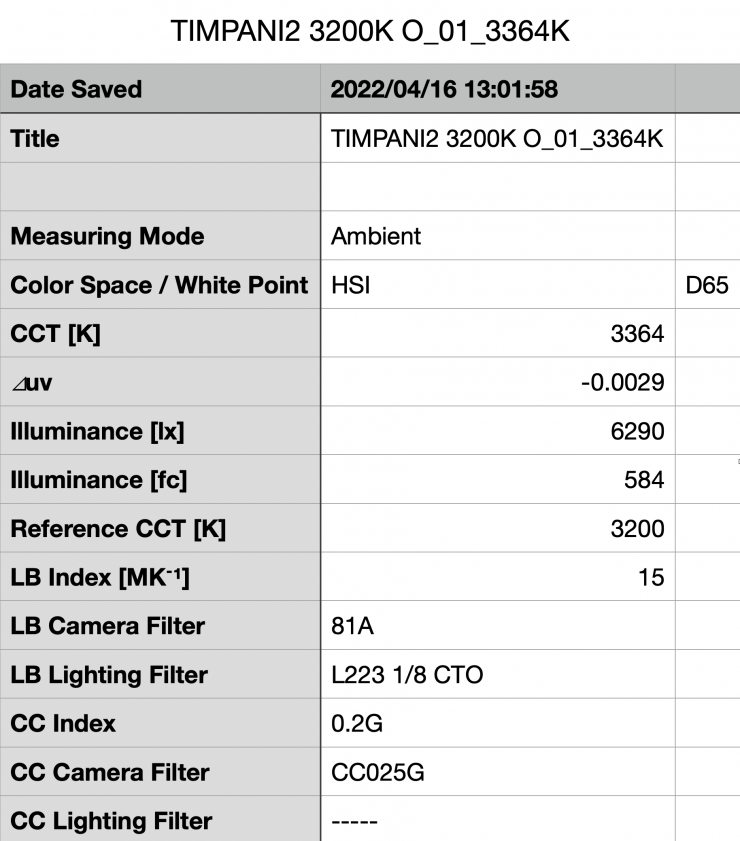
Above you can see the light recorded an output of 6290 lx (584 fc) when set at 3200K with the diffusion panel removed and run off mains power. This was 65.1% more output than when it is used with its diffusion panel. This tells me that the diffusion panel is actually doing quite a lot.

The light recorded a Kelvin color temperature of 3364K which was around 160K higher than when you used the light with its diffusion panel.
How does the output of the Luxli compare to other fixtures? Well, that is tricky, because it is hard to compare lights with vastly different beam angles, power draws, and diffusion. I have listed outputs, beam angle and power draw for some of the competing lights below.
5600K
| OUTPUT | POWER DRAW | BEAM ANGLE | |
| Luxli Timpani² (No Diffusion Panel) | 6171 lx | 120W | 78° |
| Luxli Timpani² (Diffusion Panel) | 3810 lx | 120W | 78° |
| Luxli Timpani (No Diffusion) | 3840 lx | 120W | 78° |
| Rotolight Titan X2 (100% Smartsoft Diffusion) | 3180 lx | 230W | 150° |
| Rotolight Titan X2 (No Diffusion) | 8210 lx | 230W | 68° |
| ARRI SkyPanel S30-C | 5950 lx | 200W | 110° |
| Litepanels Gemini 1×1 Soft | 6260 lx | 200W | 95° |
| Litepanels Gemini 1×1 HARD (Light Diffusion) | 15700 lx | 200W | 46° |
| Lupo Superpanel 30 Full Color Soft | 4380 lx | 200W | 115 |
| Lupo Superpanel 30 Full Color | 16900 lx | 200W | 40° |
| Aputure NOVA P300c | 9600 lx | 360W | 120° |
As you can clearly see, the output varies depending on the beam angle, diffusion, and power draw of the light. It is impossible to do an apples-to-apples comparison unless the two lights you are comparing have the same power draw, beam angle and diffusion.
The Luxli has a good amount of output, given its low power draw.
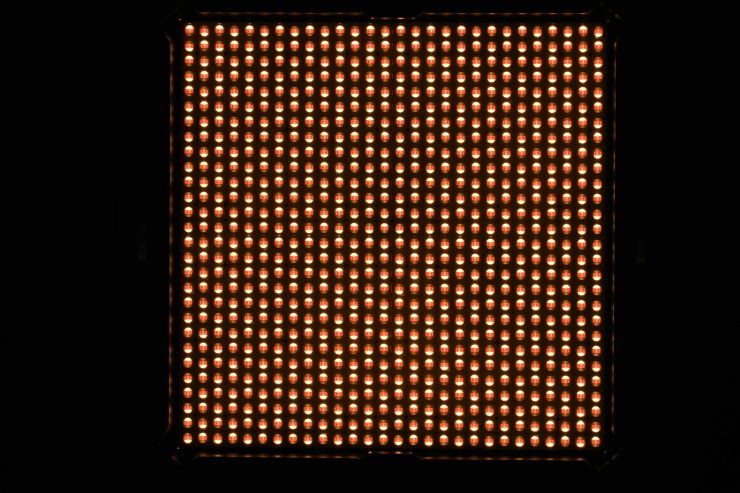
Saturated Red
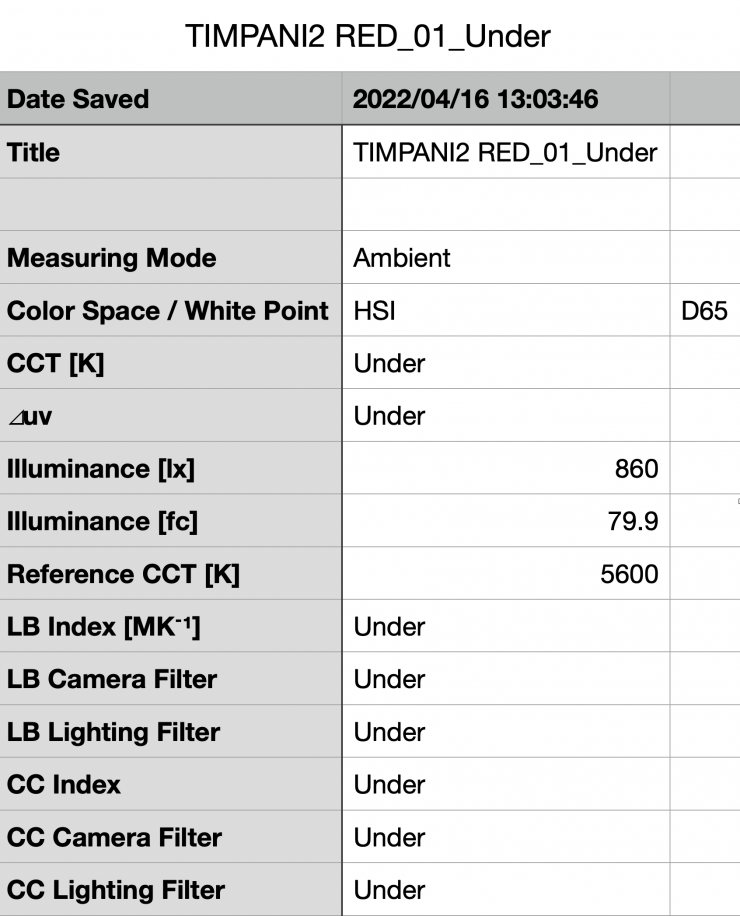
I also wanted to see how much output the light produced when creating a completely saturated red. The light recorded an output of 860 lx (79.9 fc). This is basically the equivalent of using the light at around 8-10% output if it was set at 5600K. It is important to know that RGBW lights put out significantly less output when you are creating certain saturated colors.
How does it perform at various Kelvin color temperatures?
So how does it perform at various Kelvin color temperatures when it comes to output and Kelvin color temperatures? Well, below you can see.
| KELVIN SETTING | LUX | CCT READING |
| 2800K | 3750 lx | 2785K |
| 3200K | 3810 lx | 3197K |
| 4500K | 3820 lx | 4480K |
| 5600K | 3800 lx | 5569K |
| 6500K | 3800 lx | 6481K |
| 8000K | 3800 lx | 7760K |
| 10000K | 3800 lx | 9829K |
These results tell me that the light has excellent Kelvin color temperature accuracy across its range, however, it is at its most accurate when used between 2800-6500K.
The output of the light is ridiculously consistent from 2800K to 10000K. The light has the most output when used at around 6500K. The output only varies by 1.86% from the highest to lowest scores that I recorded. A lot of lighting manufacturers concentrate on high output and that comes at the expense of consistency. I have sen lights where the output at various Kelvin color temperature settings varies dramatically.
If there is one word that sums up Luxli fixtures it is consistency.
Kelvin color consistency & linear output when dimming the light
Now, what you should always do when testing lights is to see if the Kelvin color temperature remains consistent when dimming the light. Just because you set a light at say 5600K, that doesn’t mean that the Kelvin color temperature will remain stable as you start dimming the fixture down. I also wanted to see how linear the dimming curve was.
I decided to do a series of tests at 100%/75%/50%/25%10% to see if the Kelvin color temperature being recorded changed. This was done at a distance of 1m using a Sekonic C-800.
5600K
| CCT READING | OUTPUT | INTENSITY % |
| 5569K | 3800 lx | 100 |
| 5601K | 2870 lx | 75 |
| 5574K | 1910 lx | 50 |
| 5538K | 981 lx | 25 |
| 5535K | 346 lx | 10 |
The Luxli is still able to maintain very good Kelvin color consistency as you start dimming the fixture. My testing showed that the Kelvin color temperature varied by just 66K. This tells me that you can use the light dimmed right down without having to worry about any big shifts in the Kelvin color temperature.
As far as how linear the output is when you start dimming the light, at 50% output it had 49.73% less output than when used at 100%. At 25% it had 74.2% less output than when used at 100%. At 10% output it had 90.89% less output than when used at 100%. This shows me that the light’s dimming curve is very close to being perfectly linear.
Again, with Luxli lights, what you get is excellent consistency.
Color Rendering
So now that we have seen how much output the Luxli Timpani² produces, how does it perform when it comes to replicating accurate colors?
5600K (Diffusion Panel)
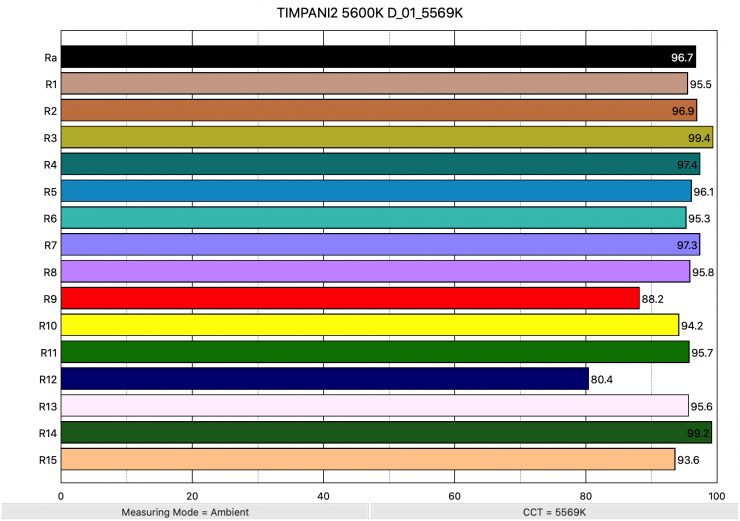
Above you can see that when the light was set at 5600K it recorded an average CRI (R1-R8) of 96.7 and an extended CRI (R1-R15) of 94.70. For replicating accurate skin tones it recorded 88.2 for R9 (red), 95.6 for R13 (closest to caucasian skin tones), and 93.6 for R15 (closest to Asian skin tones).
While these were still pretty good scores, they weren’t as good as the scores I got when I tested the original. As a reference, the original Timpani when set at 5600K recorded an average CRI (R1-R8) of 97.8 and an extended CRI (R1-R15) of 96.2. For replicating accurate skin tones it recorded 97.9 for R9 (red), 99.6 for R13 (closest to caucasian skin tones), and 97.0 for R15 (closest to Asian skin tones).

Above you can see that the Timpani² had a TLCI score of 99 when used at 5600K.
So how does the extended CRI result compare to some of the competition? Well, below you can see:
| EXTENDED CRI | |
| Luxli Timpani² | 94.70 |
| Luxli Timpani | 96.2 |
| Rotolight Titan X1 | 95.44 |
| ARRI SkyPanel S30-C | 93.39 |
| Litepanels Gemini 1×1 Soft | 91.32 |
| Litepanels Gemini 1×1 HARD | 96.52 |
| Lupo Superpanel 30 Full Color Soft | 93.4 |
| Lupo Superpanel 30 Full Color | 93.59 |
| Aputure NOVA P300c | 95.34 |
As you can see, all of these lights are very close and you would be hard-pressed to tell any of them apart. The Litepanels Gemini 1×1 HARD has the best extended CRI of any of the 1×1 RGBW lights I have tested at 5600K, but not by much.
3200K (Diffusion Panel)
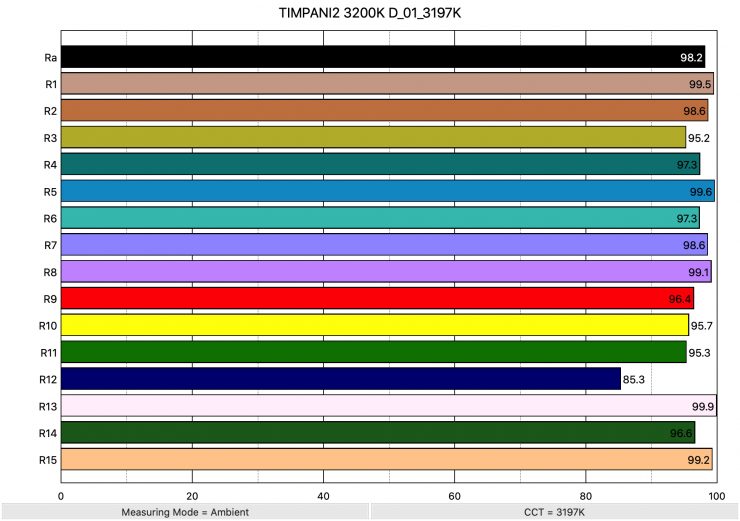
Above you can see the results for the Timpani² at 3200K. The light recorded an average CRI (R1-R8) of 98.2 and an extended CRI (R1-R15) of 96.90. For replicating accurate skin tones it recorded 96.4 for R9 (red), 99.9 for R13 (closest to caucasian skin tones), and 99.2 for R15 (closest to Asian skin tones). These are exceptionally good scores and the best scores I have ever seen from a 1×1 style light. Its score for R13 was almost perfect. I have never tested a light that had 5 scores above 99.
As a reference, the original Timpani recorded an average CRI (R1-R8) of 96.5 and an extended CRI (R1-R15) of 95.45. For replicating accurate skin tones it recorded 92.6 for R9 (red), 96.1 for R13 (closest to caucasian skin tones), and 96.3 for R15 (closest to Asian skin tones).
Above you can see that the Timpani² had a TLCI score of 98 when used at 3200K.
So how do the extended CRI results compare to some of the competition? Well, below you can see:
| EXTENDED CRI | |
| Luxli Timpani² | 96.90 |
| Luxli Timpani | 95.45 |
| Rotolight Titan X1 | 91.83 |
| ARRI SkyPanel S30-C | 93.56 |
| Litepanels Gemini 1×1 Soft | 93.32 |
| Litepanels Gemini 1×1 HARD | 93.32 |
| Lupo Superpanel 30 Full Color Soft | 91.86 |
| Lupo Superpanel 30 Full Color | 90.7 |
| Aputure NOVA P300c | 95.64 |
Again, as you can see, all of these lights are very close and you would be hard-pressed to tell any of them apart. The Luxli Timpani² did have the highest extended CRI score when used at 3200K of any 1×1 RGBW light that I have tested. In fact, the extended CRI score of 96.90 is one of the highest I have seen from any light period.
CC Index & ⊿uv
The CC Index displays the CC correction value and whether any magenta or green needs to be added or subtracted. 1 CC corresponds to 035 Kodak CC values or 1/8 Rosco filter values. Any reading less than +1.00 or -1.00 and you’re probably not going to need to make any kind of adjustment. The ⊿uv is the value to show how much this light is away from being an ideal light source (black body radiation = incandescent lamp). As with the CC Index you want this number to theoretically be zero. Kelvin is not a linear value, so we need to convert from Kelvin to MK-1 to compare the values of color temperature. To calculate from Kelvin to Mired is MK-1= 1*1000000/Kelvin. While this may sound confusing, it is the only way of measuring if the Kelvin shift is significant enough to warrant having to use a filter for correction. Below are the results for the Luxli Timpani².
Kelvin Vs MK-1
| Kelvin | Difference in K | MK-1 | Difference in MK-1 | |
| SET VALUE | 2800K | 0 | 357.14 | 0 |
| ACTUAL READING | 2785K | 15 | 359.06 | -1.92 MK-1 |
| SET VALUE | 3200K | 0 | 312.5 | 0 |
| ACTUAL READING | 3197K | 3 | 312.79 | -0.29 MK-1 |
| SET VALUE | 4500K | 0 | 222.22 | 0 |
| ACTUAL READING | 4480K | 20 | 223.21 | -0.99 MK-1 |
| SET VALUE | 5600K | 0 | 178.57 | 0 |
| ACTUAL READING | 5569K | 31 | 179.56 | -0.99 MK-1 |
| SET VALUE | 6500K | 0 | 153.84 | 0 |
| ACTUAL READING | 6481K | 19 | 154.29 | -0.45 MK-1 |
| SET VALUE | 8000K | 0 | 125 | 0 |
| ACTUAL READING | 7760K | 240 | 128.86 | -3.86 MK-1 |
| SET VALUE | 10000K | 0 | 100.00 | 0 |
| ACTUAL READING | 9829K | 171 | 101.73 | -1.73 MK-1 |
These figures might look confusing, but what it tells me is that the light is extremely Kelvin color accurate at all temperatures. Any MK-1 score that is under -9/9 means you wouldn’t have to use any color correction gels. The MK-1 scores for this light were exceptionally good. Between 2800K to 6500K the Luxli has the most consistent Kelvin Vs MK-1 scores I have seen from any light.
Again, and I have already said it multiple times during this review, look at the consistency. The attention to detail is what sets this light apart from other offerings that are even remotely close in price.
CC INDEX & ⊿uv
| CC INDEX | ⊿uv | |
| 2800K | 0 | -0.0002 |
| 3200K | 0 | -0.0002 |
| 4500K | 0 | -0.0004 |
| 5600K | 0.1G | 0.0001 |
| 6500K | 0.3G | -0.0004 |
| 8000K | 0.5G | -0.0003 |
| 10000K | 0.8G | 0.0001 |
Again, these scores are exceptionally good. I have never seen such accurate ⊿uv scores across a light’s entire Kelvin color temperature range like this before. The lights CC INDEX scores were excellent from 2800K to 5600K. At 6500K and above it does have a very mild shift, but you don’t have to worry about it unless it is above 1.0.
TM-30
TM-30 is a relatively new color rendering standard that was developed to deal with the limitations of CRI. TM-30 looks at 99 individual colors. These 99 colors are categorized into seven groups: nature, skin color, textiles, paints, plastics, printed material, and color systems.
TM-30 scores go from 0 – 100. The higher the score, the more accurate a light is at producing colors. Any TM-30 Rf score in the ’90s is considered to be good. What is interesting and something that you need to be very aware of is that two separate light sources with the exact same CRI scores can render colors very differently. A light with a high CRI rating could have a low TM-30 score. Conversely, a light with a good TM-30 score could have a bad CRI score.
Now, there are two measurements associated with TM-30, Rf and Rg.
Rf (Color Fidelity)
Rg (Color Gamut)
With Rf value, ideally, you want a score in the 90’s.
With Rg value, a score below 100 indicates that the light source renders colors with less saturation than the reference source. So ideally you want this score to be above 100.

2800K 
3200K 
4500K 
5600K 
6500K 
8000K 
10000K
Above you can see the scores for Luxli Timpani² at various Kelvin color temperatures. Below I have listed the figures as well.
| Rf | Rg | |
| 2800K | 94 | 102 |
| 3200K | 95 | 102 |
| 4500K | 95 | 101 |
| 5600K | 93 | 101 |
| 6500K | 91 | 100 |
| 8000K | 89 | 99 |
| 10000K | 86 | 97 |
The TM-30 scores are all good and it shows me that the light is pretty consistent at replicating accurate colors with full saturation. Only at 8000 and 10000K is it slightly below.
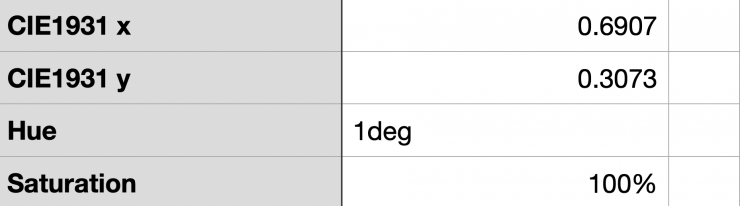
If we look at how well the light replicates a fully saturated Red, you can see above that it is able to produce 100% saturation, but the Hue did shift by 1-degree, although I am yet to see a light that didn’t.
SSI
SSI (Spectral Similarity Index) was developed by the Sci-Tech Council of the Academy. SSI gives me the ability to set any light as a standard, or use predefined standards (such as CIE D55), and then give other lights an SSI score based upon how well they will match standards such as CIE D55. This way I can measure spectral response and compare it directly against an ideal light source. This is actually a much better test than recording CRI scores.
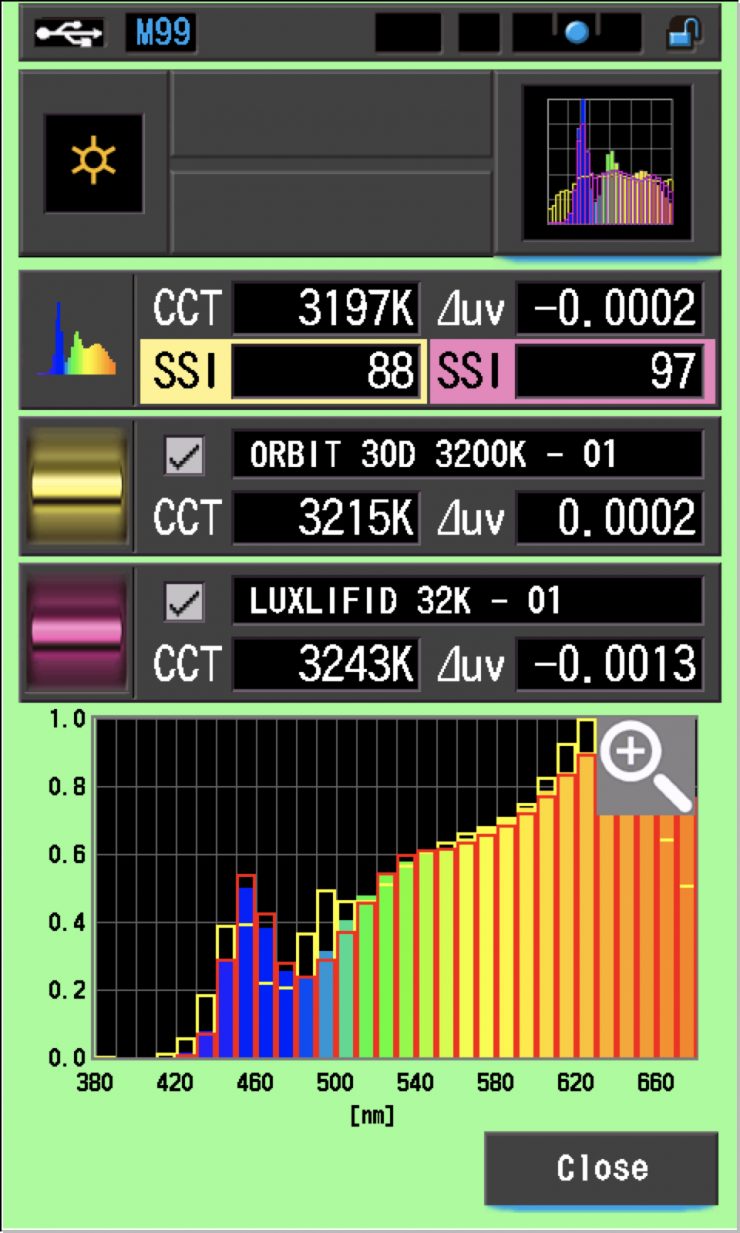
3200K
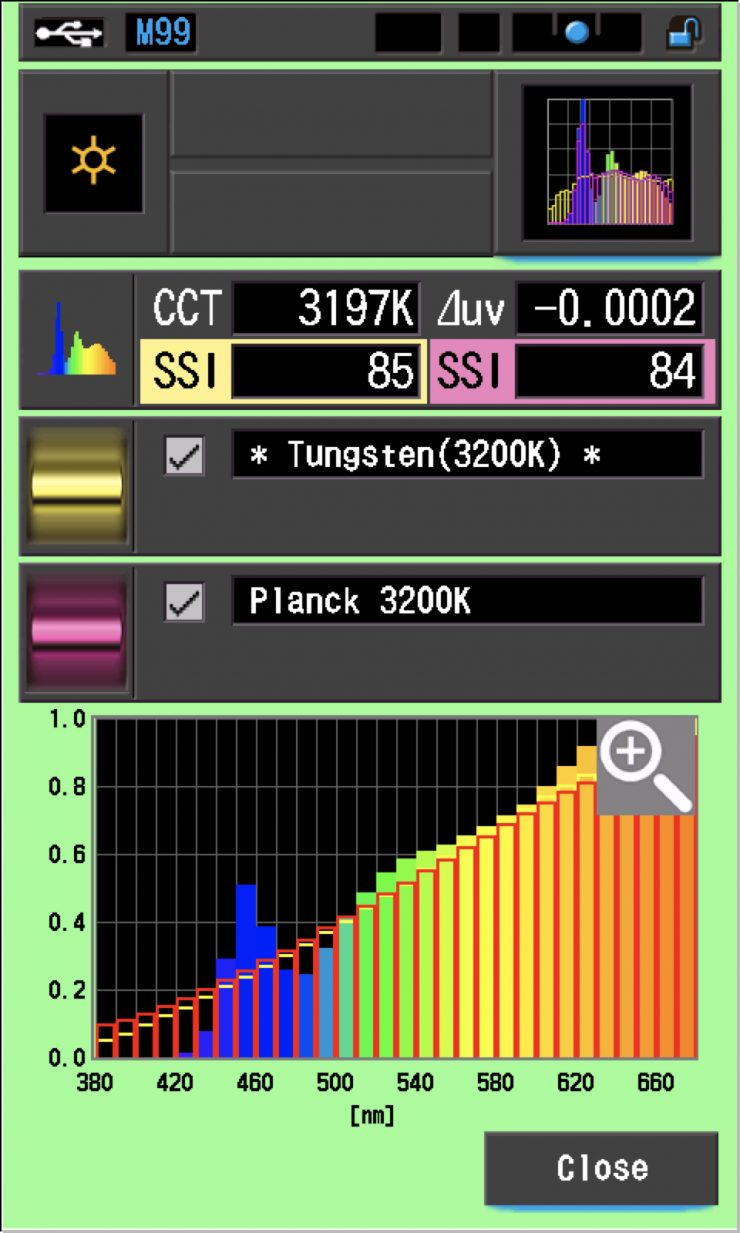
In this graph, the red bars indicate a perfect Planck 3200K source. The gold bars indicate a perfect 3200K Tungsten source. This lets us compare how close to a perfect 3200K lighting source the Luxli is. Any SSI score in the low ’80s is very good for a 3200K LED light. As you can see, LED lights have a hard time replicating colors below about 450nm.
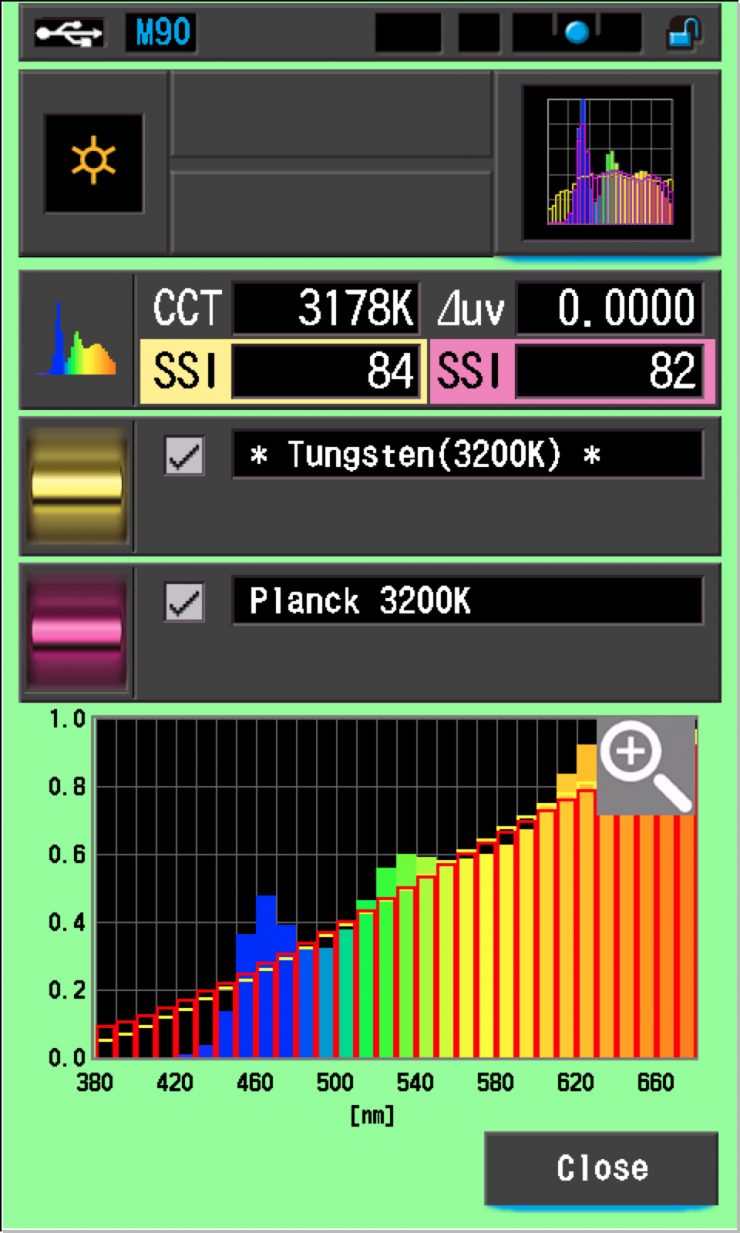
As a reference, above you can see the same result for the Rotolight Titan X2.
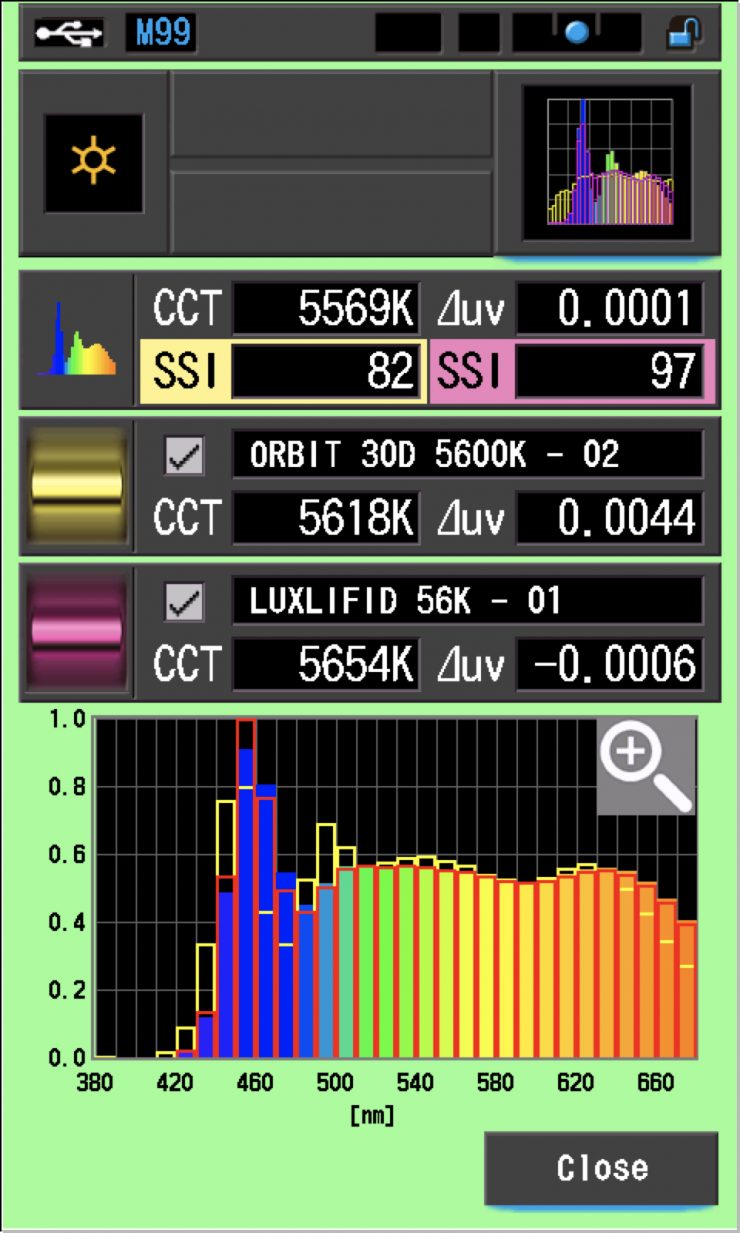
5600K
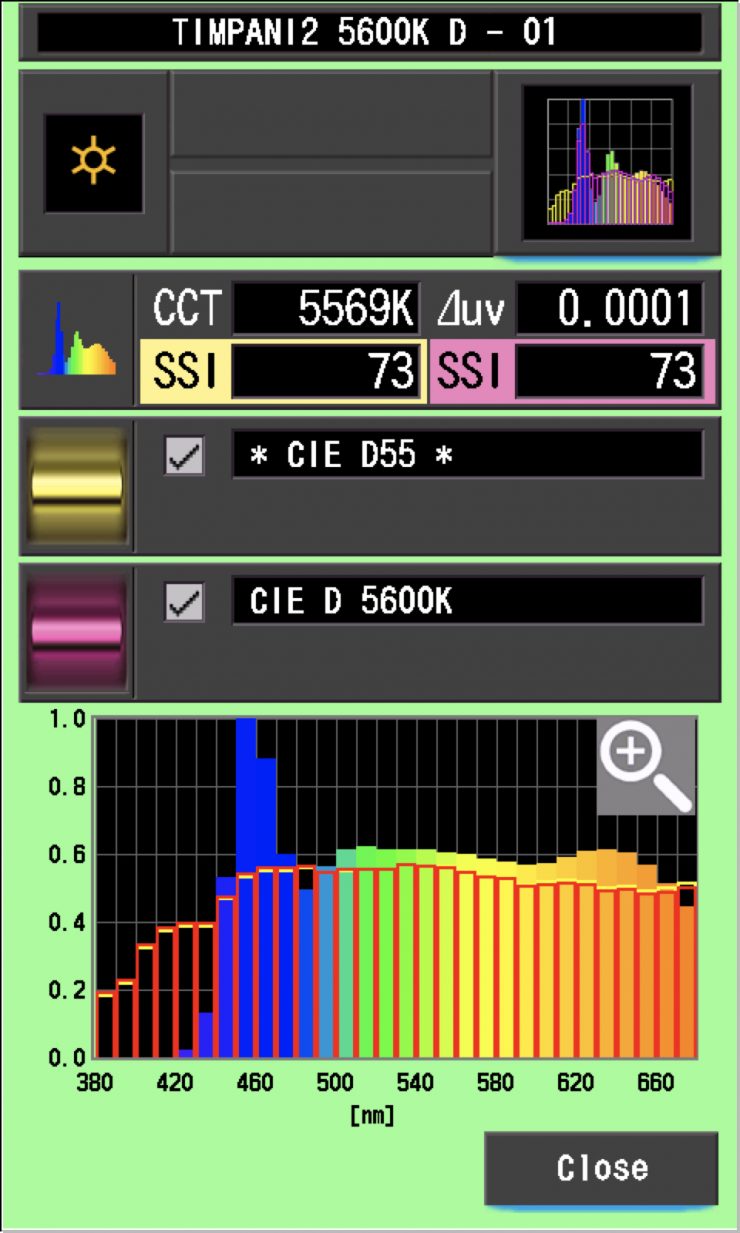
In the graph above the gold bars indicate a perfect CIE D55 source. The red bars indicate a perfect CIE D 5600K source. This lets us compare how close to a perfect 5600K lighting source the Luxli is. A score in the low 70’s is typical for a 5600K LED source.
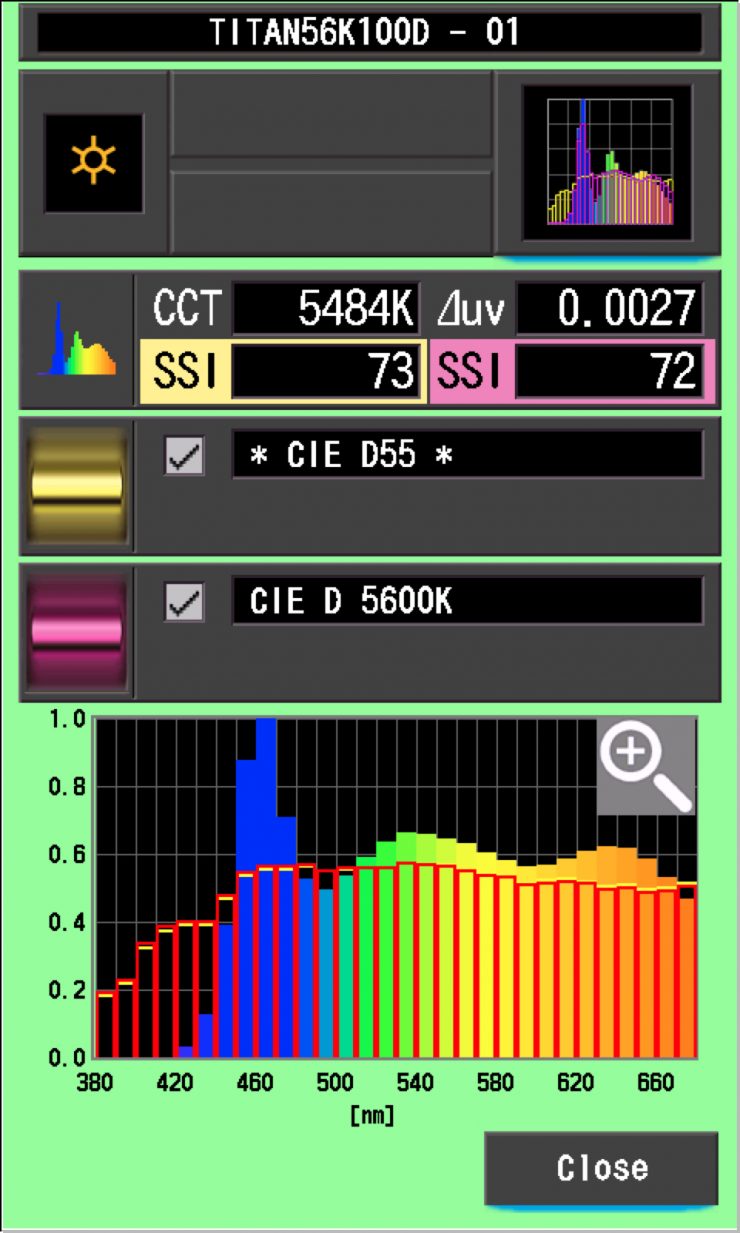
As a reference, above you can see the same result for the Rotolight Titan X2.
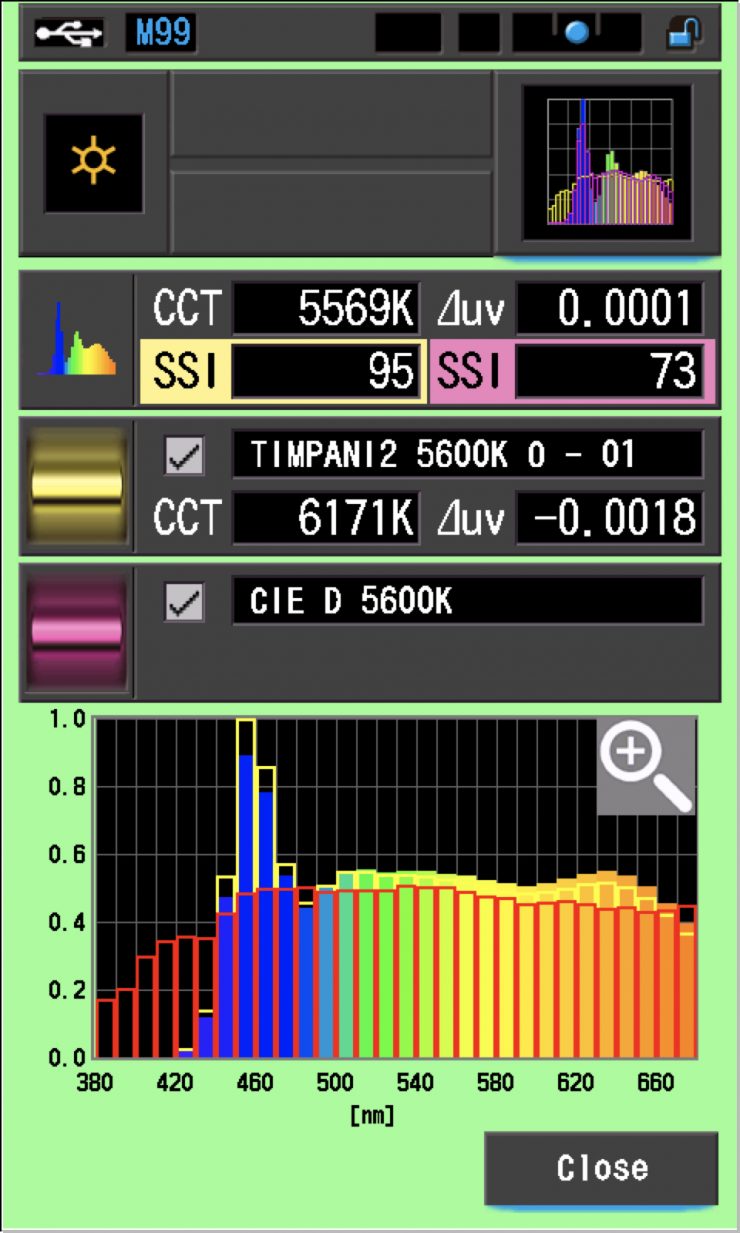
The main reason we want to record SSI scores is so we can see how well they match with other lights. As a test, I was curious to see how well the Luxli Timpani² matched an ARRI Orbiter and Luxli’s own Fiddle². Below you can see the results when the lights are set at both 5600K and 3200K.
As you can see the ARRI and the Luxli Fiddle² are not a perfect match to the Timpani² at 3200K, although the Fiddle² is very close. You would need to fine-tune the ARRI or the Timpani² to try and get them to match more closely.
Just like at 3200K, the results at 5600K were basically the same. The Timpani² is a pretty close match to the Fiddle². You would need to fine-tune the ARRI or the Timpani² to try and get them to match more closely.
Just as another test I thought I would look and see if there were any differences when using the Timpani² with its Diffusion Panel and without at 3200K. Below you can see the results.
As you can see, if you had two Timpani² lights and you were using one with the diffusion panel and one without, they aren’t going to be a perfect match. While they are still reasonably close, you could tweak them slightly to get a better match.
SSI tests are a great way of telling you what lights you own or use will work well together.
Spectral Distribution
5600K
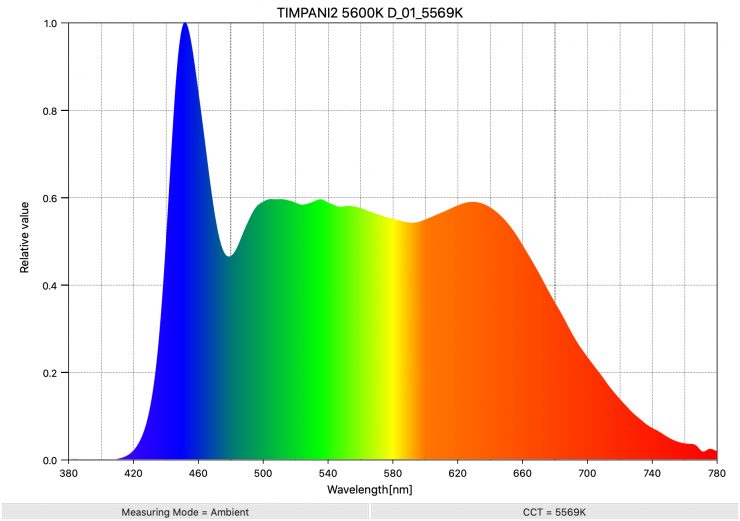
Above you can see the spectral distribution of the Luxli Timpani² when set at 5600K. The spectral distribution is fairly good at 5600K and the light doesn’t have any spikes where you wouldn’t expect to see any. This spectral distribution is fairly common for a lot of LED lights at 5600K.

As a reference, above you can see the spectral distribution for the Rotolight Titan X1.
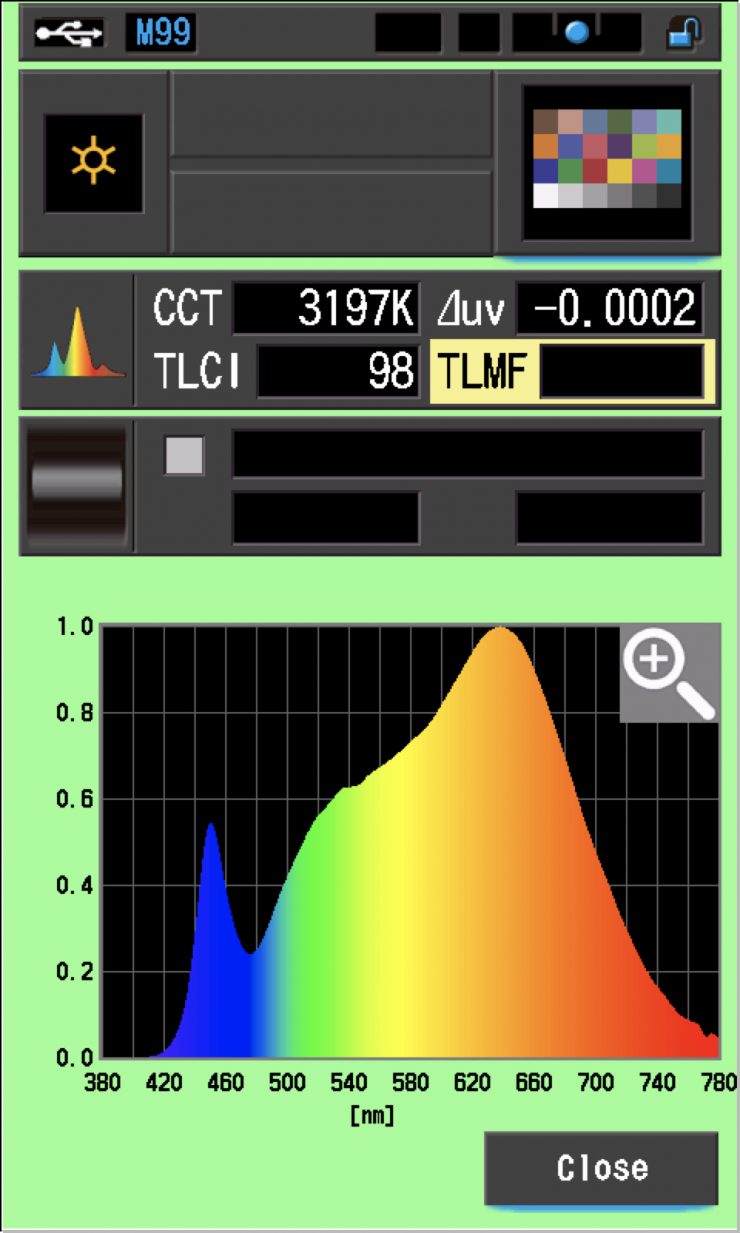
3200K
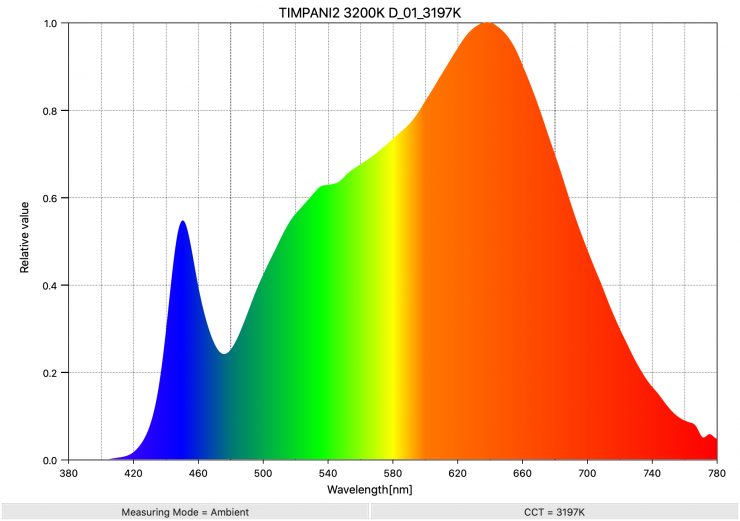
Above you can see the spectral distribution of the Luxli Timpani² when set at 3200K. The spectral distribution is very good at 3200K and the light doesn’t have any spikes where you wouldn’t expect to see any.
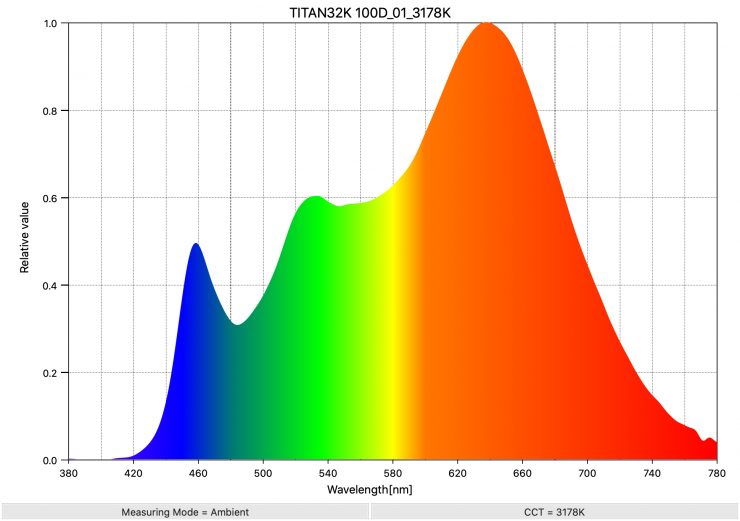
As a reference, above you can see the spectral distribution for the Rotolight Titan X1.
Real-World Performance
As I always say, photometric scores only tell you part of the story. Lots of LED lights score well these days in technical tests, but a good light should be easy to use, versatile, and provide good real-world results.
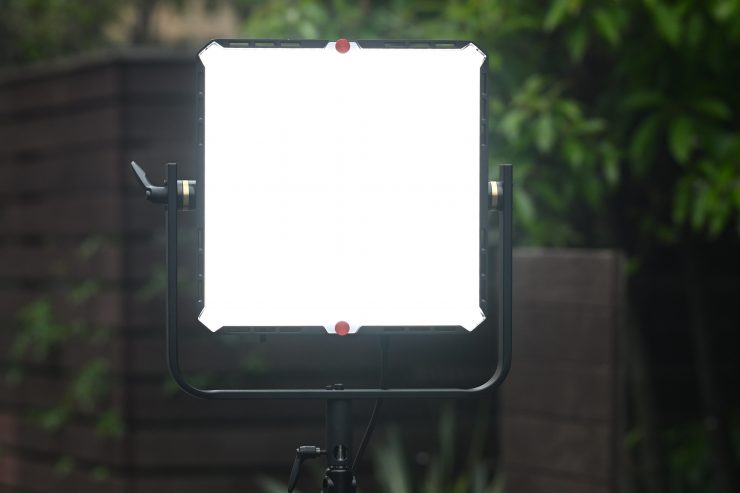
Light on (Diffusion Panel) 
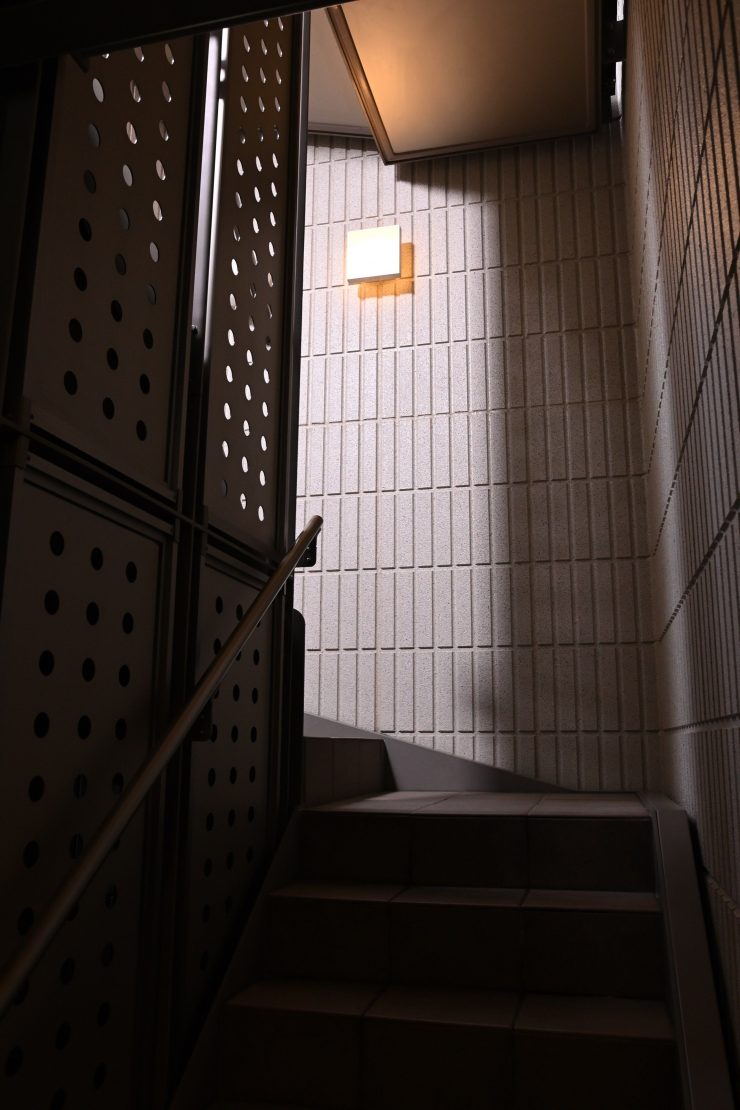
Light off 
Light on (No Diffusion Panel) 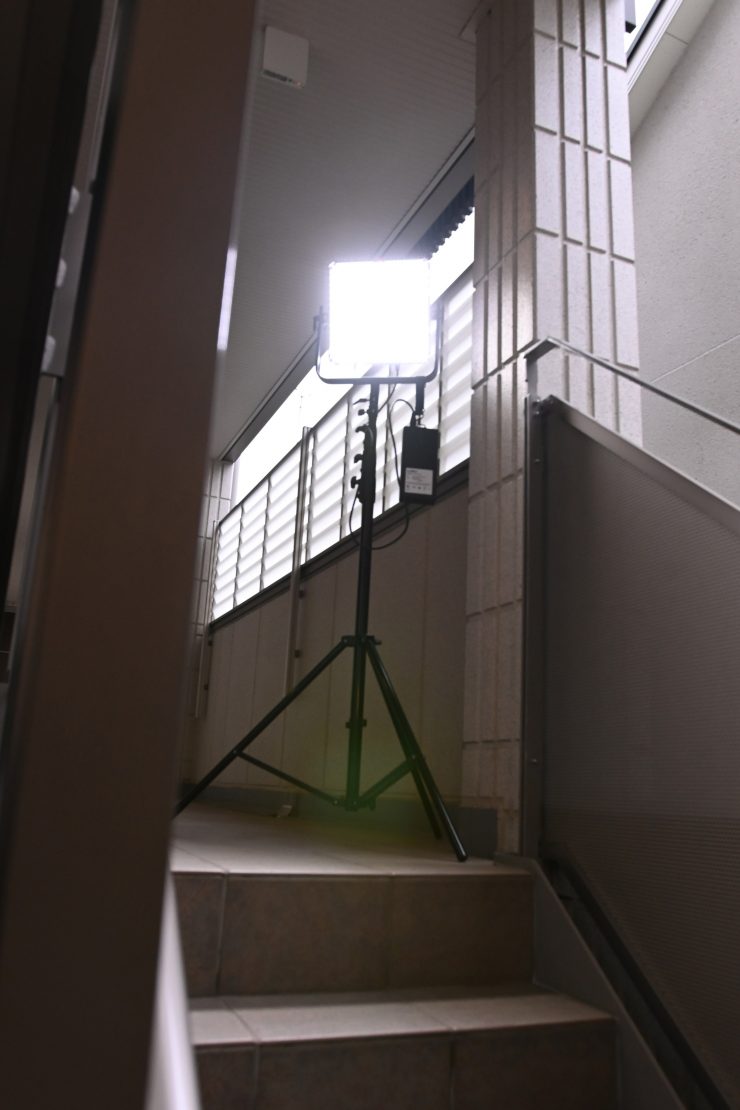
Where the light was positioned
To give you an idea about the output above you can see three shots where I have the light set at 100% and it is around 2.5 meters back from the wall. You can see the difference between when the light is off, when it is used with its diffusion panel, and when it is used without its diffusion panel.
The Timpani² does produce a really nice quality of light, and unlike with the original version where you really needed to use a softbox, with the new light, the stronger diffusion panel provides good results straight out of the box.
If you don’t have a high enough output, to begin with, and then attempt to heavily diffuse that lighting source, often the brightness of that light is reduced to a point where it’s only usable when placed very close to a subject. The light coming from the Timpani² is a lot softer than from the original, however, it still has a decent amount of output that you don’t have to place too close to your subject.
This makes the light ideal for solo operators or traveling cameramen or women who need a light that is quick to set up and can be powered remotely in the field from a camera battery. The light’s 72-degree beam angle when using the diffusion panel does make it suitable to use for interviews, and if you need even more finite control you could buy the optional barn doors.
The Timpani² would be a pretty decent option for news crews due to its ability to be run via a single flight safe battery.
Having the ability to control green and magenta is always a very useful feature to have. Being able to match other fixtures as well as getting rid of any green or magenta that you may see when using the light is something you shouldn’t take for granted.
As far as the RGB Color Mode, and effects modes go, while they are great to have available, I don’t tend to use those features that much in my line of work. In saying that, being able to generate different colors is handy for lighting up backdrops or creating color separation during interviews. It’s also nice to be able to use the light to help illuminate green screens very easily.
Do you actually need an RGBW light?
Just because we want something, doesn’t necessarily mean that we need it. Whether you actually need an RGBW light really depends on the type of things that you shoot. If you are primarily shooting interviews, then having an RGBW light may not make a lot of sense. However, in saying that, the price point of the Luxli makes it a lot cheaper than other good traditional 1×1 LED panel lights. In that regard, considering it outperforms a lot of other standard 1×1 panel lights, it’s definitely worth buying if you are in the market for a fixture with this type of form factor. Even if you aren’t going to use the additional RGB features and effects they are nice to have on hand if the situation arises.
Even if you have no need for creating colors or using effects with your lighting, RGBW lights do give you access to creating a far wider range of Kelvin color temperatures than their regular LED counterparts. Having the ability to dial in a Kelvin color temperature between 2,800 – 10,000K can be extremely handy, and you shouldn’t overlook how important being able to change the +/- green bias is.
Other Alternatives
Litepanels Gemini 1×1 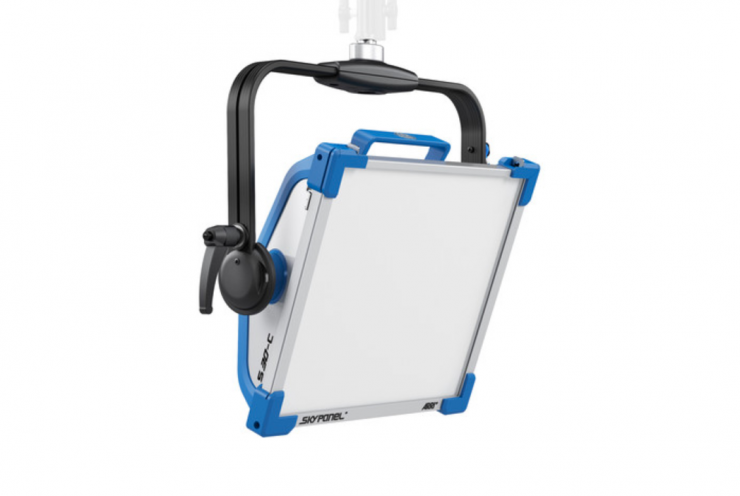
ARRI SkyPanel S30-C
There are a ton of 1×1 lights out there on the market at varying price points, but here are some of the lights that could be considered competition:
- Rotolight Titan X1
- Creamsource Vortex4 1×1 RGBW
- Litepanels Gemini 1×1
- Litepanels Gemini 1 x 1 RGBWW LED Hard Panel
- ARRI SkyPanel S30-C
- Lupo Superpanel Soft Full Color 30 Soft
- Lupo Superpanel Soft Full Color 30
- Rayzr 7 MC120
- Luxli Timpani 1×1 RGBAW
- Aputure NOVA P300c
- TRIGYN Vari-Light RGBW 1×1 LED Soft Light Kit
- Falcon Eyes D-S811 RGB 1×1
- Fluotec Cinelight Color30 1X1 Color
You would expect that the newest lights on this list would be the best, but that is not always the case.
In reality, the Luxli’s color accuracy should be much better than lights such as the ARRI SkyPanels and the Gemini 1×1 as both those fixtures have been around for quite some time. The SkyPanel was announced way back in 2015 and the Litepanels Gemini in 2017. The SkyPanel series has been hugely popular because it is widely available, super robust, and reliable.
The Lupo Superpanel Full Color 30/ Full Color 30 Soft, Luxli Timpani, Rayzr 7 MC120, Falcon Eyes, and TRIGYN are more budget-friendly options, that will probably appeal to a different segment of the market that lights like the Rotolight Titan X!, ARRI SkyPanel S30-C, Creamsourece Vortex4, etc.
All of the competition have their strengths and weaknesses and what light will work best for you certainly comes down to a lot more factors than just specifications and features.
A rental house is much more likely to carry an ARRI, Kino Flo, Rotolight, or even a Litepanels Gemini over a Lupo, Aputure, or a Rayzr 7. This is primarily to do with the build quality, after-sales service, and a long-term track record of reliability. I think this may be one of the reasons why Luxli decided to beef up the Timpani².
Price & Availability
The Luxli Timpani² retails for $1,099 USD which makes it very affordable compared to most of the competition.
The Luxli Barndoors for Timpani² LED Light cost $99 USD.
Below you can see how the price compares to the competition:
| Price | |
| Luxli Timpani² | $1,099 USD |
| Creamsource Vortex4 1×1 RGBW | $2,799 USD |
| Rotolight Titan X1 | $3,699 USD |
| ARRI SkyPanel S30-C | $4,900 USD |
| Litepanels Gemini 1×1 | $1,862 USD |
| Litepanels Gemini 1 x 1 RGBWW LED Hard Panel | $2,360.75 USD |
| Lupo Superpanel Soft Full Color 30 | $1,698 USD |
| Lupo Superpanel Full Color 30 | $1,698 USD |
| Rayzr 7 MC120 | $899 USD |
| Luxli Timpani 1×1 RGBAW | $849.99 USD |
| Aputure NOVA P300c | $1,699 USD |
| TRIGYN Vari-Light RGBW 1×1 LED Soft Light Kit | $703 USD |
| Falcon Eyes D-S811 RGB 1×1 | $1,299 USD |
| Fluotec Cinelight Color30 1X1 Color | $1,643 USD |
With modern-day lights (and this goes for just about any of today’s technology) the lifespan of the product is not going to be as long. That is not to say your light will become obsolete in 3 years’ time, but there will be something better that is bound to come along.

In saying that, a lot of today’s lights are receiving new features via firmware updates. This is something that increases their flexibility and feature set. With the Rotolight there is already a firmware road map and I wouldn’t be surprised to see additional features being added over time. Rotolight is not a company that brings out new lights at an alarming rate, so it is fairly safe to assume that we won’t be seeing a Timpani 3 anytime soon.
Conclusion
The Luxli Timpani² is a feature-rich fixture with very good color accuracy and color rendering. Too often I have seen lights where the added features have compromised the most important aspect, the quality of the light. With the Luxli you can have your cake and eat it too. The fixture is very well made, it has a decent amount of output, and it can be run via a single flight safe battery.
From the build quality to the operating system, to the exceptional color accuracy, Luxli has done things that no other manufacturer is doing, especially in a sub $1,000 USD RGBW 1×1 light.
The nearest competition is considerably more expensive and doesn’t have the same build quality, color accuracy, or feature set. To get something that is as good or better than the Timpani² you need to buy something that is a lot heavier draws a lot more power, and costs a lot more money.
Luxli continues to come out with very good lights that offer a lot of bang for your buck. It is rare to come across lighting fixtures that tick so many boxes that don’t cost a ton of money. Most ‘affordable’ fixtures tend to suffer from average build quality and limited features.
I highly recommend the Luxli Timpani² if you are in the market for a solid 1×1 RGBW fixture that won’t cost you upwards of $2,500 USD. At $1,099 USD it offers exceptional value for money.


