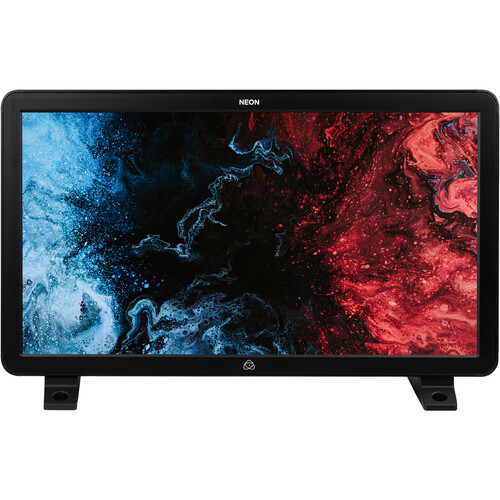
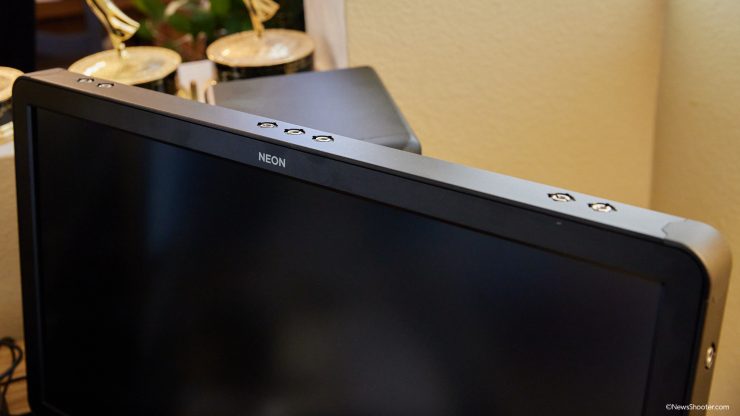
The Atomos Neon 24″ monitor/recorder was announced at Cinegear 2019 and started shipping in November 2020. This new product line is very different for Atomos, and the market doesn’t have this type of combo high-end 4K display with a modular recorder. The price is very good for the specifications at $6499. 4K production monitors with comparable specs cost twice as much as the NEON 24″ monitor making them a monitor that is worth considering if you are interested in a high-end display.
NEON 24″ KEY features
- 4096 x 2160 Native Resolution
- Supports up to DCI 4K/UHD 4K
- 10-Bit DCI P3 Color Gamut Displayed
- 1000 cd/m² with 512 Backlight Zones
- 1,000,000:1 Contrast Ratio
- Features Replaceable Master Control Unit
- Sync and Control Multiple NEONs from App
- Rec. 709 and Dolby Vision Output
- ProRes and DNx Recording
- Records to 2.5″ SSD via Master Caddy II
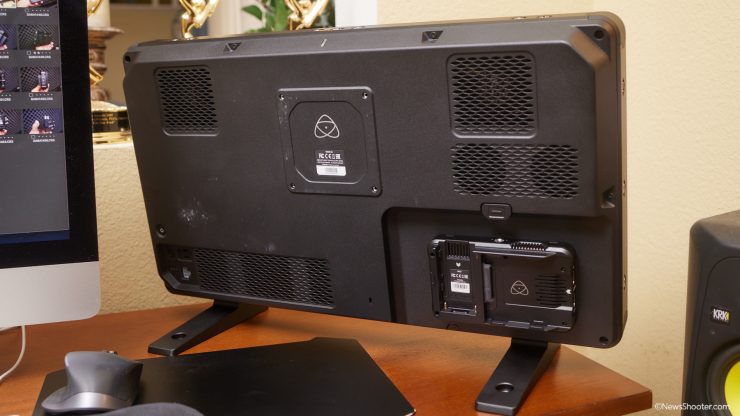
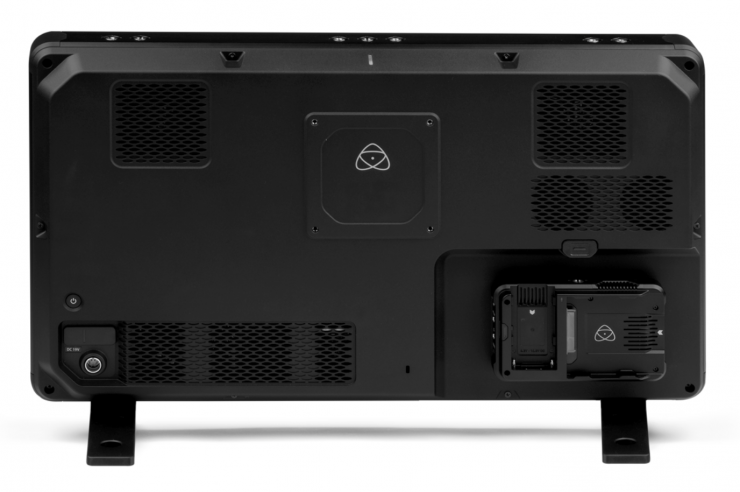
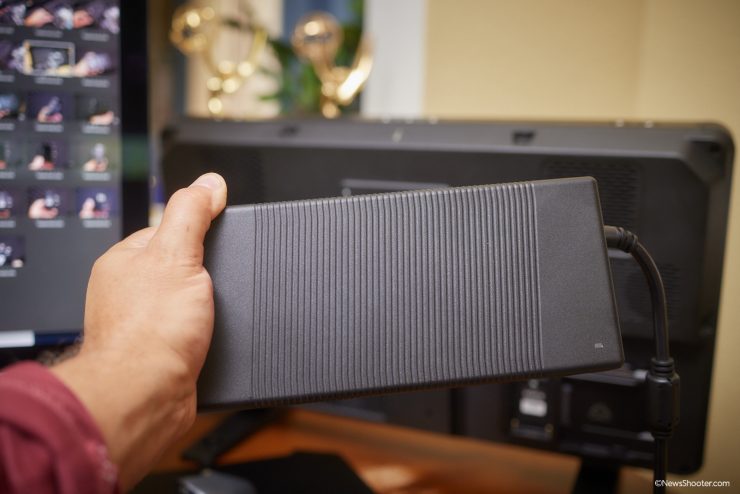
Master Control Unit
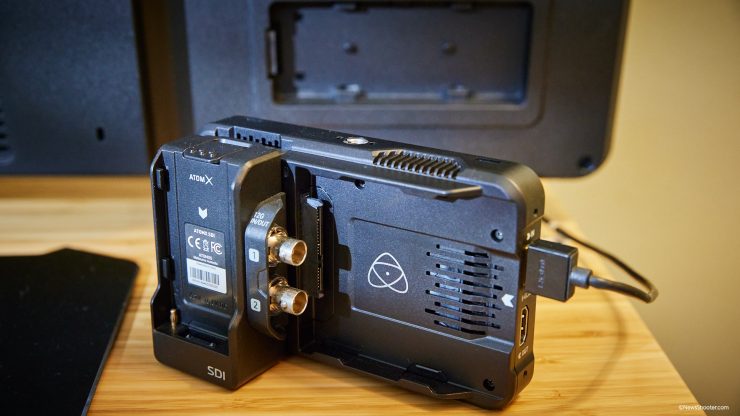
The NEON takes a queue from the 19″ SUMO as it also has a recorder built-in; however, the NEON has a modular unit on the back called the “Master Control Unit.” It’s basically a screenless Ninja V that clicks onto the back of the monitor.
The NEON includes the AtomX SDI Xpansion module for SDI connectivity. HDMI is built into the Master Control Unit. This is the only way to connect with HDMI and SDI inputs. There are no other inputs on the actual monitor except power.
NEON Connectivity
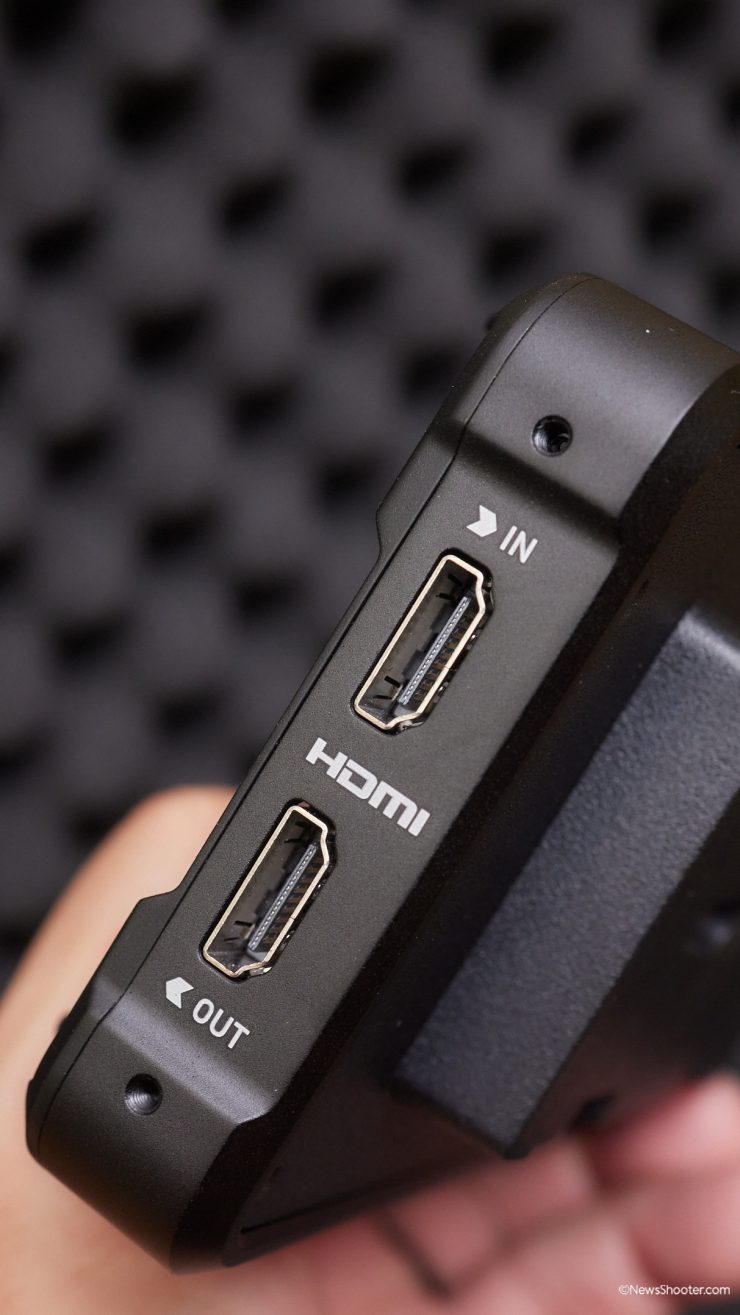
HDMI in and out 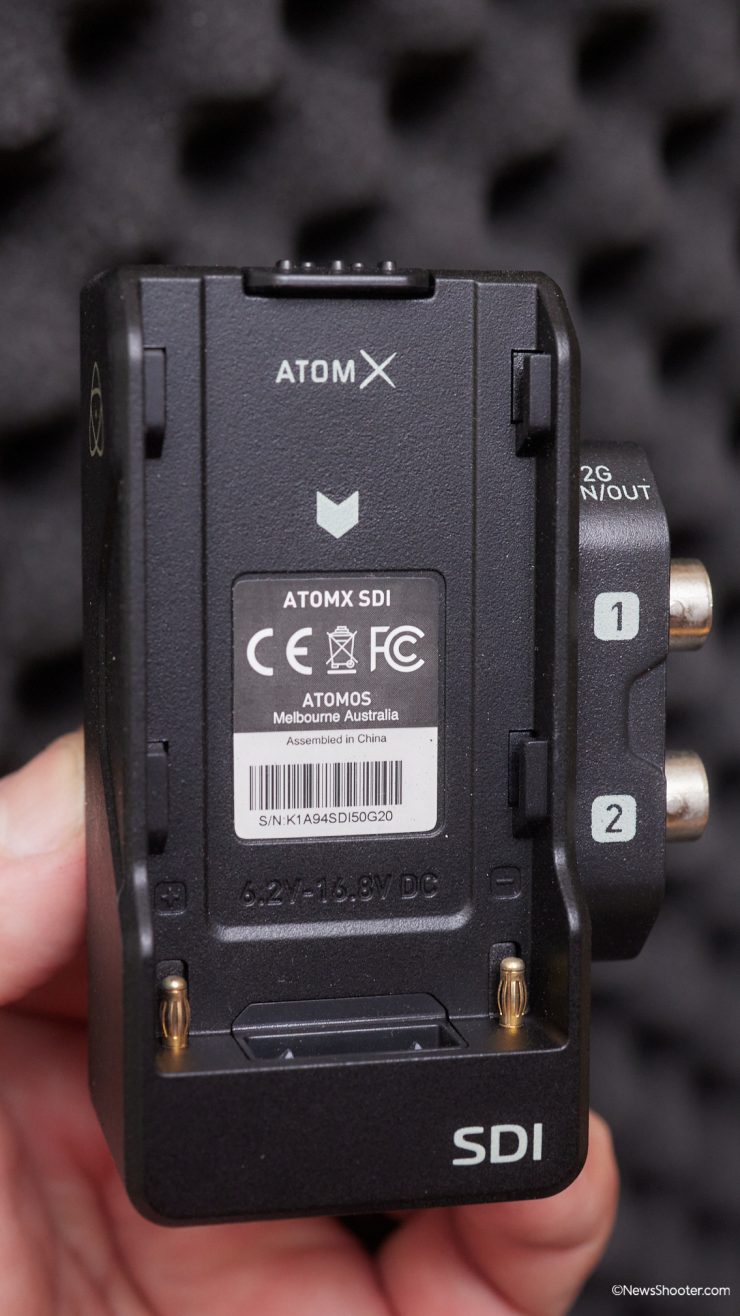
SDI in and out 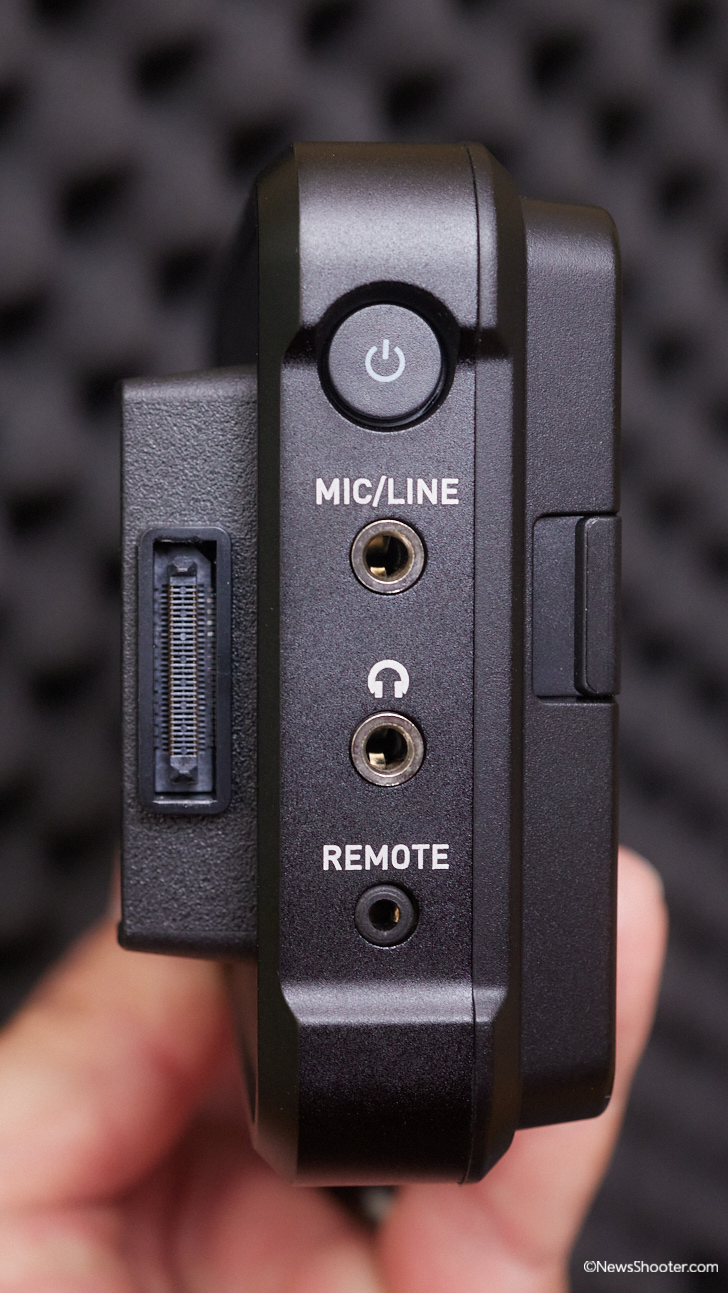
Audio in and out plus remote
All the IO is on this Master Control Unit, including Mic/Line audio with a 3.5mm jack. A 3.5mm headphone out and a Remote LANC connector for calibrating and connecting external controllers. More on that in a minute.
Included With NEON 24″
- NEON 24 Monitor
- NEON Master Control Unit
- 2 x Feet (inc. mount screws x 2)
- NEON Quick Start Guide
- 1 x Master Caddy II (inc. screws)
- 19V AC Power Adapter with mount cage
- AtomX SDI Expansion Module
- Monitor Protective Sheath
- MCU Protective Sheath
- Hex Wrench
True 10-Bit Display
Atomos states the display’s Bit depth is True 10-Bit, not 8-bit + FRC. Does this matter? Yes and no. 8-bit + FRC monitors are much less expensive than true 10-bit panels, and for the most part, the viewer can’t tell the difference. The fact that the NEON is an actual 10-bit monitor in this price range is impressive. Also impressive is the image quality. Watching 4K footage on the NEON 24″ is beautiful. When playing back HD, the image loses half its resolution and softens. This is no surprise. The image retains the full 24″ of the display. There are no HD scaling features if you want to see the actual resolution.
The panel also has a Super Wide 178 Degree viewing angle that is equally impressive.
Display Specifications
| ATOMOS NEON 24″ | |
| Size | 24″ |
| Resolution | 4096 x 2160 |
| Viewing angle | Super Wide Vision 178 Degrees >10% |
| Screen coating | Matte Anti Glare & reflection |
| PPI | 192 |
| Bit depth | True 10-Bit |
| Backlight Type | Dynamic Full Array Local Dimming (FALD) 512 Zones128 zones |
| Brightness (cdm2 / nits) | Up to 1000 Full Screen and 1200 Nits Peak HDR |
| Black Level (cdm2 / nits) | 0.002 |
| Aspect ratio | 17:9 |
| De-interlace mode | Yes, Graphic burning protection |
| Color Gamut | DCI-P3 (D65) |
| Calibration support | Atomos Calibrator with Xrite i1 Display Pro / Plus (Retail) |
Mounting Points, VESA Mount & Build Quality

With field use in mind, the NEON is covered with ARRI Accessory Mounts. Three on the sides and seven on top and bottom. The feet attach to the bottom mounting points. On the back is a standard VESA mount. The NEON 24″ is a very sturdy monitor. The feet are heavy giving plenty of stability. All in all, it has a great build quality. It’s no lightweight coming in at 8.6kg / 18.95lb.
Fan Noise
Happy to report that the NEON 24″ doesn’t have a fan noise issue. Two fans keep it cool alongside vents on the back. I’ve been using the NEON in an editing environment without issue.
When the NEON is powered up, it does make a big entrance with a robust kick-up of the fans. It reminded me of my old Mac Pro. It settles down quickly, and the fans don’t seem to periodically kick in.
Powering The NEON 24″
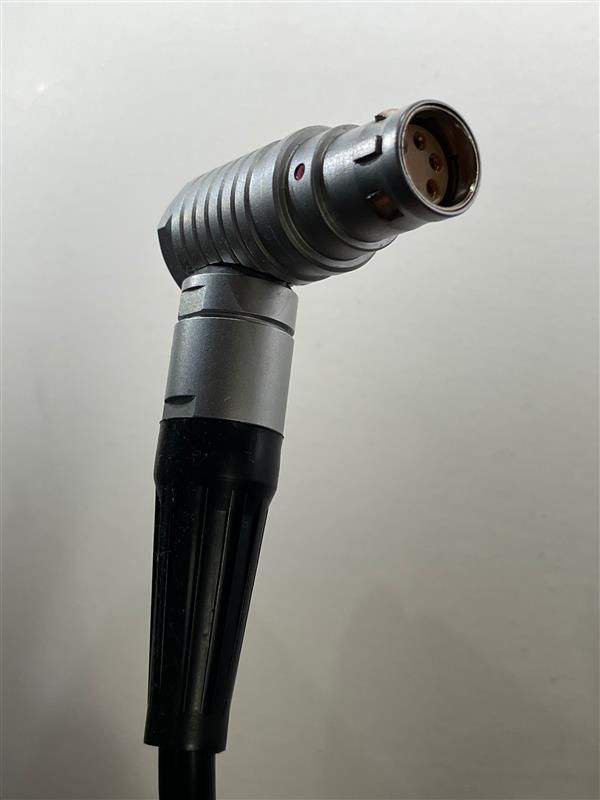
The NEON 24″ uses a different AC plug. Instead of a traditional 3-pin, It’s a locking LEMO connector. The power brick is substantial.
At this time, Atomos states you can’t use batteries to power the monitor. This is fine for post-production use; however, it might be problematic in the field as a confidence monitor or as a recorder onset. Batteries give you the mobility needed for faster-paced productions, and power cables are a pain on set for safety reasons.
This depends on the type of setup you are using. If the NEON is in a video village, then AC power should be fine. As a DP monitor running AC stingers and moving the monitor around could get messy.
Onboard Tools
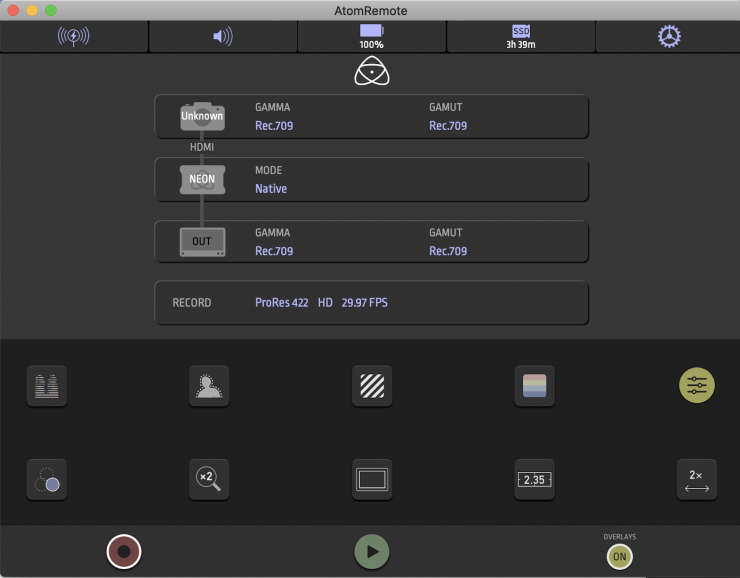
The NEON 24″ has a good amount of tools and display options. All of them are accessed through the app.
Available Tools
| Waveform | Yes, 3 size / Position |
| RGB parade | Yes, 3 size / Position |
| Vectorscope | Yes, 2 size / Position |
| 1 x Zoom | Yes. 1:1 Pixel mapping for 4k |
| 2 x Zoom | Yes |
| Focus peaking | Colour selected / threshold setting / color / Mono / edges only |
| False-color | Yes, with Scale |
| Zebra | Yes, Adjustable |
| Isolate color channel | Blue Only |
| Cine Frame Guides | 2.4:1, 2.35:1, 1.9:1, 1.85:1, 4:3 |
| Safe areas | Action and Graphic |
| Anamorphic de-squeeze | 1.33x , 1.5x ,1.8x ,2x |
No Physical Controls
This will be an issue for some people, including me, as the NEON has no menu or physical controls on the actual monitor. Everything is controlled with the AtomRemote app on an OSX Catalina Mac computer or IOS device. I don’t have to change the settings of the NEON frequently when editing as I have the scopes I need in the NLE I use, but if you are using the NEON in the field, then you have to have your iPhone or IOS device handy to bring up tools and make changes to the settings. You also have to use the app to use the NEON as a recorder. So, lots of usability hurdles with the app approach. Android devices are not supported.
This is an interesting approach from conventional front panel buttons and knobs or menu buttons on monitors. I think we can all agree navigating a menu on a monitor is a PITA! Up means, next page and the Down button select an item. Ugh.
The app is simple and makes it faster and easier to set all the functions, and it’s pretty intuitive but not perfect.
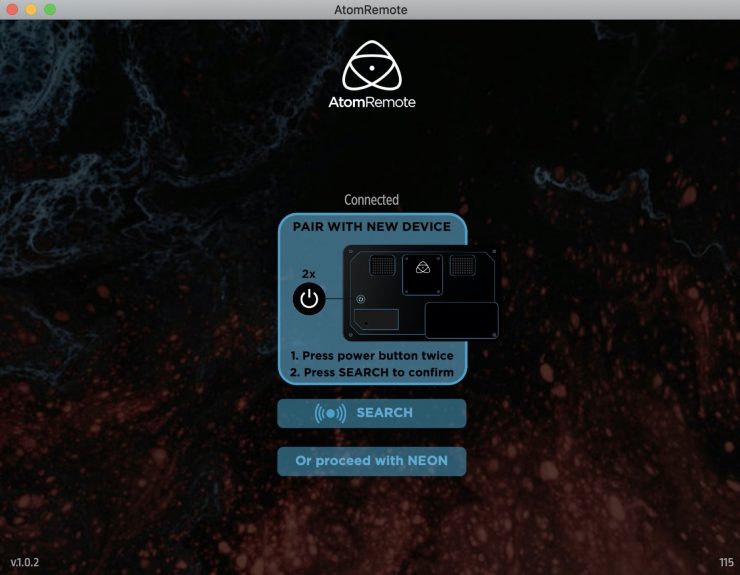
AtomRemote app is Bluetooth-based and needs to be paired with the NEON. This pairing has to be done each time the monitor is power cycled, making it a bit slow. The procedure is done once the monitor is powered up and the app is open on either the desktop or IOS device. Click on search, then double-tap the power button, and pairing starts. I found that it takes a few tries to get the NEON paired. Once in a while, it will get stuck searching and fail. When the NEON finds the app, you click on pair. The app must be open, or it will lose connection with the NEON. I have had it reopen and connect a few times, but it isn’t consistent.
The app approach is different, and I’m not fond of it much. I find it somewhat unfinished. Kind of like it wasn’t thoroughly thought out. So many products are controlled by apps on phones now, so I can see the allure to have the NEON work in this way, but as an editing monitor, it’s not that big of a deal, but if you are using the recorder function, it becomes more critical, and the app is the only way to control the recorder. Well, it’s the only free way to do so.
Atomos Button Bar Remote Coming Soon
You have two other options that you can purchase to connect with the NEON. One is the $300 Atomos Button Bar Remote, and the other is the $269 Loupedeck Live.
Atomos has developed physical controls for the NEON with the Atomos Button Bar Remote. I didn’t have one for this review, but I think it would fix the issue of using a Bluetooth connection with the OSX or IOS devices.
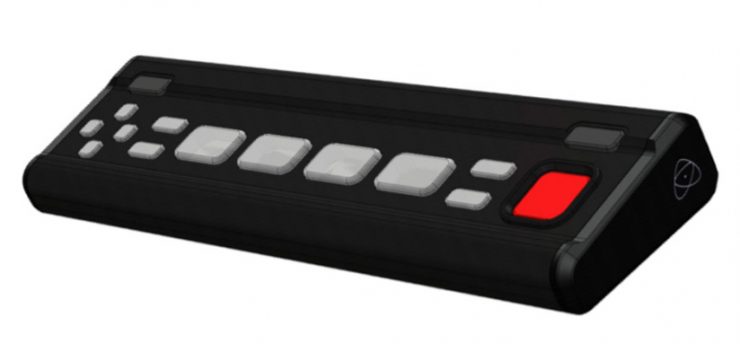
The large backlit buttons provide quick access to scopes, monitor assist tools, frame guides, LUT selection. With dedicated buttons for record and playback, you can jump into the last take to review the shot, step-through frame by frame, or loop the entire clip. It’s made of rugged aluminum and provides the same anti-rotational mount as on the NEON, and a NATO rail runs the length of the unit, allowing flexible mounting options. A single hard-wired connection uses a 2.5mm mini-jack between the remote port of NEON MCU and the Button Bar BBRCU to provide power without the need for batteries or alternative power sources, as well as LUT previews.
Calibrating The NEON
If you spend several thousands of dollars on a monitor, you will want the ability to calibrate it. Out of the box, the NEON was calibrated and looked great; however, a monitor will need to be recalibrated over time.
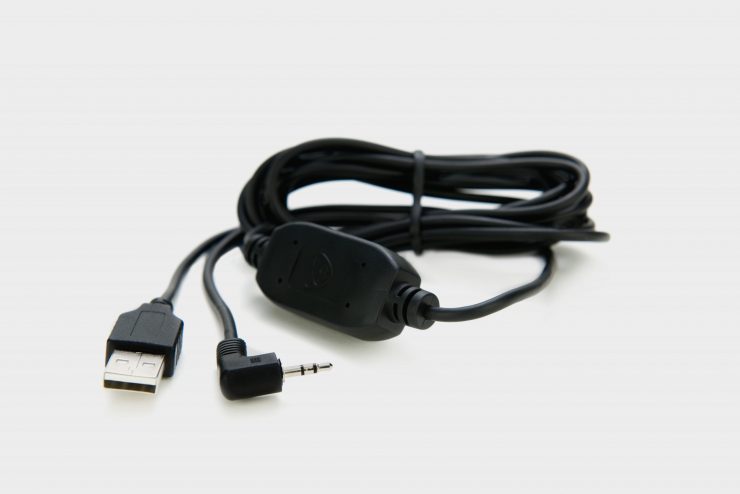
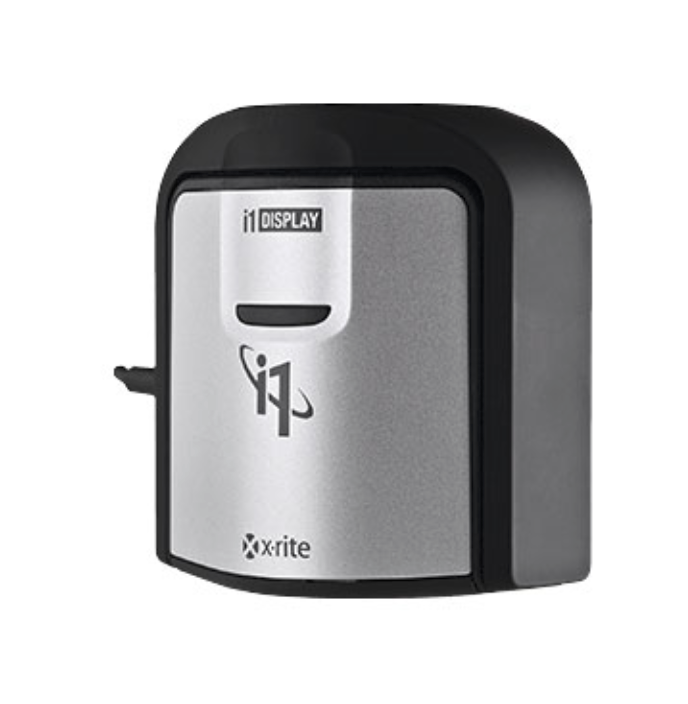
The NEON uses the same X-Rite i1Display Pro ($259) & Atomos serial to USB cable ($100) as the Ninja V, Shogun 7, SUMO 19, and Shinobi.
A computer must run the software instead of just plugging the probe directly into the monitor and performing the calibration.
This is a feature my HP DreamColor had. It was so fast and easy to perform.
The total cost for the extra kit to calibrate is $359. The upside here is if you have another compatible Atomos recorder, you can also use the kit with them and the X-Rite i1Display Pro is an excellent probe you can use on all your computer screens.
Loading LUTS
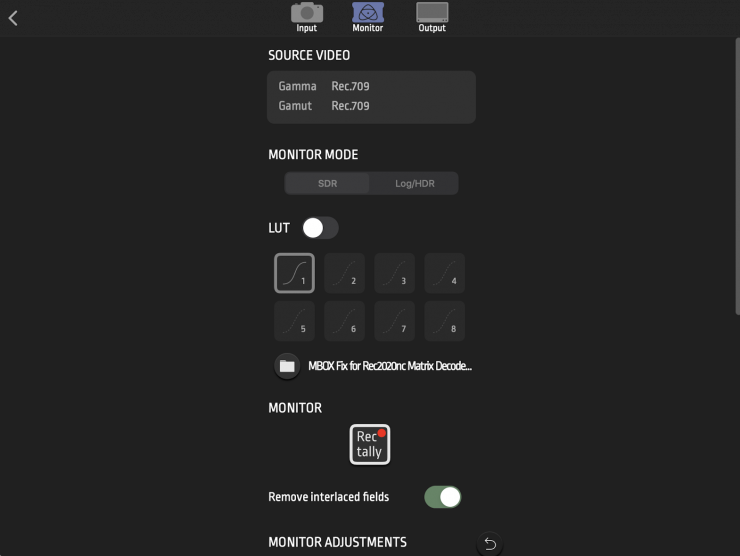
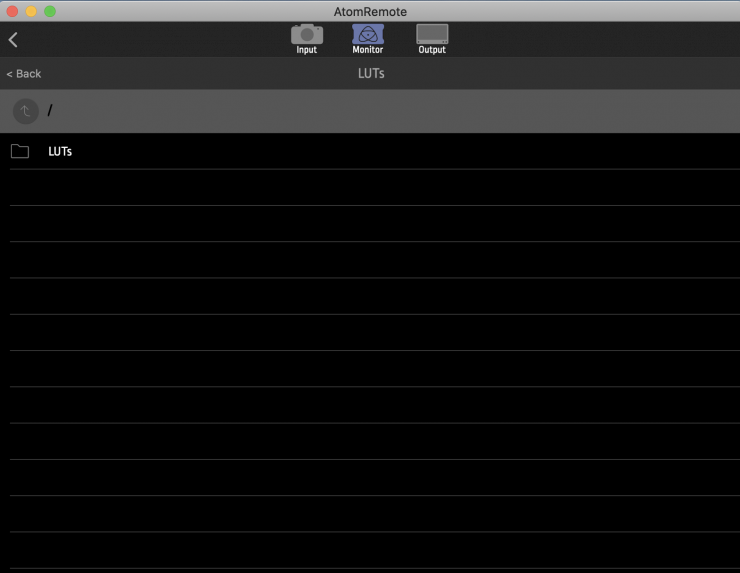
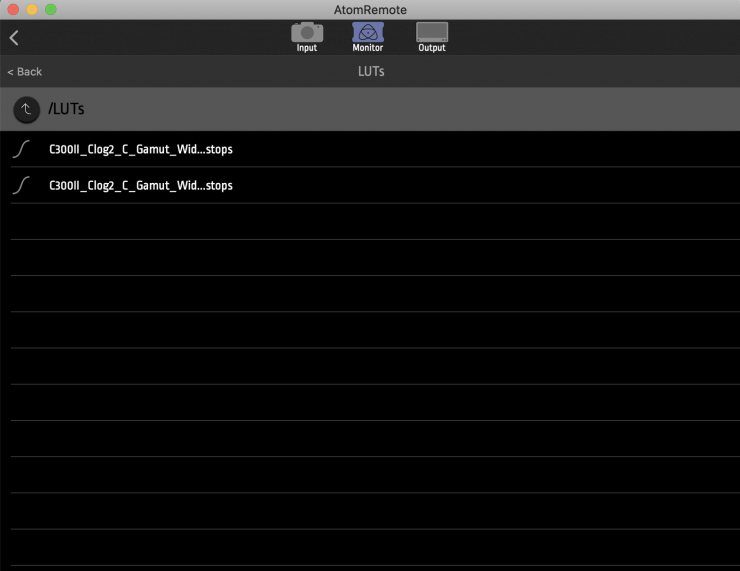
NEON is capable of loading Luts from the app. To load them, you use the SSD drive. This could be an issue if you don’t intend on using the NEON as a recorder. You will need to purchase a drive and an SSD reader to copy the LUTS onto the SSD drive. A caddy is included for raw SSD drives but not the cable to connect a drive to your computer.
To install the LUT, you mount the drive on a PC and create a folder for the LUTs and upload them to the folder. You can have several folders with different Luts for cameras, so it’s easier to find what you need. Then slide the caddy into the module and use the app to select and install it. You can have up to eight Luts preloaded.
Best of Both Worlds
The monitor/recorder is a novel idea, especially if you are the do-it-all type company that needs both a field production monitor that can also double as a recorder and a grading production monitor in the edit bay. Heck, you can even play out your sequence/timeline and record directly to the NEON in ProRes or DNxHD. You don’t have edit queue points, but you can crash record in real-time.
I appreciate the combination of having the recorder for those times I would want to use it, but in practice using it as a recorder could be problematic as the 24″ size is a bit large and heavy. If you are going to move around a lot, Atomos has a very nice hard case with firm laser-cut foam.
Using the NEON as a Recorder
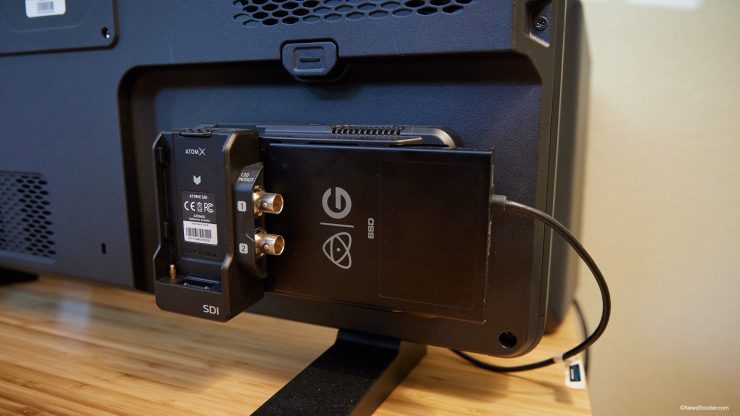
The Master Control Unit is where the SSD drive is inserted for recording. The Neon ships with the Master Control Unit, SDI module, and a Master Caddy. If you already have a Ninja V, the Master Control Unit uses the same type and size SSD drives, such as the Angelbird Atomos Master Caddy 4K RAW. The Master Control Unit looks just like a Ninja V without the monitor. Clever idea. This must save on manufacturing costs as well.
The maximum FPS is 4K is 60p and 120p in FHD. Below are the full specifications for recording and playback.
| Resolution and Frame Rates (Record, Monitor & Playback) | |
| 4k DCI | 23.98/24/25/29.9/30/50/59.94/60p |
| 4k UHD | 23.98/24/25/29.9/30/50/59.94/60p |
| 2K DCI 2046 x 1080 | 2k DCI: 23.98/24/25/29.9/30/50/59.94/60p |
| FHD 1920 x 1080 Progressive | 23.98/24/25/29.9/30 50/59.94/60/100/120p |
| FHD 1920 x 1080 PsF | Converted to P and looped out PsF |
| FHD 1920 x 1080 Interlaced | 23.98/24/25/29.9/30/50/59.94/60i |
| 1280 x 720p | 50/59.94/60p |
| Recording CODEC | |
| Apple ProRes | LT, 422, 422HQ |
| Avid DNxHD | DNxHD 220x,220,145,36 |
| Avid DNxHR | LB, SQ, HQ, HQX. |
| Playback | |
| Loop | |
| Apple ProRes Raw | Yes, recorded clips |
| Apple ProRes | Yes, with Linear PCM audio |
| Avid DNx | Yes, with Linear PCM audio |
| Multi-Input / Switching | |
| SDI A/B toggle | Via included AtomX SDI module. |
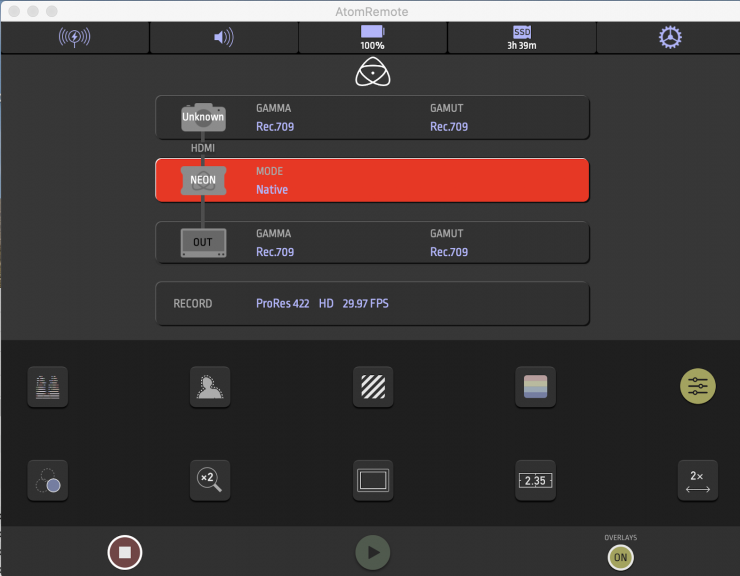
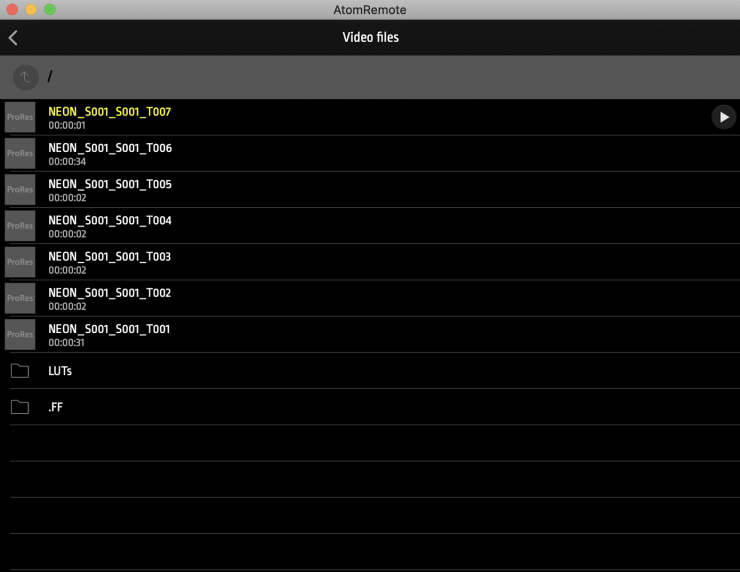

Recording and Playback are pretty straightforward. You use the app to start record or use an HDMI trigger with a compatible camera. This has to be set up in the menu. The NEON MODE will turn red once the recording has started, and the button on the monitor will also be bright red.
To play the clips back, click on the play button, and the app switches to playback mode. It’s straightforward and works well.
I wanted to see if I could playback clips that were recorded with other Atomos recorders. This would be a nice feature if on-set playback is needed from different records. I tested with media recorder with the Ninja V.
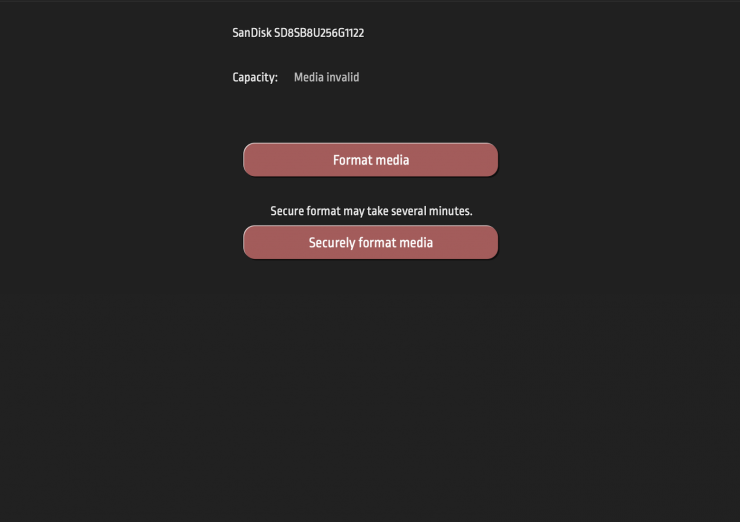
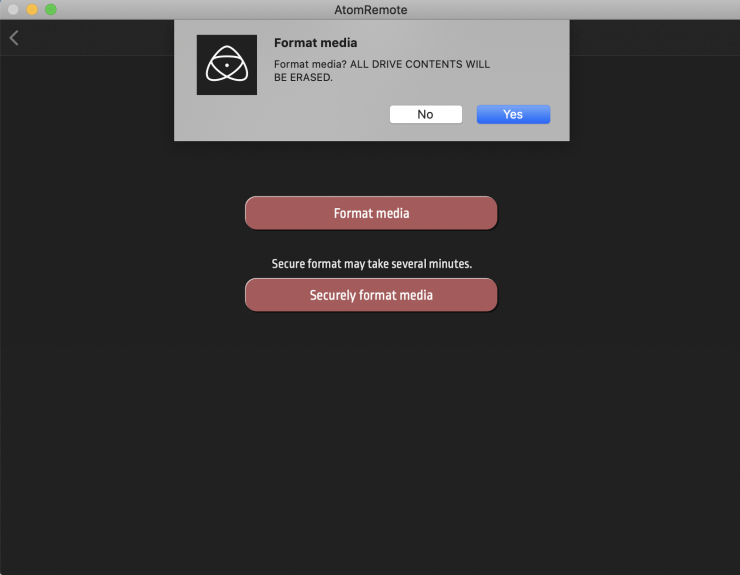
NEON didn’t recognize the SSD drive. I got a “Media Invalid” error warning. This would be a bummer if you planned on having playback from drives recorded with Atomos recorders. This tells me the NEON is designed to be a recorder, not a playback solution unless recorded with the NEON.
Value in its Class
The NEON fits into a couple of key use scenarios: Feild and post-production. While the price seems high at $6,499, it’s actually priced competitively for either recorder/field production or as a dedicated grading monitor. Atomos sort of created a new market segment even if they are the only one in it. Let’s break this down a bit.
4096 x 2160 24″ Price Comparison
If you are in the market for a true 10 bit full 4K 24″ monitor, the prices are a little intimidating. Canon, Sony, and TVLogic, alongside SmallHD and Flanders, have some costly options but not at all of those guys have a 4096 x 2160 24″ option. Comparing products is a little tricky in this case but here goes.
- Atomos NEON 24″ $6,499
- Canon DP-V2421 4K Reference Display $17,999
- Canon DP-V2420 24″ UHD 4K Reference Display $14,999
- Canon DP-V2410 24″ 4K Reference Display $8,999
- SmallHD Vision 24″ 4K HDR Pro Monitor $14,999
This list is with monitors that offer a full 4K 4096 x 2160 resolution in true 10-bit in the 24″ size class. There aren’t as many as I thought there would be. In some ways, it makes sense as not many full 10-bit 4K panels are offered in the 24″ size. Most start in the 32″ range for the full 10bit 4K options.
At the end of the day, the NEON price-wise comes out looking like a champ at $6499; there isn’t much competition price-wise. None offer an onboard record, so that does make the NEON stand-alone. The question is, do you need it? I suppose if it doesn’t push the cost up, then why not.
Conclusion
I love this monitor! Yep, I said it. It’s the best I’ve ever used as a post-production grading monitor. Heck, I haven’t used a 4K playback monitor before, and I can tell you it will be missed.
The image is gorgeous, and the viewing angles are excellent, so if someone is standing behind you while your editing, they have a clear view as well.
The recorder part isn’t much of interest to me. However, the 4K 24″ monitor part is. Atomos did something clever as they priced the NEON very competitively and created a product that doesn’t exist as of now. The question is do you want the record options over a monitor with a non-Bluetooth remote or onboard menu and buttons.
While I like the NEON a lot, I don’t like the app and not having onboard controls and shortcuts on the monitor. The recorder option is a cleaver; however, I don’t see it as something I would often use in my workflow.
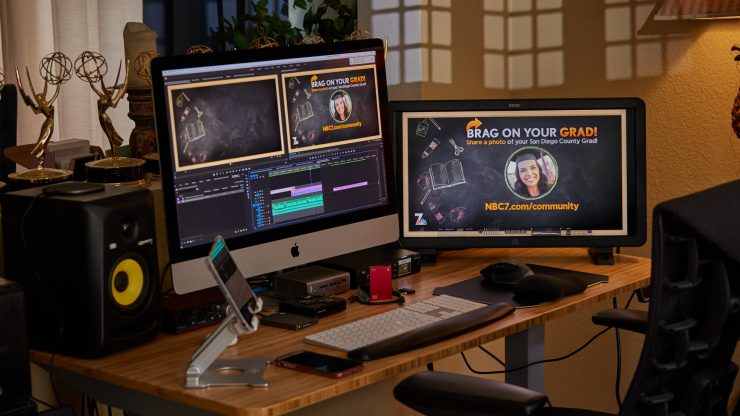
24″ is a perfect size for a post-production monitor. If you have space for one, it makes a huge difference for color grading and seeing the edits. I’m enjoying it a lot and will miss having it. $6499 is a lot of money. While it is priced highly competitively, it still is expensive. This is the main reason I haven’t purchased an external monitor for editing. Well, it’s one of the reasons. I edit on a 27″ iMac, and the color is spot on after calibrating the screen. The viewer is rather large and looks very good. The image on the NEON is almost identical to my iMac when editing in both FCPX and Premiere Pro. This gave me confidence that my iMac screen is pretty damned good!
I can see the NEON being a popular rental option for shows and DIT stations. The retail price will reflect on the rental price making it more affordable, and the NEON does have that recorder option if needed. If I could, I would buy a NEON as it ticks many boxes, but even though it’s priced so competitively, I have to ask myself if I need to spend $6500 for a monitor. For a post house, it’s a compelling option.
We all know that things get very expensive when you enter the “production monitor” space. It is frustrating how expensive it is to buy a calibrated playback monitor. I’ve been down this path so many times over the years, and it’s a struggle. You also need an IO option to use the NEON correctly. I have the Blackmagic Design UltraStudio 4K Mini that retails for $995. Yes, it’s an investment, but dang, that image is so sweet!
Like what we do and want to support Newsshooter? Consider becoming a Patreon supporter and help us to continue being the best source of news and reviews for professional tools for the independent filmmaker.