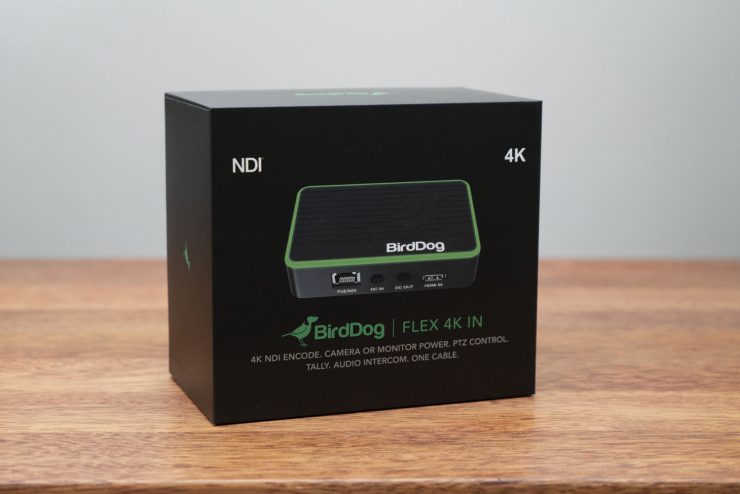
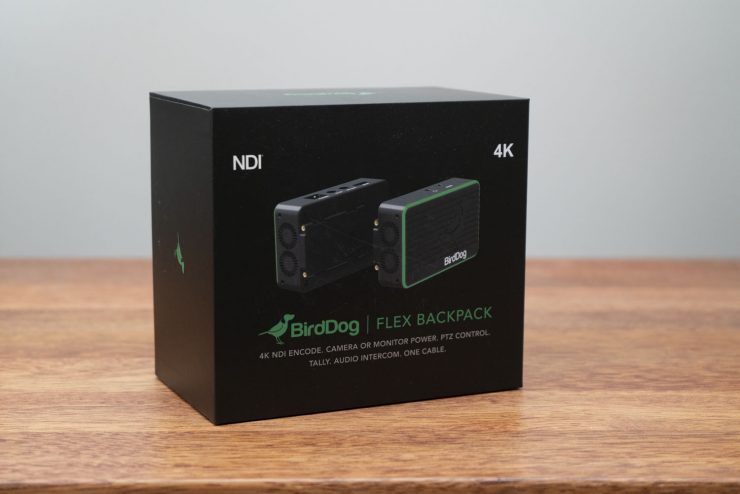
BirdDog has just announced the new Flex line of 4K NDI® devices including the Flex IN, Flex Backpack & Flex OUT.
The Flex units are very small and compact, providing a simple way of encoding/decoding a video signal using the NDI protocol for distribution over the network with support for 4K up to 30p.
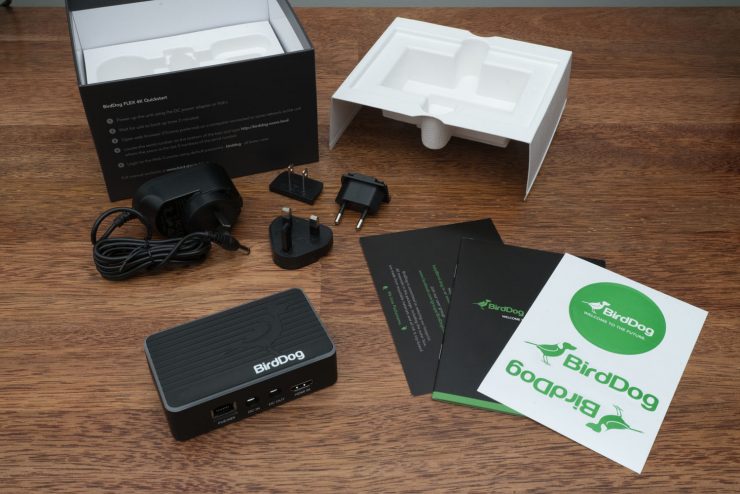
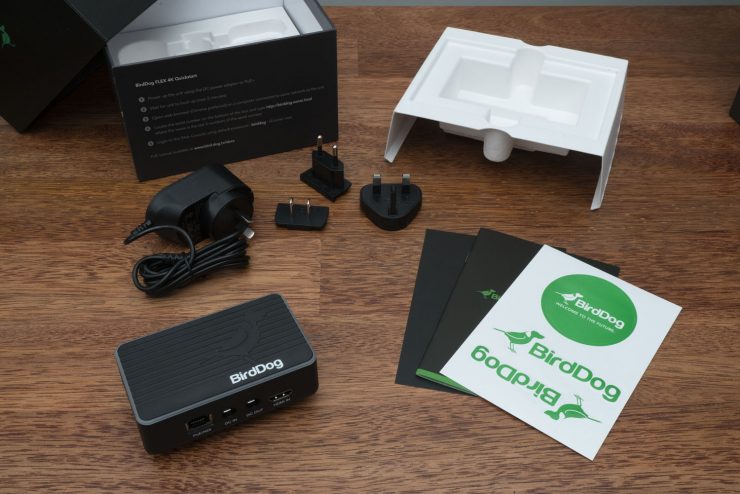
BirdDog was kind enough to send a demo unit of the Flex 4K In & Backpack for us to review. The Flex 4K Out is due to be available in Q3 this year.
Key features
- Halo Tally Light – 360 degree view
- PTZ Control via RS232 port
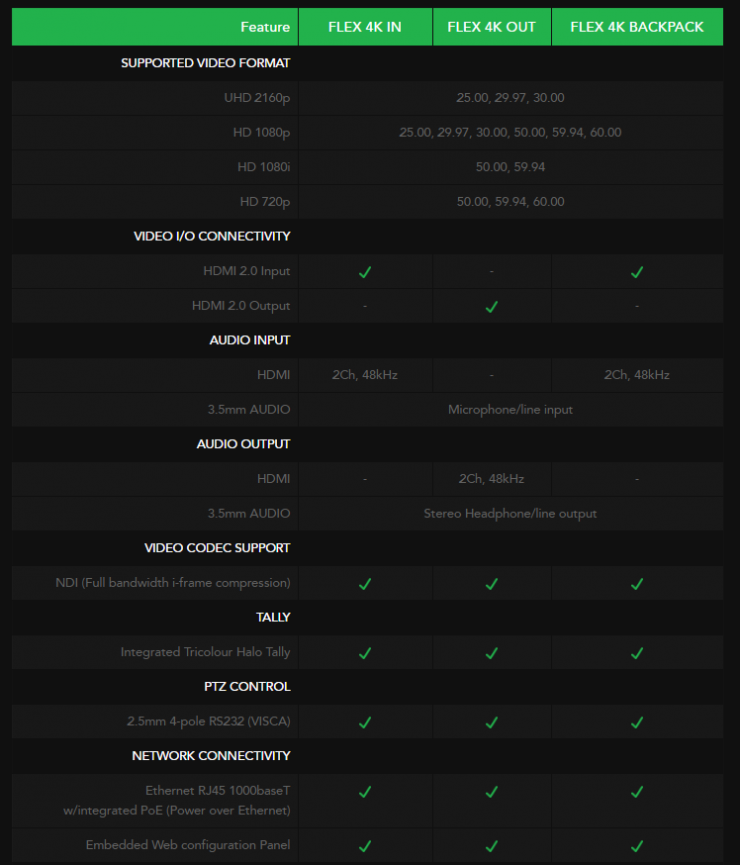
- Full NDI Encoding with Flex IN and FlexBACKPACK
- Full NDI Decoding with Flex OUT only
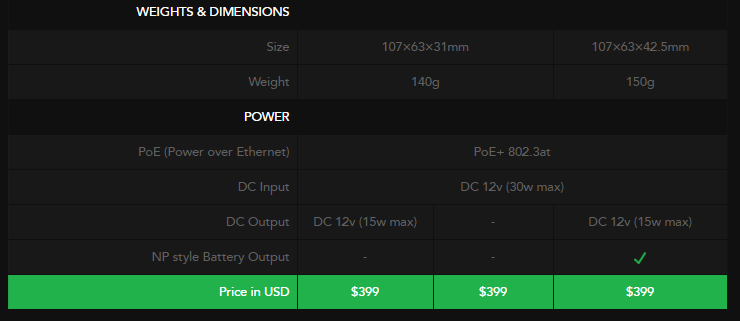
- 15w DC power out on Flex OUT and Flex BACKPACK
- Variable Bit Rate NDI – In both HD and 4K you can select the data rate to be anywhere between 60 and 360Mbps. Normally NDI is max 140Mbits in HD and 300Mbits in 4K.
What is NDI?
NDI (Network Device Interface) is a royalty-free software standard developed by Newtek that provides a workflow for IP-based video. One of the benefits of using an NDI based system is that video signals can be routed anywhere on the network with low latency, without having to use additional switching & routing hardware.
NDI|HX uses lower bitrates but is compressed with h.264.
The system was first unveiled in 2015 and released in March 2016, since then, it has been growing with new hardware options from not only Newtek but third party manufacturers like BirdDog as well as software companies with Vmix, Skype, OBS & more adding NDI compatibility.
You will even find NDI & NDI|HX found in cameras, like Panasonic’s AG-CX10. Certain cameras can be upgraded to full NDI with a paid license upgrade.
Compact & Lightweight
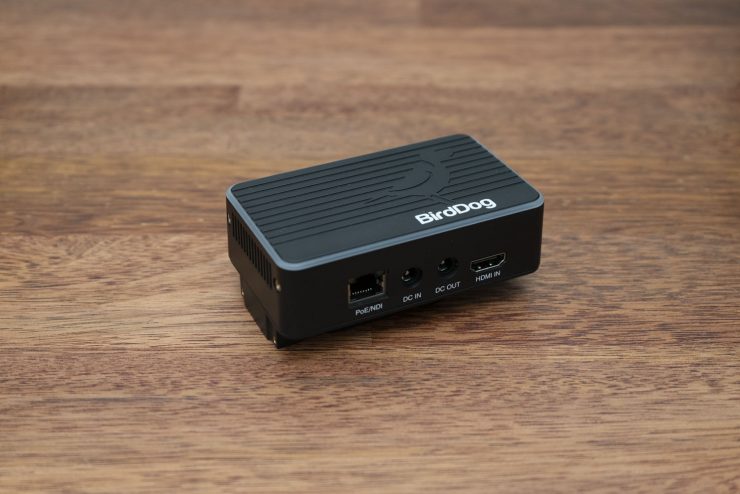
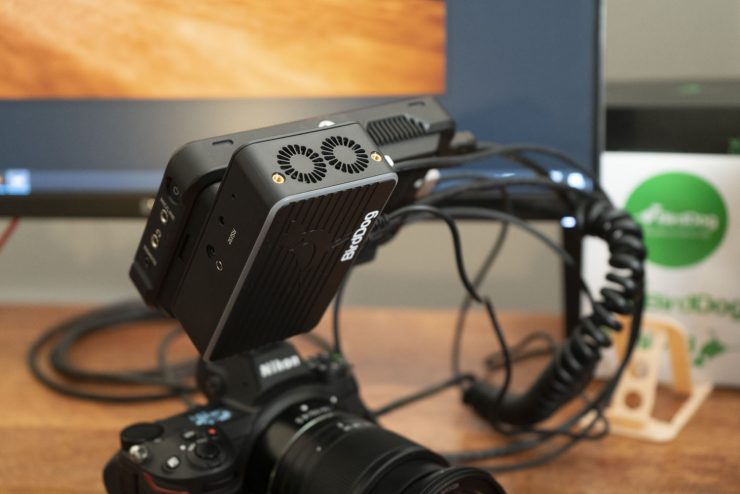
The Flex 4K In & Backpack are both very compact and lightweight. They are just a bit larger than a deck of playing cards.
Flex 4K In: 107 x 63 x 31mm
Flex 4K Backpack: 107 x 63 x 42.5mm
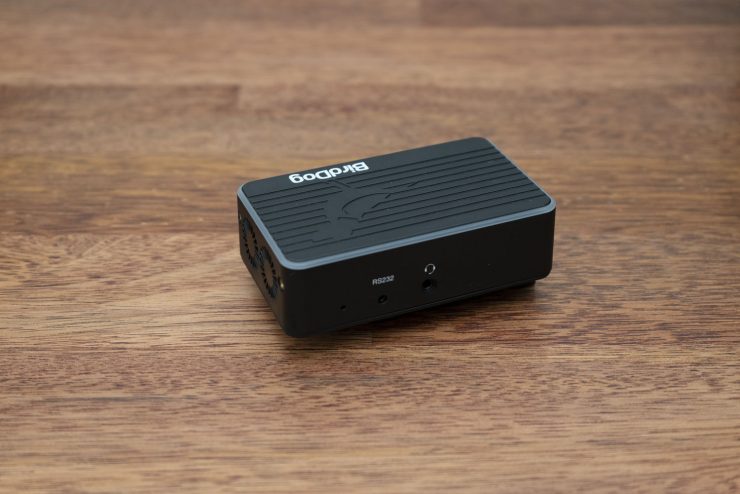
The construction is made of plastic but feels sturdy enough.
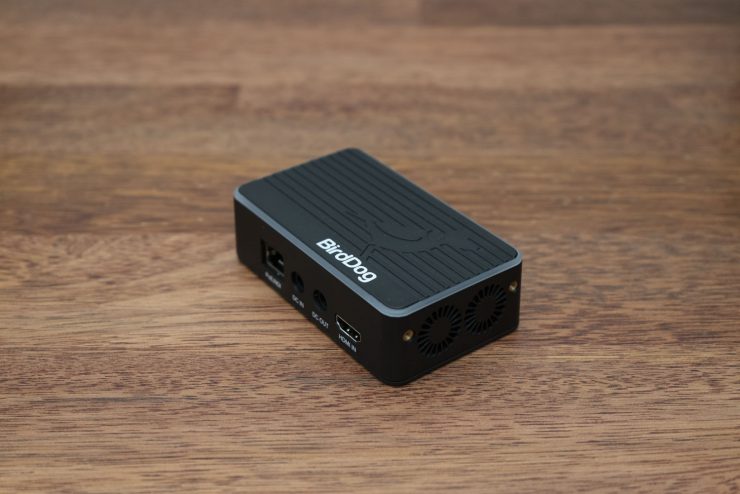
There are two small fans in the unit which act as intake & exhaust but they are not audible enough to cause any issues on set.
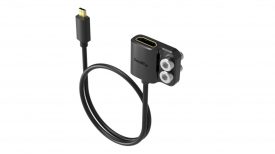
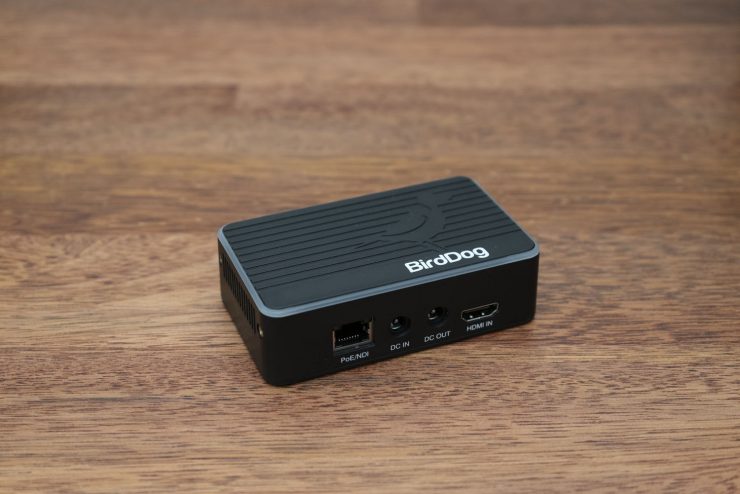
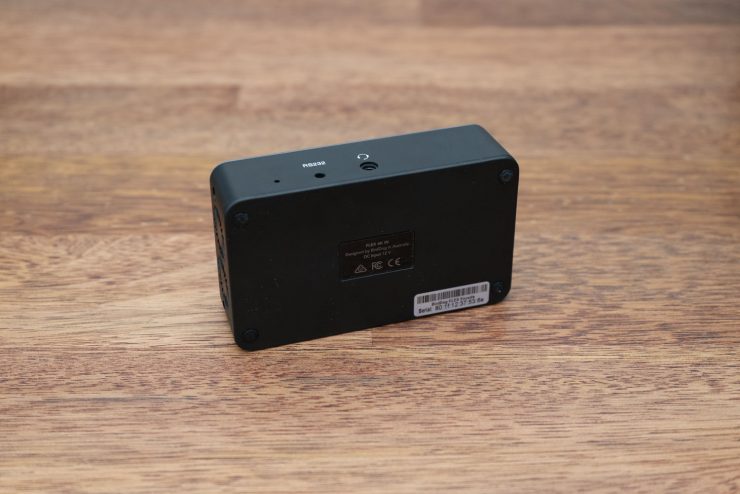
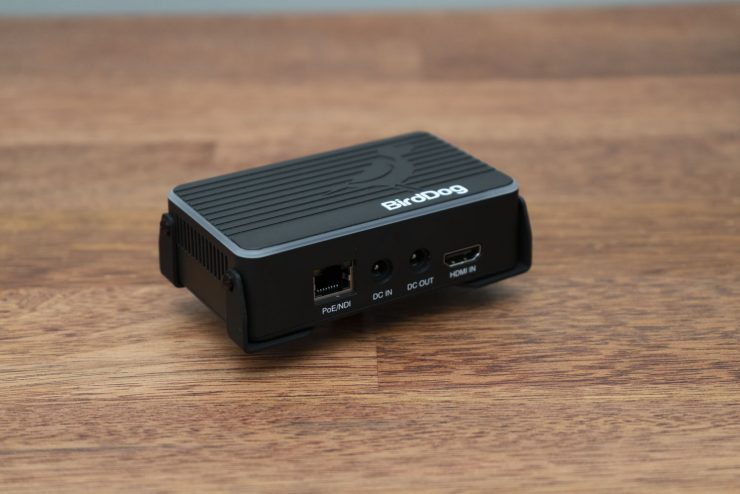
Both have the following ports
- HDMI In – video source
- PoE/NDI – Power over ethernet/data connection
- DC In – AC power for Flex unit when not using PoE
- DC Out – When powered via PoE, a DC cable or dummy battery can be connected to power the monitor or small cameras. The DC out is rated at 15W
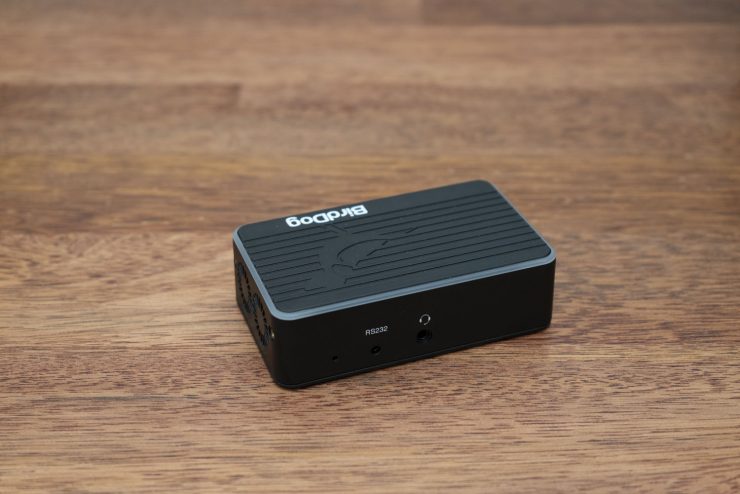
- 3.5mm Headphone – audio intercom
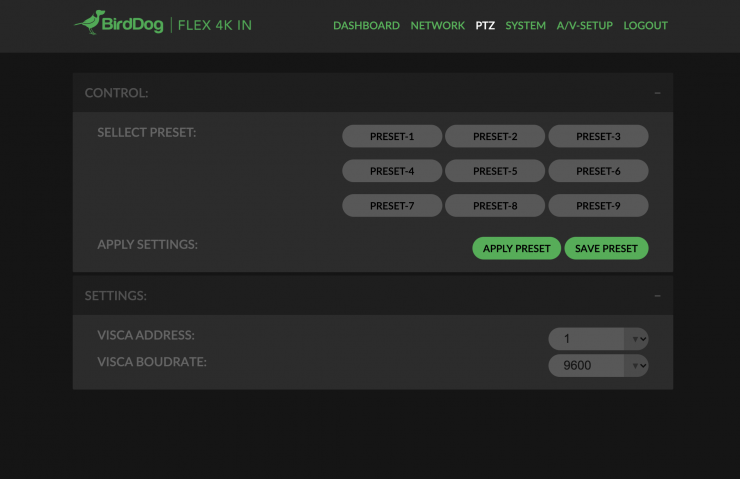
- RS232 – Remote port for PTZ
Both units also have a Halo tally light that is handy when working in a Multicam scenario.
To connect a PTZ compatible camera, you will need an adaptor cable that converts the RS232 port into RJ45.
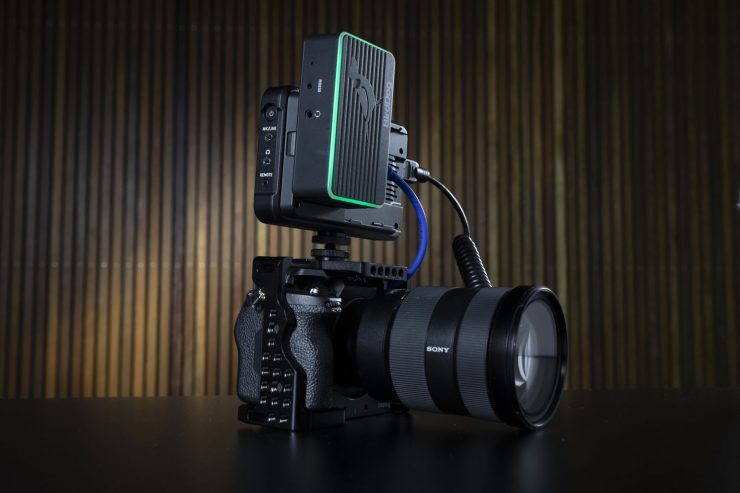
On the Flex 4K In, there are no mounting points for rigging but you can add the camera mount that screws onto the unit and provides a single 1/4-20″ thread that can be used with a cold shoe adaptor or articulating arm.
The camera mounts are made from metal and will retail for $10 USD.
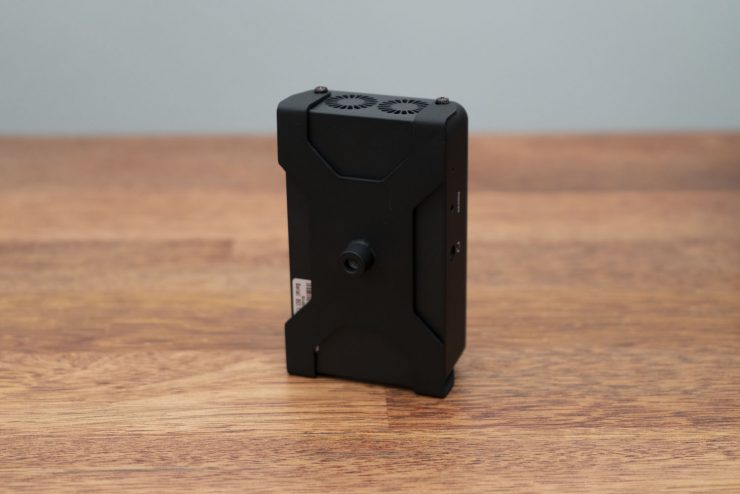
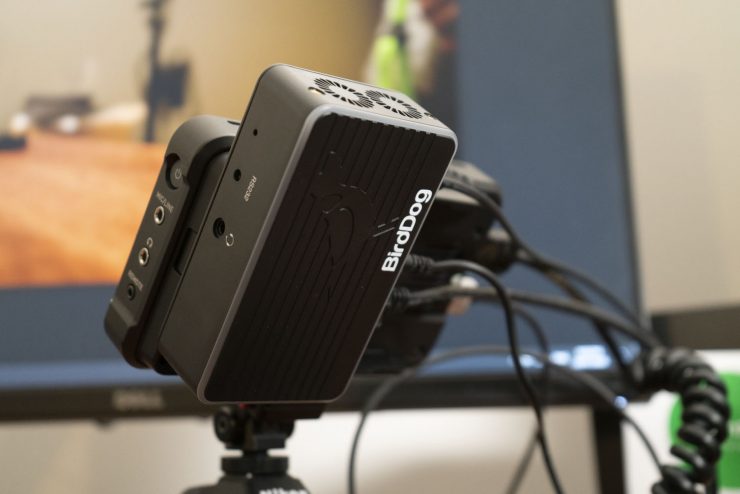
Flex 4K Backpack
The Flex 4K In & Backpack are almost identical, except for the Sony L style (NP) battery mount on the Backpack which allows it to be mounted directly onto a monitor like the Atomos Ninja V. The monitor is then powered by the single data cable using PoE.
If you want to use the Backpack on the monitor, you will need to use PoE so that the monitor receives enough power. Using the AC adapter won’t provide enough to run the Flex & monitor.

If you are using small mirrorless cameras, you could possibly also power the camera with a dummy battery connected to the DC out port on the unit, providing an all-in-one connection with the single PoE data cable and only need to add HDMI cables between the three devices.
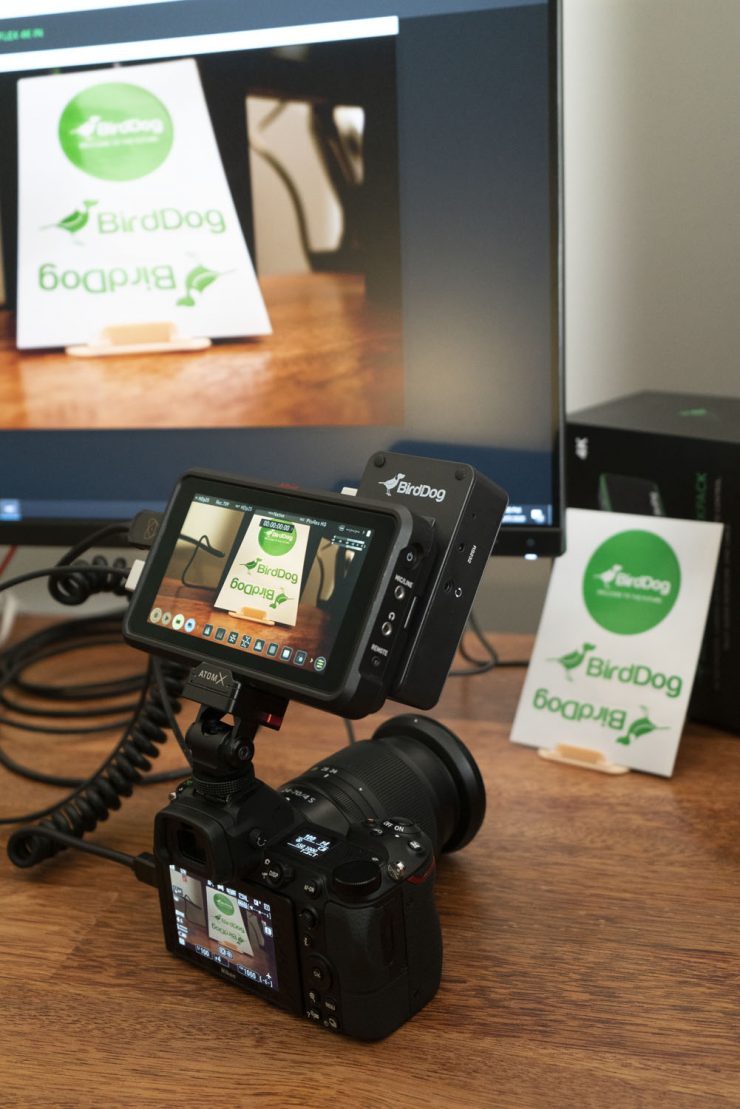
If you are going to be using the Flex 4K Backpack, you may also want to pick up a few short HDMI patch cables to minimise the amount of cable management you will need. You will still need to get the video signal from the camera and then loop out the signal from the monitor to the Flex.
Also, make sure to use good, high-quality HDMI cables as any bad connection can either result in a loss of signal or introduce artefacts into the image.
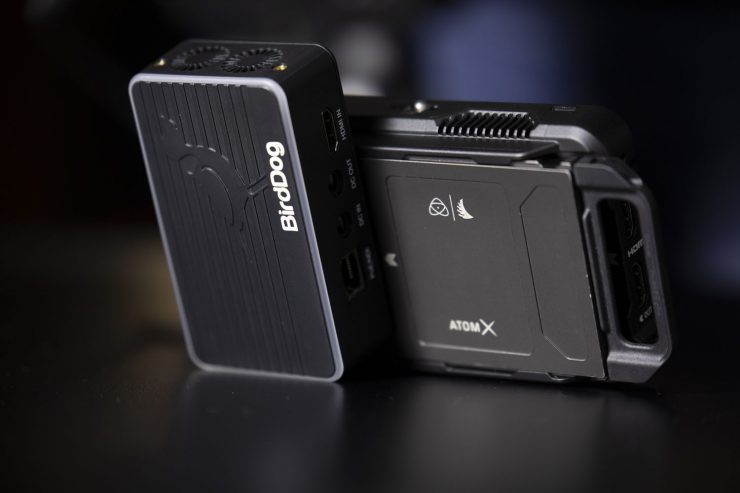
When picking a monitor for the Flex 4K Backpack, make sure that it has a HDMI output. This setup will also allow you to record to the SSD on the Ninja V.
Flex Out
The Flex 4K Out is essentially the same as the In but is a decoder. You can connect the HDMI output to any display like a TV or projector.
It doesn’t have a DC output.
Setup & Configuration
Setting up the Flex unit is essentially plug & play but there are a few things to take note of.
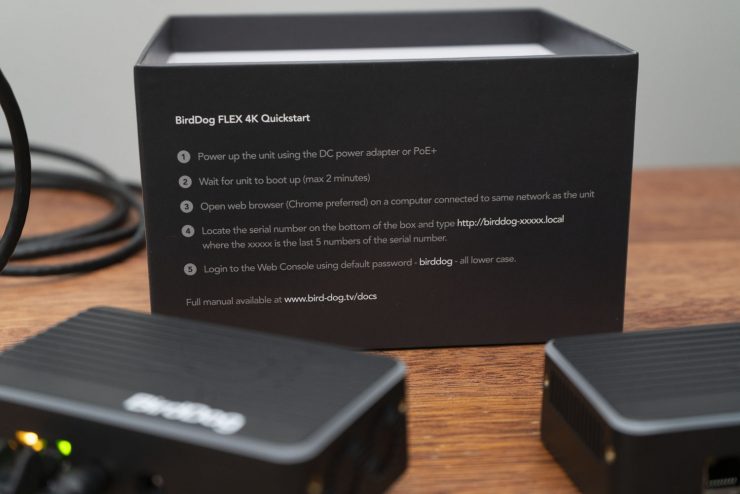
Once the unit has booted up, you can log into the dashboard by typing in http://birddog-xxxx.local into your web browser where xxxxx is the last 5 numbers of the serial number.
Logging in with the default password ‘birddog’, in lower case will give you access to the dashboard.
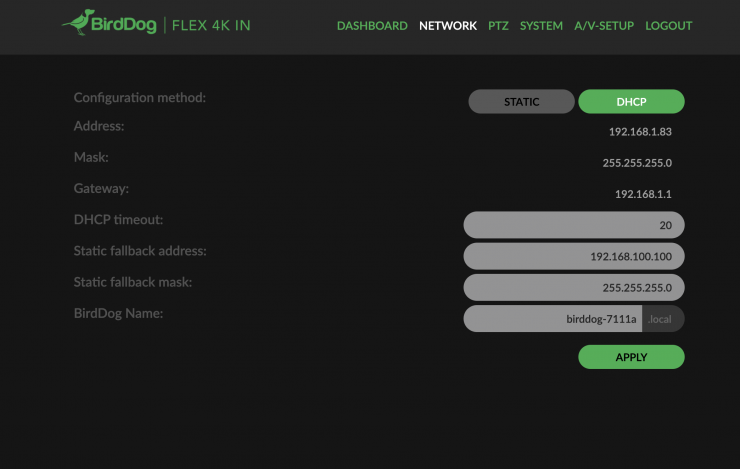
If you power the unit on without the ethernet cable connected, it will not receive an IP via the DHCP server so it will revert to its default IP of 192.168.100.100 so best to make sure that you connect the data cable before powering it on.
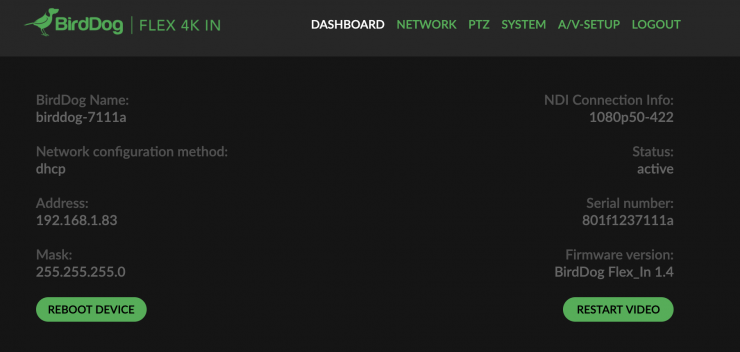
The static fallback address can be set within the dashboard, and it can also be set to a static IP.
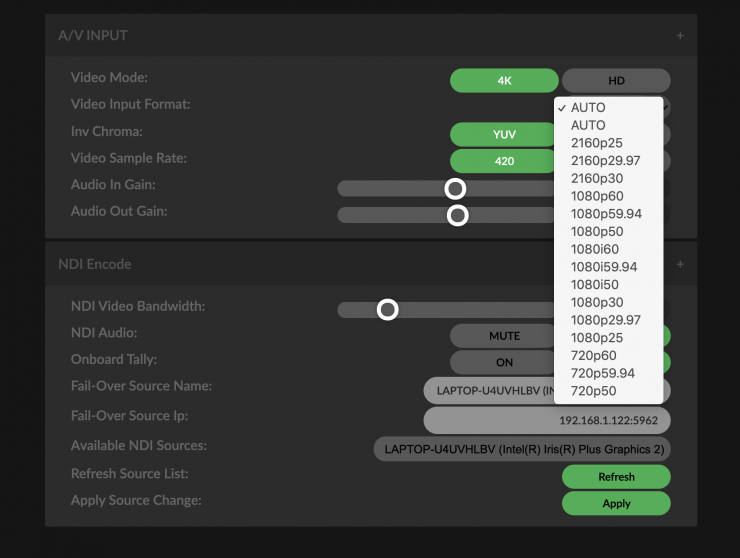
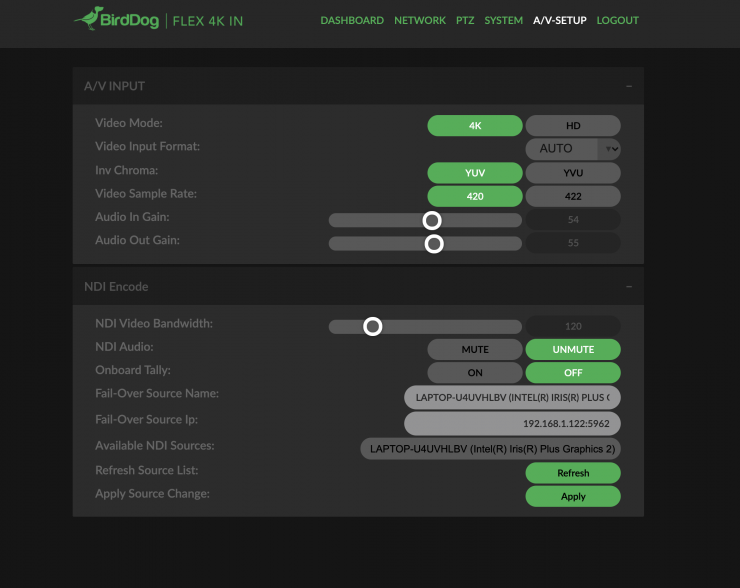
In the A/V setup tab, you can configure the resolution of your signal. Currently, you have to set it manually to 4K or HD mode but this will be automatic in the future.
Similarly, with the video input format, you will want to set this to match your camera output.
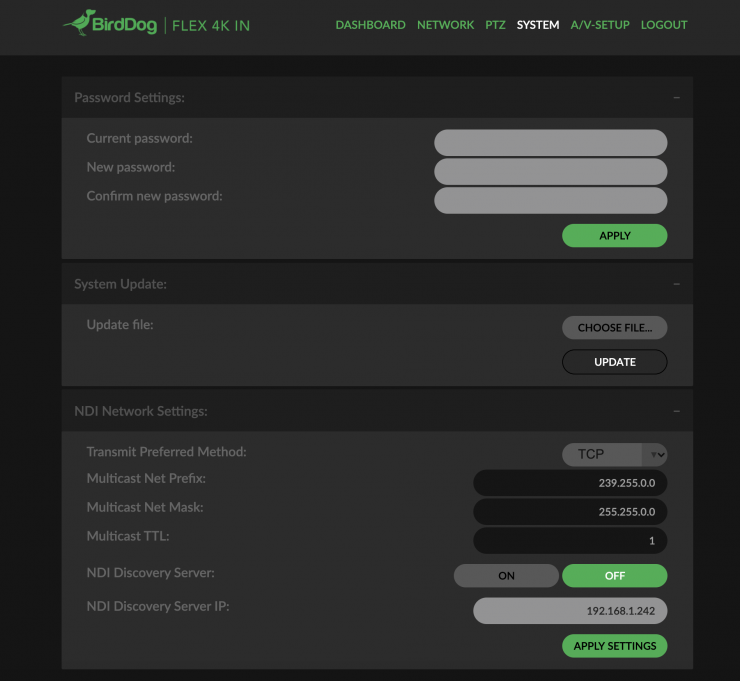
PTZ and other functions like firmware updates are also found in the dashboard.
If you have ever used NDI before, you will know that discovery of sources is very simple and will be viewable as long as you are on the same network.
Once your source is on the network, you can set it up however you please in another piece of software like Studio monitor for playback, OBS or a hardware decoder connected to a TV/projector.
BirdDog Apps
Once you are working in a system with multiple NDI sources and destinations, you will want to use some software to manage the routing rather than going to each device to tell it which source to receive.
BirdDog has a few apps available that streamline the distribution and control of all the NDI devices on the network.
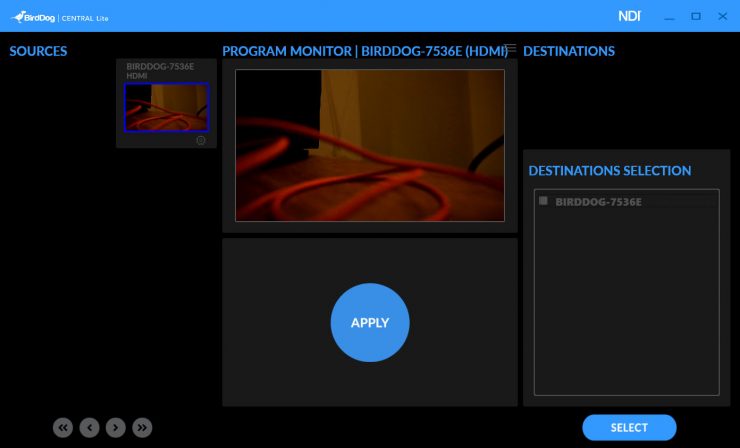
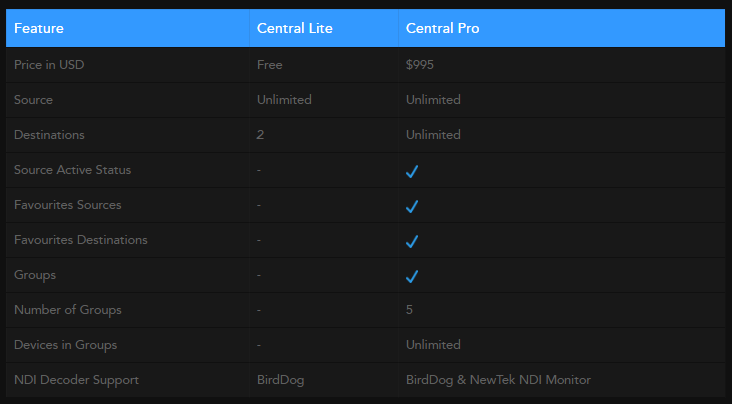
Central Lite & Central Pro are for routing the signals. Central Pro has a lot more features and costs $995 USD. With Central Lite, you will need to use a BirdDog decoder.
One of the advantages of NDI is that the routing can be configured from anywhere as long as you have access to the network. There is no need to switch physical cables around on a hardware hub.
A lot of the software is predominantly Windows-based so you will need to take this into consideration.
If you are an educational, house of worship or Not for Profit organisation, you can get Central Pro & Comms Pro for free – https://www.bird-dog.tv/together/
Bandwidth Considerations
One important consideration to make when working with NDI is the bandwidth of the system.
Since every NDI device (encoders and decoders) are on the network, there is a limit which you will need to monitor. If you aren’t on a dedicated network, you will also need to account for any other usage that may be on the network e.g. data transfers or internet use.
With the Flex system, you can set a variable bit rate NDI in either HD or 4K between 60 to 360Mbps. Normally, this is set to a maximum of 140Mbps in HD or 300Mbps in 4K.
On a few video signals, working on a gigabit network system would allow for 7 or 8 HD signals and less for 4K. Depending on your requirements, you may want to use 10Gbe ethernet for more bandwidth.
Pricing & Availability
The Flex 4K In, & Backpack are shipping now with the 4K Out expected to be available in Q3.
BirdDog Flex 4K In – $399 USD (£325/ €360 ex. VAT)
BirdDog Flex 4K Backpack – $399 USD (£325/ €360 ex. VAT)
BirdDog Flex 4K Out – $399 USD (£325/ €360 ex. VAT)
Flex 4K Camera Mount – $10 USD
$399 USD represents a price breakthrough as previously HD models have been anywhere from $600 plus.
Competitors
There are other 4K NDI encoder/decoders available but none offer quite the same versatility as the Flex system. BirdDog also has higher model 4K encoders with HDMI/SDI support.
Kiloview N40 4Kp60 UHD HDMI-NDI Converter – $664.05 USD
Newtek Connect Spark Pro 4K to NDI – $995 USD
Newtek Spark Plus I/O 4K – $895 USD
Magewell Pro Convert NDI to HDMI Decoder – $399 USD
Magewell Pro Convert HDMI TX 1-channel NDI Encoder – $399 USD
Conclusion
NDI has been growing in its maturity, and as more devices like the Flex become available, the wider the adoption rate will be.
Compared to traditional SDI routing, there are numerous advantages to using NDI and we will only see it become more common as time goes on. The Flex 4K units priced at $399 USD will play a big part in getting more consumers on board.
The versatility of being able to use a single cable to transmit data, intercom, tally & power not only reduces the clutter but simplifies the setup. PoE switches are already affordable and 10GbE will continue to come down in price.
CAT6 cable is also widely available, affordable and easy to run over long distances. It also gives you the ability to place a camera anywhere without having to worry about placing it near a power point.
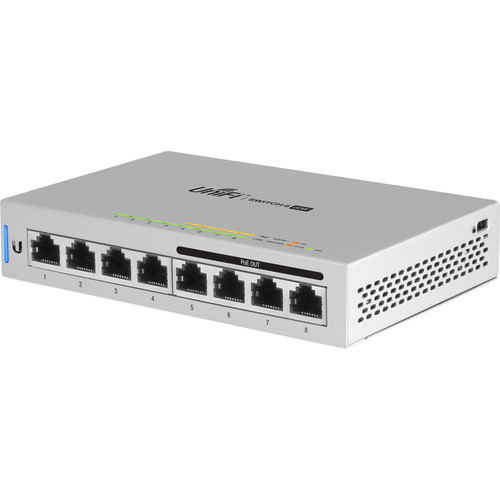
The Ubiquiti US-8-60W UniFi switch, for example, provides you with an eight-port switch, four of which are PoE enabled for only $108.90 USD.
Adding NDI into an existing facility can also require less work as you can use existing infrastructure, just upgrading to 10GbE or a larger switch.
If you haven’t tried out NDI for yourself, I highly recommend trying it out for free using OBS and the obs-ndi plugin or even the free NewTek iOS apps to give you a taste of what’s possible.