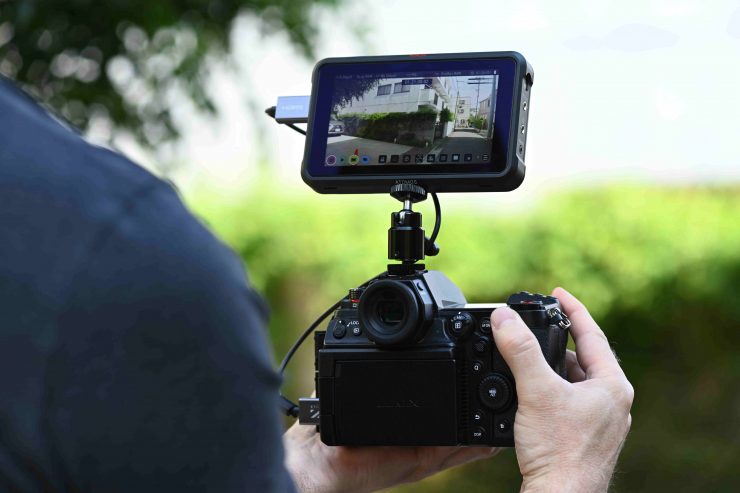
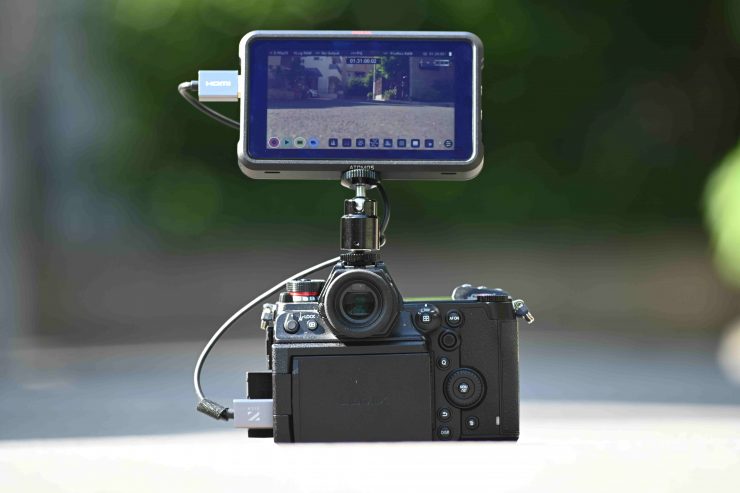
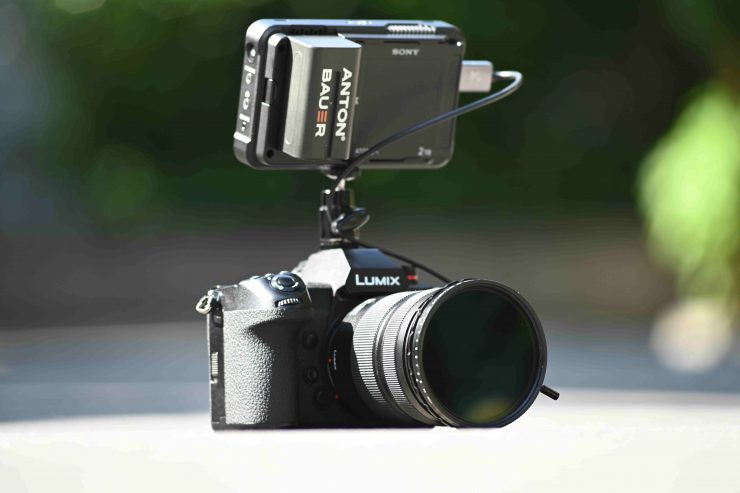
A few weeks ago Panasonic announced that its S1H now has the ability to output a RAW signal that can be recorded to the Atomos Ninja V in ProRes RAW.
The S1H can output a 5.9K RAW signal at up 30p to the Ninja V. That RAW signal can then be recorded as ProRes RAW.
Now, just to be clear, this is a first impressions using Beta firmware both on the Panasonic S1H and the Atomos Ninja V. There are bound to still be some small quirks and issues that should be addressed by the time the firmware is publically available. I am not calling this a review, because you can’t properly review beta firmware. I am not testing every single aspect of ProRes RAW recording. This is simply an introduction so you can see the benefits and caveats when using it with the Panasonic S1H.
Background
Panasonic confirmed to us that they were working on this back at the S1H official launch that happened in Hollywood in late August last year. Atomos also confirmed that they were working with Panasonic on getting it done.
“We are very proud of developing new ground-breaking technology with a company of the caliber of Panasonic. We are both highly committed to the democratization of filmmaking for creators, and the ability to record ProRes RAW or ProRes RAW HQ from the S1H to a Ninja V 5.9kp30 is a major leap forward in this endeavor.”
Jeromy Young, Atomos Co-founder and CEO.
True to their word, it has happened. It did take some time to arrive, but finally, it is here.
How do you get it?
The RAW upgrade comes in the form of a FREE firmware update (v2.0). This will be available on the 25th of May to download. You will be able to download it here.
UPDATE: Atomos Ninja V and LUMIX S1H RAW firmware delay
Here is the statement from Panasonic & Atomos:
The firmware updates enabling the much-anticipated Atomos Ninja V and Panasonic LUMIX S1H RAW over HDMI combination have unfortunately been slightly delayed from the original 25th May release schedule, to ensure the highest possible level of RAW recording.
An unforeseen technical issue has come to light in the final rounds of beta testing that needs rectification prior to shipping. The companies are working together to complete the development as soon as possible. We apologize to our mutual customers waiting for the functions this release enables.
Please note that Panasonic will be releasing Ver 2.0 firmware on May 25th with various improvements to camera functions, however, it will not include the planned RAW HDMI output feature. Atomos will release its Ninja V AtomOS for LUMIX S1H HDMI RAW in-line with Panasonic’s RAW output firmware.
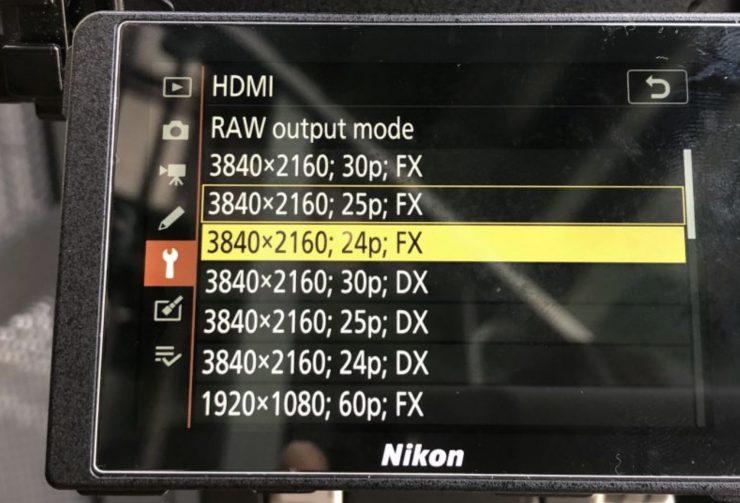
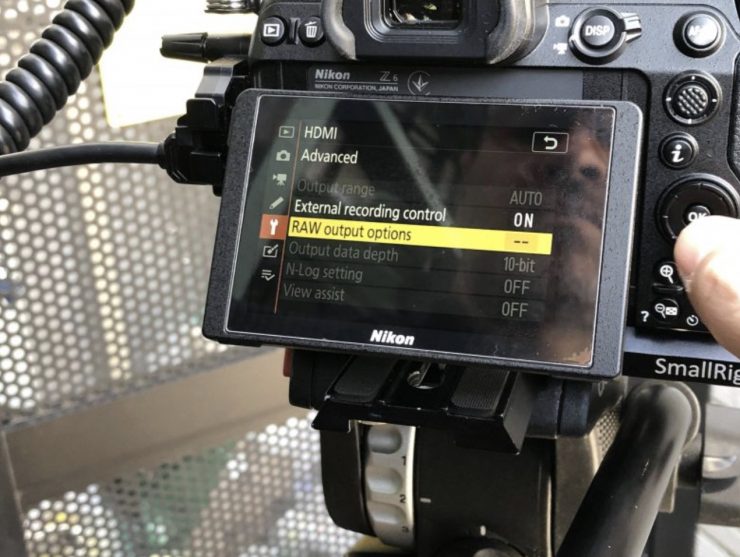
Unlike with the Nikon Z6 and Z7 you don’t have to send your camera into a service center to have an additional internal upgrade done. The cost of the RAW upgrade for the Z6/Z7 is $200 USD.
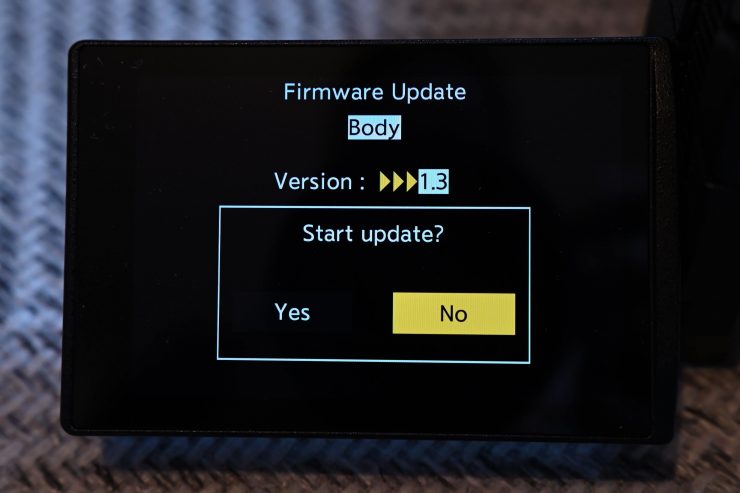
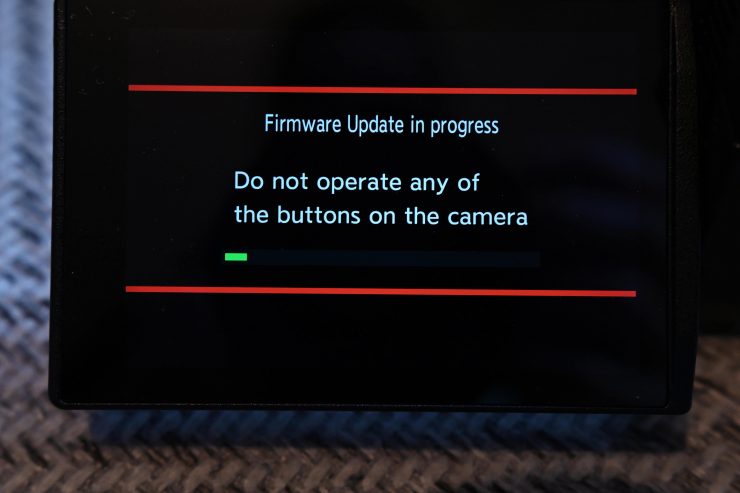
The first thing you need to do is download the firmware for the Panasonic S1H. Once you have done this you place the .bin file onto your SD card and then insert it into the camera. You then go to Settings and the Firmware and then you update the camera to the new firmware.
You then need to download the new firmware for the Atomos Ninja V. Please note the following before attempting to do the firmware upgrade:
- Atomos recommends you use a freshly formatted compatible drive.
- Always format your drives in the Ninja V first. The Ninja V formats the drive for optimal performance for video.
- Ensure that the firmware update file is on the root of the drive, and not in a folder on the drive.
- Use a freshly charged battery on your Ninja V or connect to mains power. It is very important that your Ninja V does not lose power during a firmware upgrade.
Here are the exact steps in order:
- Extract the file ATOMNJV.FW from the firmware zip file.
- Copy ATOMNJV.FW onto a drive in a Master Caddy.
- Ensure that the firmware update file is on the root of the drive, and not in a folder on the drive.
- Power down your Ninja V.
- Insert the Master Caddy with the ATOMNJV.FW file.
- Power up your Ninja V with a short press of the Power Button.
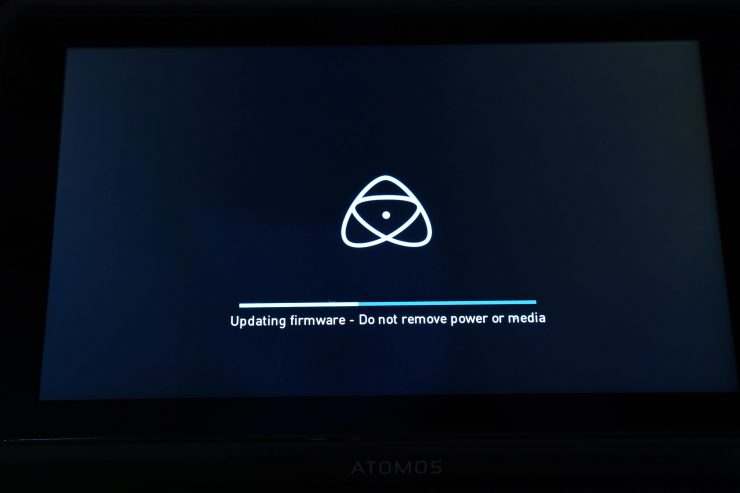
- Watch the screen. The Atomos logo will appear and then be replaced with a Please Wait message and after a few seconds, the firmware upgrade will start.
While the firmware upgrade is happening, an ‘updating firmware’ screen will appear. The firmware upgrade will take up to a few minutes. When the firmware upgrade is finished, the Ninja V will delete ATOMNJV.FW file from your drive and then power down the Ninja V.
Turn on your Ninja V again with a short press of the Power Button. When the Ninja V has booted, press the Settings Button and then
select the Info tab and check that the version number is the version expected.
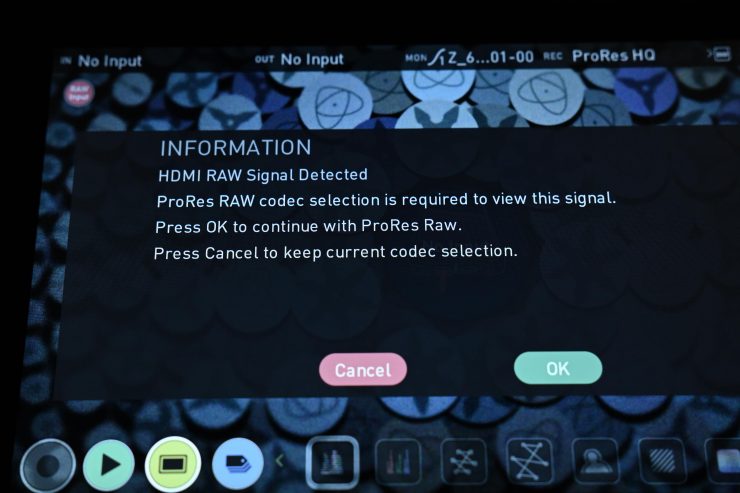
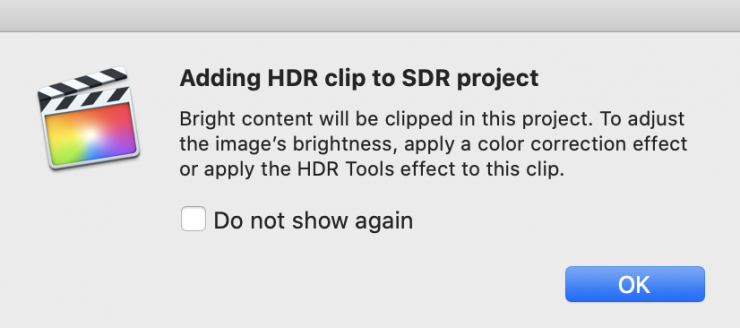
Now, there is one more crucial step you need to undertake. Once you turn the Ninja V back on you will be greeted with the screen above.
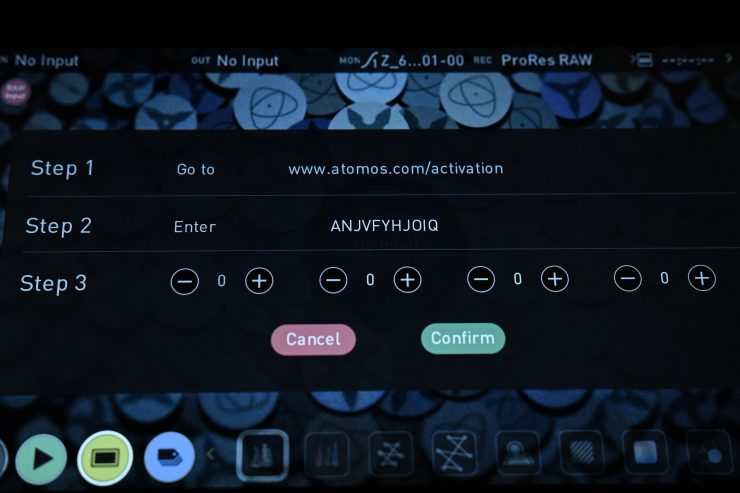
When you select OK you will be taken to this screen above.
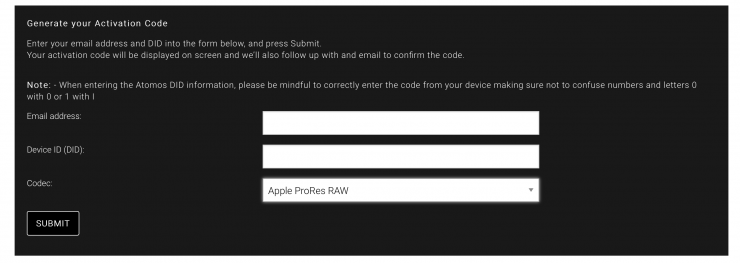
You then have to go to www.atomos.com/activation and you need to enter your email address and Atomos Ninja V serial number. Once you have done this you will get a four-digit pin that you then enter on the Ninja V to activate the ProRes RAW recording.
How do you set up the S1H and Ninja V to record RAW?
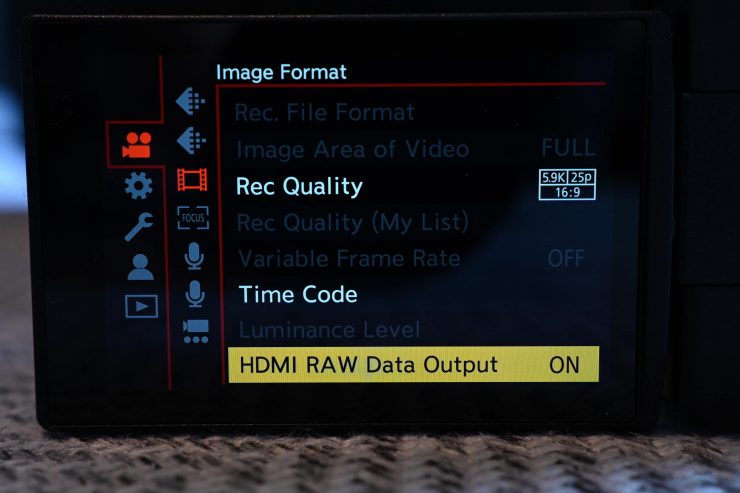
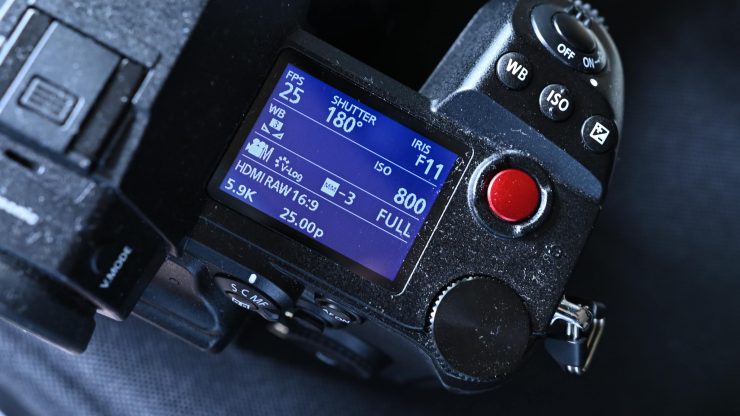
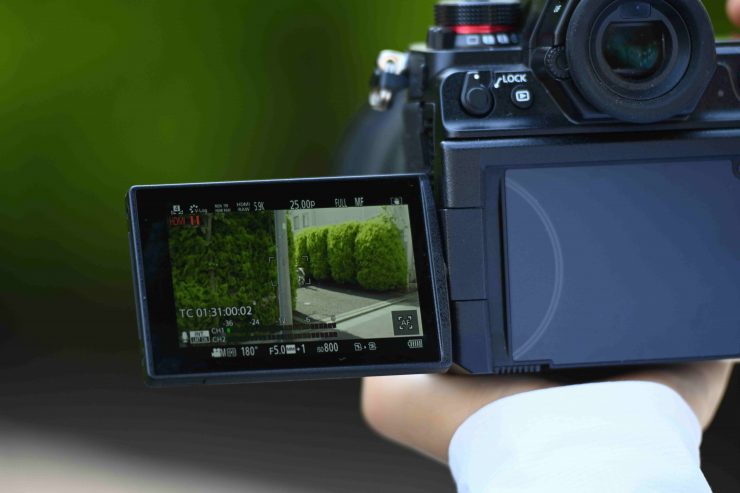
On the S1H you have to go to the Video menu and then turn the HDMI RAW Data Output to ON.

On your Ninja V (or other compatible Atomos recorder) you just need to make sure that the recorder is set up correctly to receive the input from the S1H and record ProRes RAW. You should have the Camera Output set to Log/HDR and choose the camera as Panasonic. The Gamma should be Panasonic Raw and the Gamut should be set to Panasonic Raw.
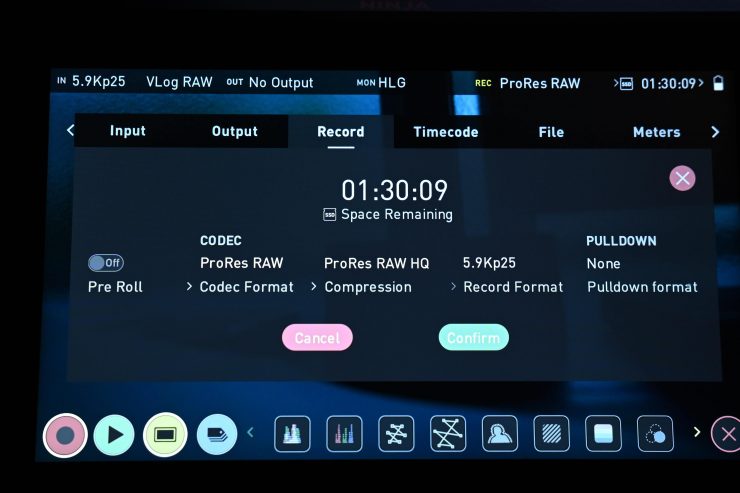
On the Record page you can then choose whether you want to record in ProRes RAW or ProRes RAW HQ.
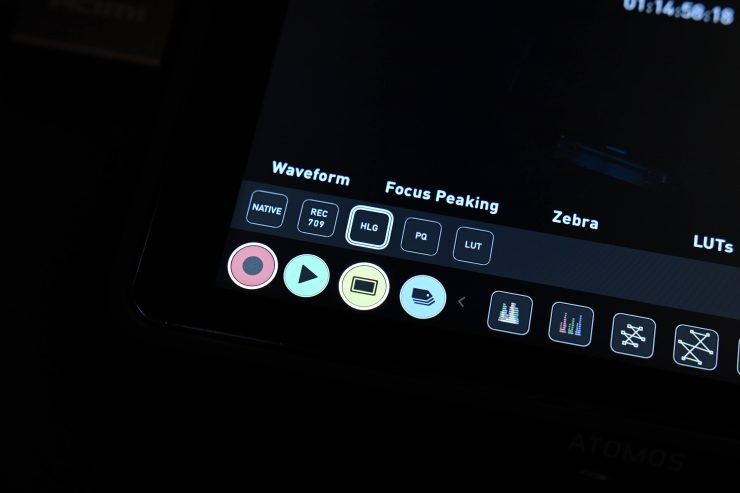
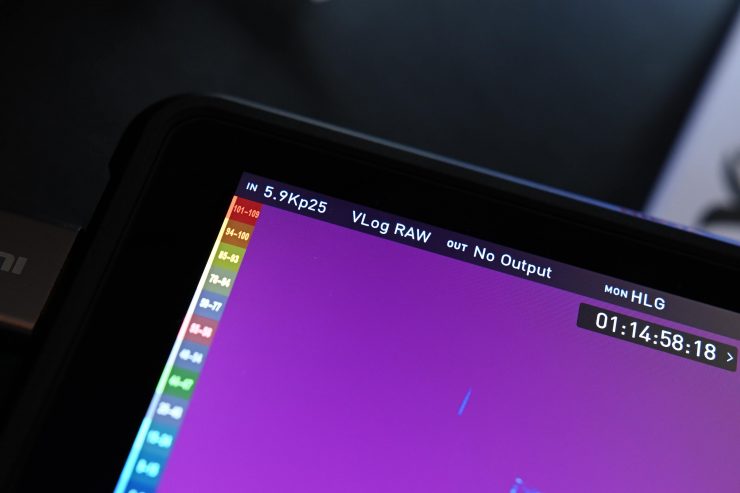
You should then set your monitoring to either HLG or PQ.
Important things that you need to be aware of
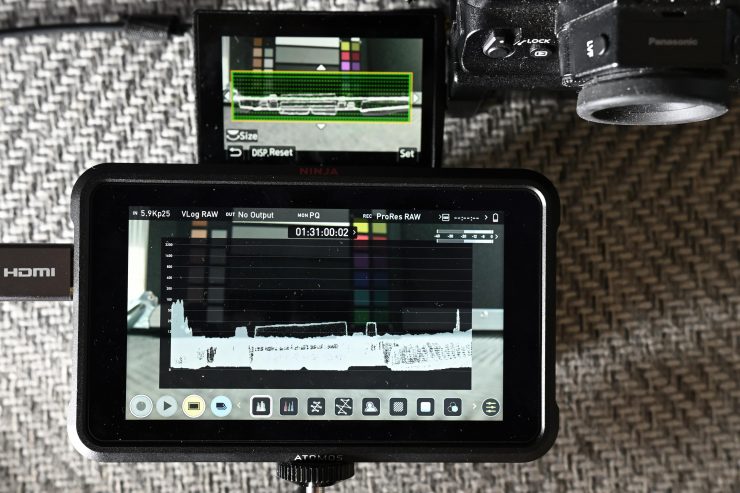
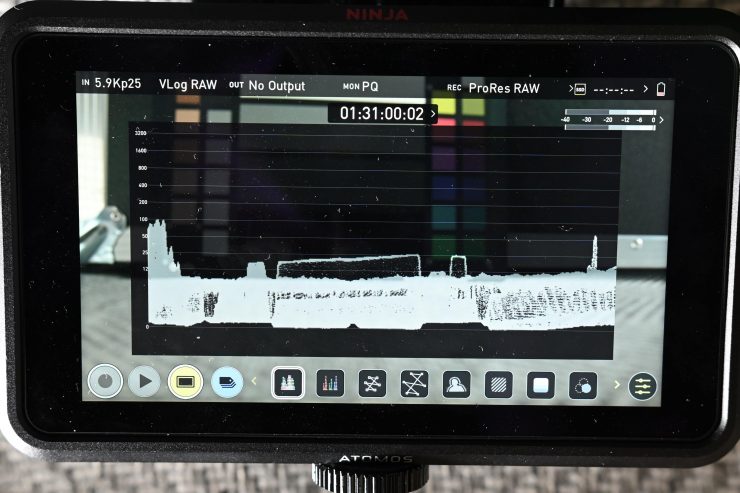
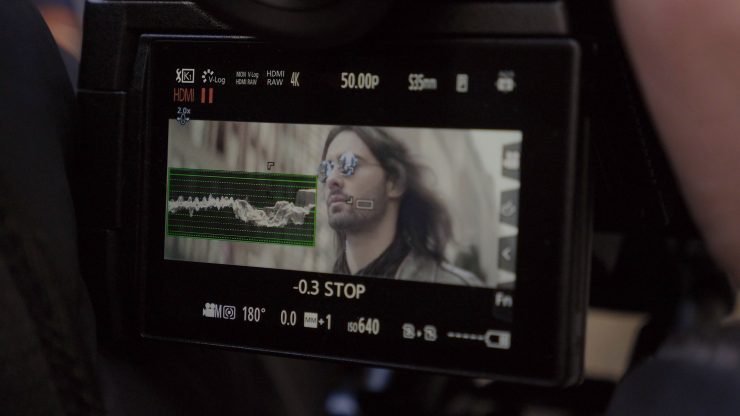
The waveform in Native mode on the Ninja V will not match the waveform on the camera when using the 709 simulation. The Ninja V waveform is a match for the waveform in Final Cut Pro X.
For this first impressions of ProRes RAW, I am following the exact guidelines I was provided by Atomos and Panasonic.
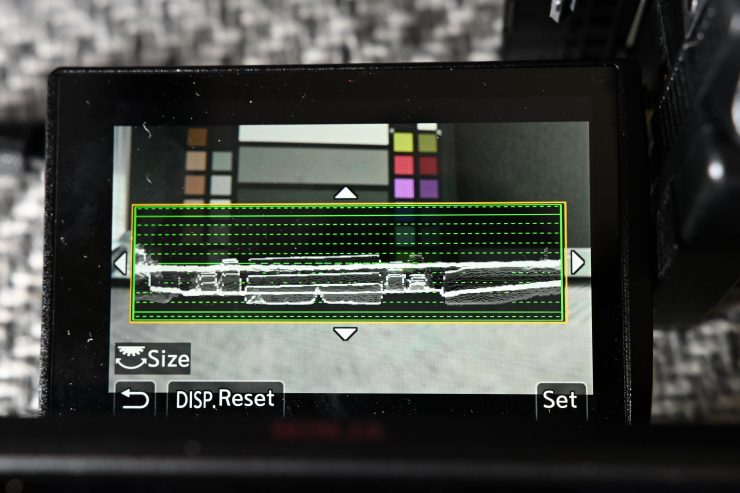
Atomos advises you to monitor RAW in HLG or PQ mode, using the waveform as well when possible. This on-screen image will encourage you to expose ‘to the right’ for lower noise imagery, while at the same time letting you check to see if your highlights are protected.
If you expose correctly using this method the image will look ‘overexposed’ on a REC.709 timeline in Final Cut Pro X or Adobe Premiere Pro Beta. This is entirely correct and you then bring the exposure down in the NLE.
You also need to be aware that the 4K RAW is only available in 4128×2176 (17:9) in the S35mm mode. You obviously can’t shoot 4K RAW full frame. If you want to shoot full-frame you can only do it when shooting in 5.9K.
What resolutions & frame rates can you record?
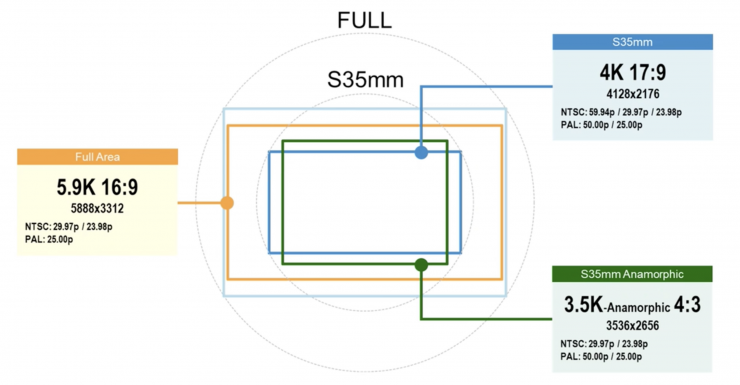
Below is a full list of what resolutions and frame rates can be done in RAW:
| RESOLUTION | FRAME RATES | |
| FULL SENSOR | 5.9K (5888 x 3312) | 23.98/25/29.97p |
| S35 | 4K (4128 x 2176) | 23.98/25/29.97/50/59.98p |
| S35 Anamorphic | 3.5K (3536 x 2656) | 23.98/25/29.97/50p |
The RAW output is 12-bit for all resolutions and frame rates.
There is a reasonably good mix of resolutions and frame rates to choose from, including a 3.5K anamorphic mode. You cannot record 24p in RAW.
Audio data is also carried over HDMI when outputting RAW.
On the beta version firmware that I was testing, the Anamorphic desqueeze monitoring on the Ninja V was not functioning. It will work on the release version.
How does it work?
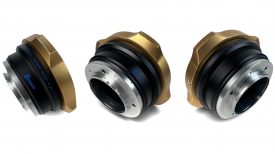
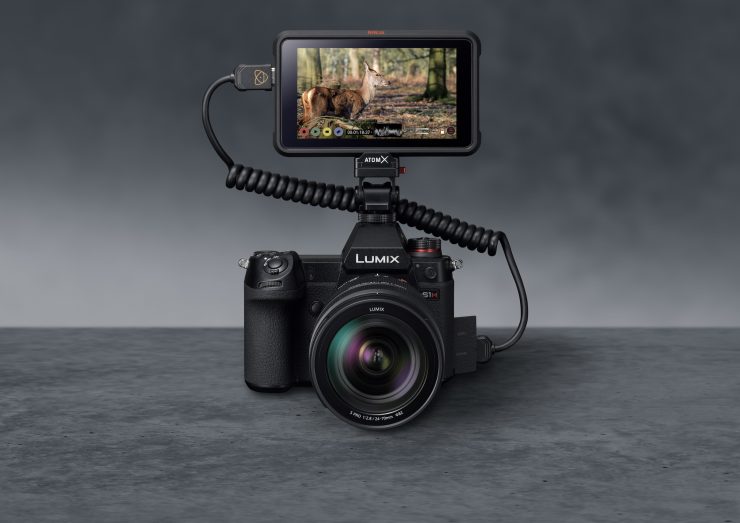
The S1H can output a stream of RAW data via a 4K HDMI cable to the Ninja V, Shogun 7, Shogun Inferno, SUMO 19, or NEON. This data is then repacked into the ProRes RAW format and recorded to a removable SSD drive. When shooting is finished, the drive is removed and connected to a computer. Footage can then be decoded (debayered) and edited in the highest possible quality. Using ProRes RAW format keeps file sizes manageable, and easy to edit.
I’m still not 100% sure how Atomos is doing this, but as we have seen, it is technically possible to output RAW over HDMI. Atomos may be using a closed-loop protocol with-in HDMI. What this basically means is that they are just taking the pixels and re-arranging them. One thing is sure, this is probably only possible because Atomos is utilizing ProRes RAW. ProRes RAW makes it practical for separate companies to work together on RAW because it provides a framework that they can both use without giving away their own processing secret sauce.
Technically you could still do this without ProRes RAW but you would have to open up all of the processing on both ends to the other company involved. This is something that is unlikely to happen.
How is RAW over HDMI from the S1H?
We are still in lockdown here, so I can’t shoot anything that exciting. For this initial evaluation, I was primarily interested in seeing the differences between recording internally or externally.
In theory, the 5.9K RAW external recording should be quite a bit better than the 5.9K internal recording. You have to remember that when you are shooting in 5.9K internally on the S1H, you are recording 200Mbps (4:2:0 10-bit LongGOP) H.265/HEVC.
A lot of the internal recording options on the S1H are already good, but as I just mentioned, the 5.9K internal recording on the camera isn’t as good as some other modes. I wanted to see the difference between the internal recording and externally recording in ProRes RAW.
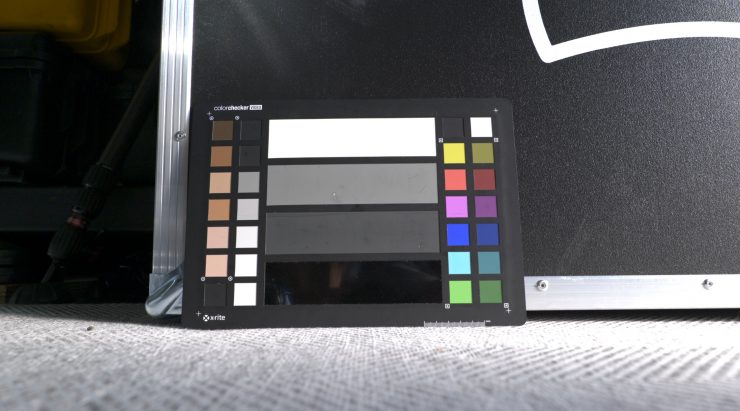
Straight away you can see there is more detail in the 5.9K ProRes RAW recording. The internal recording looks noticeably softer and there is less detail being shown. You can certainly see how much noise reduction Panasonic is applying to the image when you compare it against the RAW signal. There is quite a lot more noise in the image when recording RAW externally, but that was to be expected. In saying that, it is hardly horrible and even at 4000 ISO I think it looks ok without doing any noise reduction.
It is also a lot better to denoise in post as you will get a lot better results than trying o do noise reduction in real-time in-camera.
Now, these are simple static tests so they aren’t putting any huge strain on the codecs. If you are shooting scenes where there is lots of movement going on then having that extra information by recording in ProRes RAW will help.
So is there much of a difference between shooting RAW externally or capturing internally when you are shooting 4K? The S1H has a very good 4K internal recording codec (400Mb/s 4:2:2 10-bit) so I was interested to find out.
Above you can see a comparison between capturing internally in 4:2:2 10-bit and externally to ProRes RAW. Now, as you can only capture 4K in the S35mm mode when shooting RAW I also set the S1H to S35 mm mode as well. I shot internally in UHD, not 4K DCI as I was going to be putting both clips on a UHD timeline.
From this small test (and we are only looking at noise, sharpness, and detail), the differences aren’t nearly as apparent as they were when shooting 5.9K. The ProRes RAW external recording does have a lot more noise, but that is no surprise. In terms of sharpness and detail, they are pretty close until you start cropping a long way in. I shoot this small robot because he is an excellent subject for tests like this. He has a lot of very fine detail and a very small subtle pattern across his body.
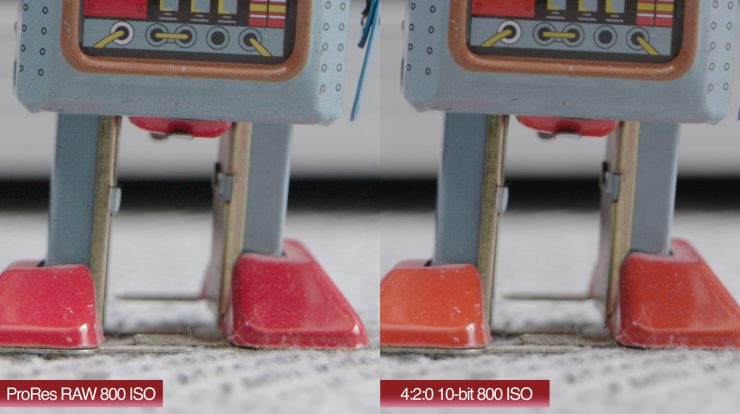
There are also differences in color when shooting RAW as opposed to capturing internally. Above you can see that on the internal recording the robot’s feet are orange, but on the RAW recording, they are red. They are supposed to be red. As the ProRes RAW is not doing any chroma subsampling, you are going to see more accurate colors than when recording internally. 12-bit recordings can see more variations of the same color than 10-bit, this is a big advantage.
You are not going to see any difference in dynamic range from shooting internally in V-log to externally in ProRes RAW. The dynamic range is exactly the same.

ProRes RAW 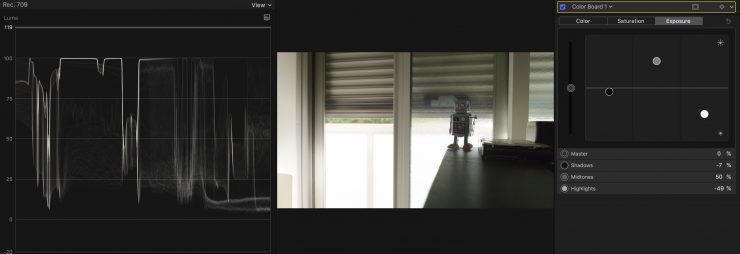
Internal Recording
Above you can see a tricky shot where I have brought up the mids while not exceeding 100% on the waveform with the highlights. One shot is in ProRes RAW and the other is internally recorded in V-Log. As you can see, they both clip at the exact same point.
You absolutely don’t want to underexpose when shooting RAW on the S1H. You need to overexpose but this can be a little tricky because the camera doesn’t have great highlight roll-off and it will clip quite easily if you are not paying close attention to a waveform.

ProRes RAW 
ProRes RAW recovered image
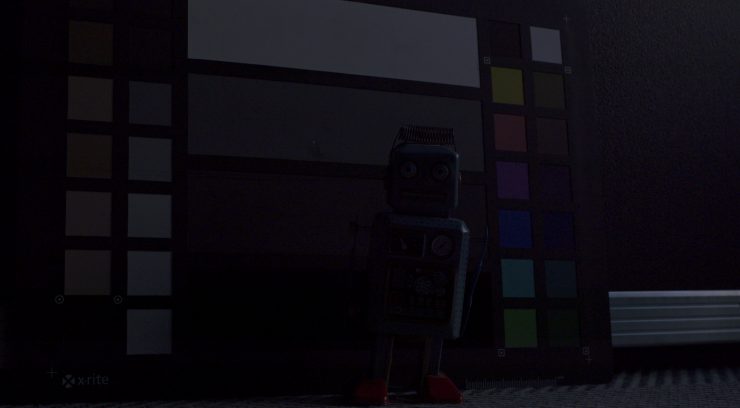
Internal 4:2:0 8-bit 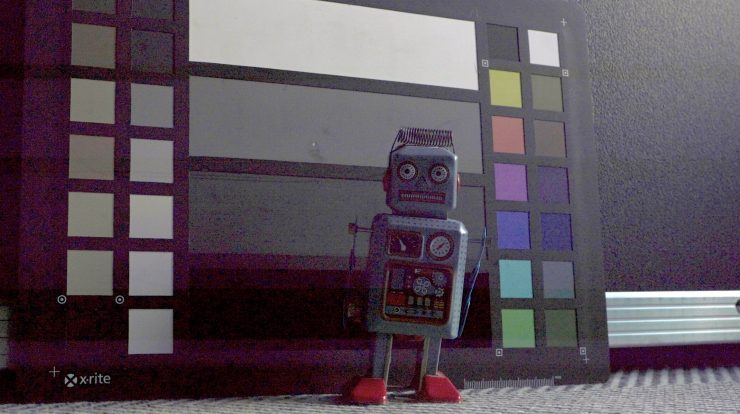
Internal 4:2:0 8-bit recovered image
Just to show you what happens if you massively underexpose your image and try and recover it. I did a small test where I shot in 4K60p in ProRes RAW and 4:2:0 8-bit 4K60p internally. I then attempted to recover both images. The recovered ProRes RAW image does look a lot better than the recovered 4:2:0 8-bit image, but it still isn’t usable. I did this extreme test just to show you that ProRes RAW isn’t some kind of magical solution where you can fix any problem later in post.
As DaVinci Resolve doesn’t support FCPX I can’t just take my recorded footage in there and use it for color correction. If I want to use Resolve I first have to import my footage in FCPX and then turn it into normal ProRes to be able to send to Resolve.
You certainly will have more flexibility in post with doing corrections by shooting ProRes RAW, but if you are getting your image 90-100% right in camera when you are shooting you are not going to notice any massive difference.
Well, what about banding? To be perfectly honest I didn’t see any banding issues with the S1H when shooting internally when I was doing some tests. I am sure it is possible to see in some instances, and yes, shooting in ProResRAW would alleviate any of those issues.
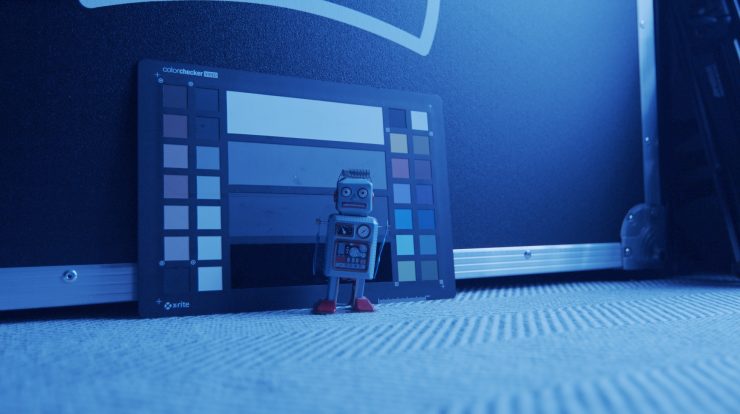
If you get your white balance really wrong when shooting in ProRes RAW, you will not be able to fix it. This is not like other RAW formats, your white balance is baked in. Ok, technically that isn’t correct, but there isn’t any dedicated RAW or ISO sliders in the RAW controls. The metadata is there, but there are no dedicated controls to adjust it.
Will this change in the future? Hopefully. Atomos stated a long time ago that :
Here is the biggest problem with ProRes RAW. It just hasn’t been explained very well by those companies using it or implementing it in their products. It is up to theses companies to do a better job of explaining how exactly it works and how to use it correctly.
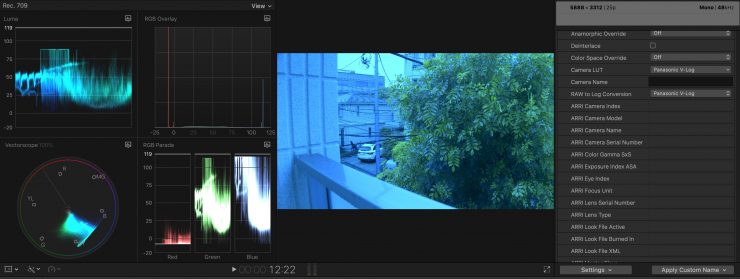
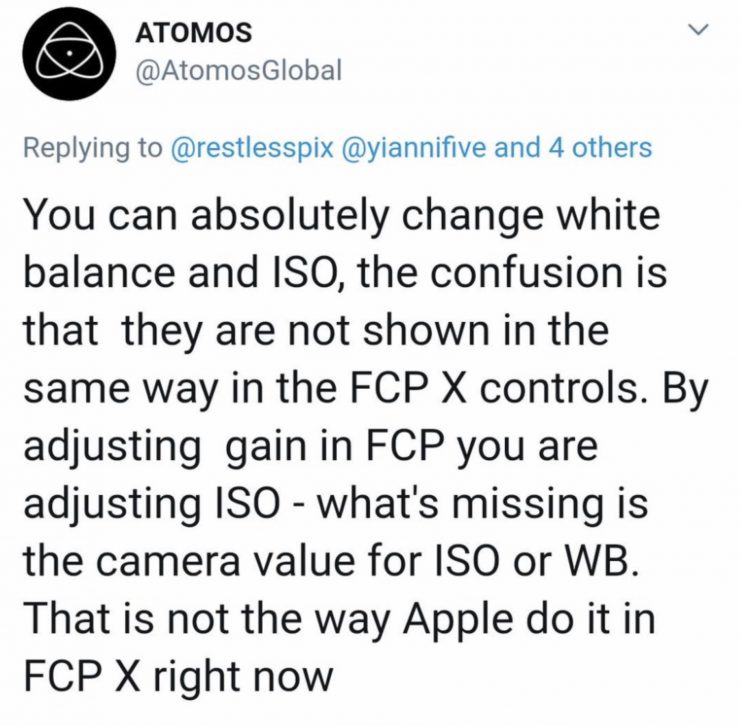
As shot with the standard ProRes RAW options selected 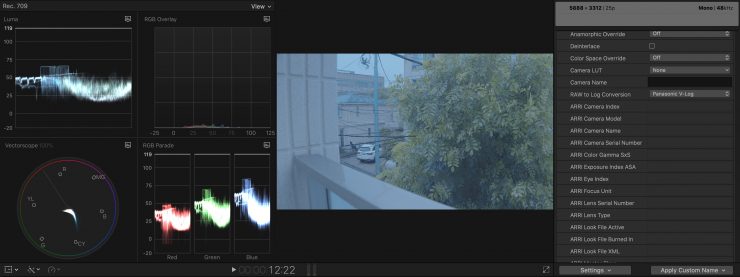
With the Camera LUT turned off 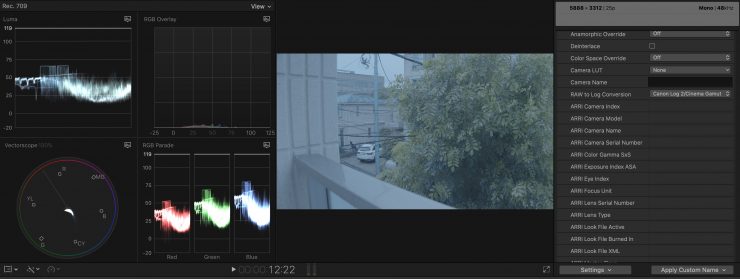
With the RAW to Log conversion changed to a Canon profile 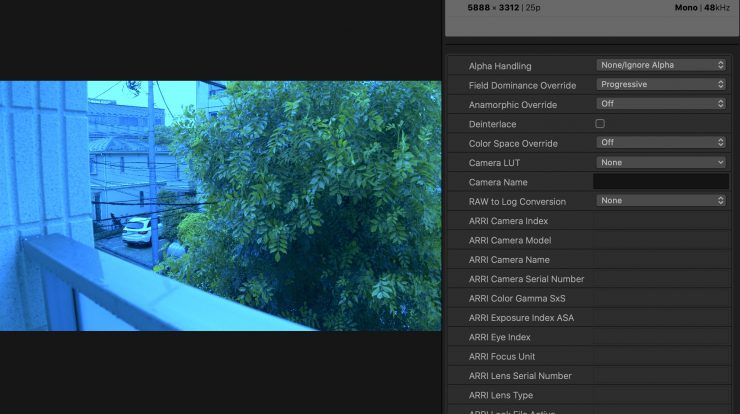
With RAW to Log & Camera LUT off 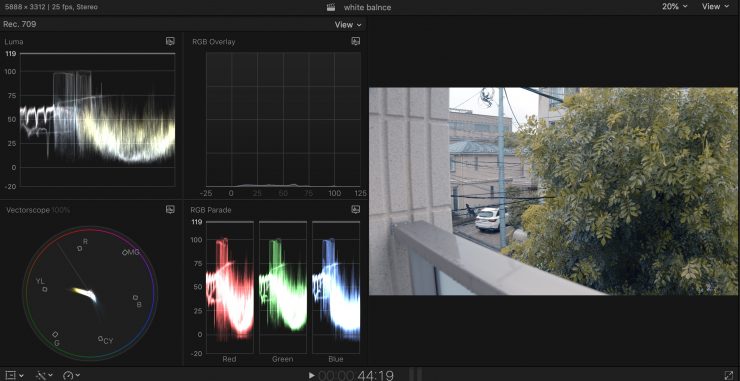
Corrected image
I tried correcting a clip I shot on purpose that had a very skewed blue/green white balance and it didn’t matter what I did, I couldn’t get it to look right. While I could get white to look reasonable, it was impossible to balance out the colors. Changing one would always affect another. Strangely I found that selecting the Raw to Log conversion as Canon Log2/Cinema Gamut provided better results.
Even with the RAW to Log conversion and the Camera LUT both turned off it didn’t help. Sure this is an extreme example and you would never actually shoot something with a WB this far off, but it shows you what you can and can’t fix. Look, maybe a professional colorist could fix it, but I certainly couldn’t get it to look right.

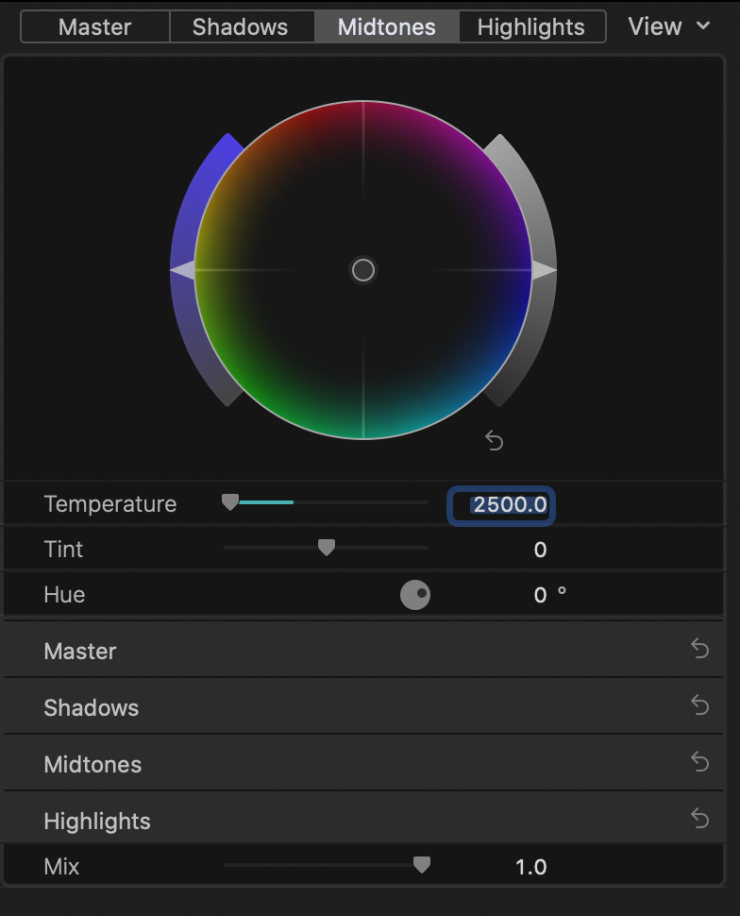
Even though there is a WB slider in the FCPX’s color correction tools ut doesn’t go any higher than 10,000K and it doesn’t go any lower than 2500K. If you need to make adjustments outside of that range you can’t.
I would have been able to achieve better results in Resolve, but I was limited to doing these corrections within FCPX as Resolve doesn’t support ProRes RAW.
If this same clip had have been shot in a RAW format that has dedicated WB adjustment I could have fixed this quite easily.
BMPCC 6K BRAW as shot 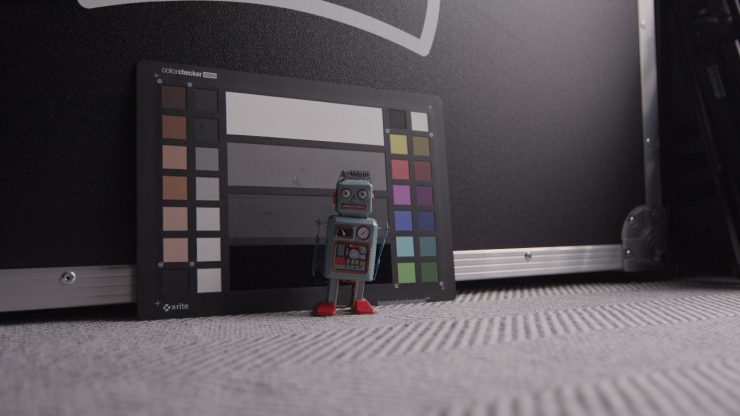
Corrected 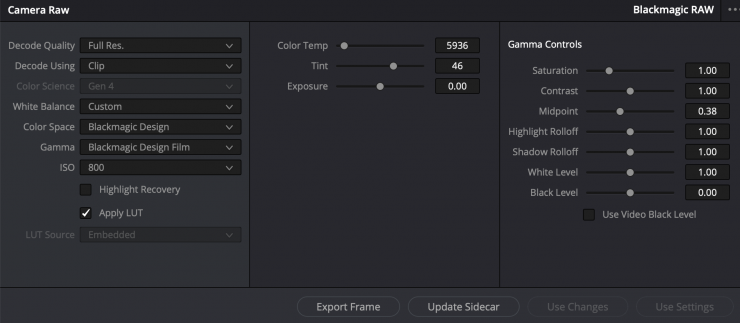
Corrections available in Resolve
So, just as a comparison I thought I would do the similar thing with a BMPCC 6K BRAW clip. I can fix that BMPCC 6K clip so easily in Resolve in a matter of seconds. This is before I have even done any type of color correction. This is simply just using the RAW tools.
Of course RAW is a lot more than just being able to adjust your white balance, but it does give you an idea of how useful it is if your white balance is way off when you were shooting.
This is the problem with multiple different implementations of RAW. With BM RAW you are stuck in Resolve and you can’t use FCPX. With ProRes RAW you can use FCPX, but you can’t use Resolve. All I can say is this needs to change for the user’s sake.
The autofocus still works, but it is no better or no worse than when you aren’t shooting RAW.
How does this change how you use the camera?
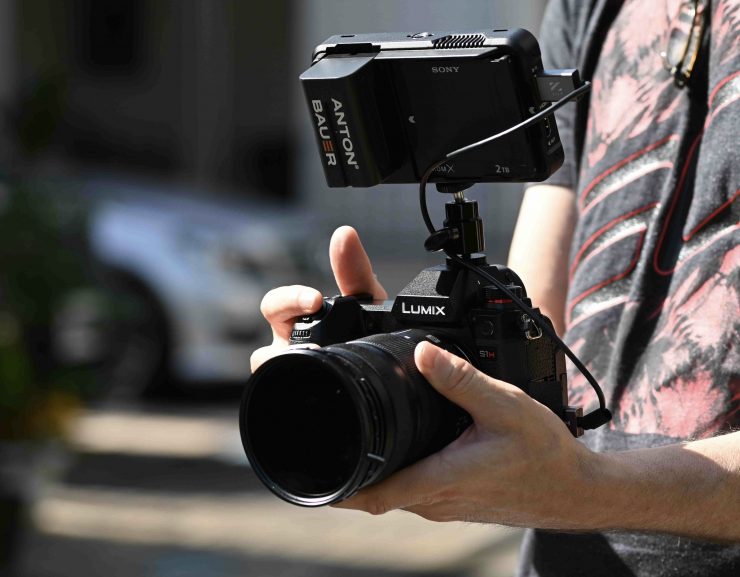
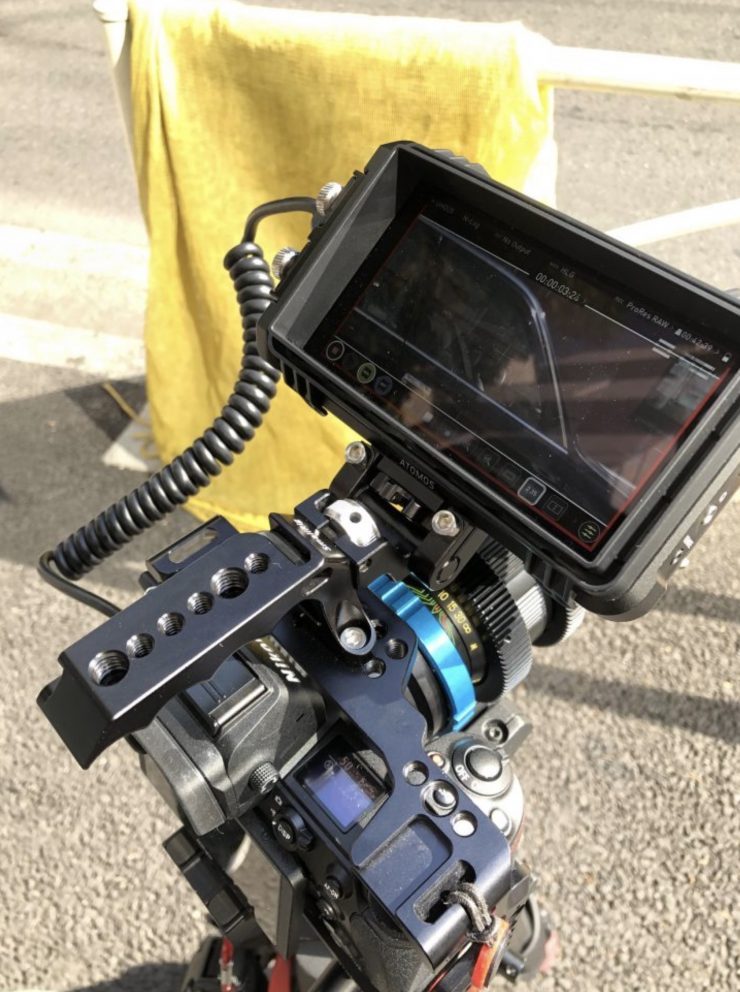
The biggest problem I have with shooting RAW on the S1H has nothing to do with image quality and everything to do with usability.
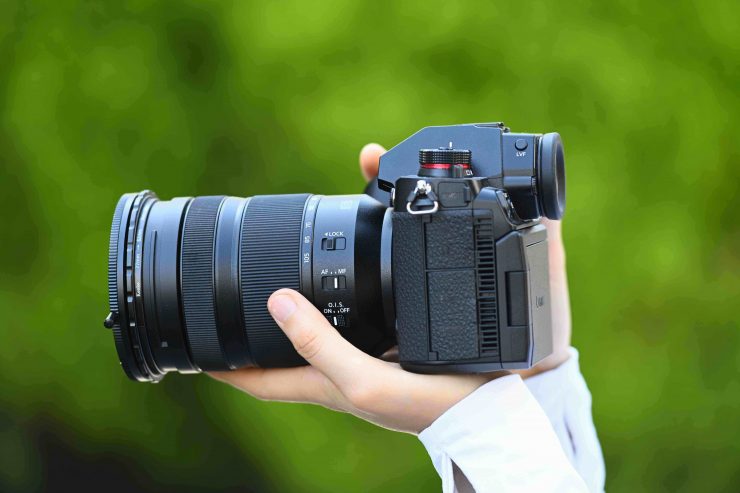
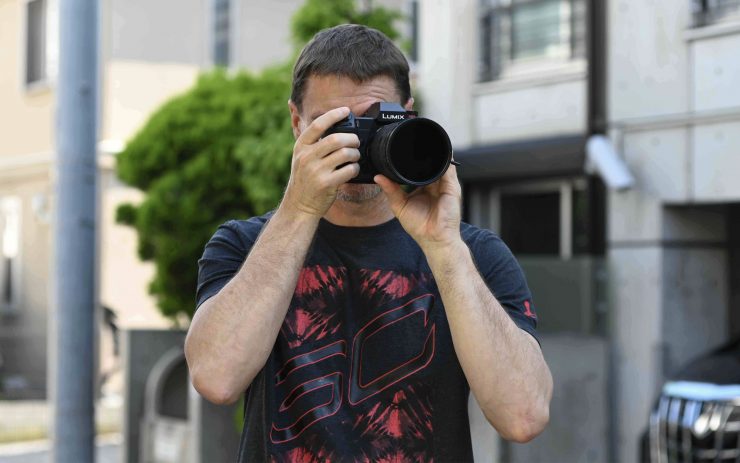
The main reason I like the S1H is that you can use it bare bones without any cages, monitors, and all of the other items that are usually associated with using a mirrorless or DSLR camera. The onboard screen is nice, the VF is good, the internal stabilization options are great, and most importantly so are the internal recording options (well, maybe not the 5.9K mode).
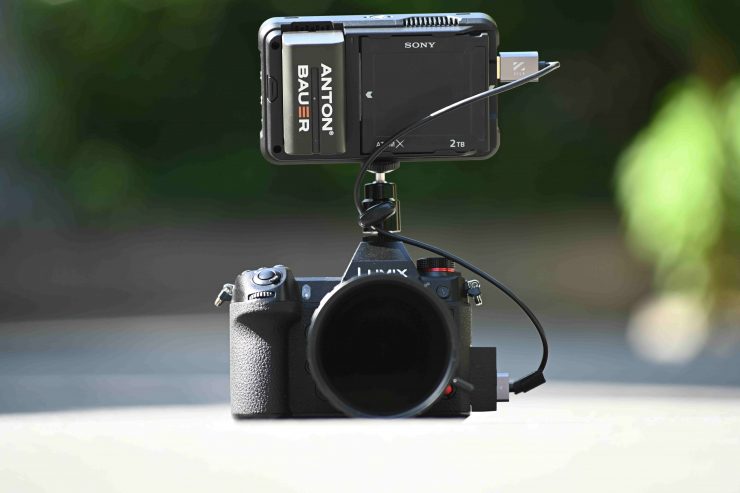
I personally think you shouldn’t have to use an external recorder in 2020. The beauty of having a small camera is that you can keep it small. Once you attach a monitor/recorder with a battery, a camera cage, and connect it up with an HDMI cable you take away a lot of the elements of what makes the S1H a good camera in the first place. A camera such as the Canon R5 will change the way we see and view mirrorless hybrid cameras because it doesn’t require an external recorder to do RAW.
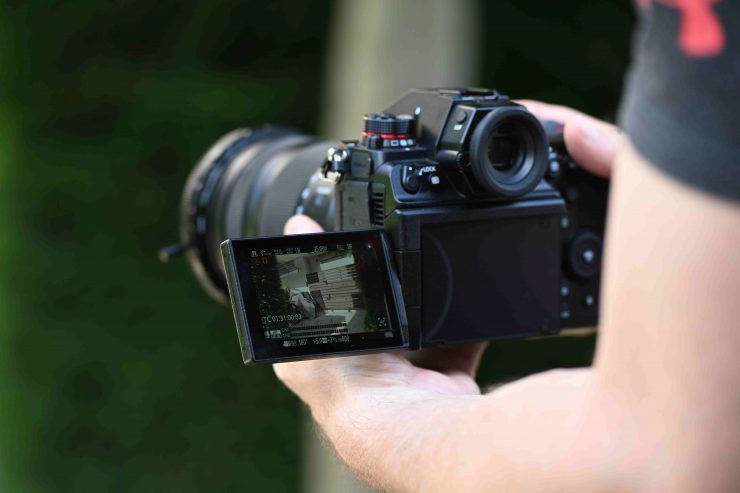
When shooting RAW with the S1H you are being forced into monitoring everything from the Atomos Ninja V. Why is that bad? Well, because the focus punch in is disabled on the LCD screen and VF you are not going to be able to get critical focus. The only way to get focus punch in is on the Ninja V. I personally find the focus punch in not to be very intuitive or easy to use on the Ninja V. You should be able to just double tap on the screen. Going through the tools is too slow and then you are stuck on whatever magnification the focus zoom is set at.
The other problem is, even though the screen is relatively bright on the Ninja V, it isn’t bright enough if you are working in very sunny conditions.
The camera combination also gets heavy once you add that Ninja V and you can’t hold it as long as you could before.
You could just put a Cine Saddle around your shoulders and then rest the camera on that, but if you are not tall you will just end up with shots that are always from a low angle looking up.
I also found that the battery life on the S1H was being reduced by a noticeable amount. You also have to put up with how hot the Ninja V gets and the noise that is generated by its fan.
The other big thing for me was because it is RAW you can’t just go between the various frame sizes to get the most out of a full-frame lens. I love being able to shoot in 4K on the S1H and go between full-frame, S35, and Pixel-Pixel. This allows me to cover a very wide focal range with a single lens. This is something you can’t do when shooting RAW.
If I look at it from another perspective, there may be a lot of people out there who are already using a cage and building their S1H up with a lot of additional components. If you are already doing that then I don’t think you will have much of a problem adding an external recorder to record ProRes RAW.
Usability is just as important as the image quality. If getting slightly better image quality comes at the expense of usability, is it worth it? This is a question only you can answer.
How much data am I going to be recording?
Despite ProRes RAW being a pretty efficient way of recording a lot of information, the file sizes are still going to be big, especially when recording 5.9K RAW. You are looking at increasing the data rate 10x.
Now I did get some weird figures here that made no sense what so ever. I am putting this down to beta firmware but I will check with Atomos. When using a 2TB AtomX SSD drive the recording time being shown was the same for ProRes RAW or Prores RAW HQ. Also, 5.9K30p was showing me a longer recording time than shooting 5.9K25p. None of this makes any sense.
Here are the times that were being displayed using a 2TB AtomX SSD drive:
| RECORDING TIME PRORES RAW | RECORDING TIME PRORES RAW HQ | |
| 5.9K30p | 97 minutes | 97 minutes |
| 5.9K25p | 90 minutes | 90 minutes |
| 5.9K23.98p | 97 minutes | 97 minutes |
| 4K23.98p (S35) | 105 minutes | 105 minutes |
| 4K30p (S35) | 90 minutes | 90 minutes |
| 4K60p (S35) | 90 minutes | 90 minutes |
| 4K50p (S35) | 90 minutes | 90 minutes |
| 3.5K50p 4:3 (S35) | 90 minutes | 90 minutes |
| 3.5K30p 4:3 (S35) | 97 minutes | 97 minutes |
| 3.5K25p 4:3 (S35) | 97 minutes | 97 minutes |
| 3.5K23.98p 4:3 (S35) | 105 minutes | 105 minutes |
Dealing with ProRes RAW files
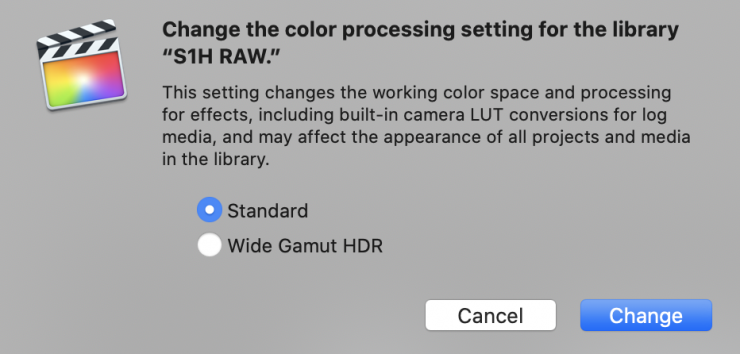
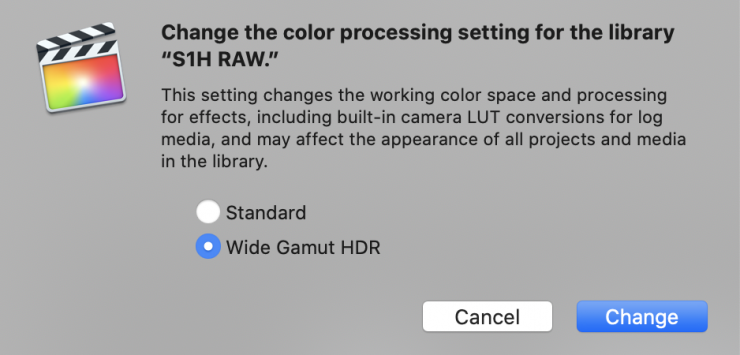
This is pretty straight forward in FCPX. The first thing you need to do to make use of the full dynamic range of the original video available in the working color space is to change the library color-processing setting to Wide Gamut HDR. When color processing is set to Wide Gamut HDR, the built-in camera LUT does not apply tone mapping and preserves the full dynamic range for color correction and effects.
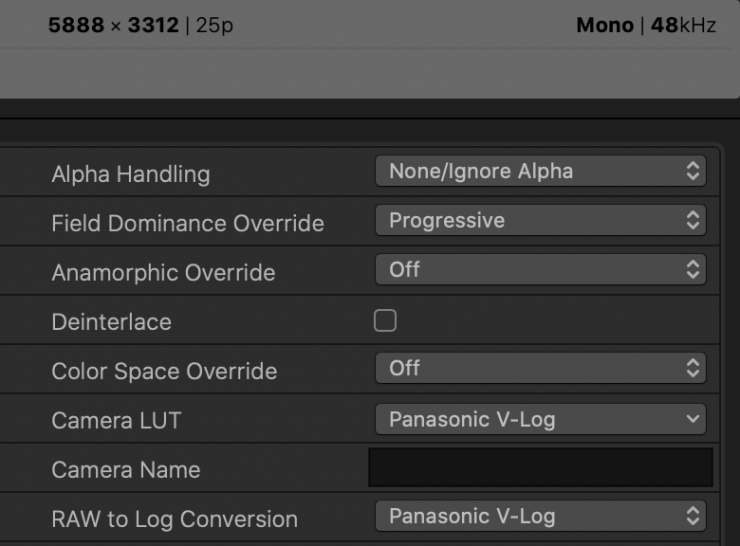
Once you have done this you can drop your ProRes RAW material into a project. You then need to go into your Information Tab and here you can see your ProRes RAW controls.
The Raw to Log Conversion setting in the Info inspector applies custom log functions created by different camera vendors so that you can color correct
your ProRes RAW files as log video. Because ProRes RAW files contain metadata that identifies the camera manufacturer, Final Cut Pro can apply the correct log function, in this case, V-Log during import.
You can also manually adjust the RAW to Log Conversion setting in the General, Extended, or Settings view of the Info inspector.
Now, you don’t have to do it this way. There are three primary ways to use ProRes RAW with Final Cut Pro in your post-production workflow:
• Using Log Conversion with Built-in Camera LUTs
• Using Log Conversion with Custom LUT Effects
• Grading Directly Without LUTs
Unlike most traditional RAW workflows, with ProRes RAW there aren’t any settings to change white balance and ISO. If you want to make changes to exposure and color you can by just using the in-built color tools in FCPX.
While the ProRes RAW files still alow for quite a bit of flexibility in post, they don’t give you the same amount of leverage as proper RAW files where you can adjust white balance and ISO.
The biggest advantage of ProRes RAW is it is simple to use and edit with. You don’t need a high end fancy computer with ProRes RAW. Speed and usability are two of its biggest selling points.
The ProRes RAW files from the S1H are much easier to work with than the internal recordings, despite being way larger in size.
Are there any caveats?
Yes, there are! Here is a list of things you need to know when outputting RAW over HDMI:
- No internal recording is possible
- The Photo Style is fixed on V-Log (the Photo Style doesn’t get applied to the RAW recording, but the display gamma on the camera will be shown as V-Log.
- AWB, AWBc, AWBw, Daylight, Cloudy, Shade, Incandescent, Flash are unavailable in the white balance settings
- White set 1-4 and Color temperature setting 1-4 are still available in the white balance settings
- Loop Recording (Video) is disabled
- VFR is disabled
- Live Cropping is disabled
- Focus Transition is disabled
- Filter Effect is disabled
- Time Stamp Record is disabled
- Segmented File Recording is disabled
- Image Area Of Video is disabled
- Digital Zoom is disabled
- Color Bars is disabled
- MF Assist Display is disabled
- Luminance level (fully fixed)
- Vignetting Compensation is disabled
- Diffraction Compensation is disabled
On the Ninja V, if you are receiving a 5.9K RAW signal from the S1H you cannot output a signal from HDMI to any other device.
As I mentioned earlier you also have to be aware that if you want to shoot in full-frame and record RAW you can only do that in 5.9K. If you want to shoot 4K ProRes RAW then you are limited to S35 for obvious reasons.
One of the other big issues is that Diffraction Compensation is disabled when you shoot RAW. If you are using a compatible lens that talks to the camera this can be a problem.
Internal Recording 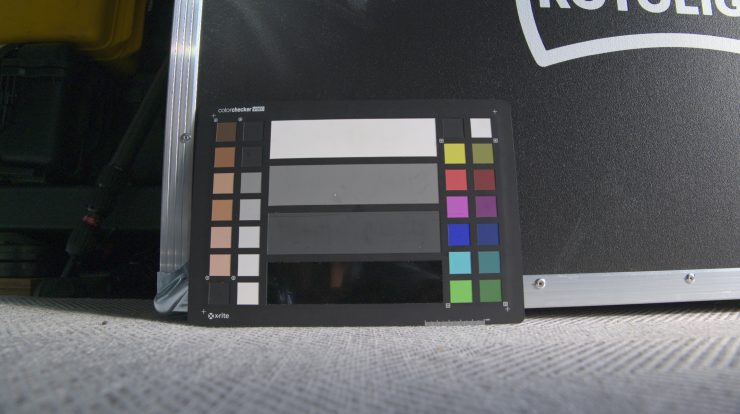
ProRes RAW Recording
Above you can see what happens to the Panasonic 24-105mm F4 lens when you shoot in RAW at 24mm and when you are recording internally. Look how much diffraction you are seeing on the RAW image! You need to be aware of these issues when shooting RAW.
In the real world, I also noticed that the battery life on both the S1H and the Ninja V seemed to be reduced when doing RAW. This is something you will need to take into account.
The S1H now joins the Nikon Z6/Z7
There are now a few cameras that can output a RAW signal over HDMI. The Nikon Z6, Nikon Z7, and Panasonic S1H. Soon you will also be able to record ProRes RAW over HDMI from several of the Z Cam cameras. RAW over HDMI was announced way back in January 2019. It has been a long wait, to say the least.
Whether we will see any other cameras joining this list remains to be seen. Canon has its own Cinema RAW Lite which they are using in cameras such as the upcoming EOS R5.
The implementation of RAW from the Panasonic S1H is a lot better than that of the Nikon Z6/Z7. Recording RAW from the Z6/Z7 personally feels to me almost more of a Magic Lantern firmware hack. With the Z6/Z7 there are so many constraints when shooting ProRes RAW externally. There is still no Nikon RAW to Log conversion available in FCPX!
With the S1H it feels much more like a proper implementation.
ProRes RAW is gaining some traction slowly
ProRes RAW was announced more than 2 years ago and there are still only a handful of cameras that can record it externally. Yes, there are now a few more cameras that can record it externally, but with so many cameras now offering RAW recording internally, ProRes RAW is at a disadvantage.
NLE support has been super slow. A few months ago Apple released ProRes RAW playback for Windows computers. This lets you use ProRes RAW with Adobe, After Effects, Media Encoder, Premiere Pro and Premiere Rush.
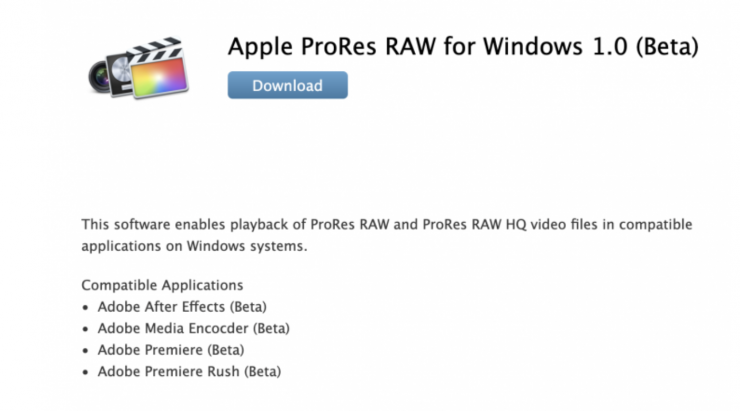
Today Adobe announced ProRes RAW support in Premiere Pro and After Effects that is aimed at creating a comprehensive, cross-platform solution for Apple ProRes workflows from camera media through to delivery.
Now, it is important to note that this ProRes Raw update is only compatible with Nvidia gfx cards if you are using a Windows computer.
The biggest problem with ProRes RAW is that it is never going to have the same industry adoption as ProRes. You can use ProRes in all stages of the production pipeline, from acquisition to post-production, and then for distribution. ProRes RAW is an acquisition codec that can then be edited, but it isn’t something that is ever going to be used as a distribution format.
For ProRes RAW to take off it needs to be implemented internally into cameras, and due to RED’s patents that is unlikely to happen anytime soon with any of the mainstream cameras. Yes, Kinefinity is going to do it with their MAVO Edge, but they don’t sell camera’s within the US, so they are not affected by the patent.
Do you really need RAW?

The answer to this will depend on an individual’s requirements. Not everyone needs to shoot RAW, in fact, a big proportion of working professionals will never get asked to deliver in RAW, but for those who do, it is nice that it can be done over HDMI to a full-frame mirrorless camera.
If you are just shooting in 4K or HD on the S1H then the internal codecs are already very good and outputting RAW may not yeld results that are significantly better given the fact that you have to add an external recorder.
If you want to best possible image quality you can get from the S1H then recording 5.9K ProRes RAW on an Atomos Ninja V is the best way to go. You need to clearly remember that RAW doesn’t magically transform this camera into something it’s not. Look, I get it, it is nice to be able to shoot in RAW, but if you can’t capture quality footage using a good internal codec then RAW isn’t going to save you.
With ProRes RAW you can’t change your white balance or ISO. While having a 12-bit recording is helpful when grading, you won’t get some of the flexibility you get with a RAW format that allows you to make ISO and white balance adjustments. ISO and WB adjustments are the two main reasons you would want to shoot RAW in the first place.
For me personally, I prefer that I’m now able to record a 12-bit image, that is the most important thing.
The biggest caveat, until you can actually edit and deal with ProRes RAW files in most NLE systems, is that there is no point shooting ProRes RAW if you are handing material straight off to a client who isn’t using FCPX or an NLE system that can deal with it. Clients may also not want to shoot 5.9K and they may want 4K full frame and not S35 4K. These are all things you need to consider carefully.
If you are doing your own projects then none of this matters.
RAW is not some magical unicorn
RAW is not going to make you a better shooter. RAW doesn’t line up and compose or light a shot. It is simply an acquisition format, nothing more.
If you think you can just buy a camera and start shooting RAW and everything will look like a Hollywood film you are sadly mistaken.
Final thoughts
The S1H was already a pretty good camera but with the Canon EOS R5 on the way, having the ability to record 5.9K RAW (even if it is externally) will keep it more relevant moving forward.
The 5.9K and 6K internal recording modes on the S1H left a lot to be desired and I found them to be lacking in detail when I reviewed the camera last year. Adding better recording options for 5.9K certainly improves the quality.
I’m personally not a big fan of external recorders. Sure, they were great back in the day when internal codecs weren’t so good, but today so many cameras have good on-board recording capabilities. In 2020, using an external recorder on a camera such a the S1H seems counter-intuitive. However, if you are looking for that bit of extra quality then it is worth using.
The best thing about the S1H is you can just pick it up and use it without having to turn it into a Frankenstein rig. As soon as you have to put a Ninja V on the top, hook up an HDMI cable and then add batteries to power it, you are losing some of that compact form factor. In saying that, it is nice to have the option to record RAW and much better quality 5.9K from the camera if you want to.
At least it isn’t an expensive proposition to turn your S1H into a camera that is capable of shooting 5.9K RAW. While there is a good chance you probably don’t need to be recording RAW, it is nice to know that you can do it for very little additional cost.
ProRes RAW moves the S1H forward in the right direction, but it is more of a jump than a leap.
Please remember that this was a review of beta firmware and not the final finished product.
Like what we do and want to support Newsshooter? Consider becoming a Patreon supporter and help us to continue being the best source of news and reviews for professional tools for the independent filmmaker.