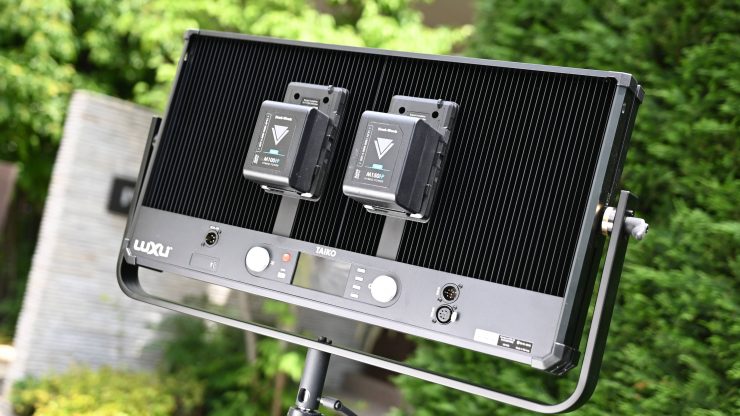
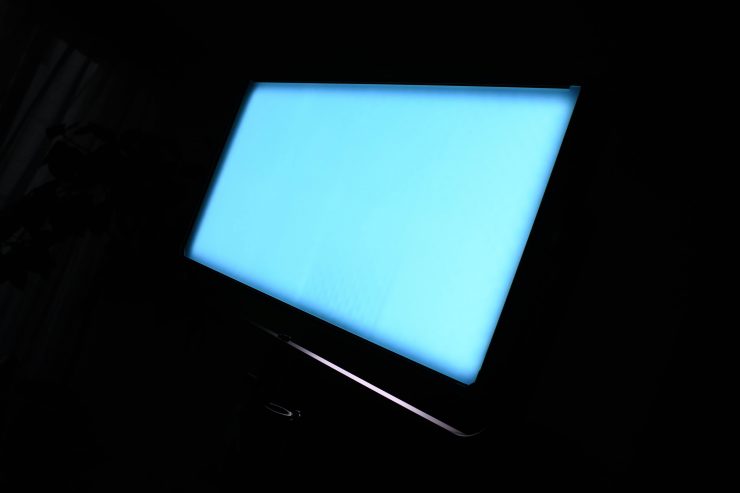
The Luxli Taiko is the Norwegian lighting company’s follow up to the very impressive Timpani that I reviewed on the site back in 2018.
At first glance, the Luxli Taiko 2×1 LED light, named after a type of Japanese drum, looks to be just a larger version of the Luxli Timpani 1×1. That’s not a bad thing. If it ain’t broke, don’t fix it.
We first saw a prototype of the Taiko back at NAB 2019.
The smaller Timpani was the most color-accurate 1×1 light I have tested to date, so I have high expectations for the Taiko.
RGBAW
So what exactly is RGBAW? The “A” and “W” in RGBAW stand for amber and white, 2800K and 5600K color temperature LED’s, respectively. The Timpani mixes the output of these two LEDs to ensure what the company claims create an exact color temperature in CCT mode and accurate color reproduction in Gel mode.
Concept
The concept behind the Taiko was to make a high quality, affordable 2×1 soft lighting source with a decent amount of output. The Takio also had to be able to be run off camera batteries and it couldn’ draw above 250W. It was also important to keep the weight (including the power supply) to under 10kg, and to make the fixture as thin as possible.
Build Quality

I was very impressed with the build quality of the smaller Timpani (considering it only costs $849.99 USD), so I expected the Taiko to be just as well made.
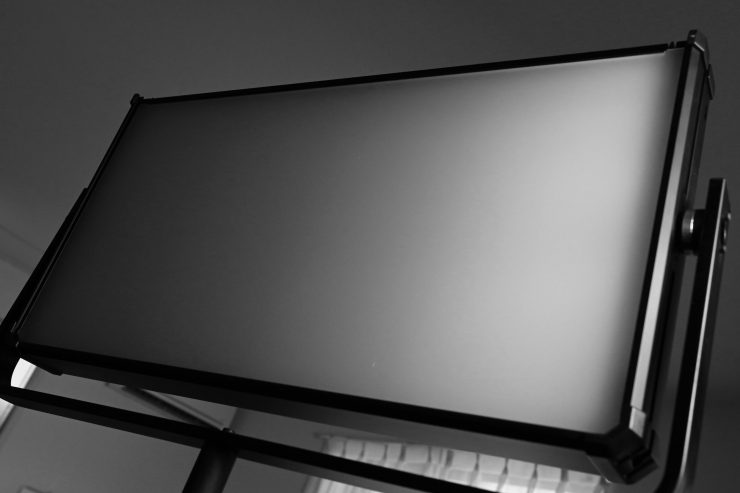
The Taiko is beautifully made and the housing is all aluminum. The back of the fixture is basically one big giant heatsink.
All the buttons and switches have a nice solid and tactile feel.
The power supply does feel a little on the cheap side compared to the rest of the light.
The light is made in Norway and not in China.
Design
As far as the design goes, a 2×1 panel light is always going to look like a 2×1 panel light! There are only so many ways you can design and build one, at least when it comes to the basic shape and form factor.
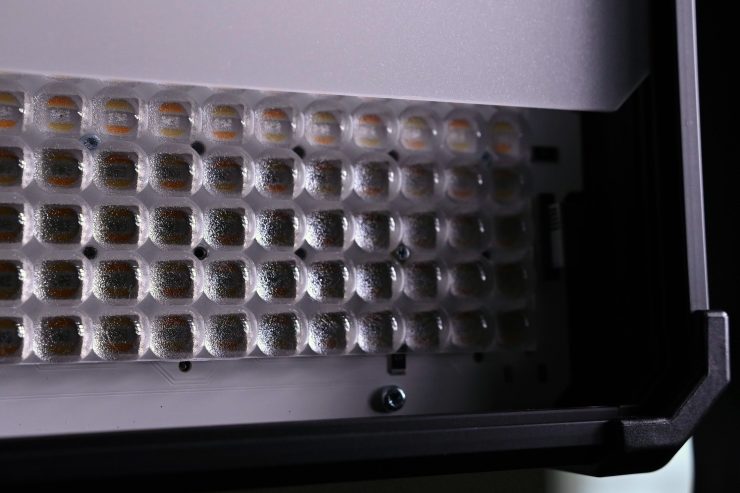
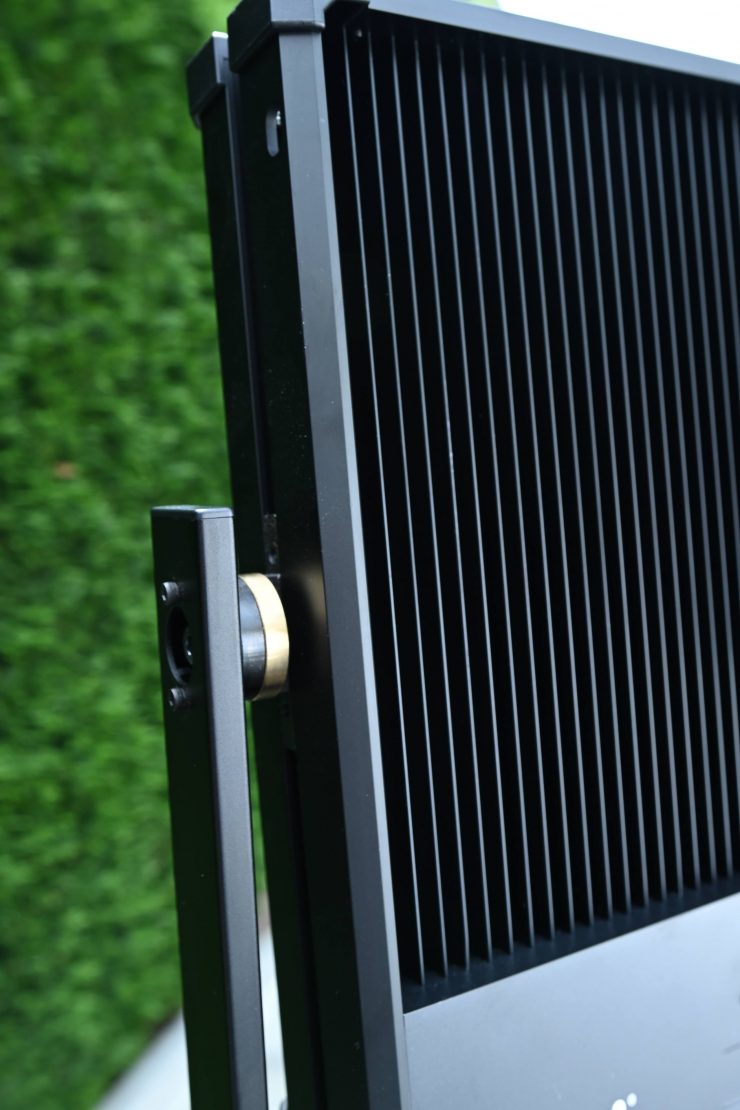
The Taiko is made up of 1568 individual LEDs. These are different LEDs to the ones used on the Timpani.
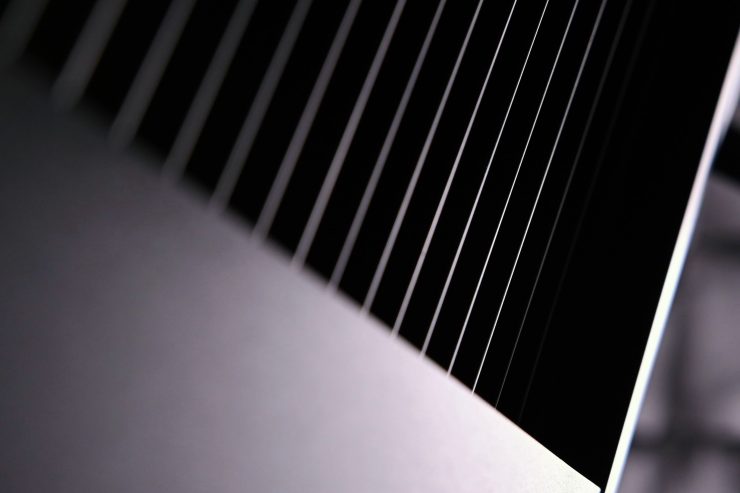
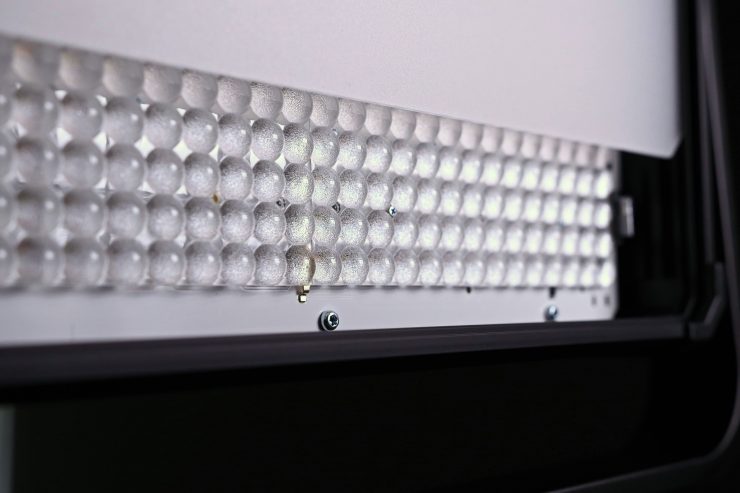
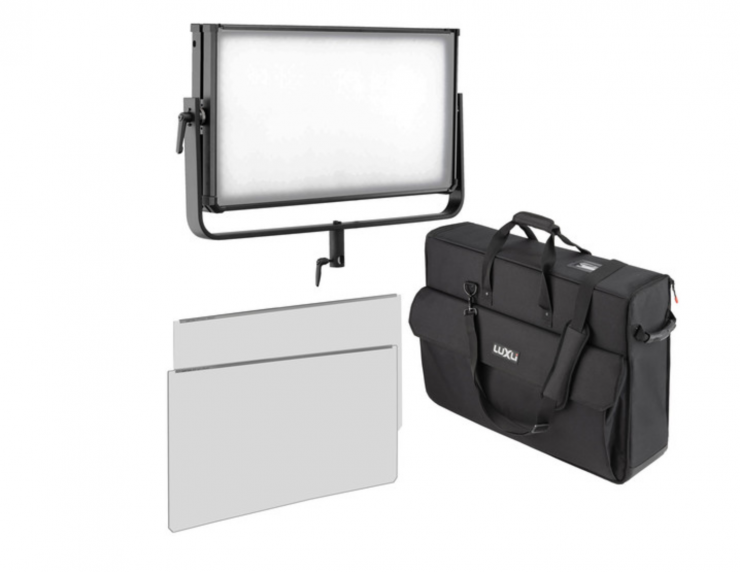
What I also like is the way the Taiko has been designed it allows you to use the light with no diffusion or with three types of diffusion panels that you slide into the front of the light.
The diffusion that came with the Timpani was very light and because of that, the individual LEDs could be seen. This resulted in those hatched style shadows which were not very nice. By including a heavier diffusion as standard on the Taiko, and moving that diffusion slightly further away from the LEDs, the Taiko doesn’t have that problem.

There is groove in the front of the light where the diffusion panel slide in. I wish Luxli had have included two grooves so you could stack diffusion.
While you can sort of stack two lots of diffusion, the top catch that prevents the diffusion from falling out won’t close properly.
As standard, you get a medium diffusion filter with the light, optional heavy, and light diffusion panels are also available. The optional diffusion panels are $99 USD each.
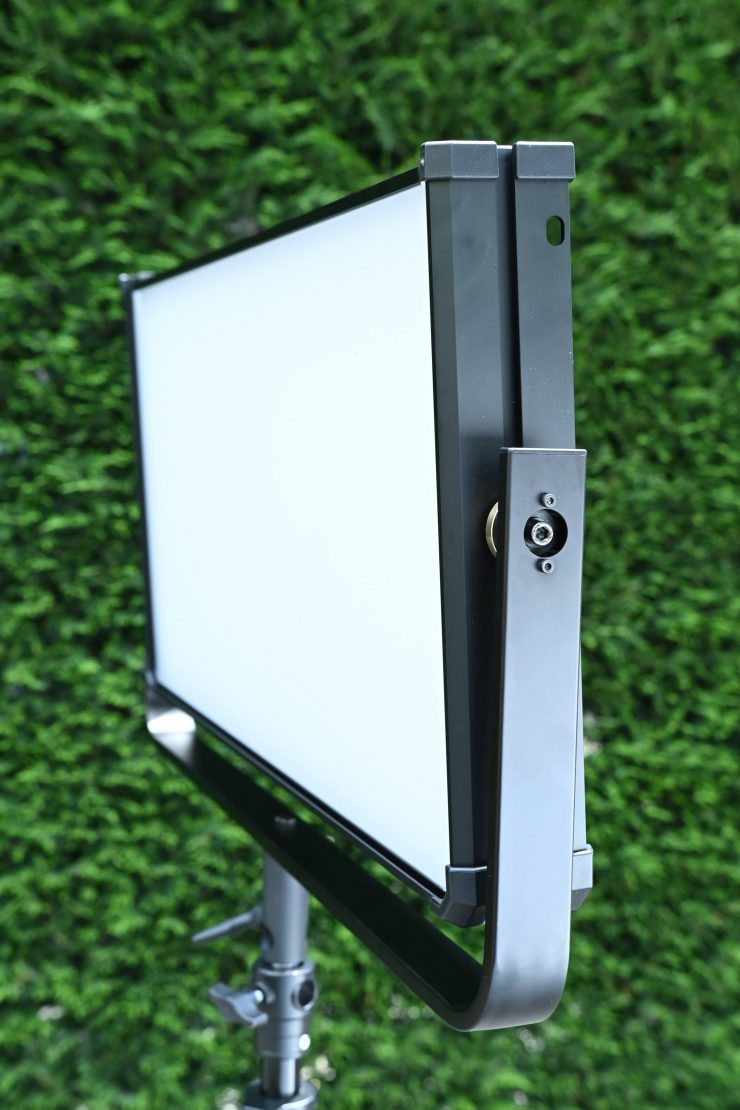
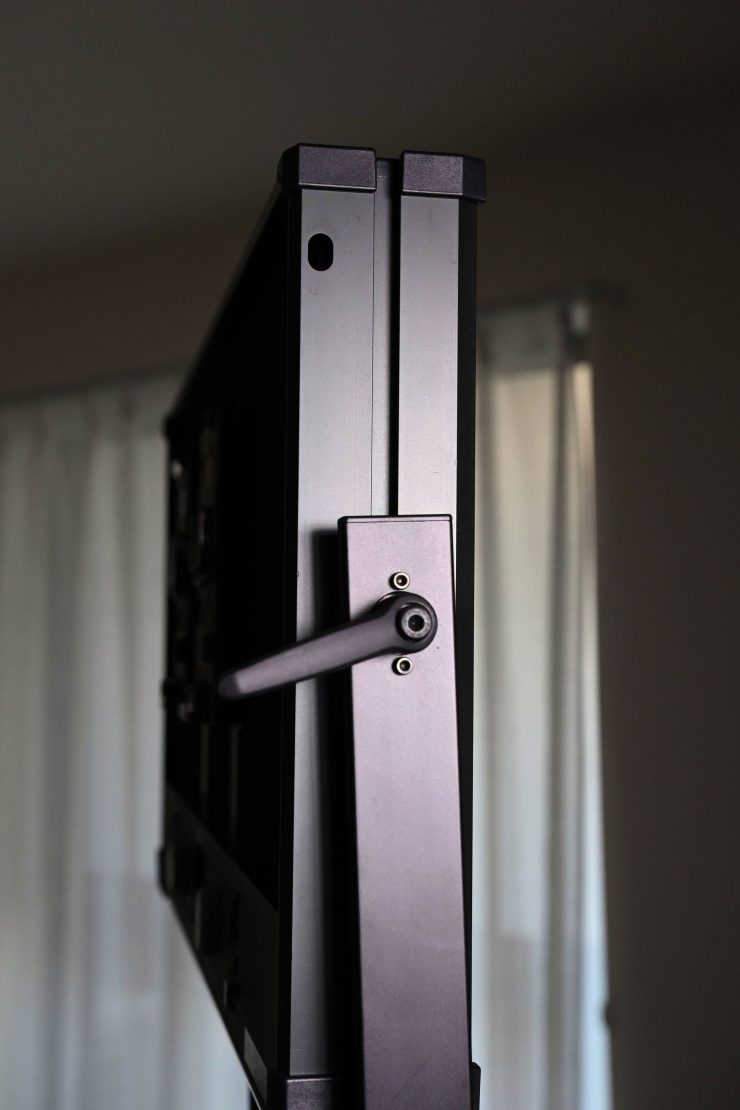
The Taiko is quite understated and Luxli has concentrated on giving it clean lines and a lot of this has to do with how thin the light this. It is not much wider than a AA battery.
The Taiko is only 3″ (7.6 cm) thick. No, that isn’t a typo. This is remarkably thin compared to other 2×1 RGBW lights that are on the market.
| FIXTURE THICKNESS | |
| Luxli Taiko | 3″ (7.6 cm) |
| Litepanels Gemini 2×1 | 6.5″ (16.5 cm) |
| ARRI S60-C SkyPanel | 5.2″ (13.3 cm) |
| Rayzr MC MAX 400 | 3.6″ (9.1 cm) |
| Lupo Superpanel 60 Full Color | 4.3″ (11 cm) |
| Rotolight Titan X2 | 5.9″ (15 cm) |
| Kino Flo Celeb 450Q DMX | 5.0″ (12.7 cm) |
| LEDGO LG-G260 | 5.8″ (14.8 cm) |
Above you can see a comparison between competing 2×1 RGBW fixtures when it comes to how thick they are.
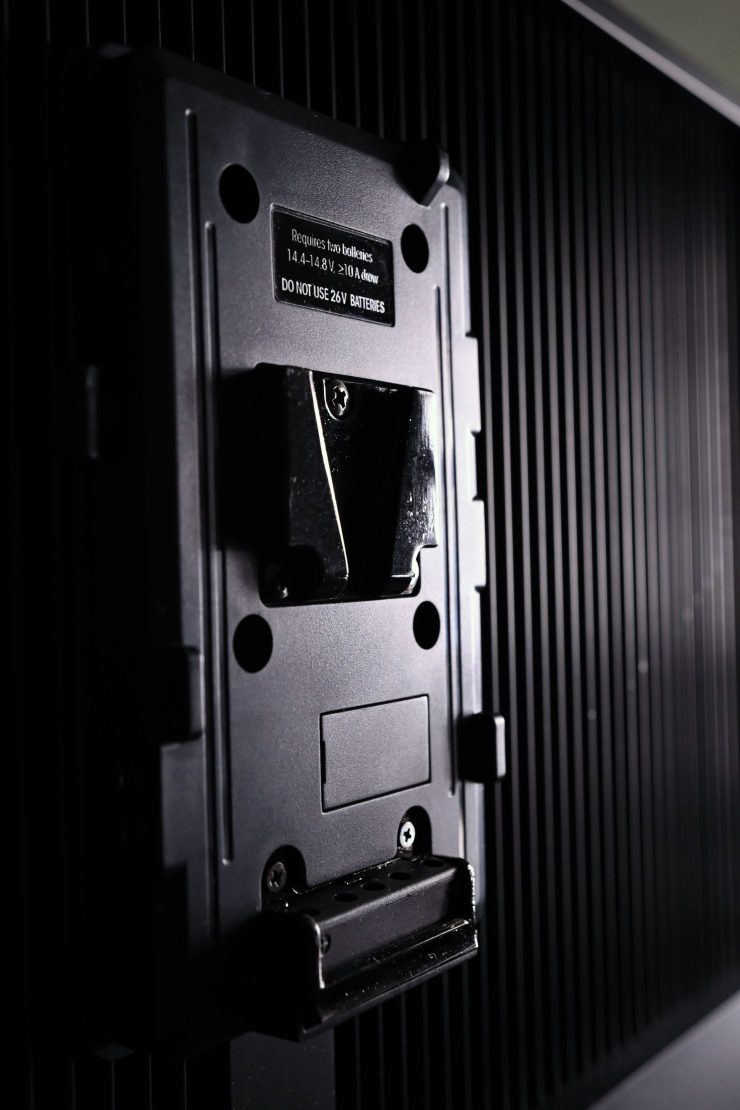
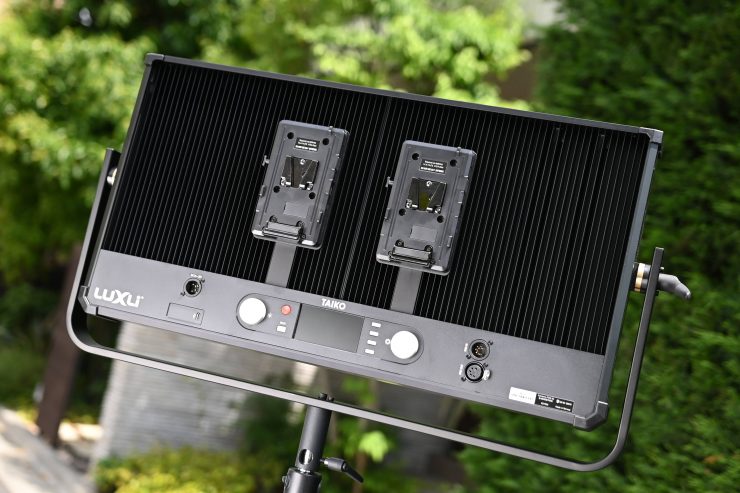
The Taiko uses a separate power supply unit, which is very common for 2×1 sized fixtures. Keeping the power supply off a large light makes a lot of sense. It does, however, mean you have additional cables that you need to use.
In contrast, the Litepanels Gemini 2×1 has a built-in power supply which in some ways is good, because it makes setting up the light very quick. I still think the Rotolight Titan X2 has the smartest solution. It uses a KinoFlo style mounting bracket so you can attach or remove the power supply from the light.
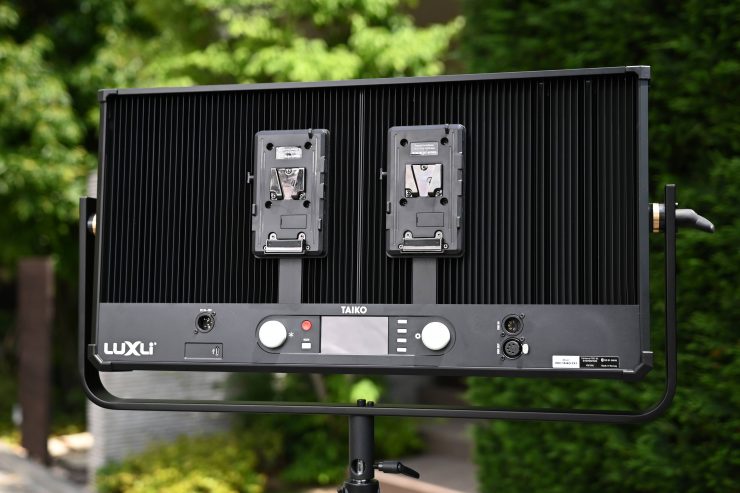
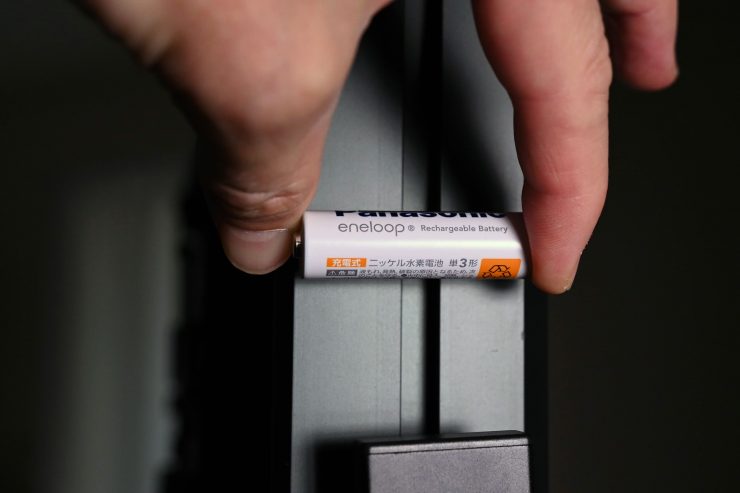
The Taiko also features two built-in V-lock battery plates. This is a nice touch and it means you don’t have to carry around additional plates or accessories to power the light remotely. The Lupo Lupo Superpanel 60 Full Color, Rayzr MC MAX 400, and LEDGO LG-G260 also feature built-in battery plates.
Unfortunately, there are no barn doors available for the Taiko.
Weight & Size
The Luxli Taiko weighs in at 7.60 kg /16.75 lb (Including Yoke) and it has physical dimensions of 27.0 x 17.7 x 3.0″ / 68.6 x 45.0 x 7.6 cm (Including Yoke).
What you also need to factor in is the weight of the power supply, it adds an additional 1.36 kg (3 lb) to the equation. The power supply is relatively light compared to most other 2×1 RGBW power supplies.
At 8.96 kg it is still a heavy light, and you need to be mindful of this weight if you intend on purchasing one. Despite being very thin, the light still carries quite a lot of weight.
So how does this weight compare to some other high output 2×1 RGBW lights? Below you can see:
| Weight | |
| Luxli Taiko 2×1 RGBAW | 8.96 kg (including power supply) |
| Rotolight Titan X2 | 14.3kg (including power supply) |
| ARRI S60-C SkyPanel | 17kg (including power supply) |
| Litepanels Gemini | 10.1kg* |
| Rayzr MC MAX 400 | 8.3kg (including power supply) |
| Lupo Superpanel 60 Full Color | 9kg* |
| Kino Flo Celeb 450Q DMX | 10.89 kg* |
| LEDGO LG-G260 | 11 kg* |
*These lights have built-in power supplies.
The Taiko is a little lighter than some of the other competing lights, and only 660g heavier than the Rayzr MC MAX 400. To be honest, the weight of the Takio is pretty good considering the build quality.
Mounting
The Taiko only comes with a yolk frame, there are no options for other mounting solutions. This is where lights like the Rotolight Titan X2 and Kino Flo Celeb 450Q DMX have an advantage.


The quality of the yolk frame on the Taiko is nice and robust and it locks down securely.
Power Draw
The light draws 250W (nominal), which is quite a lot lower than any other competing 2×1 fixtures. This is 170W less than both the Rotolight Titan X2 and ARRI SC60-C SkyPanel draw.
This gives the Taiko has a big advantage over some of the competing fixtures because you can run it off two flight safe camera batteries at full power. With lights such as the Gemini, Titan X2, and S60-C, you can only run them at around 50-60% output when using batteries.
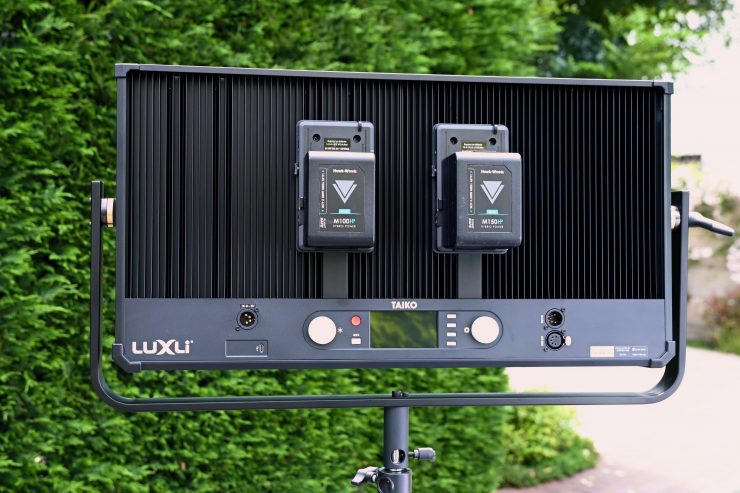
I could run the Taiko at 100% output using 100Wh and 150Wh Hawkwoods Mini V-Lok batteries.
The Rayzr MC MAX 400, LEDGO LG-G260, and Lupo Superpanel 60 Full Color can all be run off camera batteries at full power. The only problem with the Rayzr and Lupo is because they draw 400W you can’t run them off two flight safe batteries.
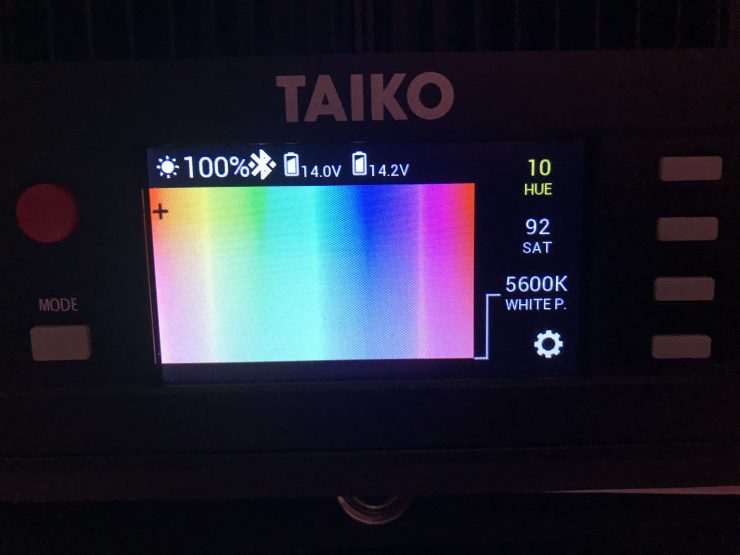
When you are running the Taiko off camera batteries you get a nice power indicator on the display that shows you the voltage of both individual batteries.
So how does the power draw compare to other similar fixtures:
| Power Draw | |
| Luxli Taiko 2×1 RGBAW | 250W (nominal) |
| Rotolight Titan X2 | 420W (nominal) |
| ARRI S60-C SkyPanel | 420W (nominal) |
| Litepanels Gemini | 325W (nominal) |
| Rayzr MC MAX 400 | 400W (nominal) |
| Lupo Superpanel 60 Full Color | 400W (nominal) |
| Kino Flo Celeb 450Q DMX | 255W (nominal) |
| LEDGO LG-G260 | 260W (nominal) |
My only gripe with the power supply is that the lead running from it to the light is too short. This means at normal operating heights the power supply, which weighs 1.3 kg, dangles in the air with all of the weight being transferred to the cable. Luxli should have put a lanyard style hook on the power supply so you could hang it on a light stand.
The other issue is that the power cable that goes from the power supply to your mains plug is also short. These may sound like small gripes, but they affect the overall operating experience and you need to be aware of them.
No fans

The Taiko doesn’t have any fans, instead, it uses a passive cooling system. The whole back of the light is one giant heat sink.
RGBW lights generate a lot more heat than conventional LED fixtures and therefore they need to be cooled. The Taiko doesn’t have fans like most other 2×1 RGBW fixtures I have seen and tested. Because it doesn’t have a fan it certainly does get a lot hotter to touch than some of those fixtures do.
The obvious benefit of passive cooling is there is no noise being generated. This is good when you need to work in situations where critical audio needs to be recorded.
More than just a light
Gone are the days where a light was just a light. A lot of today’s modern lights are now a seamless blend of hardware and firmware.
Having a light that is firmware updateable helps extend its life and adds extra functionality over time.
Controls & Menu System
If it ain’t broke, don’t fix it. Luxli already has one of the best control interfaces on the market so it isn’t any real surprise that they have kept the same system that is used on the Timpani.
Rotolight may have taken the crown with the operating system that is on the Titan X2, but Luxli’s implementation is still pretty good.
While the operating system on the Taiko isn’t quite as good as that of the Titan X2, it is a lot better than all of the other competing lights on the market. Given that the Taiko is less than half the price of the Titan X2, the fact that the operating system is almost as good, is a testament to how well Luxli has designed the light.
If you compare the operating system against 2×1 lights that are priced to compete against the Taiko, such as the Rayzr, Lupo, and Ledgo, the control system is way better.
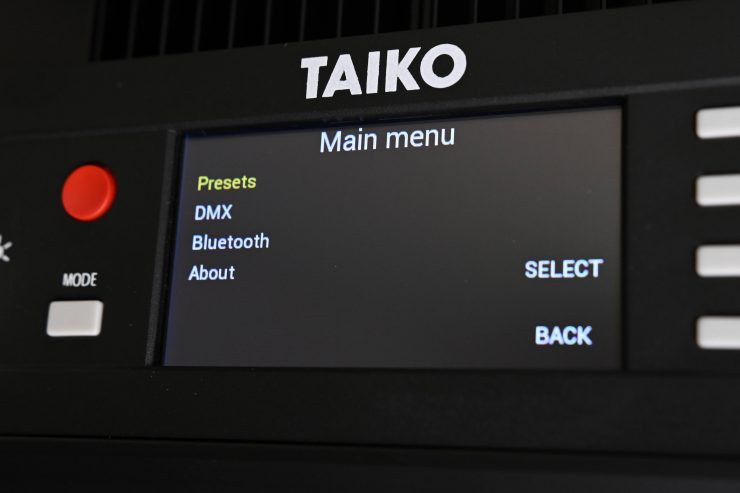
With a good light, you shouldn’t have to read a manual to work out how to operate it. You should be able to turn it on and use it straight away. You won’t find any deep sub-menus or complicated way of making changes on the Taiko.
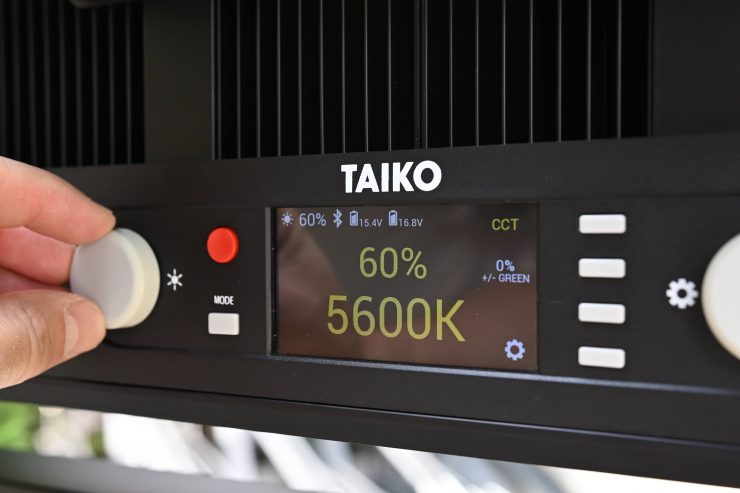
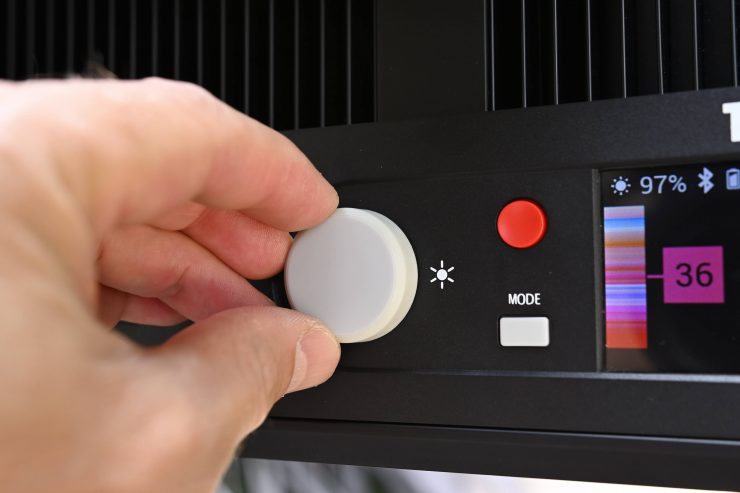
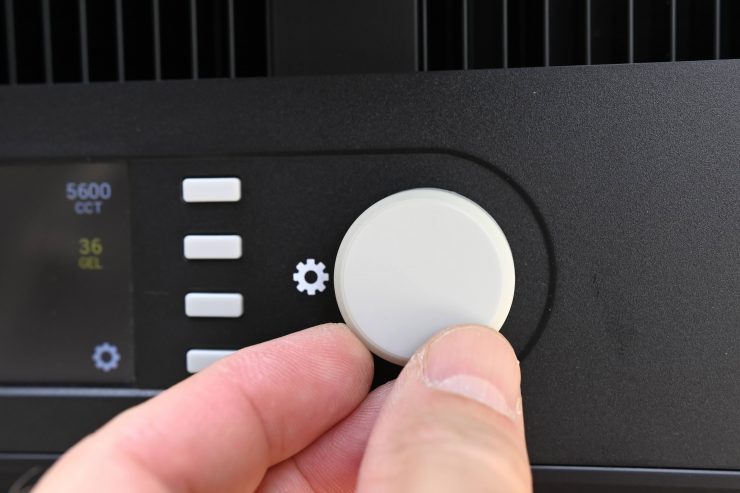

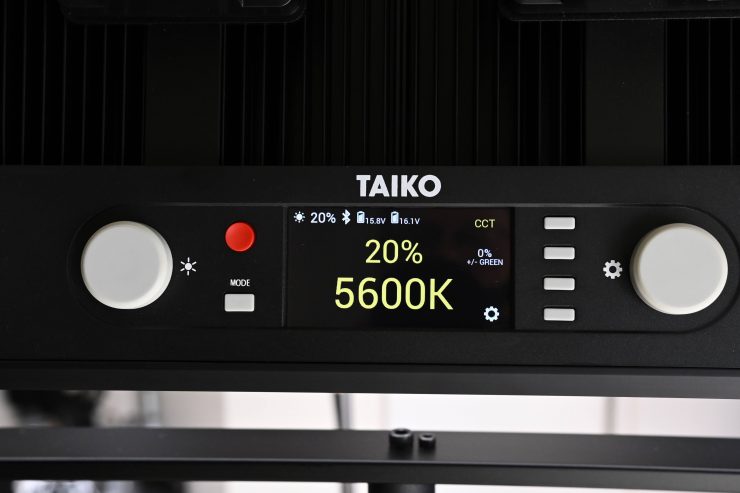
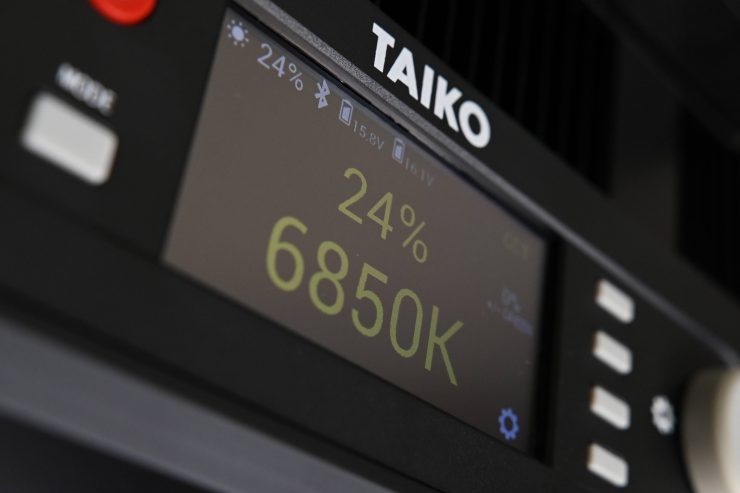
The Taiko uses a combination of dials and buttons, with a nice, large display screen.
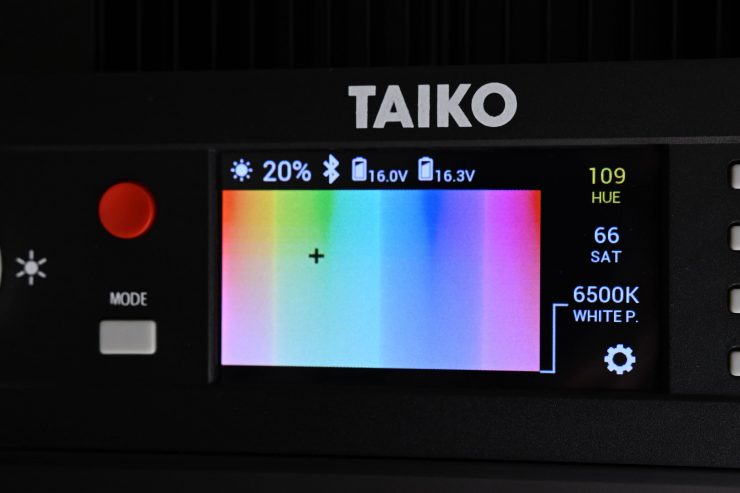
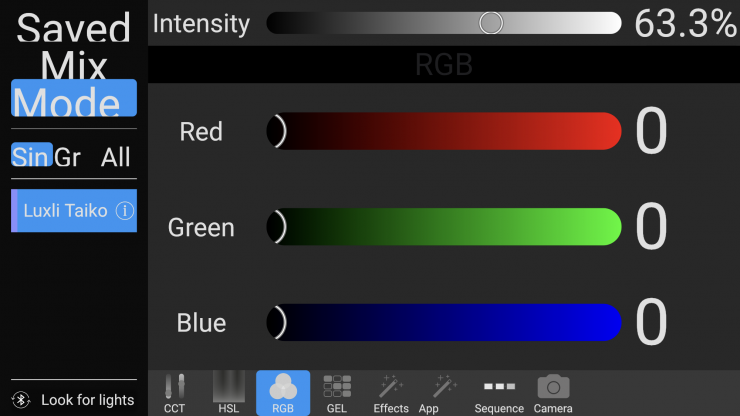
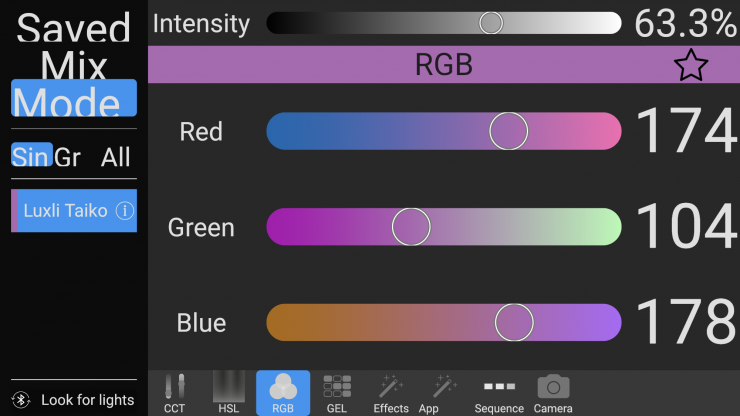
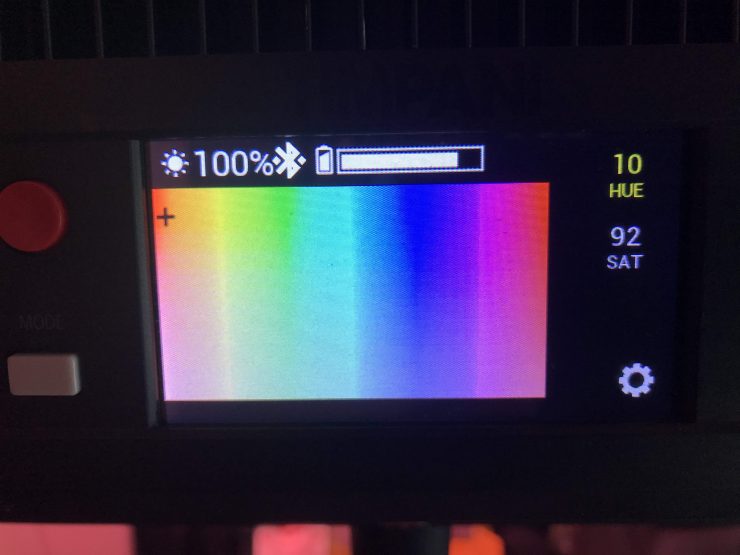
It is pretty easy to make adjustments and changes on the Taiko, and I like how there is a nice big virtual color pallette displayed when you are in the RGB Mode. This makes selecting the color you are are looking to create a whole lot easier.
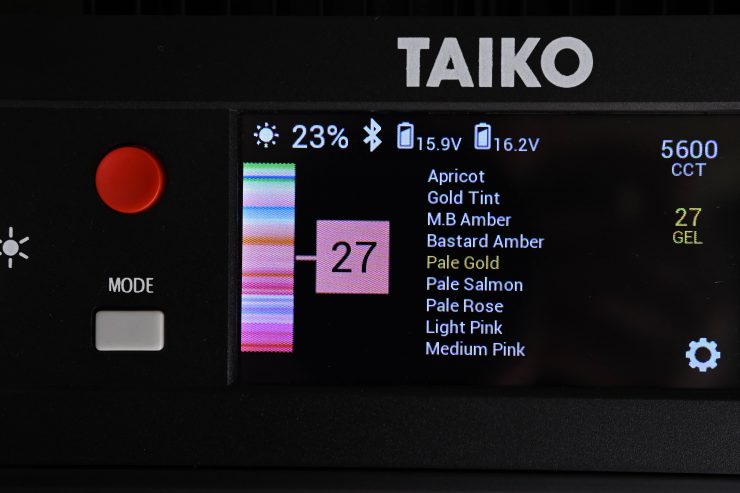
In the Gel Mode, you can also see visual color indicators of the gels you are selecting. This is way better than just having a gel name listed. It allows you to know what type of look that particular gel is going to create.
Operating Modes
CCT Mode
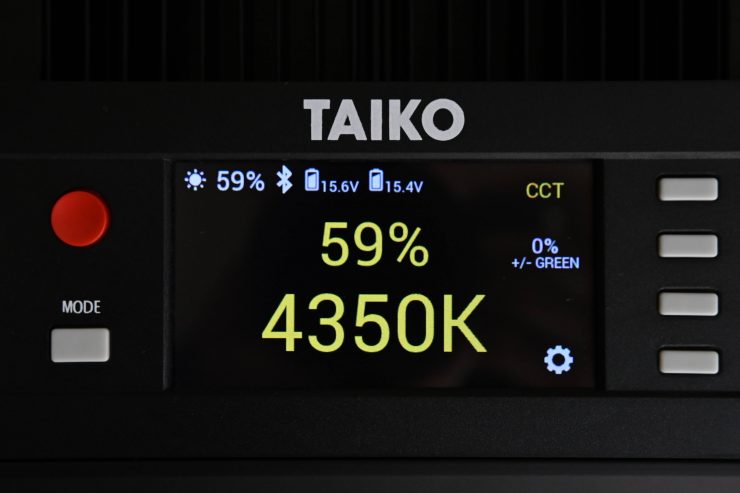
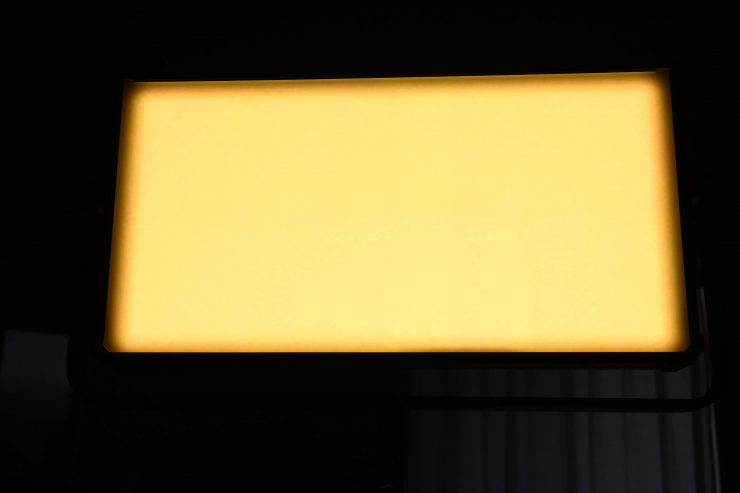
The traditional correlated color temperature (CCT) mode allows you to adjust your color temperature from 2800 to 10,000K in 50K increments. This lets you emulate any lighting condition, from the cool hues of bright sunlight to the warmth of a tungsten bulb.
CCT Mode is the one most users will find themselves using the most often.
Even if you don’t need the RGB color modes, the white light output by the Timpani can be adjusted from 2800K to 10,000K in CCT mode and it has a claimed CRI of 95 and TLCI of 97 at most color temperature settings. The Dimming and color temperature can be adjusted in fine increments, 50K for color temperature, and 1% for dimming.
It’s important to note that when the white-balance temperature is changed in this mode, the temperature in CCT mode is also changed to this temperature setting. If the temperature setting is changed in CCT mode, the Takio will set the same white-balance temperature here.
RGB Mode

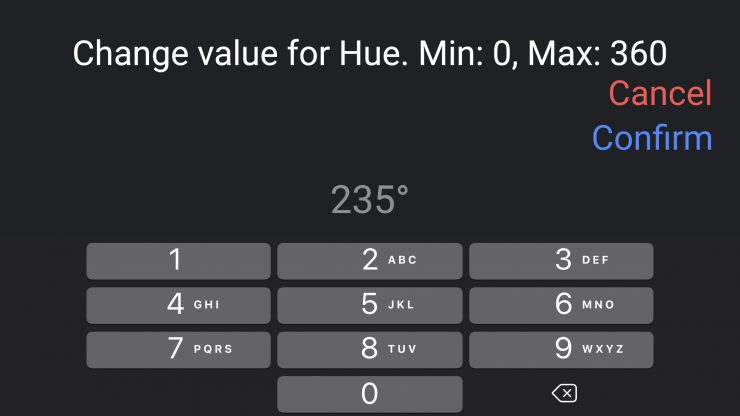
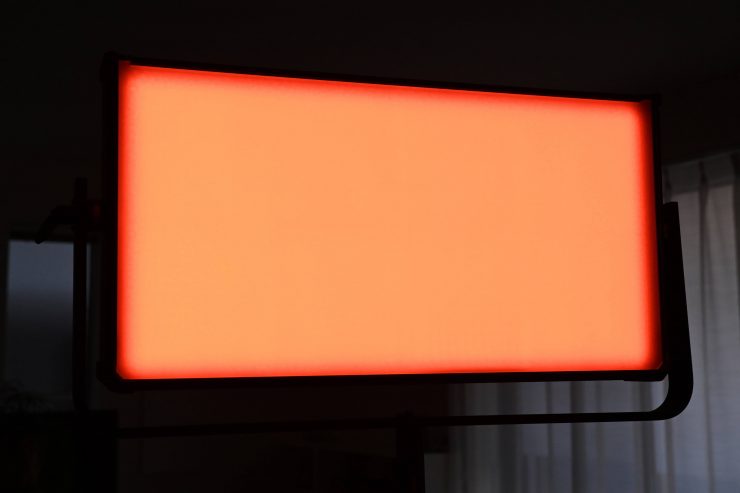
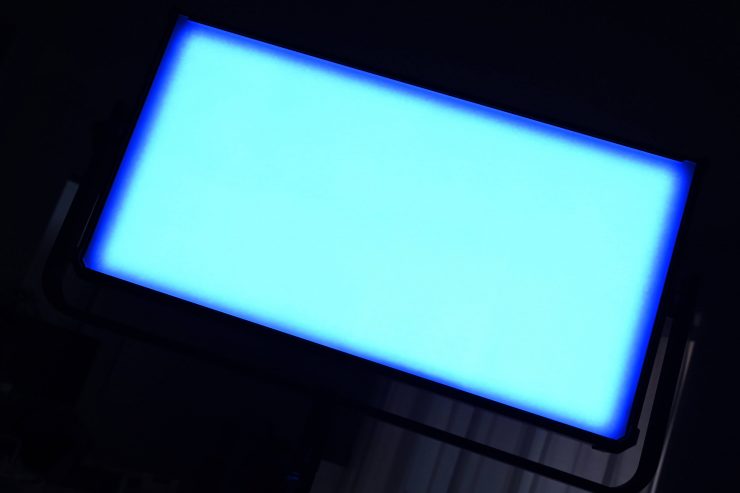
In the RGB Mode, you can scroll through the RGB color wheel in 1° increments. This allows you to dial in nearly any color in the visible spectrum.
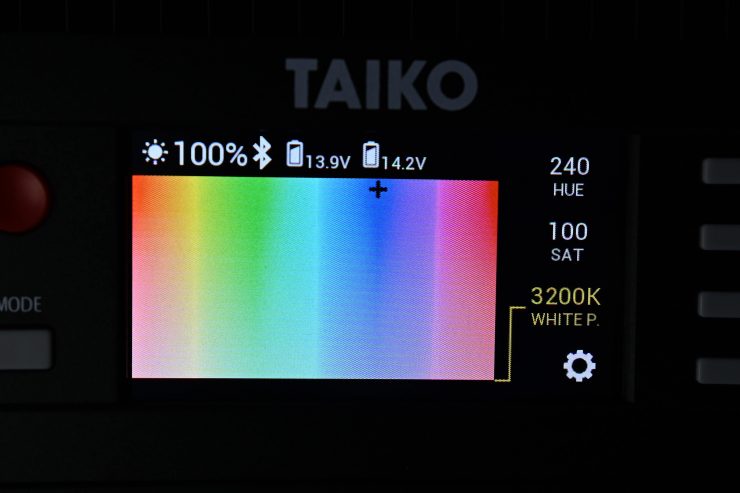
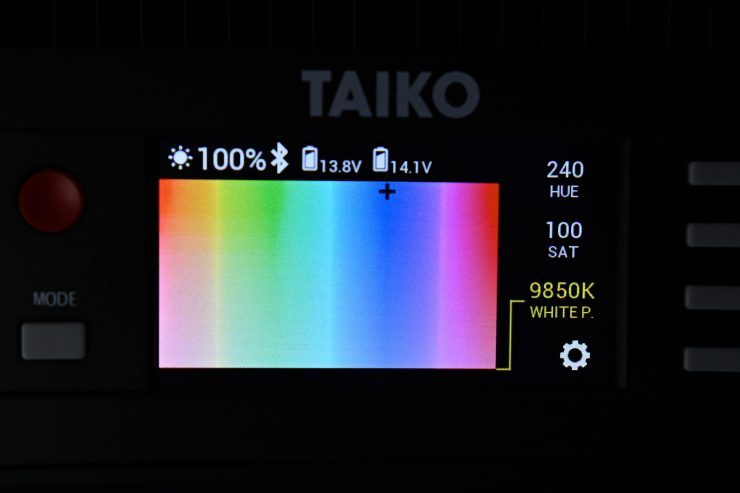
What is very interesting on the Taiko (and you can also do it on the Timpani) is that you can set the White Point in the RGB operating mode. This means if you were working with other lights that were predominantly tungsten, you could set the White Point to match that tungsten source.
You can set the White Point anywhere from 3000-10,000K.
Gel Filter Mode
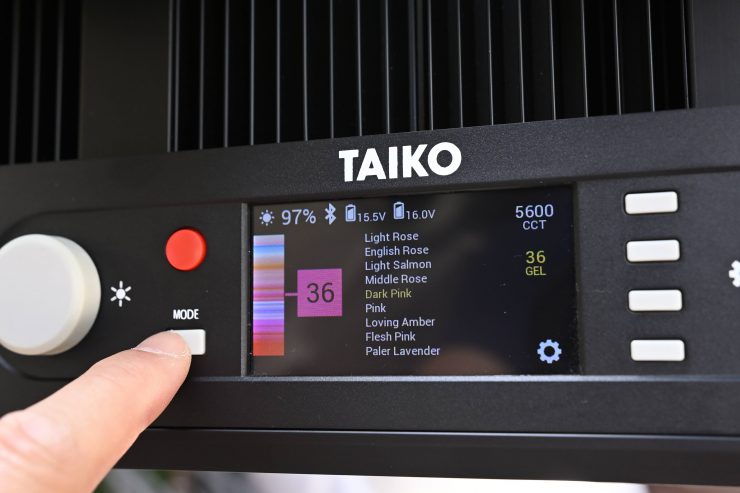
If you select the Gel Filter Mode you can select from up to 150 filters to customize the white light output. Any color temperature available in the CCT mode can be modified by the filter samplings. Included in the filters are useful items such as Chromakey Green and Blue. This filter mode was originally introduced by Luxli in their Cello, but it didn’t have anywhere near the number of filter options that are found in the Timpani and Taiko.
It is very impressive to see so many filters available in the Taiko. There is literally a filter for just about any need you may encounter.
Special Effect Mode
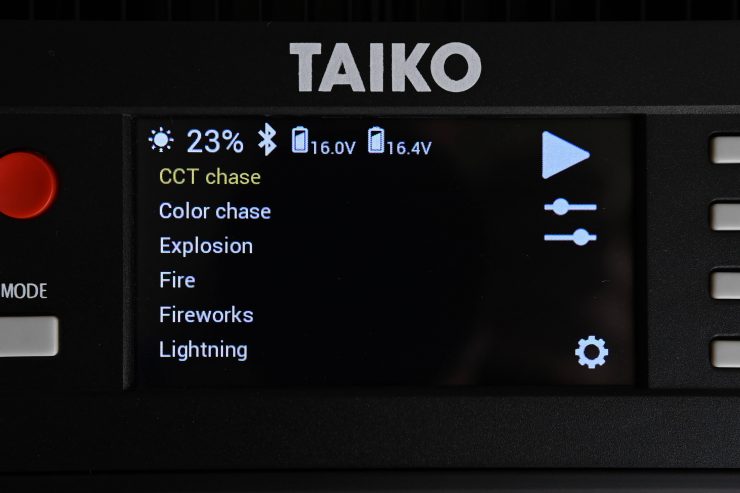

The Taiko also features a range of special effects, from strobing that imitates lightning strikes and explosions to orchestrated timed color shifts and warning lights. Each effect is adjustable in timing and color temperature. These special effects are nice to have, but realistically they are not something most shooters will use that often. If you are interested, you can read what they all do below:
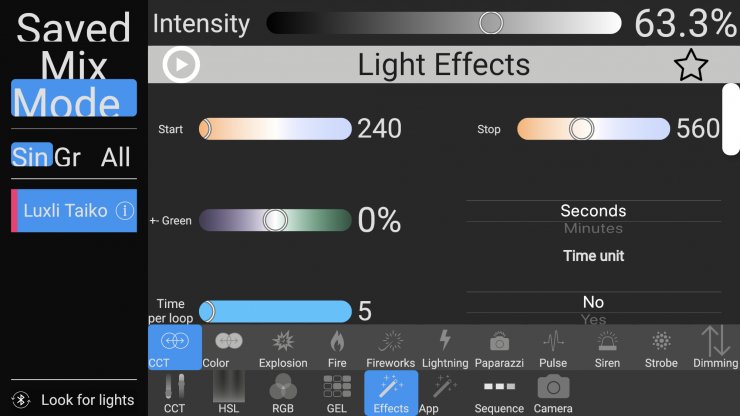
CCT Chase
A continuous loop that changes between two preset color temperatures. Good for simulating a sunrise, sunset, or a change from cloudy to sunny weather in real time. Since the sequence loops, you can shoot multiple takes without reprogramming the light.
CCT Start: Selects the color temperature at the beginning of the sequence (2400 to 10,000 K). CCT Stop: Selects the final color temperature of the sequence (2400 to 10,000 K).
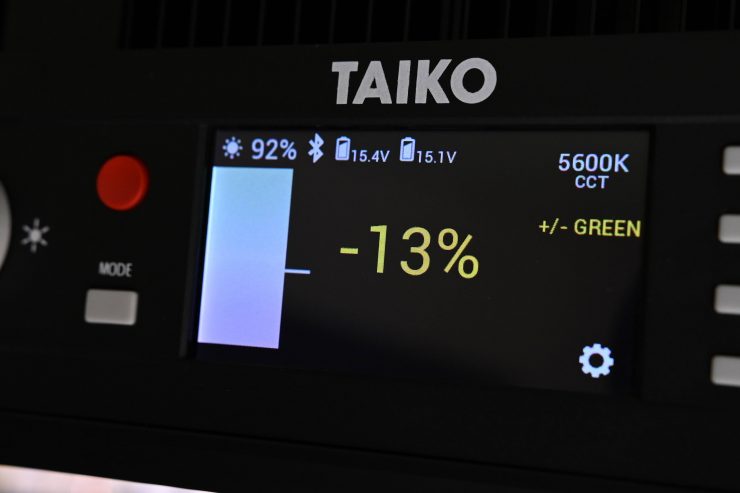
+/- Green: Sets the green/magenta (tint) saturation level in 1% increments from +100% (green) to -100% (magenta).
Time Unit: Select between seconds and minutes for the time loop. Time/Loop: Select how many seconds or minutes the loop will last (1 to 160).
Color Chase
A continuous loop that moves through the color wheel between two selected colors. Since the sequence loops, you can shoot multiple takes without reprogramming the light.
Hue Start: Selects the color at the beginning of the sequence (0° to 360°).
Hue Stop: Selects the final color of the sequence (0° to 360°).
Saturation: Determines the color intensity from 100% (full color) to 0% (white light). Time Unit: Select between seconds and minutes for the time loop.
Time/Loop: Select the duration in seconds or minutes for each loop (1 to 160).
Explosion
Simulates the light from explosions. The Timpani generates random-length pulses and strobes within a range of the red to amber section of the color wheel.
Explosions/Minute: Sets how many separate explosions occur each minute (1 to 360). Duration (%): Set the percentage of time the light is illuminated for each pulse or strobe
(5% to 95%).
Fire
Simulates the light of a candle, campfire, or bonfire in various wind conditions. Fire Type: Select candle, campfire, or bonfire.
Wind Type: Select between no wind, breeze, windy, or storm.
Fireworks
Simulates the light from fireworks. Colors and timing of each flash are random. Explosions/Minute: Sets how many flashes will occur per minute (1 to 50).
Duration (%): Determines the percentage of time the light is illuminated in each cycle. Select from a range of 5% (shortest duration) to 95% (longest duration).
Lightning
Simulates lightning by creating random short and long bursts.
CCT: Selects the color temperature of the lightning flashes (3000 to 10,000 K) in 50 K increments. Interval(s): Sets the interval of seconds between lightning flashes (1 to 60).
Paparazzi
Simulates the random firing of multiple camera flashes.
Intensity: Higher intensity increases the number of random flashes per second (0 to 100).
Bulb Type: Determines the length of each flash. Slow is the longest duration. Modern is the shortest duration. Choose from Slow, Medium, Fast, and Modern.
CCT: Sets the color temperature of the flashes from 2800 to 10,000 K+/- Green: Sets the green/magenta (tint) saturation level in 1% increments from +100% (green)
to -100% (magenta).
Pulse
Offers a steady pulse at a programmable rate. Similar to the Strobe special effect (below), but the light fades on and off.
Hue: Selects the light color (0 to 360).
Saturation: Determines the color intensity from 100% (full color) to 0% (white light). Pulses/Minute: Sets how many times the light will pulse each minute (1 to 200).
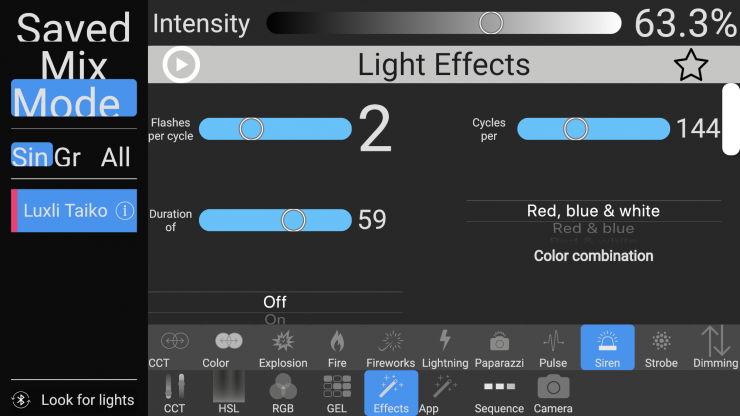
Siren
Simulates the flashing lights of an emergency vehicle, like a police car or ambulance.
Colors: Select the color combination of flashing lights. Choose red, blue, and white; red and blue; red and white; blue and white; blue; red; or SAE Amber.
Flash/Cycle: Set the number of times each individual color will flash within the cycle. Choose from 1 to 4 times per cycle.
Cycles/Minute: Determines how many repetitions of the cycle will occur each minute. Choose from 10 to 360.
Duration (%): Determines the percentage of time the light is illuminated in each cycle. Select from a range of 10% (shortest duration) to 90% (longest duration).
Strobe
Offers a steady flashing light at a programmable rate.
Hue: Selects the light color (0 to 360).
Saturation: Determines the color intensity from 100% (full color) to 0% (white light).
Frequency: Changes the number of flashes per second (1 to 25).
Duration (%): Determines the percentage of time the light is illuminated in each cycle. Select from range of 10% (shortest duration) to 90% (longest duration).
Control green and magenta color shifts

The Taiko lets you adjust +/-green values from 0-100%. This is an incredibly useful feature that lets you get rid of color casts and makes it easier to match other lights that you may be using. If you are using lights from different manufacturers they are all going to behave differently. By being able to offset green or magenta you can get the Taiko to closely match another source. For instance, if you happen to be shooting in an office building with overhead fluorescent lights, they may well have a color cast, if you can’t turn them off, you may want to replicate that same look with the Taiko. By playing with the +/-green values you can.
Unlike some other lights that have +/- green adjustment, on the Taiko, you aren’t limited to a certain amount of adjustment. The Timpani lets you go from -100% to +100%.
The only negative aspect about the way Luxli has set up the +/-green values is that they have chosen to use values in a percentage form and not in the normal CC values you find in a lot of cameras and some other lights.
Pick your color and conduct an orchestra
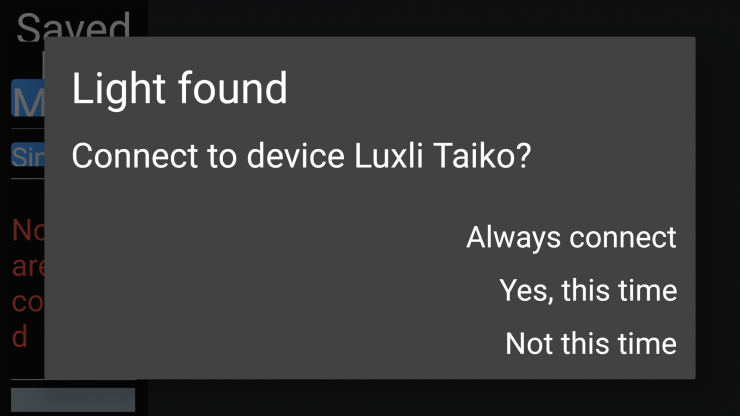
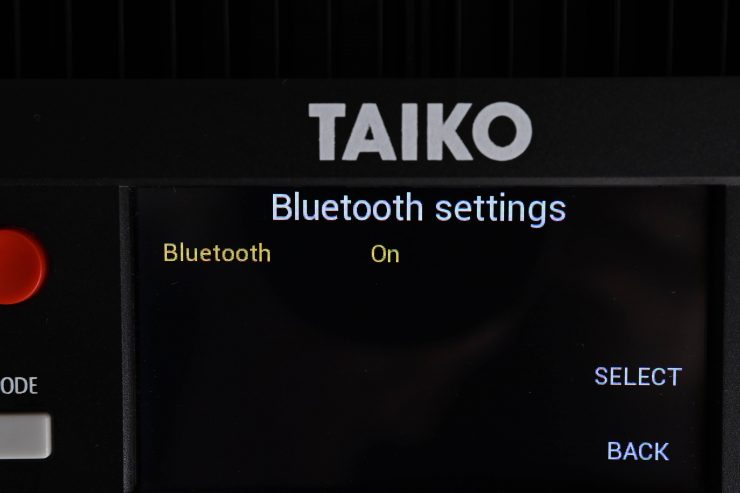
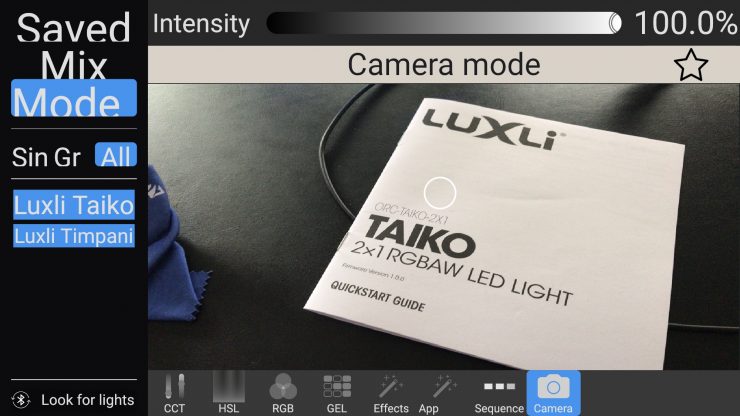
Luxli has a fantastic app that lets you control any of their lights. Any changes made on the app are sent to the Taiko via Bluetooth at a distance of up to 30′ (9.14 m) away.
The Luxli Conductor app, is available on both iOS & Android devices.
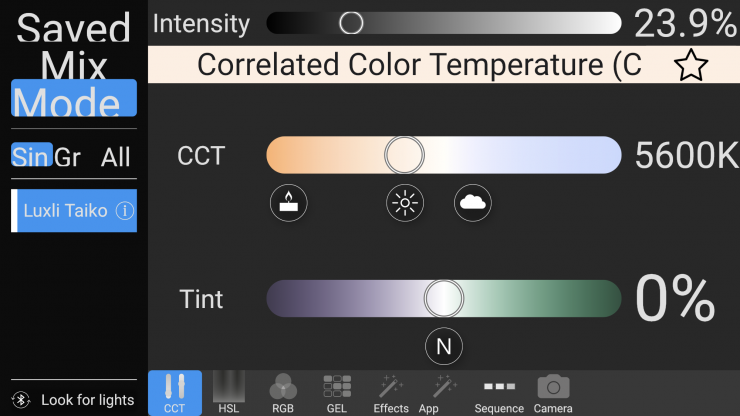
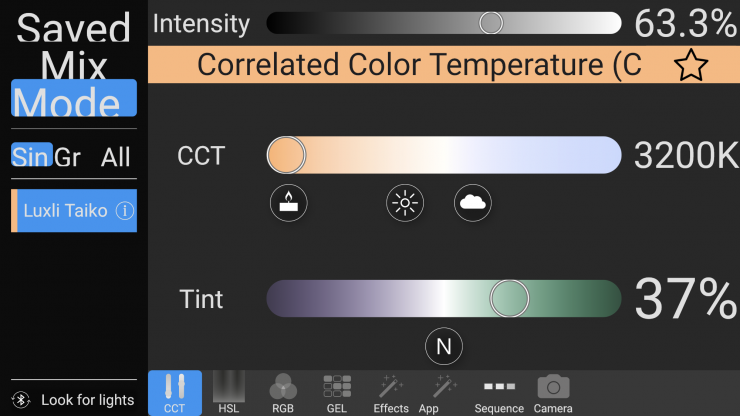
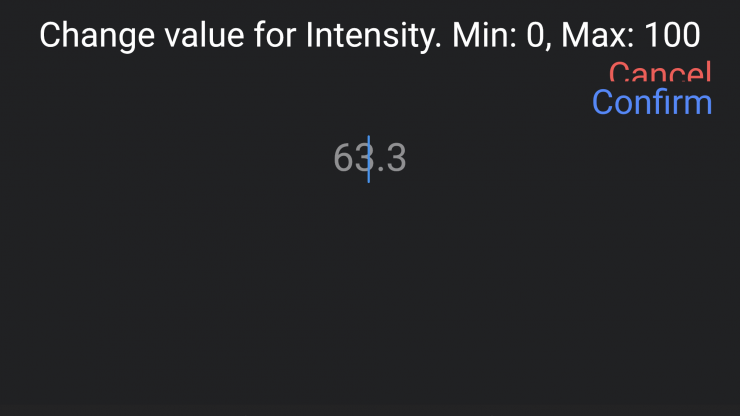
In CCT Mode, you have full control over your Kelvin color adjustment and output, as well as being able to make +/- Green adjustments.
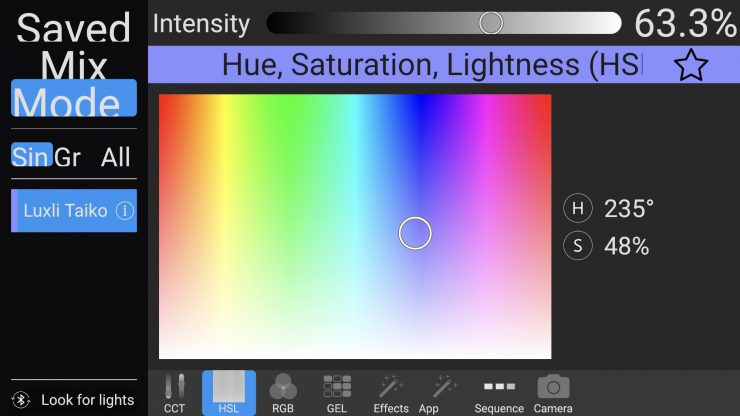
In the RGB Mode, any color on the color wheel can be selected with 1° increments. Saturation can also be controlled to mix the desired color with white light. sent to the Taiko via Bluetooth at a distance of up to 30′ (9.14 m) away.
In the HSI Mode, you can individually select the RED, Green, and Blue channels and make adjustments.

In the Gel Mode, you can select any of the available gels that are found in the light’s extensive catalog.
In Effects Mode, you can select and adjust a wide array of special effects.
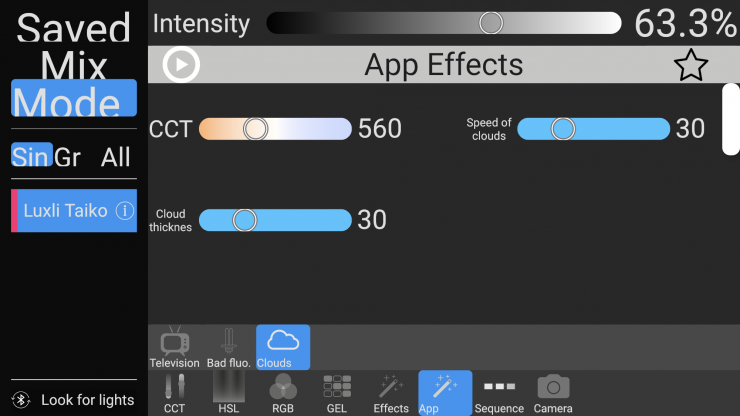
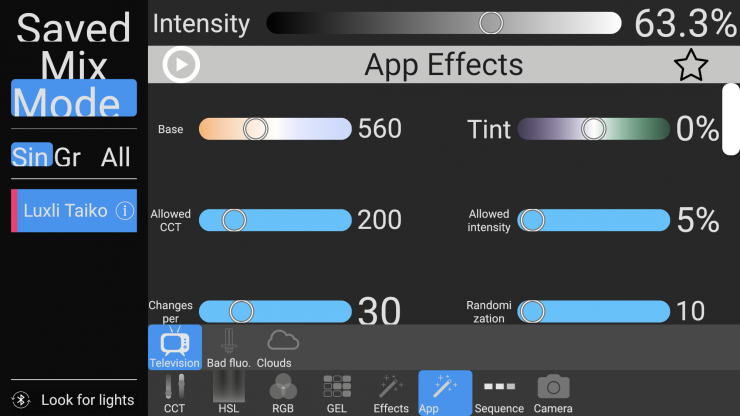
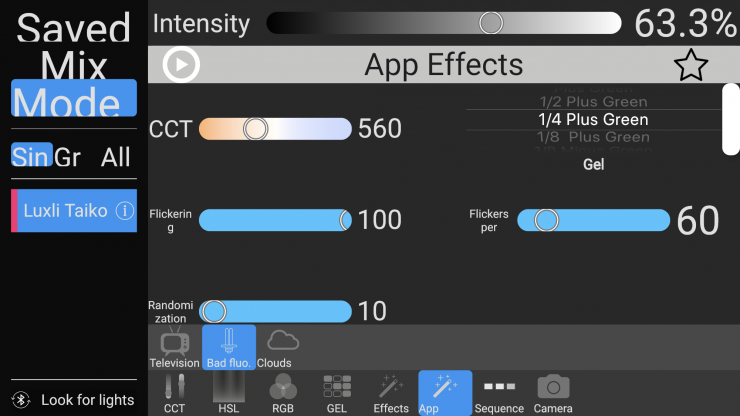
In App Mode, you can make adjustments to three effects called Television, Bad Fluro, and Clouds.

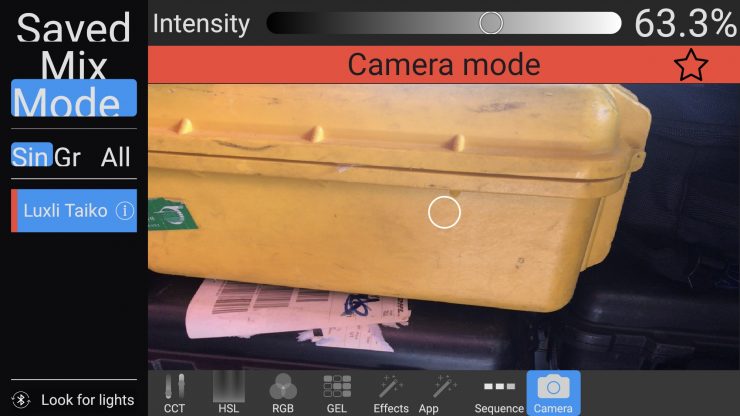
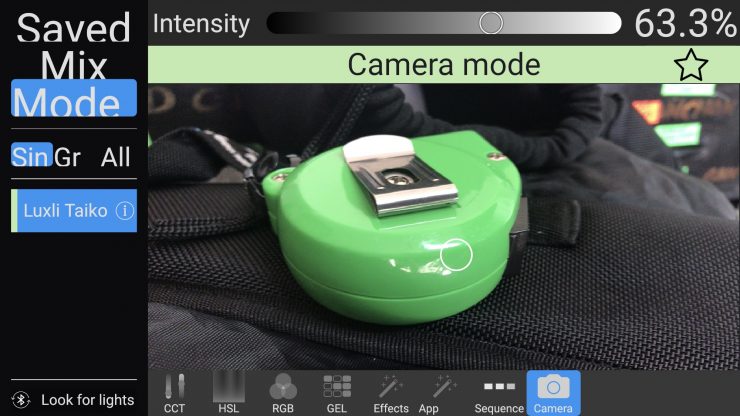
The Camera feature can be used to match any color that you frame up with your camera on a tablet or smartphone. This has been a feature on the Timpani since 2018. This is like a virtual eye dropper. You frame up a color with your camera and then touch the screen and then the light will attempt to replicate that color. It works better with some colors than others.
What I will say is that if you are using multiple Luxli lights you can get them to create identical colors.
As this feature only works when the lights are in the HSI mode you can’t use it to try and create white light. I captured a white object using the app, but the lights couldn’t replicate it. The Kelvin color temperature reading of the white object was 5351K 0.2M. When I measured the Taiko I got a reading of 16126K 9.2G!
The app is nice because it uses Bluetooth and not Wi-fi, so you don’t need to join any networks. All you do is launch the app once the light is turned on and it automatically finds your light and gives you connection options.
You can also combine multiple Luxli lights and synchronize them to operate all at once. You can make changes on one light, which will then be reflected on all of the other connected lights. The Taiko can also be controlled via DMX.
For me personally, the ability to be able to control all of these aspects of the light from a smartphone or a tablet is a big deal. It lets me make adjustments to the light while I’m still standing behind the camera so I don’t need to go over to the light, adjust it, and then walk back to the camera to see how it looks.
It also makes controlling RGB modes so much easier as it displays your color palette in a simple, clear interface. Some other RGB lights only show values for red, green, and blue and you have no idea what sort of color you are really creating without making an adjustment and then seeing how it looks. Luxli has taken the sometimes complicated and made it simple.
Saving Presets
You can save your CCT, RGB, Filter, and Special Effects mode settings as presets, and these settings can be recalled from the presets menu. The Taiko allows you to save four presets per mode.
DMX
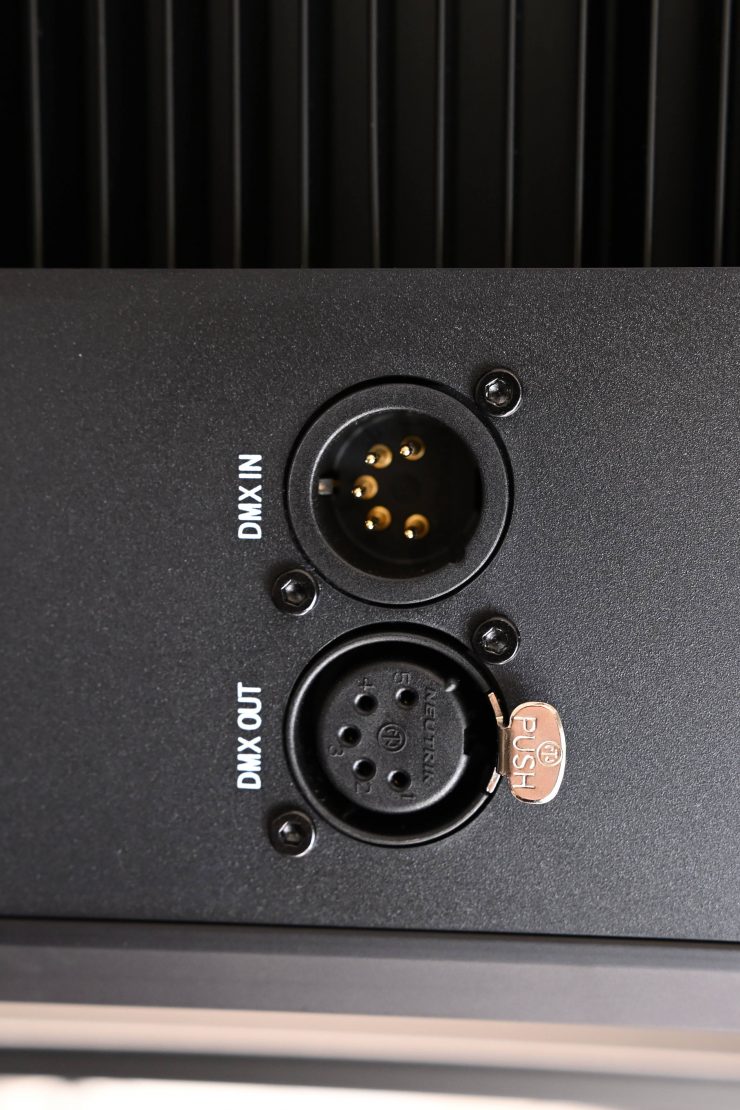

The Taiko offers 8-bit and 16-bit modes. The 8-bit modes should be used with basic DMX controllers such as dimming consoles. 16-bit modes are best for use with virtual DMX control from a computer or advanced 16-bit DMX controllers.
DMX Modes for the Taiko include:
CCT mode: ( 8 bit and 16 bit) Corresponds to the CCT mode described above. The DMX controller can adjust the color temperature from 2800 to 10,000 K and set the green/magenta saturation level.
HSL mode: ( 8 bit and 16 bit) Corresponds to the RGB mode described above. This mode controls the hue and saturation levels. The DMX controller can scroll through the entire color wheel in 1% increments.
GEL mode: ( 8 bit and 16 bit) Corresponds to the Filter mode described above. GEL mode allows the DMX controller to apply any of the 150 preset colored gels to any CCT setting.
Beam Angle
The Luxli Taiko has a beam angle of 76 degrees (with medium diffusion). This is quite narrow for a 2×1 fixture.
Below you can see what the beam angle is of other competing lights:
| Beam Angle | |
| Luxli Taiko 2×1 RGBAW | 76 degrees (with medium diffusion) |
| Rotolight Titan X2 | 68 degrees to 150 degrees |
| ARRI SkyPanel S60-C | 115 degrees |
| Litepanels Gemini 2×1 | 93 degrees |
| Razyr MC MAX 400 | 120 degrees |
| Lupo Superpanel 60 Full Color | 115 degrees |
The Rotolight Titan X2 has by far the most flexible beam angle. With lights such as the ARRI SkyPanels, you can put accessories such as honeycomb grids, benders, and intensifier panels that will change the beam angle.
Photometrics

So now let’s get to the photometric results. I always test lights in this way so that I get a reference to how they compare to other fixtures. Results only tell part of the story and should never be used alone to judge a light. I have found from extensive testing over the years that certain lights that have good photometric results don’t always look good, and lights that have worse photometric scores can sometimes look better than their results indicate.
Different lights can also look different depending on what camera you happen to be using.
In a nice touch, every Taiko light comes with its own individual photometric results. Not many companies do this and it is nice to see that Luxli does. It shows attention to detail and that lights are not just pushed off some assembly line and thrown in a box.
Output & Color Temperature Accuracy
I tested the Luxli Taiko at a variety of Kelvin color temperatures with a Sekonic C-800 Spectrometer to find out how much output the light had and how accurate the Kelvin color temperature reproduction was.
Look, it is always nice to have lights that have additional modes and features, but let’s face it, we all want a fixture that can create nice white light.
I tested the light with no diffusion, light diffusion, medium diffusion, and heavy diffusion
All readings are taken at a distance of 1m (3.28ft) in a controlled environment.
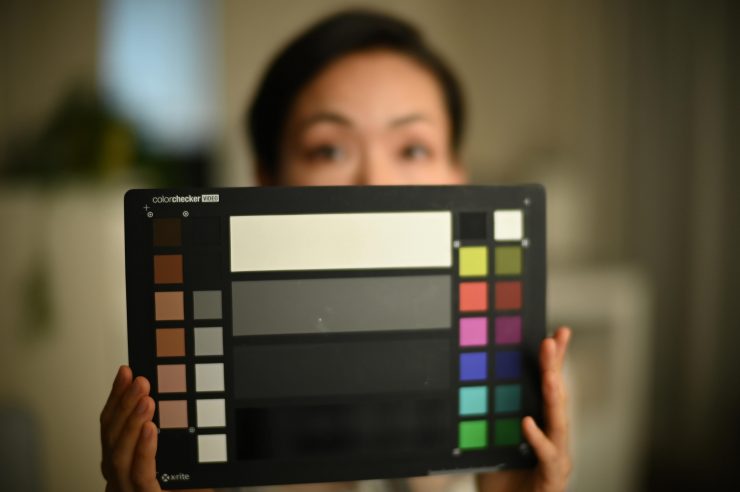
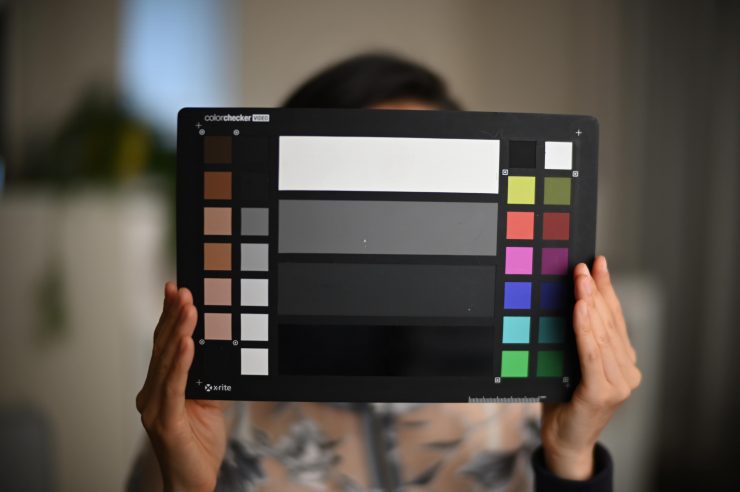
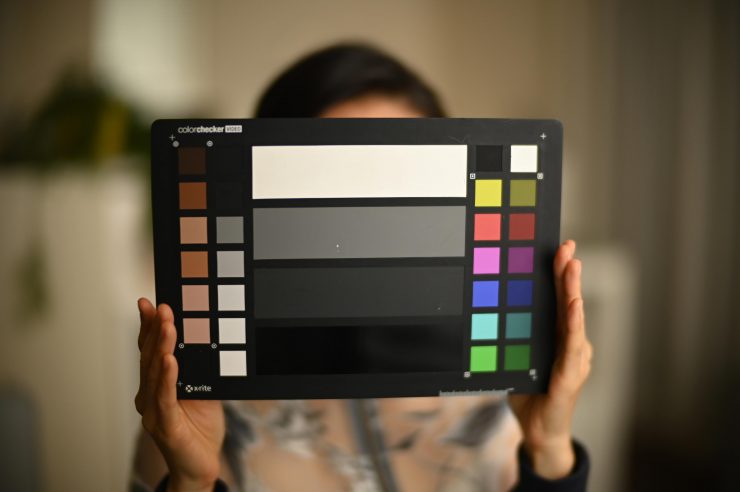
5600K (medium diffusion panel)
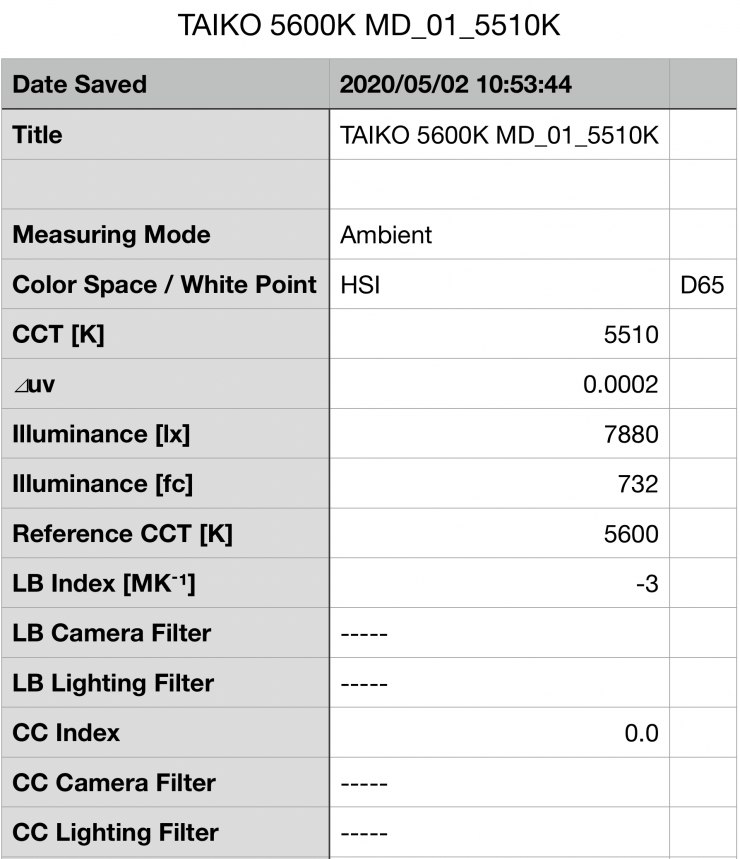
I tested with the medium diffusion panel first, because this is how the light comes as standard. Above you can see the Taiko recorded an output of 7880 lx (732 fc) when set at 5600K and run off mains power.
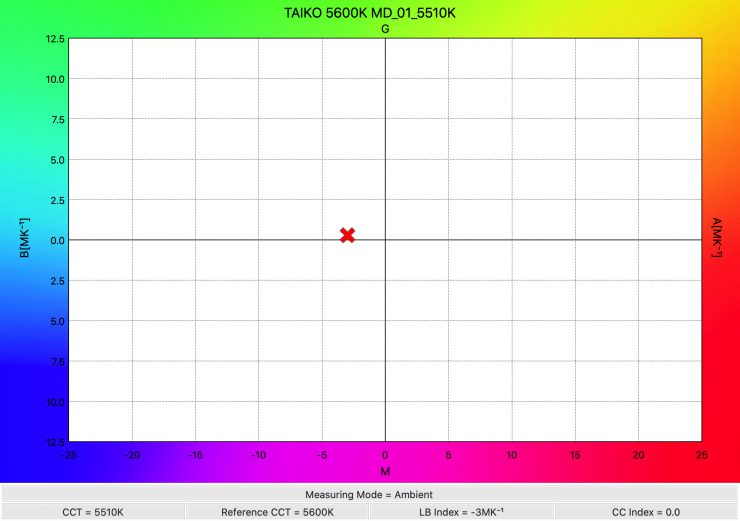
The light recorded a Kelvin color temperature reading of 5510K which was very good.
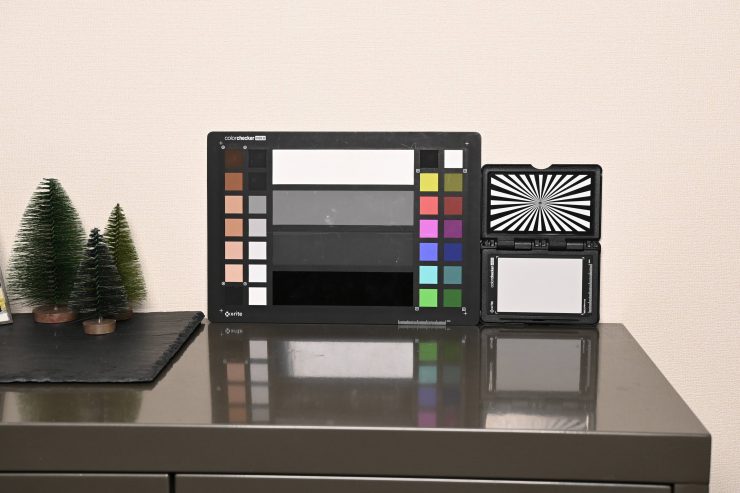
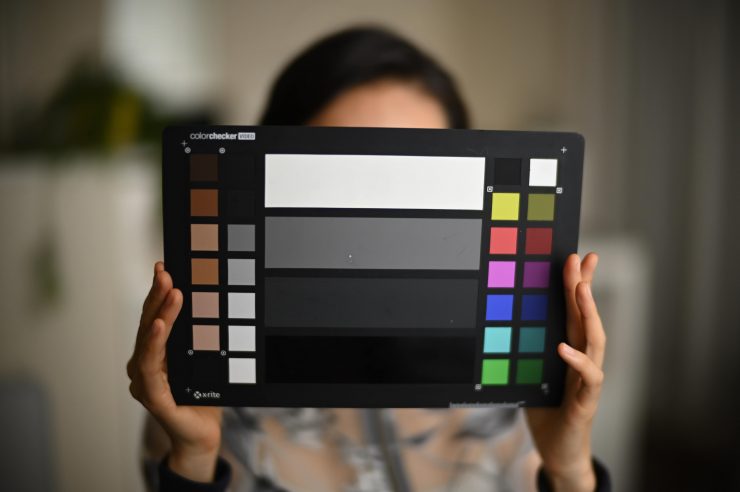
Preset 5600K WB 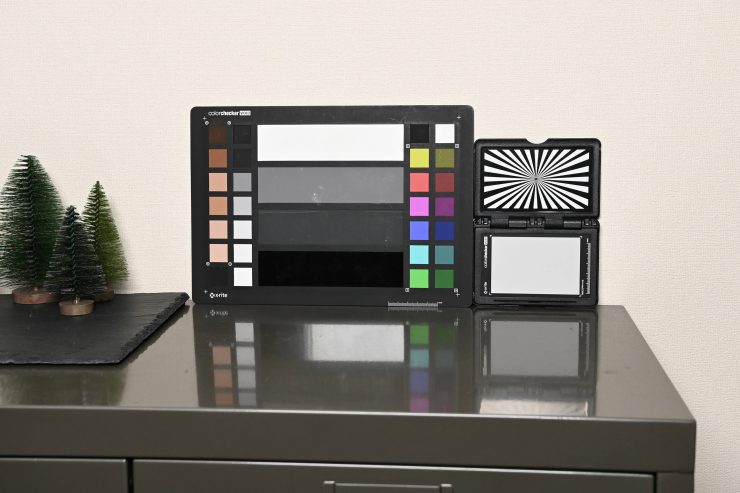
WB done
Above you can see a color checker chart that has been shot with the light at 5600K. The first is with a preset 5600K WB being used, and the second is with a WB done. There is only a very slight difference between using a preset 5600K WB on the camera and then doing a WB.
If you do a WB with this light you are going to get extremely accurate color reproduction.
5600K (no diffusion panel)
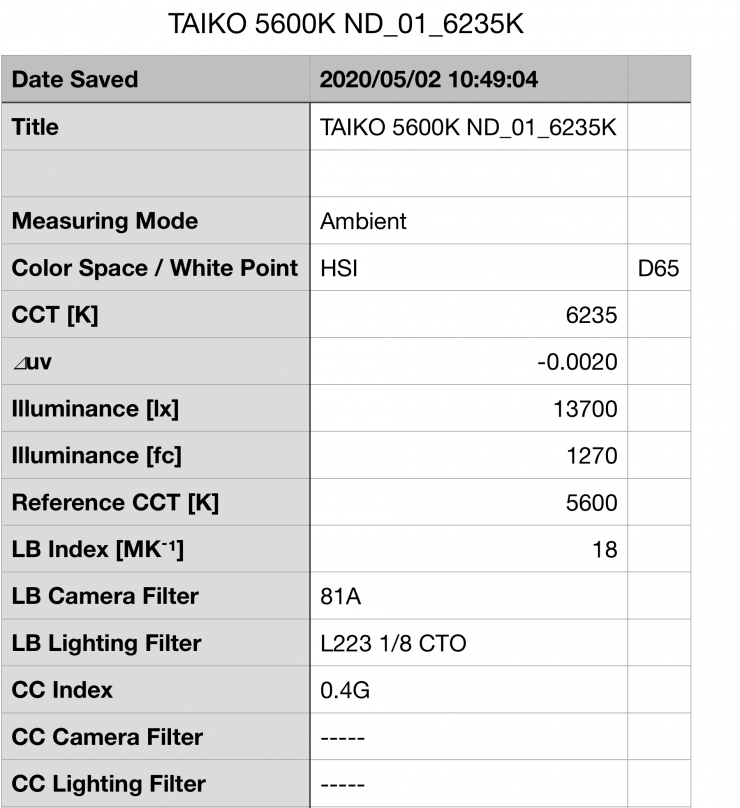
Above you can see the Taiko recorded an output of 13700 lx (1230 fc) with no diffusion panel and set at 5600K. This was more than the Rotolight Titan X2 produced at 5600K when its SmartSoft diffusion was at 0%.
This was an impressive output for any 2×1 fixture, especially one that draws just 250W. What you need to keep in mind, is that with no diffusion, anyone looking the light is looking straight at the individual LEDs. This is bright and uncomfortable for the talent. The beam angle when no diffusion is used is also quite a lot narrower than most other 2×1 panel lights.

The light recorded a Kelvin color temperature reading of 6235K (0.4G) which was way off for a 5600K source. It looks like the light is far more Kelvin color-accurate when you use the Medium Diffusion panel. This is something you clearly need to take into account when using the light.
| OUTPUT | KELVIN COLOR TEMP. | |
| No Diffusion | 13700 lx | 6235K (0.4G) |
| Light Diffusion | 12800 lx | 6136K (0.4G) |
| Medium Diffusion | 7880 lx | 5510K |
| Heavy Diffusion | 6020 lx | 5511K |
Above is a table that shows you the output and Kelvin color temperature readings for when the light was it was used with the various different diffusion panels at 5600K. As you can see the Medium diffusion panel cuts the output by 42.5%. The Heavy diffusion panel cuts the output by 56%.
The light is far more Kelvin color-accurate when used with the Medium and Heavy diffusion filters.
5600K (battery power)
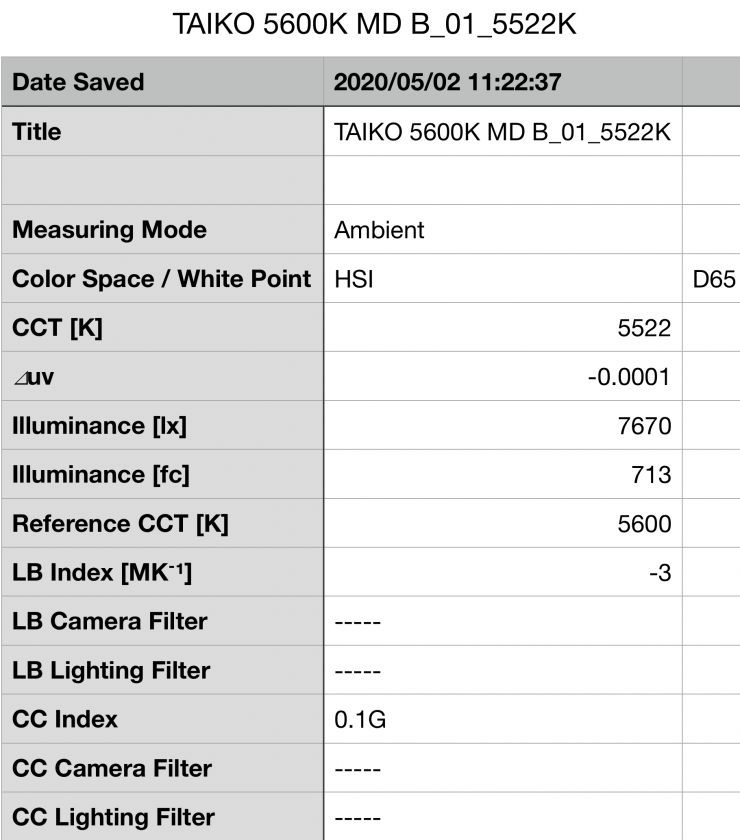
I also tested the light by running it off camera batteries to see if the output was reduced. For this test, I used the Medium diffusion panel. Above you can see that the light recorded an output of 7670 lx (713 fc). That was only 2.7% less output than the 7880 lx (732 fc) it recorded when running off mains power. This shows me that the light can be run at 100% output from camera batteries with no real sacrifice to the output. This is a big deal and one that shouldn’t be overlooked if you are in the market for a 2×1 RGBWW light.
So, how does the output at 5600K compare to some other 2×1 RGB lights that we have previously reviewed when running off mains power:
| Output at 5600K | |
| Luxli Taiko 2×1 | 13700 lx (no diffusion) 12800 lx (light diffusion) 7880 lx (medium diffusion) 6020 lx (heavy diffusion) |
| Rotolight Titan X2 | 13300 lx (no diffusion) 6030 lx (100% SmartSoft diffusion) |
| ARRI S60-C SkyPanel | 10900 lx 17500 lx (optional intensifier panel narrow the beam angle to 74°) |
| Litepanels Gemini 2×1 | 9970 lx |
| Rayzr MC MAX 400 | 10400 lx |
Comparing output figures between the various fixtures isn’t straight forward. They all have various beam angles, some have built-in diffusion, some have adjustable electronic diffusion, etc. However, given the low power draw of the Luxli, it certainly punches well above its weight. It is also versatile because you can get anywhere from 6020 lx to 13700 lx depending on whether you are running no diffusion or different strengths of diffusion.
As far as an accurate rendition of creating a 5600K source here is how some of the other 2×1 RGB lights that we have previously reviewed fare:
| Kelvin Color Temperature (when set at 5600K) | |
| Luxli Taiko 2×1 | 5510K |
| Rotolight Titan X2 | 5689K 0.1M |
| ARRI S60-C SkyPanel | 5708K 0 CC |
| Litepanels Gemini 2×1 | 5460K 0 CC |
| Rayzr MC MAX 400 | 5621K 0.4M |
All of these lights that I have reviewed have pretty accurate Kelvin color reproduction at 5600K.
3200K (medium diffusion)

Above you can see the lights output when it was set at 3200K with Medium diffusion. It produced 7820 lx (727 fc), which is 0.7% less than the 7880 lx it produced at 5600K.

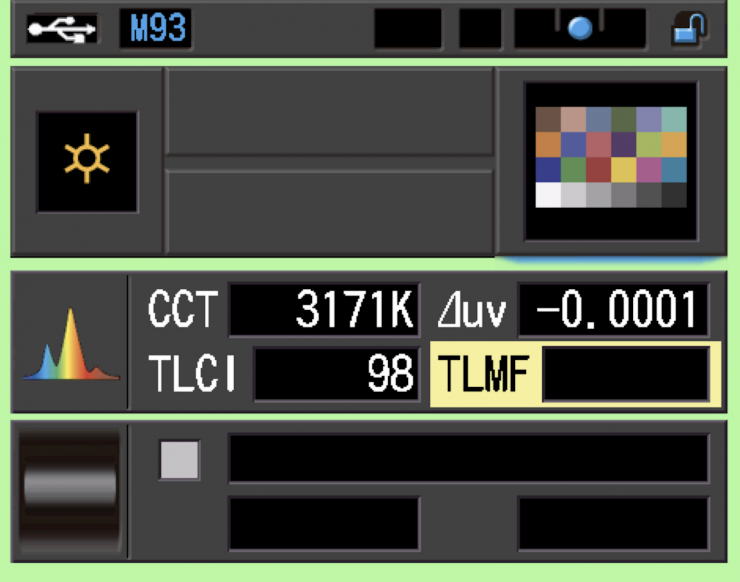
As far as Kelvin color temperature accuracy goes, it recorded a very accurate reading of 3171K.

Preset 3200K WB 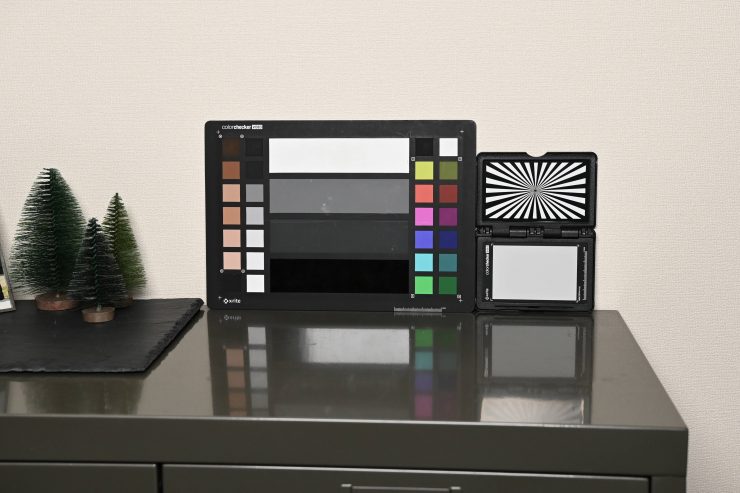
WB done
Above you can see color checker charts that have been shot with the light at 3200K. The first is with a preset 3200K WB being used, and the second is with a WB done. As you can see the Taiko produces very accurate light at 3200K. There is almost no discernable difference between using preset 3200K WB on the camera and then doing a WB.
3200K (no diffusion)
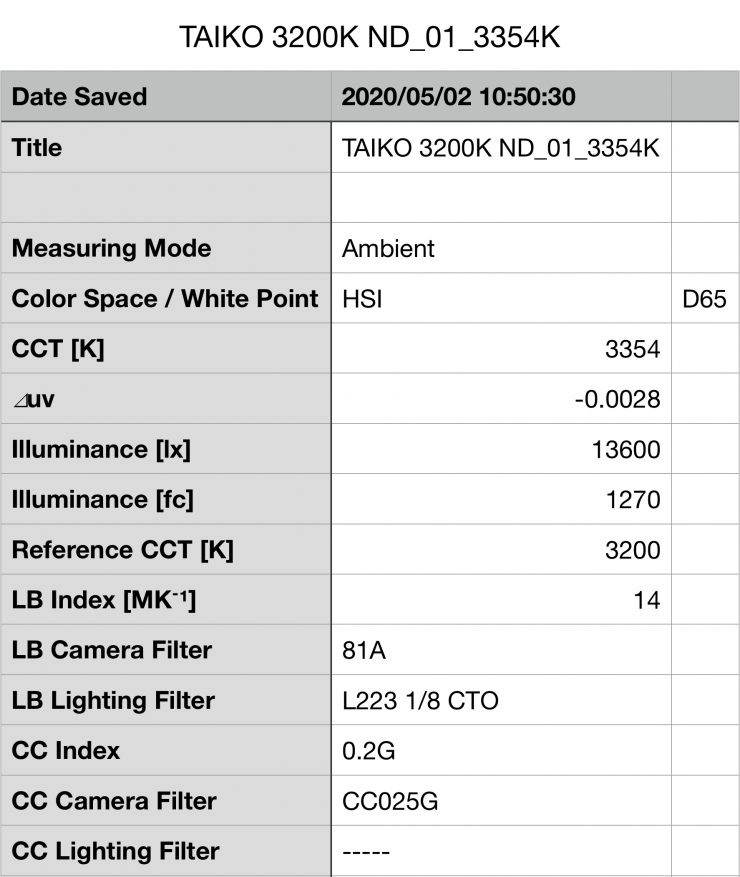
Above you can see the lights output when it was set at 3200K with no diffusion being used. It produced 13600 lx (1270 fc), which is 0.7% less more than the 13700 lx it produced at 5600K.

As far as Kelvin color temperature accuracy goes, it recorded a pretty accurate reading of 3354K (0.2G)
| OUTPUT | KELVIN COLOR TEMP. | |
| No Diffusion | 13600 lx | 3354K (0.2G) |
| Light Diffusion | 12800 lx | 3331K (0.1G) |
| Medium Diffusion | 7820 lx | 3171K |
| Heavy Diffusion | 5990 lx | 3159K |
Above is a table that shows you the output and Kelvin color temperature readings for when the light was it was used with the various different diffusion panels at 3200K.
So, how does this compare to some other 2×1 RGB lights that we have previously reviewed:
| Output at 3200K | |
| Luxli Taiko 2×1 | 13600 lx (no diffusion) 12800 lx (light diffusion) 7820 lx (medium diffusion) 5990 lx (heavy diffusion) |
| Rotolight Titan X2 | 14800 lx (no diffusion) 8920 lx (100% SmartSoft diffusion) |
| ARRI S60-C SkyPanel | 10400 lx* |
| Litepanels Gemini 2×1 | 8970 lx |
| Rayzr MC MAX 400 | 8540 lx |
*The SkyPanel has an optional intensifier panel available that increases the output but narrows the beam angle to 74°.
As you can see, the Luxli’s performance is very good compared to other fixtures I have tested.
As far as an accurate rendition of creating a 3200K source here is how some of the other 2×1 RGB lights that we have previously reviewed fare:
| Kelvin Color Temperature (when set at 3200K) | |
| Luxli Taiko 2×1 | 3171K (medium diffusion) |
| Rotolight Titan X2 | 3246K |
| ARRI S60-C SkyPanel | 3225K 0.1M |
| Litepanels Gemini 2×1 | 3249K 0.4M |
| Rayzr MC MAX 400 | 3300K 0.5M |
Just like at 5600K, all of these lights produce extremely accurate Kelvin color temperature when set at 3200K.
+/- Green adjustment
Now, as all of the fixtures include +/- Green adjustment you can quite easily correct any tint. While there is no exact science to this, and it really depends on what camera you are using as well, it’s just a matter of trial and error to see what setting actually works the best. The nice thing is, any light with +/- Green adjustment can be fine-tuned to deliver better results.
How does it perform at various Kelvin color temperatures?
Summary of results (medium diffusion)
| OUTPUT | KELVIN COLOR TEMPERATURE READING | |
| 2800K | 7870 lx | 2779K |
| 3200K | 7820 lx | 3171K |
| 4500K | 7830 lx | 4439K |
| 5600K | 7880 lx | 5510K |
| 6500K | 7840 lx | 6394K |
| 8000K | 7790 lx | 8006K |
| 10000K | 7790 lx | 9809K |
All these figures are taken with the default Medium diffusion panel being used
These results show me that the lights output is exceptionally consistent at all Kelvin color temperatures. The lights output only varies by 1.15% across the whole Kelvin spectrum.
This is the first light I have ever encountered where the output is almost dead on at every Kelvin color temperature across the range. This is extremely impressive. Whatever Luxli is doing, they are doing it right.
The results also show me that the light is extremely accurate when it comes to Kelvin color temperature reproduction throughout its range.
If there is one word that sums up the Taiko it is consistency. This consistency of the Taiko, is to me, one of its most impressive attributes. This is the most consistent light when it comes to output and Kelvin color temperature that I have ever tested.
CC Index & ⊿uv
The CC Index displays the CC correction value and whether any magenta or green need to be added or subtracted. 1 CC corresponds to 035 Kodak CC values or 1/8 Rosco filter values. Any reading less than +1.00 or -1.00 and you’re probably not going to need to make any kind of adjustment. The ⊿uv is the value to show how much this light is away from being an ideal light source (black body radiation = incandescent lamp). As with the CC Index you want this number to theoretically be zero. Kelvin is not a linear value, so we need to convert from Kelvin to MK-1 to compare the values of color temperature. To calculate from Kelvin to Mired is MK-1= 1*1000000/Kelvin. While this may sound confusing, it is the only way of measuring if the Kelvin shift is significant enough to warrant having to use a filter for correction. Below are the results for the Taiko:
Kelvin Vs MK-1
| Kelvin | Difference in K | MK-1 | Difference in MK-1 | |
| SET VALUE | 2800K | 0 | 357.14 | 0 |
| ACTUAL READING | 2779K | 21 | 359.84 | -2.7 MK-1 |
| SET VALUE | 3200K | 0 | 312.5 | 0 |
| ACTUAL READING | 3171K | 29 | 315.36 | -2.86 MK-1 |
| SET VALUE | 4500K | 0 | 222.22 | 0 |
| ACTUAL READING | 4439K | 61 | 225.28 | -3.06 MK-1 |
| SET VALUE | 5600K | 0 | 178.57 | 0 |
| ACTUAL READING | 5510K | 90 | 181.49 | -2.92 MK-1 |
| SET VALUE | 6500K | 0 | 153.85 | 0 |
| ACTUAL READING | 6394K | 106 | 156.4 | -2.55 MK-1 |
| SET VALUE | 8000K | 0 | 125 | 0 |
| ACTUAL READING | 8006K | 6 | 124.91 | 0.09 MK-1 |
| SET VALUE | 10000K | 0 | 100 | 0 |
| ACTUAL READING | 9809K | 191 | 101.95 | -1.95 MK-1 |
These figures might look confusing, but what it tells me is that the light is extremely Kelvin color accurate and you wouldn’ need to use any color correction gels at any of its settings. The MK-1 difference scores are excellent.
CC INDEX & ⊿uv
| CC INDEX | ⊿uv | |
| 2800K | 0.1G | -0.0003 |
| 3200K | 0.1M | -0.0001 |
| 4500K | 0.1M | -0.0002 |
| 5600K | 0.1G | 0.0002 |
| 6500K | 0.3G | -0.0003 |
| 8000K | 0.6G | -0.0006 |
| 10000K | 0.9G | -0.0002 |
RGB Output
With most RGB lights if you use them to generate or create colors the output gets massively reduced. So how does the Taiko fare?
I decided to do a test to see how much output the light had when I created a super-saturated color.
In the HSI mode, choosing a saturated red, and set to 100% output, the light recorded an output of 1100 lx with the Medium diffusion being used. This is something you need to be clearly aware of when using RGB and HSI modes. The output is going to be significantly lower than when using the light in CCT mode.
Color Rendering
5600K (medium diffusion)
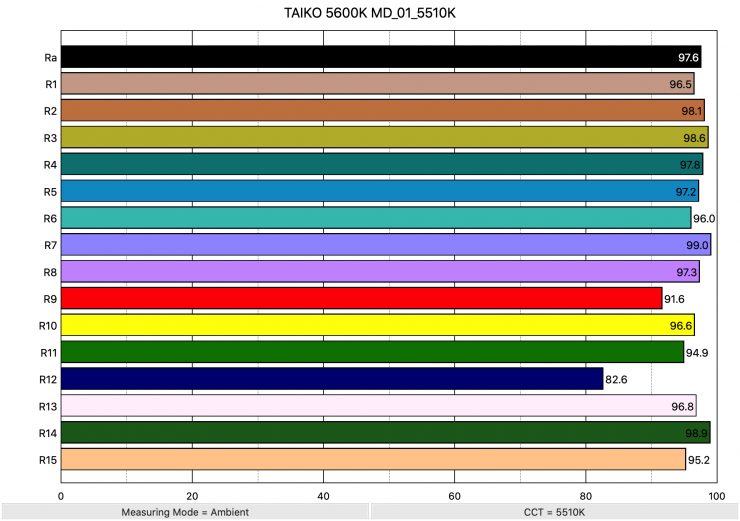
So now that we have seen how much output the Taiko produces, how does it perform when it comes to replicating accurate colors. Above you can see that when the light was set at 5600K it recorded an average CRI (R1-R8) of 97.6 and an extended CRI (R1-R15) of 95.8. For replicating accurate skin tones it recorded for R9 91.6 (red), 96.8 for R13 (closest to caucasian skin tones), and 95.2 for R15 (closest to Asian skin tones). These are very good results.
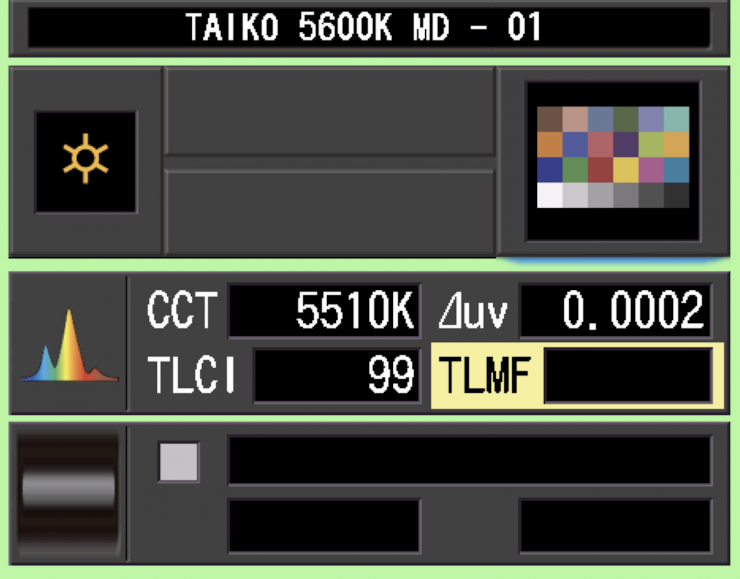
The light, when set at 5600K, recorded a TLCI score of 99. That is almost perfect.
When I tested the light at 5600K with medium diffusion and ran it off camera batteries it actually scored a perfect 100. I have never seen a light achieve that score.
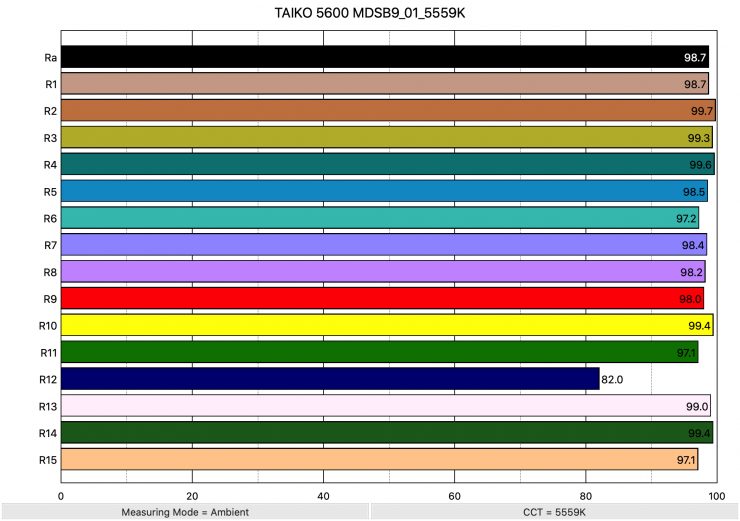
As you can add +/- Green in the CCT mode I tough I would try making adjustments on the light to try and obtain better scores. By setting the light at 5700K and adding 9% green I got an average CRI score of 98.7 and an extended CRI score of 97.44. Now, these are higher scores than I have ever seen from any LED light when trying to replicate a 5600K source. The light could produce a R9 (red) score of 98. I don’t ever remember seeing a score of 98 for red from any 5600K LED fixture. What you clearly need to know is these are just scores, and CRI scores are not the best way of judging a light.
This is why owning a Sekonic C-800 is a good idea. You can make adjustments to lights and then check what effect those adjustments have made. Being able to tune lights and do tests with the cameras you use can make a big difference.
How does this compare to some other 2×1 RGB lights that we have previously reviewed when used at 5600K? Below you can see:
| Average CRI | Extended CRI | |
| Luxli Takio 2×1 | 97.6 | 95.8 |
| Rotolight Titan X2 | 96.8 | 95.21 |
| ARRI SkyPanel S60-C | 95.7 | 92.92 |
| Litepanels Gemini 2×1 | 95.2 | 93.24 |
| Rayzr MC MAX 400 | 95.3 | 92.96 |
All of these lights perform well at 5600K, but the Luxli Taiko recorded the highest scores.
3200K (medium diffusion)
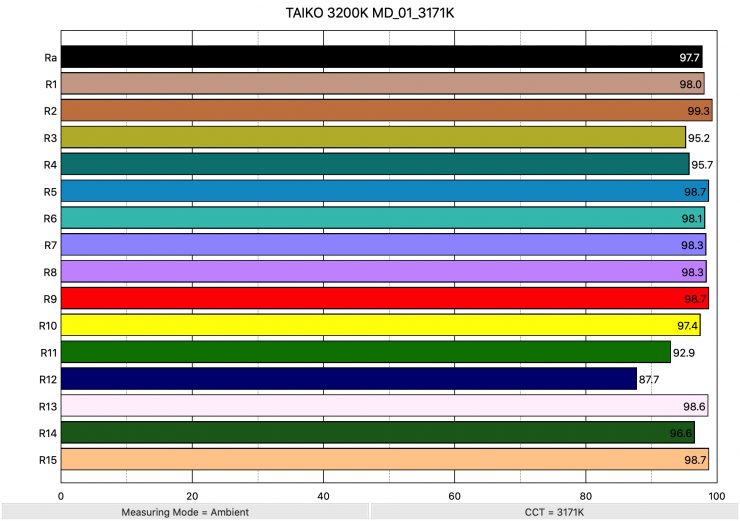
Above you can see the scores for when the light was used at 3200K. It recorded an average CRI (R1-R8) of 97.7 and an extended CRI (R1-R15) of 96.8. For replicating accurate skin tones it recorded 98.7 for R9 (red), 98.6 for R13 (closest to caucasian skin tones), and 98.7 for R15 (closest to Asian skin tones).
These results were the best from any light I have ever tested, period.
The light, when set at 3200K, recorded a TLCI score of 98.
How does this compare to some other 2×1 RGB lights that we have previously reviewed when used at 3200K? Below you can see:
| Average CRI | Extended CRI | |
| Luxli Takio 2×1 | 97.7 | 96.8 |
| Rotolight Titan X2 | 95.9 | 94.27 |
| ARRI SkyPanel S60-C | 96.1 | 94.06 |
| Litepanels Gemini 2×1 | 97.2 | 95.3 |
| Rayzr MC MAX 400 | 90.6 | 88.64 |
Once again the Luxli Taiko recorded higher scores than any of the other lights. In fact, this is the highest extended CRI score at 3200K that I have ever gotten from any light I have ever tested.
Thoughts
The Luxli Taiko is a highly accurate fixture that replicated colors better than any other light I have tested. Its scores are exceptionally good across the whole Kelvin color temperature range. In saying that, all of these lights do a very good job, and in the real world the differences would not be massively apparent.
SSI
SSI (Spectral Similarity Index) was developed by the Sci-Tech Council of the Academy. SSI gives me the ability to set any light as a standard, or use predefined standards (such as CIE D55), and then give other lights an SSI score based upon how well they will match standards such as CIE D55. This way I can measure spectral response and compare it directly against an ideal light source. This is actually a much better test than recording CRI scores.
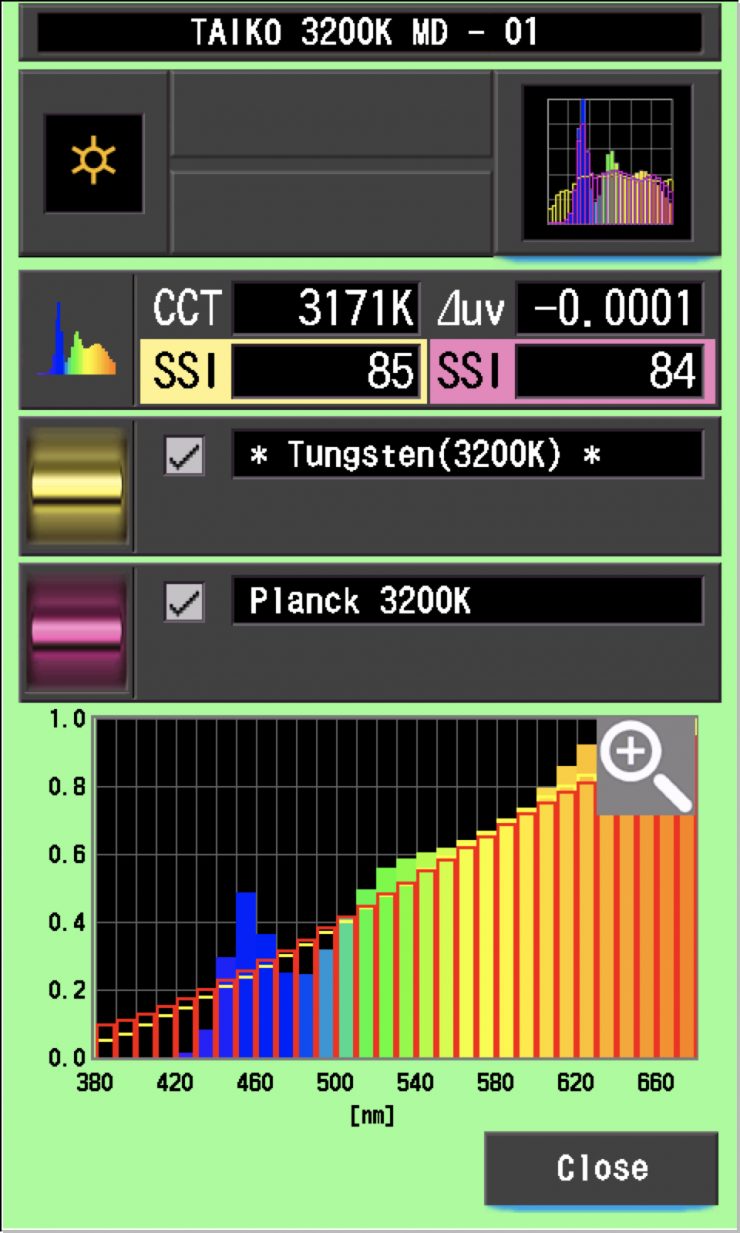
In this graph, the red bars indicate a perfect Planck 3200K source. The gold bars indicate a perfect 3200K Tungsten source. This lets us compare how close to a perfect 3200K lighting source the Taiko is. Any SSI score in the low ’80s is very good for a 3200K LED light. As you can see, LED lights have a hard time replicating colors below about 450nm.
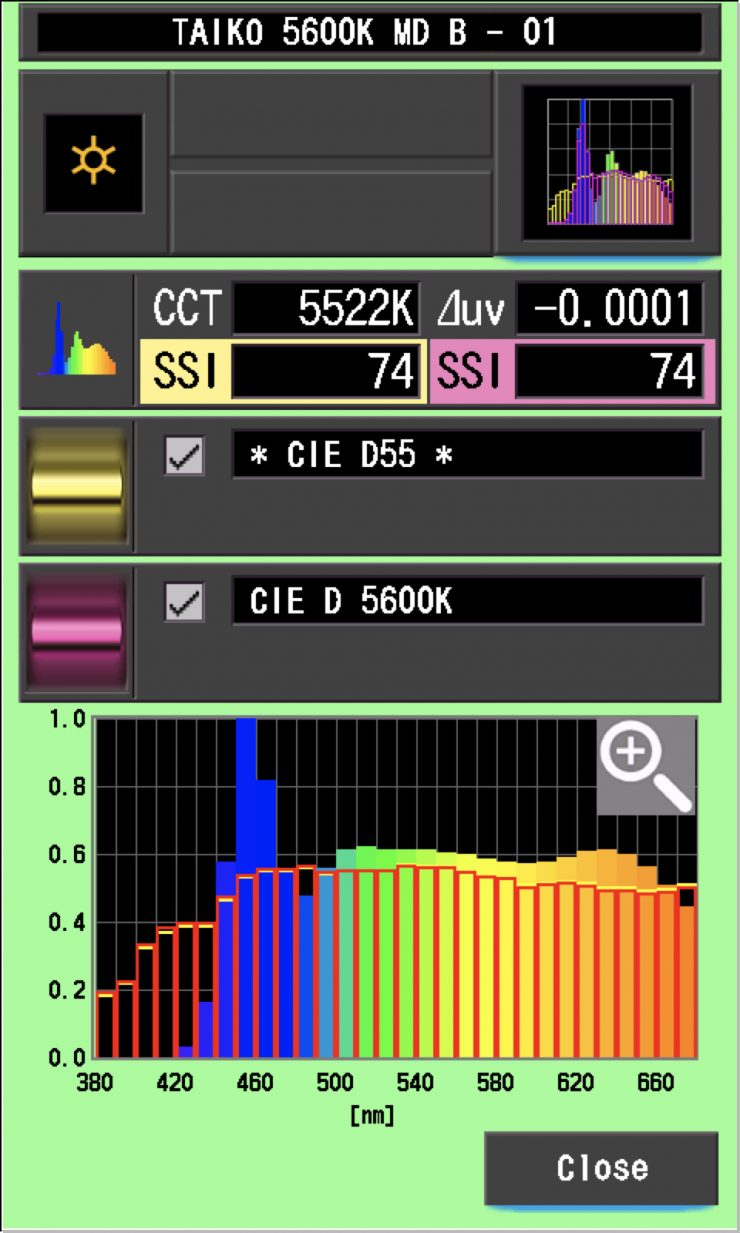
In the graph above the gold bars indicate a perfect CIE D55 source. The red bars indicate a perfect CIE D 5600K source. This lets us compare how close to a perfect 5600K lighting source the Titan X2 is. A score in the low 70’s is very good for a 5600K LED source. If you look at the⊿uv value is -0.0001. The ⊿uv value shows how much this light is away from being an ideal light source (black body radiation = incandescent lamp). This light was almost perfect.
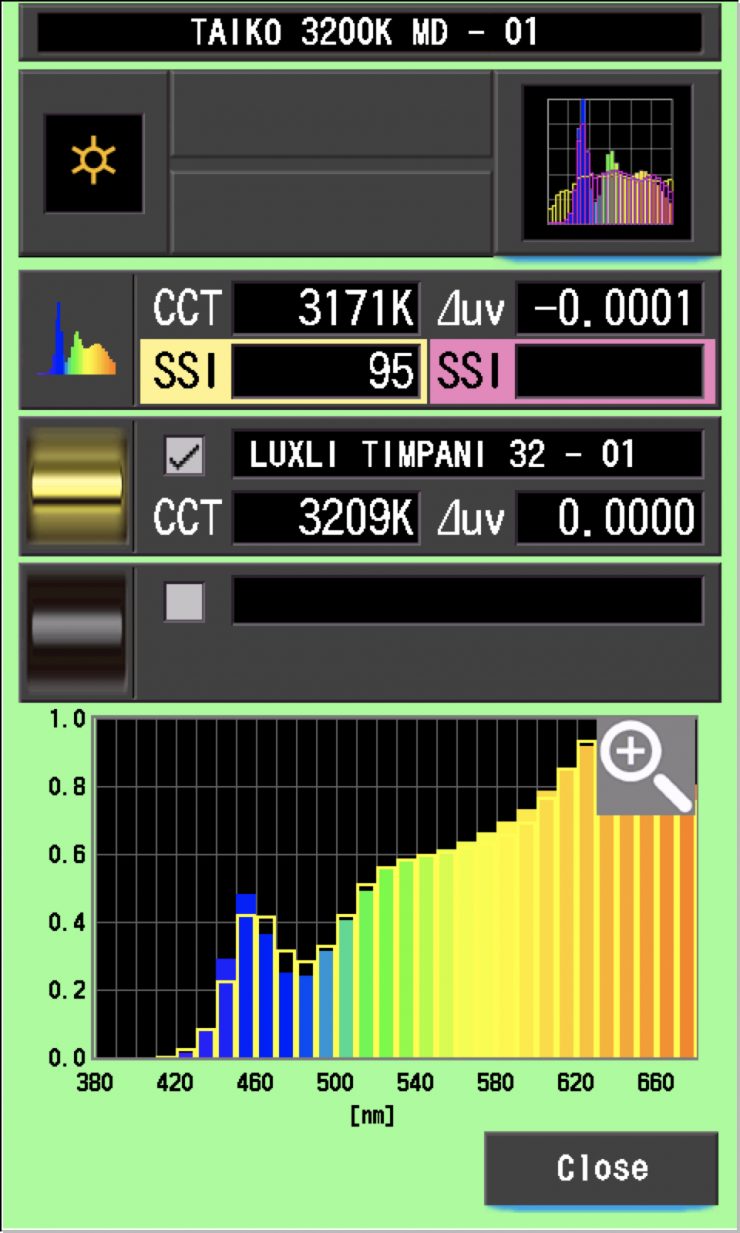
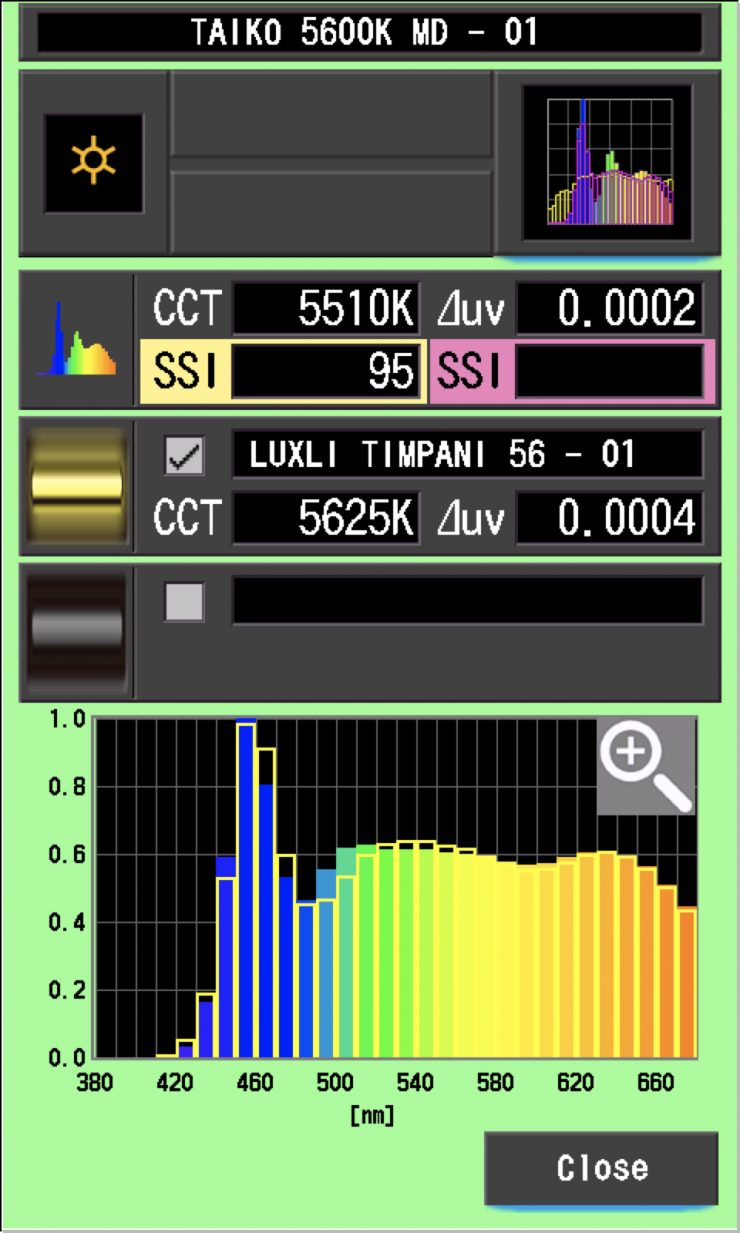
The main reason we want to record SSI scores is so we can see how well they match with other lights. I was very curious to see how well the Taiko matched the smaller Timpani. Above you can see the results at 3200K and 5600K. AS you can see, both lights, while not an exact match, are very close. This shows me that I could use the Taiko and Timpani and they will produce very similar light.
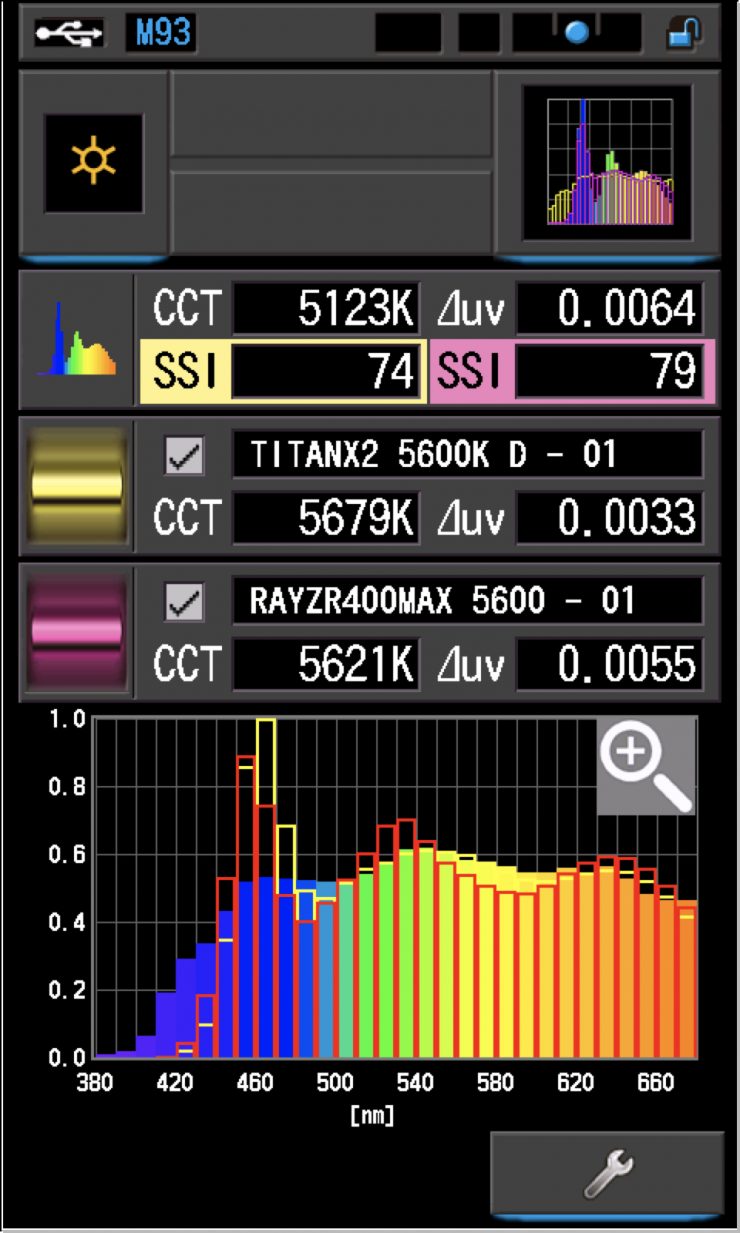
I was also curious to see how well the Luxli Taiko matched the much more expensive Rotolight Titan X2 and the Rayzr MC400 MAX (which is a little bit more expensive than the Taiko).
As you can see the Rayzr MC400 MAX and the Titan X2 are not a good match when used with the Taiko. You can see that the Taiko doesn’ have any of the spokes in the spectrum like the other two lights.
SSI tests are a great way of telling you what lights you own or use will work well together.
Spectral Distribution
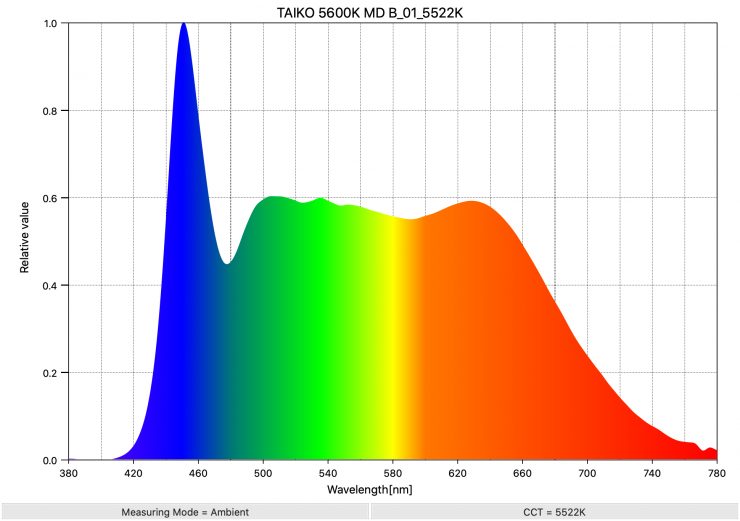
Above you can see the spectral distribution of the Taiko when it is set at 5600K. The spectral distribution is very full and even.
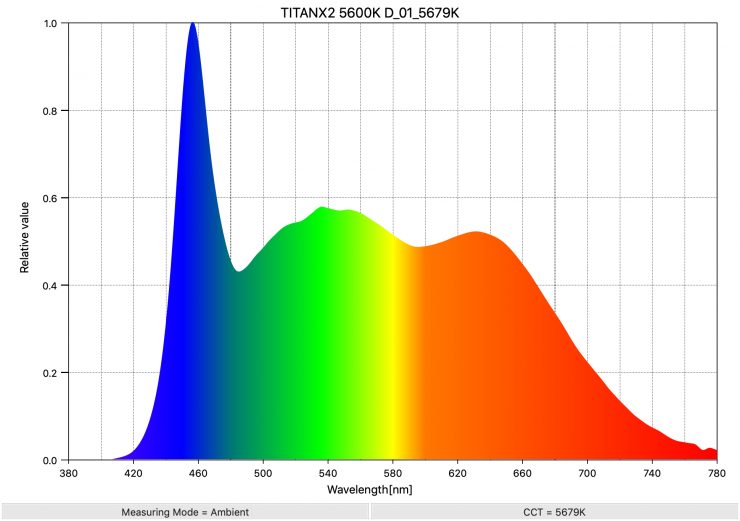
As a comparison, above you can see the spectral distribution of the Rotolight Titan X2 when it is set at 5600K. The spectral distribution is pretty good, but not as full as that of the Luxli.
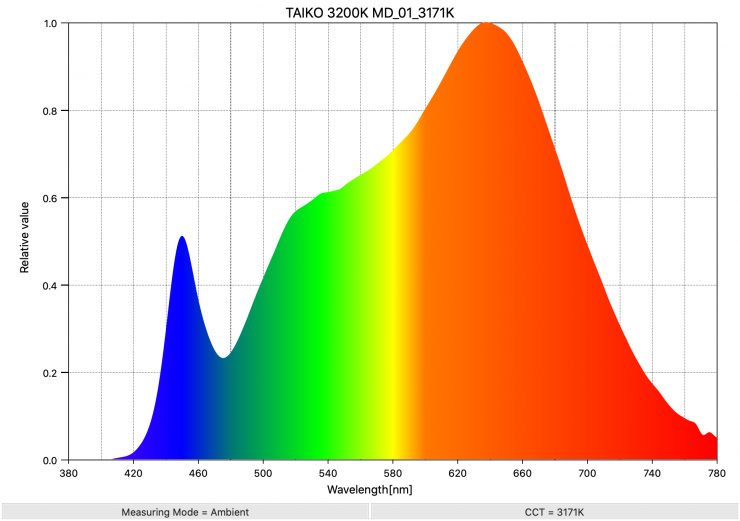
Above you can see the spectral distribution of the Taiko when it is set at 3200K. The spectral distribution is nice and full and there is only a light push towards green.
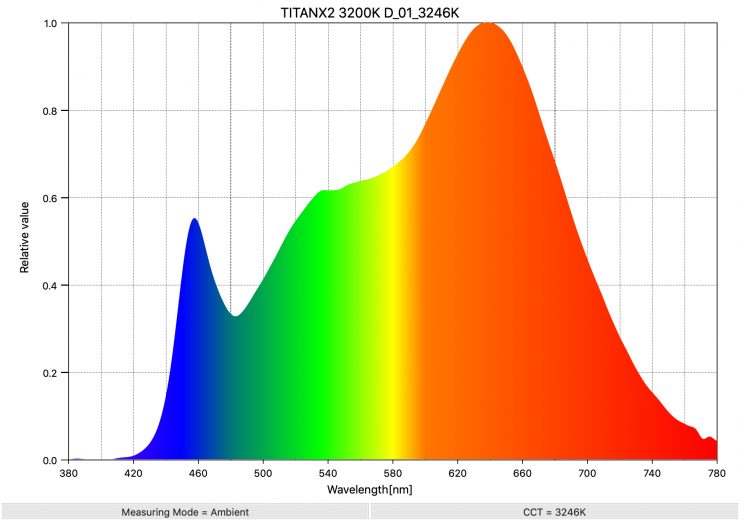
Again as a comparison, above you can see the spectral distribution of the Rotolight Titan X2 when it is set at 3200K. As you can see, the Rotolight and Luxli have fairly comparable spectrums at 3200K.
Real-World Performance & Quality of Light
As I always say, photometric scores only tell you part of the story. So do the scores from the Taiko translate into real-world performance? Yes, they do. The quality of the light that is coming from the Taiko is right up there with some of the best lights I have ever tested. The photometric data can only give me scientific data and it is much more important for me to see how the light looks and performs with skin tones.

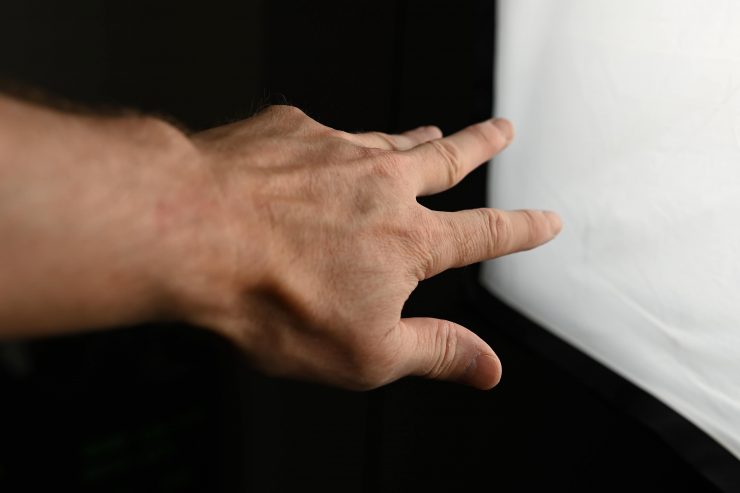
It is very easy to create a very soft, flattering light source using the Taiko. I found that by using a combination of the diffusion panels and a DoPchoice softbox I could create a very soft lighting source without needing to punch it through a diffusion screen. This makes it a very quick and easy light to use for interview situations or for any scenario where you need soft light.

My hand is 7cm away from the wall 

These objects are right up against the wall
I was very impressed with how soft the light was coming from the Taiko, especially if you use it with a softbox. You get very soft diffused shadows that only appear when objects are really close to a wall or another object.
Conversely, If you want a much stronger, direct looking light source you can just use the fixture without any diffusion panels. This gives you the best of both worlds.
What is fantastic about the Taiko is that you can run it off two flight safe batteries at full power with almost no loss in output. This allows you to use the light on location or outdoors when there is no mains power available.

No light 
Light on, no diffusion
Above you can see an example of how much output the light has when no diffusion is used. This is a subject standing in the shade with a bright background.
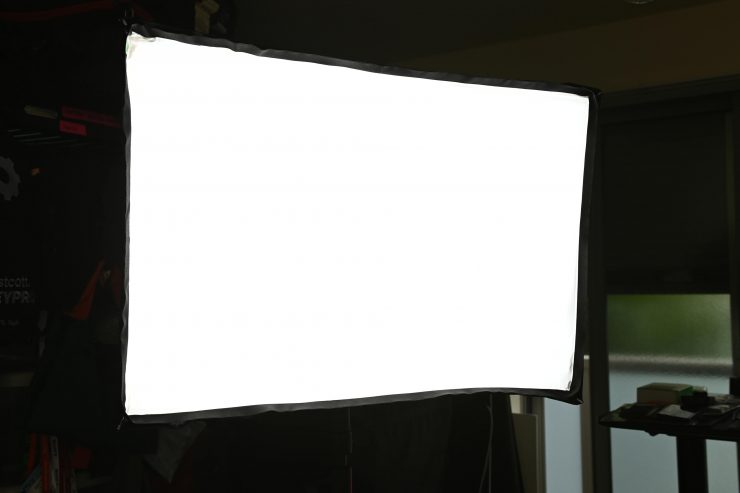
It is also nice that if you already own a softbox for another 2×1 light, it will probably fit on the Taiko. I found I could use a DoPchoice snapbag softbox from the Gemini 2×1 and it worked well on the Taiko. You get a nice wide source with the diffusion and a softbox.
The Taiko combines good usability, useful features, and it has a good amount of output This all comes with the added benefit of the light being extremely color accurate.
Having digital filters, and special effects are nice, but most users will just want to create really nice white light, and that is something the Taiko does really well.
How does it compare to the competition?
I don’t have access to all of the lights I have been comparing the Taiko to, but I can compare it head-to-head against the Litepanels Gemini, Rotolight Titan X2, and the Rayzr MC400 MAX.
Head-to-head comparisons are hard to do because different cameras have different sensors and the color response is different from camera to camera. One light may look better with a certain camera than another.
I am going to just do a couple of head-to-head examples looking at the following:
- Color Reproduction– how accurate are the lights at 3200K and 5600K when no WB is done and when a camera WB is done.
- Skin Tones- how do the lights look at 3200K and 5600K when no WB is done and when a camera WB is done.
Color Reproduction
So, let’s compare the color rendition of all of the lights when used at 3200K and 5600K when a preset WB is used in camera and when a WB has been done.
For these tests, I have kept the exposure, ISO, and shutter speed the same. I used a 3200K and 5600K preset WB and then WB balanced the camera using an 18% grey card.
3200K (Preset WB)
Luxli Taiko 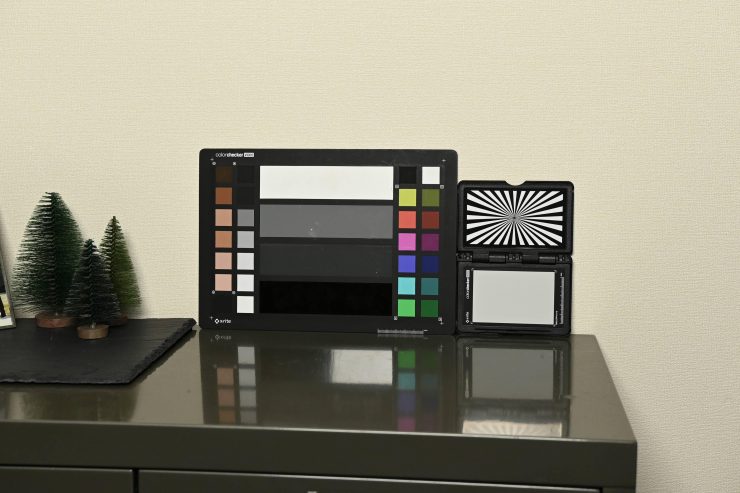
Litepanels Gemini 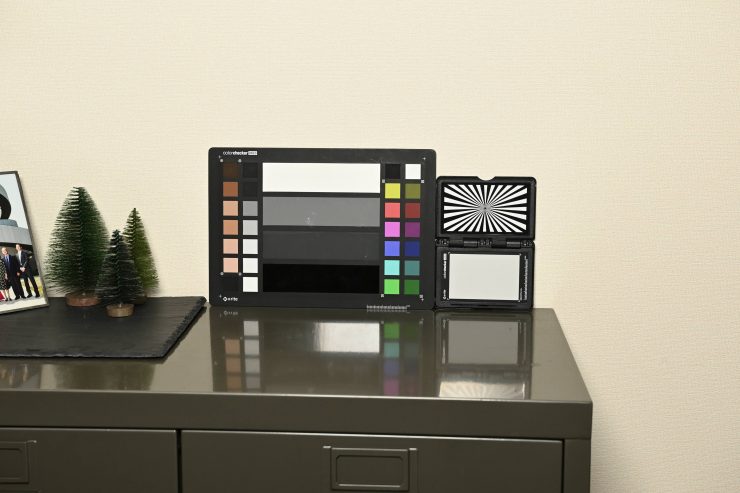
Rayzr MC400 MAX 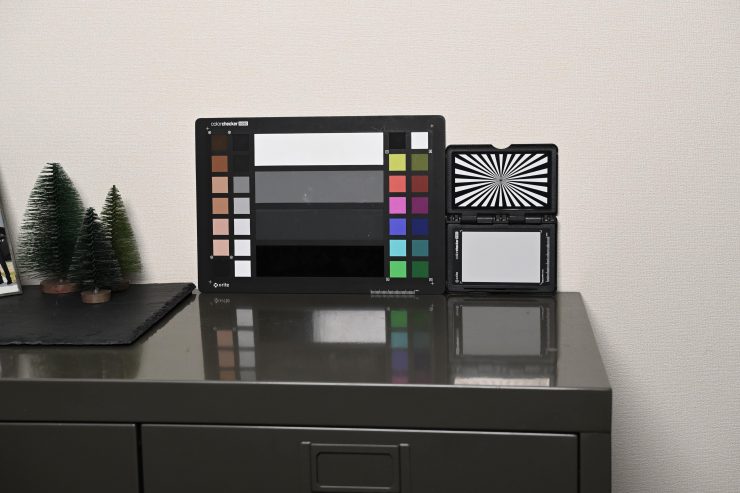
Rotolight Titan X2
As you can see, the Litepanels Gemini and Rayzr MC400 MAX both skew towards green if no WB is done. The Luxli Taiko has a slight lean towards magenta (but it is fairly minimal). To my eye, the Rotolight Titan X2 is the most neutral when a preset WB is used.
3200K (WB Done)
Luxli Taiko 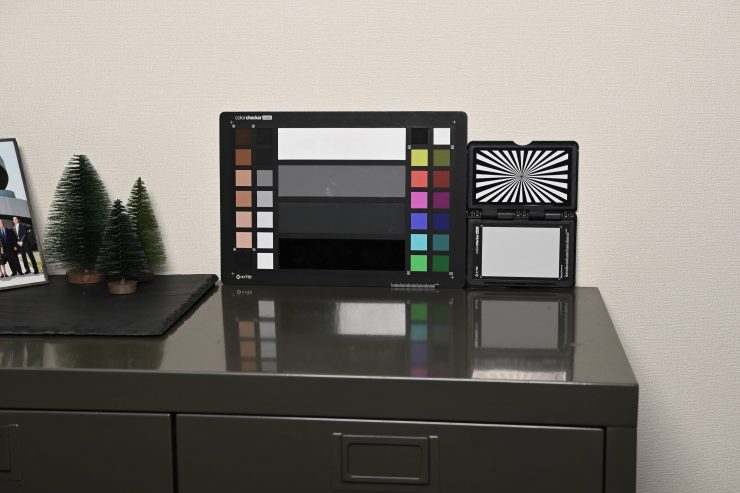
Litepanels Gemini 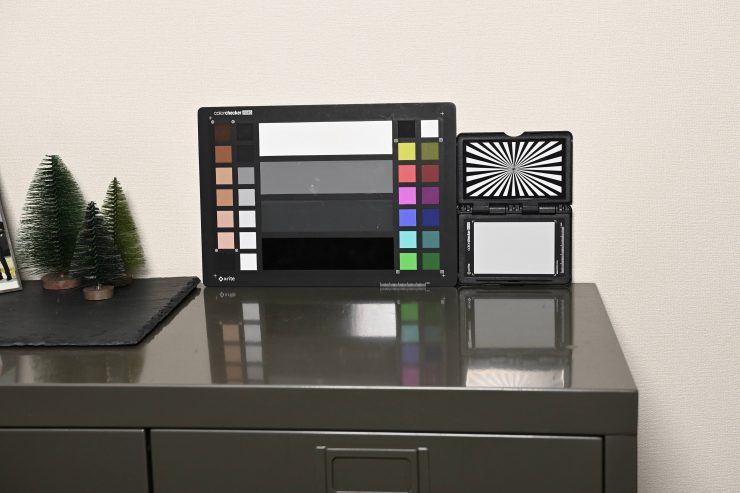
Rayzr MC400 MAX 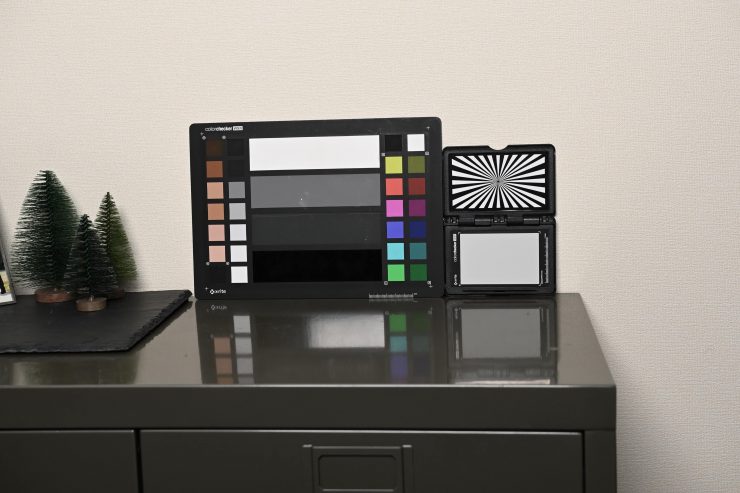
Rotolight Titan X2
As you can see, all the lights are very neutral once a WB has been done. The Rayzr perhaps has a slight push towards magenta compared to the other three lights, but it is fairly minimal. You would struggle to see any real-world difference between these lights if you do a WB.
5600K (Preset WB)
Luxli Taiko 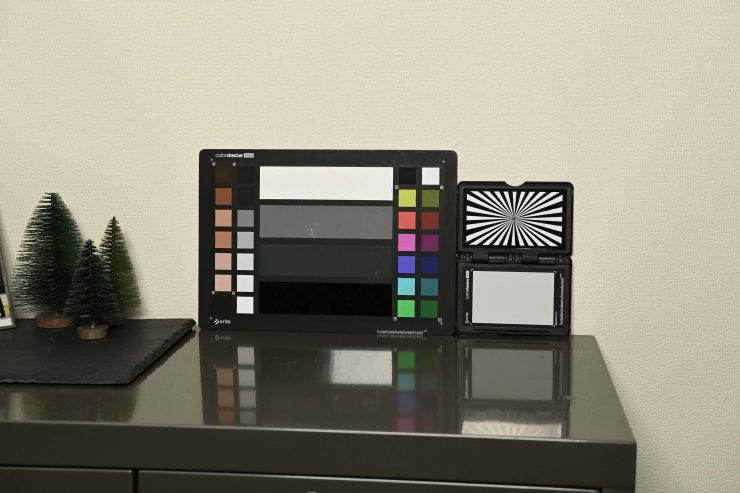
Litepanels Gemini 
Rayzr MC400 MAX 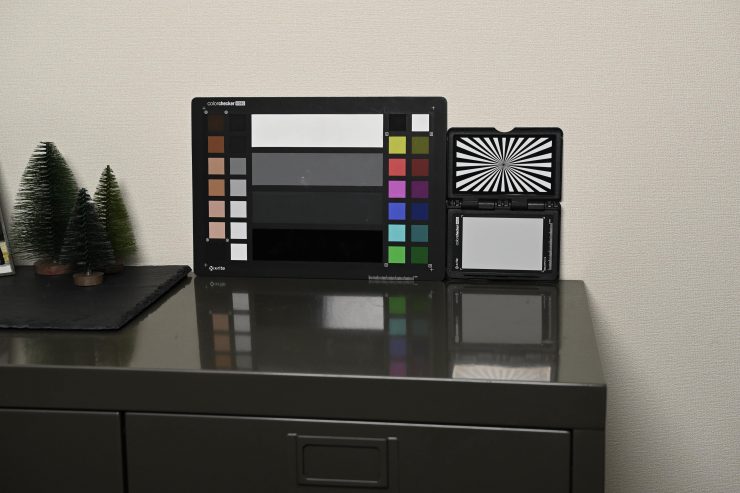
Rotolight Titan X2
As you can see, just like at 3200K, the Litepanels Gemini and Rayzr MC400 MAX both skew towards green if no WB is done. The Luxli Taiko appears to be the most neutral to my eye, but the Rotolight Titan X2 is very close behind.
5600K (WB Done)
Luxli Taiko 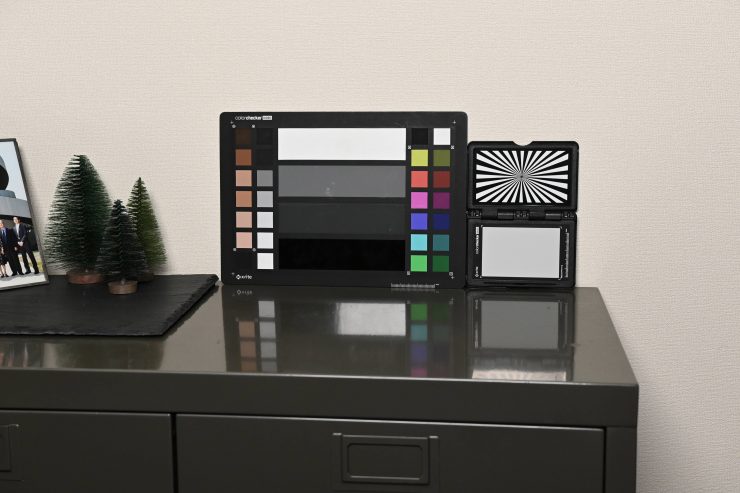
Litepanels Gemini 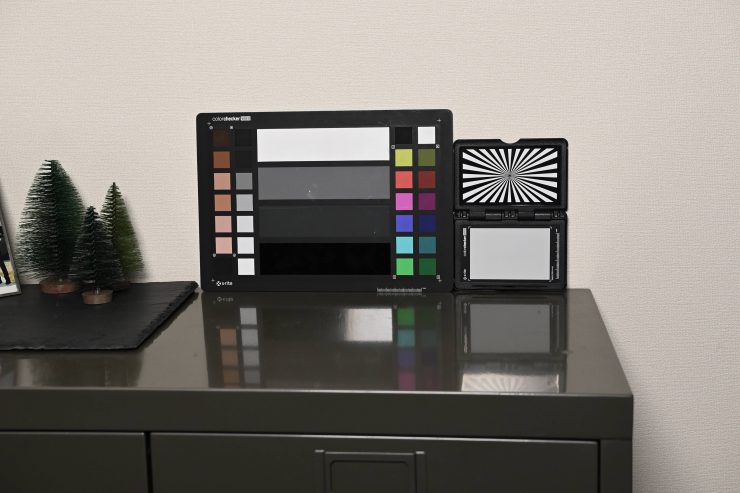
Rayzr MC400 MAX 
Rotolight Titan X2
As you can see, all of the lights correct up nicely once a WB is done. To my eye, the Rayzr has a slight magenta push, and the Litepanels Gemini, Rotolight Titan X2 are very close. The Luxli seems to have a slight advantage over the other lights, but it is still very close.
Skin Tones
Replicating good skin tones is an important factor you need to consider when using any light. Skin tones can look very different when different cameras/sensors are used. Lights can also look better with certain cameras/sensors as well, so doing head-to-head tests is difficult unless you are testing different camera and different light combinations.
For these tests, I have kept the exposure, ISO, and shutter speed the same. I used a 3200K and 5600K preset WB and then WB balanced the camera using an 18% grey card. Nothing has been altered or changed in post.
Again, I need to stress that skin tones can obviously be manipulated in post. This is simply to show how the various lights look on skin tones without any corrections being done.
So you may well ask, ‘Why bother doing this test then?’ This is still a good way of seeing the differences between all of the lights and how they vary.
Please don’t pay any attention to the exposure of the various lights. The same shutter speed, ISO and F stop were kept for all shots. All of the lights have different strengths of in-built diffusion and different beam angles.
No correction has been done in post. This is exactly as was shot. It is important to remember that all of these lights have +/- correction so they can all be fine-tuned to produce better results.
3200K (Preset WB)

Luxli Taiko 
Rotolight Titan X2 
Litepanels Gemini 
Rayzr MC400 MAX
Luxli Taiko 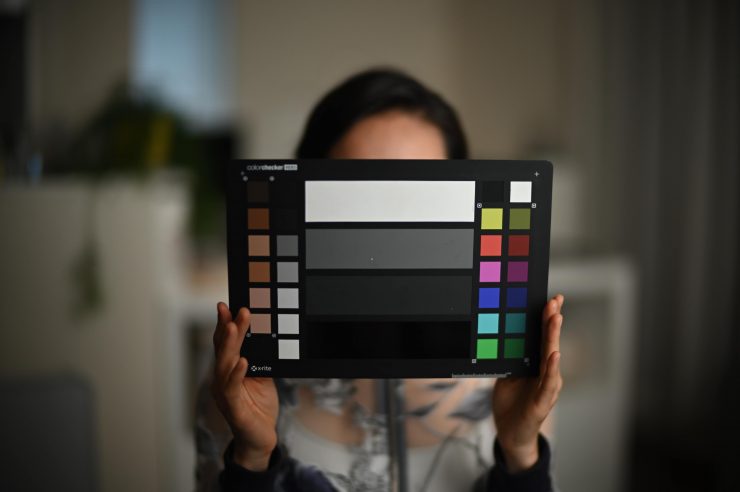
Rotolight Titan X2 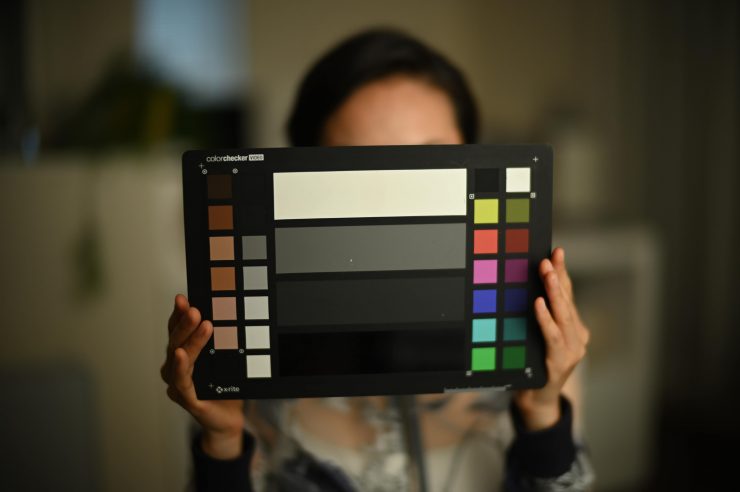
Litepanels Gemini 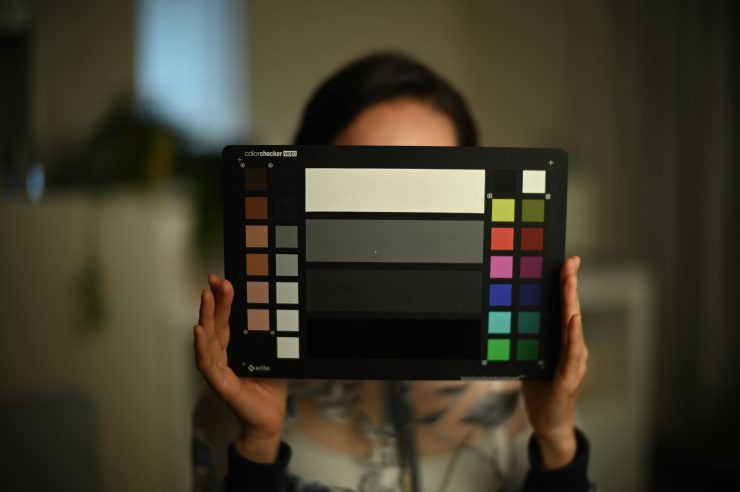
Rayzr MC400 MAX
At a preset 3200K WB you can see that the Luxli Taiko, Litepanels Gemini, and Rayzr MC400 MAX have green casts, however, at least the Rayzr has a bit more warmth to the face. The Titan X2 is far more neutral when a preset WB is used.
3200K (WB done)

Luxli Taiko 
Rotolight Titan X2 
Litepanels Gemini 
Rayzr MC400 MAX
Luxli Taiko 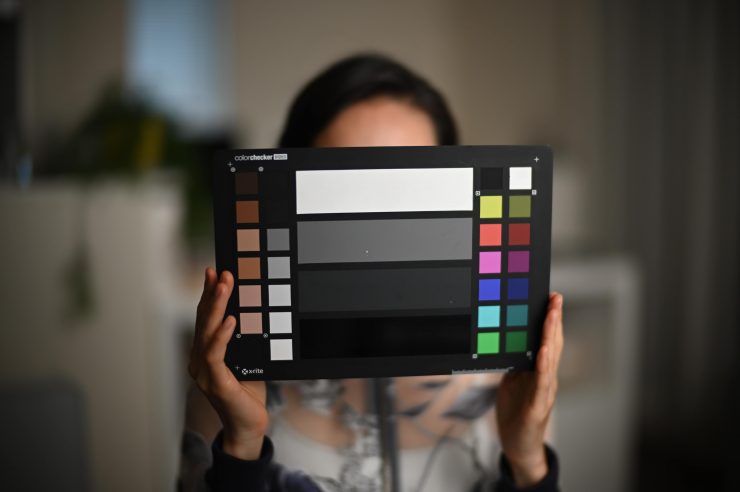
Rotolight Titan X2 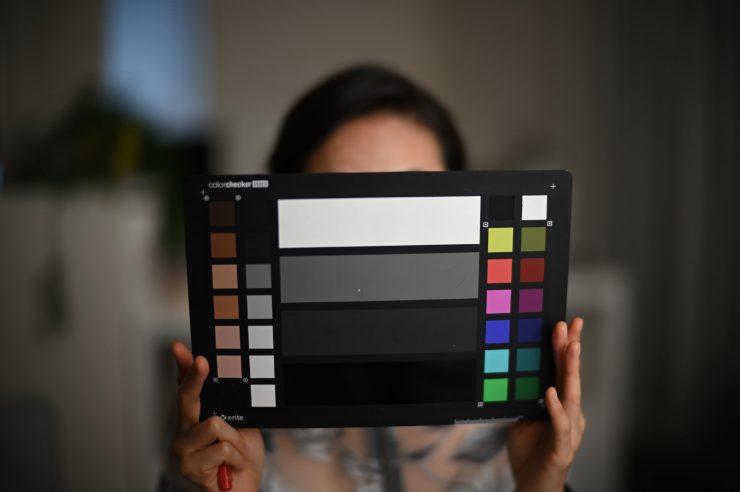
Litepanels Gemini 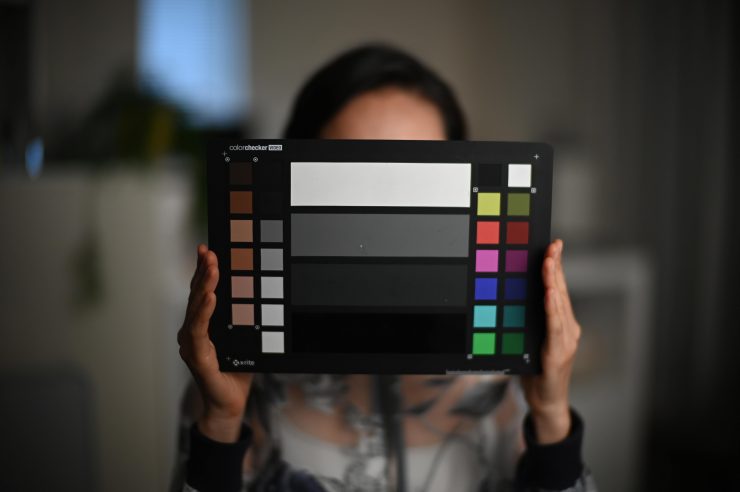
Rayzr MC400 MAX
When a WB is done, all three lights look pretty good. The Rayzr MC400 MAX definitely is slightly warmer than the other two lights and you can see that with the skin tone reproduction. The Rotolight almost looks almost identical after doing a WB as it did when a preset 3200K WB was used. The Taiko looks really nice after you do a WB.
5600K (Preset WB)

Luxli Taiko 
Rotolight Titan X2 
Litepanels Gemini 
Rayzr MC400 MAX
Luxli Taiko 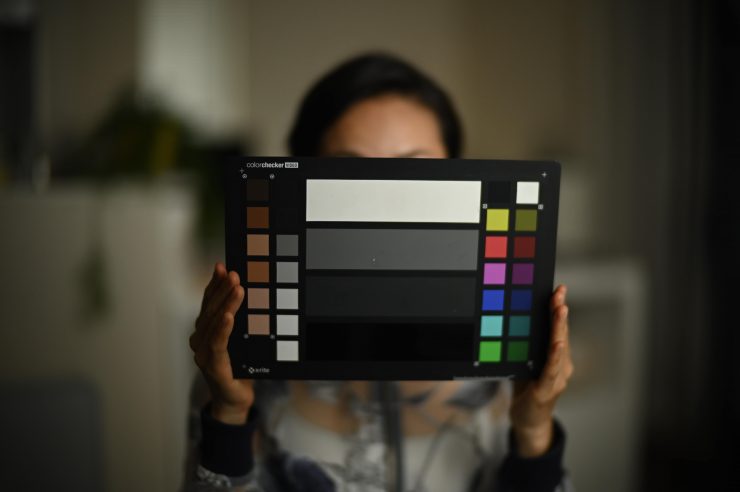
Rotolight Titan X2 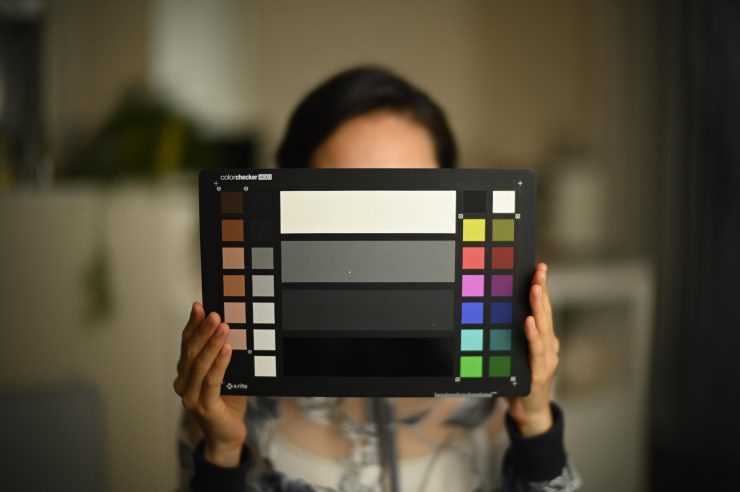
Litepanels Gemini 
Rayzr MC400 MAX
At a preset 3200K WB you can see that both the Litepanels Gemini and Rayzr MC400 MAX have slight green casts, but it is more prevalent on the Rayzr. The Titan X2 is far more neutral when a preset WB is used, with the Taiko just behind.
5600K (WB done)

Luxli Taiko 
Rotolight Titan X2 
Litepanels Gemini 
Rayzr MC400 MAX
Luxli Taiko 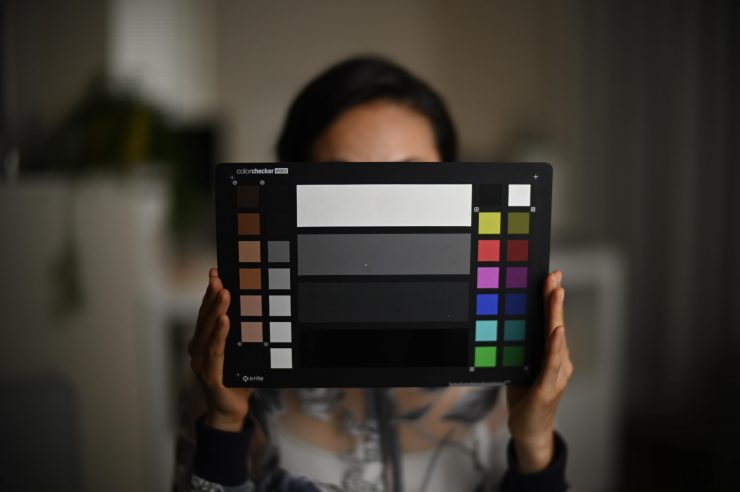
Rotolight Titan X2 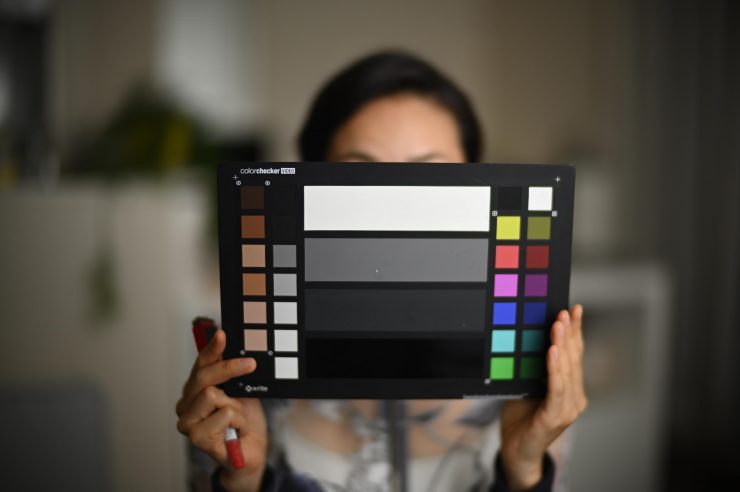
Litepanels Gemini 
Rayzr MC400 MAX
When a WB is done, all three lights look pretty good. The Rayzr MC400 MAX definitely is slightly warmer than the other two lights and you can see that with the skin tone reproduction. All of the lights are pretty close after doing a WB.
It is impressive that the Taiko can hold its own against much more expensive fixtures. Once you do a white balance I would argue to is just as good as the Rotolight Titan X2 and Litepanels Gemini.
Firmware Updatable
Like a lot of today’s lights, the Taiko is fully firmware upgradeable.
Who is the Taiko aimed at?

You could use the Taiko for lots of different applications, but the light is certainly being targeted as a versatile, battery-powered 2×1 RGBW solution for owner/operators.
Even though the Taiko can compete head-to-head with lights such as the Rotolight Titan X2, ARRI S60-C SkyPanel, and Litepanels Gemini, price wise it competes directly with the options from Lupo, Razyr, and Ledgo.
The Taiko is likely to appeal to solo shooters and small crews simply because it can be run off camera batteries at full power in the field.
In saying that, this is still a heavy light and you need to factor that in if you travel a lot.
Other Alternatives
The main competition for the Taiko comes in the form of the following lights:
- Rotolight Titan X2
- Litepanels Gemini 2×1
- ARRI SkyPanel S60-C
- LEDGO LG-G260
- Lupo Superpanel Soft Full Color 60
- Rayzr MC 400
- LEDGO LG-G260
- Luxli Taiko 2×1 RGBAW
- Kino Flo Celeb 450Q DMX
- Kino Flo FreeStyle 21
- Kino Flo Diva-lite 20
- VELVETlight EVO 2
All of these lights have their strengths and weaknesses. Finding the right 2×1 RGBW light that works for you is not an easy choice. Almost all modern lights these days are capable of producing decent results.
Price & Availability
The Luxli Taiko is exceptionally well priced at $1,699 USD. This makes it substantially more affordable than almost all of the competition. This makes it one of the most affordable 2×1 RGBW lights on the market. There may be some other cheap Chinese 2×1 RGBW lights that I am not aware of, but I doubt they come anywhere near the Taiko in terms of build quality and performance.
Below you can see how the price compares to the competition:
| Price | |
| Luxli Taiko 2×1 RGBAW | $1,699 USD |
| Rotolight Titan X2 | $4,999 USD |
| ARRI SkyPanel S60-C | $6,550 USD |
| Litepanels Gemini 2×1 | $3,795 USD |
| Lupo Superpanel Soft Full Color 60 | $2,598 USD |
| Rayzr MC MAX 400 | $1,999 USD |
| LEDGO LG-G260 | $2,565 USD |
| Kino Flo Celeb 450Q DMX | $4,585.75 USD |
| Kino Flo FreeStyle 21 | $1,525.75 USD |
| Kino Flo Diva-lite 20 DMX | $2,035.75 USD |
| VELVETlight EVO 2 | $3,766.50 USD |
As you can see, the Taiko is a whopping $4,851 USD cheaper than an ARRI SkyPanel S30-C, and $3,300 USD less than a Rotolight Titan X2.
Kits
Luxli also sells a range of kits. There is a Luxli Taiko 2×1 RGBAW LED Light Complete Kit that sells for $1,798.18 USD. In this kit you get:
- Luxli Taiko 2×1 RGBAW LED Light
- Power Supply with Power Cord
- Diffusion Panel
- Yoke
- Photometric Calibration Results Data Sheet
- Limited 1-Year Warranty
- Luxli Travel Case for Taiko 2 x 1 LED Light (Black)
- Shoulder Strap
- Padded Divider
- Luxli Diffuser for Taiko 2×1 Panel (Light)
- Luxli Diffuser for Taiko 2×1 Panel (Heavy)
This kit offers tremendous value for money, considering you also get a nice travel bag for the light.
Another kit that is available is one where you can get the Takio and a couple of Timpani fixtures. The Luxli Taiko 2×1 and Timpani 1×1 RGBW LED 3-Light Kit ($3,594.96 USD) consists of a Taiko, bag, and three diffusion filters, as well as two Timpani fixtures and a carry bag.
This kit is cheaper than buying a single Litepanels Gemini, Rotolight Titan X2, or ARRI SkyPanel S30-C.
Conclusion
The Luxli Taiko is a very, very good light. It offers tremendous value for money when you compare it against the competition.
The light is fully-featured, well built, and produces a really nice quality of light. The color rendering scores are exceptional and the output is right up there with a lot of the competition. The low power draw and the ability to run it off flight safe camera batteries at 100% are features that make this light stand out.
The output is almost identical no matter what Kelvin color temperature you run the light at and it is very Kelvin color-accurate across its whole range. This light is super consistent.
The interface and operating system are one of the best I have seen and making changes to the light is straight forward and intuitive. While Rotolight’s touchscreen interface is now the gold standard for which all other lights should now be judged against, the Taiko’s is better than most other options that are out there.
If you have been looking at a Rotolight Titan X2, Litepanels Gemini or an ARRI SkyPanel, the Luxli Taiko is a light you should also be seriously considering, especially if your budget is limited. As far as technical color accuracy scores go, it outperforms all of those lights, and that is no easy task.
As an owner/operator, the Taiko makes a lot more sense to buy than any of those lights I just mentioned. None of those lights above can be run at 100% off flight safe camera batteries and they are all substantially heavier and way more expensive.
At its price point, the Taiko’s only real competition, at least in my opinion, comes from the Lupo Superpanel Full Color 60 and the Rayzr MC400 MAX, but in all honesty, the Taiko is in a class of its own.
I was massively impressed with the Luxli Taiko 2×1, it is the best bang for your buck 2×1 RGBW light on the market by a country mile. While it may not have some of the advanced features of the Rotolight Titan X2, at its price point, nothing else is better.
The Taiko is one of the most impressive lights I have ever reviewed, and Luxli has done a fantastic job with this light. It punches well above its weight and can stand toe-to-toe with much more expensive offerings. While it isn’t going to knock out the Rotolight Titan X2, it is certainly capable of going the distance, and that’s extremely impressive given the massive difference in price.
Like what we do and want to support Newsshooter? Consider becoming a Patreon supporter and help us to continue being the best source of news and reviews for professional tools for the independent filmmaker.


