The Moza Slypod is like nothing I’ve ever seen before. It’s a retracting motorized rod that doubles in length at different speeds. It can be used as a slider, jib, dolly, and even on a monopod with the included feet. In some ways, it’s a little easier to do moves with it than using a traditional slider. One move that I find challenging is the over the top slide. This takes a lot of rigging to mount a slider upsidedown and pull it off with a conventional slider; however, with the MOZA Slypod, it’s a simple setup. Before I start the review, I have to let you know it wasn’t all smooth sailing with the Slypod; however, in the end, I think the device is revolutionary, and I applaud MOZA for the innovation.
Issues with my copy of the Slypod
I was having lots of wobble issues with the first copy I had, and it seemed to increase over time while testing. I contacted MOZA, and they sent me a replacement, and with the second copy, I had to retest all over again. While this is disappointing, it’s also good that MOZA recognized the copy I had was defective after I explained the issues I was having. I also read a few reviews that had the same problem and they also had the early samples exchanged. The problems I had with back and forth wobble is gone, so it’s likely an issue with early pre-production models that has been fixed.
Always Update The Firmware
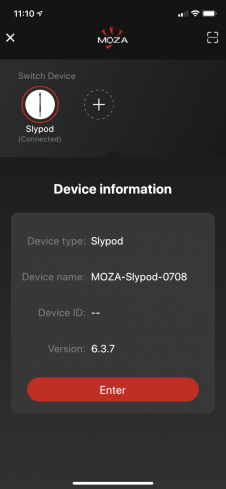
One of the first things I did when the new MOZA Slypod arrived was to connect the Slypod with the MOZA Master app to see if an update to the firmware was available. The version that the Slypod shipped with is Ver. 6.3.7. Sure enough, the app showed an update is available. When I went to upgrade, it goes through the process but doesn’t seem to update the Slypod. I tried this several times, but could never get it to work. Uh oh. Here we go again?
The kit comes with a head for mounting the camera; however, it uses a Manfrotto QR plate. Why it’s not an Arca/Swiss style is a mystery. Having both QR systems makes it frustrating for both types of users. However, I found the Arca/Swiss mount to be incompatible with my clamps. It’s not an Arca/Swiss compatible plate.
Moza slypod Key features
- Motorized 11″ telescoping movement in horizontal (slider) mode and vertical (monopod) mode
- 9 lb horizontal rated (safety) payload, 20 lb vertical (22 lb / 40 lb max payload)
- Ultra-slow 0.15mm per second to up to 1.1″ / 28mm per second travel speed
- The two-hour built-in battery can be charged via a USB port during operation for continuous use
- 21″ length fully collapsed
- 38″ length fully extended and with a wooden handle attached on one end and included pan-and-tilt accessory on the other
- Carbon fiber construction; weighs just 1.65 lb
- Weatherproofed design
On with the review! What’s included
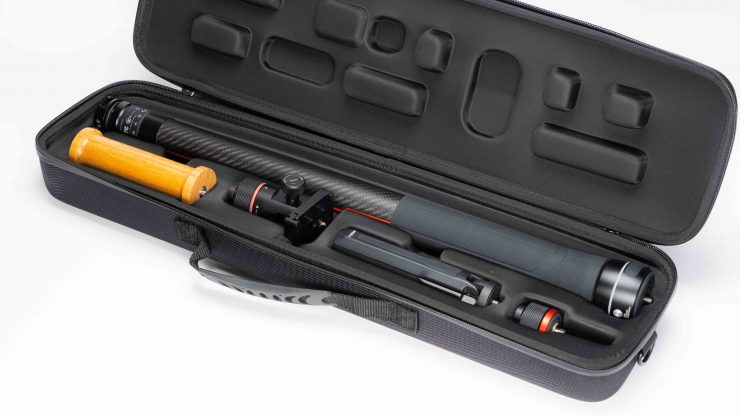
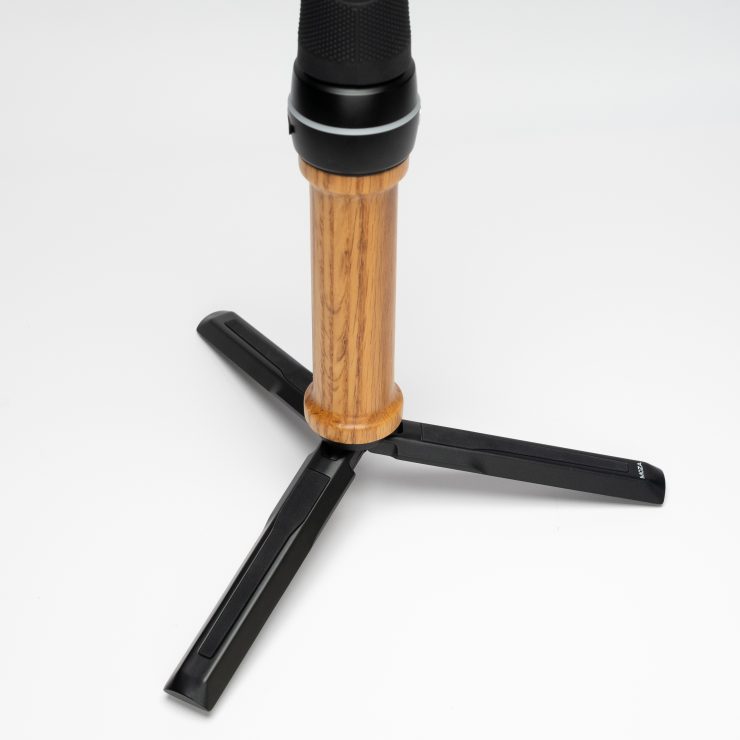
The Slypod comes with a semi-hard case for storage and transport. Included is a nice wood handle to make it longer and a little easier to hold as well as a set of feet to use it as a Monopod. Yeah, it’s a Monopod as well!
You can’t mount the feet direct to the Slypod as it has a 1/4 20″ screw as well as the feet, so the handle has to be in the middle. I found it when used on a tripod. I preferred not to use the handle since, without it, it makes the Slypod shorter from the back.
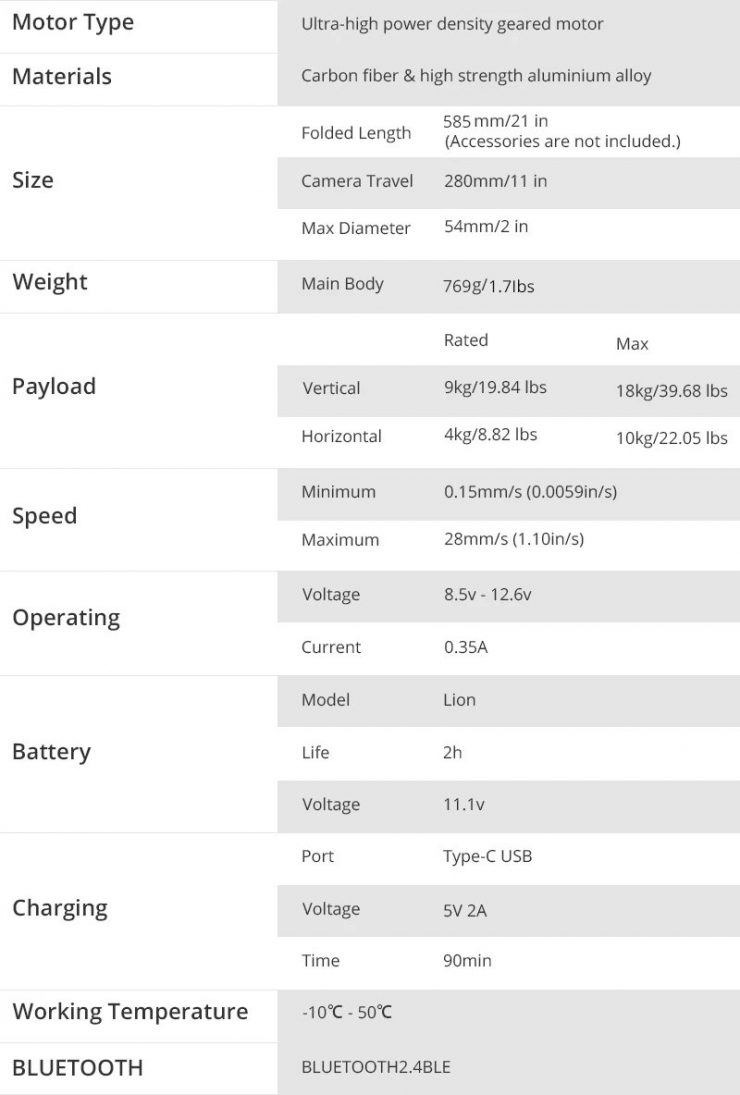
Moza Slypod Specifications
The MOZA Slypod has a maximum payload of 4kg or 8.82 lbs when horizontal and 9kg or 19.84 lbs vertically, making the Slypod a good fit for hybrid cameras. However, the vertical payload is impressive at 9kg, and if you have a heavier payload, it might work, but I tend not to like to push it when dealing with payloads. The same goes for tripods.
Mounting and Setting Up The Slypod
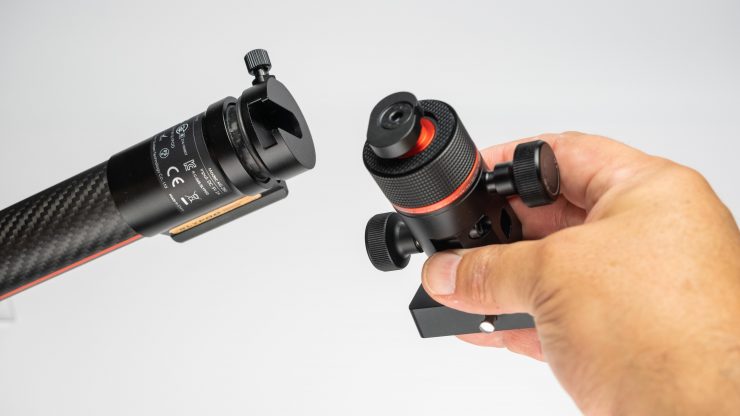
As I mentioned earlier, the Slypod includes a head that mounts directly to the Slypod. It uses a proprietary connection, so this is the only option you have. Well, maybe not the only option as also included is a 1/4 20″ adapter with the proprietary locking base for other mounting options. I suppose you could mount a different ball head.
It locks into place, and from the base of the head, it tightens down to prevent moving. A Manfrotto style quick-release system is attached to the head. This is handy if you’re already in the Manfrotto ecosystem.
A safety pin on the QR plate will prevent the camera from sliding off if not locked down correctly.
I found the Manfrotto QR release to mount securely when locked down and yes, it fits just fine on Manfrotto heads.
The head is a ratcheting style head, not a fluid version. This prevents it from flopping over simular to a magic arm. I found it to be easy to use for the shots I needed. It’s not as fast as a fluid head but fast enough. It’s important to make sure the pan is tightened as much as you can by hand to keep the camera from moving while performing slides.
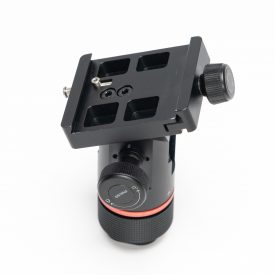
Built-In Quick Release Plate
One issue I found is with the built-in Arca/Swiss mount. It is larger than a standard Arca/Swiss plate. I tested it with both a Really Right Stuff clamp and a Kessler QR clamp with the same results.
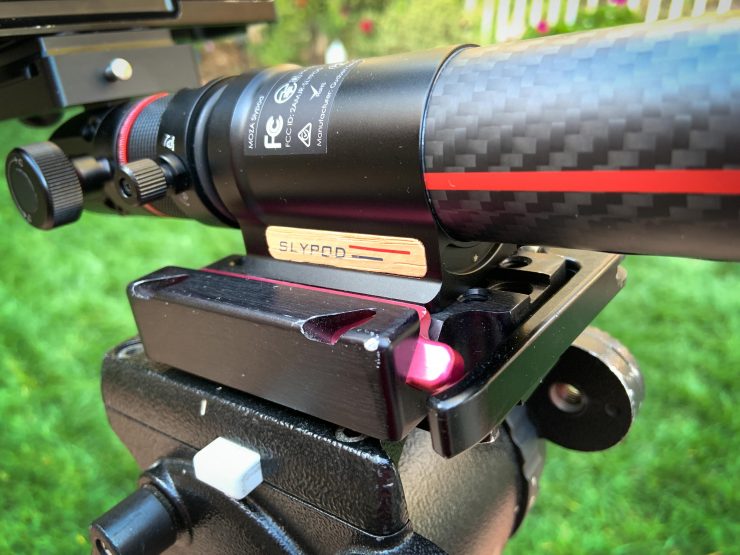
I was able to close the clampdown, but the plate isn’t seated correctly under the red release portion of the clamp, making the connection on the dangerous side. It did hold it but not correctly.
With a Really Right Stuf clamp, I wasn’t able to close the clamp. I might take a file to it and shave it down, but that will happen after the review process is done.
This has been an issue on cages and plates I have tested from several manufacturers. Why they don’t stick with exact specs makes no sense to me. If you want to add an actual Arca/Swiss compatible plate it can be mounted with two taps on the “not so Arca/Swiss” plate. MOZA should have gone with the Manfrotto plate design as they used for the head.
On-Board Controls
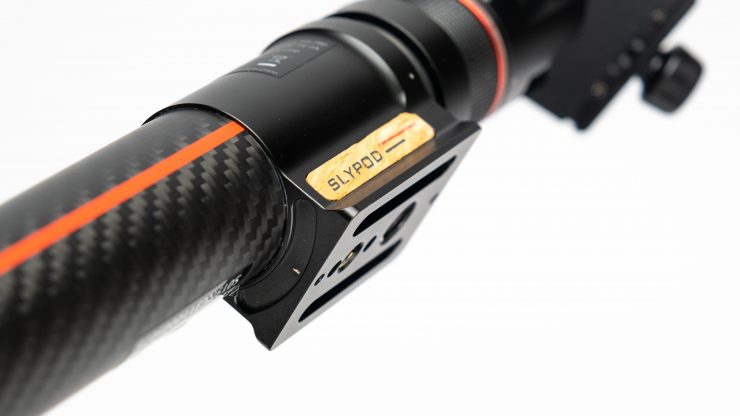
The Slypod is made up of two pieces of carbon fiber and has a motor to extend and retract a carbon fiber section. I don’t know precisely how the motor works. It could be a pully system or a corkscrew design.
The motor and system are inside of the Slypod, so no extra external devices are required. This makes the Slpod very fast to set up. Attach a mounting plate for your tripod and the supplied head for the camera, and you’re ready to go.
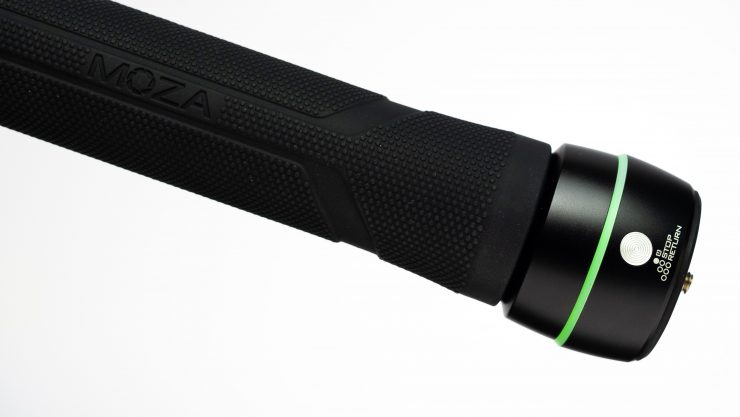
To turn the Slypod on you simply hold the button in for a few seconds until the green LED on the base is solid green.
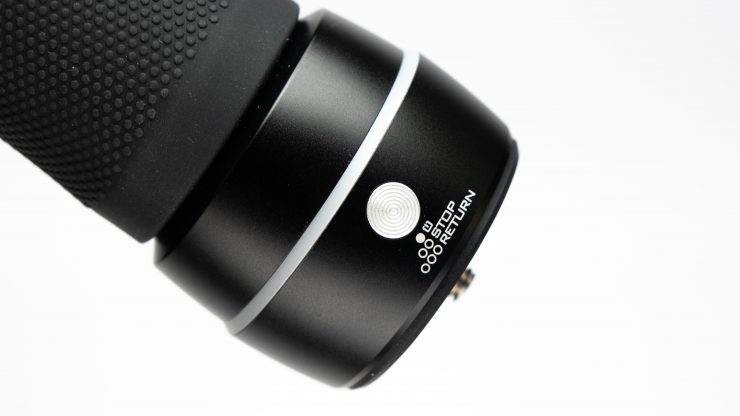
The ON/OFF button when double-tapped will STOP the Slypod when moving and with 3-taps will RETURN.
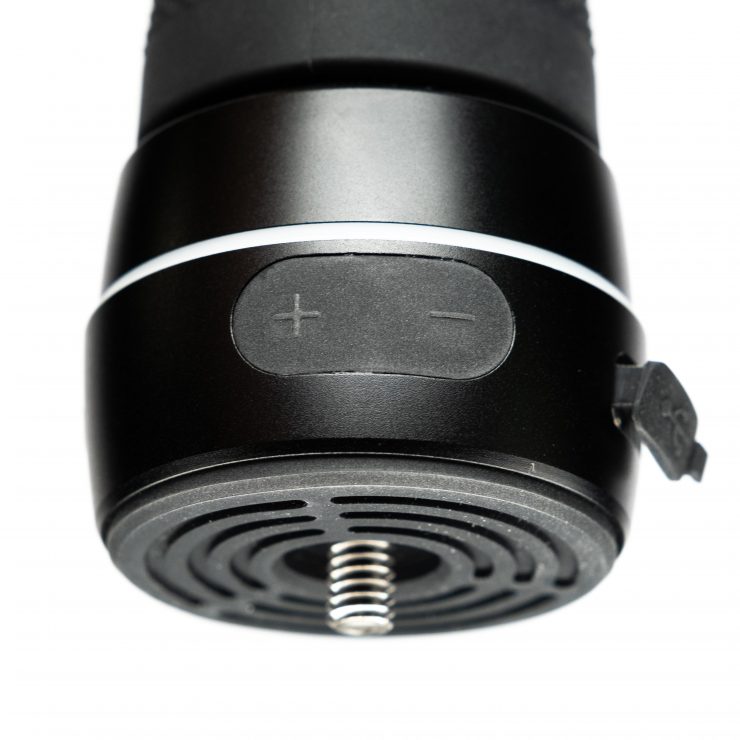
On the other side is a + and – button. This controls the speed of the Slypod while extending. To put the Slypod in loop mode hold all three buttons down at the same time.
Operating the Slypod locally or from the device works well. It can be a little fidgety getting the right speed with such a short distance it can travel. Also, controlling the Slypod locally can add shake or bumps. For short takes, it’s fine. To get the most out of the MOZA Slypod using the Master App is a better option. More the Master App in a minute.
The Slypod charges with a USB type C connection alongside the other buttons at the end of the device. It takes approximately 90-minutes to fully charge and last about 2-hours.
Balance is Important
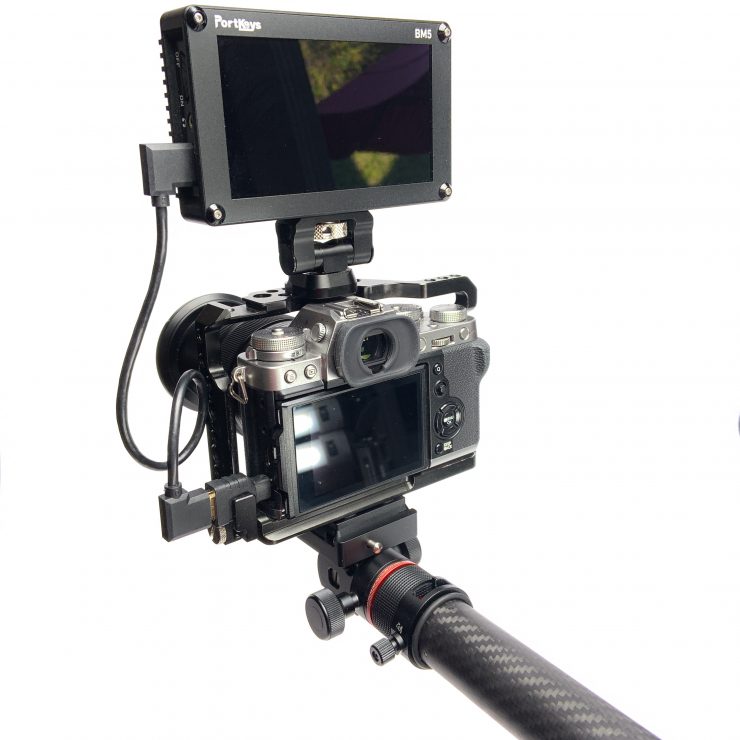
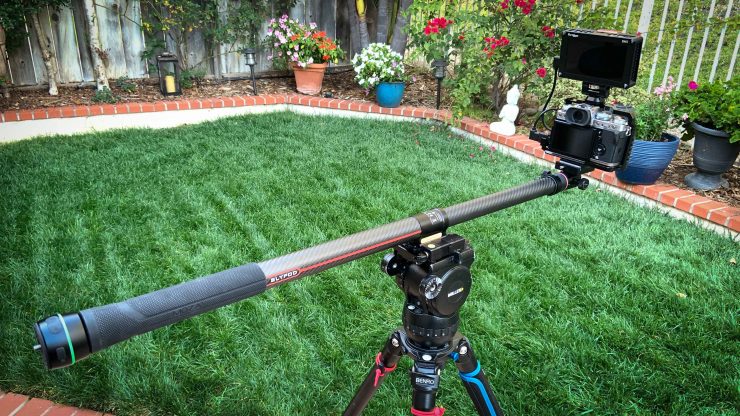
Depending on the camera you are using, you need to make sure the weight of the camera when fully extended is not going to tip your tripod over. I highly suggest trying to get the camera over one leg and add a small shot bag on the other end of the Slypod. This isn’t necessary for small cameras like the X-T3 and kit lens, but if you have a tripod with a narrow footprint, you should make sure a few sandbags are around to keep your camera safe.
I also feel a solid-fluid head on your tripod is a good idea. I would hate to see your camera hit the ground due to a cheap underweighted head.
Controller
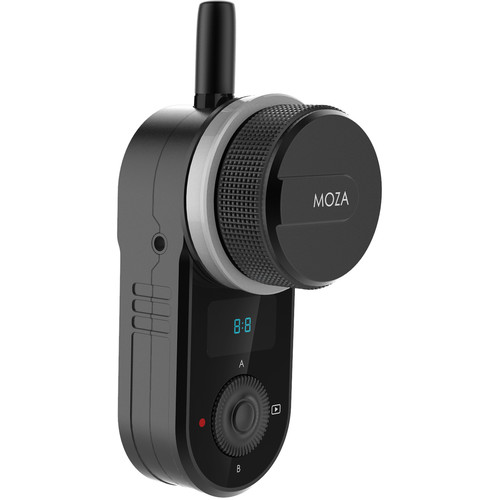
Another option to control the Slypod is with the Moza Slypod Wireless Remote Controller. I don’t have the follow focus unit to test with, but it looks like a good option instead of touching the Slypod while performing a move.
MOZA App
Yep, you guessed it! The Moza Slypod has an app. As I mentioned, the app is used to upgrade the firmware it also controls the Slypod’s functions.
Using apps with lights and gadgets has become the norm these days, and I do like the integration, but using my iPhone for several devices on set can be a struggle. After all, it is my phone too.
I’ve thought about buying an iPod Touch many times to use as my remote for all the production gear I have. It makes a lot of sense to free up my iPhone for other purposes.
The Moza Master app makes controlling the Slypod easier and keeping your hands off the device will avoid bumping it by using the + / – buttons on the end of the Slypod, causing you to reset and do another take.
The Slypod does a whole lot more than go up and down. It can be programmed for different lengths and speeds plus has timelapse functions. In future firmware updates, the Moza Slypod will be able to work seamlessly with the Moza AirCross 2 gimbal for creating more-complex movements.
Basic control with the Moza Master App
One thing to know about using the MOZA Master app is you cant use both the app and the controls on the Slypod at the same time. It’s one or the other.
I did find if you are using the app and take a break or the iPhone screen goes dark when you go back to the app, the connection will be lost, and reconnecting doesn’t work. The workaround is force closing the app and reopening and also reconnecting to the Slypod. You don’t have to restart the Slypod just restart the app and connect.
Regular Mode
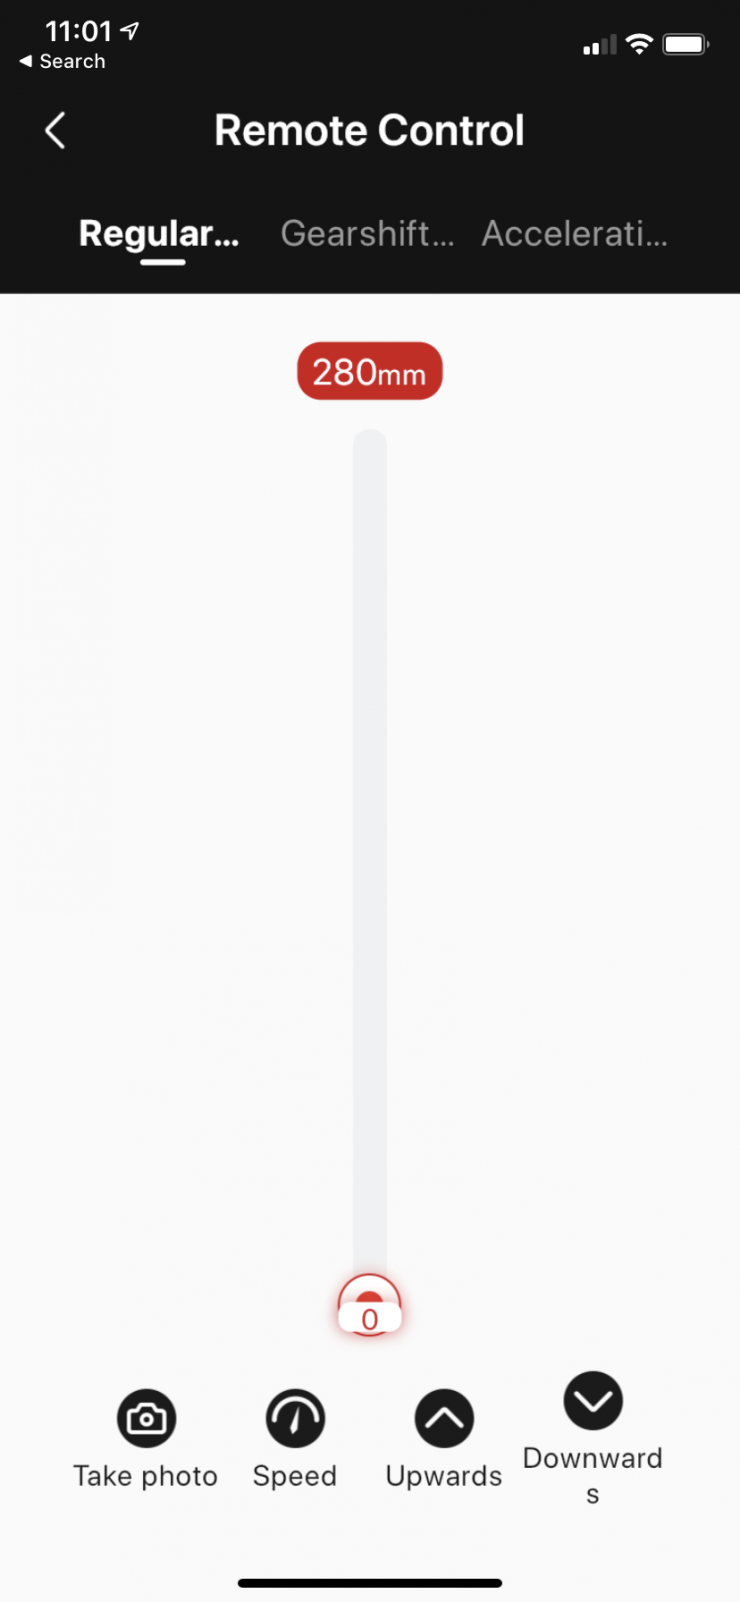
If you only want to do basic moves, the Remote Control option is a good choice as it’s simple to use. The first option is Regular Mode. This is very basic as it only controls the speed and up and down motion.
Gearshift Mode
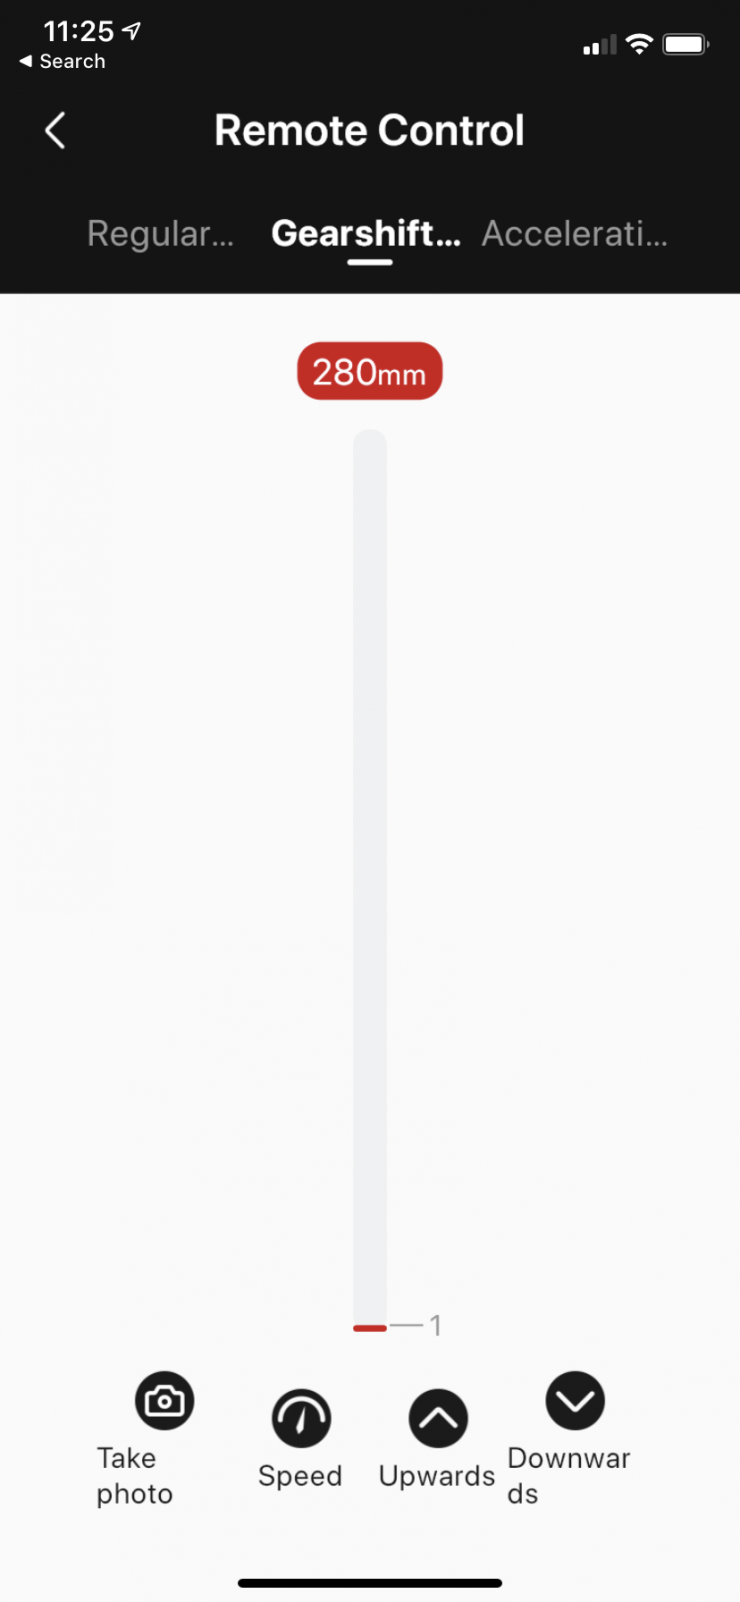
The second option is Gearshift. The Slypod will move from the current speed to the set speed and then decelerates to the end position. The end position speed is 0.
Acceleration Mode
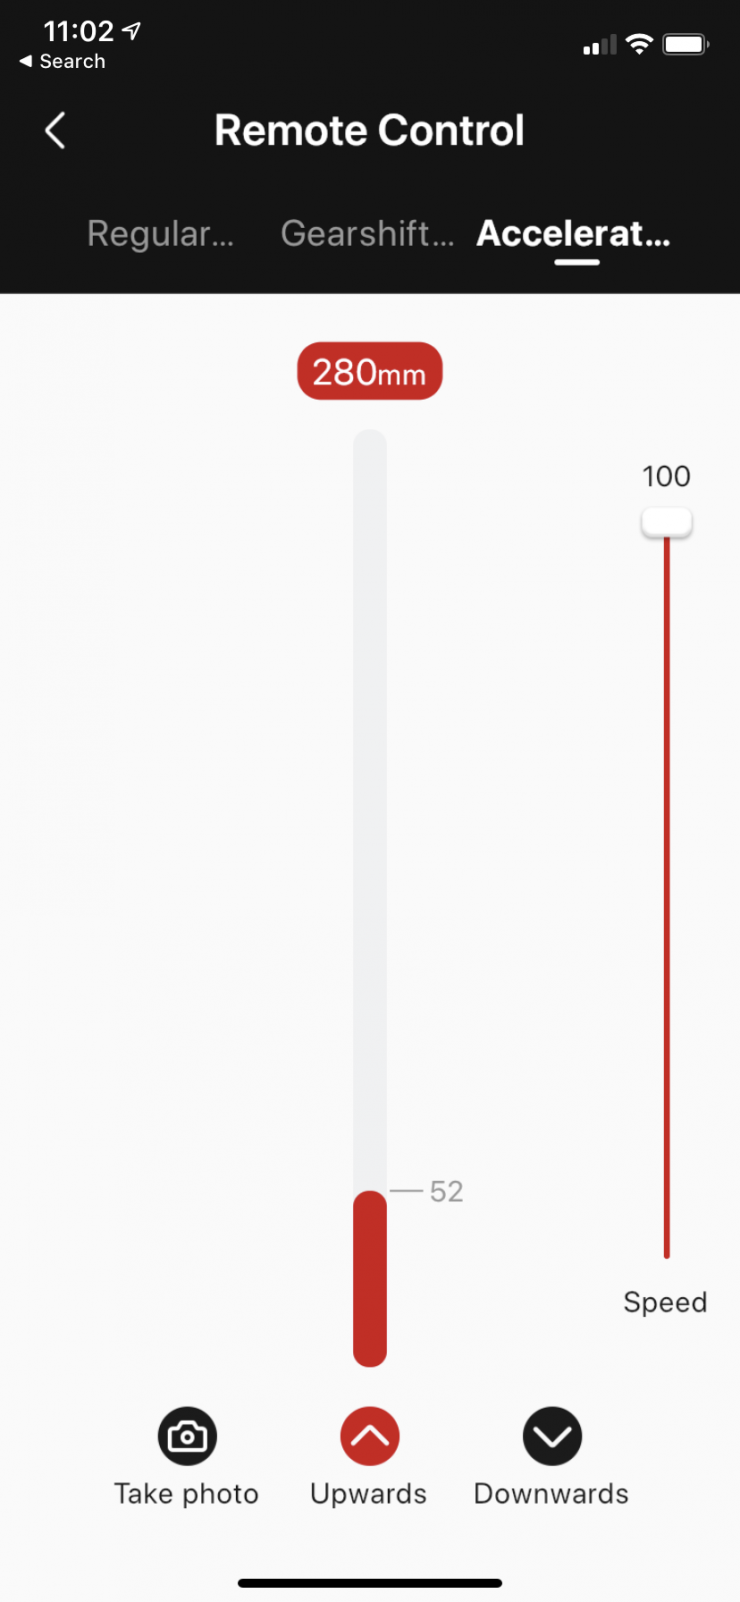
The third option is the Acceleration Mode. By dragging the white mark to set the device acceleration speed, and the device will continue to accelerate to the end position according to the set speed. When the Slypod extends to 280mm or retracts to 0mm it will reach the set speed that was set.
I’m not sure how useful these settings are as I tend to like the shot to be consistent. When the move stops it does feel mechanical in nature so I probably wouldn’t use it. YMMV. 😀
Creative Video Mode
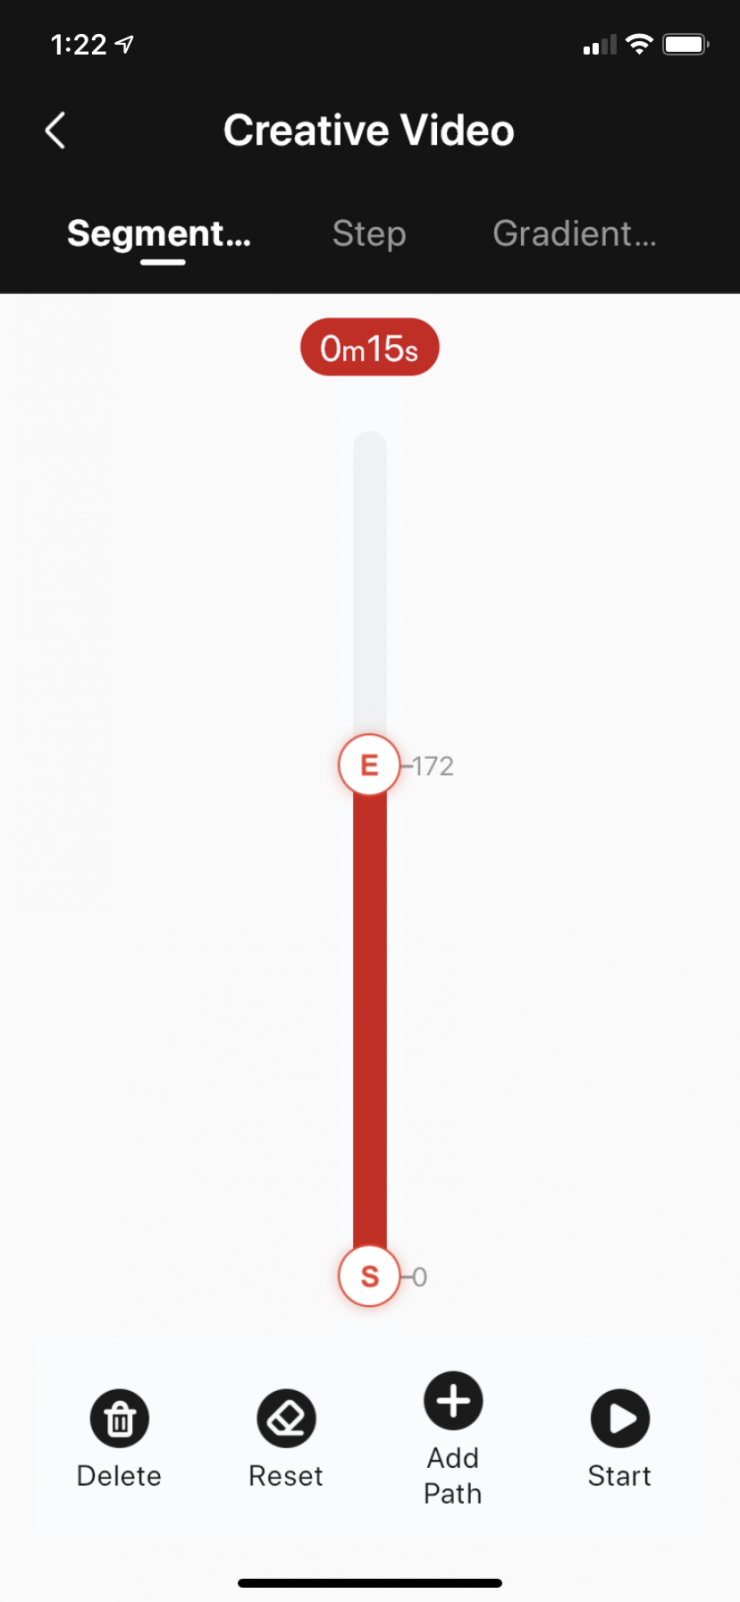
The Segmentation settings are the ones I used the most for video work. It’s very easy to program, and you don’t have to touch the Slypod at all. In Segmentation mode, you have the option to create moves based on length and time of travel. You can also set up multi moves and have a ramping effect between them.
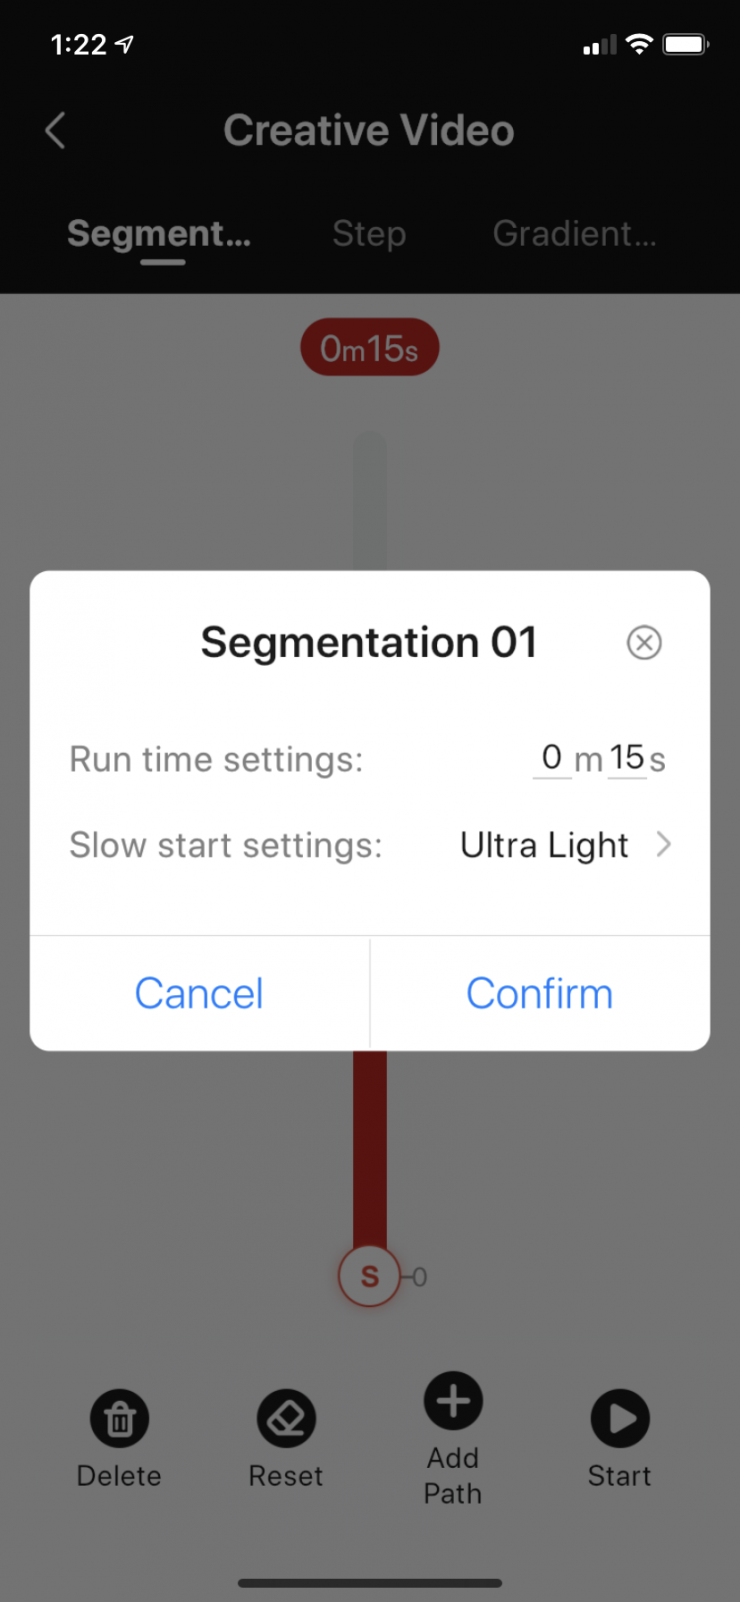
By tapping on the time indicator at the top of the range, you get a dialogue widow to set how long the move will be and how slow the camera move will start. If you intend to us the beginning of the shot, an Ultra Light setting is pretty smooth. If you want to just get it going as fast as possible, choose Heavy.
In Creative Video using Segmentation, you don’t have the opportunity to preview the Slypod’s start and end. It takes a little more time to get the camera in the right starting position by trial and error. I would like to see a few added features to make this possible like a GO TO START option and end as well. This way, fine-tuning a shot would be a bit faster than guessing and several playbacks and resets.
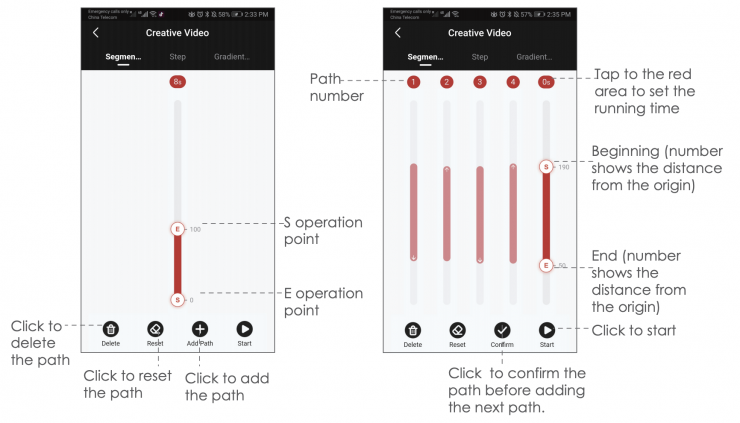
You can set up to five paths to run sequentially at different speeds and endpoints.
Step Timelapse Mode
To use the timelapse mode at its full potential, you need to purchase the specific cable for your camera. At this time, only Sony, Canon and Nikon cameras are compatible. With the cable attached, the Slypod will trigger the camera in intervals as the Slypod is moving down the track. The Slypod will stop, take a picture, then move to the next step and repeat until done.
Performance
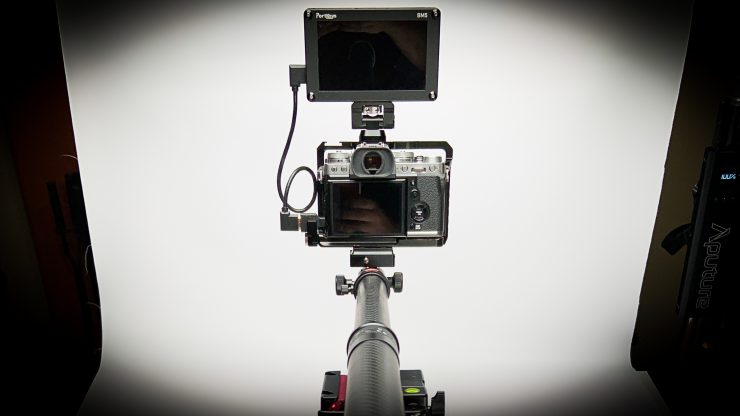
The MOZA Slypod is fun to use. I especially like exploiting its strengths. I can set up an overhead tabletop setup in minutes with a nice over the top slide. This would be very time consuming and require a lot of rigging to set up with a conventional slider. Pushing the camera forward on a slider is not very effective as the track will come into view very quickly.
Once you get familiar with the app, the Slypod is easy to use and not as cumbersome as I originally thought it would be. It’s lighter than a slider, and the camera doesn’t have to be removed when moving it from scene to scene. So many times with a slider I forget to lock the cart and the camera will slide while moving it. DOH!
Since I use a Fujifilm X-T3, I wasn’t supplied the cable to do time-lapse testing; however, it looks like an interesting feature for motion time-lapse. again with such a lightweight system, all you need is a tripod and your off and running.
11-inch Slider/Dolly
The push-in/out is a move that the Slypod shines at. As I mentioned, sliders are too close to the lens and not the right tool. A dolly is designed for this. While the Slypod has a minimal range of approximately one foot, it’s plenty for some product b-roll and I think the Slypod is very good for this purpose. When using it as a slider 11-inches of travel at a slower speed will give you a nice 10-second shot.
Noise
This thing is loud. Even in Silent Mode, it’s too noisy to record dialogue with. That’s a bummer as it could be a great second angle in looping mode for interviews. I also would have to be mindful of other people when using it in public places. The grinding sound can be annoying if it’s going on for a long period of time.
Motion Control with Moza AirCross 2
I don’t have the Moza Air Cross 2 to integrate with the Slypod, but I can see some real potential in creating interesting moves. I do feel it might take a lot of planning and trial and error to get both working seamlessly together, but that’s more my opinion since I haven’t tested them together.
Conclusion
I like the MOZA Slypod. I think it’s a tool that I will get more use from than a slider alone. It’s easier to work with than a slider and does more than just slide. It mimics a small dolly move that has nice production value and takes up very little room on set. Plus I don’t need an assistant to use it. Add the vertical option for smooth dolly shots and it covers more than any tool I know. Oh, I didn’t mention the motion control option for time-lapse either. Pretty impressive.
The MOZA Master app is pretty good. It gets a little annoying always having to reconnect it when the iPhone closes, but using it as opposed to operating it locally is much better due to no bumps when using the on-board buttons to start and select speed.
All in all, it’s a good piece of kit that adds production value to your shots. The retail price for the MOZA Slypod is now $449.00 and I think it’s priced fairly.
Like what we do and want to support Newsshooter? Consider becoming a Patreon supporter and help us to continue being the best source of news and reviews for professional tools for the independent filmmaker.


