I love lighting! It truly makes the shot. Creating a mood or look is important to tell the story or the message you want to deliver. Lighting does this so well. When I have the opportunity to try something different I jump right in. I’m not a guy who always does the same setup. I also like to try new diffusion techniques as well as different types of fixtures. As a result, I learn a few things plus it’s fun! Also along with lighting comes gripping. I think it’s the kid in me that likes to build with Lego which is why I like shiny light stands and diffusion frames. At the end of the day, you tear it all down!
Lighting is one of the fastest changing and evolving parts of the film and video production world. Yeah, cameras are really good now with clean, high ISO levels, but we need to use lights. Even though the lights we do use don’t need to be as big and bright, we still need to use them.
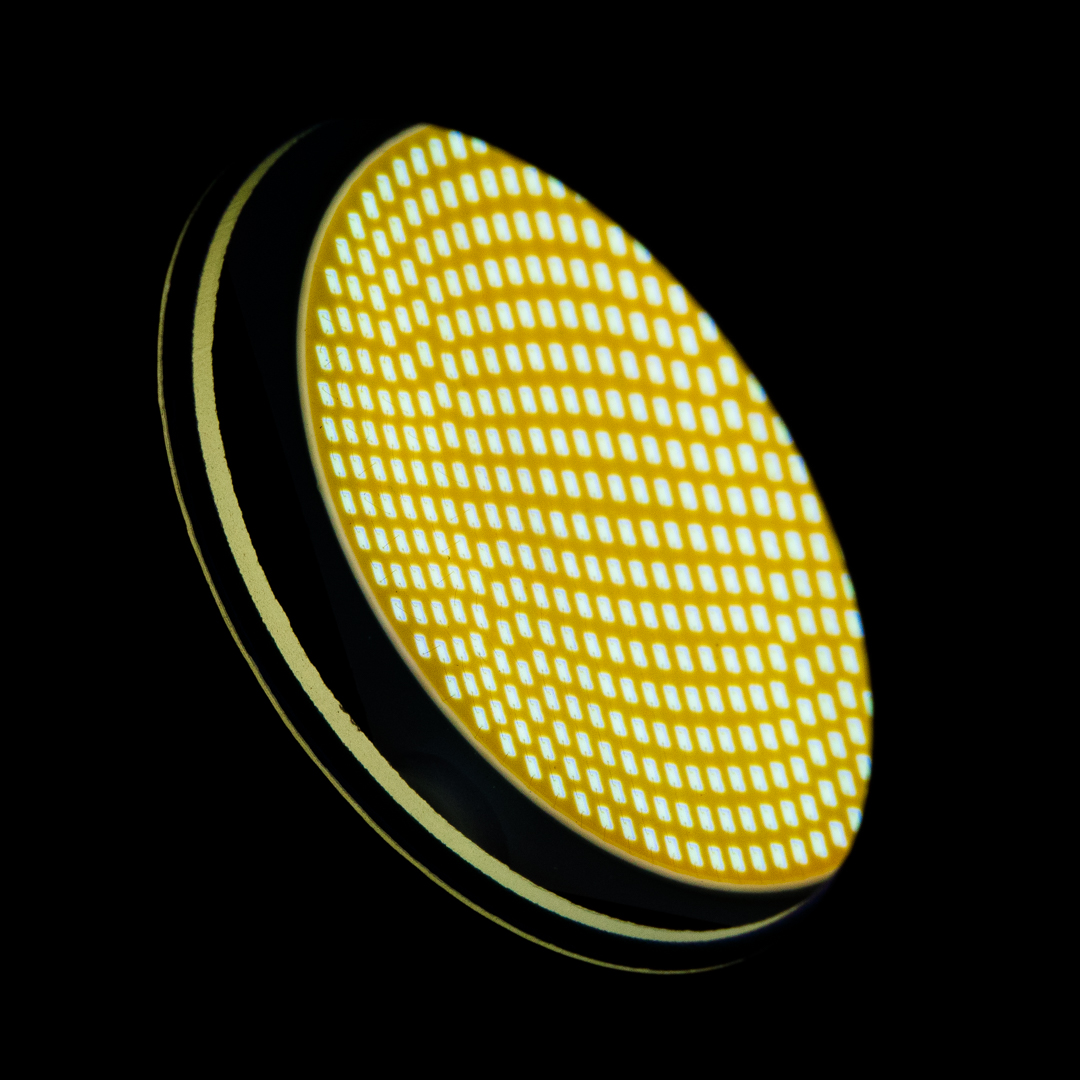
Above is what a COB or ‘Chip On Board’ light looks like. Inside the yellow circle of the COB is an array of tiny LED’s that produce a single source. LED lighting keeps getting better with options from fresnels to large panels and punchy RGB fixtures. We are also seeing lights with 95 to 98 CRI consistently in the lower price ranges.
Personally, I’m a big fan of large lighting sources. I like how it wraps the talent and is nice and soft. For me, soft is the key. No pun intended 😀
To get soft lighting you either have to use diffusion or bounce the light onto the subject to create a large source. 4×4 frames are a big part of my lighting setups. I can put all kinds of lights behind them since the 4×4 front now becomes the source. I’ll stick a couple of Litepanel ASTRA panels or an Aputure COB 120d or 300d behind them to get the output and look I need. I use all daylight these days and bi-color lights have the advantage of being able to play well with other lights since you can dial them in to match.
Bring on the tube lights
Lately, I’ve been using more tube lights by Quasar Science and I never thought I would take to them as much as I have.
My first exposure to them was the battery-powered Quasar Science Q-LED tube lights. These suckers are bright and bi-colour. I did a review on them that you can check out here
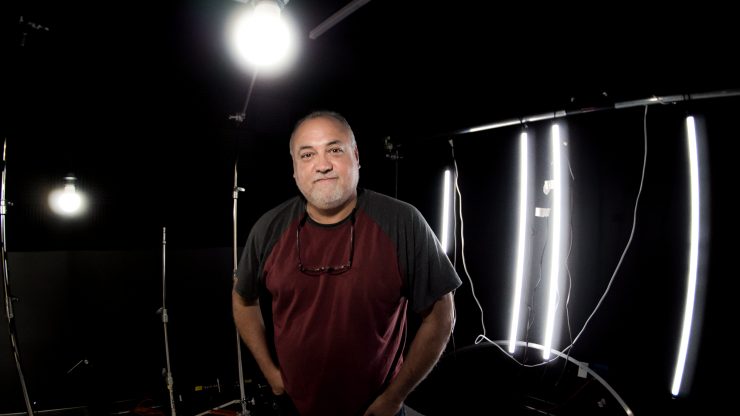
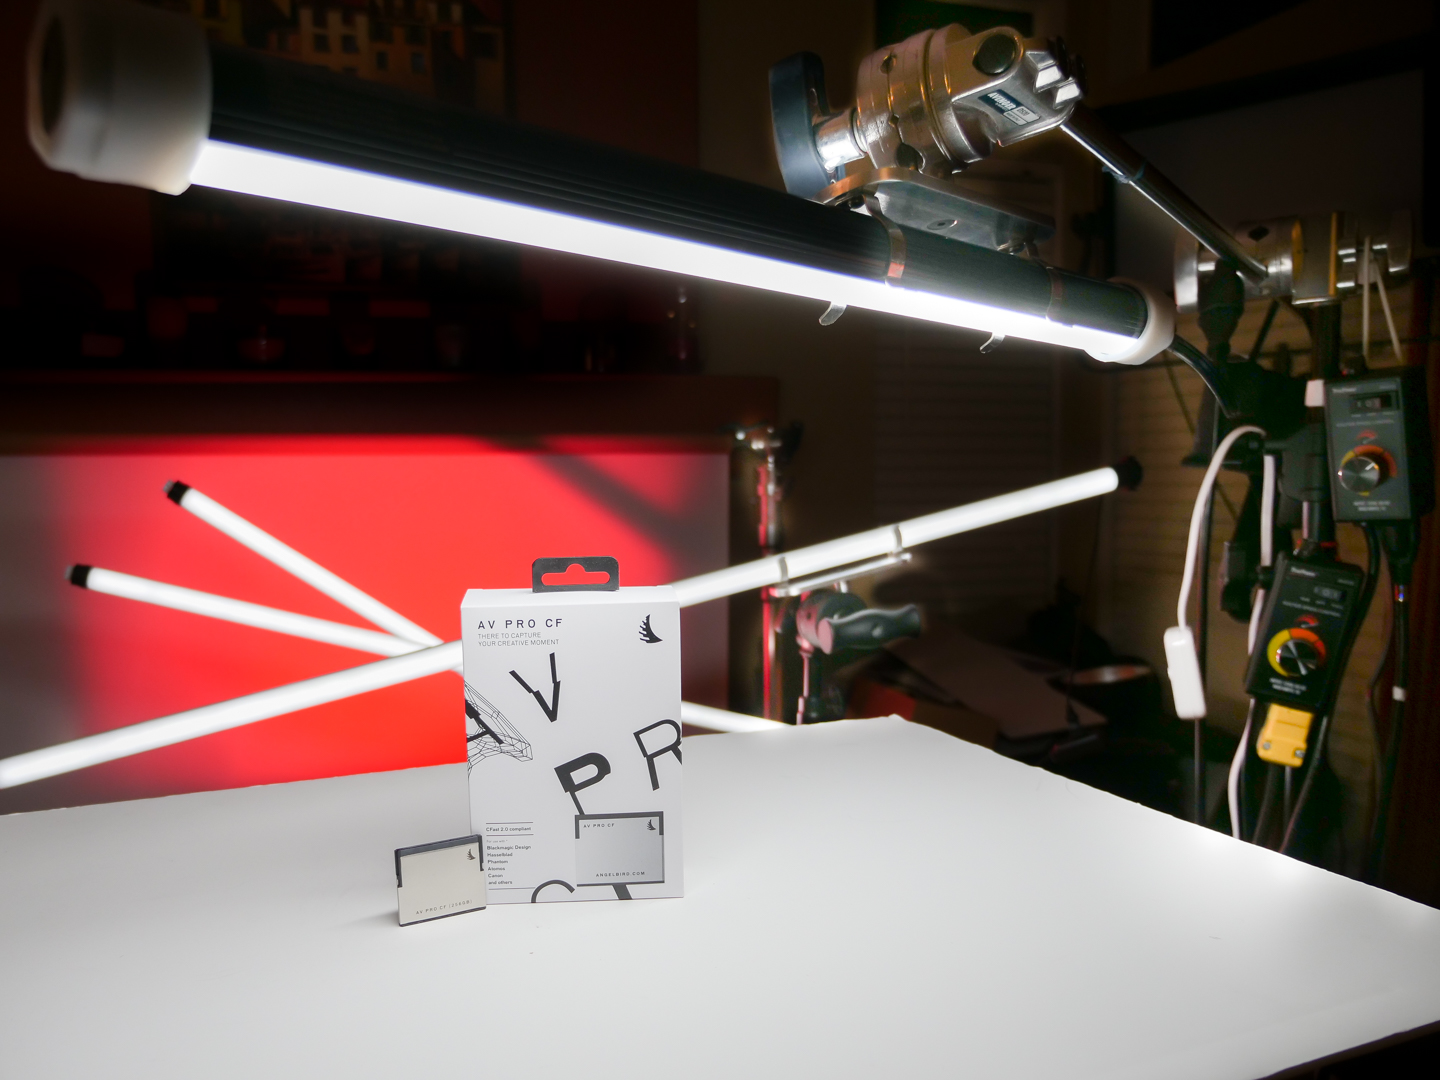
I had a promo shoot for our investigative unit and the look that the producers wanted wasn’t really doable in our space so I had to come up with something that would work. I’ve seen a lot of music videos lately using the Quasar Science T8’s and Xcross-fades in various lengths and thought this might be a cool way to add an interesting lighting element in the background. I picked up four 4′ daylight T8’s since they are pretty reasonably priced at $75 each. I also picked up several tungsten LED bulbs from IKEA to try which worked well to break up the pattern in the background. Mounting these tubes are a bit of a challenge if you haven’t used them before but that’s where the fun is.
Getting my Grip on
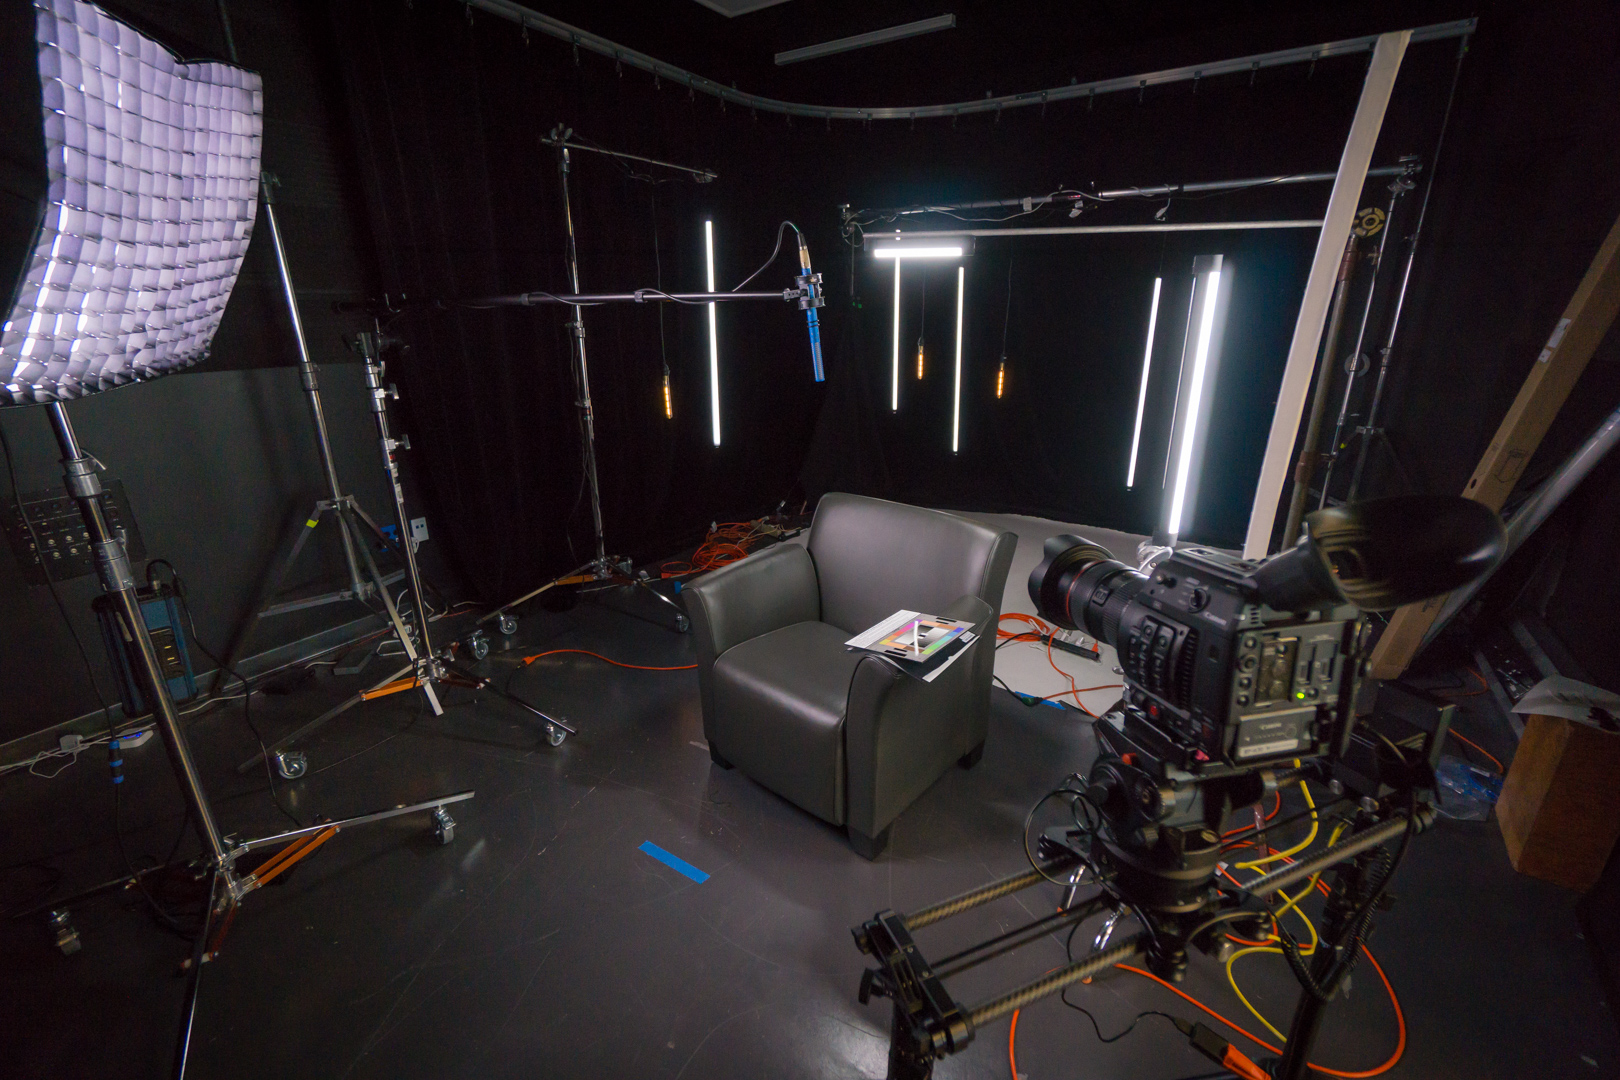
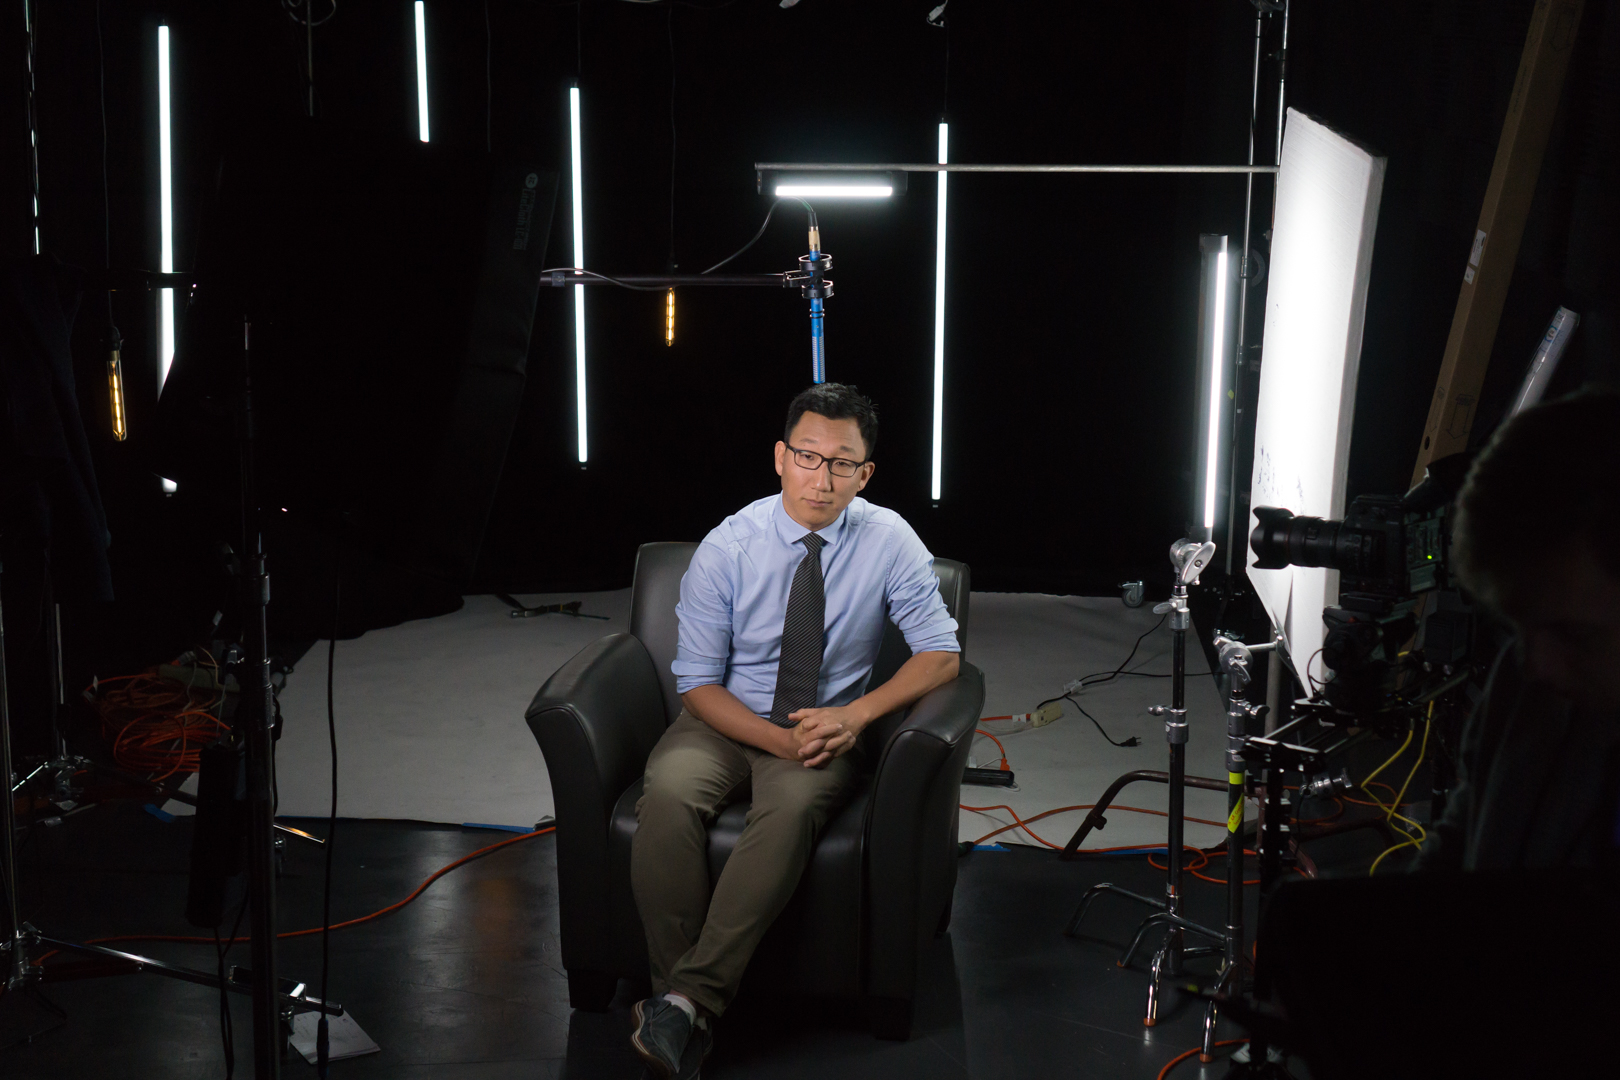
I wanted to have the T8 LED tube lights to look like they’re floating in the background. Now with a basic idea how the heck am I going do it? A long horizontal goal post would work perfectly. I Haven’t used speed rail before for building up a goal post so this might be a good opportunity to up my grip game. I found a resource locally and purchased four 6 foot pieces.
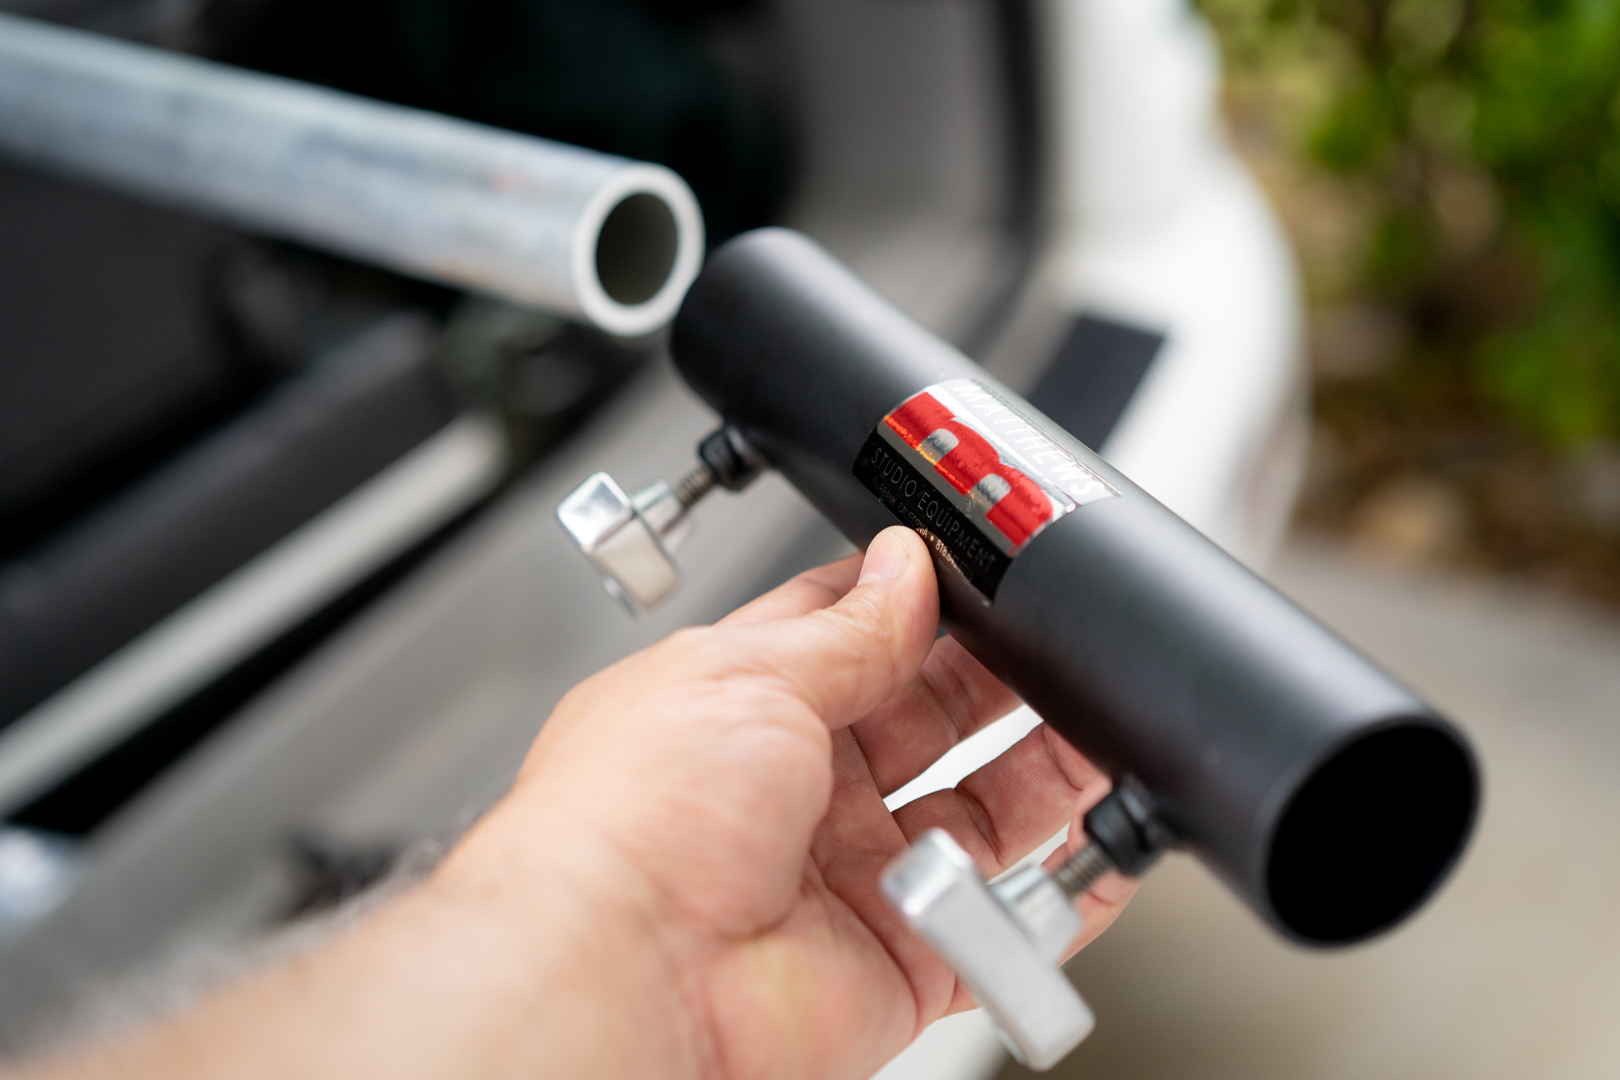
To build the speed rail goalpost I used a Matthews Frame Part Connector for 1-1/4″ Pipe. ($32.00). This safely lets me attach two 6′ segments of speed rail to create a nice long 12-foot goalpost setup. That was so easy!
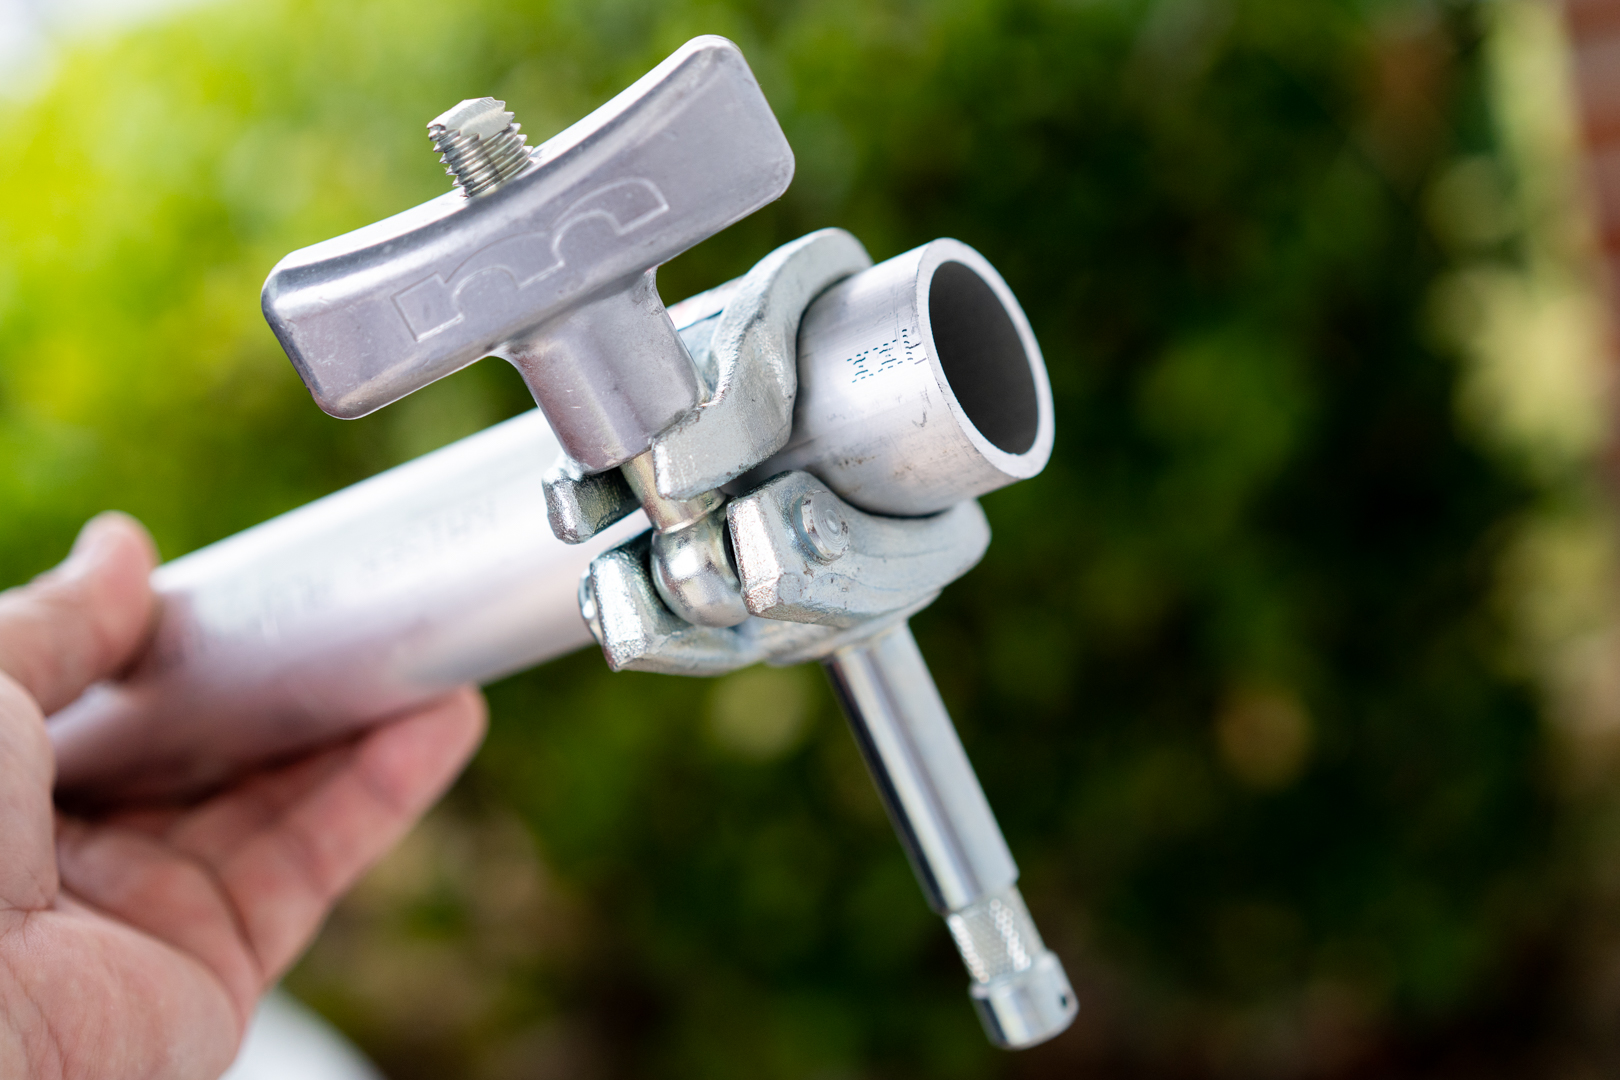
On the ends are Matthews Baby Grid Clamps ($47.00). They simply slide right into a grip head on a sturdy light stand. This setup was overkill for my lighting scheme but it sure was sturdy, plus if I wanted to hang a light fixture to it I could. Options are good and I don’t like wobbly unsafe setups. It’s not worth getting myself or others injured. This was so easy to setup and worked great. Now that I have the speed rail I can use this grip gear for other shoots if I ever need to hang some backlights or create a small cage. Ahh. “Erik The Builder”. Having a small goal post rig in your kit is a great idea. It’s fairly inexpensive for the speed rail, joiner, and a couple clamps. The shorter speed rail sections make transporting them much easier too.
If I could have done anything differently it would be to add some fishing wire to the bottom of the T8’s so I could align them better. I didn’t notice this issue until we started shooting. Bummer.
Controlling the tube lights
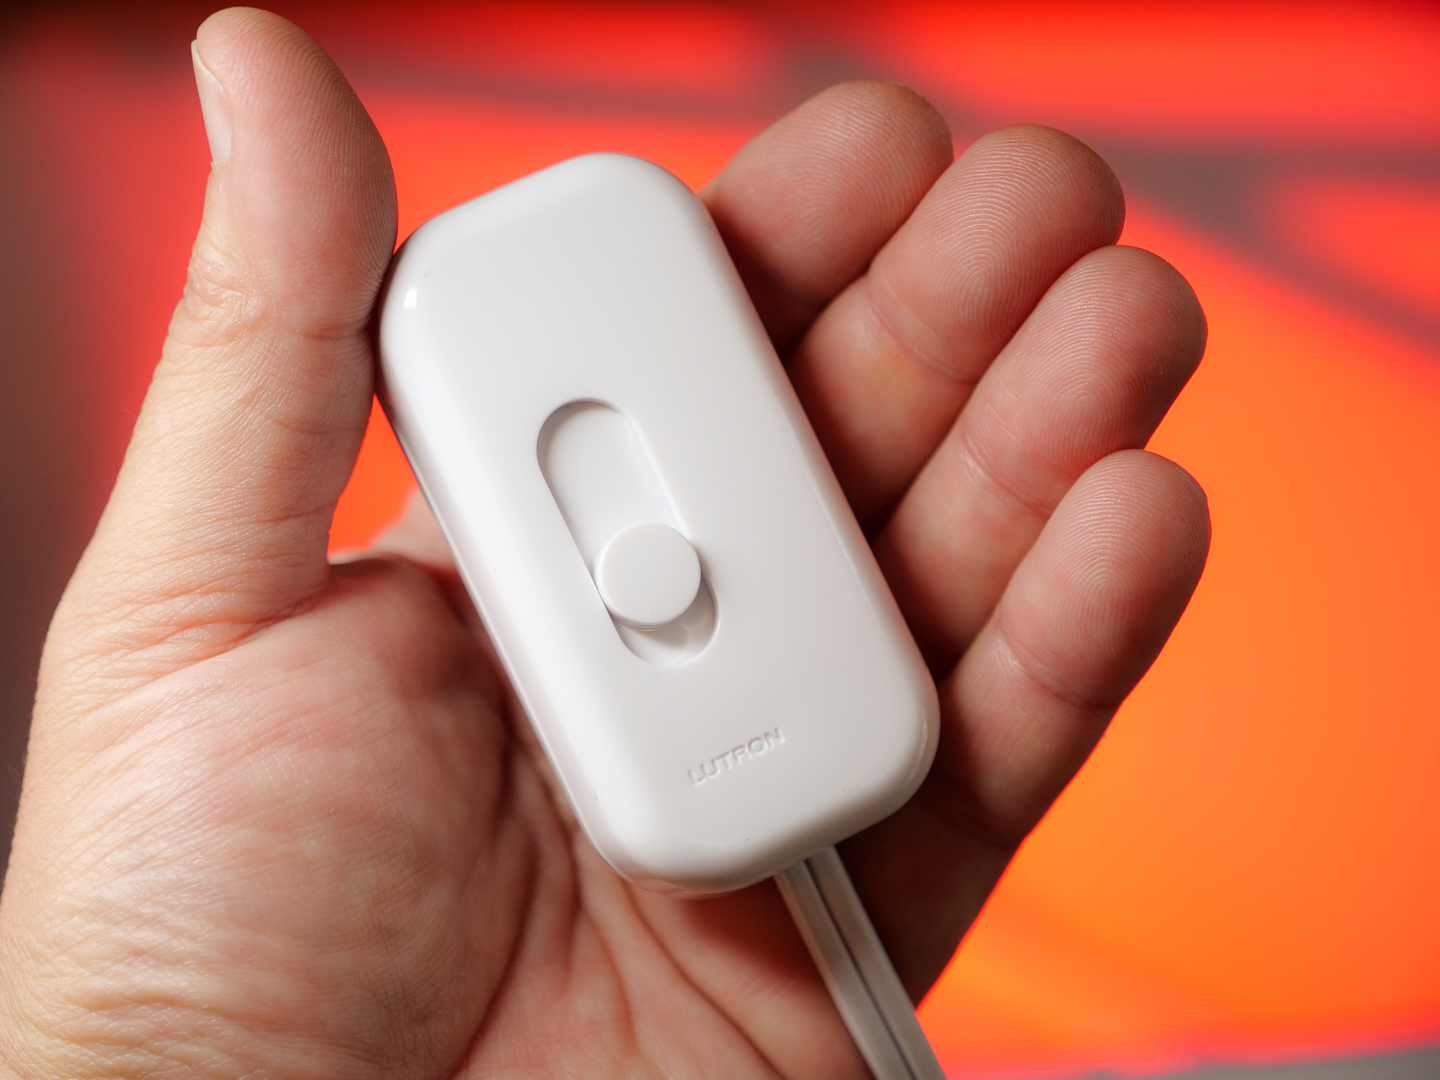
To control the output of the lights I used a few cheap and simple Lutron lamp dimmers. These are also relatively inexpensive and can be found on Amazon or your local hardware store for about $15. They work well and I was able to dim them down to a level that looked nice while keeping the background dark. I didn’t have any flickering issues with the dimmer. It did get a little messy on that speed rail with extension cords. Lots and lots of extension cords and gaffers tape.
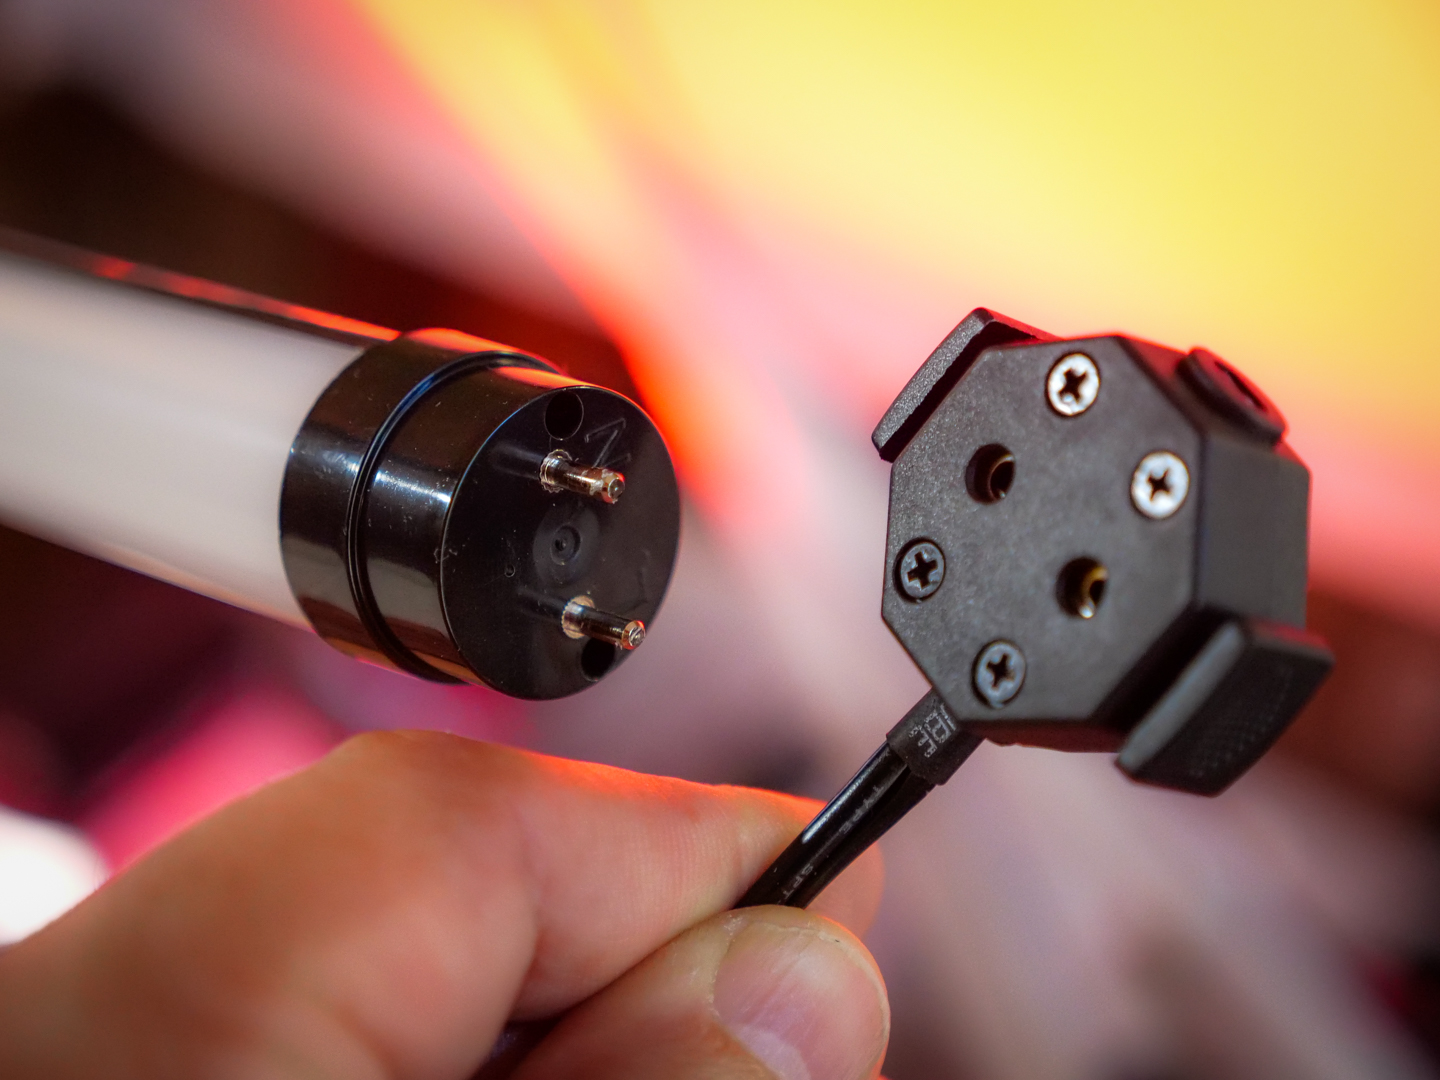 The T8’s have a short 2-pin cable that clamps onto the tube fixtures end. There isn’t an on/off switch on the tubes or connector. The clamp on the connector does hold pretty well and that’s a good thing or I would have had to gaffe tape them to the connector. Maybe that would have been a good idea to do anyway. consequently, they hung just fine and never fell off the speed rail.
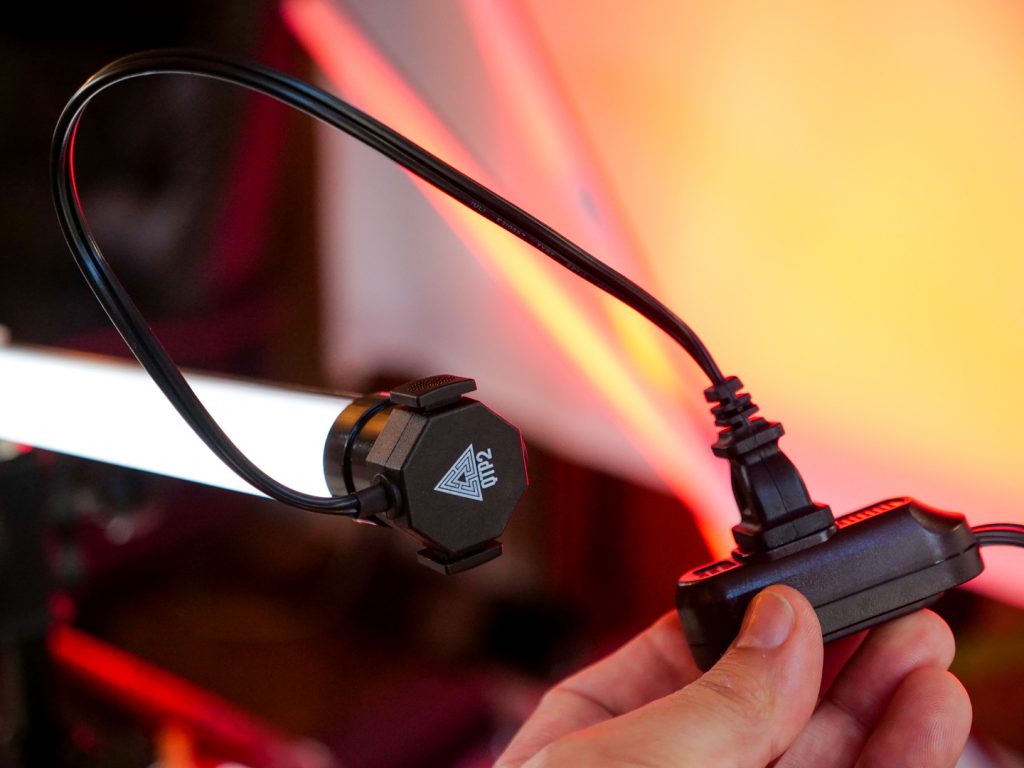
The cable that comes off the connector is very short. This means you need a lot of extension cords to power them while also trying to mount them. I put a few on the same cable and dimmed them together. This made it a little easier to control and keep the output levels even.
Camera Setup
For this shoot, I used two cameras. A Canon C300 MKII and a Canon C200 on a Rhino slider with Motion and Arc. I set it to do a continuous back and forth with parallax move to keep the talent centred. I really like the Rhino slider with Motion setup. Very quiet and easy to use. All in all, I thought this worked well for the spot and I learned a lot too. Never stop learning folks!
Total Cost
I bought four 4′ Q-LED T8’s from Quasar Science for the spot for a total of $300. The dimmable model is $75 for the 4′. Maybe on the pricey side but for the versatility I think it’s a fair price. The output is pretty good for a thin tube and plenty bright to use in your set as well. The advantage of them being dimmable is essential. I had them at the lowest I could go before they turn off for the background scene in the promo. So how colour accurate are these? Since we all love those fancy charts here you go!
Colour Test
To measure the T8 lights, I used a Sekonic C-700 Spectromaster colour meter. We here at Newsshooter have been using the C-700 Spectromaster for some time and it’s an invaluable tool for checking output and colour of any lighting fixture.
Quasar Science Q-LED Dimmable 5600K T8 Photometric Results
- Average CRI 98.5
- Extended CRI 97
- 476 LUX at 1 meter
- 44.2 footcandles
Colour Rendering
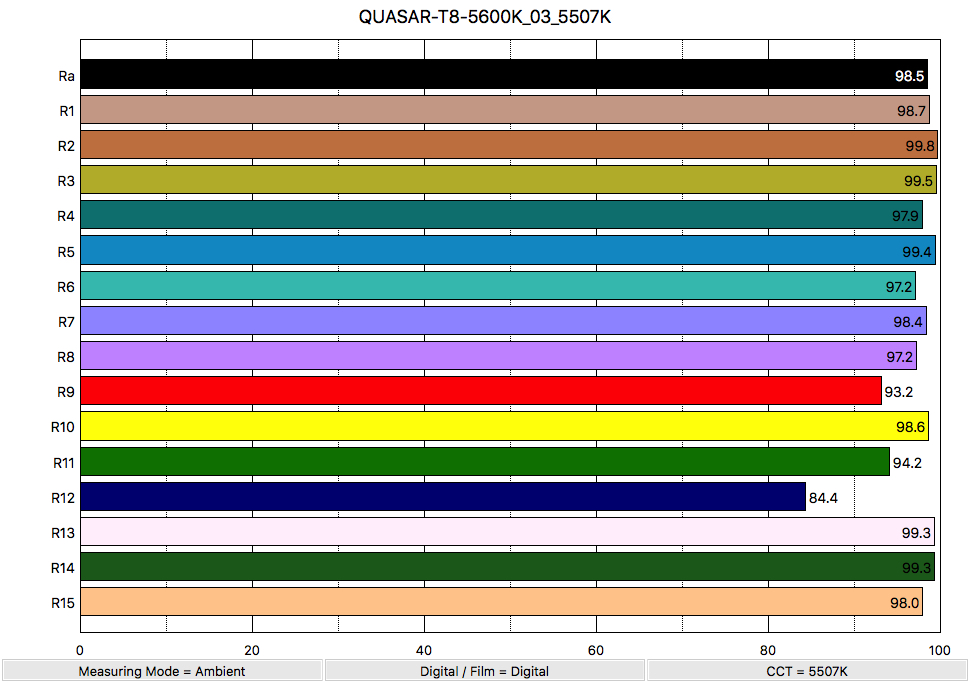
Colour scores look good. Lots of high 90 plus scores.
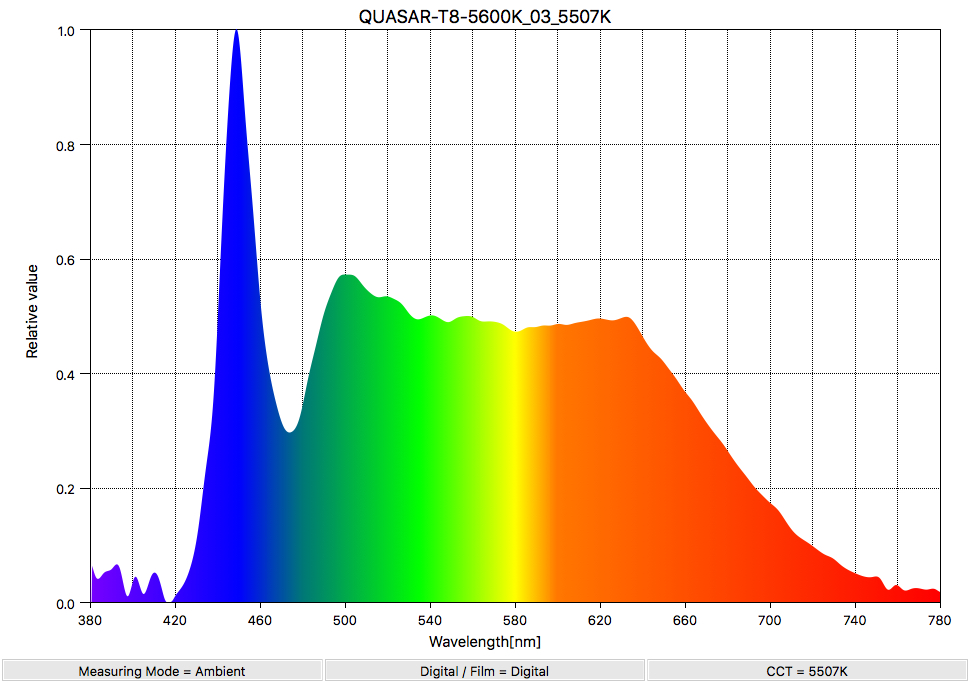
Spectral Distribution
White Balance

What I learned from using tube lighting in my productions
Since this shoot, I’ve continued to experiment with tube lighting and I find them in a lot of my setups lately. Not just as background elements but for actually lighting talent and product shooting.
The light that comes from them is very soft and the longer length gives pretty good coverage. It’s different than using traditional fixtures since the length is 4 feet long while the typical LED fixture is a 1×1 12″ panels. They make great backlights and hair lights. I also like bouncing them into a white bounce board. That’s how I lit the investigates promo. I also used an Intellytech LC-160 with diffusion and grid for a key with a Q-LED bounced into a large 4×4 bounce board for fill. Very simple lighting setup.
The biggest issue with these tube lights is figuring out how to mount them. The lights are all plastic so, I don’t have to worry about any glass shattering but these fixtures don’t have a mounting point per say. I first tried using clamps like the good ole Maffer and Cardellini varieties and while they work I just didn’t like the idea of squeezing the fixtures. These clamps are heavy duty. With a little too much tightening, you could easily crush the fixture by accident. Not in the plan!
With a little digging, I found these excellent aluminium Fluorescent Lamp Holders with 5/8″ Pin from Modern Studio Equipment.
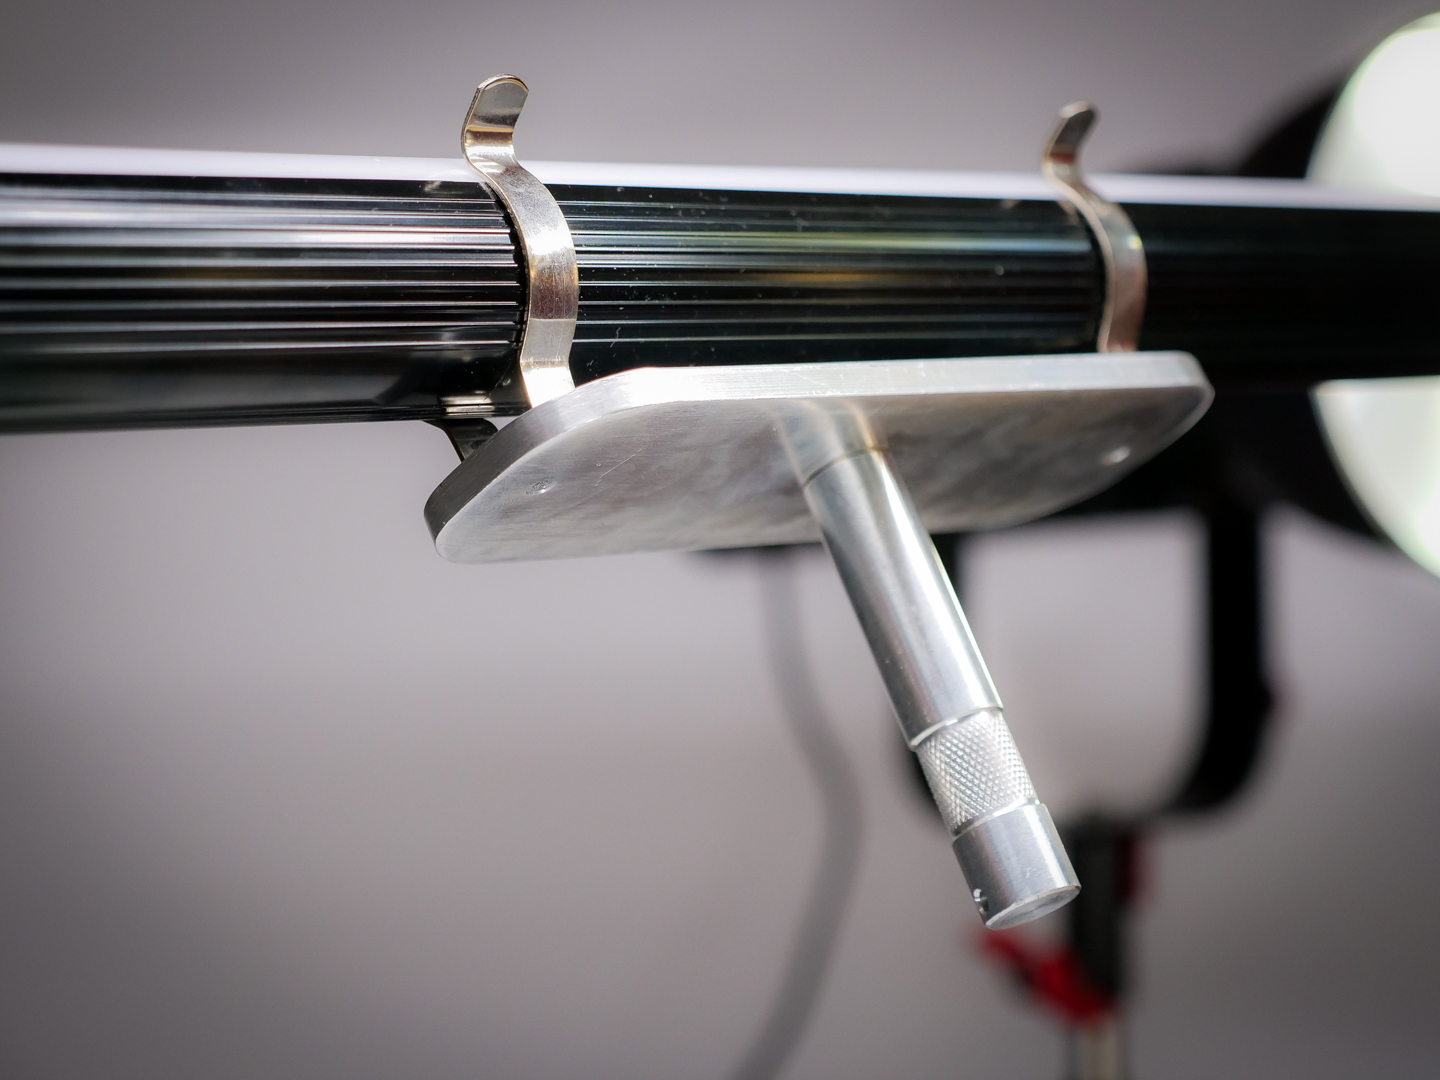
These are designed to work with the larger T12 style tube lights like the Quasar Science Xcross-fades so I purchased some T8 clips on Amazon. Now I have options to mount either type of tube light to these lightweight sturdy mounts. With the 5/8″ pin on the mount, they fit nicely into a grip head or a C-stand with an arm. Perfect for getting the lights over your subject.
A new option I saw at NAB 2018 from Matthews Grip is the MQ Mount (USD $69). These hold the T12 type tubes without the possibility of crushing them while making them easy to work with. I need to pick up a few of these.
Matthews Grip also makes “My Way plates” for attaching several tubes to a plate for higher output.
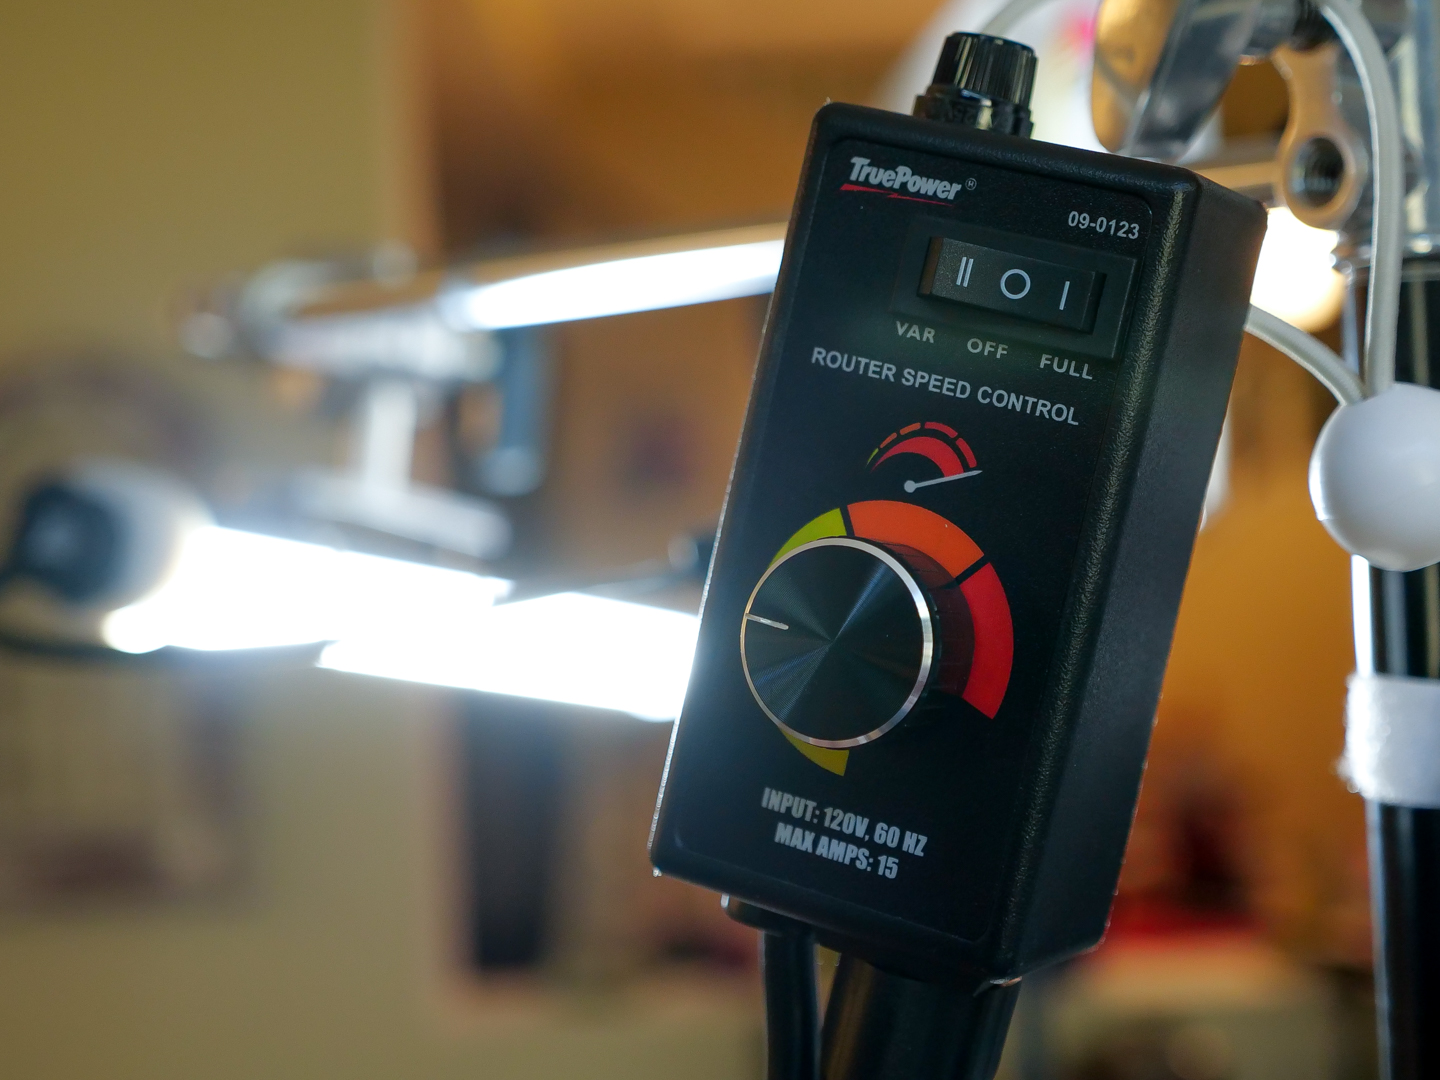
I mentioned dimmers earlier in the post that worked for the promo shoot, but I decided to get some better ones. TruePower makes industrial speed controllers for routers, duct, and inline fans. To be honest I have no idea what that is but I do know they work great for dimming the X-crossfades as well as the T8’s fixtures.
The advantage is that they’re grounded and they are bigger with a clip on the back that allows me to add some bungee or cord making hanging on light stands possible. They also have a two-way switch to go from full output to the dimmer control. The Lutron dimmers while worked great did strobe for a few seconds when first turned on at lowest setting but only for a few seconds then stopped. Not all the T8’s did this so I think the dimmer might be faulty. To be clear the lamps are not causing the strobing. It was the dimmer. The lamps are designed to be flicker free.
That’s a wrap!
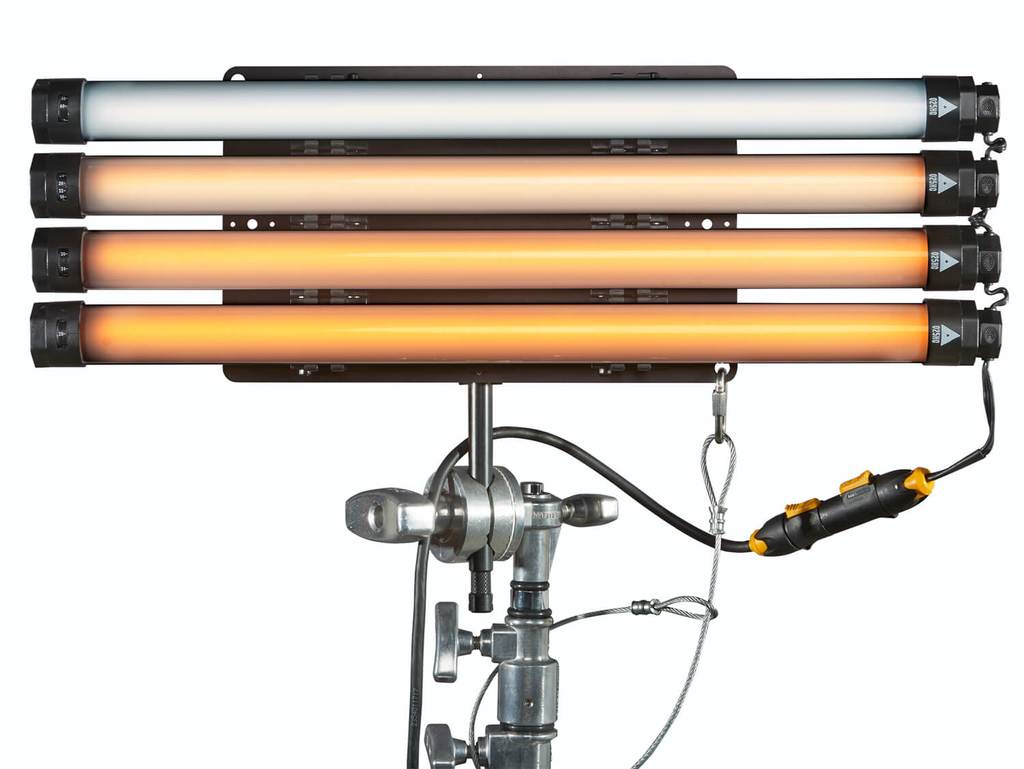
With my new addiction comes yet another tube light. The Quasar Science X-crossfades. These are really nice but much more expensive. For a 2′ version, they run $175. They go up to 8′ long and retail at USD $475. I have a 2′ one for now and will add a few 4′ ones to the kit. These are popular for retrofitting Kinoflo Diva lights. Quasar Science now has RGB tube lights as well for when you want to be more colourful. I’ll have a demo version in soon for a full review.
Tube lighting is growing fast and I keep learning about new exciting tube LED products like the Digital Sputnik Voyager RGB which even work underwater and the new SPEKULAR lights. These look like a lot of fun to use in front of the camera as well as lighting your subjects. At NAB this year I saw a lot of new versions coming out from a lot of different brands. In closing, I think tube lighting is here. As a result, mounting options will only get easier as more people want to use them. Have you played with tube lighting? Let’s talk in the comments section below.


