Have you ever tried to solve a small problem only to discover you’ve accidentally solved a much bigger one as well? Like when you remove a scene because it has technical issues, only to find that the whole film flows much better or you manage to combine two setups into a single shot to save time and get the best shot of the day in the process? Well, I think that’s pretty much what Apple did when they created the ProRes family of codecs.
It’s all because of HDV
The DV format changed the video production world around the turn of the millennium because it put resolution, colour fidelity and noise levels previously only available on very expensive broadcast gear into a consumer or prosumer format that was easily accessible. It’s release roughly coincided with Apple’s release of the original iMac and Final Cut Pro Version 1. The link between all of these was the Firewire cable that meant you could suddenly get video in and out of a computer for editing with no additional gear and no quality loss. For the first time ever you could shoot broadcast resolution video and do frame-accurate editing on gear worth thousands rather than hundreds of thousands of dollars.
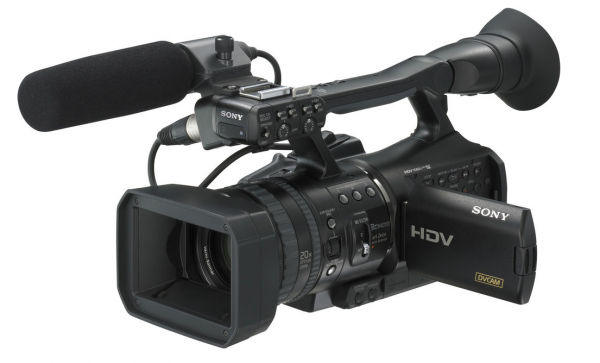
Then in 2003 as the “HD revolution” was gathering steam, along came HDV. Of course, what everyone wanted was an HD version of DV and that’s exactly what it sounded like but unfortunately, that’s exactly what it was not. HDV had to pack 4 times as many pixels into roughly the same data rate so that it could use the same readily available cassette format as DV. In order to achieve this one of the biggest things they had to do was make the format inter-frame rather than intra-frame compression. Both formats used MPEG-2 based Discrete Cosine Transform (DCT) encoding but one of the things about DV that made it so easy to edit in a computer was that each frame within the file was compressed as an individual frame.
With inter-frame encoding, HDV was able to dramatically reduce the data rate by having a relatively small number of complete frames and making the other frames reference only their differences from these keyframes. Because adjacent frames usually carry a lot of similar information this can be a really effective way of cutting the data rate but it is much better suited to straight playback than to editing because editing needs to be able to cut on any frame, not just the keyframes.
Along came ProRes
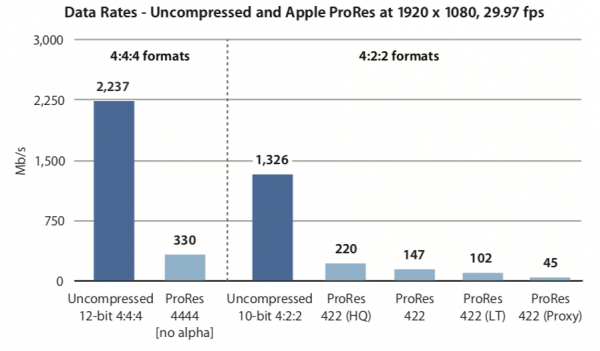
In 2007 Apple released the first ProRes variants largely to solve this problem. There were plenty of good quality codecs around that you could convert HDV to in order to edit (e.g. Uncompressed) and there were plenty of codecs that provided a workable data rate (e.g. h.264) but there really wasn’t an option that had good quality at a reasonable data rate for HD. This was particularly important because HDV was so highly compressed to start with that converting it to a different highly compressed format often compounded the problems. ProRes 422 and ProRes 422 HQ solved this very elegantly by using Intra-frame DCT with the robust 422 colour sampling of broadcast formats and using some very clever encoding to get an amazing balance between workable data rates, great picture quality and fast encoding and decoding. Not only that, but it was all happening in 10 Bit, with 4 times as much tonal subtlety available as an 8 Bit format.
I vividly remember sitting in an Apple presentation where they announced ProRes and played a demo of footage that had been through 10 digital generations – that is uncompressed and then re-compressed 10 times – which was then compared it to the original and we saw that it was visually identical! In 2007 that was earth-shatteringly impressive at those data rates. At the same time, they also introduced ProRes 4444 which used ProRes encoding at higher data rates, with no colour subsampling and the option of having an Alpha channel and was indispensible for interchange and rendering of graphics. ProRes quickly took the post-production world by storm, becoming a de-facto standard for mastering and delivering a very wide range of material.
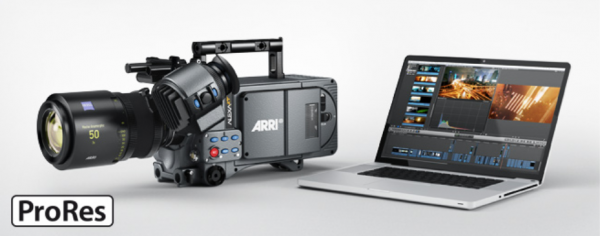
ProRes started to take over the production side after the ARRI Alexa was introduced in 2010 with a built-in ProRes recorder. Suddenly ProRes was the go-to capture format that delivered low compression, high resolution, high bit depth images straight into post-production in what had quickly become the preferred format for many post facilities. Other manufacturers such as Blackmagic Design jumped on board with cameras capable of recording ProRes internally.
In parallel with all of this was the rise of RAW in digital cinema cameras. (I personally agree with the convention of writing RAW in caps because it differentiates “RAW footage” from “raw footage”). RAW had been around for many years as an option for stills photographers when Oakley sunglasses billionaire Jim Jannard wanted to shift his hobby from photography to filmmaking. The story goes that he was shopping around for a moving picture camera and was disappointed that despite the price being virtually no issue, it was impossible to get the kind of resolutions, bit depth and RAW recording that was so readily available in DSLR’s. Of course, the big challenge here is that moving pictures require processing a constant stream of data at what were impossible frame rates for stills cameras of the day. Not only was it not available to buy at any price but none of the existing manufacturers even said they had a roadmap for when it might be available. So Jim Jannard being Jim Jannard decided to start a company to make digital cinema cameras that recorded high bit depth, 4K RAW images.
The thing about RAW is that it is actually incredibly efficient
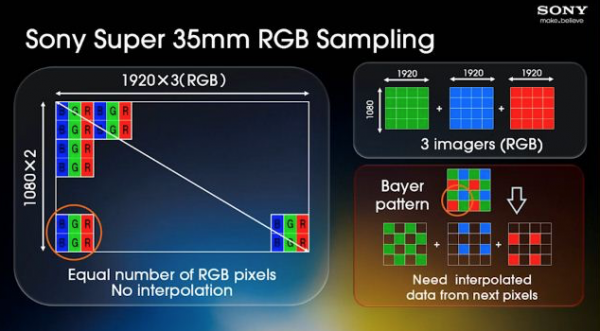
With traditional 3-chip video cameras including the high-end digital cinema cameras of the time including the original Panasonic Varicam and the Sony F900, the light coming through the lens is split through a prism into red, green and blue beams and these fall onto separate image sensors, each tuned to that part of the visible spectrum. Each of these would usually require the same resolution as that recording format. So for HD, each sensor would have to have 1920 pixels across in 1080 rows. In HD this means that you have a total of 6.3 million photosites delivering the 6.3 million red, green and blue pixels that need to be recorded.

The first steps in making this more practical in terms of data rate, most digital video formats from Digital Betacam to DV to HDCAM converted these RGB to a component video format with a luminance (Y) channel and two channels that recorded the difference of the red and blue channels from the total in the Y channel. From this information, it is possible to mathematically calculate and work out the exact Red, Green and Blue values for every pixel. Because our eyes are much more sensitive to brightness than colour information when perceiving detail, it is possible to sub-sample the colour difference channels to a lower resolution than the Y channel. Most professional formats had the colour difference channels at half the resolution of the luminance channel and this makes it possible to calculate with pretty accurate interpolation, what the R, G and B values should be for each pixel in the image. Doing this reduces the pixel count from 6.3 million down to 4.2 million pixels and this process is represented digitally as the sampling structure of 4:2:2 (the source of the 422 in ProRes) and is often referred to as YUV or more technically YPbPr.

In order to move to larger sensors and single sensors, having a red, green and blue photosite for every pixel is not the most effective way to design a sensor for a variety of reasons. Stills camera manufacturers quickly realised that for digital SLR’s to become practical they would need to have larger, single sensors which would also make them compatible with existing lenses designed for film rather than optimised for passing through a beam splitter. The best way of doing this is with a Bayer pattern that has alternating lines of Red & Green, then Blue and Green. From this, all single-sensor digital cameras can calculate with remarkable accuracy what the RGB values are for every pixel. Initially, this was done in camera for stills and video but manufacturers realised that by keeping the image natively in the Bayer pattern pixels they could reduce the data rate by two thirds and use some of that saving to provide much higher bit depth and lower compression. So to take our HD image example, while YUV Component Video reduces the pixel count from 6.2 million down to 4.2 million, not converting the Bayer pattern requires only 2.1 million pixels to be recorded to get the same 6.3 million in the final image.
As you move to higher resolutions these pixel saving grow proportionally. So a 4K DCI image has 26.5 million RGB pixels and 17.6 million in YUV while only 8.8 million in Bayer pattern. So by the mid-2000’s Bayer pattern RAW had become hugely popular with professional and serious amateur photographers but was still unavailable to filmmakers.
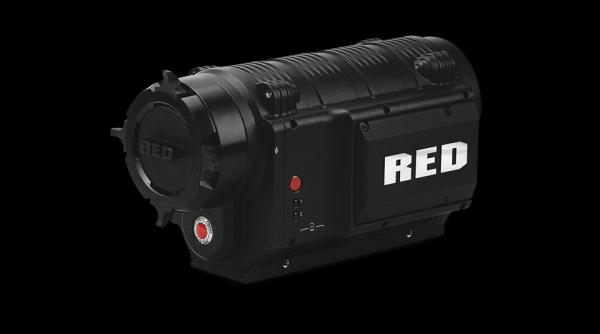
Jim Jannard and his team at RED Digital Cinema announced in 2006 that they were going to build a camera with a Super-35mm sized 4K image sensor and record to a new format called REDCODE which was a compressed, Bayer pattern RAW file. It’s fair to say that the resulting RED ONE that was released in 2007 is one of a small number of cameras that genuinely changed the trajectory of filmmaking technology. Over the coming years, most professional camera manufacturers offered RAW recording options, mostly with add-on recorders to avoid infringing RED’s patents on compressed RAW recordings in a video camera.
Eventually RED even offered ProRes as a recording option in its cameras and for some time now we have essentially had a choice between ProRes or RAW. Cinematographers and colourists often argue for RAW because of the latitude and quality. Producers and post facilities often argue for ProRes because of the of the manageable files and data rates and the resulting cost savings.
“Is it ProRes or is it RAW?”
Because until now you had one or the other. The truth is that it is ProRes and it is RAW and while that may sound crazy to many people it does actually make perfect sense. What Apple has done is take the very clever compression foundation of ProRes and applied it to pixels arranged in a Bayer pattern instead of a YPbPr Component Video pattern. Of course, making that work well in practice must be a lot more complicated but conceptually that’s what’s happening. We already have superb 12 bit ProRes with the ProRes 4444 XQ format, so it’s not a big leap in thinking to apply that technology to Bayer pattern data.
Remember, there’s nothing magical about RAW. It’s just a really efficient way of taking the data off a Bayer pattern sensor with minimal processing and recording that at high enough bit depth and low enough compression to be able to apply the digital processing that’s otherwise done in camera to be done at the equivalent quality in post-production. That’s it.

So you might be wondering why people don’t use ProRes XQ instead of RAW. A lot of people actually do. It’s a fantastic format that in practice gives you the same flexibility as RAW. The catch is that it’s a slightly compressed codec and the data rate is almost as high as Lossless RAW. Remeber this is because RAW starts off with 66% less data in the first place.
What does ProRes RAW mean in practice?
Let’s take a moment to consider the different elements of what usually gets lumped together under the label of “format”. By this, I mean image structure, codec and wrapper.
Image Structure in this context means the target pixel count such as 4096×2160 combined with the channel arrangement such as RGB, YUV or Bayer and the colour sampling structure such as 444, 422 or 420.
The Codec is how this information is encoded and decoded using various types of compression coding such as variations of DCT like MPEG-2, MPEG-4 or Wavelet like REDCODE and JPEG-2000.
The wrapper is the file format this is enclosed in. I like to compare this to a book where the Image Structure is like the words, the Codec is like the language they are written in and the Wrapper format is the form of the book – paperback, hardcover or e-book. As with books, the same Image Structure (words) can be written in different languages (codecs) and these can be bound in different forms (wrapper files).
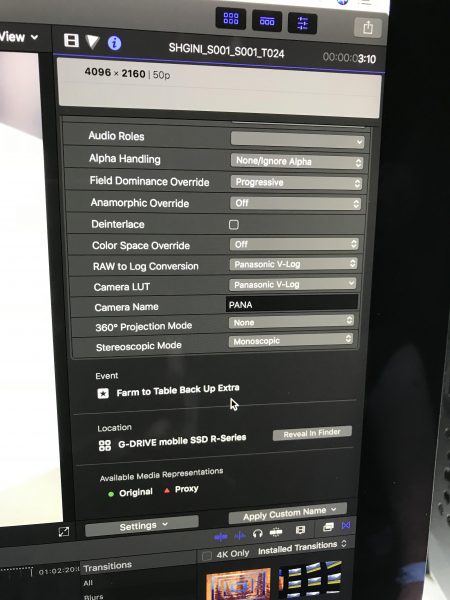
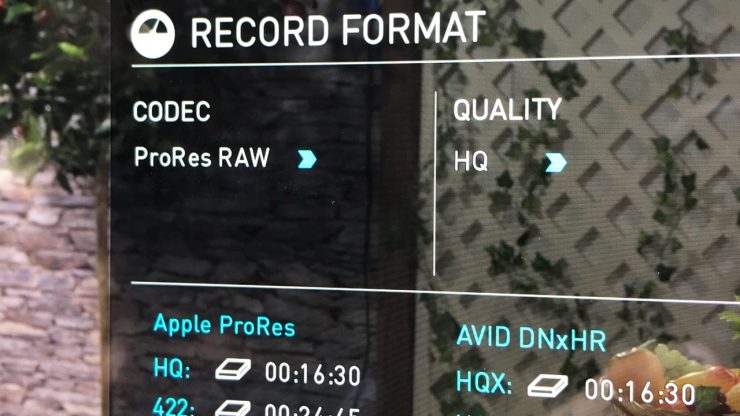
This is where the real practical significance of ProRes RAW comes in. It takes the Bayer pattern Image Structure data from the camera and encodes it with a consistent and very efficient Codec and then puts it into a very convenient MOV Wrapper with lots of useful Metadata.
This means that RAW versus Non-RAW can be a discussion that is much more disconnected from time and budget constraints. It means that RAW workflow can be consistent across different cameras and manufacturers and that using different RAW-capable cameras will be easier and more effective. It also means that RAW will be a viable option for a lot of projects that otherwise might not have been able to consider it. With even a little bit of uptake from some key camera manufacturers, ProRes RAW could easily become the new de-facto standard for a very wide range of productions from commercials and documentaries up to big features and high-end drama series.
Not a bad legacy for that pesky little HDV format, that it eventually led to this massive game changer for us professional filmmakers with ProRes RAW.