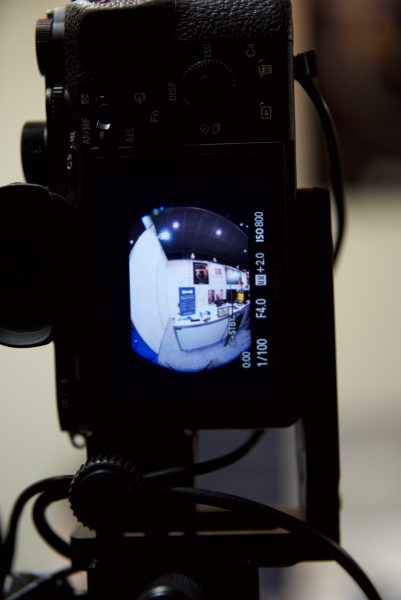
At the CP+ Show in Japan we saw a new 360° VR software system called PanoMoments. The system creates images that aren’t photos, nor are they videos. It is probably easiest to think of them them as 360° living photos. Unlike normal VR content, they’re captured using a rotating camera system.

Any camera can be used as long as you have a ultra wide angle or fisheye lens. By attching your camera vertically to any number of rotating camera platforms such at the PanoCature Loop you can easily create and capture very immersive content.
One of the biggest benefits is that there is no stitching required and no nasty parallax headaches to deal with. The end results are easily obtainable without having to spend a lot of money. The system really is quite unique and is an entirely new creative VR medium.
How to Capture
Capture 120+ photos around 360° using a still / video camera and fisheye lens mounted ~80mm in front of the the No Parallax Point (to emulate head rotation) and a robotic panorama base
Convert photos to Equirectangular projection with a 4-click batch process using a lens specific template for software like Hugin (free) or PTGui ($91). No stitching required!
Upload Equirectangular photos to PanoMoments.com
Choosing your subject
Standard 360 cameras capture in all directions at once, whereas PanoMoments only allow you to see ~180 degrees at a given instant. This fundamental difference allows you to more easily direct both the subjects and the viewer’s attention. With the exception of the extreme edges of the frame, everything captured by the camera during its rotation will be seen by the viewer as they pan around. One of your goals as a photographer should be to make sure there are interesting elements throughout the 360 degrees rotation, whether that’s movement, interesting visual details, etc.
Number of frames
You can capture a PanoMoment in as few as 36 shots with a full circular fisheye lens, but if you really want the PanoMoment to feel special, you’ll likely want many more frames. Note that the exact number doesn’t matter; it could be 127, 363, or 4101 frames. We typically like to shoot between 200-400 frames.
Your camera’s capture frame rate directly controls the type of motion you can capture – either smooth or stop motion. Even though most modern still cameras advertise high burst rates (ie. 10-15fps), they typically are only capable of recording 1-3fps in long (over 60 seconds) periods. Make sure to test your camera’s capabilities and to use the fastest compatible memory card to maximize your capture rate. Even with a modest capture rate of 2fps you’ll be able to capture interesting stop motion PanoMoments in a 60-180 second rotation.
If you’d like your PanoMoment to have smoother movement (ie. people moving or water flowing) then you’ll need to use a video camera recording at least 30fps. This likely means you’ll need to capture in a compressed format like .MP4 or .MOV which will result in a lower quality capture compared to a still camera capturing in RAW or high quality JPEG. That is the tradeoff – smoother motion for quality. Also remember that when shooting in video modes you’ll likely have a narrower vertical field of view (16:9 vs. 3:2 or 4:3) so you might want to choose a fisheye lens with a smaller image circle if you want to shoot a lot of smooth motion PanoMoments.
Capturing with horizontal parallax (highly recommended)
Typically when you shoot panoramic photos you want to position your camera on the ‘No Parallax Point’ (NPP). This allows the camera to be rotated about its optical center and results in seamless stitching. However, this isn’t how your eyes see things when you rotate your head. While it does allow you to pan around a panoramic photo, it ends up feeling very static as you don’t get to “see around” objects as you pan your view. Since PanoMoments don’t rely on standard photographic stitching, you are free to position your camera away from the NPP (80mm in front of NPP is about ideal). This allows you to capture realistic motion parallax in the horizontal direction and feels much more natural during panning.
If you choose to shoot with horizontal parallax you’ll need to capture more frames to create smooth transitions, even for entirely still scenes with no movement. This is due to the nature of parallax where objects at various depths in your scene will move differently relative to each other. If you have too few frames you’ll see visual parallax “pop/jump” when you pan. If you are capturing with parallax, we recommend a minimum of 120 frames.
If you’d like to shoot without horizontal parallax, you’re free to lower the frames to around 36, but you may still want to capture many more if there is motion in the scene.
Time period for a rotation
There is no right answer for calculating the time period for a rotation. It’s mainly a creative choice, but light conditions and camera capabilities do play a role. If you’re shooting outside on a bright sunny day and have a camera capable of high frame rate capture (> 30fps), you can complete a continuous shooting rotation in a little as 12 seconds (any shorter and you may have issues with rolling shutter), but you should also experiment with slower captures (60-180 seconds) or even crazy long multi hour/day captures. The key point to remember is that the capture time influences the speed of motion on playback. Ie. Capturing a rotation in 120 seconds and rotating the full 360 degrees on viewing in 12 seconds would result in 10x realtime playback speed, ie. fast forward. It is important to note that if there is no motion in the scene, the time speed up/down effect will not be discernible.
Depending on light conditions, you’ll be able to shoot in two primary rotation modes using your automatic panorama rotating head: SMS (shoot, move, shoot) and Continuous (capture while rotating). The former is useful for shooting in lower light conditions where motion blur due to camera rotation is a concern, and the latter is useful for when you want a faster rotation and you have enough light to shoot at a high enough shutter speed to freeze any blurring effect of the camera rotation.
Camera exposure settings
While light conditions are likely different at various points around the 360 degree rotation, you most likely don’t want to shoot in any automatic exposure mode (P, A, S, or Auto) as the light levels will jump too abruptly (in ⅓ or ½ exposure stops) as you pan around the Pano Moment. We recommend shooting in full manual exposure and white balance modes. That way you don’t have any exposure jumps as you pan, and if you find that you must adjust light levels, you can do it in post processing with much more granularity than ⅓ or ½ exposure stops.
Regardless of shooting in SMS (shoot, move, shoot) or Continuous capture modes, you’ll need to pay special attention to your shutter speeds. Sometimes you may want blurring of moving subjects in your scene, but you likely don’t want the still environment to be blurred.
We recommend shooting in your camera’s RAW capture mode. This provides the highest possible quality and much more freedom in post processing compared to JPEG. If you’re shooting with a video camera you most likely won’t have a RAW option (except in high end cinema or machine vision cameras) so you’ll want to choose whatever the highest quality/resolution setting your video camera provides.
Capture the shot
Depending on your camera/rotator setup and capture mode (SMS vs. Continuous) you may end up using your camera’s built-in intervalometer, video capture mode, continuous burst mode, or the rotator’s trigger to start the capturing process. Set up your rig at home and test out a slow rotation with your rotator’s SMS mode, then take it outdoors in bright sunlight to try a continuous capture. The most important detail of the capture is ensuring that each frame is at an equal angular distance (ie. for 360 frames each frame should be at 1 degree increments). If there is large deviation between frames then you will notice alignment errors (ie. judder / jumping) when viewing the Pano Moment.
Capturing a good PanoMoment takes a bit of practice. It’s no different than still photography — It’s not the gear that takes a good photo; it’s the photographer.
Convert to Equirectangular format
After your capture is complete, you’ll need to batch convert the entire photo set into Equirectangular projection (and optionally correct any lens distortion). You’re welcome to use any traditional stitching programs such as PTGui, Hugin, or Autopano, but remember you won’t be using the actual stitching functions of these programs. You’re simply changing the projection to Equirectangular and setting the output FOV to correspond to the maximum of the horizontal and vertical FOV captured. See our PTGui / Hugin guide for a walktrhough of creating a project/lens template so that the process can become an easy 3 click workflow.
Membership and Licensing
We want to encourage everyone to try out the capture technique, but to offset the costs of storage, bandwidth, and server fees, we’re offering two membership levels: a free membership with 20GB of storage, and a $10/month Pro membership with 500GB of storage, the ability to embed PanoMoments on your own personal website, and future features targeted at professional photographers. If you’re looking to integrate PanoMoments into your own commercial application, please reach out to [email protected] to discuss licensing options.
Studio and Camera Rentals
Interested in renting a PanoMoments camera rig or want to hire us to capture a PanoMoment for a project or event? Send an email to [email protected] and we’ll get in touch.
The system looks to be a very interesting alternative to using traditional VR. While it doesn’t create real time video, the 360° living photos are quite an immersive way to display certain content. Probably the most exciting thing for me personally is the ability to easily capture 360° immersive time lapes without having to spend too much money.
For more information on PanoMoments head over to their website.


