By technical editor Matt Allard:
In the second part of my review of the new Panasonic DVX 200 I will be focusing solely on Scene Profiles, V-Log L and the colour science of the camera. Please note that the camera I am using still isn’t the final production version.
V-Log and V-Log L are Panasonic’s version of the logarithmic gamma curves that can record a flatter, more gradable image. Like the familiar Canon C-Log and Sony S-Log they retain more detail in the shadows and highlights than a regular gamma.
Many GH4 owners have been eagerly awaiting the arrival of a Log-type gamma curve. V-Log L (the “L” stands for Lite) is a new iteration of the original V-Log that has been designed for both the DVX 200 and GH4.
It is worth noting that while it is similar to the existing V-Log, but there are important differences. The original V-Log was designed specifically for the Varicam 35 cinema camera to best take advantage of its 14+ stops of dynamic range. The new V-Log L allows a claimed 12 stops of dynamic range to be recorded.
The DVX 200 will not be available until October and if I was a betting man, I would wager that V-Log L will be made available for the GH4 at around the same time. This upgrade has been in the works for a long time. I saw a GH4 running V-Log at Interbee in Japan last year and several beta testers around the world have also been using V-log on their GH4s for quite some time.
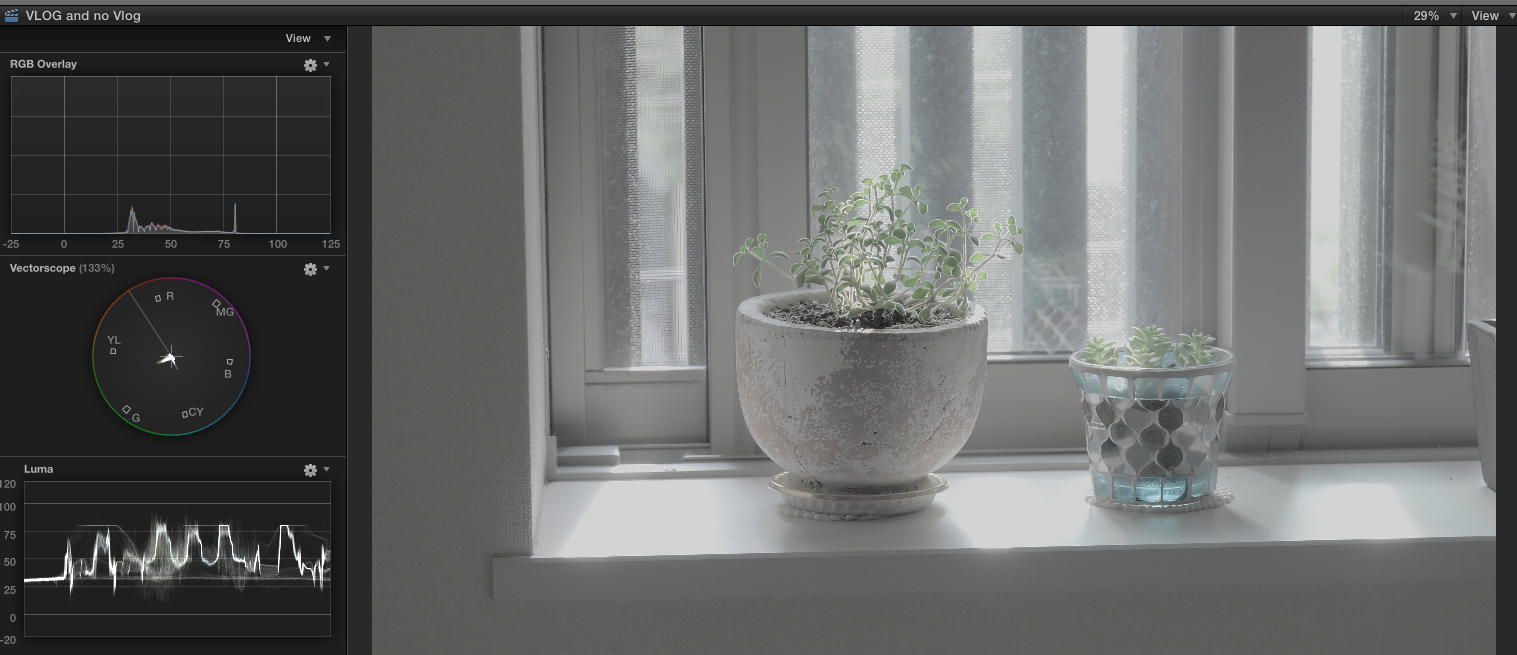
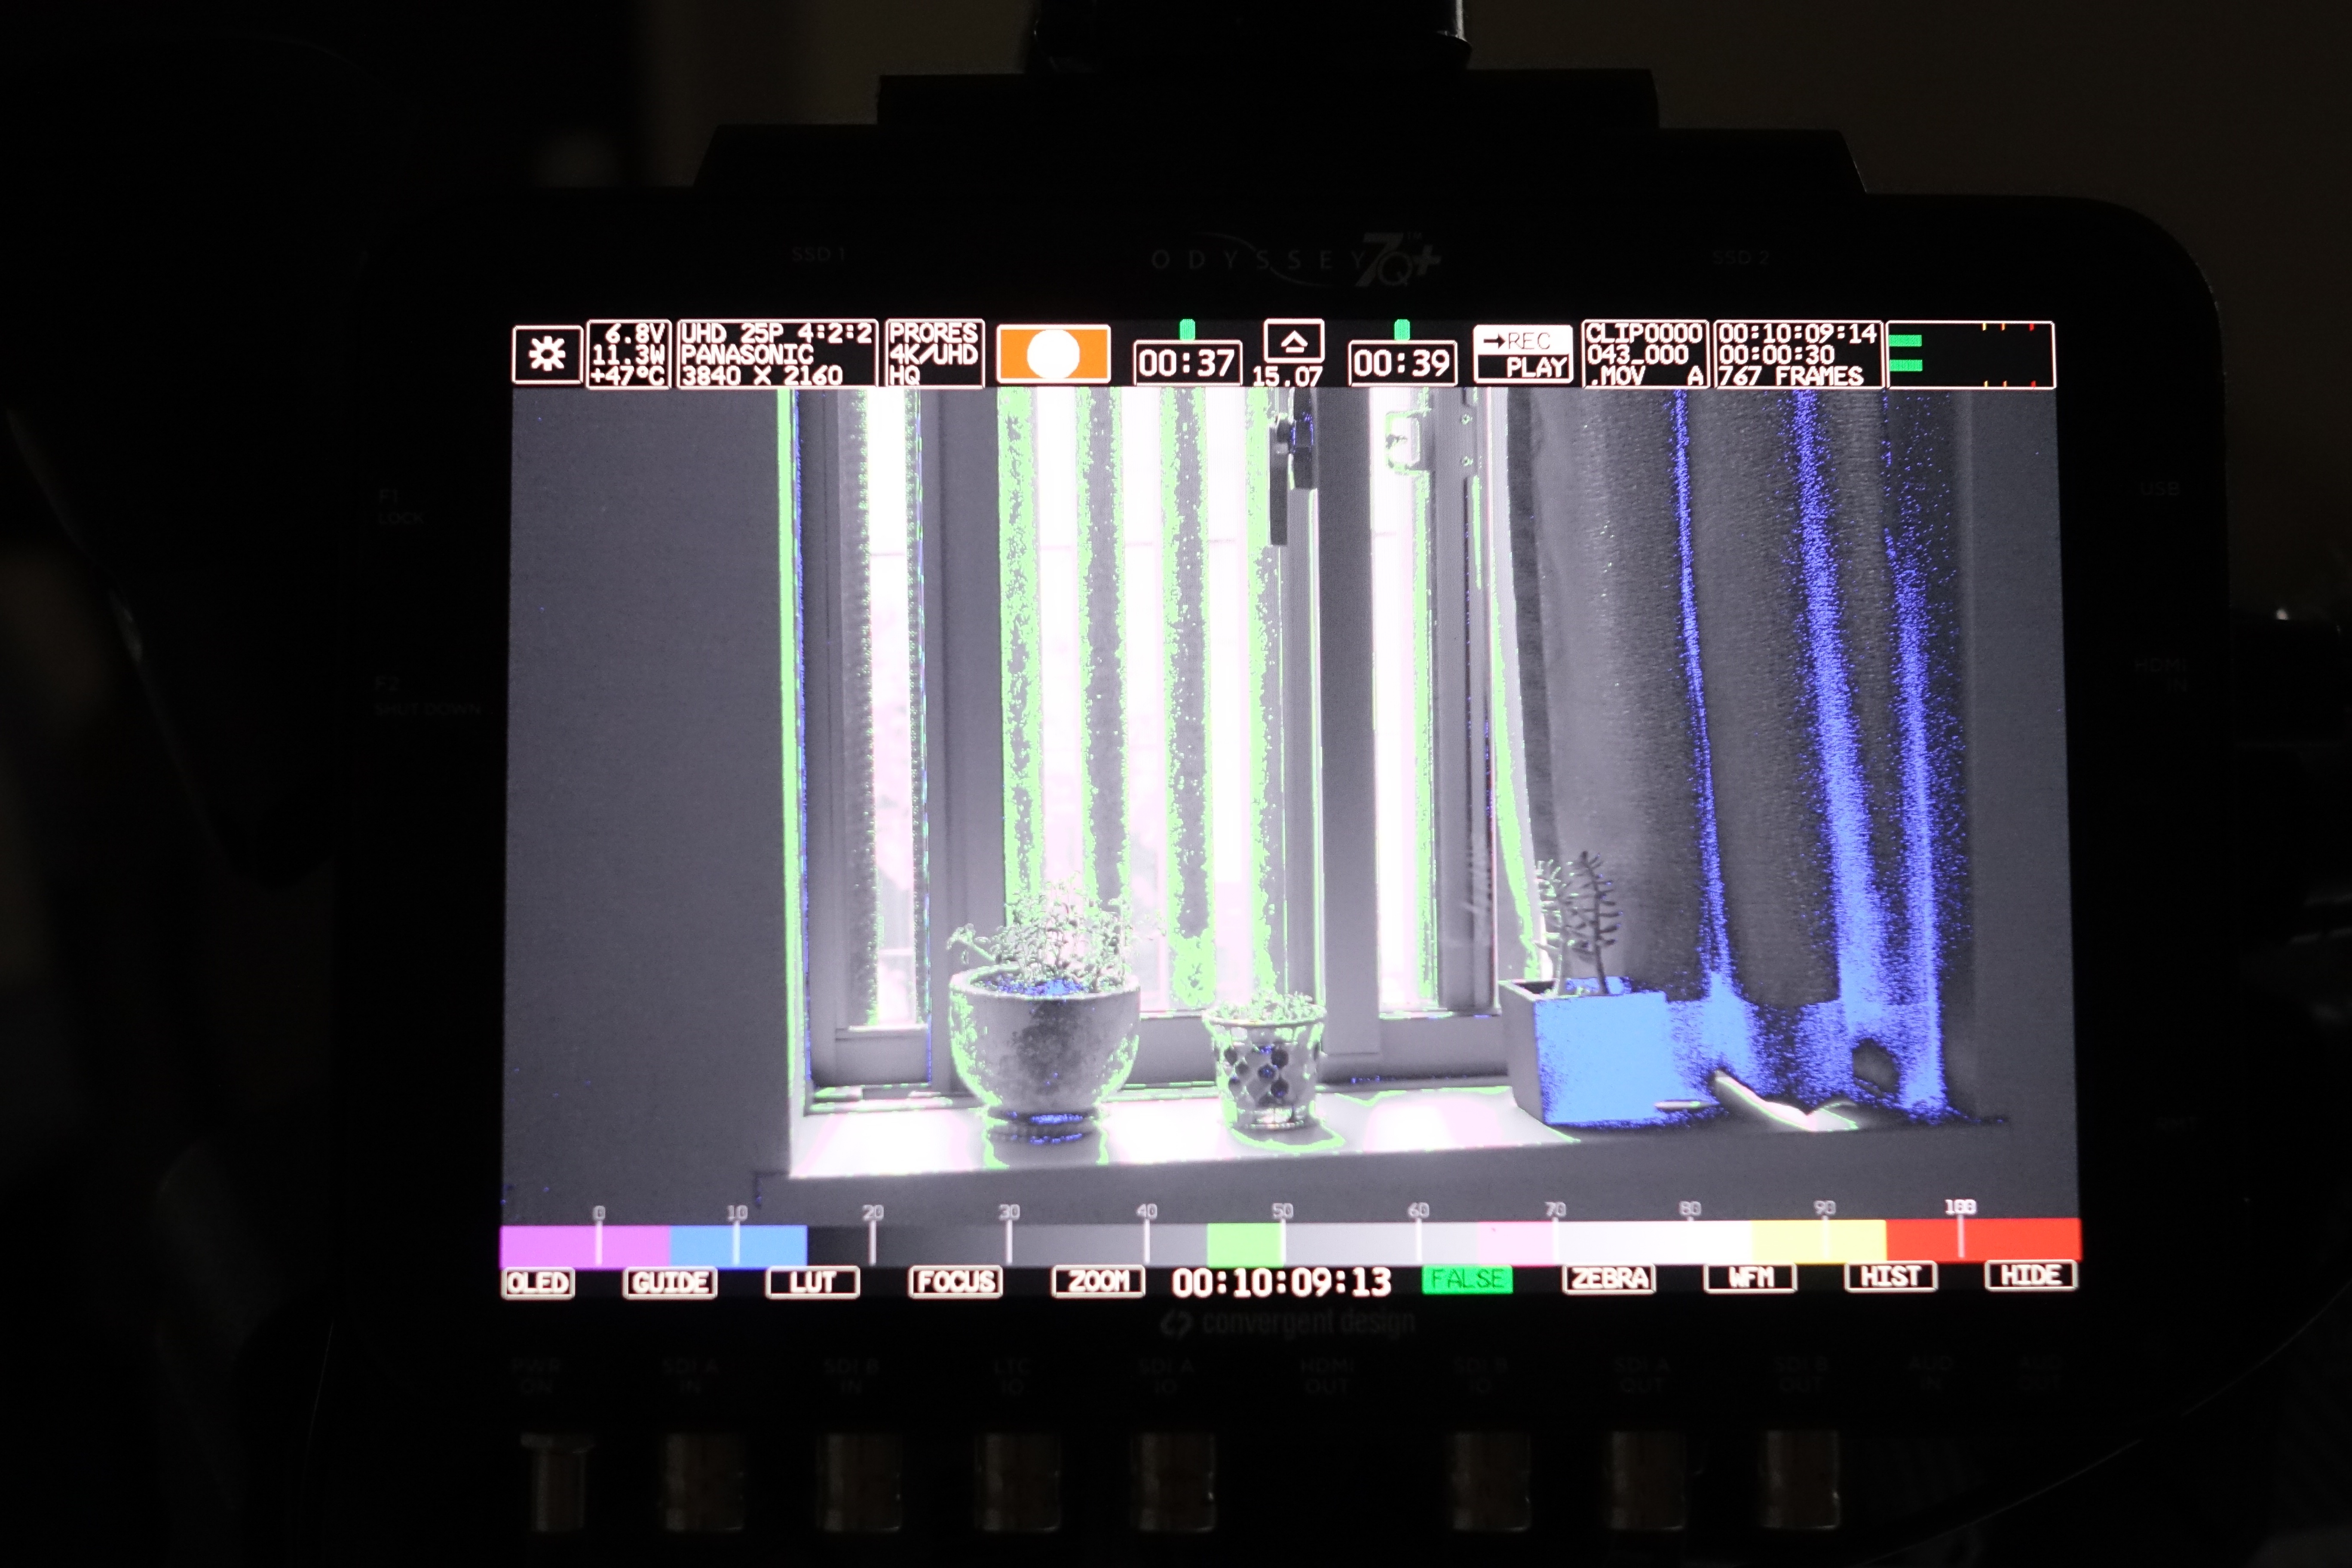
So what is the V-log L like on the DVX 200? Well, it certainly is a very flat image and looks like it has more dynamic range than a standard gamma. Don’t expect miracles though – success with Log gamma is dependent on the camera’s sensor and colour science to achieve good results. I found that while the image is nice and flat, the way it rolls off highlights on the DVX 200 is not pretty. On the built-in waveform monitor, or when using false colour, the V-Log L image may well show no evidence of highlight clipping, but if you look at the image closely the brightest parts of the image have almost no highlight roll-off and appear clipped, even though they aren’t. There are no options to adjust parameters when using V-Log L. I suspect that V-Log L isn’t the culprit here; it is likely due to how the image is being processed by the camera itself.
I did a series of tests in a high dynamic range scene to see the differences between using V-Log L and the other Scene Files that are available on the DVX 200. Please note that all the Scene Files shown are set at their factory settings. You can see the results above. Note: The default Knee setting that is assigned to [SCENE1] in [CUSTOMIZE SCENE] is “93.0”.
Above are some more examples that you can download, this time shot in 4K 24p. All shots are at the base 500 ISO. I found that even at 500 ISO the V-log L image appears to be quite noisy. The problem I find with V-Log L is that if your are trying to keep your highlights well below 80% IRE to avoid clipping, then you are having to underexpose your image. Then when you adjust the V-Log L image later in post, if you have to bring up the mids you introduce a lot of noise. You can download the V-LOG V709 V35 LUT yourself and have a go applying it to the V-Log L clips.
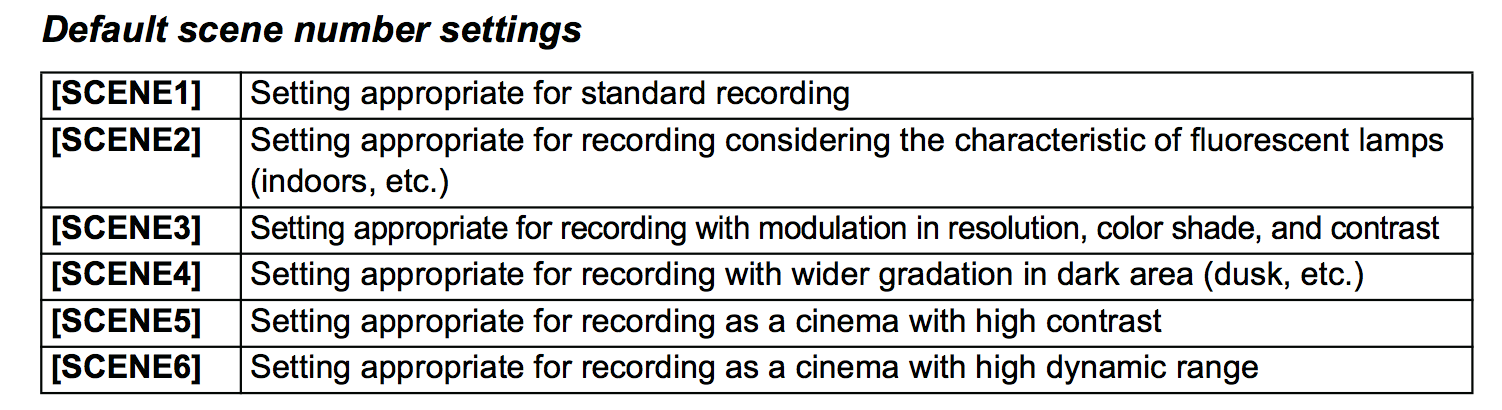
Apart from V-log L, there are 6 other Scene Files you can choose from and they can all be adjusted, apart from V-Log L. There is a Matrix setting for [CINE-LIKE] and gamma settings that include 3 FILMLIKE options and a Cine-Like-V and Cine-Like-D. There are several parameters you can adjust, but please be warned that you should really know what you are doing when adjusting settings in any camera. Here is a list of what you can adjust:
Skin Tone Detail – This makes skin colours appear softer for a more attractive appearance. This is more effective if you record a person closely, from the torso up.
Master Detail – Adjusts the degree of overall outline correction in images.
Detail Coring – Adjusts the detail noise removal level.
V Detail Level – Adjusts the degree of vertical outline correction in images.
Knee APE Level – This sets the detail level of high luminosity areas (extremely bright areas).
RB Gain Control – [R GAIN]: Adjusts the intensity of red. [B GAIN]: Adjusts the intensity of blue. [GAIN OFFSET]*: Sets whether to maintain or reset the [R GAIN] and [B GAIN] settings when Auto White Balance/Auto Black Balance is used.
Chroma Level – Adjusts colour density.
Chroma Phase – Adjusts colour balance.
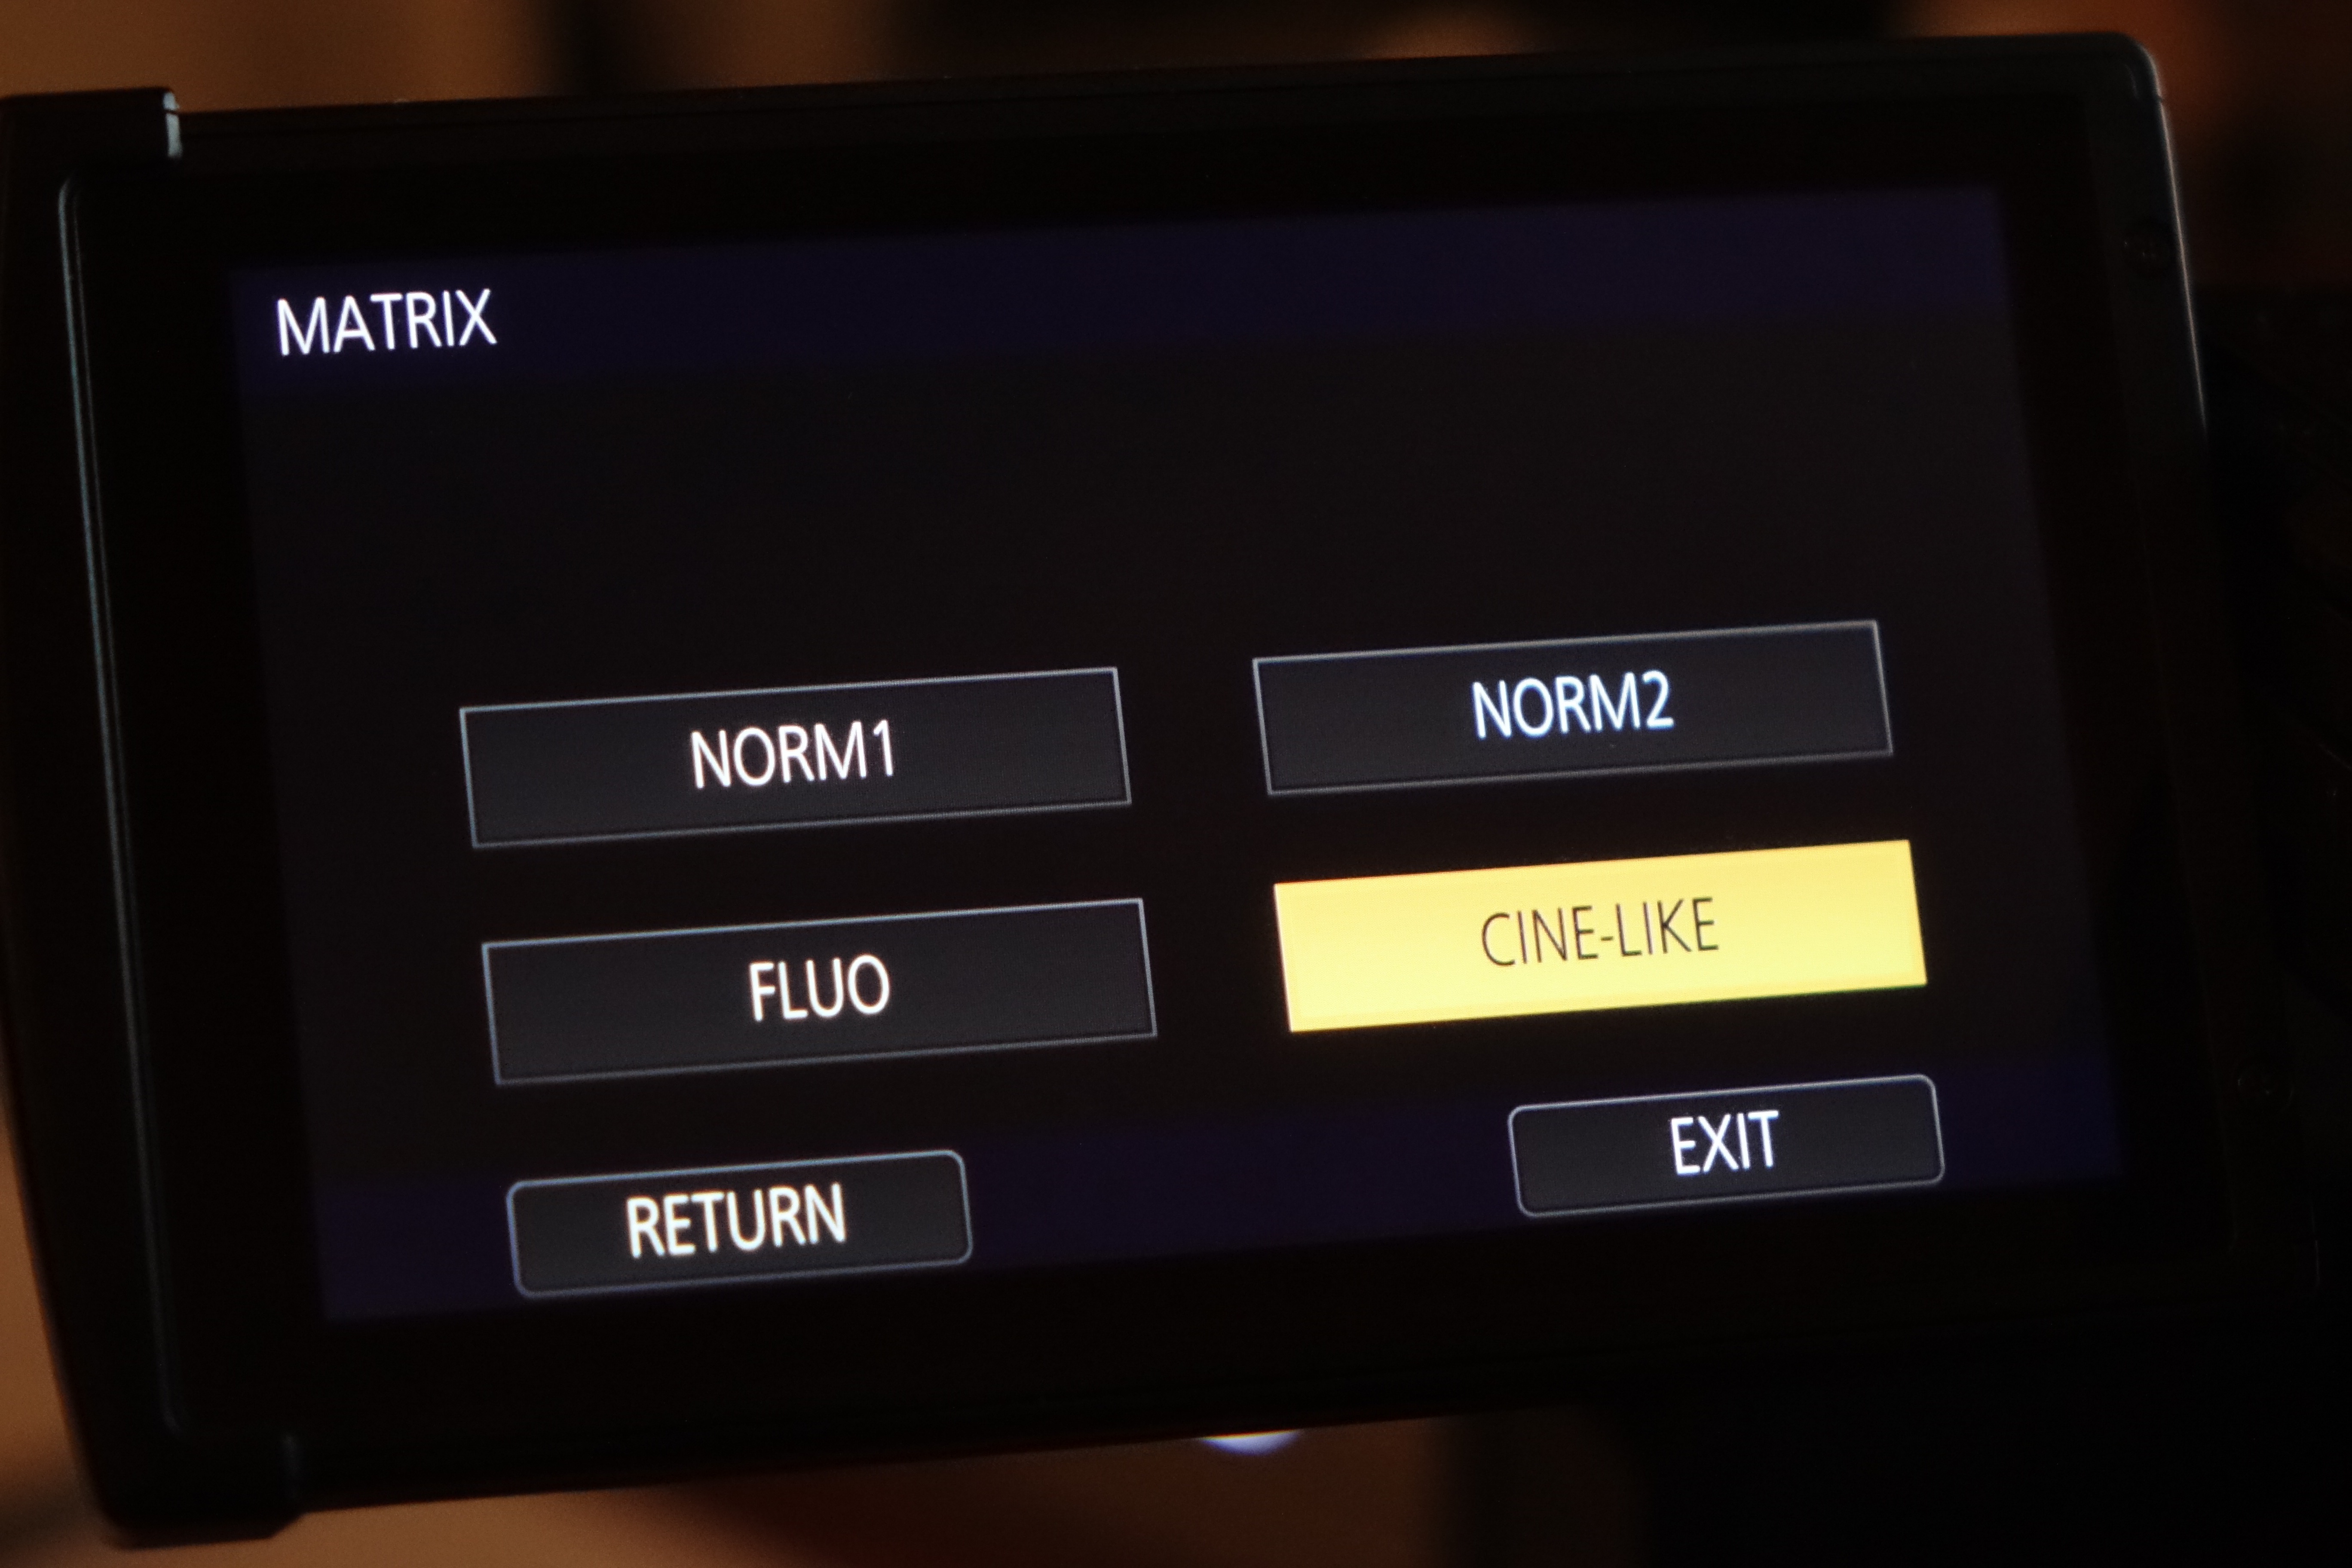
Matrix – Represents the colour during the recording. [NORM1]: Suitable for recording in the open air or under a halogen lamp. [NORM2]: Suitable for brighter colours than the [NORM1] mode. [FLUO]: Suitable for recording indoors under fluorescent lamp.[CINE-LIKE]: Suitable for cinema-like image.
Colour Correction – This function sets colour saturation and phase. It applies individual effect on 16 phases in an image. You can adjust individual hues.
Master PED – Adjustment of black level based on the image is performed.
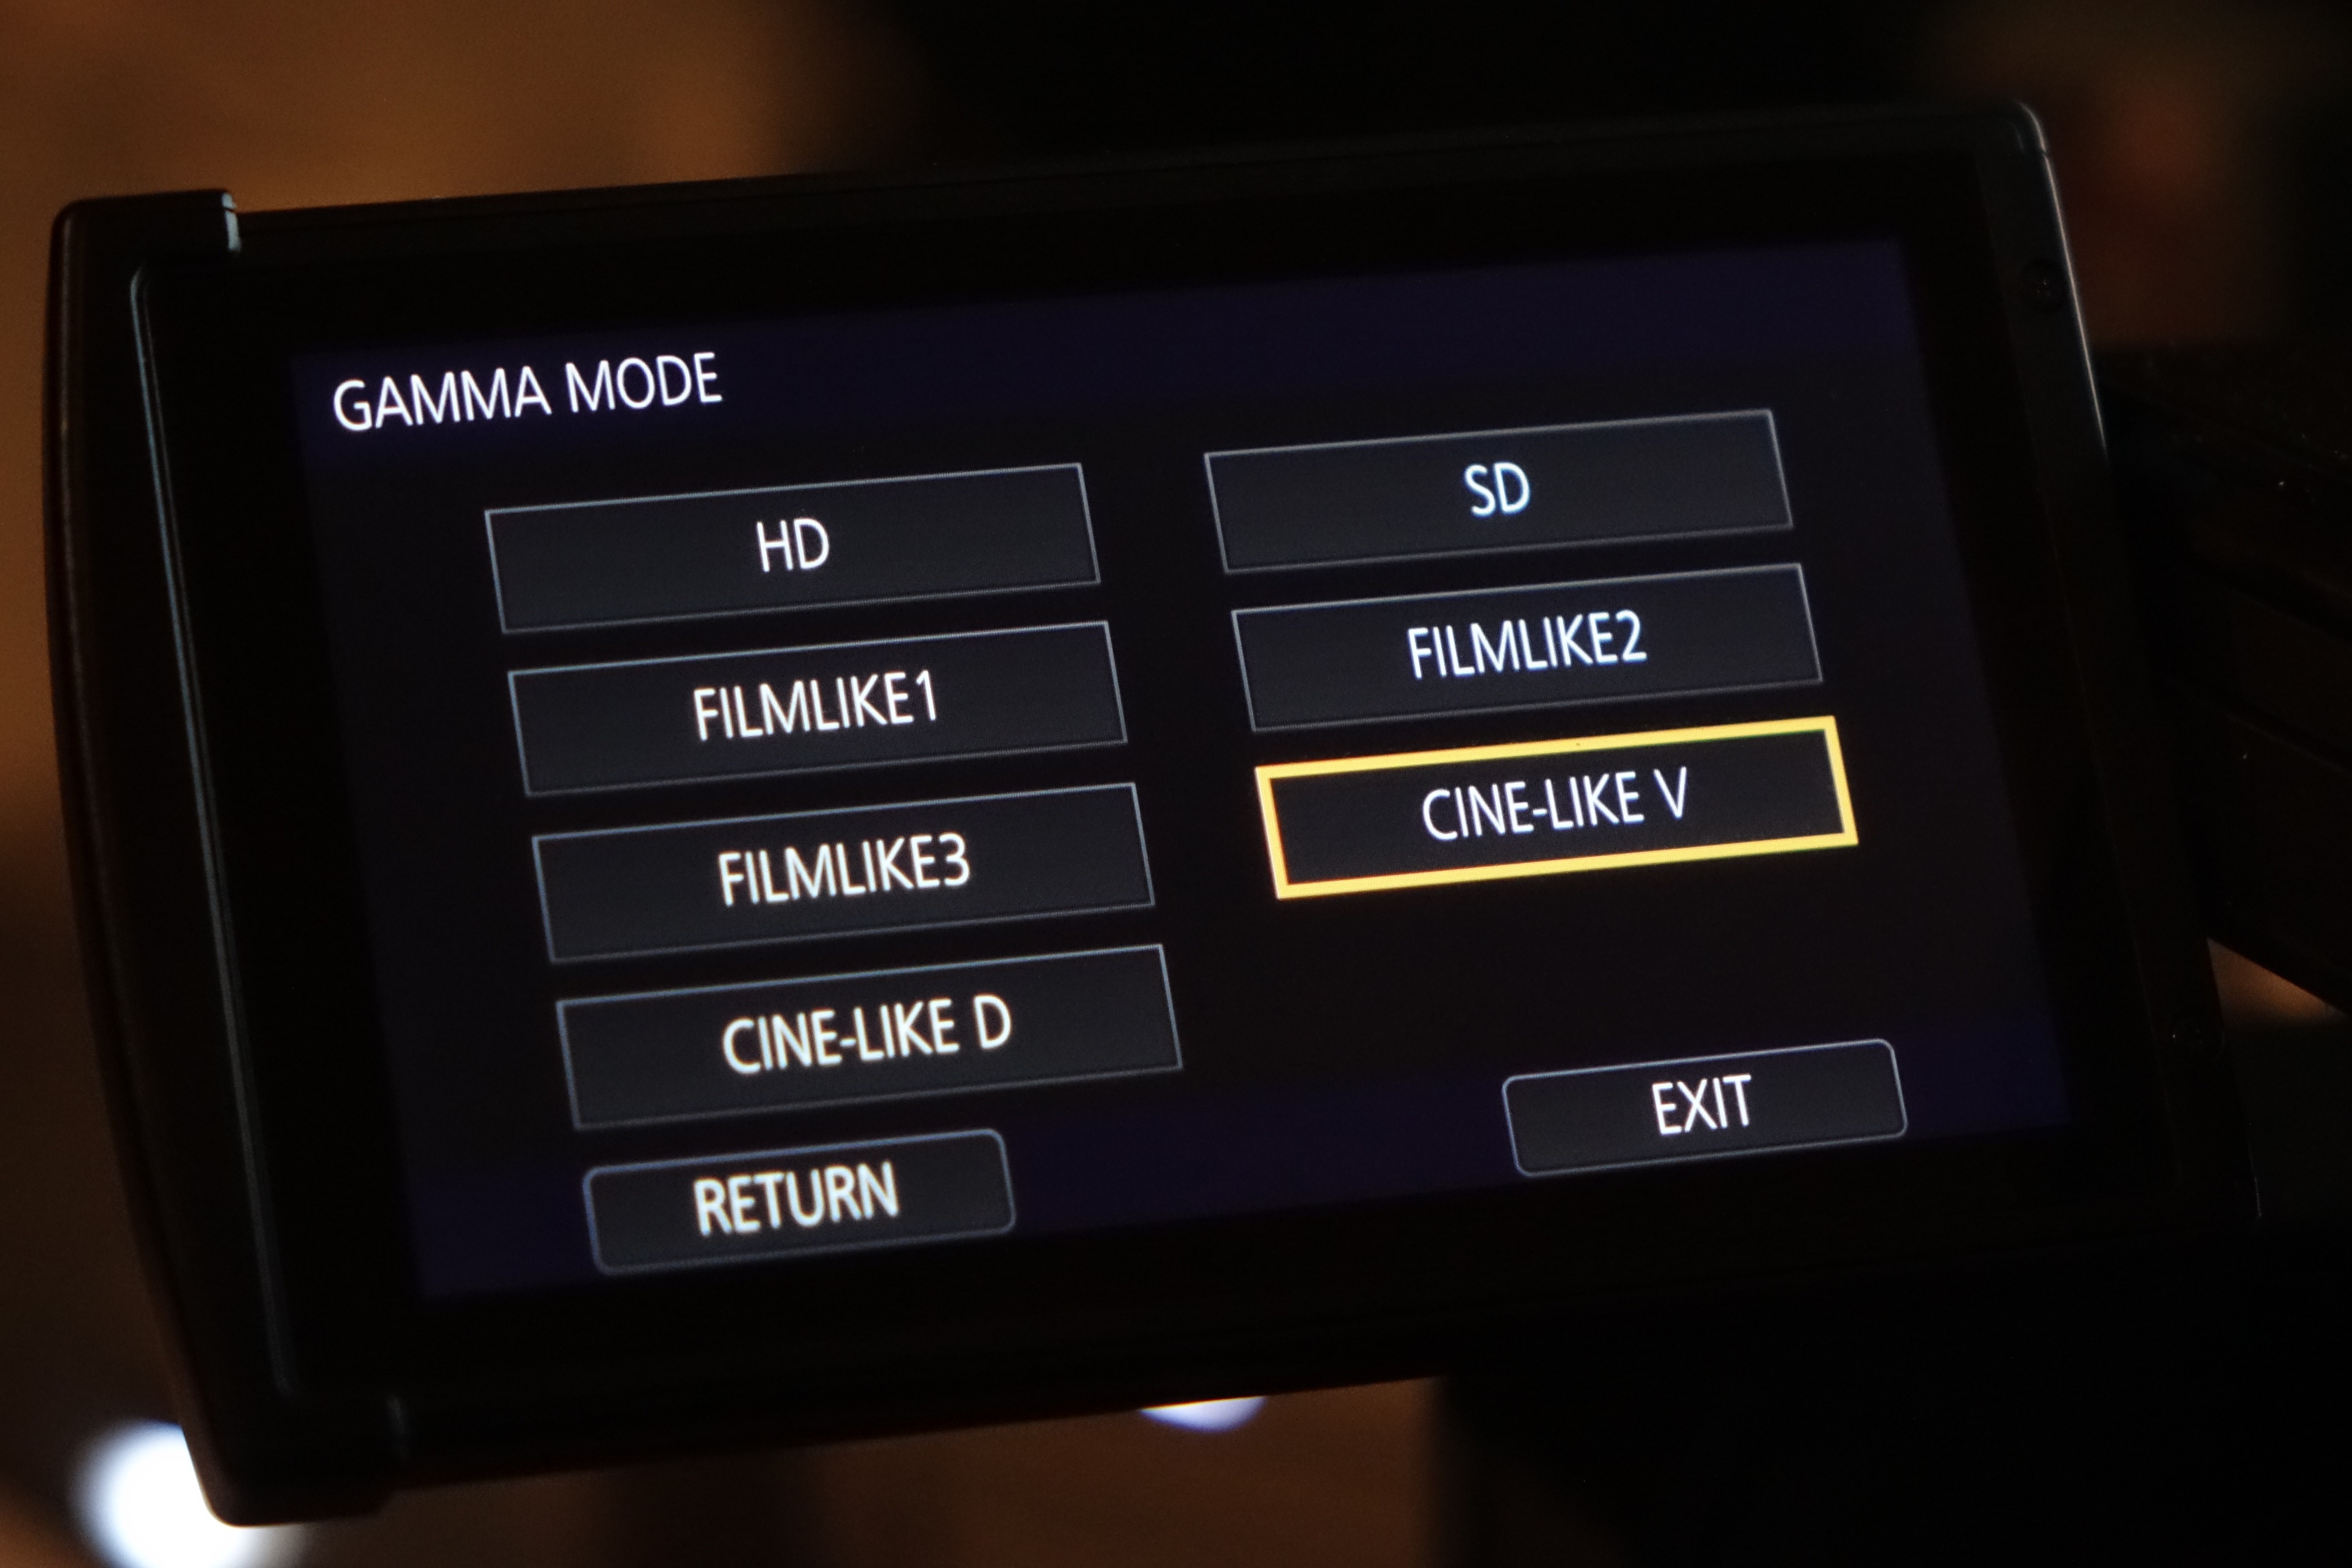
Gamma Mode – Tone or contrast of the image is set in accordance with the recorded scenes.
[HD]: This is the video gamma feature for HD (High Definition).
[SD]: This increases gain in darker areas more than [HD] does.
[FILMLIKE1]: This feature reproduces highlight areas more than [HD] does.
[FILMLIKE2]: This feature reproduces highlight areas more than [FILMLIKE1] does.
[FILMLIKE3]: This feature reproduces highlight areas more than [FILMLIKE2] does.
[CINE-LIKE V]: This gamma feature creates cinematic images with sharper contrast.
[CINE-LIKE D]: This gamma feature creates cinematic images.
When [CINE-LIKE V] or [CINE-LIKE D] is selected, Panasonic recommend that you set the lens aperture to a level lower than the normal lens iris level (approximately 1/2 a stop) to fully utilize the feature of the selected setting.
Black Gamma – This sets the gamma curve of dark areas.
Back Gamma Range – This sets the upper limit on the compression/expansion of the [BLACK GAMMA] setting.
Knee Mode – To avoid overexposure, select the compression level of the high intensity video signals received through the image sensor.
Knee Master Point – This adjusts the knee point position in 0.5% steps when [KNEE MODE] is set to [MANUAL].
Knee Master Slope – This sets the knee inclination when [KNEE MODE] is set to [MANUAL].
DRS – Selects the DRS (Dynamic Range Stretcher) function.
DRS Effect – Selects the level of the DRS function.
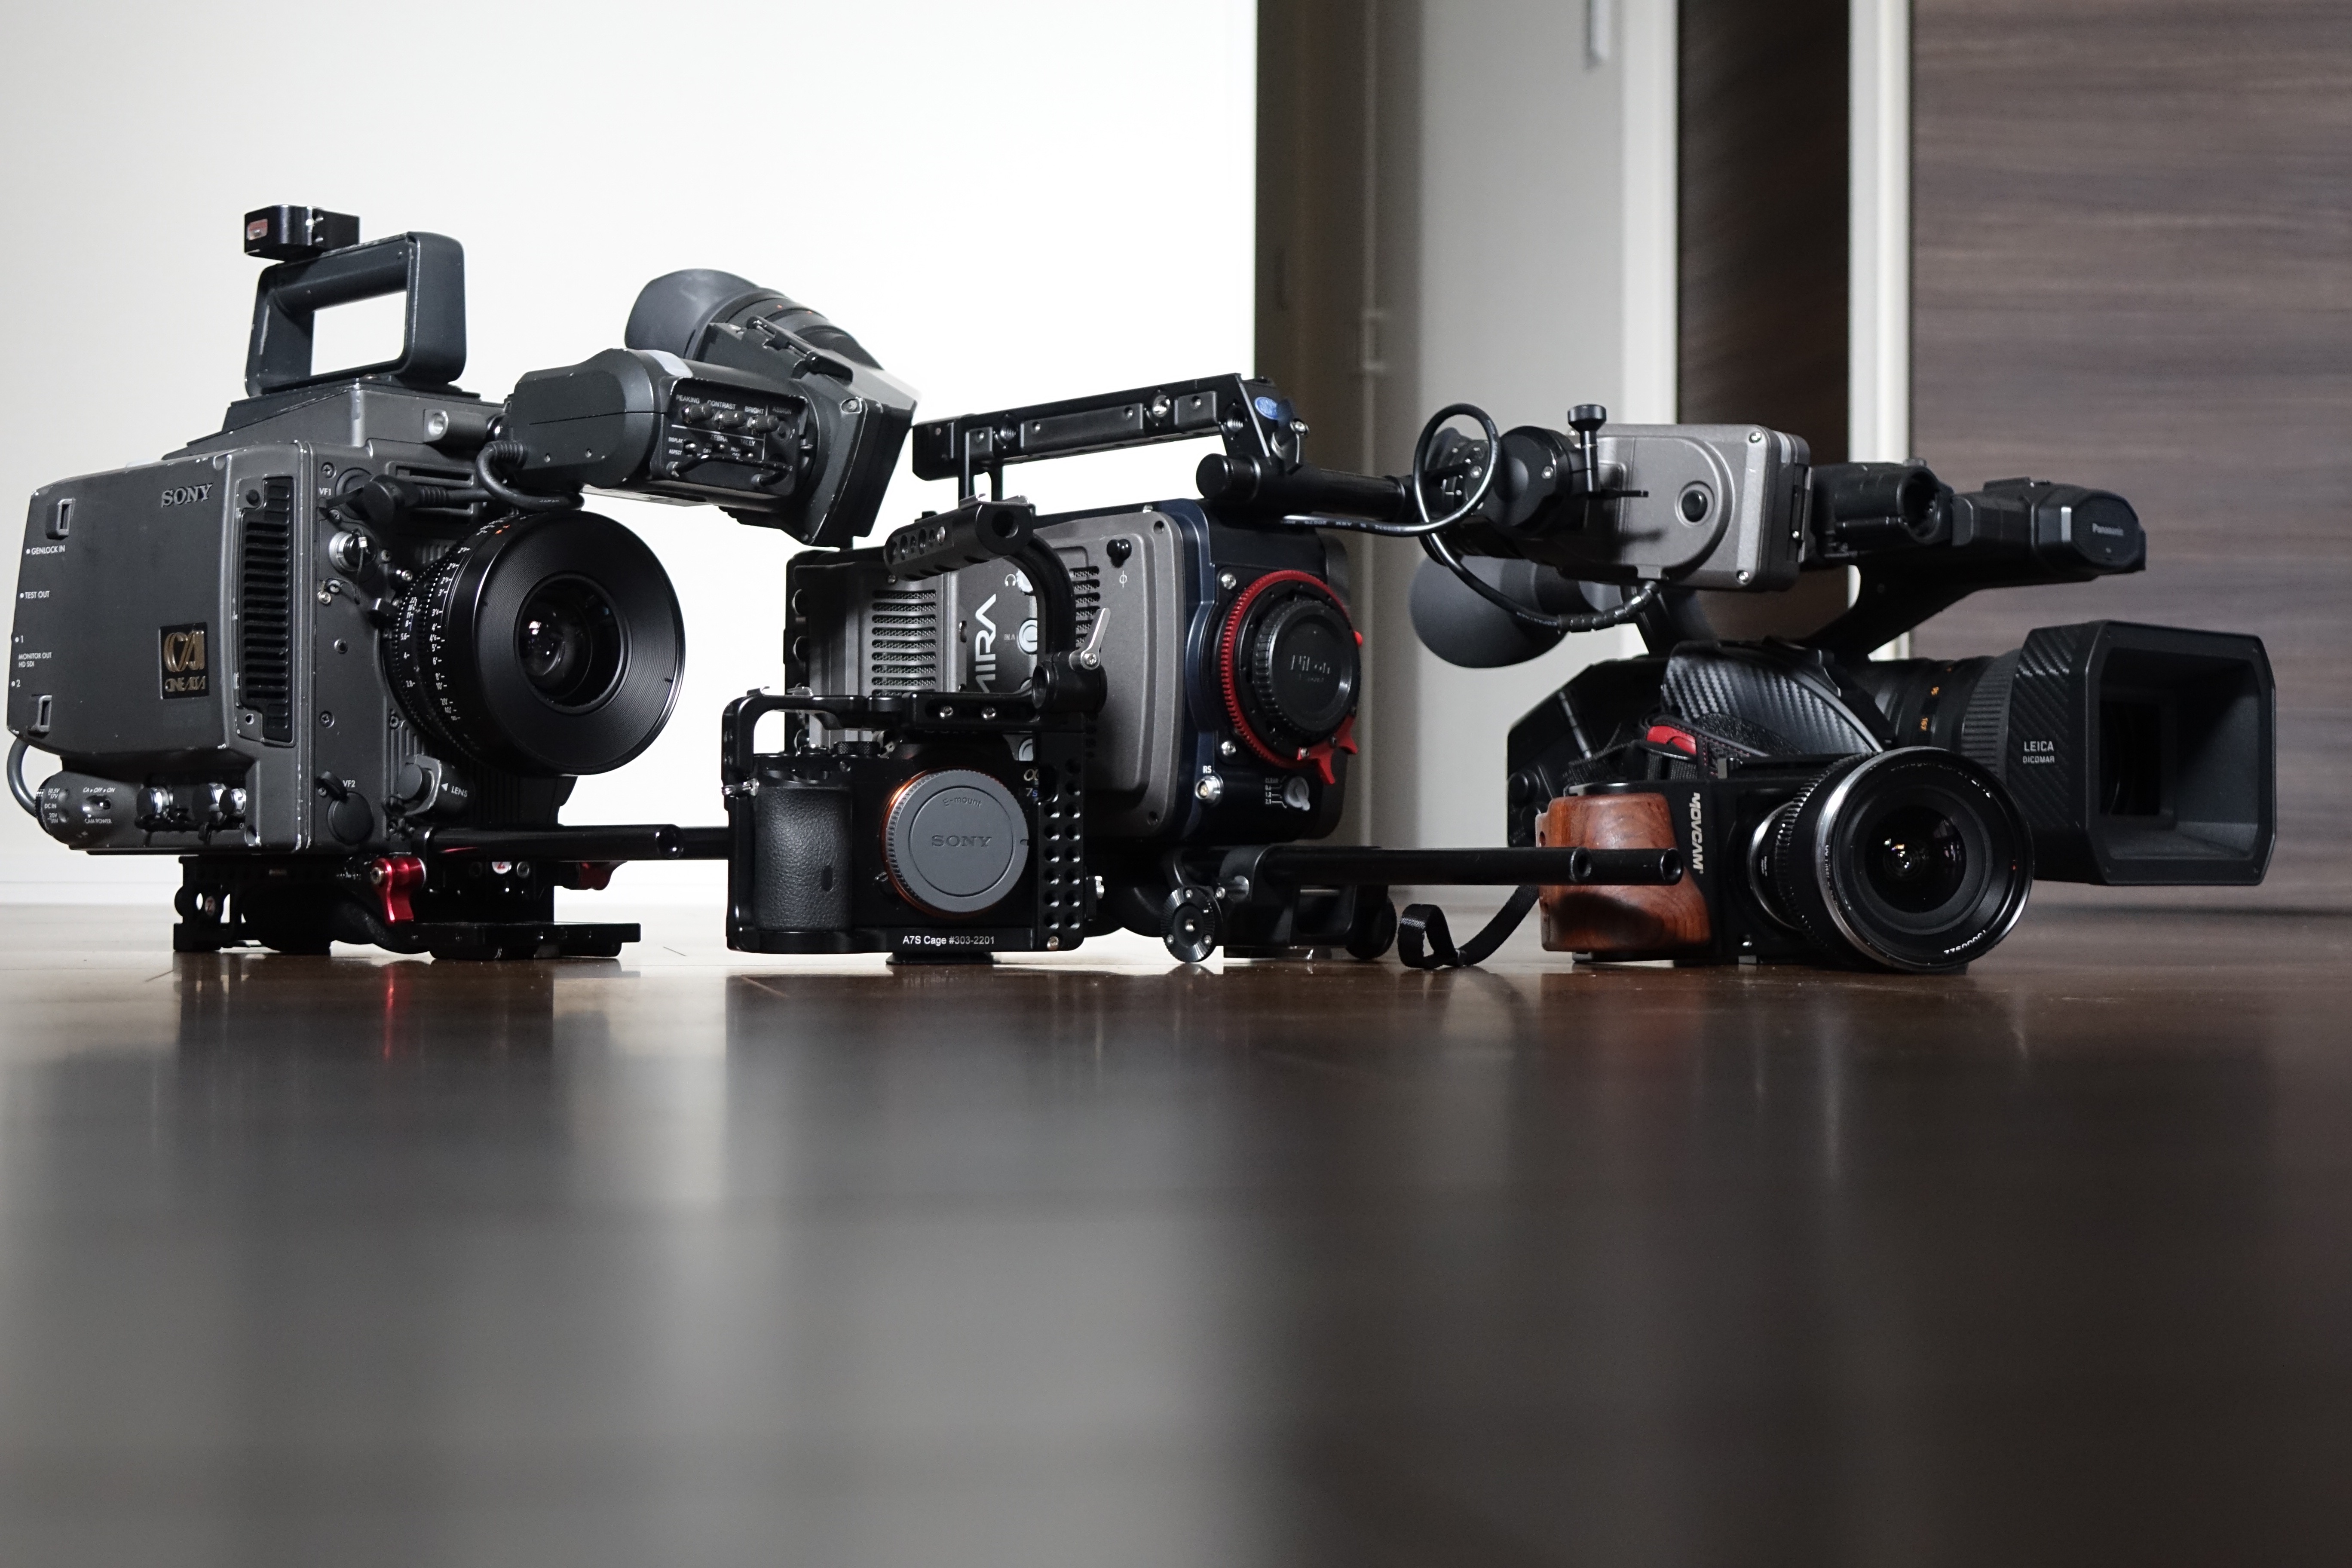
So now let’s look at how the DVX 200 handles skin tones when various Scene Profiles, matrix and gamma settings are changed. I will also compare it to the Sony a7S, the Blackmagic BMPCC, ARRI Amira and Sony F35. The Amira and F35 are obviously the benchmarks here, but I wanted to see how well the Panasonic measured up. The Panasonic definitely footage has a slight magenta cast to it by default. I really did not like the look of the V-Log L image when the default V-LOG V709 V35 LUT was applied. This was the LUT that Panasonic recommend I use for the DVX 200. I also find the V-Log L image to be quite noisy even at 500 ISO. I did some basic tweaks in FCPX to get a nicer look, but I am sure a professional colourist could achieve a much more pleasing image. As far as other Scene Files go on the camera, you can get some pretty good results, but this all depends on the type of look you are after. The tests I did were not very scientific and as I was having to shoot myself, you will have to excuse the variations in exposure and focus. This test was not designed to get the best possible looking image or skin tones out of each camera. It was designed so you can see what you get out of the box without making any adjustments or doing any colour correction. All the cameras were white balanced under the same light at the same intensity, except the F35 in S-Log/S-Gamut mode where 5600k was used, and the BMPCC where white balance was set at 5600k. Skin tones are very much a personal choice and different people have different opinions on what looks good and what doesn’t. I will leave it up to you to judge for yourself.
I also tested how accurately the DVX 200 maintained colours when using the camera’s internal ND filters. I saw no visible shift in colour accuracy regardless of what ND was used. You can see the test below.
The colour rendition the camera produces is generally quite pleasing and more to the point fairly accurate. Where I find the camera has limitations is in the highlights – regardless, it seems, of whether you’re using regular Scene Files or V-Log L. I would have expected that a Log curve would provide more highlight protection on the DVX 200, but this doesn’t seem to be the case. You really need to be very careful when exposing to avoid getting rather nasty blown-out highlights. I think Panasonic have done a pretty good job of getting the most out of the micro 4/3 sensor in this camera, despite the obvious problems with noise and highlight roll off.
V-Log L definitely needs to be treated with some care and a lot of experimentation and testing will need to be done to get the best out of it. You can tinker with a lot of the camera’s looks, but it is good to know that you can also get pleasing colour results straight out of the box without any tweaking.
You can see part 1 of my review here:
Panasonic DVX 200 Review Part 1: Camera overview, ergonomics and build
In Part 3 of my review, I will show some footage shot in UHD, 4K and HD and look at the various frame rates and codecs available in the camera.