Newsshooter have been lucky enough to get our hands on the new Panasonic DVX200 to test. This camera is pre-production, but I am told it is near-final. Over the coming week we will be putting the camera through its paces to examine the picture quality, low light performance, colour reproduction, V-Log L gamma, rolling shutter, menus, high frame rates, 4K/UHD/HD performance, lens performance, five axis image stabilisation, ergonomics, usability and just about anything else you can think of.
The Panasonic DVX 200 is the world’s first 4/3 sensor, 4K/60p capable camcorder with an integrated zoom lens. It can also record slow motion at up to 120fps in Full HD. The camera features a Leica-branded Dicomar 4K 13x zoom lens coupled with a sensor that Panasonic say has 12 stops of dynamic range – made possible by the VariCam style V-Log L processing. The “L” stands for lite and is a different log curve than that of the Varicam 35’s V-Log. V-Log L is made specifically for the DVX 200 and GH4 to best maximise dynamic range. The Varicam 35’s V-Log, while similar to V-Log L, is not the same, and has been taliered to the cameras Super 35 sensor and to best utilise the 14+stops of dynamic range.
In this first part I am going to look at the camera’s controls and layout.
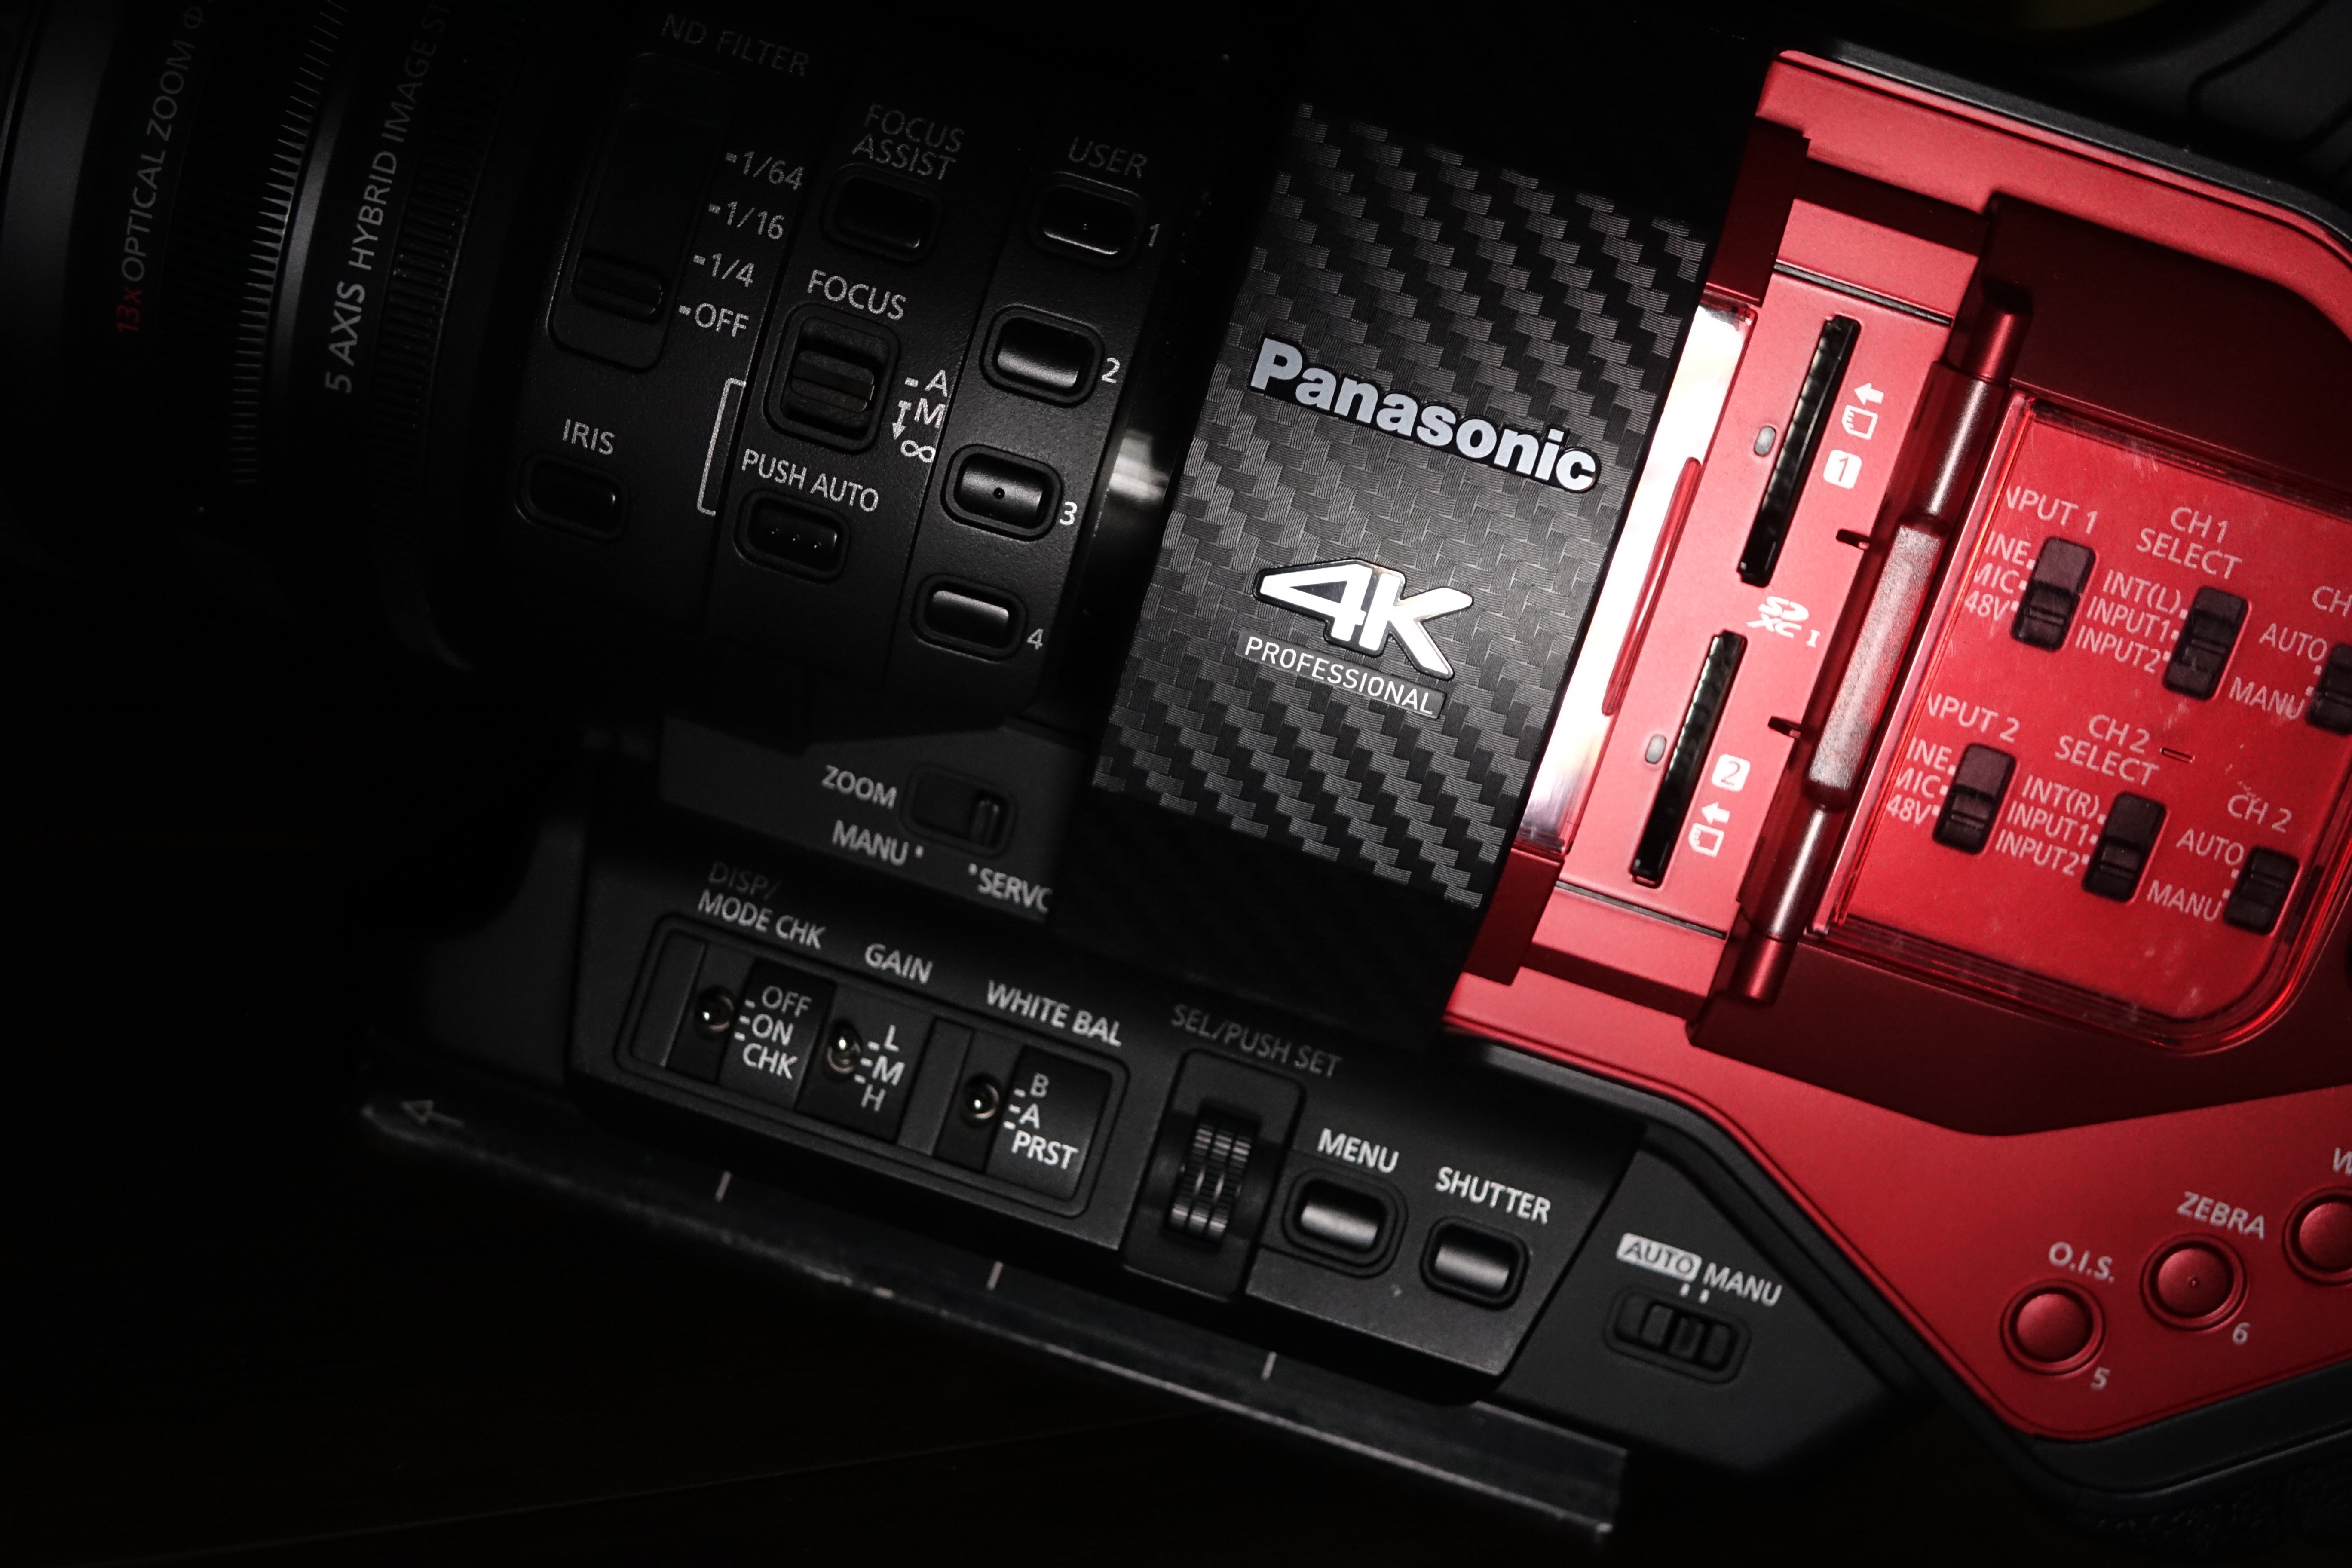
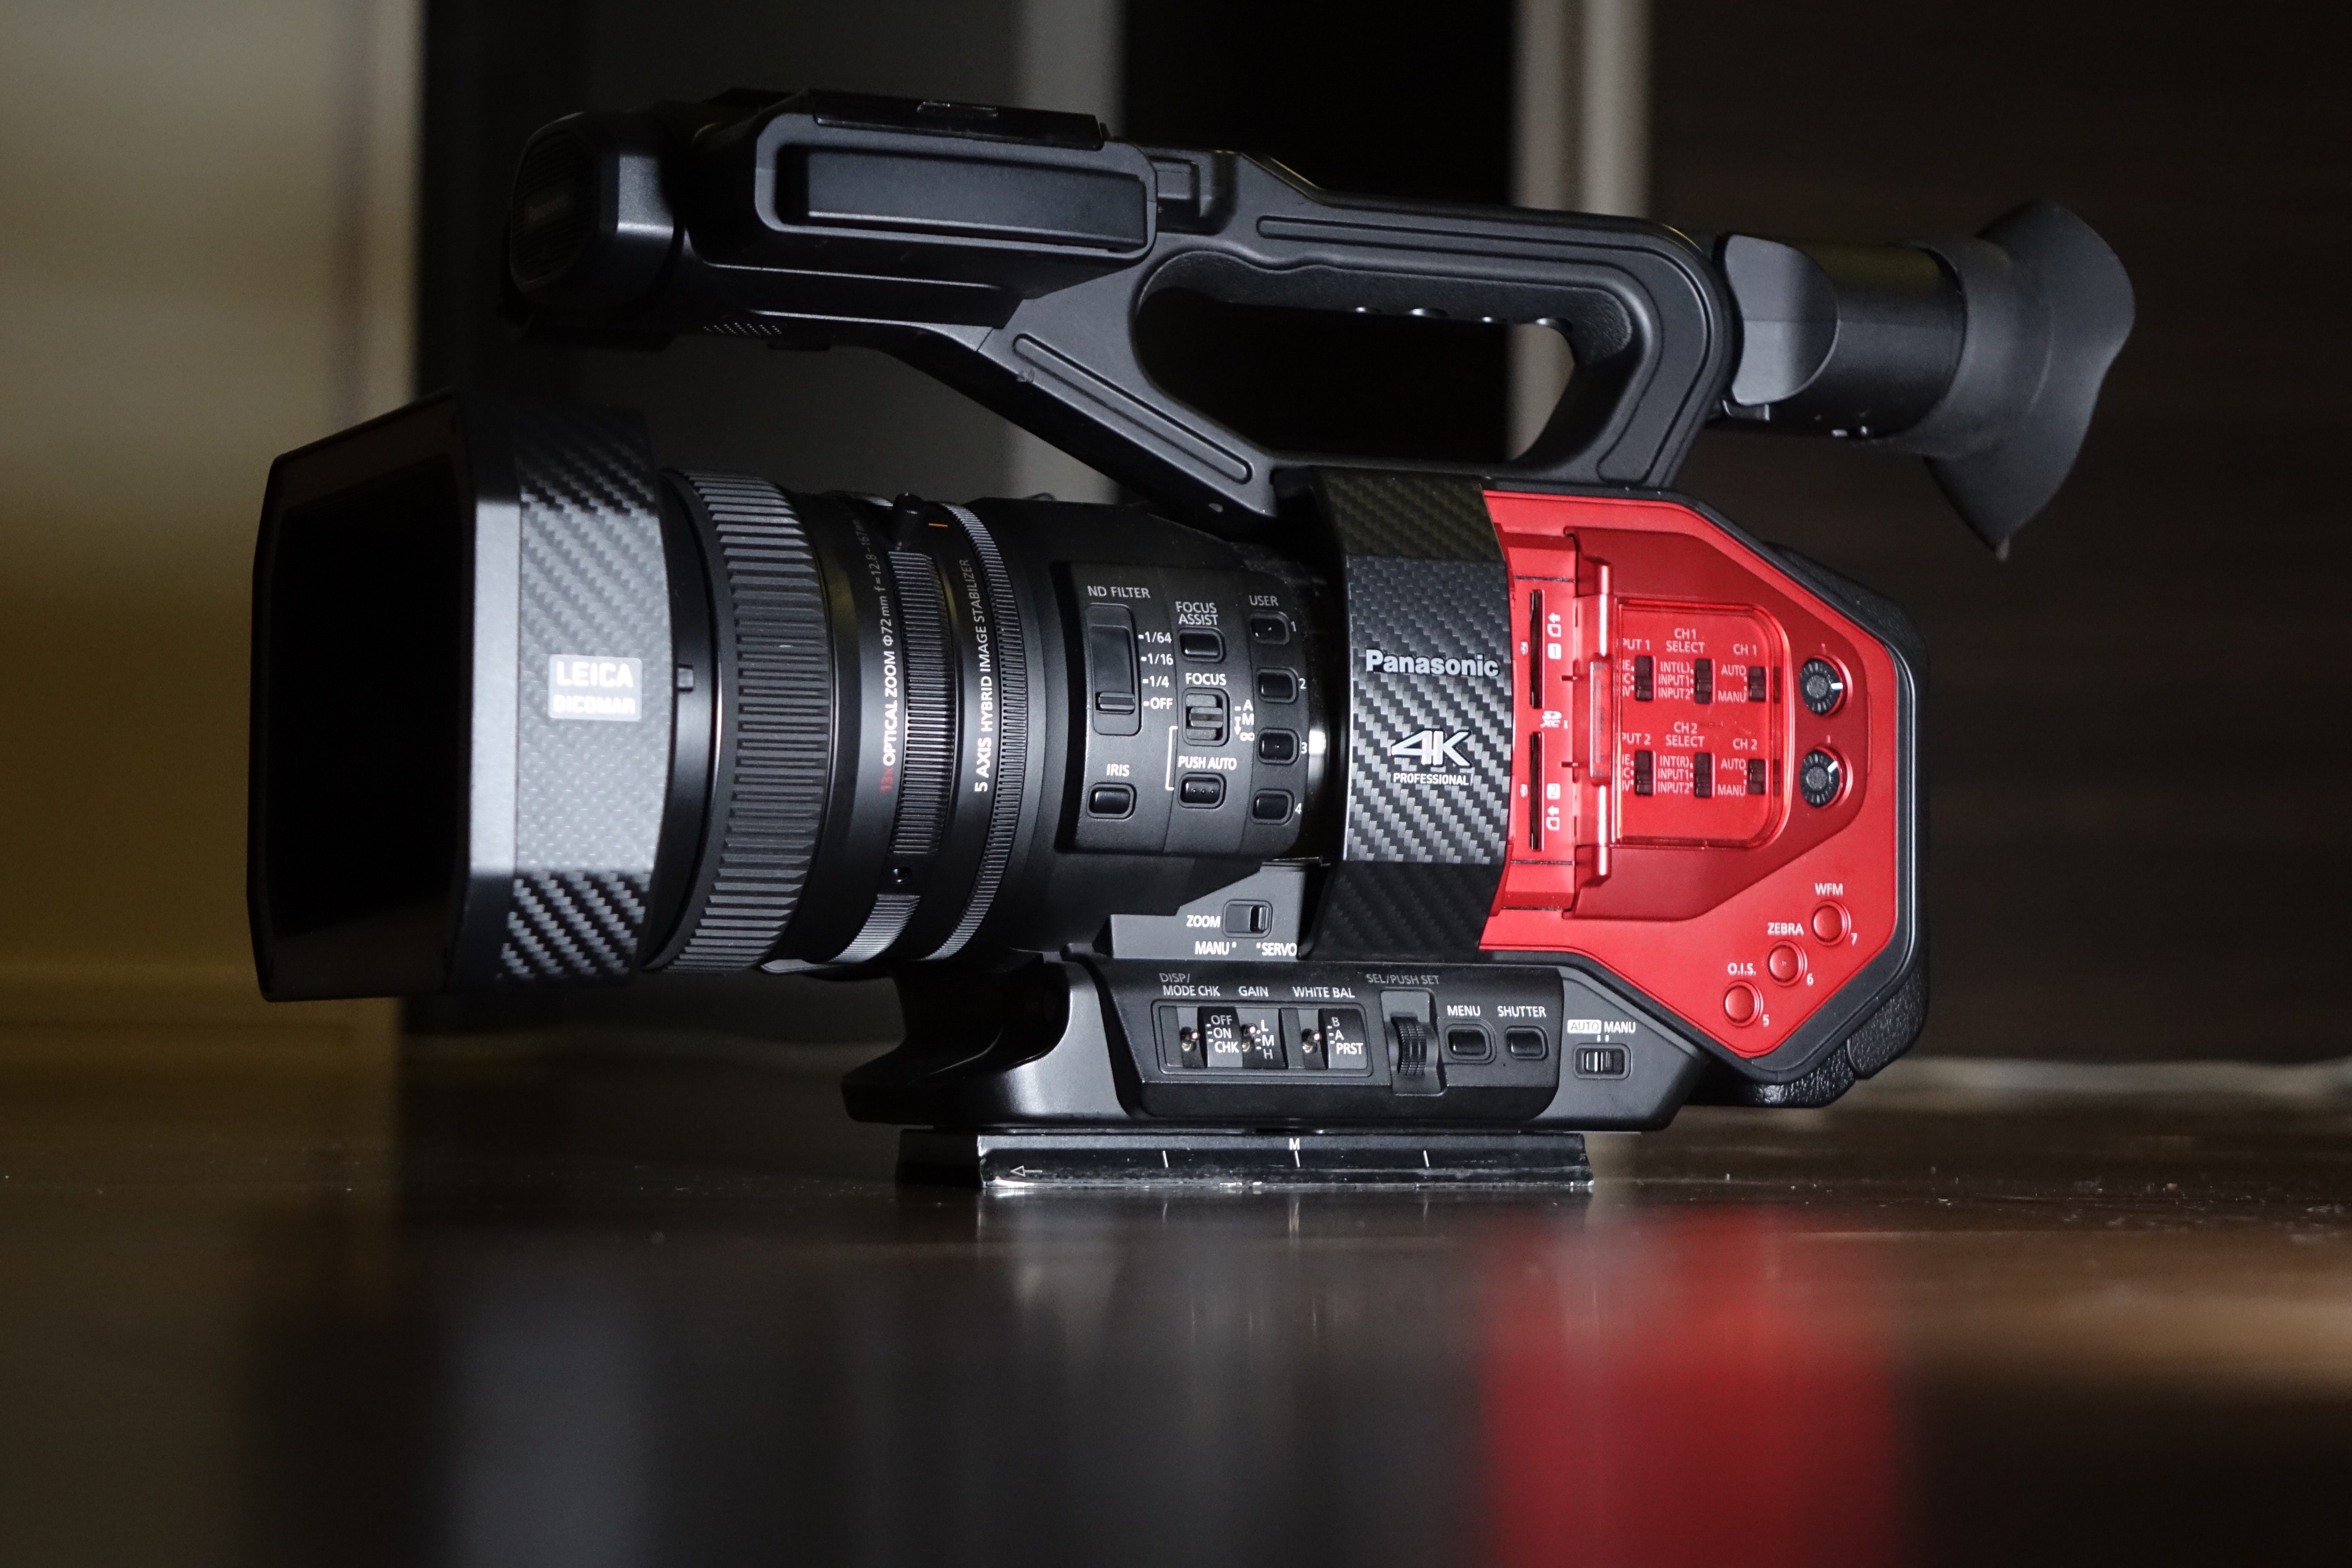
The camera design is very similar to other fixed lens pro camcorders – just with a larger sensor. In fact, if it wasn’t for the red-plastic-and-carbon-fibre look of some of the panels, the DVX200 could easily be mistaken for its ancient ancestor, the good old DVX100. There is still a viewfinder at the back and a flip-out LCD screen towards the front. Cameras like this are designed to be held out in front of the operator and are not a natural fit on your shoulder. You put the viewfinder up to your eye, your right hand on the servo control grip, and use your left hand to either steady the camera or adjust iris, focus or zoom. The servo zoom handgrip has been nicely designed and has a slight curve which makes it very comfortable to hold. It is also nice to see a fixed lens camera that has 3 separate control rings for focus, zoom and iris.

You could mount the camera to something like a Zacuto VCT baseplate and use a Gratical HD EVF to put it on your shoulder, but I think this defeats the purpose of having a camera in this form factor. Not only would you be adding extra weight, but the added expense would take the price of the camera package up to the same level as a Sony FS7 basic kit.
I’m not a big fan of the camcorder-style ergonomics, but a lot of people are. Panasonic are clearly targeting this camera at shooters who want an all-in-one solution and don’t want to add anything to the camera to make it work. It is supposed to appeal to users of EX1s and HPX170 users who want a larger sensor in the same style of body.
If you were to believe a lot of the chatter online then you might think that everyone wants to use an interchangeable lens camera with super-shallow depth of field. This couldn’t be further from the truth. If you have ever worked in Asia, Africa or South America you will have seen that the majority of cameras being used, particularly for news and event filming, are cameras with this form factor.
Anyone who has used a handycam in the past will be right at home with the layout of the DVX 200. The key buttons and functionality are all in familiar places and easily accessible. Unfortunately, the menu system is not quite as simple. It took me a long time to change settings; I had to constantly go back and forth to the instruction manual to work out how to use certain features on the camera. Maybe I am spoilt by the simplicity of my new ARRI Amira, but I still find most of the Japanese camera menus overly complicated. The menu items aren’t well labelled and on more than one occasion I had to go searching through the whole menu to find where a setting was. I’m sure with time users will become more accustomed to where settings are, but it really shouldn’t be so hard.
The flip-out 4.3 type (approximately 2,760,000 dots) LCD screen is nice, bright and quite clear. I found it easy to use and I could judge critical focus and exposure without any issues. The rear viewfinder is pretty good as far as built-in viewfinders go. It is a 0.39 type OLED with approximately 2,360,000 dots, (video display area: approximately 1,770,000 dots). It is quite sharp and features a diopter control. I did, however, find that when I placed my eye up against it I couldn’t really see the whole image without moving my eye around. It is no match for a decent external EVF like the Zacuto Gratical.
In terms of operating the camera, a few things left me scratching my head. There is a proximity sensor on the rear viewfinder that is designed to allow users to switch rapidly between the LCD and viewfinder without having to touch any buttons. This sounds great in theory, but I found it kept de-activating the LCD screen at the front of the camera when I didn’t want it to. With the camera on a tripod, if I stood near the back of the camera – my normal position when shooting – then every time I came within 4 or 5 inches of the viewfinder the proximity sensor would activate and turn off the front LCD screen that I was using. I looked into the menu to see if there was any sort of setting to allow the LCD screen to be kept on at all times but couldn’t find one.
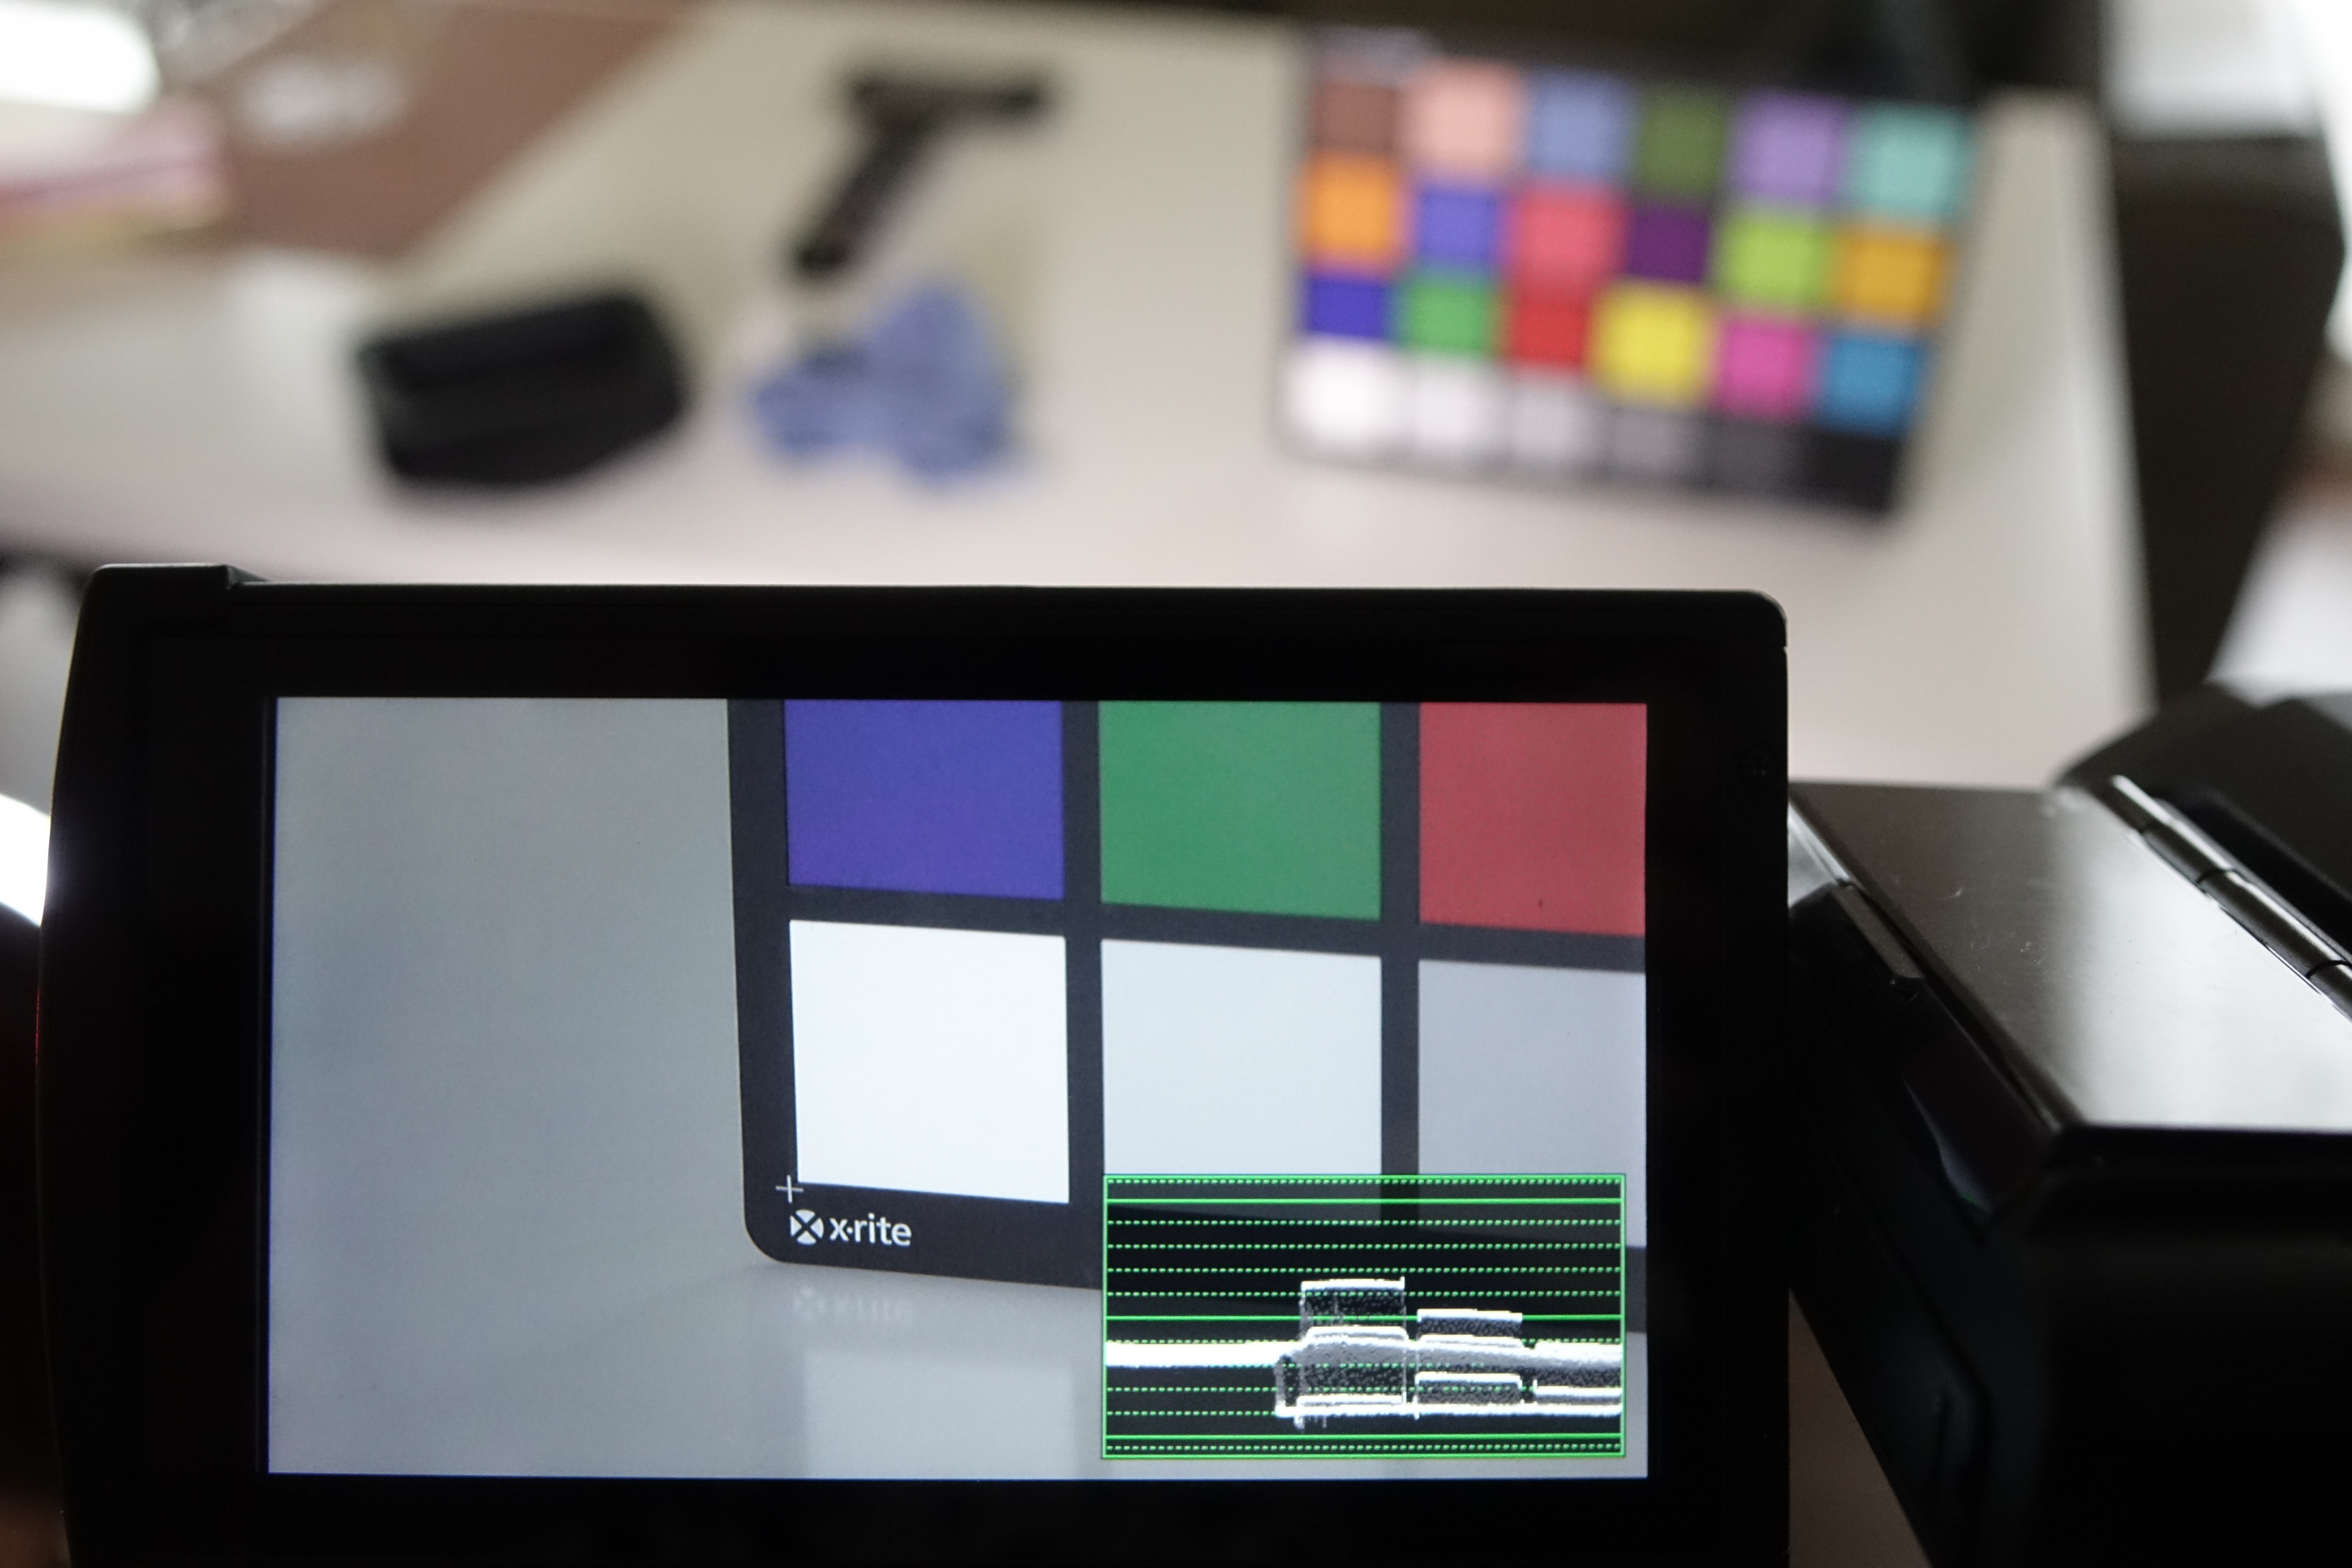
The other problem I encountered is that when you activate the waveform monitor to judge exposure you lose all your other display information. If you want to have the waveform up all the time you will be flying blind, with no ability to see if you are recording, or see your audio levels or any other important information. I asked Panasonic about this and I was told that it is due to a hardware limitation. I hope this isn’t the case and they can work around this in firmware.
White-balancing the camera can also be frustrating. The white balance control switch has three settings: a preset and A and B custom settings. The preset can be set at 5600k or 3200k, or you can dial in your own value anywhere from 2000k up to 15,000k. This all sounds great and for many users this will be the way they work with white balance, but if you actually perform a custom white balance in the A or B positions then you don’t get all the info you would usually expect. Instead of the camera indicating what the measured Kelvin value is, all you see is a ‘white balance OK’ notification on the screen. This is unlike pretty much every other broadcast camera I’ve ever used.
The Panasonic V-Log L gamma setting allows the camera to record a much flatter image designed to give more flexibility in grading and greater retention of detail in the extreme ends of the exposure range. As such it is a welcome addition to the camera. Like many other cameras the DVX200 has an in-camera look up table (LUT), called ‘V-Log L Assist function’ by Panasonic. It transforms the flat image into a good approximation of what it looks like after it has been converted to standard REC.709. You can set this function to switch between corrected and flat image by pressing one of the assignable buttons. The big problem is that if you want to use it you have to keep the button depressed. As soon as you let go of the button then it returns to the flat V-Log L image. Hopefully this is not a hardware limitation and can be fixed in a firmware update.
The DVX200 has two XLR audio inputs and the usual audio controls found on most pro camcorders. Strangely, though, one of the XLR inputs is up on the top at the front of the camera, while the other one is at the rear towards the base. I am not quite sure why they have been put so far apart, although Sony did a similar thing with the FS700. The headphone jack is also oddly located behind a flap that you will need to keep open if you want to have your headphones plugged in to monitor audio.
The camera runs off a VW-VBD58 battery that is housed inside a compartment at the rear of the camera. This is fully enclosed, apparently to keep out dust and moisture. This only problem is that if you want to run a third party battery that has a power tap or barrel connector on it to power other accessories then you are out of luck – unless you want to keep the rear door open on the camera.
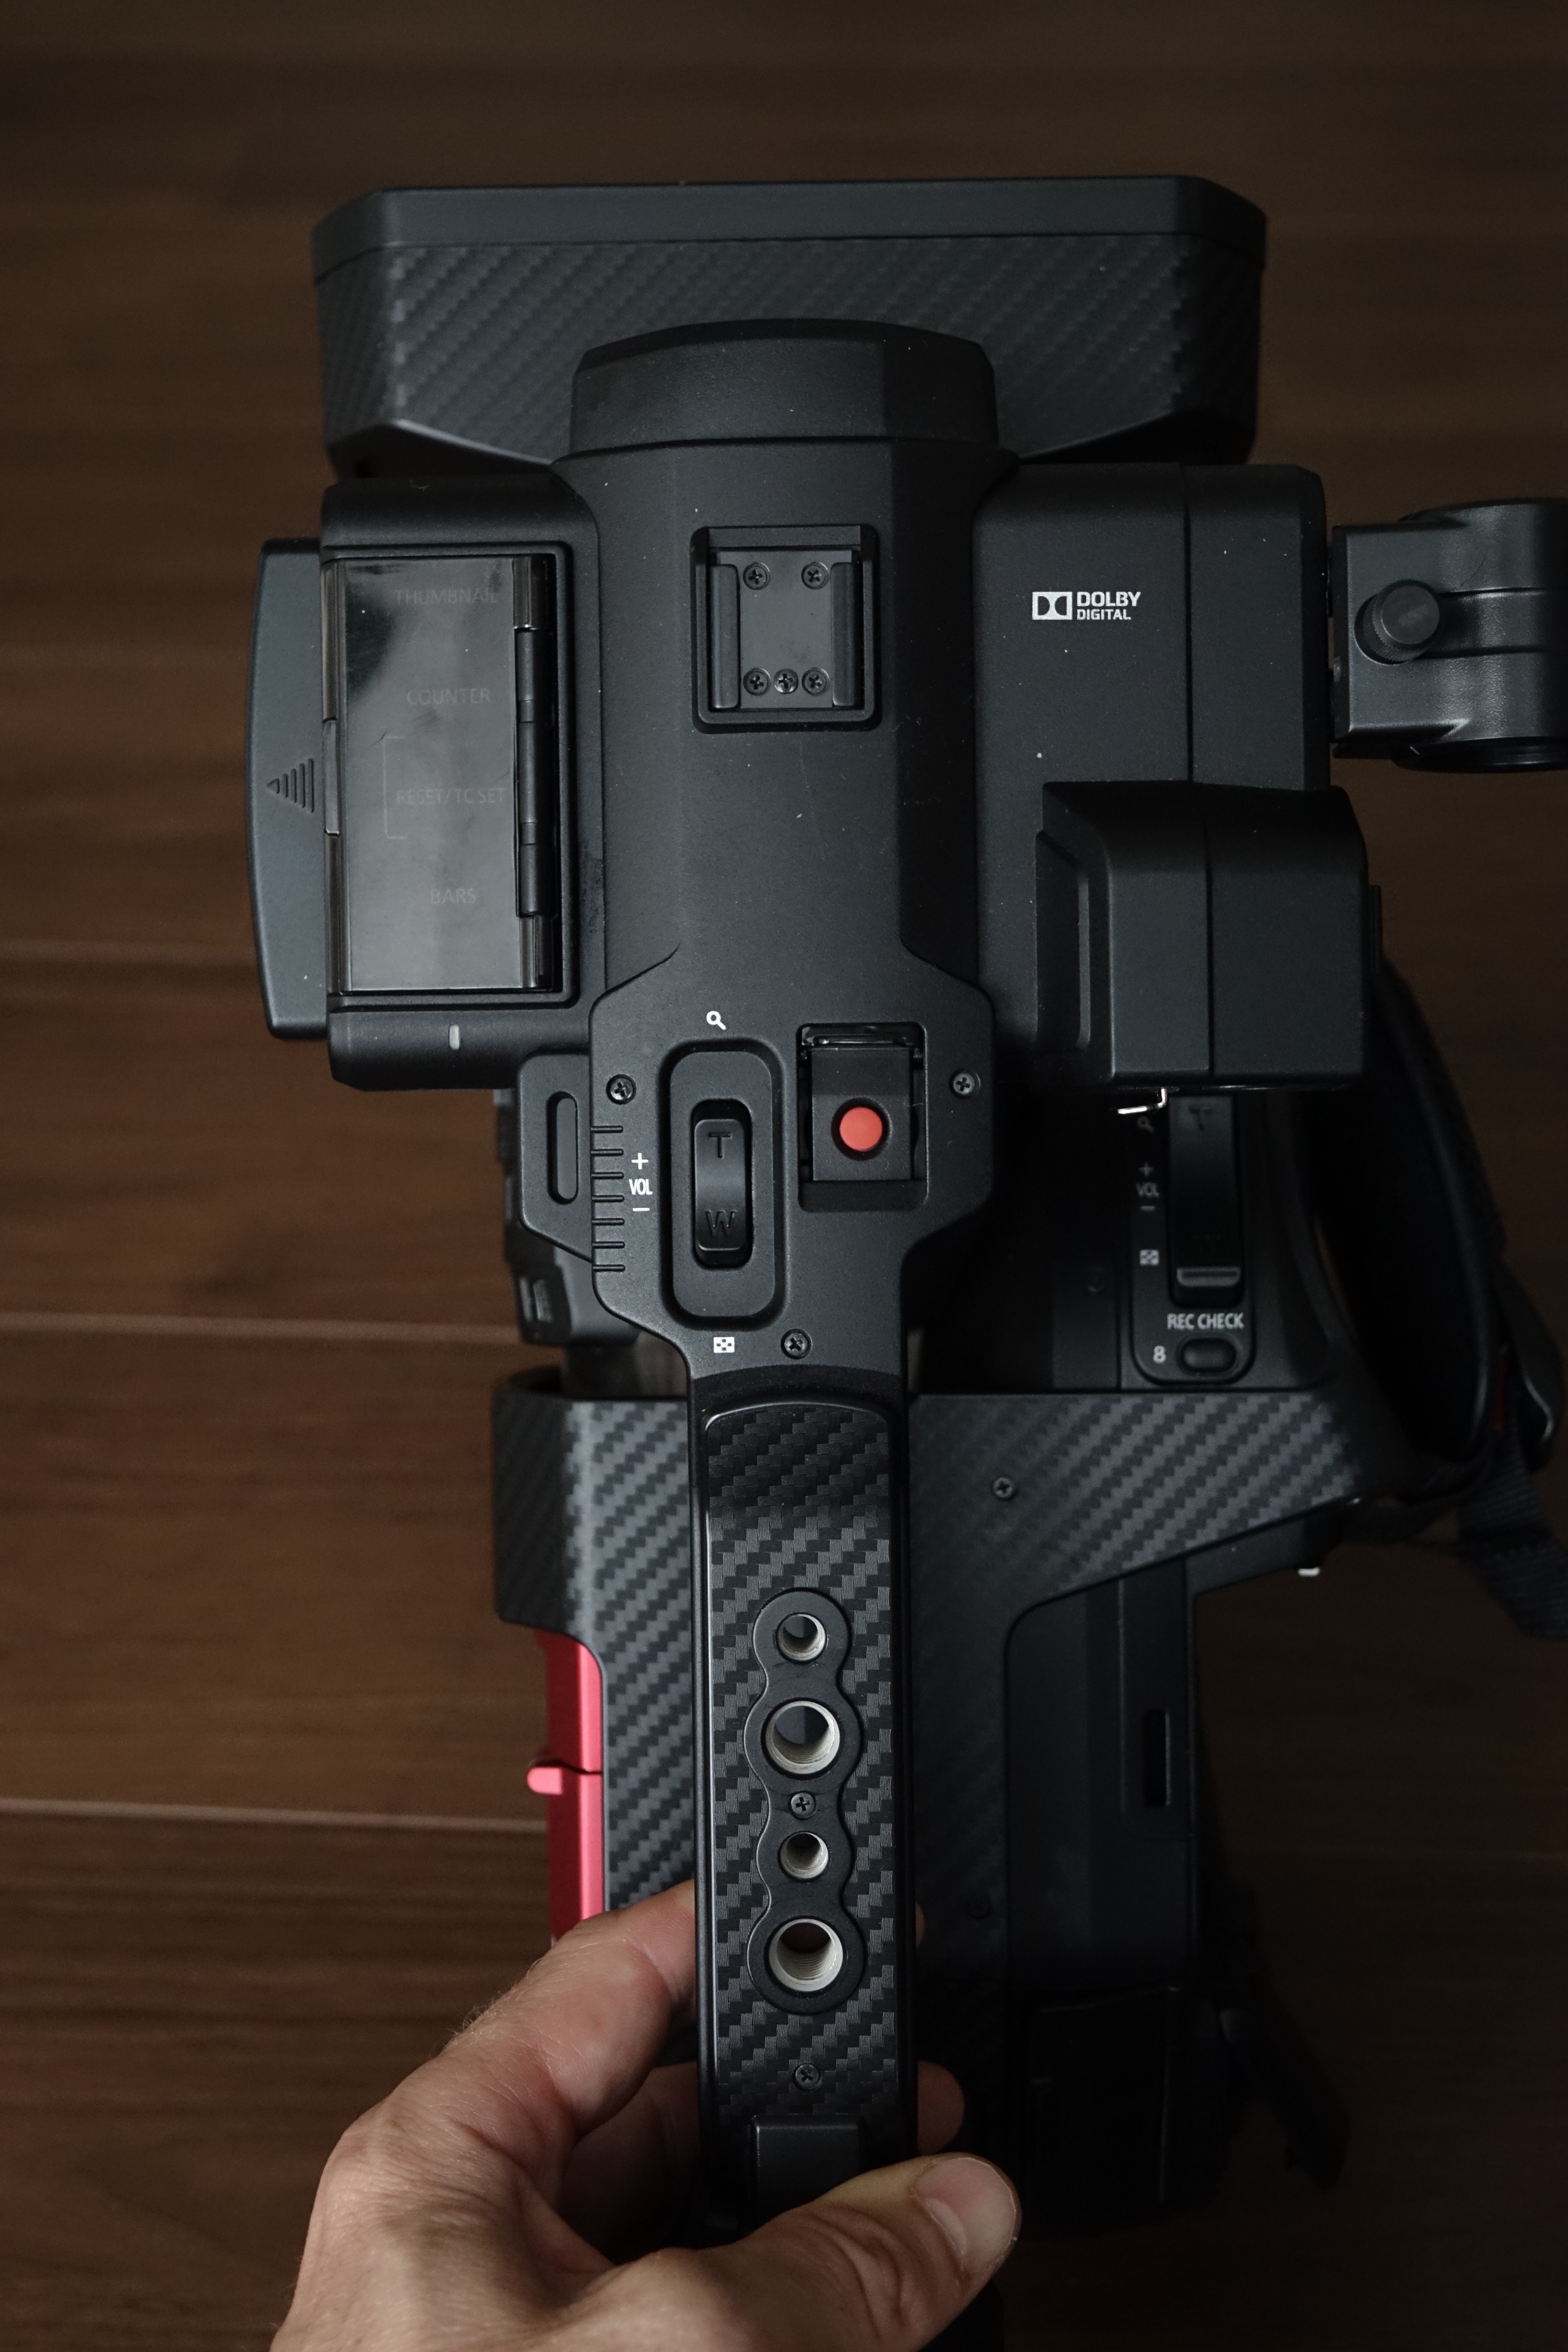
As far as build quality goes, the camera – although made out of a hard plastic material – feels solid in the hand and quite durable. All the sliding and connector covers close very firmly and don’t feel at all flimsy. The only thing that looked less solid was the connection point between the flip-out LCD screen and the body of the camera. I would be worried about it if it took enough of a knock. This is probably no less durable than other cameras out there with similar flip-out screens, though. The camera has weather sealing which should make it better suited for foul weather conditions, although this is pretty hard to test. There are two 1/4 20 and two 3/8 mounting points on the top handle for mounting accessories. The handle is very solid and robust and does not detach from the camera body.
In Part 2 of my review I will be looking at V-Log L and the camera’s scene files. Stay tuned.


