Guest post by Philip Grossman:
If you really want to put an untested piece of equipment through its paces, I would submit that Chernobyl is probably a good place to do this. It was in this spirit that I was fortunate enough to receive a Ronin-M three-axis gimbal from my local distributor, UAVExperts.aero. They gave me their demo unit – that had just arrived and hadn’t even been opened – two days before I departed for the Ukraine to finish filming my documentary ‘Exploring the Zone’ in the Chernobyl Nuclear Zone of Exclusion.
The market for handheld three-axis gimbals has become crowded over the past couple of years, with tens of companies around the globe producing a product. Much of the rise in popularity of these systems can be attributed to the explosion in the aerial drone market.
DJI and CineStar (now Freefly systems) were some of the first companies to create three-axis gimbal systems for drones, using brushless motors. Over the past five years the technology has matured, the motors have become stronger and the software more robust. And, almost as important, the prices have plummeted, allowing the technology to be adopted by a larger user base.
Freefly were the first company to announce a handheld three-axis brushless gimbal systems for the film industry. Their Movi M10, which supports small-to medium-sized cameras, sold for nearly $15,000. Within 18 months, DJI sent shockwaves through the market with the release of their first handheld three-axis gimbal, the Ronin, which sold for less than $3,000 US and could support up to 16lbs.
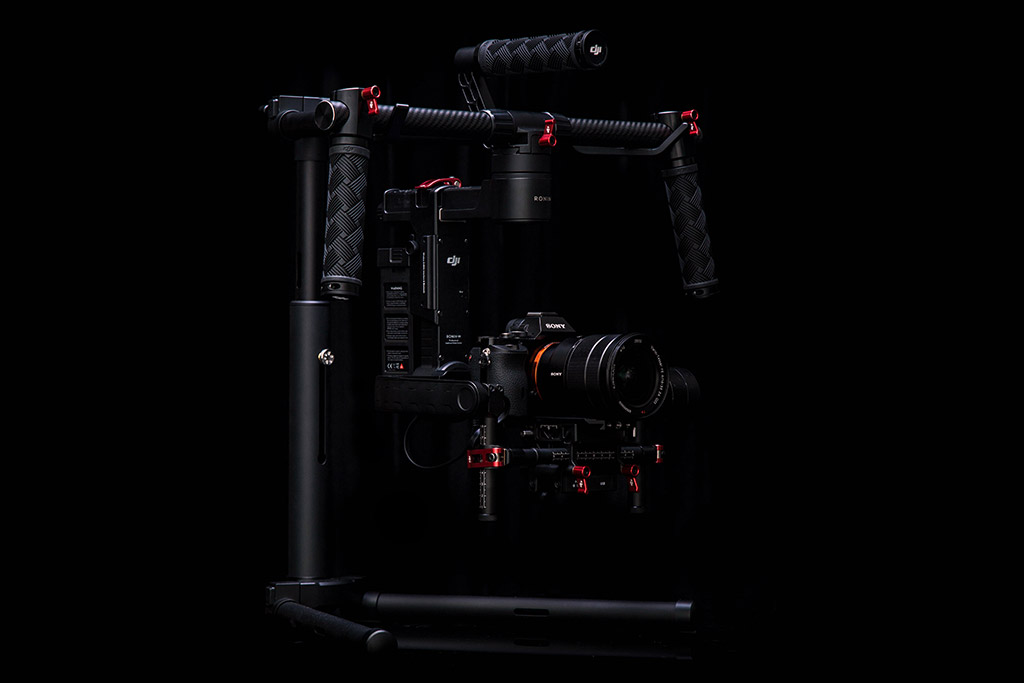
And now DJI has released a second handheld gimbal: the Ronin-M. It’s designed to carry even smaller camera systems like the Panasonic GH4, Sony A7s, or BlackMagic Pocket Cinema Camera. It’s small, but despite its size the diminutive Ronin-M is still capable of carrying systems weighing up to 8 lbs: potentially a useful travelling companion for my final trip to Chernobyl’s irradiated wasteland.
Preparation
The day before I departed, I opened the Ronin-M’s box and took out the pieces to figure how I would be able to pack for the 16-hour journey to Chernobyl. I was surprised by just how small the unit was and how easily it broke down. I own its larger sibling, which came in a large pelican-style case. The Ronin-M ships in a rather small box and weighs only five pounds, which, compared to the Ronin’s 10lbs, was quite light.

The design of the top handle bar is ingenious. The two arms disconnect from the center hub making it very easy to pack and transport. This was of utmost importance to me as I was already packing about 250 lbs of gear (including two drones and three cameras) and had to find enough space to pack the Ronin-M. Since the top arms come apart, I was able to just stick them in my Tamrac Expedition 9 backpack without any problem. Also, overall the design of the Ronin-M is very clean. Compared to several of its competitors which have exposed cables, the Ronin-M had very few dangling wires which in turn meant fewer opportunities for snagging or tangling.
Set Up
Setting up the Ronin-M is almost identical to the full size Ronin, though the smaller gimbal seemed to balance more quickly. This might have been down to the fact that I was dealing with a smaller camera system compared to my typical FS7 set up; but the ease of use was a relief. It also appears that the software and motors are far more tolerant if the rig is not perfectly balanced.
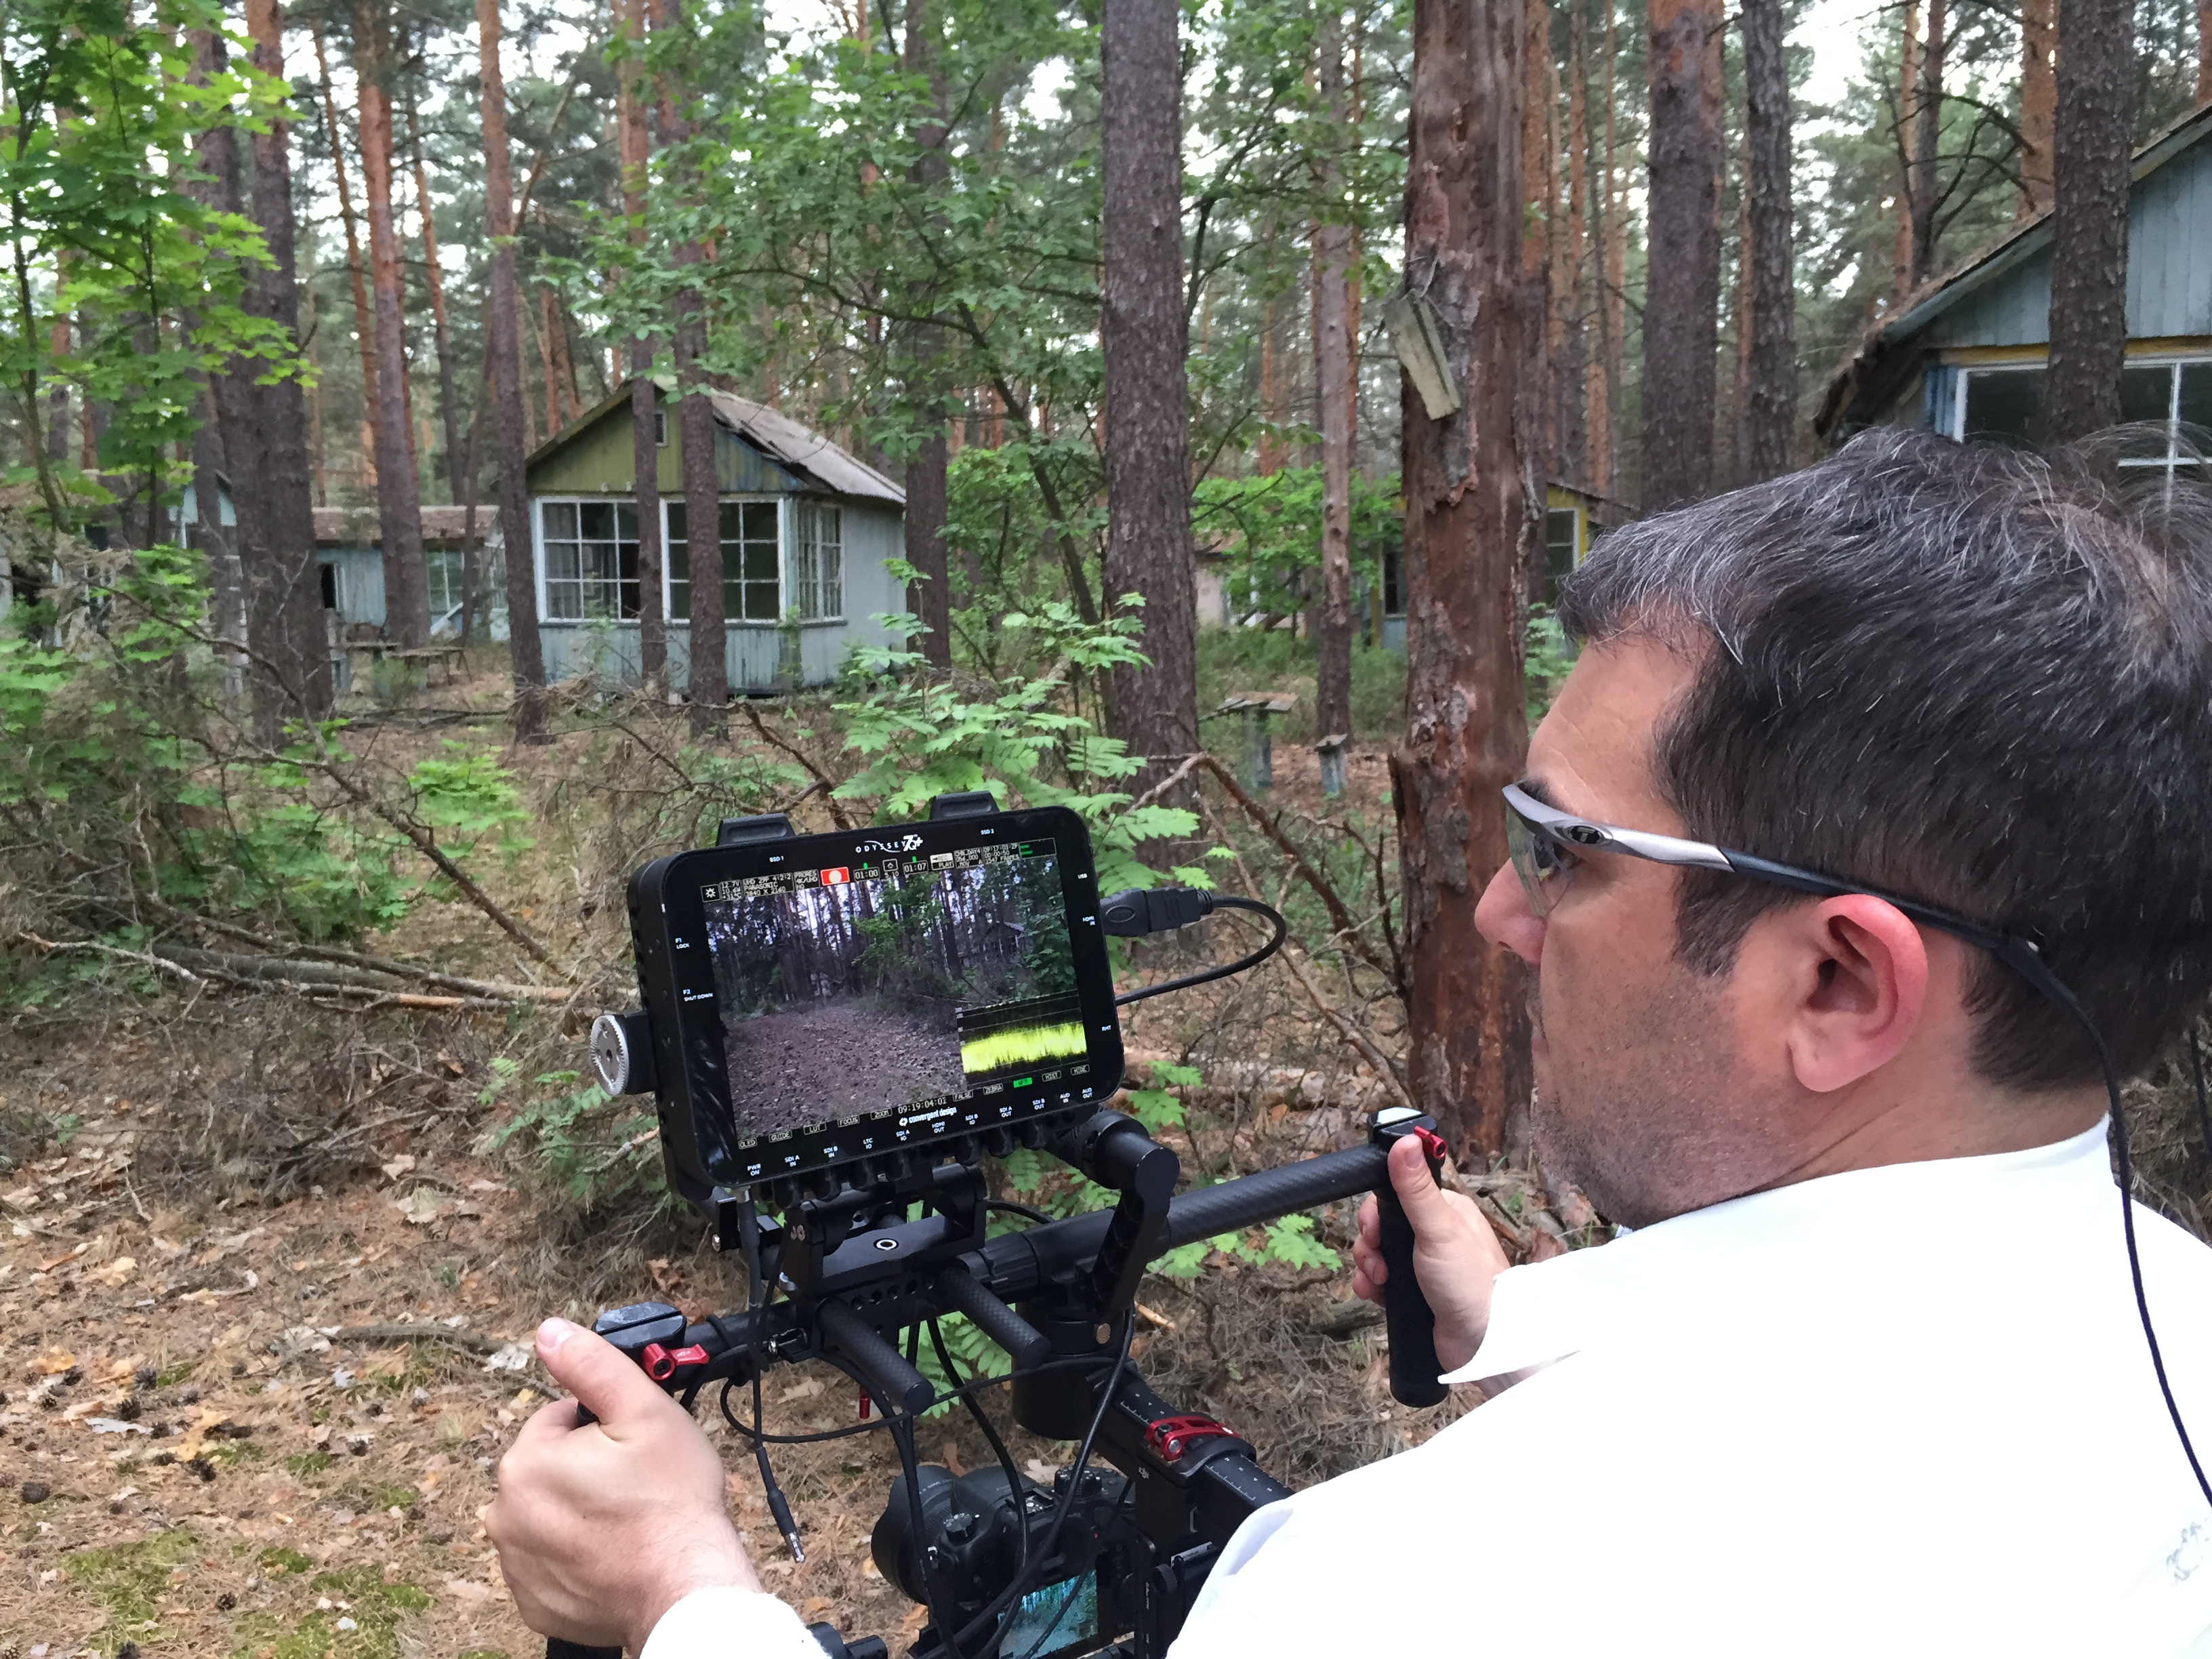
For shooting in Chernobyl with the Ronin-M, I decided on my GH4 with my Convergent Design Odyssey 7Q+. I attached a small quick-release to the Ronin-M’s own camera plate so I could easily remove the GH4 for other uses or to change lenses. This also allowed me to completely balance the camera: when I changed lenses I only needed to adjust the Ronin-M’s sled plate forward or back to maintain balance.
The software is identical to the Ronin and is very configurable. This part of the set up took the most amount of time to fine tune the responsiveness of the unit. As I’ve previously mentioned, I own the larger Ronin and have spent a fair amount time fine tuning it with the app, so I had some idea of what each setting affected. It still required me to move each setting from its max to its min to see how it reacted before finding the appropriate settings. With everything balanced and set up, I packed the core Ronin-M into my 5.11 Tactical messenger bag along with my laptop and set off for the airport.
Using it in the Field
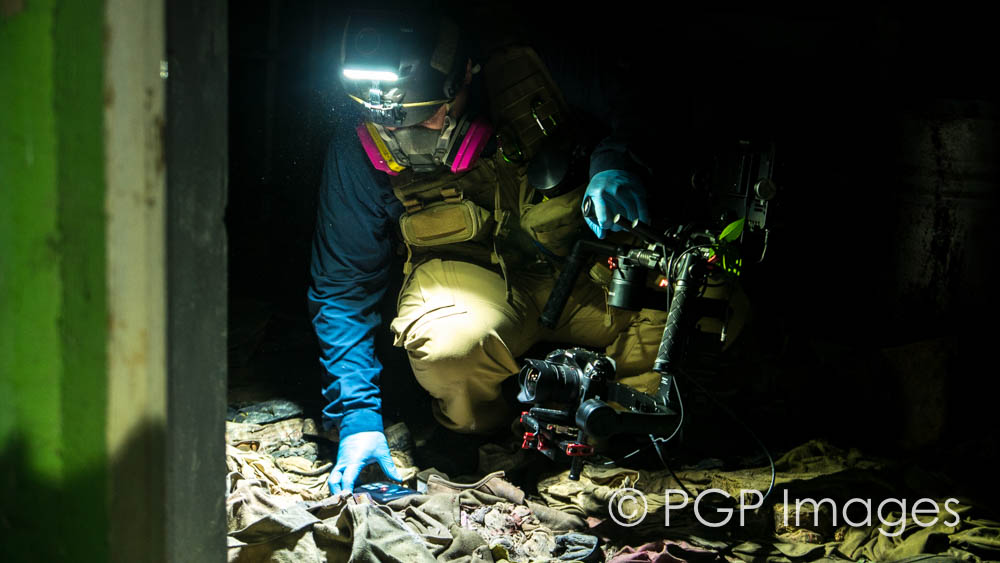
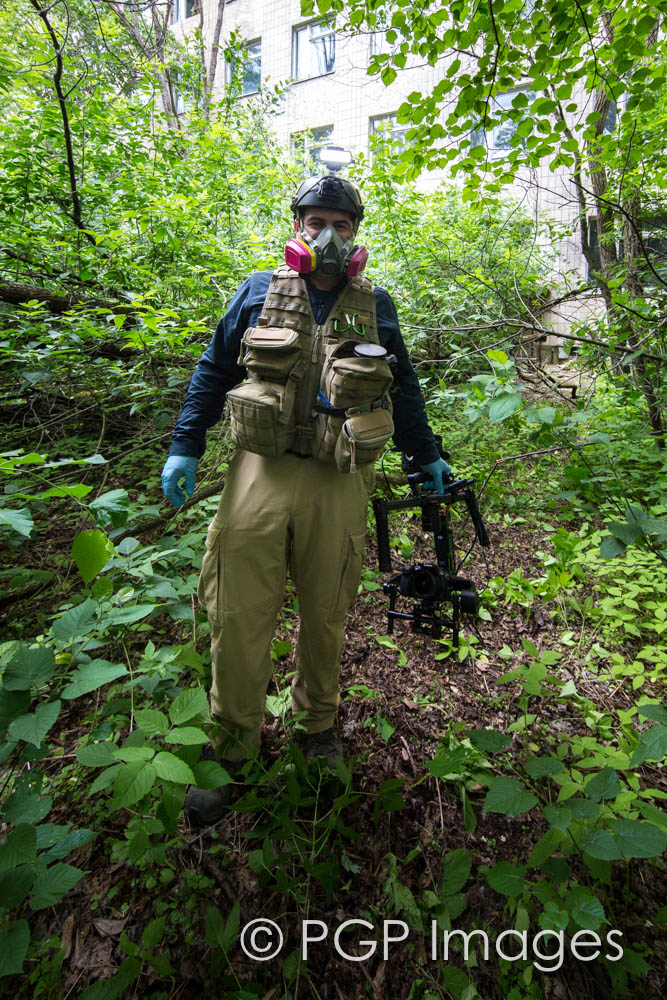
As you can imagine, Chernobyl is not the most friendly of locations for electromechanical devices. Besides concerns of radiation (though in most areas the levels are not much greater then Denver, Colorado where I reside) operating in the Zone required respirators and gloves in some areas, making operating equipment a bit challenging. Also, gear has a tendency to be handled, well let’s say less than gingerly. Most times, it was folded and pushed in between a few bags stuffed in the back of our vehicle.
The Ronin-M handled the abuse of operating in the Chernobyl environment very well. I only had to calibrate the unit once while in the Zone. It appeared to have about a two-degree roll over a three-day period of time. After doing an auto calibration, it balanced out perfectly.
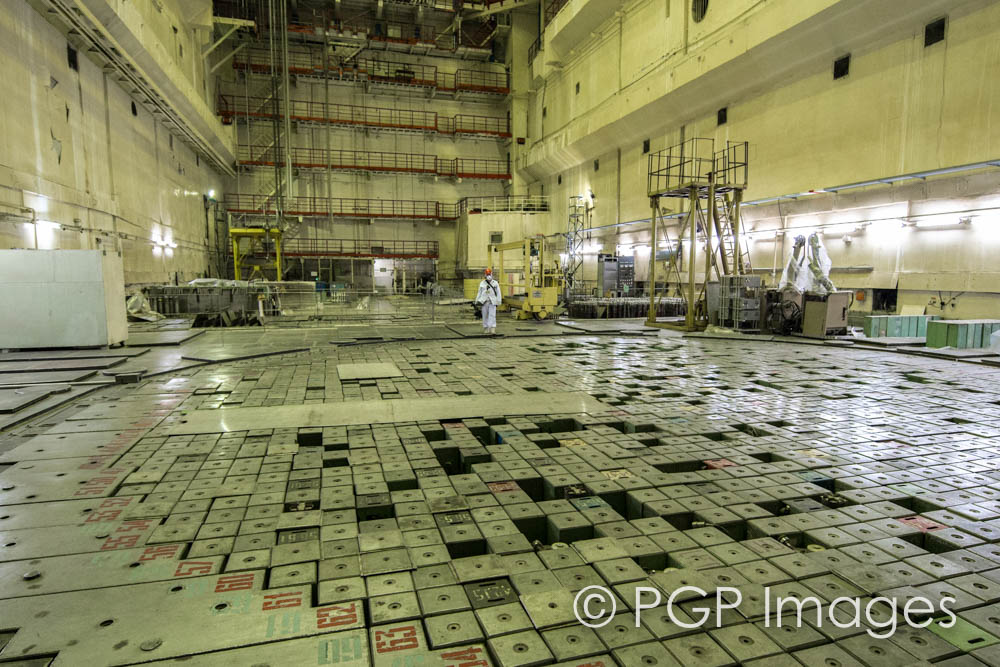
One of the shots for which I wanted to use the Ronin-M was walking in the Red Forest, which is where the majority of the debris from the Reactor no. 4 explosion landed. The forest turned red within 24 hours and was eventually dug up and turned under. A lot of contaminated material was also buried in five large burial mounds. I set up the Ronin-M, connected the P-tap power to the Odyssey, and walked 1.5km to the radioactive burial mounds. The Ronin-M shots were silky smooth even moving through the forest between the trees, all the time keeping an eye on my Geiger counter/dosimeter to make sure I didn’t get myself into trouble.
Using the P-tap to power the Odyssey was very convenient and reduced the need to carry an additional Sony NP battery (the power plate I currently have connected) while walking through the radioactive forest. This does, however, cut the runtime of the Ronin-M by about 50% as the 7Q+ does use a fair amount of energy. This was not an issue for this particular shot as I was not planning on spending any more time than necessary in the Red Forest.
Though it is 50% lighter than the larger Ronin, the M still takes some strength to carry with the GH4 and Odyssey 7Q+ mounted – the total weight was about 10lbs. Having carried it for about four hours in the Chernobyl Nuclear Power Plant, it gets heavy over time if you have not worked out in awhile.
The smoothness of the shots are dependent on how you have the unit set up via the app. Some of my initial shots felt too mechanical due to my settings. I was able to review the footage on the Odyssey 7Q+ and make the necessary adjustments with the app on my iPhone in the field. Within a few seconds, the Ronin-M was updated and I continued to shoot. This ability in and of itself is worth the price of admission.
The Negatives
The Ronin-M is an exceptionally engineered three-axis gimbal and the build is rock solid, however there are a few areas that could use improvement. The first point to be aware of is that it does not come with clamps to mount a monitor or recorder to the top handle. The original Ronin did come with monitor clamps, but not the Ronin-M.
Luckily, I brought with me the mounting clamps that came with my full size Ronin. Much to my surprise, however, on the first morning of shooting in Chernobyl when I went to mount my Odyssey, I realized the mounting clamps from the full-size Ronin are bigger in diameter than the Ronin-M’s top bar. I had to use a few layers of gaffer tape to thicken the top bar for the clamps to fit.
The ability to twist off the top handle bars is great; however, when you twist them back on, the screw mechanism doesn’t seem to screw on snugly. I believe this might be a result of the material it is made out of – that you just can’t screw them on tightly as they’re made of aluminum. I never felt like they would unscrew completely and the top handle would fall off, but they did loosen and you could feel a bit of slack.
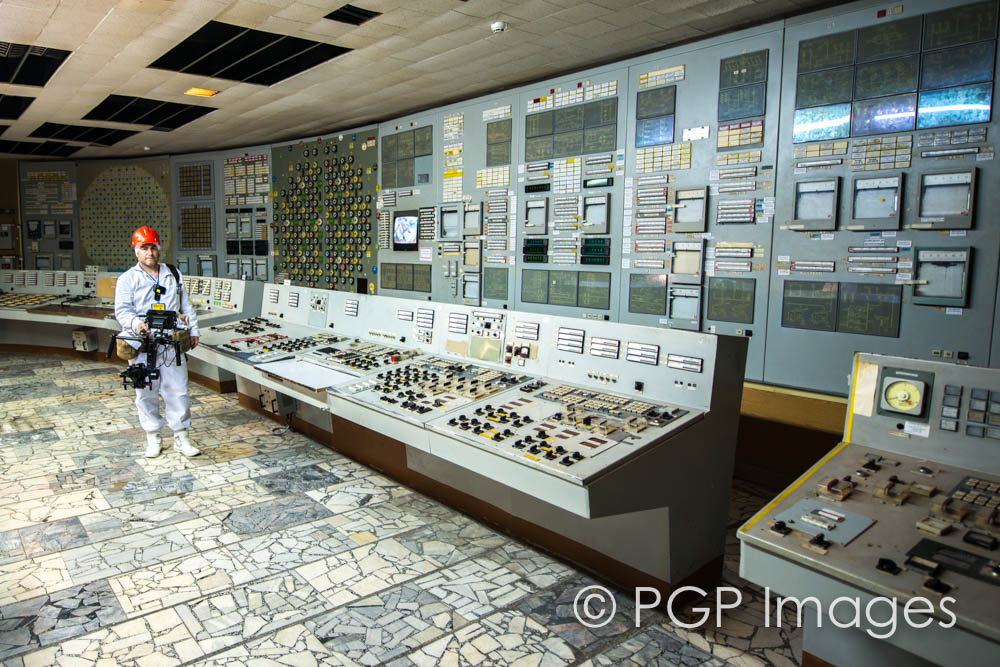
Again, a quick wrap of gaffer tap and the issue was corrected. I spent four hours filming in the Chernobyl Reactor complex with the gaffer tape holding the top handle locking mechanism in place. I believe that DJI could modify the threading to use a tighter thread count and this issue would be corrected.
I also would have like to have seen an HDMI input on the baseplate unit and corresponding HDMI output near the top handle to help reduce the cabling on the unit. Now it might just be my specific need, but the fewer cables hanging off the unit, the less likely I am to catch one on something.
Conclusion
I have tried and owned many camera stabilization systems over the years. I even tried to build one of my own about five years ago using Kenyon gyroscopes, so I was excited to see the technology finally move off drones to the hand held film market.
I can honestly say I pushed the boundaries of the Ronin-M in the shooting environment and it really performed. It has one of the best price/performance metrics of any unit in the market and with the addition of the slated thumb controller it becomes a great single operator device. For documentary work, it can take the place of a slider and jib in some instances, which means less gear to carry.
DJI has a history of improving performance over time through firmware updates and I believe this will continue with the Ronin-M. The unit is also small enough that I might just mount it to my xFly Systems xFold drone . In conclusion, the DJI Ronin-M is another tool I will be permanently adding to my arsenal for making films.
About the Author
Philip Grossman is the Director of Global Solutions Architecture for Imagine Communications, a global leader in video infrastructure, advertising systems and workflow management solutions serving the media networks, broadcast stations, digital media, communication service provider and enterprise markets spanning 185 countries.
He is also an independent film maker and cinematographer based in Denver, Colorado and has been working on a five-year personal project documenting the Chernobyl Nuclear Exclusion Zone. Philip is a self-professed geek when it comes to film production equipment and has been involved in the art and science of film-making for over 20 years.
Philips websites are PGP Images Exploring the Zone and you can contact him on [email protected]