
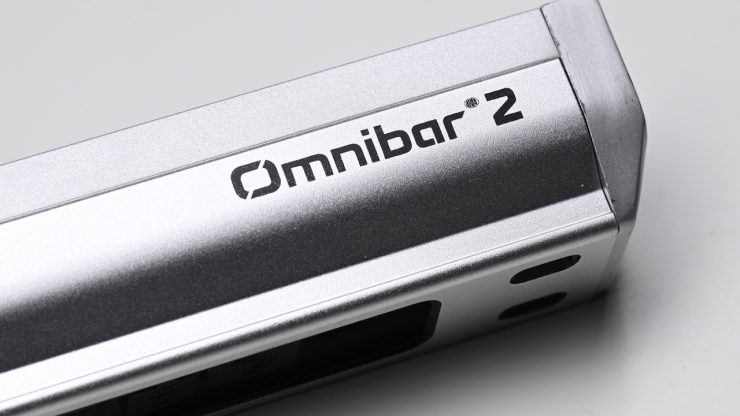
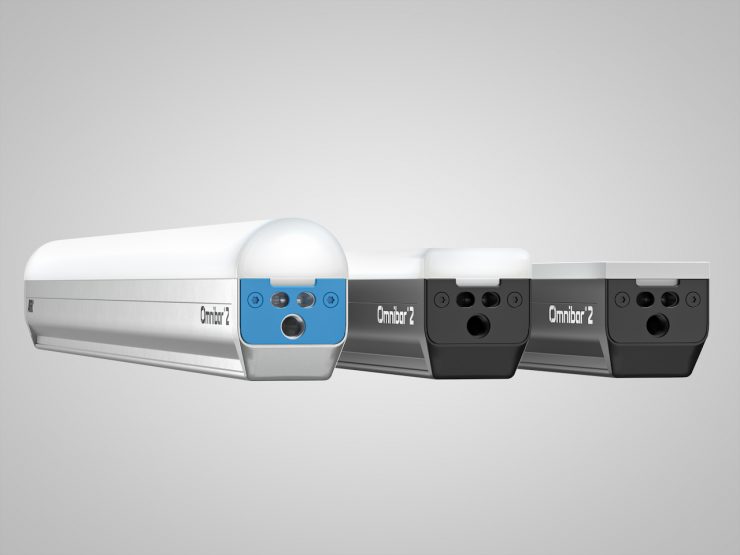
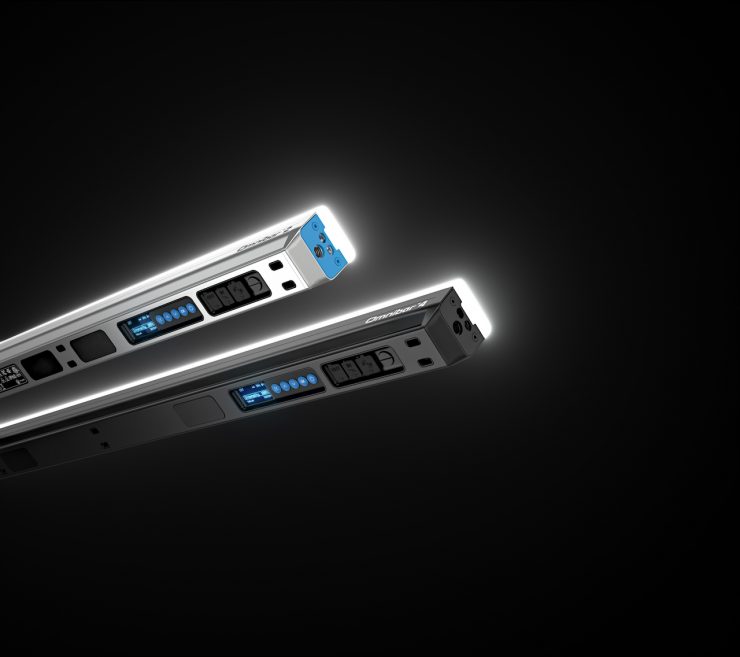
ARRI recently unveiled its first lighting product since it was taken over by the Riedel Group. The new fixture is called Omnibar, and it is a compact, scalable LED bar system.
ARRI is touting that it is a new take on tube-style lighting, with better mounting and usability options than existing solutions that are on the market.
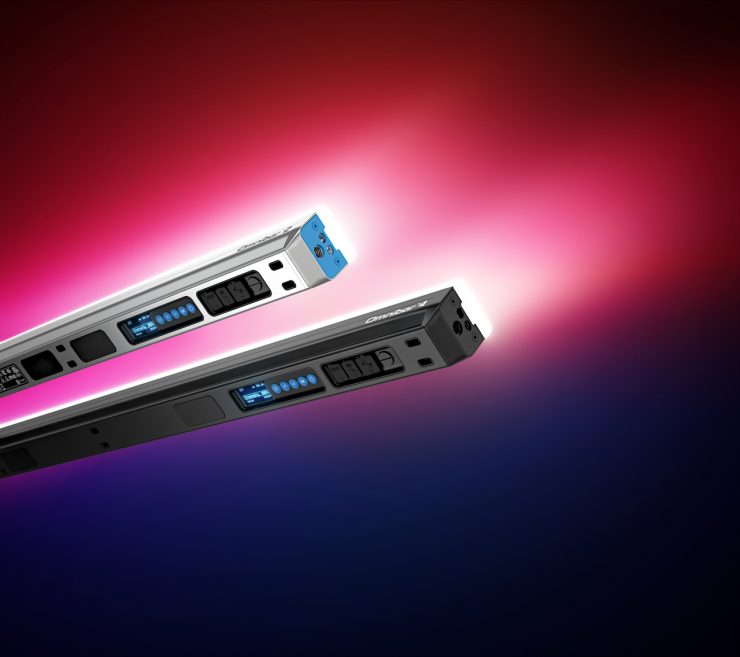
ARRI wanted to take what was good about a tube and what was good about a bar and combine them together to build a hybrid solution that solves real-world issues.
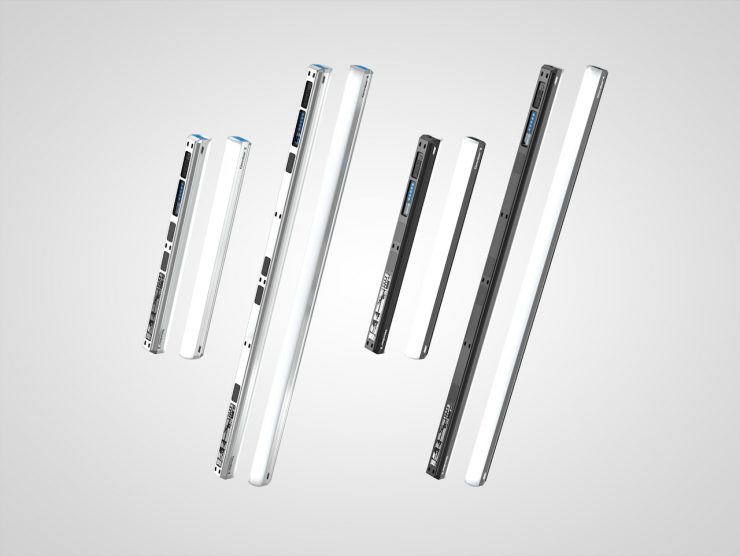
Key features
- High-quality, full-spectrum ARRI light
- 2′ and 4′ options
- Interchangeable optics for different lighting needs
- 16 / 32 pixel zones for smooth effects and transitions
- Flexible rigging options
- Onboard, Bluetooth app, DMX, and built-in CRMX control
- Daisy-chain power and data for scalable setups
- IP65 weatherproofing
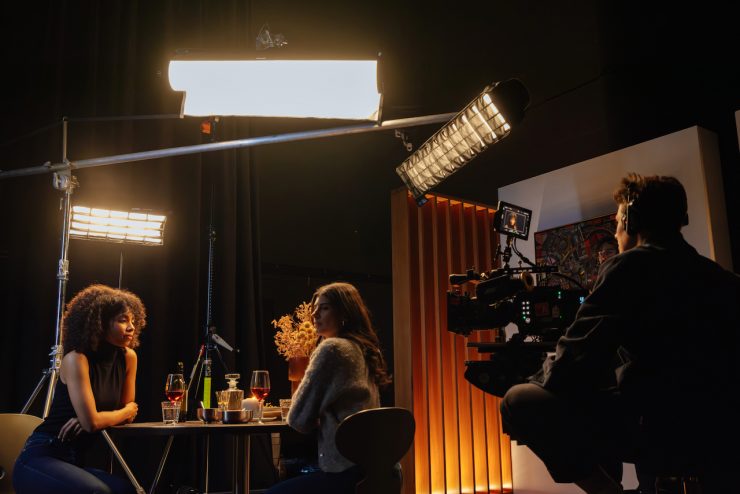
- Works as an in-shot practical, a flexible source outside the frame, or a visible design element
- Suitable for film, broadcast, content creation, and event applications
- Designed to scale from compact single-bar use to larger multi-bar setups
- Supports both standalone operation and system-based workflows via Omnibase
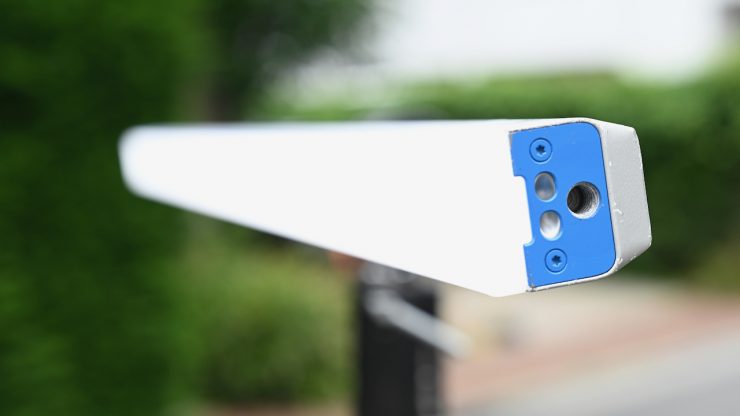
Omnibar is the first ever ARRI light to be made and manufactured in China with the help of a third party. This represents quite a shift for ARRI, and it arguably shows that they are trying to adapt to the shifting market, at least when it comes to lighting.
Build Quality
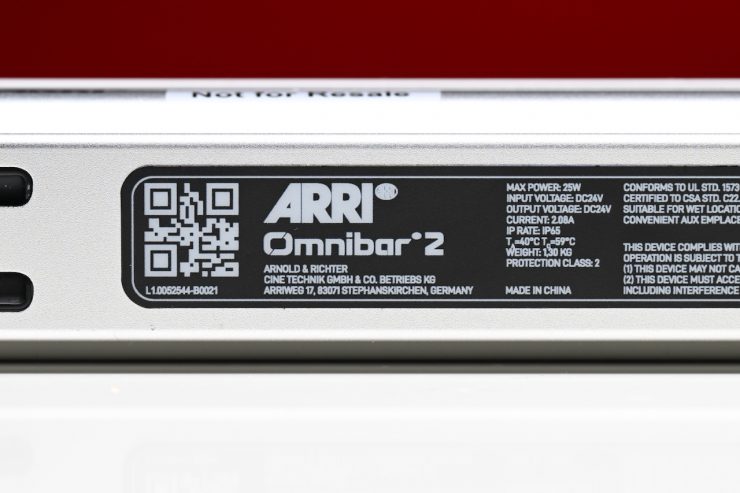
Seeing a Made in China label on an ARRI product is certainly a sign that times have changed. With the high cost of labor and manufacturing in Germany, ARRI needed to go in a different direction with its lighting to try to remain competitive.
So has the build quality taken a hit due to the fact that the light is made by a third-party manufacturer?
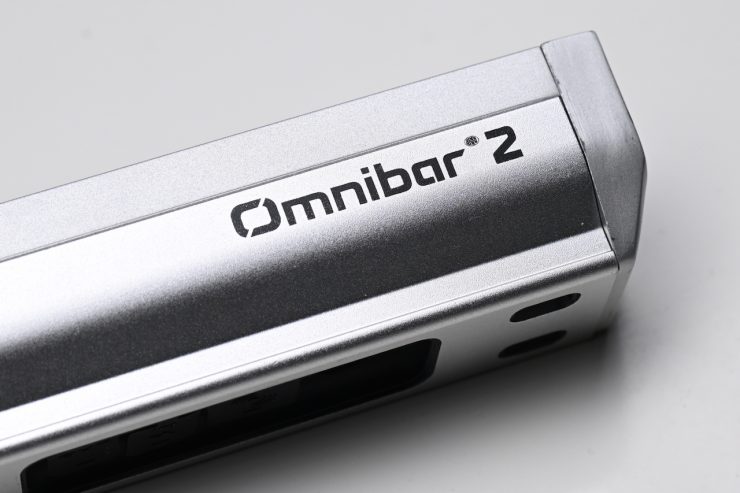
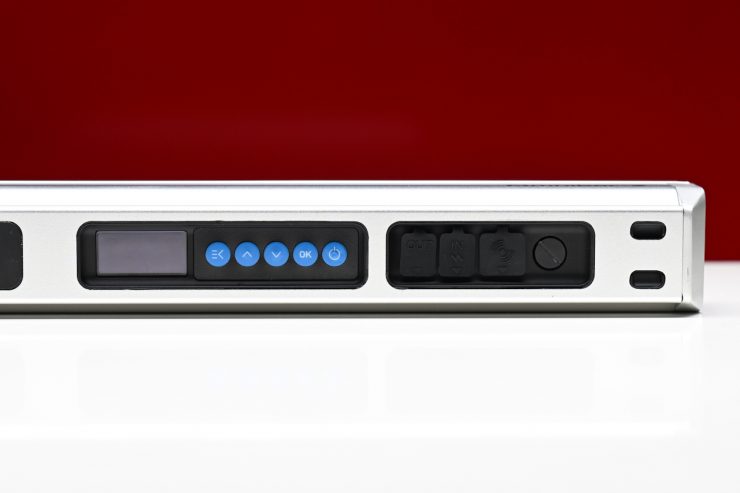
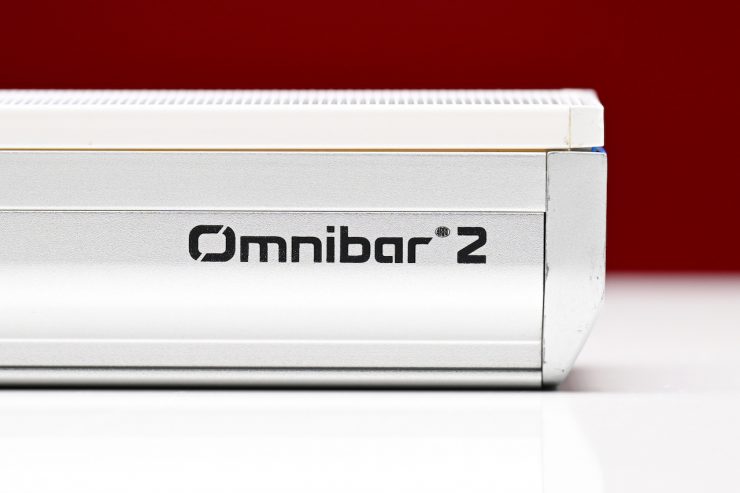
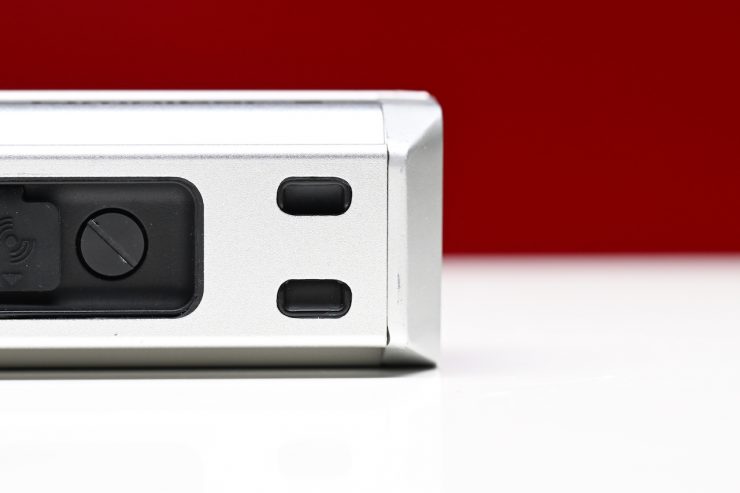
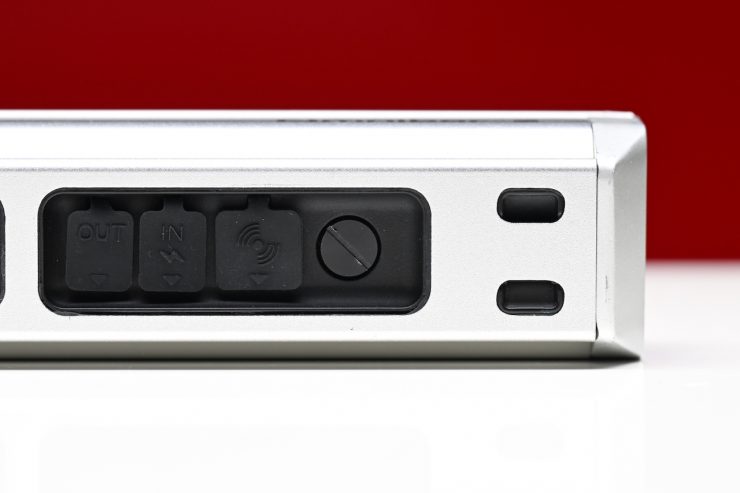
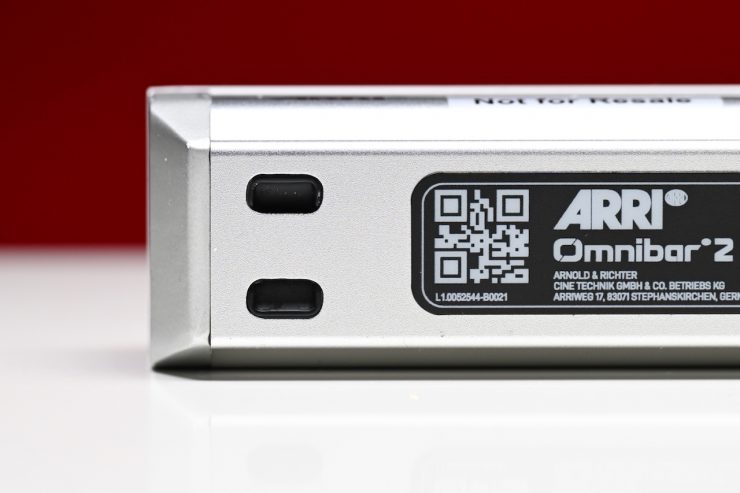
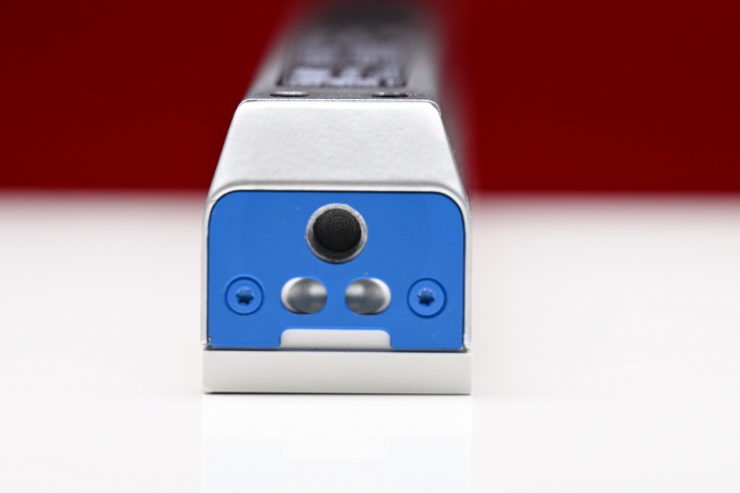
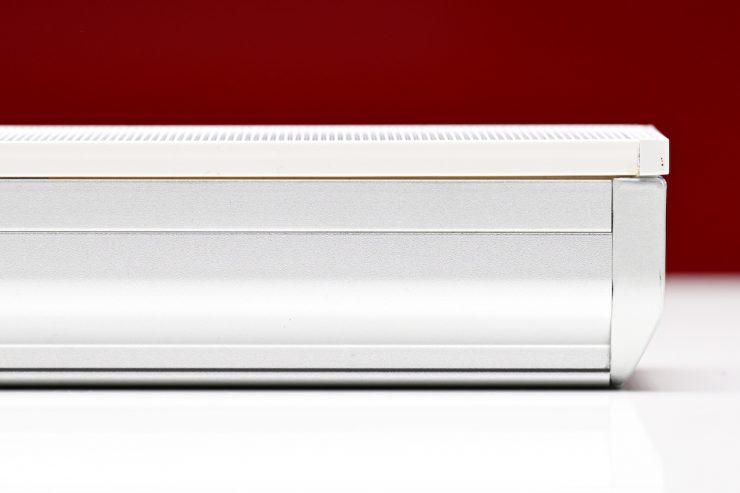
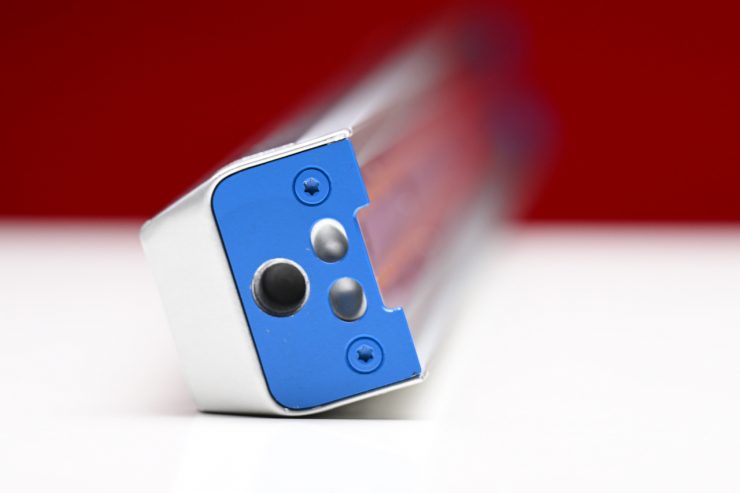
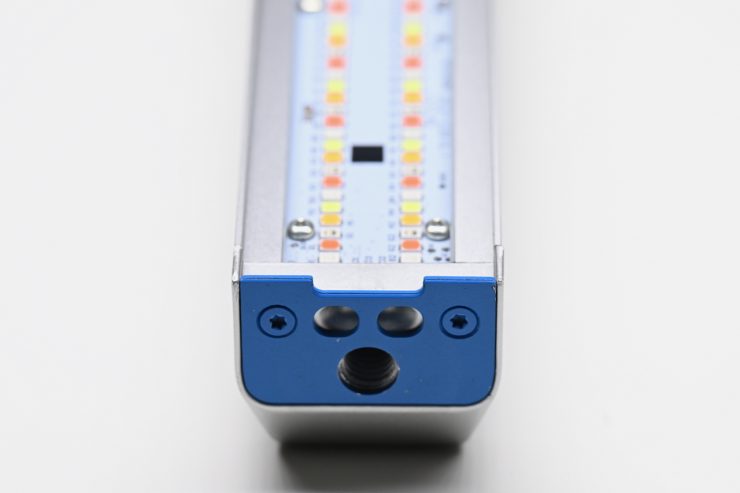
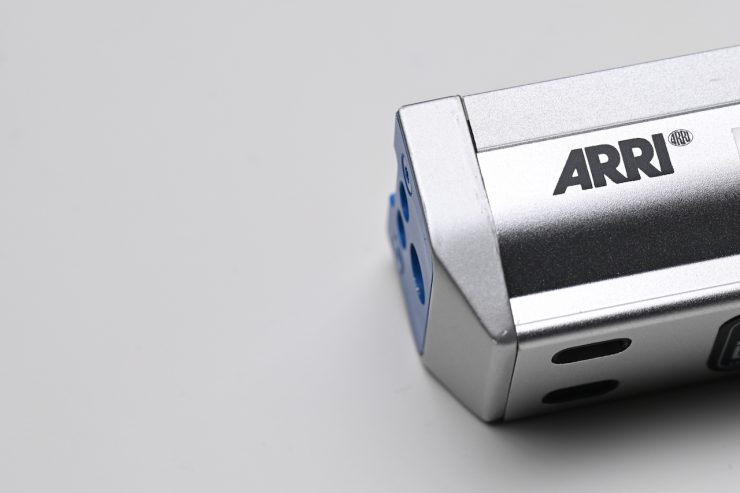
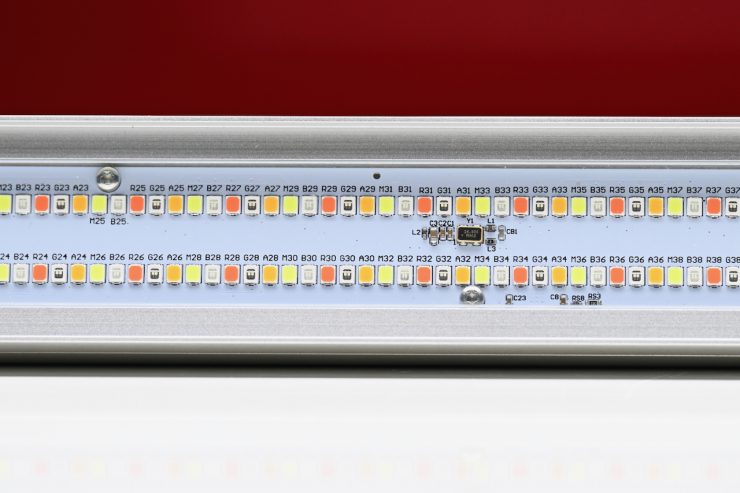
In my opinion, the build quality is still very good. The Omnibar is solidly constructed, and the exterior casing is very strong and robust.
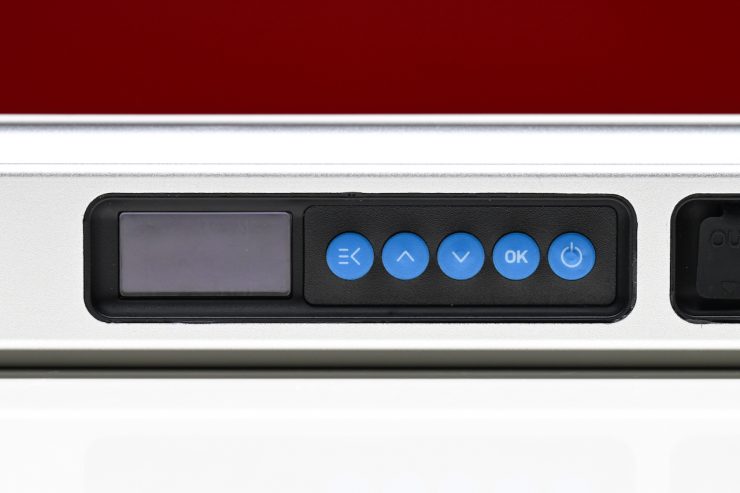
I like that the display screen and onboard controls have been recessed, as I have found in the past with a lot of the tube lights that the screen and controls can get scratched or damaged when they are placed down or transported.
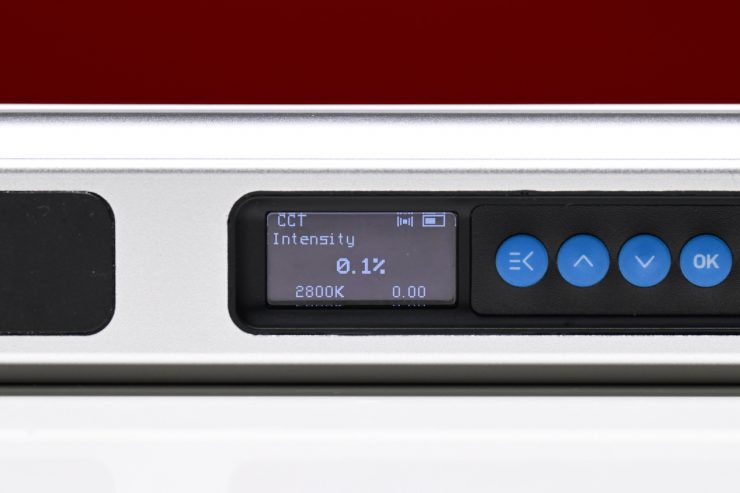
The on-board display is pretty basic, but it gets the job done. Arguably, most users are probably going to use the app or DMX, etc., to control the fixtures. What I do like is that the screen automatically rotates when you turn the Omnibar around.
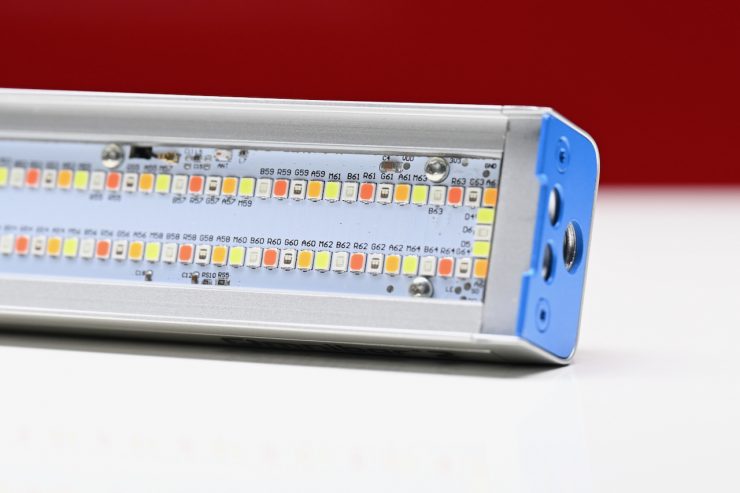
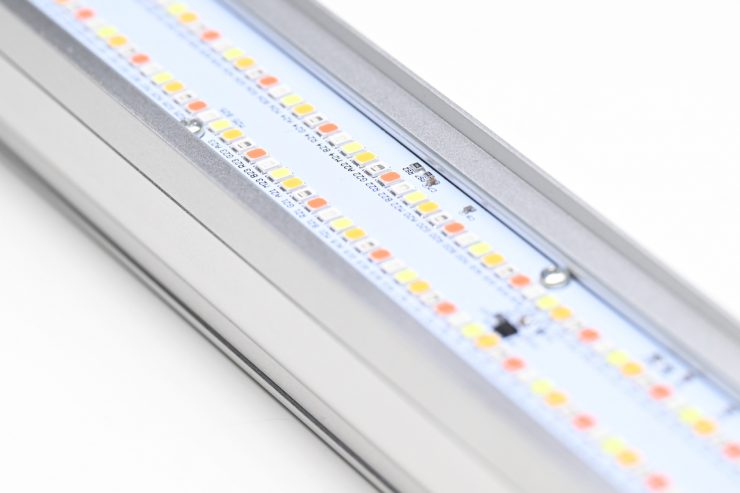
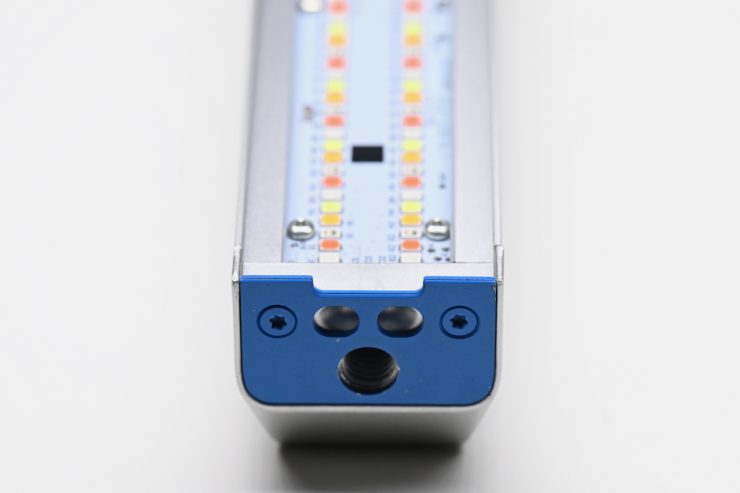
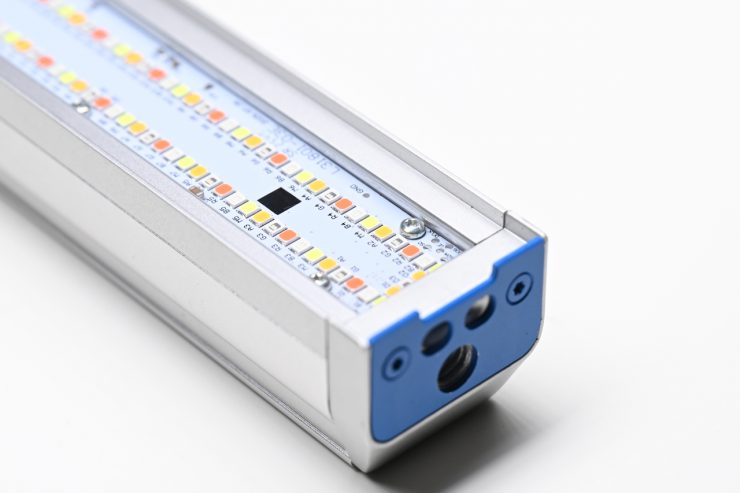
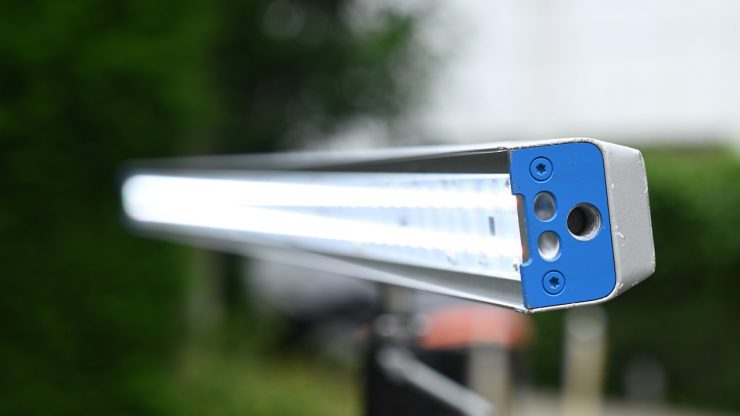
The LEDs are also protected by a very hard built-in screen, so you don’t need to worry about them getting damaged.
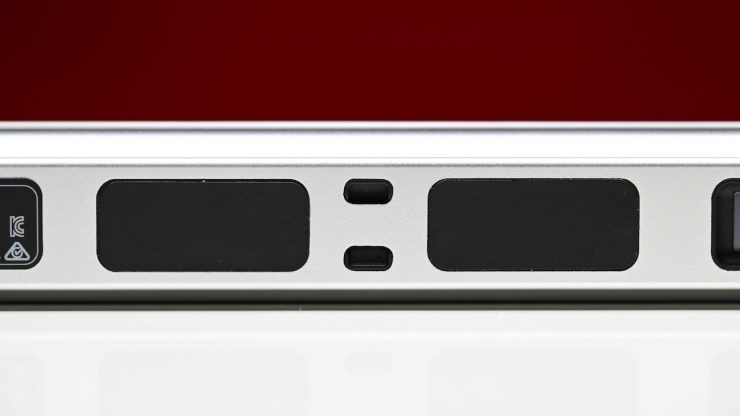
The built-in magnets are super strong and once attached to a metal surface, an Omnibar won’t move or slide.
The magnetic lighting modifiers also attach securely to the fixture.
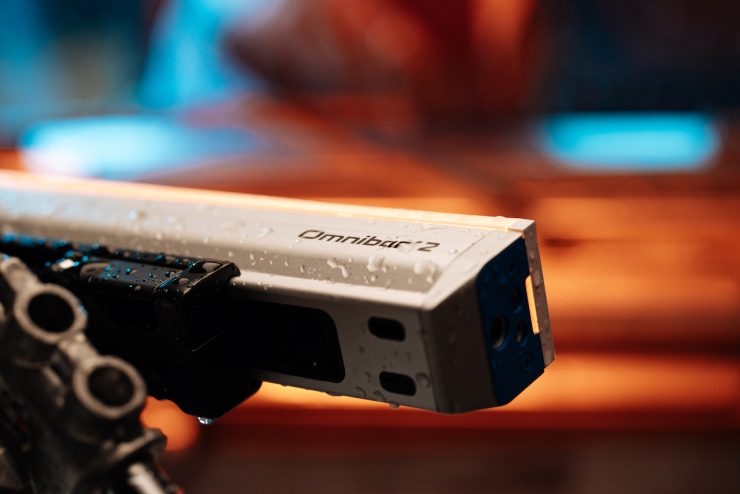
Along with the IP65 rating and build quaility the Omnibar has certainly been made to stand up to the rigors of rental house and field use.
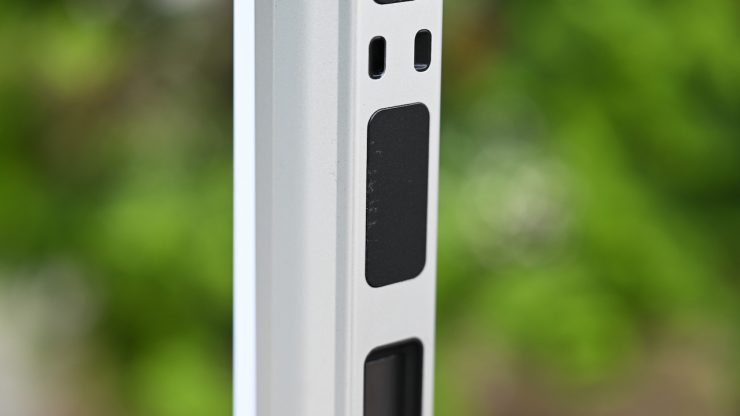
The only small issue I came across is that when you slide the Omnigrip along the Omnibar, it does end up scratching the back of the fixture. This is purely a cosmetic thing, and if you want to make sure this doesn’t happen, it is better to take the Omnigrip off completely and then attach it where you want it.
Solving the rigging headaches
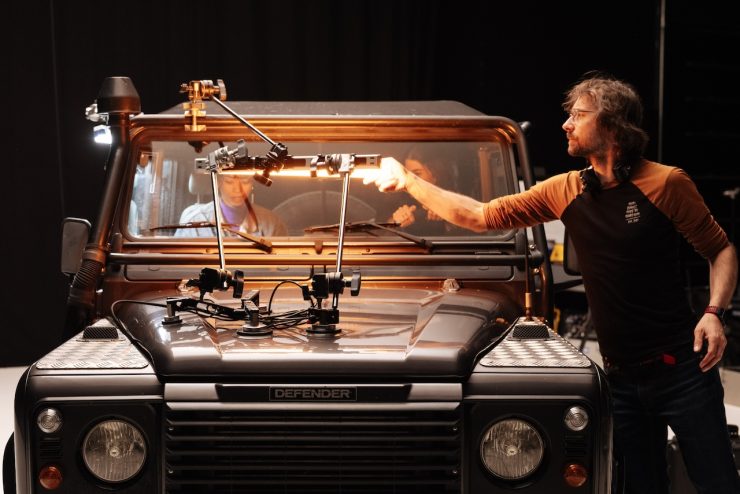
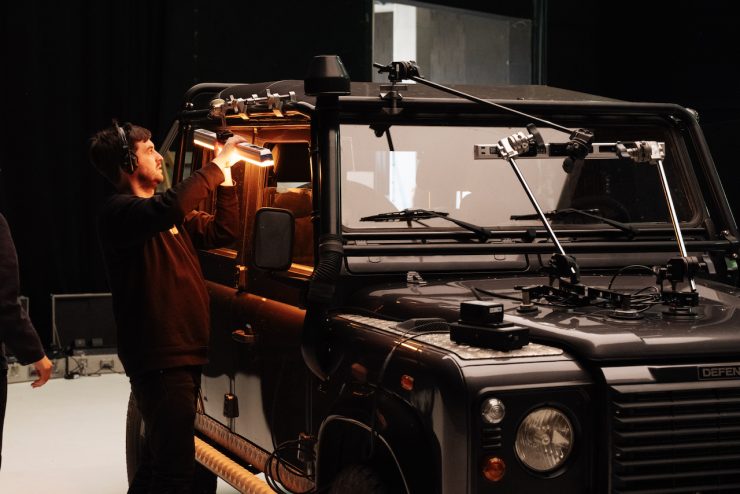
Anyone who has ever used tubes knows that they can be difficult and fiddly to mount. The main goal of Omnibar was to come up with a product that simplifies rigging and provides more options for users.
So many people attach tubes to pipes, handrails, etc., usually with zip ties, and this almost always means placing them over the light-emitting surface.
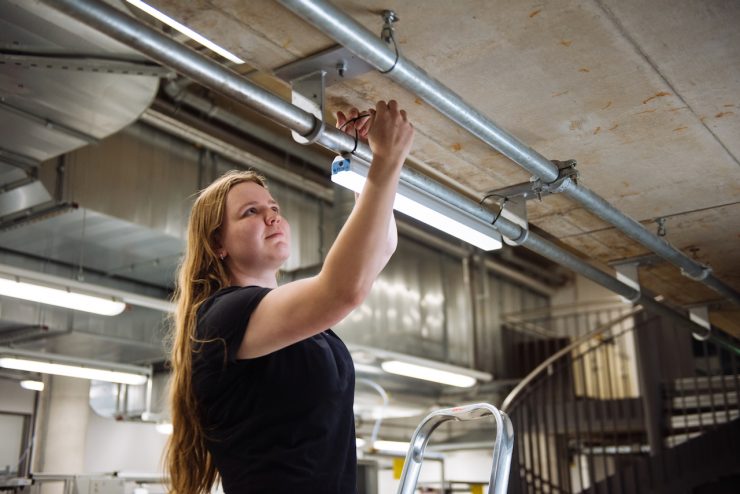
ARRI wanted to solve this, so they put a lot of effort and time into coming up with a solution that utilizes built-in magnets, and also what they refer to as cable slots.
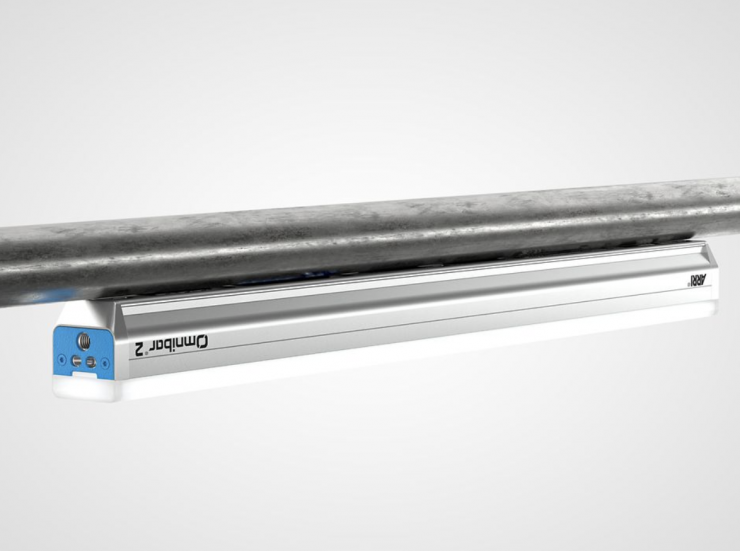
As the magnets are super strong, you can place Omnibar vertically, horizontally, and also overhead. With the magnets, you can also place a four-foot Omnibar into an existing T8 tube lighting fixture, which is also very useful. And, because ARRI made the 4′ Omnibar a tad shorter than actually 4′, it fits into a T8 space and won’t hit the two connectors on the ends.
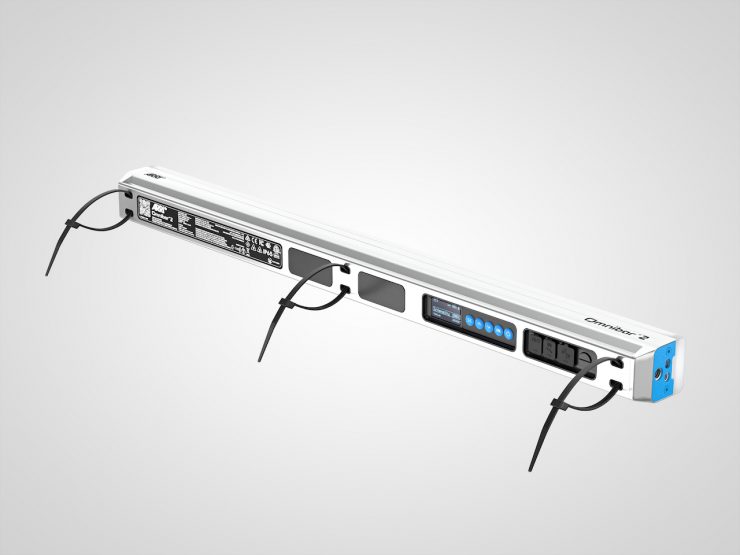
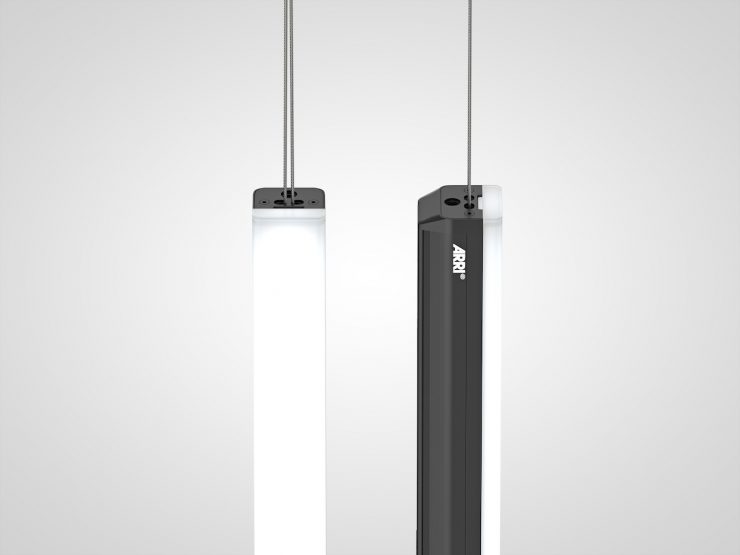
With the built-in cable slots, you can put zip ties through it, as well as safety cables. If you have the thinner safety cables, they’ll fit through that as well as most types of wires. Also, that is the point where the center of gravity is for the Omnibars, so if you’re hanging them, that becomes very advantageous.
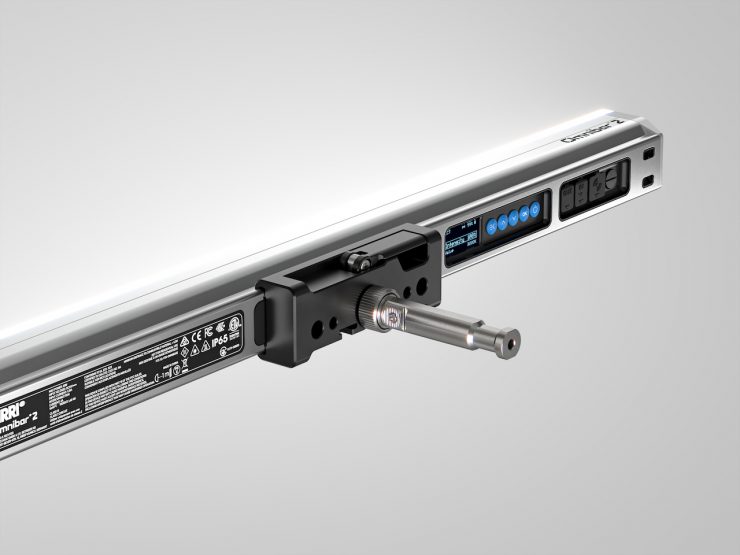
So, without any extra accessories, you already have quite a few ways to mount the bars to different surfaces. Then on top of that, ARRI thought about what else they could improve, so they have what they call the Omnigrip and the Omnipin.
The Omnigrip will fasten at any point on the back side of the bar. It is best to think of it as a rail on the back of the bar, so this will clamp down anywhere along the edge of the Omnibar.
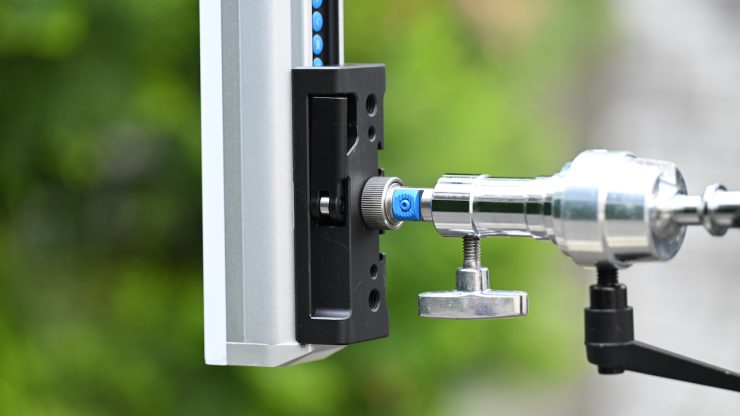
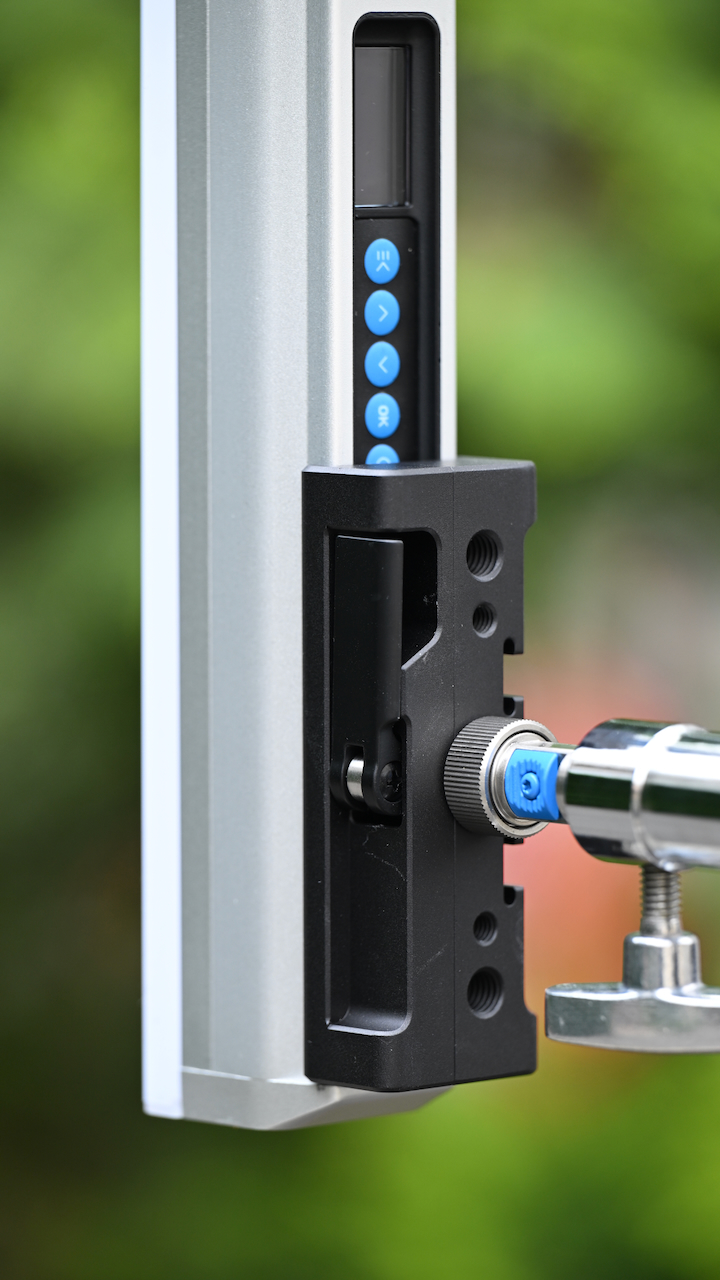
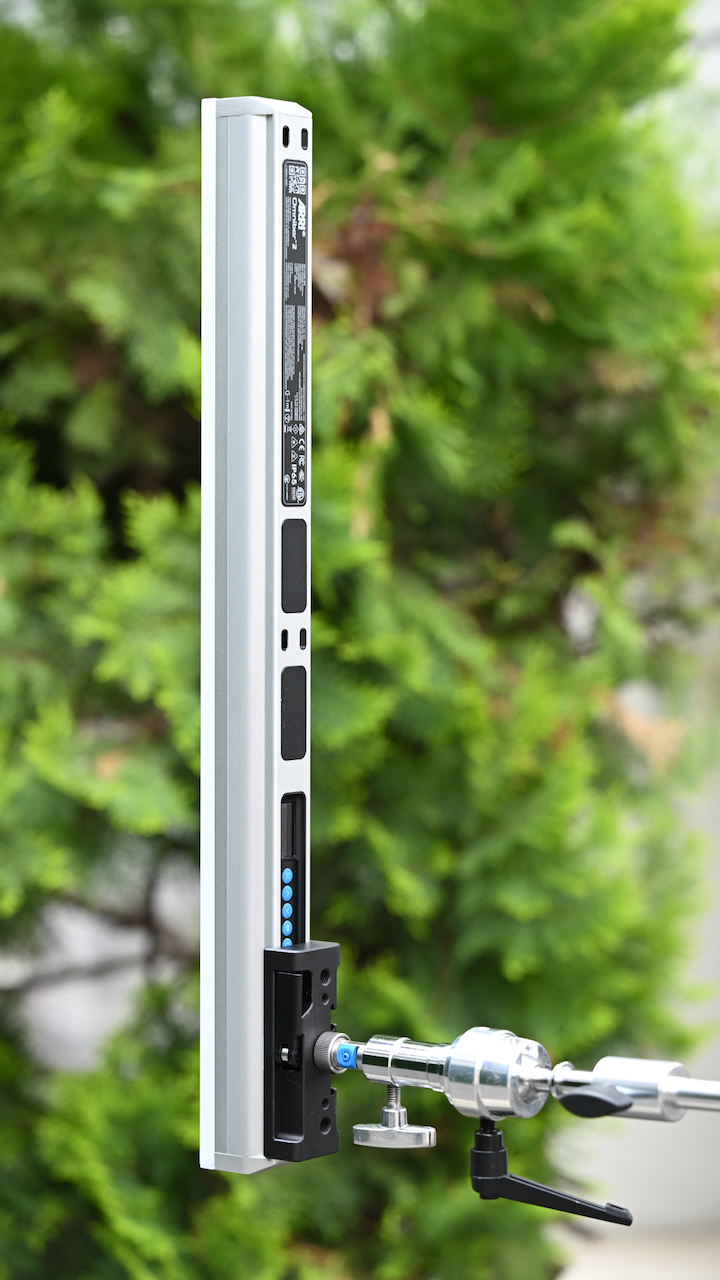
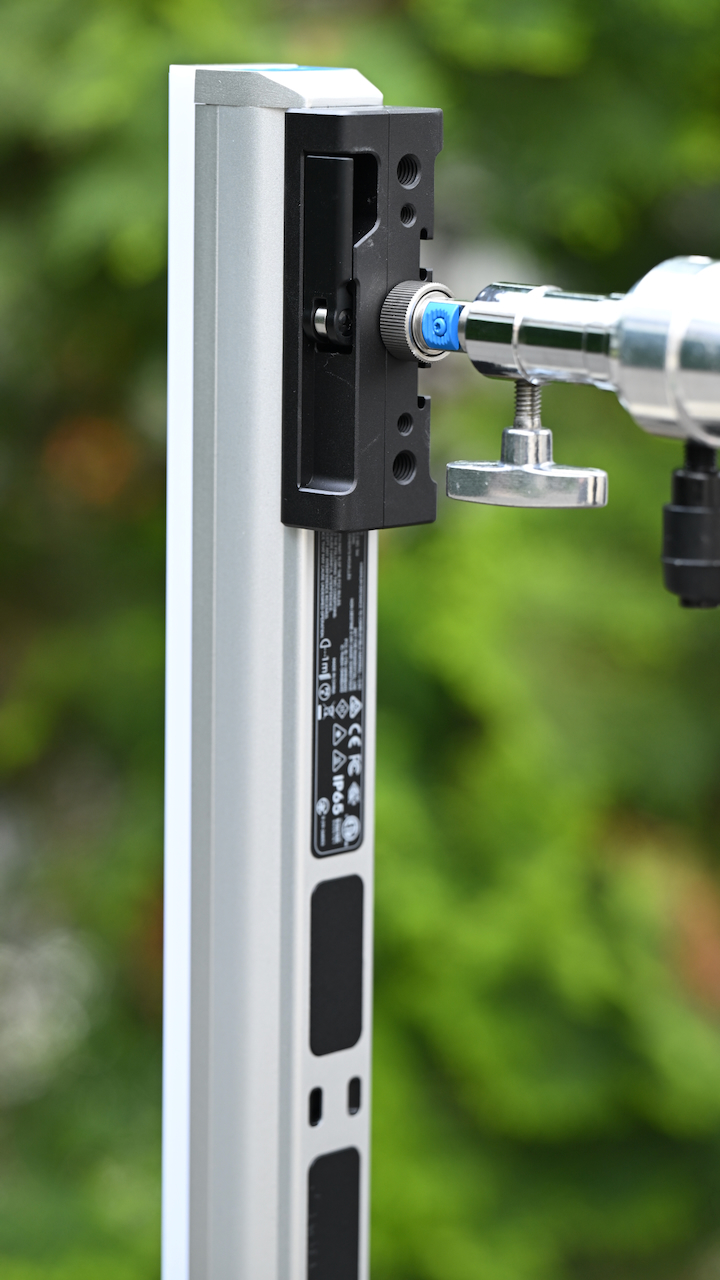
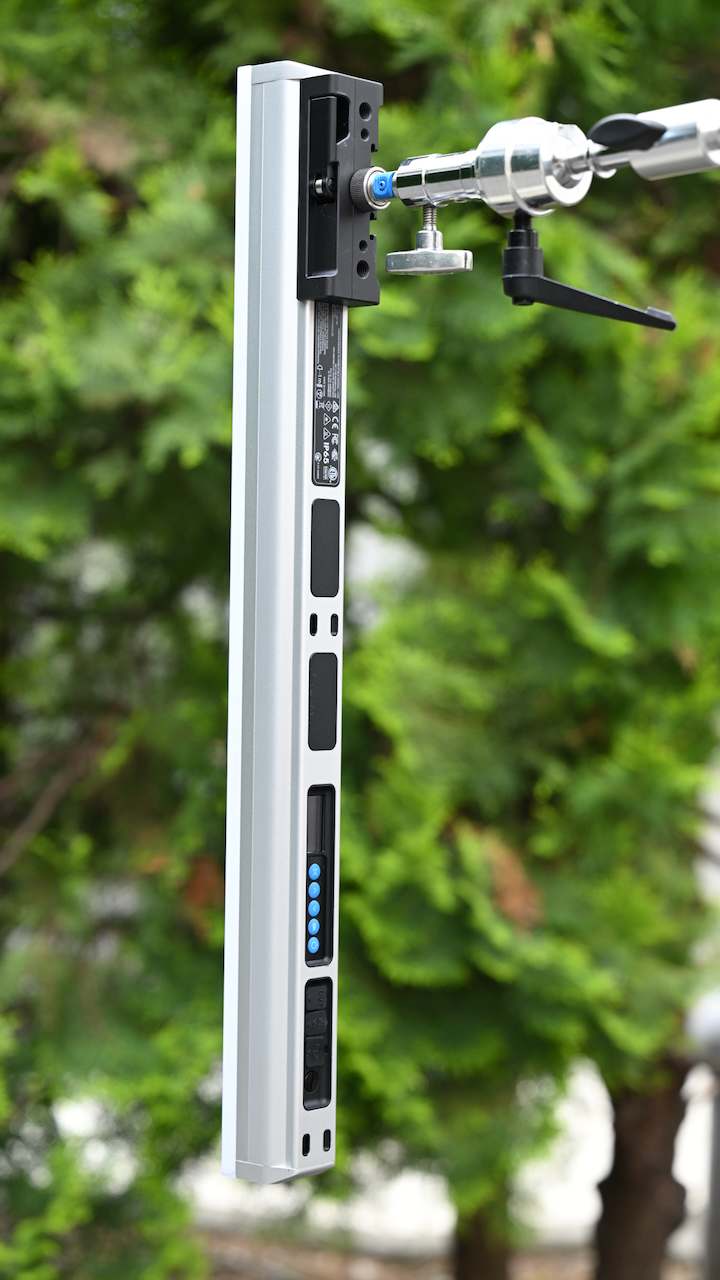
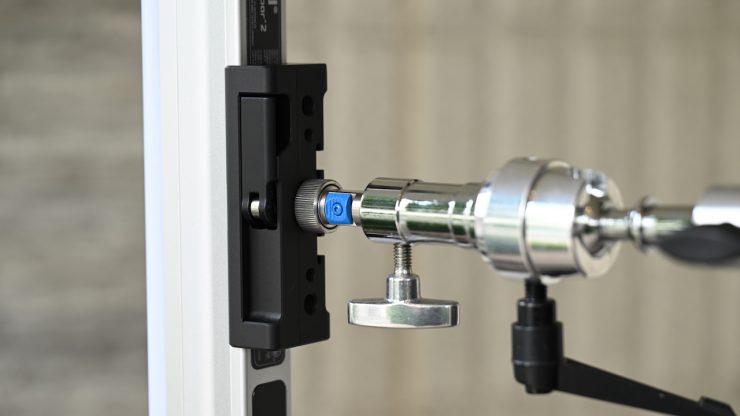
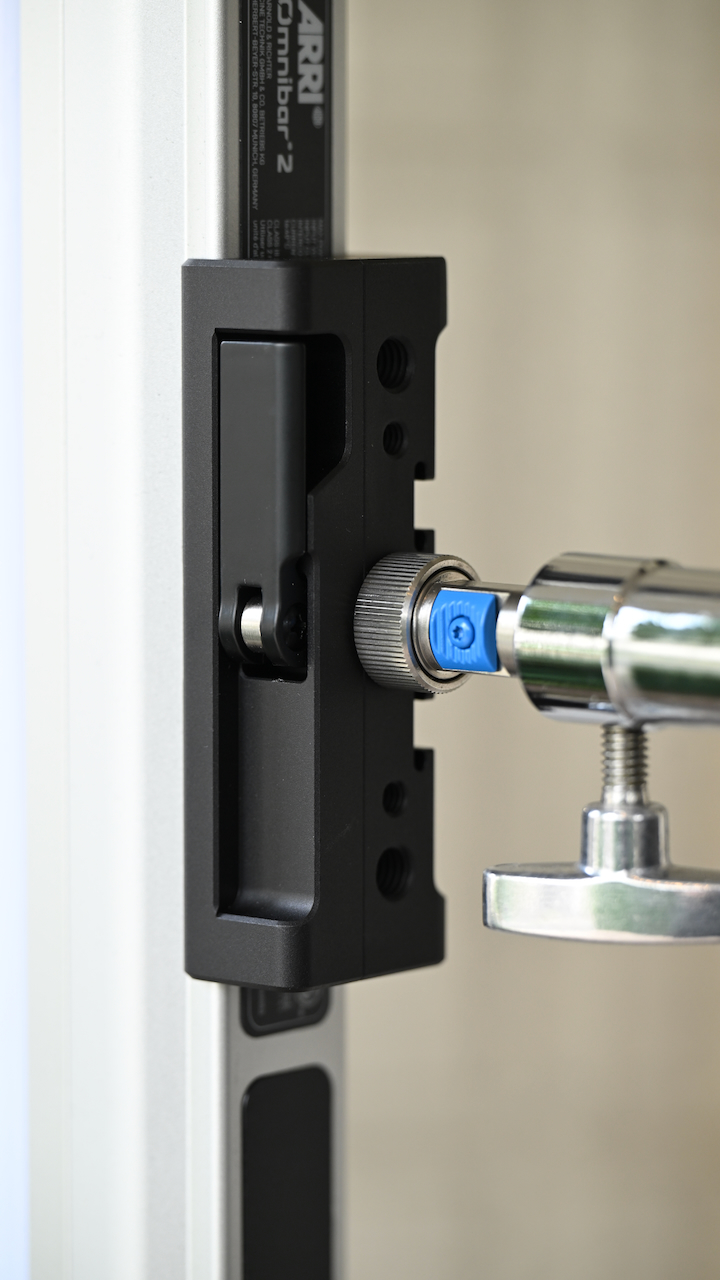
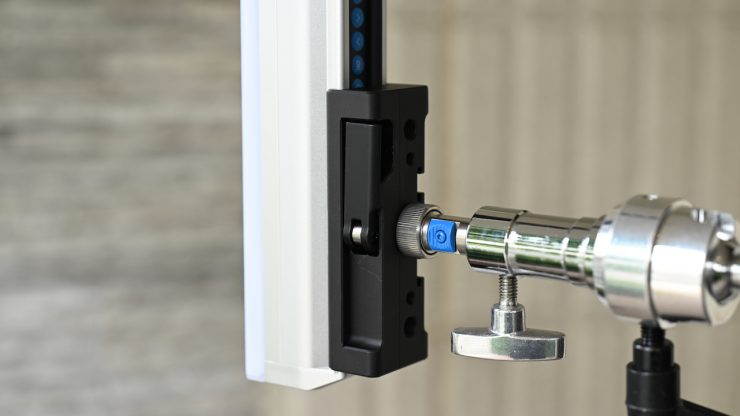
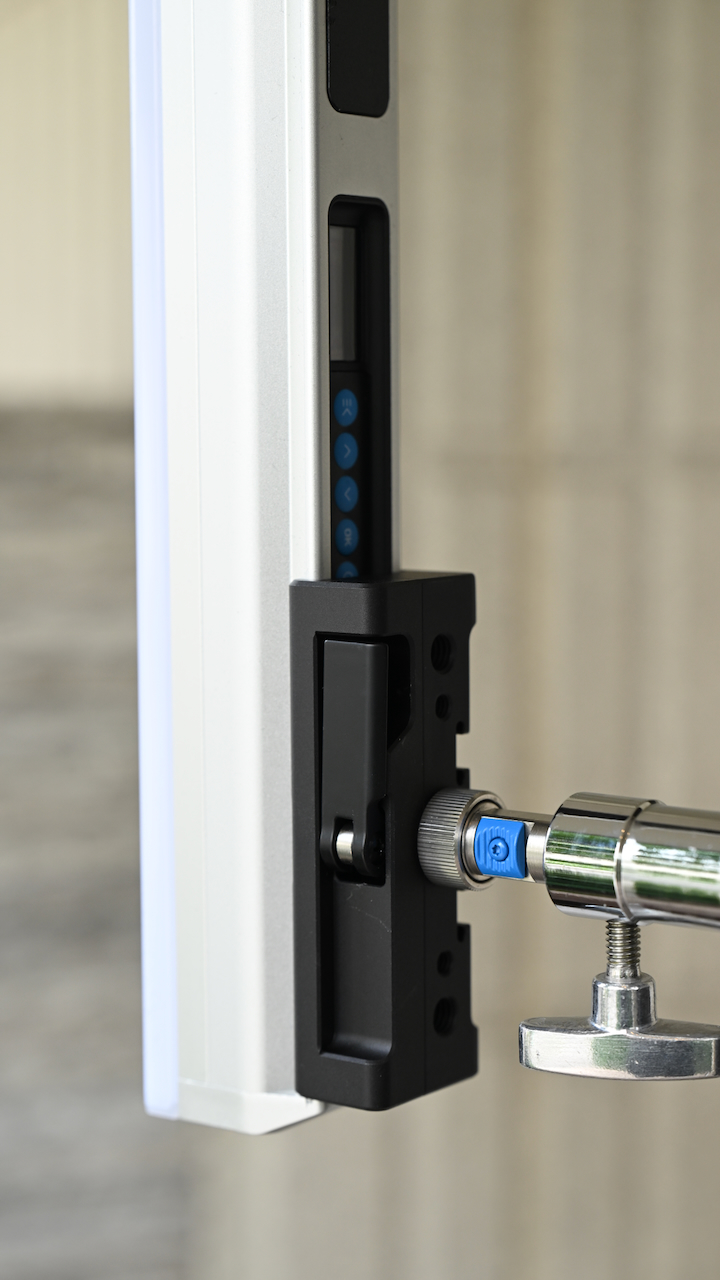
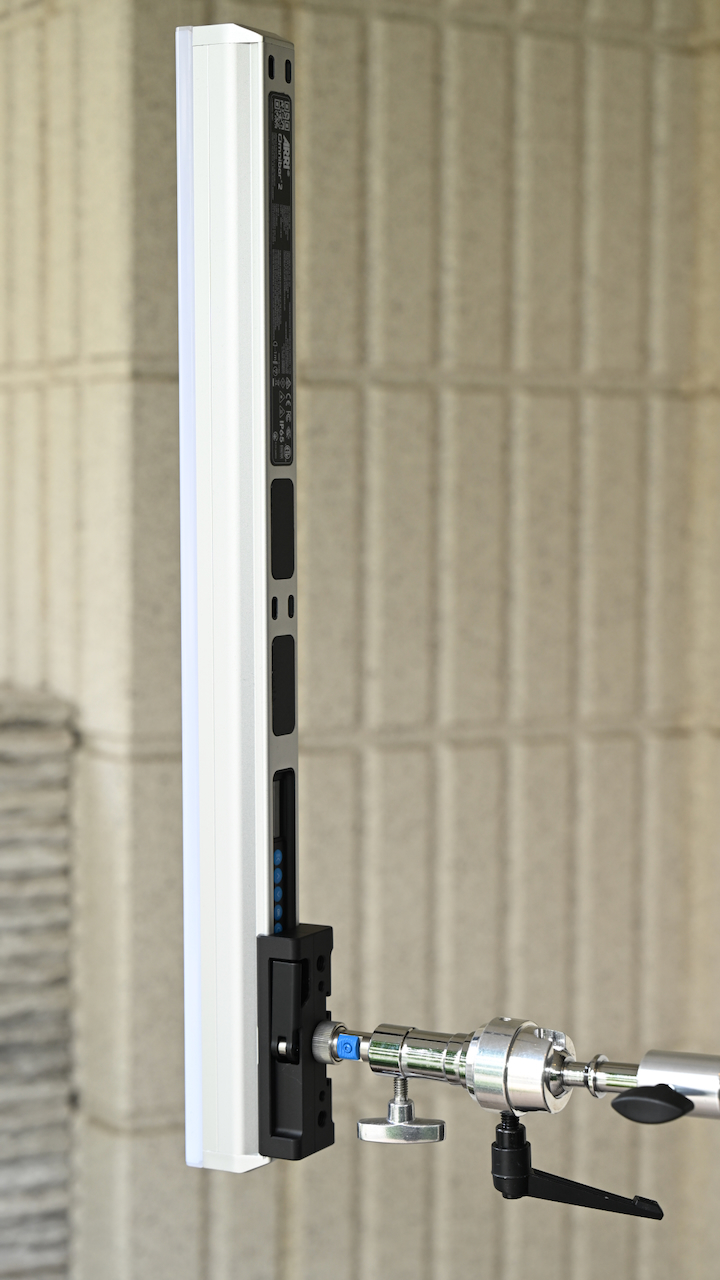
This system works really well, and it allows for a lot of versatility.
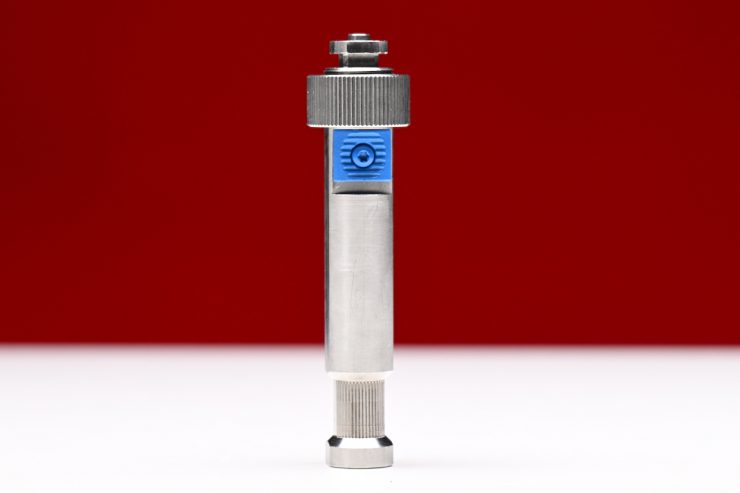
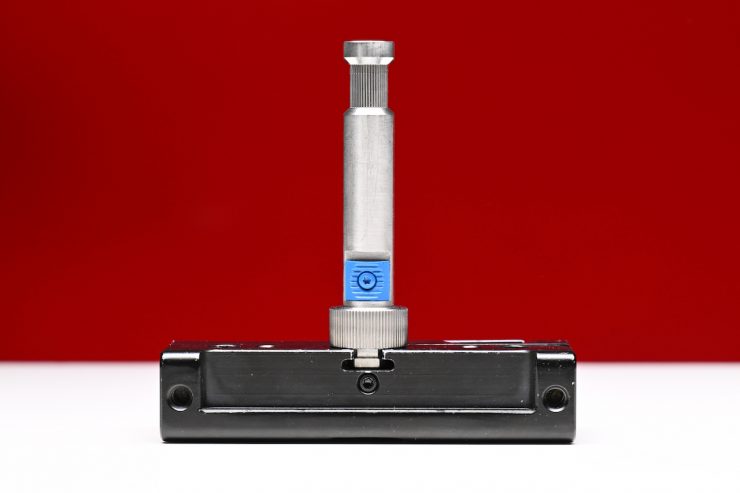
With the Omnipin design, instead of screwing it with the 3/8″ screws, which are really annoying because when you hang them into the grip or the clamp in the wrong direction, they always loosen in one direction, ARRI made this so you just click it in. It has a safety mechanism, so you click it in, and then you have a positive lock that you turn, and then it’s fastened and won’t spin.
If you want to create seamless, longer Omnibars, the Omnigrip can be attached in the middle between two Omnibars. This way, you can create that kind of seamless, gapless, longer Omnibar connecting multiple fixtures together, and the Omnigrip is the device that holds them together.
If that wasn’t enough, ARRI also came up with a few other dedicated accessories for mounting.
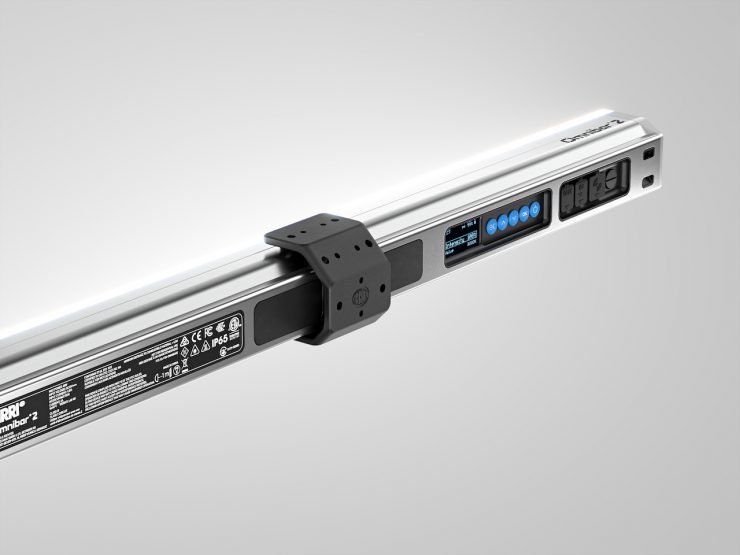
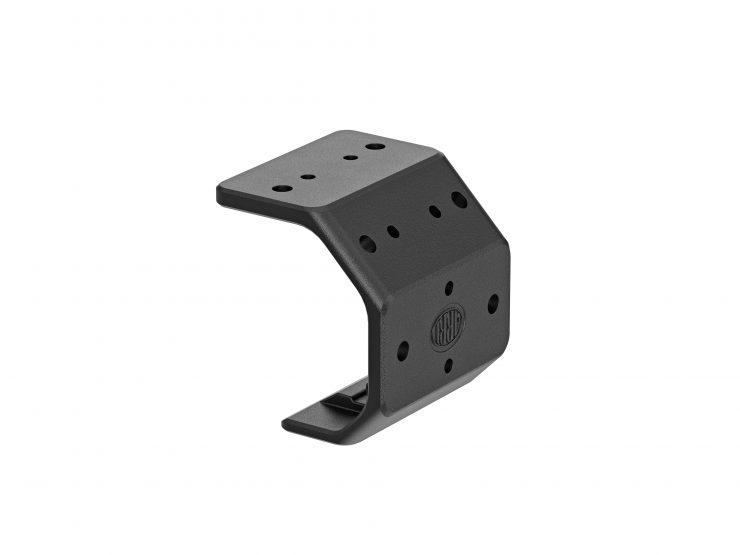
The Omniclip clips onto the bar, also through the rail system. It’s easy enough to click in, easy enough to click out, and it will never fall off by itself. So you kind of have to use a little bit of force and get the angle right. This is a really good way to fasten the bars to almost any surface.
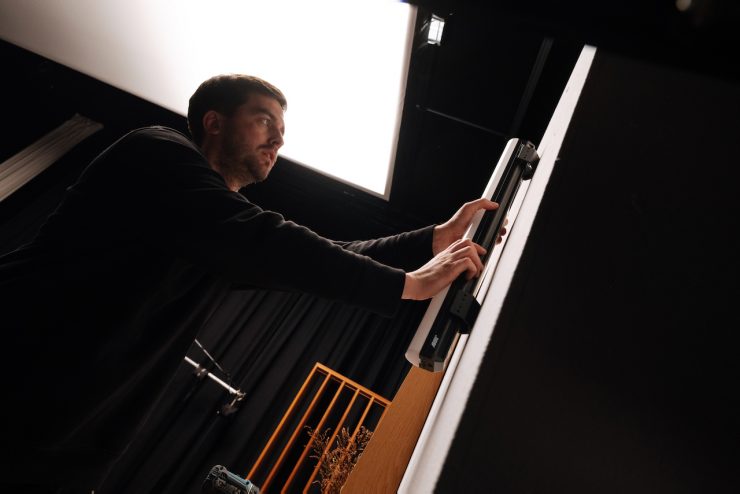
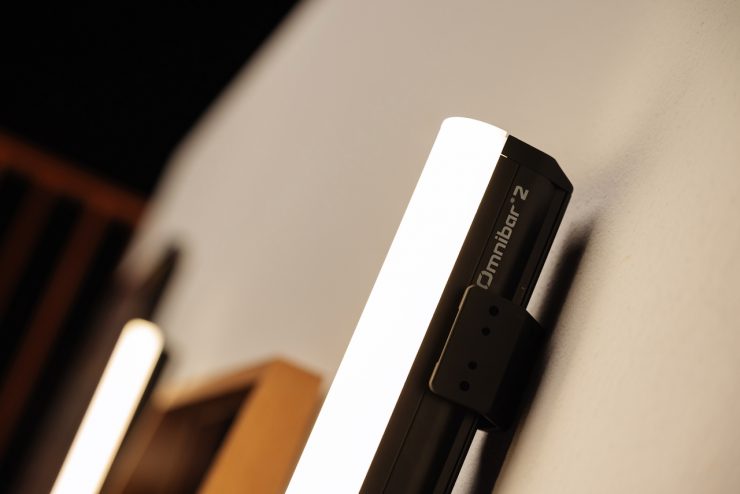
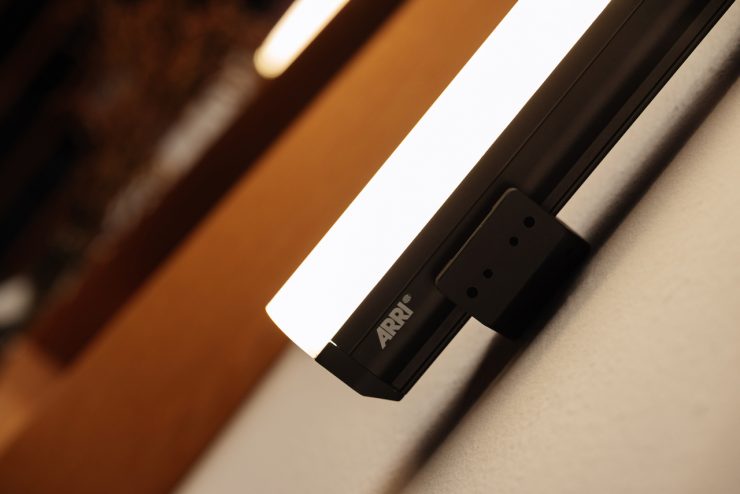
You can also just screw these clips into any set, any wooden surface, or wall, if you’re allowed to, and then once you start your shoot, you click in the bars that you want to use in those positions. So you could give these to a set designer and be like, let’s install these clips there, there, there, there, there, you know, later when I’m ready, I’m going to click in the bars into the set there. There is also an extra installation gauge that you can clip the clips into and then screw them on, and they’re perfectly parallel. You get them installed at the right angle every time without any kind of extra measurement and time wasted to do that.
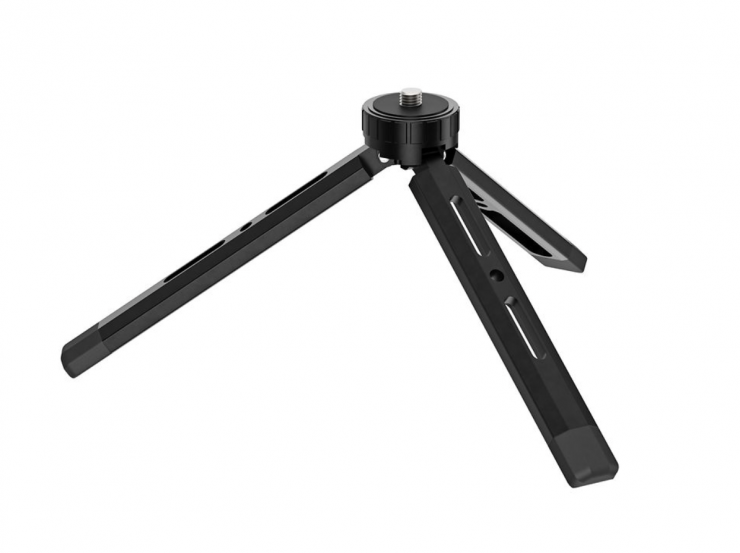
There is also a Mini Tripod, which is great to use as a floor stand. It is lockable in three different positions, depending on the height you want to use.
This is a clever design and a lot better than most other similar solutions on the market. You can have four different heights with a really simple mechanical design.
With the flat design where the legs lie flat on the floor, there are screw holes that allow you to fasten it to any surface if you really want to, or if you need that extra stability.
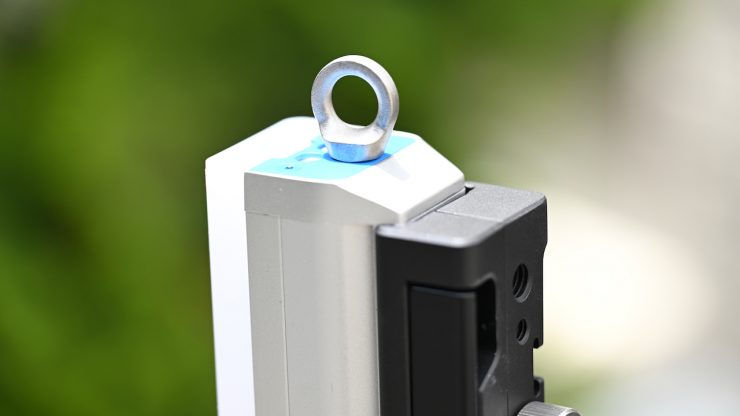
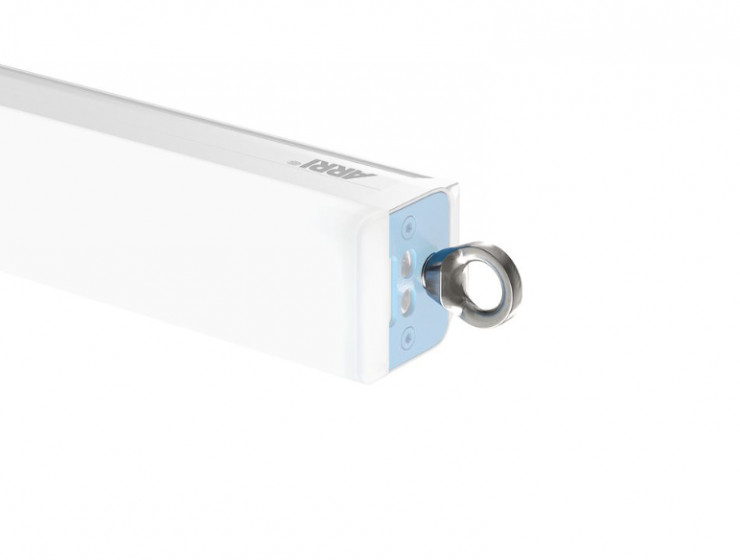
Finally, there is the Eyebolt Adapter. This is not the most exciting of accessories, but it is necessary because for certain installations, you need to have that safety cable, and some of the safety cables are just too thick to pass through the built-in cable slots on the Omnibar.
The multitude of well-thought-out mounting solutions is arguably one of the Omnibar’s biggest selling points.
Interchangeable Optics
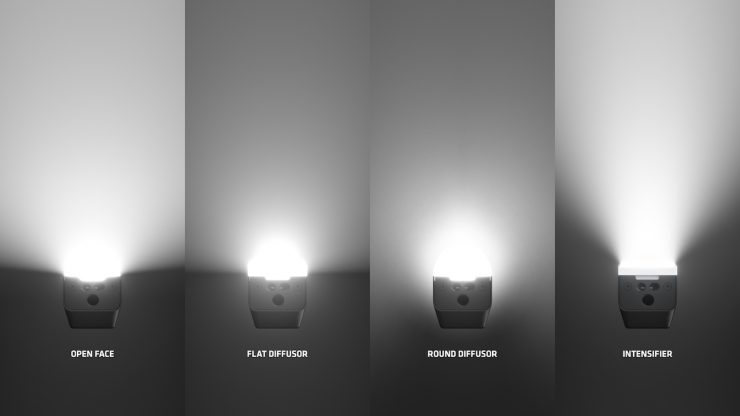
Something that is quite unique to Omnibar is the ability to change the optics. With tube solutions, because of their design, you are limited to what type of lighting modifiers you can use. Having the ability to change how you use the Omnibar makes it a much more versatile solution.
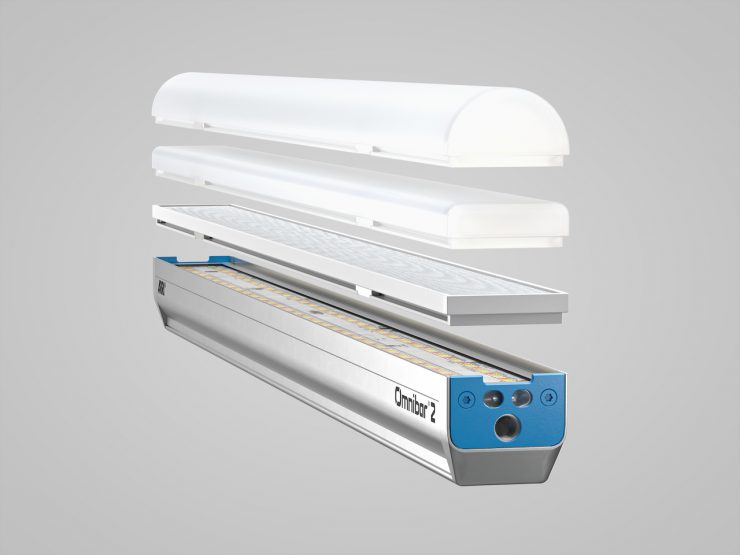
ARRI has come up with a magnetic snap-on system that allows you to change the optics on Omnibar depending on what your requirements are.
The optics that ARRI will be shipping with the Omnibar are really easy to take off and put on. The optics consist of a Round Diffuser, Flat Diffuser, and an Intensifier.
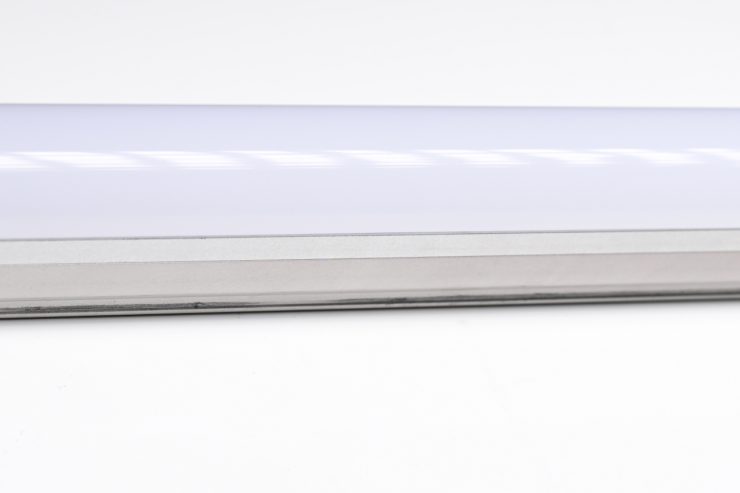
The Round Diffuser (145°) was designed to create a hybrid look to make the Omnibar look like a tube, especially from afar, and because of the bar design, you get much more flexible rigging than you would with a traditional tube light.
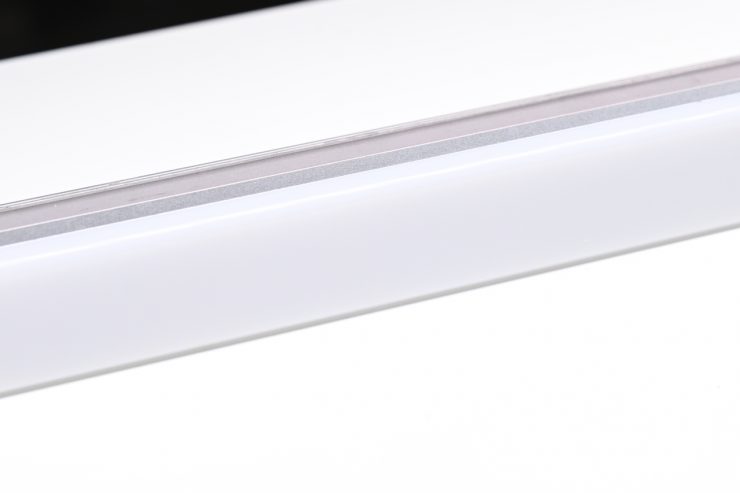
The Flat Diffuser (130°) provides a lower profile and creates more of a bar look.
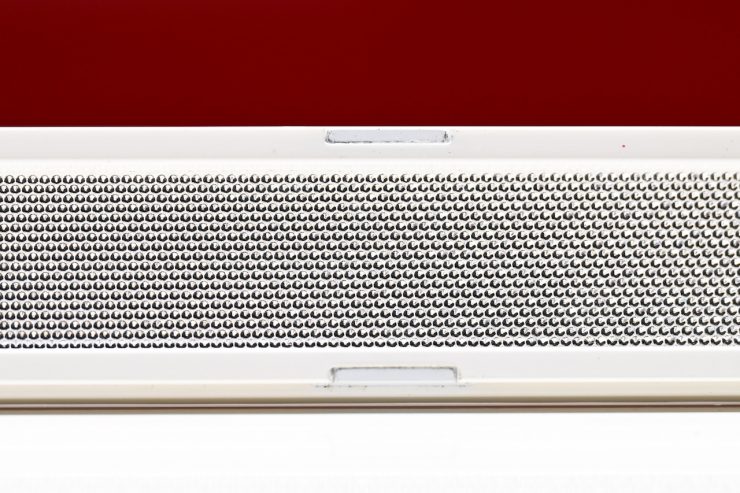
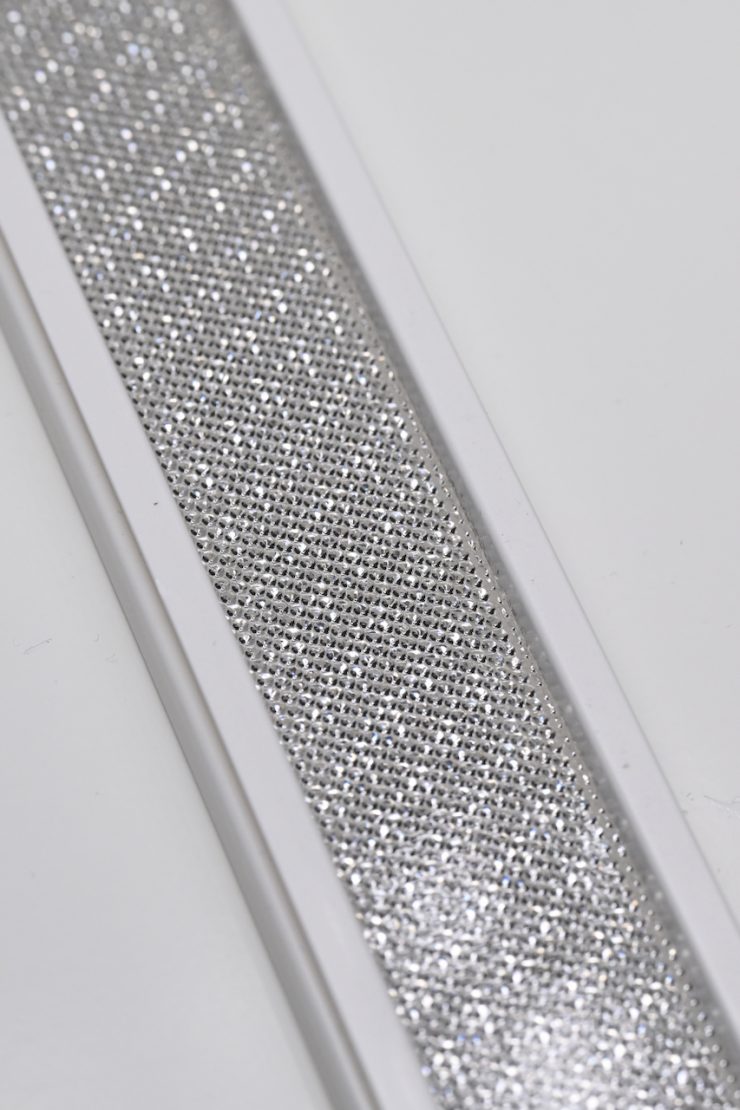
The Intensifier tightens the beam spread (60°) and produces a stronger, more concentrated output.
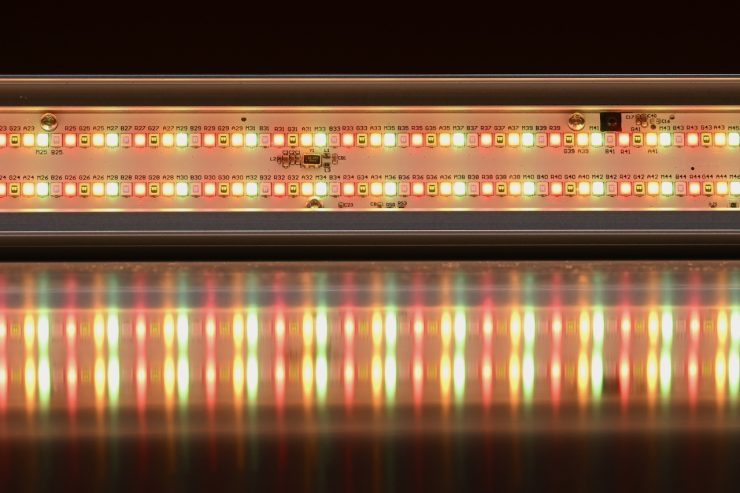
The other big advantage Omnibar has over traditional tube solutions is that you can use it open face (115°) to give you even more output. This is especially useful when you’re putting them in a soft box, or you’re using it to indirectly bounce light or put it through some other type of diffusion.
ARRI has also added a boost mode that you should only use when you’re under 25 degrees Celsius. This will boost your output by another 20%.
Companies such as DOP Choice, Chimera, and LightSock will be coming out with the accessories to control the light even more.
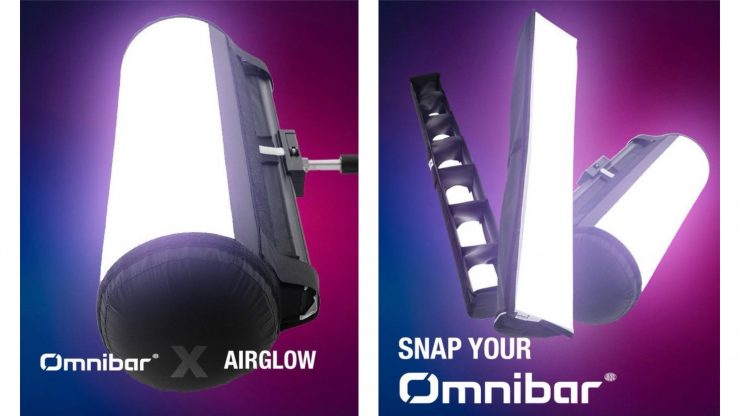
DoPchoice has a large selection of ARRI Omnibar Lighting Modifiers available, including the SNAPBAG Omnibar 4, SNAPGRID 40/60° ARRI Omnibar 4, SNAPGRID 40° Omnibar 4, and AIRGLOW LANTERN – Omnibar 4. All these solutions are also available for the Omnibar 2 versions.
SNAPBAG Omnibar 4 – for ARRI
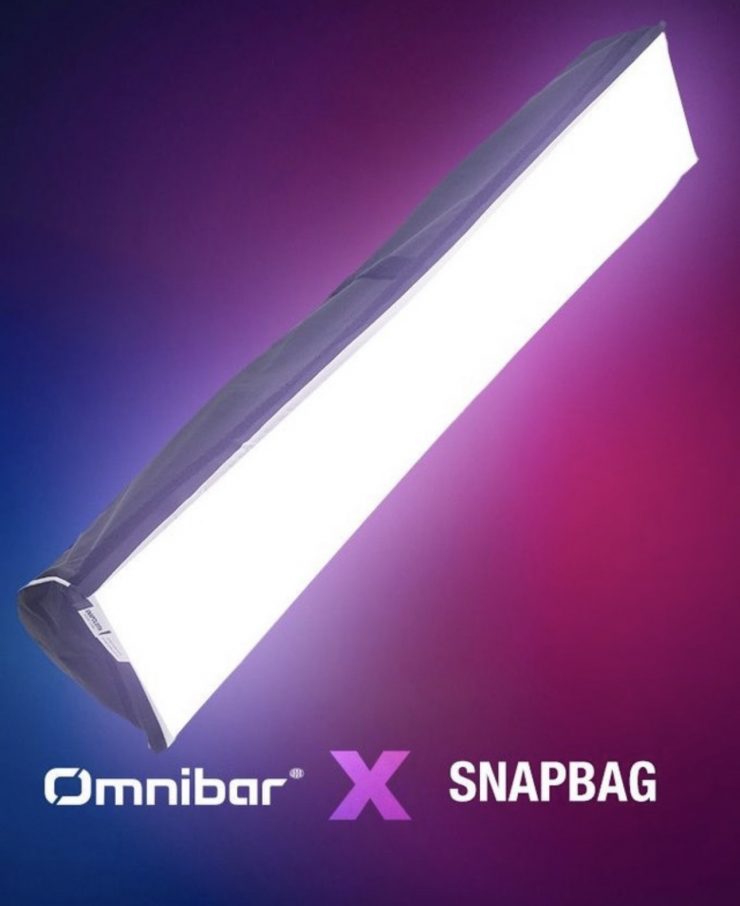
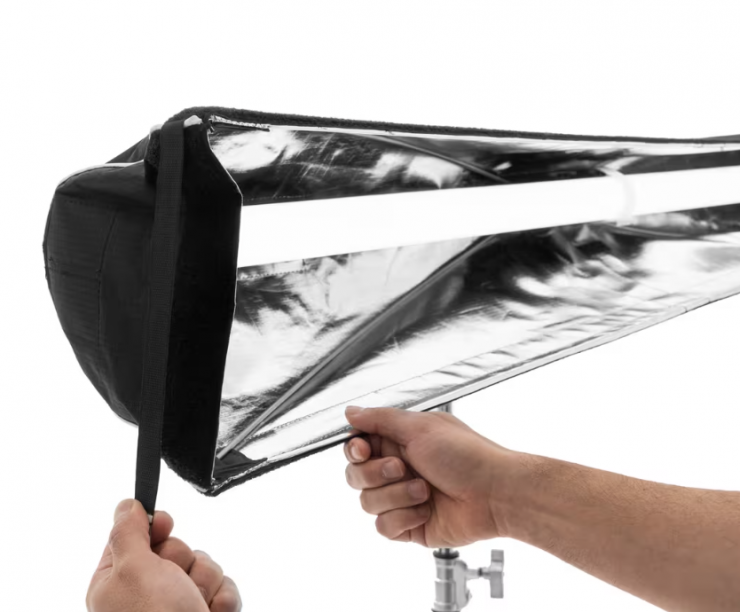
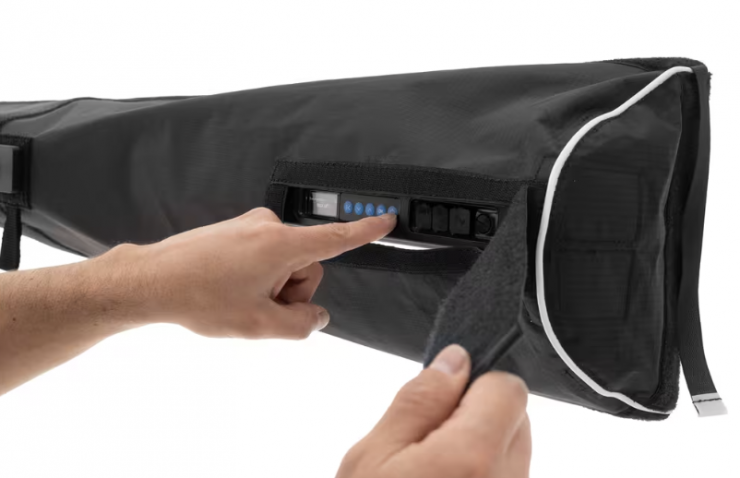
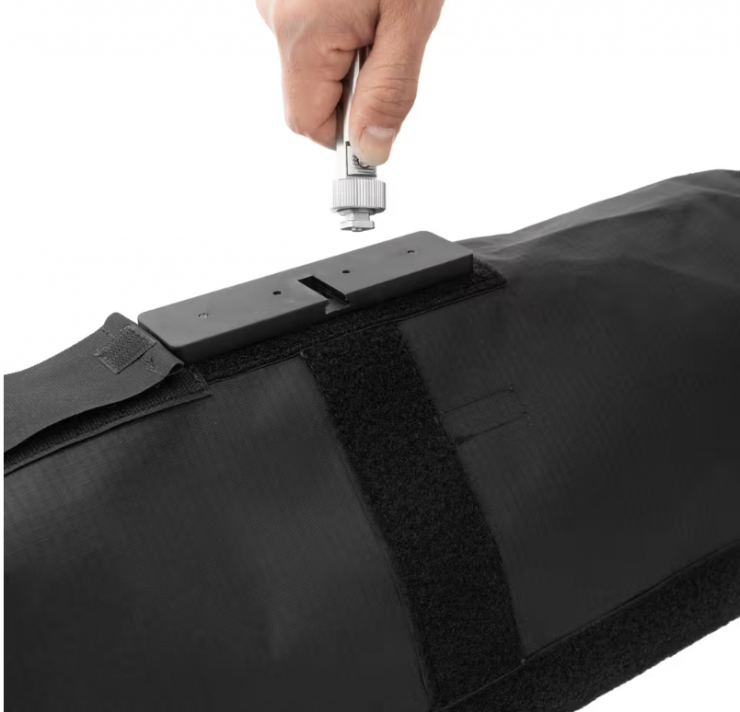
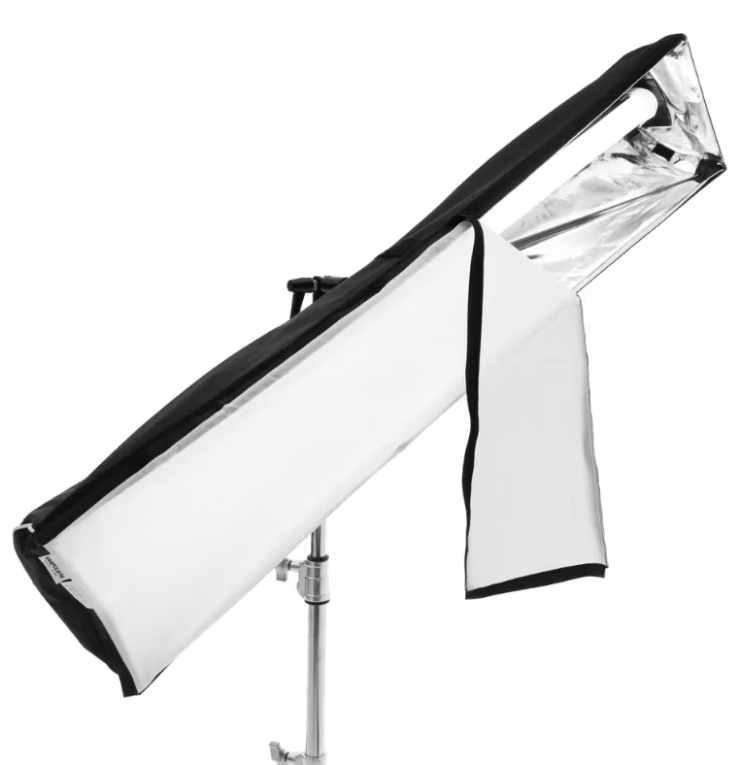
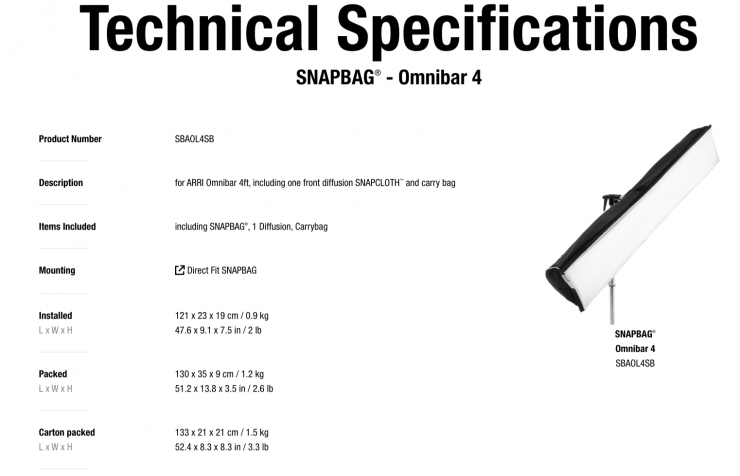
Main features:
- Quick setup without speedring
- Dedicated for your lighting fixture
- Lightweight and compact packing
SNAPGRID 40/60° ARRI Omnibar 4 – for SNAPBAG
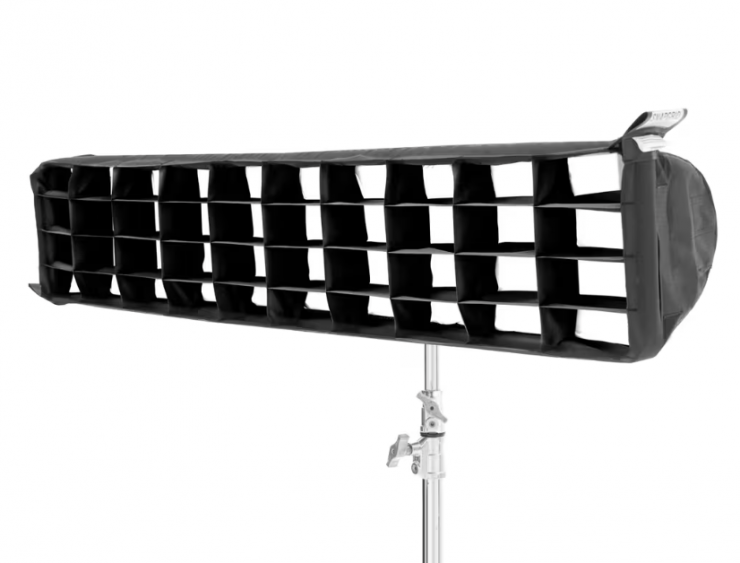
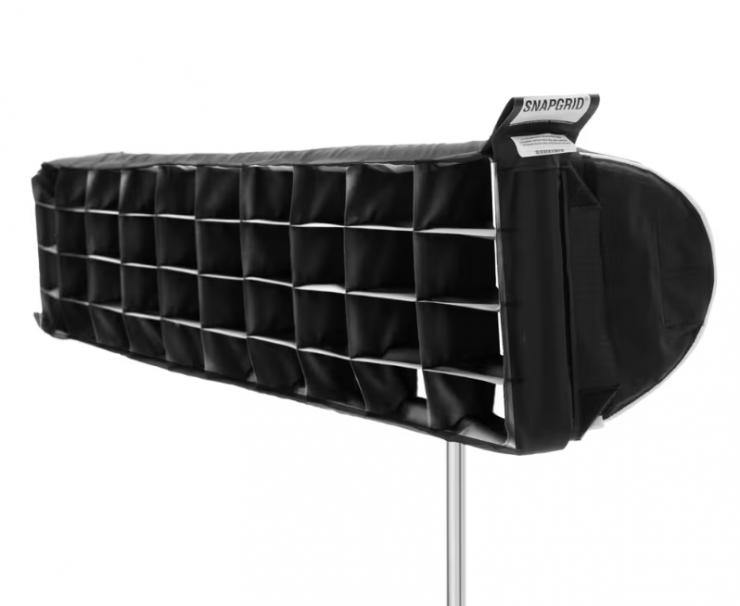
From the smallest to the biggest rectangular SNAPBAGS, DoPchoice SNAPGRIDS help you shape soft light with control and confidence. SNAPGRID from DoPchoice affixes to a SNAPBAG softbox with a hook-and-loop attachment directly to the front frame and hold their form without sagging – no matter the size. Quick to mount, durable, and always precise.
- No tummy. Always tight.
- No hassle. Incredibly simple and quick to install
- No wearout. Extremely durable.
- Many different beam angles
SNAPGRID 40° Omnibar 4 – for ARRI
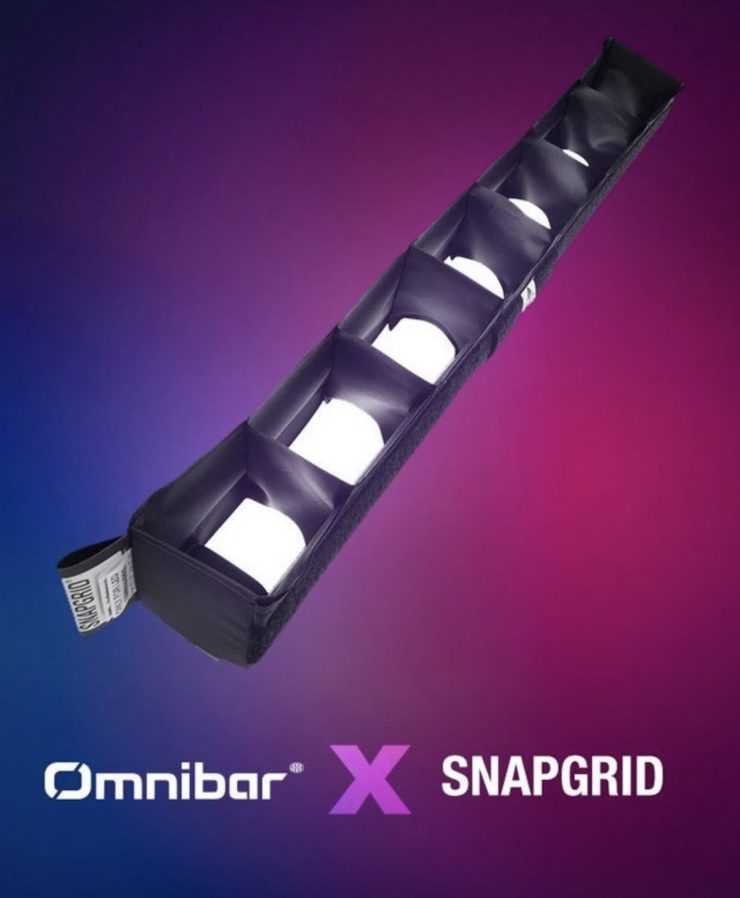
Controlled softness for modern tube lights. Tubes offer a unique lighting aesthetic – but when you need to shape and direct the light, SNAPGRIDS are the ideal solution. Tailored to tightly fit the tube, these lightweight fabric grids mount directly and give you full control without changing the character of the light. Designed to wrap perfectly around tube lights, these grids keep their shape and block unwanted spill, even in dynamic setups or tight spaces. Setup is a breeze with simple hook-and-loop fasteners that attach directly to the tube. No extra hardware or tools are required.
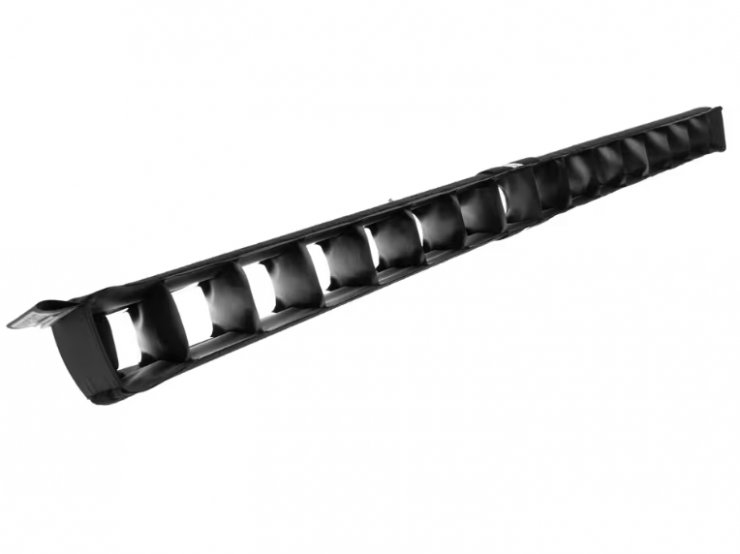
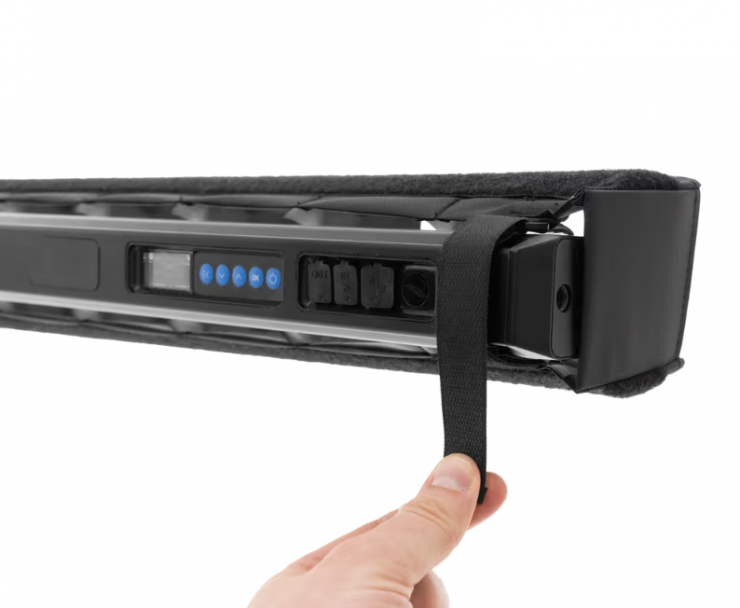
- No tummy. Always tight.
- No hassle. Incredibly simple and quick to install
- No wearout. Extremely durable.
- Choose from different beam angles
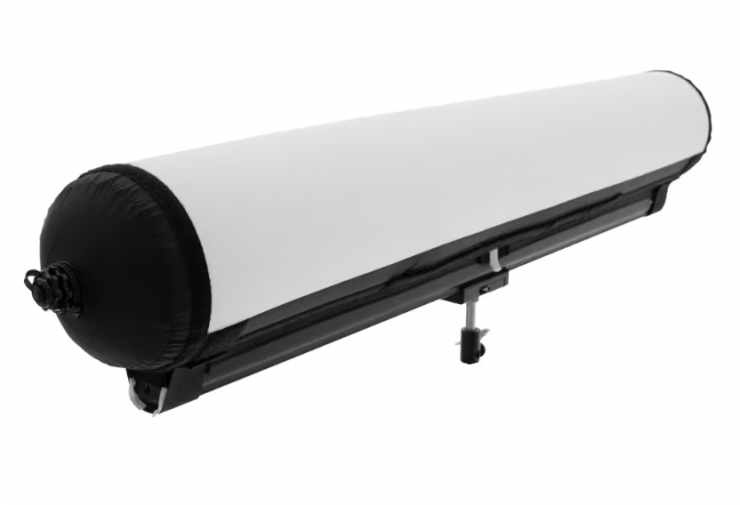
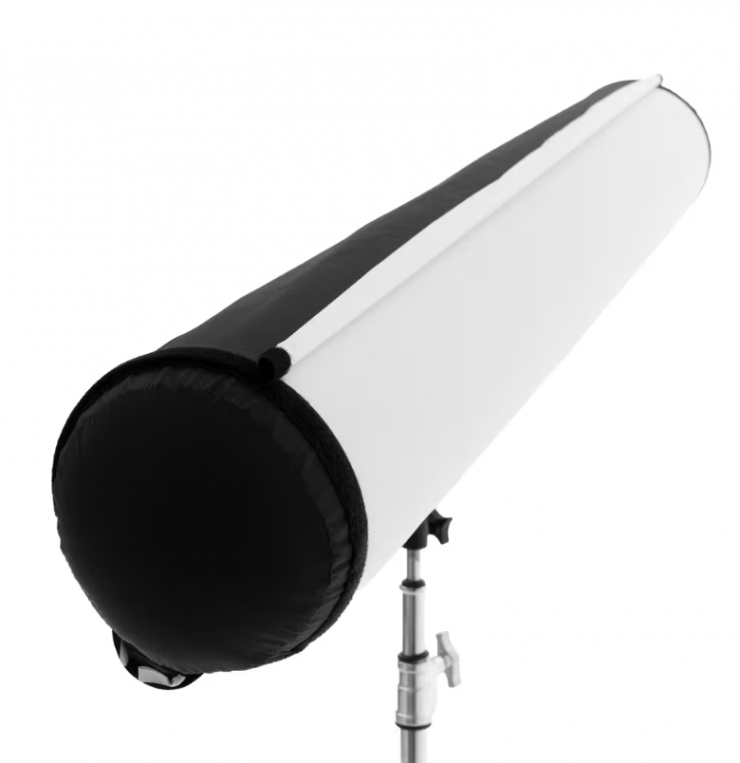
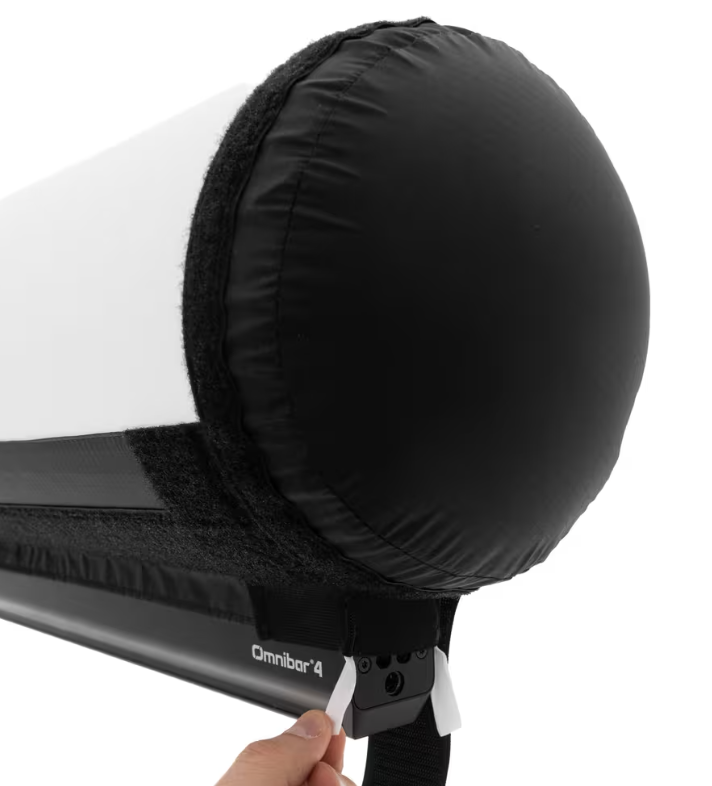
AIRGLOW LANTERN – Omnibar 4 – for ARRI
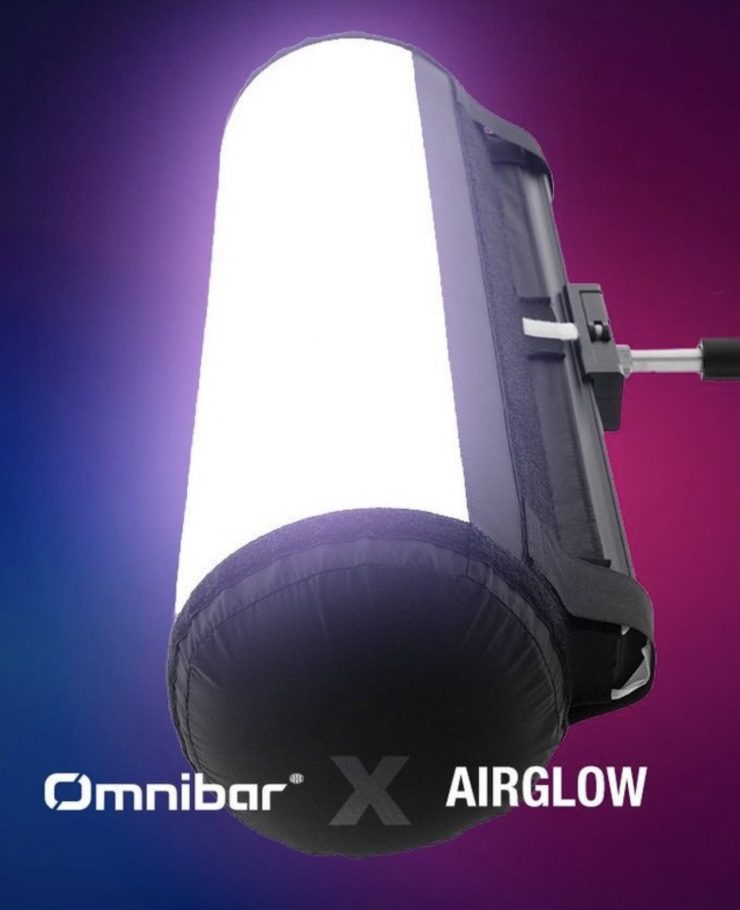
Designed for ambient fill and practical overhead lighting, DoPchoice Direct Fit SNAPBAGS are purpose-built for today’s most popular panel lights. They mount directly to the fixture without adapters or speedrings, keeping setups fast and clean. Whether you’re lighting a tabletop, a room, or filling shadows on set, these lanterns mount quickly, pack down small, and are made to fit a range of popular LED fixtures. Add optional skirts for even more control where you need it.
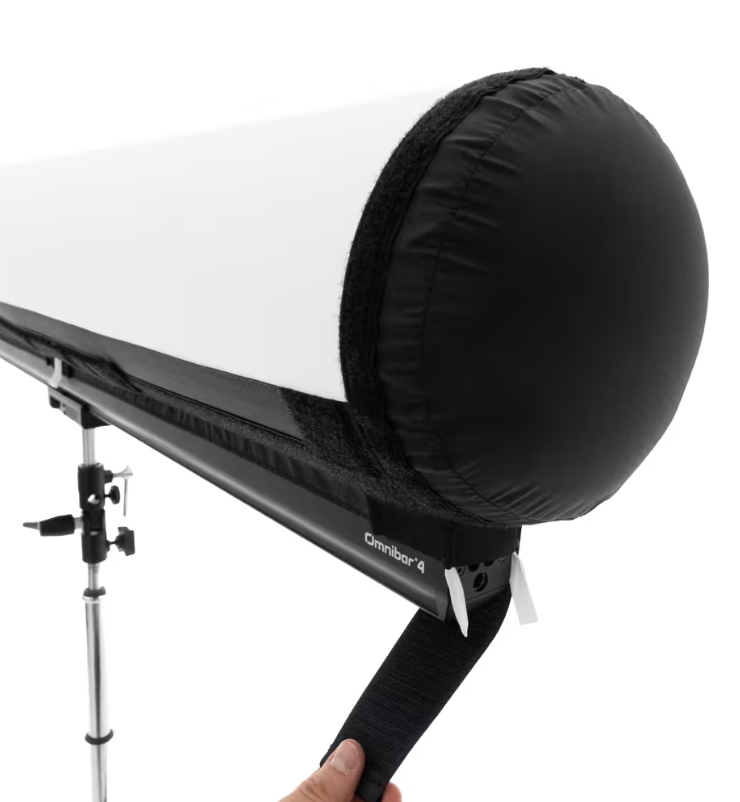
Main features:
- Quick and easy Setup
- Made to fit popular LED Panels
- Lightweight and compact packing
Output

Above, you can see the claimed output figures for the Omnibar 4′ version.
- At 1m / 3.3′ when used Open Face, the claimed output is 1,475 lx
- At 1m / 3.3′ when used with the Round Diffuser, the claimed output is 832 lx
- At 1m / 3.3′ when used with the Flat Diffuser, the claimed output is 737 lx
- At 1m / 3.3′ when used with the Intensifier, the claimed output is 1,287 lx
As a comparison, below you can see the claimed output of 4′ tube lights that are on the market when set at 5600K and used at =1m / 3.3′.
| OUTPUT @1m /3.3″ | |
| Astera Titan 4′ | 785 lx |
| Aputure INFINIBAR PB12 RGB LED Light Panel (4′) | 617 lx |
| Nanlite PavoTube II 30C | 666 lx |
| amaran T4C RGB LED Tube Light | 744 lx |
| Godox TL120 RGB LED Tube Light | 685 lx |
| Neewer TL120C RGB LED Tube Light | 500 lx |
Battery Powered
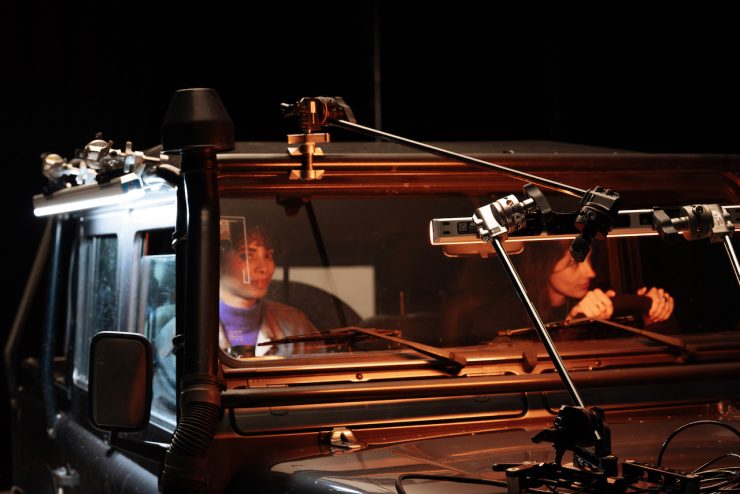
Omnibar features a built-in battery, but it can also be powered in other ways. Both the Omnibar 2 and the Omnibar 4 can run for over two hours at full brightness, which is higher than that of the competitors. You also have the ability to set a runtime setting to run for up to 24 hours at reduced output levels, as well as 16 or 12 or whatever is necessary.
In the Omnibar Creator Set, you get a Universal Power Supply/Charger. You can’t power the Omnibar directly through USB-C; however, you could use a DC to D-Tap cable if you wanted to power it via a camera battery.
The Omnibar 2 has a 25-watt power draw, while the Omnibar 4 has a 50-watt power draw.
How does the power draw of the Omnibar 4 compare to other 4′ (or close to) tube lights? Below you can see:
| POWER DRAW | |
| ARRI Omnibar 4 | 50W |
| Astera Titan 4′ | 48W |
| Nanlite PavoTube II 30C | 60W |
| Aputure INFINIBAR PB12 RGB LED Light Panel (4′) | 36.5W |
| amaran T4C RGB LED Tube Light | 50W |
| Godox TL120 RGB LED Tube Light | 30W |
| Neewer TL120C RGB LED Tube Light | 42W |
How does the power draw of the Omnibar 2 compare to other 2′ (or close to) tube lights? Below you can see:
| POWER DRAW | |
| ARRI Omnibar 2 | 25W |
| Astera HELIOS | 24W |
| Aputure INFINIBAR PB6 RGB LED Light Panel (2′) | 18W |
| Nanlite PavoTube II 15C | 30W |
| amaran T2C RGB LED Tube Light | 25W |
| Godox TL60 RGB LED Tube Light | 18W |
| Neewer TL60C RGB LED Tube Light | 20W |
RGBMA LED Engine
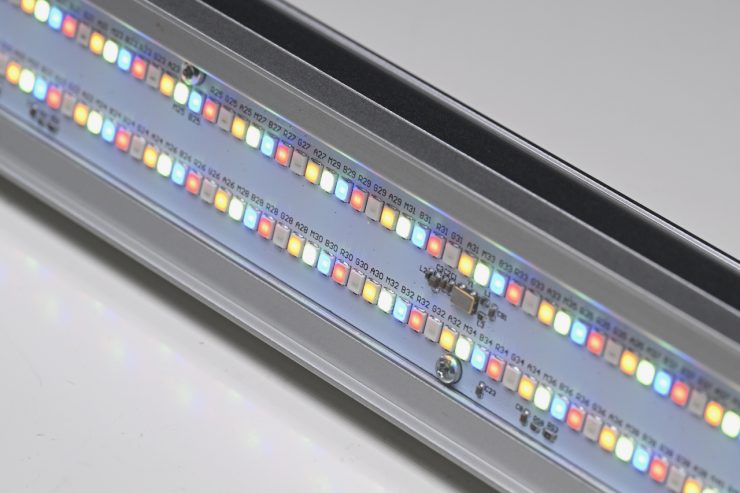
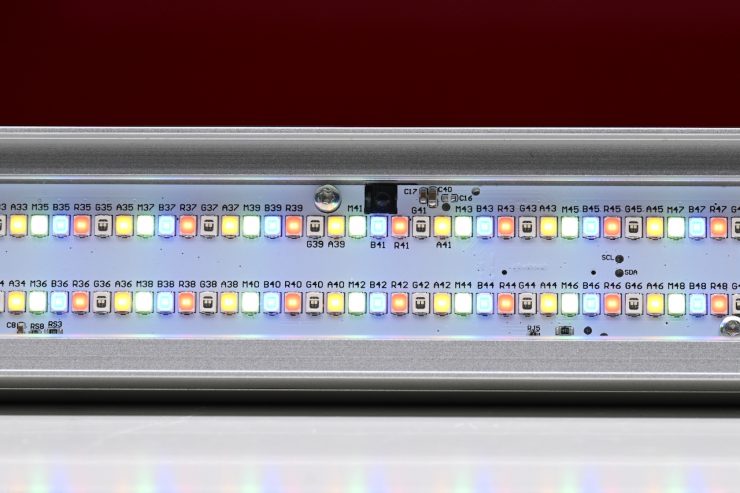
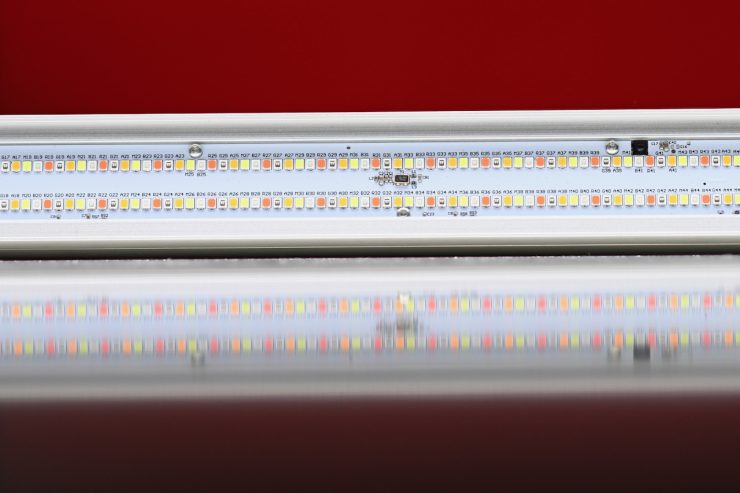
The Omnibar utilizes an RGBMA LED engine that is claimed to provide a high-quality, full-spectrum output. RGBMA is Red, Green, Blue, Mint, and Amber.
ARRI chose the RGBMA light engine after a lot of experimentation, as they found it offered the best balance between high quality and affordability.
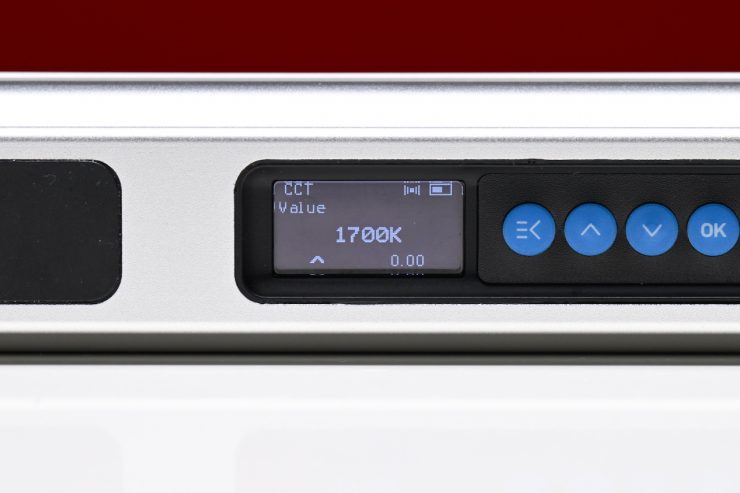
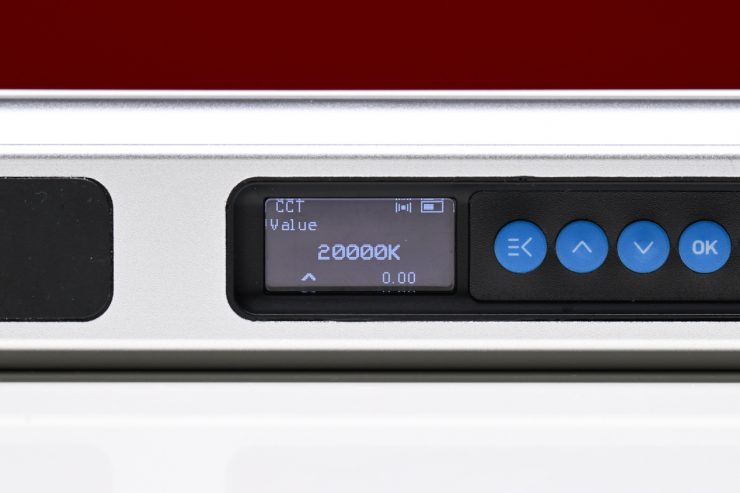
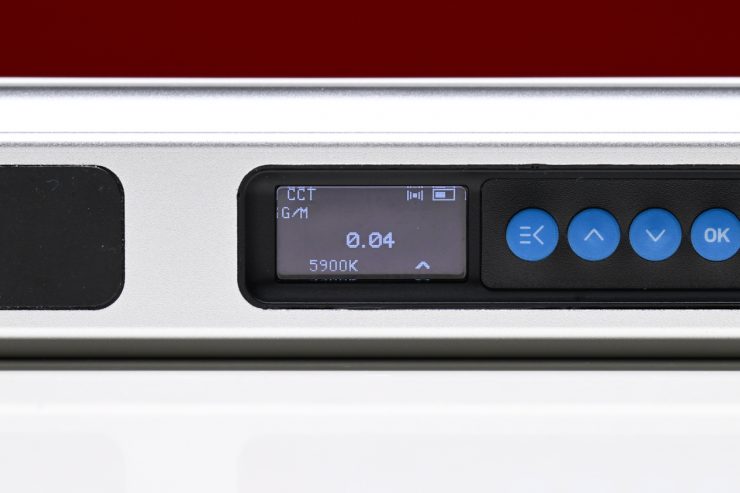
The fixtures have a CCT range of 1,700-20,000K and a claimed CRI of 98 and TLCI of 98 when used at 5600K. They also offer full +/- G/M correction.
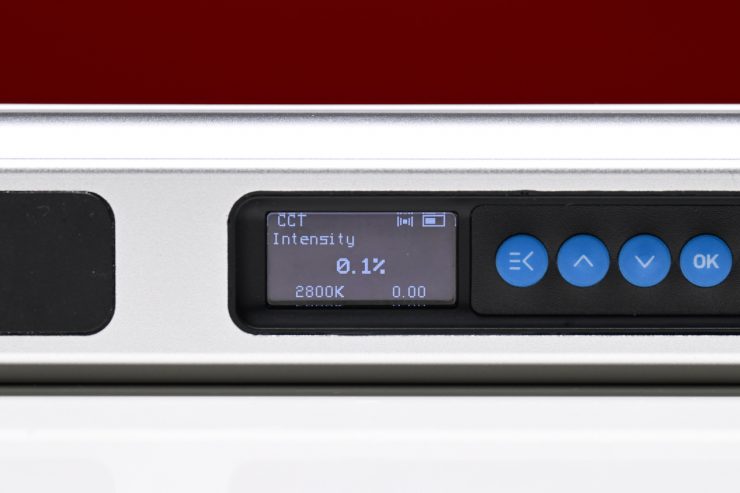
The fixtures are said to offer smooth dimming all the way down to 0.1%. ARRI told me that they spent a lot of time making sure that the fixture performs very well at low-end brightness levels.
16/32 Pixels
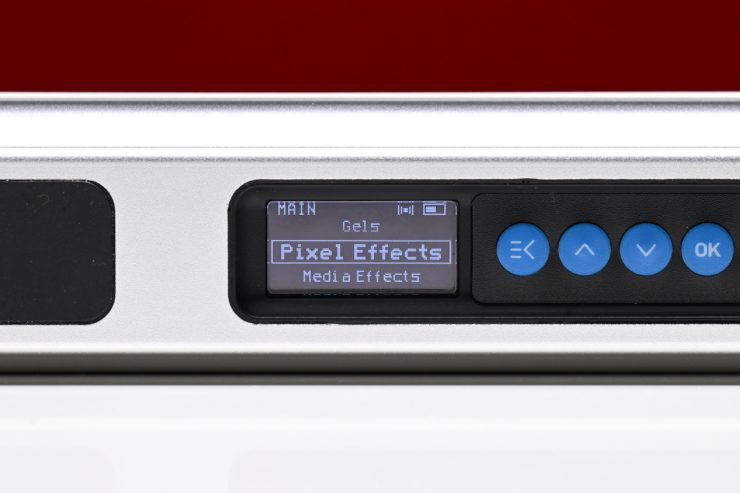
The 2′ Omnibar has 16 pixels, while the larger 4′ Omnibar has 32 pixels. This allows users to create smooth effects and transitions.
Bluetooth Mesh
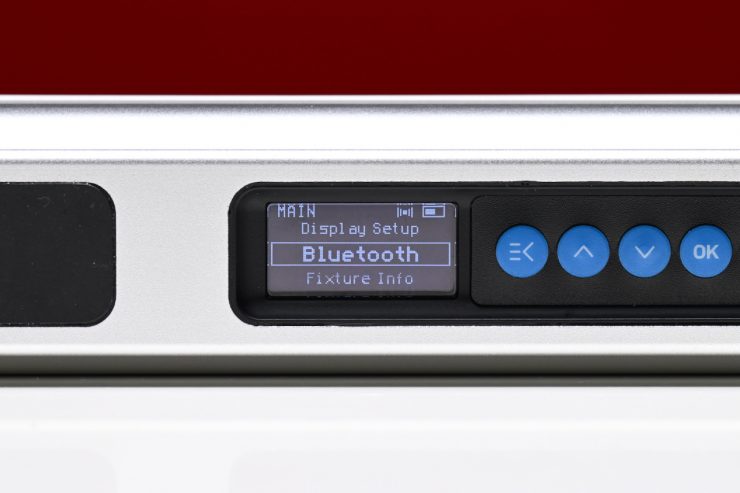
ARRI has developed its own Bluetooth Mesh protocol. Bluetooth Mesh isn’t a new concept, and lighting companies such as Aputure have had their own version for many years. Bluetooth Mesh is designed to be more resilient than either Bluetooth or WiFi on their own. Lights with Bluetooth Mesh act as both transmitters and receivers.
The Omnibars utilize Bluetooth 5, and once you have that mesh built up, you can place them far apart and do most of the setup. ARRI’s new system allows multiple Omnibars to react as one, and they’re in sync. ARRI told me that this has never been possible with Bluetooth before. ARRI put in a lot of effort to create this new protocol because Bluetooth is a notoriously slow protocol, and you often lose packets on the way while they’re transferring. Also, most Bluetooth protocols are designed so that the light reacts whenever it gets the signal, which is similar to how DMX works. However, because of how slow it is, let’s say you want all of them to go green, then the first one goes green, then the next one, then the next one, then one of them doesn’t even go green, doesn’t even get the signal. So to get around these issues, ARRI had to make this new protocol that is super lightweight and that adds functionality where you get the signal quickly and efficiently.
ARRI’s system was also designed to be quick and easy to use. For smaller crews or solo operators who only want to connect up a handful of lights, you don’t need to use lighting consoles or CRMX Bridges.
For larger productions, there is the ability to daisy chain and control huge numbers of Omnibars.
The current Bluetooth mesh limit is up to 30 Omnibar fixtures on a single device.
The Omnibar fixtures I originally had to review weren’t production versions, and they were running an older firmware, so I was unable to test how they work when you want to control multiple units at once.
Control Interfaces & Omnibase
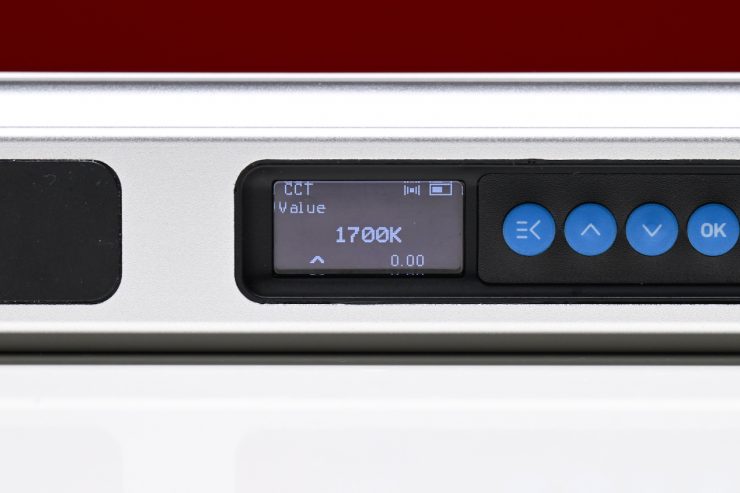
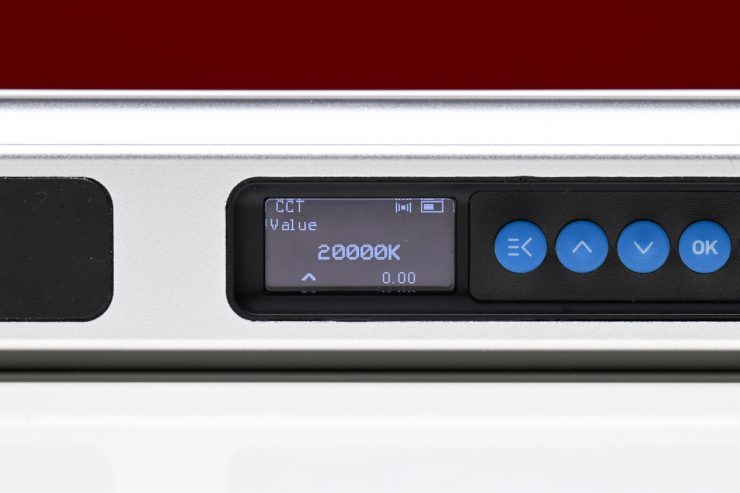
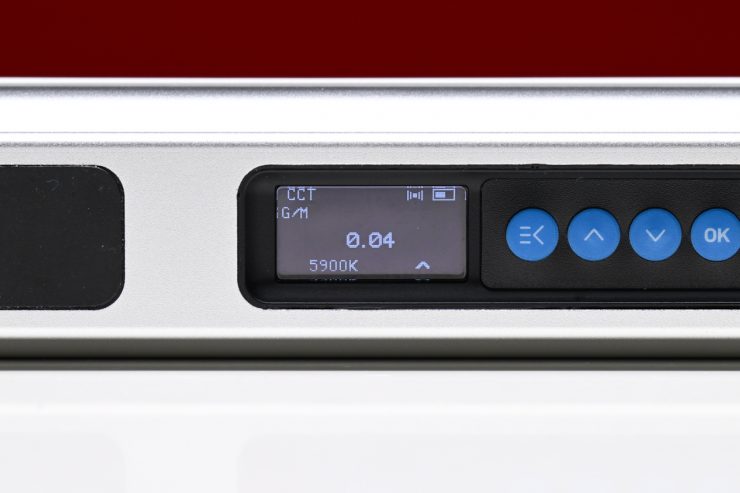
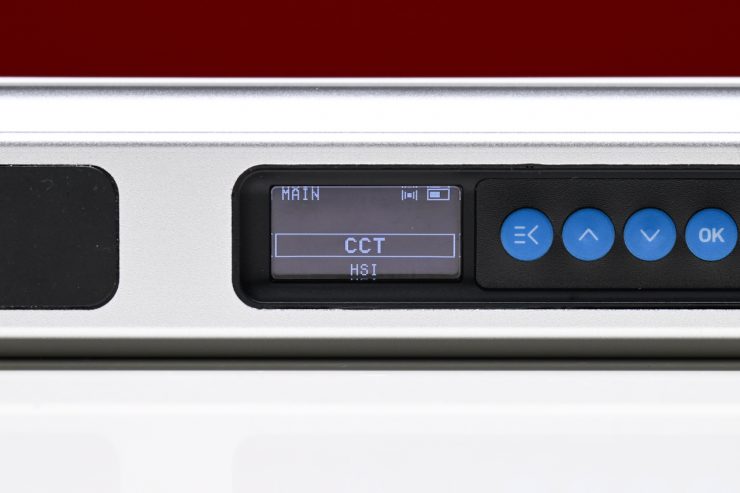
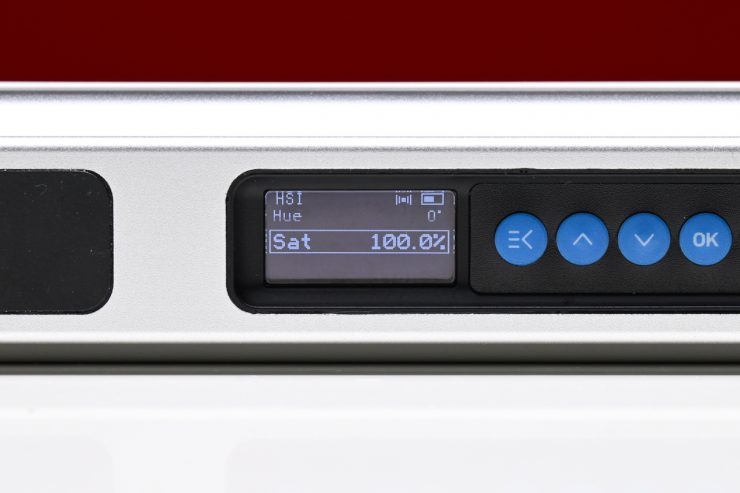
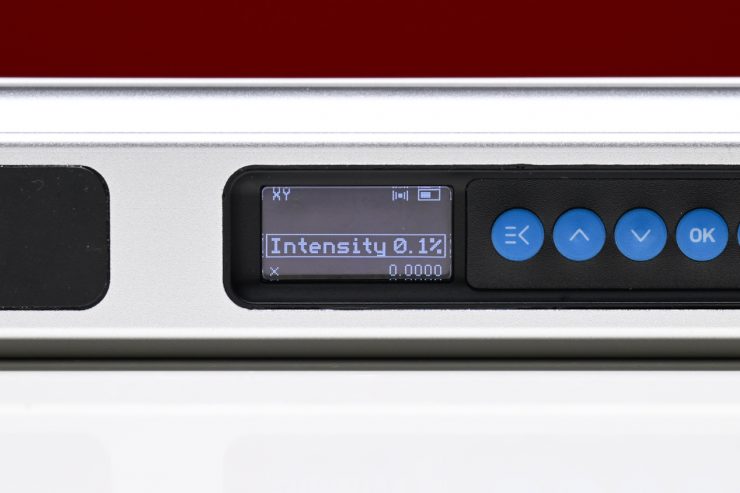
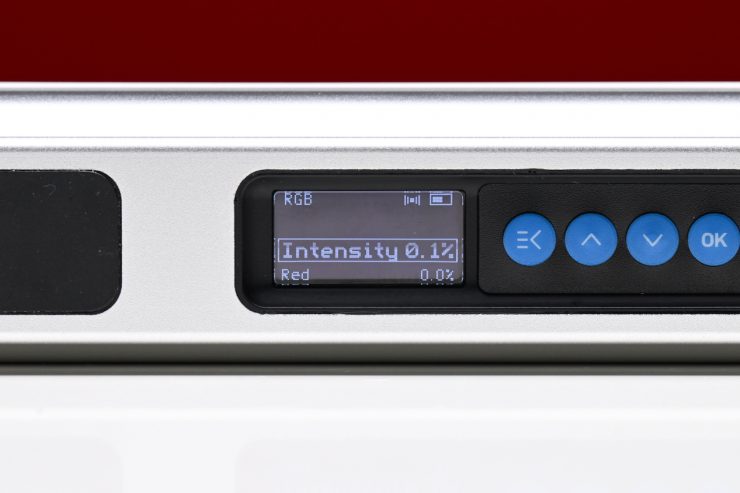
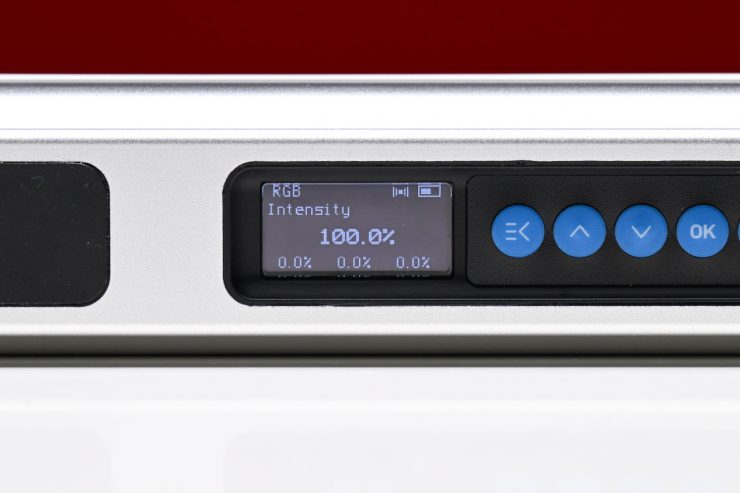
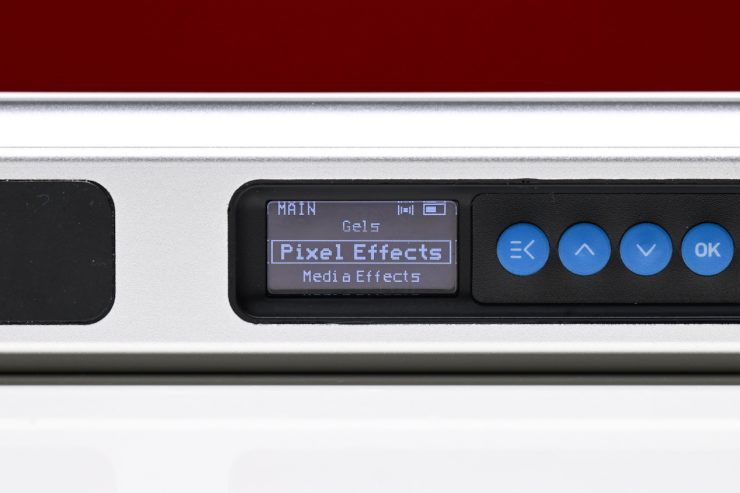
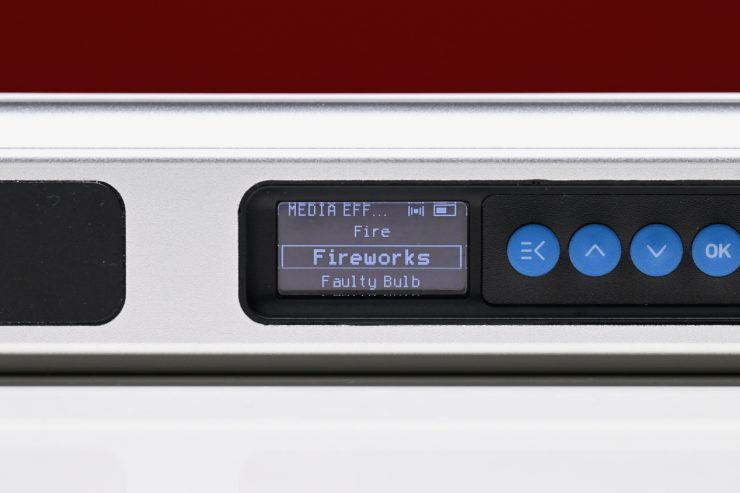
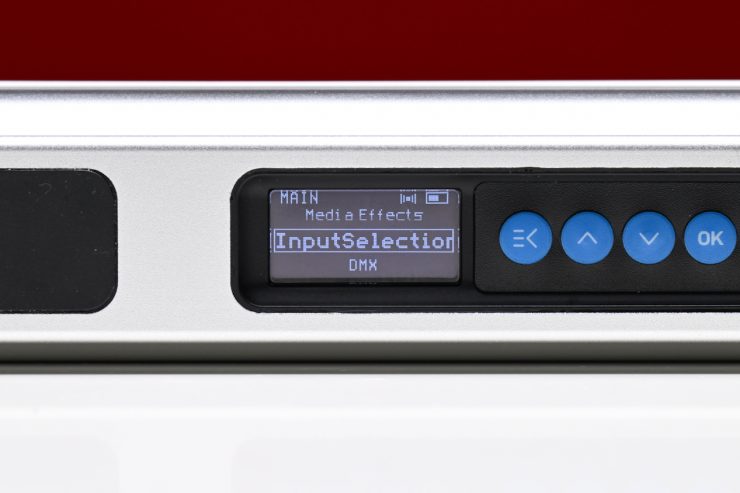
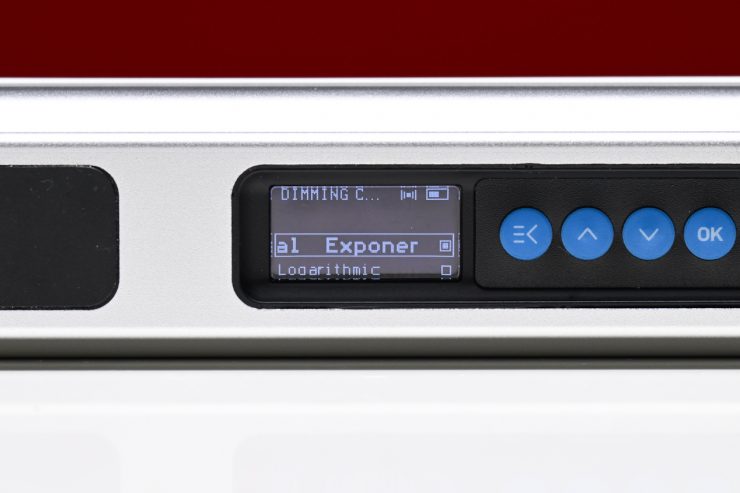
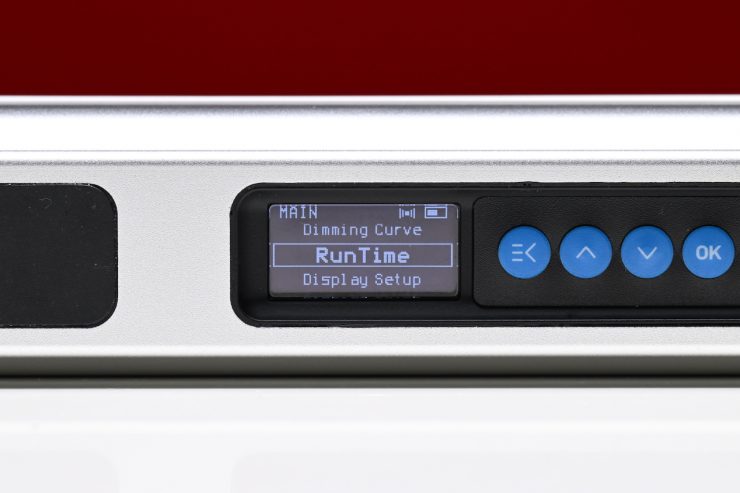
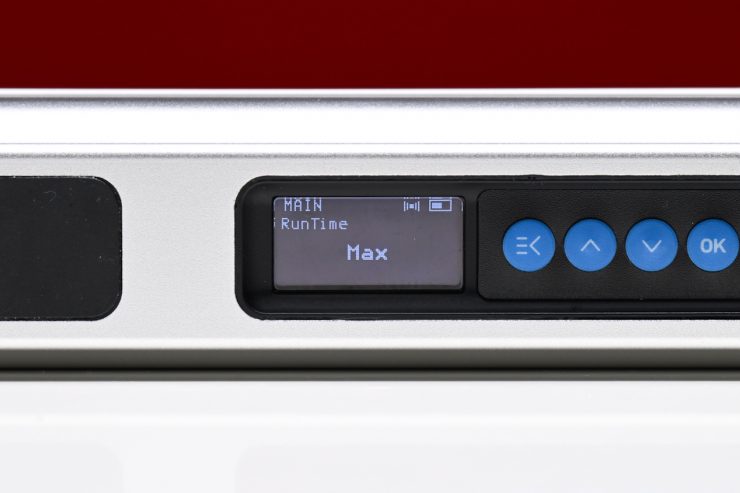
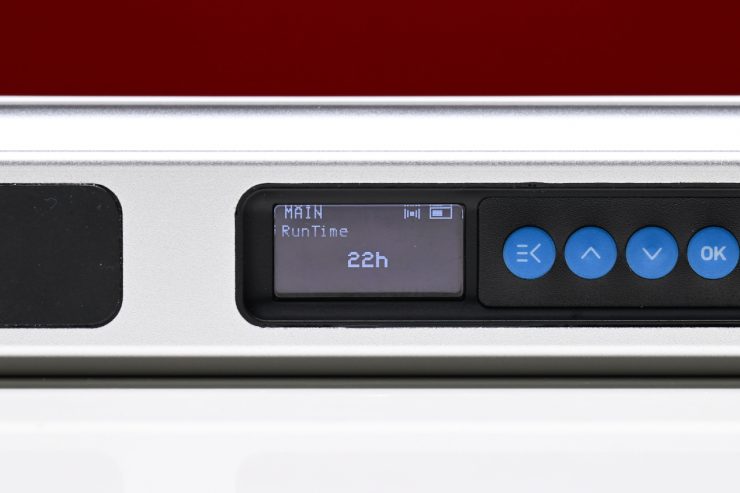
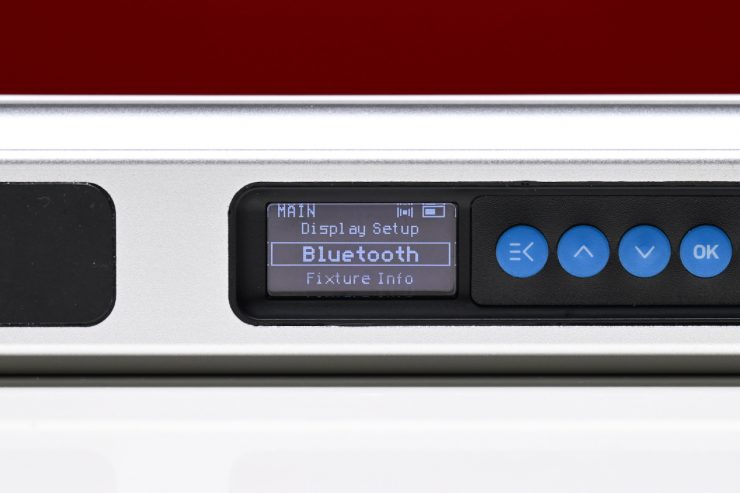
Omnibar features a fully integrated onboard control panel as well as an ARRI Omnibar Control app control via ARRI Bluetooth Mesh.
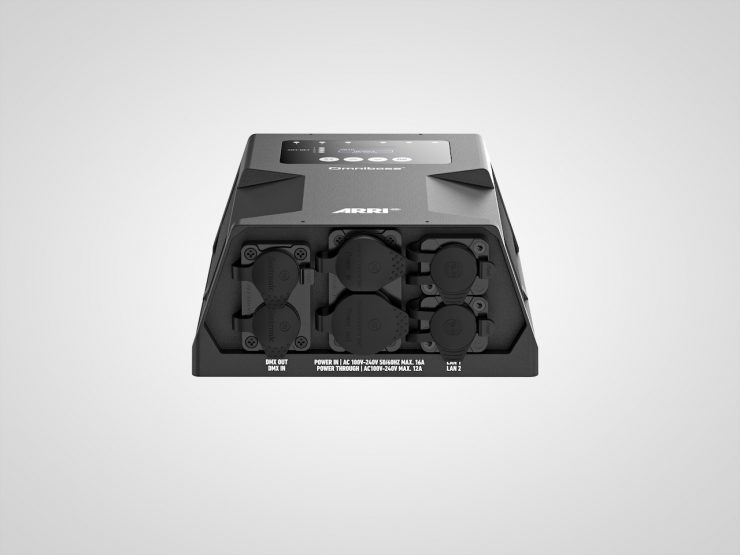
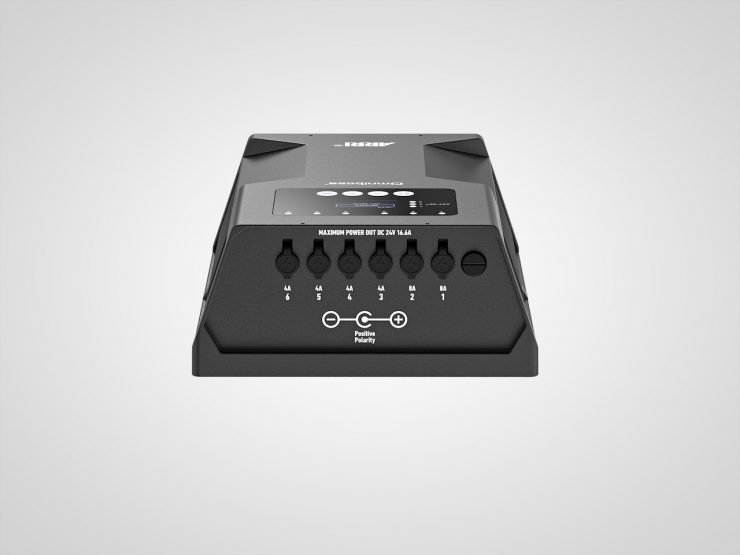
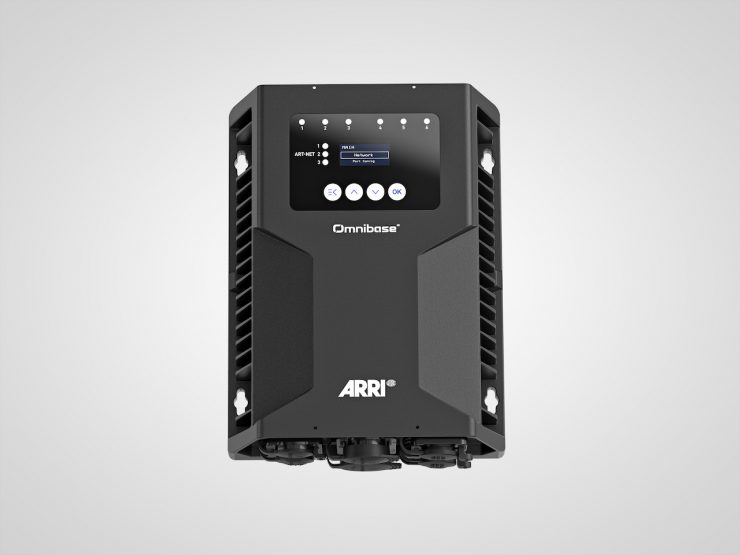
Omnibar supports wired DMX, sACN, and Art-Net workflows via Omnibase, and there is a built-in LumenRadio TimoTwo CRMX in every Omnibar. Software updates can be done using the app, and ARRI is also working on implementing the ability to do it over USB-C.
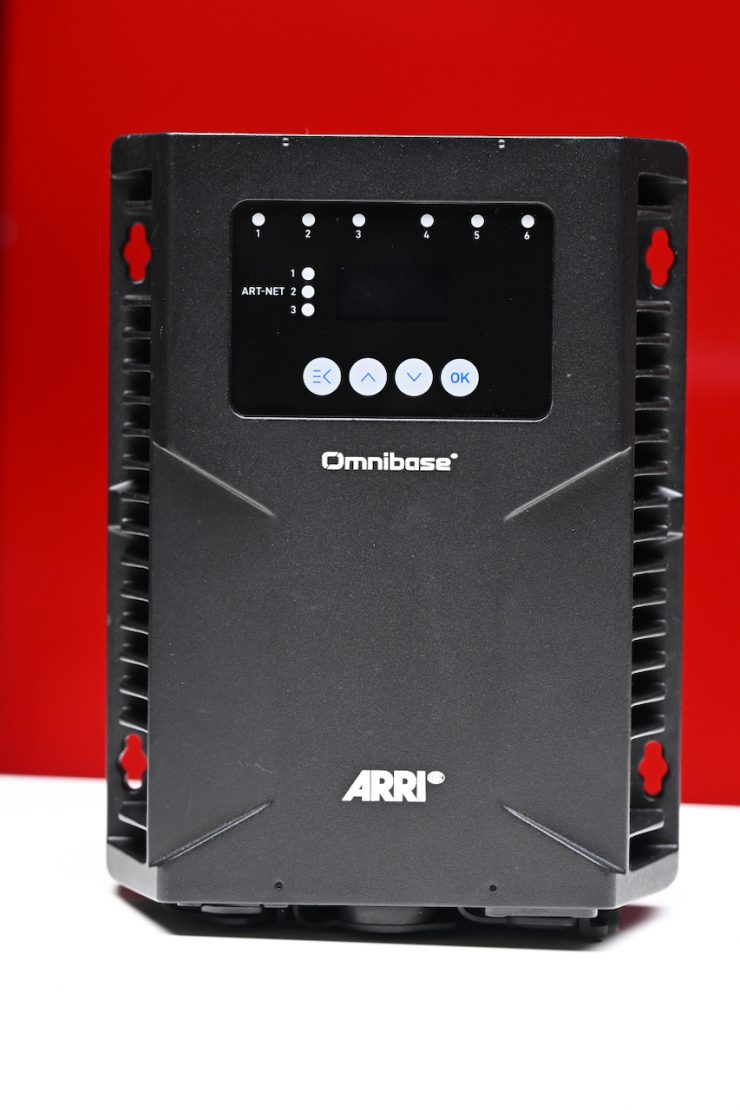
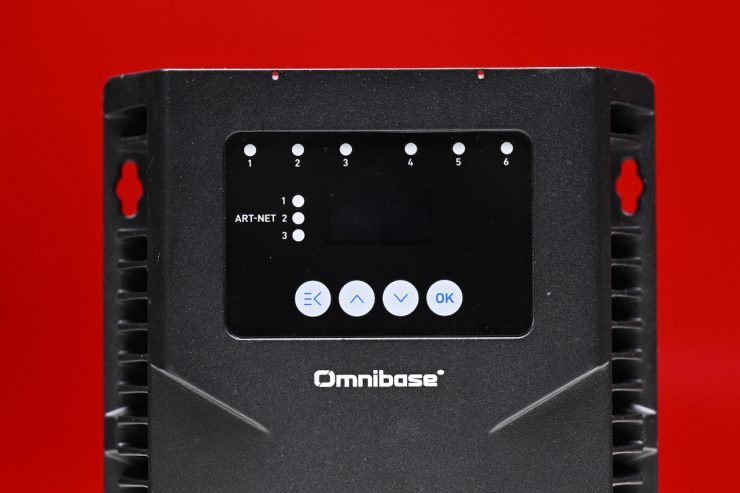
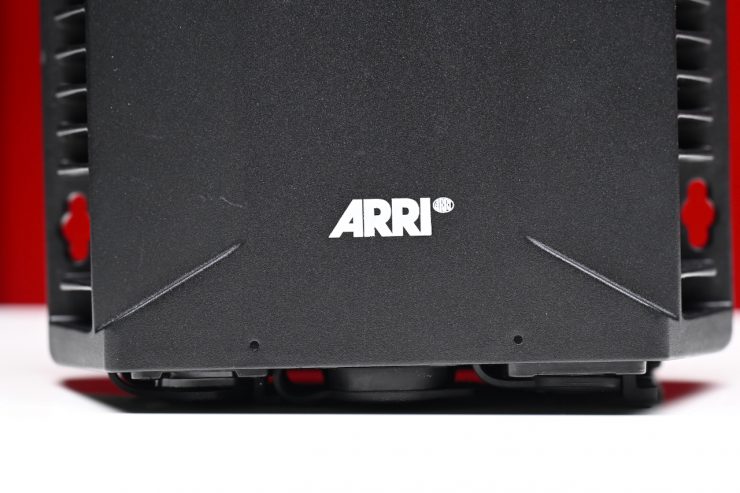
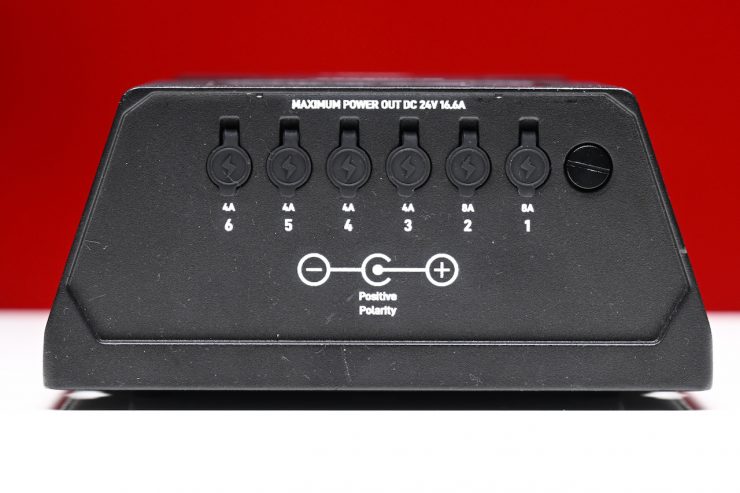
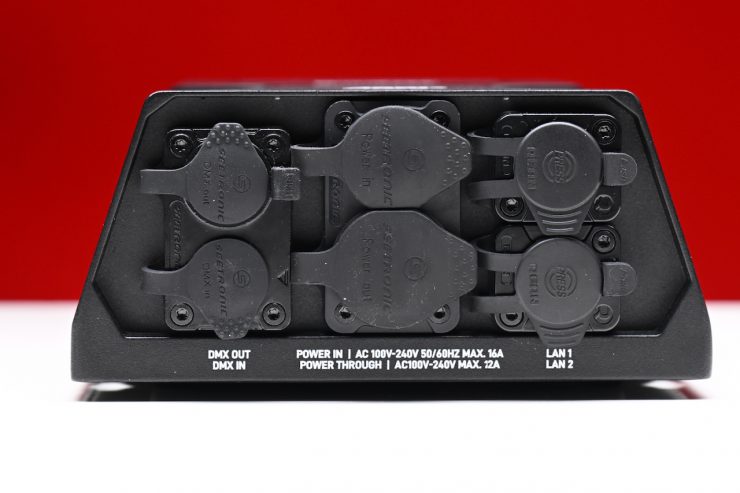
The Omnibase is a power supply and data source for one or more Omnibars. It is an interface to wired DMX, sACN, Art-Net. The Omnibase is a charger for the Omnibar battery.
The big area where ARRI wanted to improve, especially versus the Astera Powerbox, is that the Astera Powerbox is not IP65, and one of the big limits is that every port has to go to one bar, so you end up with a lot of long cables from that Powerbox to the different tubes in your setup. Additionally, you always have to find a safe place where your Powerbox doesn’t get any rain on it, etc.
ARRI’s Omnibase is IP65 rated, with or without the cables plugged in, so you can use it in any kind of weather conditions. Also, the Astera Powerbox only supports one DMX universe, so here you have six universes; you can do up to one universe per port. Conversely, ARRI has six ports on the Omnibase, so data and power pass through the cable, so one OmniBase can support 24 feet of Omnibars. So you can have any combination you can think of, such as six Omnibar 4s or 12 Omnibar 2s, as long as it’s not over 24 feet. Ports one and two on the Omnibase can support up to 12 feet, and ports three to six can support six feet, but you can use them any way you want as long as you’re aware of these limitations. There are six ports, and the vacuum valve on the very end is for the vacuum tester, so this is standard for every IP65 product. You have a little vacuum tester that you can attach there, and it’ll tell you if it’s actually IP65 or not.
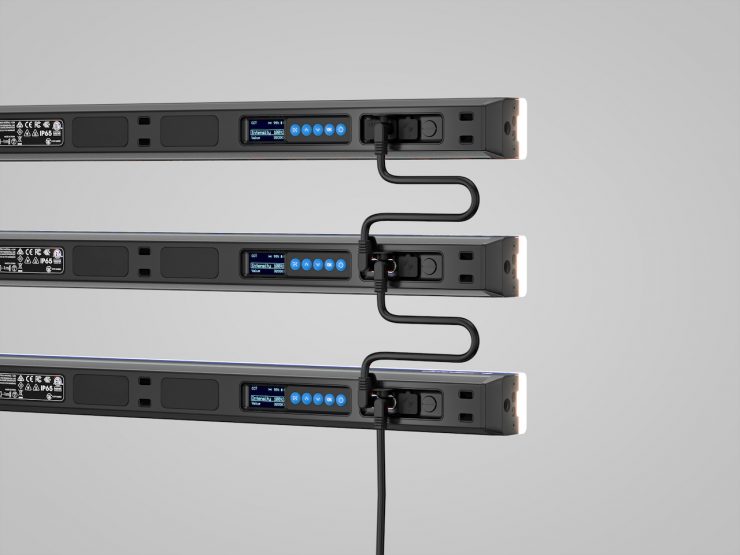
You can also daisy-chain Omnibars to create a central power and data hub by using the Omnibar. This allows you to use one cable that supplies power and data connection from the Omnibase to the Omnibar. This is designed for clean power and data daisy-chaining across larger setups.
OmnibaSE Key features
- Ports 1-2 (8 A): max. 3 × 4 ft or 6 x 2 ft per daisy chain (12 ft)
- Ports 3-6 (4 A): max. 3 x 2 ft per daisy chain (6 ft)
- Supports up to 6 x Omnibar 4 or 12 x Omnibar 2 (24 ft)
- Input signals: DMX, Art-Net, sACN
- IP65-rated housing
- Up to 6 DMX universes, one per output port
DMX Control Modes
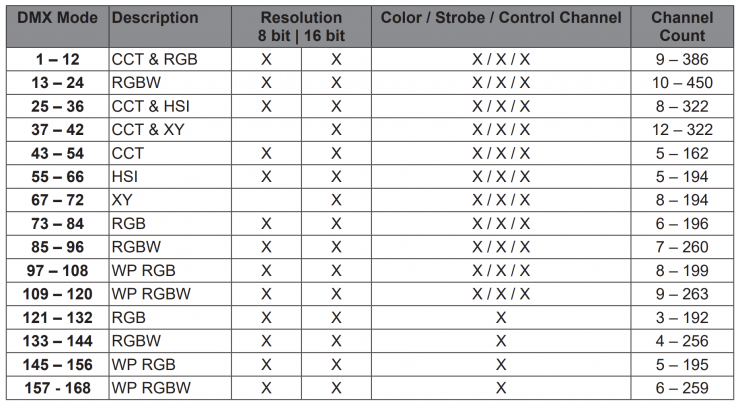
The Omnibar offers 168 different DMX modes. You can find a detailed overview of all DMX modes in the Omnibar DMX Protocol Specification. It is available for download on the ARRI documentation portal. All DMX modes support color channels. DMX mode 1 is the default mode.
Dimming Smoothing
The Omnibar offers different dimming smoothing options. These options allow you to achieve the optimal dimming performance for any environment and application. You can set the option through DMX only.
Available options:
- Dimmer Smoothing OFF: No dimmer smoothing active.
- Dimmer Smoothing Fast: Fast dimmer smoothing.
- Dimmer Smoothing Standard: Normal dimmer smoothing.
- Dimmer Smoothing Smoother: The intensity change is soft.
- Dimmer Smoothing Smoothest: The intensity change is very soft.
- Force Smoothing Off: Deactivates dimmer smoothing for sudden intensity changes above 50%.
- Force Smoothing On: Forces the dimmer smoothing (when active) to always apply smoothing. This prevents sudden jumps that would occur because of a threshold value. With “Force Smoothing Off,” the threshold value is 50%. Below 50%, the smoothing is active; above 50% it is deactivated. “Force Smoothing On” means that even an intensity change from 0 to 100% intensity and back is smoothed. No light flash is possible.
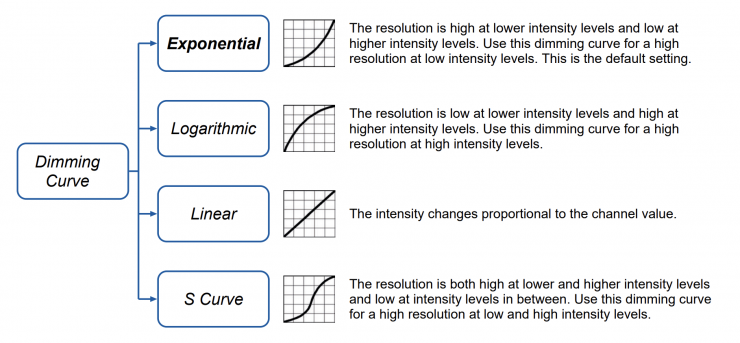
Dimming Curves
Omnibar Control App
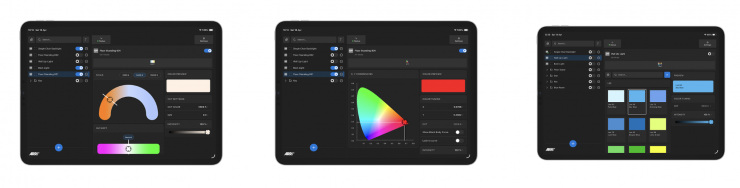
The Omnibar Control App lets you discover, configure, and control your Omnibar fixtures quickly and intuitively. You can create scenes, Groups and Shapes, adjust color and effects, group fixtures, change settings, and manage more advanced lighting setups directly from your mobile device.
A Group is used to organize fixtures by scene, location, or any custom setup that matches your workflow. You can apply a single color or setting to the entire group, or fine‑tune individual fixtures within it, making Groups ideal when you want several fixtures to operate together.
A Shape is used for creative control. Shapes allow you to apply pixel‑based effects across multiple fixtures at once, enabling coordinated patterns, movement, and dynamic lighting effects. Shapes can also be renamed, helping you identify specific effects or visual ideas quickly.
Groups can contain other Groups or Shapes, allowing you to organise complex lighting setups more clearly.
Omnibars connect via Bluetooth using an ARRI‑designed mesh protocol, purpose‑built for professional lighting control. Fixtures communicate by passing control commands across the mesh, delivering improved responsiveness, reliable synchronisation, and extended operating range, allowing seamless control even when your device is farther away from the furthest fixture.
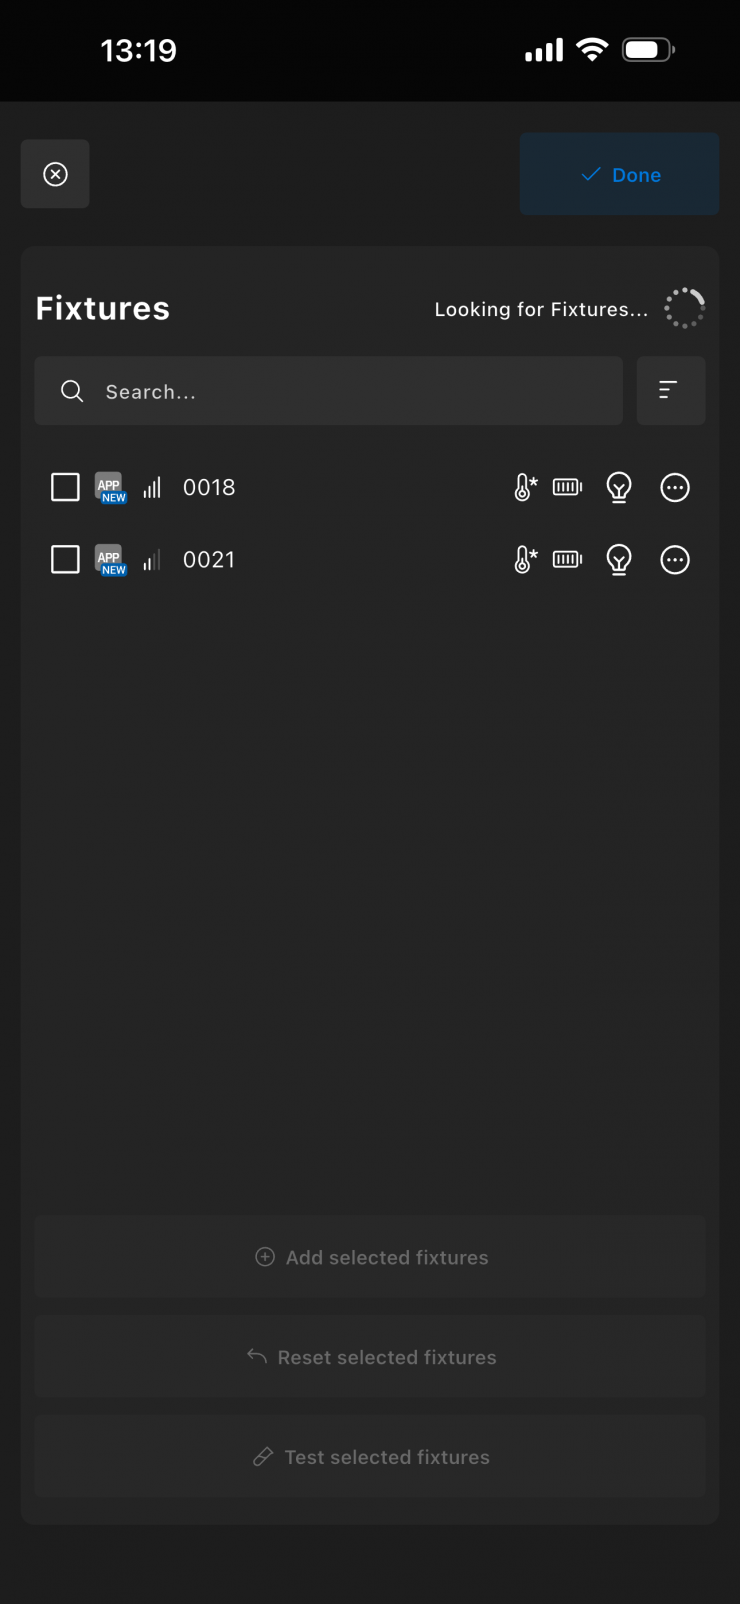
With the Omnibar Control app, you first need to search for Omnibar fixtures to add. The app can detect an Omnibar even when it isn’t turned on, as the Omnibar’s Bluetooth interface is active at regular intervals.
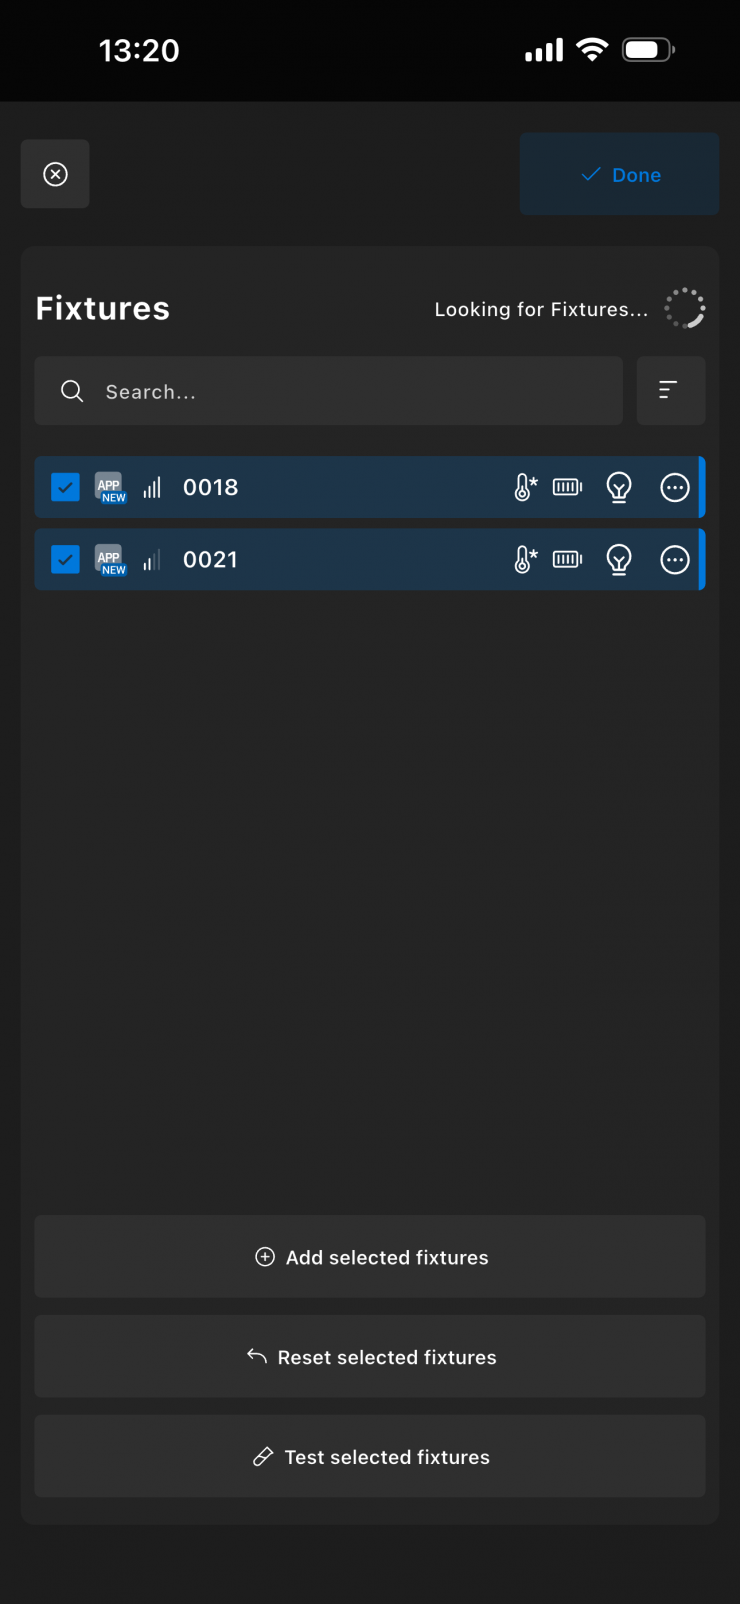
Once you have found the fixtures you want to add, you select them and press Add selected fixtures.
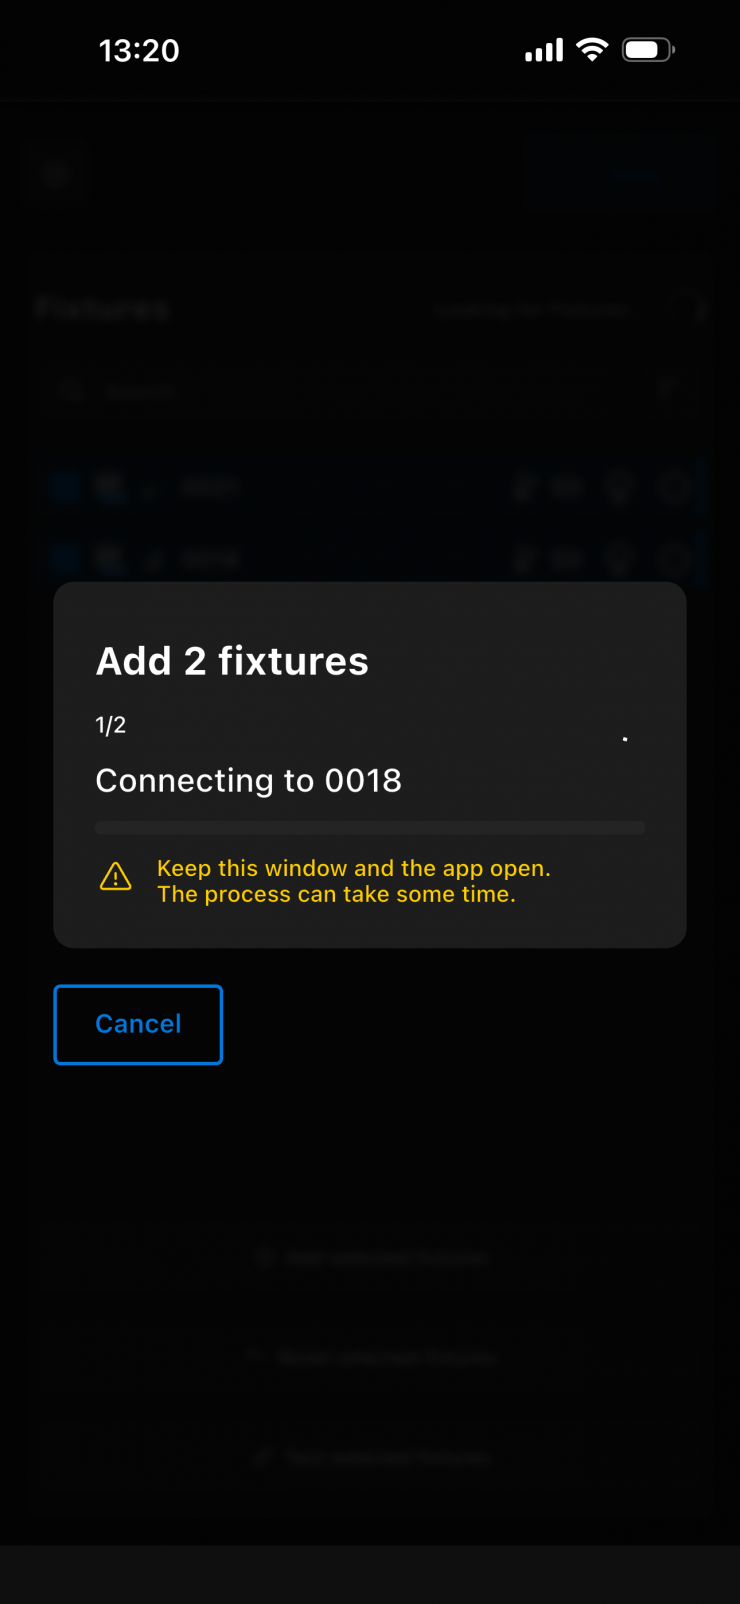
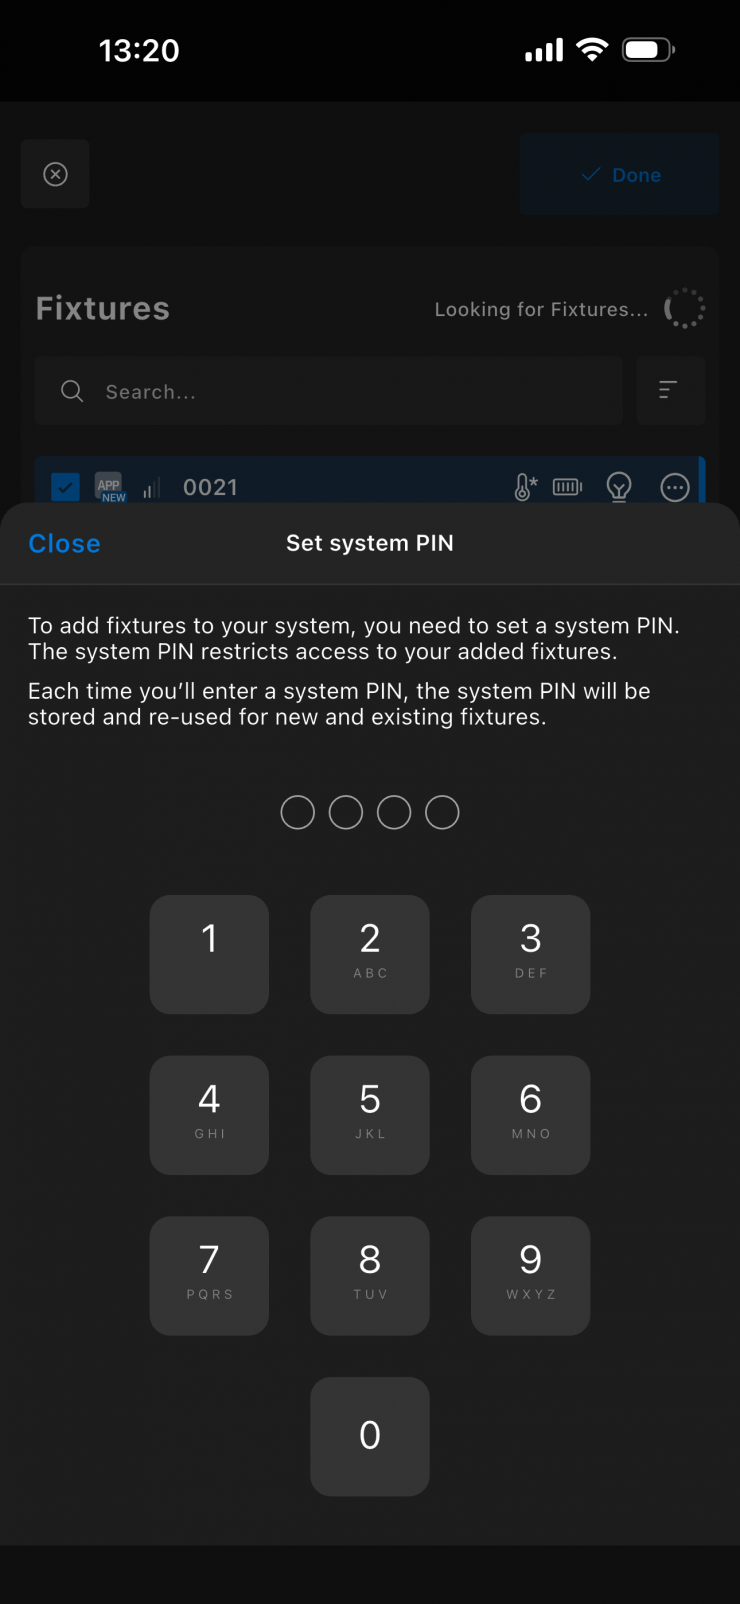
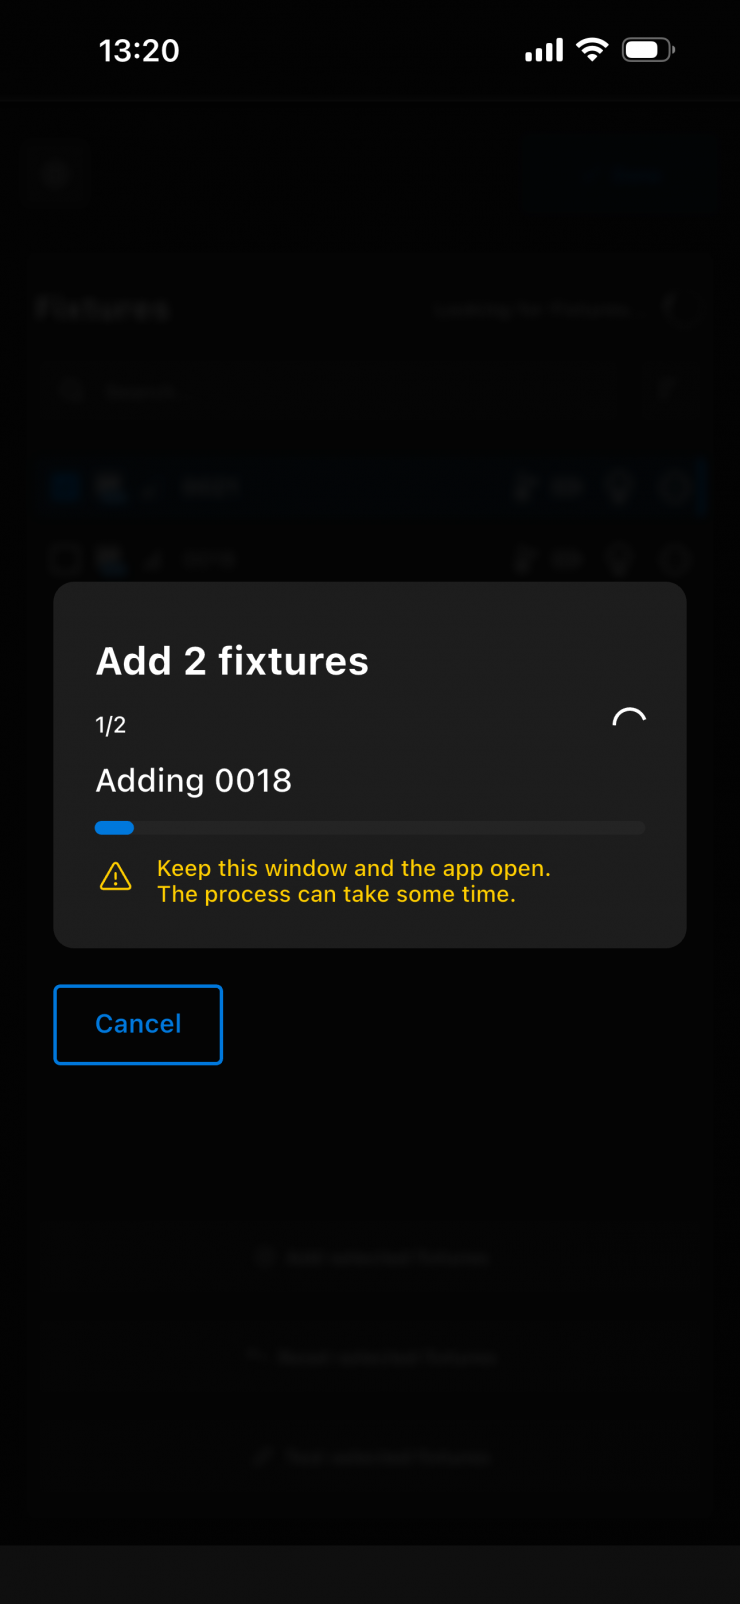
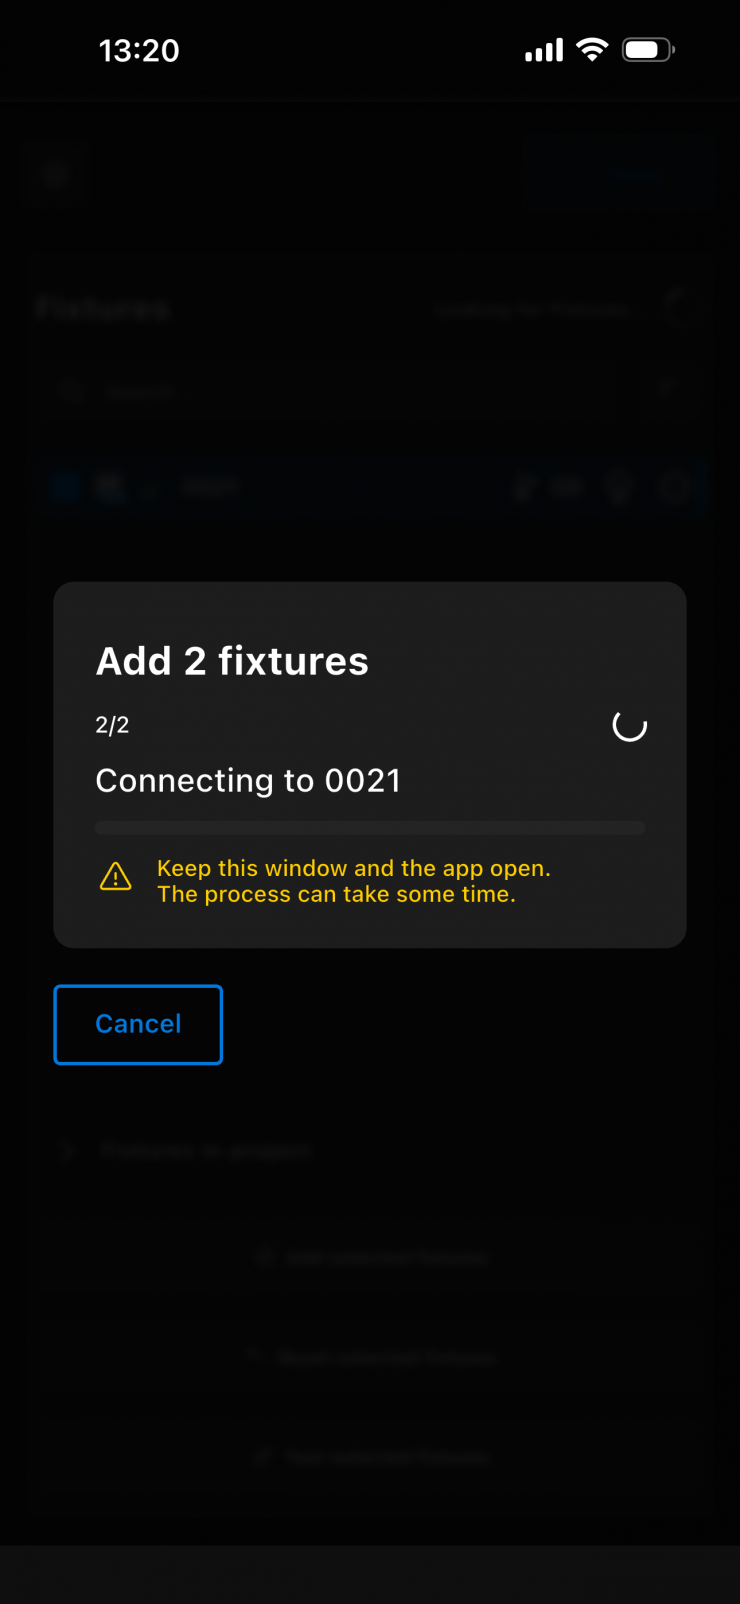
The app will then start setting up the fixtures for use. You will also need to enter your own system pin.
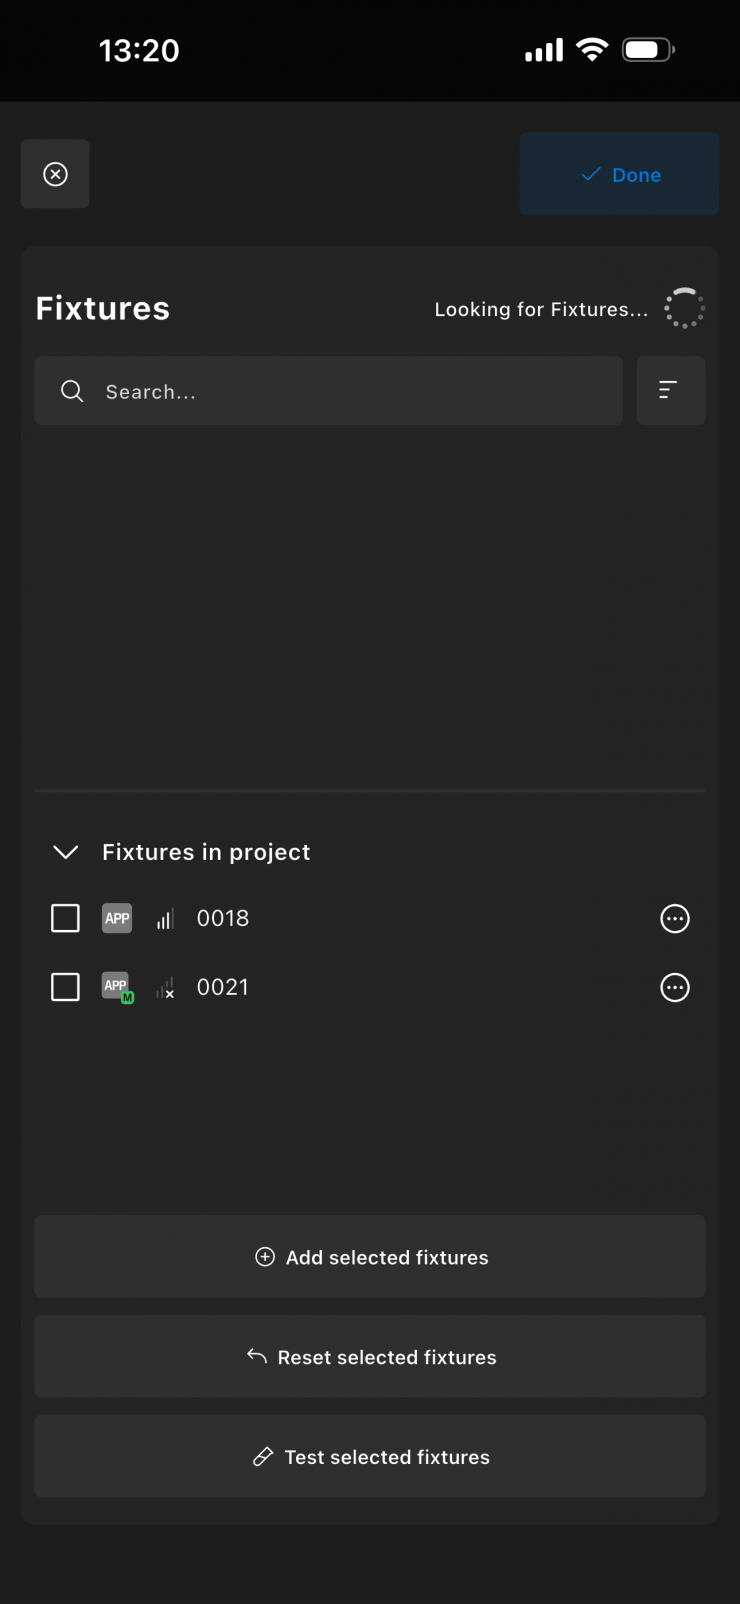
Once completed, the fixtures will be shown in your Project.
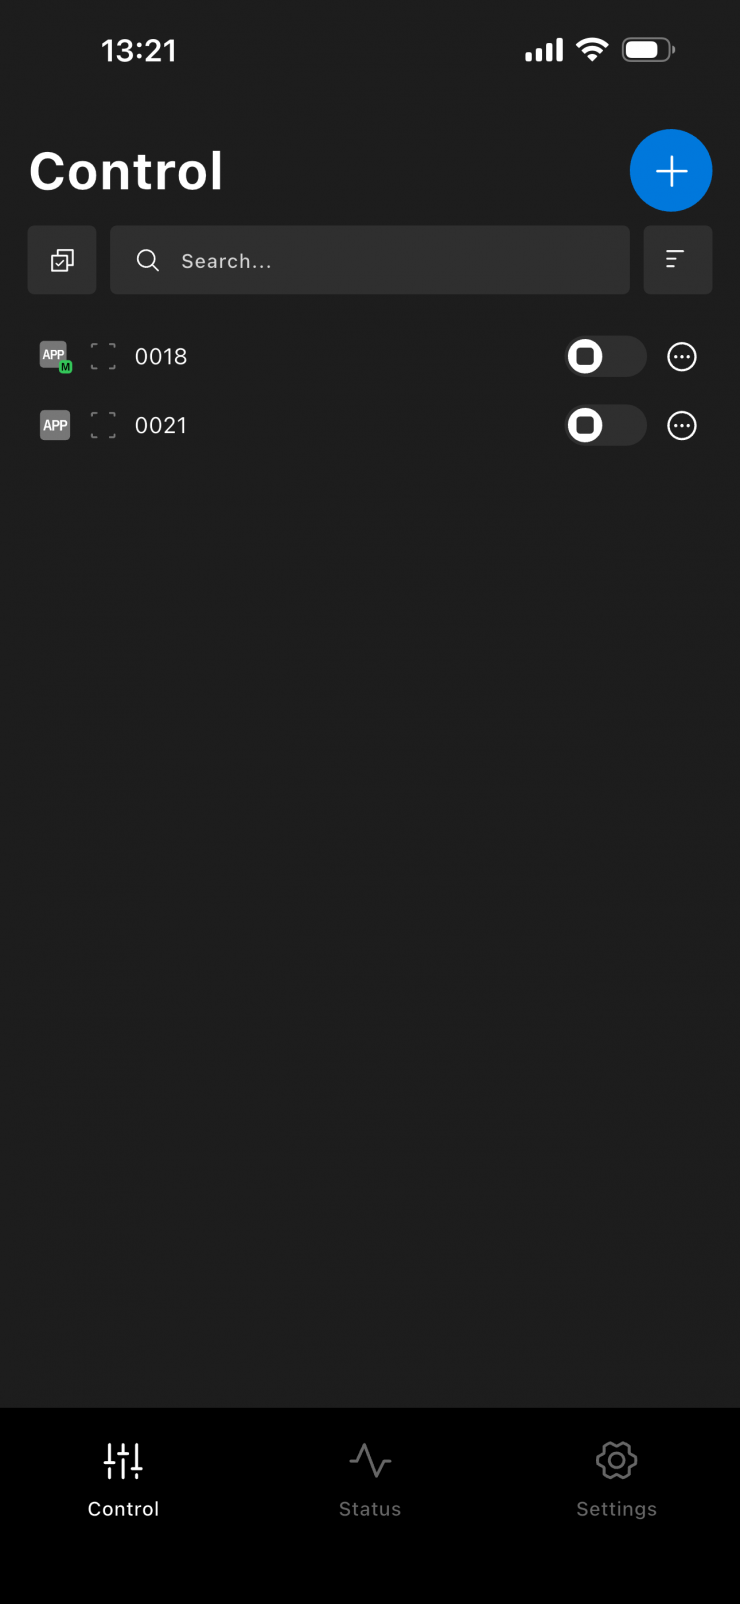
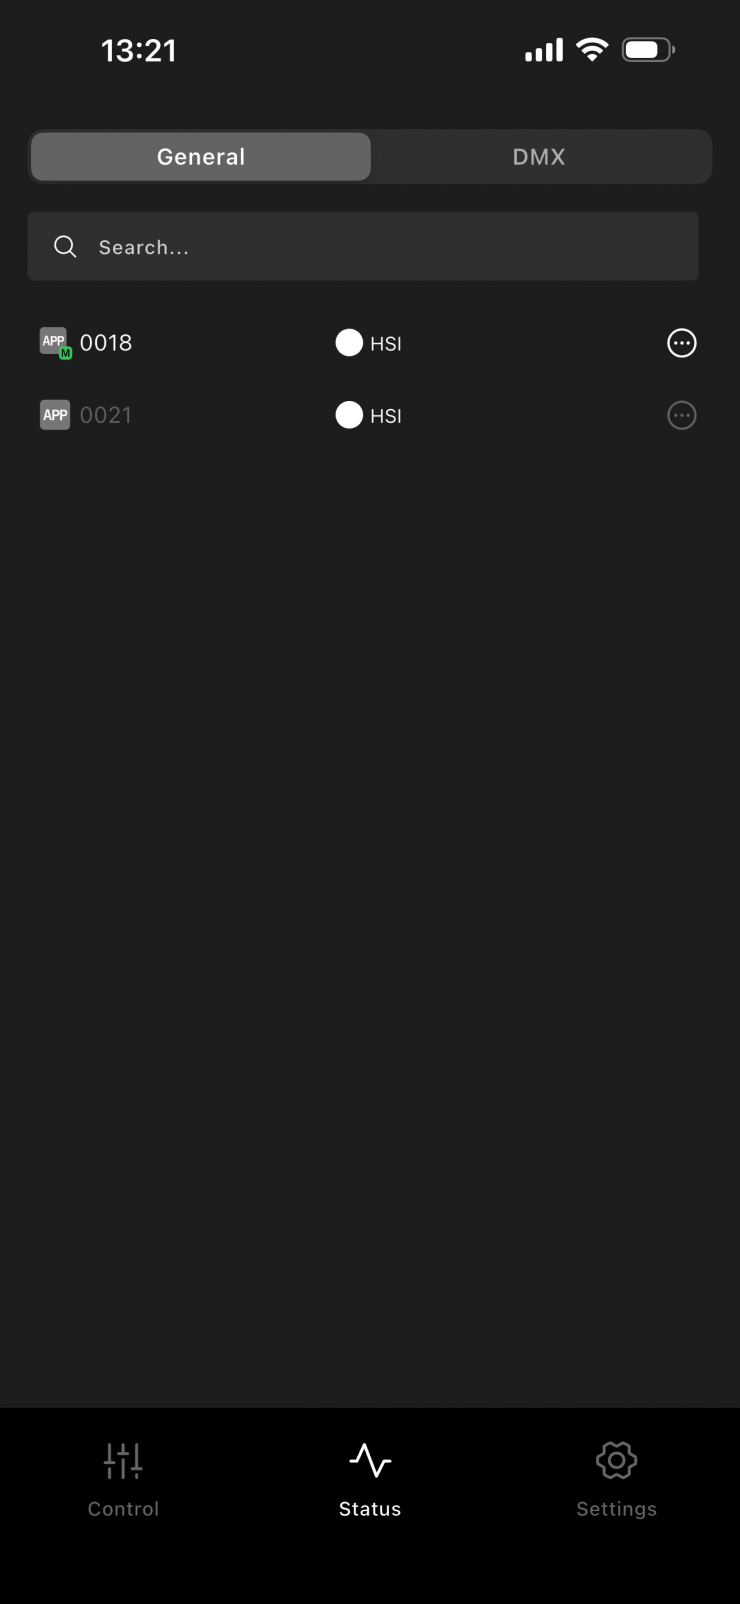
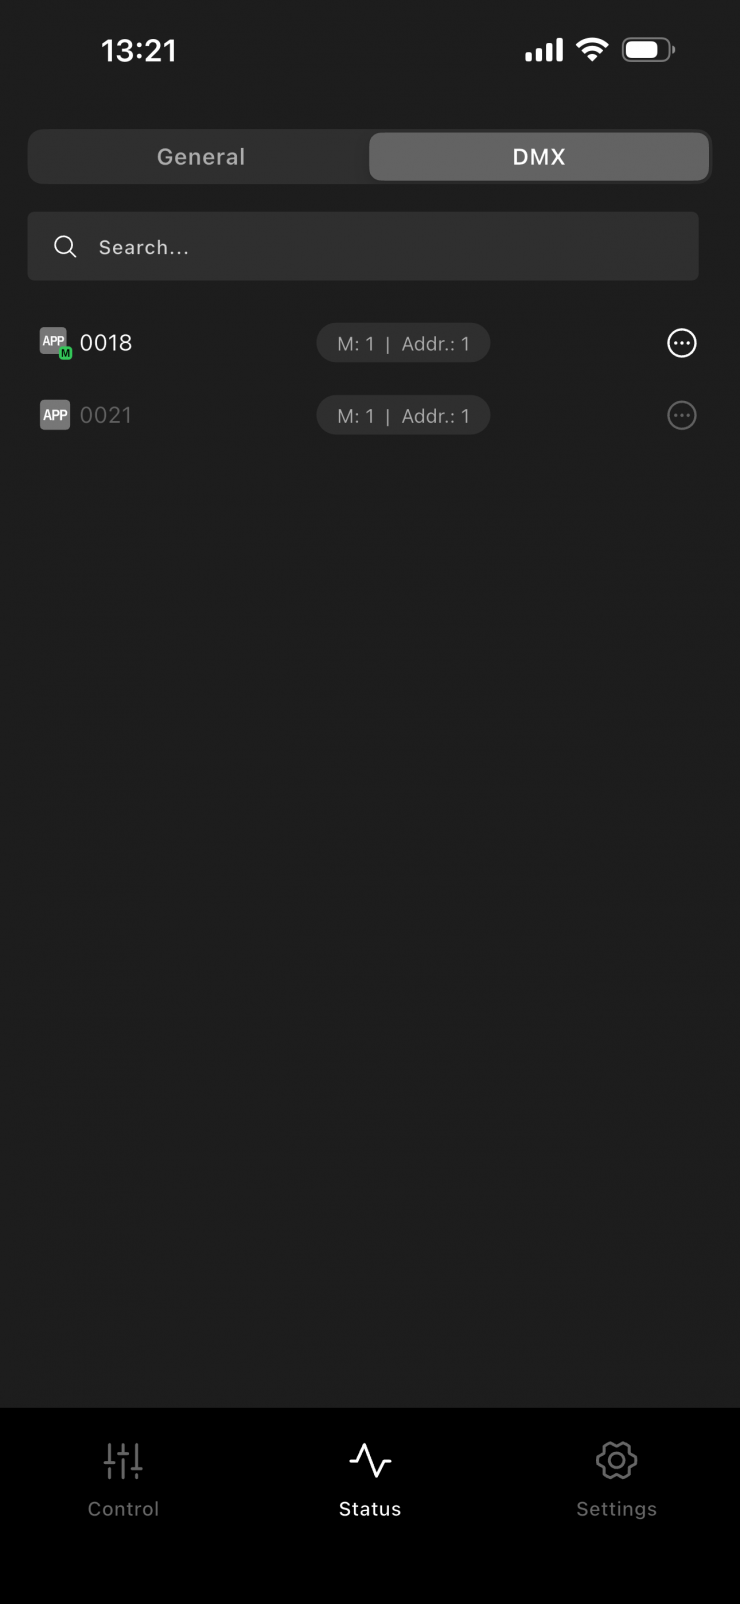
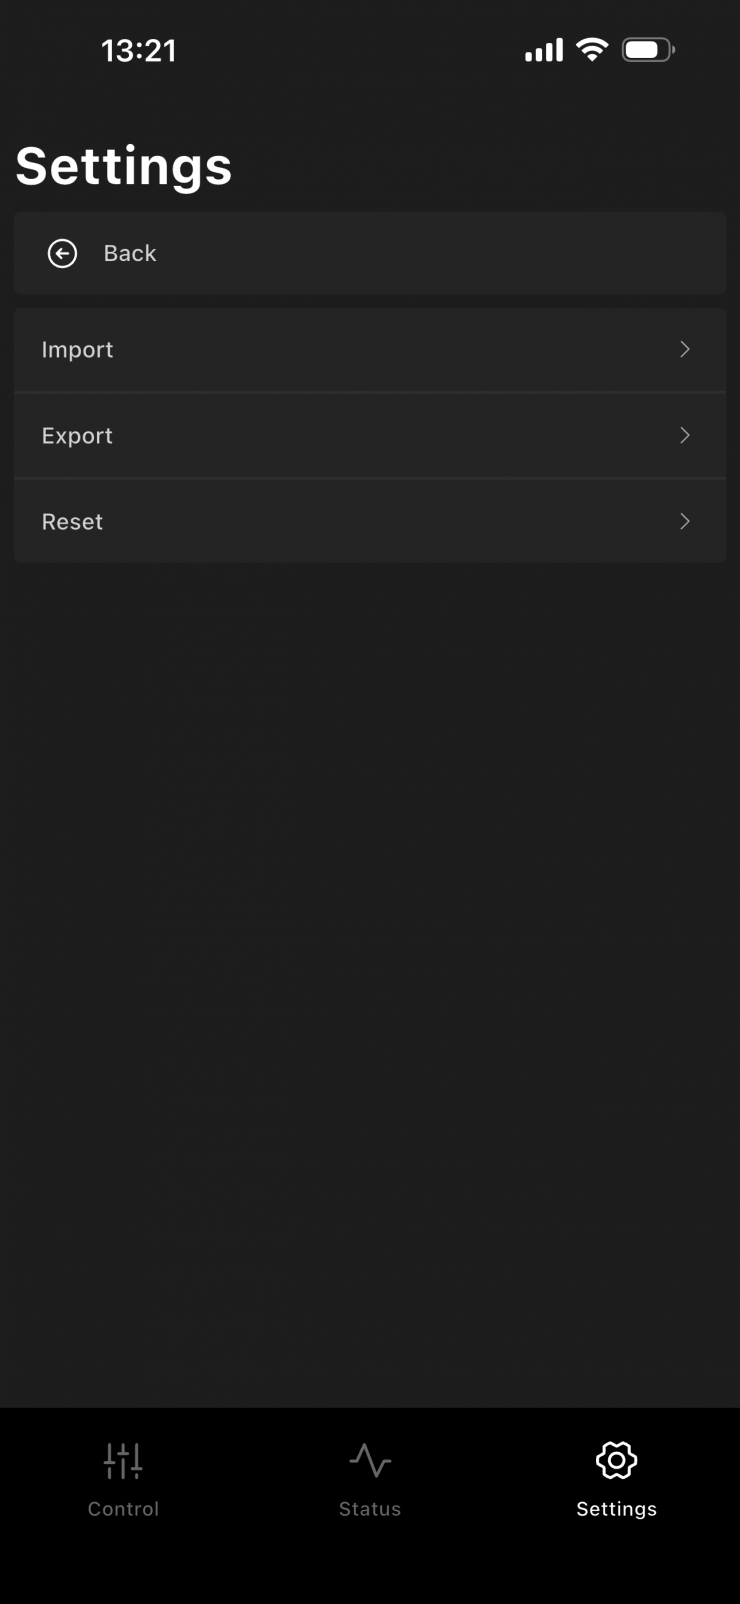
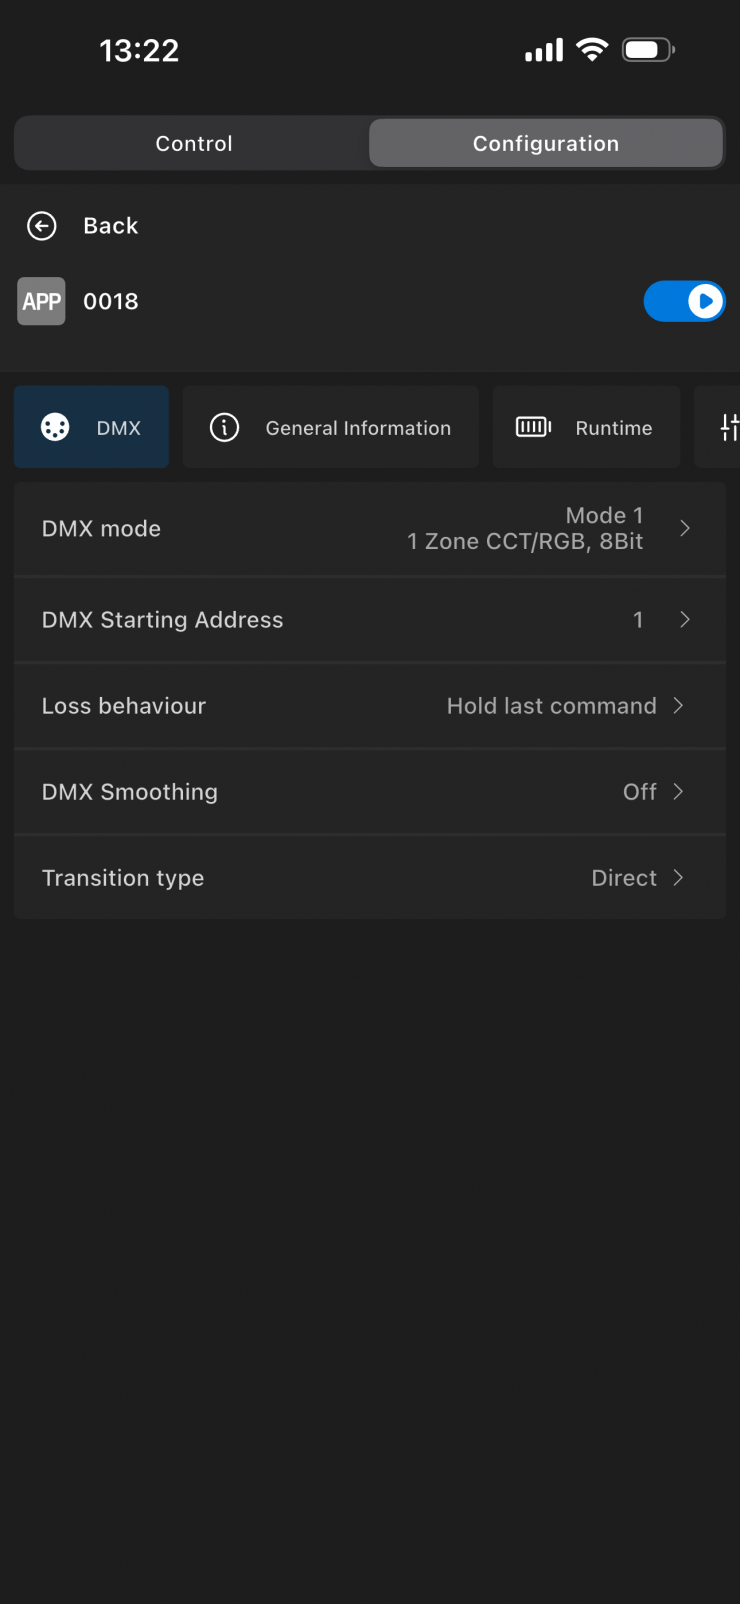
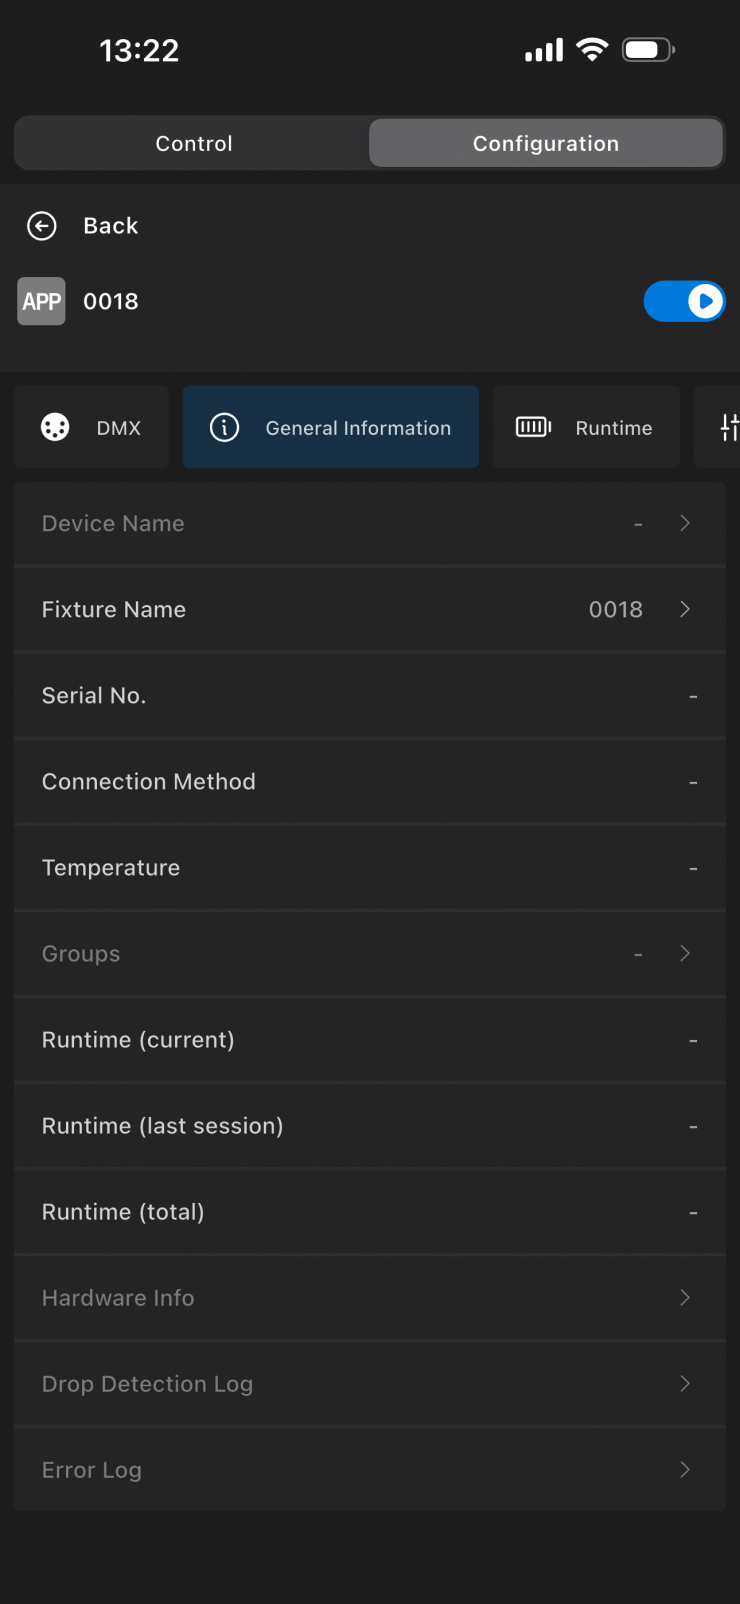
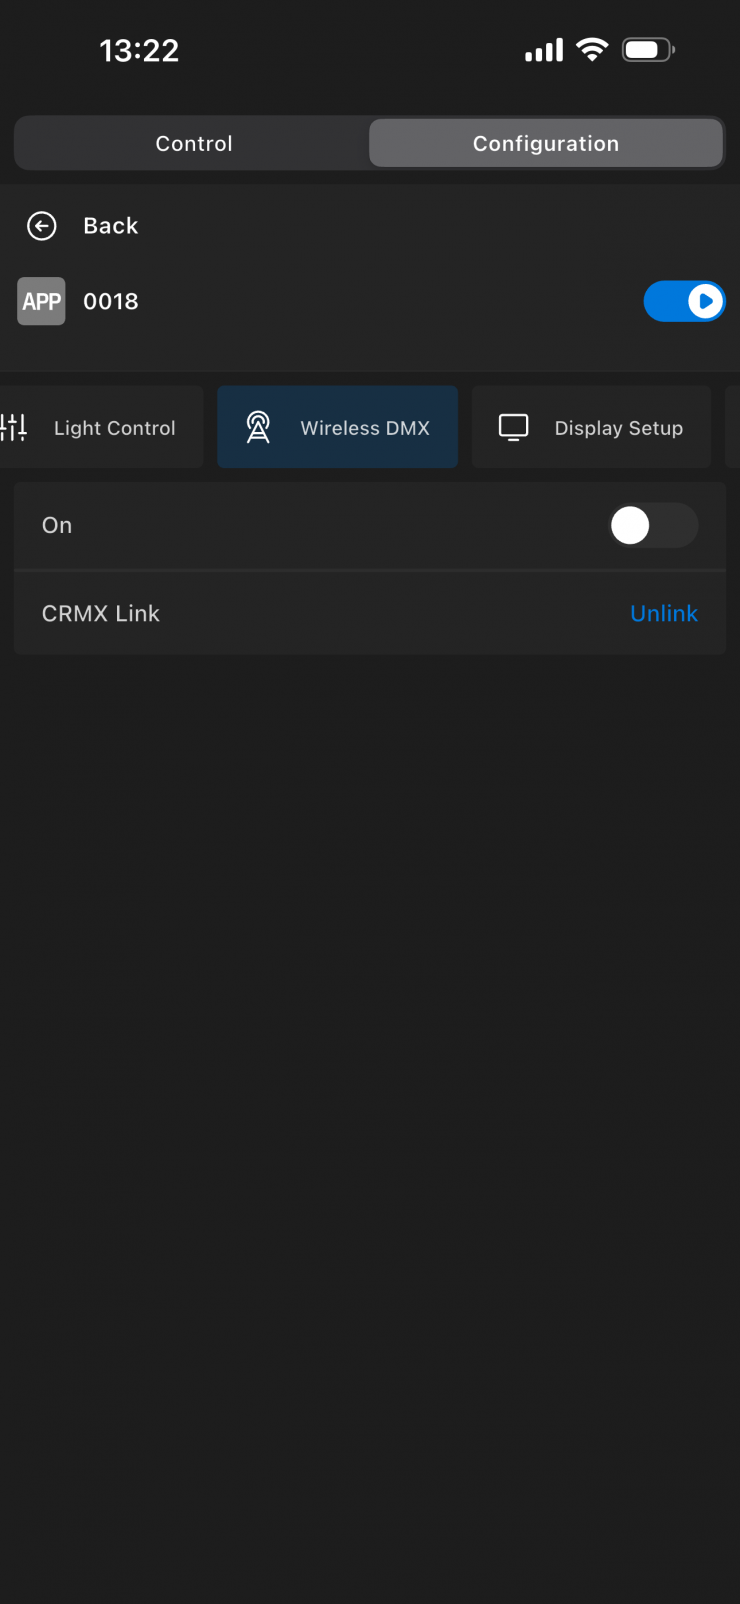
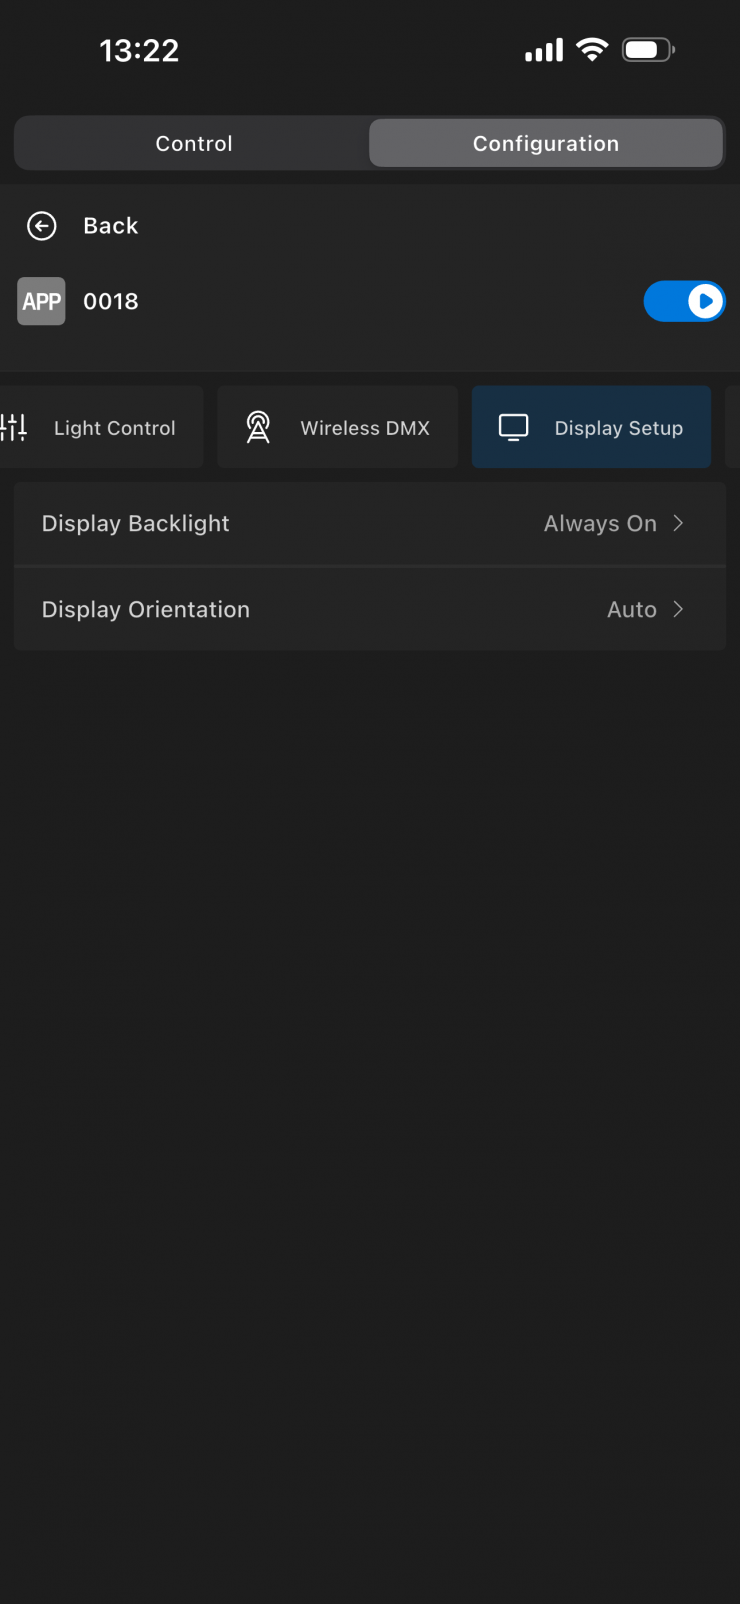
Once you click on the fixture or fixtures, you will then be taken to the above page. Here you can choose between Control, Status, and Settings. Above, you can see some of the options that are available.
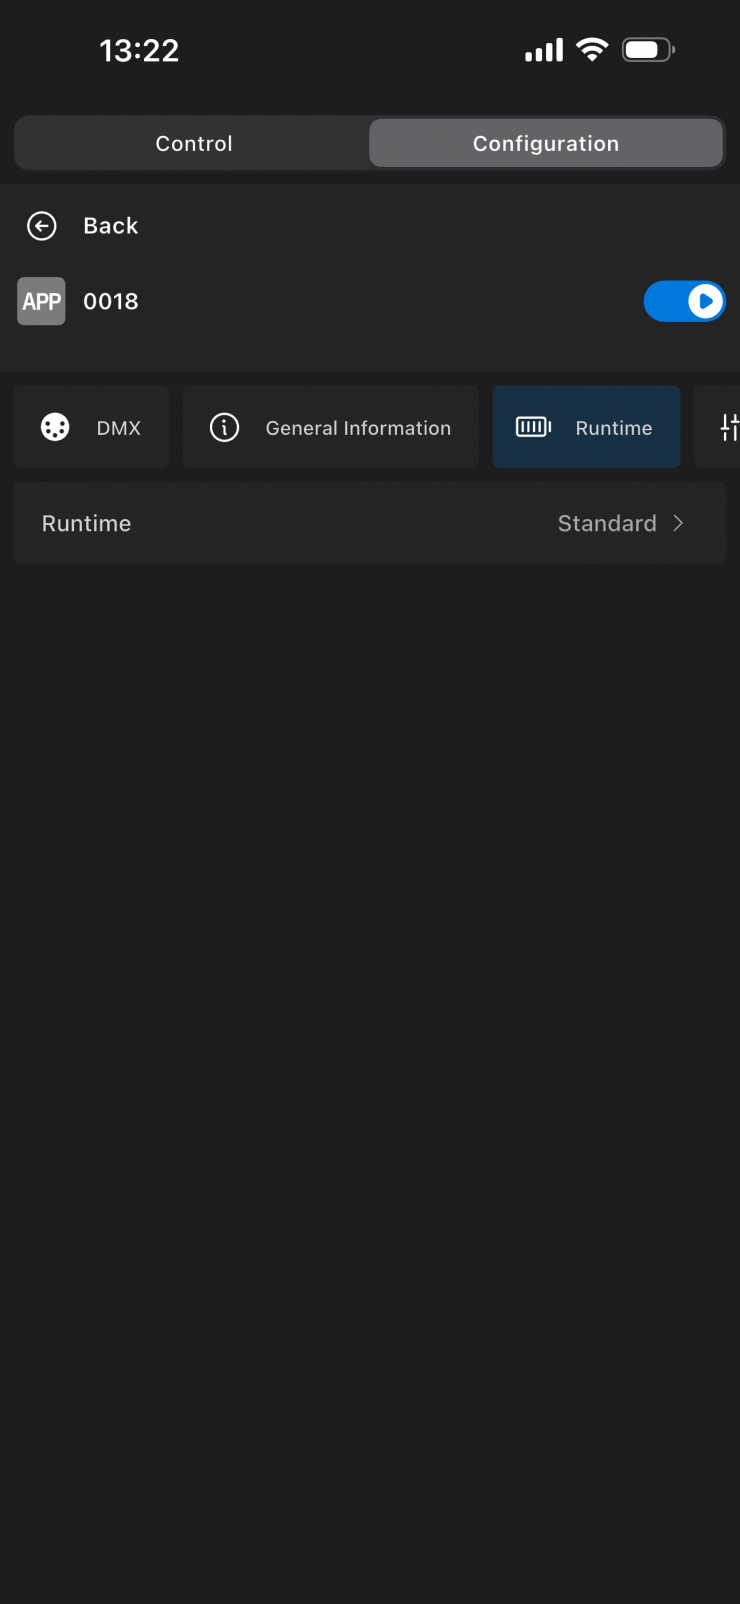
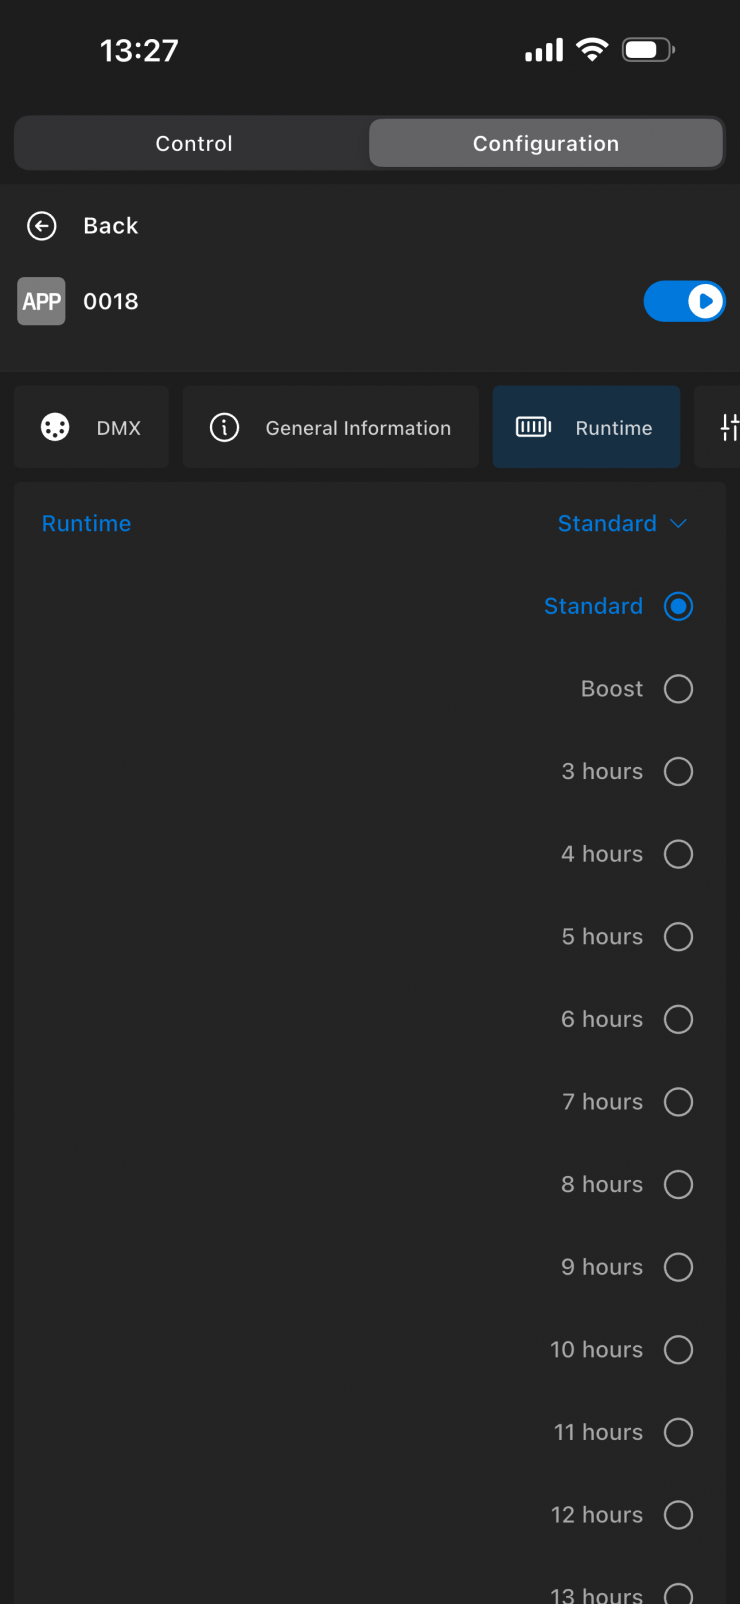
In Settings, you can go to Configuration and then Runtime if you want to pre-select how long the fixture should run for. Depending on the battery or powering solution, it will then run the light at whatever output works for that time period.
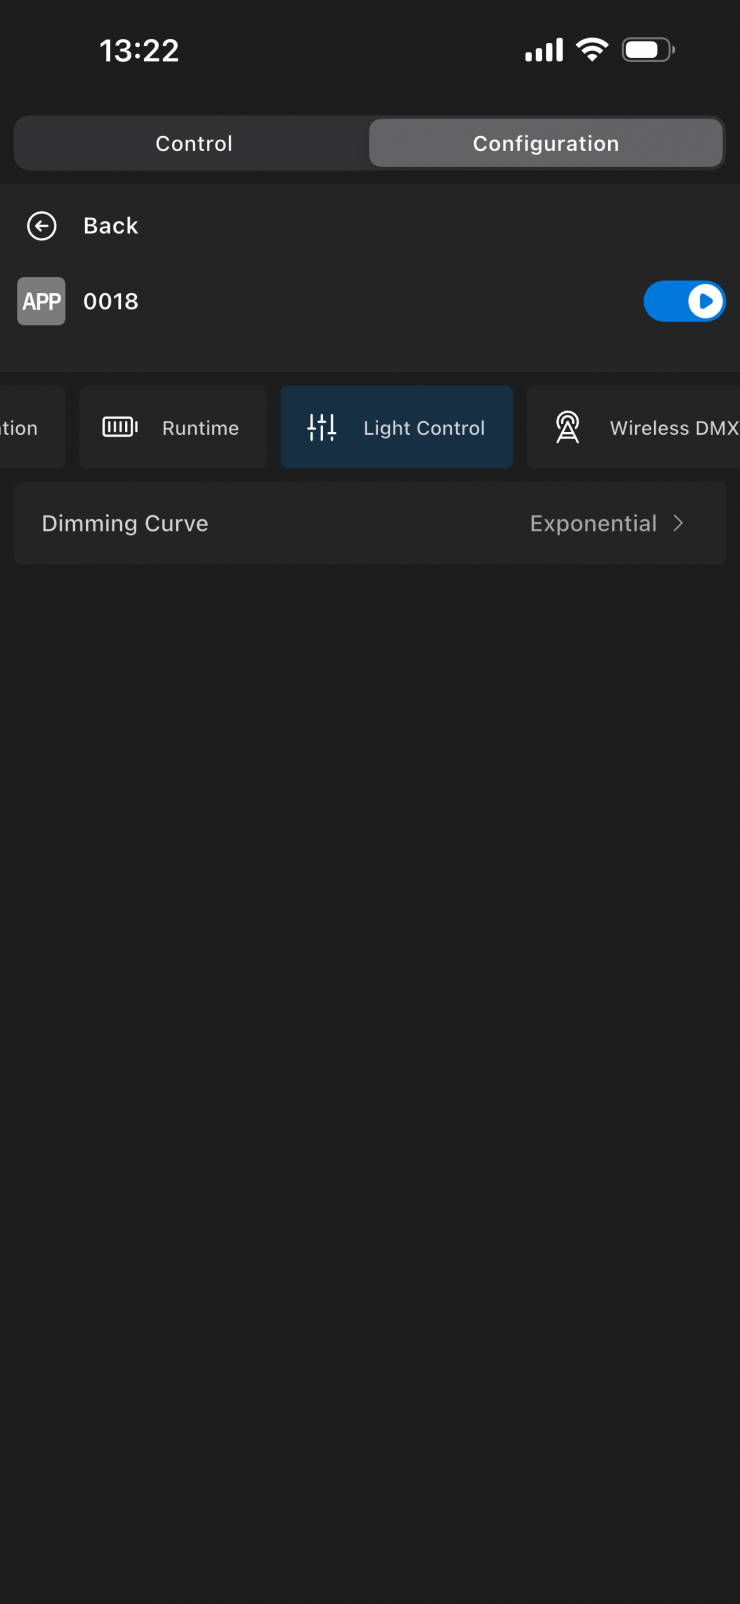
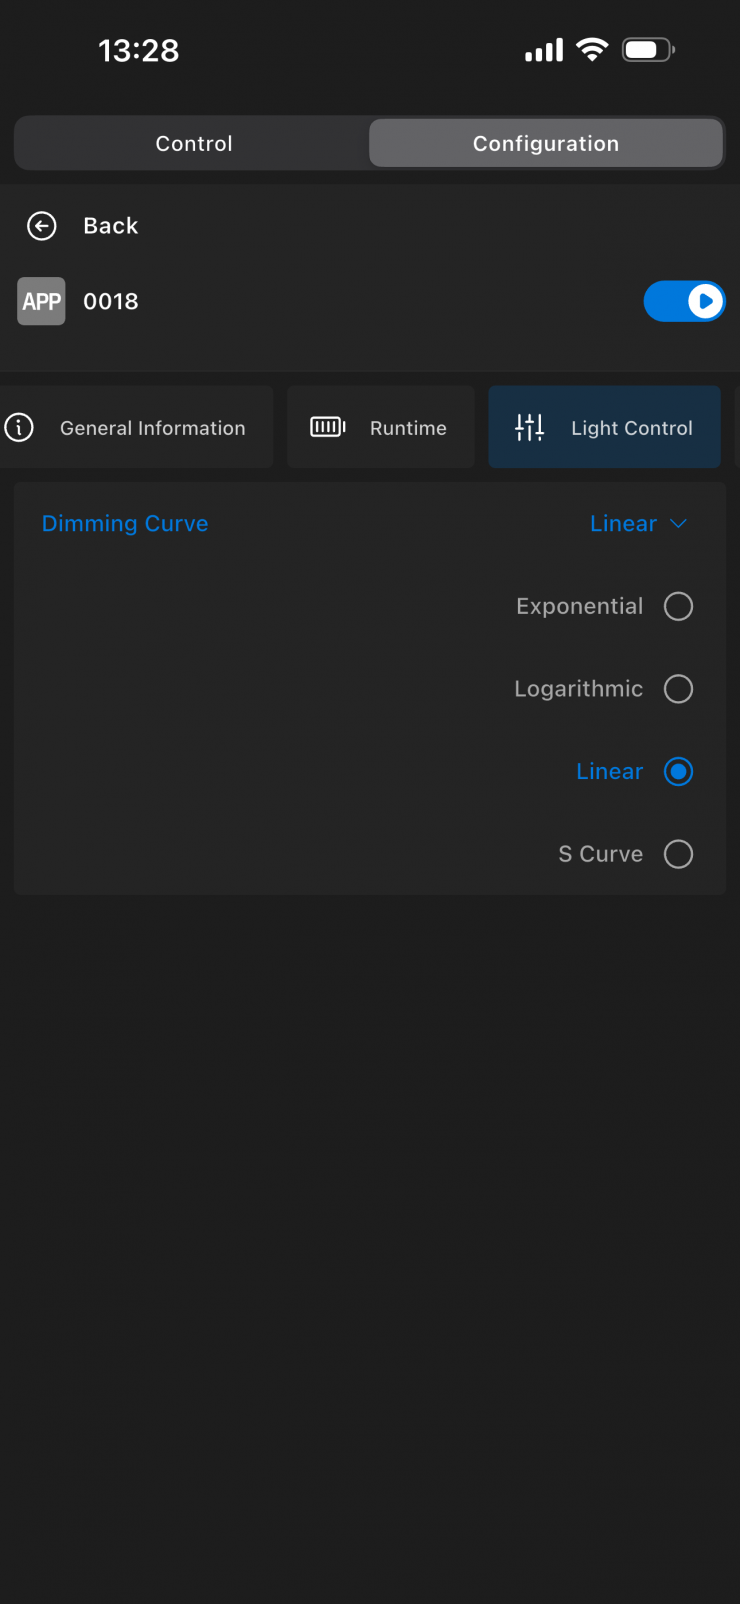
Under Configuration, then Light Control, you can choose the dimming curve.
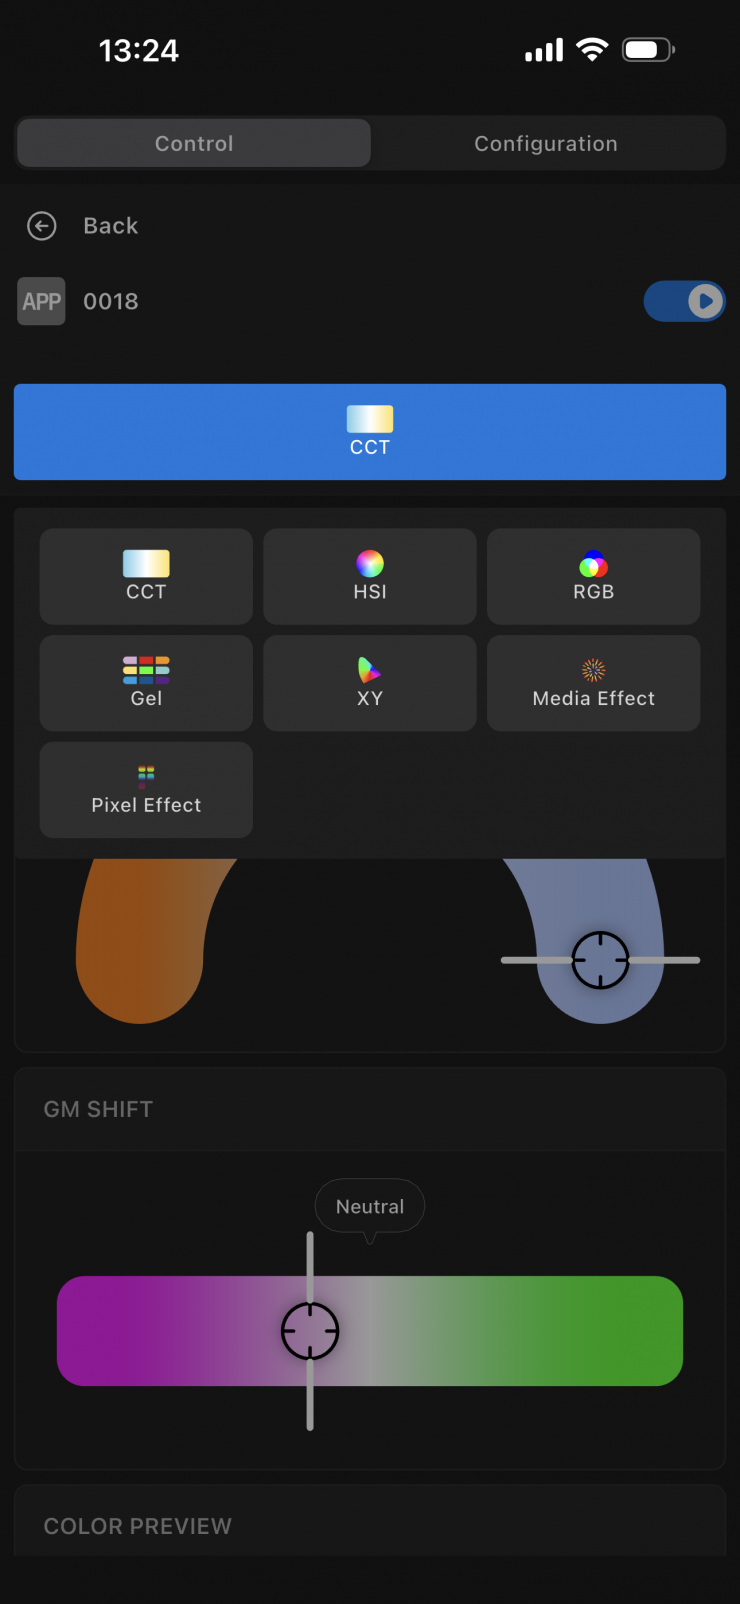
On the Control page, you can choose what mode you want to use the Omnibar in by clicking on the CCT icon.
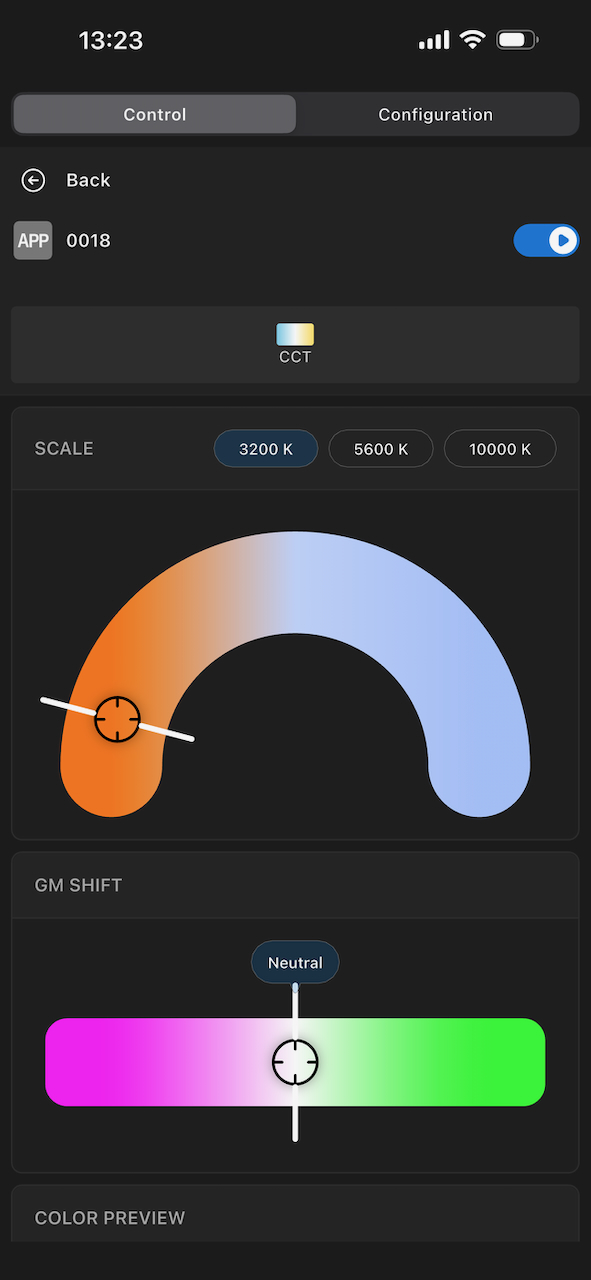
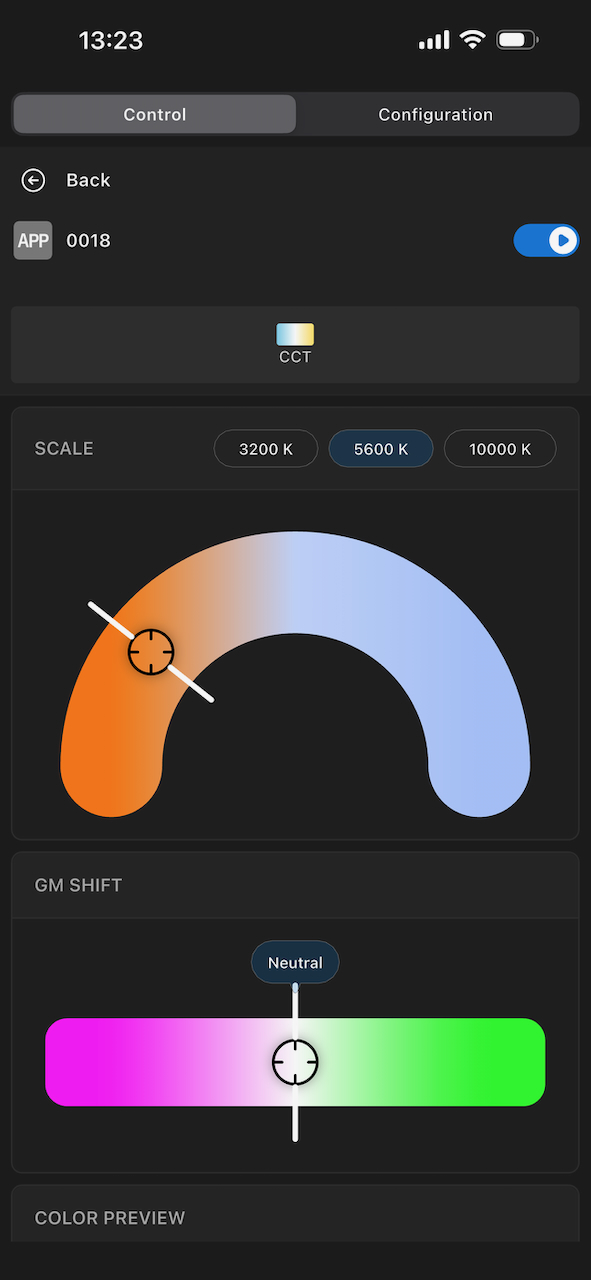
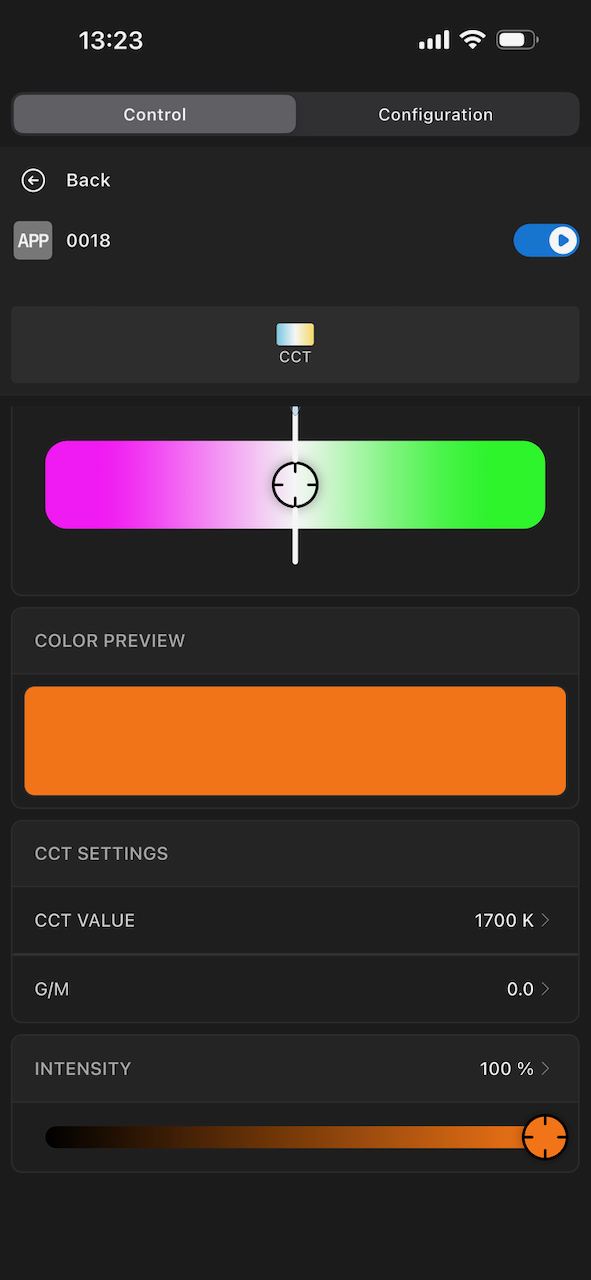
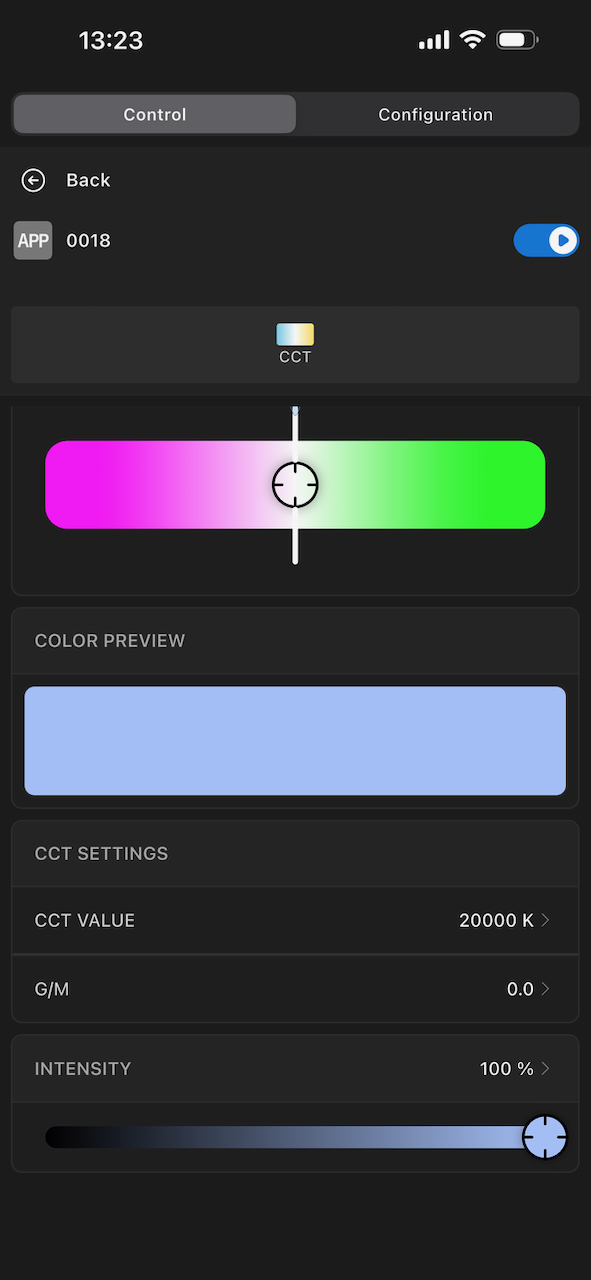
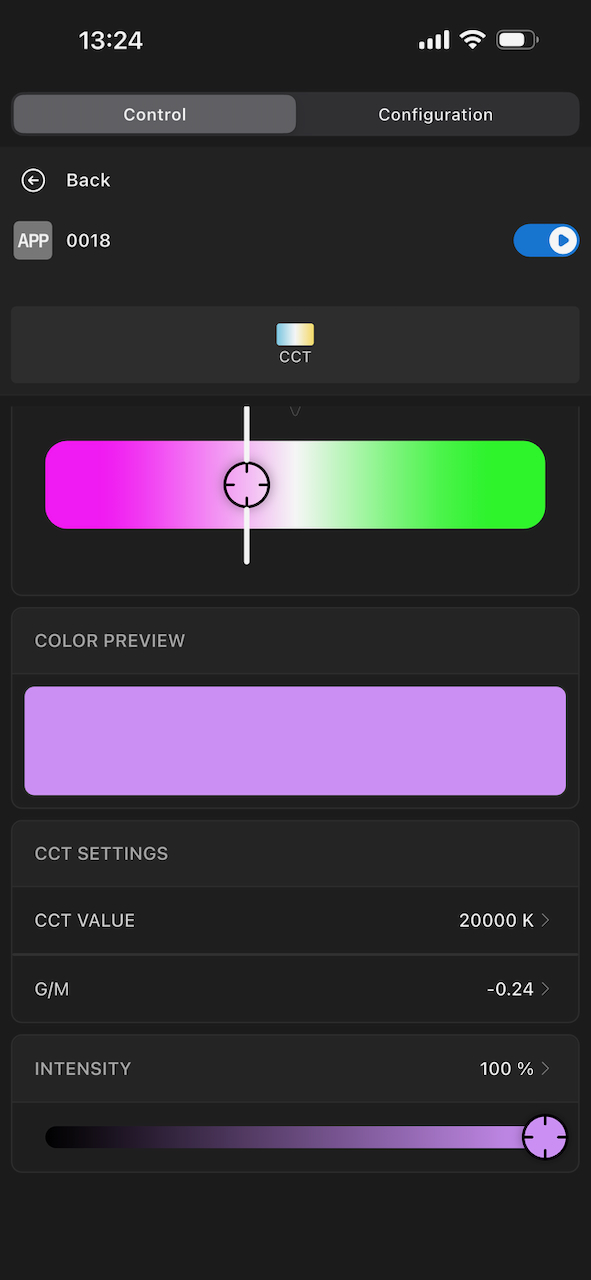
In CCT mode, you can change the CCT, +/- G/M, and intensity. There are also three preset CCT settings you can choose from. You need to scroll down on an iPhone to see the actual CCT value, G/M setting, and intensity.
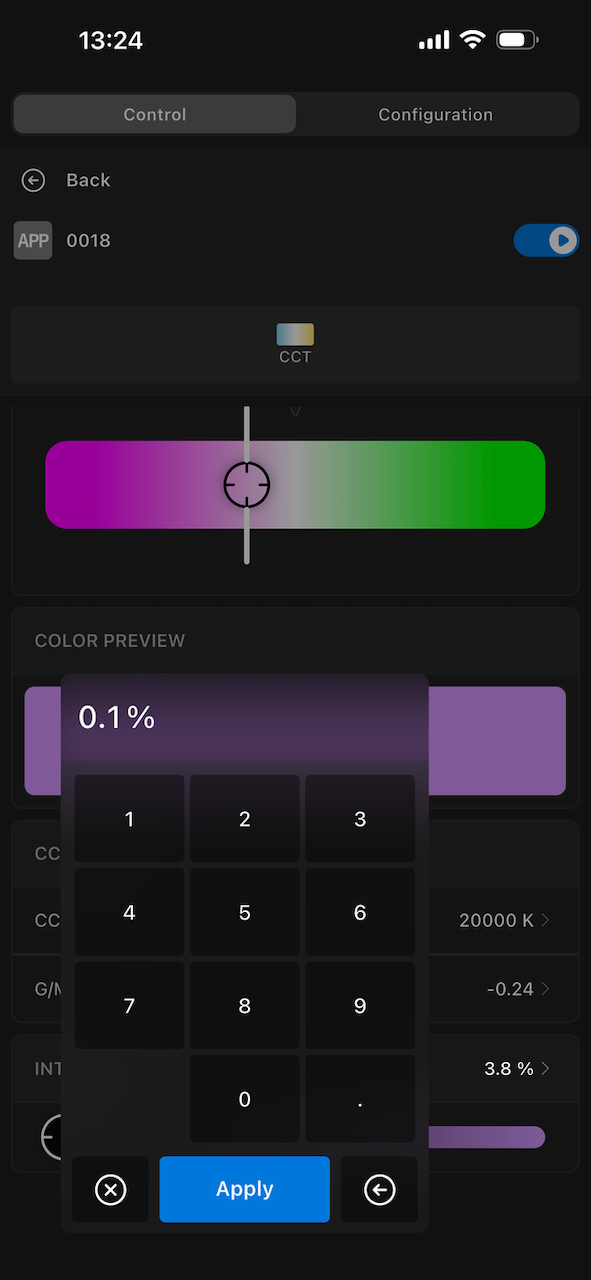
You can either use the sliders or enter values numerically.
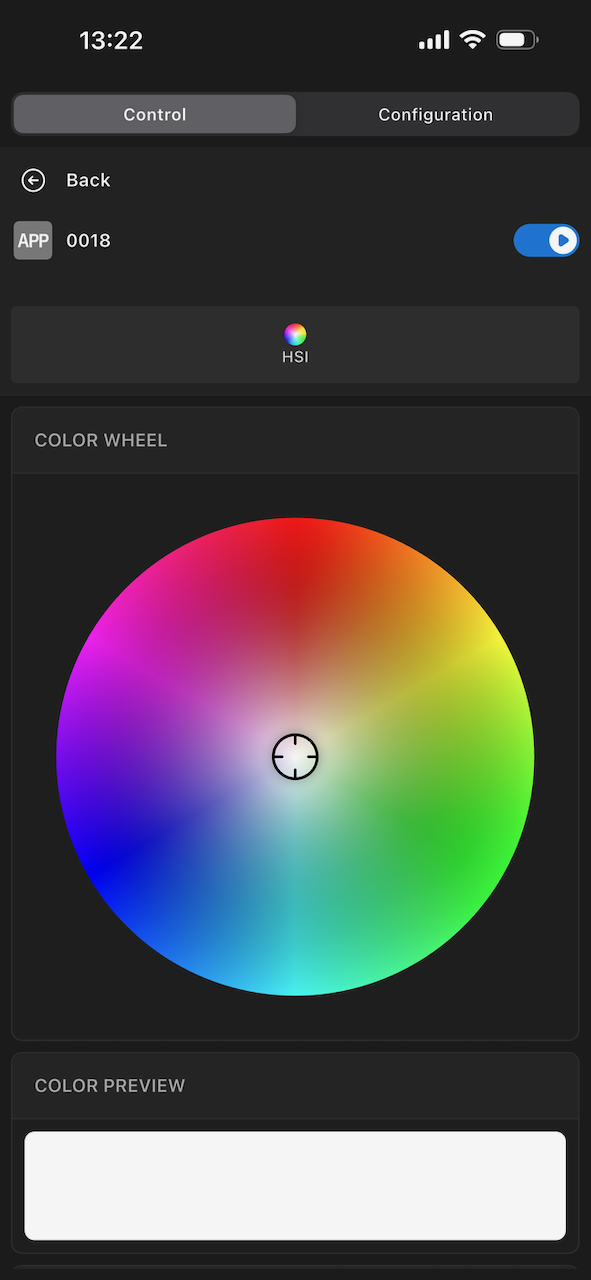
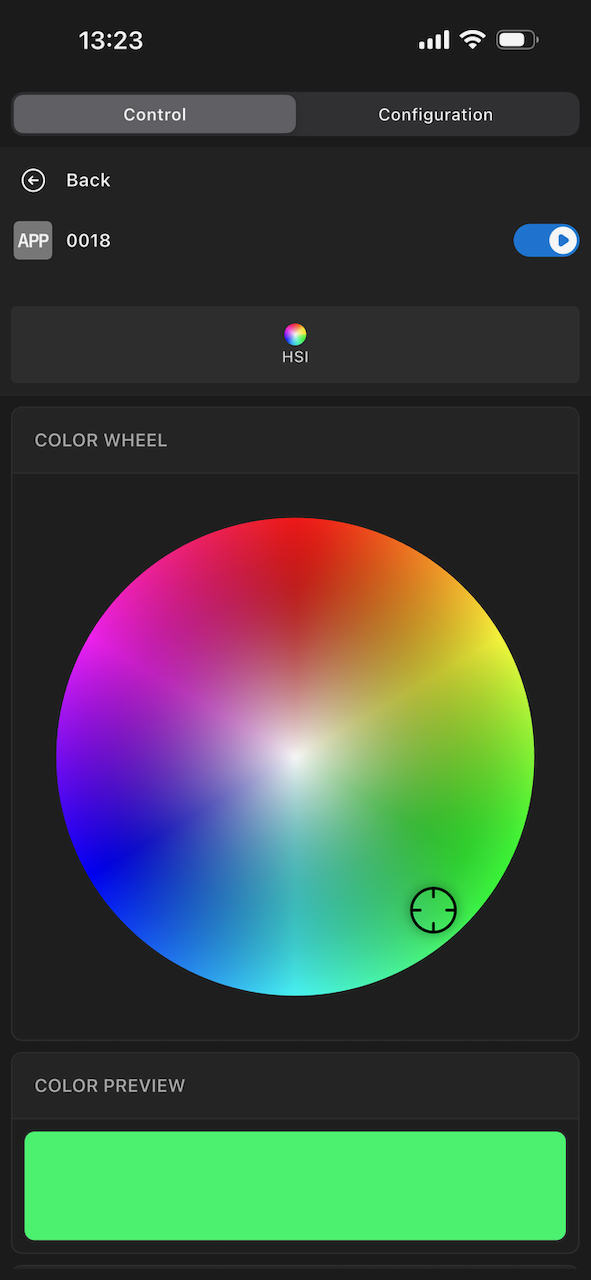
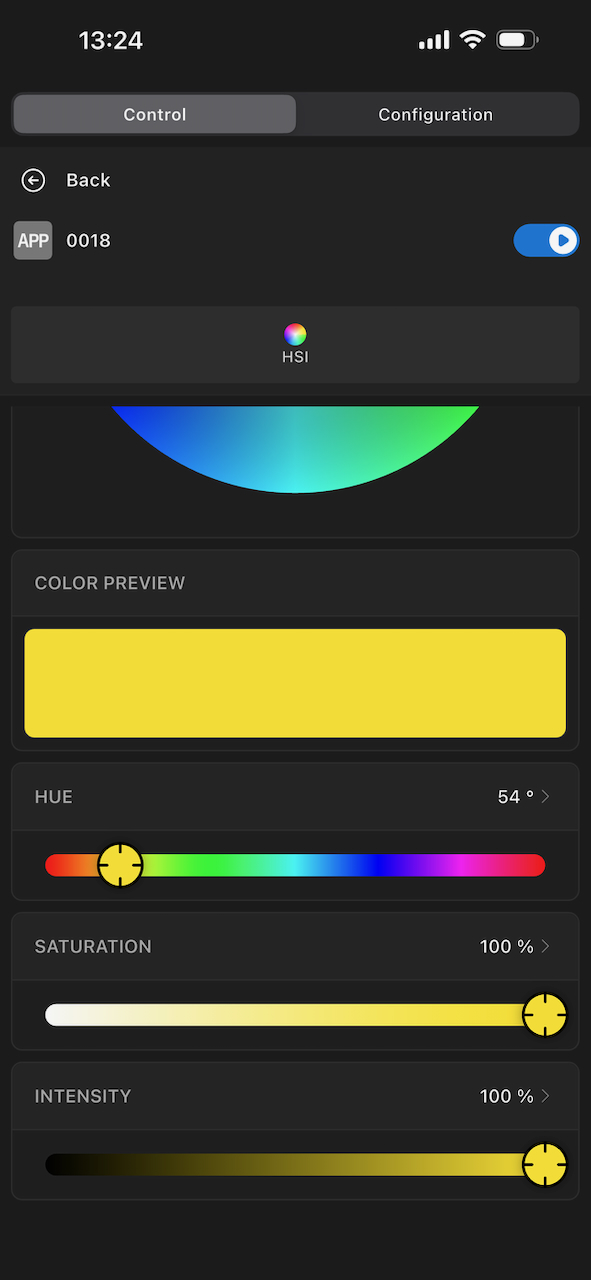
In HSI mode, you can change the hue, saturation, and intensity. Again, you need to scroll down on an iPhone to see the rest of the screen.
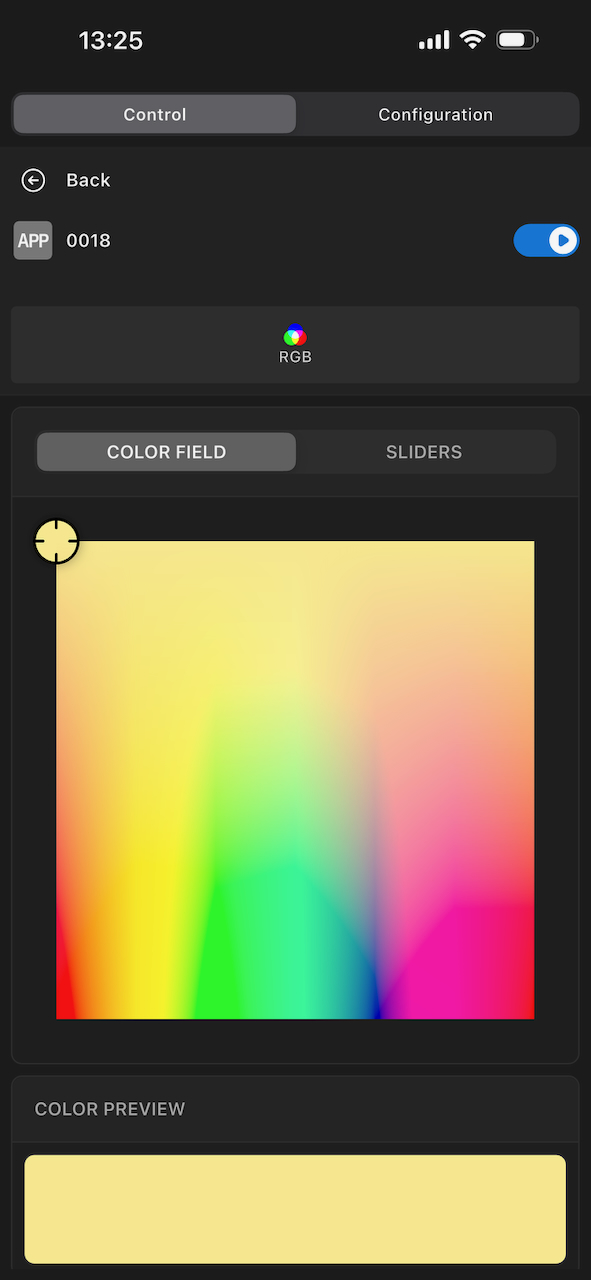
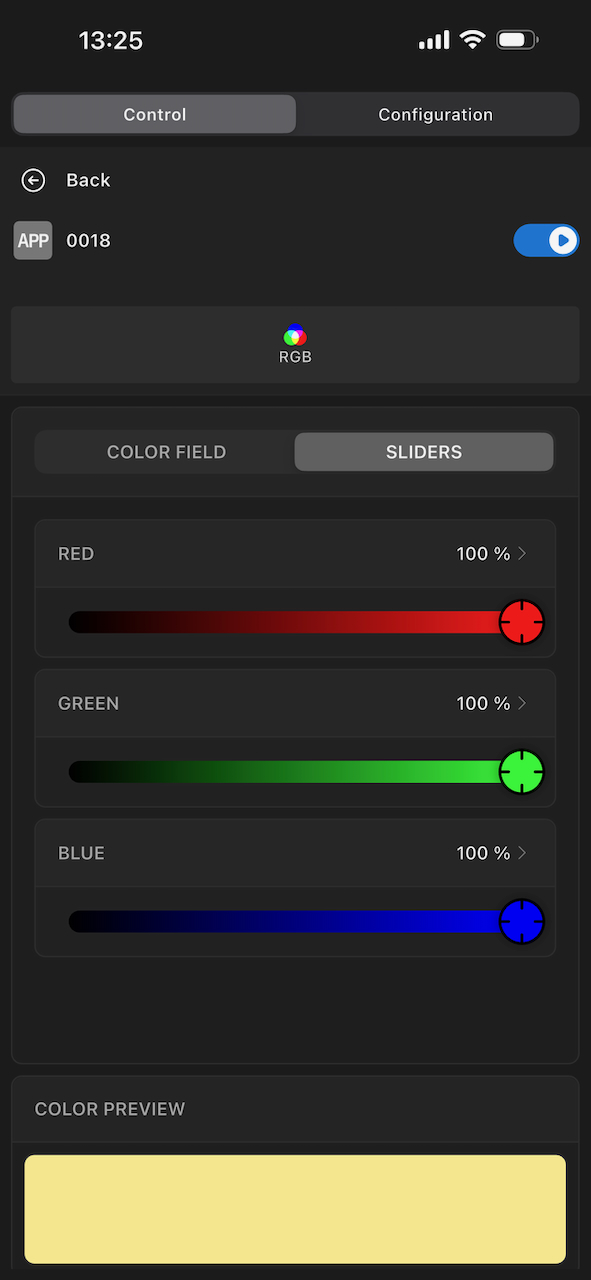
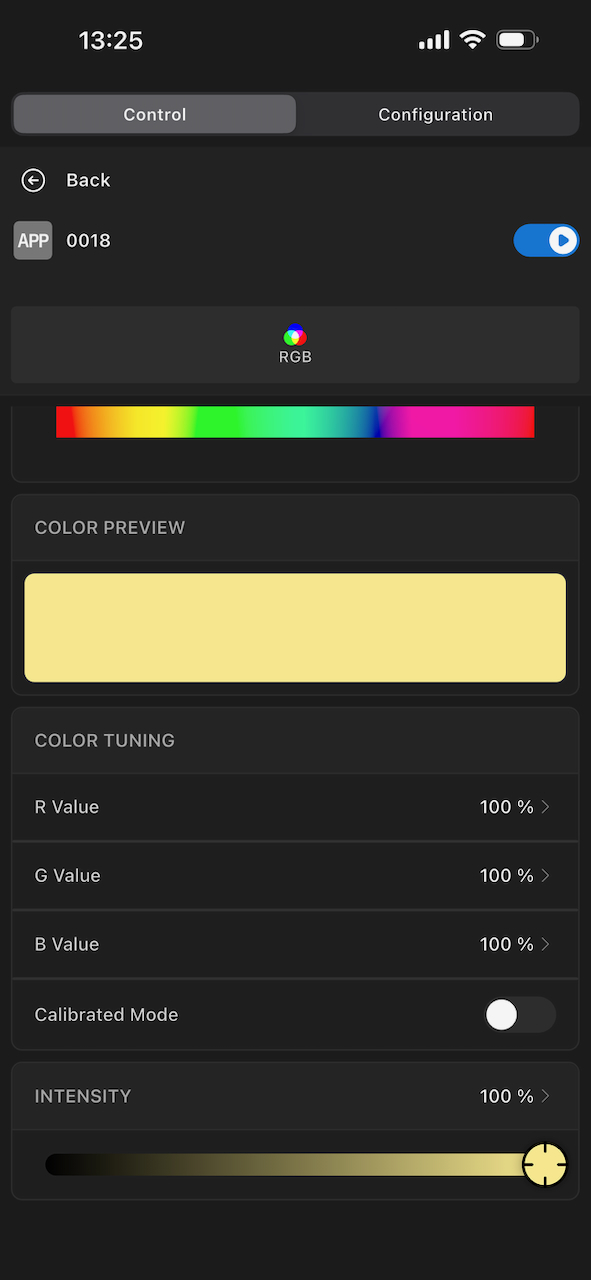
In RGB mode, you can change the individual values for red, green, and blue. You can also choose to activate Calibrated Mode.
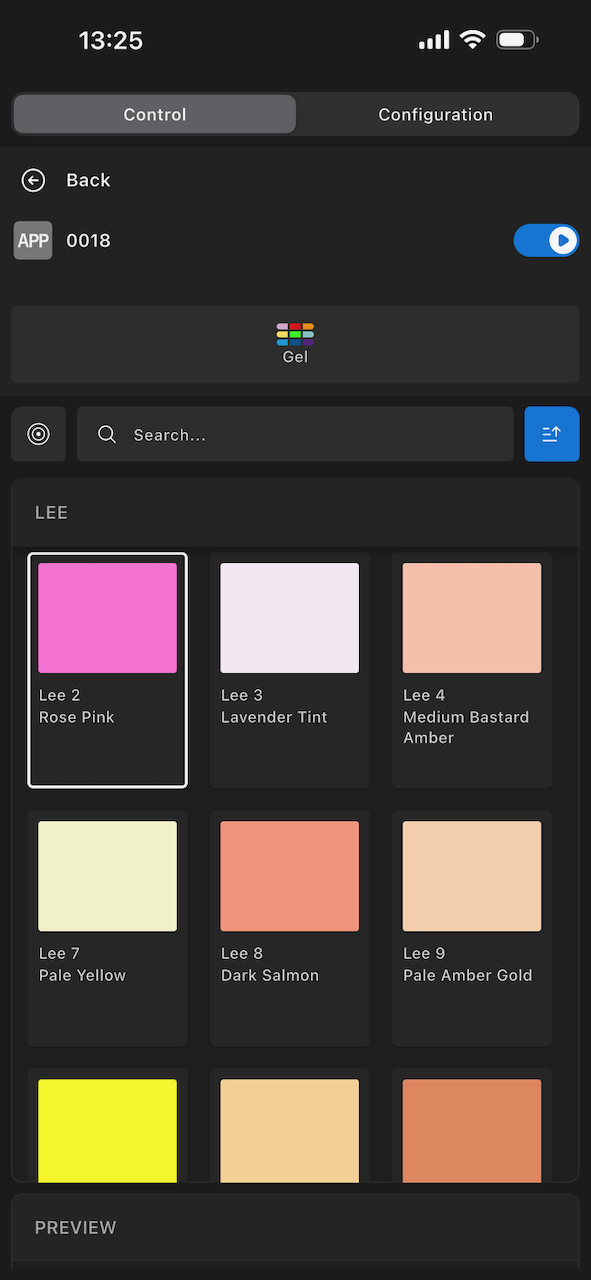
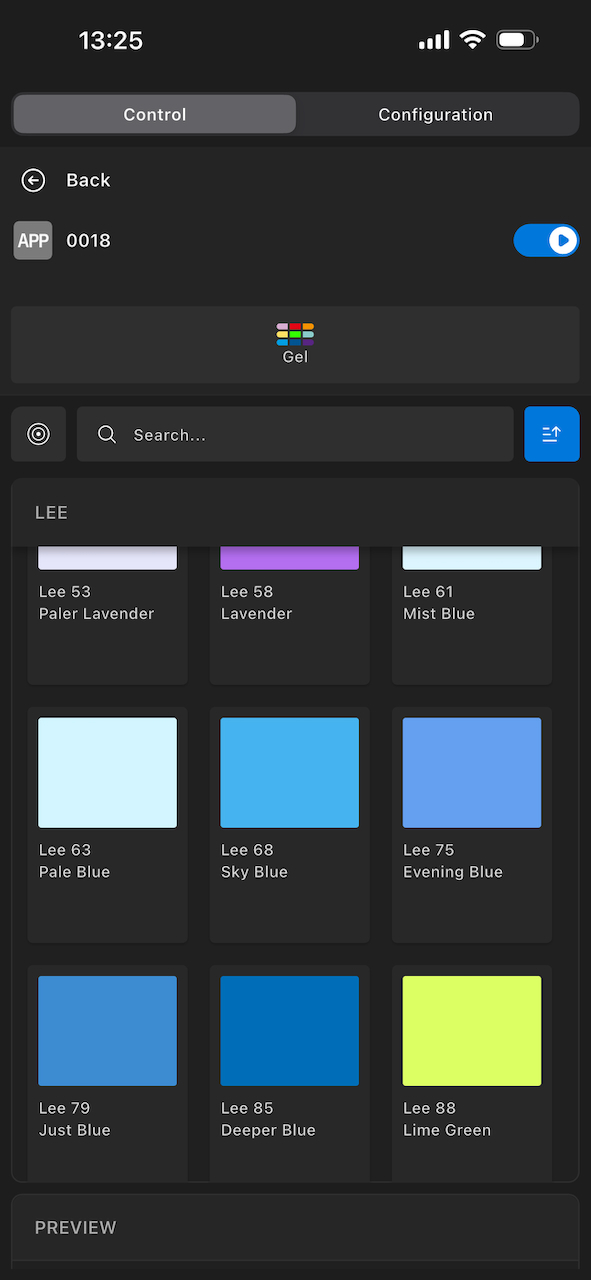
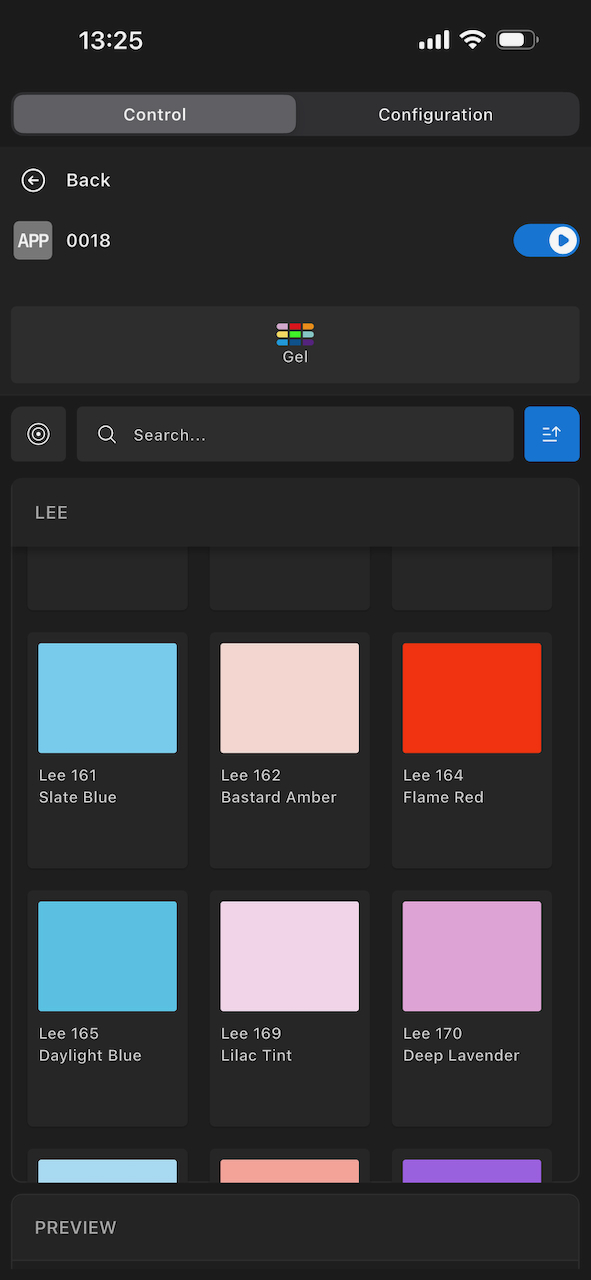
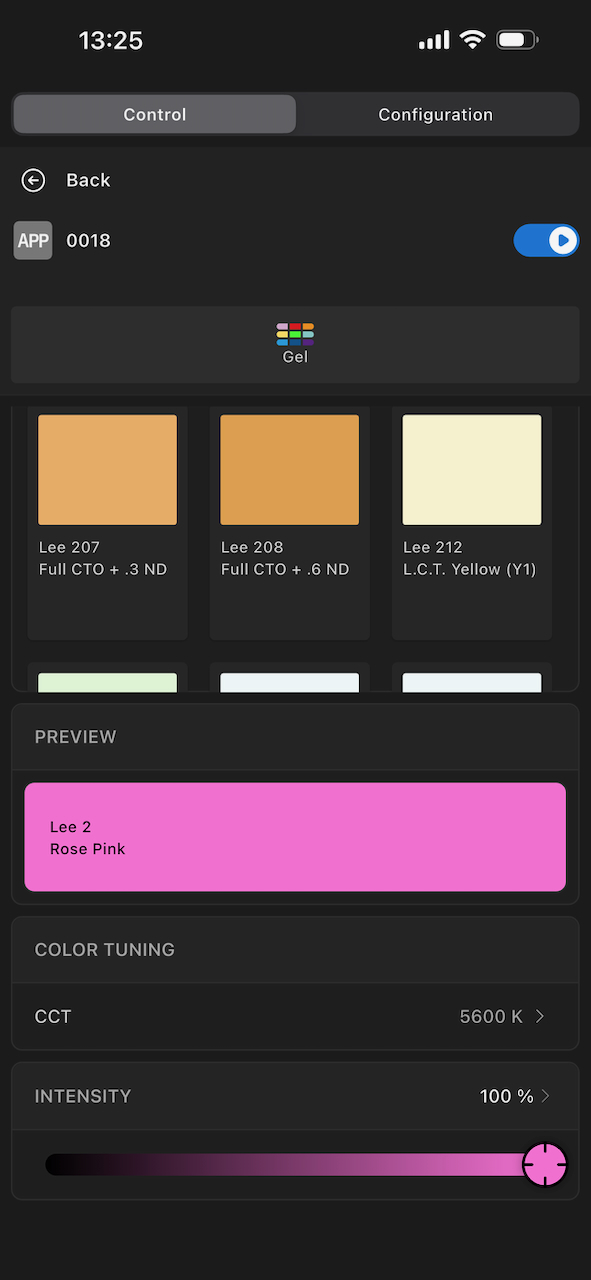
In Gel mode, you can choose from a wide array of digital gels. Users can set the base CCT.
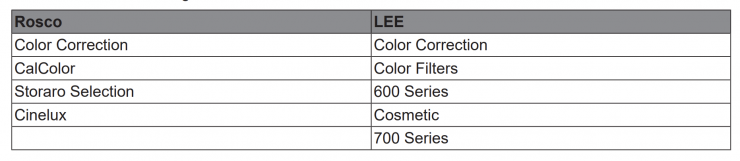
Above, you can see the types of gels that are available.
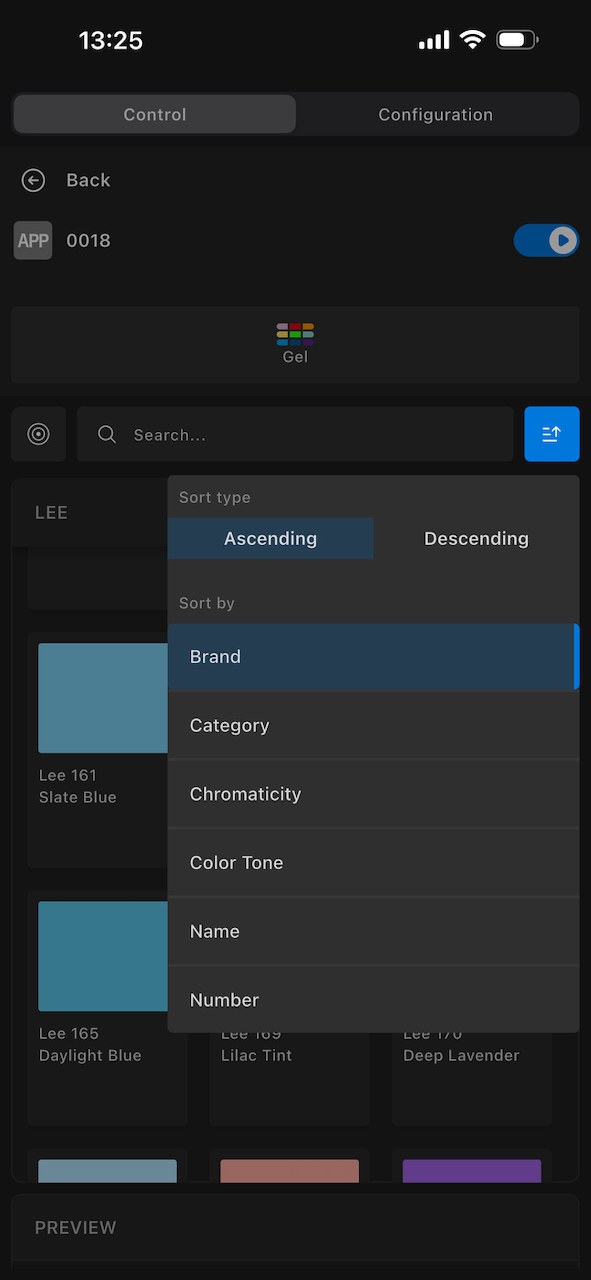
You can also search for gels by specifying certain parameters.
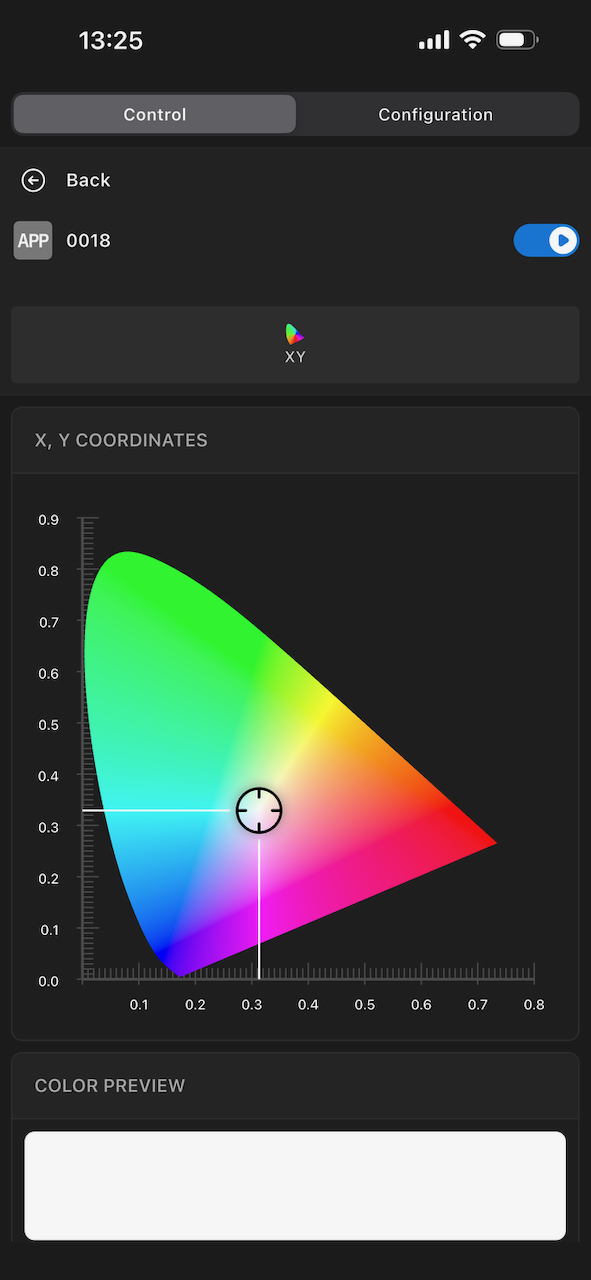
In XY mode, you can dial on x and y coordinates, which is handy if you are trying to match other fixtures.
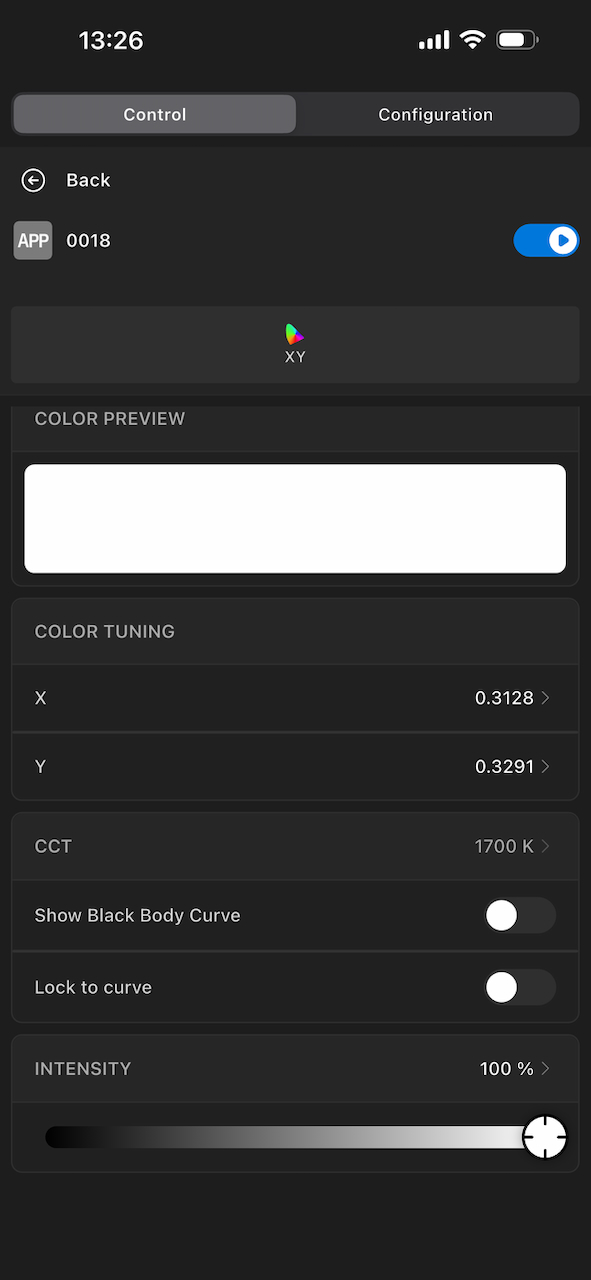
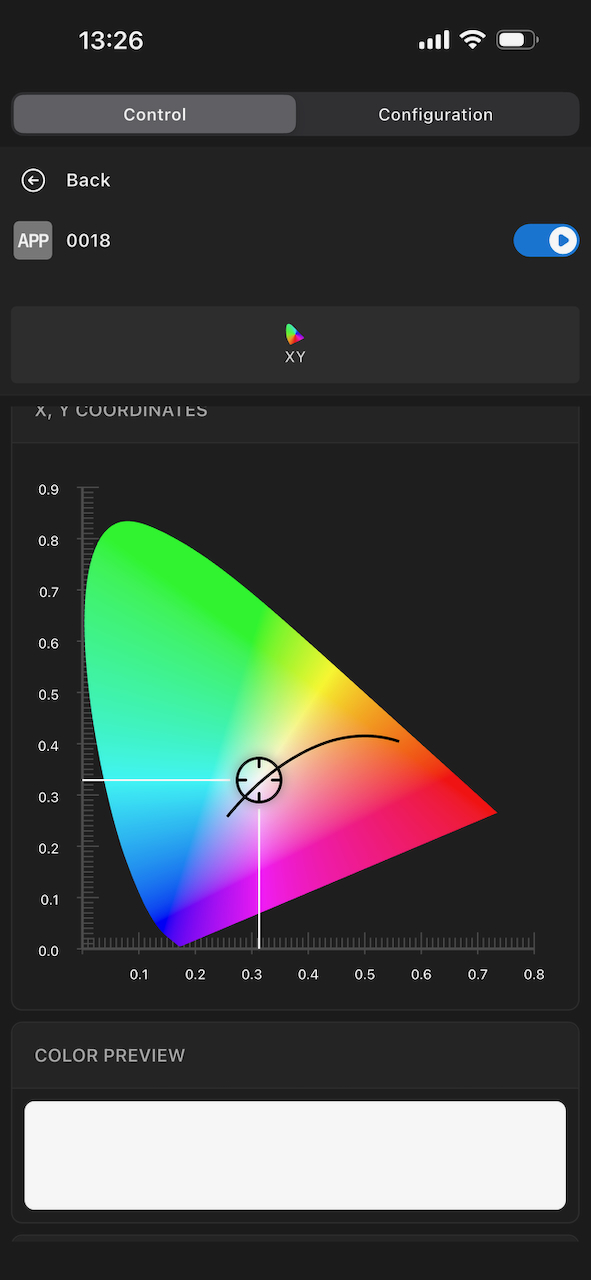
ARRI also offers you the ability to show the Black Body Curve or lock the fixture to the curve.
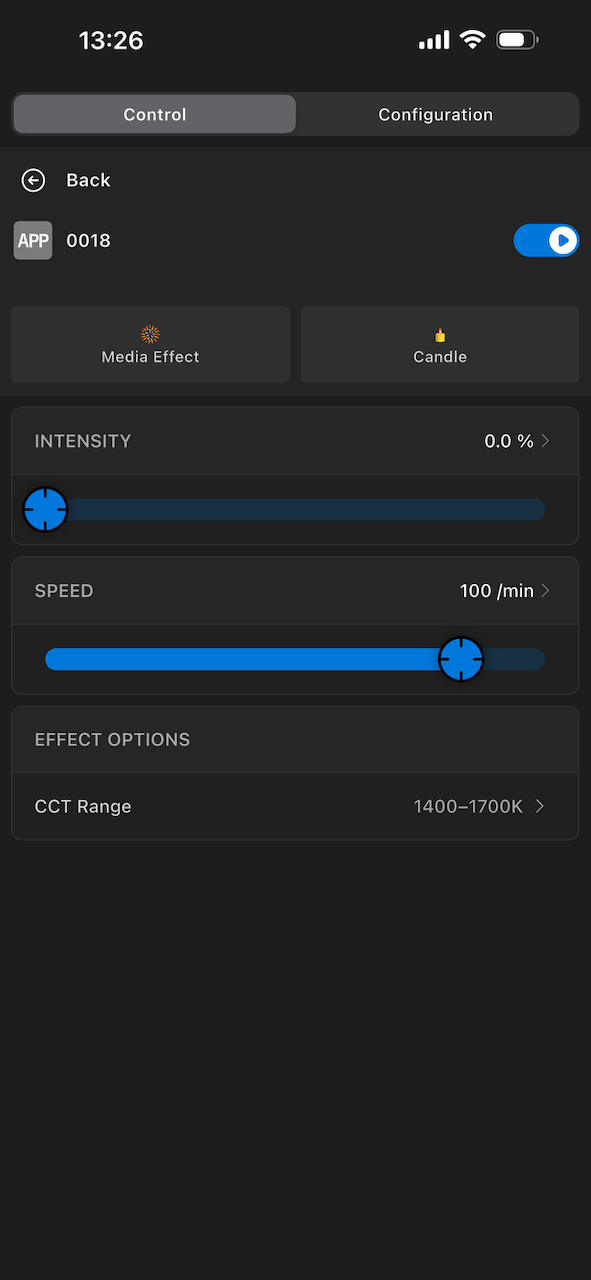
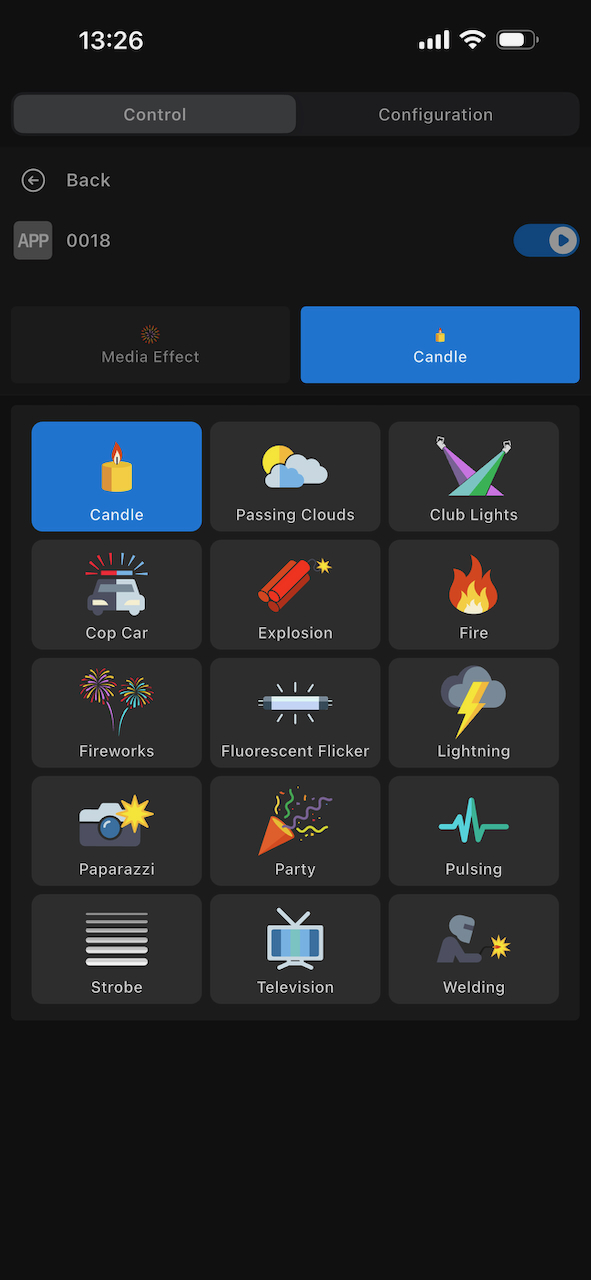
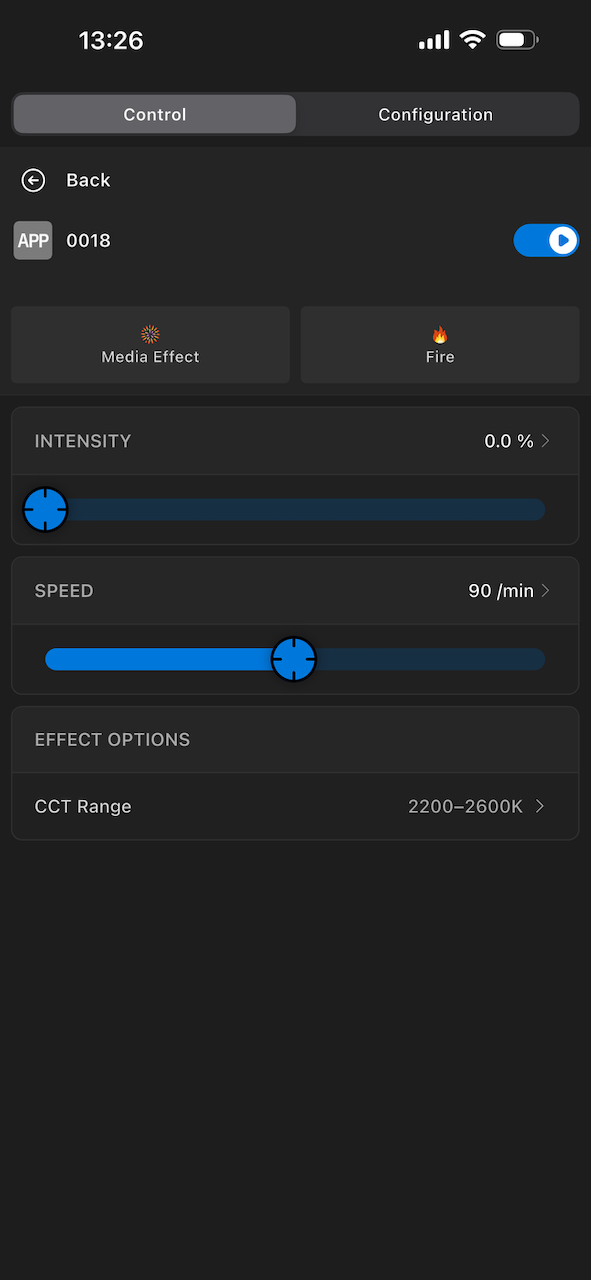
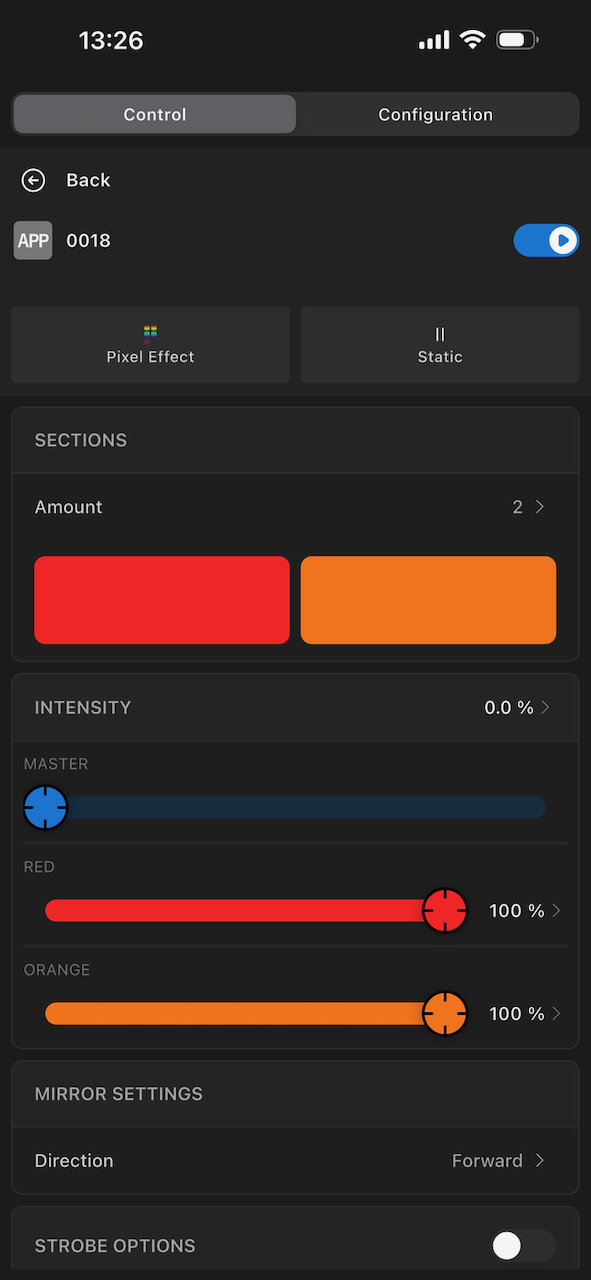
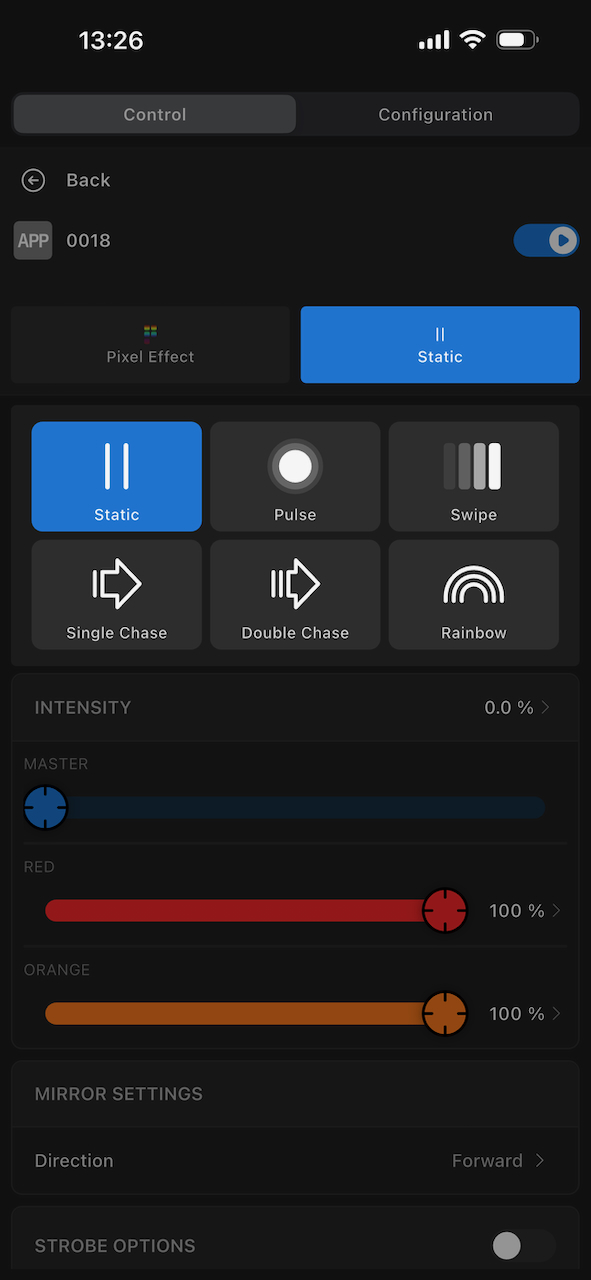
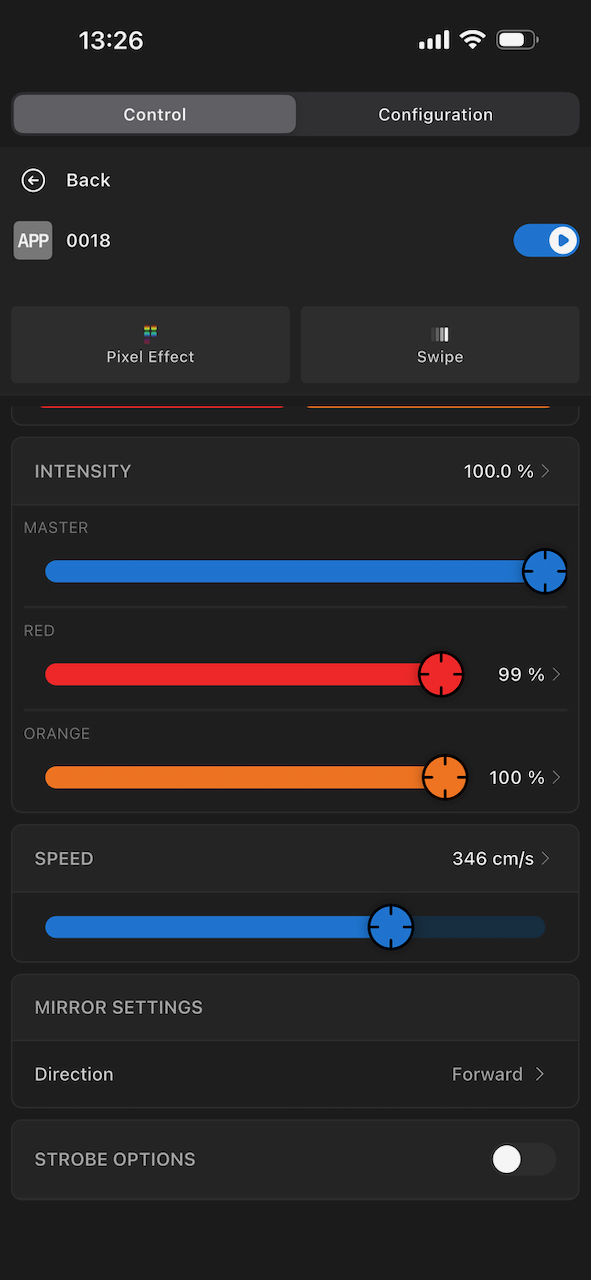
In Media Effect mode, you can choose from 15 different effects. You also have the ability to adjust and tailor those effects.
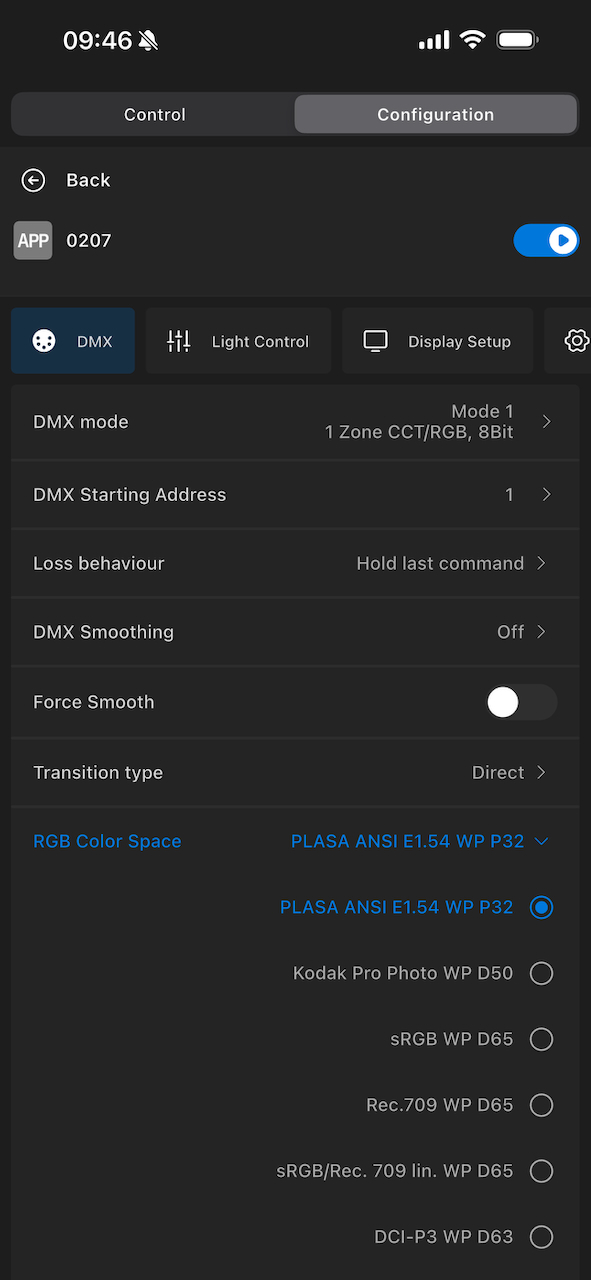
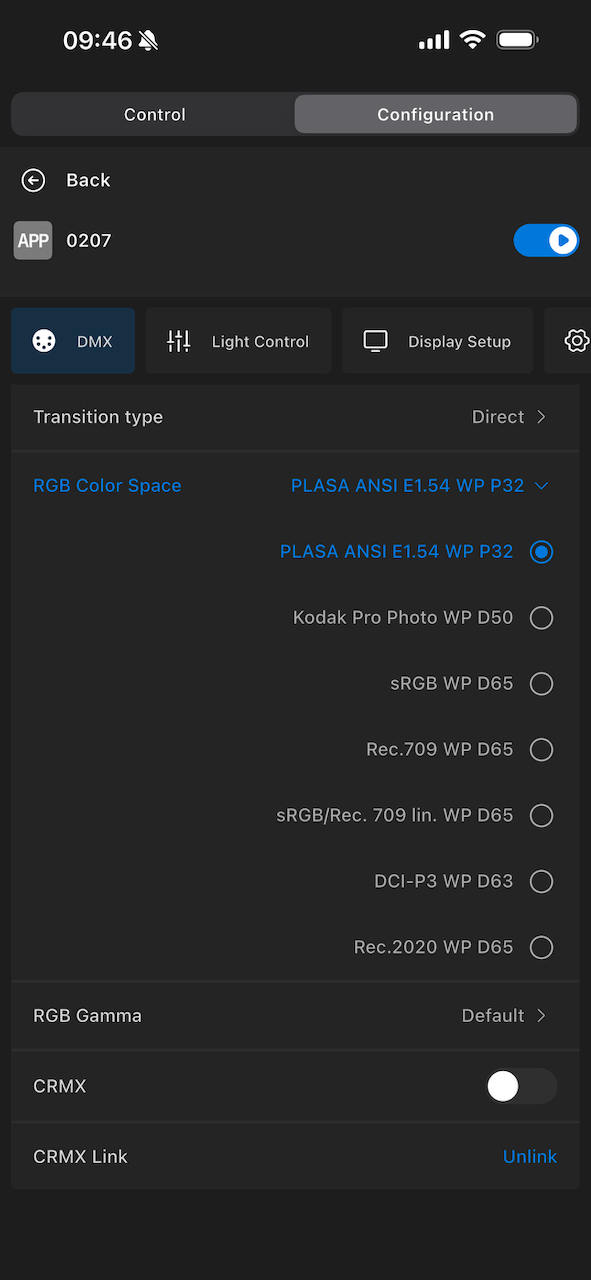
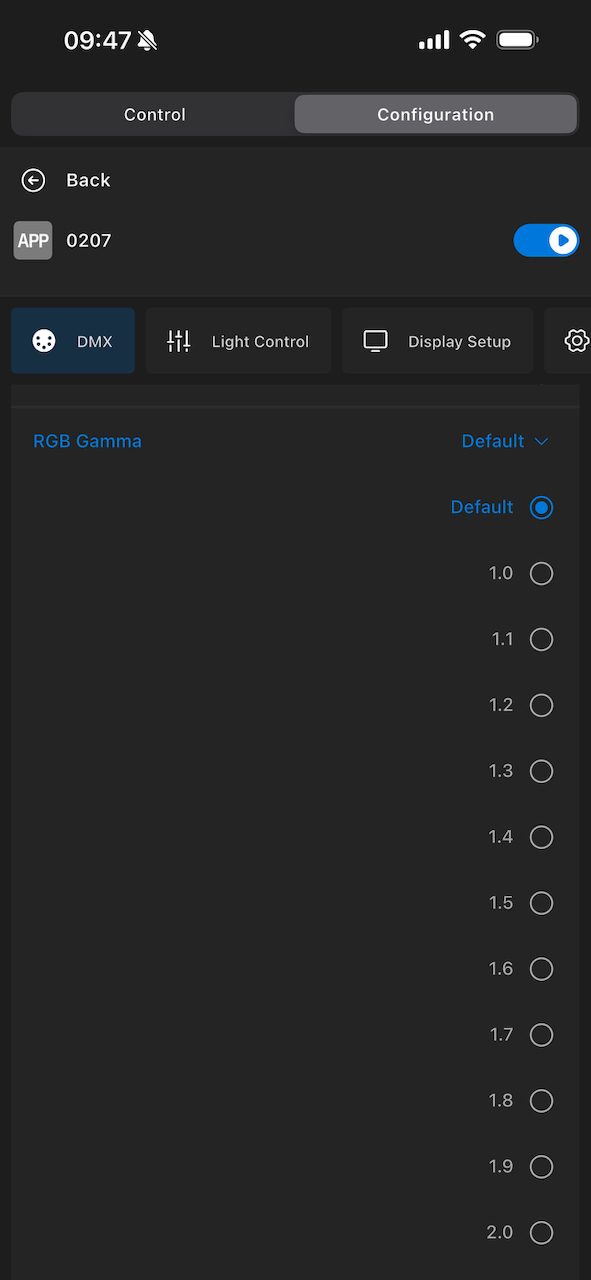
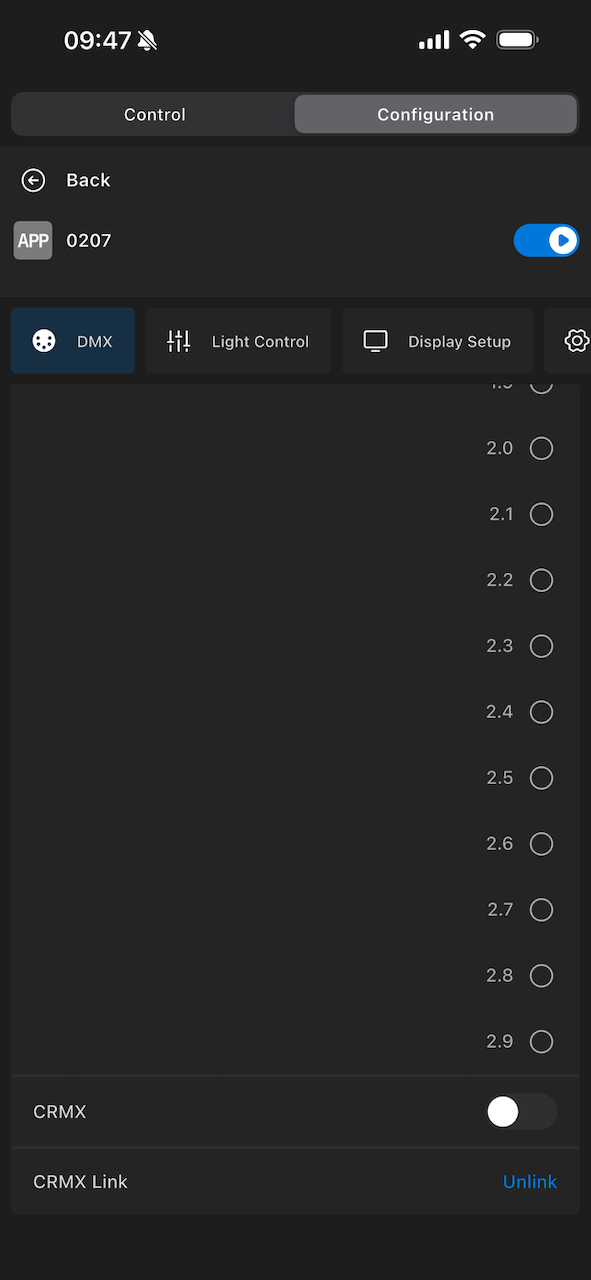
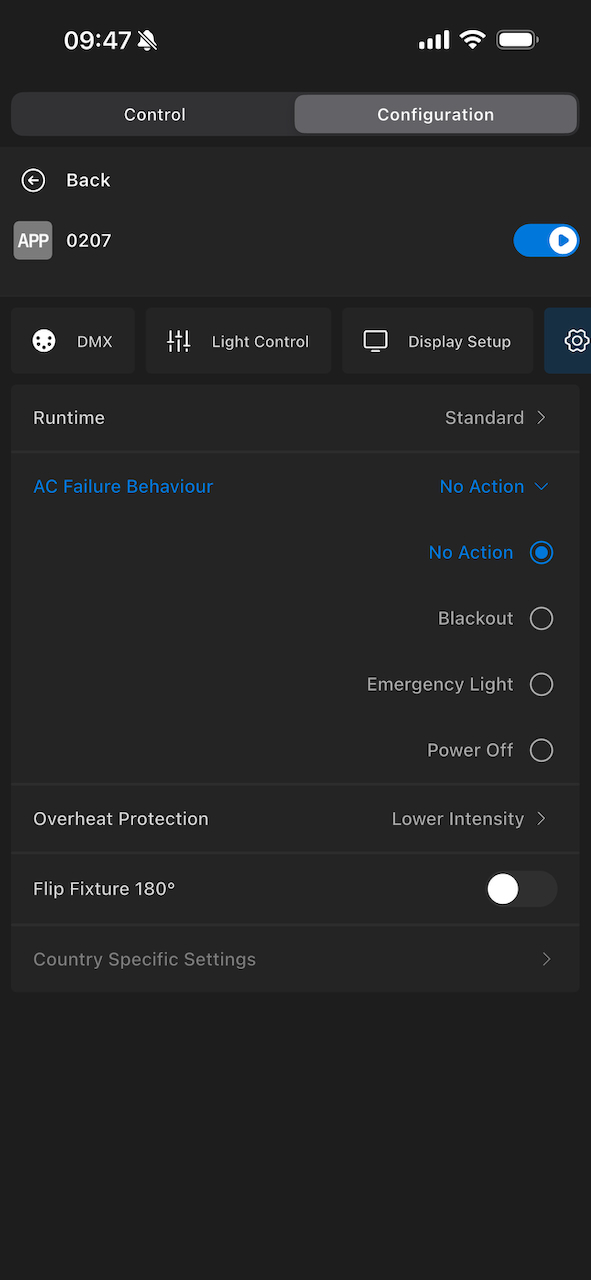
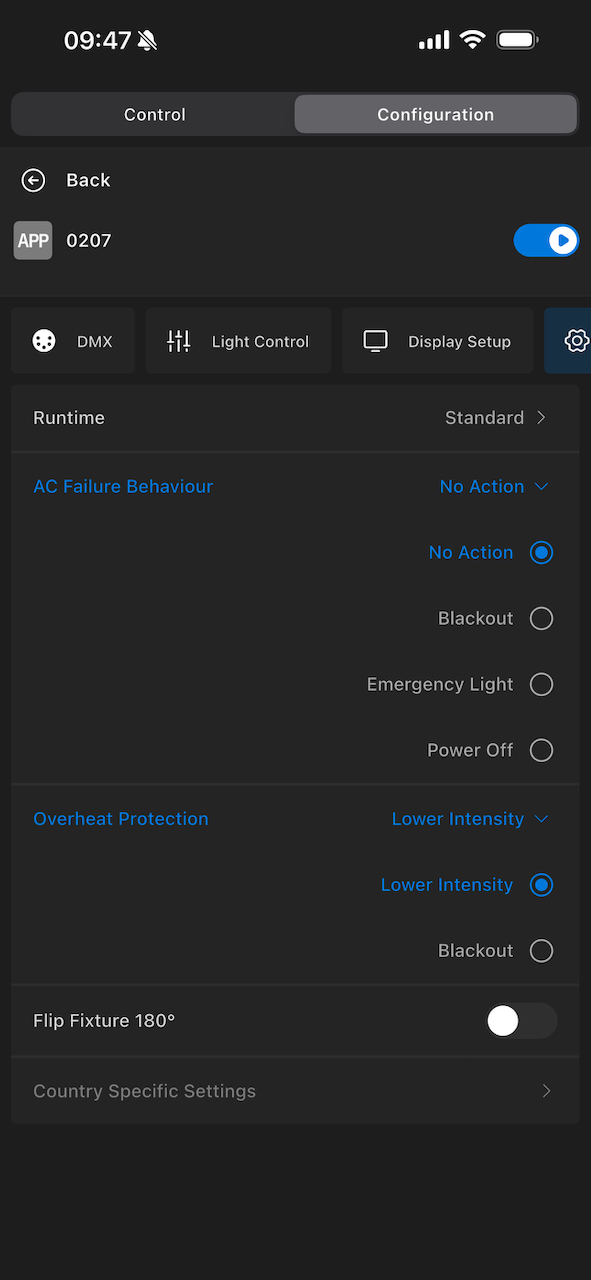
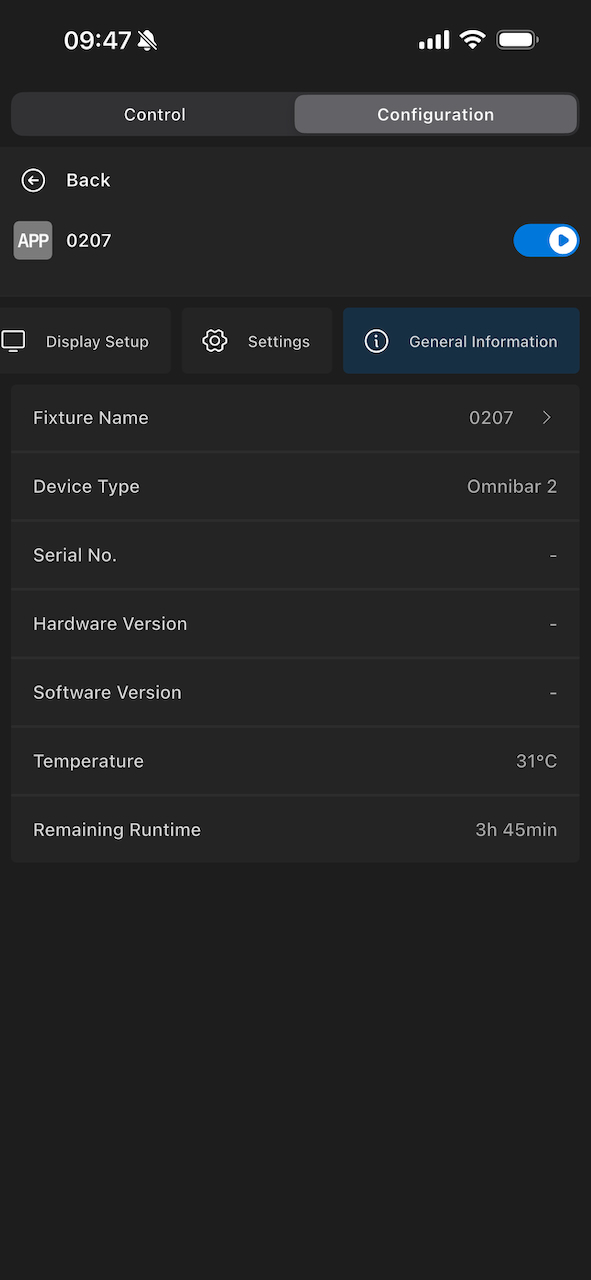
Above, you can see some of the other features and functionality that are available in the app.
Overall, it is a pretty easy app to use, but it’s also yet another app you need. ARRI already has LiOS and Stellar.
I’m not the biggest fan of the Omnibar Control App when you are using it on an iPhone, as you need to scroll down to see the whole page. I would have preferred to have seen a one-page layout.
IP65
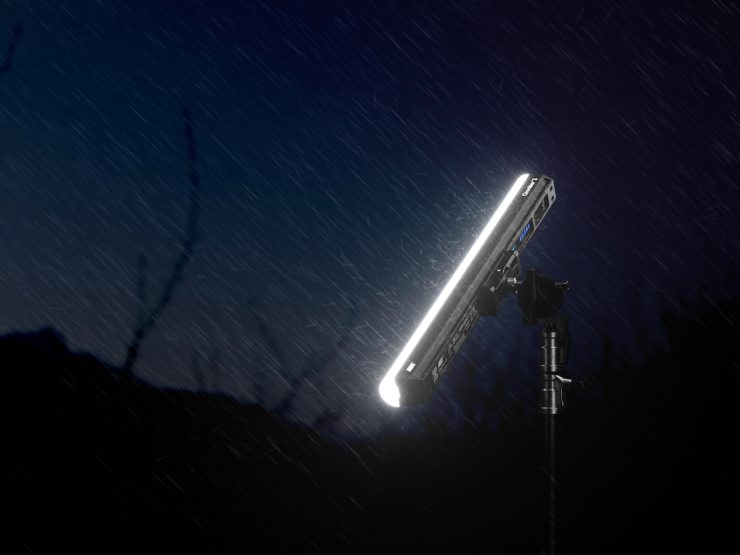
IP65 is almost becoming a standard for lighting fixtures these days, and that is why ARRI designed the Omnibar and its modifiers to meet IP65 standards.
Weight
The Omnibar 2 is 1.3kg / 2.86 lb, and the Omnibar 4 is 2.3kg / 5.07 lb. This does make them heavier than most other tube-style fixtures. As a comparison, below you can see what some other 4′ tubes weigh.
| WEIGHT | |
| ARRI Omnibar 4 | 2.3kg / 5.07 lb |
| Astera Titan 4′ | 1.35kg / 3 lbs |
| Aputure INFINIBAR PB12 RGB LED Light Panel (4′) | 1.96kg / 4.32 lb |
| Nanlite PavoTube II 30C | 1.4kg / 3.09 lb |
| amaran T4C RGB LED Tube Light | 0.95kg / 2.09 lb |
| Godox TL120 RGB LED Tube Light | 1.27kg / 2.8 lb |
| Neewer TL120C RGB LED Tube Light | 3.2kg / 7.1 lb |
As another comparison, below you can see what some other 2′ tubes weigh.
| WEIGHT | |
| ARRI Omnibar 2 | 1.3kg / 2.86 lb |
| Astera HELIOS | 0.765kg / 1.68 lb |
| Aputure INFINIBAR PB6 RGB LED Light Panel (2′) | 1kg / 2.2 lb |
| Nanlite PavoTube II 15C | 0.85kg / 1.87 lb |
| amaran T2C RGB LED Tube Light | 0.5kg / 1.1 lb |
| Godox TL60 RGB LED Tube Light | 0.73kg / 1.6 lb |
| Neewer TL60C RGB LED Tube Light | 0.82kg / 1.8 lb |
Photometrics
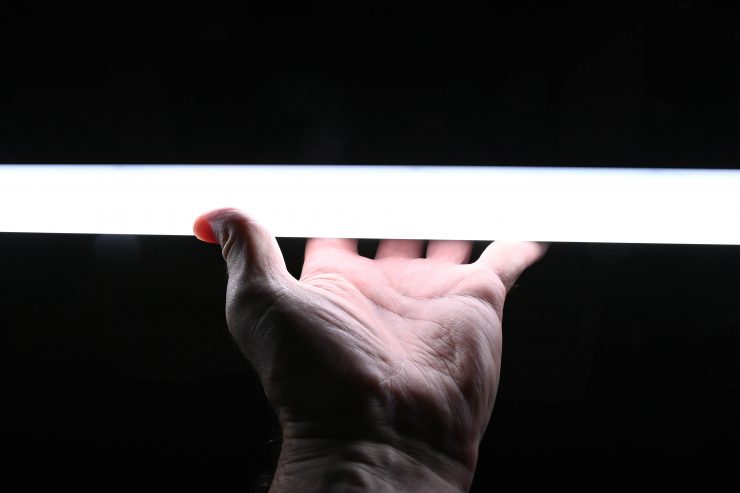
So now let’s get to the photometric results. I always test lights in this way so that I get a reference to how they compare to other fixtures. Results only tell part of the story and should never be used alone to judge a light. I have found from extensive testing over the years that certain lights that have good photometric results don’t always look good, and lights that have worse photometric scores can sometimes look better than their results indicate.
You need to look at all of the photometric results to get an accurate assessment of a light; looking at just one set of results is like reading one chapter in a book and skipping the rest.
Different lights can also look different depending on what camera you happen to be using.
Output & Color Temperature Accuracy
I tested the Omnibar fixture at a variety of CCT settings with a Sekonic C-800 Spectrometer to find out how much output the light had and how accurate the CCT reproduction was. All readings are taken at a distance of 1m (3.28ft) in a controlled environment.
ARRI Omnibar 4 5600K (Flat Diffuser)
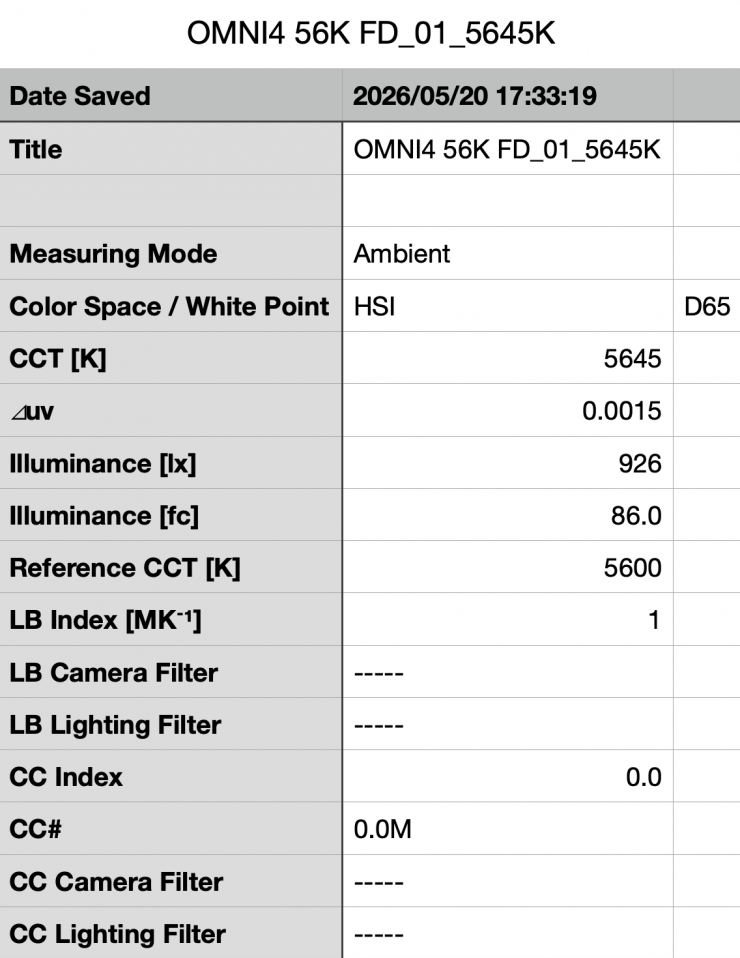
Above, you can see the ARRI Omnibar 4 recorded an output of 926 lx (86.9 fc) when set at 5600K and used with the Flat Diffuser.
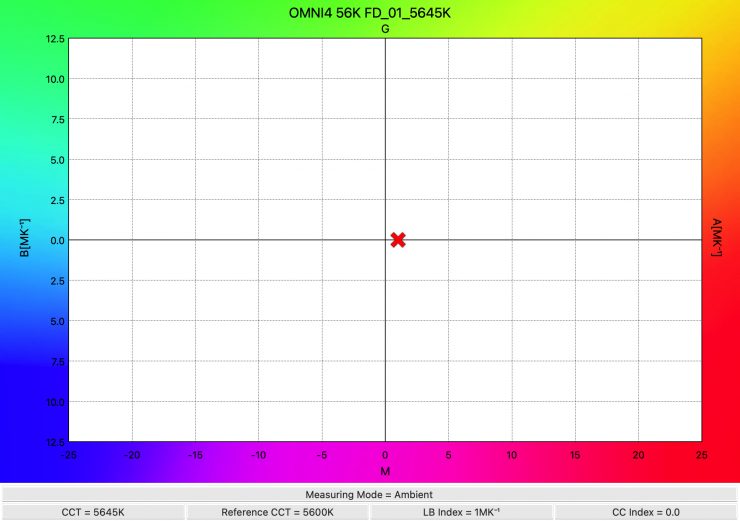
The fixture produced a very good CCT reading of 5645K.
ARRI Omnibar 4 5600K (Flat Diffuser) Boost Mode
The Omnibar does have a Boost mode that is claimed to increase the output by 20%. So let’s see if it does.
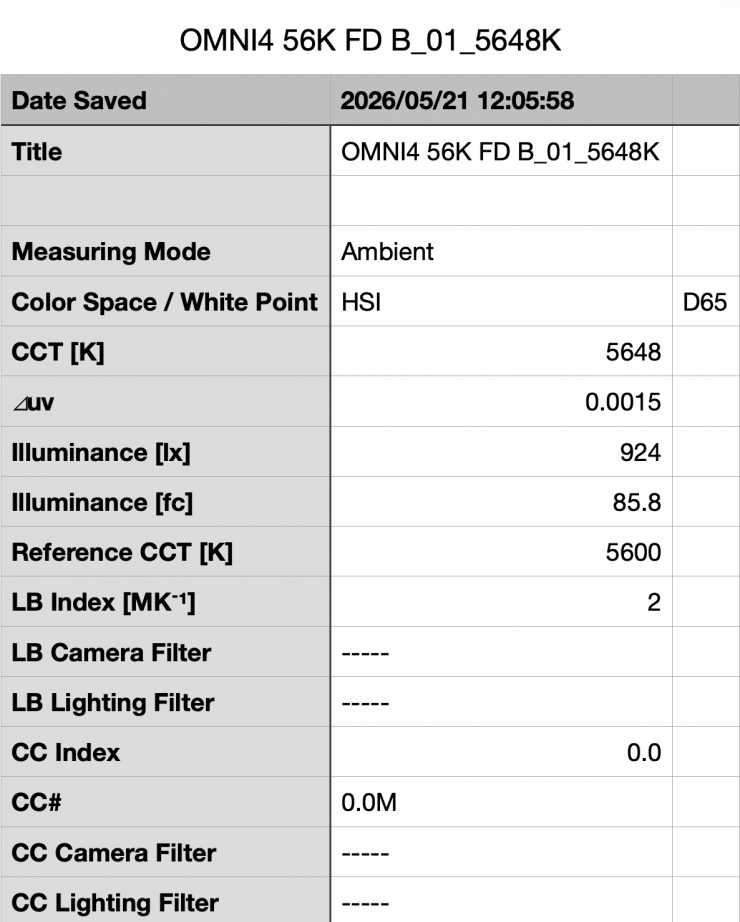
Above, you can see the ARRI Omnibar 4 recorded an output of 924 lx (85.8 fc) when set at 5600K and used with the Flat Diffuser and in Boost mode. For some reason, this was basically the same output as when the light was used with the Boost mode turned off. I can’t explain why this was the case. I reached out to ARRI, and because the light I was testing was not a shipping version, this feature wasn’t working.
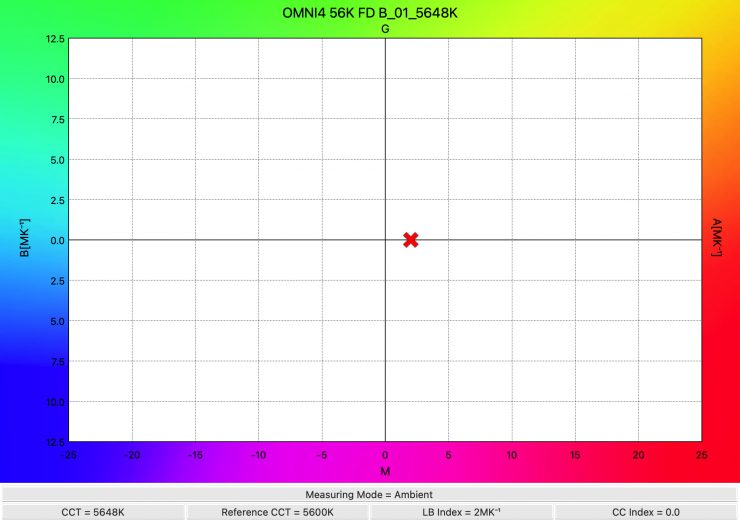
The fixture produced a very good CCT reading of 5648K.
ARRI Omnibar 4 3200K (Flat Diffuser)
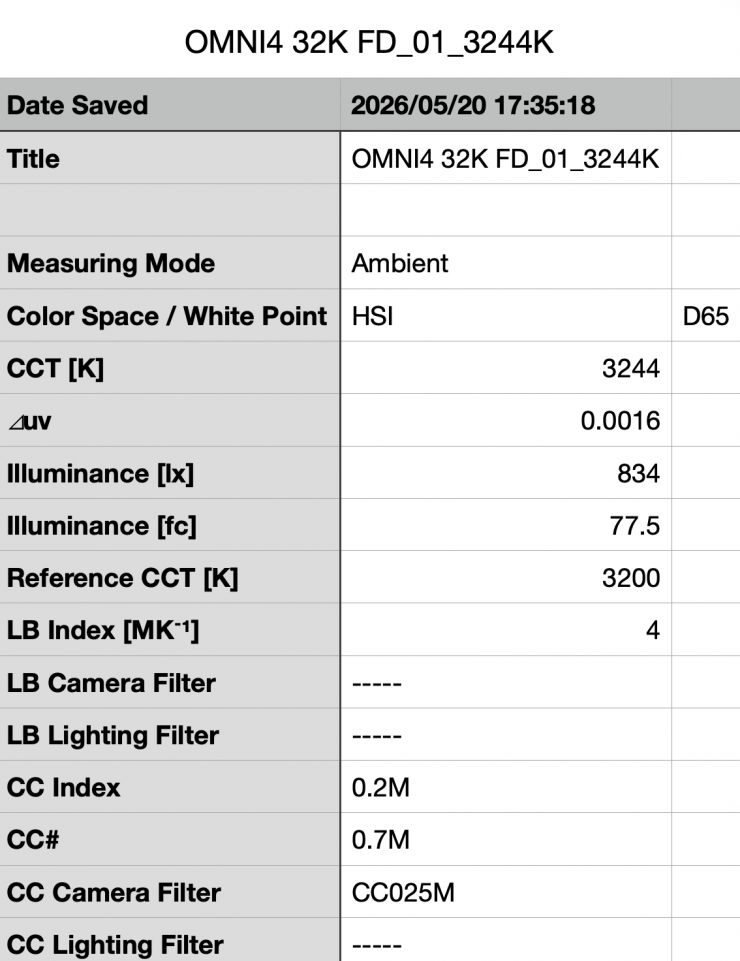
Above, you can see the lights’ output when it was set at 3200K and used with the Flat Diffuser produced 834 lx (77.5 fc), which was 9.93% less than the 926 lx it produced at 5600K.
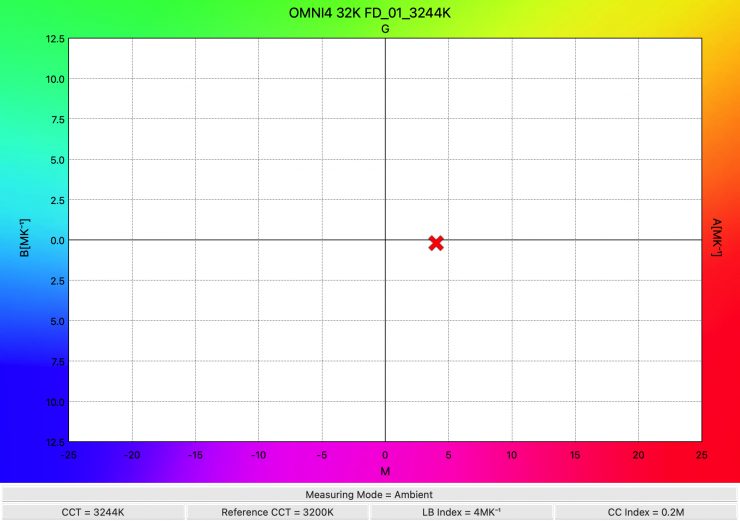
As far as CCT accuracy goes, it recorded a pretty accurate reading of 3244K.
So, how does it perform at various CCT settings when it comes to output and CCT accuracy? Well, below you can see.
| CCT READING | OUTPUT | |
| 2500K | 2537K | 744 lx |
| 3200K | 3244K | 834 lx |
| 4500K | 4547K | 903 lx |
| 5600K | 5645K | 926 lx |
| 6500K | 6554K | 918 lx |
| 8000K | 8057K | 919 lx |
| 10,000K | 10041K | 912 lx |
These results tell me that the light retains very good CCT accuracy across its range. It was no more than 57K off between 2500K and 10,000K.
The output of the light is very consistent from 4500-10,000K. Below 4500K, it does start to drop off.
ARRI Omnibar 4 5600K (No Modifiers)
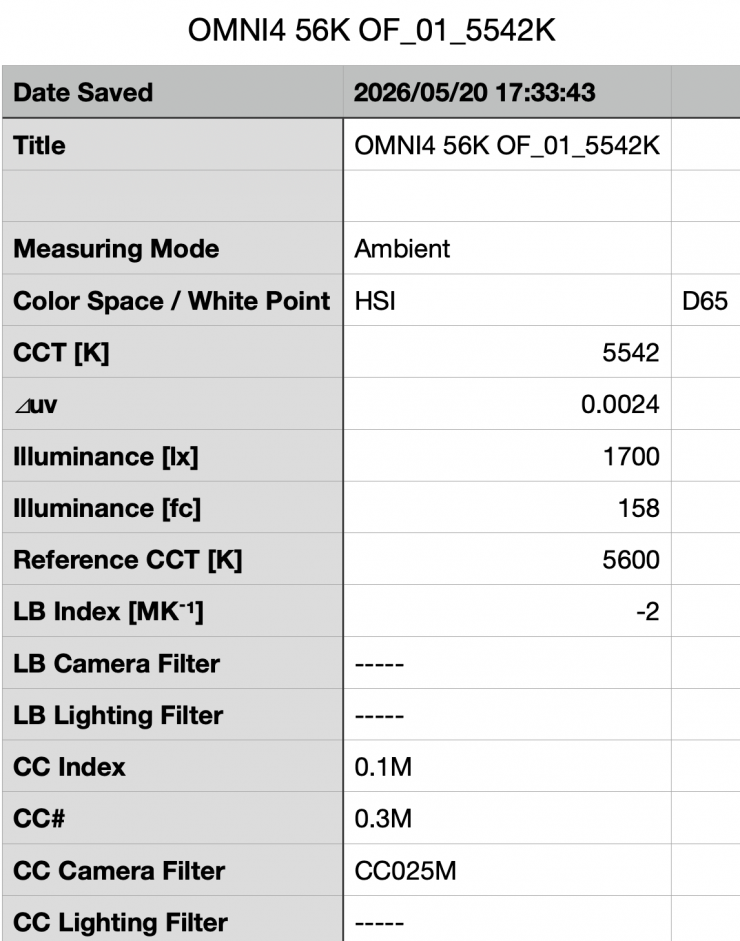
Above, you can see the ARRI Omnibar 4 recorded an output of 1700 lx (158 fc) when set at 5600K and used without any modifiers. This is a good amount of output.
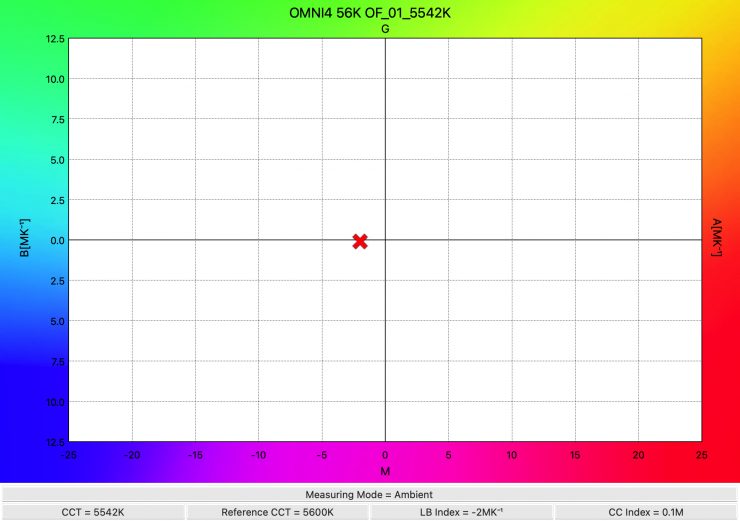
The fixture produced a CCT reading of 5542K, which was a good reading.
ARRI Omnibar 4 3200K (No Modifiers)
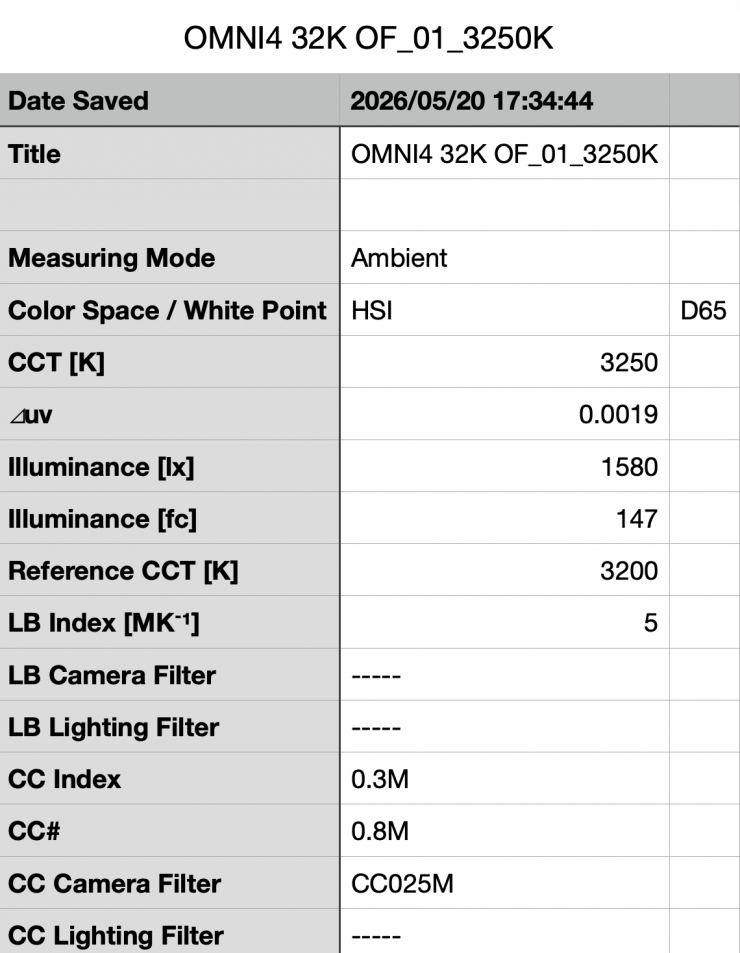
Above, you can see the lights’ output when it was set at 3200K and used with no modifiers produced 1580 lx (147 fc), which was 7.05% less than the 1700 lx it produced at 5600K.
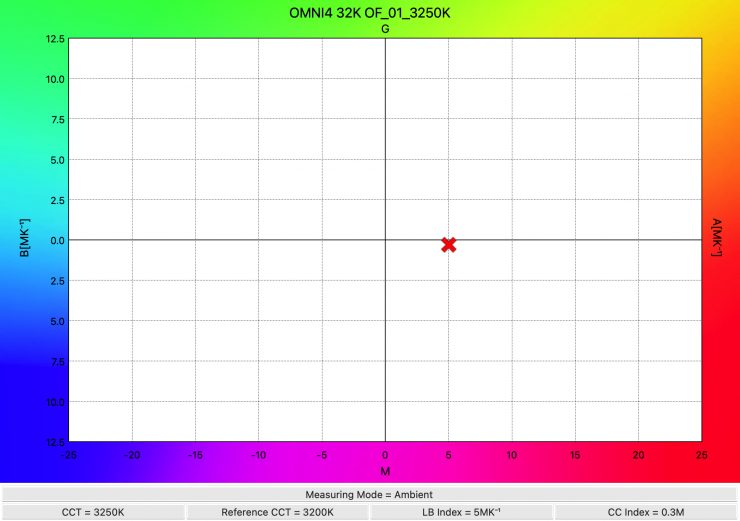
As far as CCT accuracy goes, it recorded a pretty accurate reading of 3250K.
ARRI Omnibar 4 5600K (Round Diffuser)
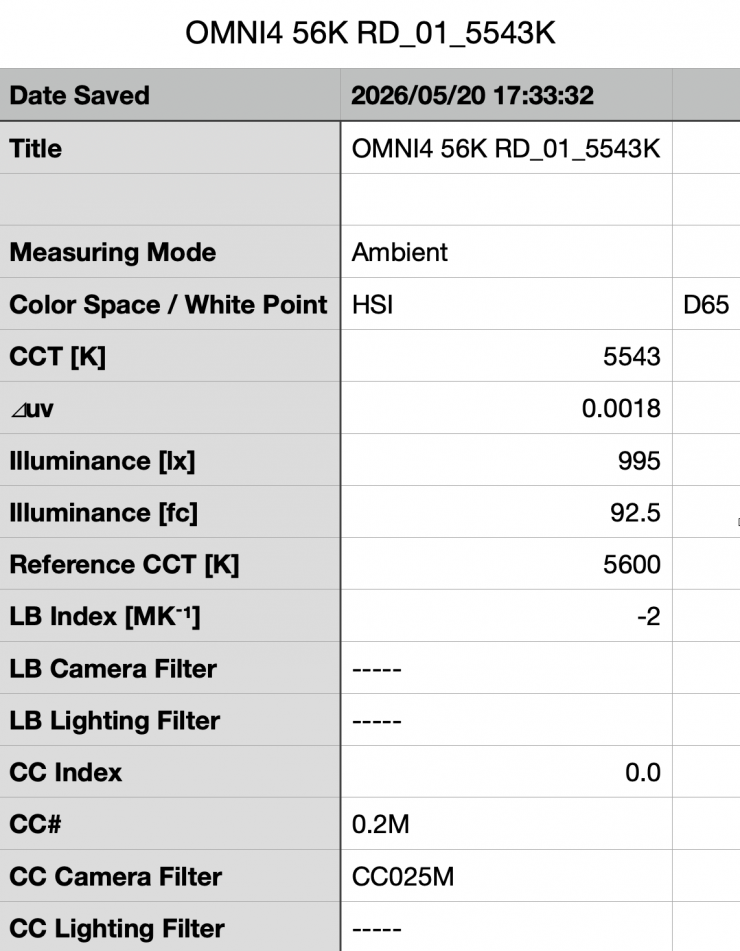
Above, you can see the ARRI Omnibar 4 recorded an output of 995 lx (92.5 fc) when set at 5600K and used with the Round Diffuser.
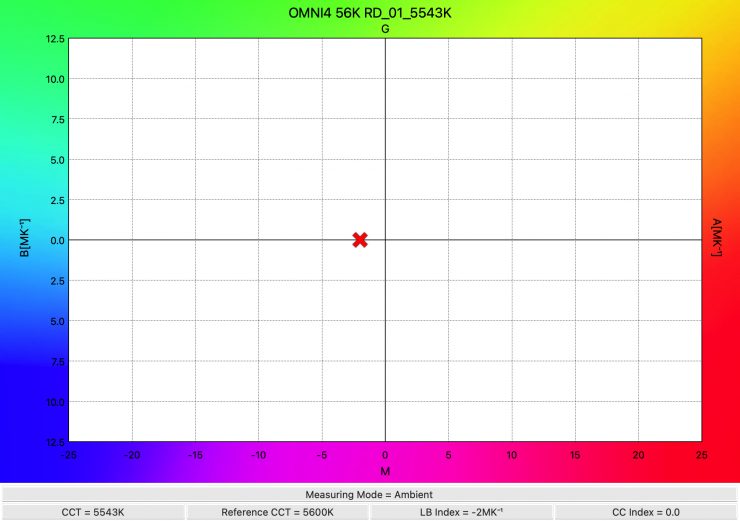
The fixture produced a CCT reading of 5543K.
How does this output and CCT reading compare against the Nanlite PavoTube 30C II?
| OUTPUT | CCT | |
| ARRI Omnibar 4 | 995 lx | 5543K |
| Nanlite PavoTube 30C II | 666 lx | 5580K |
Below you can see how the output compares to some other 4′ solutions:
As a comparison, below you can see the claimed output of 4′ tube lights that are on the market when set at 5600K and used at 1m / 3.3′.
| OUTPUT @1m /3.3″ | |
| Astera Titan 4′ | 785 lx |
| Aputure INFINIBAR PB12 RGB LED Light Panel (4′) | 617 lx |
| amaran T4C RGB LED Tube Light | 744 lx |
| Godox TL120 RGB LED Tube Light | 685 lx |
| Neewer TL120C RGB LED Tube Light | 500 lx |
ARRI Omnibar 4 3200K (Round Diffuser)
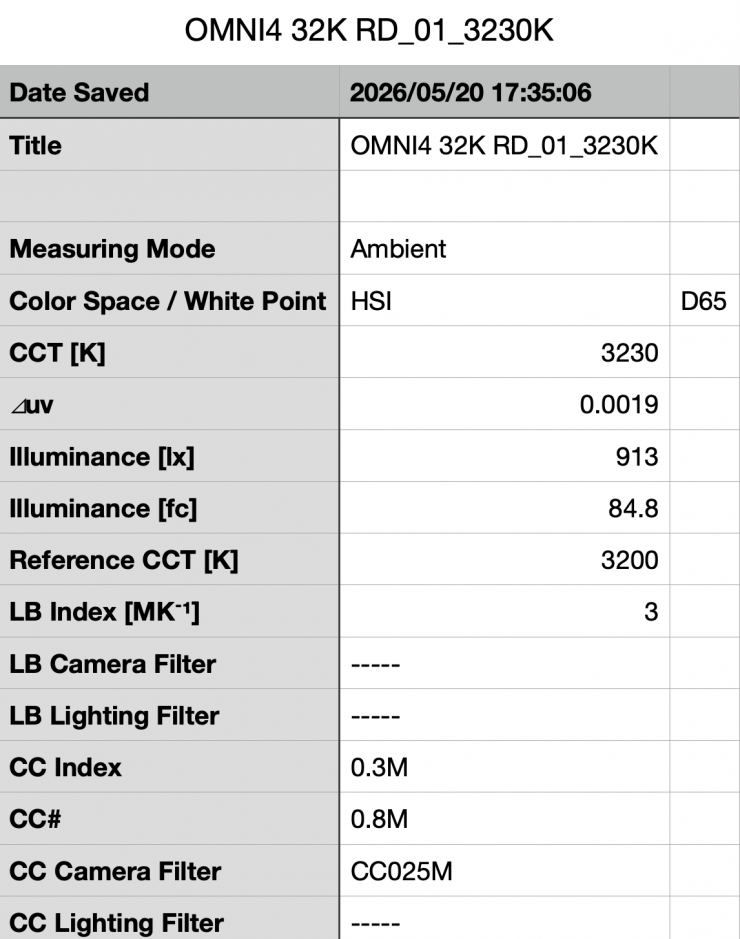
Above, you can see the lights’ output when it was set at 3200K and used with the Round Diffuser produced 913 lx (84.8 fc), which was 8.24% less than the 995 lx it produced at 5600K.
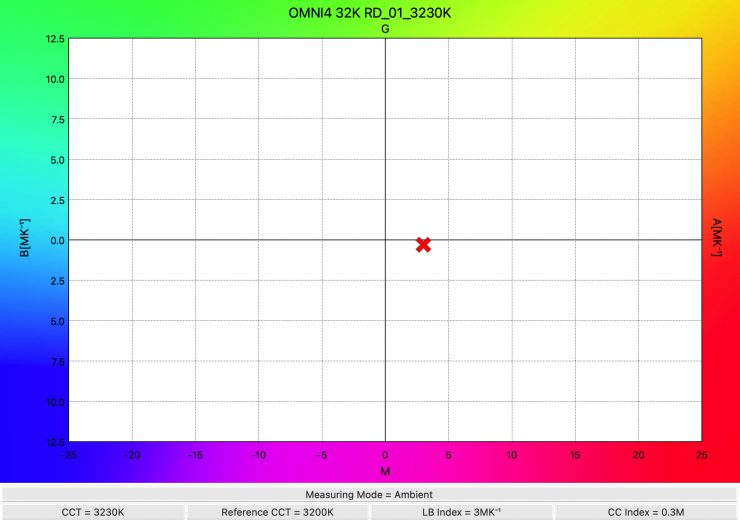
As far as CCT accuracy goes, it recorded a pretty accurate reading of 3230K.
How does this output compare against the Nanlite PavoTube 30C II?
| OUTPUT | CCT | |
| ARRI Omnibar 4 | 913 lx | 3230K |
| Nanlite PavoTube 30C II | 598 lx | 3166K |
ARRI Omnibar 4 5600K (Intensifier)
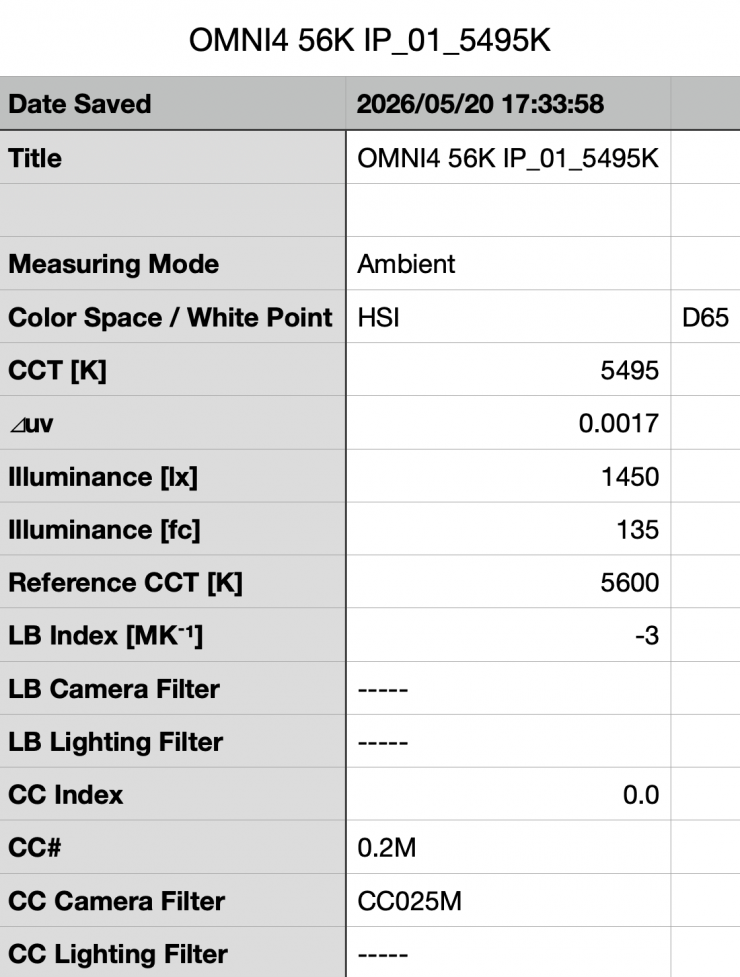
Above, you can see the ARRI Omnibar 4 recorded an output of 1450 lx (135 fc) when set at 5600K and used with the Intensifier. This was 14.7% less output than when the Omnibar was used open face.
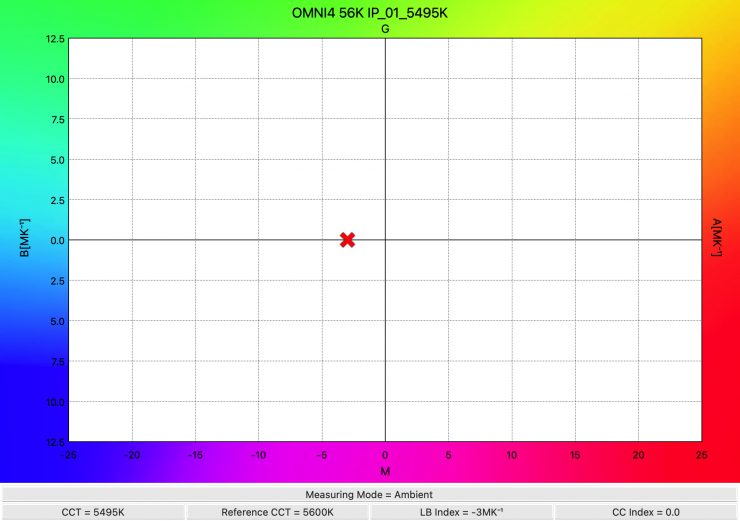
The fixture produced a CCT reading of 5495K.
ARRI Omnibar 4 3200K (Intensifier)
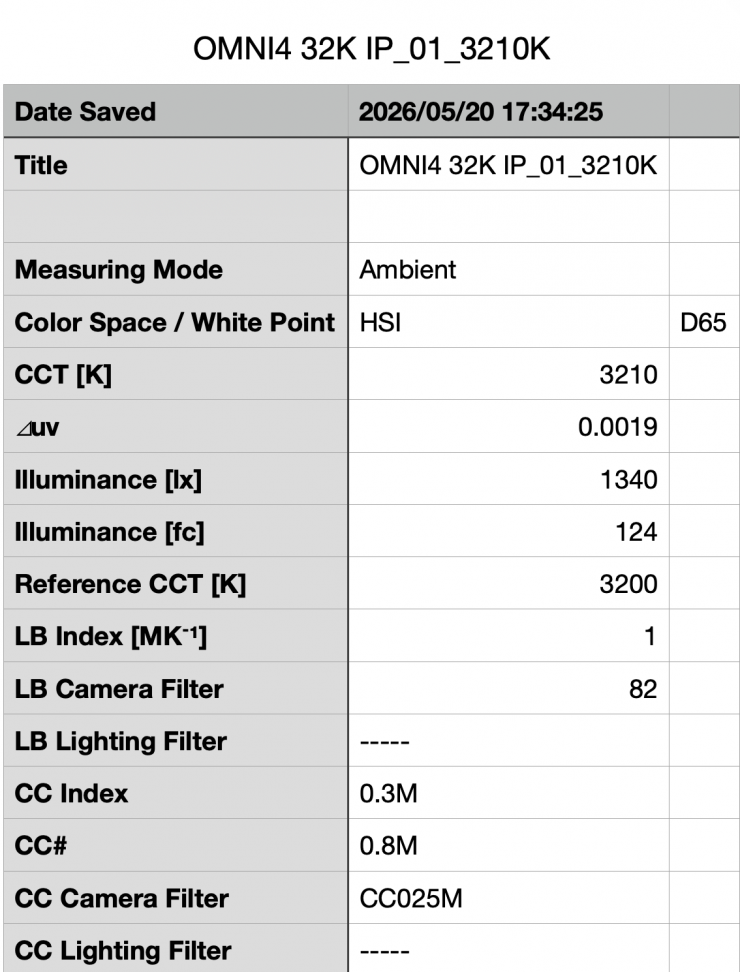
Above, you can see the lights’ output when it was set at 3200K and used with the Intensifier was 1340 lx (124 fc), which was 7.58% less than the 1450 lx it produced at 5600K.
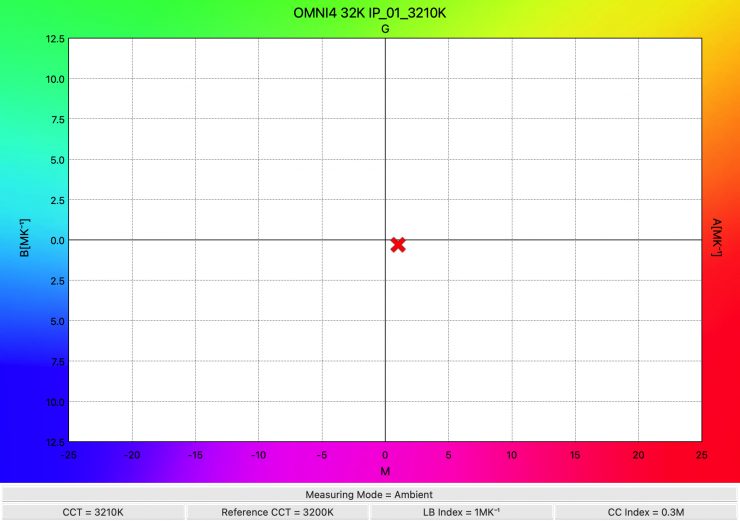
As far as CCT accuracy goes, it recorded an extremely accurate reading of 3210K.
So, let’s now sum up the output and CCT accuracy when the Omnibar 4 was used open face and with the various modifiers.
So, how does it perform at various CCT settings when it comes to output and CCT accuracy? Well, below you can see.
5600K
| CCT | OUTPUT | |
| Open Face | 5542K | 1700 lx |
| Flat Diffuser | 5645K | 926 lx |
| Round Diffuser | 5543K | 995 lx |
| Intensfier | 5495K | 1450 lx |
The CCT value remained pretty consistent, and it only varied by 150K. By using the various modifiers, you can change the output of the Omnibar, which certainly adds to its versatility.
3200K
| CCT | OUTPUT | |
| Open Face | 3250K | 1580lx |
| Flat Diffuser | 3244K | 834 lx |
| Round Diffuser | 3230K | 913 lx |
| Intensfier | 3210K | 1340 lx |
The CCT value remained very consistent, and it only varied by 40K.
How does it perform when creating saturated colors?
I also wanted to test the Omnibar 4 with its Flat Diffuser to see how it performed when creating super-saturated colors.
0° – RED
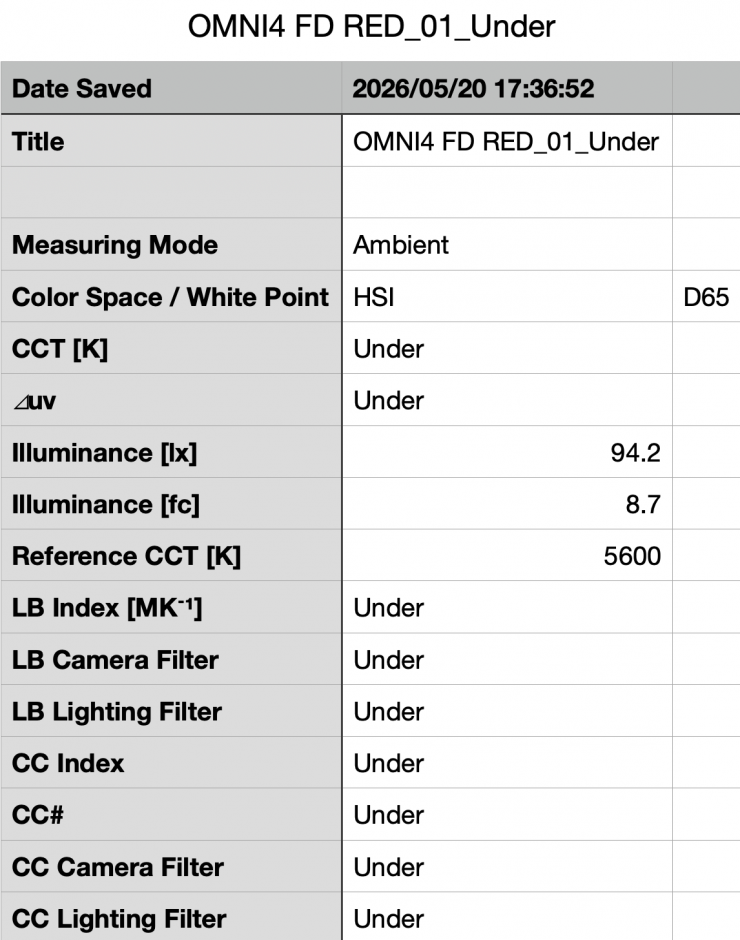
Above, you can see that the light recorded an output of 94.2 lx / 8.7 fc @1m / 3.3′.
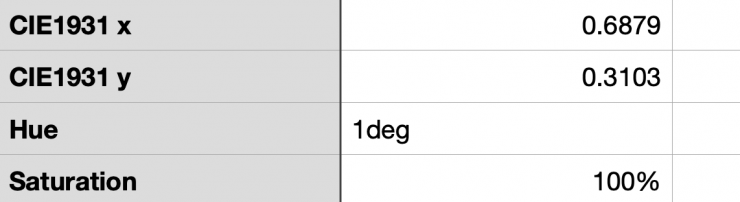
As far as creating an accurate 0° Red, the Omnibar was 1° off.
120° – GREEN
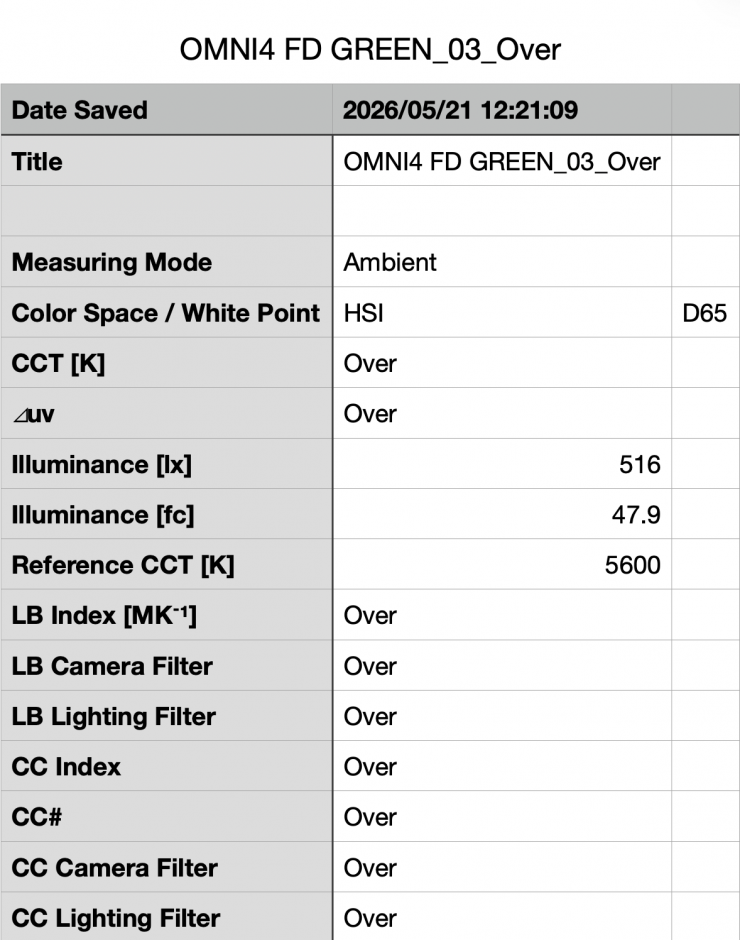
Above, you can see that the light recorded an output of 516 lx (47.9 fc) @1m / 3.3′.
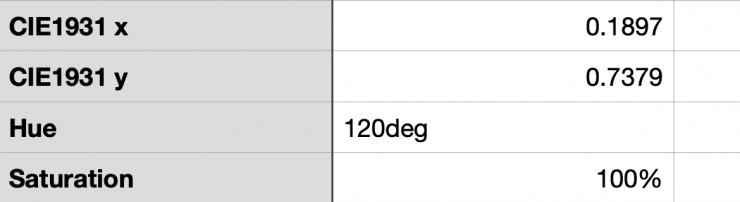
As far as creating an accurate 120° Green, the Omnibar was spot on with a 120° reading and 100% saturation.
240° – BLUE
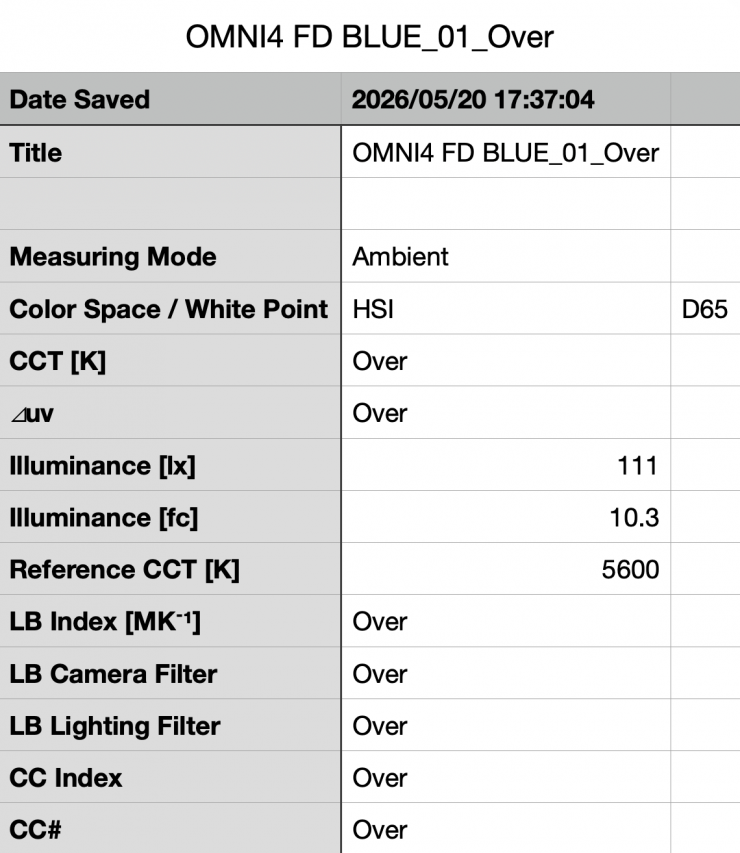
Above, you can see that the light recorded an output of 111 lx (10.3 fc) @1m / 3.3′.
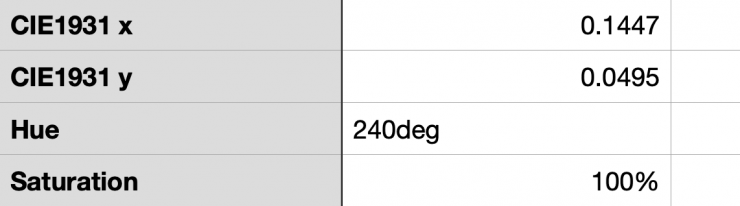
As far as creating an accurate 240° Blue, the Omnibar had a perfect reading of 240°, with 100% saturation.
60° – YELLOW
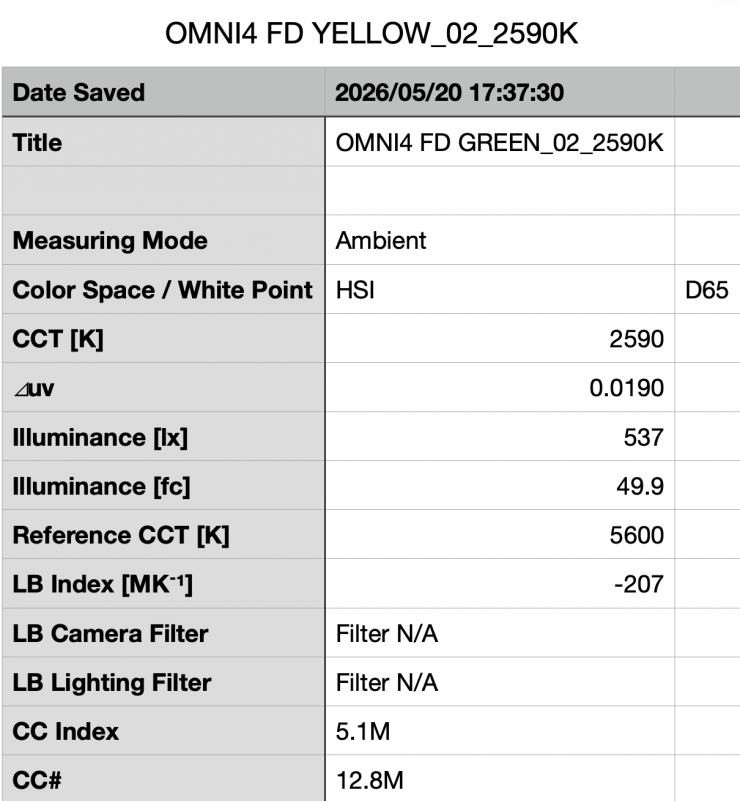
Above, you can see that the light recorded an output of 537 lx (49.9 fc).
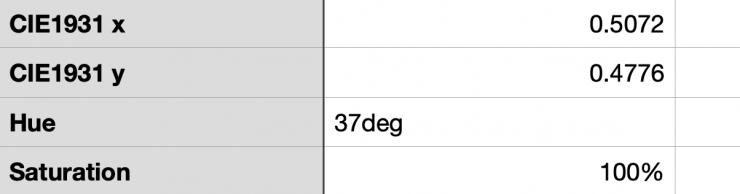
As far as creating an accurate 60° Yellow, the Omnibar was way off with a reading of 37°.
Color Rendering
So now that we have seen how much output the Omnibar produces, how does it perform when it comes to replicating accurate colors? Well, let’s find out.
ARRI Omnibar 4 5600K (Flat Diffuser)
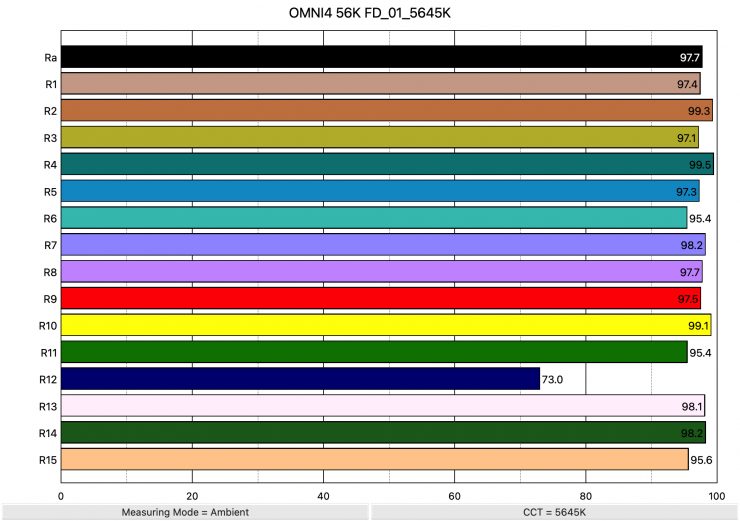
Above, you can see that when the light was set at 5600K, it recorded an average CRI (R1-R8) of 97.7 and an extended CRI (R1-R15) of 95.92. For replicating accurate skin tones, it recorded 97.5 for R9 (red), 98.1 for R13 (closest to caucasian skin tones), and 95.6 for R15 (closest to Asian skin tones). These results were generally very good, but R12 (Blue) was pretty low with just a score of 73.0.
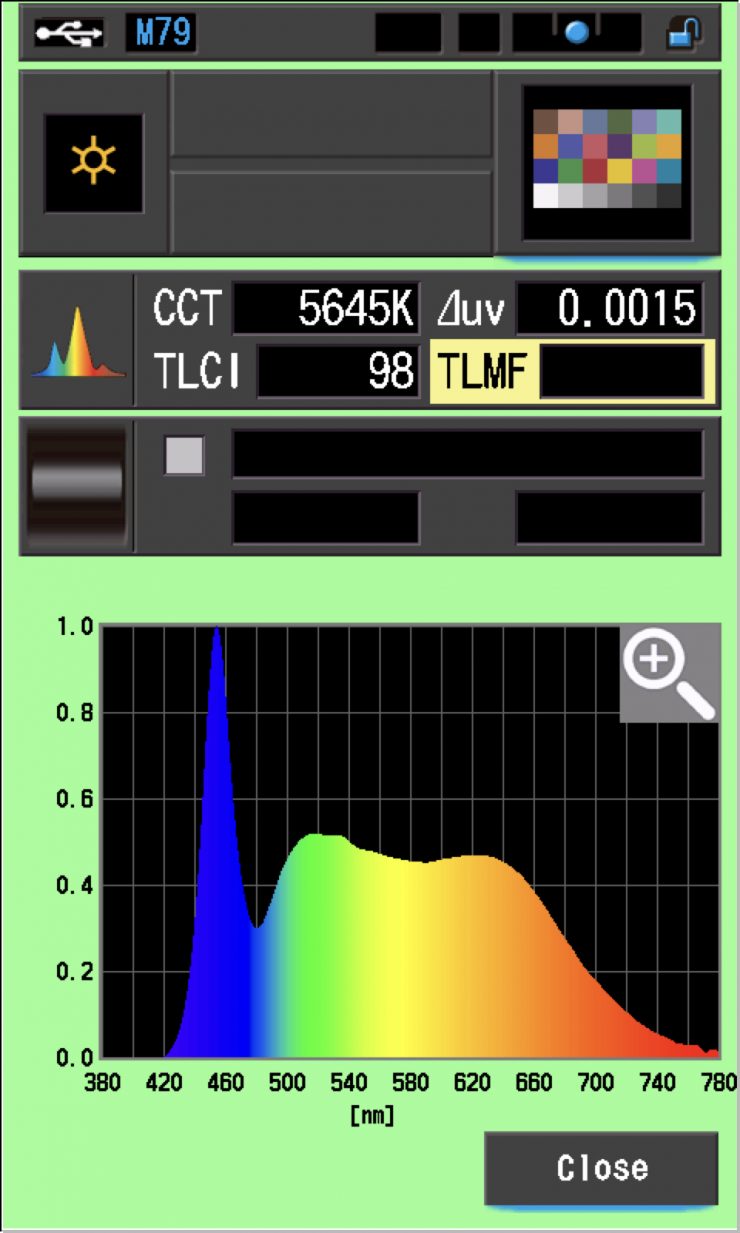
The light, when set at 5600K, also recorded a TLCI score of 98.
So how does this compare to the Nanlite PavoTube 30C II? Below, you can see:
| EXT CRI | R9 | R13 | R15 | ||
| ARRI Omnibar 4 | 95.92 | 97.5 | 98.1 | 95.6 | |
| Nanlite PavoTube 30C II | 95.54 | 91.8 | 94.9 | 95.3 |
ARRI Omnibar 4 3200K (Flat Diffuser)
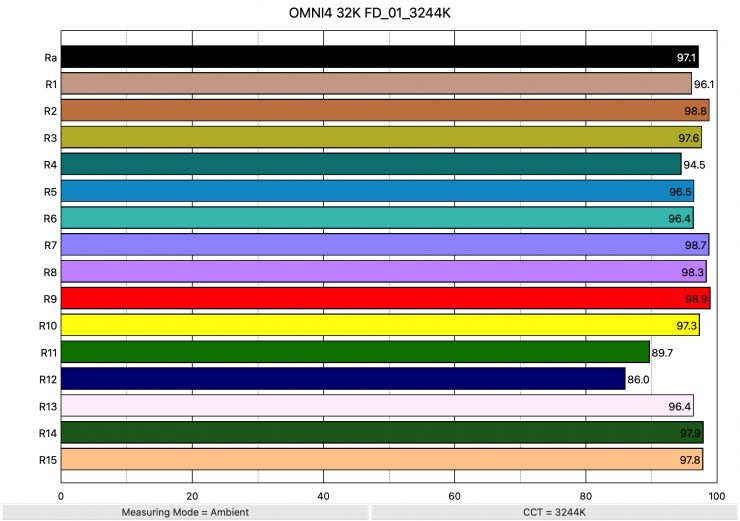
Above, you can see the scores for when the light was used at 3200K. It recorded an average CRI (R1-R8) of 97.1 and an extended CRI (R1-R15) of 96.06. For replicating accurate skin tones, it recorded 98.9 for R9 (red), 96.4 for R13 (closest to caucasian skin tones), and 97.8 for R15 (closest to Asian skin tones).
Just like at 5600K, these results were generally very good; however, R11 (Green) and R12 (Blue) were both slightly below 90.
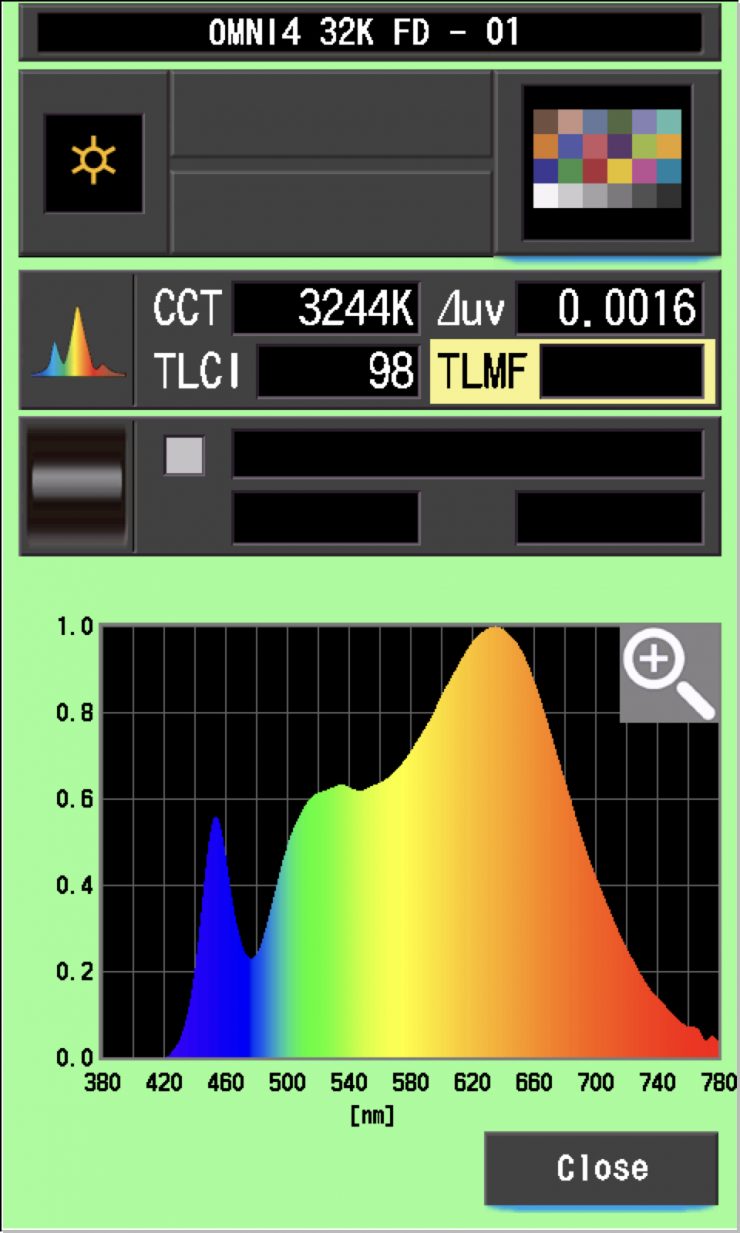
The light, when set at 3200K, recorded a TLCI score of 98.
So how does this compare to the Nanlite PavoTube 30C II? Below, you can see:
| EXT CRI | R9 | R13 | R15 | ||
| ARRI Omnibar 4 | 96.06 | 98.9 | 96.4 | 97.8 | |
| Nanlite PavoTube 30C II | 93.98 | 89.4 | 95.1 | 96.1 |
CC Index & ⊿uv
The CC Index displays the CC correction value and whether any magenta or green need to be added or subtracted. 1 CC corresponds to 035 Kodak CC values or 1/8 Rosco filter values. Any reading less than +1.00 or -1.00 and you’re probably not going to need to make any kind of adjustment. The ⊿uv is the value to show how much this light is away from being an ideal light source (black body radiation = incandescent lamp). As with the CC Index you want this number to theoretically be zero. Kelvin is not a linear value, so we need to convert from Kelvin to MK-1 to compare the values of color temperature. To calculate from Kelvin to Mired is MK-1= 1*1000000/Kelvin. While this may sound confusing, it is the only way of measuring if the Kelvin shift is significant enough to warrant having to use a filter for correction. Below are the results for the light when it was used with its Flat Diffuser.
ARRI Omnibar 4 Kelvin Vs MK-1
| Kelvin | Difference in K | MK-1 | Difference in MK-1 | |
| SET VALUE | 2500K | 0 | 400.00 | 0 |
| ACTUAL READING | 2537K | 37 | 394.16 | 5.84 MK-1 |
| SET VALUE | 3200K | 0 | 312.5 | 0 |
| ACTUAL READING | 3244K | 44 | 308.26 | 4.24 MK-1 |
| SET VALUE | 4500K | 0 | 222.22 | 0 |
| ACTUAL READING | 4547K | 47 | 219.92 | 2.30 MK-1 |
| SET VALUE | 5600K | 0 | 178.57 | 0 |
| ACTUAL READING | 5645K | 45 | 177.14 | 1.43 MK-1 |
| SET VALUE | 6500K | 0 | 153.84 | 0 |
| ACTUAL READING | 6554K | 54 | 152.57 | 1.27 MK-1 |
| SET VALUE | 8000K | 0 | 125.00 | 0 |
| ACTUAL READING | 8057K | 57 | 124.11 | 0.89 MK-1 |
| SET VALUE | 10000K | 0 | 100.00 | 0 |
| ACTUAL READING | 10041K | 41 | 99.59 | 0.41 MK-1 |
These figures might look confusing, but what they tell me is that the light is extremely CCT-accurate at 4500K and above. It’s also still pretty good below 4500K as well. Any MK-1 score that is under -9/9 means you wouldn’t have to use any color correction gels. Any MK-1 score that is under -6/6 is a very good result.
ARRI Omnibar 4 CC INDEX & ⊿uv
| CC INDEX | ⊿uv | |
| 2500K | 0.1M | 0.0020 |
| 3200K | 0.2M | 0.0016 |
| 4500K | 0.2M | 0.0014 |
| 5600K | 0 | 0.0015 |
| 6500K | 0.1G | 0.0014 |
| 8000K | 0.4G | 0.0016 |
| 10000K | 0.7G | 0.0019 |
These were very good results across the board. There was nothing here that anyone should be concerned about. The ⊿uv scores were extremely consistent across the CCT range.
TM-30
TM-30 is a relatively new color rendering standard that was developed to deal with the limitations of CRI. TM-30 looks at 99 individual colors. These 99 colors are categorized into seven groups: nature, skin color, textiles, paints, plastics, printed material, and color systems.
TM-30 scores go from 0 – 100. The higher the score, the more accurate a light is at producing colors. Any TM-30 Rf score in the ’90s is considered to be good. What is interesting and something that you need to be very aware of is that two separate light sources with the exact same CRI scores can render colors very differently. A light with a high CRI rating could have a low TM-30 score. Conversely, a light with a good TM-30 score could have a bad CRI score.
Now, there are two measurements associated with TM-30, Rf and Rg.
Rf (Color Fidelity)
Rg (Color Gamut)
With Rf value, ideally, you want a score in the 90’s.
With Rg value, a score below 100 indicates that the light source renders colors with less saturation than the reference source. So ideally, you want this score to be above 100.
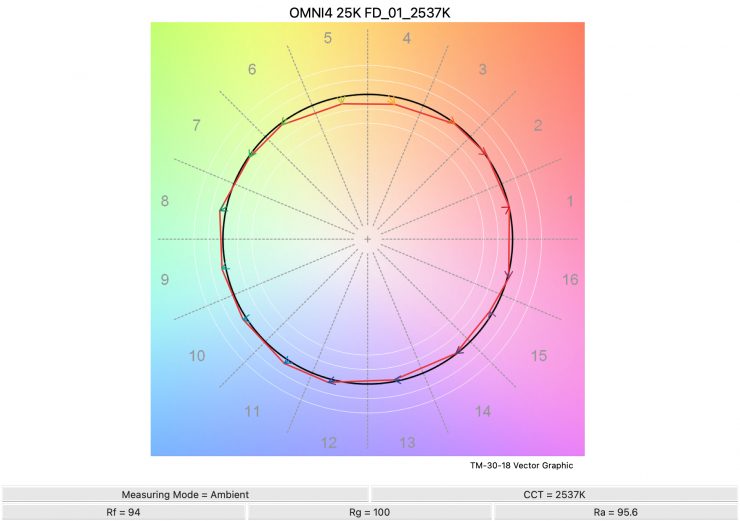
2500K 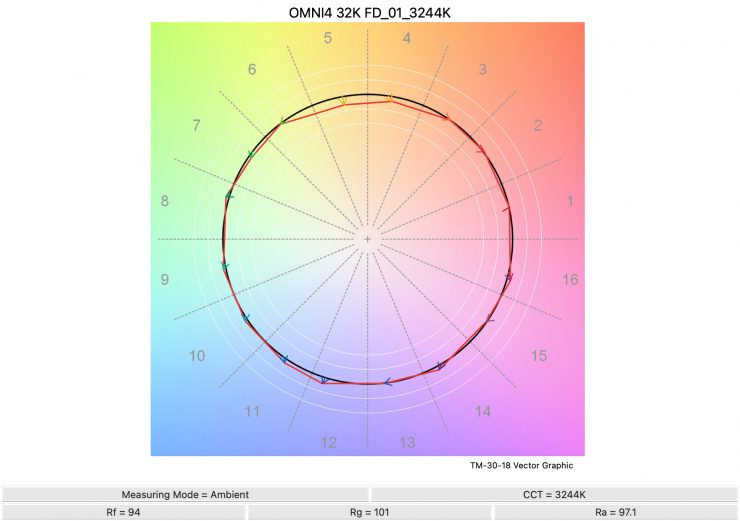
3200K 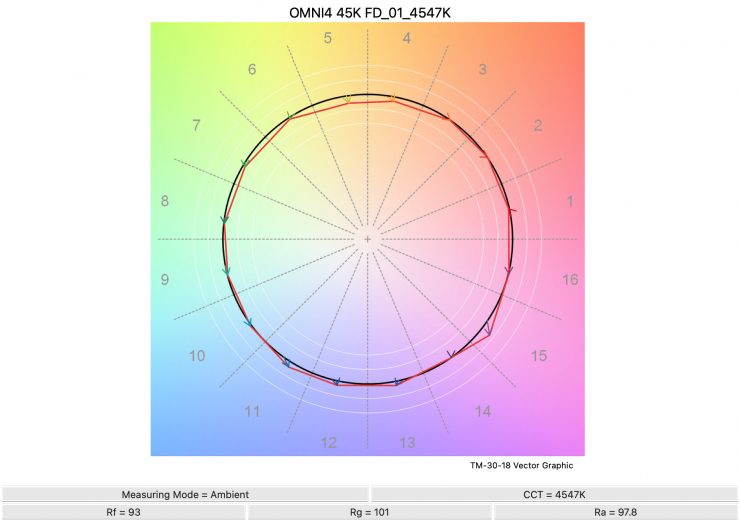
4500K 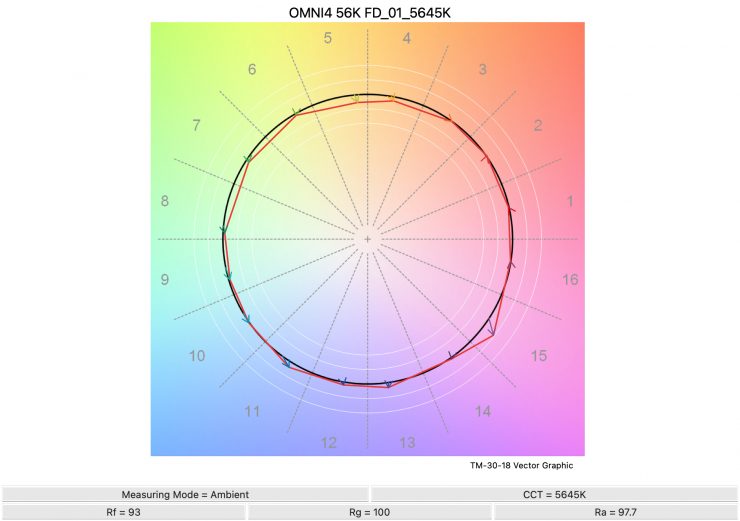
5600K 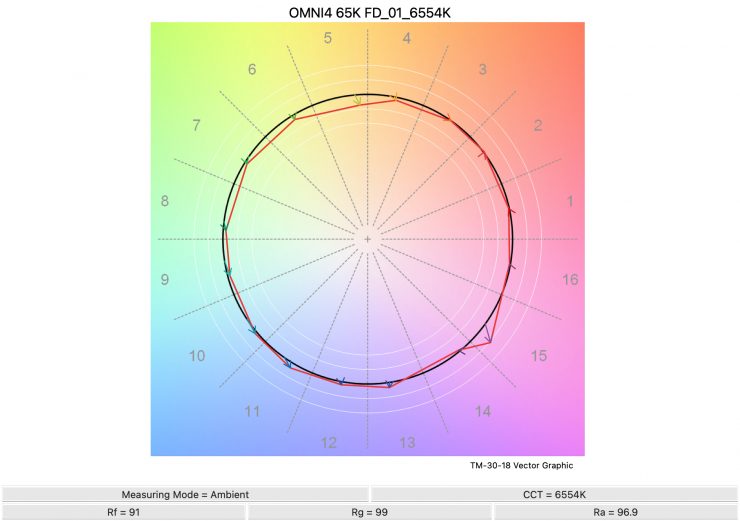
6500K 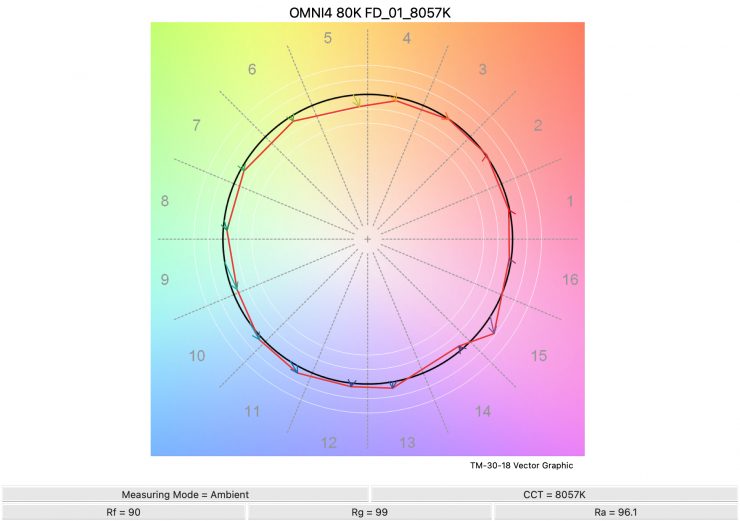
8000K 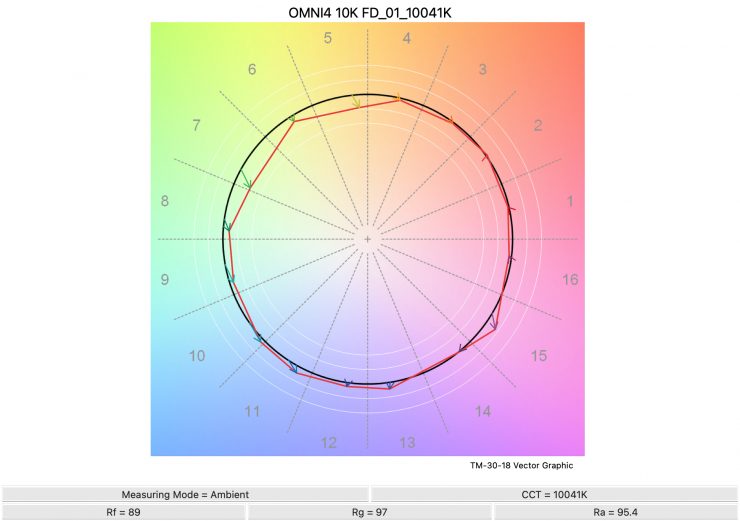
Above, you can see the scores for the ARRI Omnibar 4 at various CCT settings. Below, I have listed the figures as well.
Here are the results:
| Rf | Rg | |
| 2500K | 94 | 100 |
| 3200K | 94 | 101 |
| 4500K | 93 | 101 |
| 5600K | 93 | 100 |
| 6500K | 91 | 99 |
| 8000K | 90 | 99 |
| 10000K | 89 | 97 |
The TM-30 scores were fairly consistent across its CCT range, and it shows me that the light is reasonably consistent at replicating accurate colors with full saturation. At 10,000K, it did start to struggle slightly.
SSI
SSI (Spectral Similarity Index) was developed by the Sci-Tech Council of the Academy. SSI gives me the ability to set any light as a standard, or use predefined standards (such as CIE D55), and then give other lights an SSI score based upon how well they will match standards such as CIE D55 measure spectral response and compares it directly against an ideal light source.
ARRI Omnibar 4 3200K
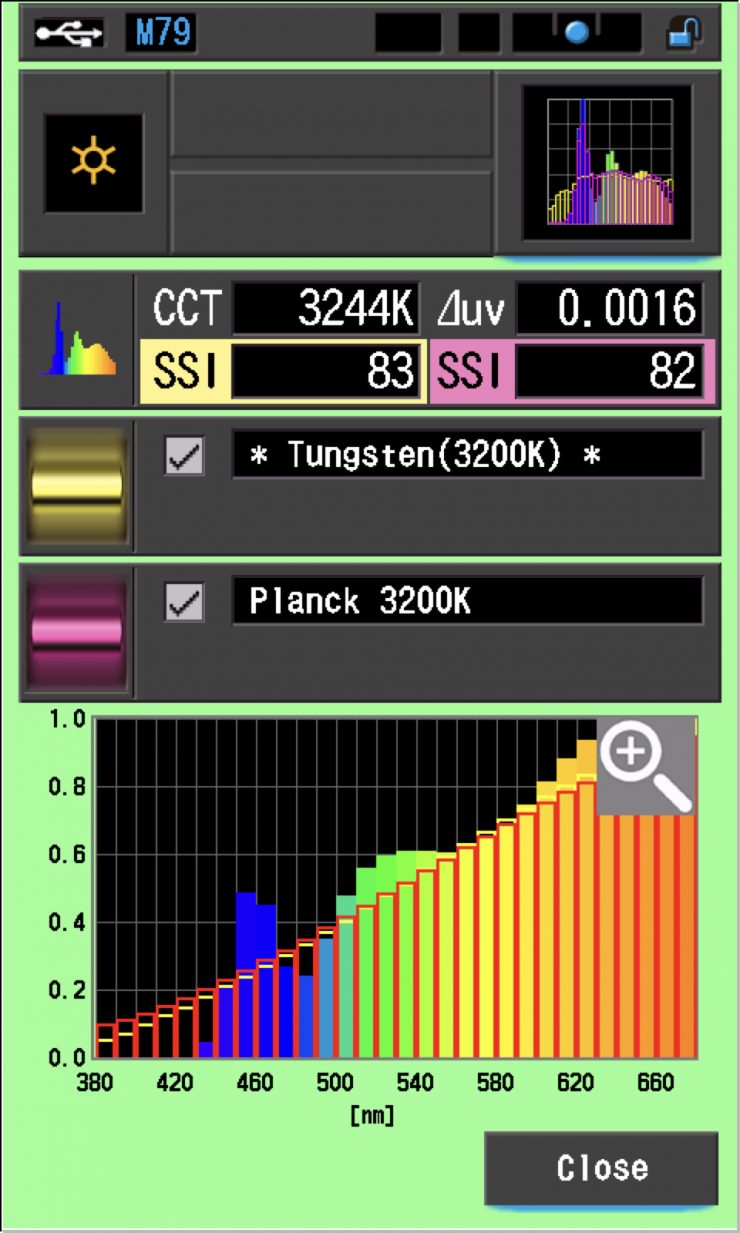
In this graph, the red bars indicate a perfect 3200K (Tungsten source. The Red bars indicate a Planck 3200K source. This lets us compare how close to a perfect 3200K lighting source the ARRI Omnibar 4 is. A score in the mid ’80s is very good for an LED light trying to replicate a 3200K source.
ARRI Omnibar 4 5600K
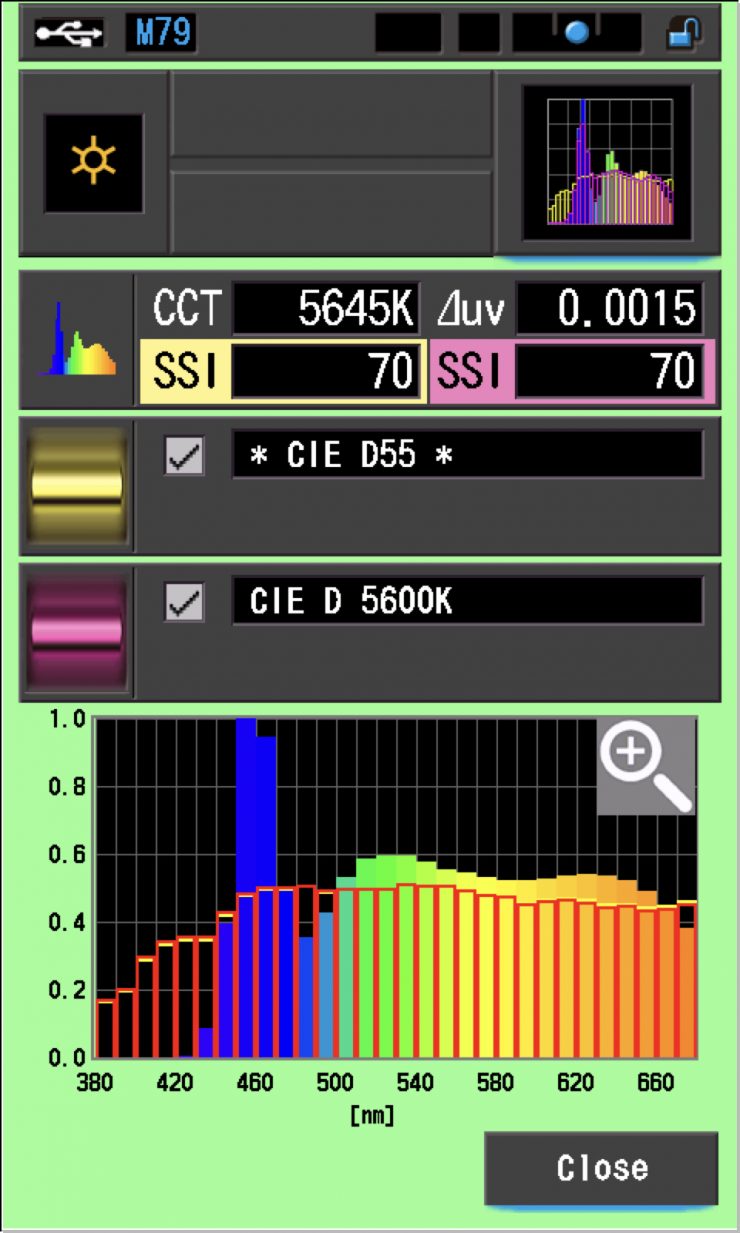
In the graph above, the red bars indicate a perfect CIE D 5600K source. The Red bars indicate a perfect CIE D55 source. This lets us compare how close to a perfect 5600K lighting source the ARRI Omnibar 4 is.
Most LED lights only record SSI scores in the 70s when they are used at 5600K.
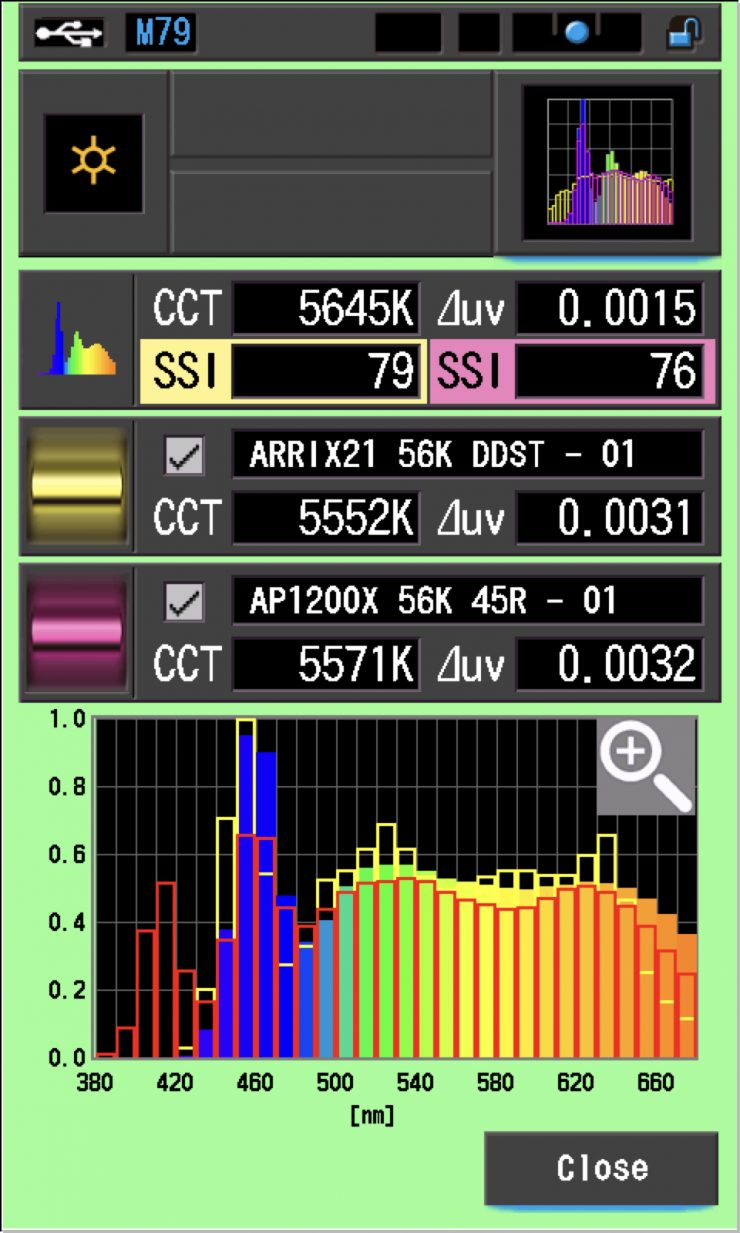
The main reason we want to record SSI scores is so we can see how well they match with other lights. As an example, let’s see how well the Omnibar matches the ARRI SkyPanel X21 and the Aputure STORM 1200x when used at 5600K. As you can see, the Omnibar is not a very good match for either fixture. In a perfect world, you would want the lights you are using to have a score of 100 if they were all being used at the same CCT setting. That is rarely ever going to be the case unless you are using the exact same lights from the same manufacturer; however, any score in the 90s should, in theory, provide a very decent match.
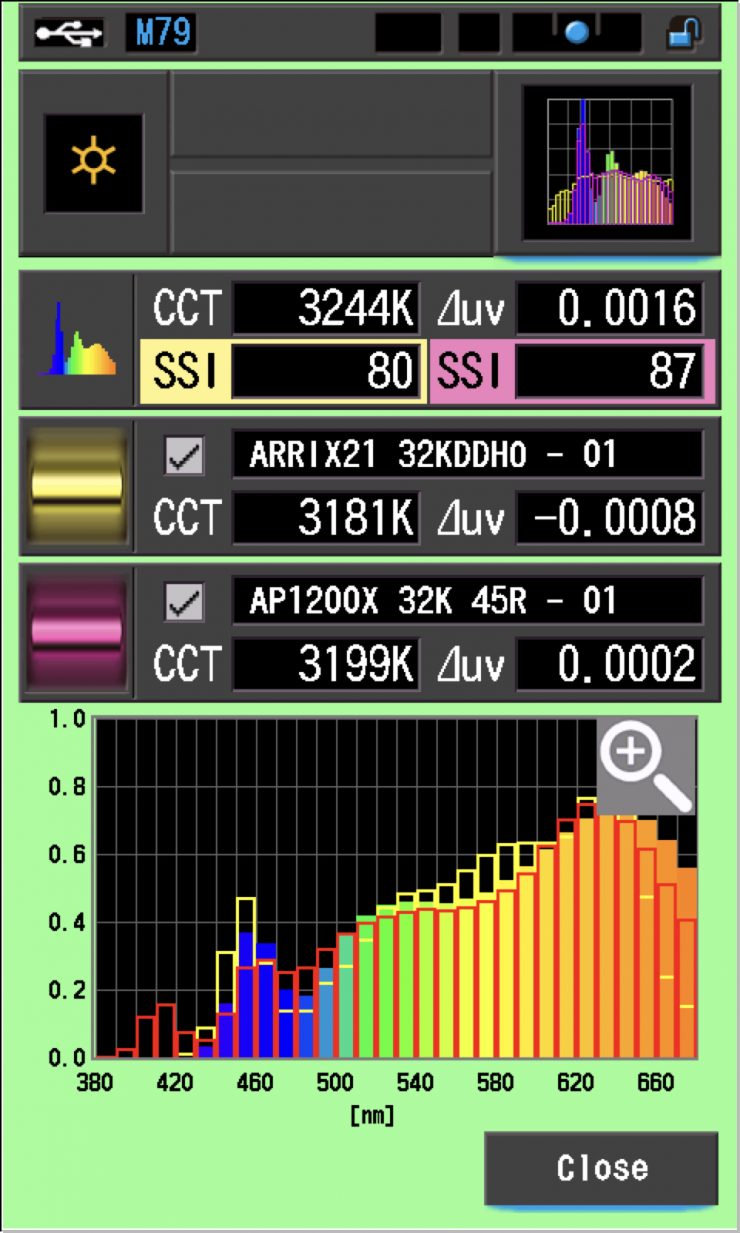
As another comparison, above you can see how all of those same lights match when used at 3200K. As you can see, the Omnibar is a better match to the Aputure than the SkyPanel X21.
Let’s also see how well the Omnibar with its Flat Diffuser matches itself when used open face and with its Intensifier.
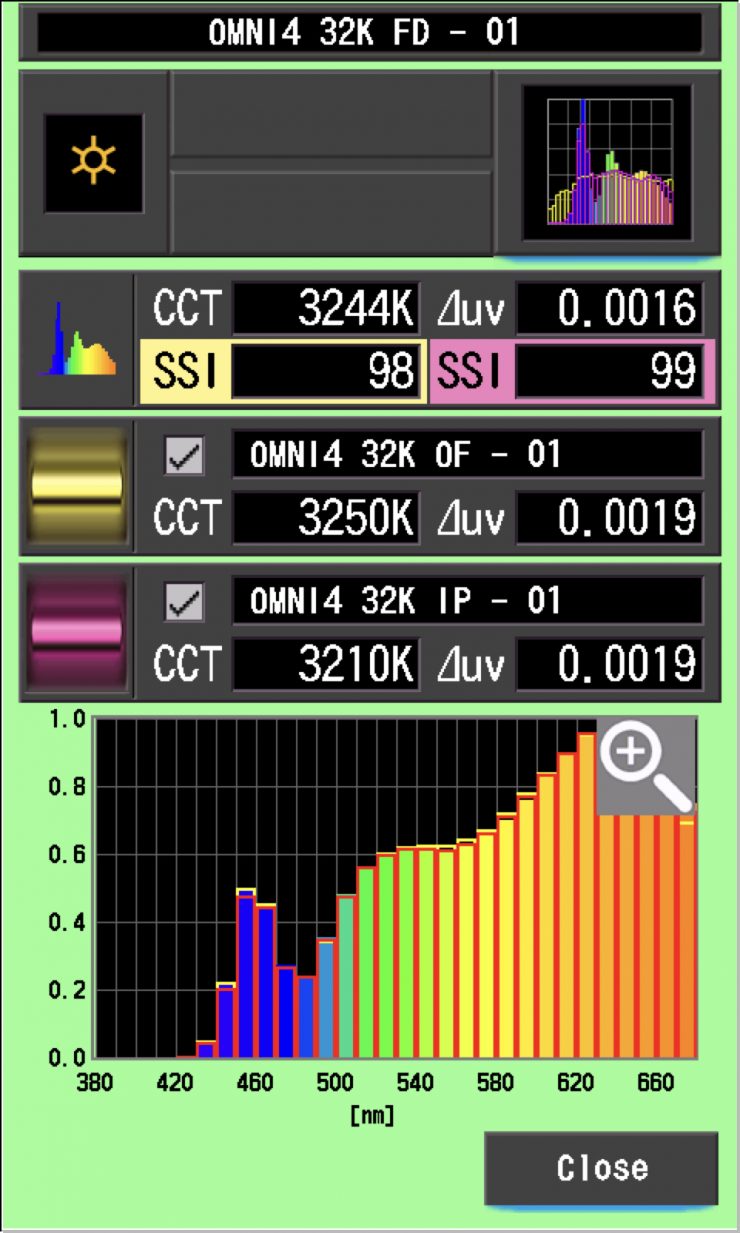
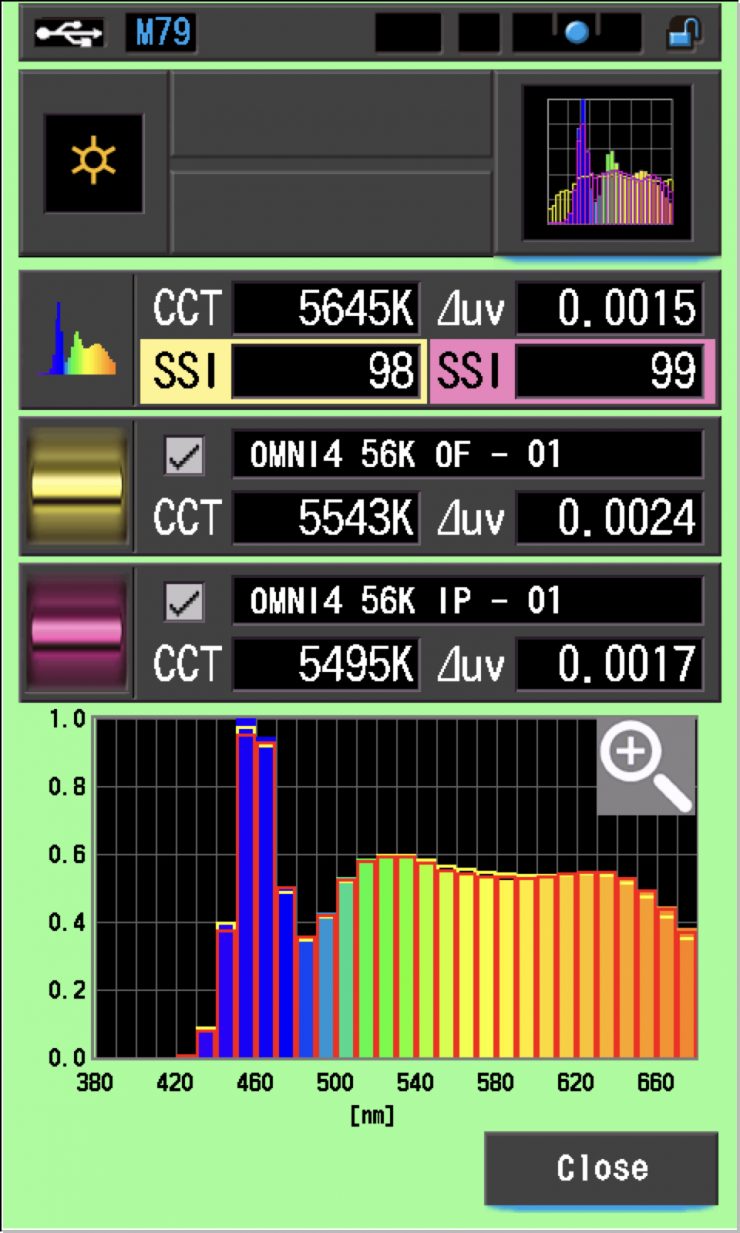
As you can see, the light is almost a perfect match to itself. This tells me that you can use multiple Omnibars with various modifiers and they will all match.
Spectral Distribution
ARRI Omnibar 4 5600K
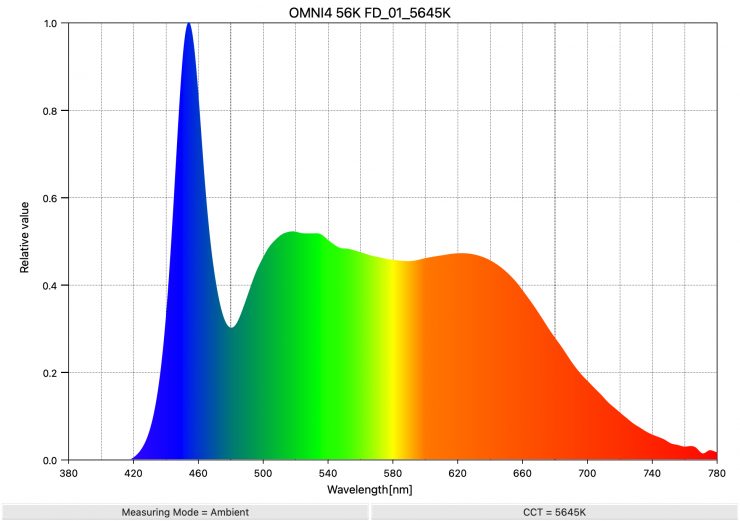
Above, you can see the spectral distribution of the ARRI Omnibar 4 when it is set at 5600K. The spectral distribution is not overly full.
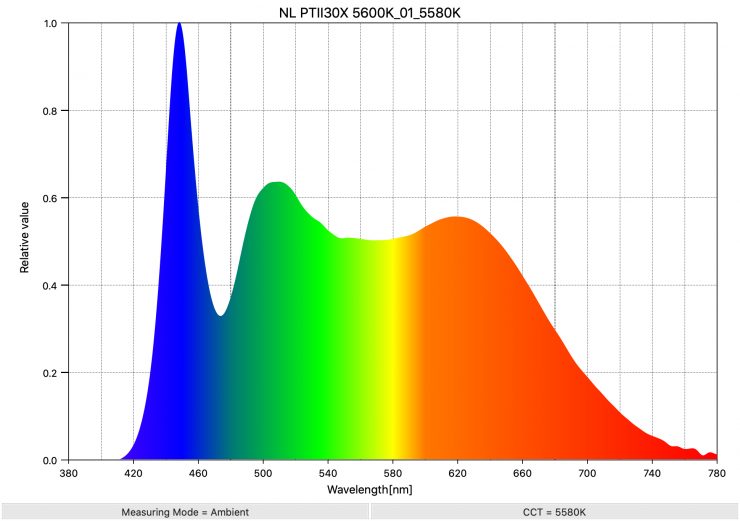
As a comparison, above you can see the spectral distribution of the Nanlite PavoTube II 30X when it is set at 5600K. The spectral distribution is not overly full, and there is definitely a bit of a bump in green.
3200K
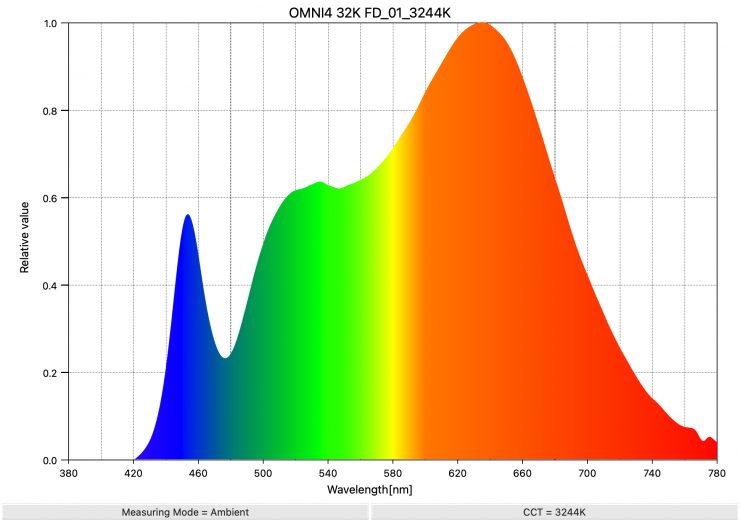
Above, you can see the spectral distribution of the ARRI Omnibar 4 when it is set at 3200K. The spectral distribution is pretty good for an LED light being used at 3200K, but just like at 5600K, there is a bump in green.
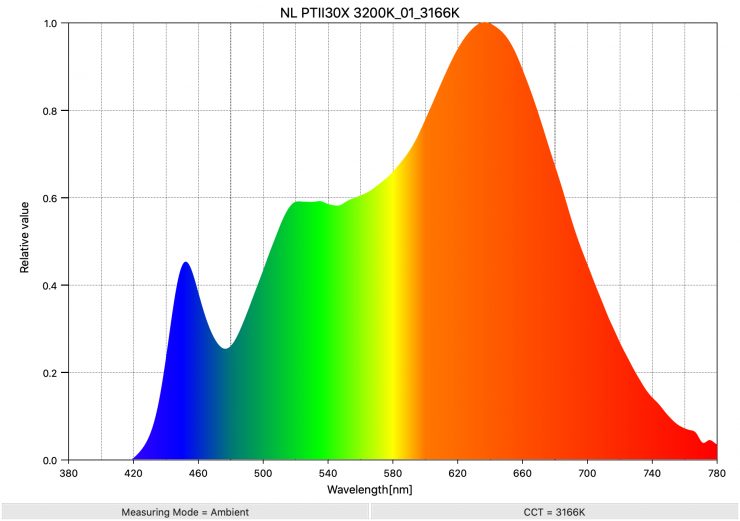
As a comparison, above you can see the spectral distribution of the Nanlite PavoTube 30C II when it is set at 3200K. The spectral distribution is pretty good for an LED light being used at 3200K, but just like at 5600K, there is a bump in green.
Real-World Performance & Quality of Light
I might sound like a broken record, but as I always say in lighting reviews, photometric scores only tell you part of the story. LED lighting technology has reached a point where almost all of the lights that are being released score well in photometric tests. What you should be focusing on, and this goes for just about any product, is usability. How will this product fit into the way I like to work?
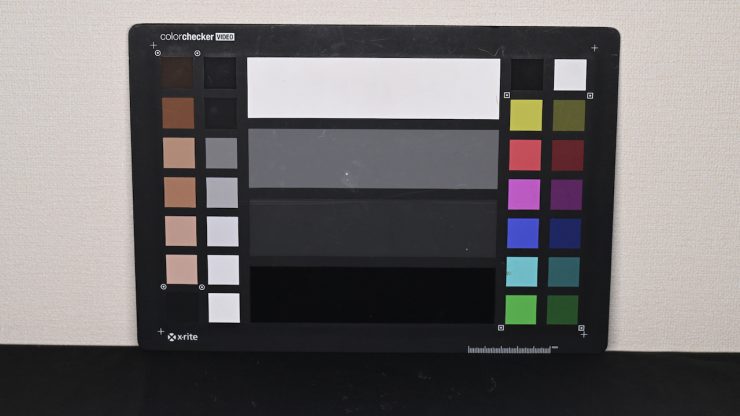
Preset 5600K Camera WB 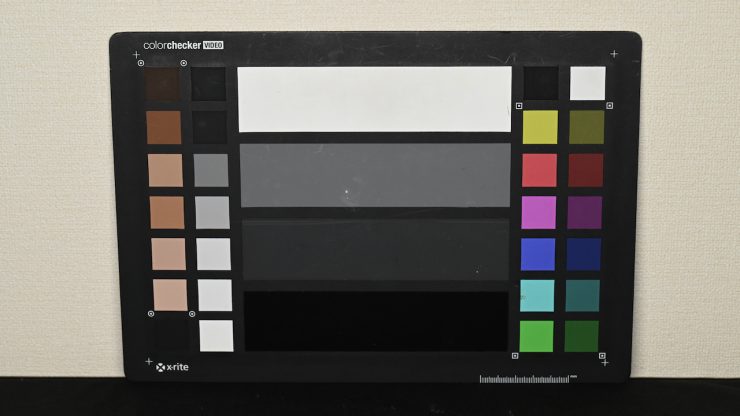
Camera WB
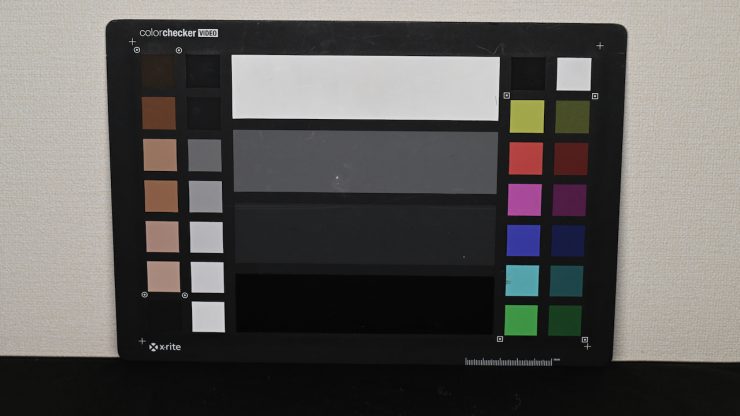
Firstly, let’s look at one of the most important aspects of a light, color accuracy. I set up a small test in a controlled environment where I shot a color checker chart with the camera WB at a preset value of 5600K, with the light set at 5600K. I then did a manual WB to see what the differences were. As you can see, the ARRI Omnibar leans just a tiny bit magenta, but at least in my opinion, it looks better before doing a camera WB.
Preset 3200K Camera WB 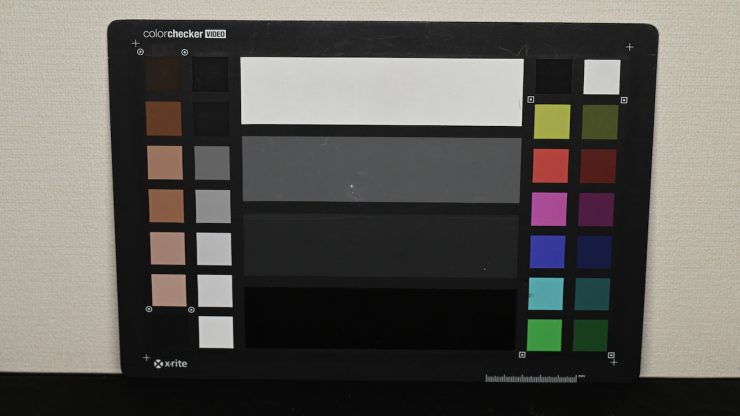
Camera WB
Now, let’s do that exact same test, but this time at 3200K. In the real world, at 3200K, the light is very accurate. The color accuracy of the fixture is impressive.
The ARRI Omnibar is quick to set up, and you could use the light for lots of different applications. Lights such as this are fairly versatile and can be used as accent lights, interview lights, replacements for practicals, etc, etc.
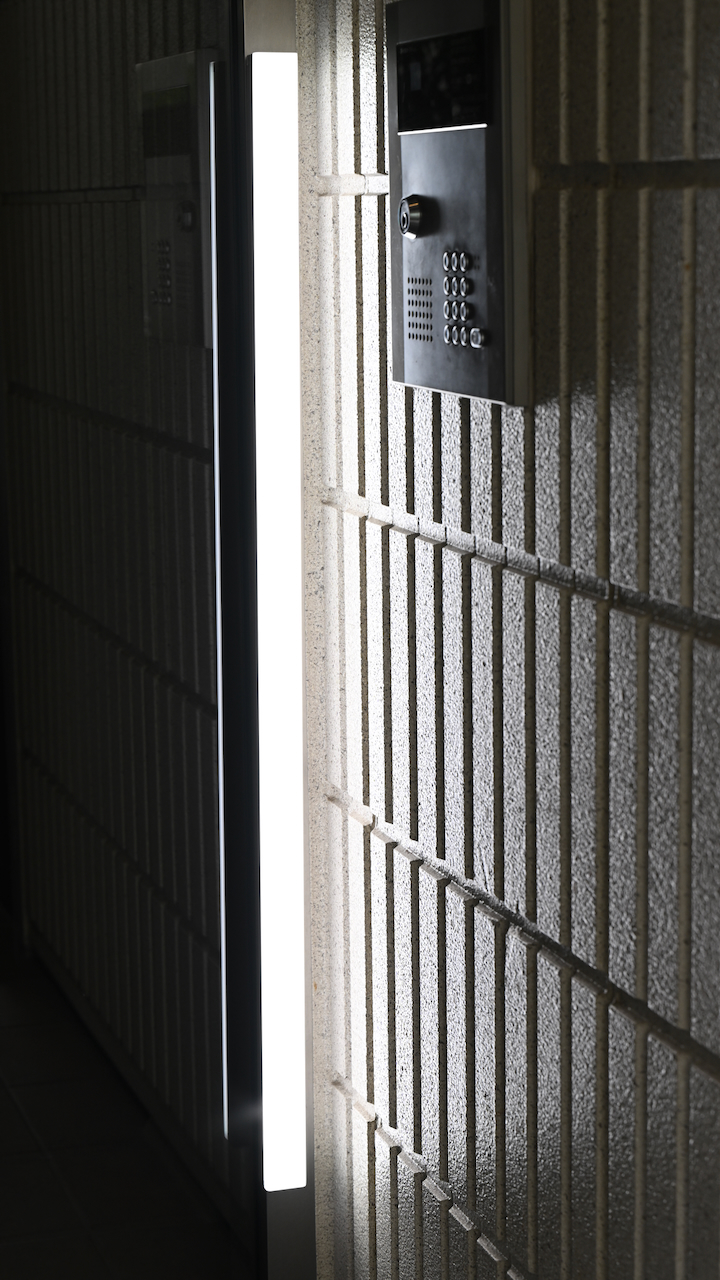
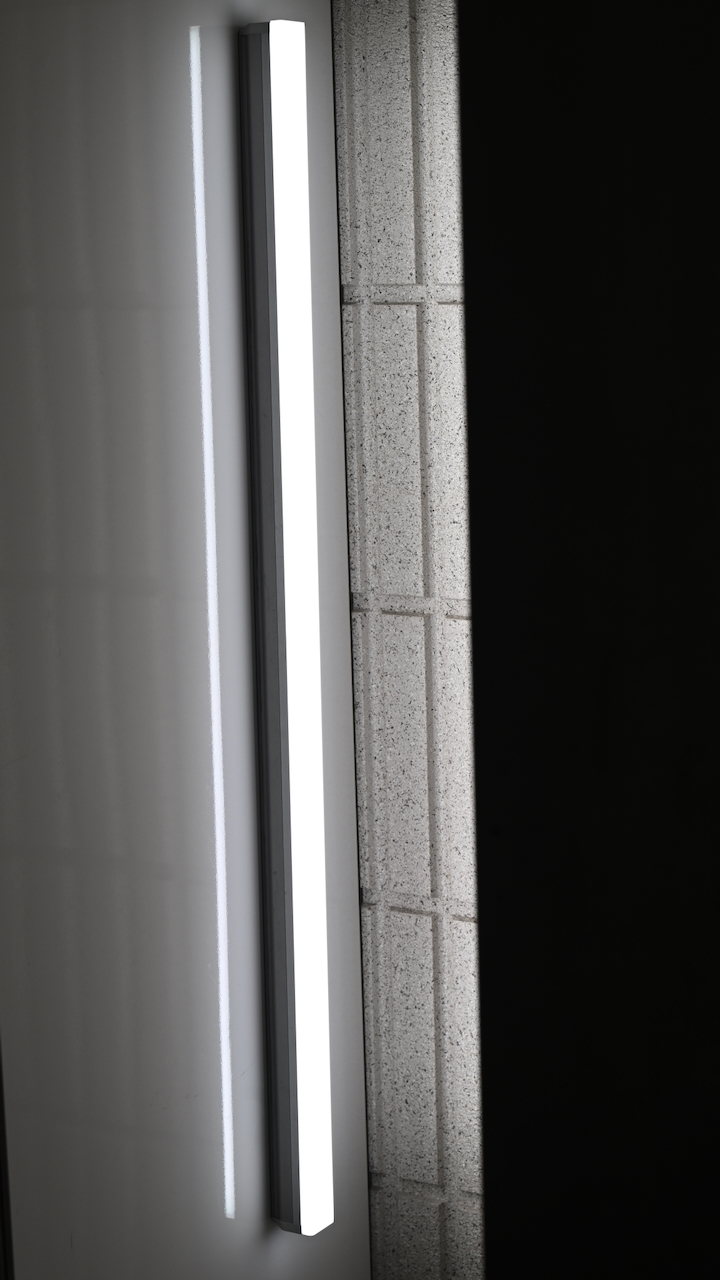
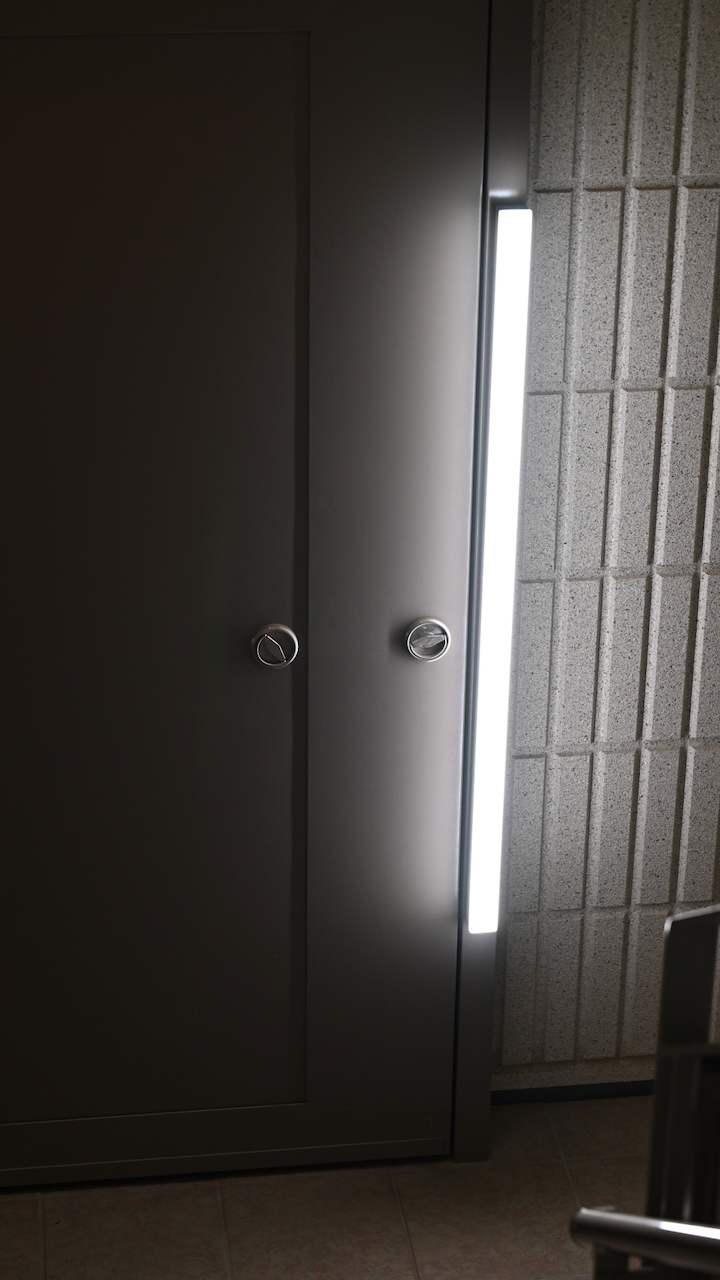
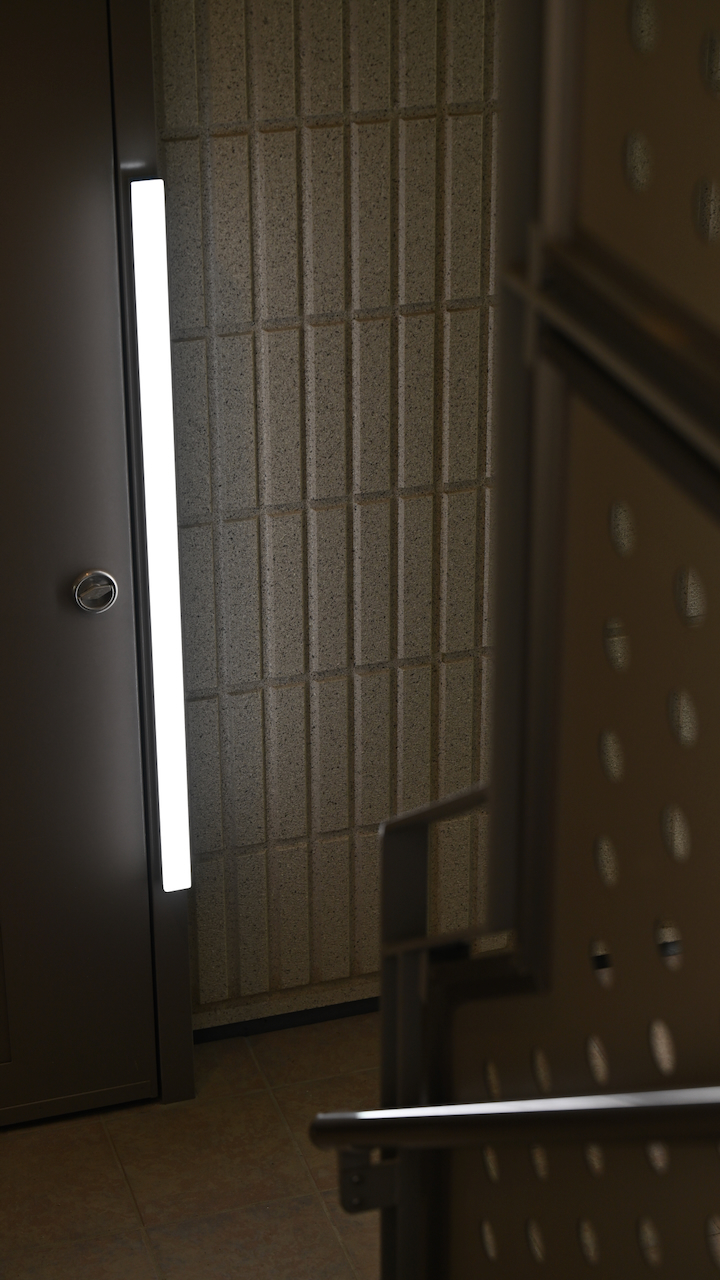
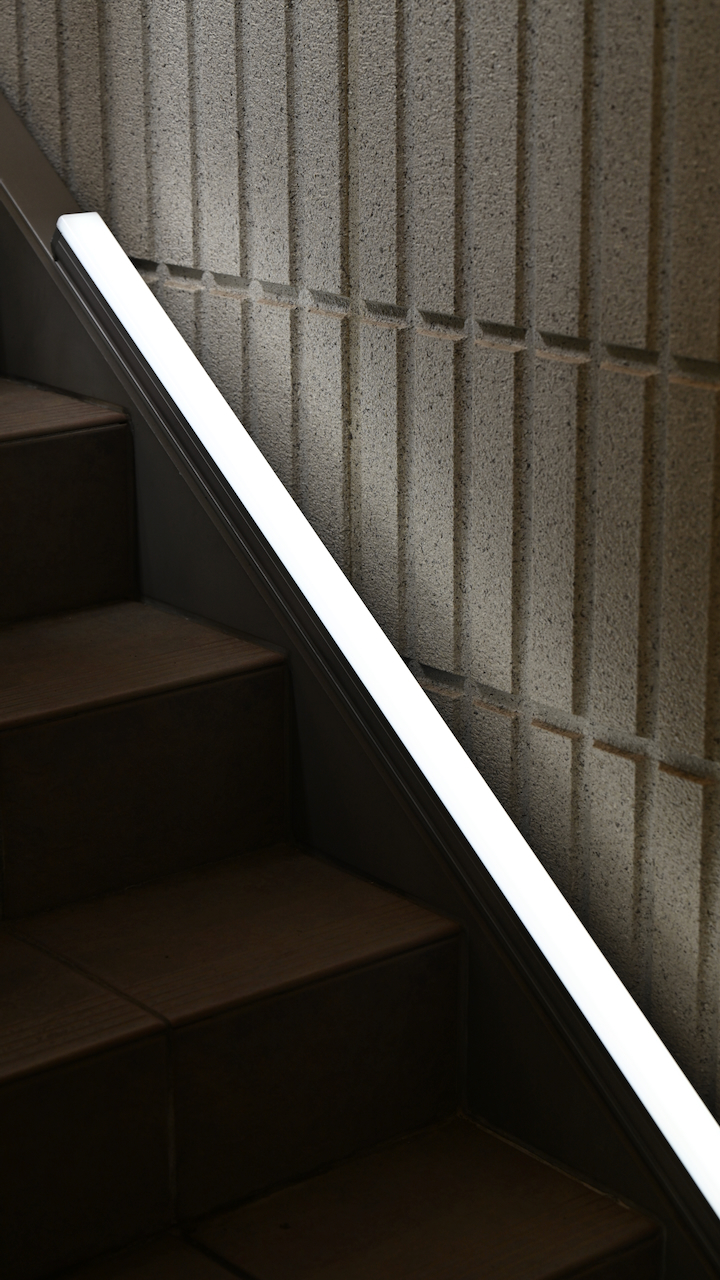
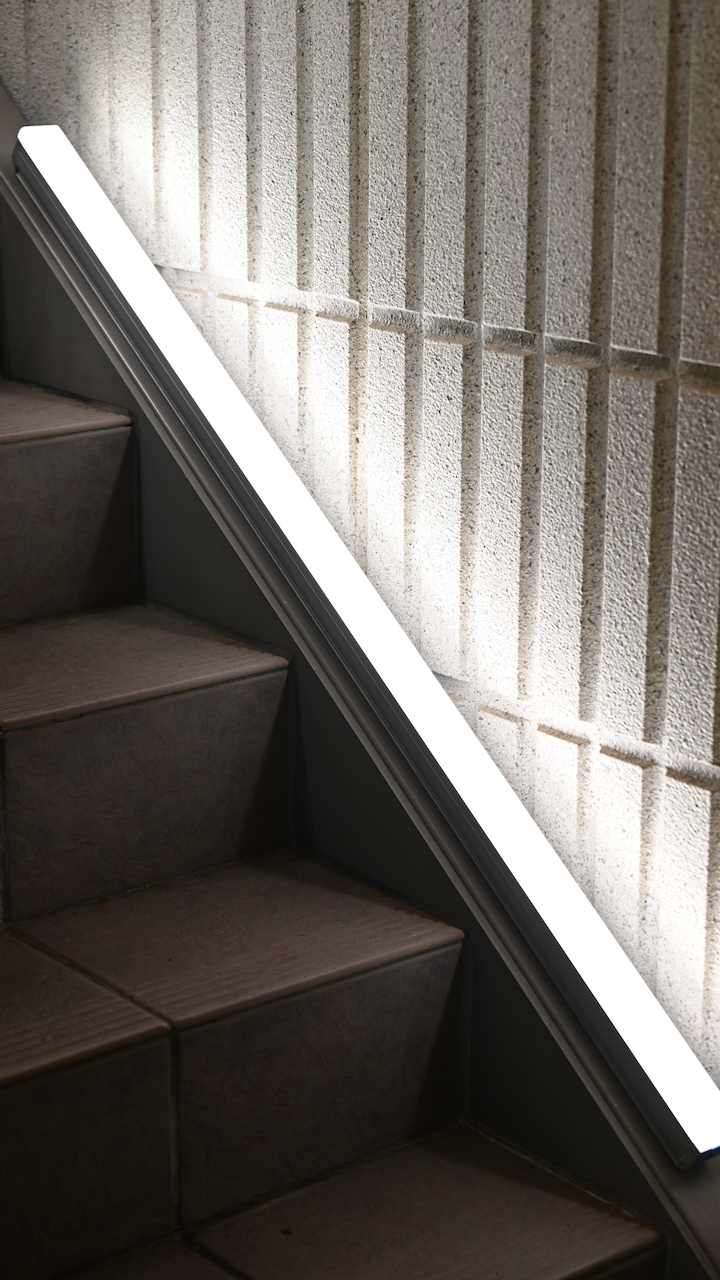
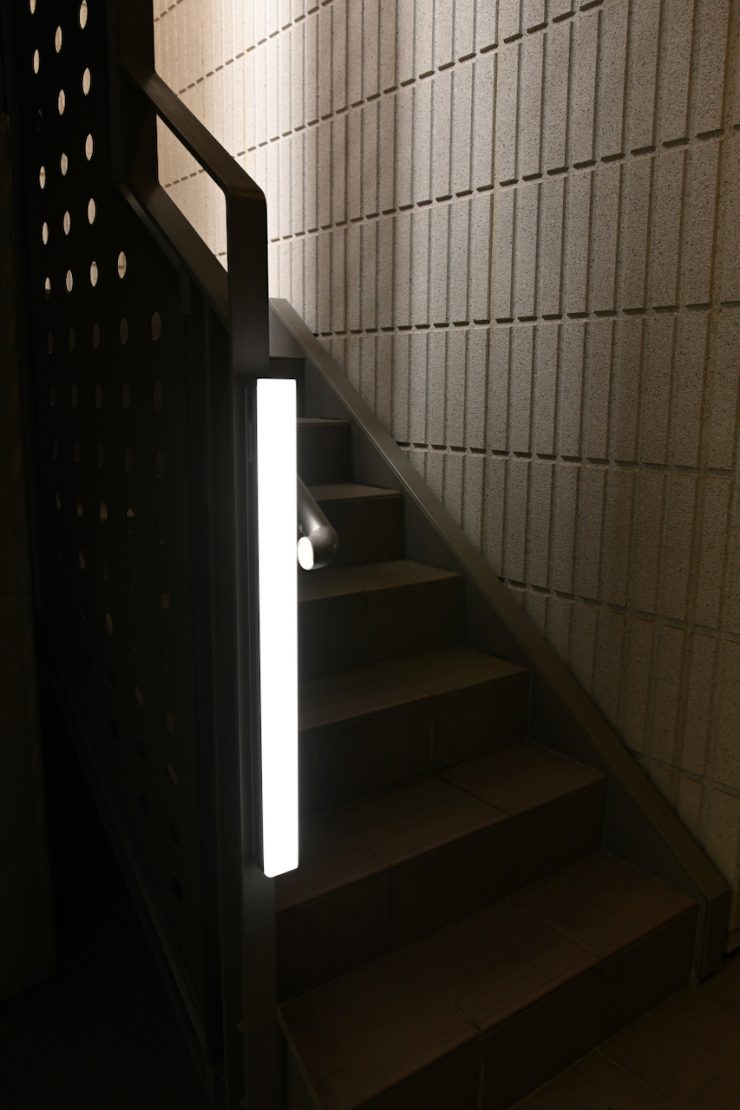
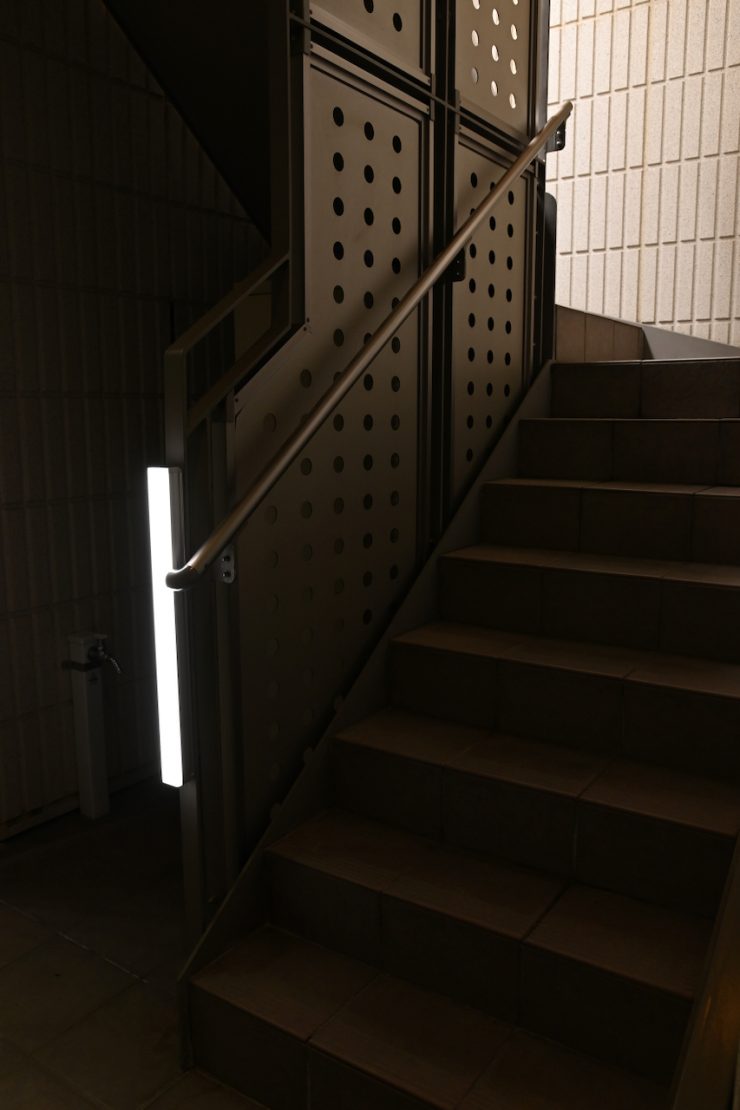
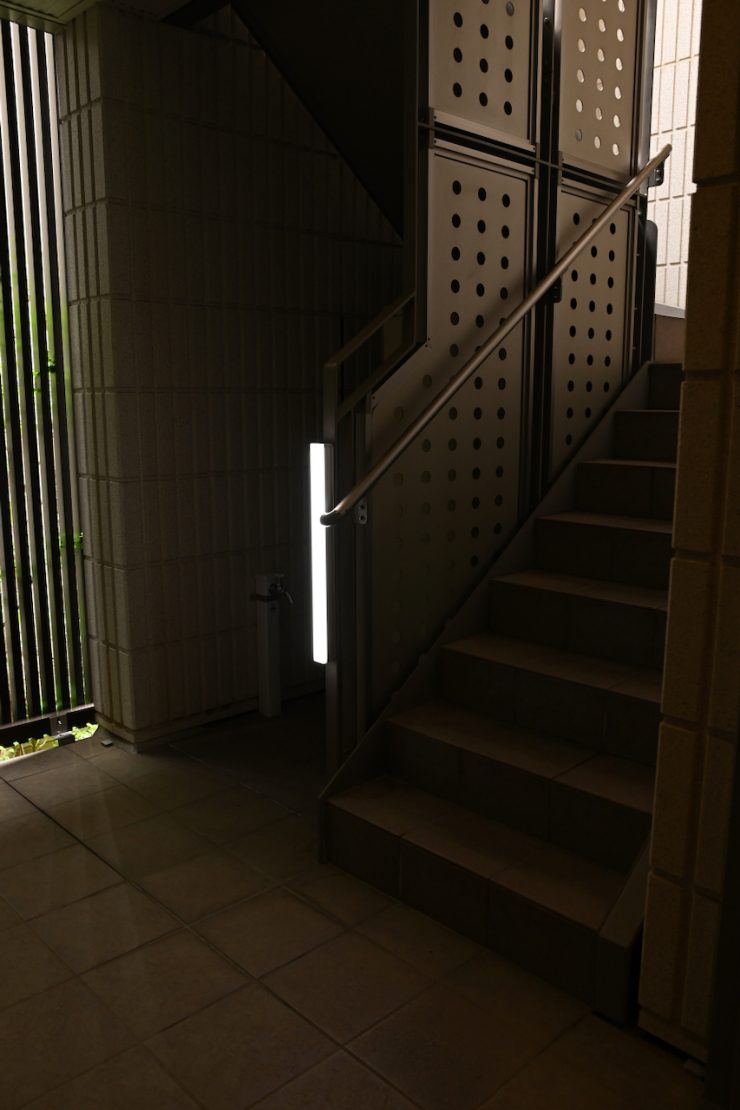
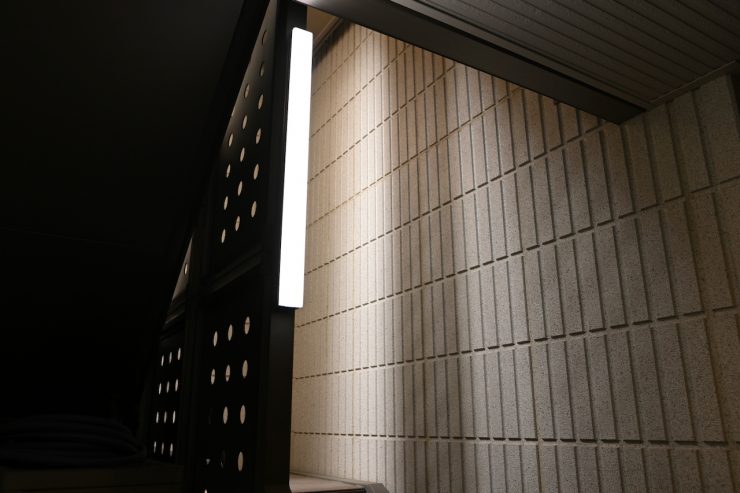
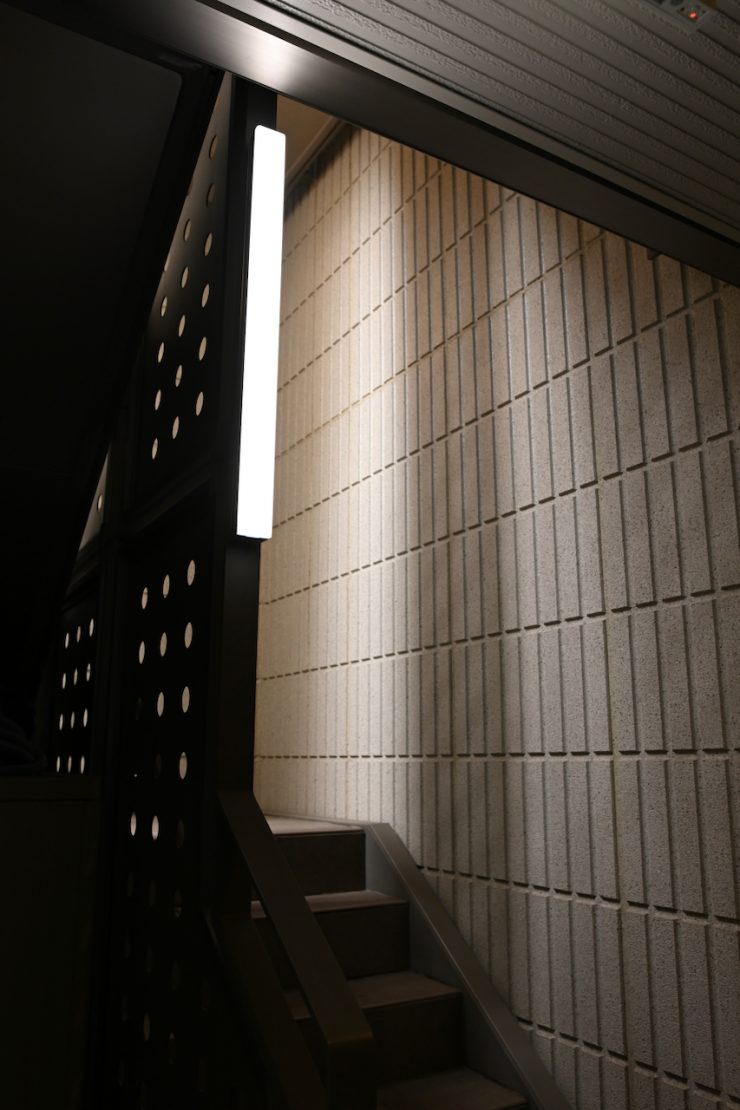
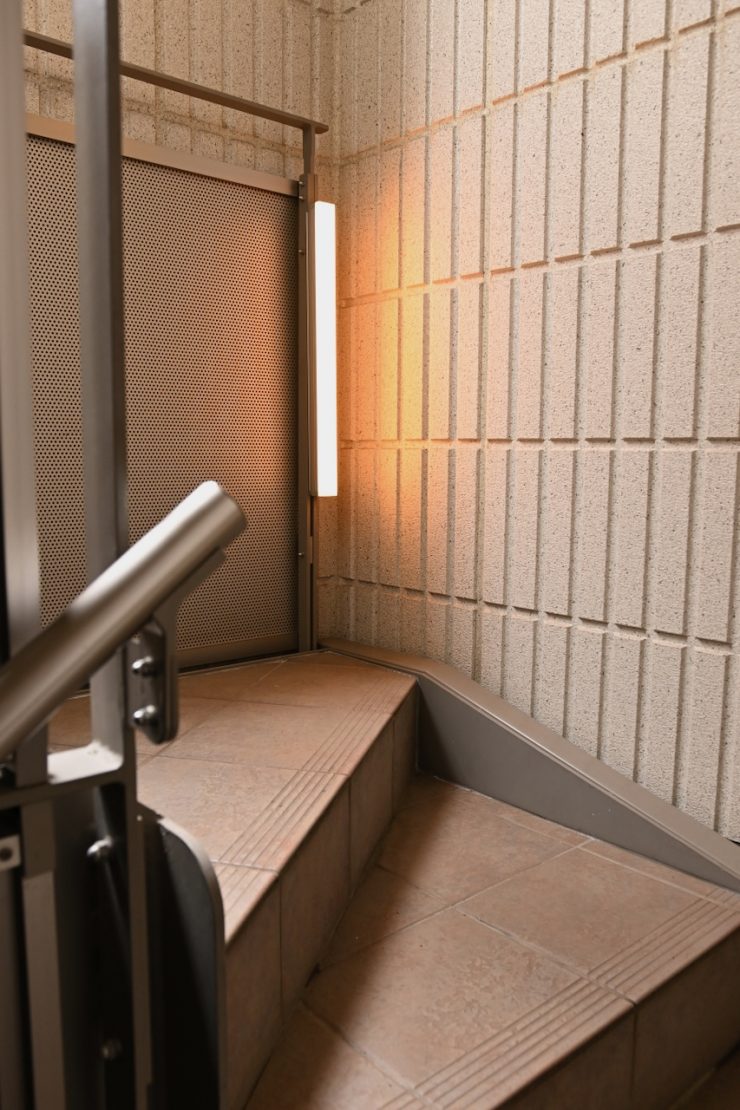
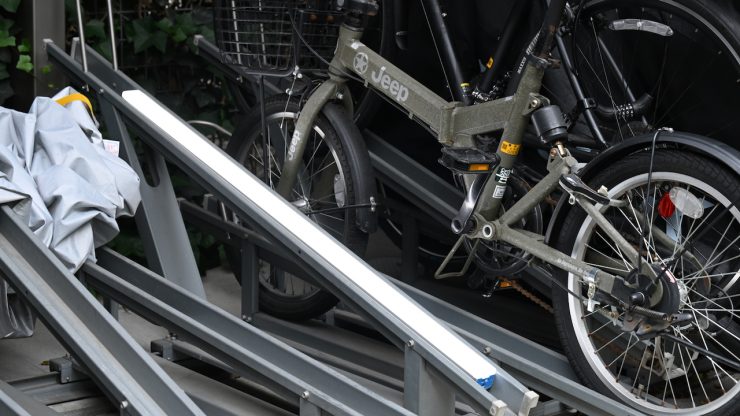
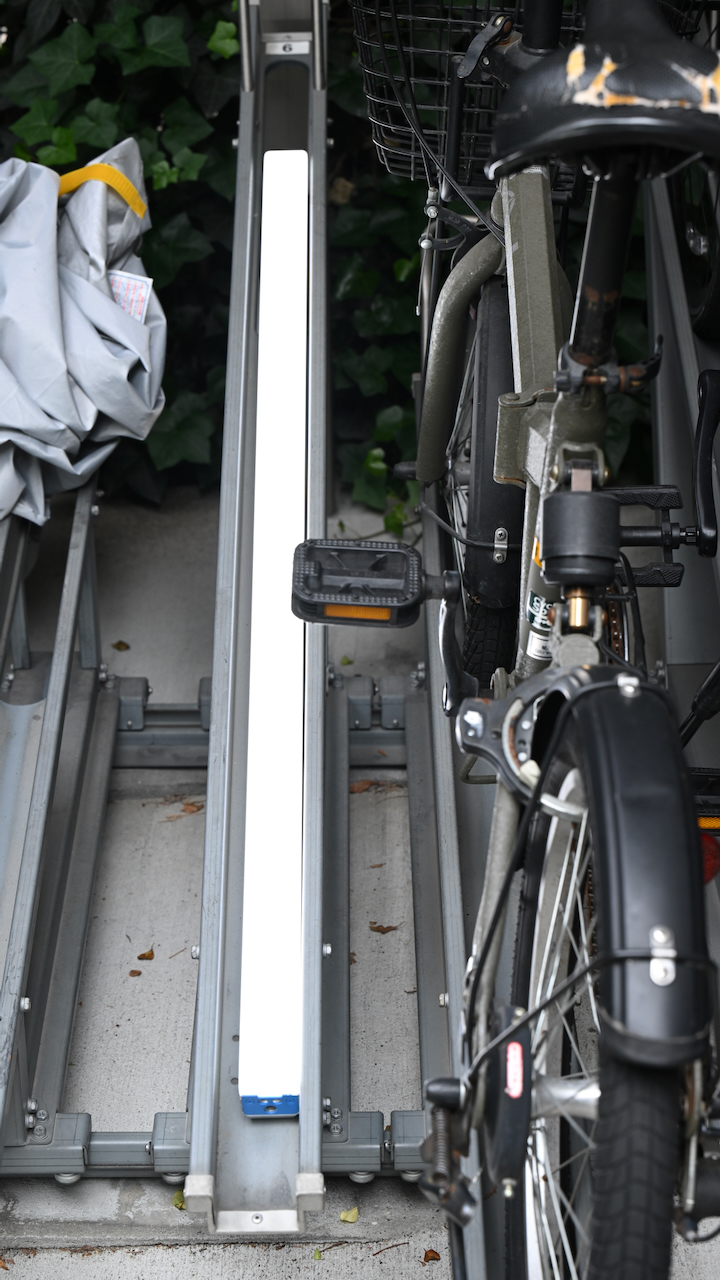
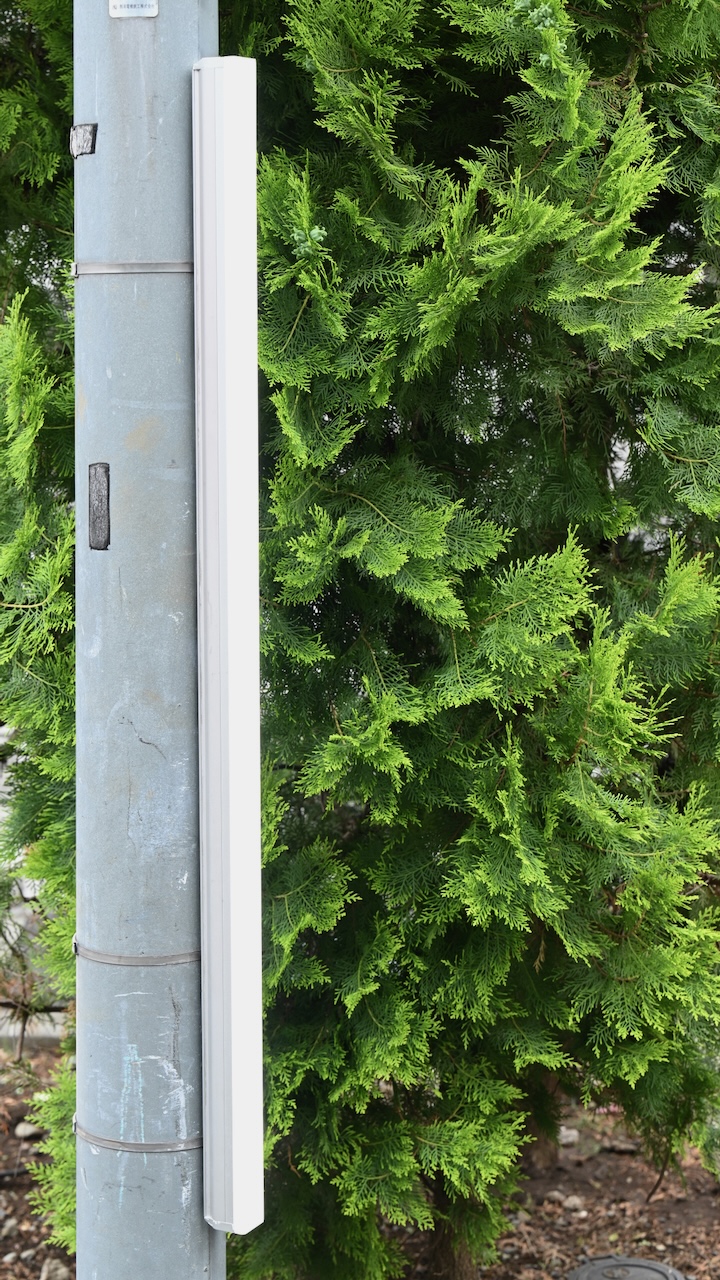
The strong magnets are fantastic, and because of the design of the Omnibars, they work really well as practical sources that can be shown in a shot.
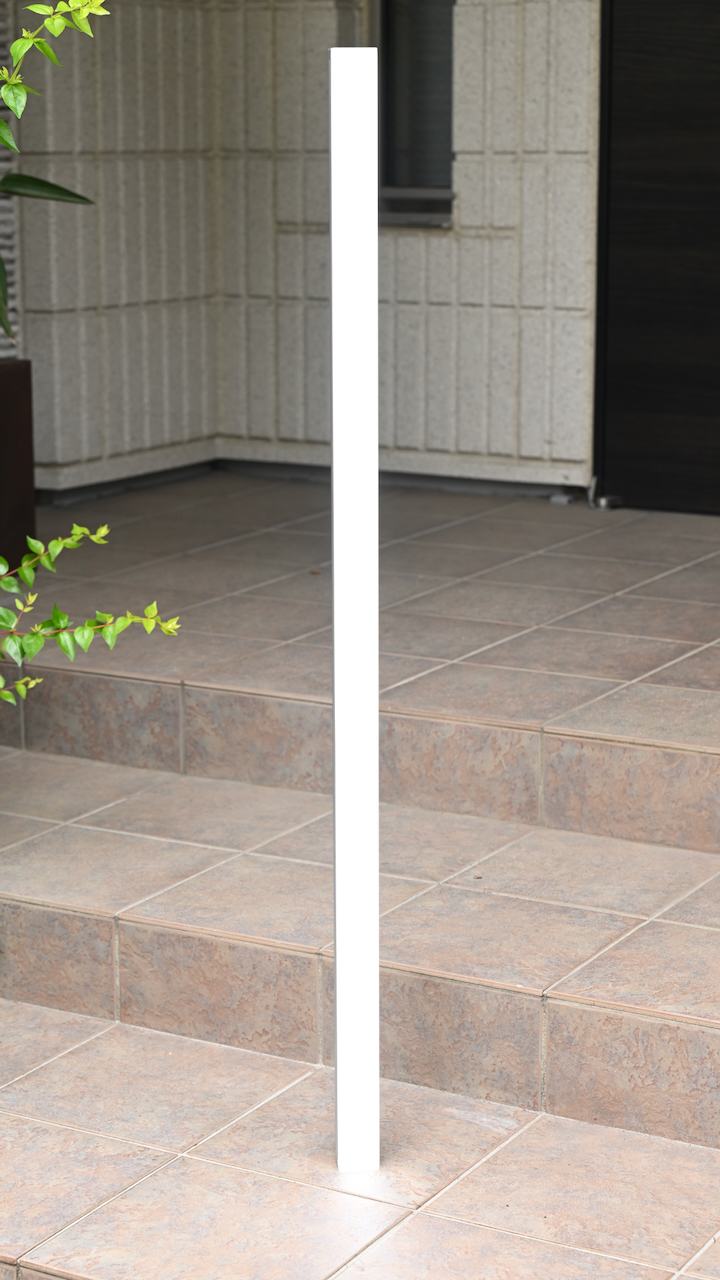
Because it’s a bar rather than a tube, it sits nicely on a flat surface.
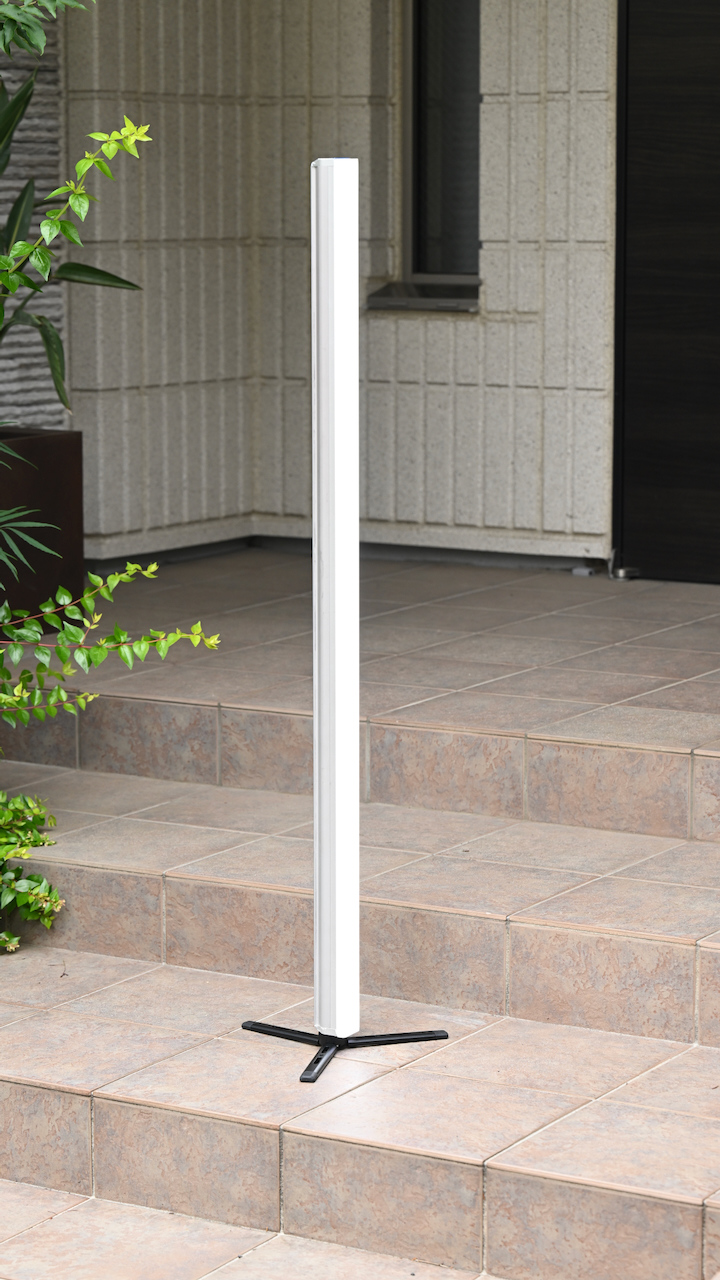
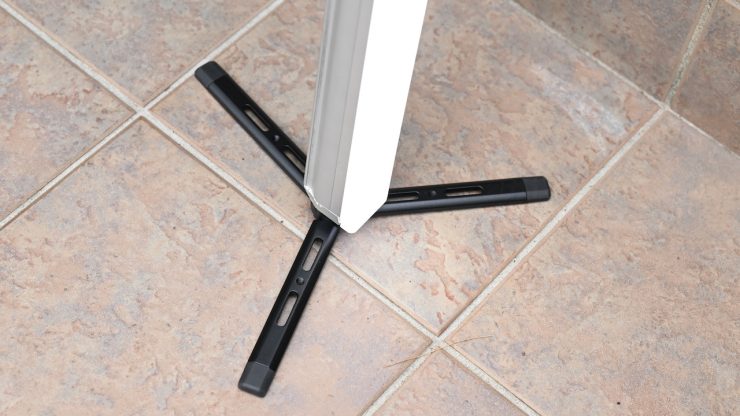
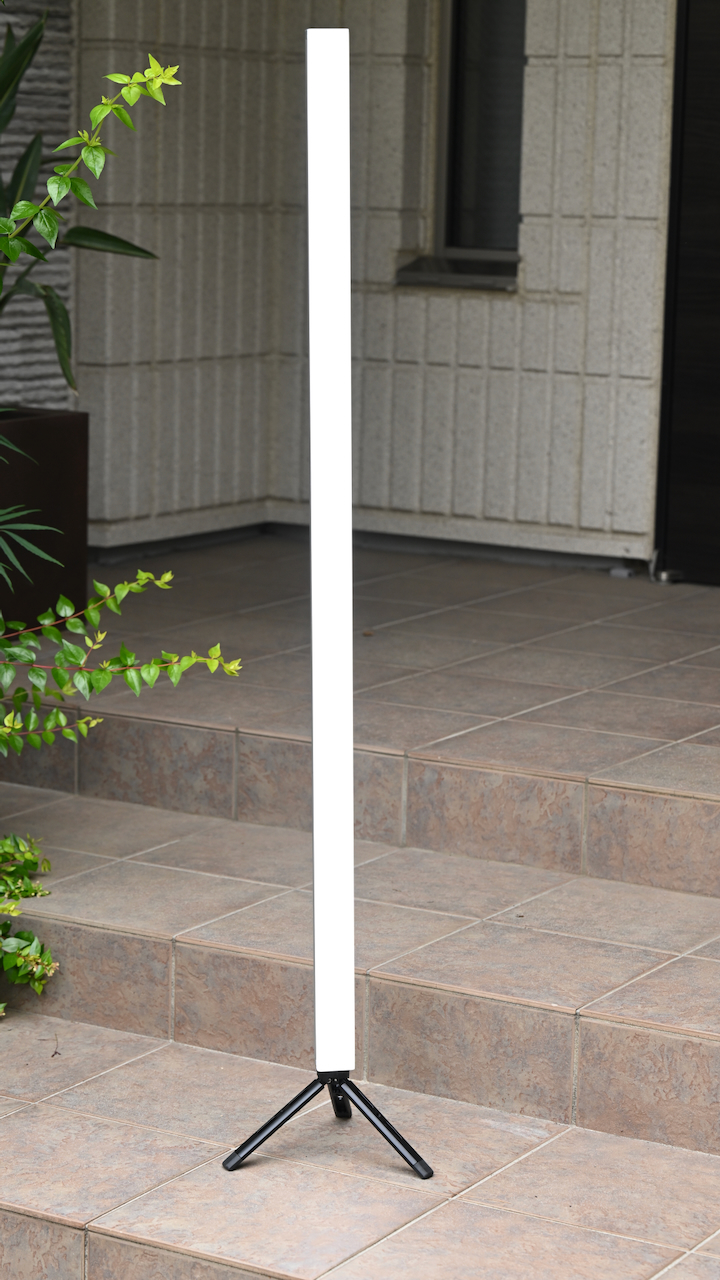
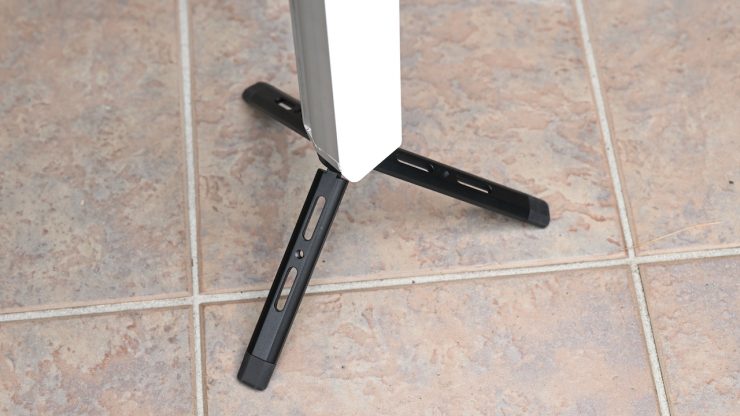
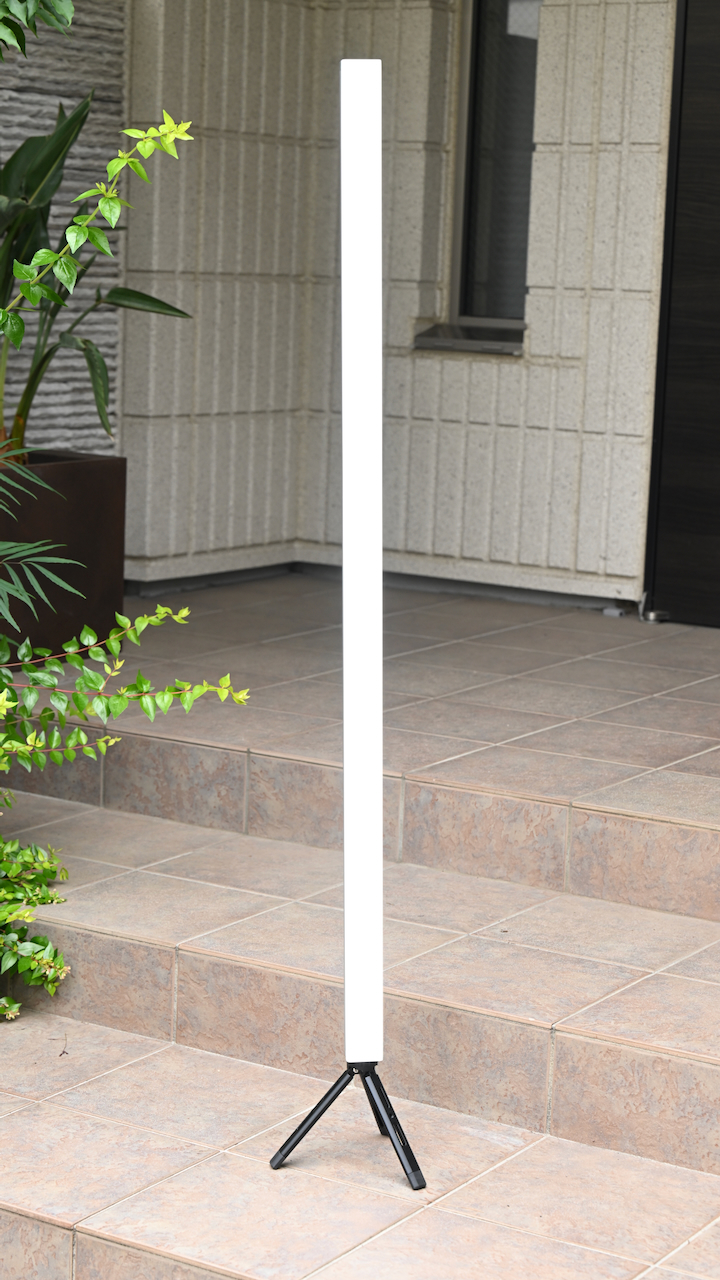
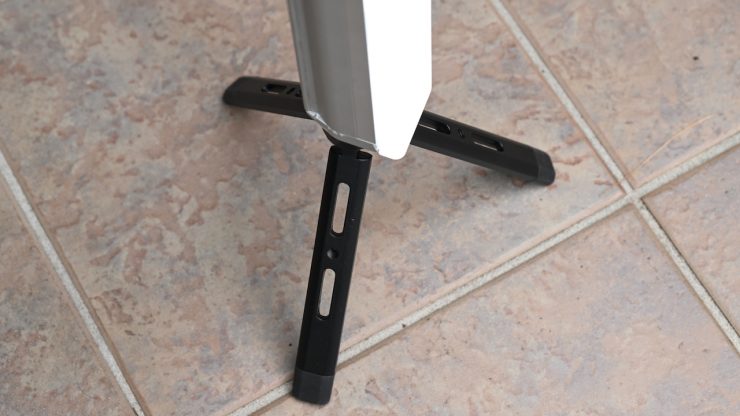
The Mini Tripod works really well, and it allows you to place an Omnibar in a variety of positions depending on your requirements.
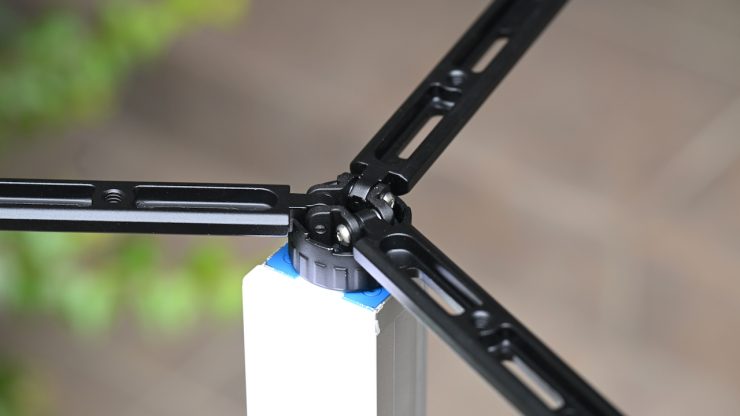
You adjust the height position by moving the bottom of the base around. This allows you to lock the legs at a particular height.
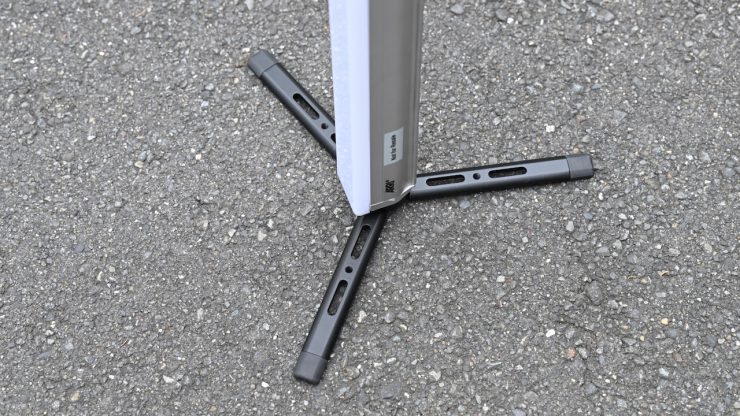
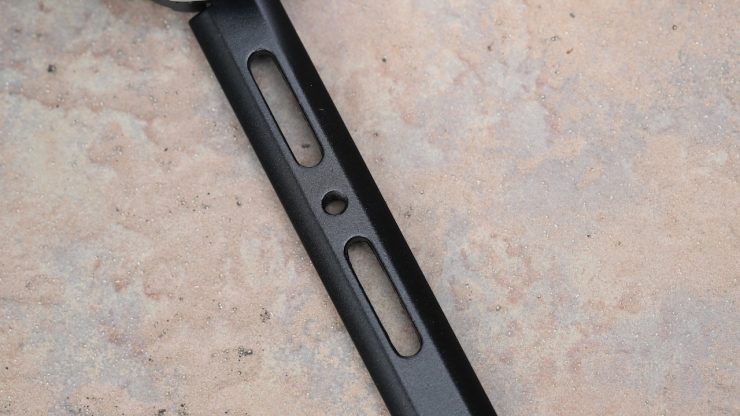
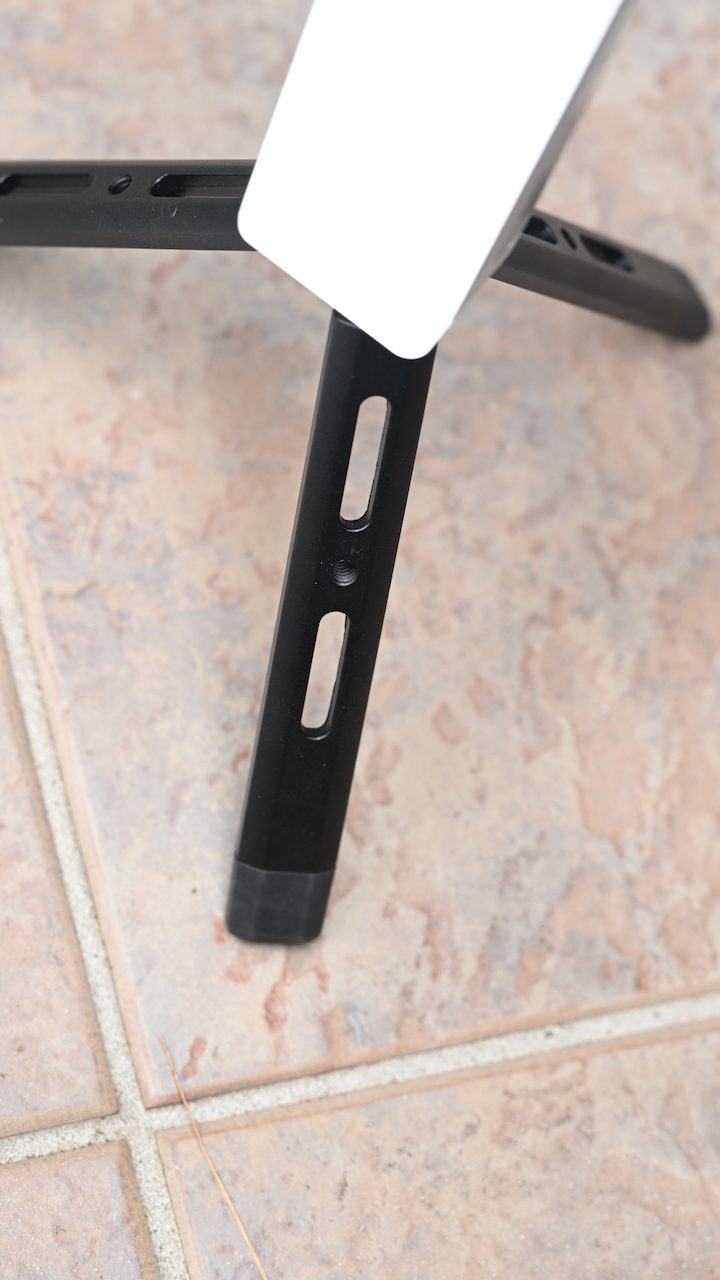
It is nice that it has threaded holes and slots, so you could use it to attach it more securely if need be.



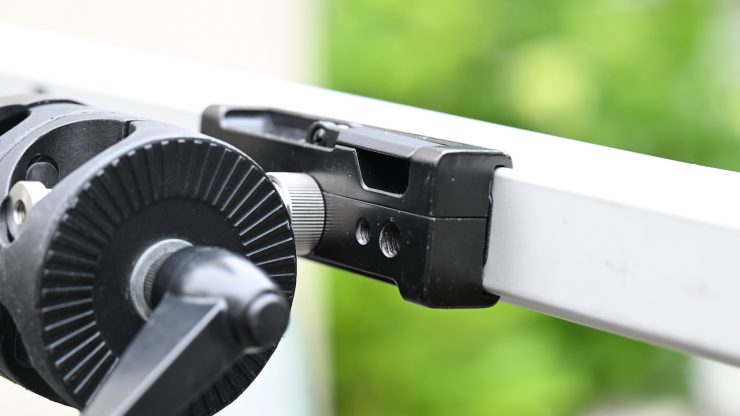
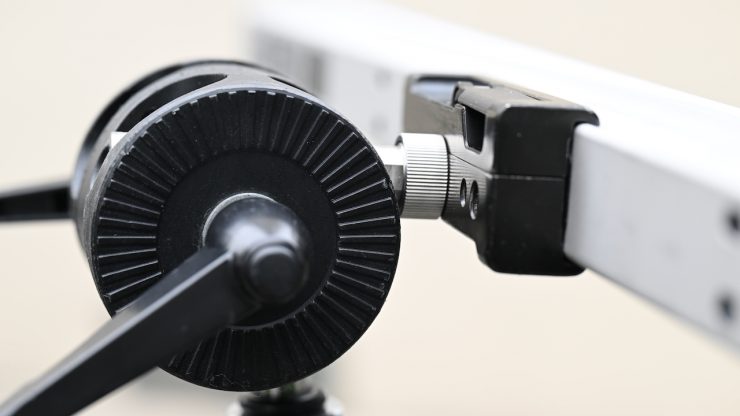
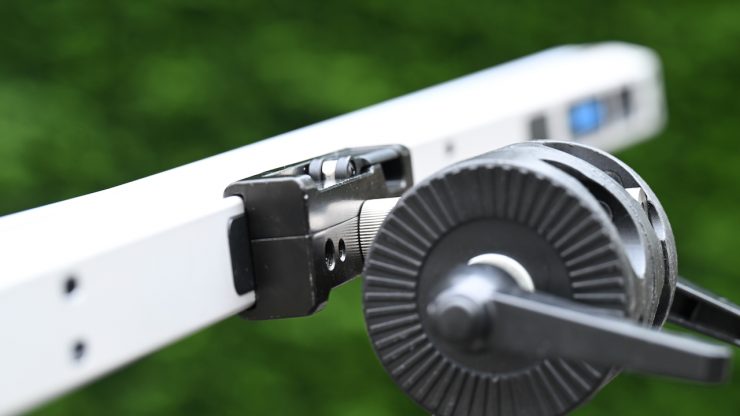

The Omnigrip is a nice accessory that securely attaches to an Omnibar, and it allows for plenty of adjustment.

Omnibar 2 at 34% 
Omnibar 2 at 100% 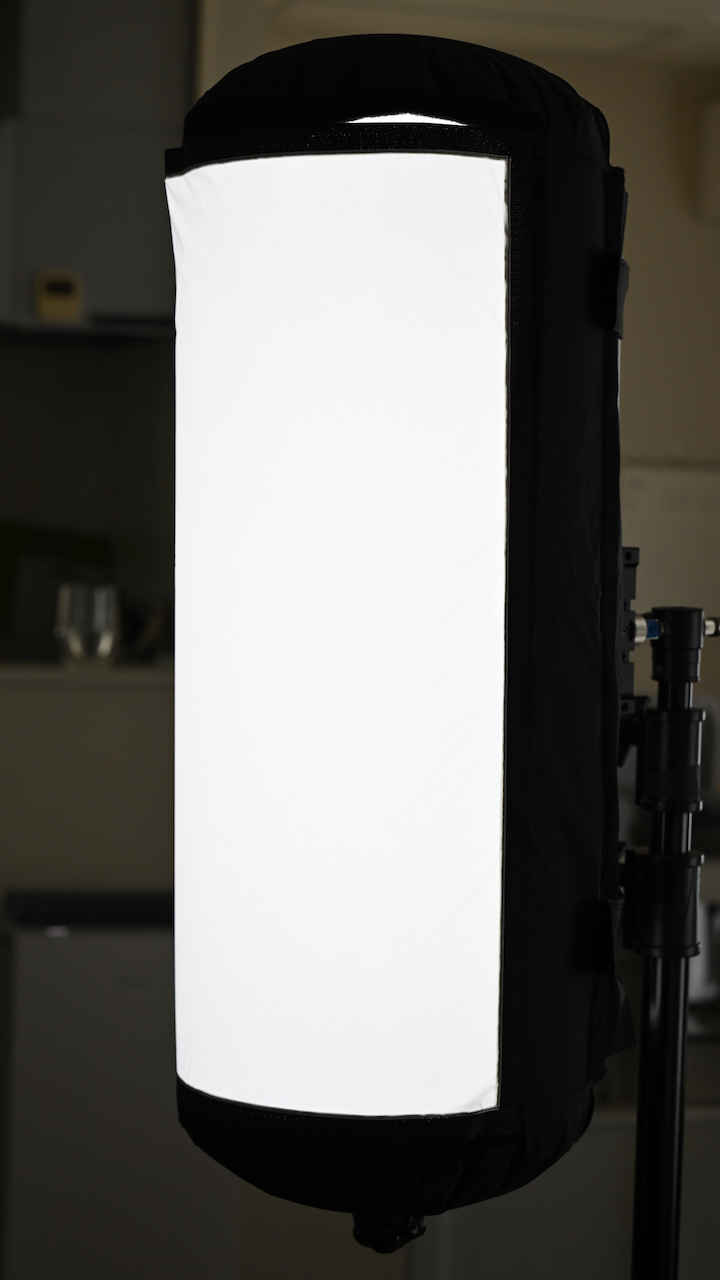
Above you can see what the Omnibar 2 looks like when used in conjunction with the Caligri Airtube Switch 60/2ft XL. There are no other lighting sources being used, just the Omnibar 2. The light still had a lot of punch, even when used with the diffusion. You could get away with using it as a key light for interviews in a semi-controlled environment.

Omnibar 2 
Light off
As far as output is concerned, the Omnibar 4 has a reasonable amount of output, and for a lot of scenarios where it will be used as a practical or placed in shot on purpose, it doesn’t need to be too bright. If you wanted to use it as a key light in an interview, you certainly could. The Omnibar 2 obviously has less output, and that means it won’t be as suitable as the Omnibar 4 for certain applications.

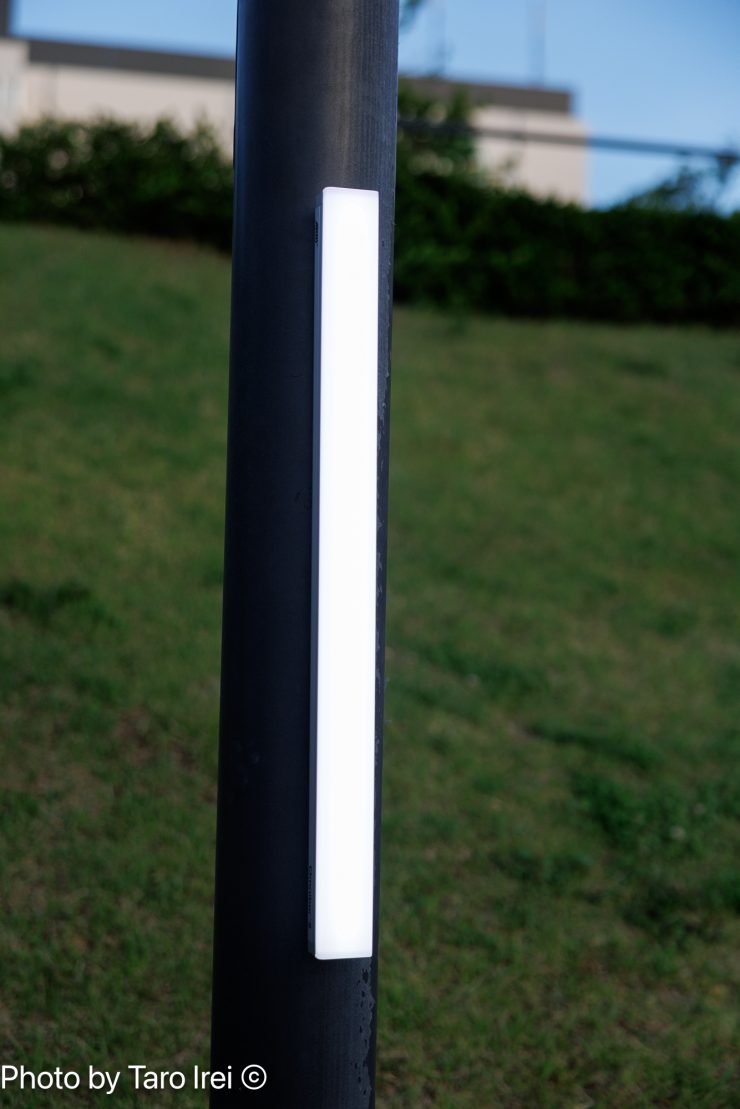
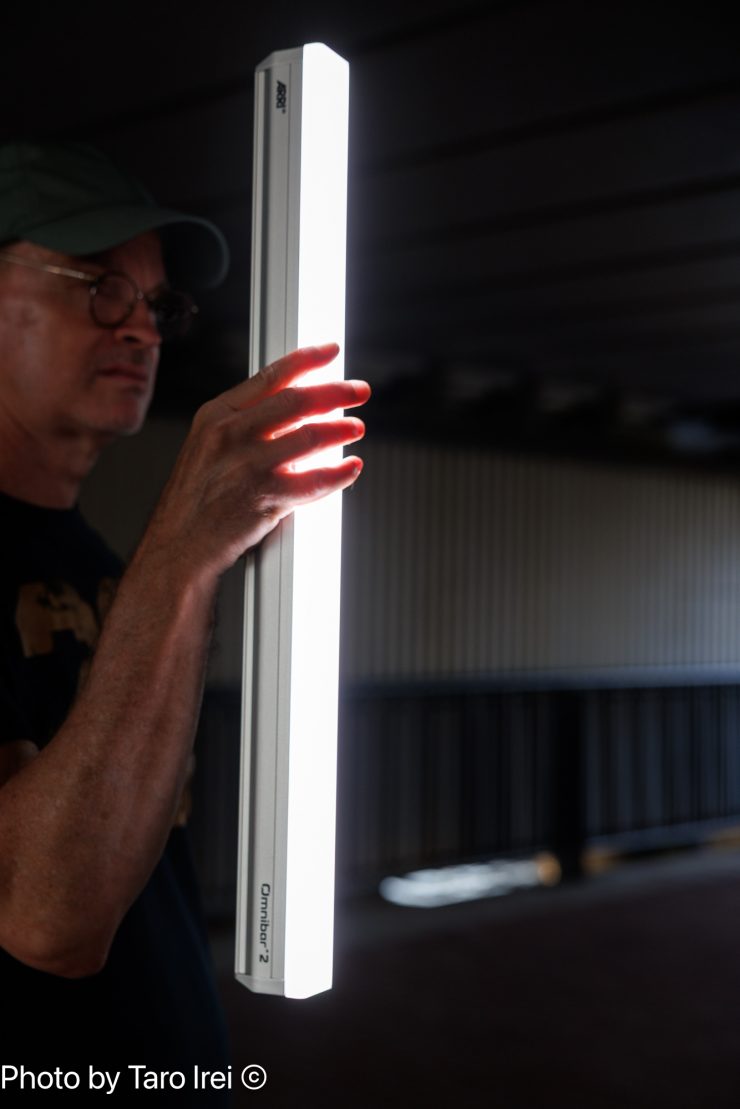
When I first saw the Omnibar, I wasn’t sure how much different it would be from a traditional tube light. However, after using it for a while, I found that its versatility and well-thought-out mounting options, at least in my opinion, make it a better all-around solution than existing tube lights. You do have to factor in the physical size of the Omnibar 4, particularly when it comes to transport and storage, but that is true of any long tube light.
If you are shooting music videos or other content where you need a light to be able to create colors or effects that can be discreetly placed in a scene, then lights such as the Omnibar make a lot of sense.
Kits
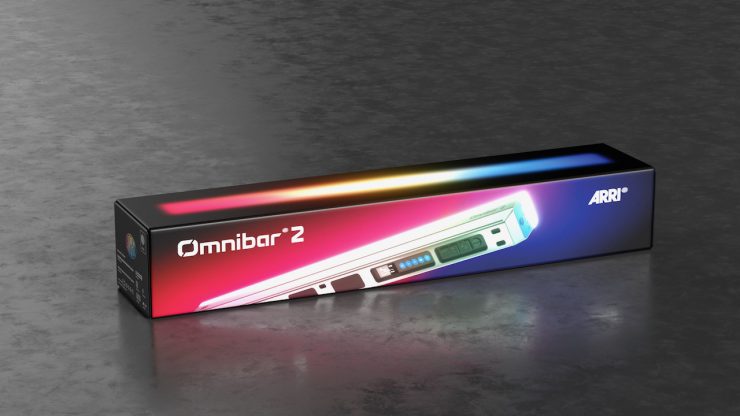
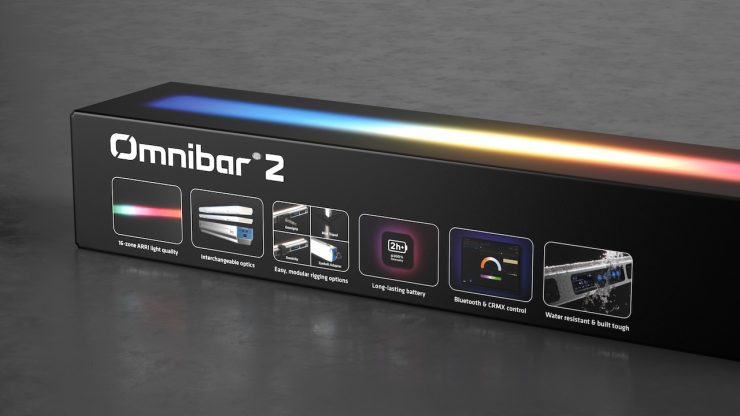
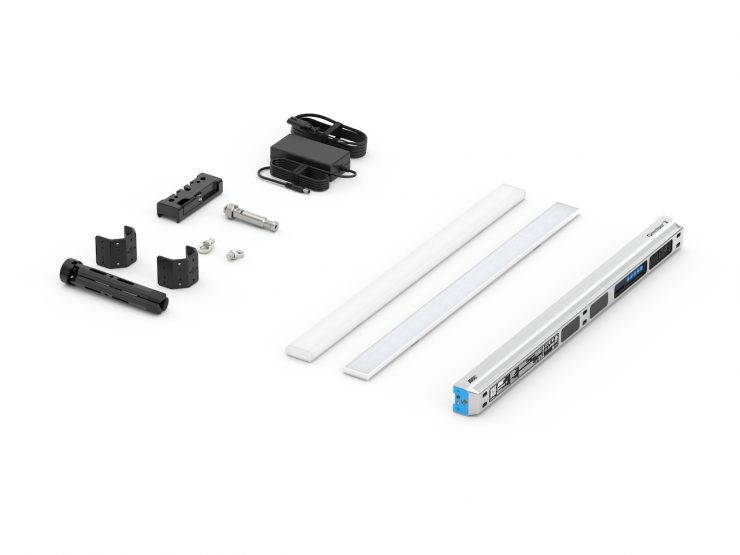
ARRI is offering a range of different kits depending on your needs. The first is the Omnibar Creator Set, which provides the most accessible entry into the Omnibar ecosystem. ARRI told me that it is designed for content creators and production companies that own their own gear. It includes a silver Omnibar 2 with the following accessories (no round diffuser included):
- ARRI Omnibar 2 (Blue/Silver)
- Flat Diffuser
- Intensifier
- Omnigrip
- Omnipin
- 2 x Omniclip
- 2 x Eyebolt
- Mini Tripod
- Universal Power Supply/Charger
- Limited 1-Year Manufacturer Warranty
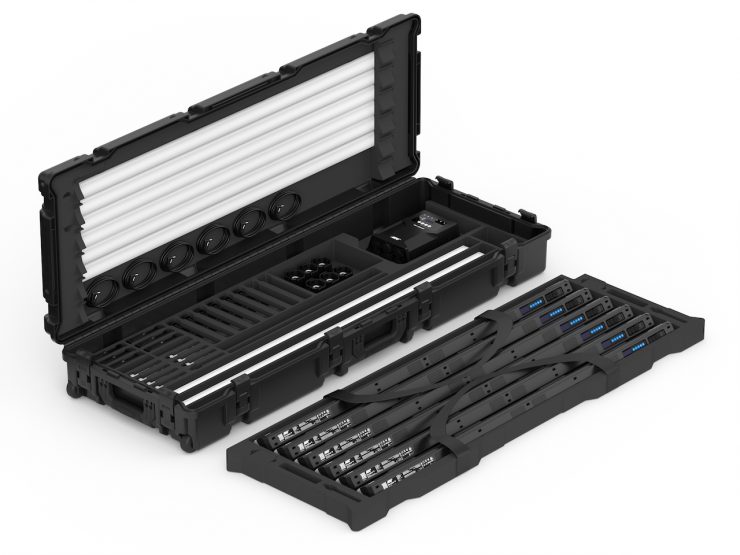
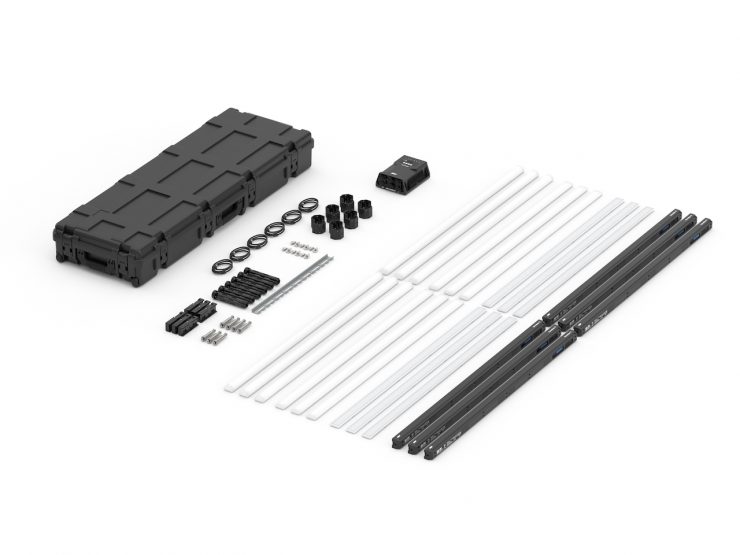
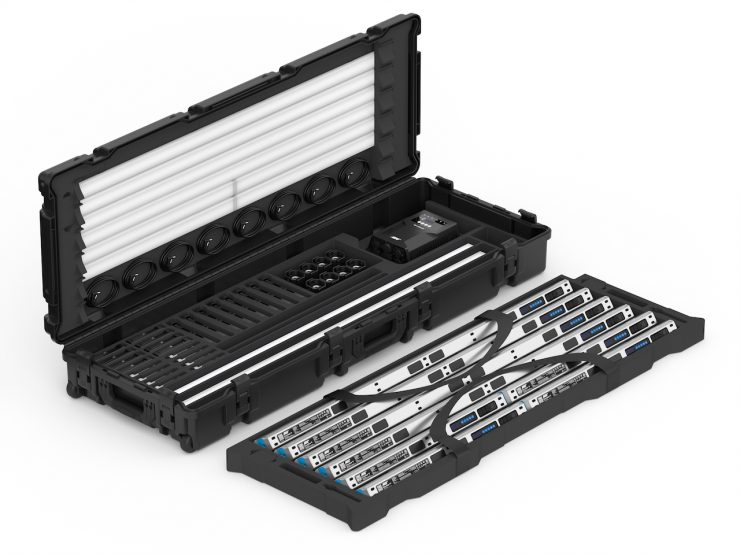
The Omnibar Combo kits and Production kits come with multiple Omnibars, all the accessories in the quantities that you need, and they include an OmniBase so that you can charge and control these through DMX. So the overall logic with the Combo kit was that ARRI wanted to do something different. It is a very flexible system aimed at gaffers and DPs, as you can combine both 2′ and 4′ Omnibars. None of the competitors sells it this way, but after ARRI showed it to a lot of gaffers, they really liked it because they can have two-foot bars and four-foot bars, both in the same case. If someone needs a six-foot bar, they can combine the four-foot and the two-foot together. This gives the kit a lot of versatility.
Once you put all of that together in a travel case, it is pretty heavy (45kg / 99.2 lbs), so it’s definitely not lightweight, but the case comes with wheels, so you can move it as a single person, especially if it’s on the ground. If you have to pick it up, it’s a two-man job.
All of the accessories are on the bottom, and the layer with the actual bars you can take out. Then, in the lid, you have the extra diffusers, and they’re magnetically attached. So it’s actually really practical if you have the wrong diffusers on the bar for what you want to do next. You can just take the one off the lid, put that one on the bar, put the unused one into the lid, and quickly get everything configured the way you need it.
If you’re charging the Omnibars, you could have the cables plugged into the OmniBase already and then just feed them up. There’s a little hole where you can feed them up through the bottom and have them all plugged in and charging them through the OmniBase in the case. Now, ARRI made sure that you have to keep the lid open because you don’t want anything to overheat with the whole case closed. That was a conscious decision because originally ARRI was thinking that they could put a plug on the outside and make it really convenient, but then a lot of people would not leave the case open, and it’s a little bit too dangerous.
ARRI also knows that the rental houses tend to have their own storage, transport, and flight cases. For this reason, ARRI has both the Omnibar 4 set and the Omnibar 2 set. In these, you get a bar and all the accessories, and it makes it more flexible in terms of creating your own flight cases.
Pricing & Availability

The ARRI Omnibar Creator Set costs $850 USD (€650). This is still a lot of money for a 2′ light. As a comparison, the Nanlite PavoTube II 15C RGB LED Tube Light (2′) is $153 USD, and the Aputure INFINIBAR PB6 RGB LED Light Panel (2′) is $479 USD.
The Omnibar 2 Set is $1,150 USD (€690), and the Omnibar 4 Set is $1,400 USD (€890). As a comparison, the Astera Titan Tube RGB LED Tube Light (3.4′, Basic Kit) is $850 USD, the Aputure INFINIBAR PB12 RGB LED Light Panel (4′) is $511.20 USD, and the Nanlite PavoTube II 30C RGB LED Tube Light (4′) is $199 USD.
Now, despite the Omnibar being touted as one of the most affordable lights ARRI has ever made, it still isn’t arguably aimed at the lower end of the market. In my opinion, Omnibar is priced to compete against the Astera Titan tubes. Personally, I think $850 USD for the Creators Kit is too much for a single 2′ fixture, and it’s only going to appeal to a select group of people. I only say this because you can buy roughly 5 Nanlite PavoTube II 15C RGB LED Tube Lights (2′) for the same price. Despite the Omnibar having some very nice features and functionality, if you are trying to target a new demographic, the pricing needs to be closer to $400 USD.
The ARRI Omnibar Combo Kit is $11,500 USD (€7,500), and the Production Kit is $9,990 USD (€6,500).
So, how does the price of the 4′ Omnibar compare to other similar tube lights? Below you can see.
| PRICE | |
| ARRI Omnibar 4 Single Set | $1,400 USD |
| Astera Titan Tube RGB LED Tube Light (3.4′, Basic Kit) | $850 USD |
| Aputure INFINIBAR PB12 RGB LED Light Panel (4′) | $639 USD |
| Nanlite PavoTube II 30C RGB LED Tube Light (4′) | $199 USD |
| amaran T4C RGB LED Tube Light (4′) | $329 USD |
| Genaray PX4-RGB Pixel RGB LED Tube Light (4′) | $219 USD |
| Neewer TL120C RGB LED Tube Light (4′) | $230.99 USD |
| Godox KNOWLED TP4R Pixel RGB LED Tube Light (4′) | $569 USD |
| Godox AT200Bi KNOWLED Air Bi-Color LED Tube Light (4′) | $799 USD |
| Lume Cube XL RGB LED Tube Light (4′) | $319.99 USD |
How does the price of the Omnibar 2 compare to other 2′ (or close to) tube lights? Below you can see:
| PRICE | |
| ARRI Omnibar 2 | $850 USD |
| Astera Helios Tube RGB LED Tube Light (1.8′, Basic Kit) | $634.50 USD |
| Aputure INFINIBAR PB6 RGB LED Light Panel (2′) | $479 USD |
| Nanlite PavoTube II 15C | $153 USD |
| amaran T2C RGB LED Tube Light | $199 USD |
| Godox TL60 RGB LED Tube Light | $178 USD |
| Neewer TL60C RGB LED Tube Light | $219.99 USD |
Conclusion
It’s good to finally see a new ARRI lighting product. The Omnibar is a very well-thought-out fixture with a lot of nice features, especially with the interchangeable optics and mounting options.
It is solidly made and constructed, and it produces a good amount of output. The Omnibar is very CCT-accurate, and the CCT accuracy is also excellent when dimming the fixture down.
The biggest caveat is the cost of entry, considering the majority of the competition is substantially more affordable. This makes the Omnibar, despite how good it is, a tough sell for owner/operators looking at tube lights.
The usability of the Omnibar is something that makes it stand out from other similar lighting solutions on the market. That alone may make it a worthwhile addition to your kit.