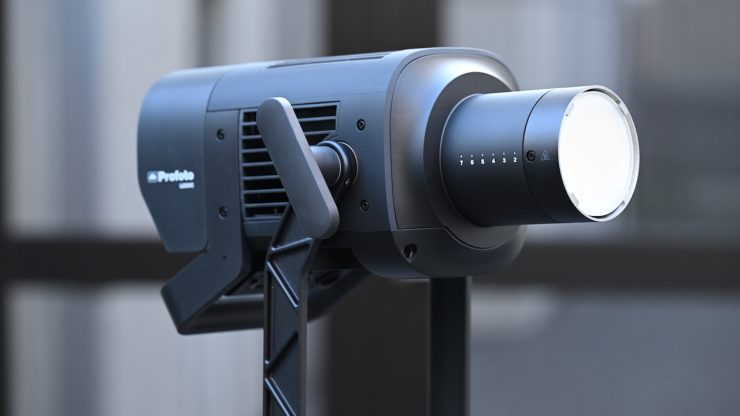
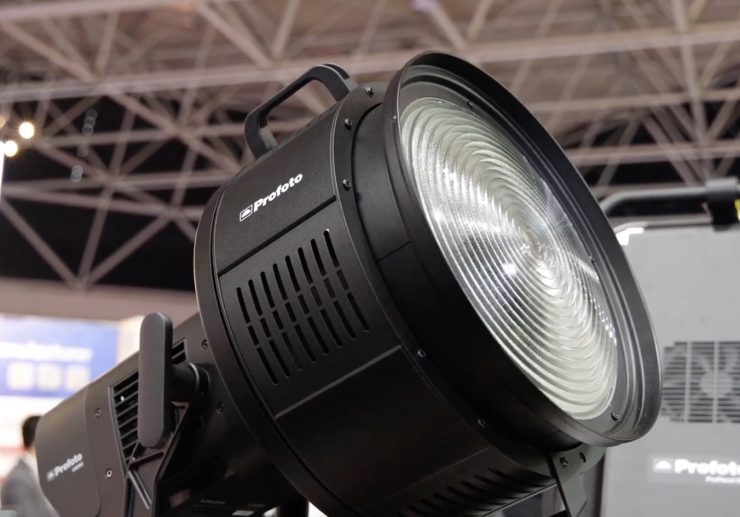
The Profoto L600C is an RGBWWW 600W full-color point-source LED light that is claimed to deliver uncompromising light quality with ease of use. It is built on Profoto’s CORE-6 RGBWWW LED engine and cooled by HydroCTech. Profoto states that it offers outstanding performance without the need for external ballast.
You may be familiar with the name Profoto, as they have been a staple in the photography world for a very long time, and over the last few years, they have diversified into making fixtures for film and television. The L600C is compatible with up to 100 different modifiers from the Profoto light shaping system, allowing for a lot of versatility in how you use it. Profoto hasn’t forgotten its photography roots, and the fixture features HSS flash capabilities, allowing it to be used as a hybrid lighting solution for both video and stills shooters.
This is the first LED light I have ever reviewed from Profoto, so it will be interesting to see how it stacks up.
The Profoto L600C was first unveiled at Cine Gear 2025.
In recent years, we have seen lighting companies chasing high output, and while there is nothing wrong with that, ultimately, it’s the quality of the light that arguably matters the most. For a lot of owner/operators, lights in the 300-600W power draw range tend to be the sweetspot between size & weight, output, and power draw.
Key features
- For Studio & Film/TV Production
- 600W Fixture
- 2000-15,000K CCT; RGBWWW Color Control
- AC Power
- Onboard, DMX/RDM, CRMX & App Control
- CRI 96 | TLCI 99 | SSI 90, 84
- Profoto Core LED Engine
- HydroCTech Liquid Cooling System
- Profoto Mount; 1-1/8″ & 5/8″ Mounting
- Precision 0.1-100% Dimming & Four Curves
The Profoto L600C looks to be in direct competition with lights such as the NANLUX Evoke 600C, Aputure 700x, Kelvin Epos 600, the now-discontinued Prolycht Orion 675 FS, Aputure LS 600c Pro, etc.
Lights in this form factor are very popular because of their versatility. We have seen the market flooded by so many similar-featured spotlights over the last few years. However, what we are now starting to see is vastly superior light engines being used.
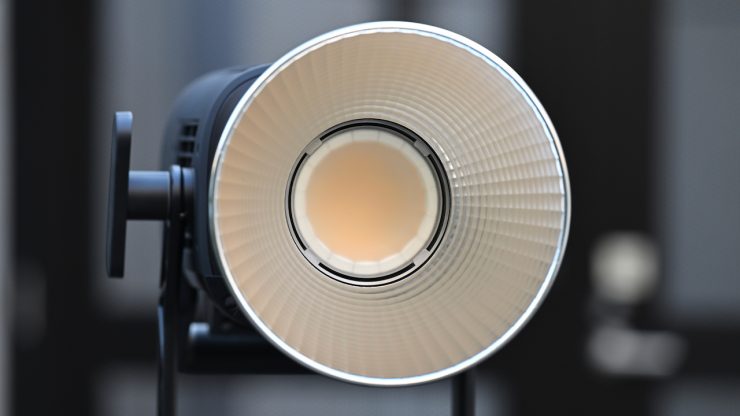
CORE-6 RGBWWW LED Engine
The L600C is claimed to feature the world’s first triple-white (RGB WWW) LED engine, offering superior color rendering with an industry-leading TLCI of 99 and SSI of 90, and unmatched power through the white Kelvin range.
According to Profoto, the CORE-6 RGBWWW LED Engine is capable of delivering exceptional light quality in both white and colored light.
We have seen everything from RGBW/RGBWW to 6-color systems (RGBLAC), to Aputure’s BLAIR CC, and NANLUX’s new C8 Full Color Light Engine, which is claimed to be the industry’s first eight-color light engine.
The Profoto L600C has a CCT range of 2,000–15,000K. As a comparison, the NANLUX EVOKE 650C has a CCT range of 1,000-20,000K, and the Kelvin Epos 600 has a CCT range of 1,700-20,000K. The Aputure Storm 700x, which isn’t technically a full color fixture, has a CCT range of 2,500-10,000K.
The Profoto L600C has claimed TM-30 scores of RF 97 / RG 100, and CRI and TLCI scores of 96 and 99, respectively. The SSI scores are claimed to be 90@3200K / 83@5600K. It offers Full Rec. 709 coverage and 80% Rec. 2020 coverage.
As a comparison, the Evoke 600C can achieve 82% coverage of the CIE 1931 visible color gamut. It is 6% higher than Rec. 2020 in the visible color gamut and has 94% coverage of the Rec. 2020 color space. It has a claimed CRI of 98, a TLCI of 98, and TM-30 scores of Rf 96 and Rg 100.
As another comparison, the Aputure STORM 700x has a 70% coverage of the Rec. 2020 color gamut. It has a claimed rating for both CRI and TLCI of 95. The light also has claimed SSI scores of 87 at both 3200 and 5600K, as well as TM-30 ratings at Rf 95 and Rg 100.
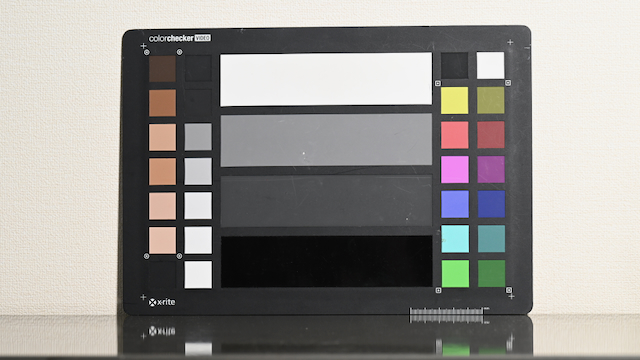
Preset 5600K WB 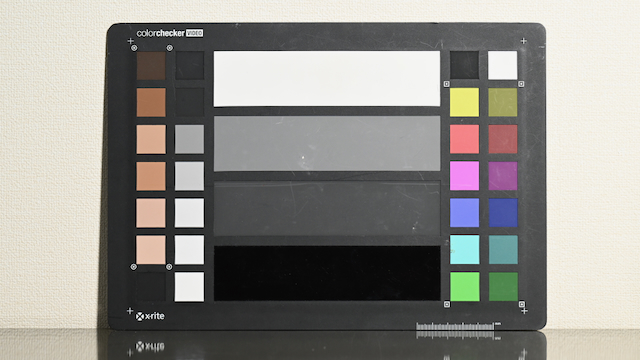
Manual WB
If you want to see just how good the Profoto L600C is when it comes to color accuracy, above, I have set the light at 5600K and used a preset 5600K WB on the camera. I then did a manual WB for a comparison. As you can see, there is almost no noticeable difference at all.
Preset 3200K WB 
Manual WB
Above is the same test, but this time at 3200K.
Concept
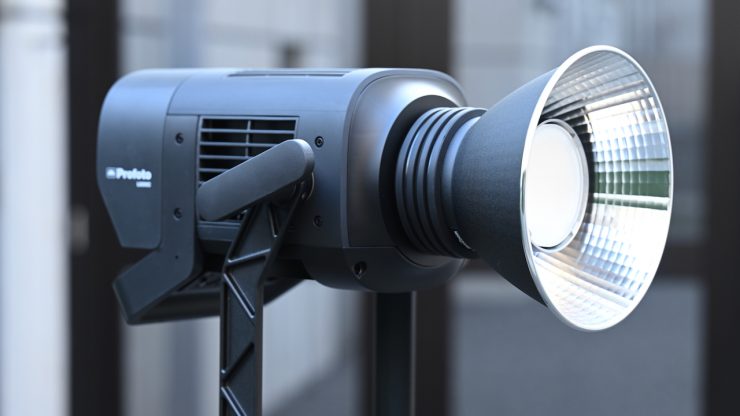
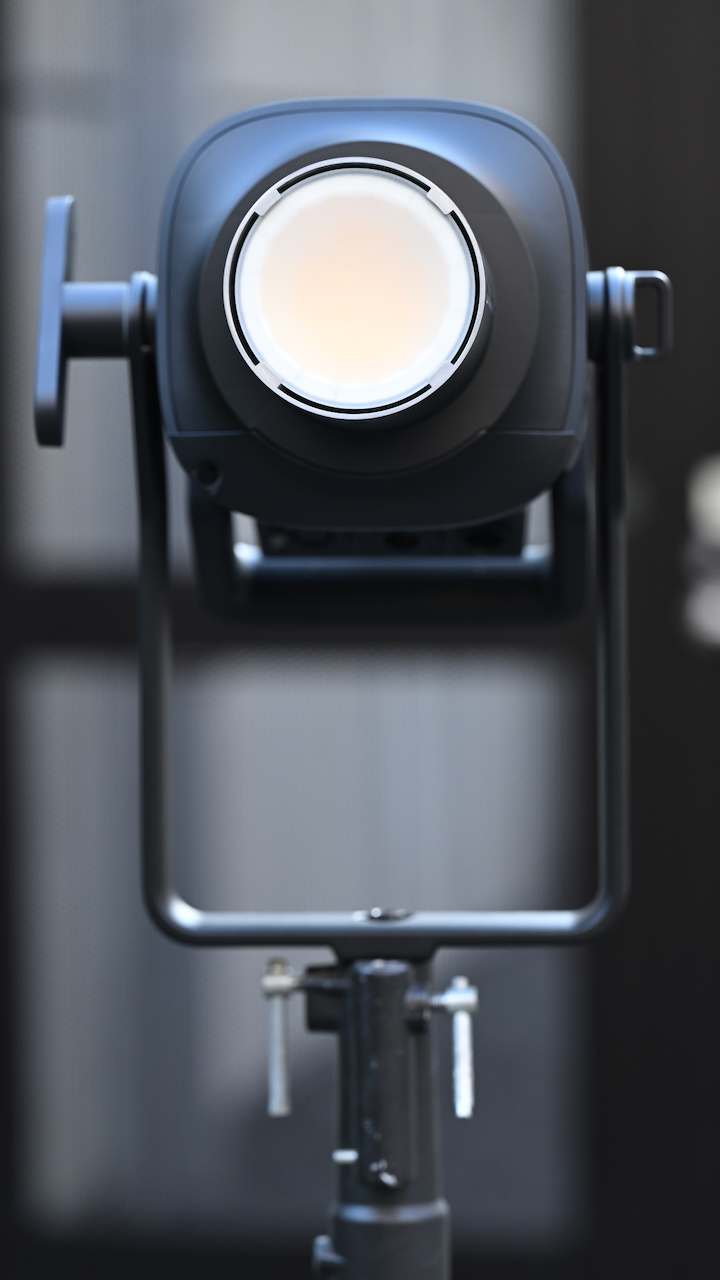
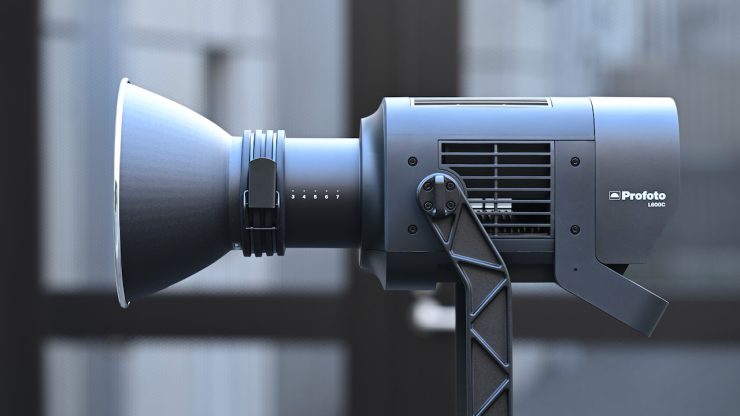
The concept behind the Profoto L600C was to create a 600W point source LED light that was designed for high-end productions, prioritizing speed, precision, and performance, all while weighing 6.1 kg / 13.5 lbs (including yoke).
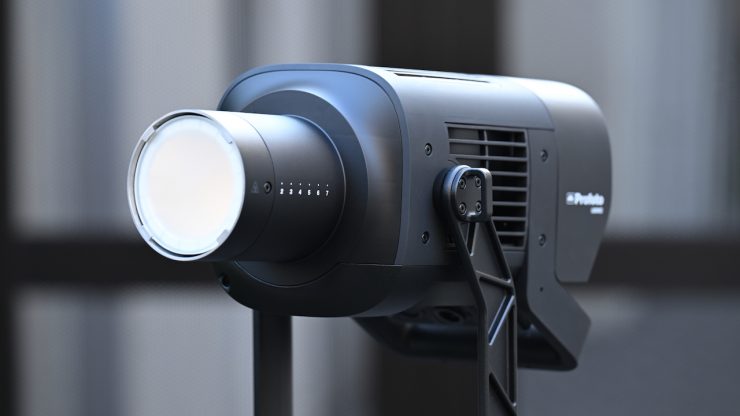
You can only make a COB spotlight in a certain form factor, but it does look a little different from other similar fixtures on the market.
What do you get?
In the Profoto L600C kit that I will be reviewing, you get the following items:
L600C/L600D lamp with
yoke
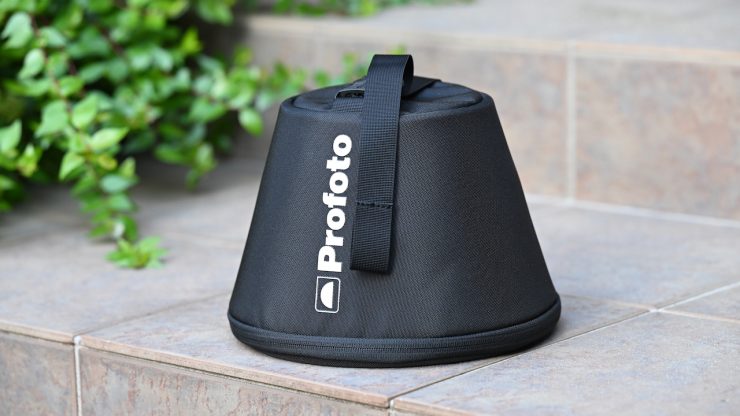
- Transport & storage case
- Protective transport cap
- AC power cord (7m / 23 ft)
- Safety strap
- QSSG (Quick Start and
Safety Guide)
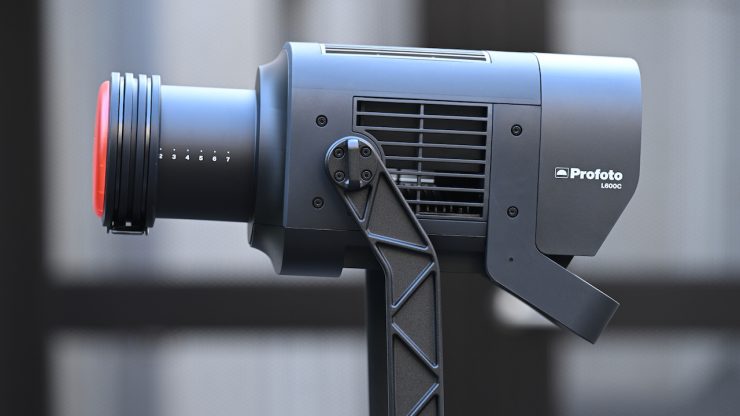
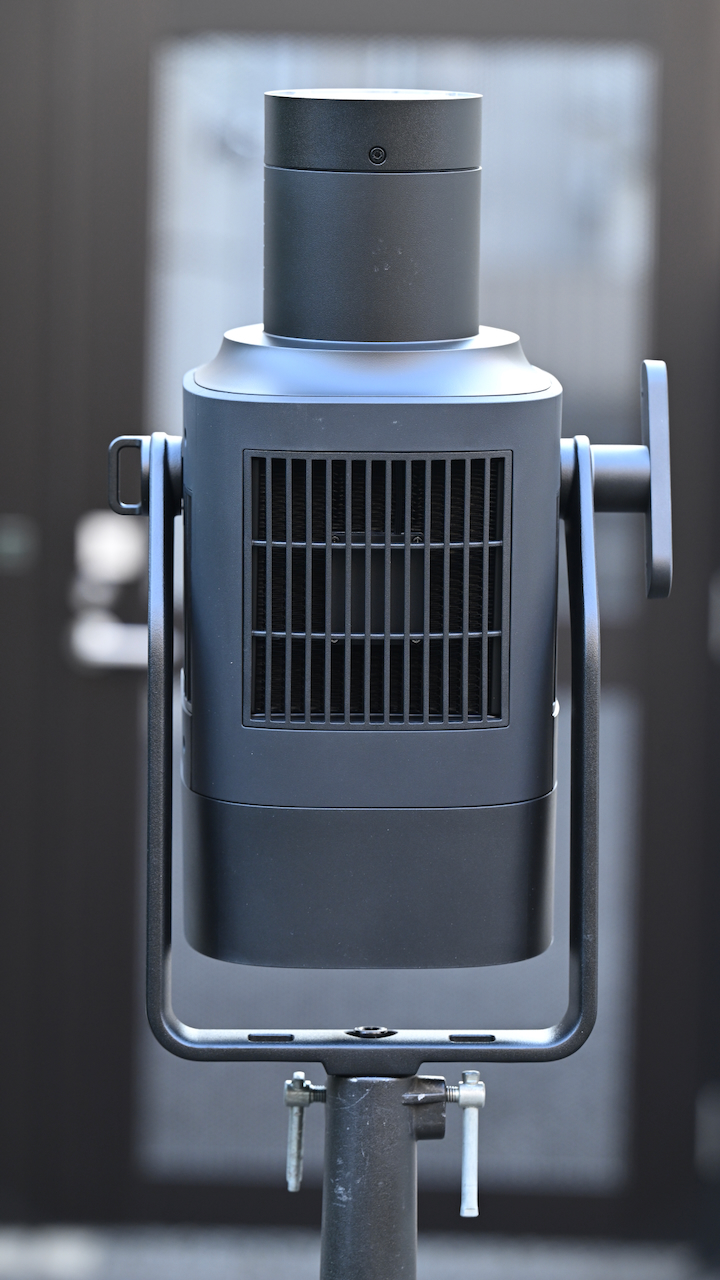
Build Quality & Design
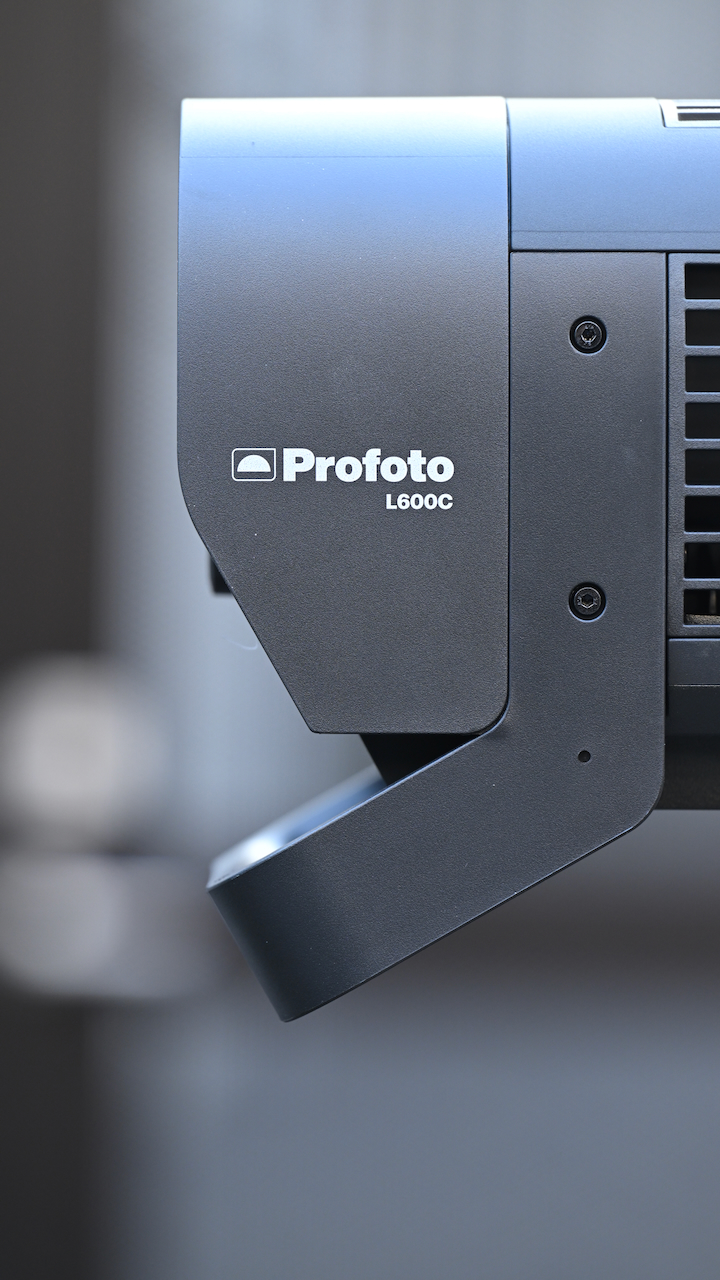

Despite its lightweight, the L600C is really well-made and constructed, and you can tell that a lot of thought and care went into the design. Profoto has a good reputation when it comes to build quality with its photographic equipment, and that has carried over to the L600C.

Profoto’s whole ethos was for the L600C to be robust, reliable, and easy to use.
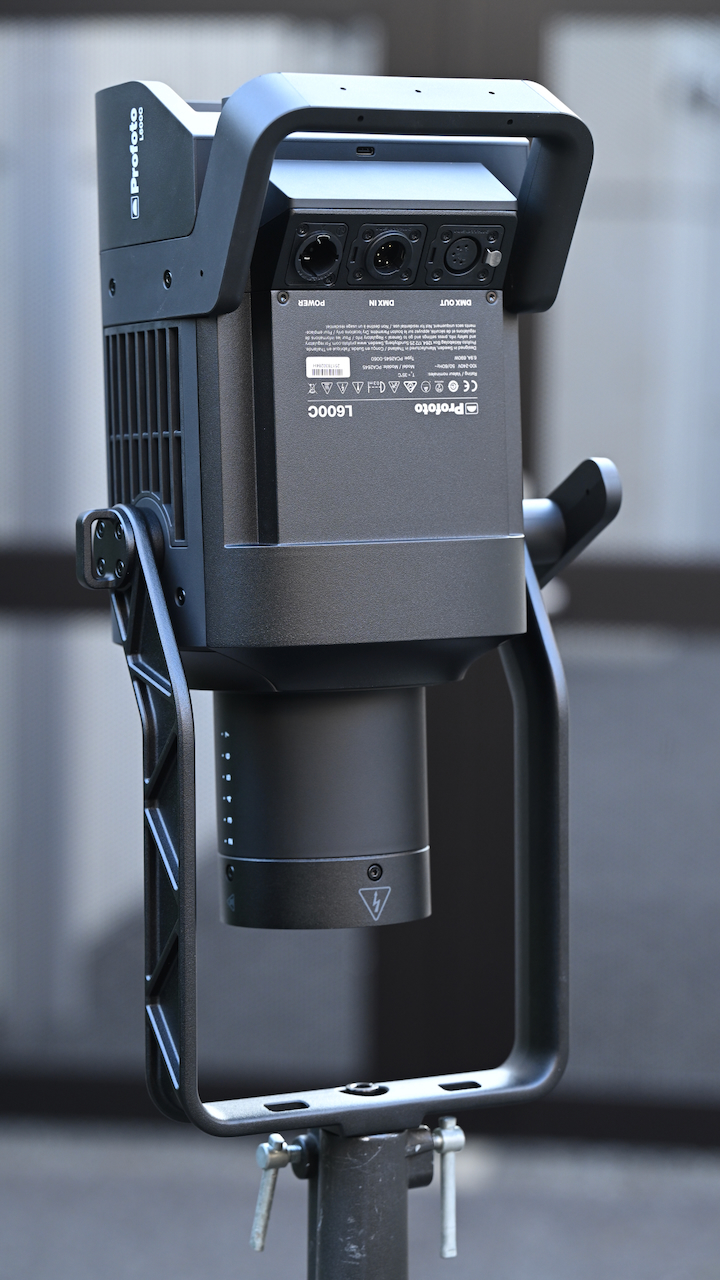
Unlike most similar fixtures, where there is a separate light head and power supply/controller, the L600C is a fully self-contained unit. This has its pros and cons. While having a single all-in-one unit takes away complexity, it does mean that in some cases you may need to use heavier-duty light stands, and it is harder to make on-board changes if the light is at a certain height.
Having multiple components can be a pain, but it does allow you to use smaller-sized light stands because you don’t have all the weight sitting just on the fixture itself. It also helps with cooling and minimizing any noise. You can’t have your cake and eat it too. Lighting manufacturers need to balance weight and size with power draw and efficiency. However, in saying all of this, the L600C is a bit of an exception to the rule, as I found that you could get away without needing to use a heavy-duty light stand as long as you are not using very large lighting modifiers. Because it is also very quiet, you don’t have the caveat that sometimes comes with an all-in-one fixture with this type of power draw.
The L600C wasn’t designed to be used in inclement weather, and it doesn’t have an IP66 rating like the competing NANLUX Evoke 600C.
It is nice that Profoto includes a (7m / 23 ft) AC power cord with the fixture.
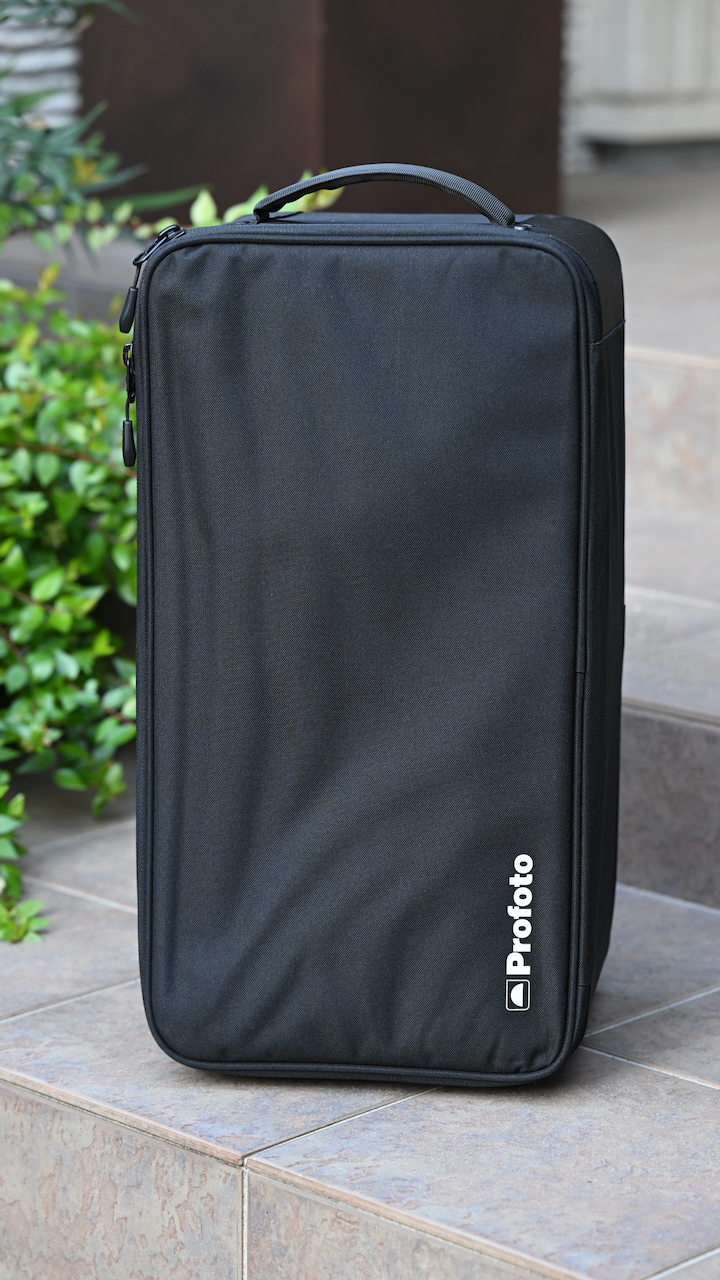
The included case that comes with the light kit I was reviewing is decent enough. It is nice and small, and it doesn’t require any wheels as it is easy enough to carry, given its lack of weight.
The L600C, like so many of the new lights coming to market, is an example of blending software and hardware. With software playing such a big role, lighting companies can continue to improve and update fixtures over time via firmware updates. This does give them somewhat of an advantage over older fixtures. There are so many lights on the market where manufacturers make a big deal about them being firmware upgradable, and then never release a single update. It will be interesting to see what firmware updates Profoto does moving forward.
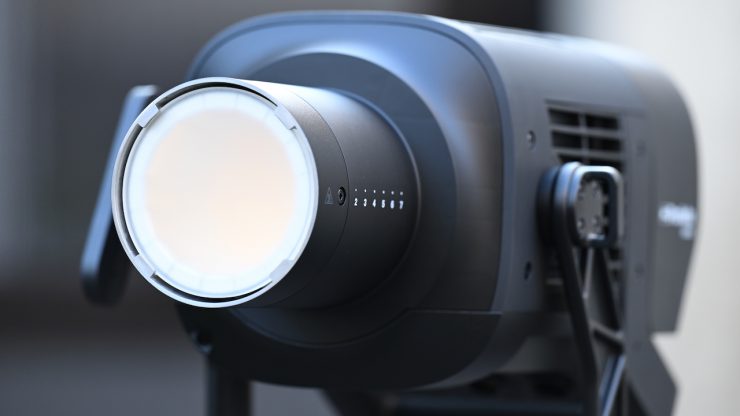
Quite a few LED lights on the market, including the L600C, are using COB technology. COB stands for “Chip On Board,” where multiple LED chips are packaged together as one lighting module. The advantage of COB LEDs being multi-chip packaged is that the light-emitting area of a COB LED can contain many times more light sources in the same area that standard LEDs could occupy. This results in a greatly increased lumen output per square inch. The caveat with COB LEDs is that they produce a ton of heat, and that heat needs to be effectively dispersed. In a lot of situations, you also need to diffuse them as they are very bright to look at and unsuitable for directly lighting talent.
Before using the L600C for the first time, Profoto highly recommends
registering it and checking for firmware updates. By registering, you’ll
ensure that Profoto can notify you of future updates. If you register your product within 60 days of purchase, you will also receive:
- 1 extra year of Standard Warranty.
- Option to purchase 1–3 years of Extended Warranty (up to 5 years total).
To register and update your product:
- Download Profoto Control from the App Store or Google Play.
- Open the app and create an account.
- Power on your light and connect it via the app – it will be registered automatically.
- If a firmware update is available, it will appear in the app. Tap
Update to proceed. For details, see the Firmware Updates section. - To claim your extended warranty: Go to profoto.com/myprofoto and log in with your account. Navigate to your product and enter the purchase date to activate the 1-year extended standard warranty. Choose if you wish to purchase an additional extended warranty
(1–3 years).
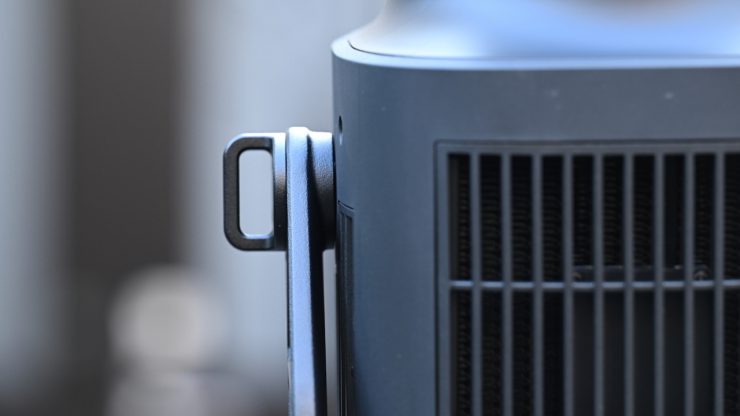
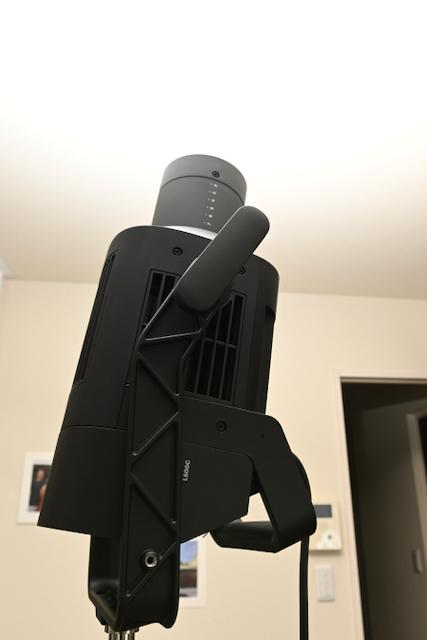
Yoke
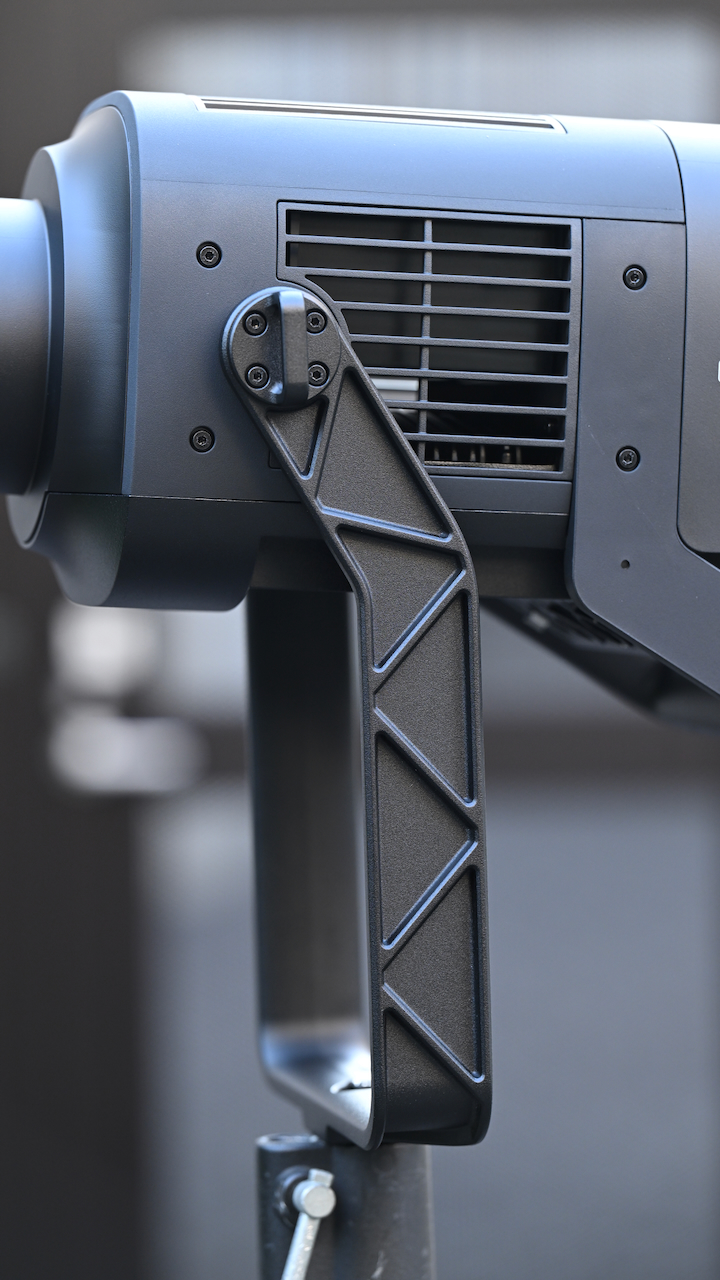
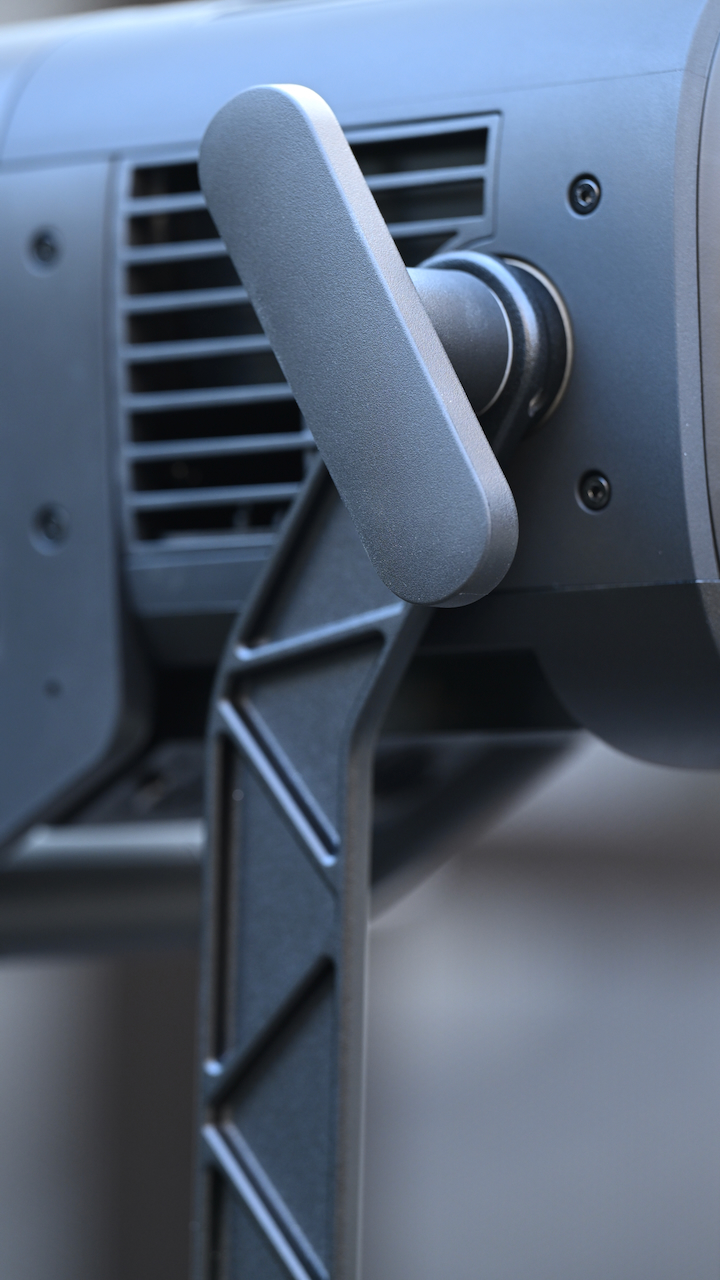
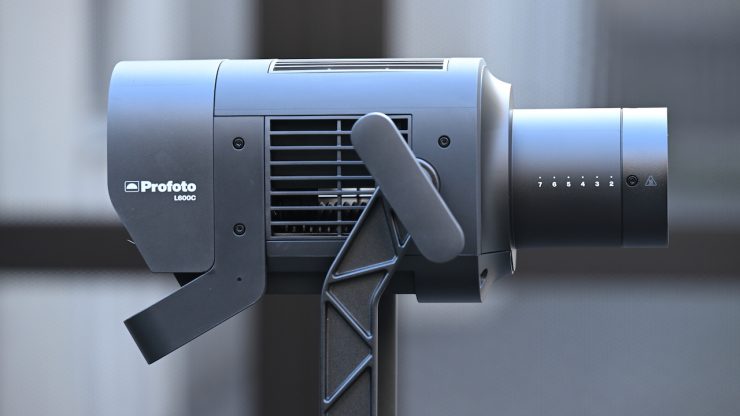
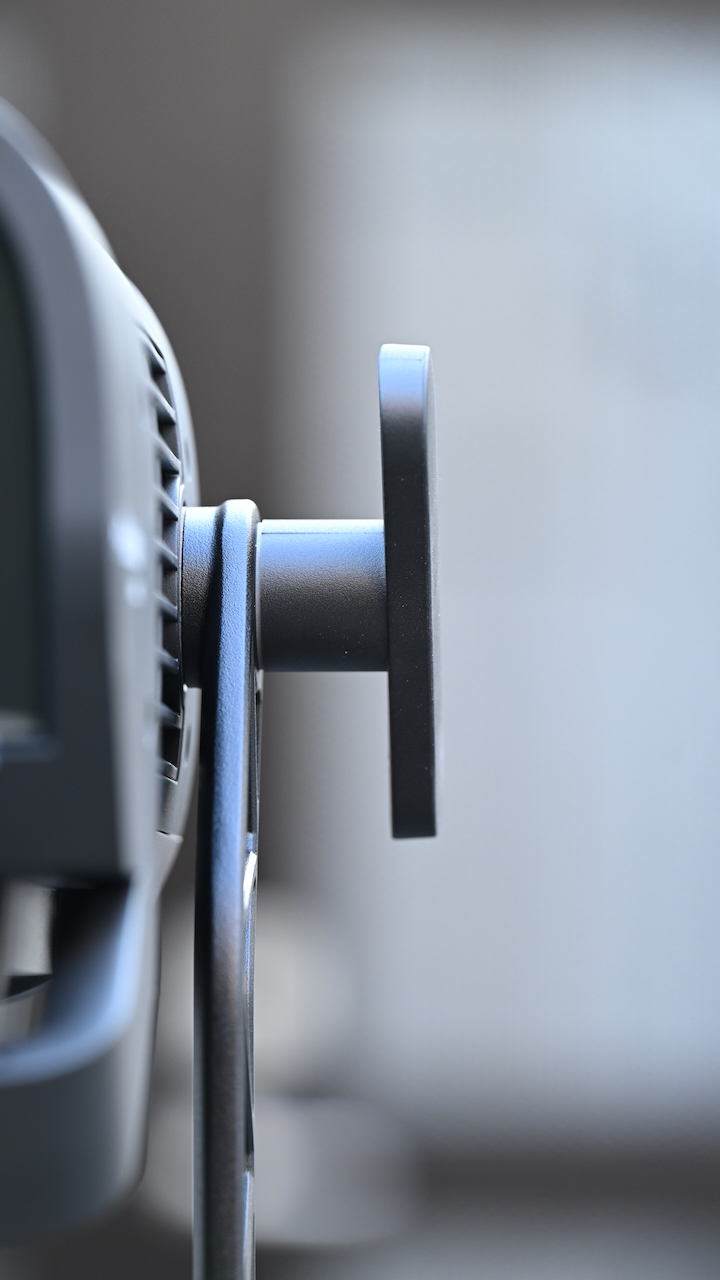
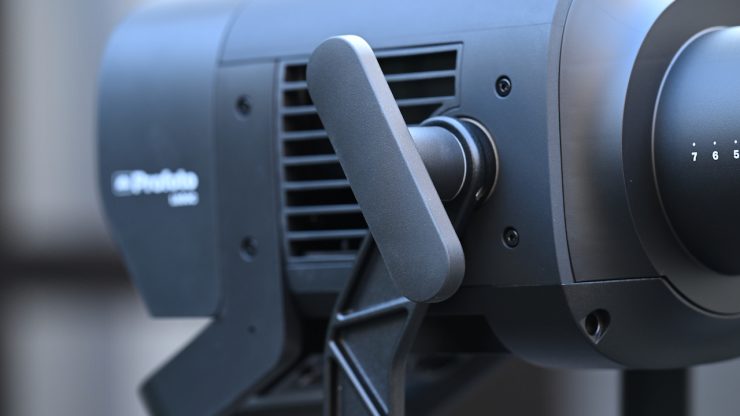
The yoke locking mechanism is very well-made and easy to use. You can undo it, and the light doesn’t just suddenly tip forward or backward, even when using a large lighting modifier. This has been really well thought out and designed.
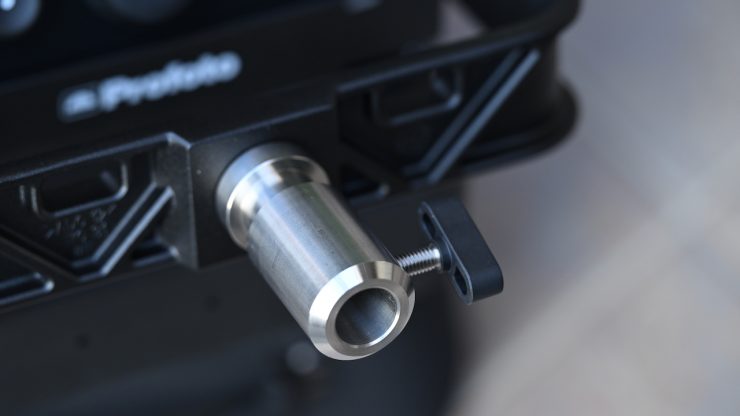
On the bottom of the yoke frame, there is a combo Junior receiver (28 mm) Baby Pin (16 mm / 5/8″), and the ability to put it on a regular light stand using the Baby Pin (16 mm / 5/8″).
There is also the ability to use the included safety wire to connect the light to the yoke.
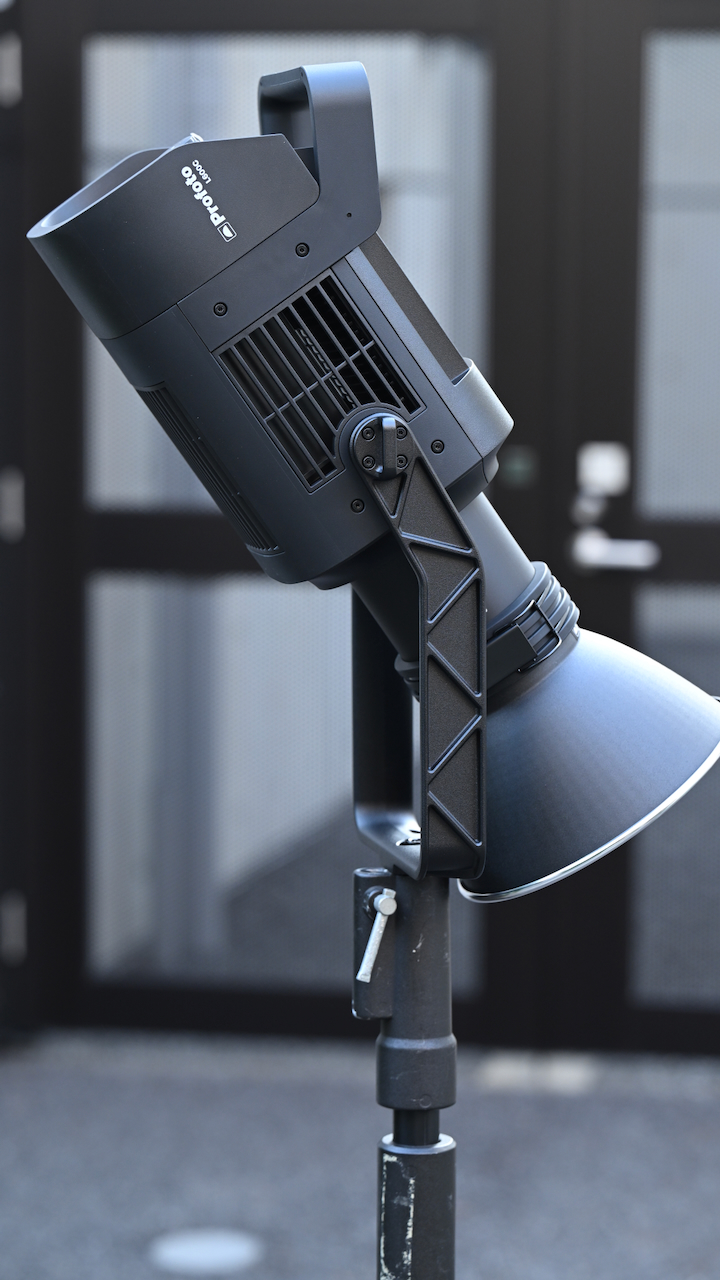


The light can be angled completely up or down, and the power cable will not hit the yoke frame. If you are using a lighting modifier, the angle gets slightly reduced. You can also rotate the yoke 180 deg when mounting in the ceiling.
Profoto recommends that you shouldn’t mount the lamp upside down, as this will reduce the cooling capacity.
Weight & Size
The Profoto L600C features an all-in-one design that integrates lamp head, control unit, and power supply into a single 6.1 kg / 13.5 lb unit, measuring 19.3 x 10.6 x 9.8″ / 49 x 26.9 x 24.9 cm.
Having a fixture of this output and power draw that only weighs 6.1 kg / 13.5 lb is impressive. I personally think that one of the light’s biggest draw cards is its small size and weight.
So, how does this weight compare to some other similar fixtures?
| | TOTAL WEIGHT |
| Profoto L600C | 6.1 kg / 13.5 lb |
| NANLUX Evoke 600C | 7.26 kg / 16.01 lb |
| Aputure STORM 700x | 9.25 kg / 20.39 lb |
| Kelvin Epos 600 | 12.18 kg / 26.85 lb |
| Prolycht Orion 675 FS | 12 kg / 26 lb |
| Aputure LS 600c Pro II | 11.3 kg / 24.9 lb |
| Aputure STORM 400X | 6.95 kg / 15.31 lb |
| ARRI Orbiter | 11.7 kg* / 25.8 lbs |
| Aputure LS 600x Pro | 10.05 kg / 22.15 lb |
| Nanlite Forza 720B | 9.5 kg / 20.94 lb |
| Nanlite FC500C | 6.14 kg / 13.53 lb |
| Godox LITEMONS LA600R | 5.1 kg / 11.2 lb |
| COLBOR CL600R | 8.2 kg / 17.8 lb |
| Falcon Eyes S600CPro | 9.95 kg / 21.71 lb |
| HIVE LIGHTING Super Hornet 575-C | 6.12 kg / 13.5 lb |
* Doesn’t include the weight of the yoke frame
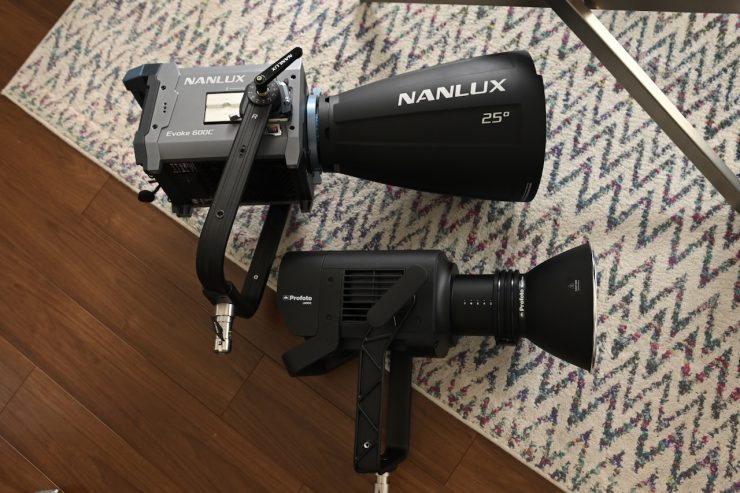
Above, you can see how the size compares between the Profoto L600C with its MaxiZoom Reflector and the NANLUX Evoke 600C with its 25-degree reflector.
If you are travelling a lot, every kg or pound you can save helps, especially if you are flying.
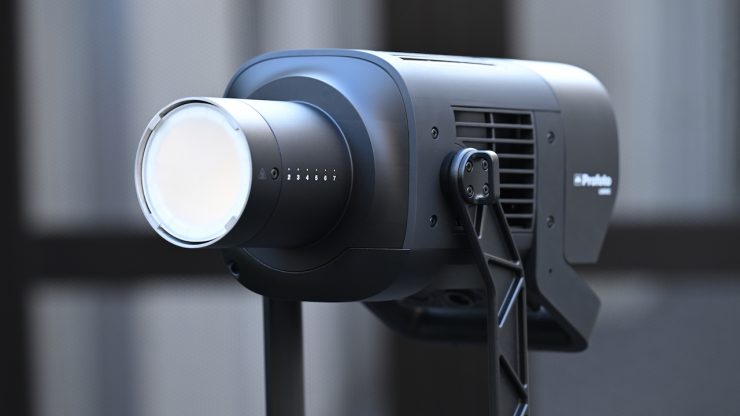
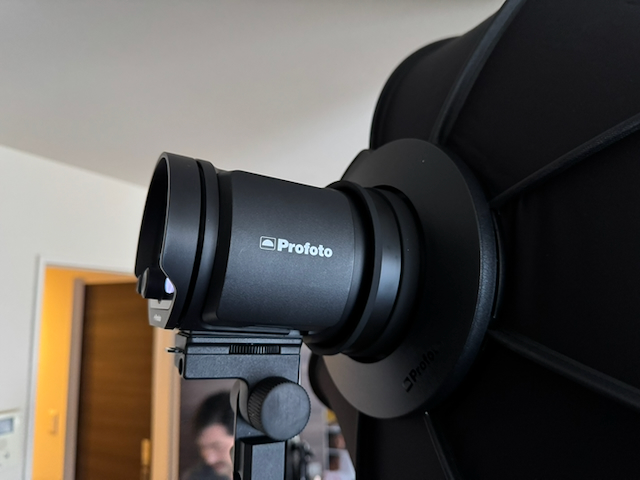
Profoto Mount
The L600C utilizes a Profoto mount. This allows you to use 100’s of different and readily available lighting modifiers. Now, this is a proprietary mount and arguably a lot of people would prefer something that is slightly more universal, like Bowens. The Profoto mount does take some getting used to if you have primarily been using the Bowens mount.
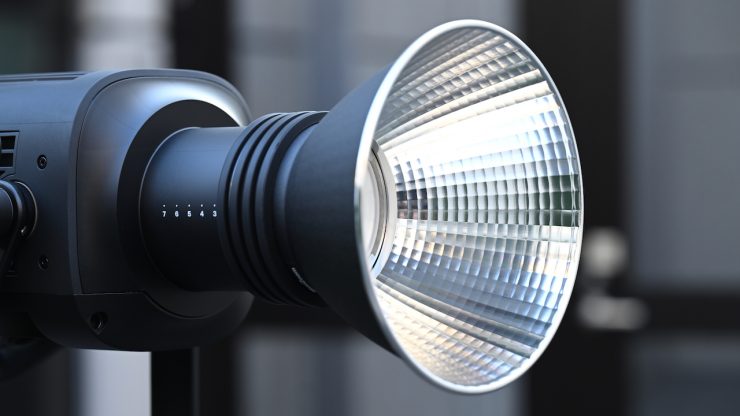
Unfortunately, you don’t get any lighting modifiers with the kit. The Profoto MaxiZoom Reflector is an optional extra that costs $225 USD. I really think this should have been included in the kit.
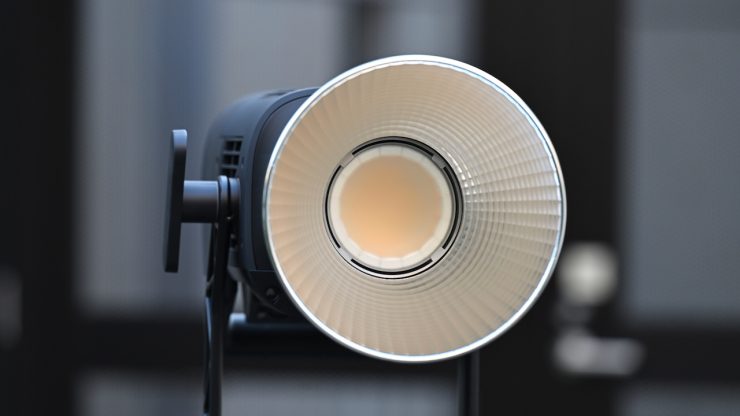
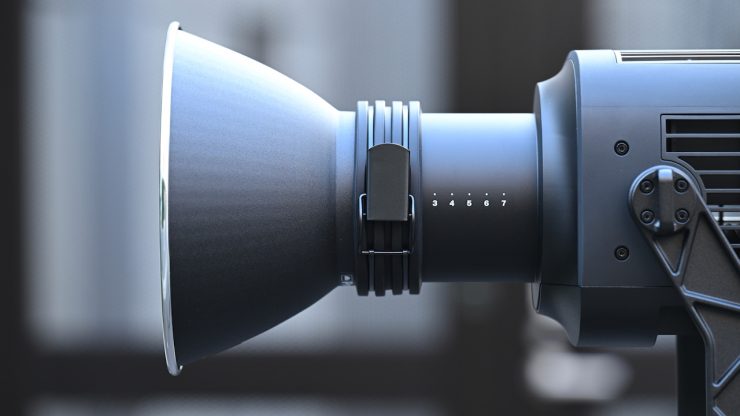

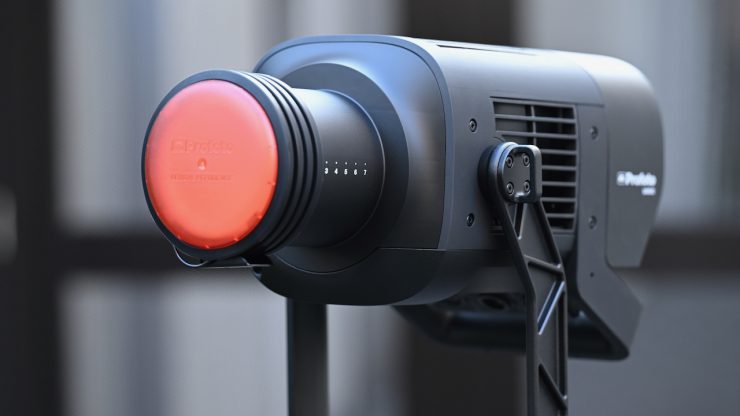
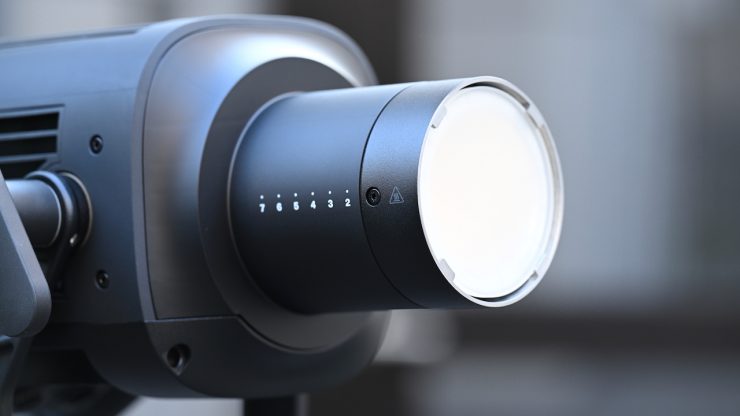
The Profoto MaxiZoom Reflector is a compact, high-performance light shaper designed to maximize the output of Profoto’s flat-front flashes and point-source LEDs. It creates a punchy light with smooth, natural fall-off. In a spot position, it produces a narrow 25° beam. You simply slide the reflector back on the mount on the L600C to fine-tune the beam angle and output.

There are quite a few very affordable Profoto to Bowens Mount Converters that you can also pick up for less than $50 USD.
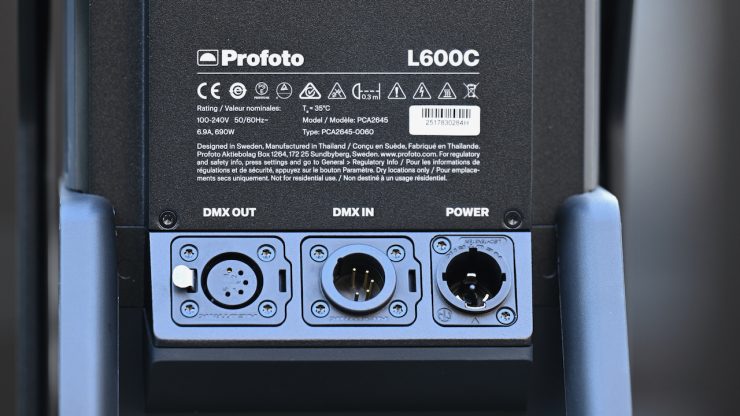
Power Draw
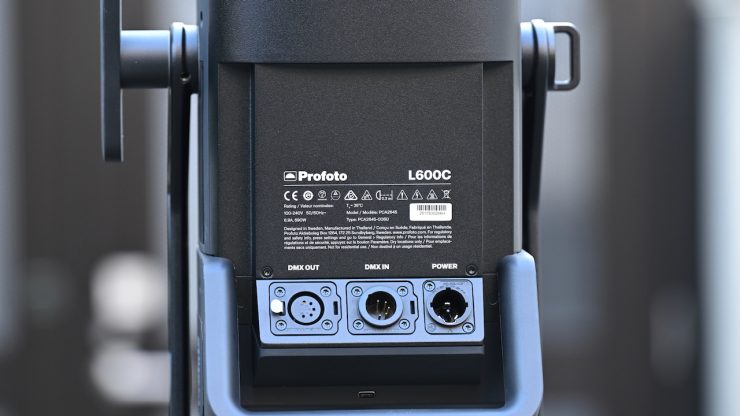
The light draws a maximum of 690W. The light utilizes a single powerCON TRUE1 AC Power Input (100 to 240 VAC, 50 / 60 Hz) that allows direct power from wall outlets (100–240V).
So, how does the power draw compare to other competing fixtures? Below you can see.
| Profoto L600C | 690W |
| NANLUX Evoke 600C | 600W |
| Aputure STORM 700x | 850W |
| Kelvin Epos 600 | 600W (nominal) 720W (rated) |
| Prolycht Orion 675 FS | 675W |
| Aputure LS 600c Pro II | 720W |
| Aputure STORM 400X | 500W |
| ARRI Orbiter | 500W |
| Aputure LS 600x Pro | 720W |
| Aputure LS 600d Pro | 720W |
| Nanlite Forza 720B | 800W |
| Nanlite FC500C | 500W |
| Falcon Eyes S600CPro | 600W |
| Godox LITEMONS LA600R | 600W |
| COLBOR CL600R | 600W |
| HIVE LIGHTING Super Hornet 575-C | 600W |
As you can see, the power draw of most of these lights is fairly similar.
There isn’t any 48V DC input, so you can’t power it remotely from block batteries, etc. This does arguably put it at a slight disadvantage if you need to power a fixture remotely in the field. In saying that, most people are just using portable battery solutions from companies such as BLUETI, DJI, Jackery, etc., as they are more affordable.
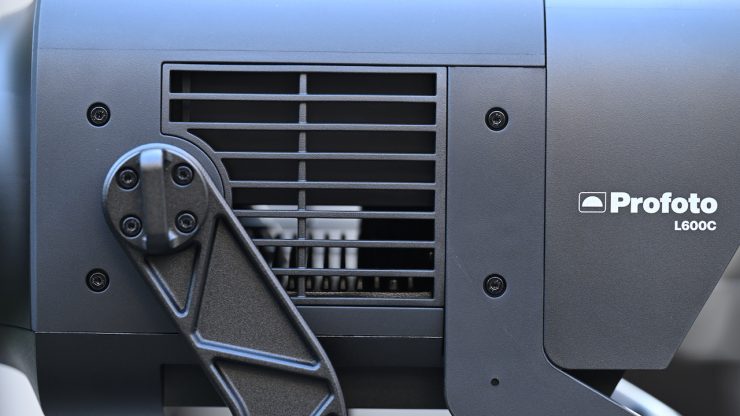
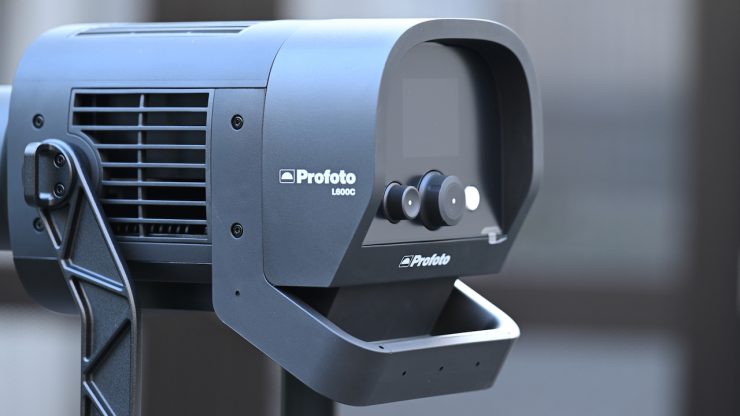
How does it stay cool?
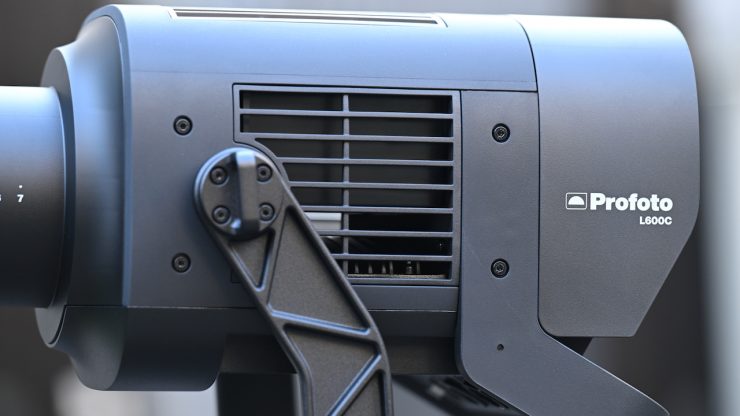
Large, high-powered COB lights get very hot, and keeping them cool is not an easy task. Using fans is the best solution, but the caveat with fans is that they can create noise.
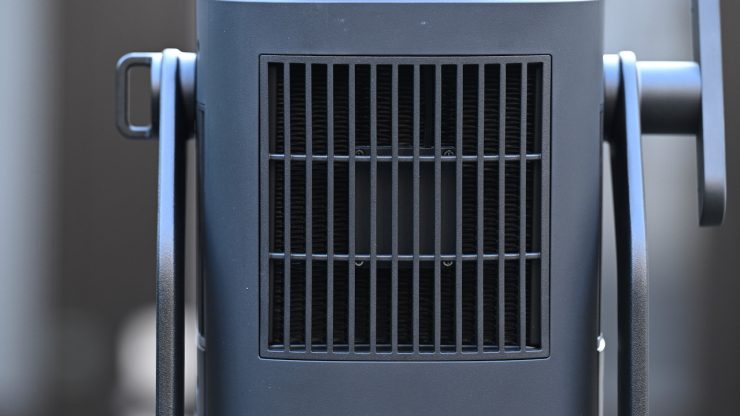
The L600C utilizes an active HydroCTech Liquid Cooling System (patent pending). The active HydroCTech liquid cooling system handles heat from the LED and its power electronics, ensuring longevity and quiet operation for sound-sensitive environments. Just to be crystal clear, the L600C still utilizes a fan.
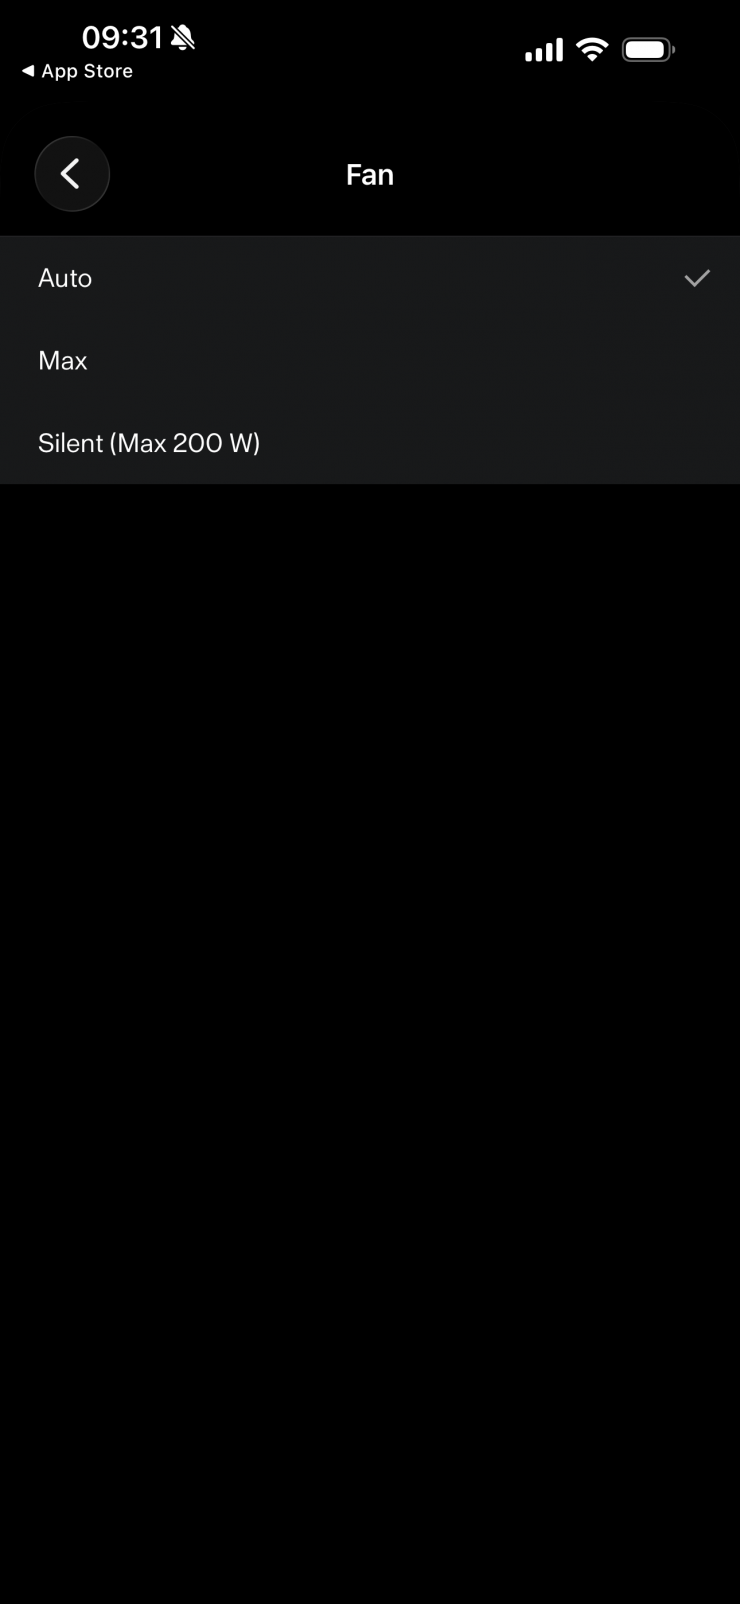
Fan settings

With the fan settings, you can select from three available fan modes: (When a mode other than Auto is active, a fan mode icon appears in the top-right corner of the main screen)
- Auto (default) – Adjusts fan speed automatically to maintain a safe operating temperature.
- Max -Runs the fan at a constant high speed, equivalent to the maximum fan speed used in Auto mode.
- Silent – Runs the fan at a minimum constant speed. (Silent fan mode limits the maximum available light output)
The L600C is very, very quiet, and the fan is only really audible if it is running in its Max mode.
The L600D/C has built-in Temperature Protection to prevent damage from overheating or extremely low temperatures.
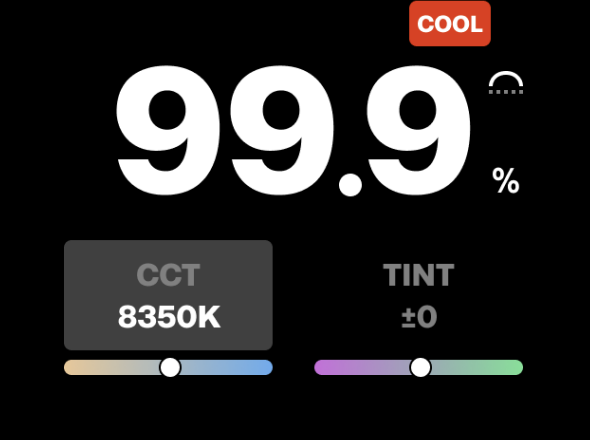
Too hot – If the internal temperature becomes critically high, a “COOL” indicator appears on the main screen. If the temperature continues to rise, the light output shuts off, and the fan switches to maximum speed for cooling.
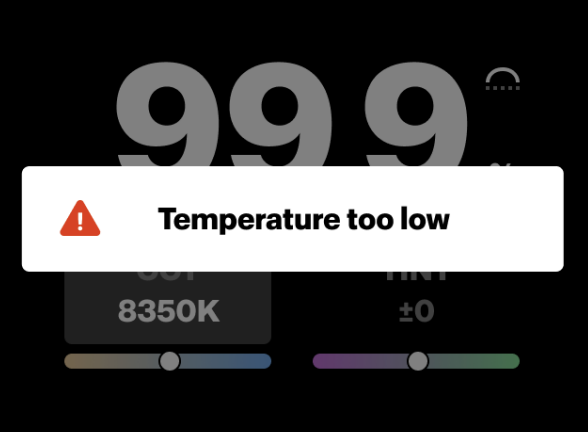
Too cold – A similar warning will be shown if the unit is turned on
below the critical minimum temperature for the liquid cooling (e.g., when frozen).
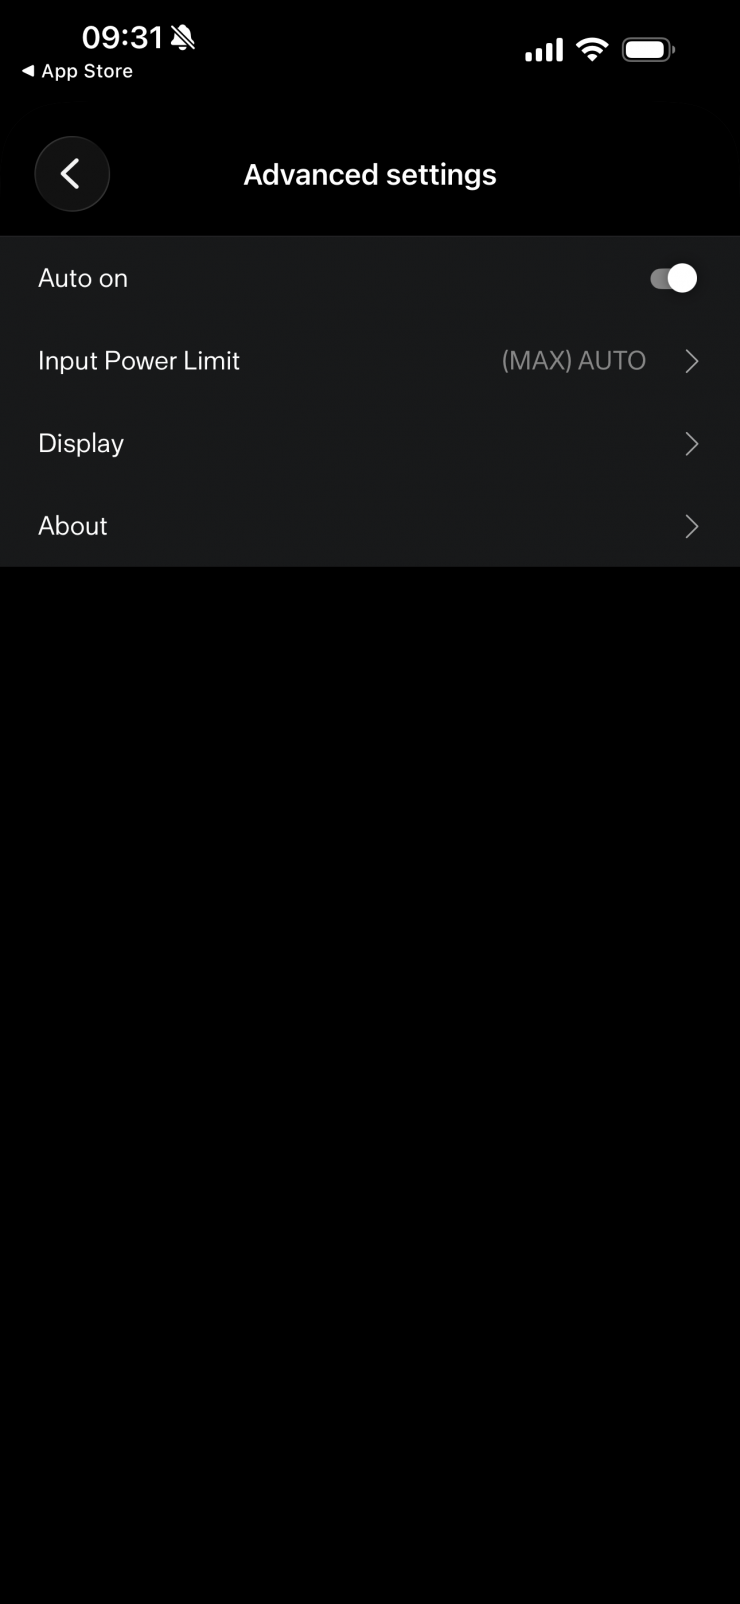
Limit the lamp’s input power
A nice feature in the L600C is the ability to limit the lamp’s input power to reduce maximum power draw. This is useful when:
• Power sources are fused with limited current.
• Multiple lights share the same circuit.
• A portable generator or battery pack is used.
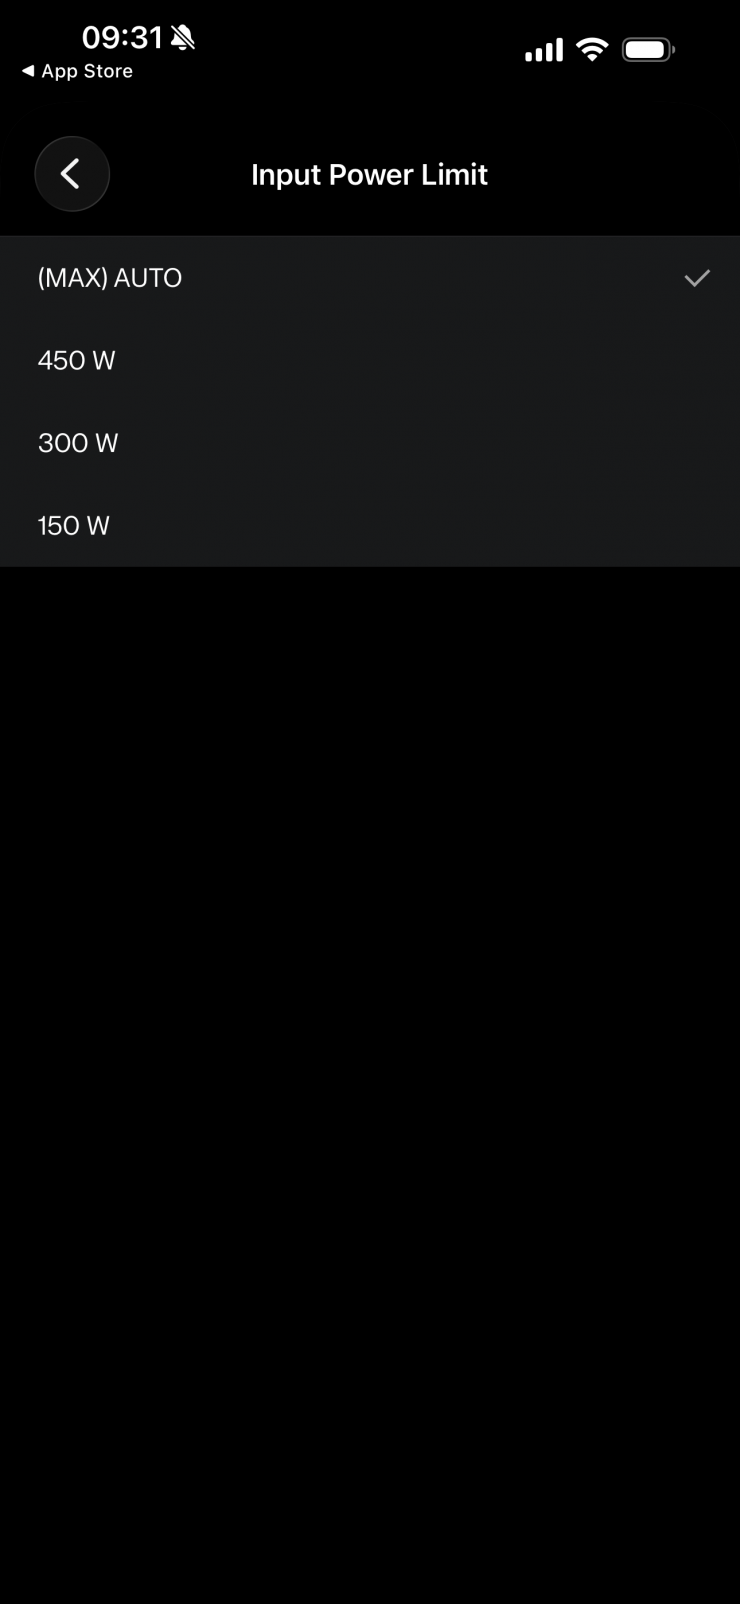
You can select from three available input power limits. When a limit other than Auto is active, the selected power limit appears in the top-left corner of the main screen.
- Auto (default) – Automatically allows the highest input power based on input voltage.
- 450W – Limits input power to 450 Watts.
- 300W – Limits input power to 300 Watts.
- 150W – Limits input power to 150 Watts.
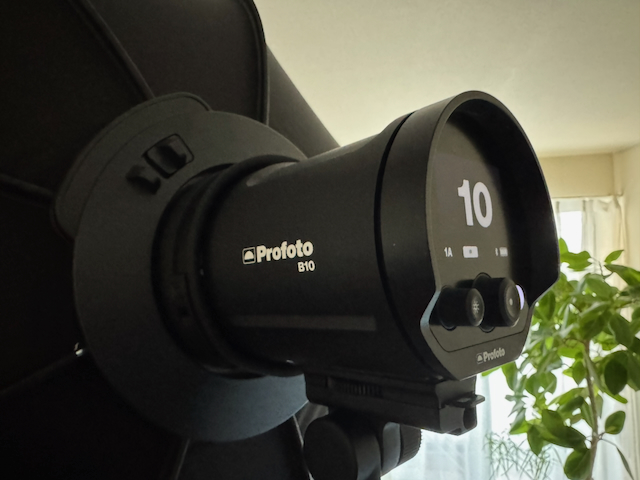
Control & Operation
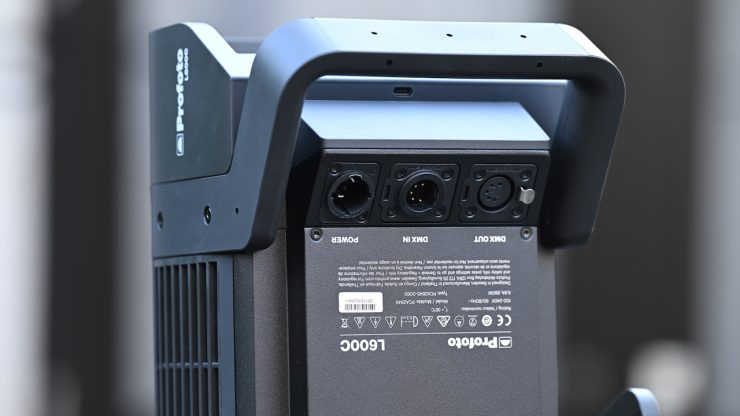
The L600C features an intuitive onboard user interface. These minimalist local controls are combined with a clear screen display to facilitate onboard adjustments. Additionally, Profoto Air and Profoto AirX connectivity enable a variety of ways to manage the fixture. The L600C also adds other important communication methods via its DMX/RDM and CRMX capability. The L600C’s wireless connectivity is possible from up to 328′ away.
There is also a free Profoto Control Desktop app to expand your control options. The app offers control over your Profoto light right from your Mac computer. Some of the many features of the Profoto Control Desktop app are the ability to save and reuse custom presets, independent control of up to six lighting groups, tethering integration, and firmware updates.
Note: Compatible with any Mac computer running macOS 14.6 or later.
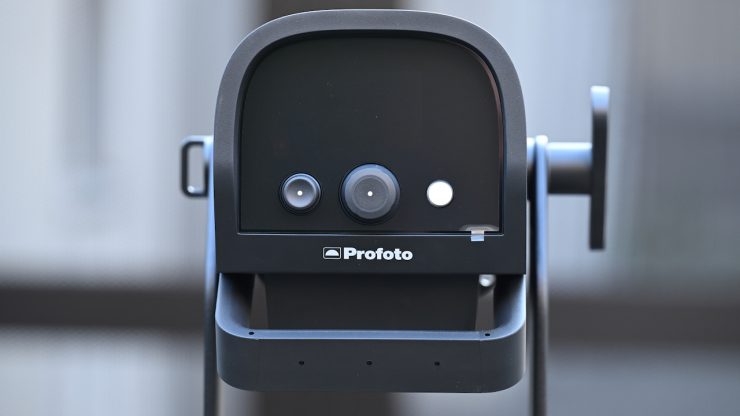
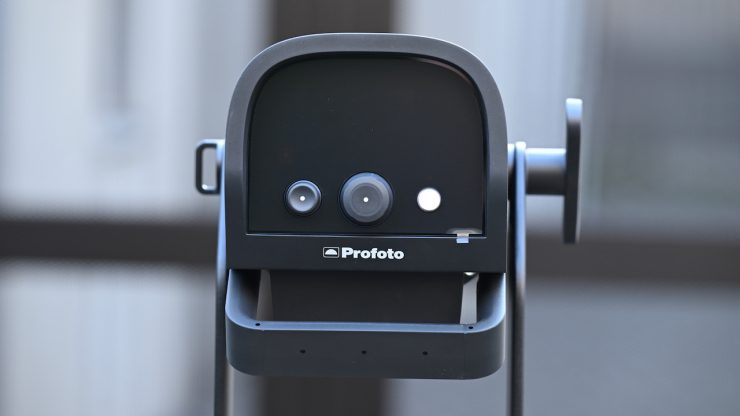
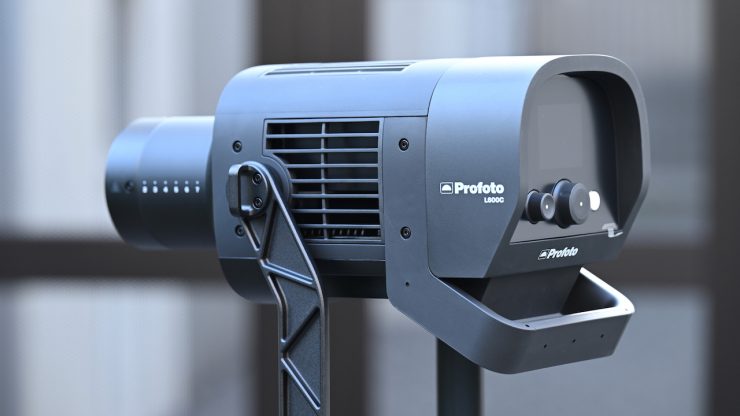
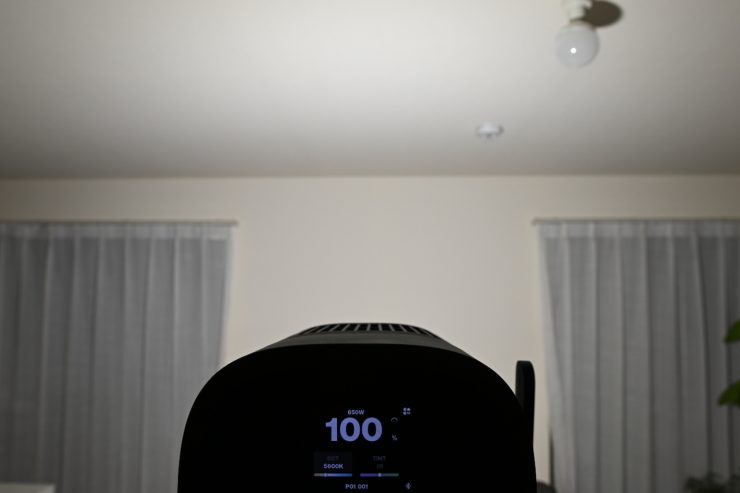
On the back of the fixture, there is a reasonably large display and just three buttons.
The Right (white ) button – On/Off
• Short press: Turn the lamp on or off.
• Long press: Turn off the unit.
• In settings menu: Short press to exit the menu
The Center dial – Main dimmer
• Rotate: Adjust light intensity (0.0-100%). Faster rotation increases speed.
• Short press: Open the settings menu.
• Long press: Lock or unlock the controls.
• In settings menu: Rotate to navigate, short press to select.
The Left dial– L600C – Light Mode Control
• Rotate: Adjust the selected light mode parameter.
• Short press: Switch between parameters (e.g., hue/saturation, CCT/tint).
• Long press: Open the light mode selection menu.
• In light mode selection menu: Rotate to navigate, short-press to select.
• In settings menu: Short press to go back one level L600D – Secondary dimmer
• Rotate: Adjust light intensity (0.0-100%). Faster rotation increases speed.
• In settings menu: Short press to go back one level
You can turn the dial slowly to change the light intensity in 0.1% increments per step.
• Turning the dial quickly accelerates the adjustment rate.
Locking/Unlocking user interface
You can lock the control interface to prevent accidental changes during use.
• Long-press the center dial to lock the user interface.
• When locked, a lock icon will appear on top of the main screen indicating the lock status.
• All controls are disabled except the ability to unlock.
• Long-press the center dial to unlock.
Operating Modes
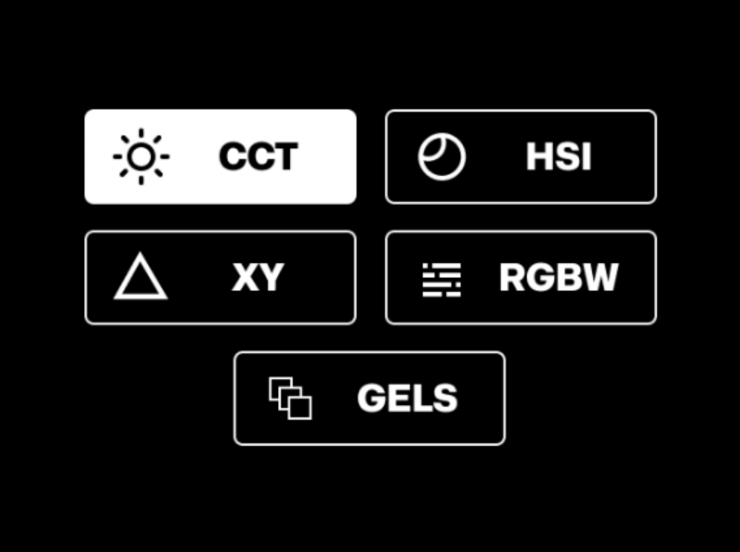
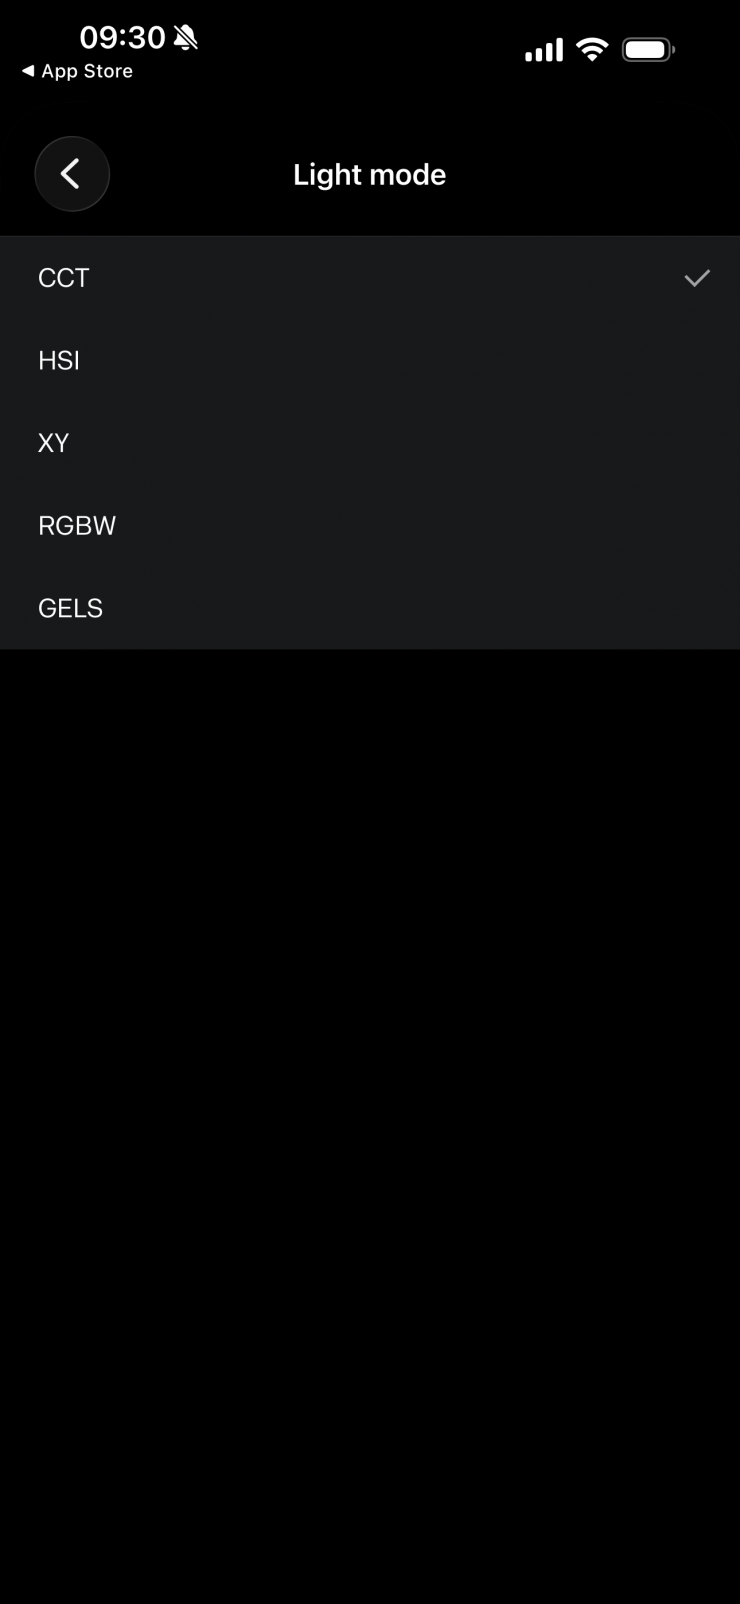
The L600C offers six selectable light modes, each providing different ways to adjust the light’s color characteristics:
- CCT – White light mode with adjustable color temperature and tint.
- HSI – Color mode with adjustable hue and saturation.
- XY – Color mode using X/Y coordinate control for precise color definition.
- RGBW – Color mode with individual control of Red, Green, Blue, and White channels.
- GELS – Simulated gel mode with selectable presets based on LEE and Rosco gels.
To change the light mode, press and hold the left dial to open the light
mode selection menu.
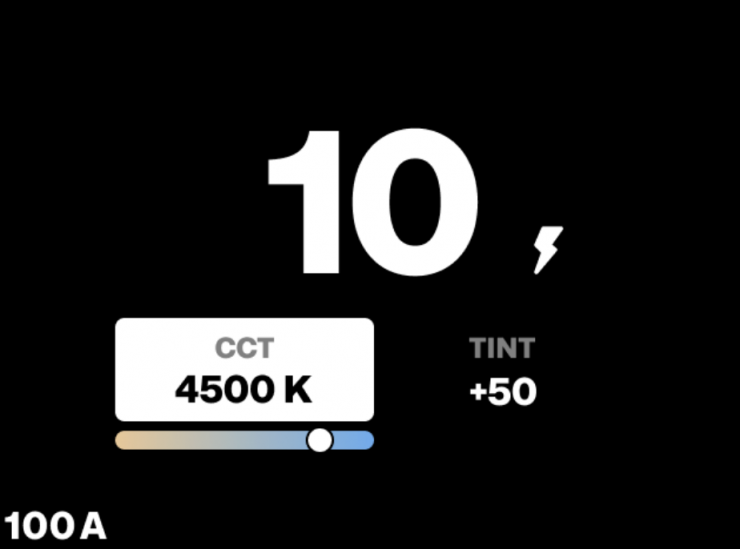
Correlated Color Temperature (CCT)

This is the mode most people are going to use the light in. In the CCT Mode, you have full access to making Kelvin color temperature adjustments between 2000-15,000K. This is a very wide range, and it offers plenty of versatility.
The CCT light mode includes two selectable output modes, found under Settings > CCT Output
Constant (default) – Limits the maximum light output to maintain consistent intensity across the CCT range (~2600K–8000K), based on the set dim level.
Max – Removes the output cap to allow maximum possible intensity at any selected CCT.
You can adjust the intensity right down to 0.1%, and the light still stays on.
The fixture also has continuous variable (full -100 to +100 minus green to full plus green) correction.
Being able to dial in more or reduce the amount of green coming from your lighting source can make a huge difference. Different camera companies use different sensors in their cameras, and they all react differently to light. Some camera sensors may lean towards magenta, and some may lean more towards green. By making CCT adjustments, you can dial in the light so that it looks better for whatever camera system you are using. CCT adjustment also helps when you are trying to match lights from different manufacturers.
HSI

The HSI mode lets you create just about any color you can think of. It gives you full hue and saturation control as well as intensity. By manipulating the hue and saturation, you can create some really interesting colors that, depending on the project you are working on, can really add some creative flair. I quite like using this mode to create a lot of color separation between the foreground and background, or for recreating a really cold or warm-looking image.
Because the interface has really good visual aids, it is so much easier to dial in the exact color you want to create. On some lights, you have to use dials with no visual reference.
XY

In this mode, you can adjust the x,y coordinates of the light. This can be handy when trying to match other fixtures or light sources if you have a Specromaster that can measure x,y coordinates.
RGBW

In this mode, you can individually adjust the Red, Green, Blue, and White channels of the fixture.
The output intensity is not constant when you change X and Y values. Light output will vary depending on the selected color coordinates.
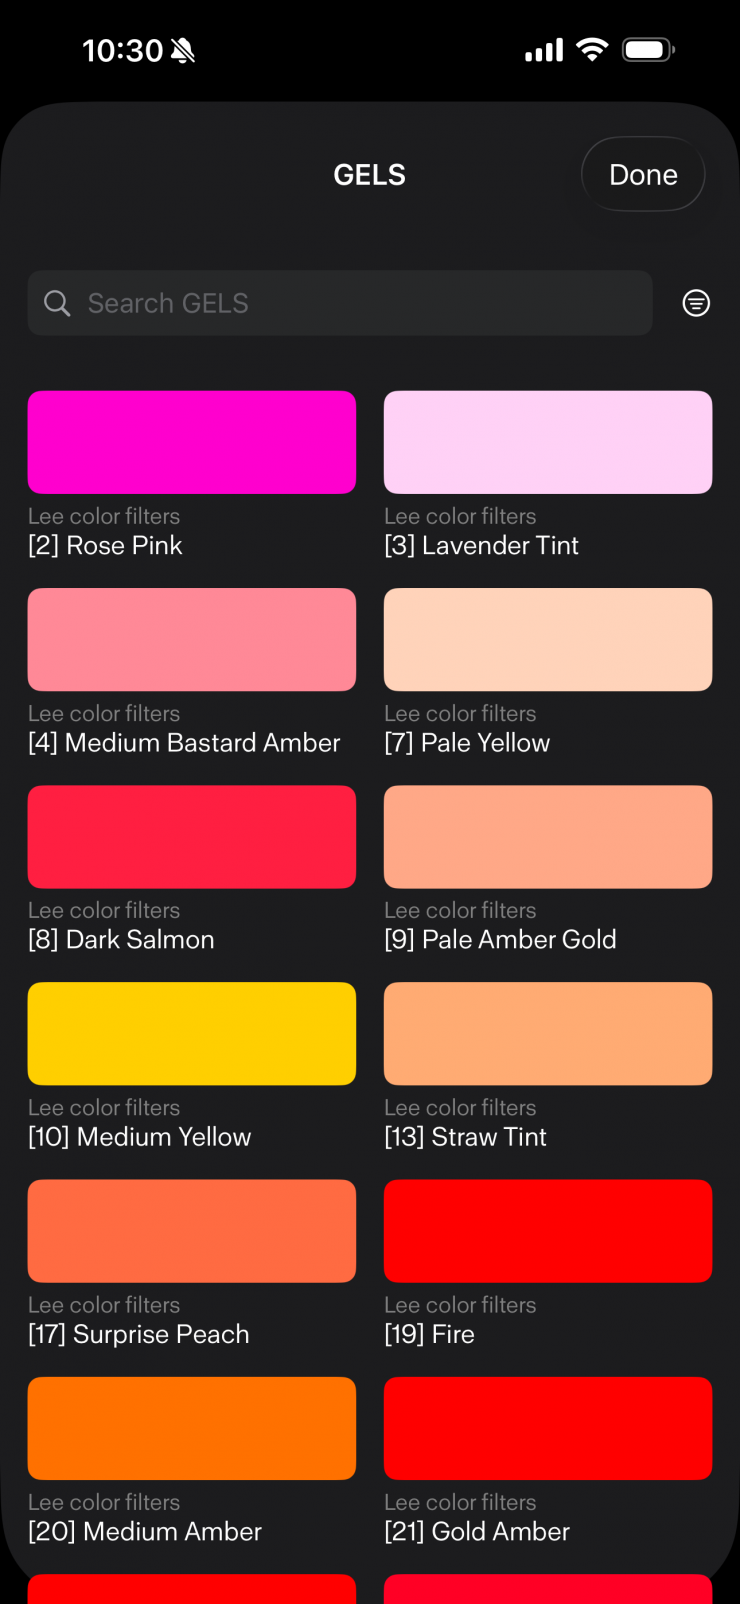
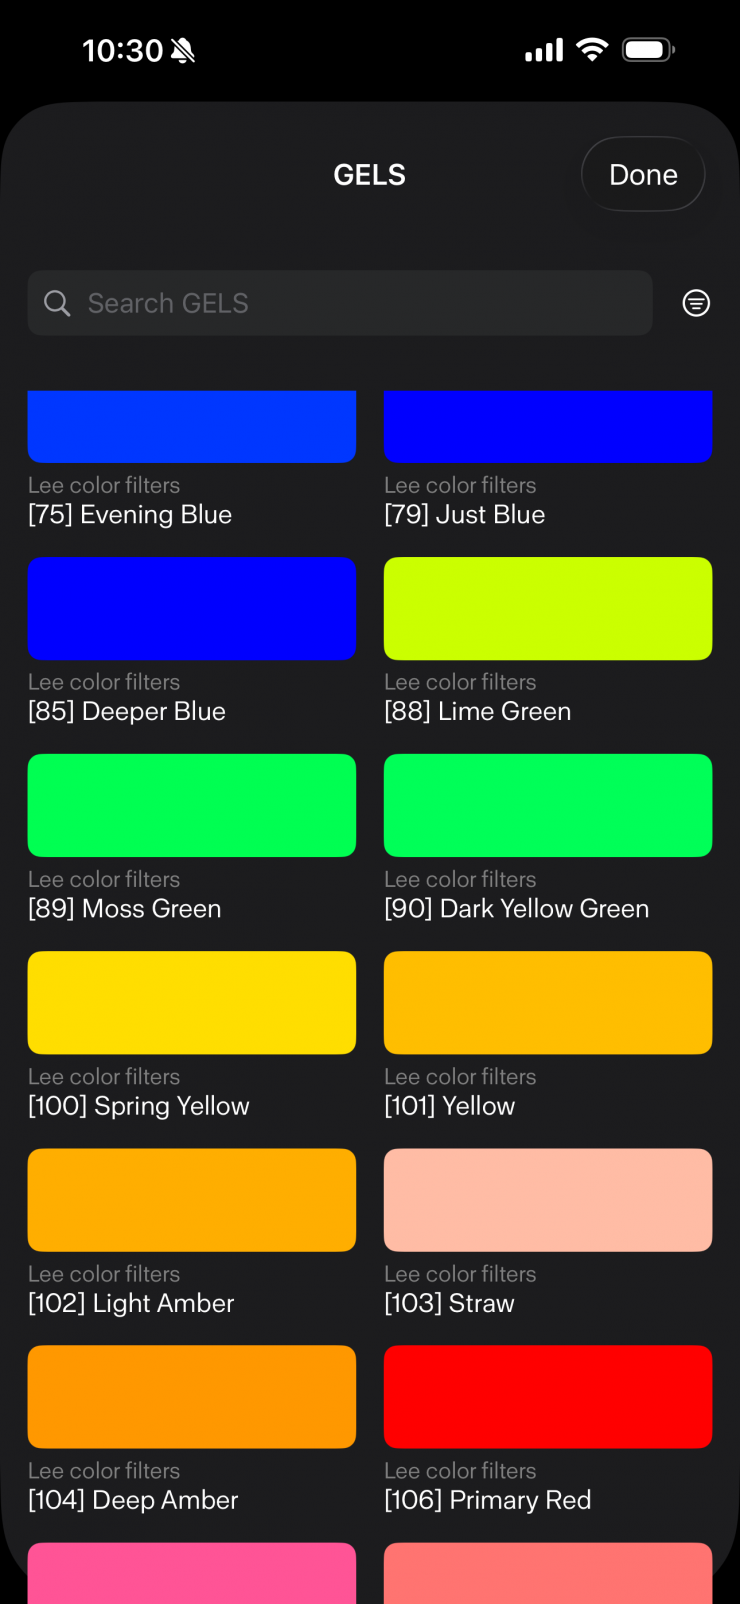
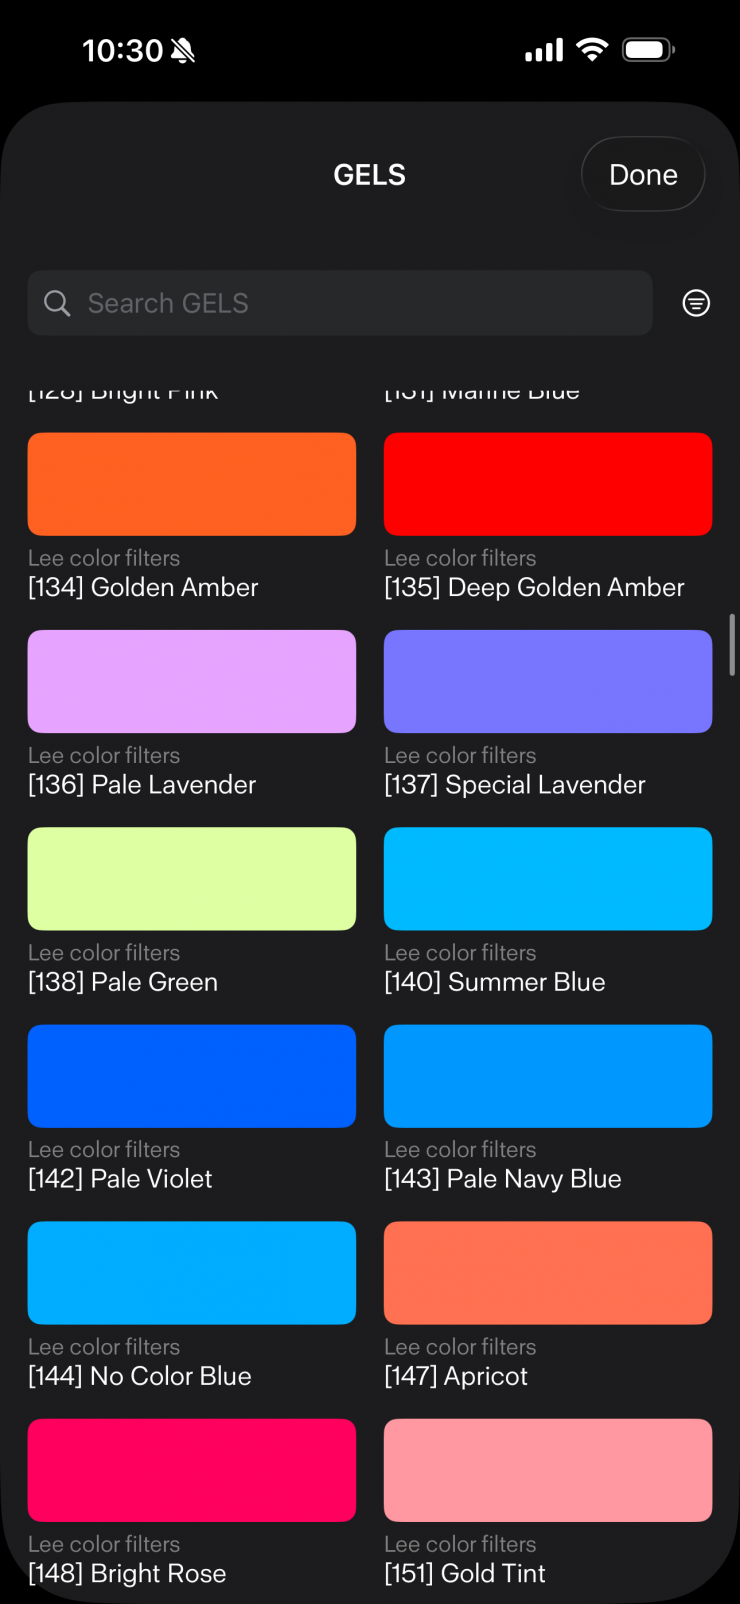
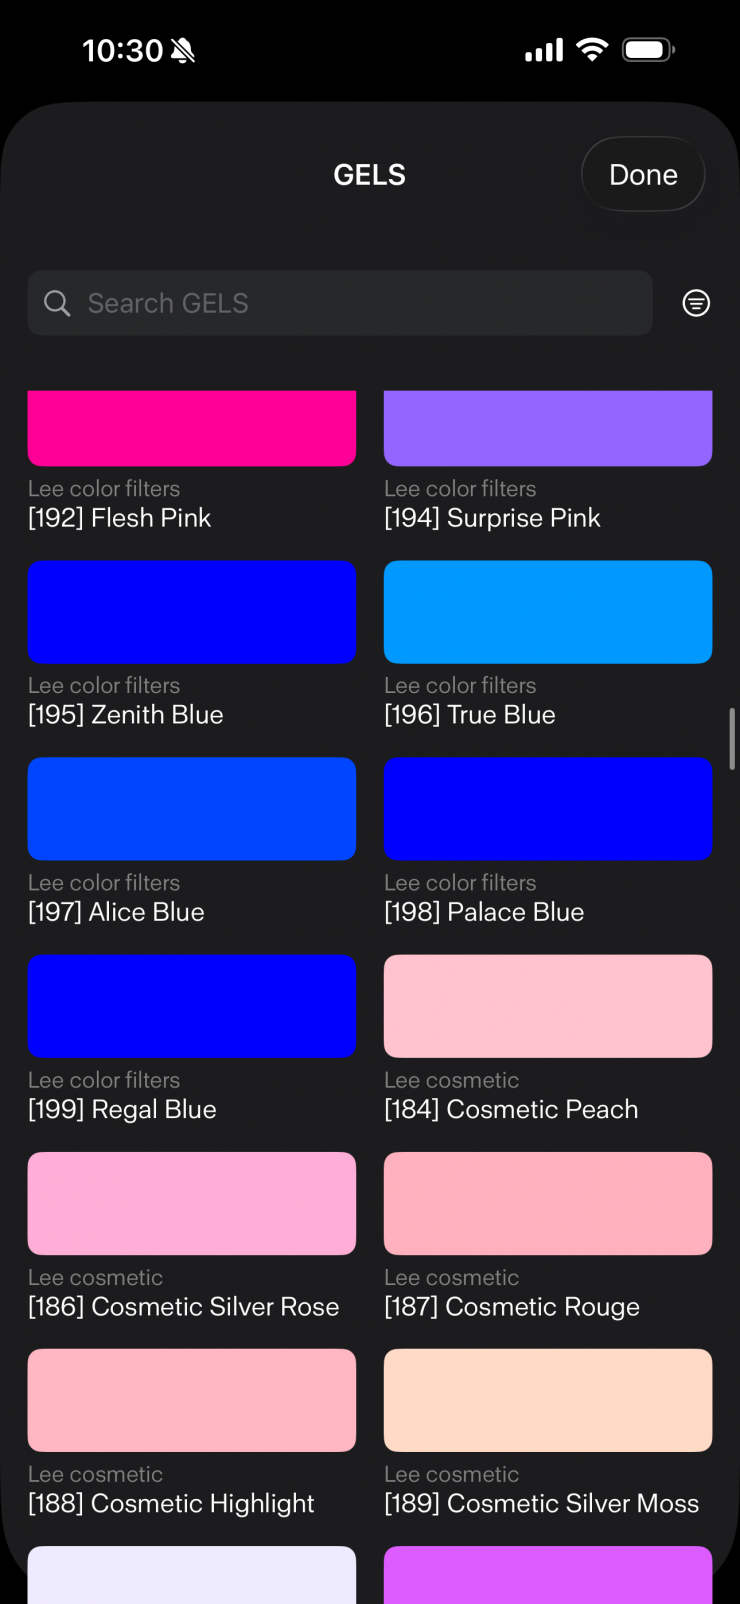
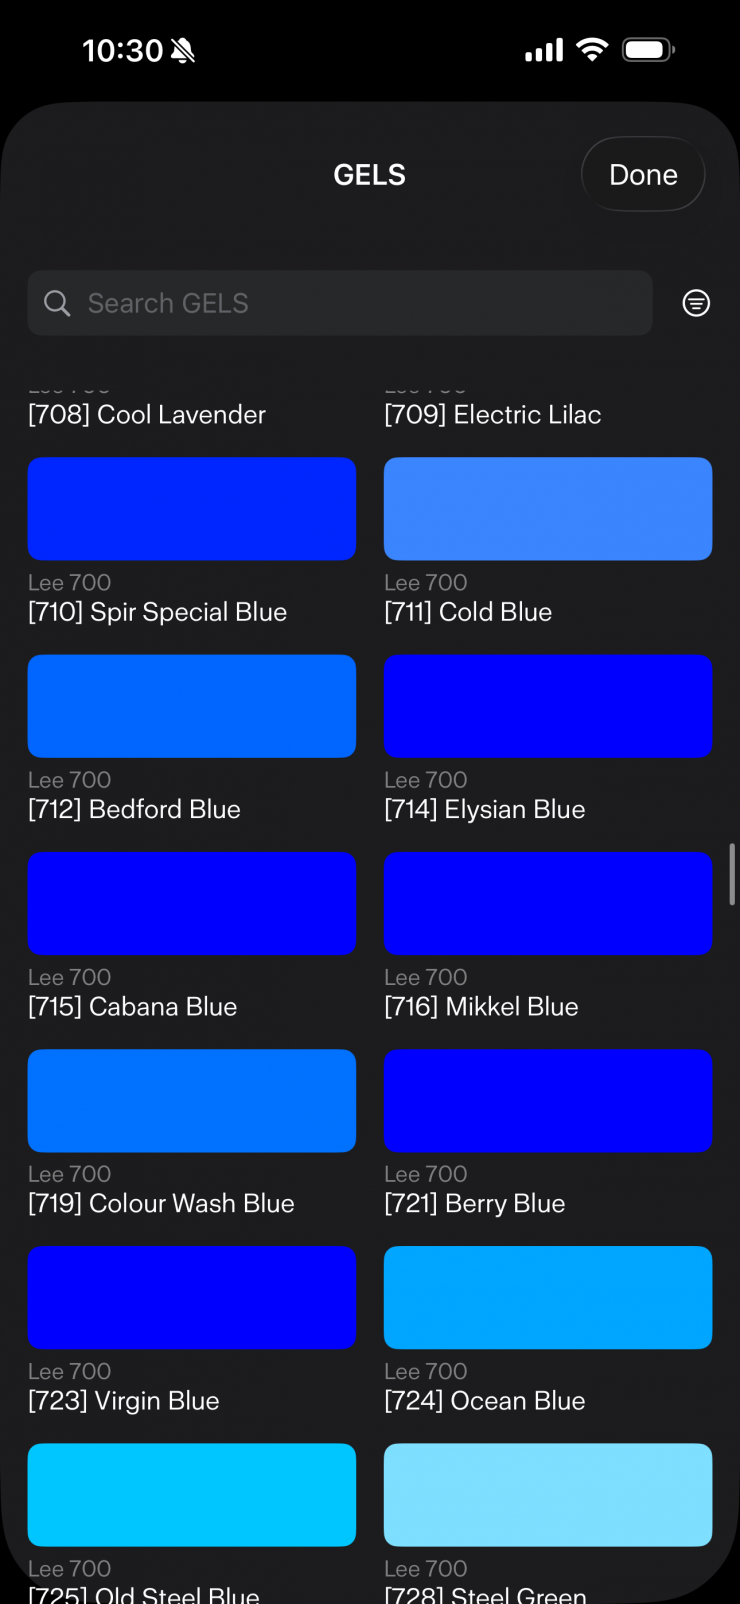
Gel

Inside the fixture, there is a huge assortment of industry-standard gels from both Lee and Rosco. In fact, you can choose from a vast array of Rosco and LEE gels.
Having built-in Digital Gels not only means that you don’t have to physically carry gels around, but you can also quickly and easily replicate popular gels. Using the gel mode can help you match other lighting sources, especially if you are working with other lights with physical gels.
Navigating Settings Menu
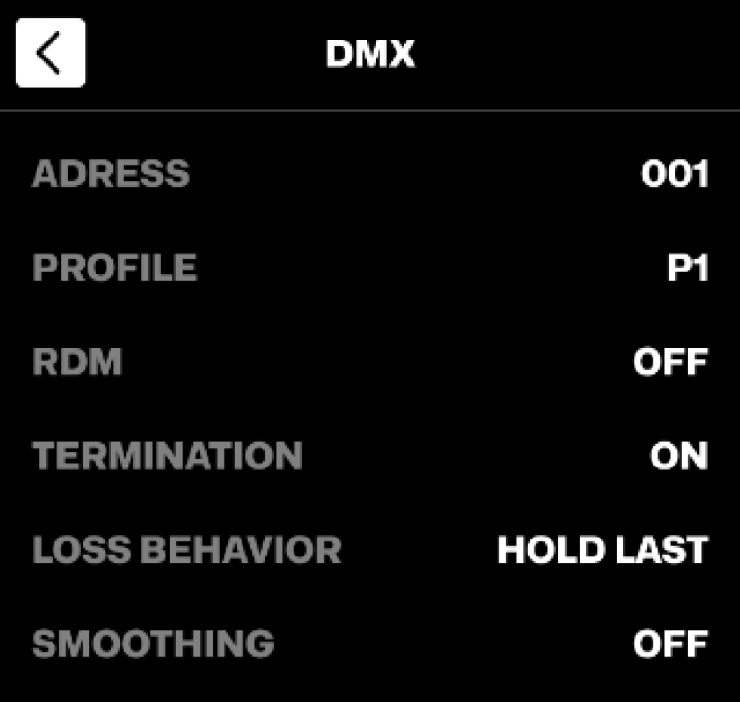
The Settings menu gives you access to all configurable options for the unit.
The menu is very easy and intuitive to navigate.
Profoto Control App
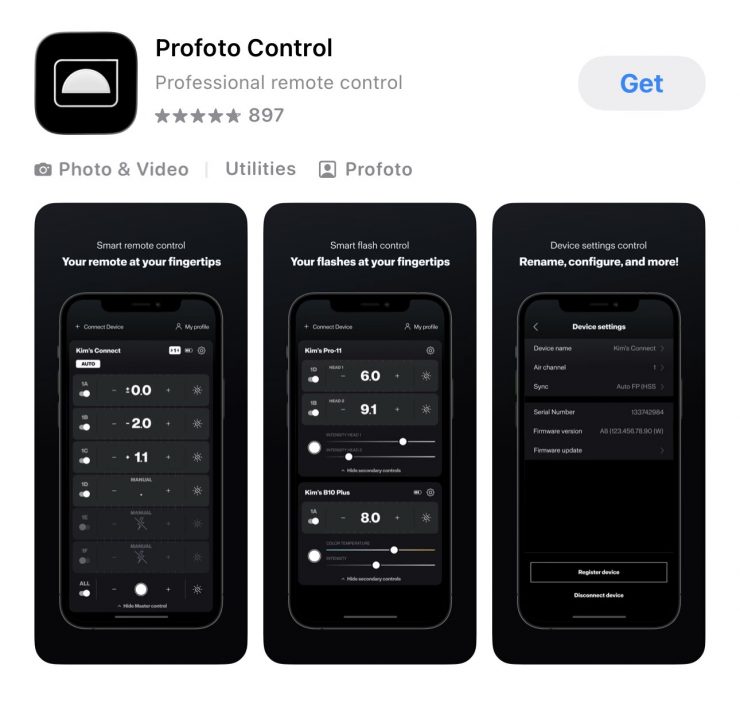
The integrated Bluetooth module supports remote control via the Profoto Control app, available on the App Store and Google Play.


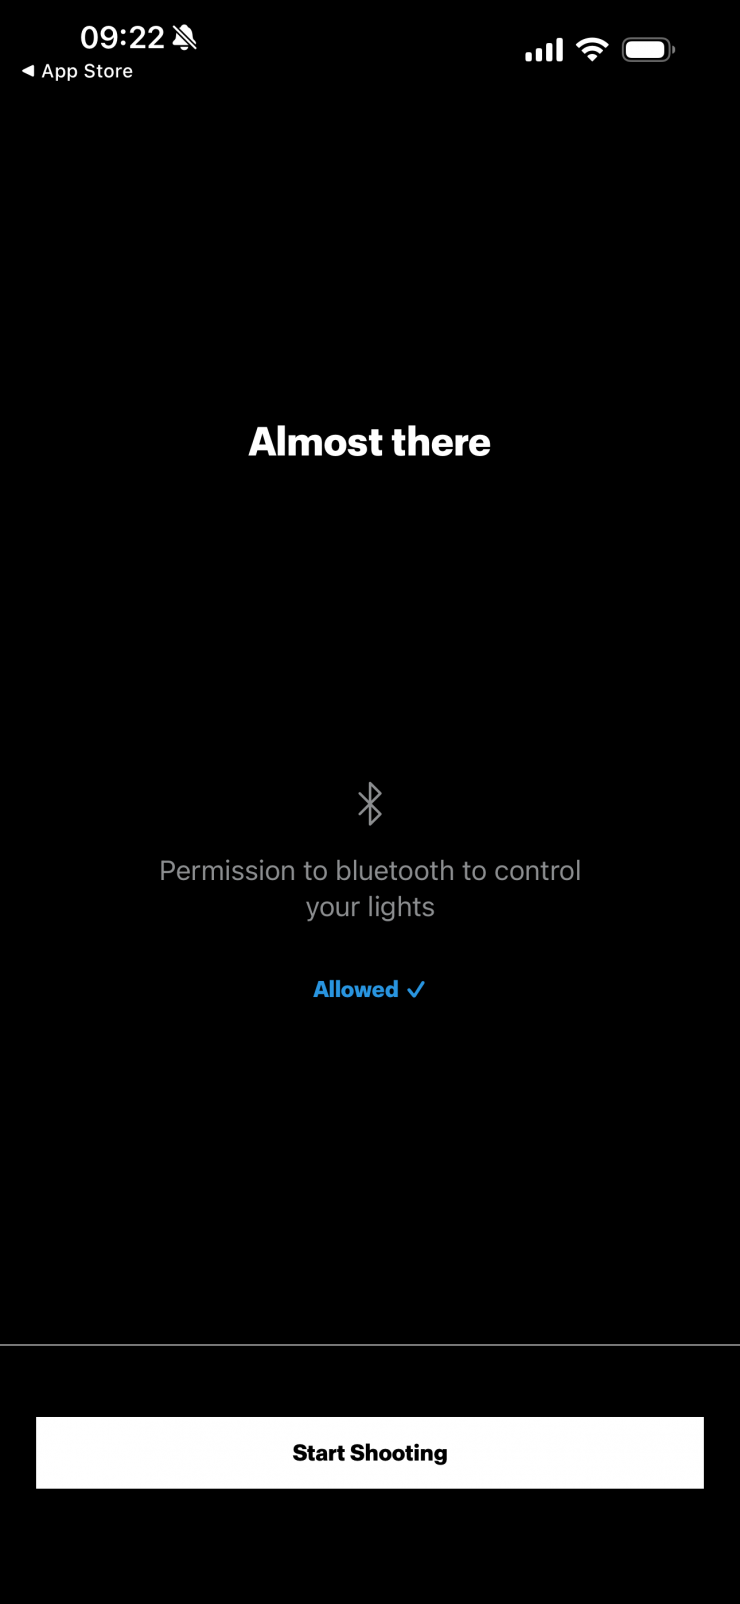
To pair a light with the Profoto Control app, make sure that Bluetooth is ON and Disconnected (Settings > Bluetooth). Then follow the in-app instructions to connect your light.
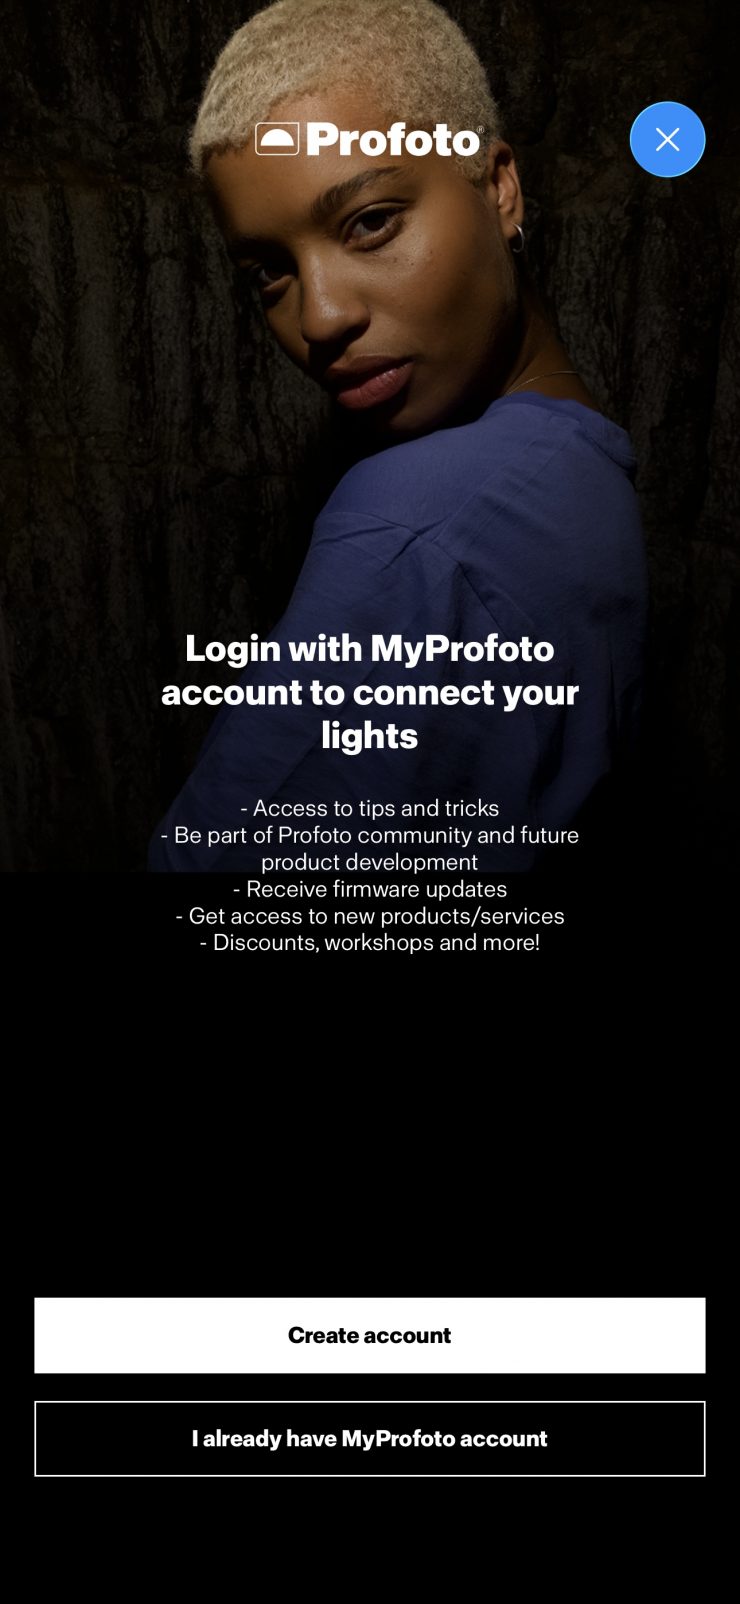
The first time you go to use the app, you will be asked to register an account. I am not the biggest fan of having to do this just to use an app.
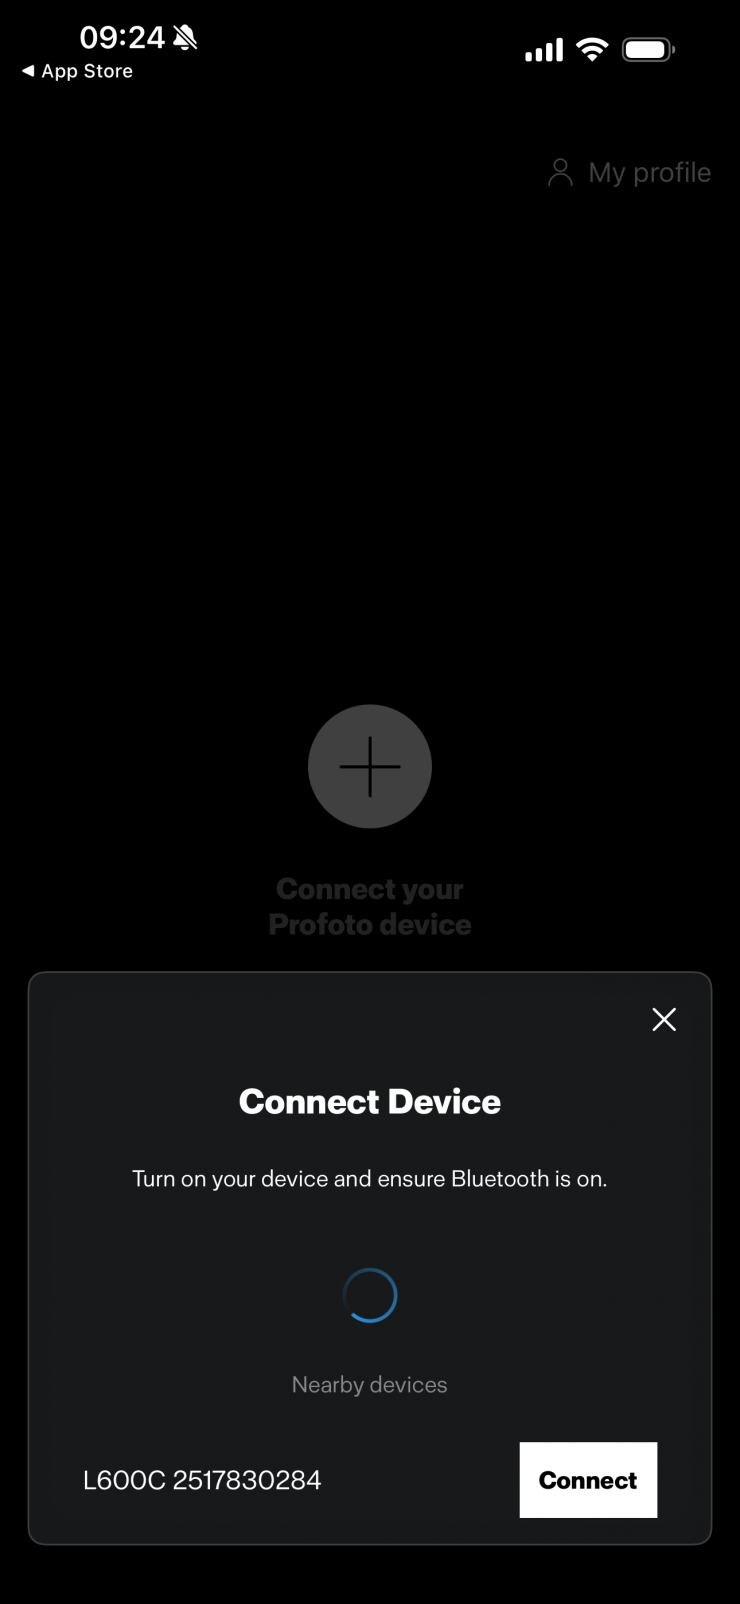
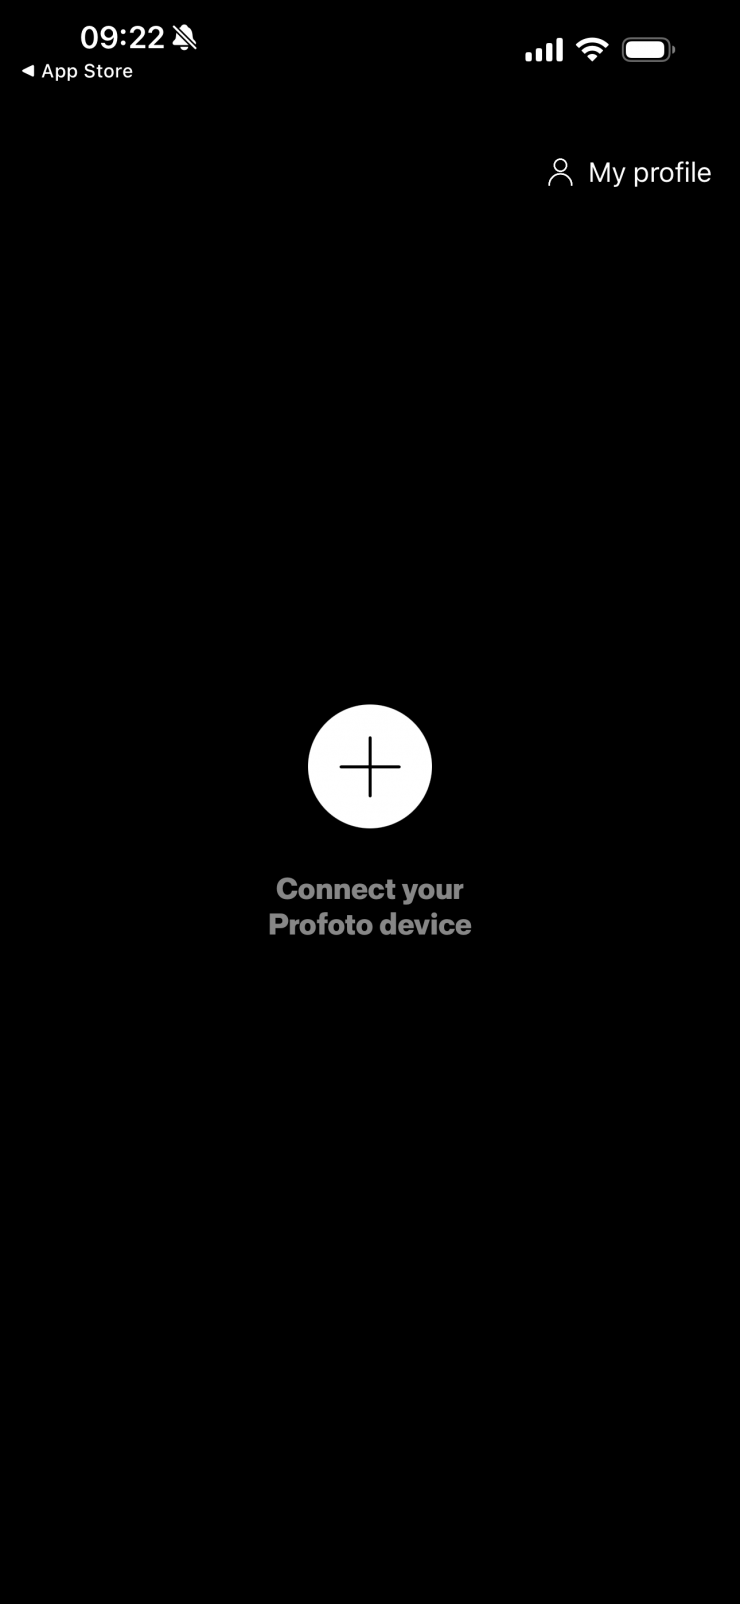
Once registered, it will automatically show any Profoto fixtures that are turned on with their Bluetooth enabled.
You then simply connect to the light you want to control.
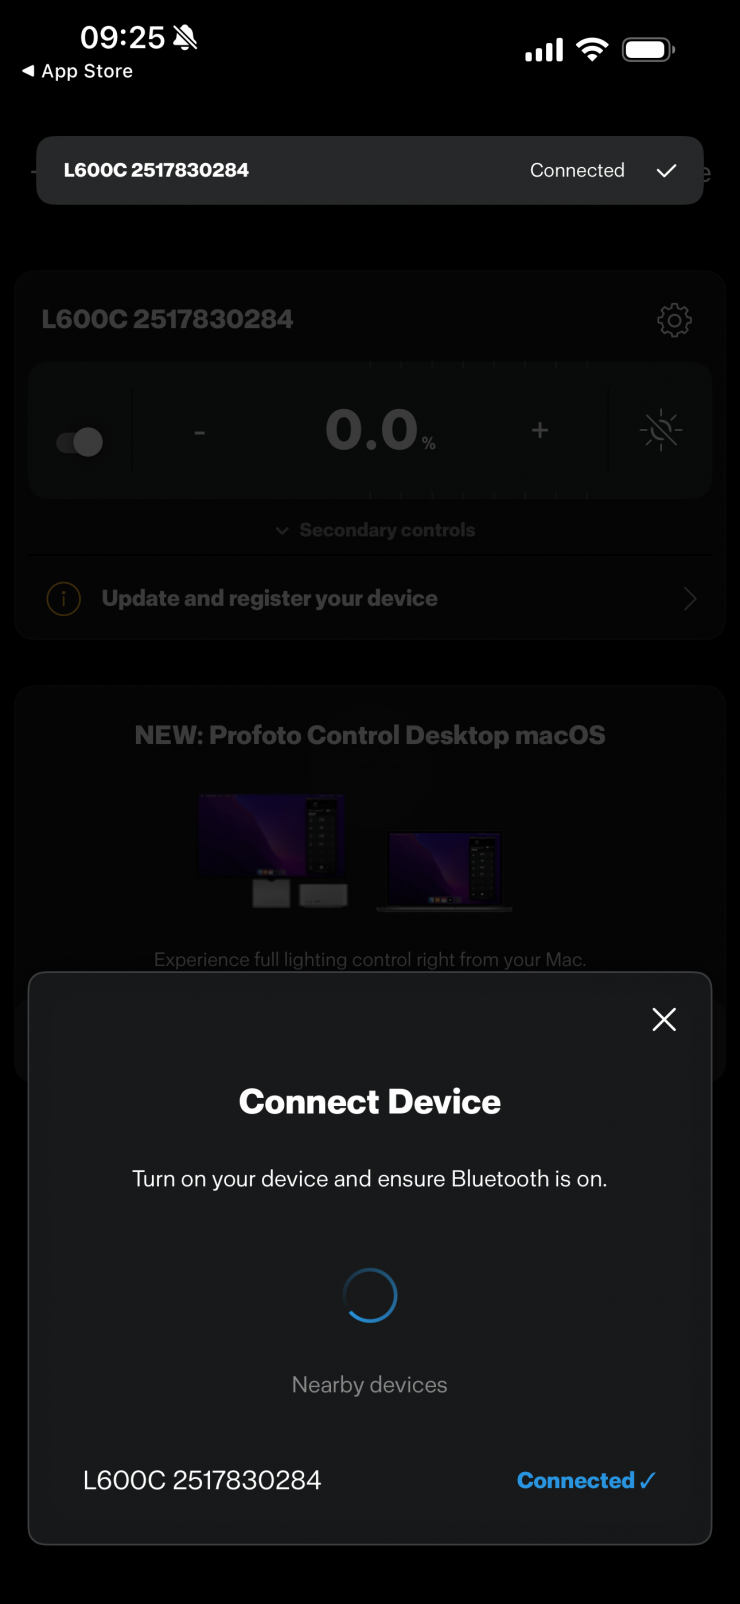
Once a light has been connected to the Profoto Control app, it will automatically reconnect the next time you launch the app until you manually disconnect the light in the app.
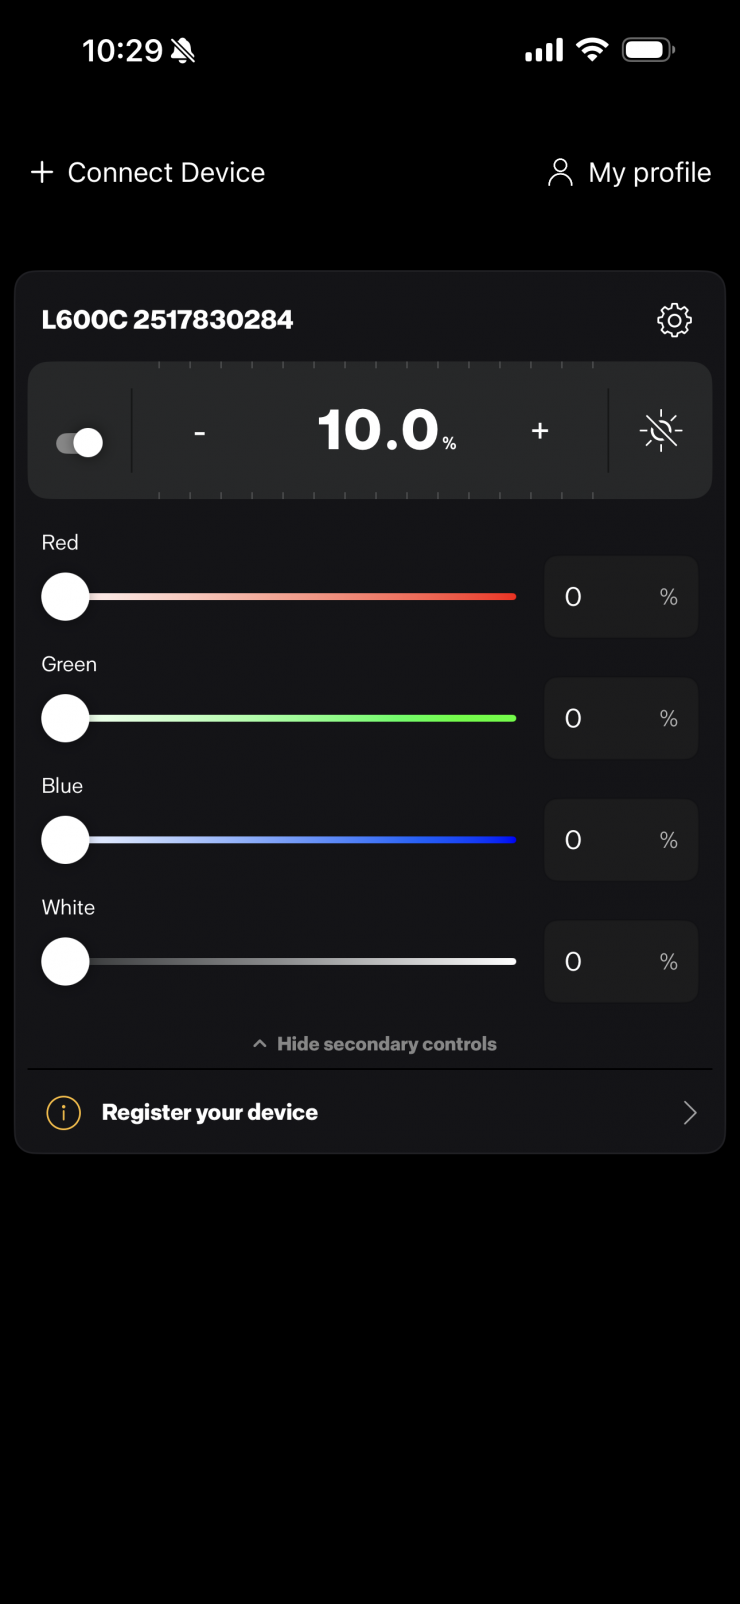
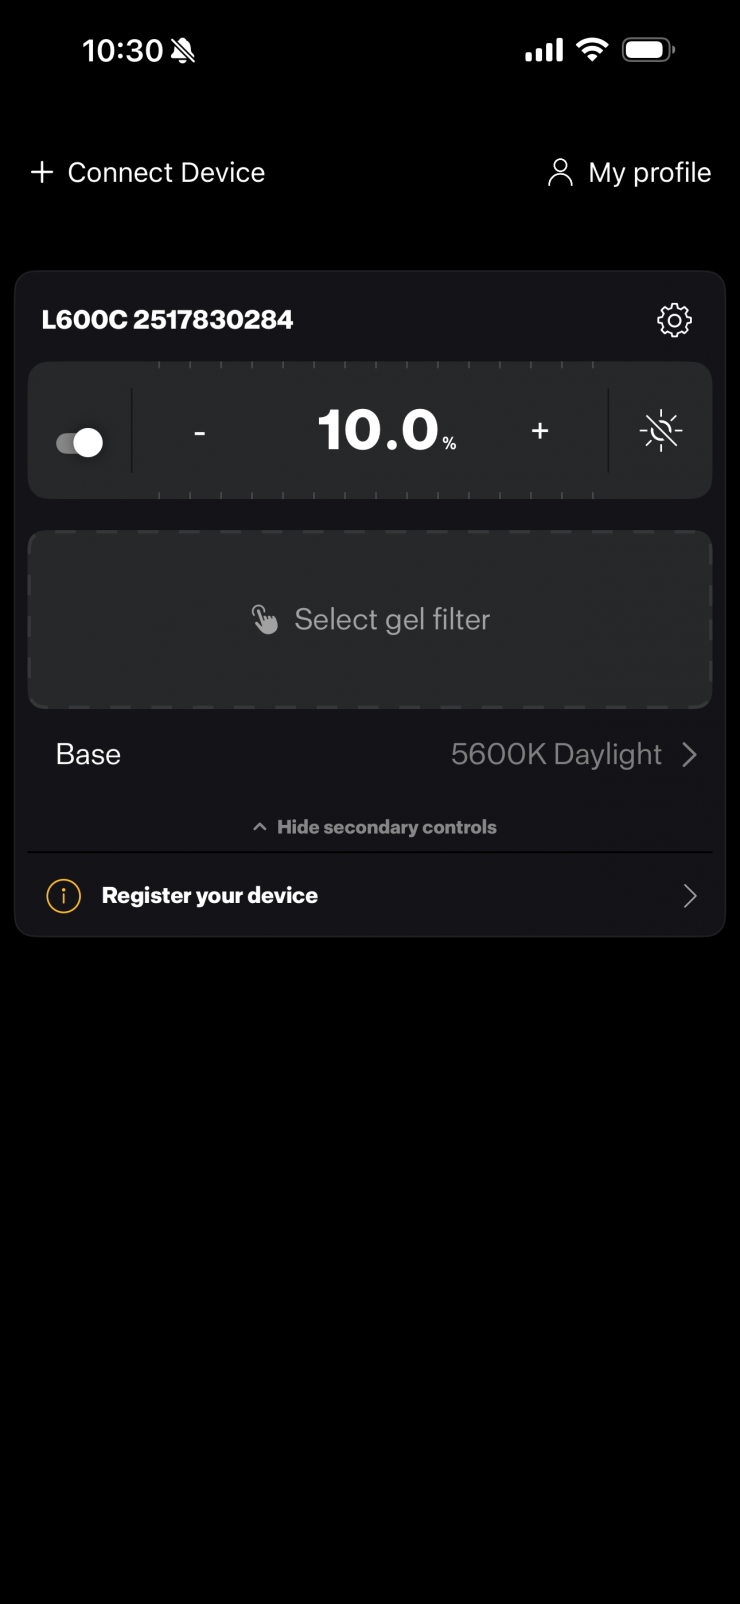
Above, you can see the main screen that you get brought to once you have connected up to the light.
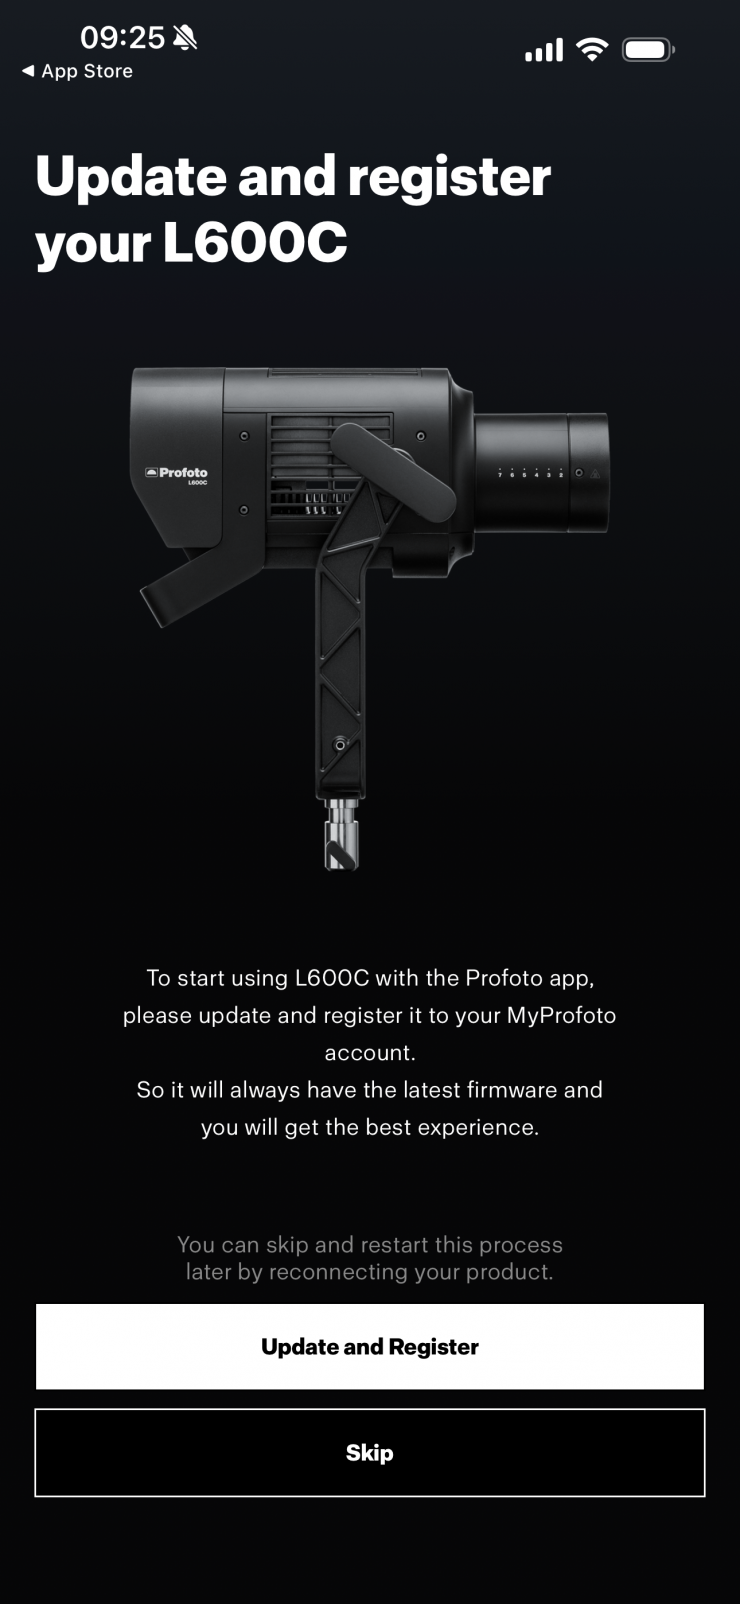
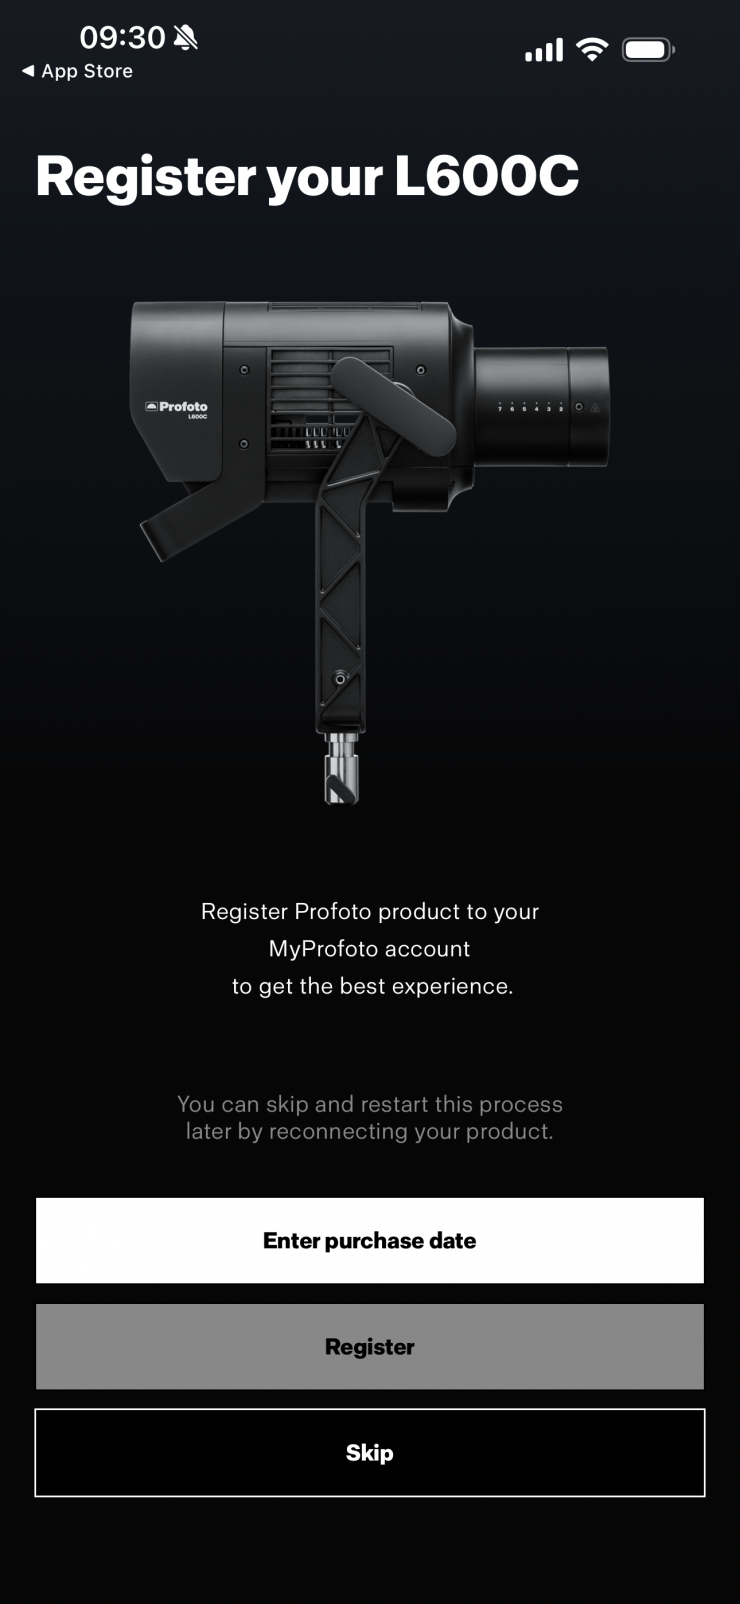
You will then be taken to another screen if you haven’t registered your fixture or a firmware update is required.
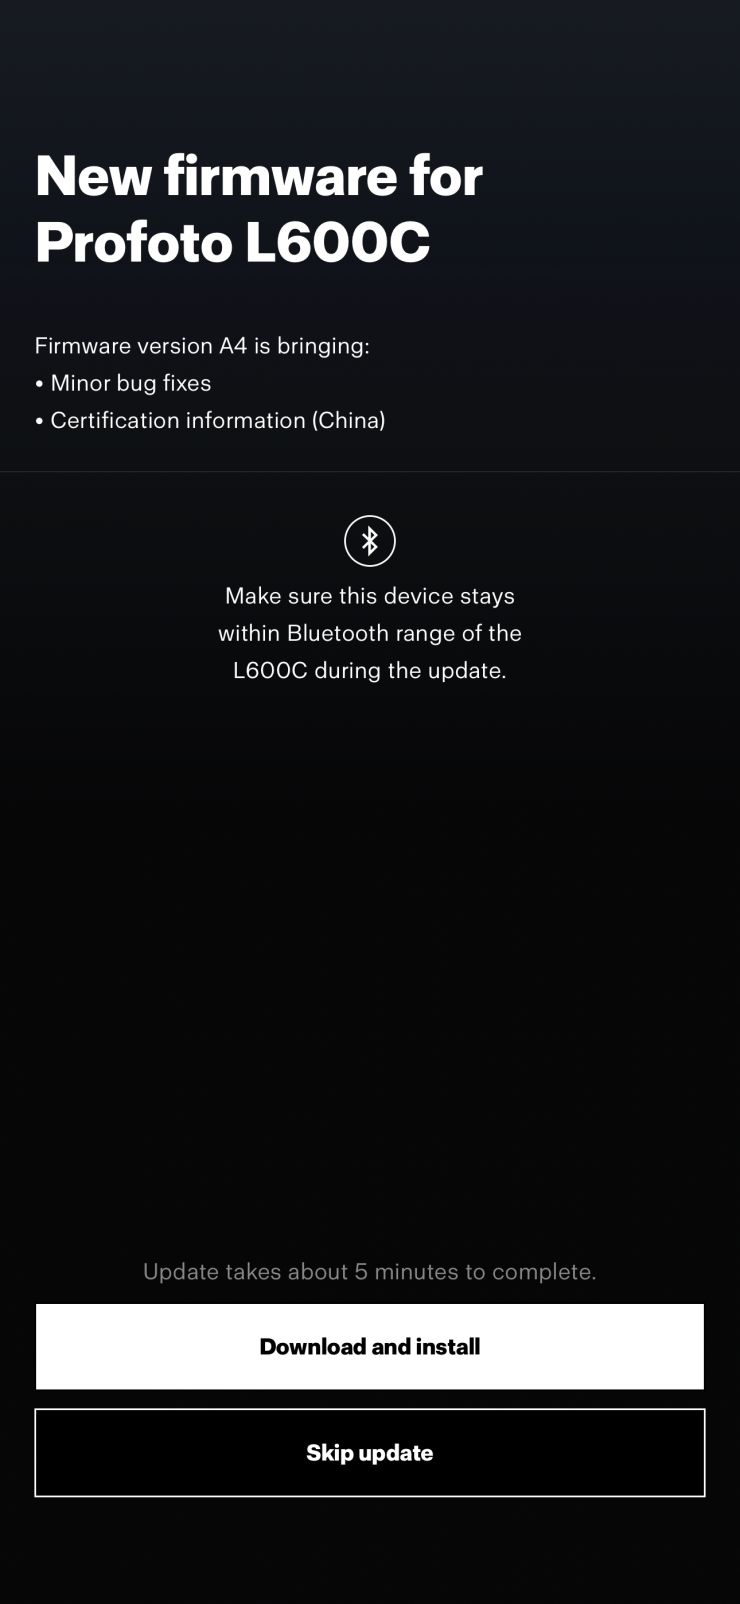
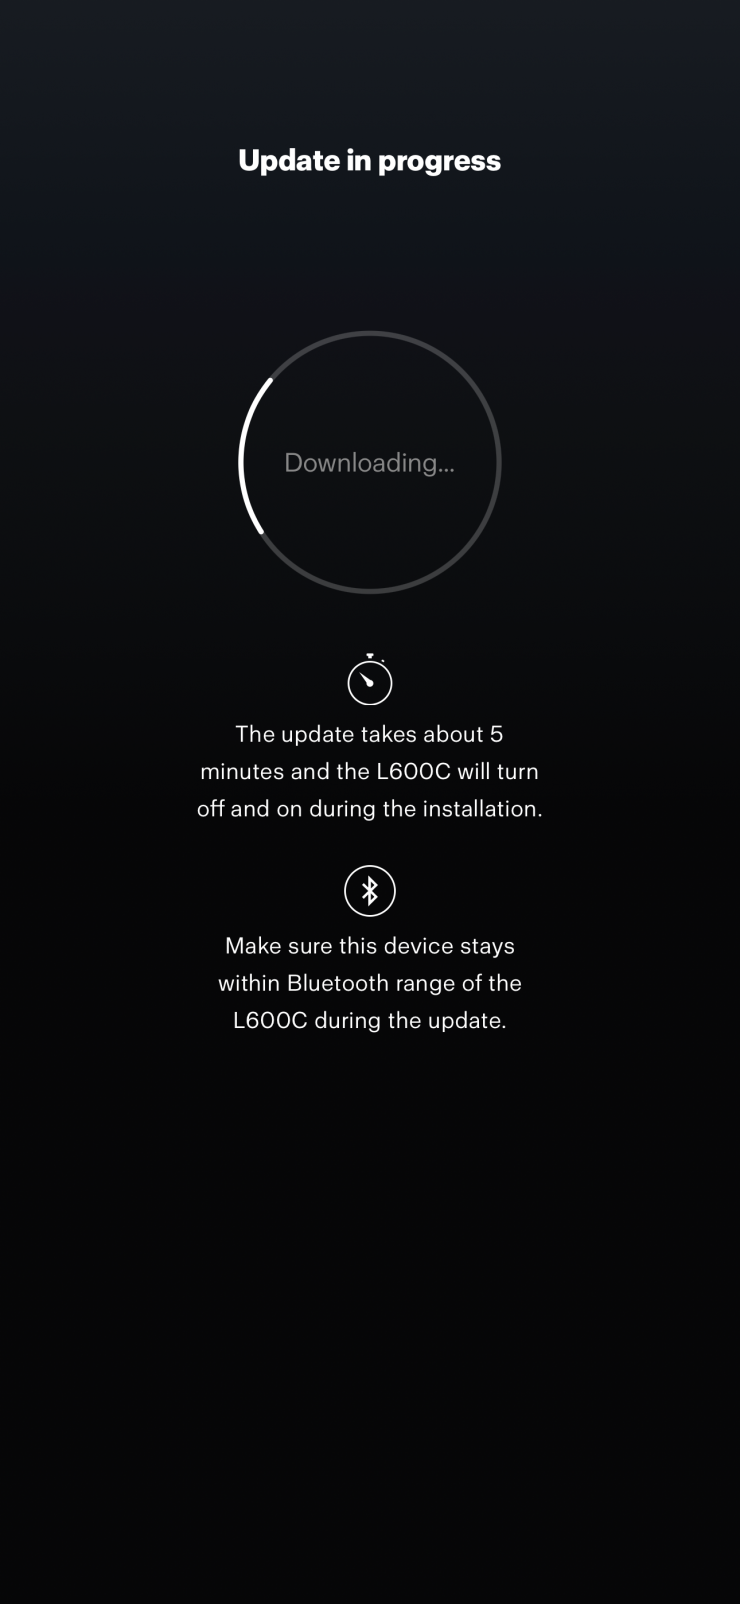
If there is a firmware update you need to do, it is a straightforward procedure.

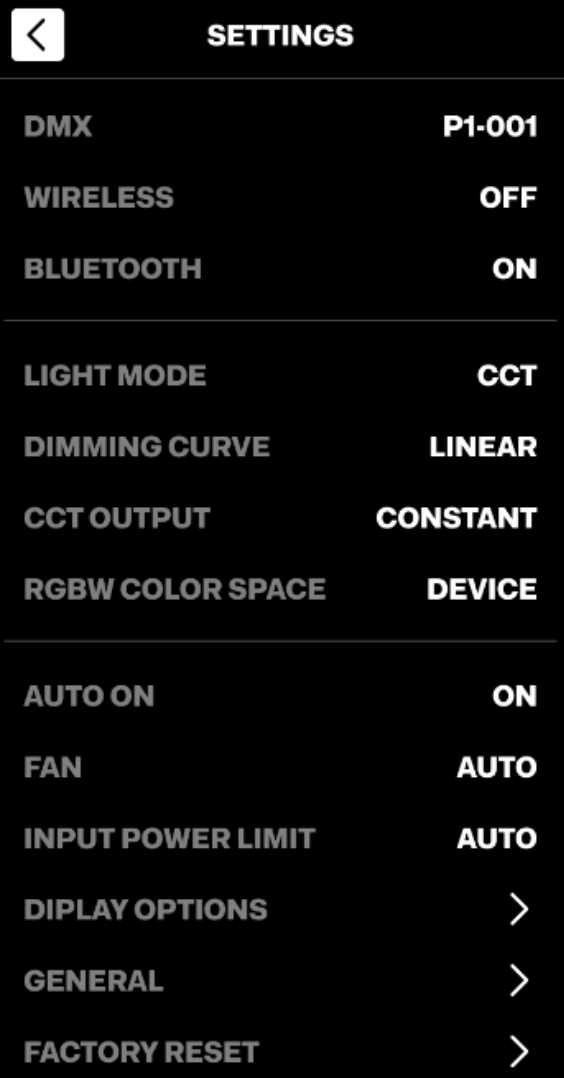
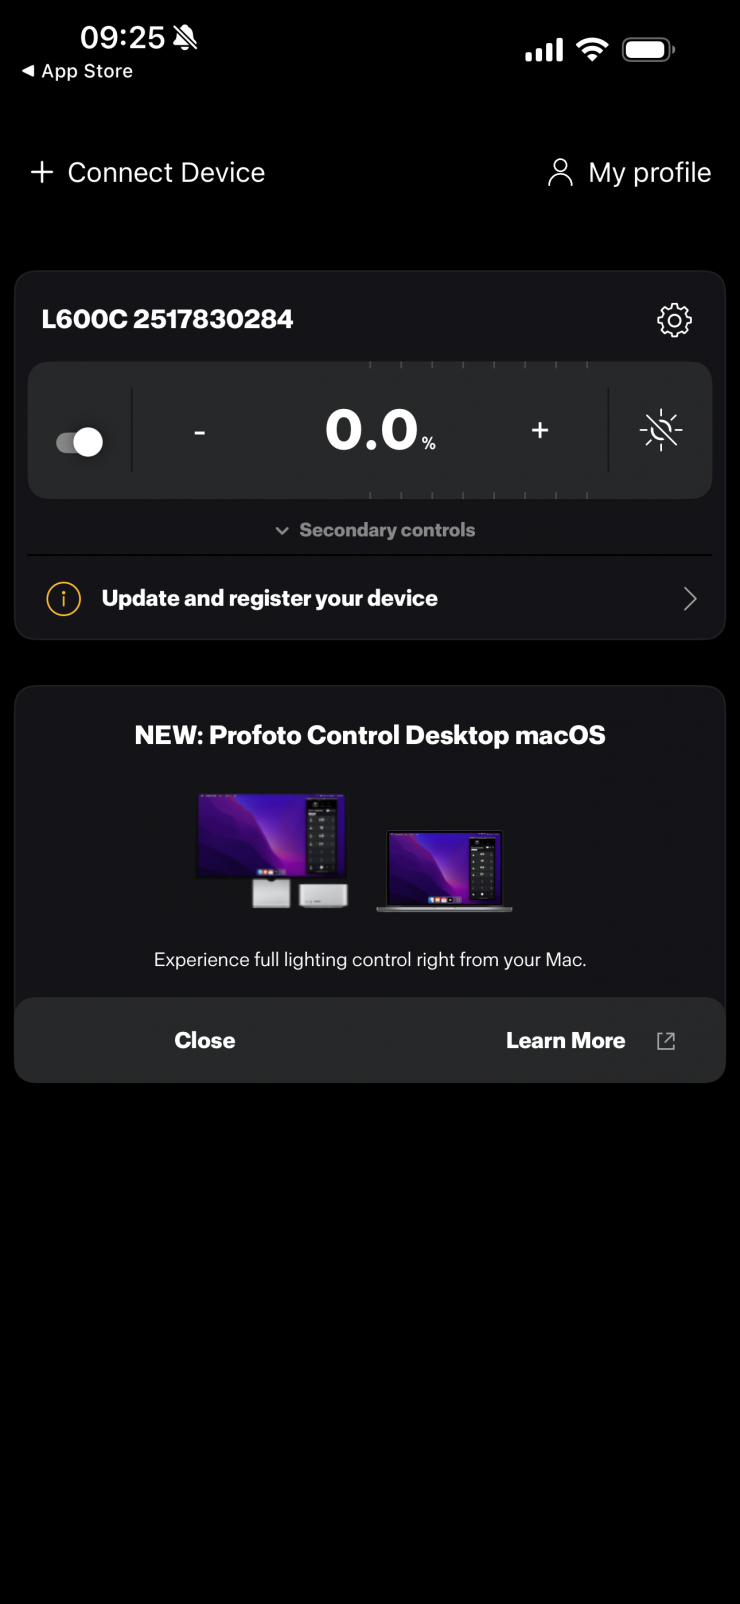
Once you are back on the main UI page, you can click on the gear icon in the top right corner to go to the Settings page.
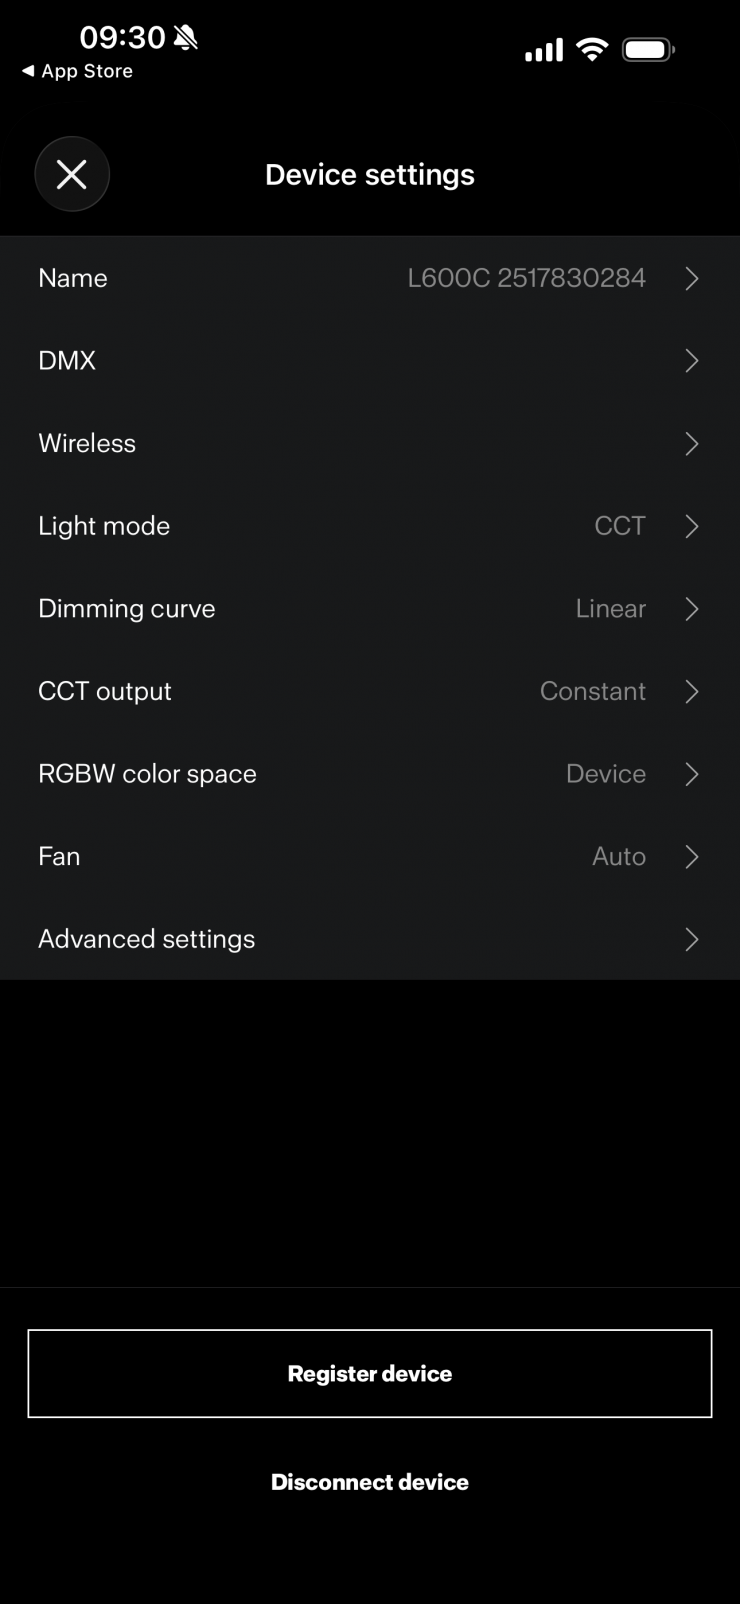
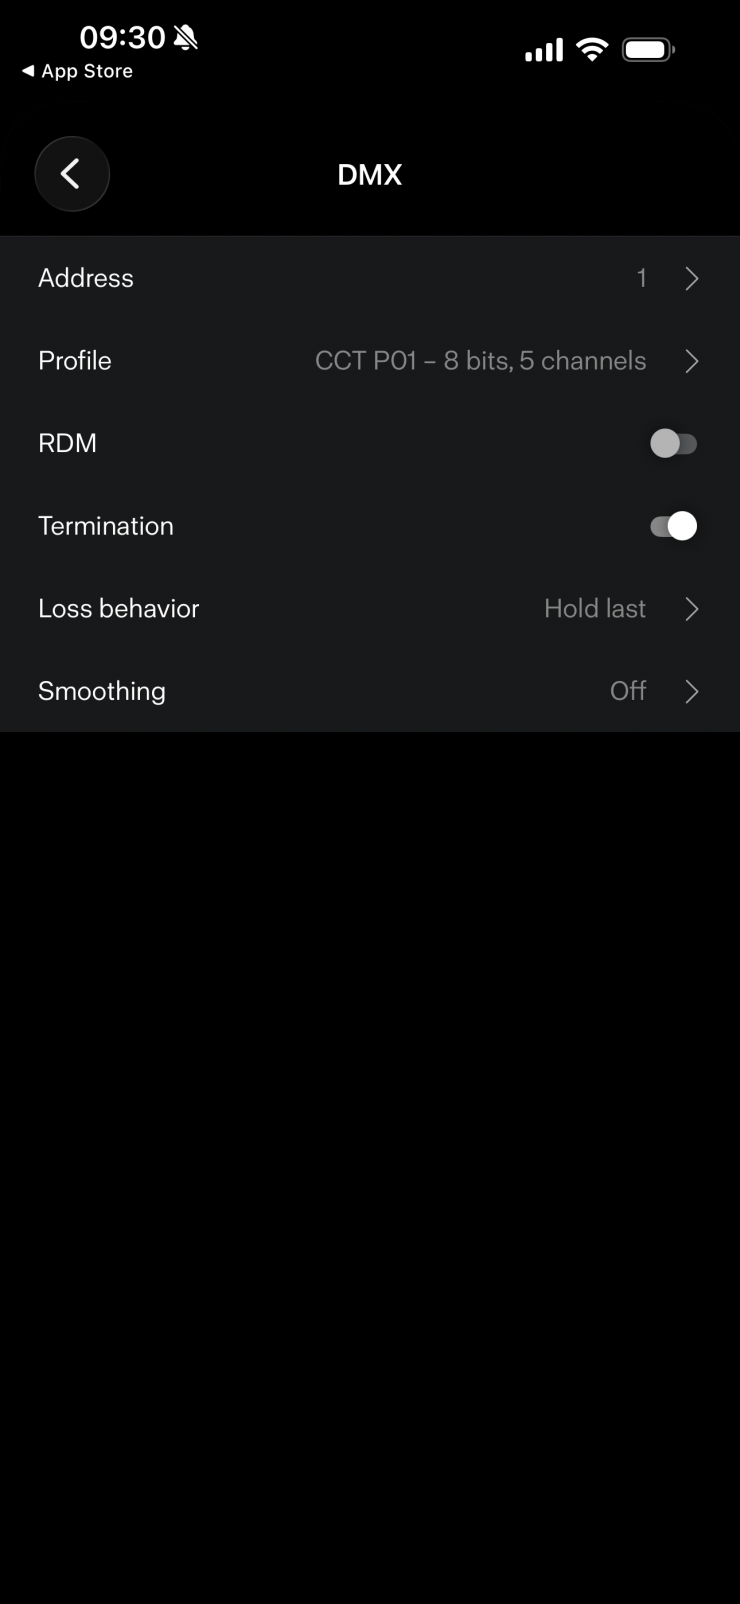


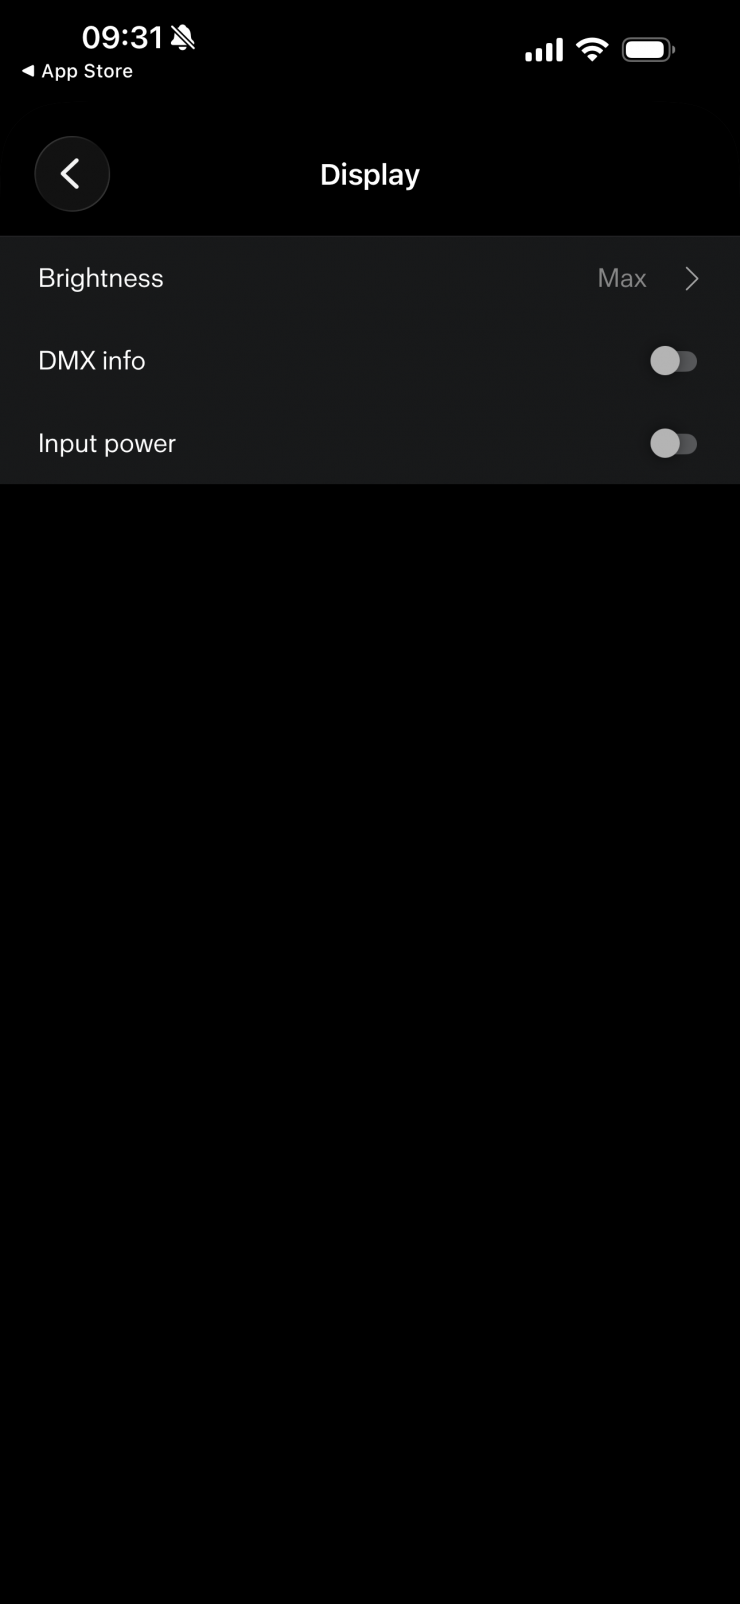
Here you can changeand view a wide array of settings, including Light Mode, Fan, Dimming Curve, CCT Output, RGBW Color Space, Wireless, and DMX.
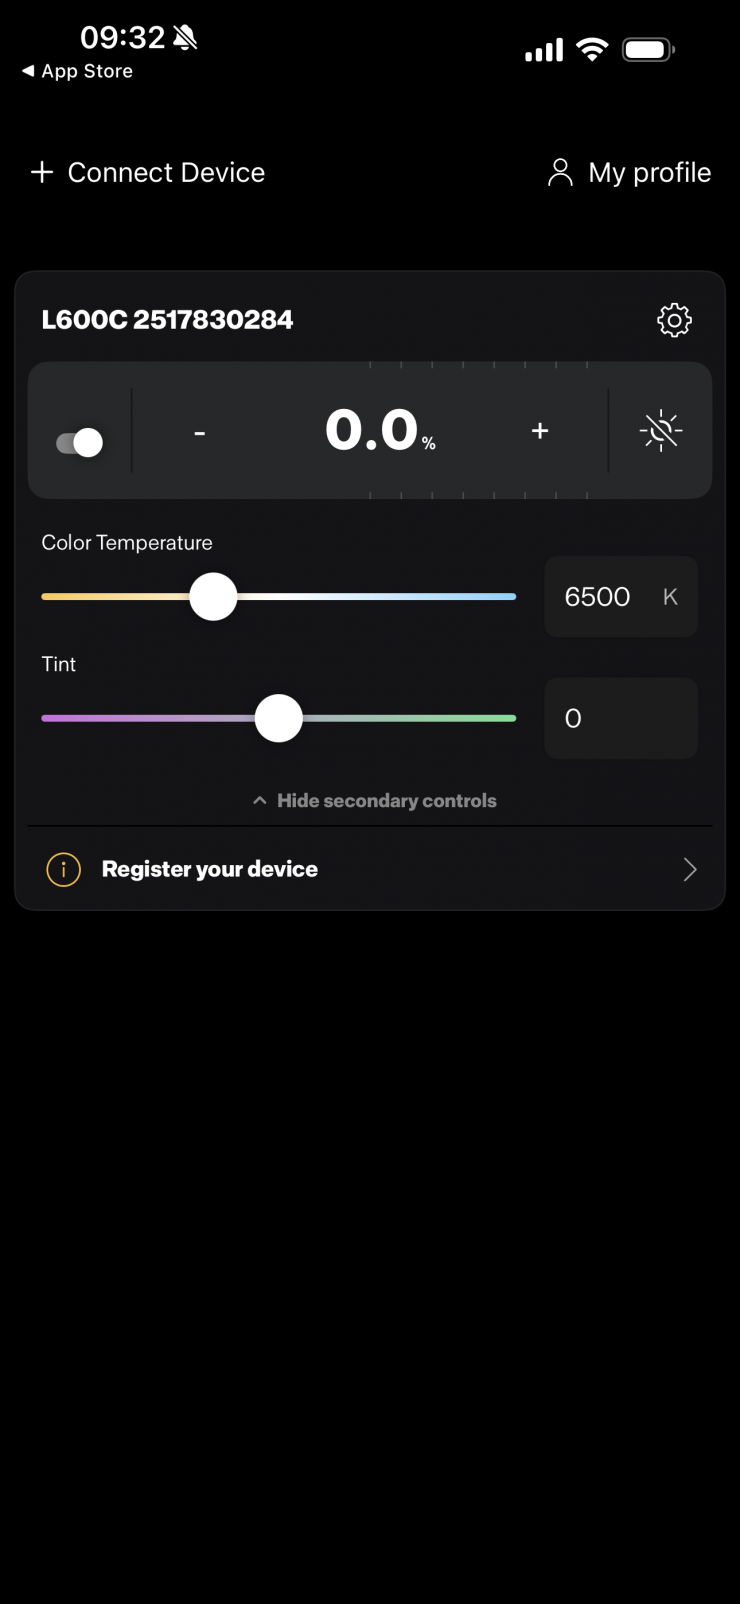

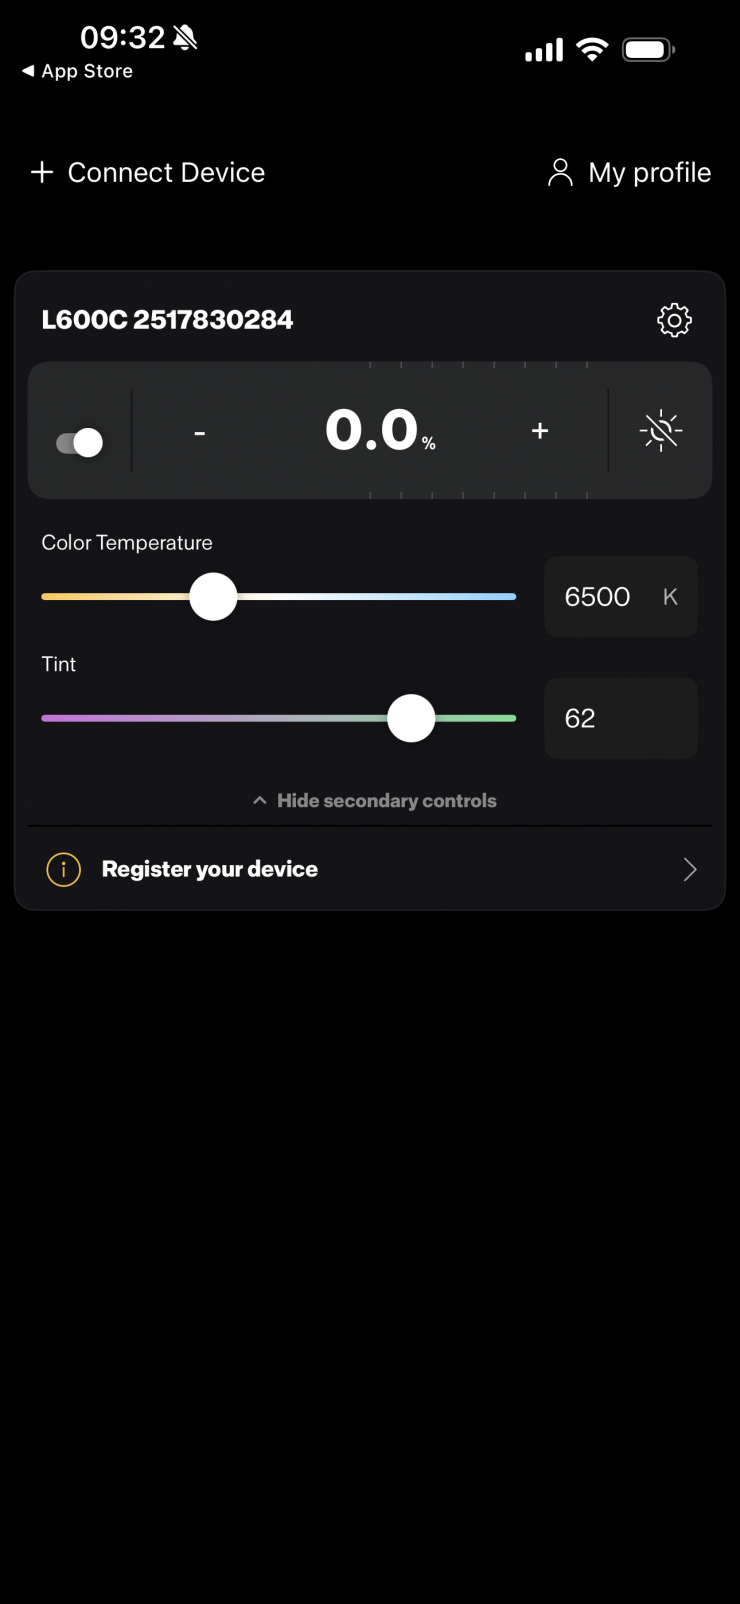
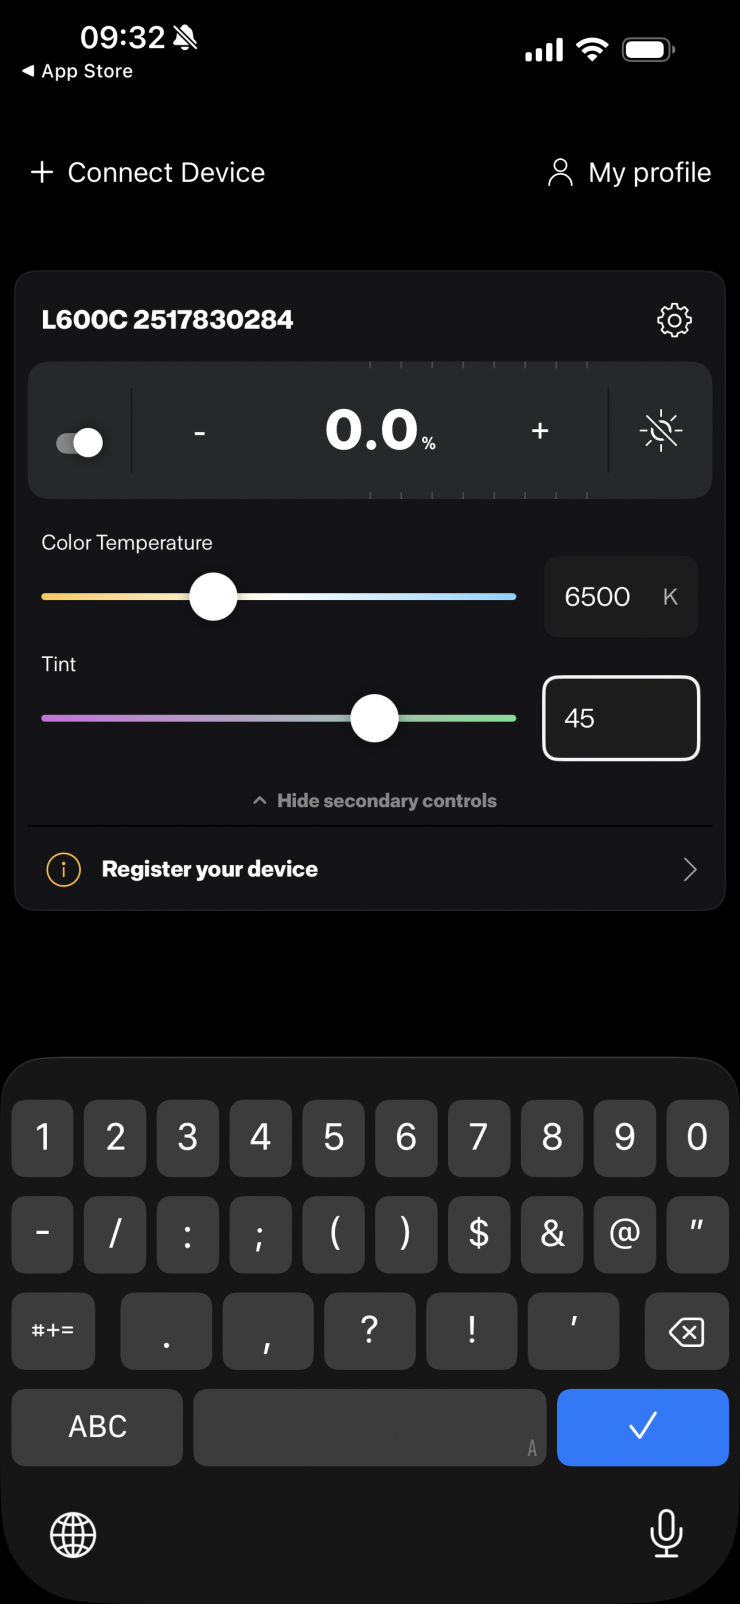
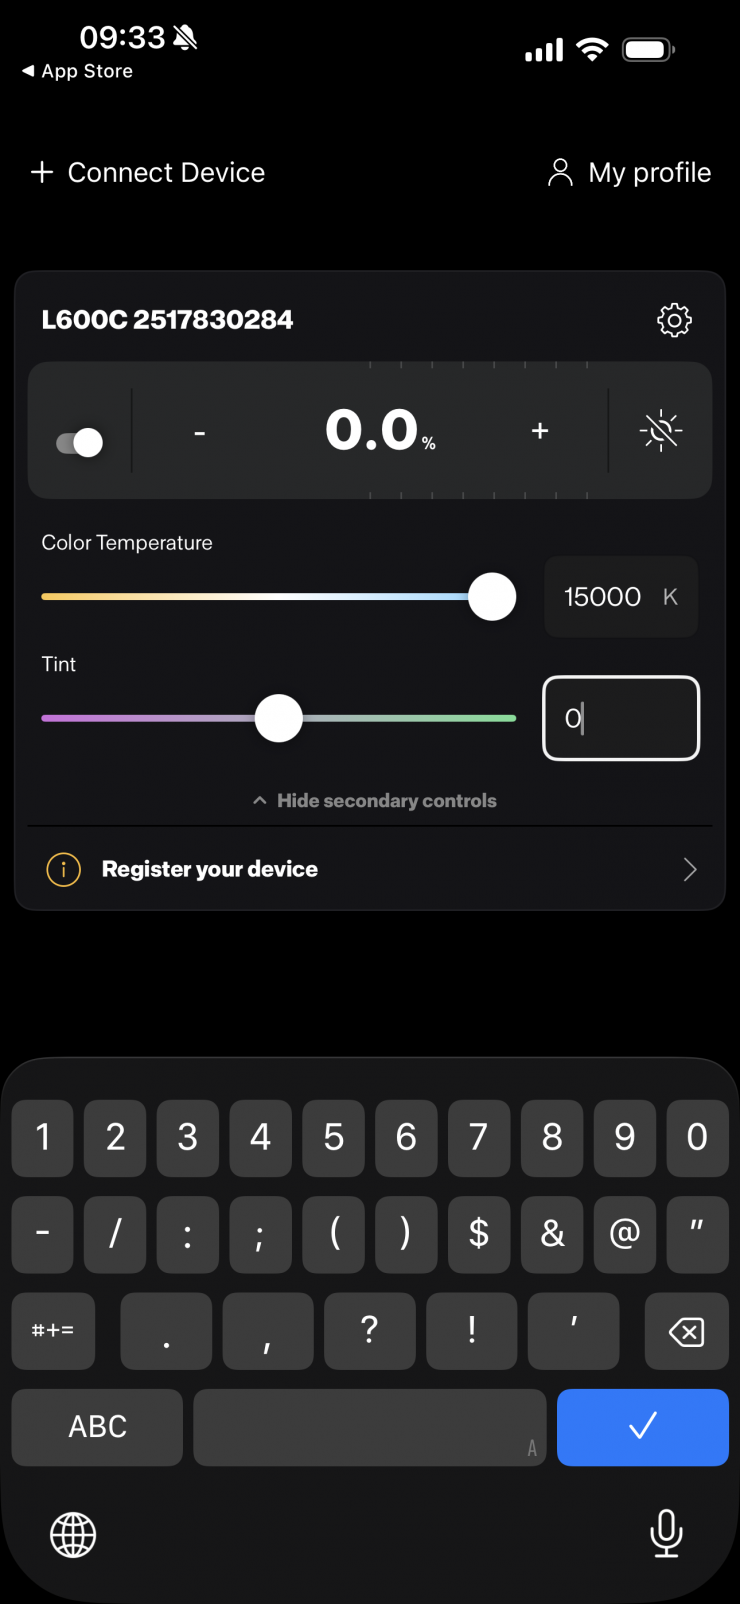
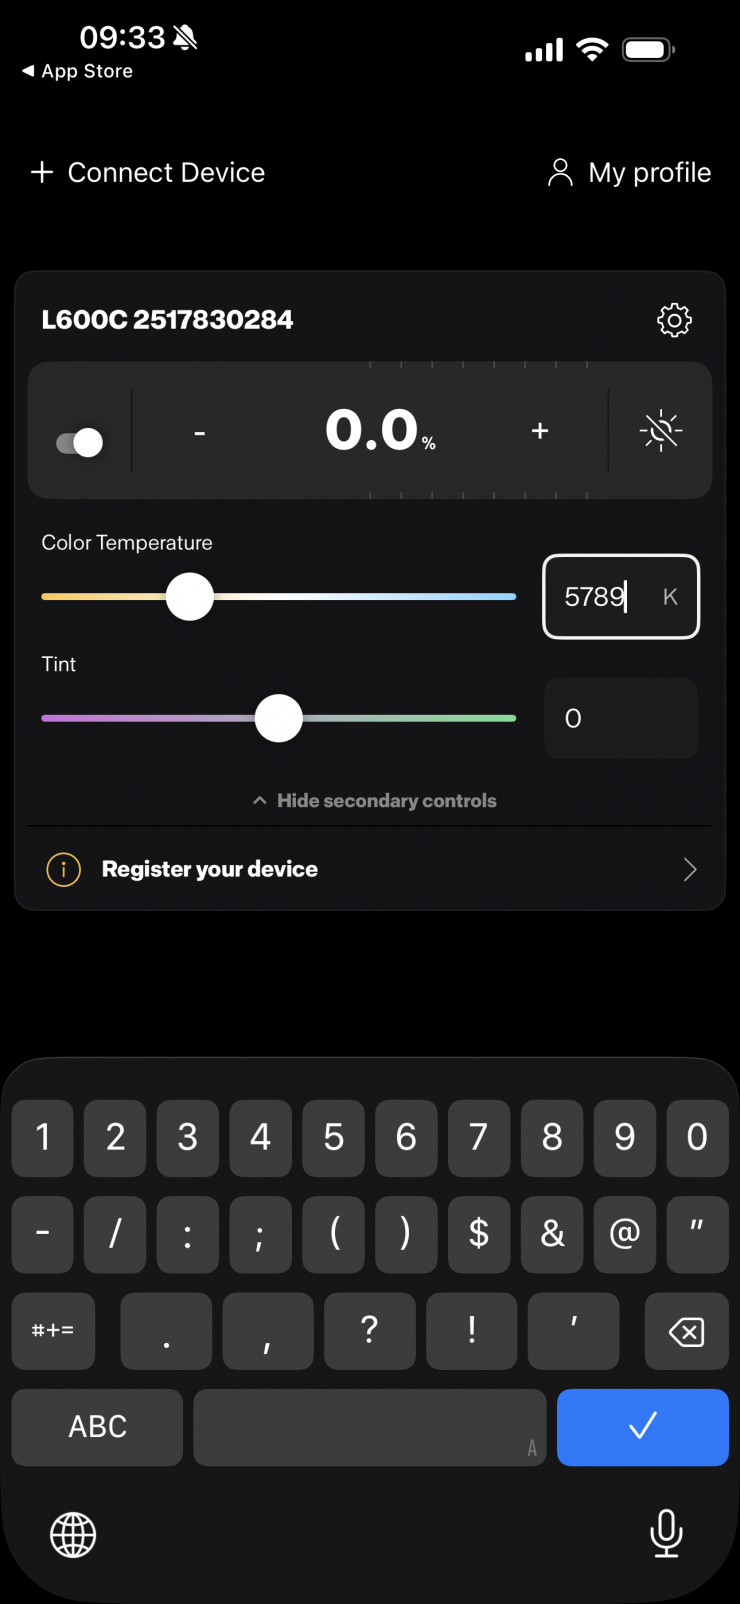
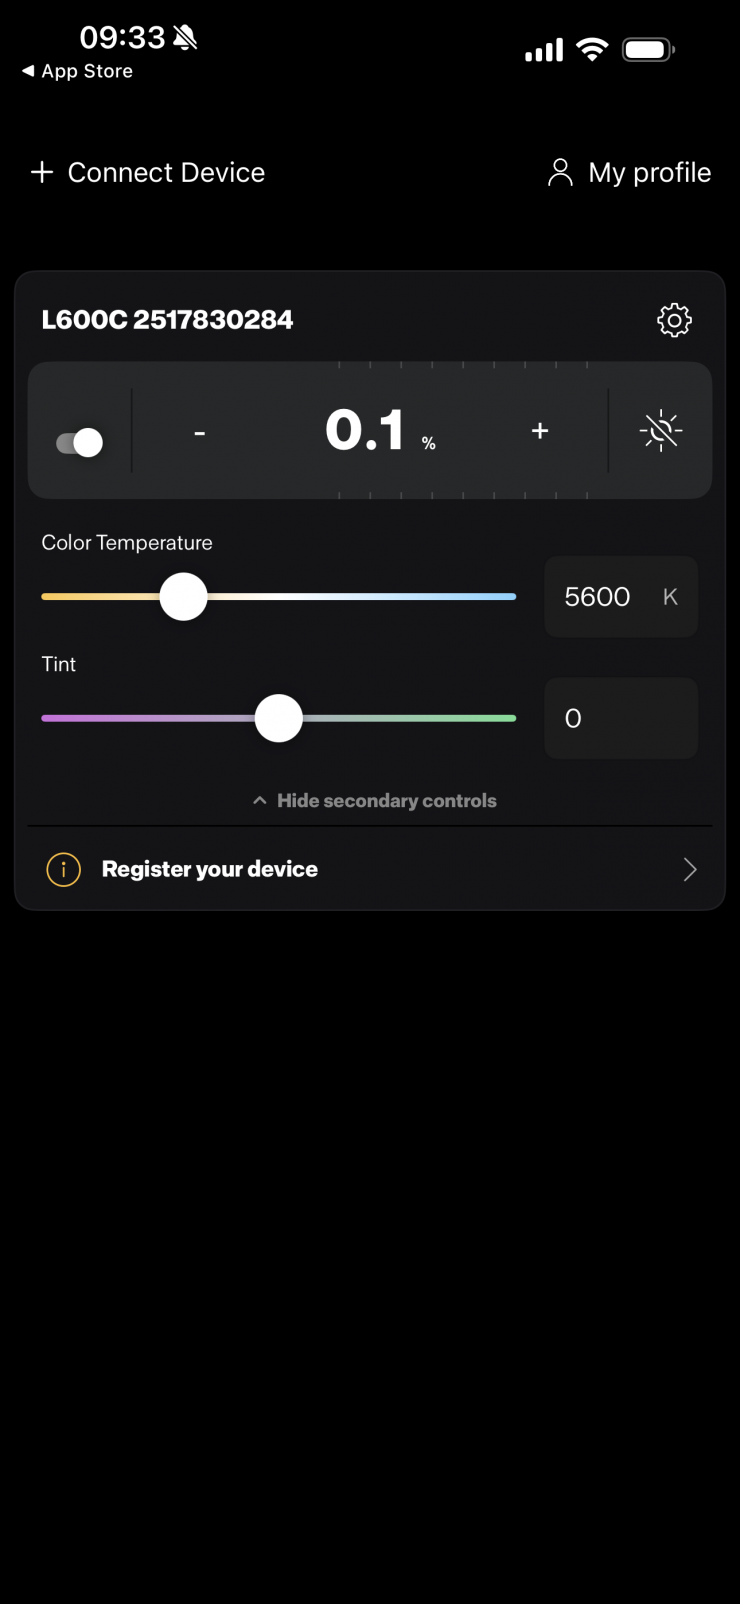
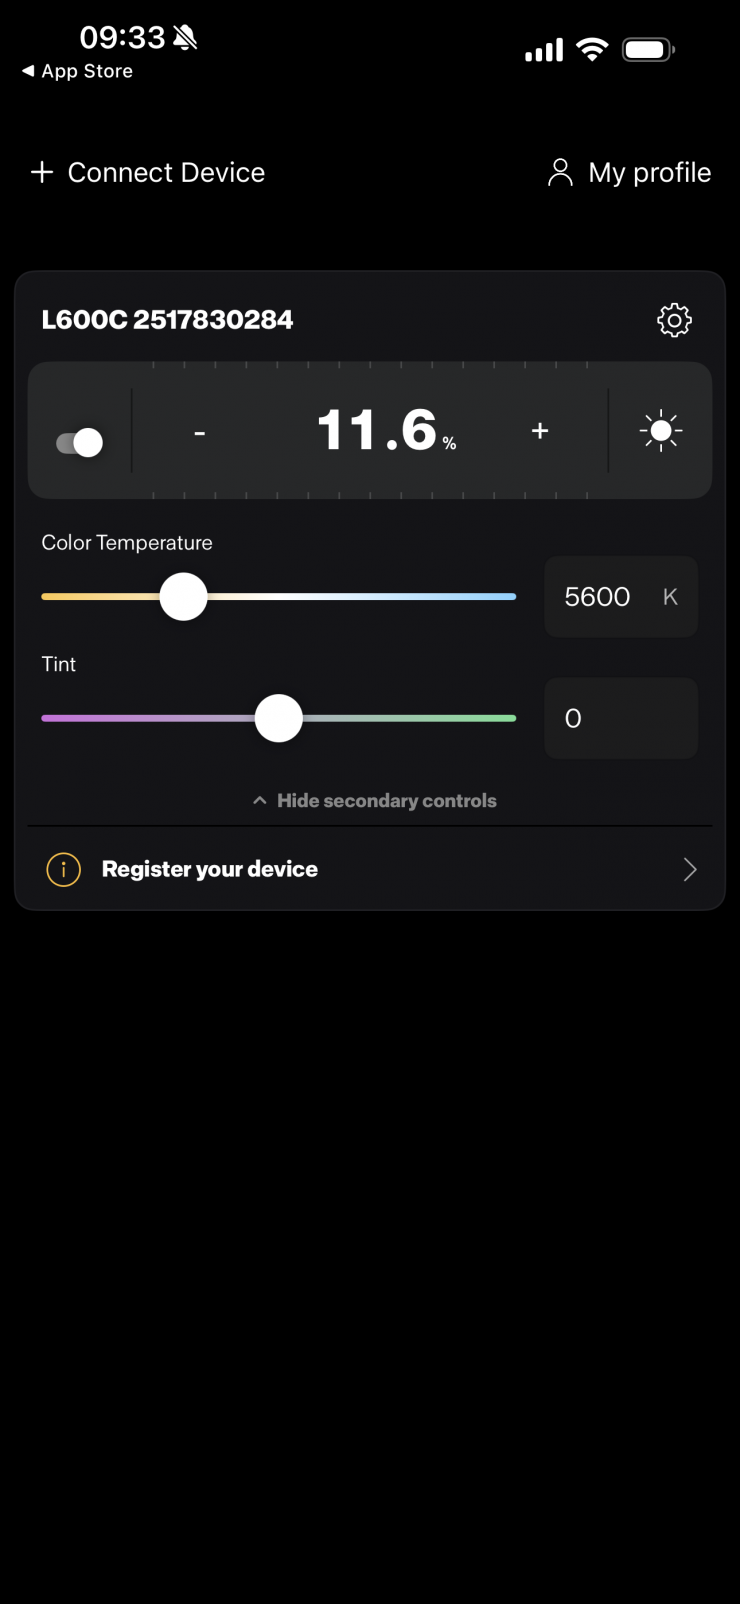
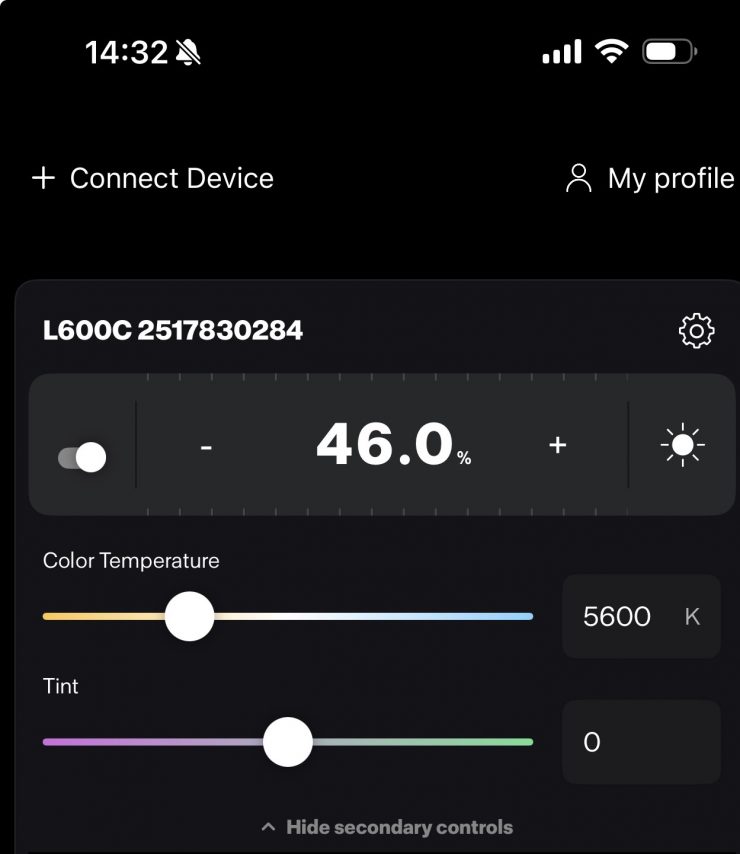
Back on the main page, you can simply adjust the CCT, +/- G/M, and output intensity. You can also choose to hide all of the secondary controls if all you need to do is adjust the intensity. You can also manually type in values instead of using the sliders.
I would have liked to have seen some presets for commonly used CCT values on this page and the ability to directly access other operating modes. Having to go to another menu to change the operating mode doesn’t feel very intuitive.
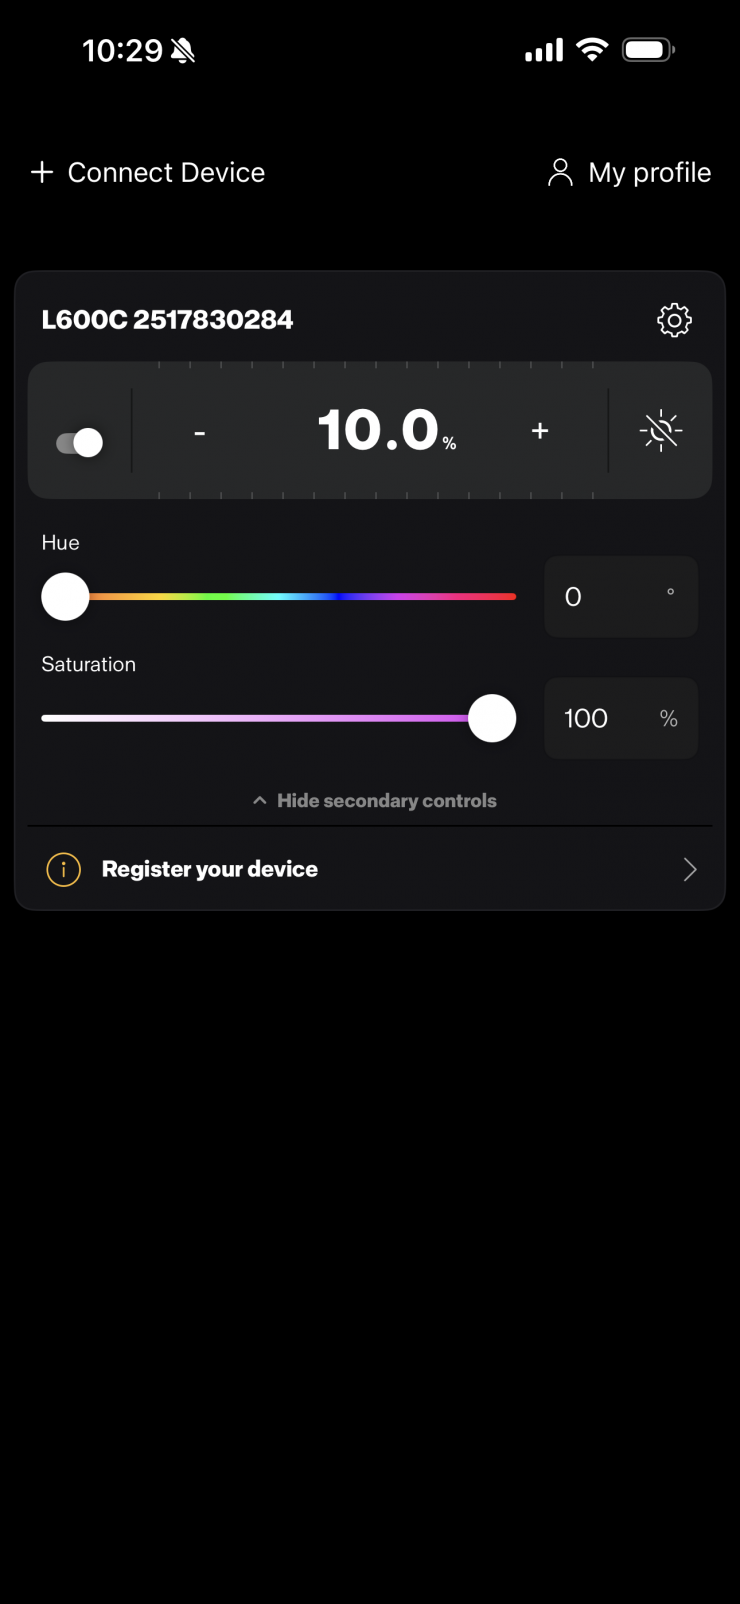
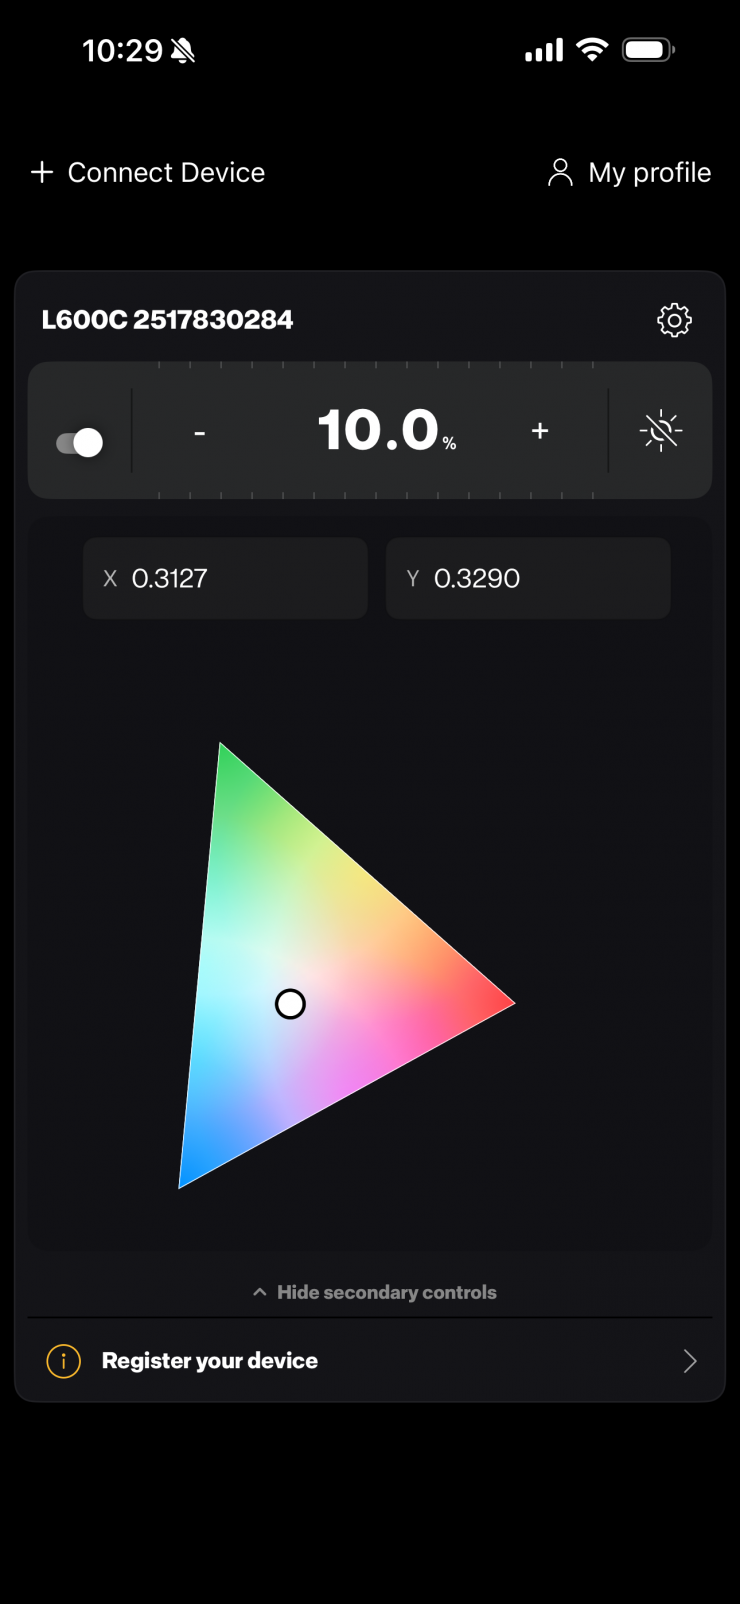

Above, you can see the UI screens for the various operating modes.
Overall, the app works well. It is easy to make changes, and it connects up without any issues. It is, however, arguably pretty basic compared to some other light control apps from manufacturers.
On the positive side is is very snappy to use and you don’t get any noticeable delay as you find on some other lighting apps.
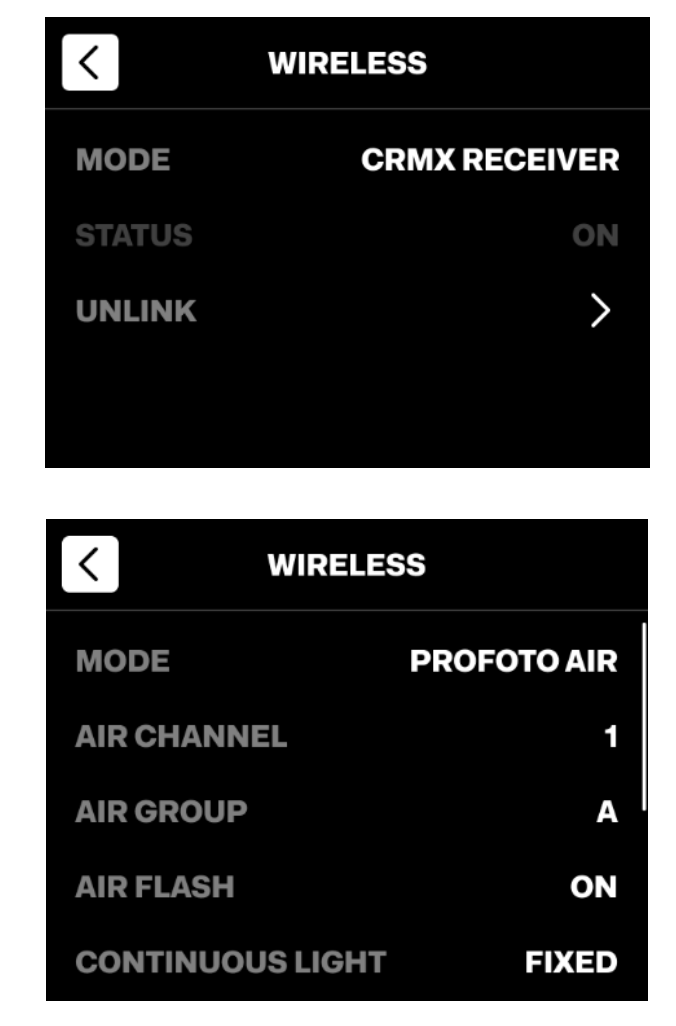
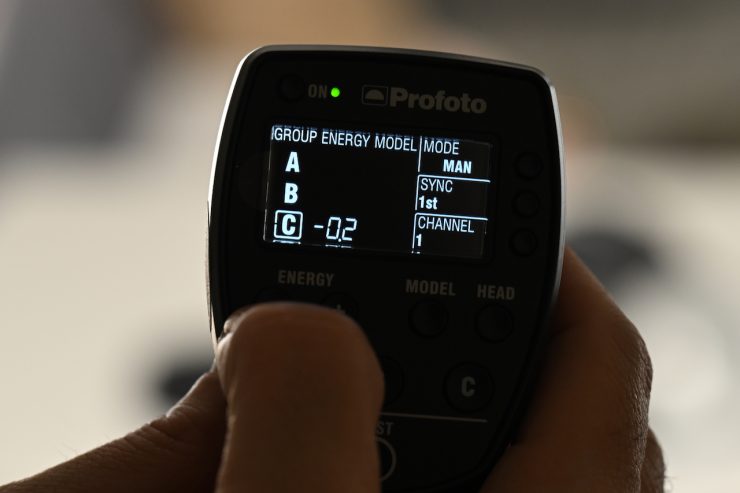
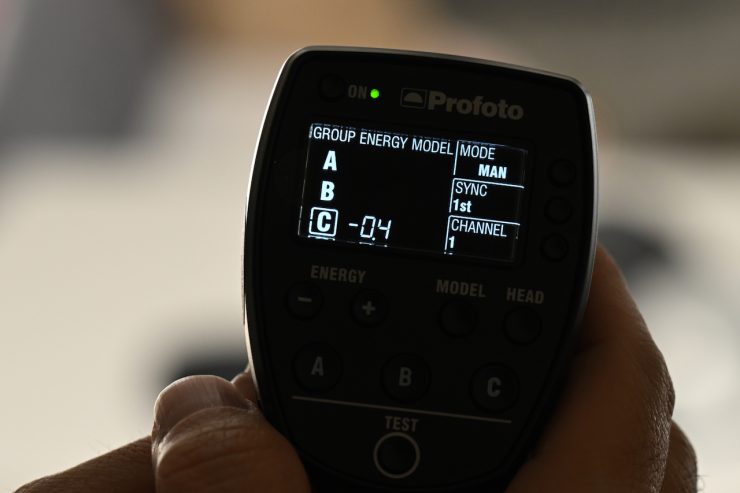
Profoto Air (and Air flash mode)
Profoto Air is a proprietary wireless protocol integrated into all Profoto
lights. It enables remote control and flash triggering via any Profoto
on-camera remote, such as the Profoto Connect Pro. When Profoto Air is selected, you can also enable Air Flash mode to use the lamp as a flash source instead of continuous light.
With Air Flash enabled:
• The continuous light is dimmed to a low standby level
• The lamp will pulse a 30-millisecond flash at full set intensity
when triggered from a Profoto remote.
Air Flash Mode is ideal for use cases where high-intensity flashes are needed, without keeping the full continuous light output active. It reduces power consumption and increases comfort for subjects, especially in portrait photography.
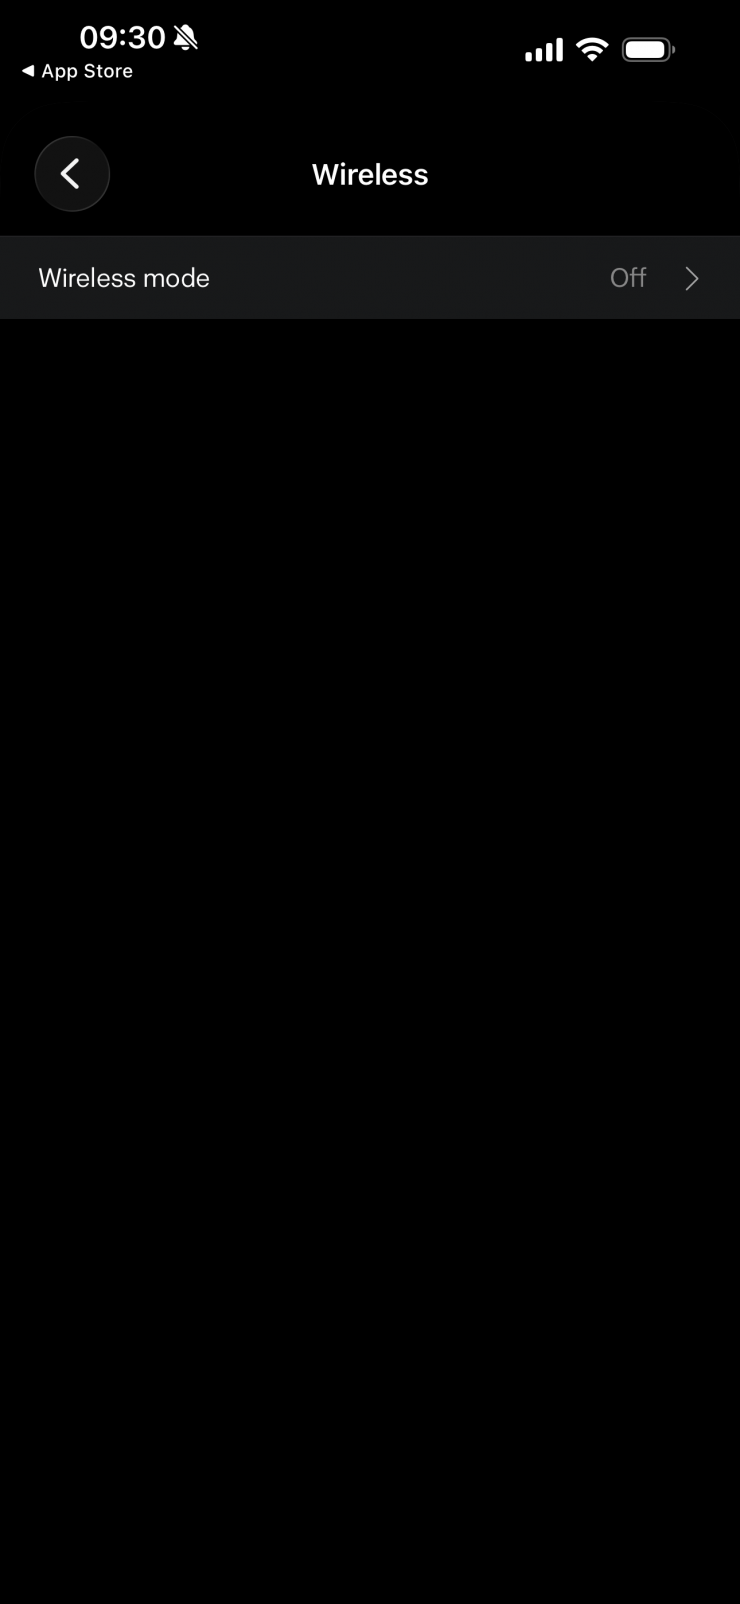
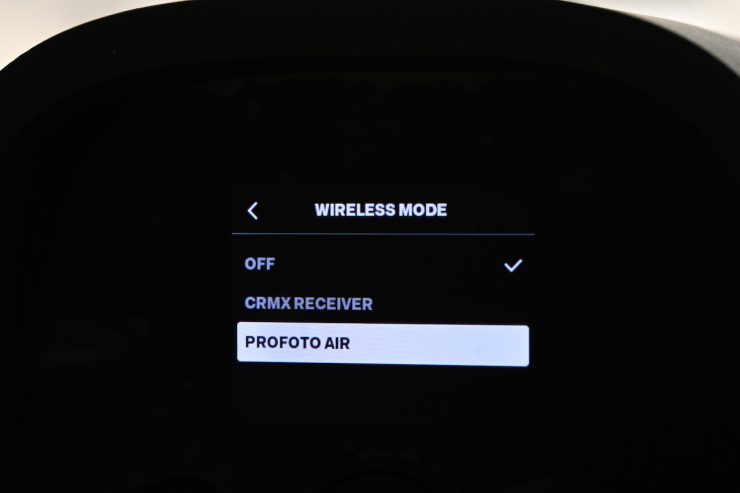
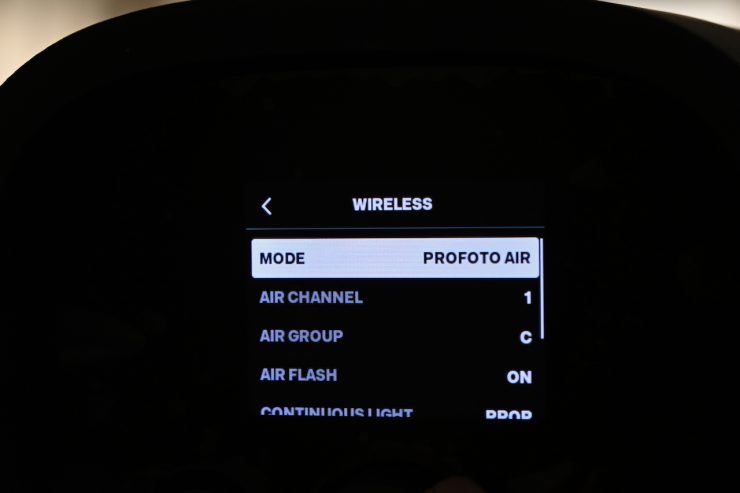
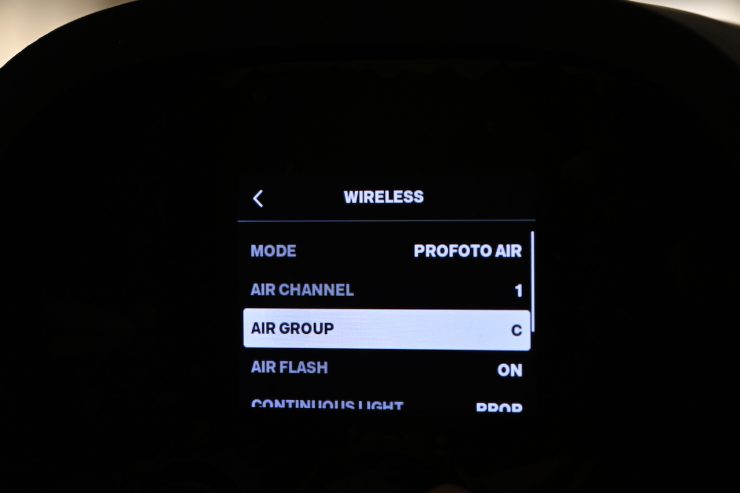
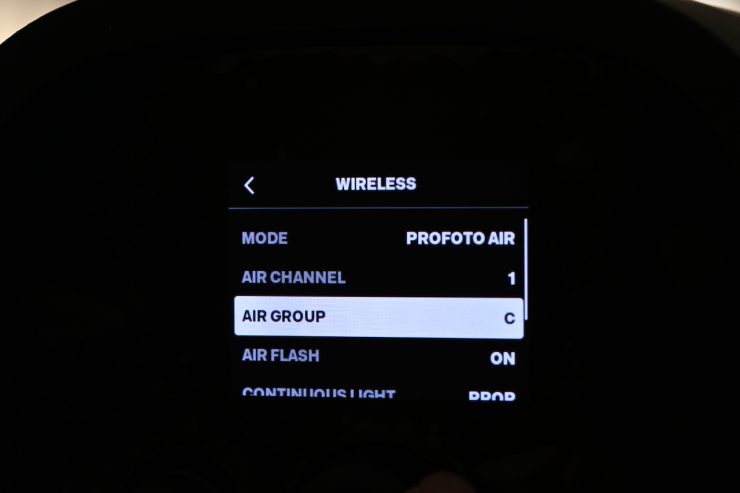
To select Profoto Air (and Air Flash):
- Go to Settings > Wireless > Mode and select Profoto Air
- The Profoto Air menu will open, allowing you to:
− Select the same Air channel (1–100) as set on your remote.
− Assign the light to an Air group (A–F).
− Enable Air Flash if you want to use the lamp as a flash.
Once Profoto Air is active:
• The dimming scale on the main screen changes to the Profoto
scale (0.1–10), matching the scale used by Profoto remotes.
• The selected channel and group are shown in the bottom-left
corner of the screen.
• If Air Flash is enabled, a flash symbol is displayed on the main
screen.


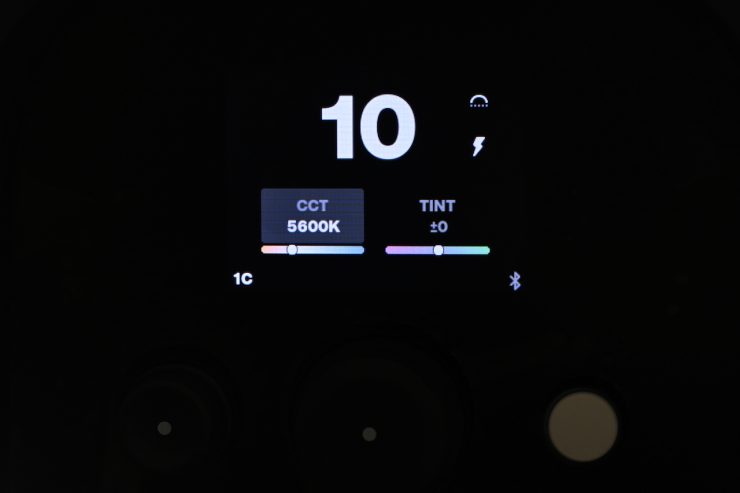
This Air Flash mode is super easy to set-up and use.
Dimming curve settings

Users can elect from four available dimming curves to customize how the
light responds when dimmed. If a curve other than Linear is selected, a dimming curve icon appears on the right side of the main screen (just above the percentage symbol).
• Linear (default) – Standard linear dimming response.
• Logarithmic -Smoothest dimming at high brightness levels.
• Exponential -Smoothest dimming at low brightness levels.
• S-curve – Smooth dimming at both low and high brightness levels.
RGBW color space settings

The RGBW color space menu allows you to choose from four available RGBW color spaces:
• Device (default)
• Rec. 709
• Rec. 2020
• DCI-P3
All selectable RGBW color spaces are calibrated with 6500K whitepoint.
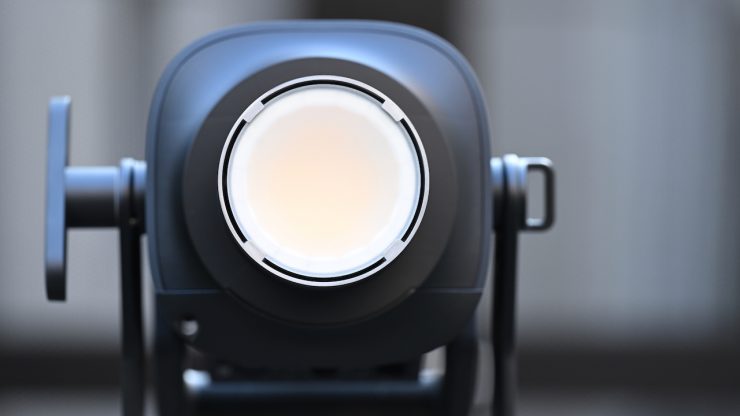
Beam Angle
The native beam angle when the fixture is used open face is 65°. A native beam angle of 65° is pretty tight; however, the NANLUX Evoke 600C also has a beam angle of 65°, and the Aputure 700x has a native beam angle of 58º.
Photometrics
So now let’s get to the photometric results. I always test lights in this way so that I get a reference to how they compare to other fixtures. Results only tell part of the story and should never be used alone to judge a light. I have found from extensive testing over the years that certain lights that have good photometric results don’t always look good, and lights that have worse photometric scores can sometimes look better than their results indicate.
You can’t judge a light from one set of photometric results. You have to look at all of the different results to be able to come to a conclusion.
Different lights can also look different depending on what camera you happen to be using.
Output & Color Temperature Accuracy
I tested the Profoto L600C at a variety of CCT settings with a Sekonic C-800 Spectrometer to find out how much output the light had and how accurate the Kelvin color temperature reproduction was. All readings are taken at a distance of 1m (3.28ft) in a controlled environment. The readings were also taken directly from the lighting source. In the case of using the light with the Reflector or softbox, the readings were taken from the end of the attachments.
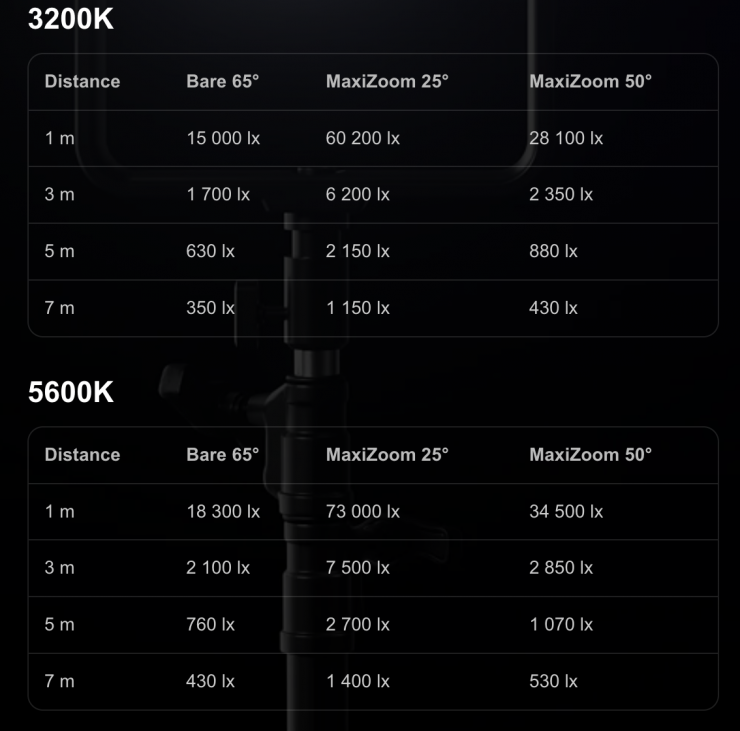
Above, you can see the claimed output figures from the manufacturer.
Open Face

Let’s first look at the light when it is used open face.
Profoto L600C 5600K (Open Face) Max Output
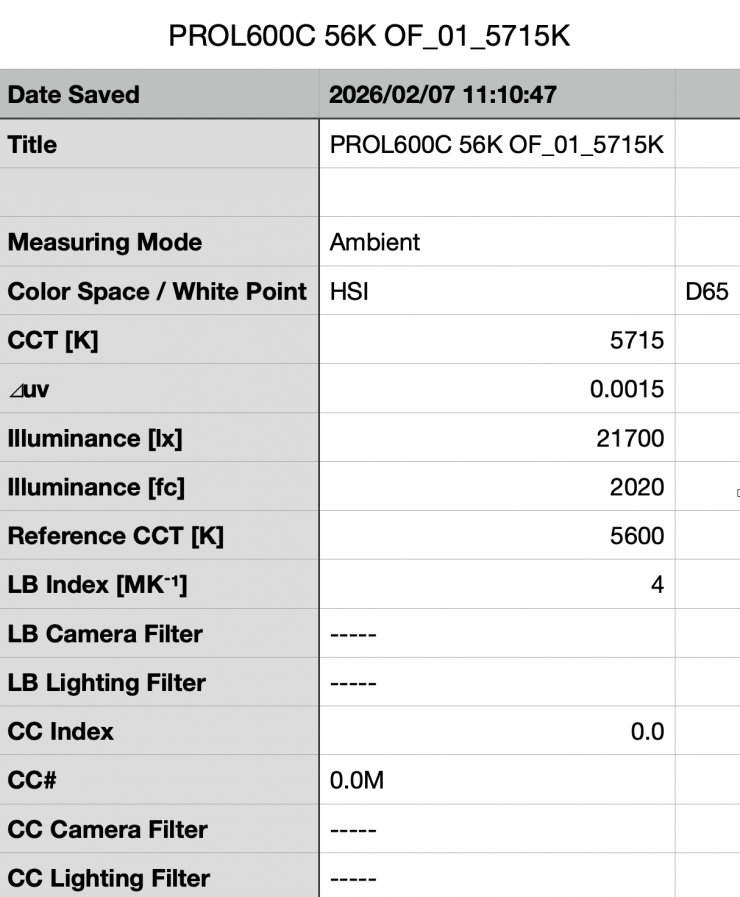
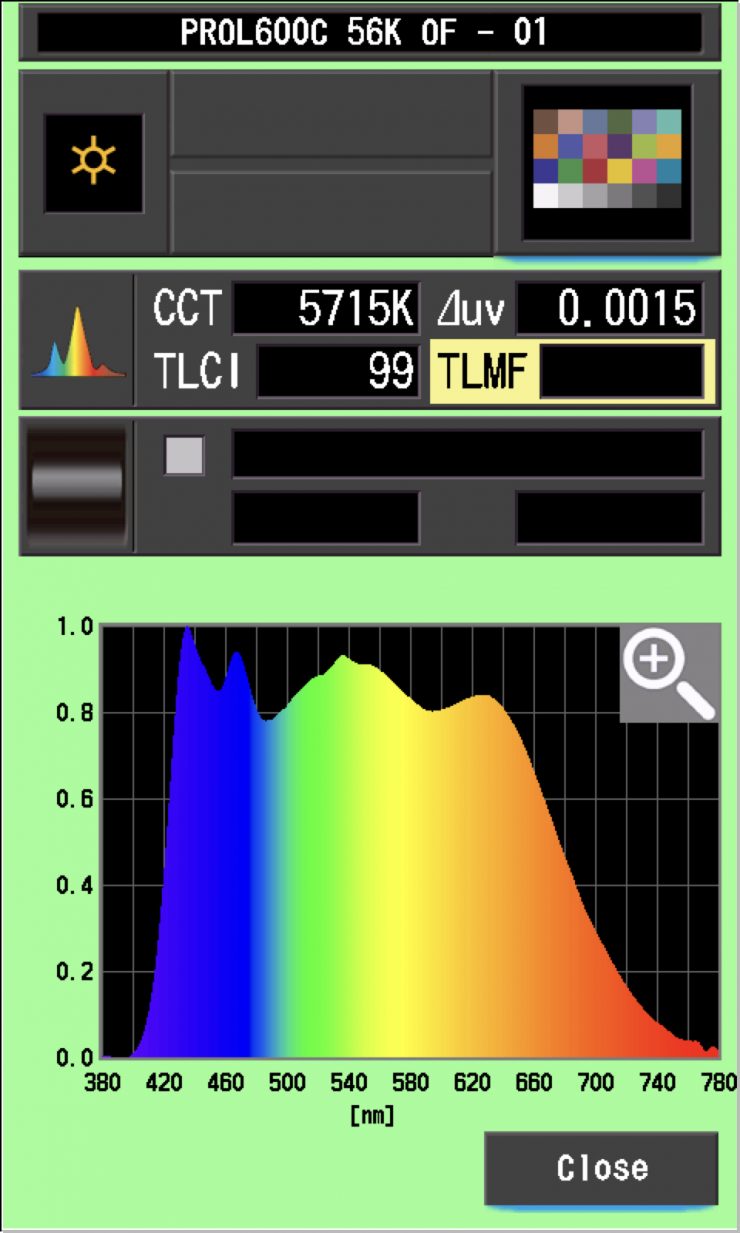
Above, you can see that the L600C recorded an output of 21,700 lx (2020 fc) when set at 5600K and used open face.

The light recorded a CCT reading of 5715K, which was pretty decent.
Profoto L600C 3200K (Open Face) Max Output
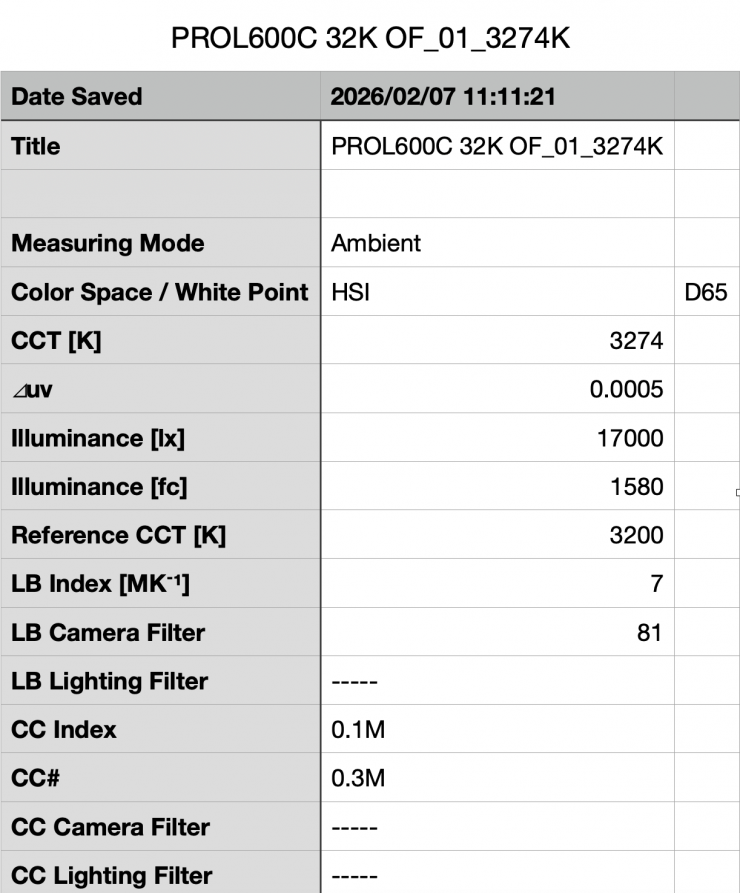
Above you can see the light’s output when it was set at 3200K in the open face configuration was 17,000 lx 1580 fc), which is just 5.02% less than the 17,900 lx it produced at 5600K.

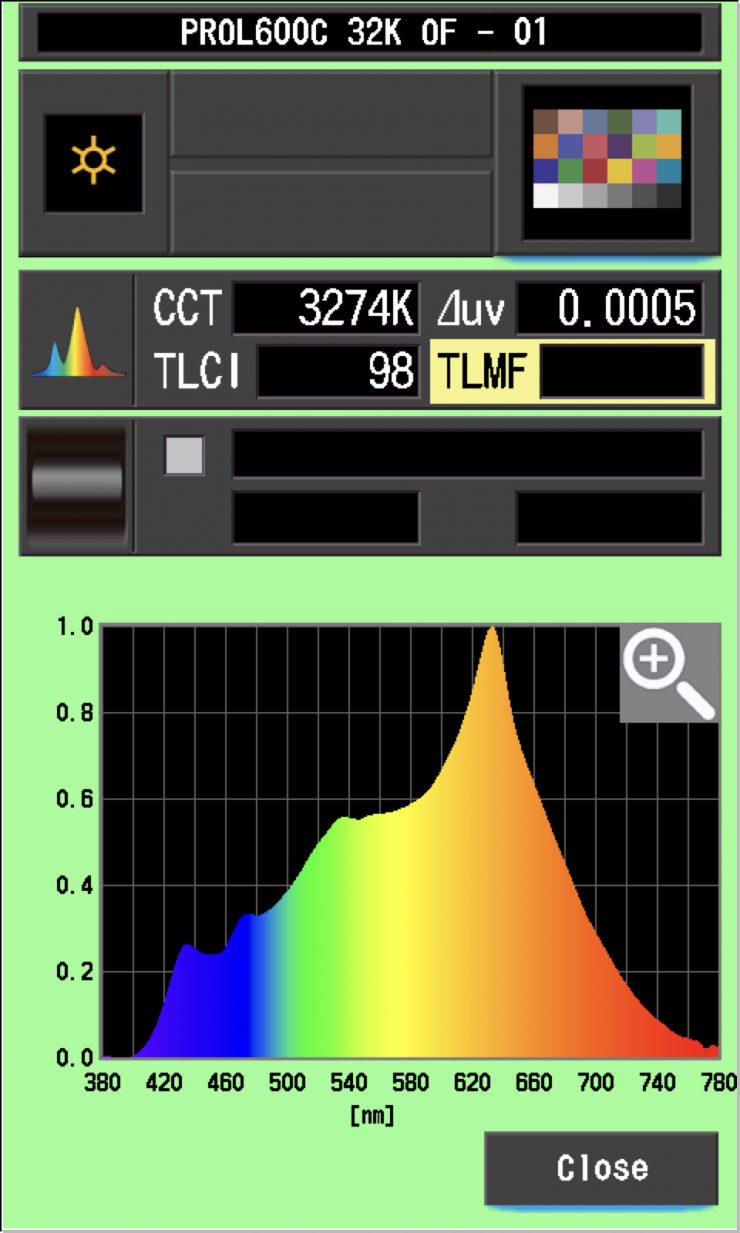
As far as CCT accuracy goes, it recorded a pretty accurate reading of 3274K.
Summary of results (Open Face)
| | OUTPUT | CCT |
| 2500K | 16,300 lx | 2583K |
| 3200K | 17,000 lx | 3274K |
| 4500K | 19,900 lx | 4704K |
| 5600K | 21,700 lx | 5715K |
| 6500K | 18,300 lx | 6455K |
| 8000K | 13,900 lx | 8209K |
| 10000K | 13,800 lx | 10259K |
Above, you can see a summary of results when the light was used open face at various CCT settings.
The results show me that the light’s CCT accuracy when used open face was very good across its CCT range
In the Max output mode, the light’s output isn’t going to be that consistent across the CCT range.
So how does this compare to the NANLUX Evoke 600C when it is used open face?
| | Output at 5600K | CCT (K) |
| Profoto L600C | 21,700 lx | 5715K |
| NANLUX Evoke 600C | 34,000 lx | 5697K |
| | Output at 3200K | CCT (K) |
| Profoto L600C | 17,000 lx | 3274K |
| NANLUX Evoke 600C | 25,100 lx | 3217K |
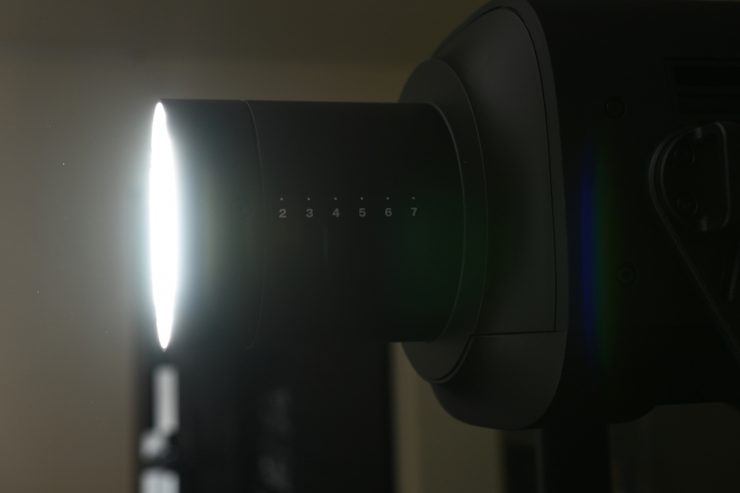
MaxiZoom Reflector @25°

So, now let’s see how much output the light has when used with its MaxiZoom Reflector @25°
Profoto L600C 5600K MaxiZoom Reflector @25° Max Output
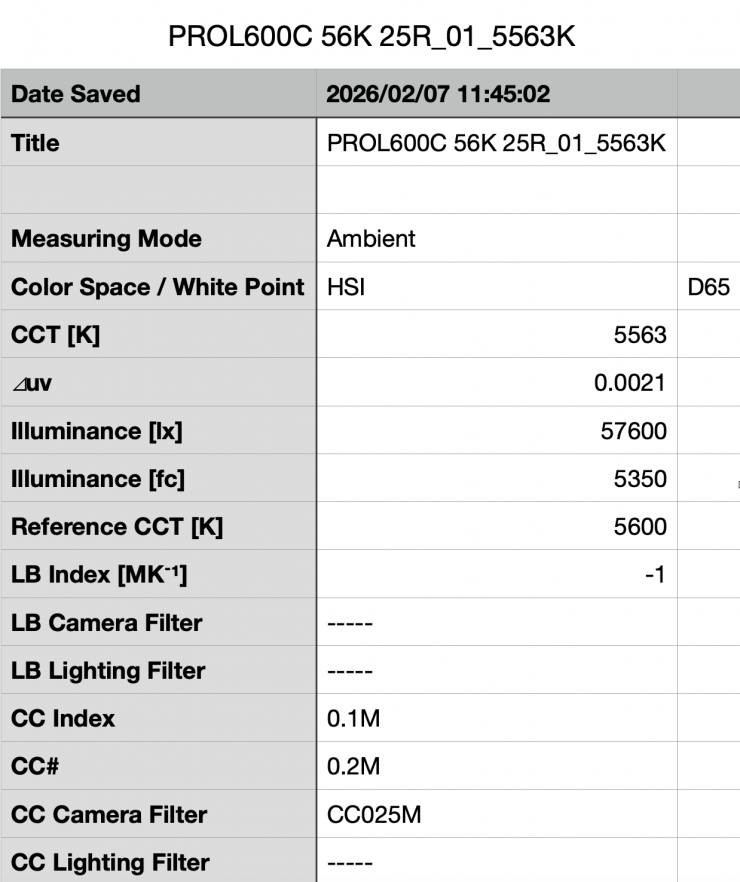
Above you can see the light’s output when it was set at 5600K with the standard reflector was 57,600 (5350 fc). It is important to note that this measurement was made 1m/ 3.3′ from the end of the reflector.
This is a decent amount of output from a light this size using a reflector, but not as high as some other competing lights with similar power draws.

As far as CCT accuracy goes, it recorded a very good reading of 5563K. This was a slightly better reading than the 5715K it recorded when used open face.
Profoto L600C 3200K MaxiZoom Reflector @25° Max Output

Above you can see the light’s output when it was set at 3200K with the standard 25° reflector was 45,700 lx (4250 fc), which was 20.65% less than what it output at 5600K.

As far as CCT accuracy goes, it recorded a reading of 3260K, which was a very good result.
Summary of results (25° reflector) Max Output
| | OUTPUT | CCT |
| 2500K | 44,400 lx | 2608K |
| 3200K | 45,700 lx | 3260K |
| 4500K | 53,900 lx | 4650K |
| 5600K | 57,600 lx | 5563K |
| 6500K | 51,300 lx | 6280K |
| 8000K | 38,800 lx | 7945K |
| 10000K | 37,800 lx | 9762K |
Above, you can see a summary of results when the light was used with its 25° reflector at various CCT settings.
The results show me that the light’s CCT accuracy when using the standard 25° reflector was excellent. The output was pretty consistent from 4500-6500K, but the light does have significantly less output at 8000K and 10,000K.
So how does this compare to the NANLUX Evoke 600C when it is used with its 25° reflector?
| | Output at 5600K | CCT (K) |
| Profoto L600C | 57,600 lx (MaxiZoom Reflector @25° | 5563K |
| NANLUX Evoke 600C | 185,000 lx (25° reflector) | 5679K |
| | Output at 3200K | CCT (K) |
| Profoto L600C | 45,700 lx (MaxiZoom Reflector @25°) | 3260K |
| NANLUX Evoke 600C | 134,000 lx (25° reflector) | 3163K |
Profoto L600C 
NANLUX Evoke 600C
If you want to see what this actually means in the real world, above, I have compared both fixtures in the exact same spot with the camera settings unchanged.
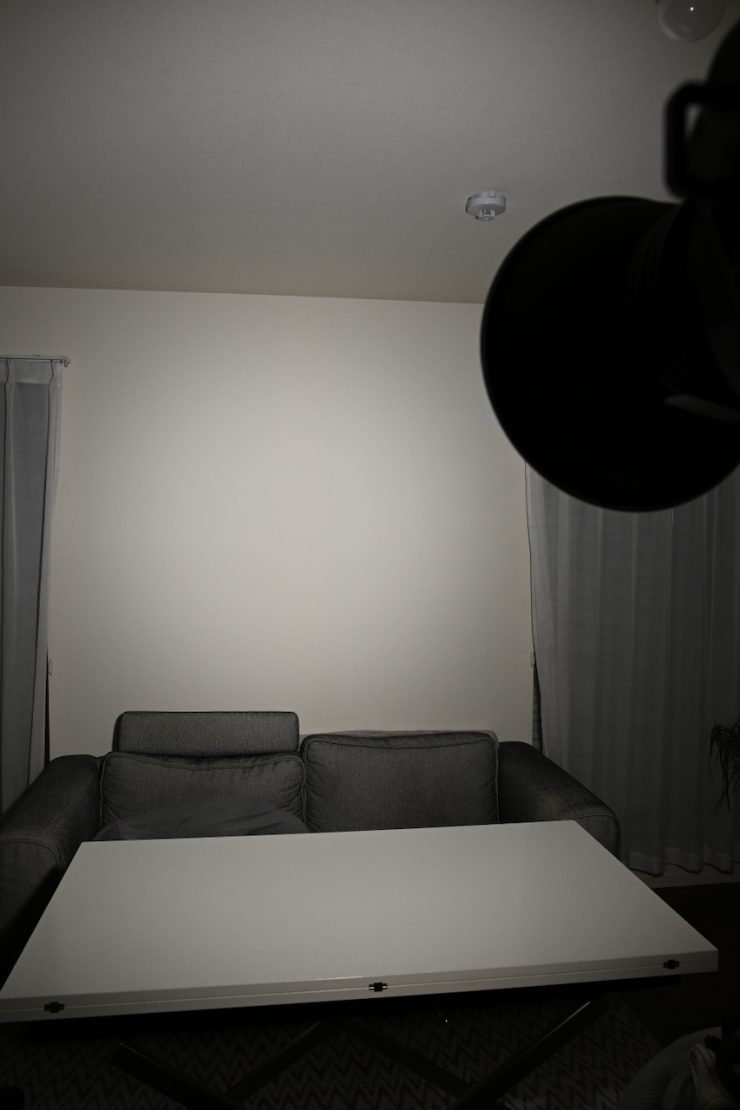
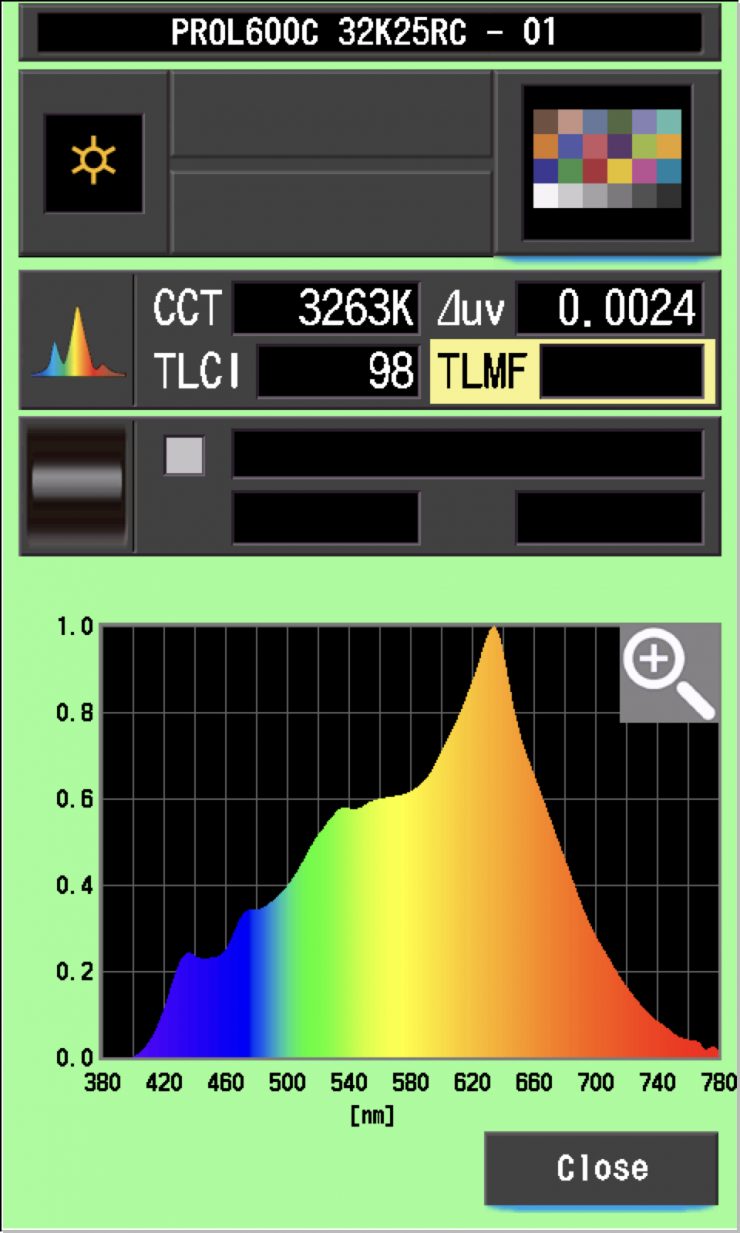
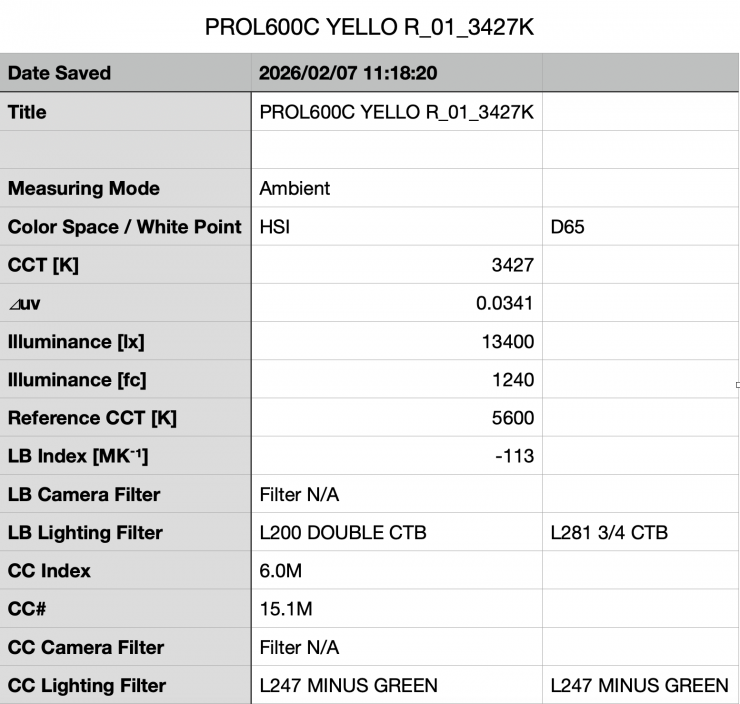
Profoto L600C 3200K MaxiZoom Reflector @25° Constant Output
Above you can see the light’s output when it was set at 3200K with the standard 25° reflector in its Constant Output Mode was 41,300 lx (3840 fc), which was 9.62% less than what it output in its Max Output Mode.

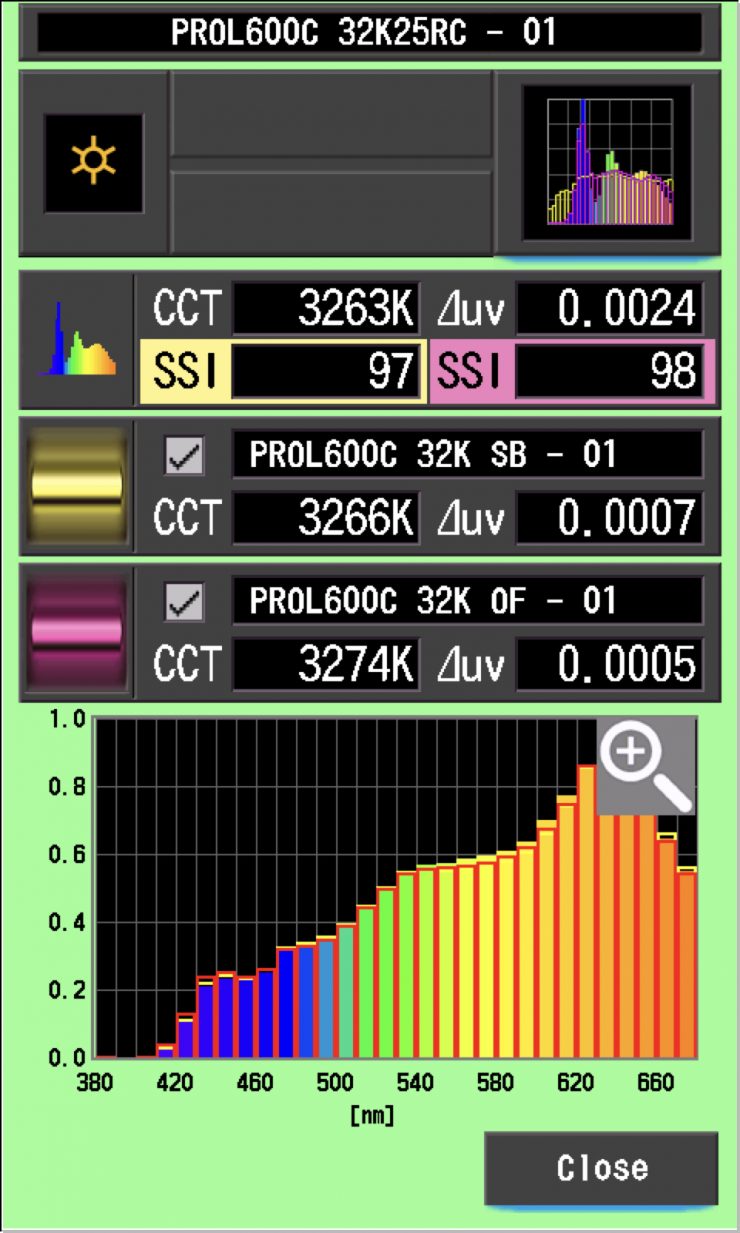
As far as CCT accuracy goes, it recorded a reading of 3263K, which was a very good result.
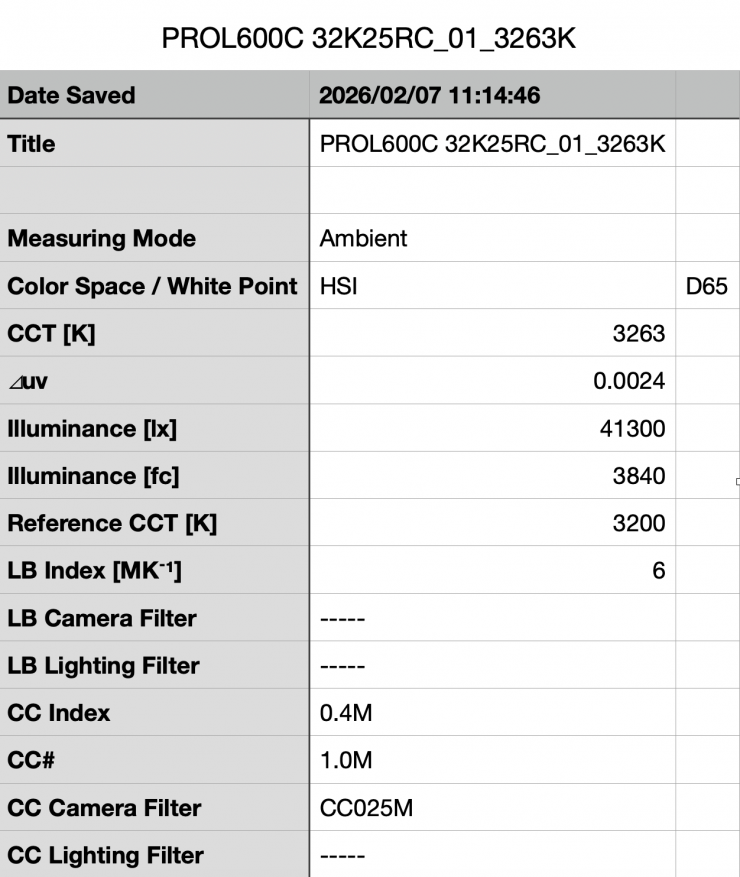
Profoto L600C 5600K MaxiZoom Reflector @25° Constant Output
Above you can see the light’s output when it was set at 5600K with the standard 25° reflector in its Constant Output Mode was 42,000 lx (900 fc), which was 27.28% less than what it output in its Max Output Mode.

As far as CCT accuracy goes, it recorded a reading of 5580K, which was an excellent result.
Summary of results (25° reflector) Constant Output
| | OUTPUT | CCT |
| 2500K | 41,500 lx | 2607K |
| 3200K | 41,300 lx | 3263K |
| 4500K | 41,900 lx | 4527K |
| 5600K | 42,000 lx | 5580K |
| 6500K | 42,000 lx | 6443K |
| 8000K | 39,300 lx | 7969K |
| 10000K | 38,000 lx | 9808K |
Above, you can see a summary of results when the light was used with its 25° reflector at various CCT settings in its Constant Output Mode.
The results show me that the light’s CCT accuracy was excellent, and the output was very consistent and only varied by 9.5%. From 2500K to 6,500K, it only varied by 1.66%.
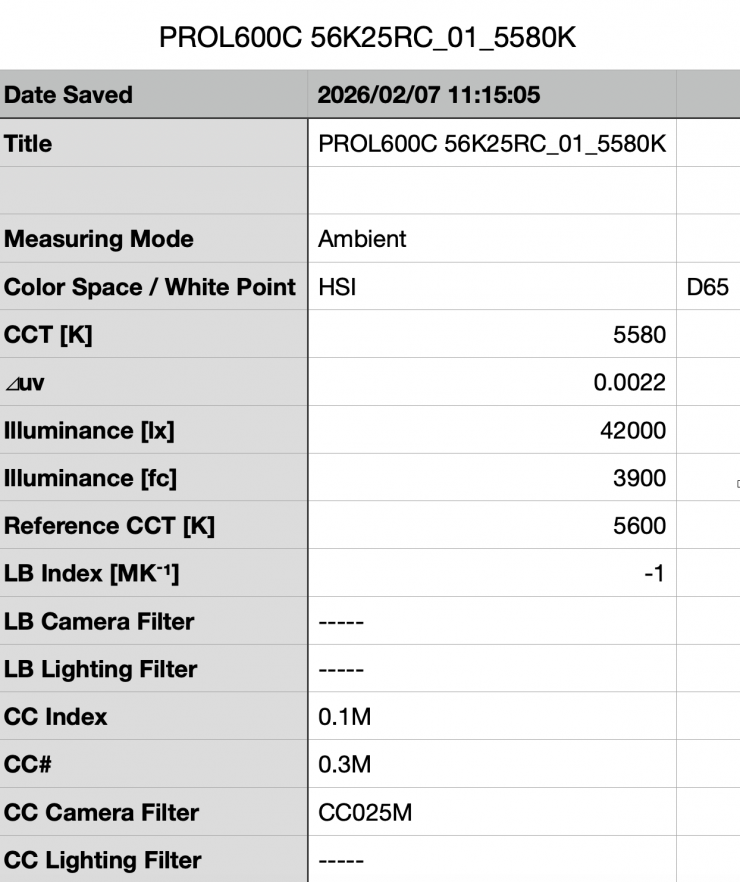
Profoto L600C 5600K MaxiZoom Reflector @25° Max Output Fan Silent
Above you can see the light’s output when it was set at 5600K with the standard 25° reflector in its Max Output Mode, and with the fan set to Silent was 21,500 lx (2000 fc), which was 62.67% less than what it output with the fan set to Auto or Max.

As far as CCT accuracy goes, it recorded a reading of 5567K, which was an excellent result.
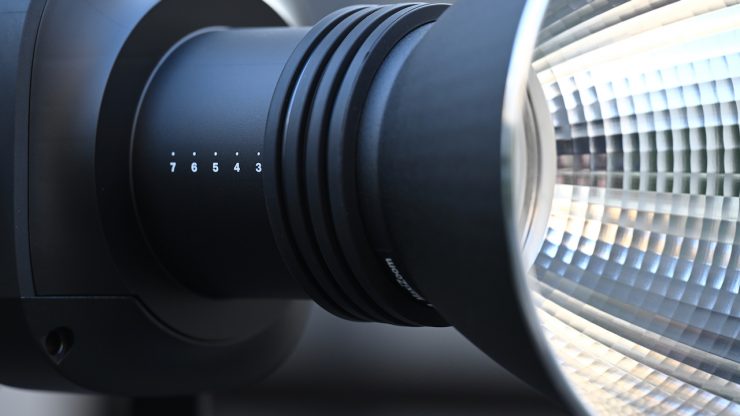
MaxiZoom Reflector set back to its furthest position on the L600C

So, now let’s see how much output the light has when used with the MaxiZoom Reflector set back to its 3.5 position on the L600C. Now, I have no idea what the beam angle is when you do this, but it is probably somewhere around 45°.
Profoto L600C 5600K MaxiZoom Reflector set back to position 3.5

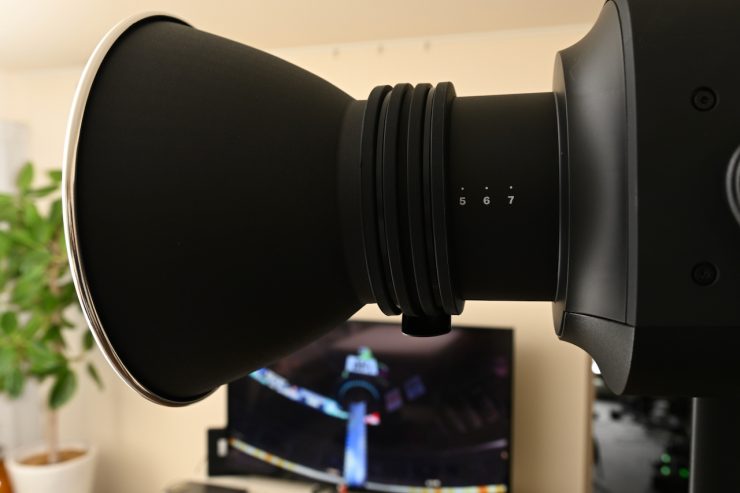
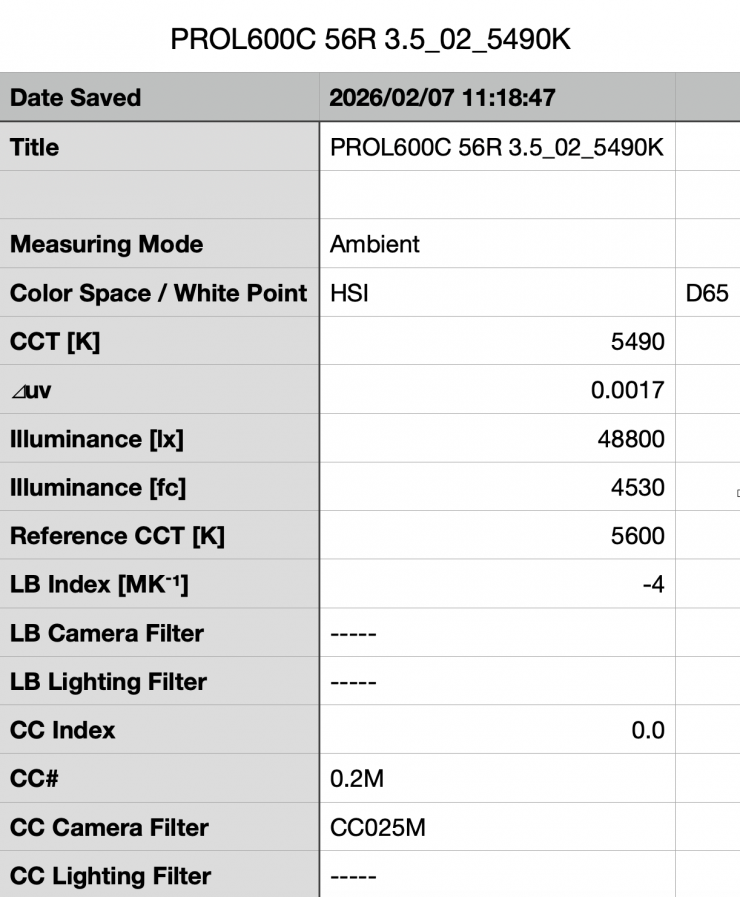
Above, you can see the light’s output when it was set at 5600K with the MaxiZoom Reflector set back to the 3.5 position was 48,800 lx (4530 fc). It is important to note that this measurement was made 1m/ 3.3′ from the end of the reflector.

As far as CCT accuracy goes, it recorded a reading of 5490K.
How does this compare to some of the competitors we have reviewed? Below you can see:
5600K
| | Output at 5600K | CCT (K) |
| Profoto L600C | 48,800 lx | 5490K |
| NANLUX Evoke 600C | 73,500 lx (45° reflector) | 5671K |
| Kelvin Epos 600 | 83,000 lx (62° reflector) | 5666K |
| Prolycht Orion 675 FS | 55,700 lx (55° reflector) | 5515K |
| Aputure LS 600c Pro | 49,000 lx (62° reflector) | 5617K |
| Nanlite Forza 720B | 73,000 lx (55° reflector) | 5397K |
| Aputure LS 600x Pro | 64,800 lx (55° reflector) | 5397K |
Now, this is not really an apples-to-apples comparison, because I have no way of actually knowing the exact beam angle that the MaxiZoom Reflector is producing when set back to the 3.5 position. So I wouldn’t be basing anything on these results.
Below you can see how the output of the Profoto L600C compares to some HMI fixtures at a distance of 3m.
| | OUTPUT @5600K 3m / 9.9′ |
| Profoto L600C (MaxiZoom Reflector set back to the 3.5 position- probably around 45°) | 5422 lx |
| ARRI M8 (Standard reflector 60°) | 4589 lx |
| ARRI M18 (Standard reflector 63°) | 9556 lx |
| K 5600 Lighting Joker 2 400W (50° super wide) | 2400 lx |
| K 5600 Lighting Joker 2 800W (50° super wide) | 5560 lx |
Please note that the readings from the two K 5600 Lighting options and the ARRI M8 and M18 are claimed figures. I haven’t independently tested these lights.
While the Profoto L600C is quite different from a light like the Joker2 and M18, at least you can get some idea of how its output compares.
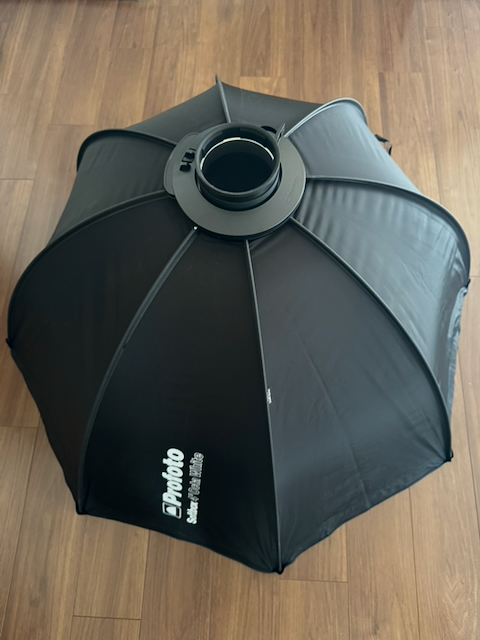
Profoto Octa Softbox (4′, White Interior)
As this is a light that is likely to be used with lighting modifiers such as softboxes, let’s have a look at the output and CCT accuracy when using a Profoto Octa Softbox (4′, White Interior).
Profoto L600C 5600K (Profoto Octa Softbox 4′, White Interior)
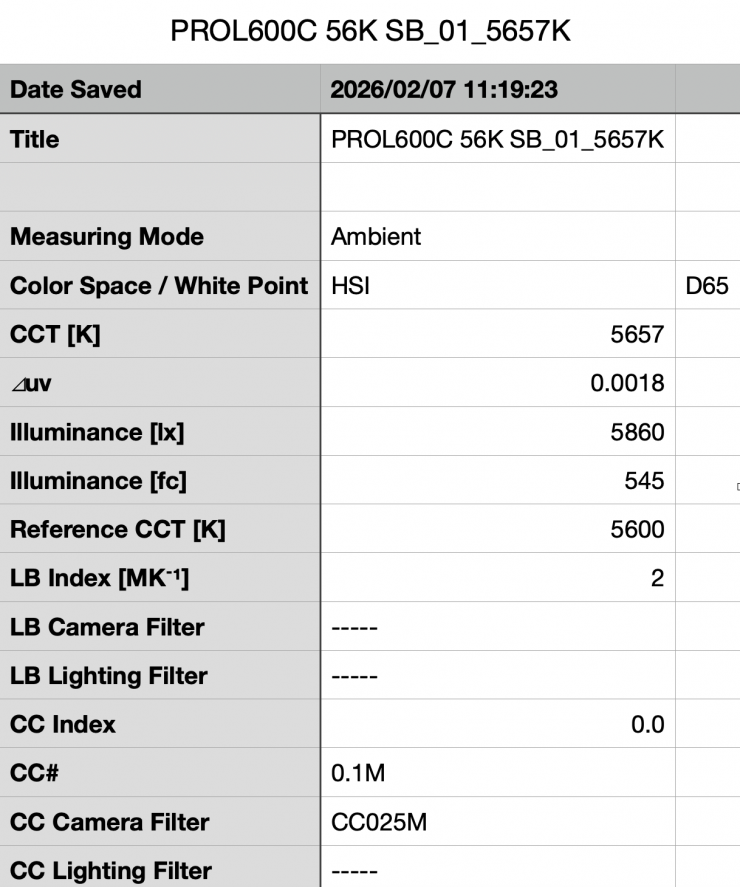
Above you can see the light’s output when it was set at 5600K and used with a Profoto Octa Softbox 4′ was 5860 lx (545 fc).
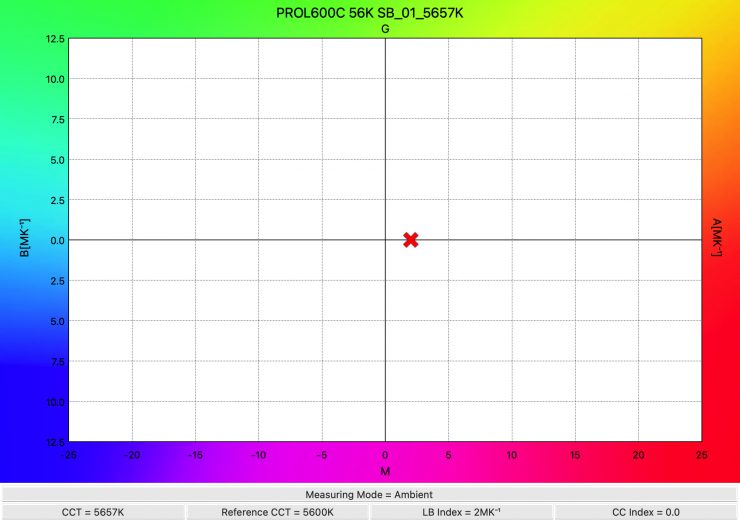
As far as CCT accuracy goes, it recorded an excellent reading of 5657K.
Profoto L600C 3200K (Profoto Octa Softbox 4′, White Interior)
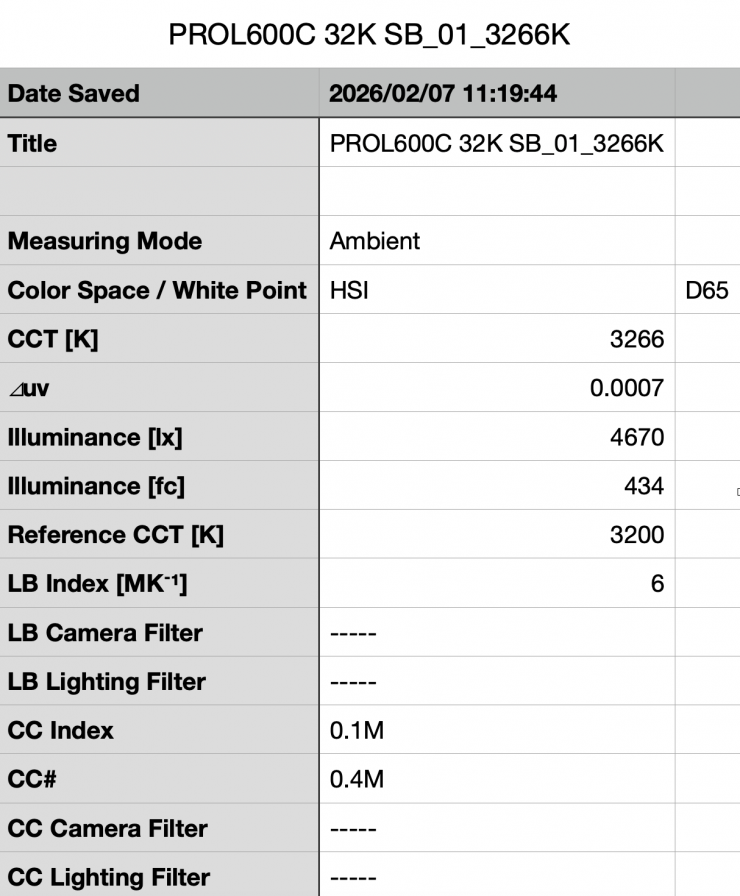
Above you can see the light’s output when it was set at 3200K, with a Profoto Octa Softbox 4′ was 4670 lx (434 fc).

As far as CCT accuracy goes, it recorded an excellent reading of 3266K.
The L600C produces a good amount of output and CCT accuracy when using the Profoto Octa Softbox 4′, White Interior.
+/- Green adjustment
As the fixture includes +/- Green adjustment, you can quite easily correct any tint. While there is no exact science to this, and it really depends on what camera you are using as well, it’s just a matter of trial and error to see what setting actually works the best. The nice thing is, any light with +/- Green adjustment can be fine-tuned to deliver better results.
CCT consistency & linear output when dimming the light
Now, what you should always do when testing lights is to see if the CCT remains consistent when dimming the light. Just because you set a light at say 5600K, that doesn’t mean that the CCT will remain stable as you start dimming the fixture down. I also wanted to see how linear the dimming curve was.
I decided to do a series of tests at 100%/75%/50%/25%10% to see if the CCT being recorded changed. This was done at a distance of 1m / 3.3′ using a Sekonic C-800. These tests were done at 5600K with the light being used with its MaxiZoom Reflector.
Profoto L600C MaxiZoom Reflector @25° (Linear Dimming)
| CCT READING | OUTPUT | INTENSITY % |
| 5563K | 57,600 lx | 100 |
| 5596K | 47,500 lx | 75 |
| 5593K | 33,500 lx | 50 |
| 5704K | 16,300 lx | 25 |
| 5584K | 7550 lx | 10 |
The Profoto L600C maintained excellent CCT consistency as you start dimming the fixture. My testing showed that the CCT readings varied by just 35K from 100% to 10%.
As far as how linear the output is when you start dimming the light, at 50% output, it had 41.84% less output than when used at 100%. At 25%, it had 71.70% less output than when used at 100%. At 10% output, it had 86.89% less output than when used at 100%. This shows me that the light’s linear dimming curve could be better.
Color Rendering
So now that we have seen how much output the L600C produces, how does it perform when it comes to replicating accurate colors?
Profoto L600C 5600K (MaxiZoom Reflector @25°) Constant Output
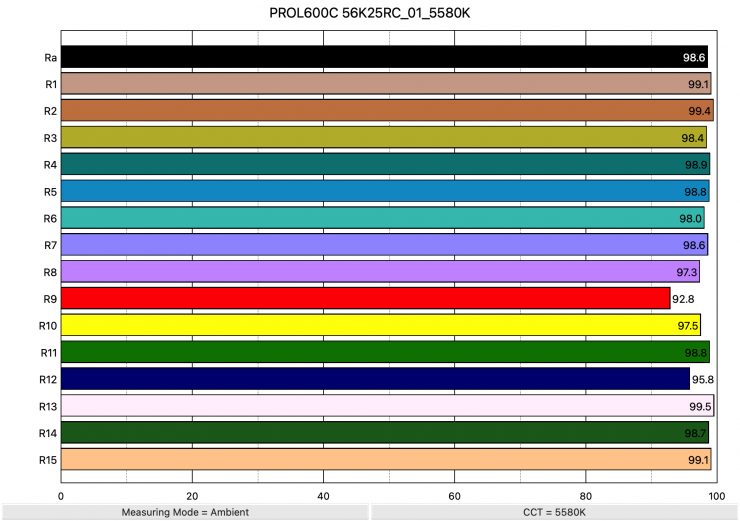
Above, you can see that when the light was set at 5600K, using the 25-degree reflector recorded an average CRI (R1-R8) of 98.6 and an extended CRI (R1-R15) of 98.04. For replicating accurate skin tones, it recorded 92.8 for R9 (red), 99.5 for R13 (closest to caucasian skin tones), and 99.1 for R15 (closest to Asian skin tones). These are the best results I have ever seen from an LED light at 5600K, and not a single value was below 90.
The light, when set at 5600K using its MaxiZoom Reflector, recorded a TLCI score of 99.
Profoto L600C 3200K (MaxiZoom Reflector @25°) Constant Output
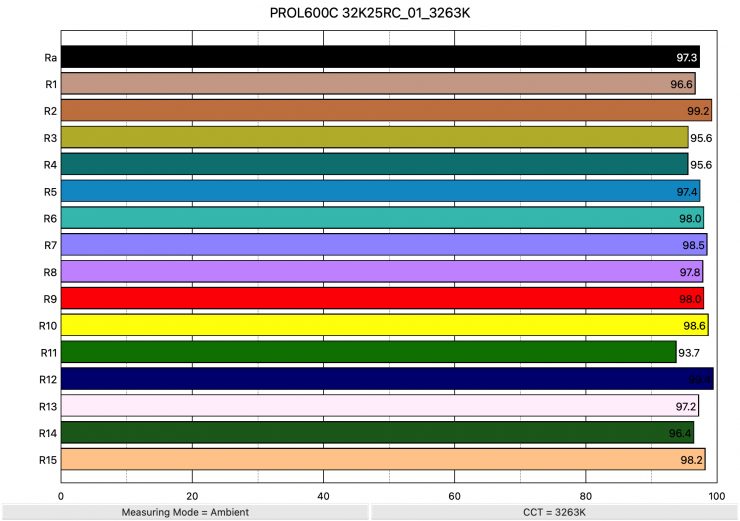
Above, you can see the scores for when the light was used at 3200K. It recorded an average CRI (R1-R8) of 97.3 and an extended CRI (R1-R15) of 97.34. For replicating accurate skin tones, it recorded 98.0 for R9 (red), 97.2 for R13 (closest to caucasian skin tones), and 98.2 for R15 (closest to Asian skin tones). Not a single value was below 90.
These results were outstanding and almost as good as when the light was used at 5600K.
The light, when set at 3200K, recorded a TLCI score of 98.
How do these figures at 3200K and 5600K compare to other lights that we have previously reviewed? Below you can see:
5600K
| | EXTENDED CRI | R9 | R13 | R15 |
| Profoto L600C | 98.04 | 92.8 | 99.5 | 99.1 |
| NANLUX Evoke 600C | 97.75 | 96.5 | 98.6 | 99.1 |
| Kelvin Epos 600 | 96.06 | 95.9 | 98.4 | 98.0 |
| Prolycht Orion 675 FS | 96.73 | 98.2 | 98.9 | 99.5 |
| Aputure LS 600c Pro | 95.32 | 98.9 | 99.1 | 99.0 |
The scores were outstanding for the Profoto L600C, and it had the highest extended CRI score I have ever seen from an LED light at 5600K.
3200K
| | EXTENDED CRI | R9 | R13 | R15 |
| Profoto L600C | 97.34 | 98.0 | 97.2 | 98.2 |
| NANLUX Evoke 600C | 96.16 | 89.6 | 98.1 | 97.3 |
| Kelvin Epos 600 | 97.42 | 91.7 | 99.3 | 97.6 |
| Prolycht Orion 675 FS | 94.19 | 79.0 | 96.5 | 93.2 |
| Aputure LS 600c Pro | 96.78 | 91.5 | 93.9 | 95.7 |
The scores were excellent for the Profoto L600C at 3200K were outstanding. The extended CRI score was just below the Kelvin Epos 600,
Profoto L600C 5600K (Open Face)
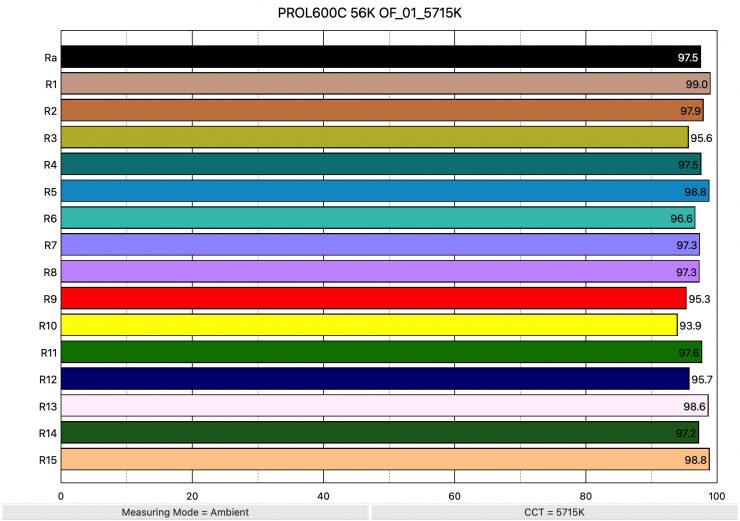
Above you can see that when the light was set at 5600K and used open face recorded an average CRI (R1-R8) of 97.5 and an extended CRI (R1-R15) of 97.14. For replicating accurate skin tones, it recorded 95.3 for R9 (red), 98.6 for R13 (closest to caucasian skin tones), and 98.8 for R15 (closest to Asian skin tones). These are outstanding results, and not a single value was below 90.
The light, when set at 5600K and used open face, recorded a TLCI score of 99.
Profoto L600C 3200K (Open Face)
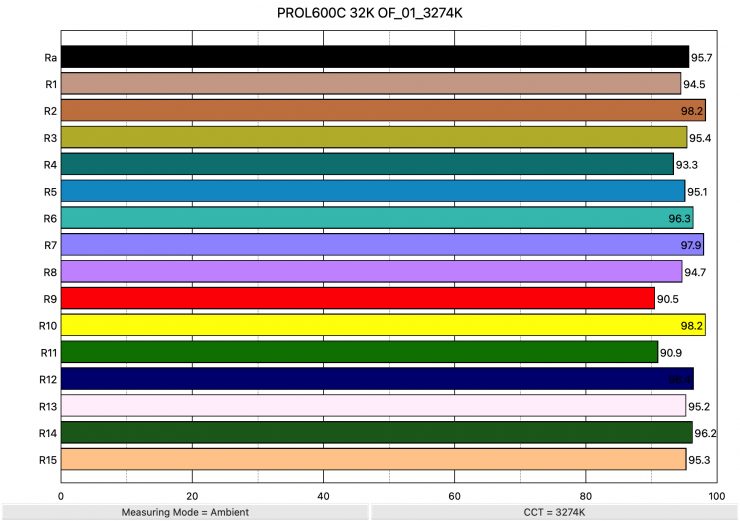
Above, you can see that when the light was set at 3200K using the standard reflector recorded an average CRI (R1-R8) of 95.7 and an extended CRI (R1-R15) of 95.20. For replicating accurate skin tones, it recorded 90.5 for R9 (red), 95.2 for R13 (closest to caucasian skin tones), and 95.3 for R15 (closest to Asian skin tones). These were excellent results, and not a single value was below 90.
The light, when set at 3200K and used open face, recorded a TLCI score of 98.
CC Index & ⊿uv
The CC Index displays the CC correction value and whether any magenta or green need to be added or subtracted. 1 CC corresponds to 035 Kodak CC values or 1/8 Rosco filter values. Any reading less than +1.00 or -1.00 and you’re probably not going to need to make any kind of adjustment. The ⊿uv is the value to show how much this light is away from being an ideal light source (black body radiation = incandescent lamp). As with the CC Index you want this number to theoretically be zero. Kelvin is not a linear value, so we need to convert from Kelvin to MK-1 to compare the values of color temperature. To calculate from Kelvin to Mired is MK-1= 1*1000000/Kelvin. While this may sound confusing, it is the only way of measuring if the Kelvin shift is significant enough to warrant having to use a filter for correction. Below are the results for the Profoto L600C:
Profoto L600C Vs MK-1 (MaxiZoom Reflector @25° Constant Output)
| | Kelvin | Difference in K | MK-1 | Difference in MK-1 |
| SET VALUE | 2500K | 0 | 400 | 0 |
| ACTUAL READING | 2607K | 107 | 383.58 | 16.42 MK-1 |
| SET VALUE | 3200K | 0 | 312.5 | 0 |
| ACTUAL READING | 3263K | 63 | 306.46 | 6.04 MK-1 |
| SET VALUE | 4500K | 0 | 222.22 | 0 |
| ACTUAL READING | 4527K | 27 | 220.89 | 1.33 MK-1 |
| SET VALUE | 5600K | 0 | 178.57 | 0 |
| ACTUAL READING | 5580K | 20 | 179.21 | -0.64 MK-1 |
| SET VALUE | 6500K | 0 | 153.84 | 0 |
| ACTUAL READING | 6443K | 57 | 155.20 | -1.36 MK-1 |
| SET VALUE | 8000K | 0 | 125 | 0 |
| ACTUAL READING | 7969K | 31 | 125.48 | -0.48 MK-1 |
| SET VALUE | 10000K | 0 | 100 | 0 |
| ACTUAL READING | 9808K | 192 | 101.95 | -1.95 MK-1 |
These figures might look confusing, but what they tell me is that the light is extremely CCT-accurate from 4500K to 10,000K. The only real anomaly was at 2500K, where the light was way off. Any MK-1 score that is under -9/9 means you wouldn’t have to use any color correction gels. The MK-1 scores for this light were extremely good, apart from at 2500K.
Profoto L600C CC INDEX & ⊿uv (MaxiZoom Reflector @25° Constant Output)
| | CC INDEX | ⊿uv |
| 2500K | 0.1M | 0.0015 |
| 3200K | 0.4M | 0.0024 |
| 4500K | 0.3M | 0.0022 |
| 5600K | 0.1M | 0.0022 |
| 6500K | 0.1G | 0.0020 |
| 8000K | 0.3G | 0.0020 |
| 10000K | 0.6G | 0.0020 |
The CC Index & ⊿uv scores were very consistent. The ⊿uv scores were the most consistent I ever seen from an LED light. The CC Index scores were also very good across the board.
TM-30
TM-30 is a relatively new color rendering standard that was developed to deal with the limitations of CRI. TM-30 looks at 99 individual colors. These 99 colors are categorized into seven groups: nature, skin color, textiles, paints, plastics, printed material, and color systems.
TM-30 scores go from 0 – 100. The higher the score, the more accurate a light is at producing colors. Any TM-30 Rf score in the ’90s is considered to be good. What is interesting and something that you need to be very aware of is that two separate light sources with the exact same CRI scores can render colors very differently. A light with a high CRI rating could have a low TM-30 score. Conversely, a light with a good TM-30 score could have a bad CRI score.
Now, there are two measurements associated with TM-30, Rf and Rg.
Rf (Color Fidelity)
Rg (Color Gamut)
With Rf value, ideally, you want a score in the 90’s.
With Rg value, a score below 100 indicates that the light source renders colors with less saturation than the reference source. So ideally, you want this score to be above 100.
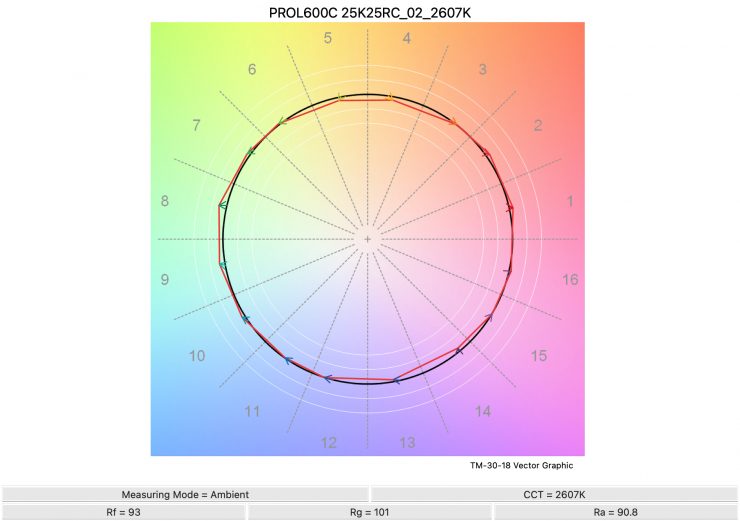
2500K 
3200K 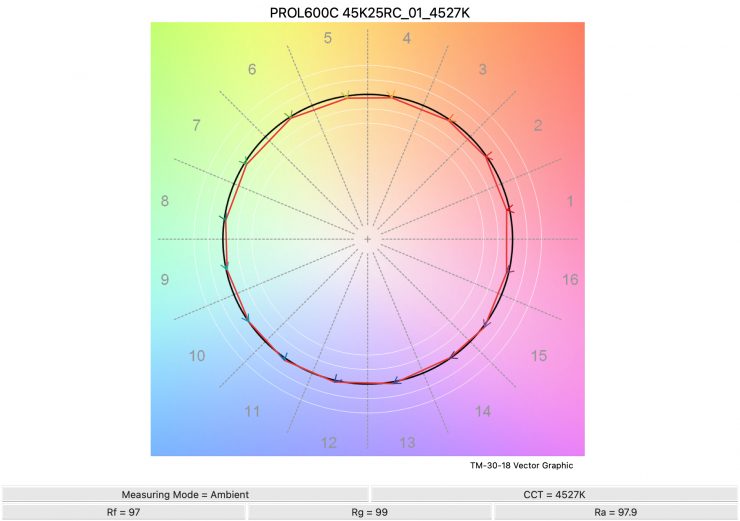
4500K 
5600K 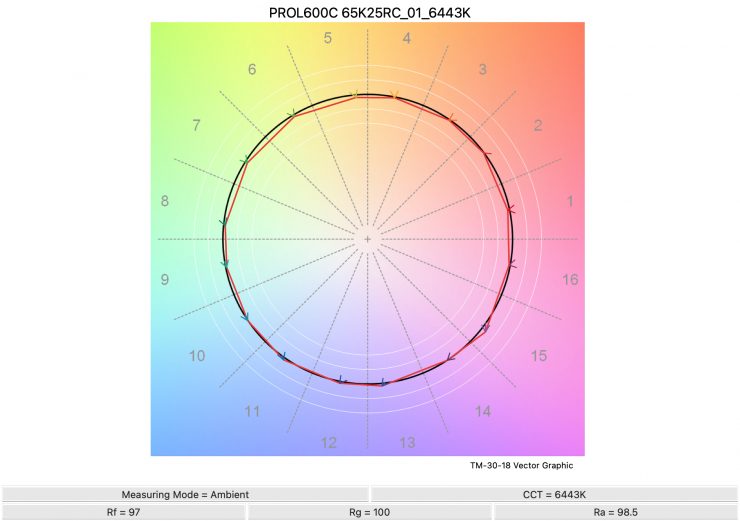
6500K 
8000K 
10,000K
Above, you can see the scores for the Profoto L600C at various CCT settings. Below, I have listed the figures as well.
Here are the results:
| | Rf | Rg |
| 2500K | 93 | 101 |
| 3200K | 97 | 100 |
| 4500K | 97 | 99 |
| 5600K | 97 | 100 |
| 6500K | 97 | 100 |
| 8000K | 96 | 99 |
| 10000K | 94 | 98 |
The TM-30 scores were excellent for this light, and it shows me that it is very consistent at replicating accurate colors with full saturation. The consistency of the light is very impressive.
Output & accuracy when creating saturated colors
I also wanted to test the light to see how it performed when creating super-saturated colors using the MaxiZoom Reflector in the Max Output Mode.
0° – RED
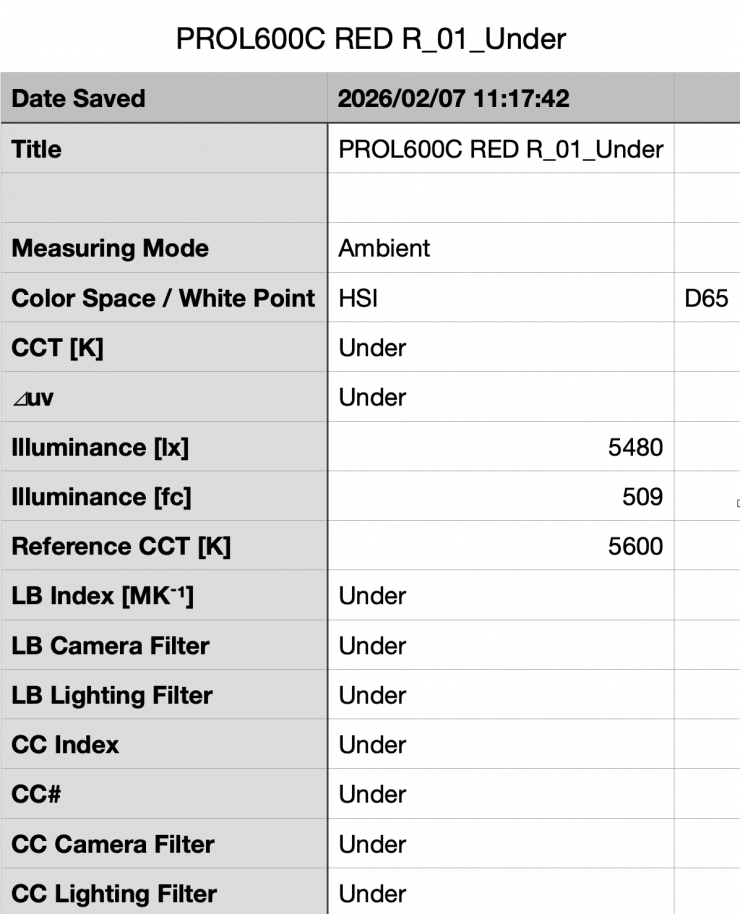
Above, you can see that the light, when using its 25° reflector, recorded an output of 5,480 lx (509 fc).
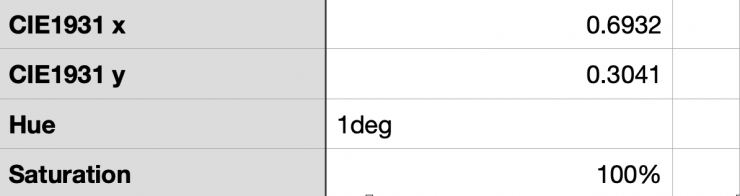
As far as creating an accurate 0° RED, the L600C was 1° off with a reading of 1°.
120° – GREEN
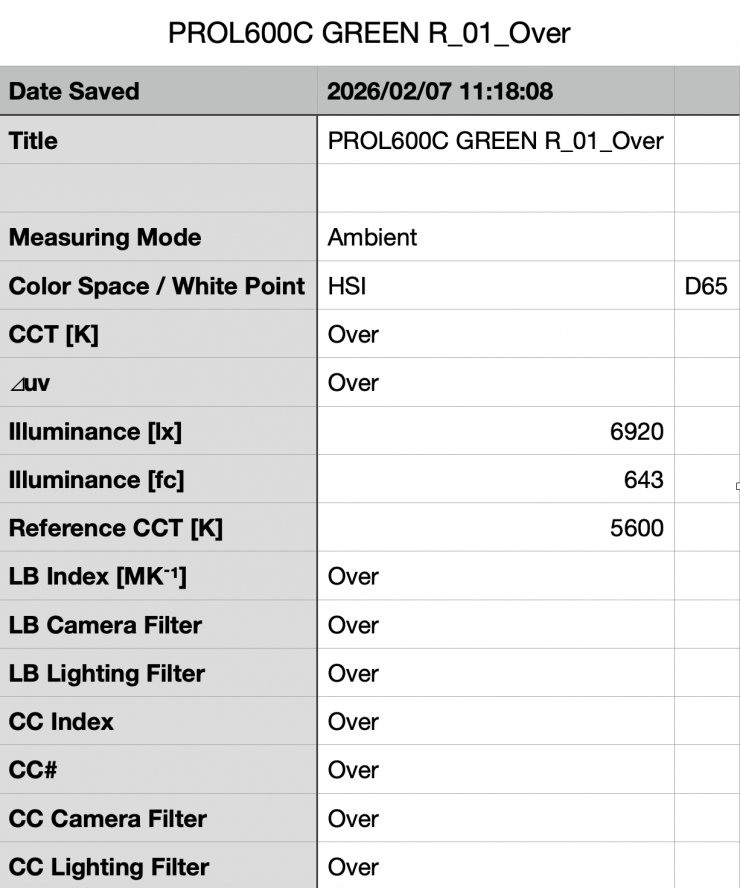
Above, you can see that the light, when using its reflector, recorded an output of 6,920 lx (643 fc).
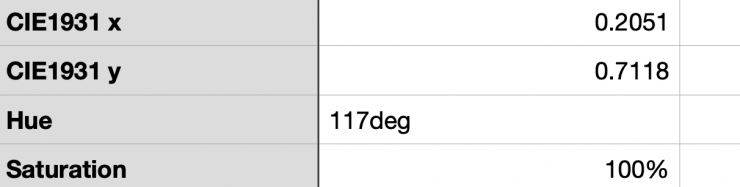
As far as creating an accurate 120° GREEN, the L600C was 3° off with a reading of 117° and 100% saturation.
240° – BLUE

Above, you can see that the light, when using its 25° reflector, recorded an output of 2,300 lx (213 fc).
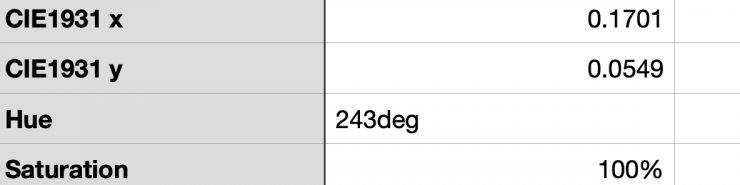
As far as creating an accurate 240° Blue, the L600C was 3° off with a reading of 243°.
60° – YELLOW
Above, you can see that the light, when using its 25° reflector, recorded an output of 13,400 lx (1240 fc).
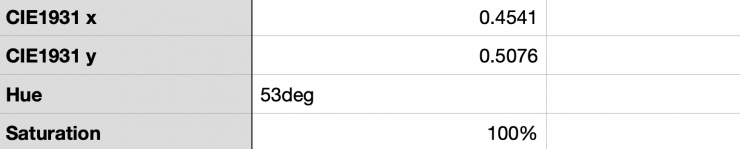
As far as creating an accurate 60° Yellow, the L600C was 7° off with a reading of 53°.
With the L600C, the output certainly doesn’t remain consistent depending on what color you are trying to generate. This is something you need to keep in mind.
SSI
SSI (Spectral Similarity Index) was developed by the Sci-Tech Council of the Academy. SSI gives me the ability to set any light as a standard, or use predefined standards (such as CIE D55), and then give other lights an SSI score based upon how well they will match standards such as CIE D55 measure spectral response and compare it directly against an ideal light source.
SSI is a much better way to judge an LED light than CRI or TLCI, although they don’t tell the full story of any light, and you can’t judge a light by SSI scores alone.
SSI is useful for seeing how well different lights will play together. As the Sekonic C-800 Spectromaster can measure SSI, I decided to test out the Profoto L600C to see how it performed.
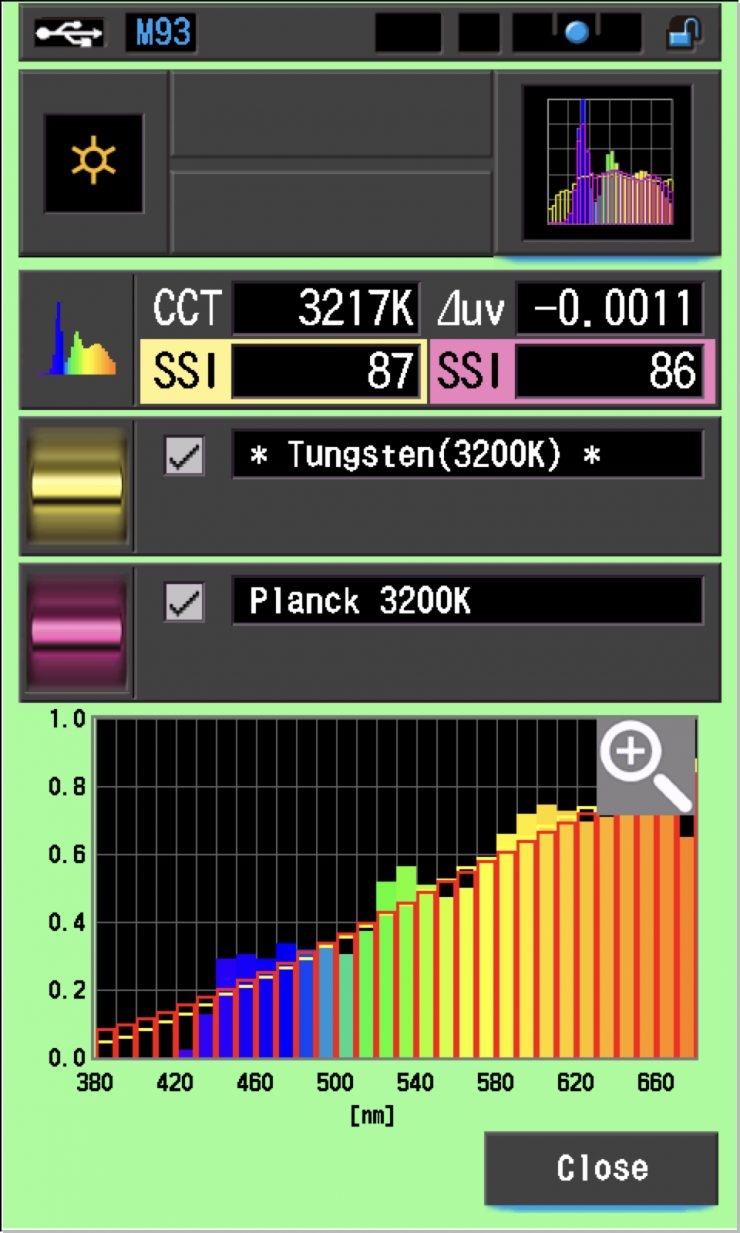
Profoto L600C 3200K
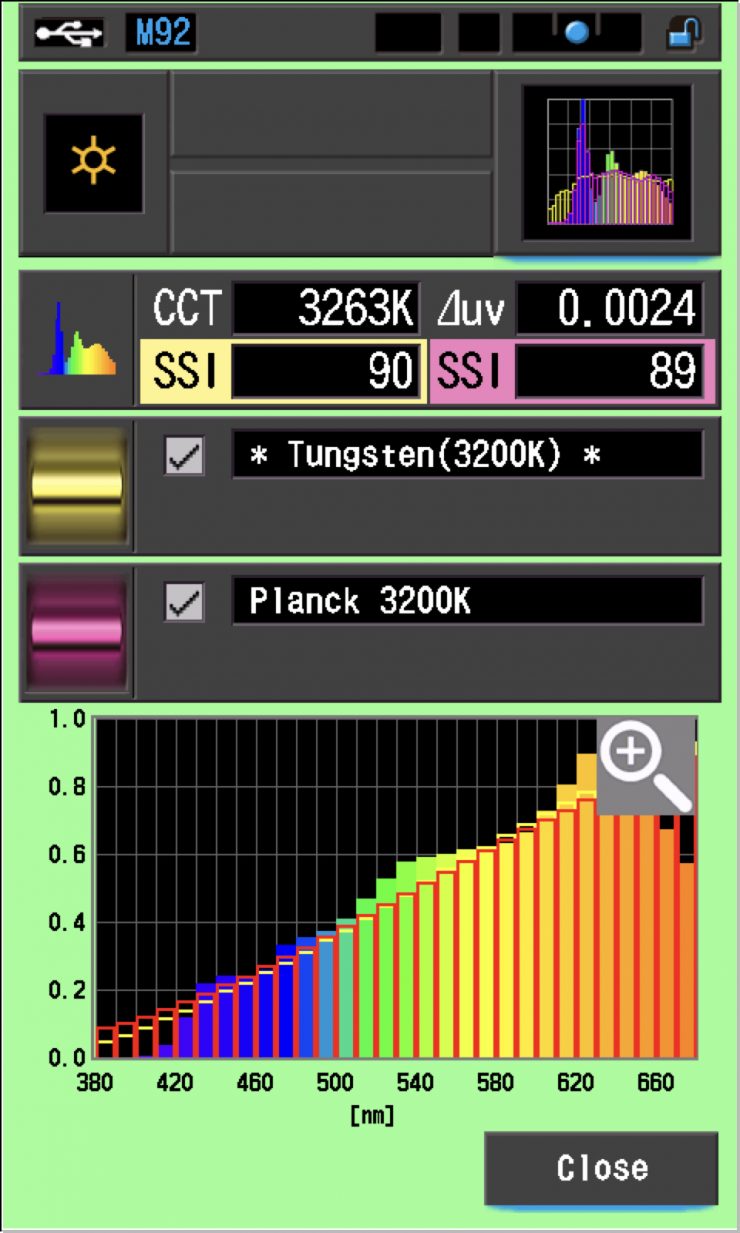
In this graph, the red bars indicate a perfect Planck 3200K source. The gold bars indicate a perfect 3200K Tungsten source. This lets us compare how close to a perfect 3200K lighting source the Profoto L600C is. Any SSI score in the high 70s, low ’80s is very good for a 3200K LED light. These were outstanding scores.
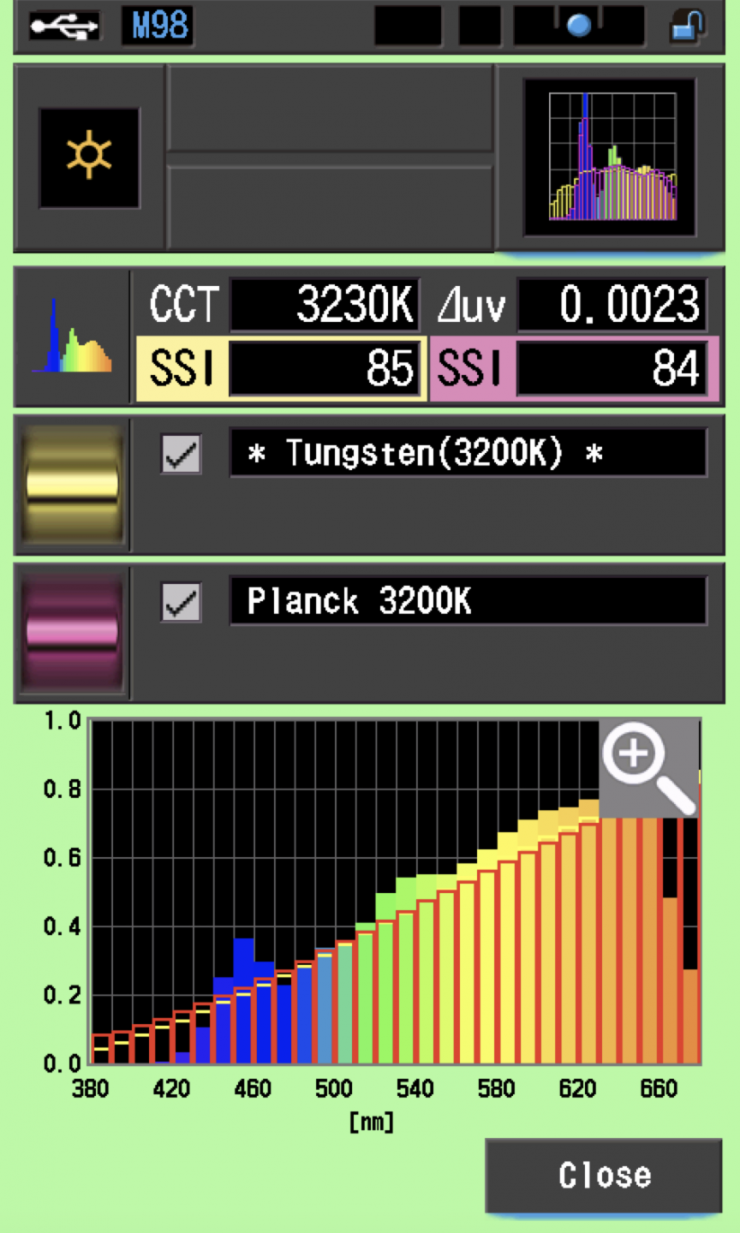
As a comparison, above are the SSI scores for the NANLUX Evoke 600C.
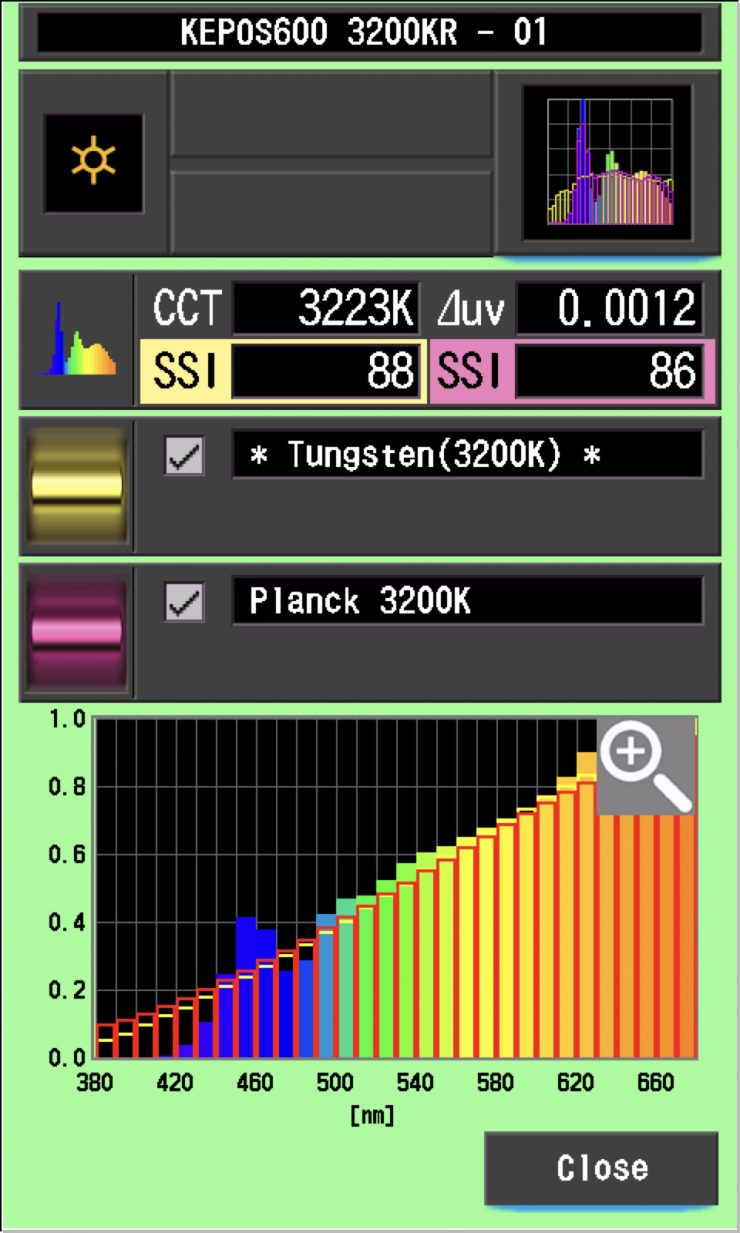
As another comparison, above are the results for the Kelvin Epos 600.
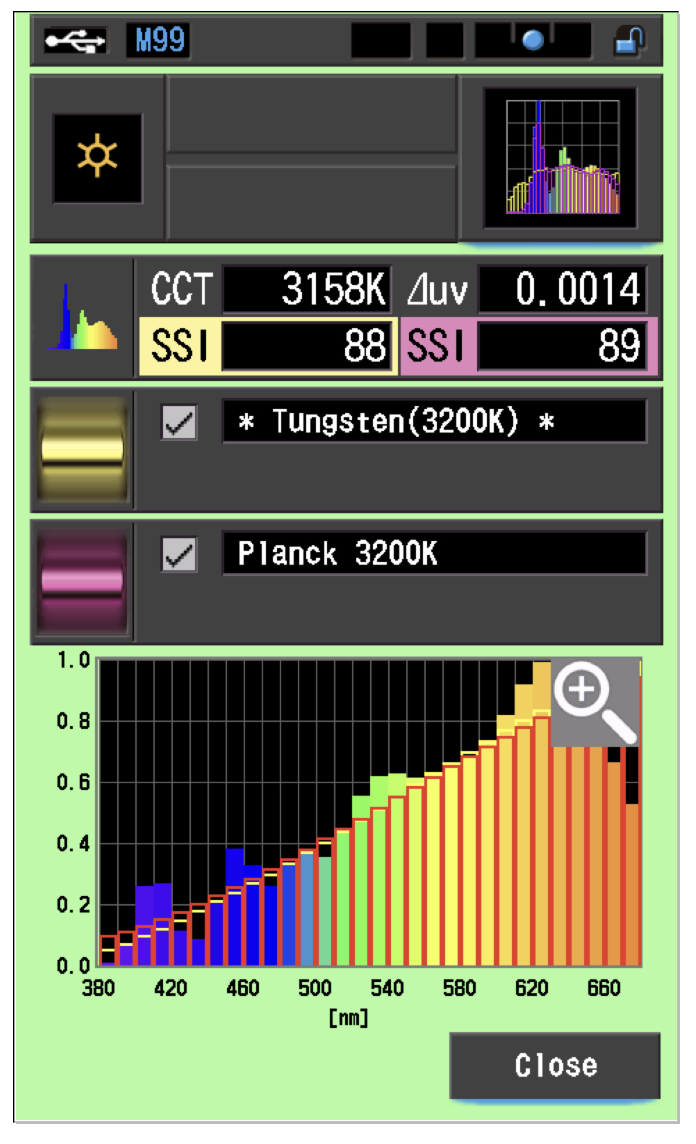
As another comparison, above are the same results for the Prolycht Orion 675 FS.
As another comparison, the results for the Aputure STORM 1000c are above.
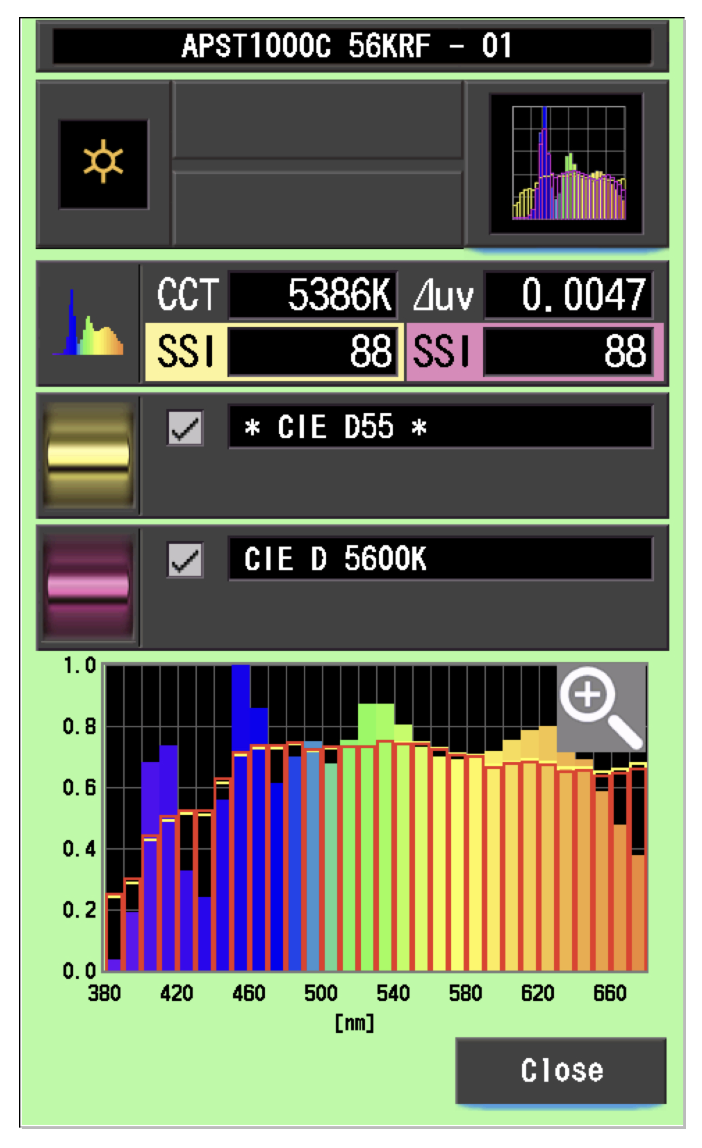
Profoto L600C 5600K
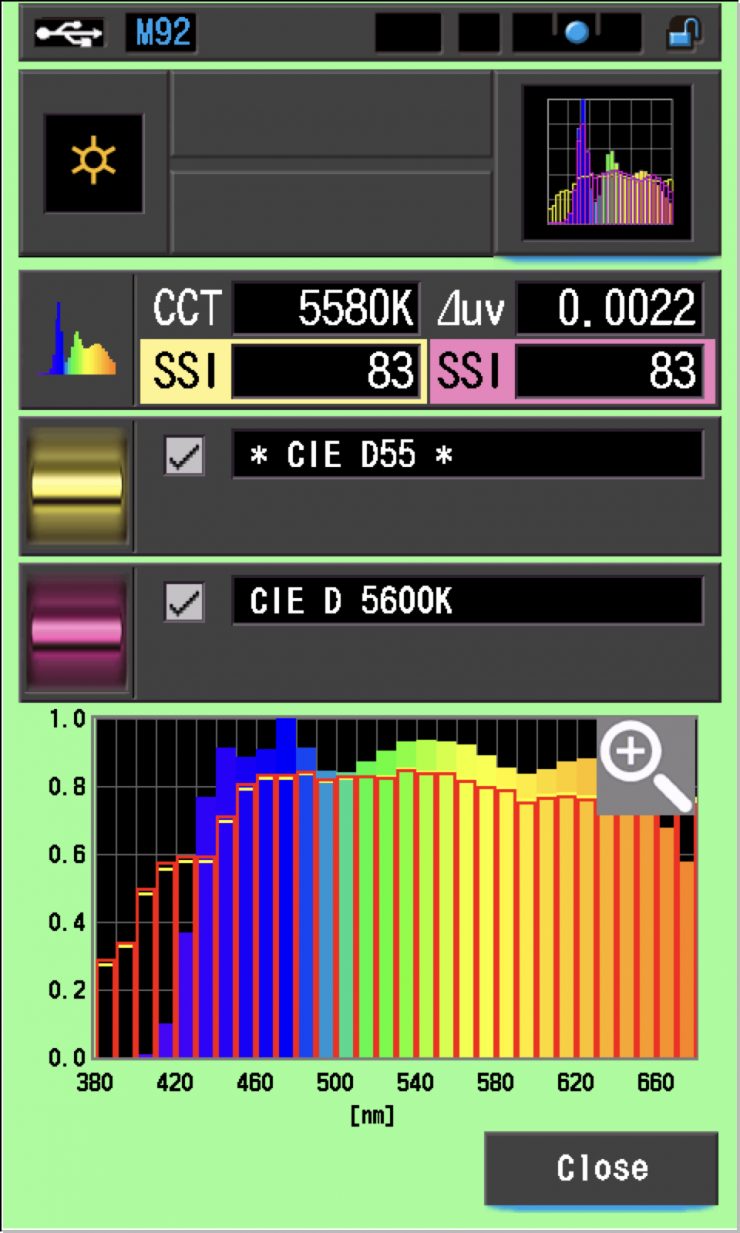
In the graph above, the gold bars indicate a perfect CIE D55 source. The red bars indicate a perfect CIE D 5600K source. This lets us compare how close to a perfect 5600K lighting source the Profoto L600C is. A score in the low 70s is typical for a 5600K LED source. The scores for the L600C were very, very good.
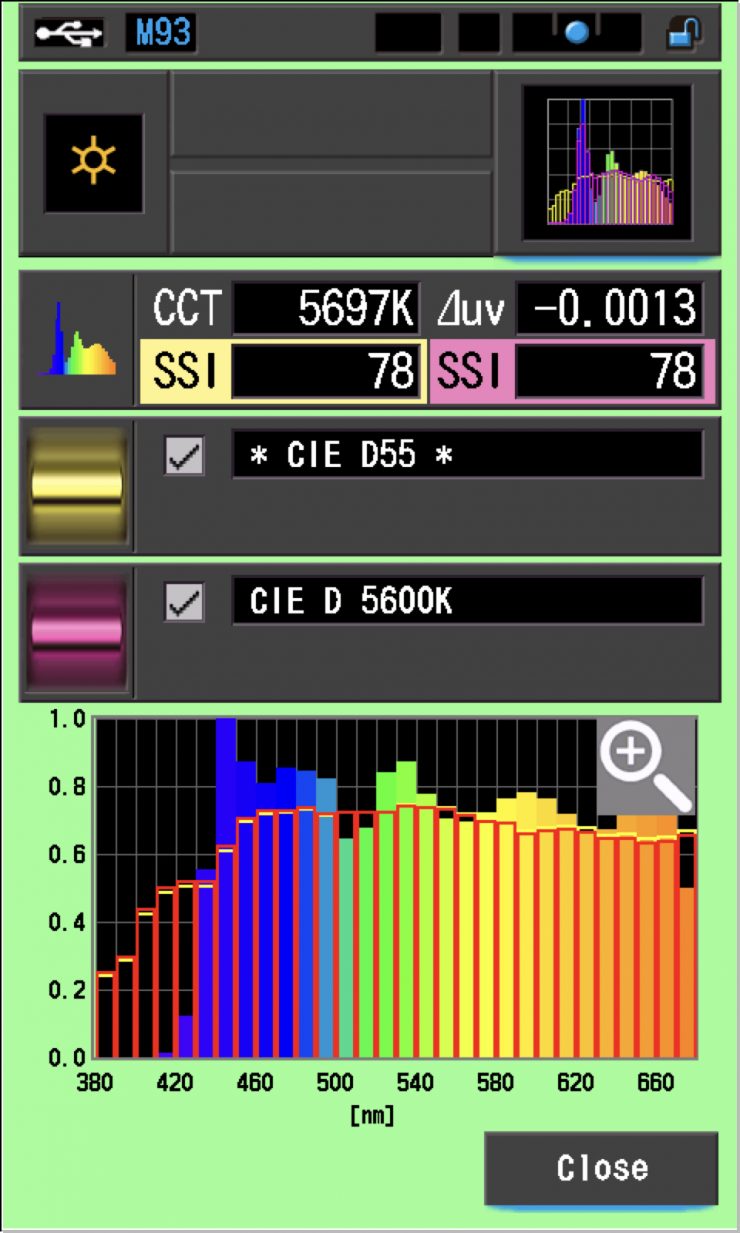
As a comparison, above are the scores for the NANLUX Evoke 600C.
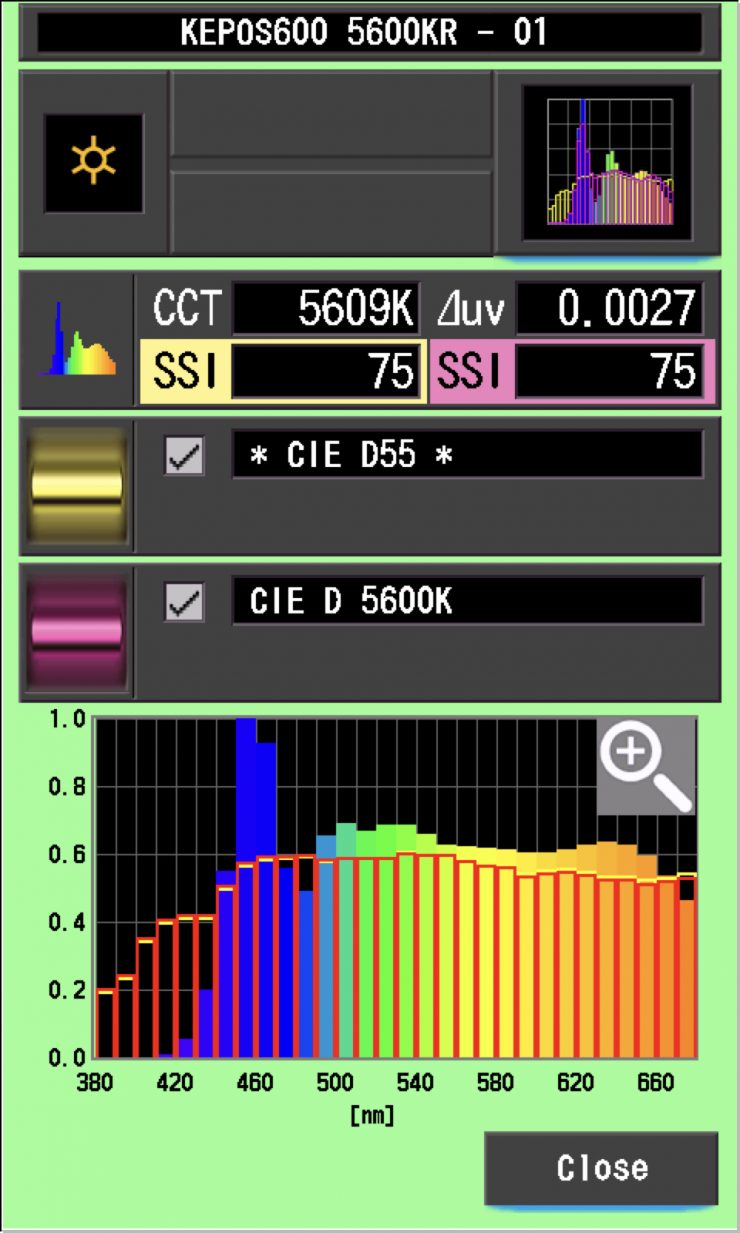
As another comparison, above are the results for the Kelvin Epos 600.
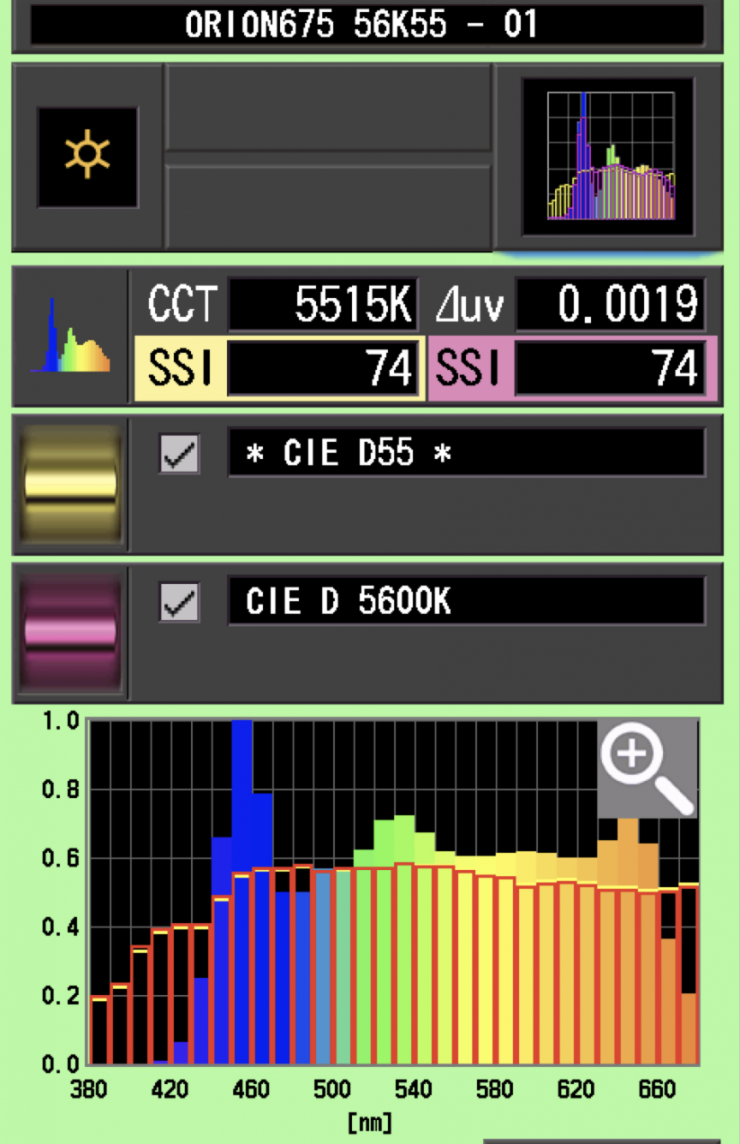
As another comparison, above are the scores for the Prolycht Orion 675 FS.
As another comparison, above are the results for the Aputure STORM 1000c.
The main reason we want to record SSI scores is so we can see how well they match with other lights. As an example, I wanted to see how well the Profoto L600C matched the NANLUX Evoke 600C and Kelvin Epos 600. Below you can see the results.
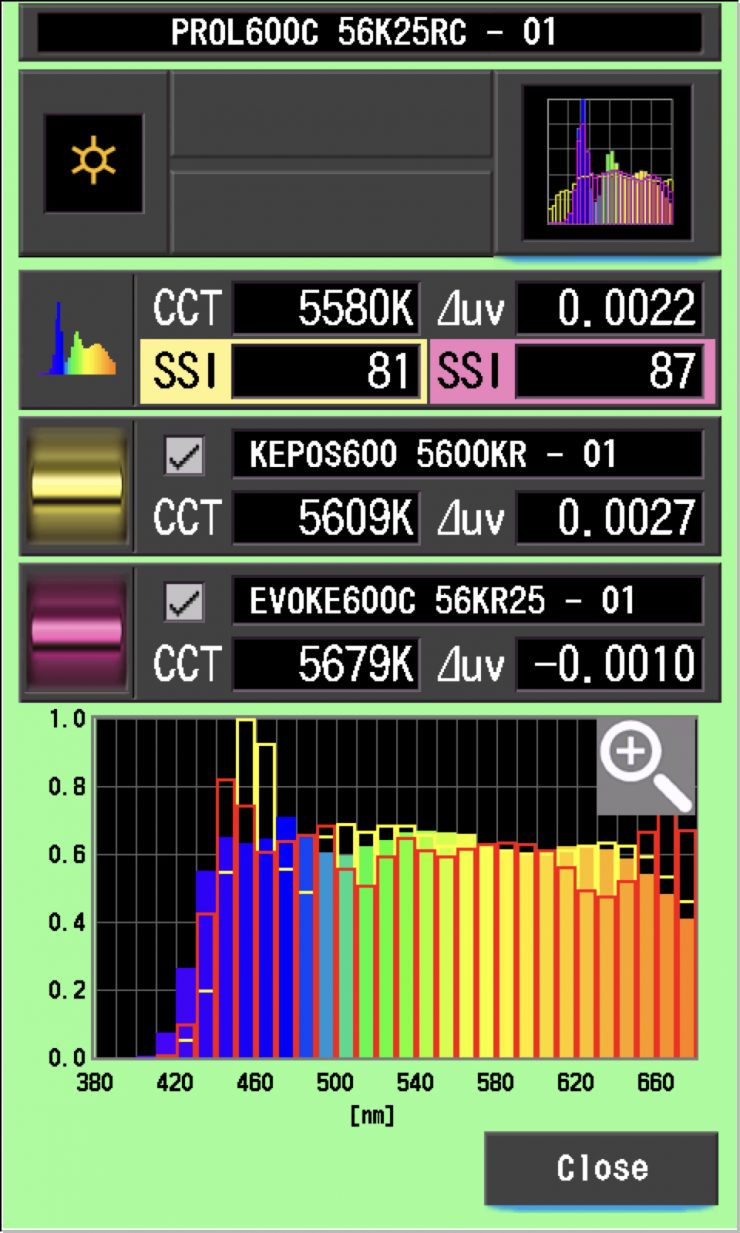
As you can see, neither light is a perfect match to the Profoto L600C. The Profoto L600C was a much closer match to the Evoke 600C than it was to the Kelvin Epos 600.
As another test, I thought I would compare those same lights against the Profoto L600C at 3200K. Below you can see the results.
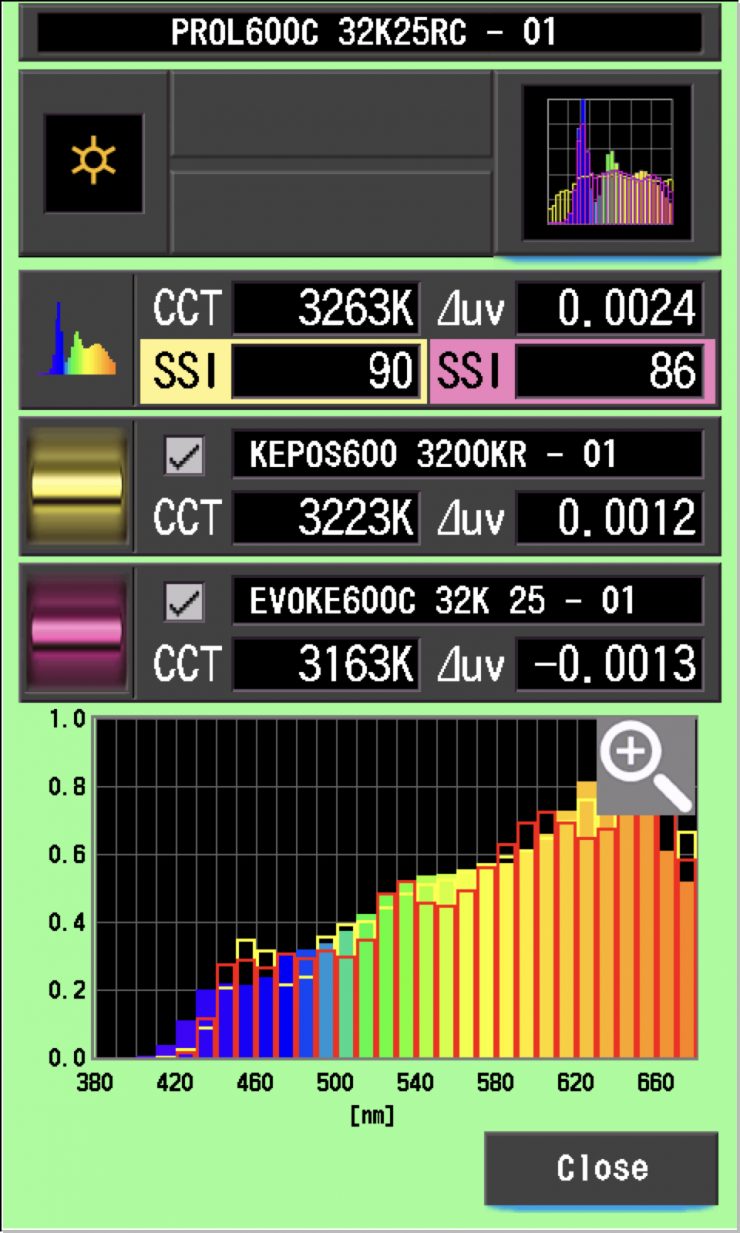
As you can see, at 3200K, the lights were a slightly better match, but again, they weren’t an exact match to the Profoto L600C. In saying that, very few lights from different manufacturers are ever going to be an exact match. What was interesting is that at 3200K, the L600C was a better match to the Kelvin Epos 600.
Okay, so now let’s see how well the Profoto L600C matches itself when used open face and with the Profoto Octa 4′. In theory, these scores should be very high.
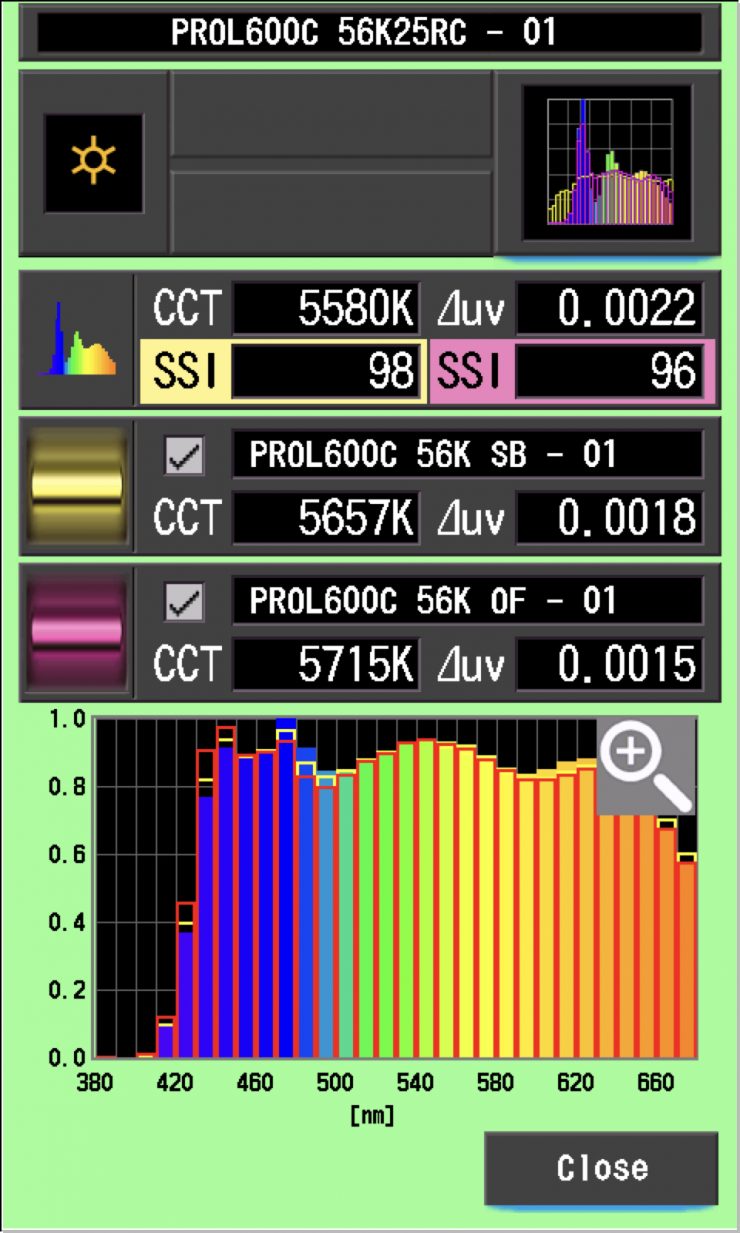
As you can see, the scores were almost a perfect match. This shows that you can use the Profoto modifiers without having to worry that they won’t match.
Again, at 3200K, they were almost a perfect match.
SSI tests are a great way of telling you what lights you own or use will work well together.
Spectral Distribution
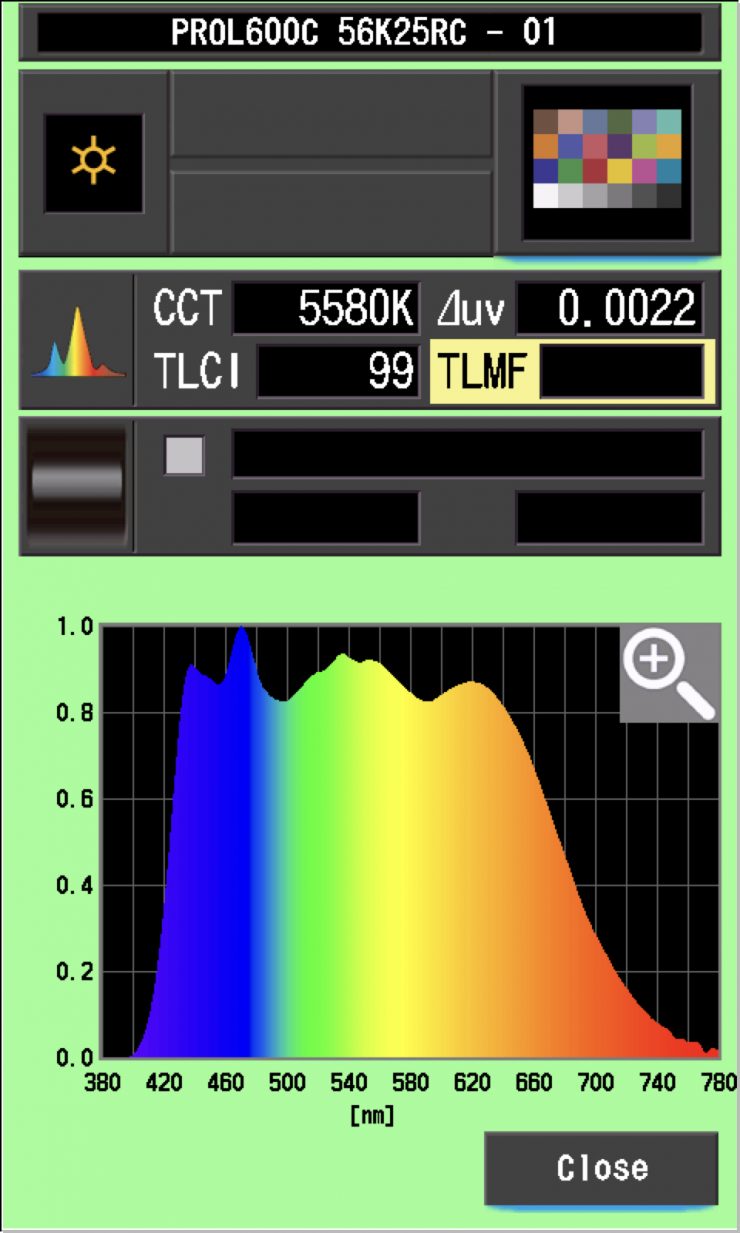
Profoto L600C 5600K
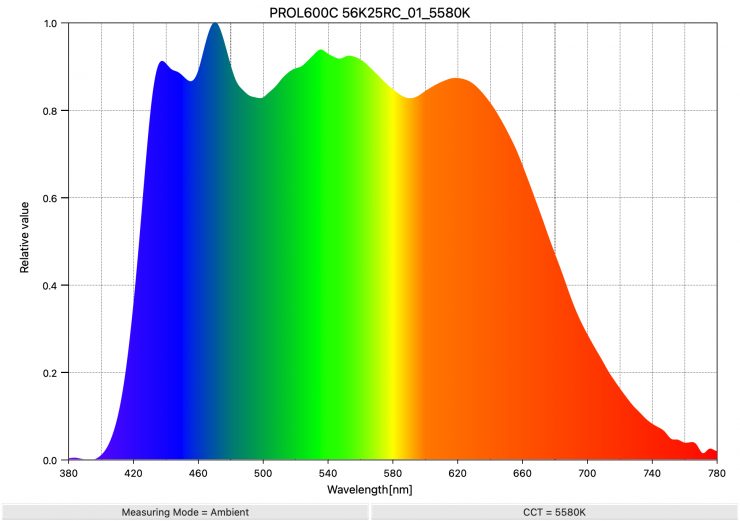
Above, you can see the spectral distribution of the Profoto L600C when it is set at 5600K. The spectral distribution is very, very full, and it has a lot of information from the 420nm to 660 nm range.
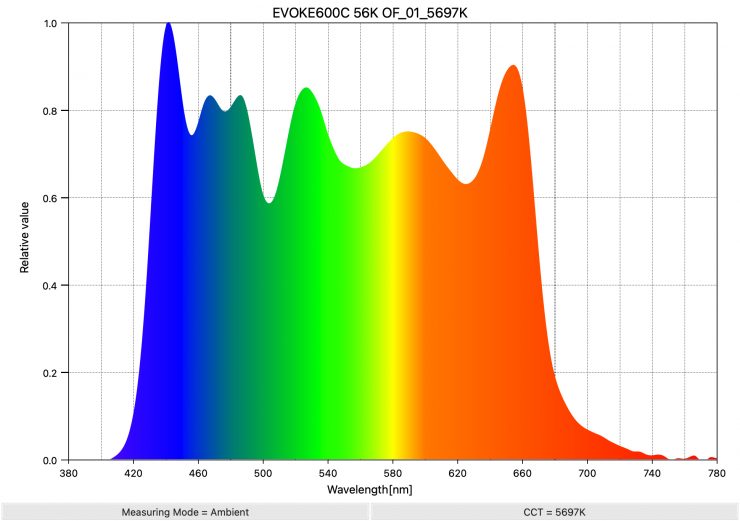
As a comparison, above, you can see the spectral distribution of the NANLUX Evoke 600C when it is set at 5600K. The spectral distribution is very full, and it has a lot of information in the 640 nm to 680 nm range that you don’t see in a lot of competing lights.

As another comparison, above you can see the spectral distribution for the Kelvin Epos 600.
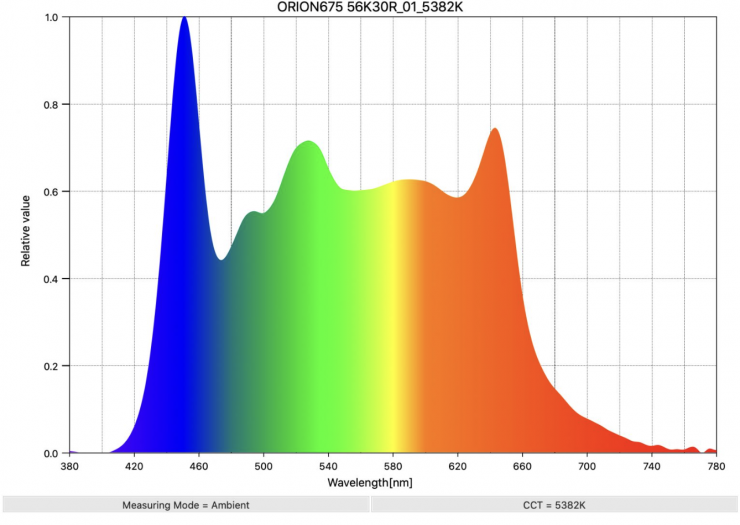
As another comparison, above you can see the spectral distribution of the Prolycht Orion 675 FS when it is set at 5600K
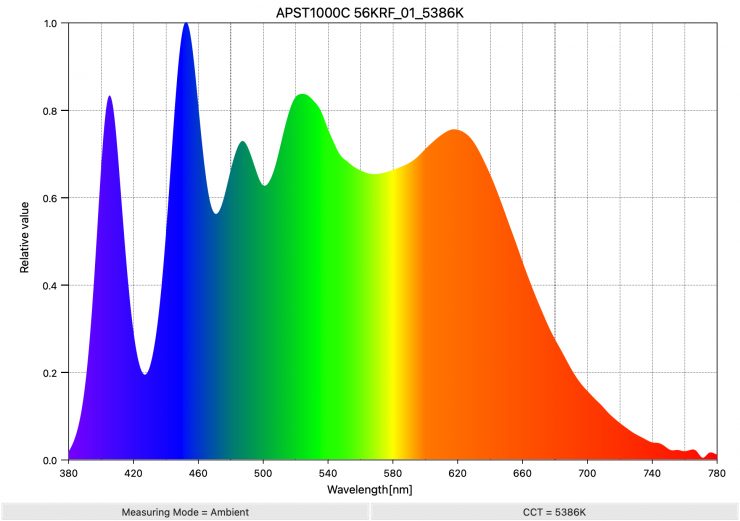
As another comparison, above you can see the spectral distribution of the Aputure STORM 1000c.
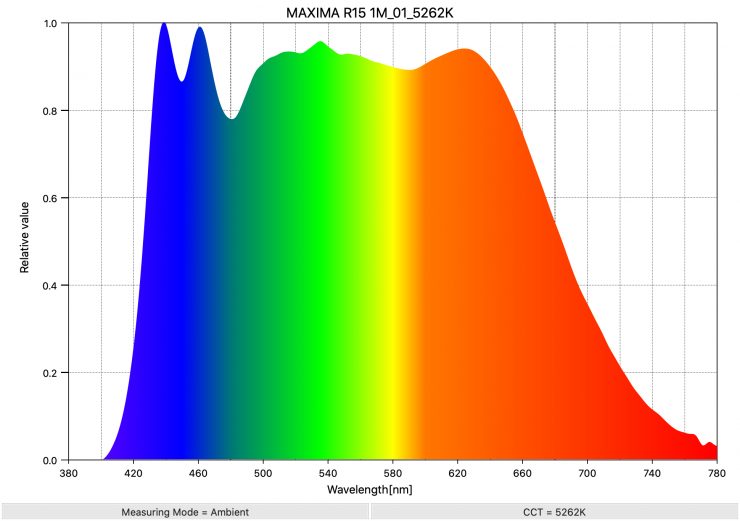
If you want to see what another really good spectral response looks like for a spotlight at 5600K, above is the result for the Maxima 3.
Profoto L600C 3200K
Above, you can see the spectral distribution of the Profoto L600C when it is set at 3200K. The spectral distribution is very linear.
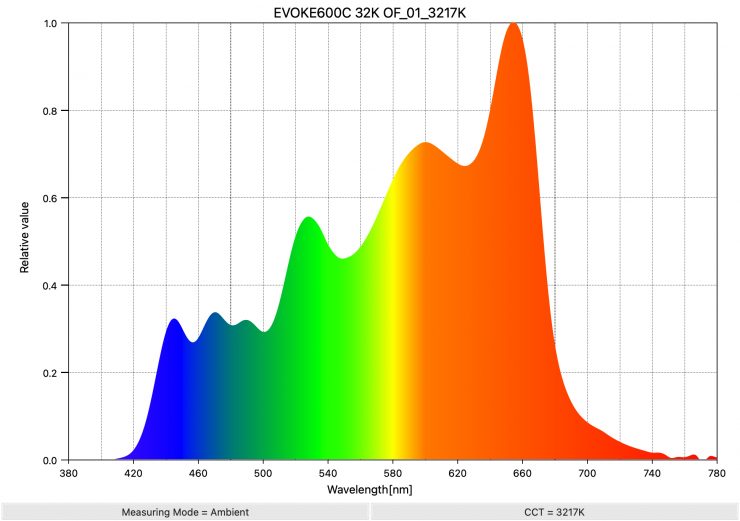
As a comparison, above, you can see the spectral distribution of the Evoke 600C when it is set at 3200K. The spectral distribution isn’t overly linear.
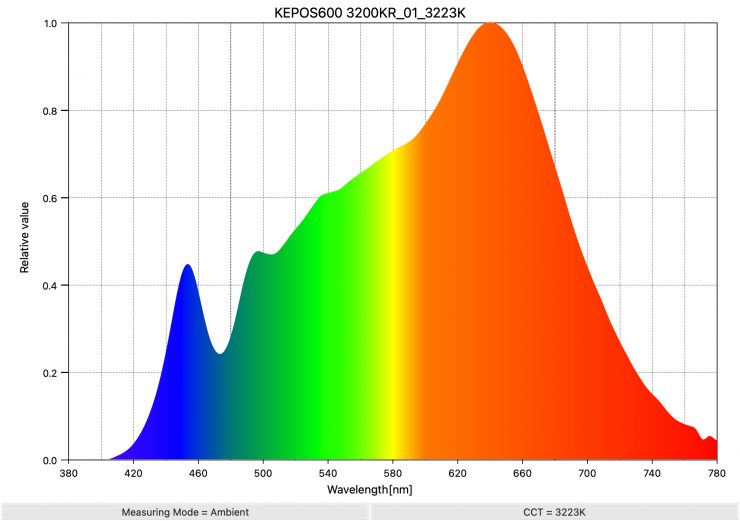
As another comparison, above you can see the spectral distribution for the Kelvin Epos 600.
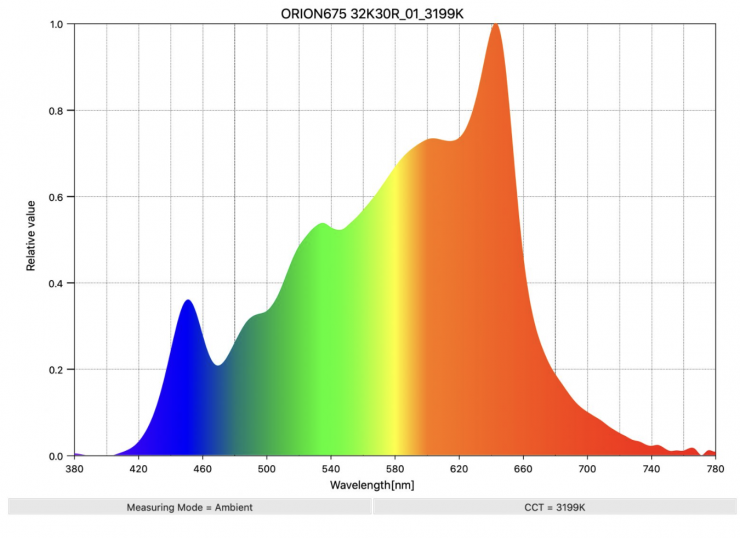
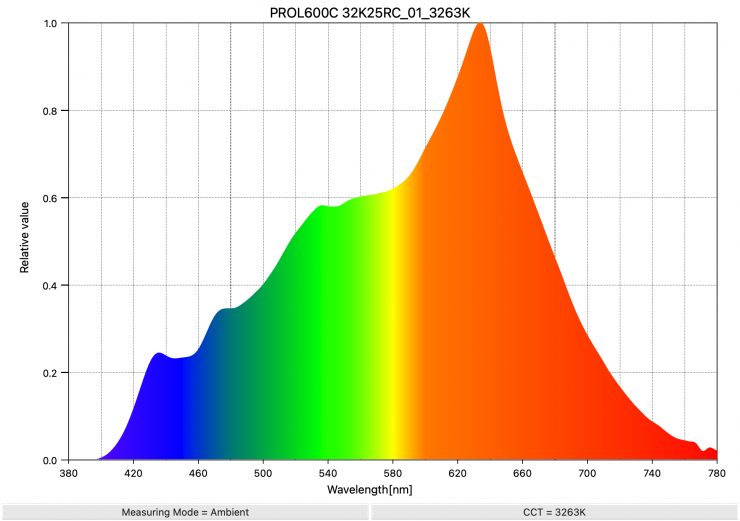
As another comparison, above you can see the spectral distribution of the Prolycht Orion 675 FS when it is set at 3200K
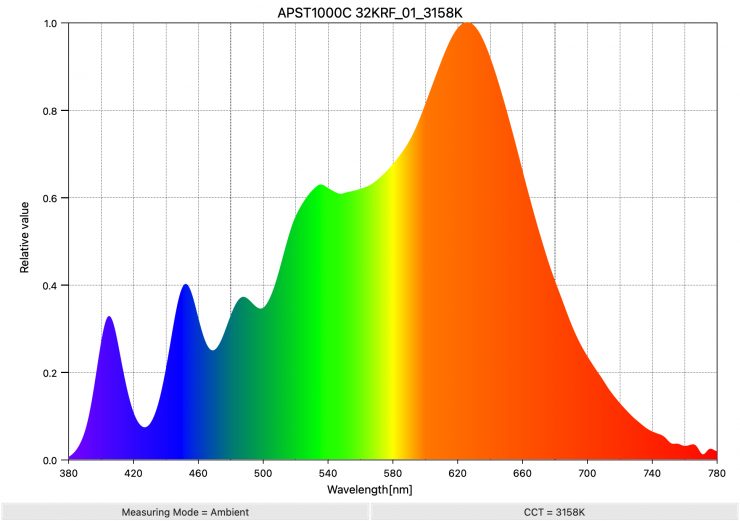
As another comparison, above you can see the spectral distribution of the Aputure STORM 1000c.
Real-World Performance & Quality of Light
As I always say, photometric scores only tell you part of the story. So let’s find out if the scores from the Profoto L600C translate into real world perfromance.
The photometric results can only give me scientific data, and it is much more important for me to see how the light looks and performs, especially with skin tones.
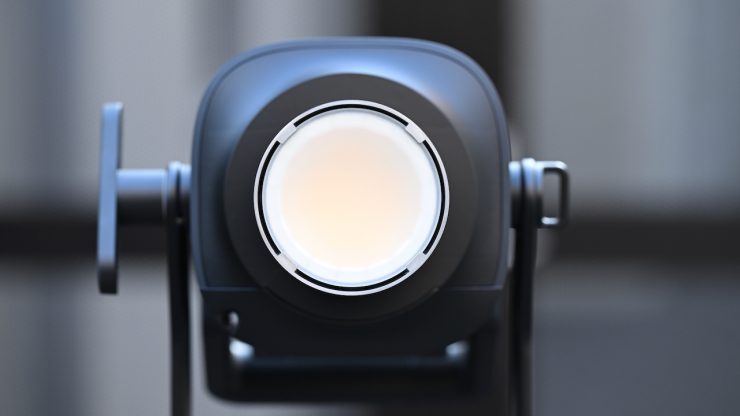
Open Face 
Reflector @25° 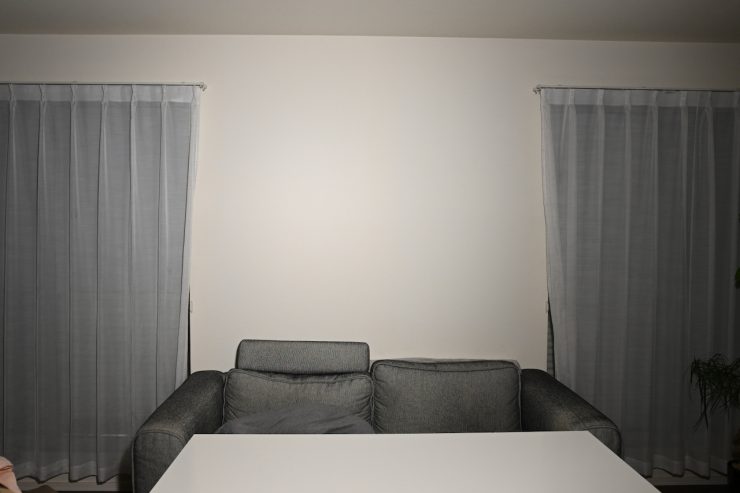
Reflector @ around 45°
Firstly, let’s look at the difference between using it open face and with its optional MaxiZoom Reflector @25°. I have also included a shot with the redflector moved back to its mid position on the L600C. Please note I have adjusted the camera settings for each individual shot.
The beam angle of 65° when the fixture is used open face is actually wider than you would think. Above, the light is at a distance of 3m / 9.9′ from the wall.
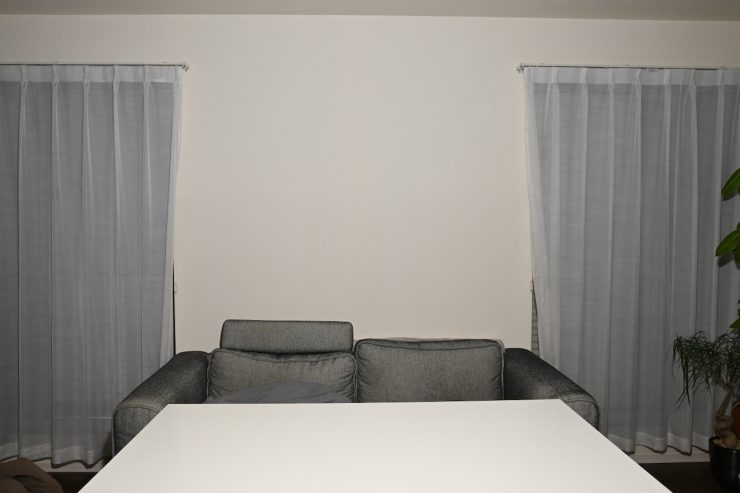
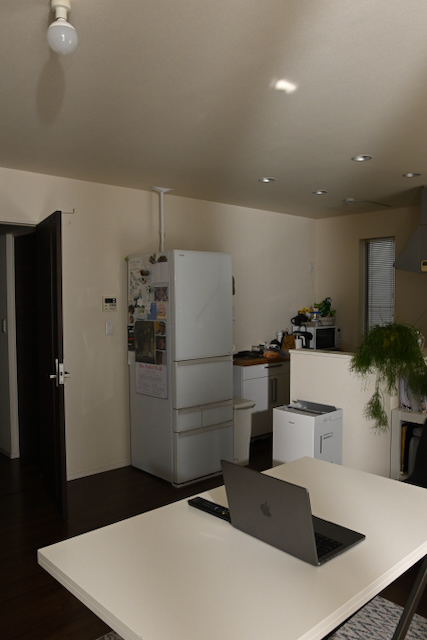
It is very easy to create a very soft, flattering light source using the L600C and the optional Profoto 4′ Octa. It allows you to create a very soft lighting source without needing to punch it through a diffusion screen. This makes it a very quick and easy light to use for interview situations or for any scenario where you need a soft light.


Above, you can see what the light looks like with the optional Profoto Octa Softbox (4′, White Interior) being used. I am not using any other lights or flags, etc., in these examples, and the output level was at 46%.
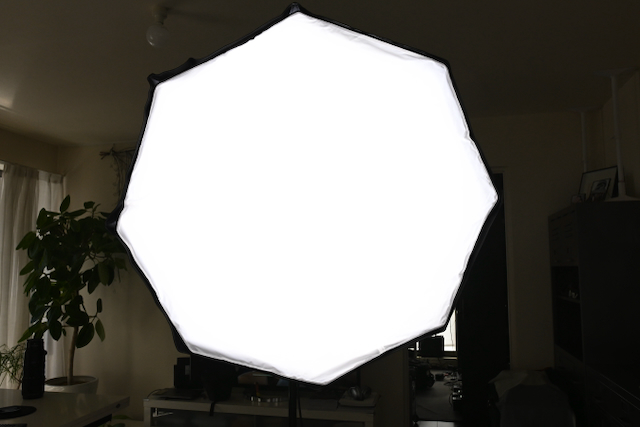
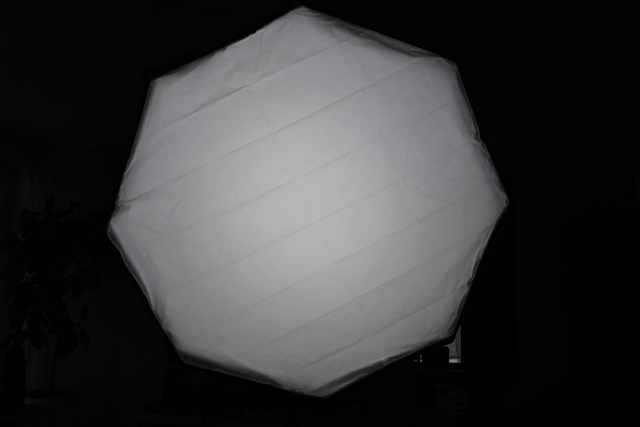
The light does a very good job at filling up a large softbox, even though the beam angle is only 65 degrees. For some reason, the design of the light means that the illumination seems to spread out further than other comparable point source fixtures with a similar beam angle.
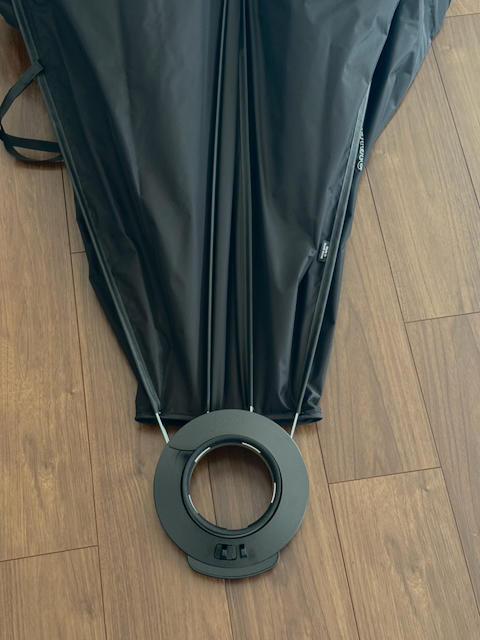
The Profoto Octa Softbox (4′, White Interior) folds flat and is super quick to set up and use.
It also works well when you punch the light through a large diffusion screen or into some polyboard.
Open Face 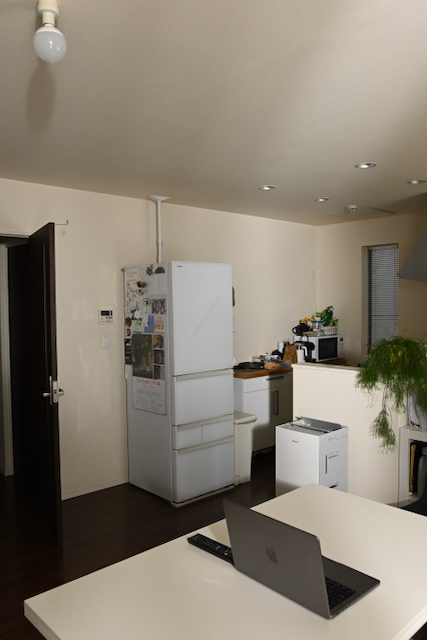
25 Degree Reflector. 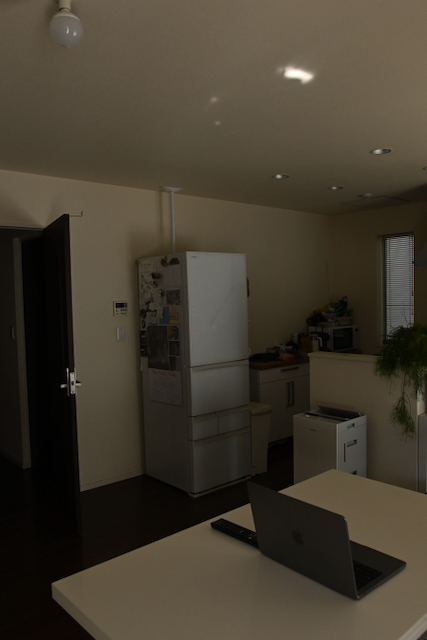
Light Off 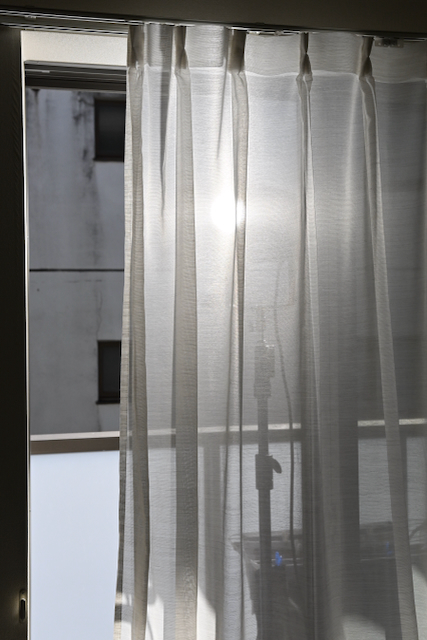
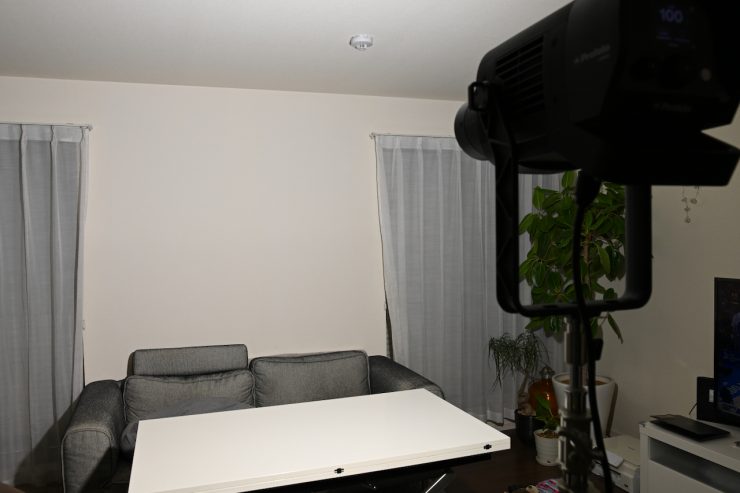
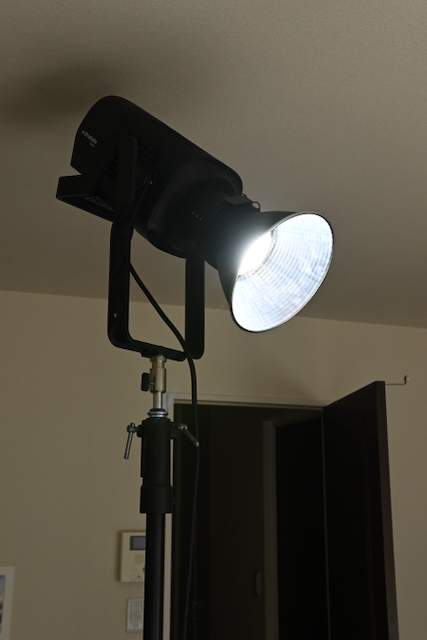
Light position
Above, you can see comparison images showing the light when used open face and with its 25 Degree Reflector. The fixture was positioned outside and punched through a sheer. I have kept the camera settings the same for all of these tests.
Above, you can see what the light looks like with its 25 Degree Reflector being punched directly down into a table.
Position of light 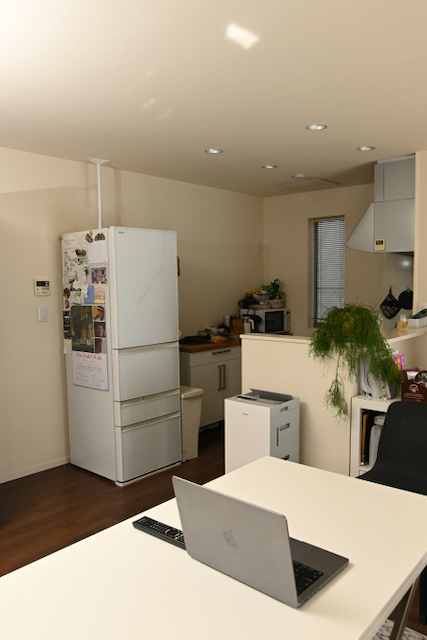
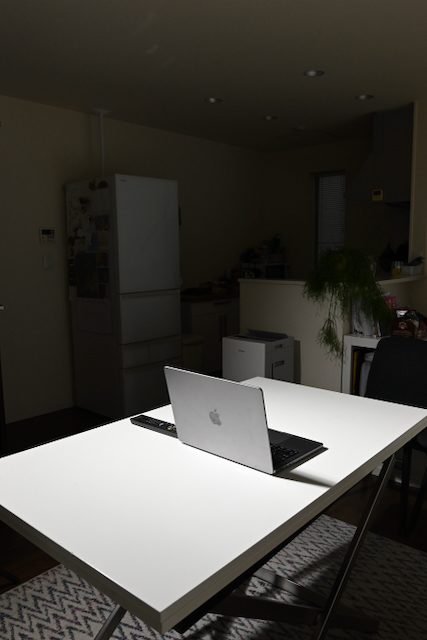
Light On 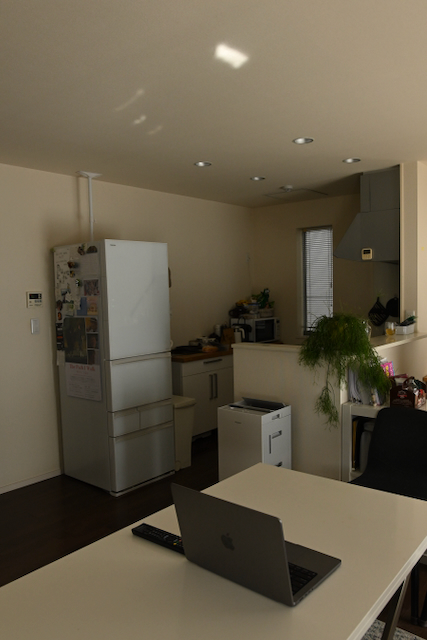
Light Off
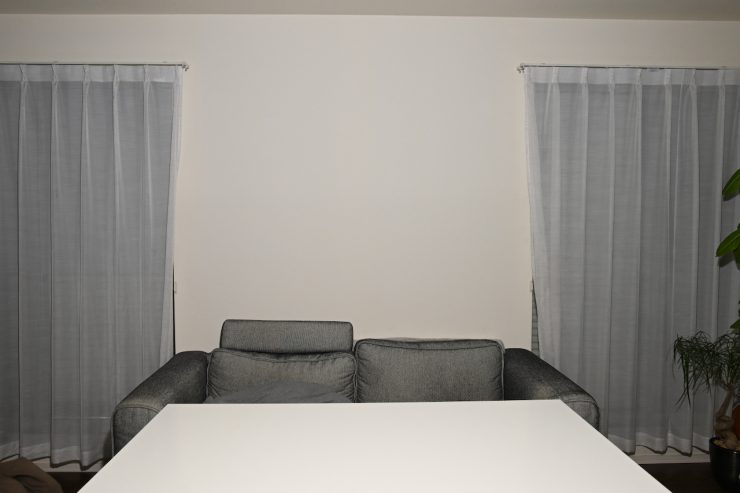
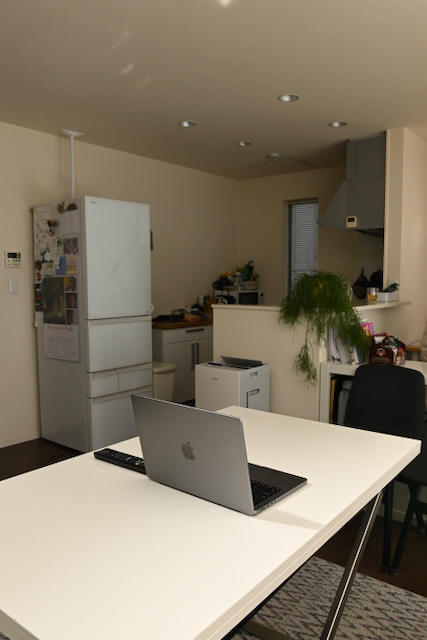
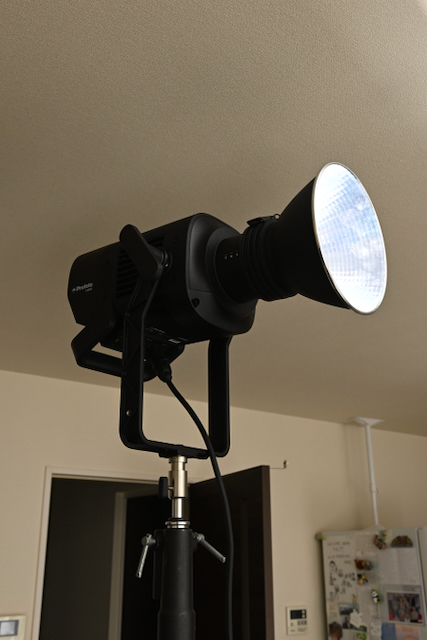
Above you can see what the light looks like when used open face and punched into the ceiling.
Above, you can see what the light looks like with its 25 Degree Reflector being punched into a wall to create an indirect light source.
Air Flash Mode

L600C continous lighting mode with softbox F8, ISO 400 1/50th 
L600C in Air Flash Standbye Mode with softbox F4, ISO 400, 1/50th 
L600C using Air Flash mode with softbox F4, ISO 400 1/200th 
Profoto B10 Monoblock Flash with softbox F22, ISO 400 1/200th
Above, you can see comparison images between using the L600C with the Octa 4′ softbox in the AirFlash Standby Mode, the L600C with the Octa 4′ softbox using the AirFlash Mode, and when using the Profoto B10 Monoblock Flash with the Octa 4′ softbox.
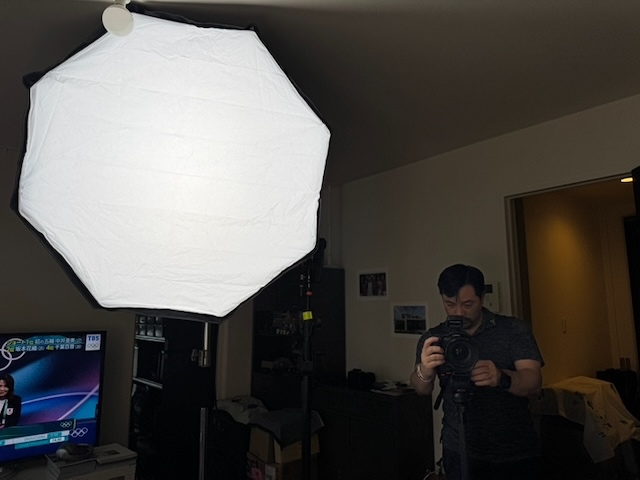
All the images were taken at the same distance from the subject. The light was positioned 2m away.

From my testing, I found that when using the Air Flash mode, it doesn’t provide any more illumination than just using the continuous light by itself.
While it is a handy feature if you are doing multimedia work, it isn’t going to be nearly as bright as a dedicated flash.
Fresnel Zoom
Profoto showed an upcoming Fresnel Zoom for the L600C back at IBC 2025.
The new Pro Fresnel Zoom will work with both the L600C and the L1600D. It provides a 14-40 degree range.
Who is the Profoto L600C aimed at?
Just like most point-source LED lights with this type of power draw, you could use the Profoto L600C for lots of different applications, but the light is certainly being aimed as a versatile, high-output, well-made, and lightweight lighting fixture for professionals in the TV and film industry.
It is priced to appeal to mid to high-end owner-operators who are looking for a jack-of-all-trades lighting solution, especially those who may be doing both stills and video. It is also likely to appeal to rental houses that may already have a large array of Profoto modifiers.
Just like most modern-day LED spotlights, the Profoto L600C has the ability to be a hard light source or a soft source, depending on what lighting modifiers you use it with.
Is the Profoto L600C likely to appeal to solo shooters and small crews who are looking for a similar light to say an Aputure LS 600c Pro II or a NANLUX Evoke 600C? That is hard to say because it does cost considerably more, but some users may value the smaller size and weight if they travel a lot.
Price & Availability
The Profoto L600C retails for $3,995 USD. This does make it considerably more expensive than a lot of other competing fixtures that could be considered competition.
Below you can see how the price compares to some of the competition:
| | Price |
| Profoto L600C | $3,995 USD |
| NANLUX Evoke 600C | $2,060 USD |
| Aputure STORM 700x | $1,690 USD |
| Kelvin Epos 600 | $2,999 USD |
| Aputure LS 600c Pro II | $1,490 USD |
| Aputure LS 600d Daylight LED Monolight | $872 USD* |
| Aputure STORM 400x | $1,059 USD |
| Aputure STORM 1000c | $2,990 USD |
| Nanlite Forza 720B | $1,519 USD* |
| Aputure LS 600x Pro Light Storm | $1,393 USD |
| Nanlite FC500C | $719.20 USD |
| Nanlite FC720C | $599.20 USD |
| Godox LITEMONS LA600R | $919 USD |
| amaran Ray 660c | $699 USD |
| HIVE LIGHTING Super Hornet 575-C | $5,999 USD |
| COLBOR CL600R | $1,999 USD |
*Currently on sale at B&H as of the 6/03/2026
Conclusion
While it might have a high price tag, there is no denying that the Profoto L600C is a very impressive fixture. It has outstanding photometric performance, it is very lightweight and compact compared to other competing fixtures, and it is well-made and easy to use. There are a lot of Profoto lighting accessories and lighting modifiers available, which means you can use the fixture for a lot of different applications.
The Profoto Core-6 LED light engine is very impressive, and it delivers excellent results. The color accuracy is some of the best I have seen from any LED spotlight. Its extended CRI score when used at 5600K was the highest I have ever seen from any light.
My biggest takeaway from reviewing the L600C is the low weight and compact size. The fixture comes in a very small case, and it is very easy to carry and transport. A lot of the competing fixtures take up way more space and weigh considerably more.
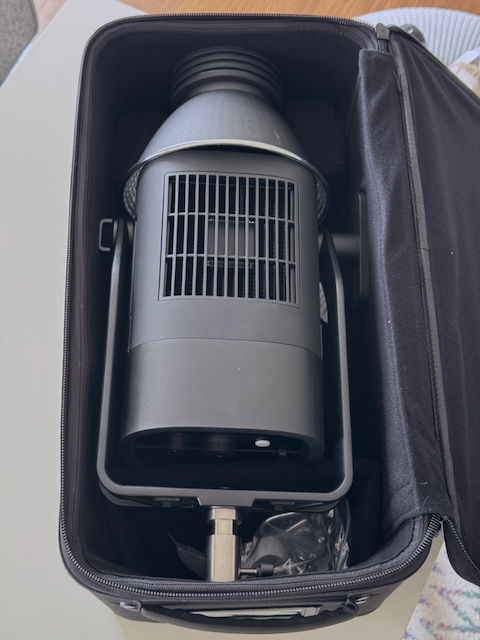
You can also put the optional MaxiZoom Reflector inside the case, which is very handy, and it saves space.
The interface and operating system are pretty easy to use, as is the app. The app is fairly basic, but it is very responsive, and it auto-connects as soon as the light comes on, which saves a lot of time.
The light is also extremely quiet, and there is only noise when you have it set at Max output and are using it at 100% output. In most operating modes, you would struggle to hear anything.
What some users may find disappointing is that if you want to run the light remotely without mains power, then you will need to use a 48V solution. This arguably puts it at a disadvantage if that is one of the things you are looking for in a light. In saying that, with so many affordable portable battery solutions now available from companies such as Ecoflow and BLUETTI, etc, maybe it’s not as big of a deal as it used to be.
The light has a decent amount of output, but it isn’t going to have the punch of something like the NANLUX Evoke 600C.
At least in my opinion, if you are looking for a 600W full color fixture and you have a high budget, then the three best options on the market are the Profoto L600C, NANLUX Evoke 600C, and the Kelvin Epos 600. Where NANLUX has the advantage is that they have a complete ecosystem of lighting products. The Aputure STORM 700x, despite not technically being a full color fixture, is also a light that is going to provide fierce competition.
The biggest caveat of the L600C is the price, as it is basically twice the cost of a NANLUX 600C. Even the larger and more powerful Aputure STORM 1000c was recently reduced to $2,995 USD. This makes the L600C a hard sell despite its outstanding photometric performance and compact size. Price is, of course realtive and it depends on your needs and budget as to what works for your individual requirements.
If you are doing a lot of stills and video work, then the L600C makes a lot of sense given its heritage and capabilities, if you already own Profoto flashes and modifiers.
If you don’t need all of the bells and whistles and build quality that come with a light like this, then you may well find that lower-priced options from other companies may be a better option. If, however, you are looking for a no-compromise full color COB fixture with great build quality and uncompromising performance, the Profoto L600C ticks a ton of boxes.
The Profoto L600C is an outstanding fixture, and it is one of the best-performing lights I have ever reviewed.