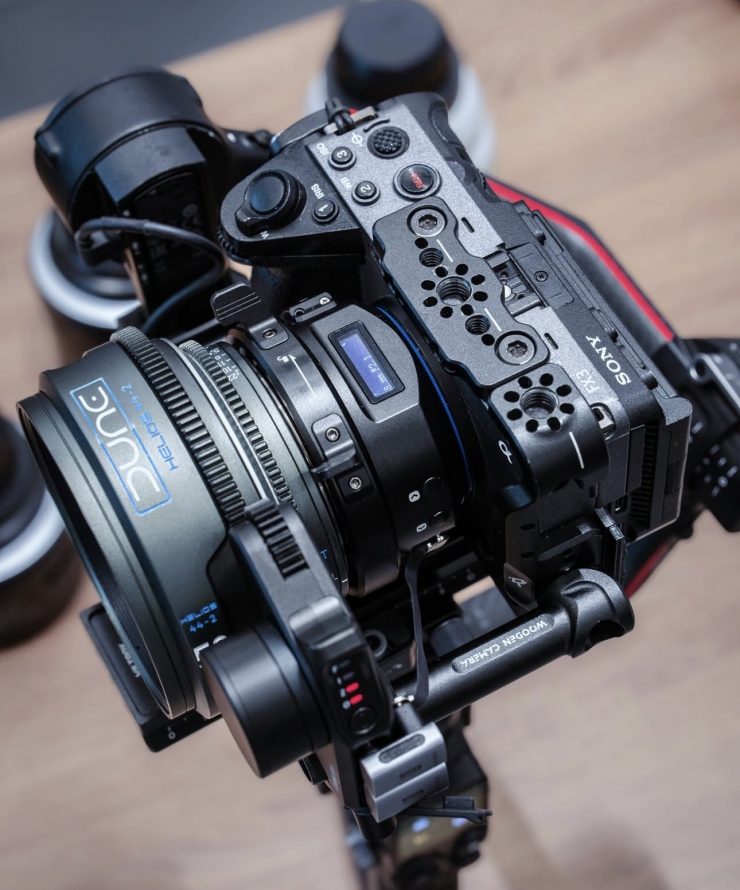
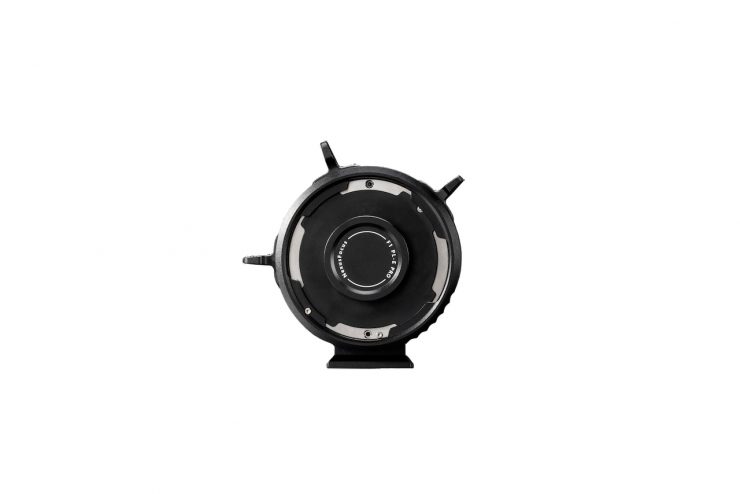
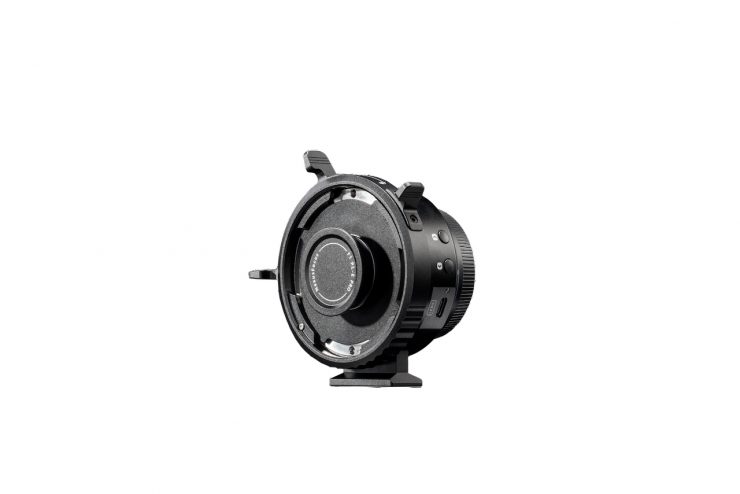
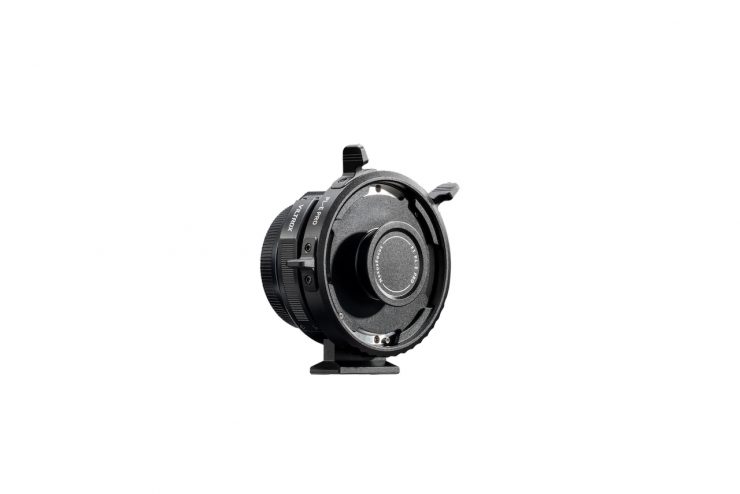
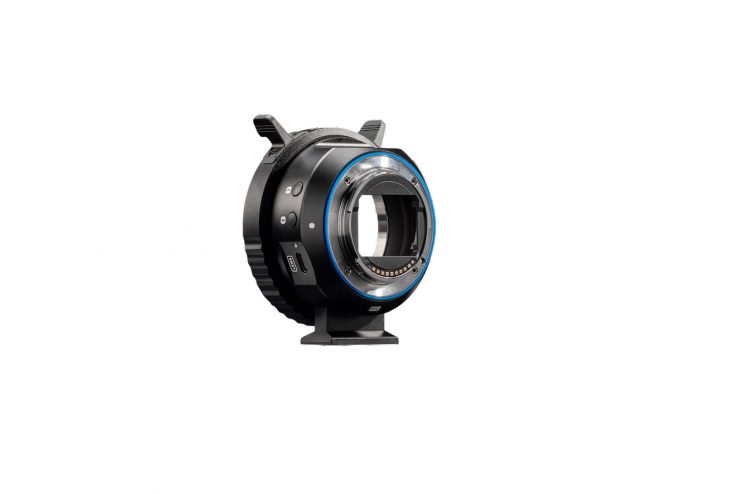
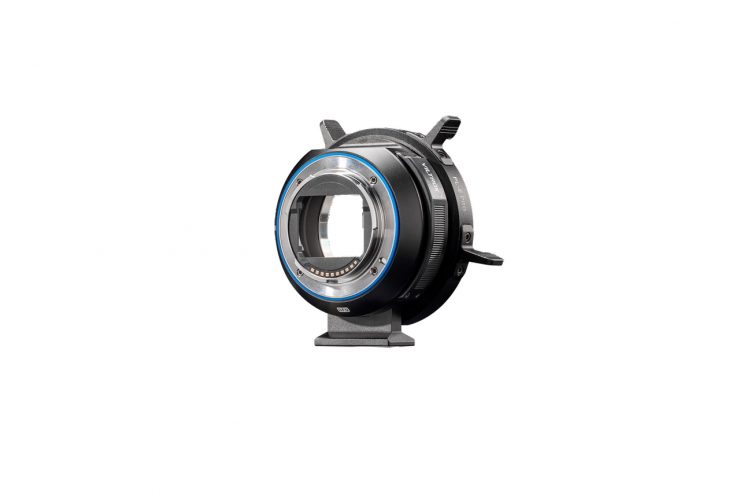
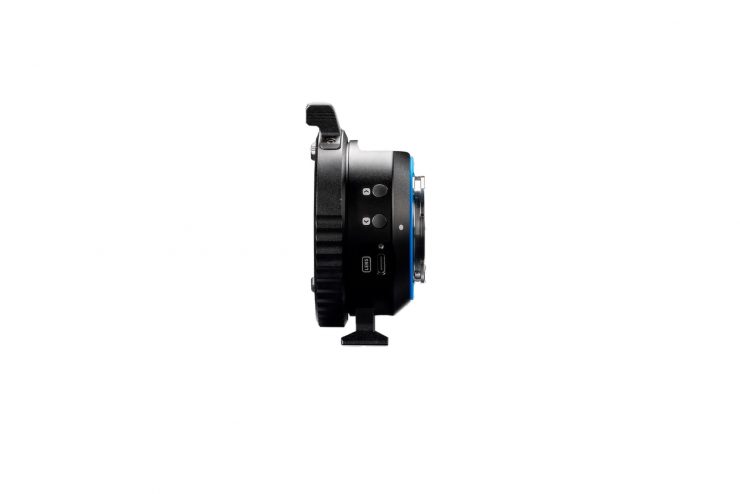
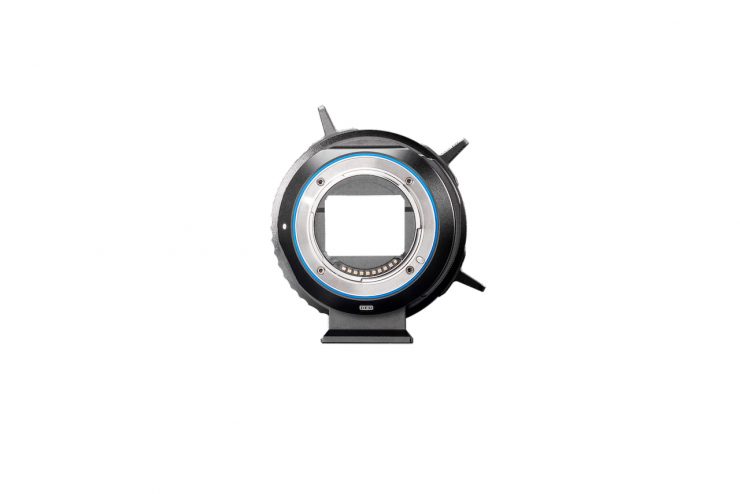
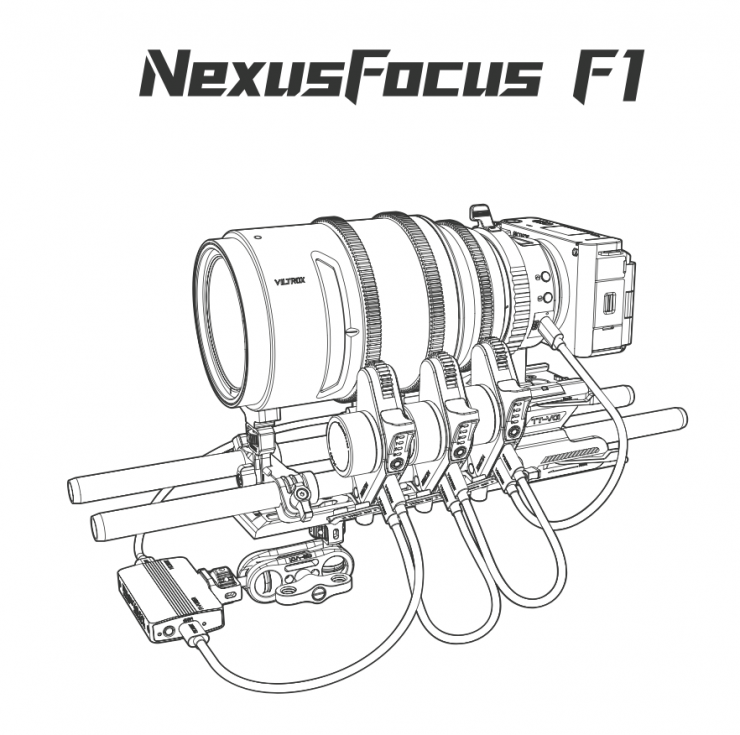
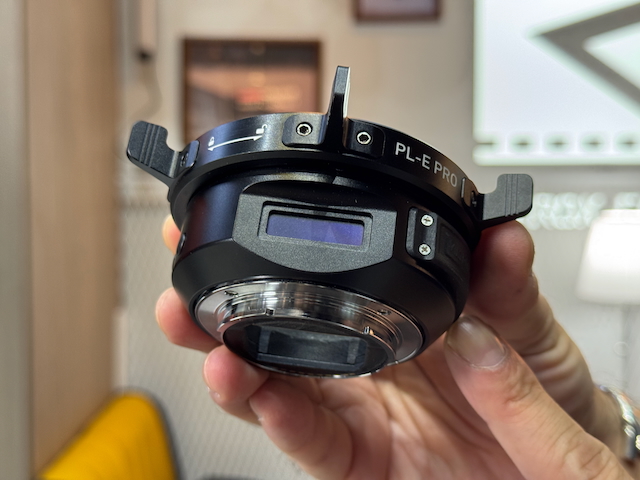
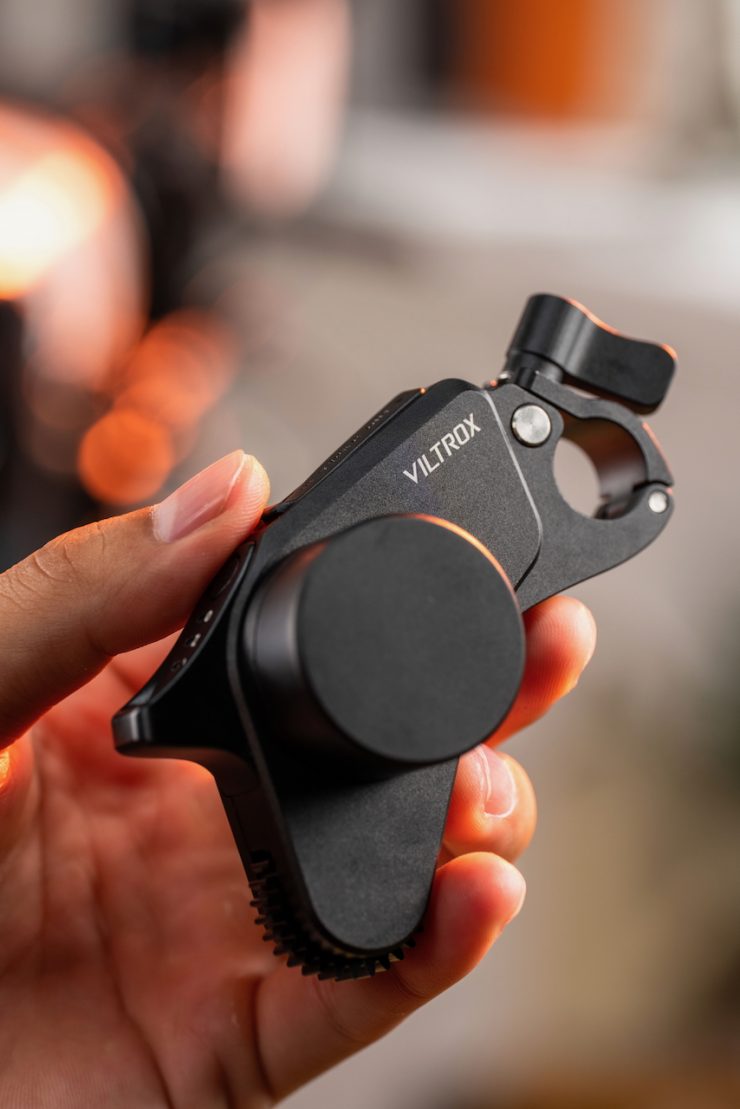
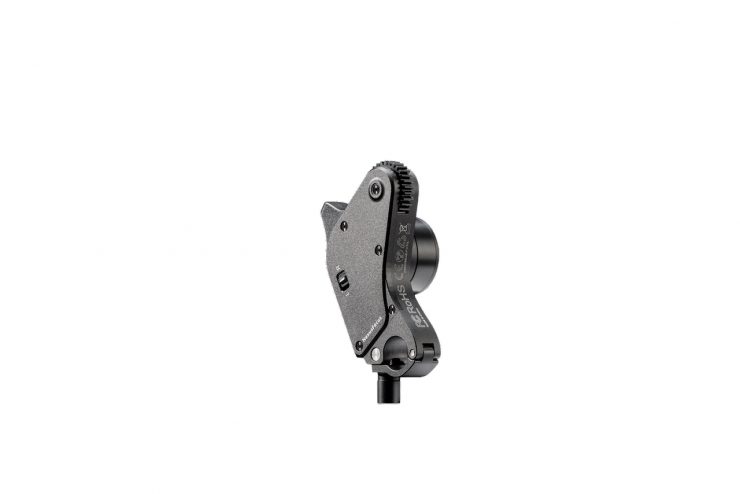
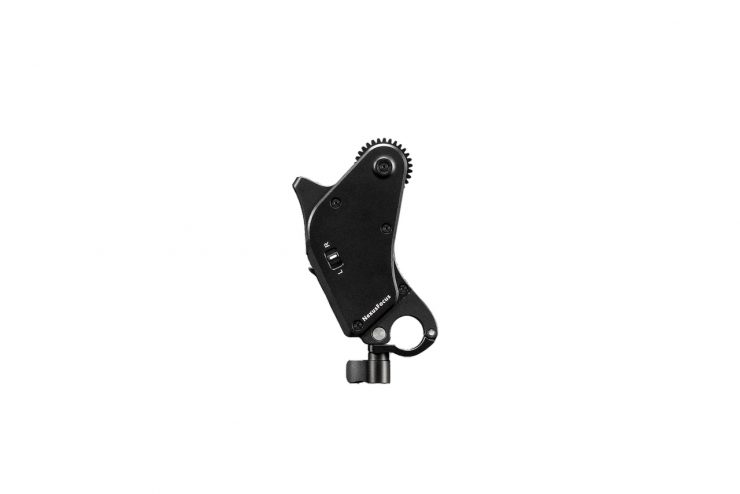
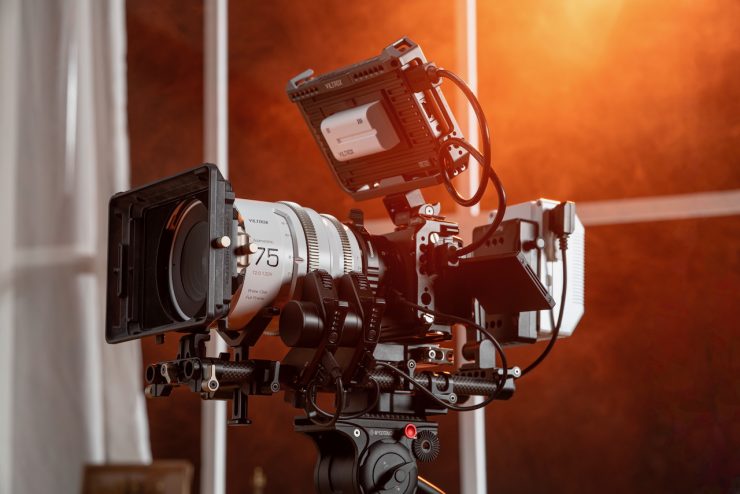
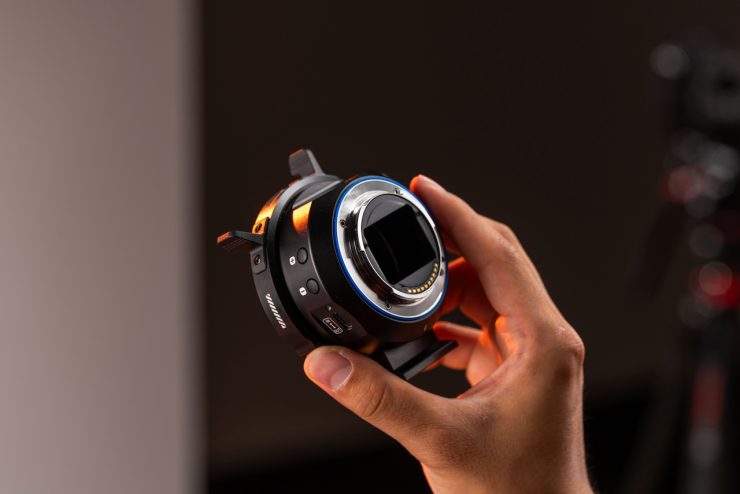
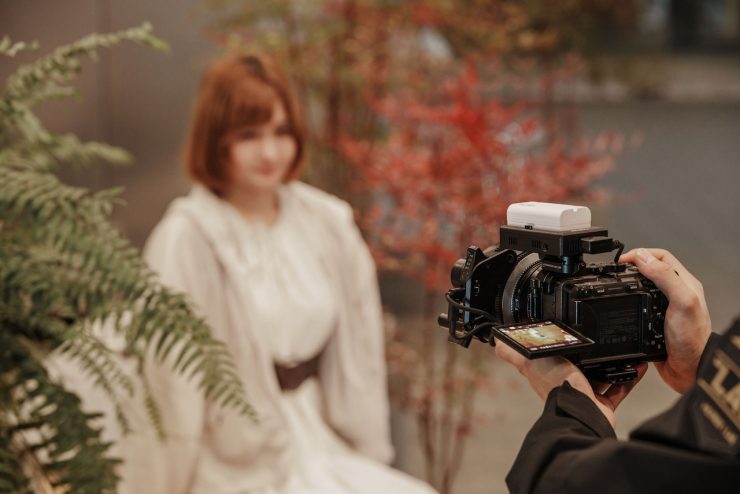
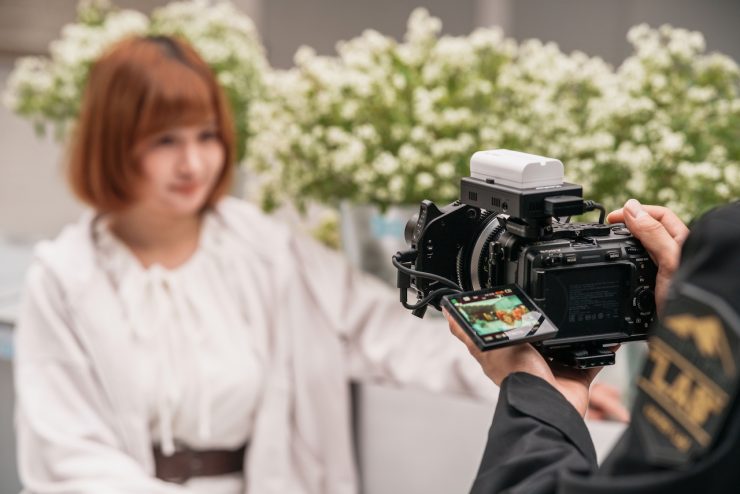
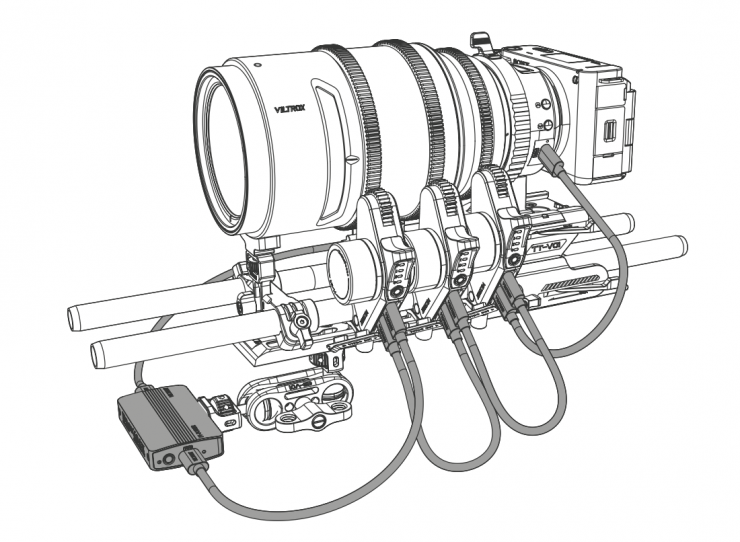
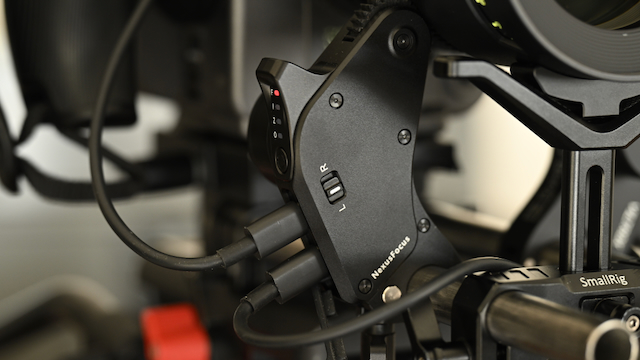
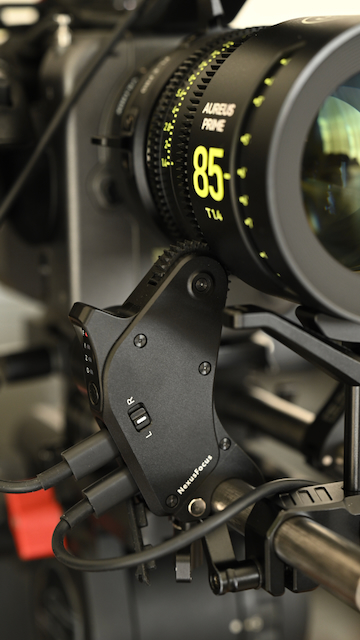
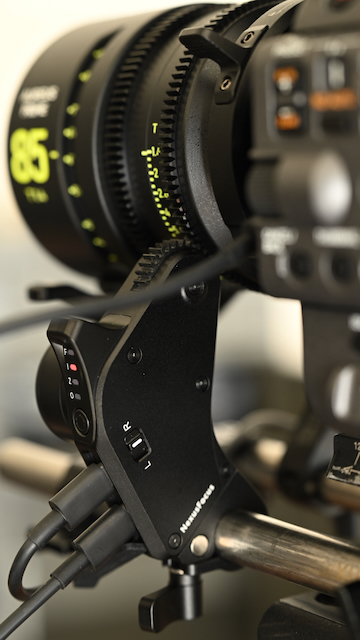
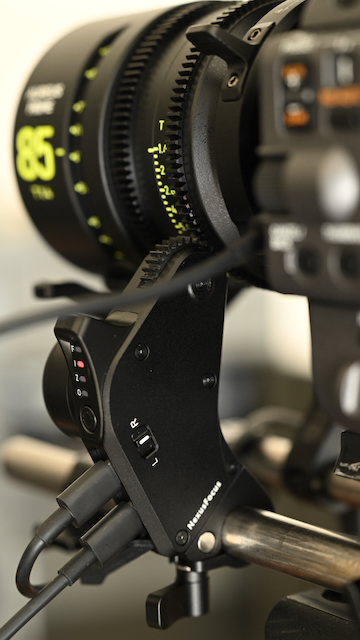
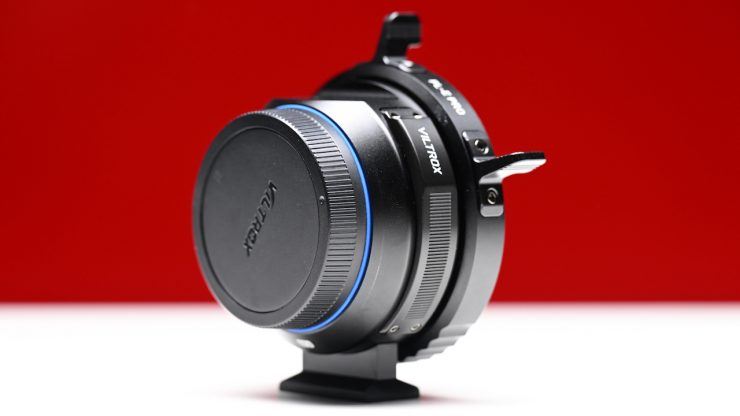
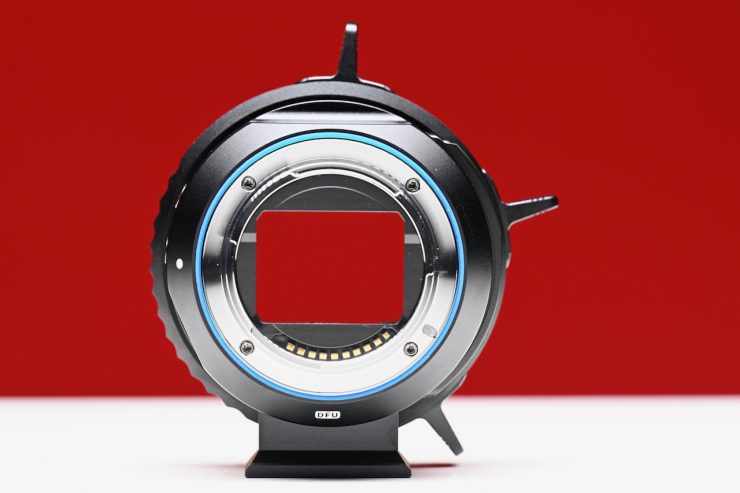
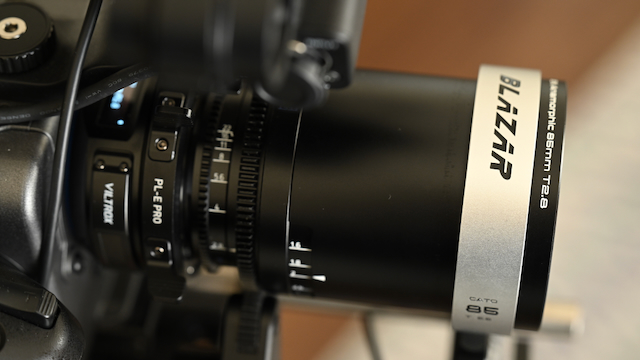
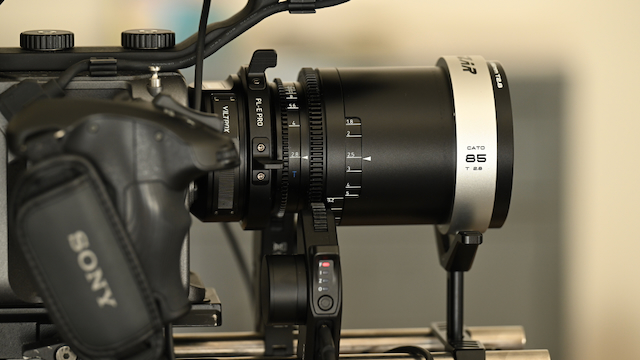
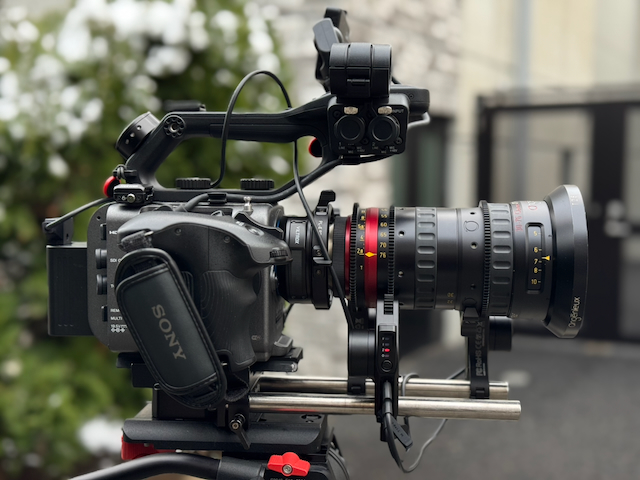
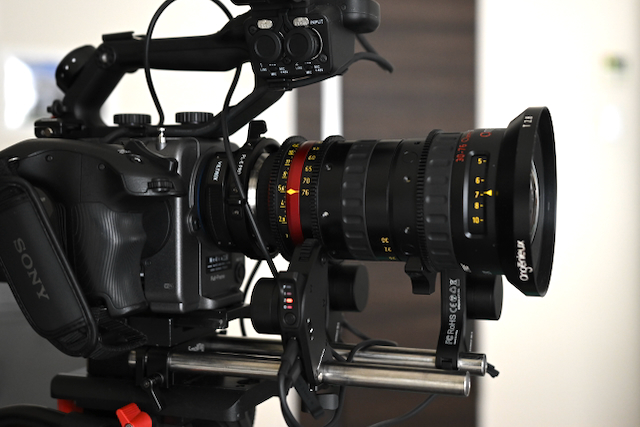
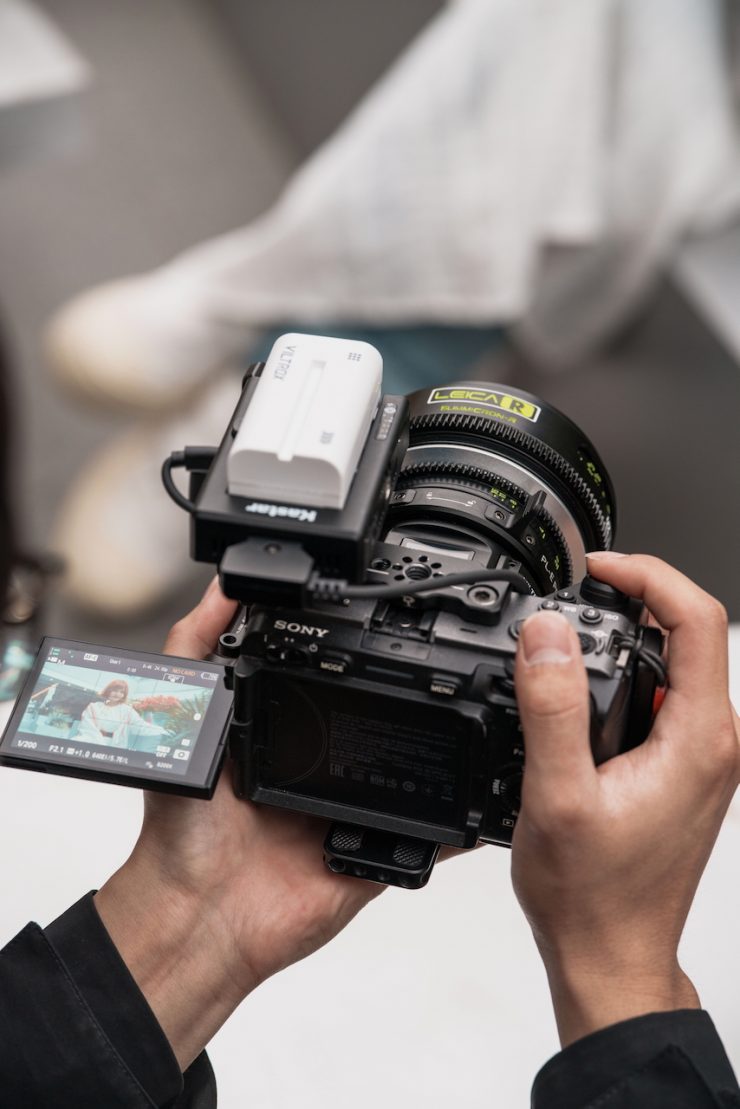
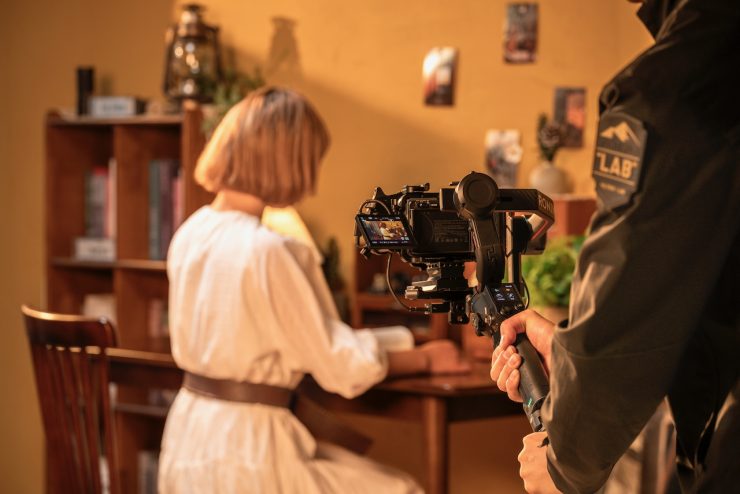
The Viltrox NexusFocus F1 PL to Sony E-mount adapter, which allows manual PL cine lenses to behave as AF lenses, is arguably one of the most anticipated products of 2026.


According to Viltrox, the NexusFocus F1 adapter with AI Autofocus (PL-E) acts as a ‘translator’ between past and future. It brings native autofocus to manual lenses, giving vintage lens enthusiasts, solo operators, and small TVC crews greater flexibility in how they work.
Unlike common LiDAR solutions, the Viltrox NexusFocus adapter leverages the camera’s native autofocus system to drive lens focus, aperture, and zoom adjustments.
We first saw a prototype of this product being shown at IBC 2025 in Amsterdam last year. Sometimes a product comes along that really stands out, and the Viltrox NexusFocus F1 was one of the most interesting pieces of kit I saw in 2025.
Through the lens adapter mount, Viltrox motors can receive and translate that autofocus information directly from the camera sensor.
Essentially, when you touch the back LCD screen on the camera, the AF system sends the same information to the lens motors as it would to a native E-mount AF lens. This allows for full AF tracking, eye detection, etc. As it is deeply integrated with Sony’s powerful PDAF and AI subject recognition, NexusFocus F1 can provide instant, reliable, and smooth focus performance. Meanwhile, native touch-focus control on the camera delivers a smoother, more intuitive workflow.
This is a very clever solution, which, in my opinion, is easier to use than something like the LiDAR-based DJI Focus Pro. What you need to clearly remember is that a LiDAR-based system has the advantage that it can be used with any camera, including digital cinema cameras that don’t feature AF.
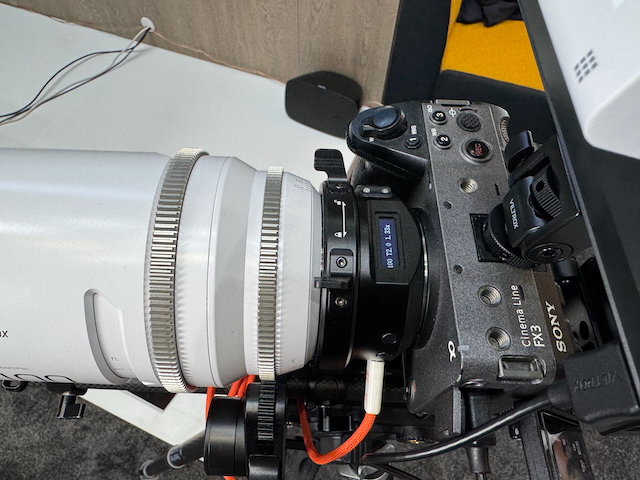

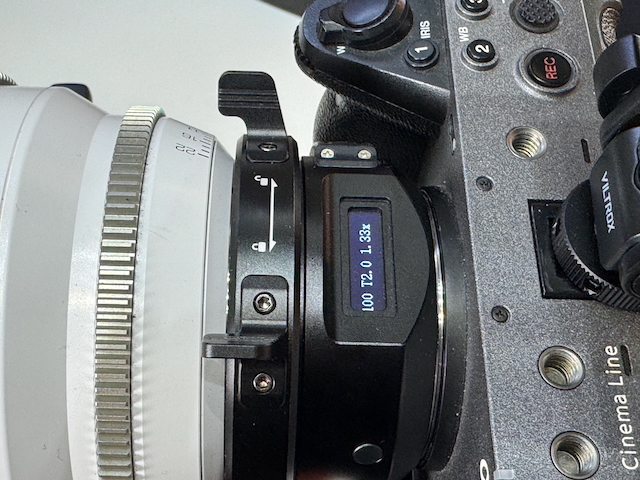
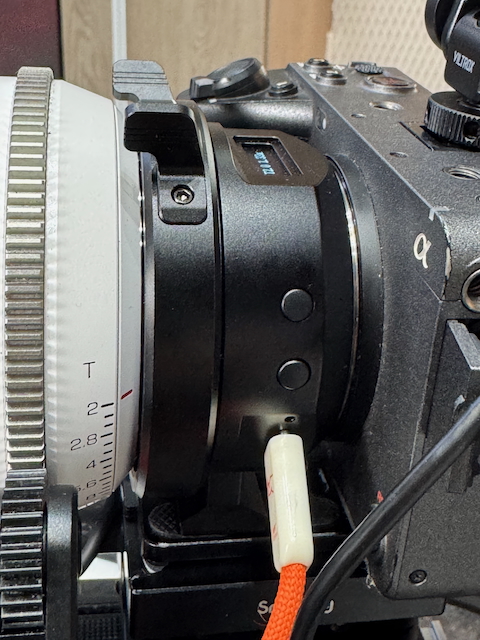
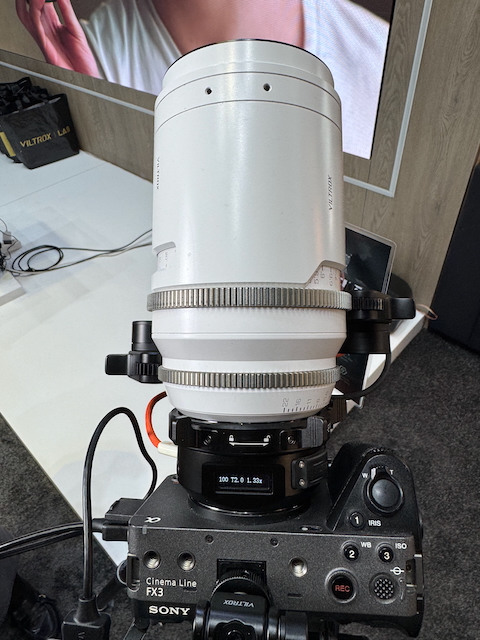

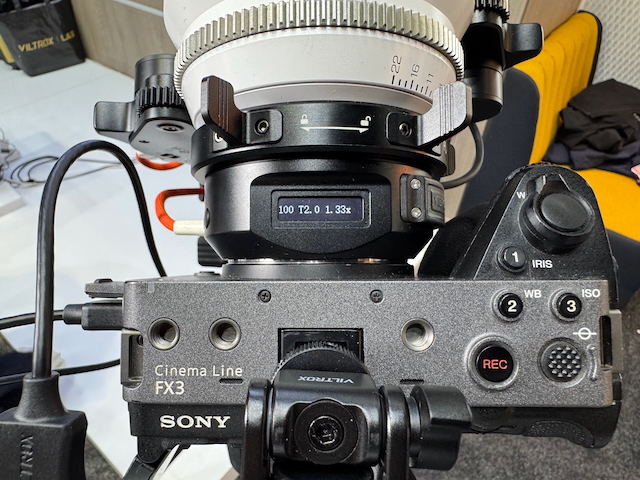
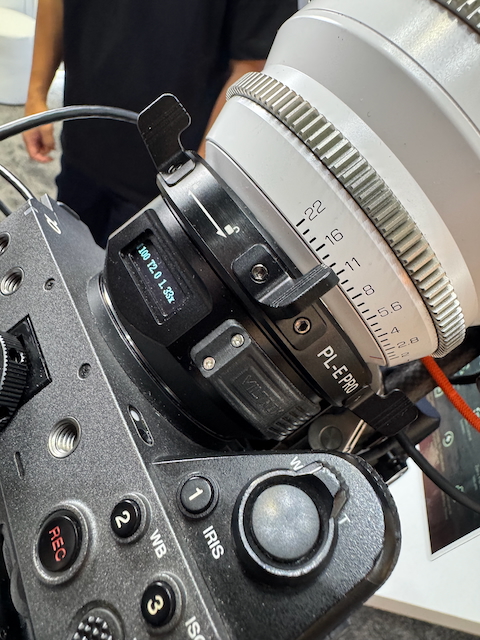


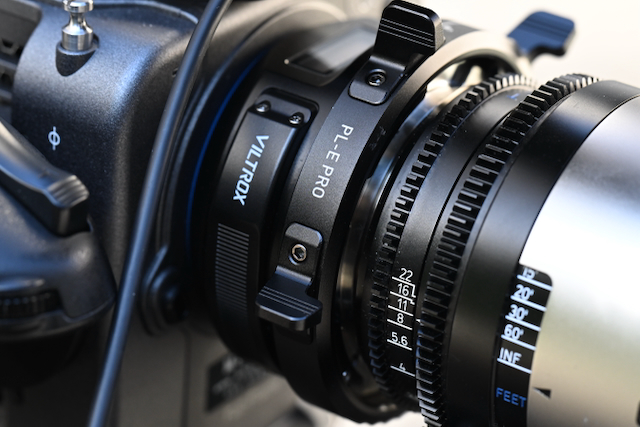
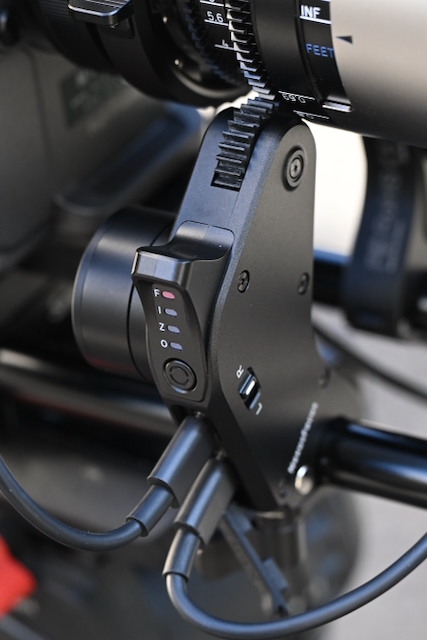
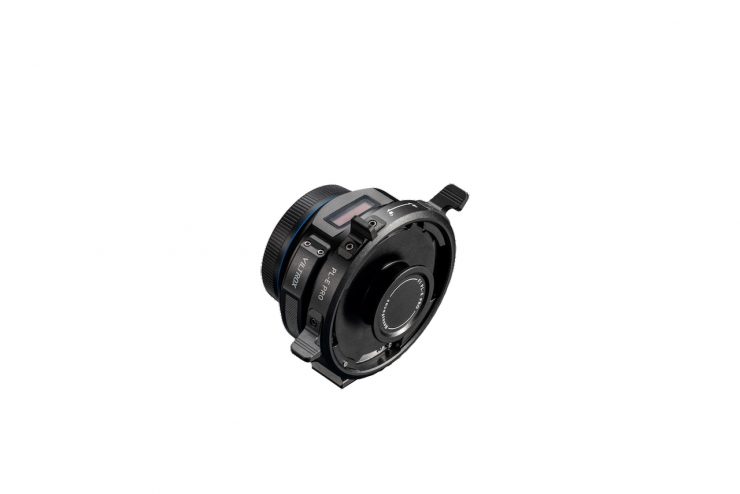
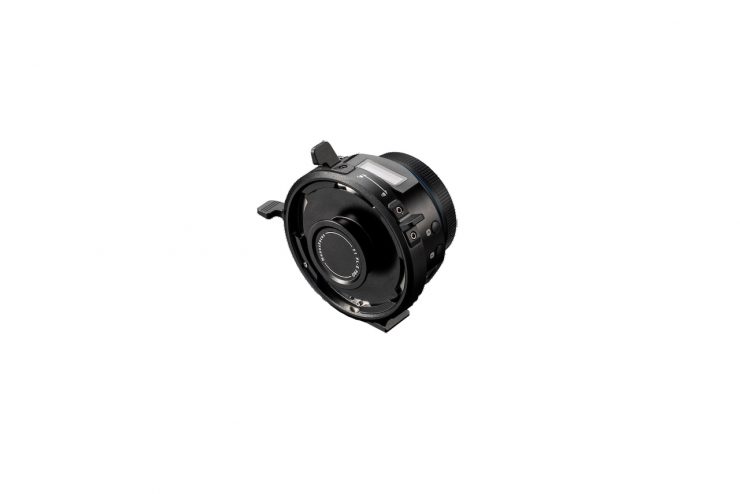
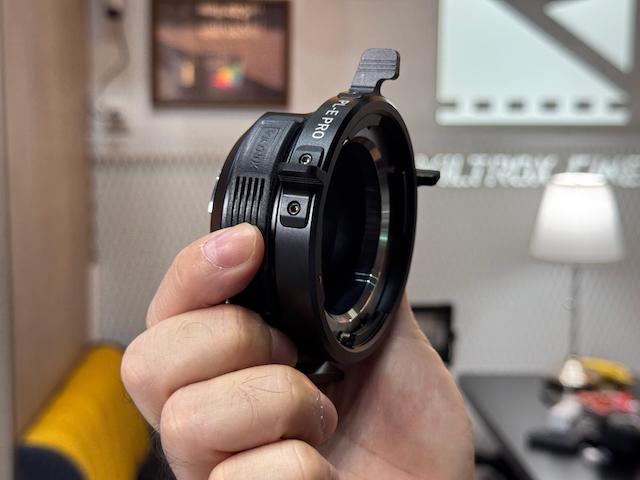
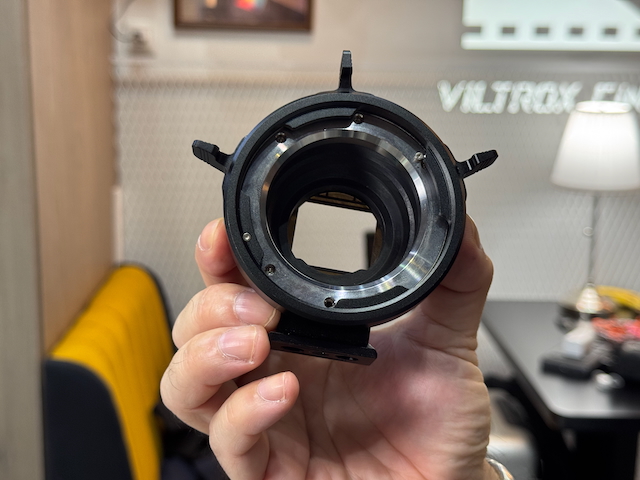
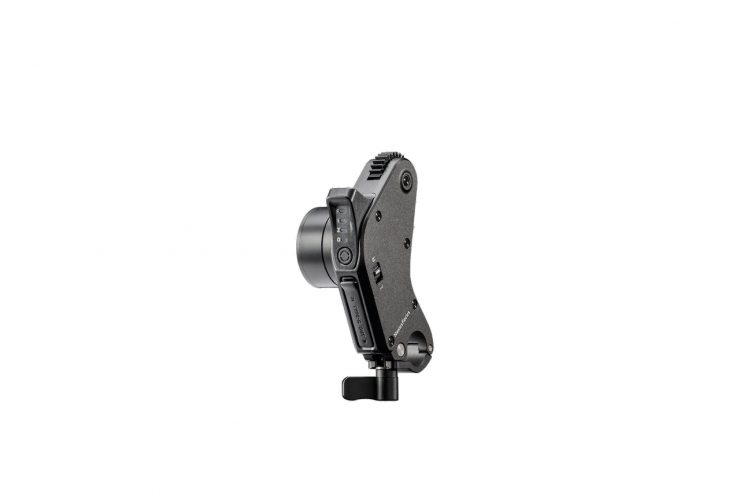
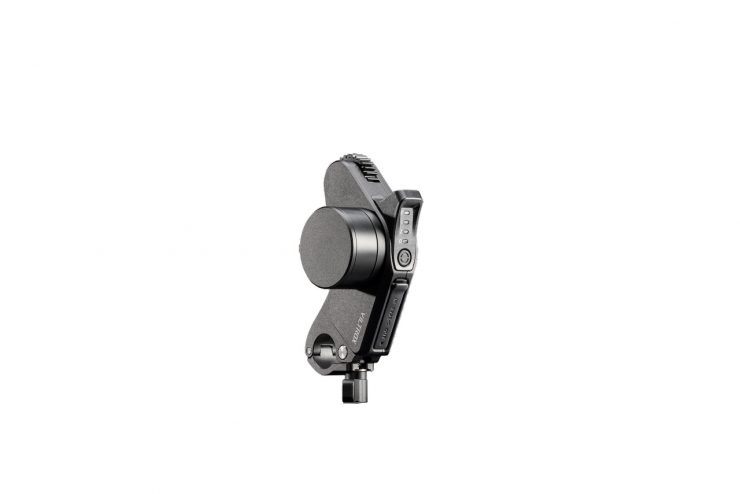
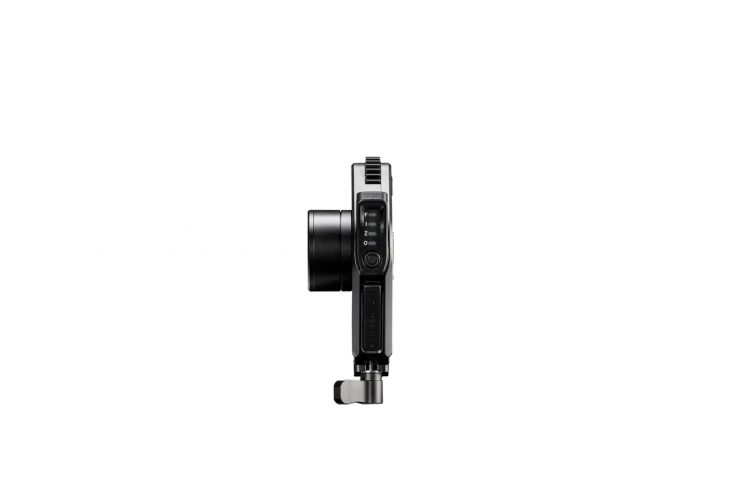
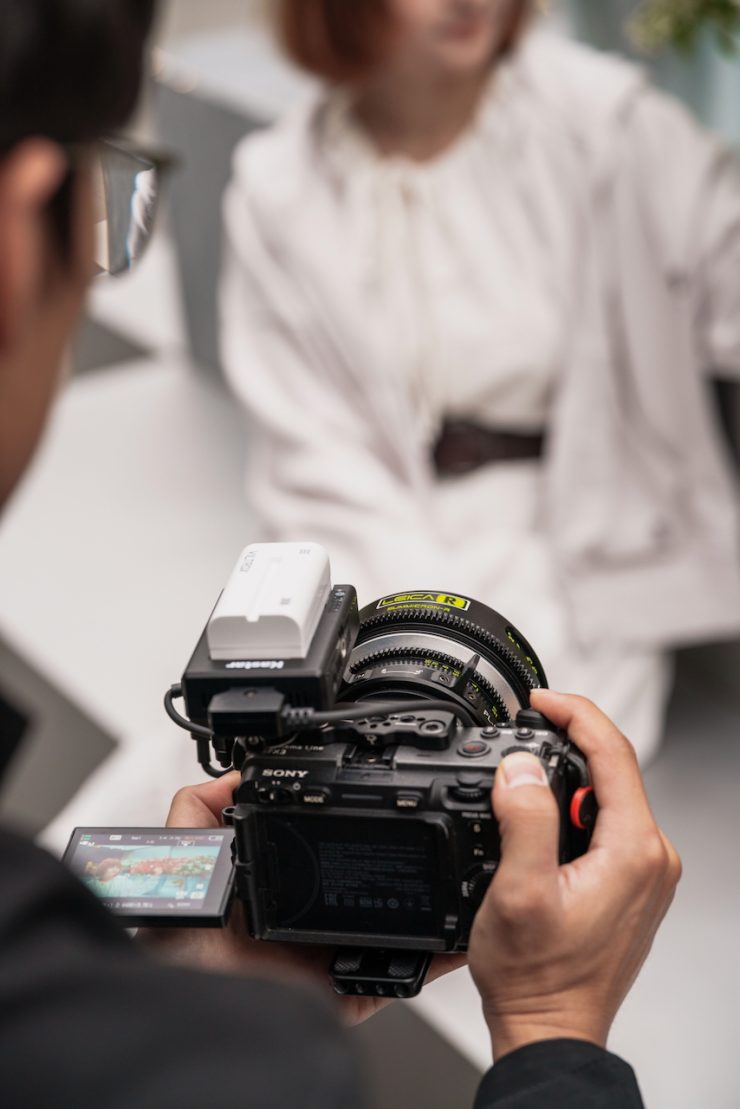
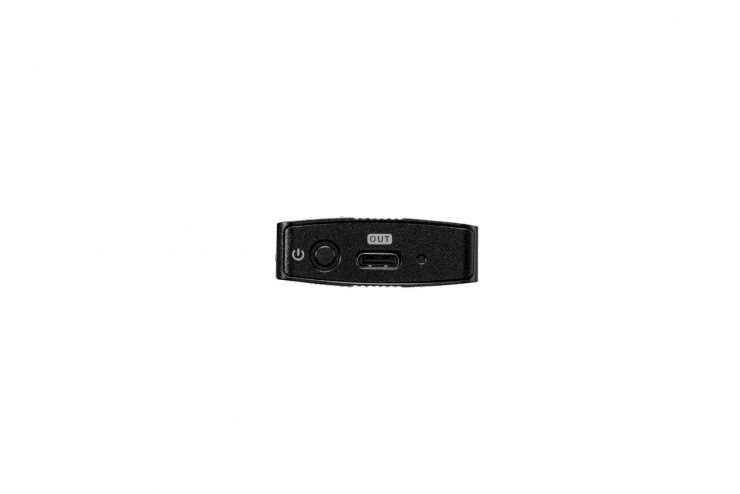
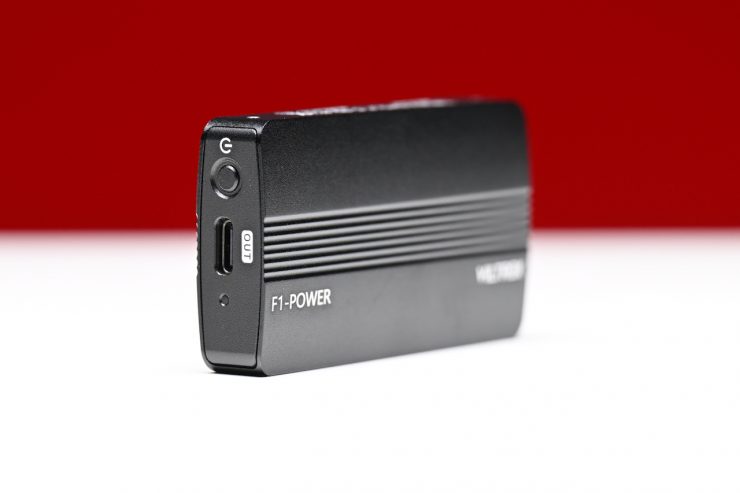
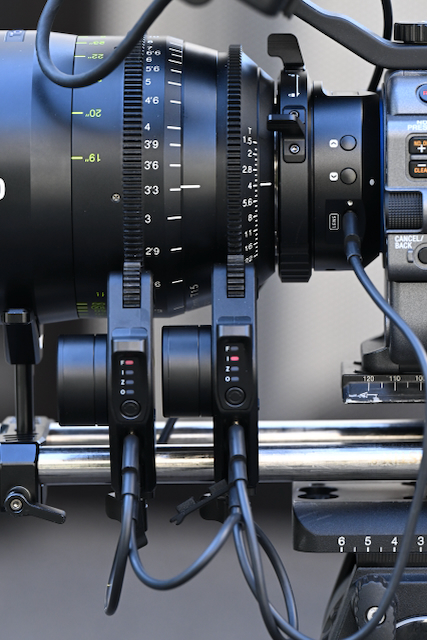
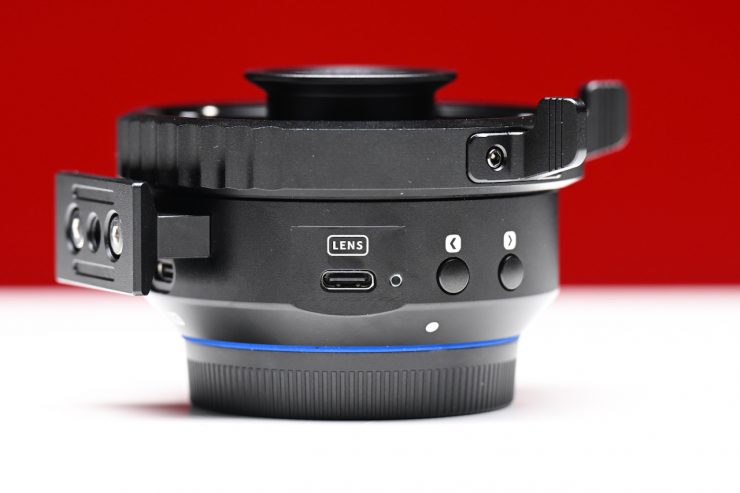
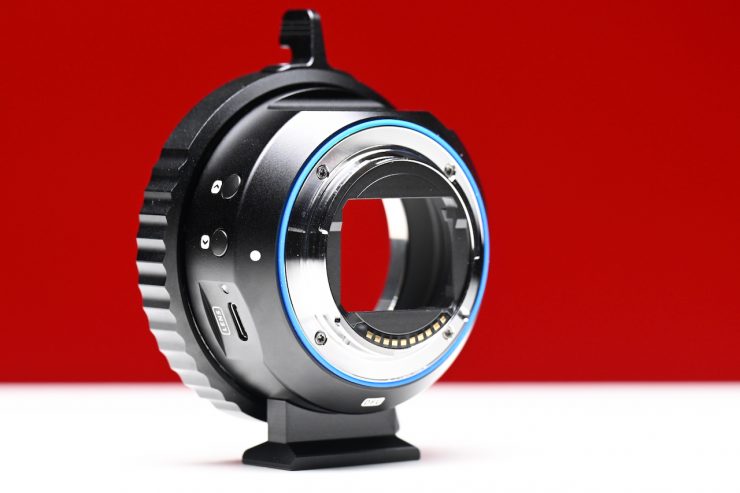
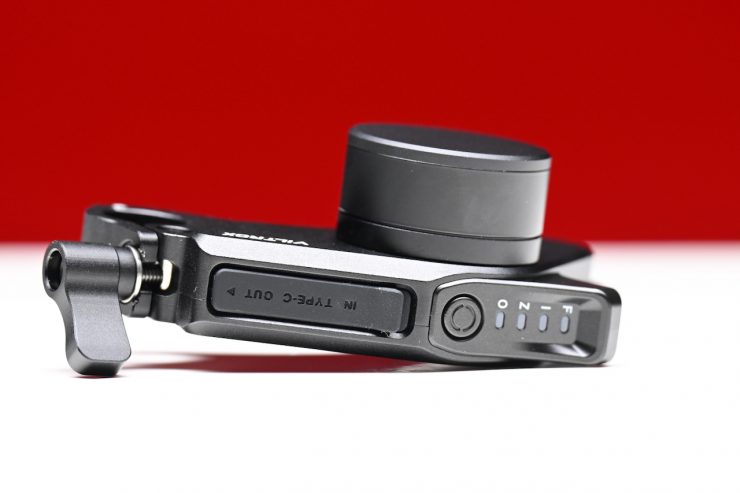
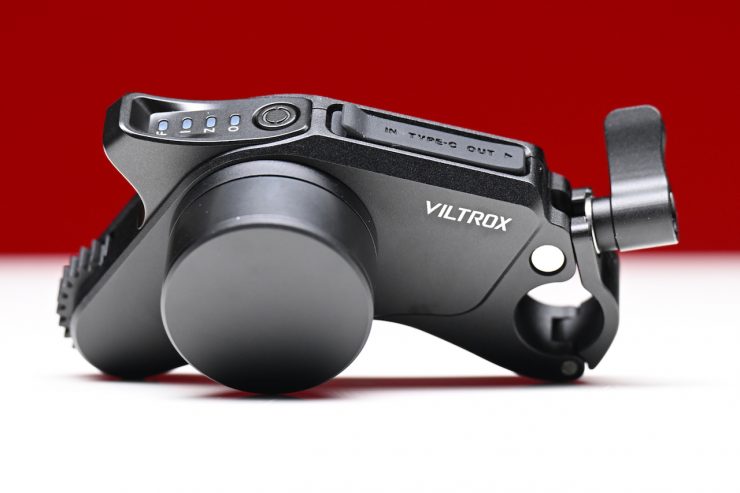
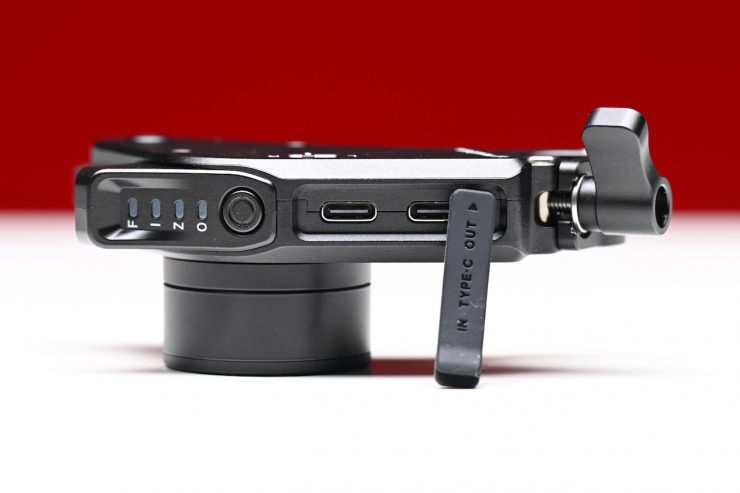
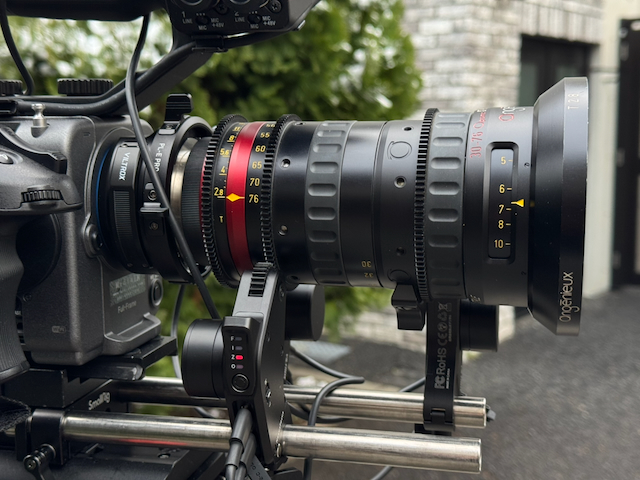
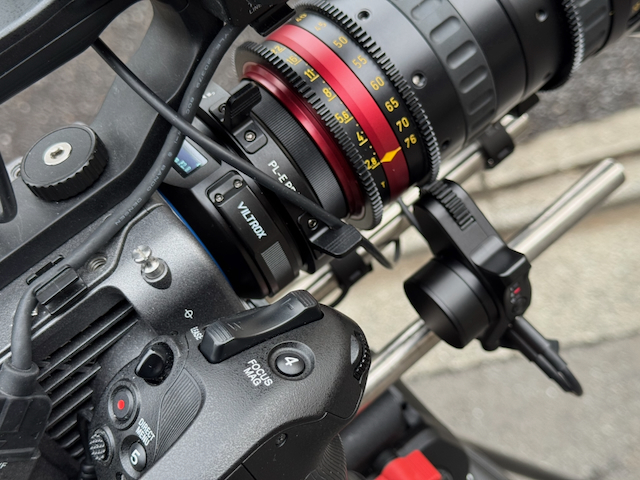
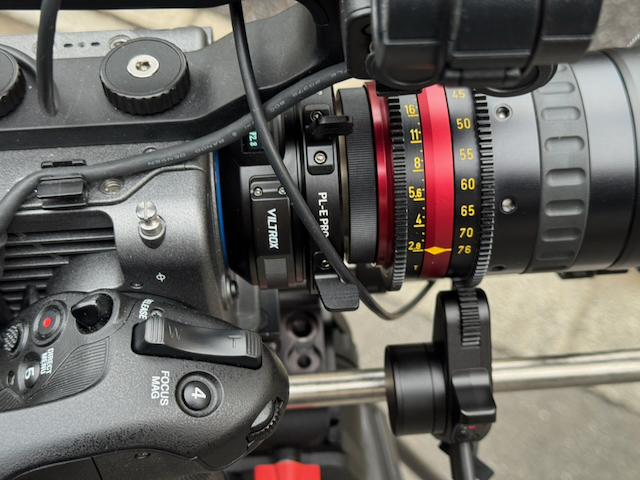
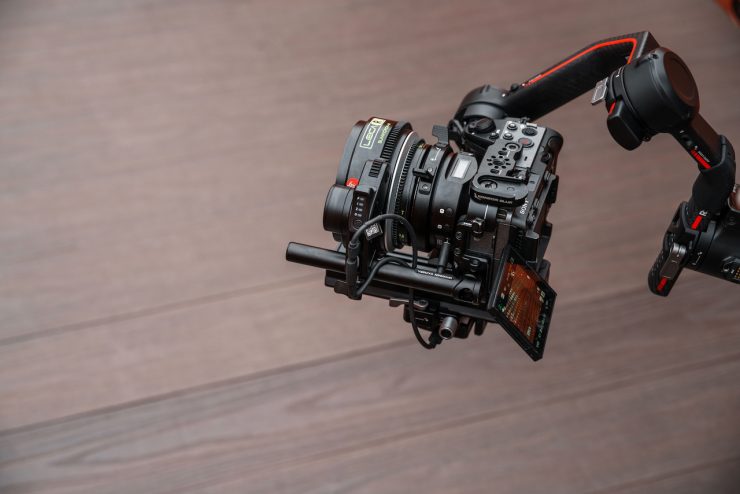
The Viltrox NexusFocus F1 uses a special PL mount that talks to the camera and is then able to send the AF information through standard USB-C cables to up to 3 motors at the same time.
In the basic kit, you get two motors, but you can buy a kit that has three motors.
You can use the camera’s iris control, and the motor will adjust the iris on the lens just as if you were using a native AF lens. With cameras like the FX3 or FX6 that have a zoom control lever, if you were using the system with a cinema zoom, you can zoom the lens just like you would when using a power zoom.
In addition, it is also compatible with the Sony Monitor & Ctrl APP, so you can easily operate recording, focus, iris, and zoom from your smartphone or iPad.
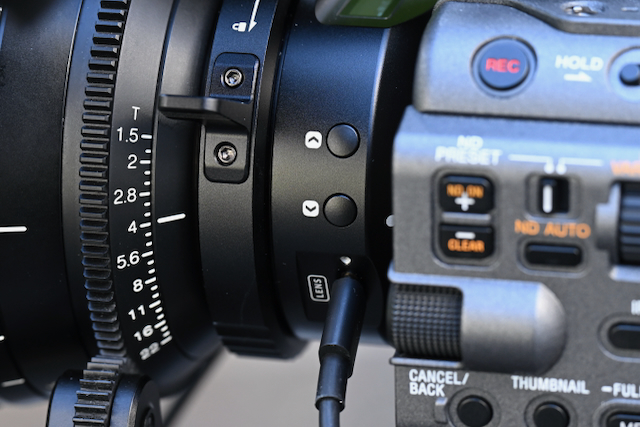
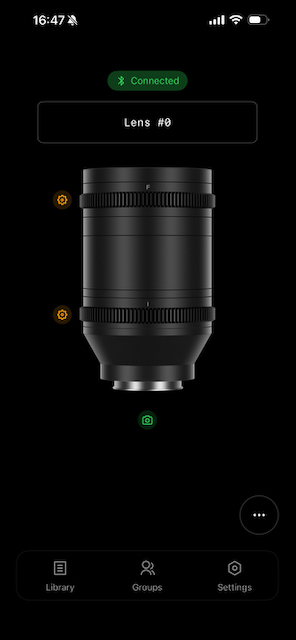
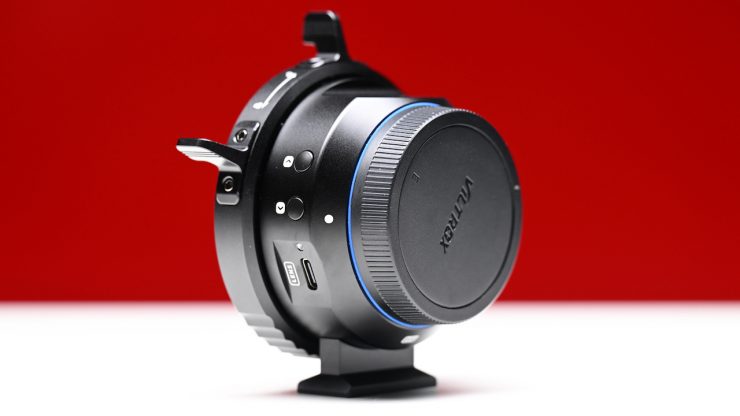
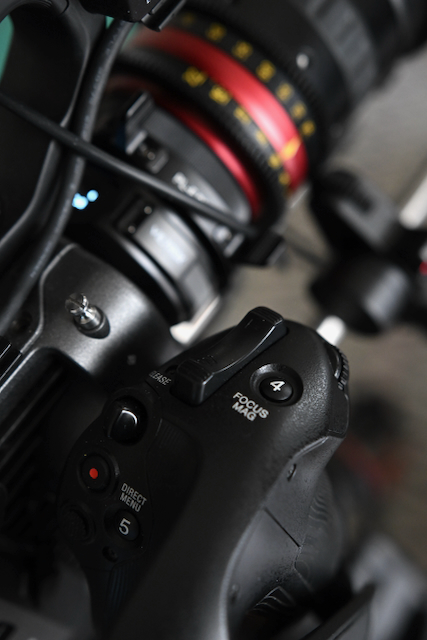
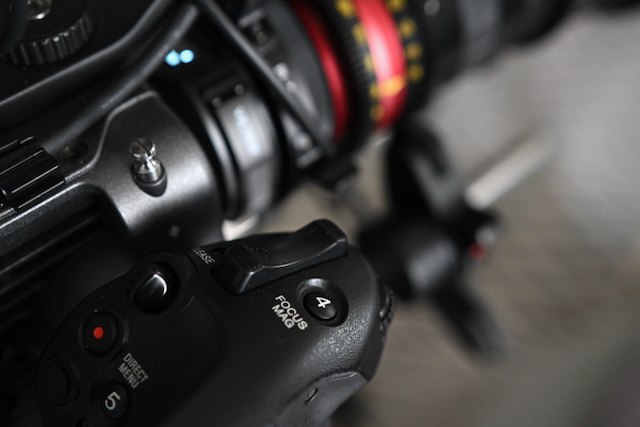
The adapter has a digital display on the top that tells you what lens you are currently using.

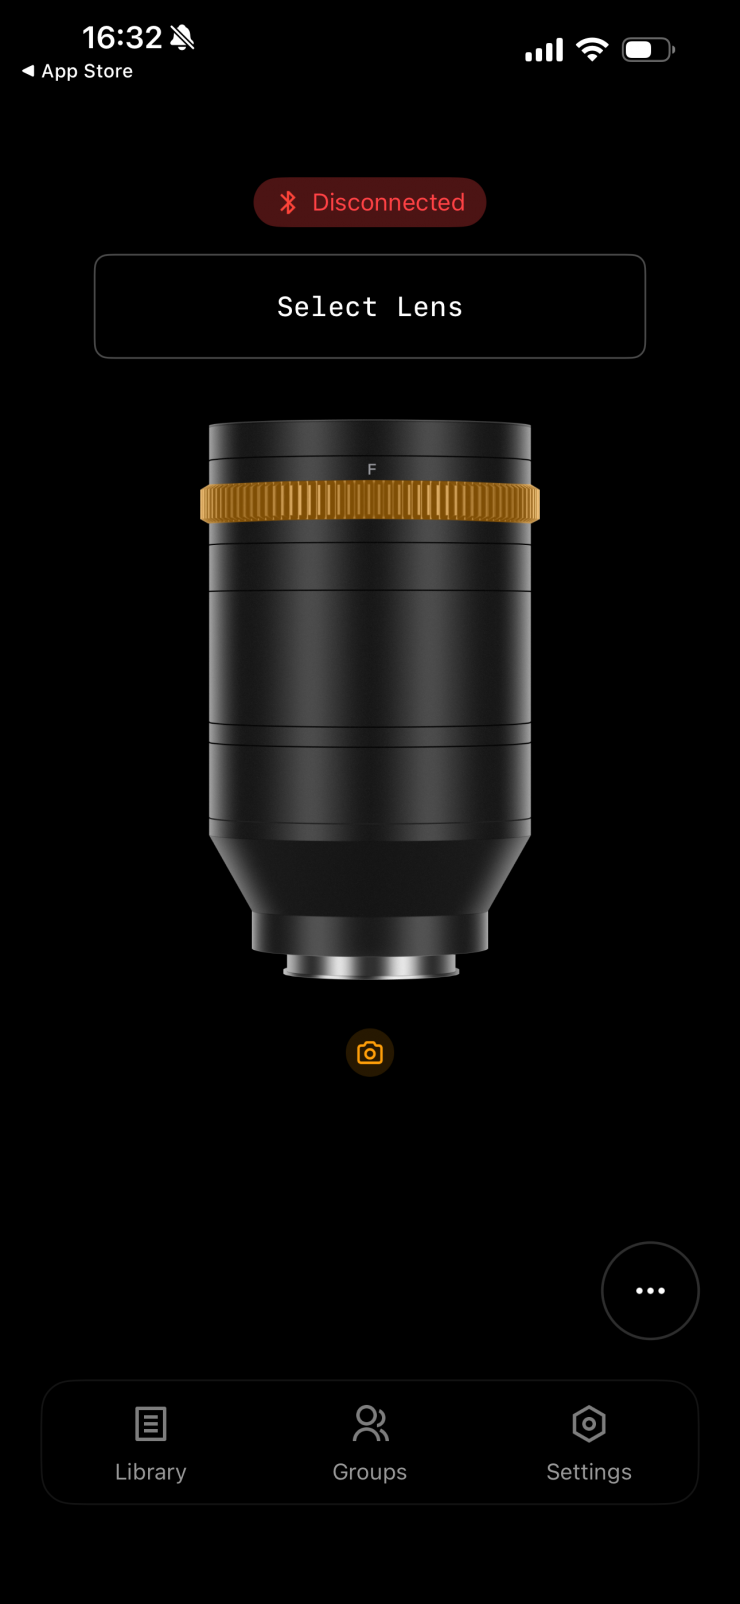
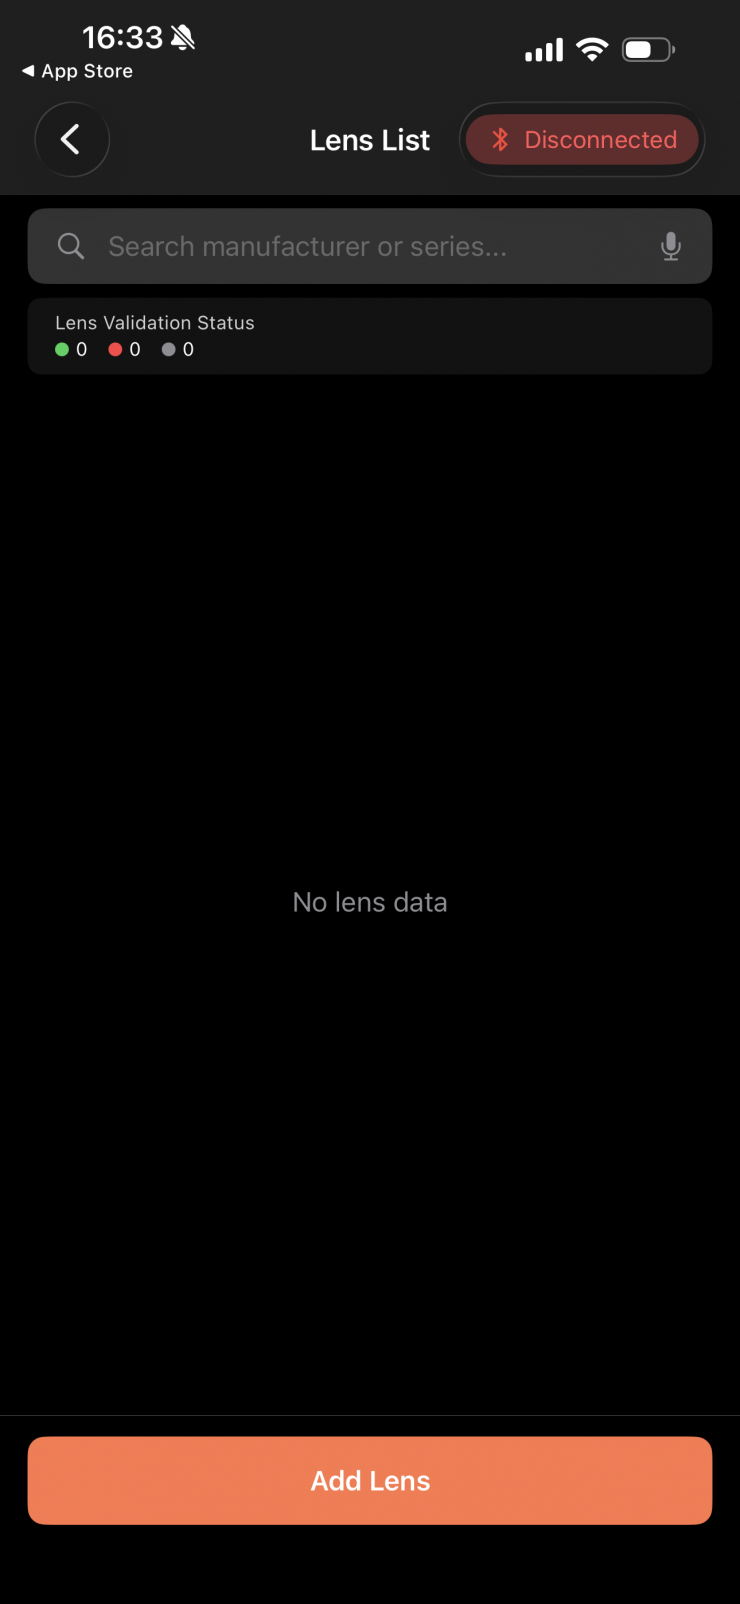
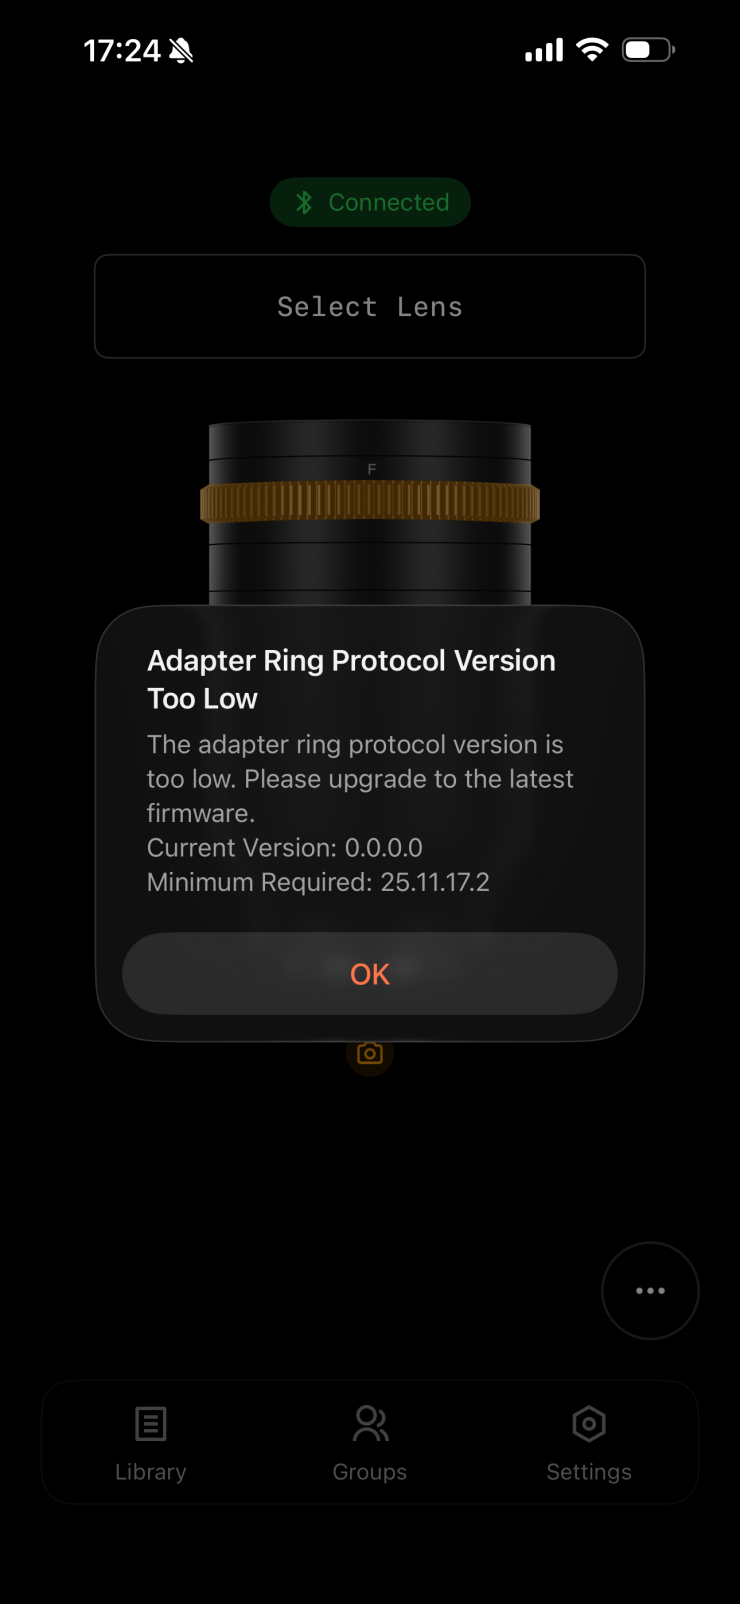
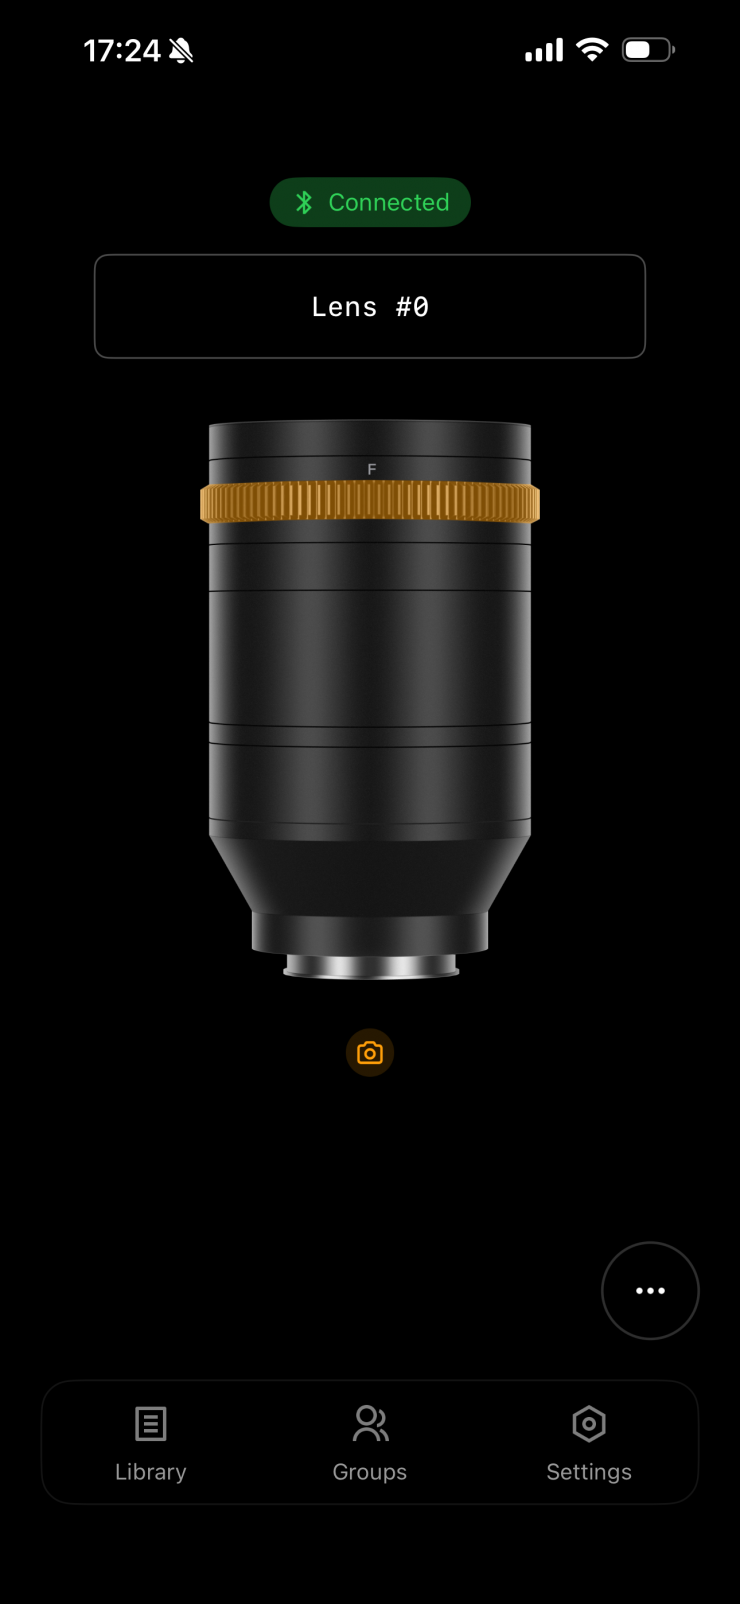
You can use the NexusFocus F1 with the Viltrox NexusFocus APP. The system automatically detects calibration status on startup, so users can just mount the adapter, power on, and start using it if the lens has already been calibrated (automatic calibration is currently only available on the iOS app version). You can also save lenses that can be recalled. This saves on having to set up lenses so they are ready to go straight away.
At least to my knowledge, the Viltrox NexusFocus mobile app is supposed to come with a wide range of lens calibration profiles ready to go, but on the version I was testing, there were no saved lens profiles.
As the system relies on the cameras’ AF, it works in a completely different way than LiDAR.
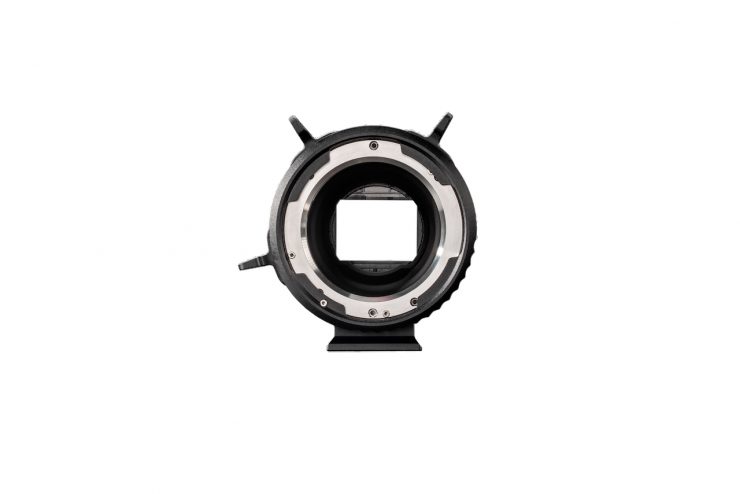
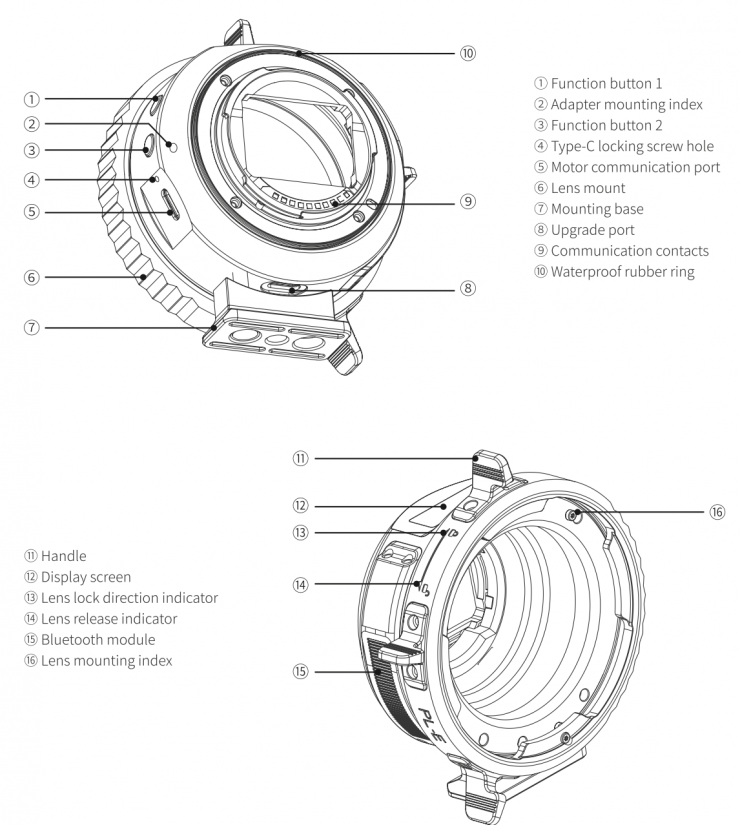
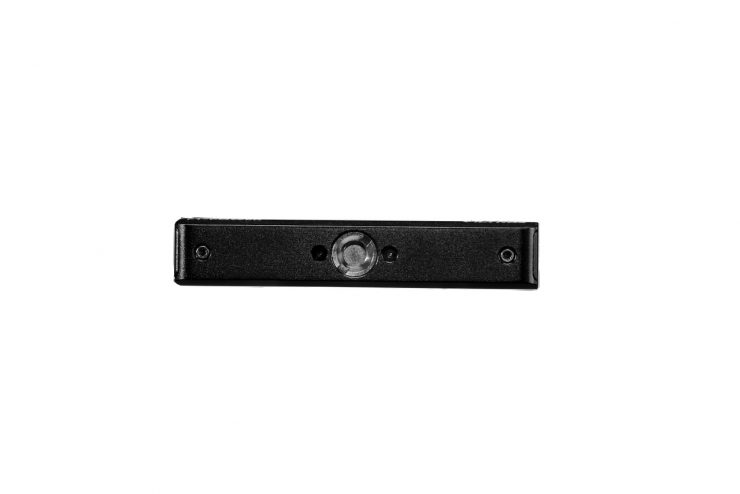
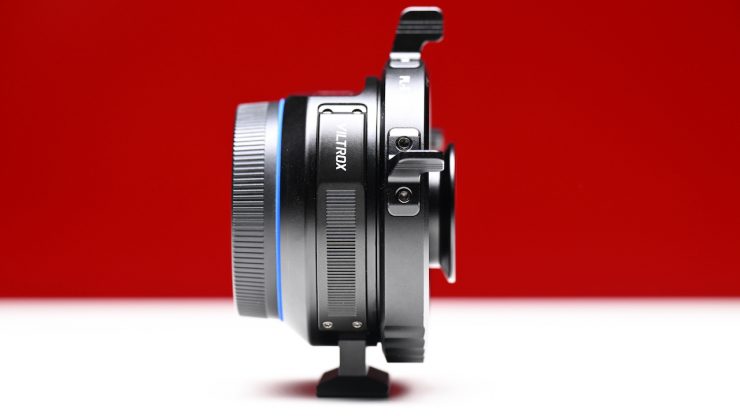
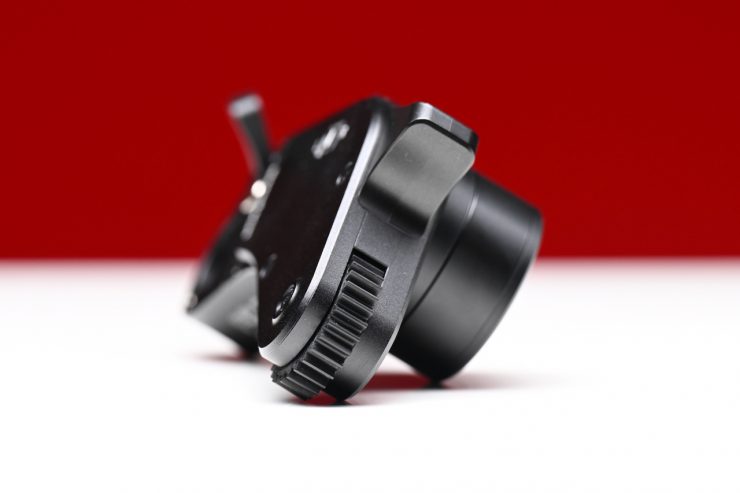
There is a dust-resistant seal at the camera mount end of the adapter, as well as a unique handle on the adapter ring for easy lens locking and release. Viltrox also includes a detachable tripod mount for flexible support. The adapter is made from aluminum alloy and stainless steel, and it features a matte-black coated inner wall for anti-reflection.
What cameras will it work with?
The NexusFocus F1 adapter will work with quite a few Sony cameras, such as the FX2, FX3, FX30, a6700, and FX6.
It will not work with the BURANO or FX9, as they use slightly different iterations of the E-mount.
Viltrox states that you should also use caution if you want to use a rehoused or vintage lens that has been converted to PL mount, as some of these older lenses have more fragile mechanical structures.
What features will be available at launch?
Core functionality, including autofocus operation and basic lens control, will be available at delivery. Some advanced features may be refined or introduced later through firmware or app updates.
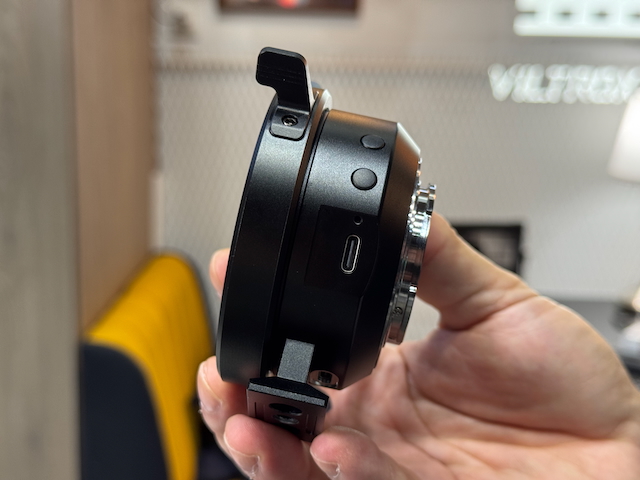
How do you power it?

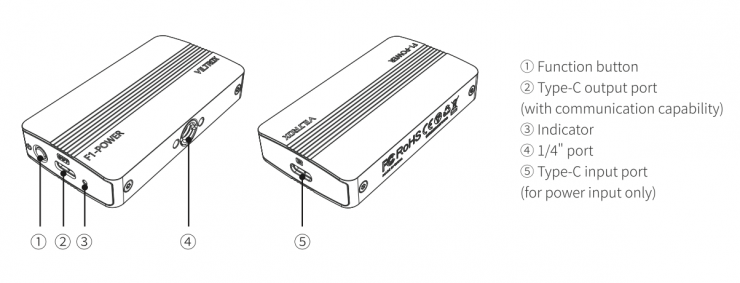
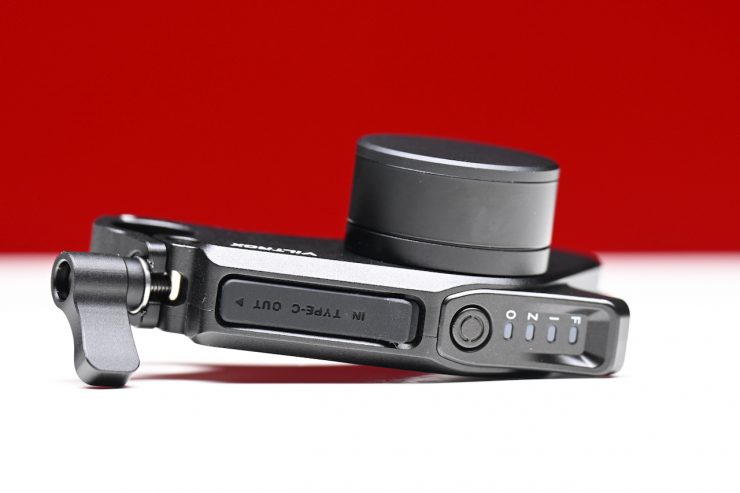
The NexusFocus F1 adapter supports DC power input with a voltage range of 5 V to 20 V. The product includes a built-in PD protocol chip that automatically identifies and matches PD power sources, supporting up to 20 V input for optimal performance. To ensure stable operation and full performance, Viltrox recommends that you use a high-quality power adapter with an output power greater than 35 W.
The camera powers the NexusFocus F1 adapter, but it doesn’t power the motors.

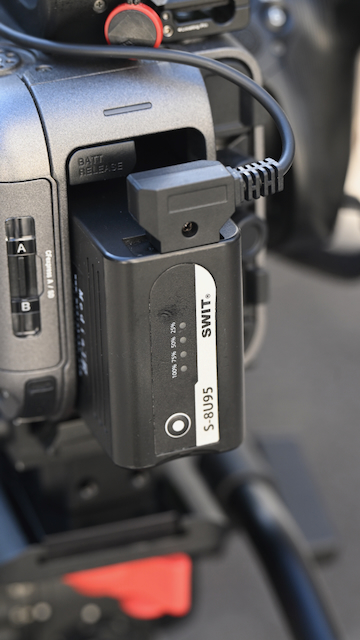
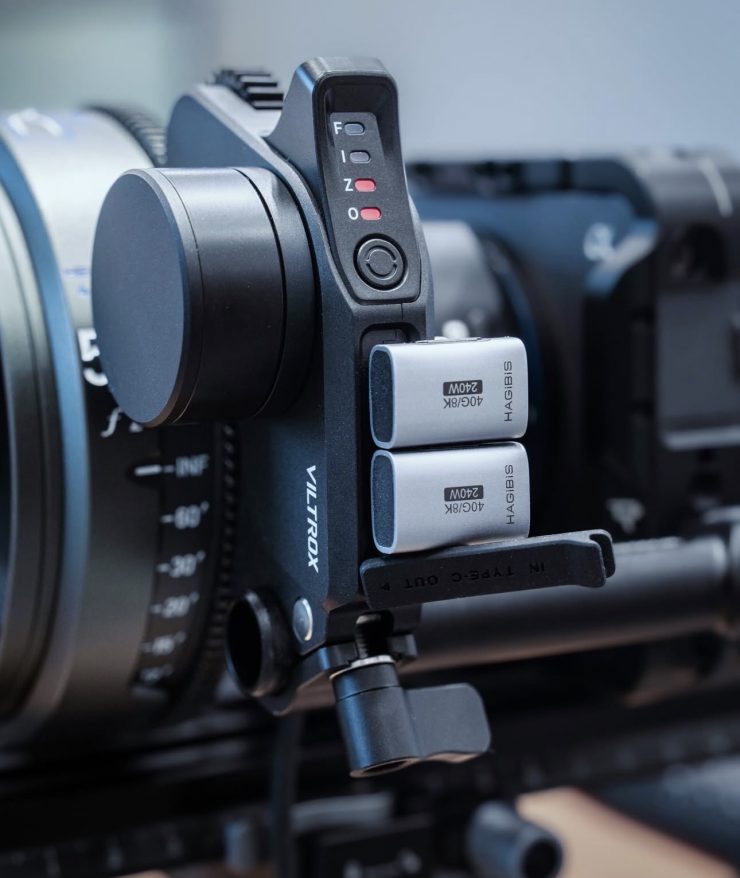
With the Sony FX6, I was using a SWIT S-8U95 battery that had a D-tap on it to power the motors.
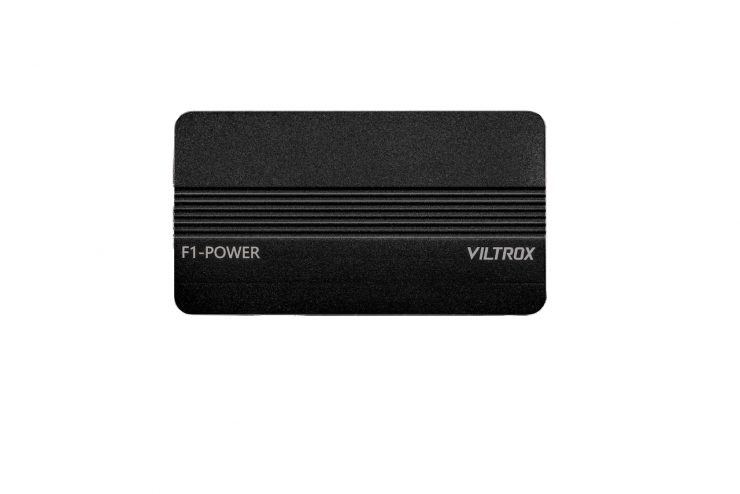
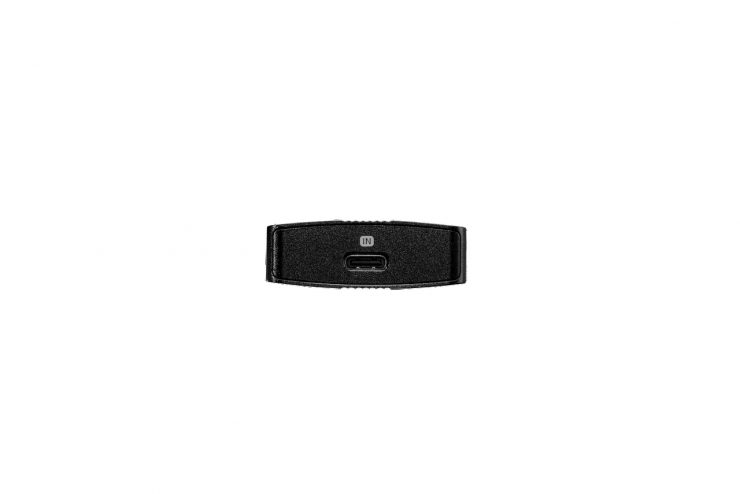
The NexusFocus F1 adapter does come with a power box. The PowerBox is a power management and voltage control module designed to provide stable and controlled voltage output between the power source and the connected device. Its basic operating logic is: IN (Input) → Voltage Regulation / Conversion → OUT (Output).
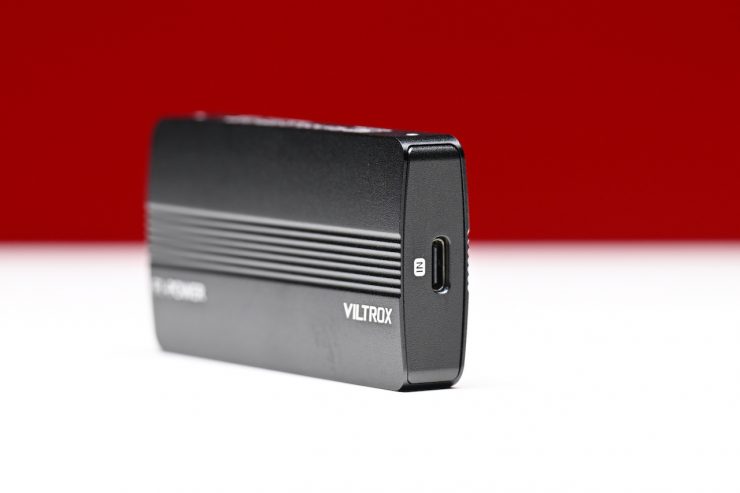
The PowerBox is not a battery or a primary power source. It functions as an
intermediate power control unit that performs voltage stabilization, step-up, or step-down processing to protect devices from unstable or fluctuating power input.
When is the PowerBox required? The PowerBox is recommended when the input power source is unstable, provides variable voltage, or does not directly meet the power requirements of the device.
Typical use cases include, but are not limited to:
• USB-C power sources
• USB-C PD triggered outputs (9V / 12V / 15V, non-fixed voltage)
• Power banks
• USB-C outputs from stabilizers such as Ronin or DJI RS series
• Mobile or temporary power solutions
In these scenarios, the PowerBox converts unpredictable or fluctuating input voltage into a stable and reliable output, ensuring consistent device operation.
The PowerBox is not necessary when the power source already provides a stable output that matches the device’s input specifications.
Typical examples include:
- D-Tap outputs from V-mount or Gold Mount batteries
- Stable 14.4V direct power outputs
- Devices designed to accept this voltage range directly
In such cases, no additional voltage boosting or regulation is required. Direct power delivery offers higher efficiency and reduced energy loss.
Just to reiterate clearly, the PowerBox is not a mandatory power component, but a power management solution designed to enhance power stability and operational safety. When using USB-C, PD, or other unstable power sources, the PowerBox is strongly recommended. When using stable direct power outputs such as D-Tap, and the voltage matches the device requirements, the PowerBox can be omitted.
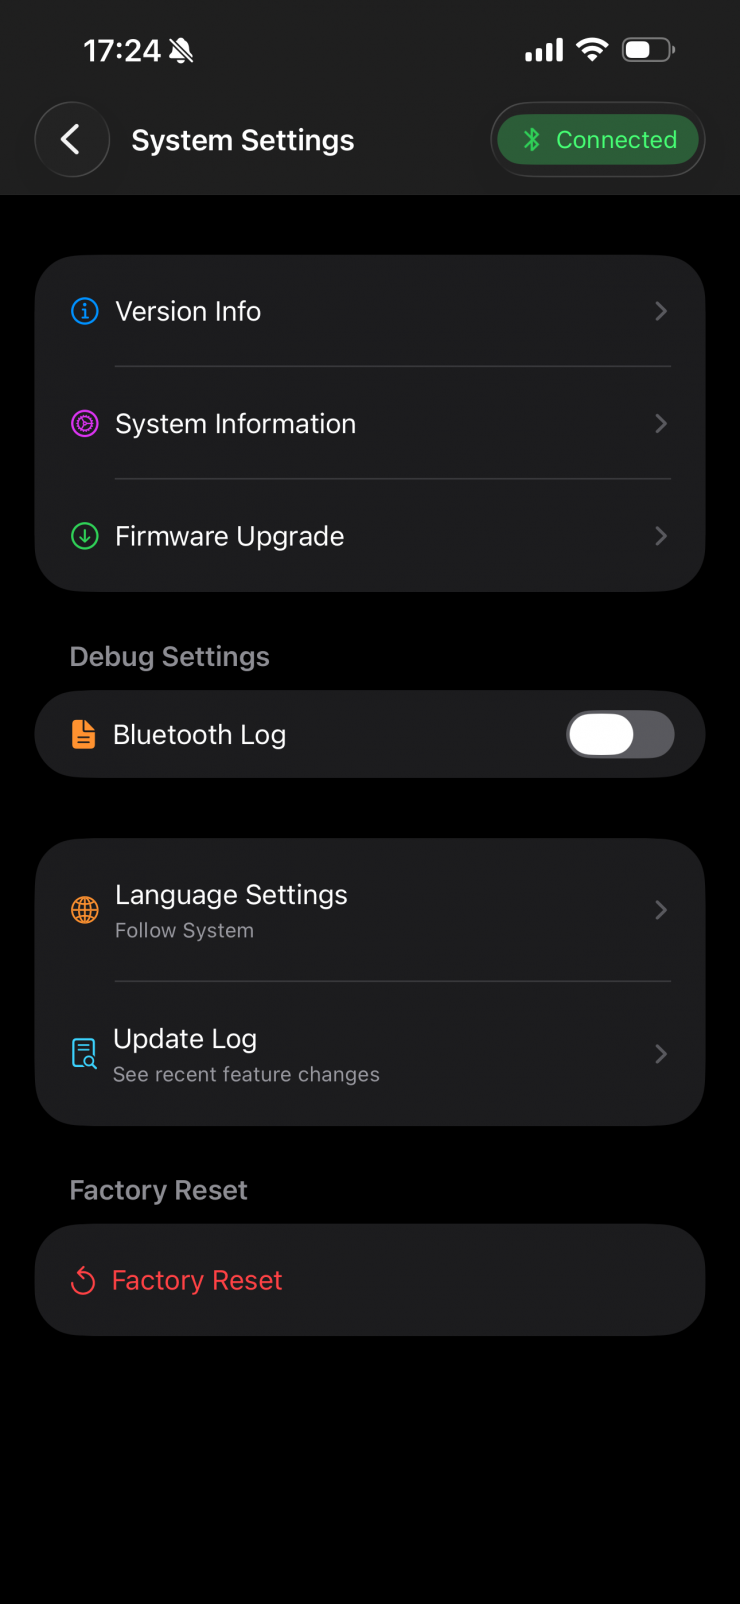
How do you set it up?

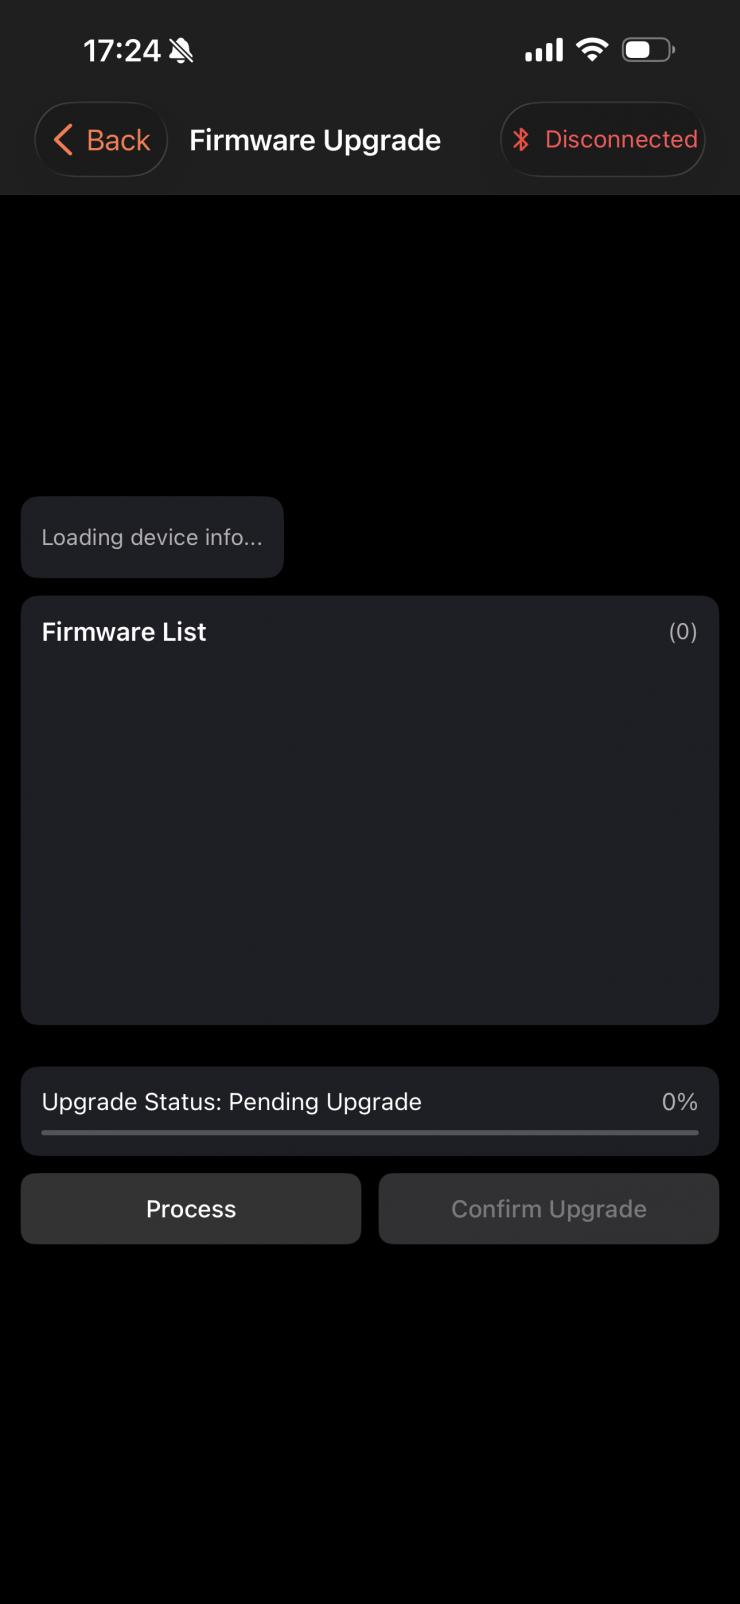
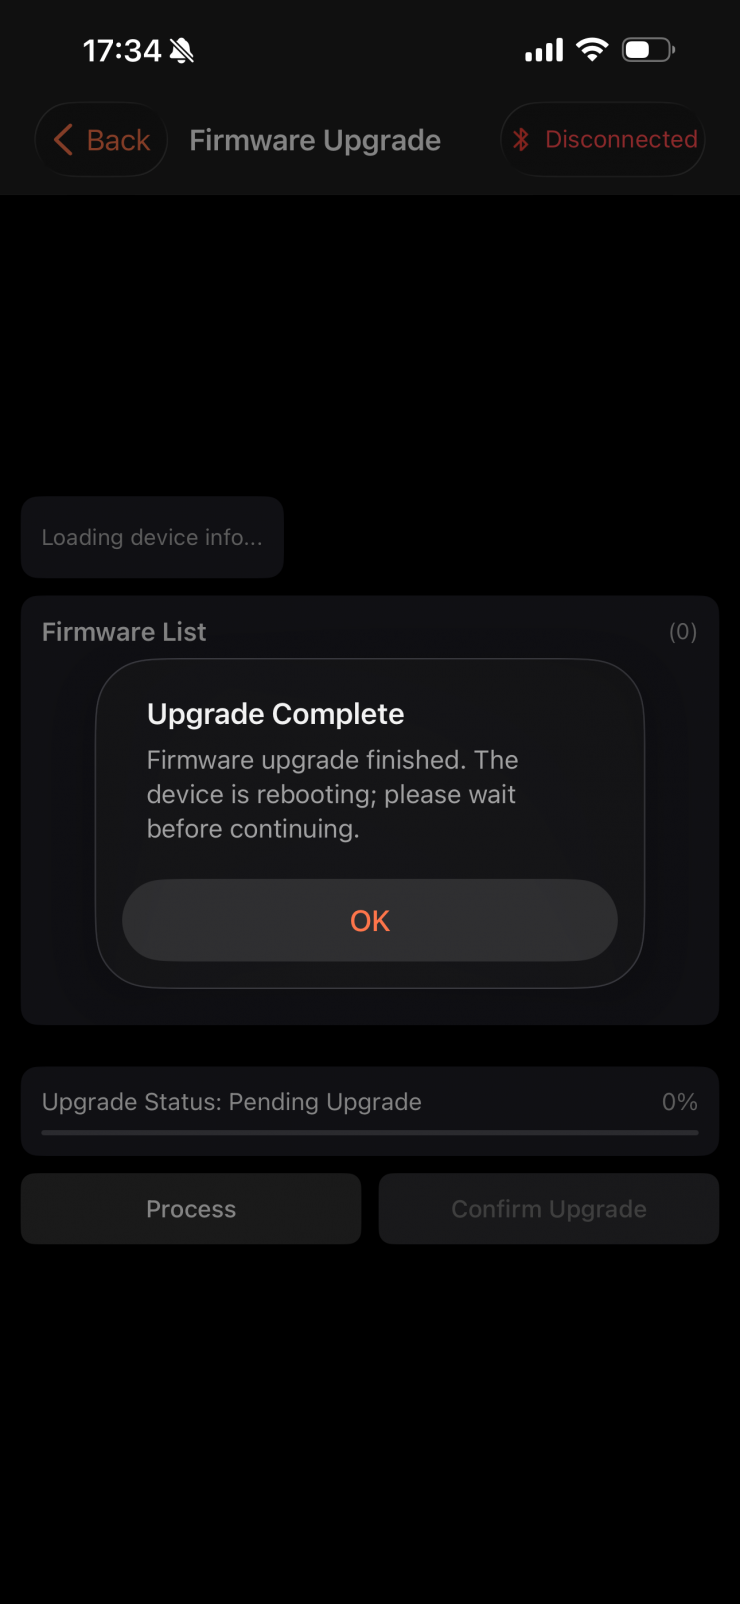
Before you first use it, you will need to do a firmware upgrade. To do the
2.1 Adapter Firmware Upgrade: You need to remove the base from the adapter and locate the USB-C/DFU port. You then use a power bank or a 5V charger to supply power to the adapter.
The adapter screen will show “OTA Mode.”


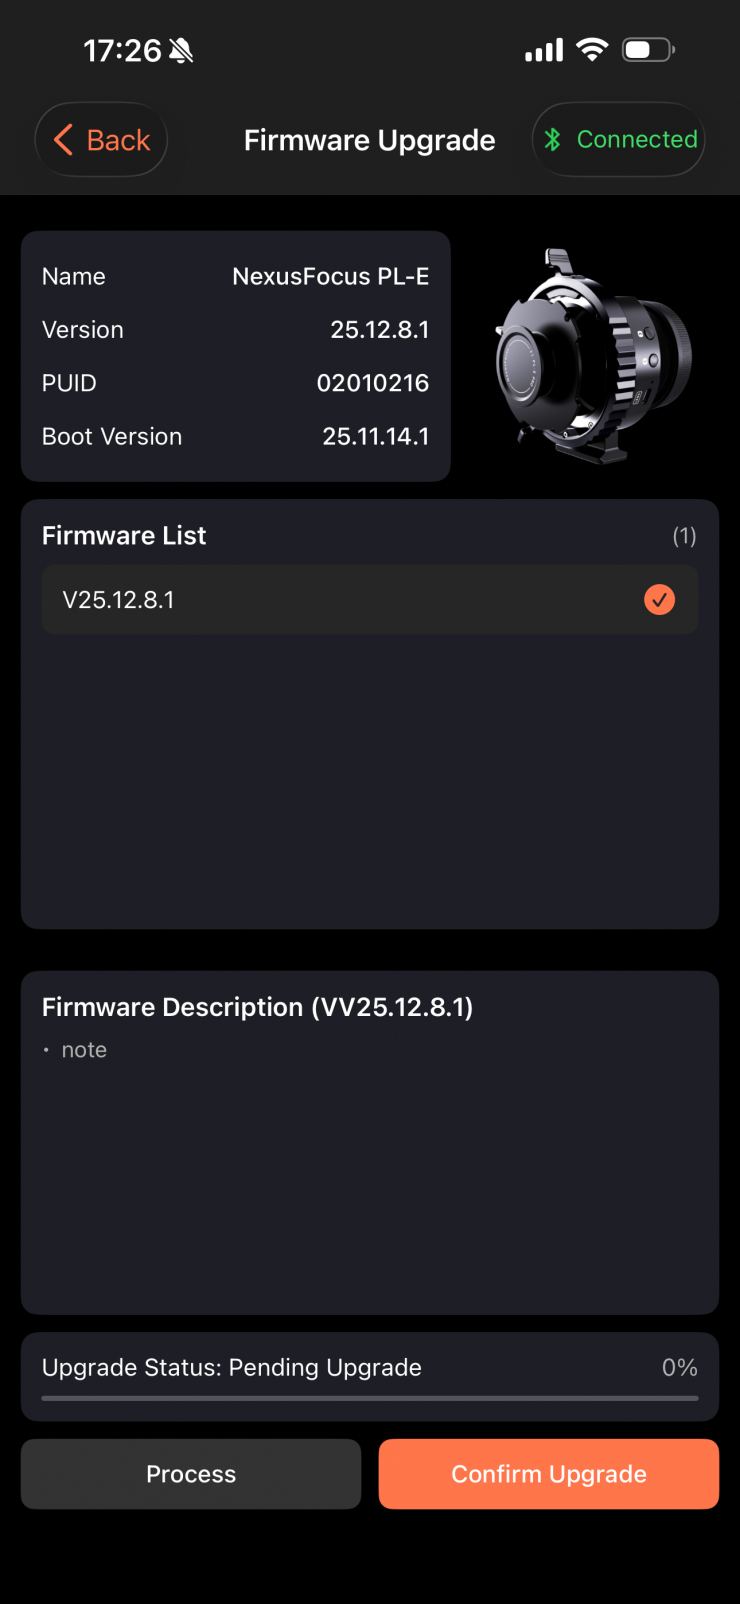
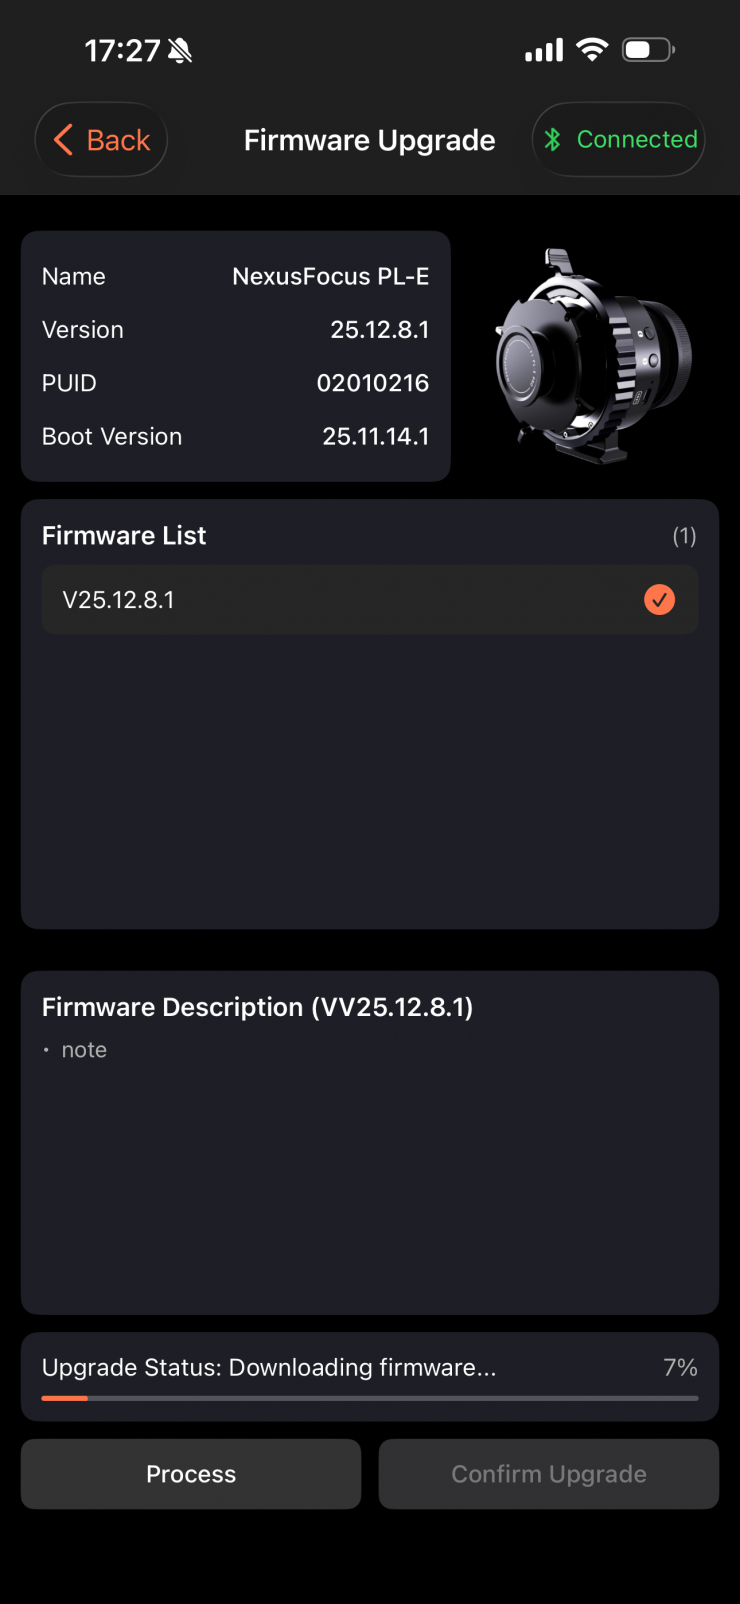
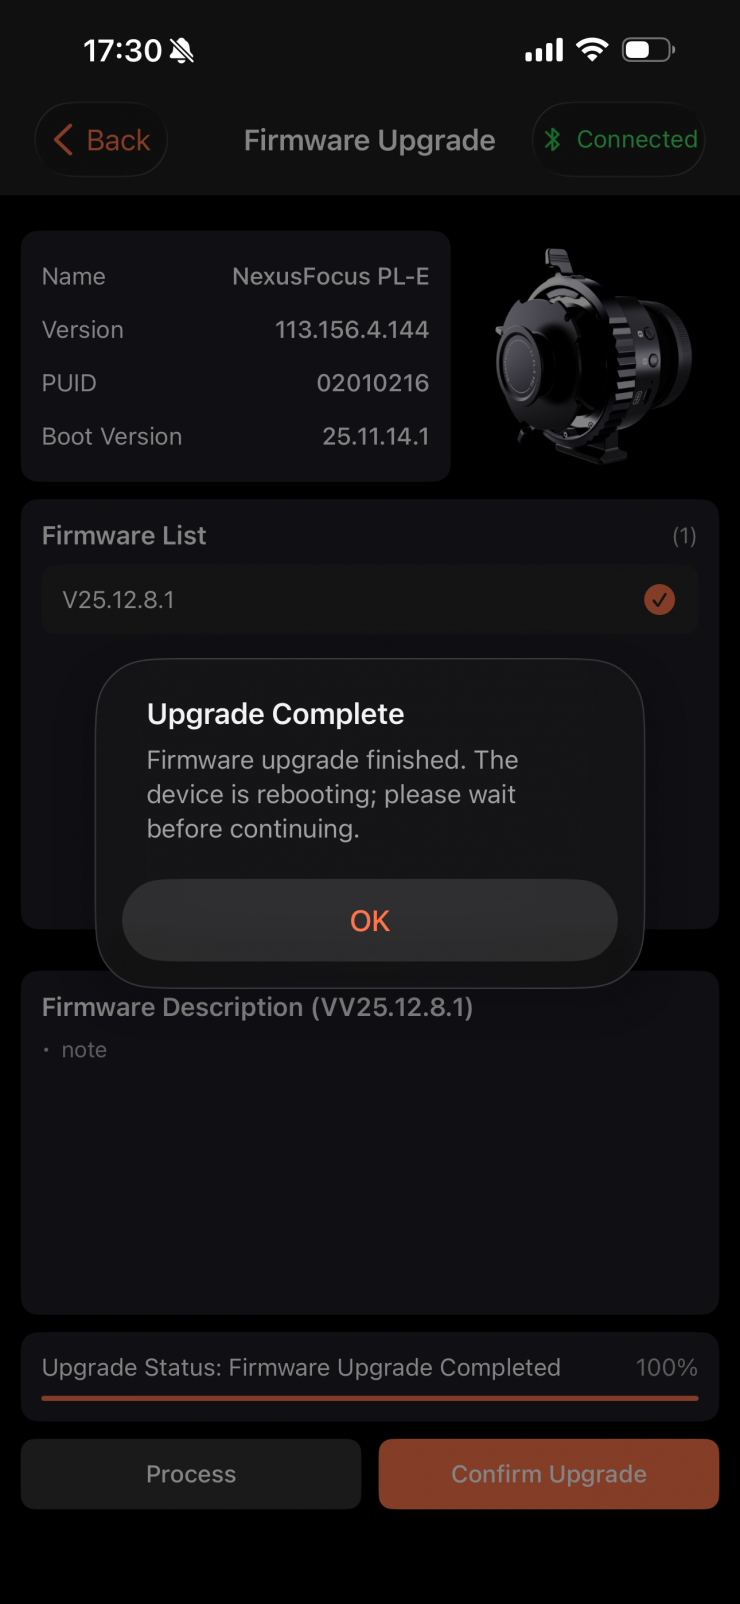
The next step is to open the NexusFocus APP → Connect via Bluetooth →Check Firmware →Upgrade.

Once you have updated the adapter, you then need to update the motors.
Motor Firmware Upgrade
• Press and hold the motor button while plugging in the USB-C power cable. Then the LED will display a running light, indicating that it has entered upgrade mode.
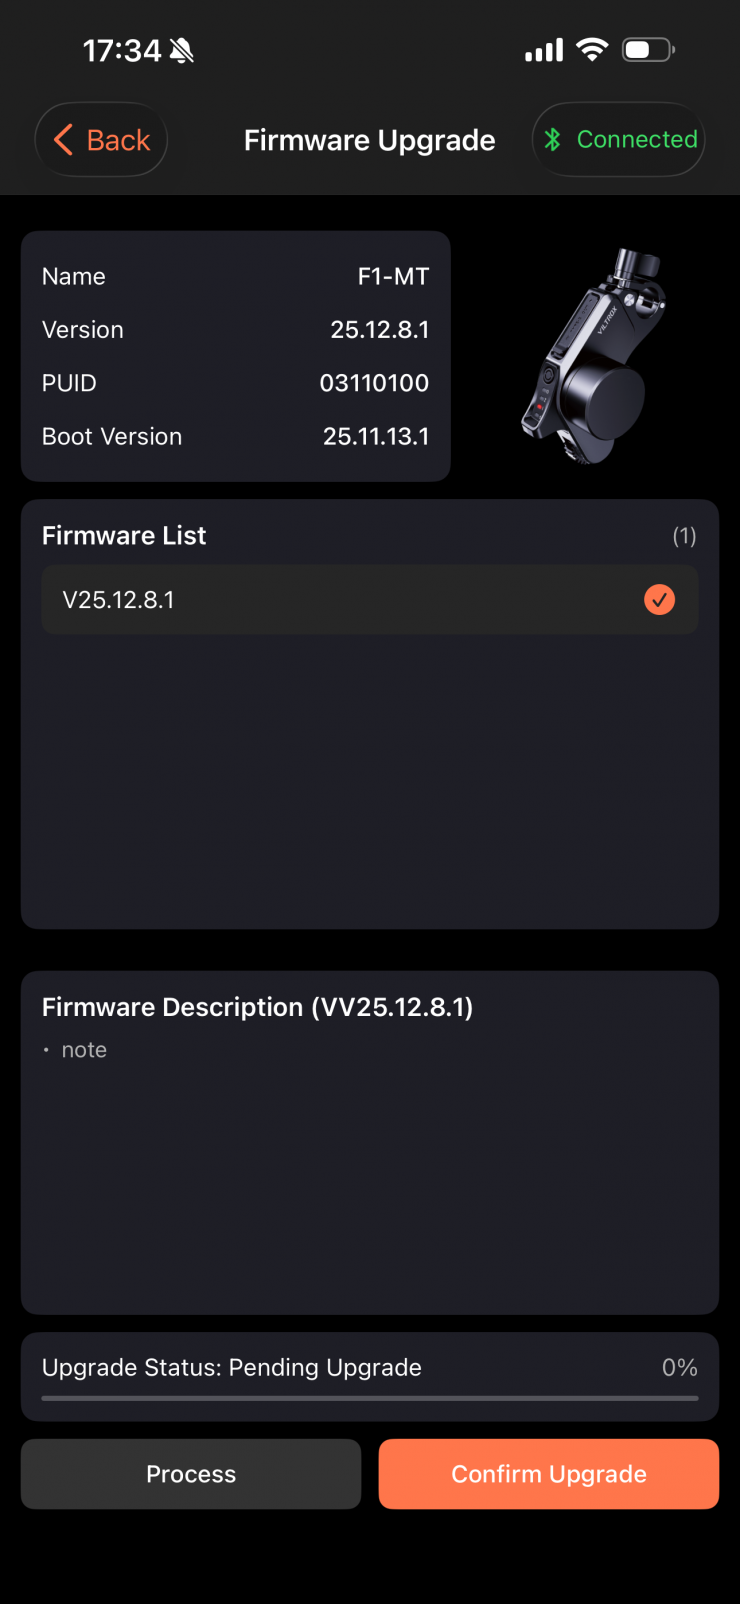
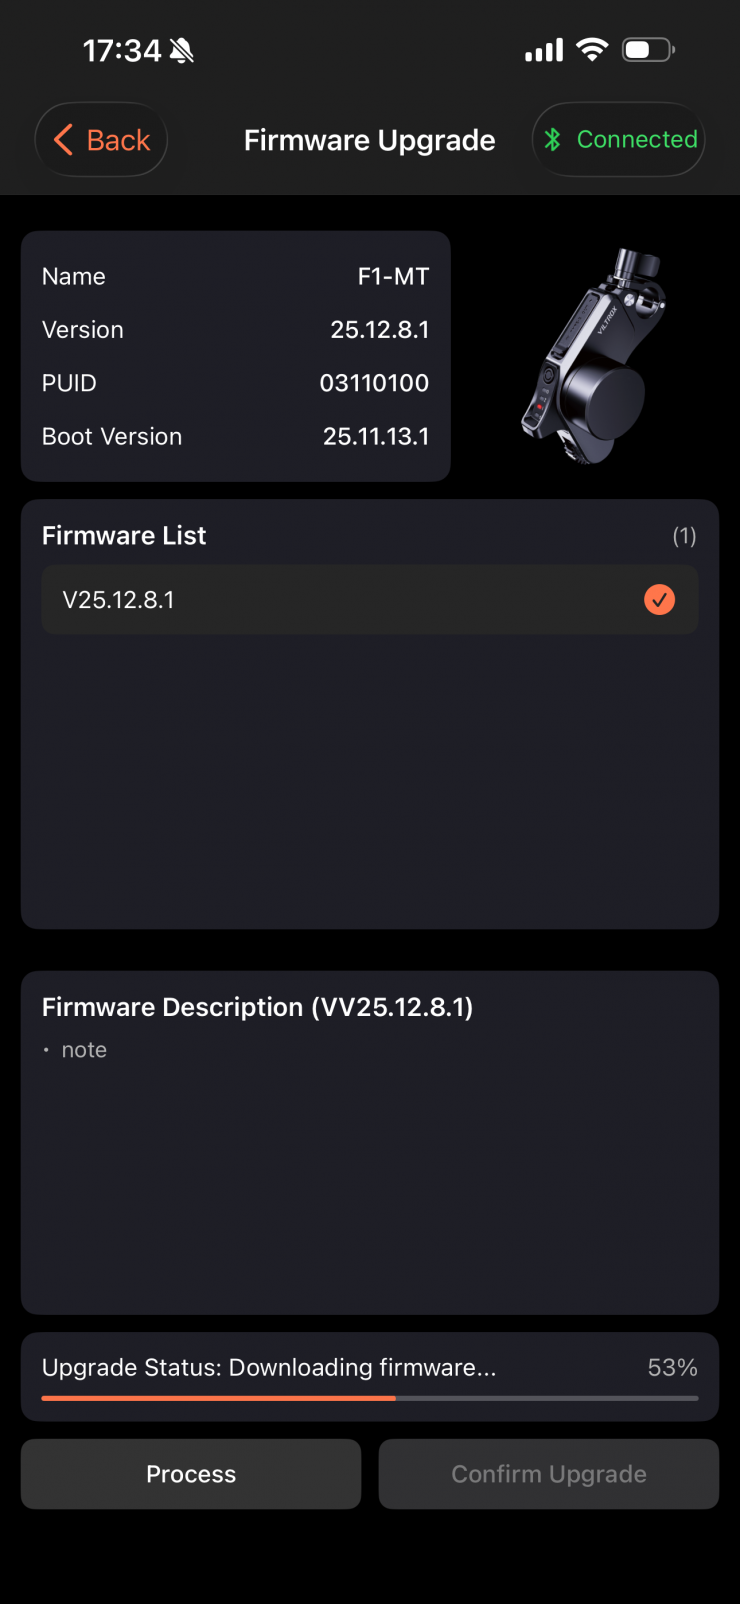
Then open the APP → Connect via Bluetooth → Check Firmware →Upgrade
Ok, now that we have done the firmware update, we can install the system on our camera.

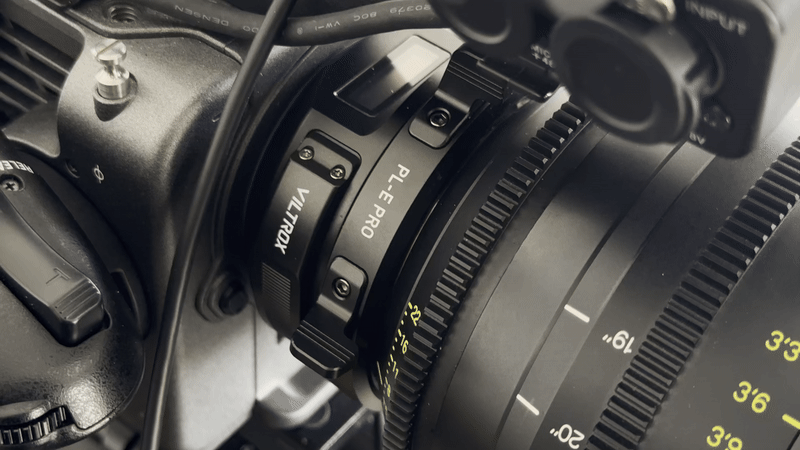
The first step is to install the adapter and lens. You simply insert the PL-E Adapter into the camera body and then mount a standard PL lens and
lock it securely.

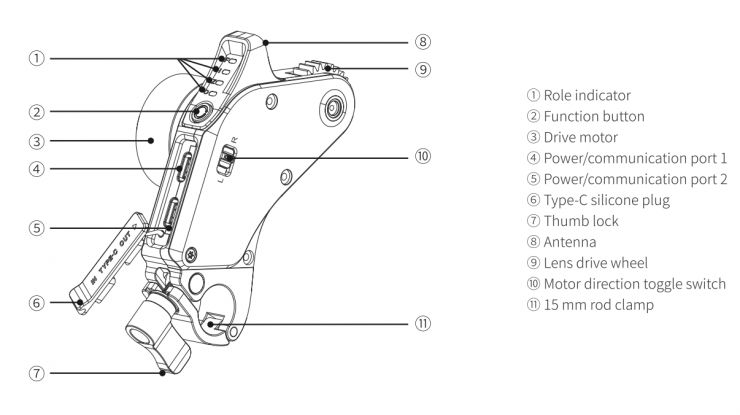
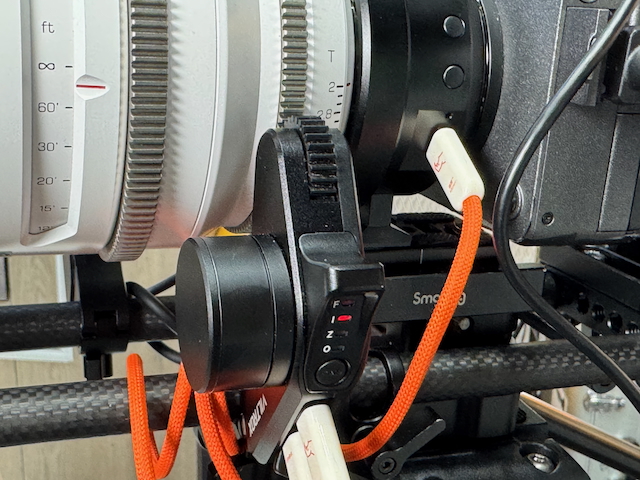
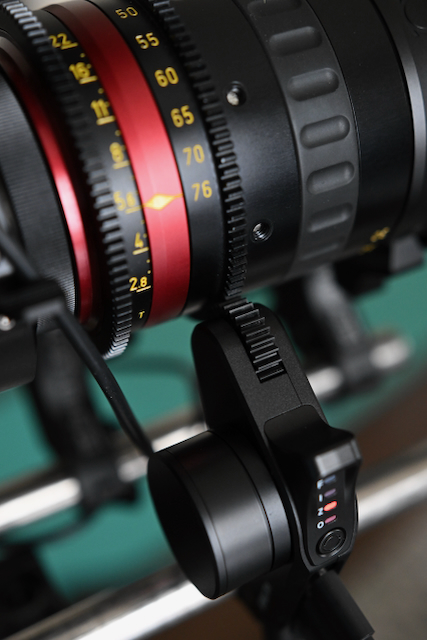
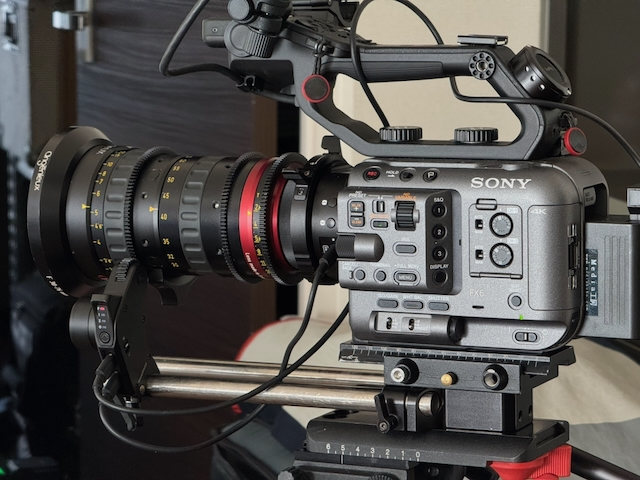
You then attach the motors to 15mm rods and make sure they are firmly engaged and secured on the lens gears. How you actually mount the motors will depend on your camera and what type of 15mm rod set-up you are using.
As the motors have no height adjustability, they can be difficult to mount with certain camera and lens combinations.

You connect the supplied D-tap to USB-C cable from a battery source to the input of one of the motors (I always used the focus motor). You then take another USB-C to USB-C cable and connect it from the output of the motor to the input of the other motor. Finally, you connect the remaining USB-C to USB-C cable from the output of the motor to the lens input port on the adapter.
The problem with the supplied cables is that Viltrox should include at least one right-angle cable. I say this because with some of the camera cages for mirrorless hybrids, the left-side protrudes and you won’t be able to attach a straight USB-C to USB-Ccable because there isn’t enough space.

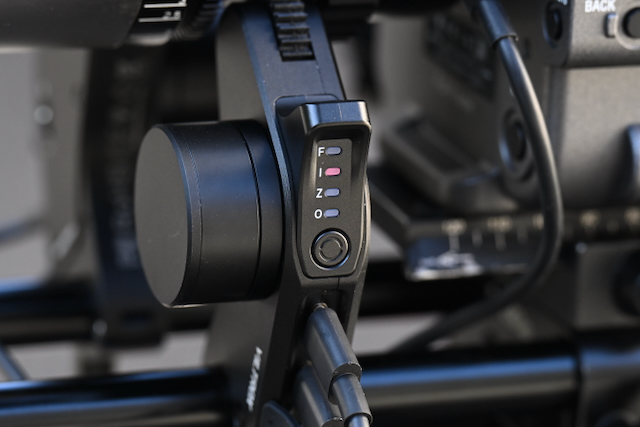
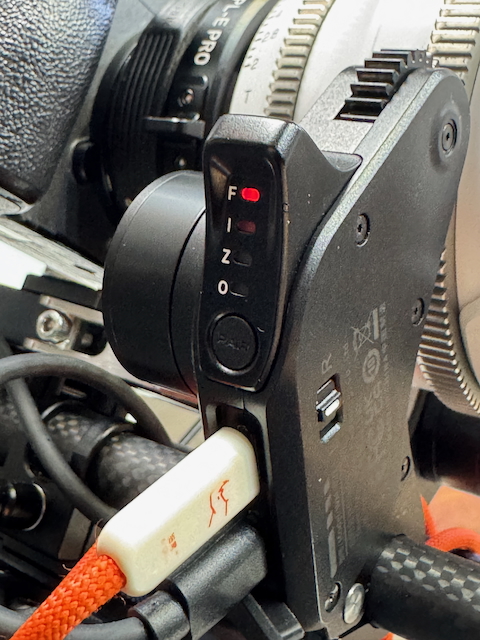
You then need to set up the motors depending on what axis you want them to control. To do this, you press and hold the motor button to switch roles: Focus / Iris / Zoom.

You can also adjust the L / R direction switch on the side of the motor to ensure the correct rotation direction. There is a problem with this that I will discuss further down in the review.
When two or more motors are assigned the same role, communication between the adapter ring and motors becomes disrupted. You need to make sure that all of the motors are assigned to different functions.

Here is some sage advice: don’t buy or use cheap 15mm rods if you plan on using motors. I was borrowing an FX6 for this review, and with the rods that came with it, I had continual problems with the motors coming loose from the lens gears, no matter how much they were locked down and properly engaged.
As soon as I swapped the rods over to some Bright Tangerine Drumstix I no longer had any issues.
I would also highly recommend using a lens support when running motors.
At the moment, the product does not yet support manual control or connection to third-party devices. However, Viltrox does plan to introduce additional accessories and features to enable this functionality in the future.
Once we have done all of these steps to set up the hardware, we need to do the APP Calibration Process (Full Mode).
To connect the NexusFocus F1 Adapter, we do the following steps:
• Turn on the camera
• Open the mobile APP; the APP will automatically detect the device
• Complete pairing via Bluetooth
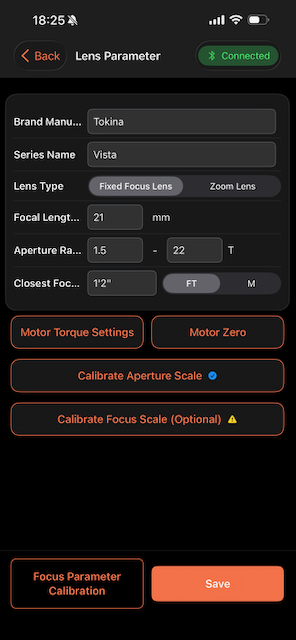
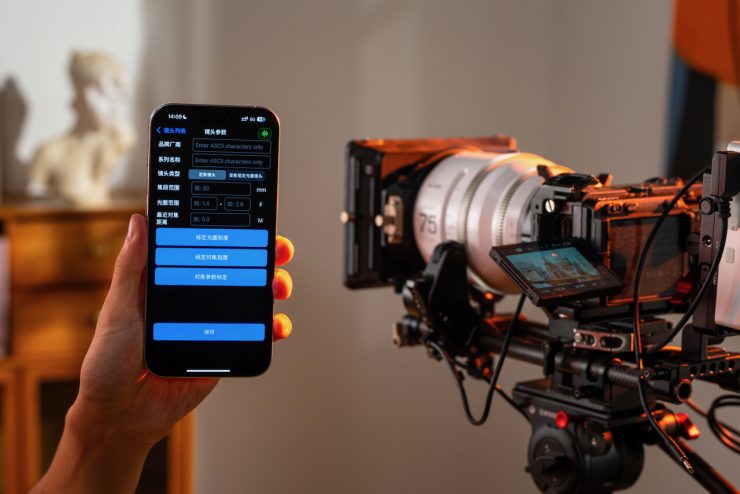
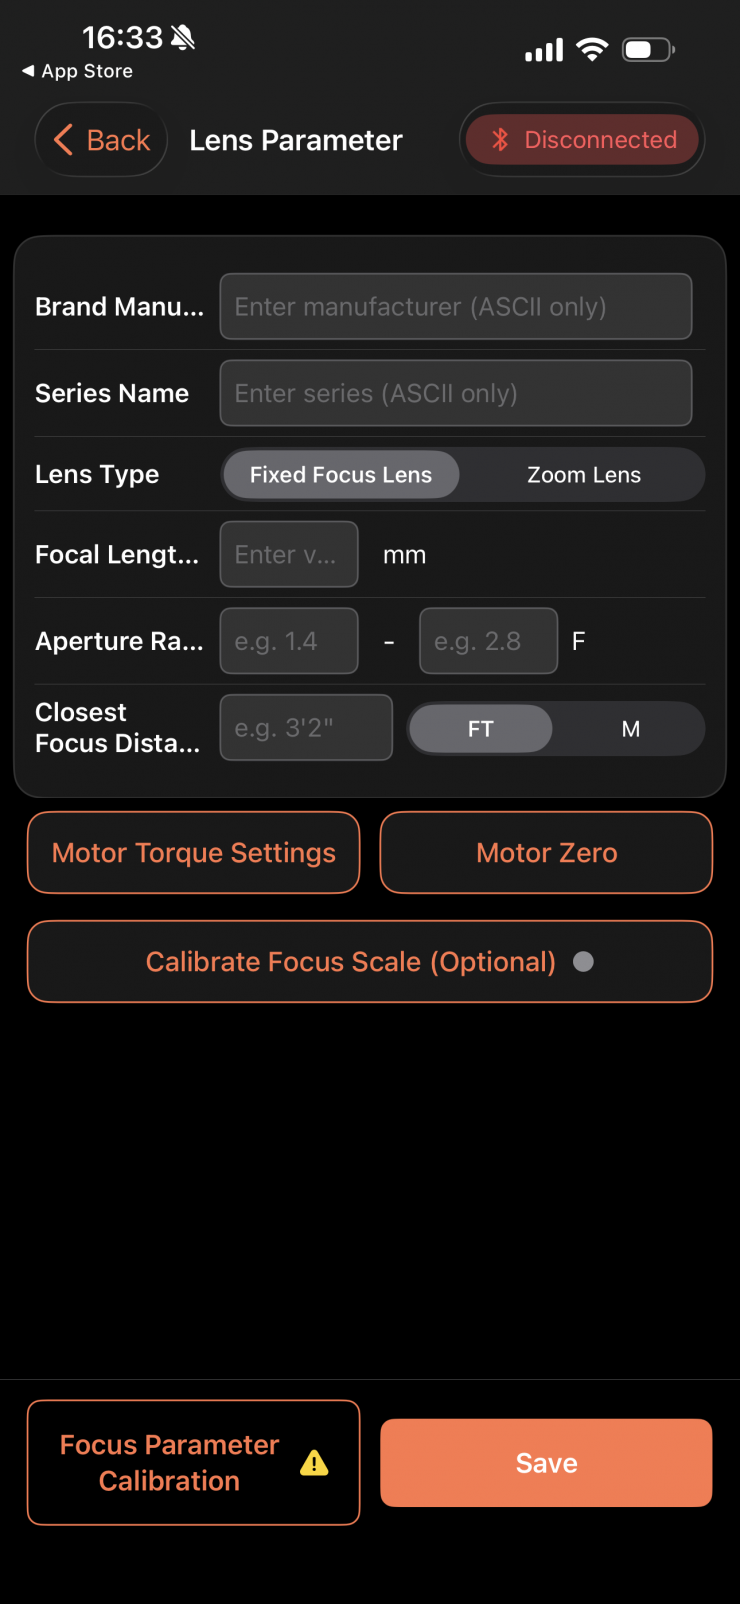
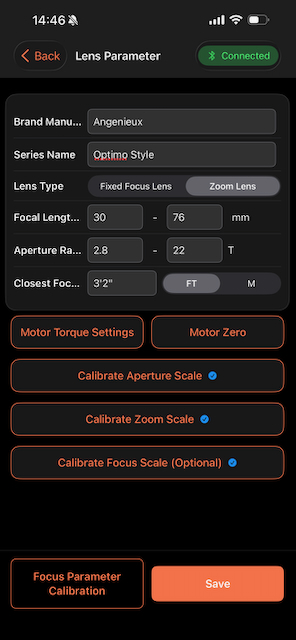
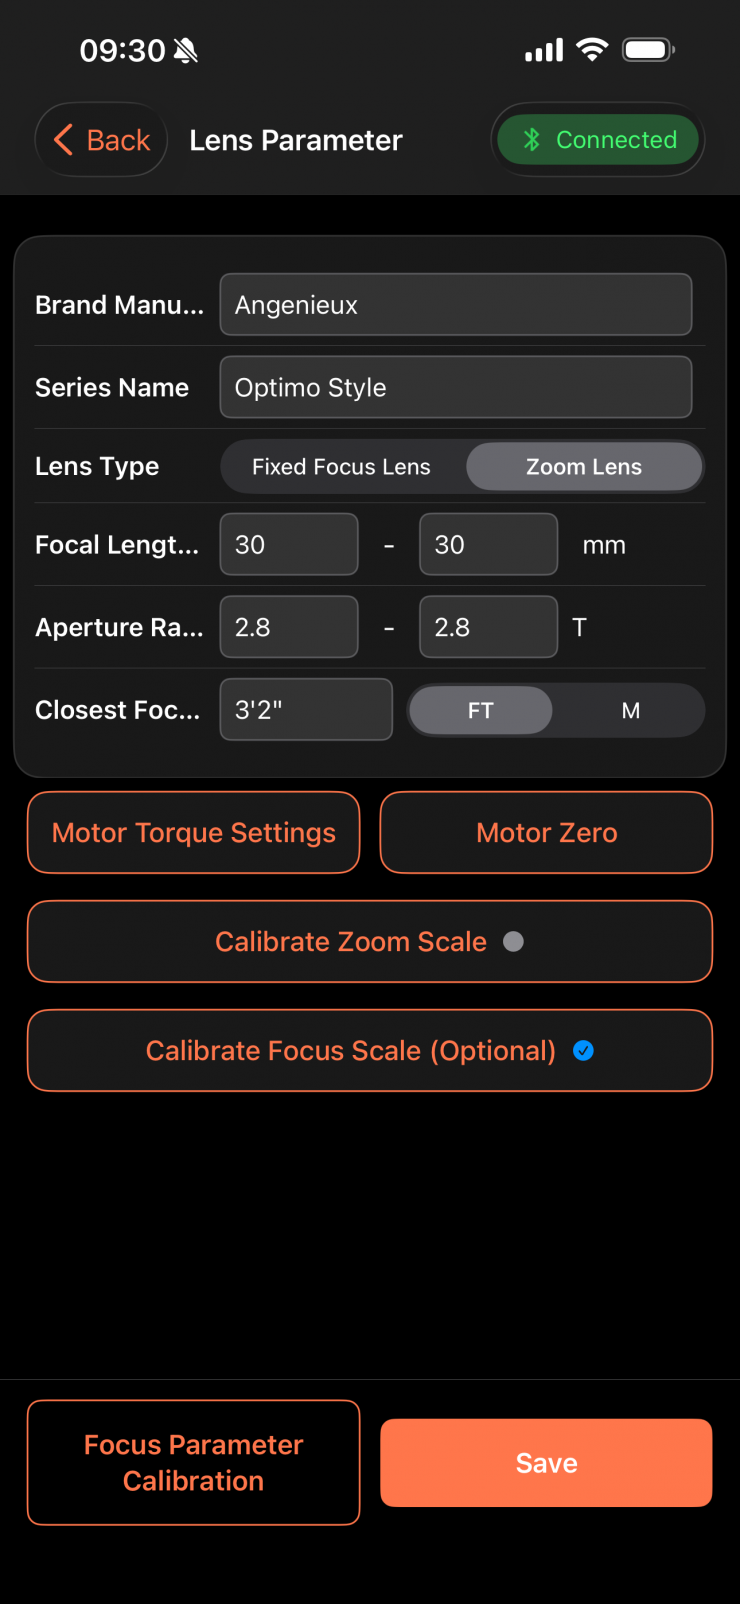
Once we have connected to the app, we then need to add a new lens. This takes a bit of time as you need to enter some data.
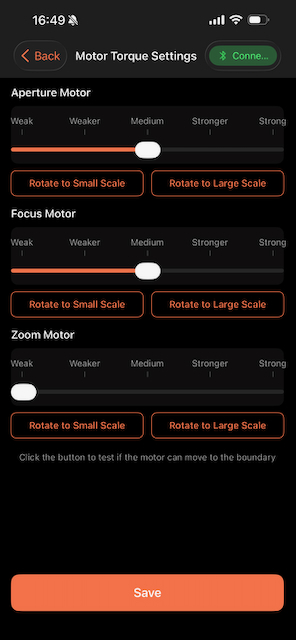
You can also change the motor torque settings if you need be.
Screenshot 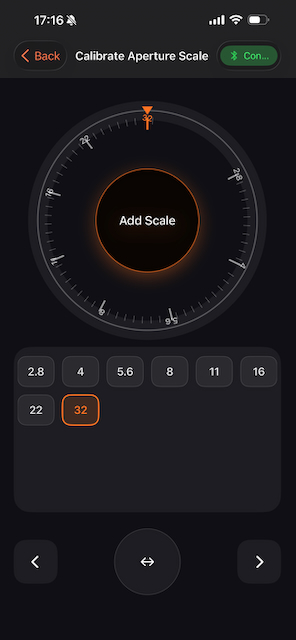
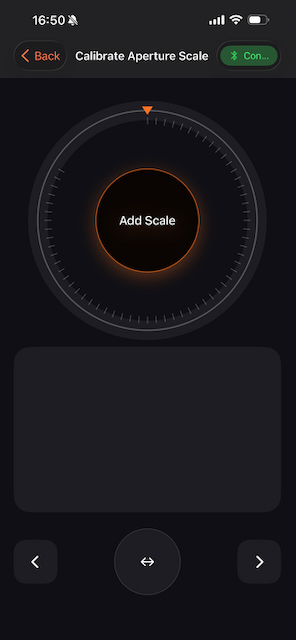
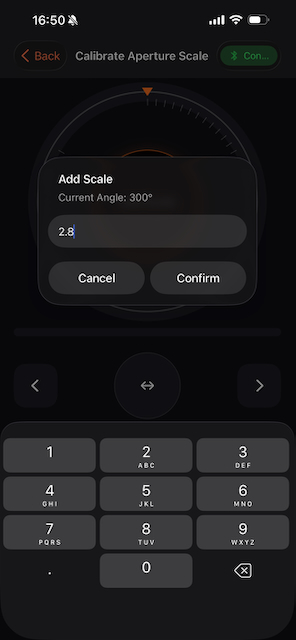
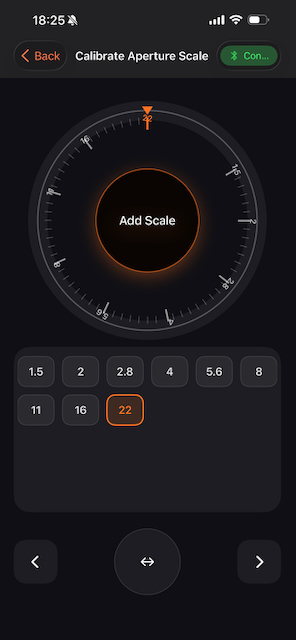
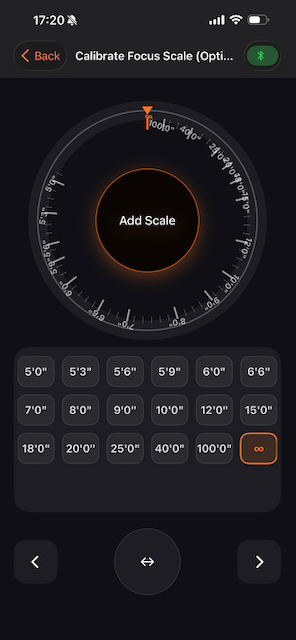
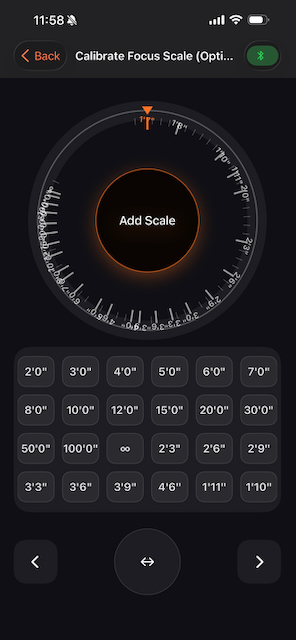
You then need to add to the aperture scales for the lens. This is a process of adding the T or F stops so they correspond to the markings on the lens.
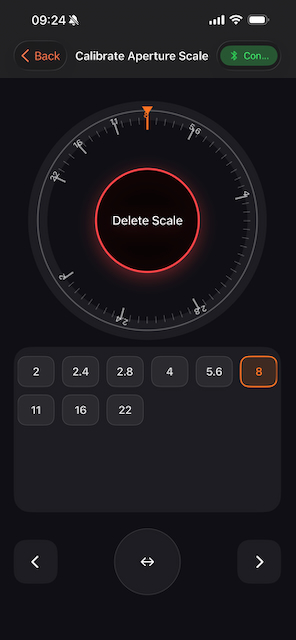
If you make a mistake, you can delete the markings one at a time by clicking on them.
Screenshot
Next (even though this says it’s optional, I would do this), you enter the focus markings.
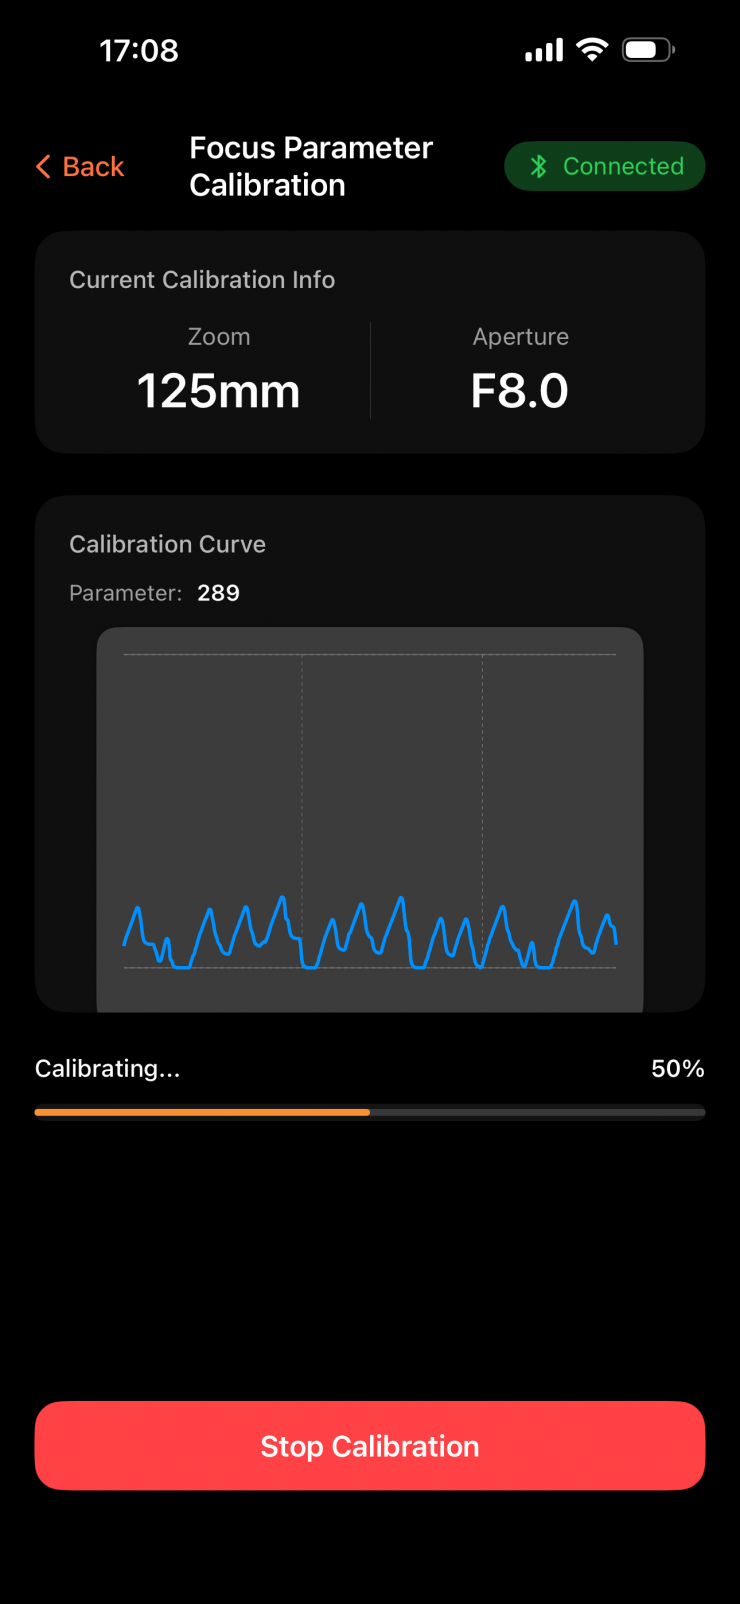
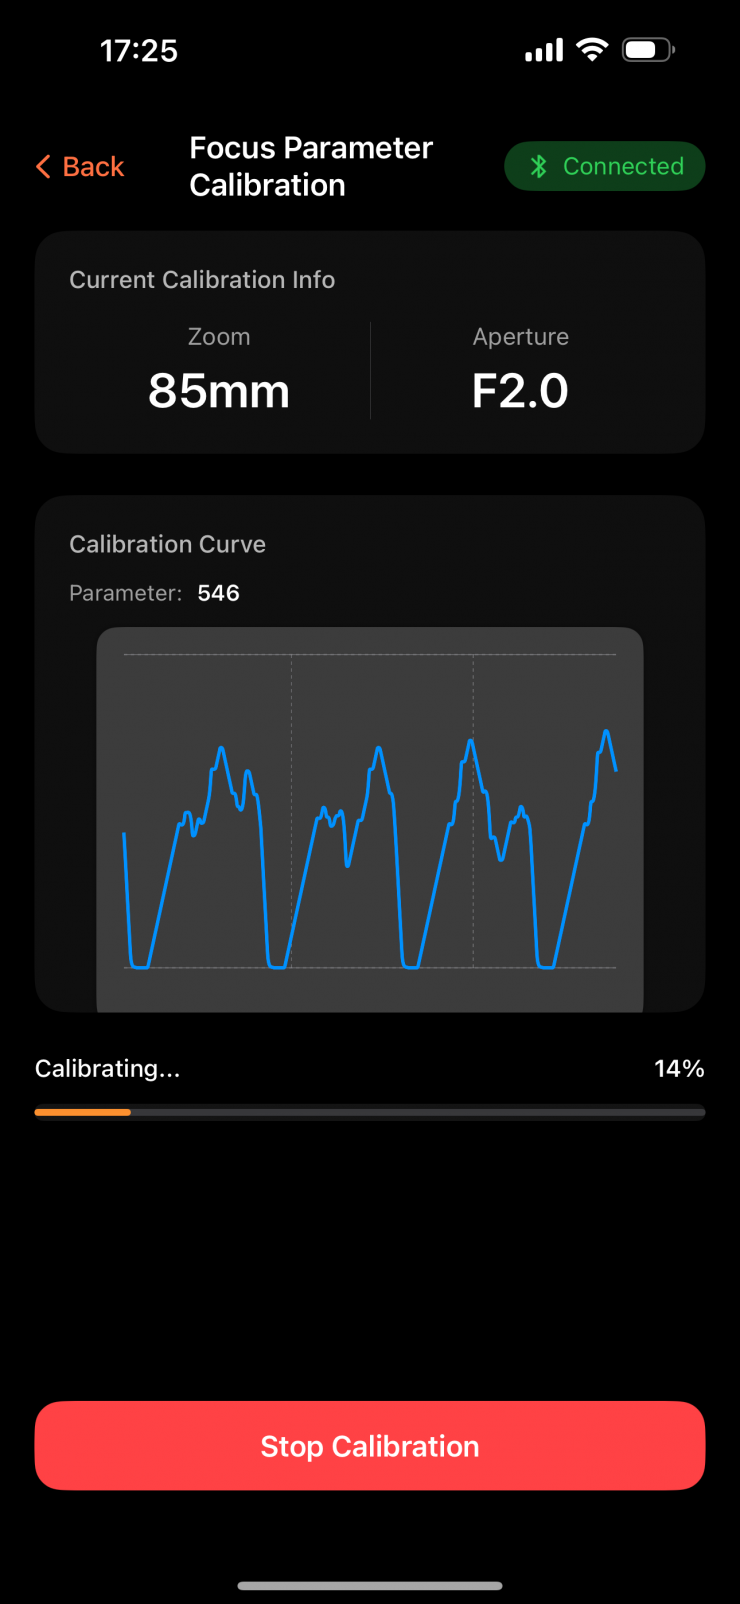
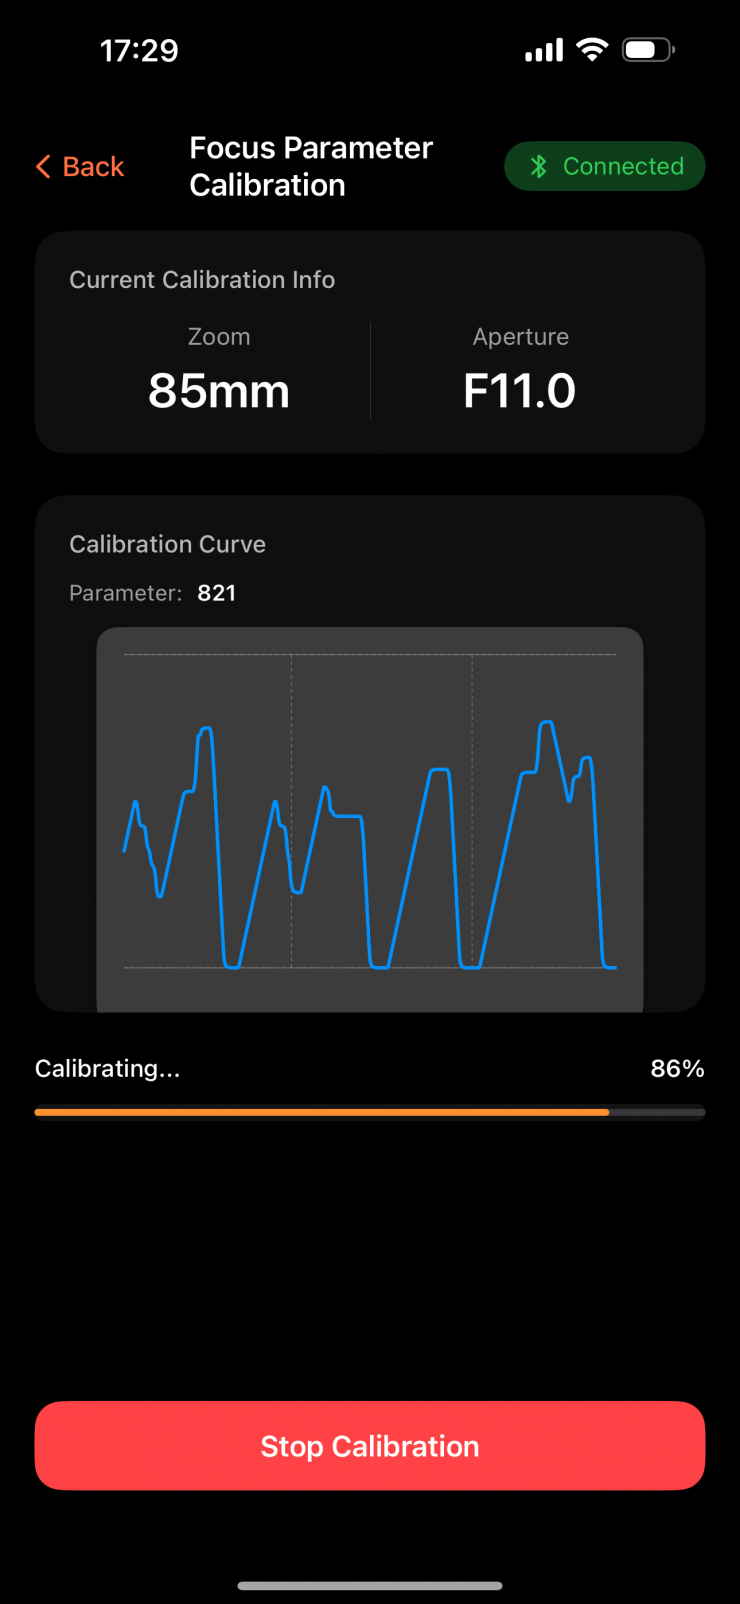
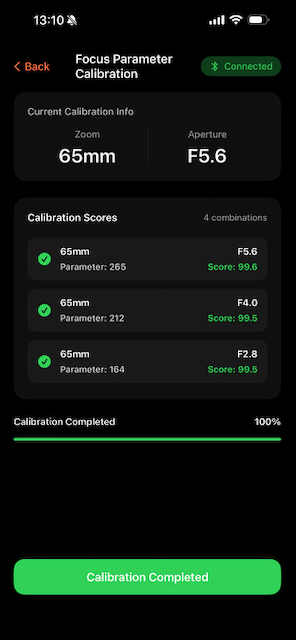
Next, we move on to calibration.

Screenshot 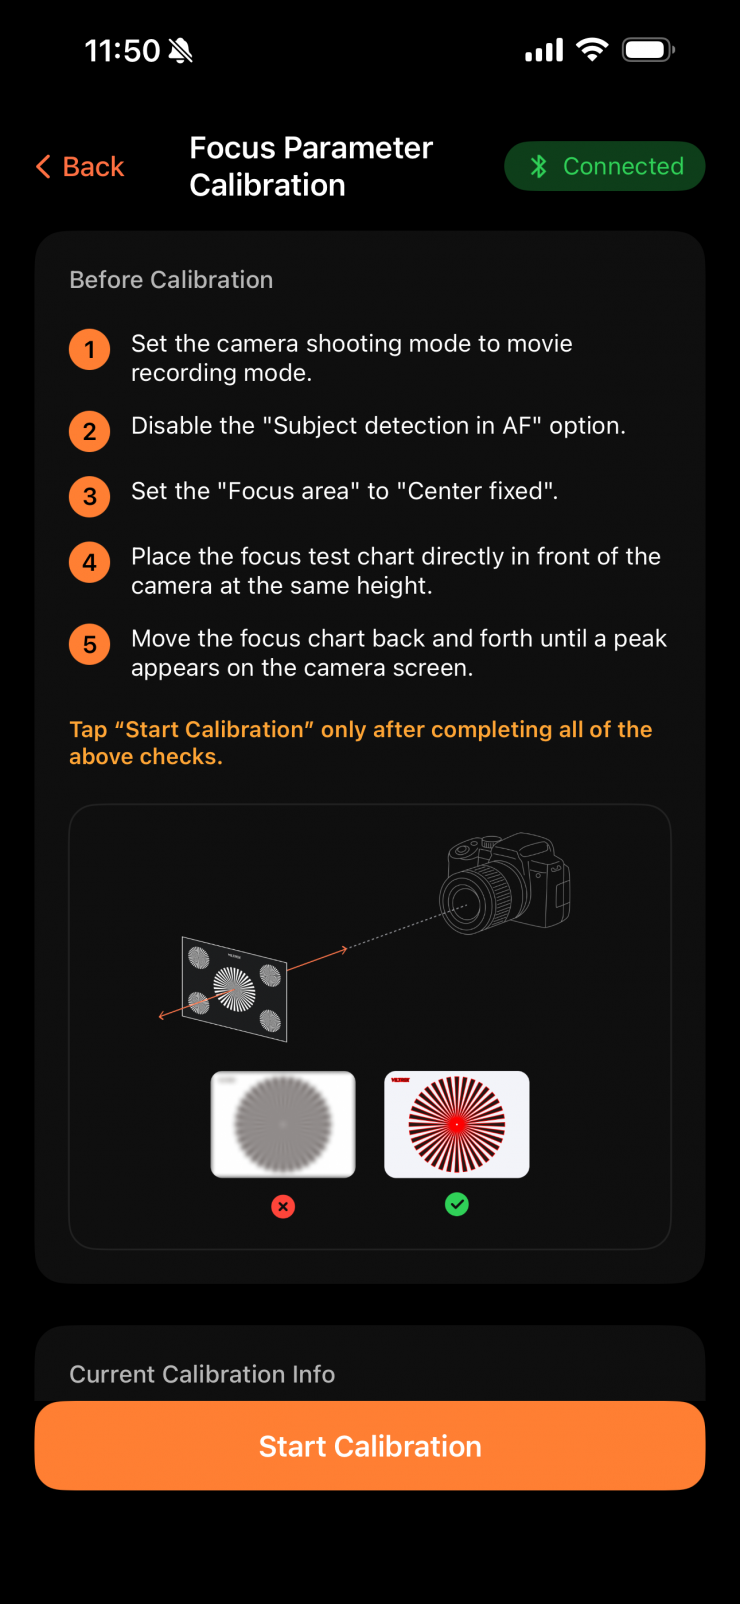
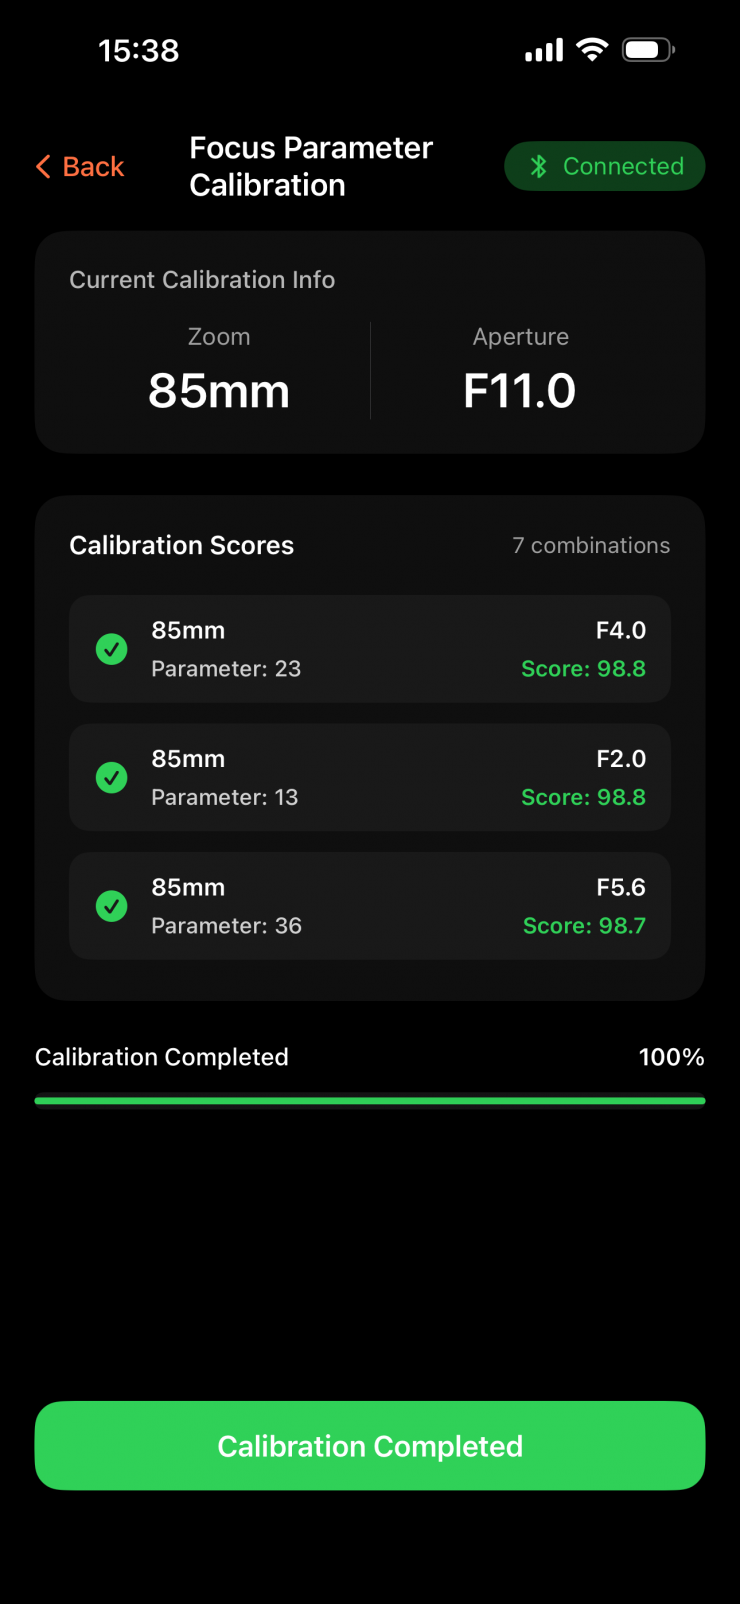
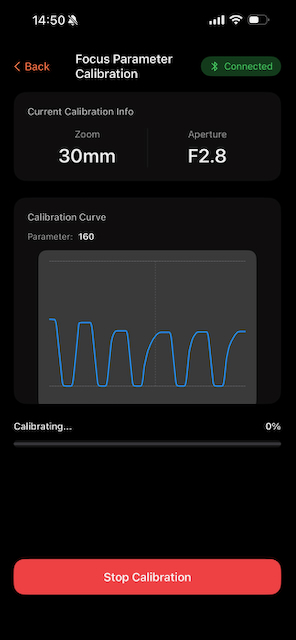
In the APP, select Focus Parameter Calibration.
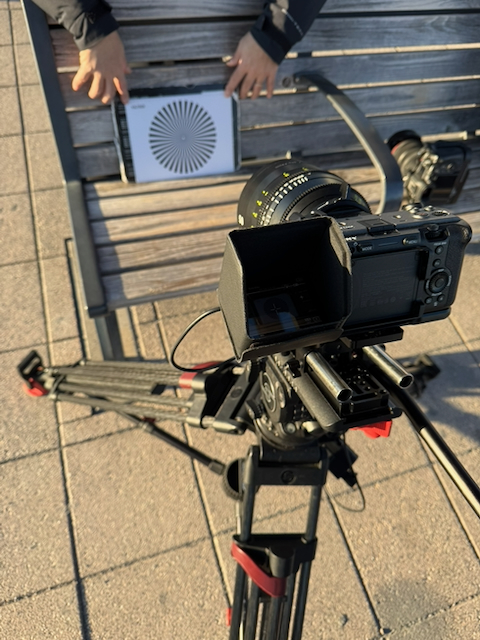
- Place the calibration paper in front of the lens
- Follow the APP prompts to complete focus/iris calibration
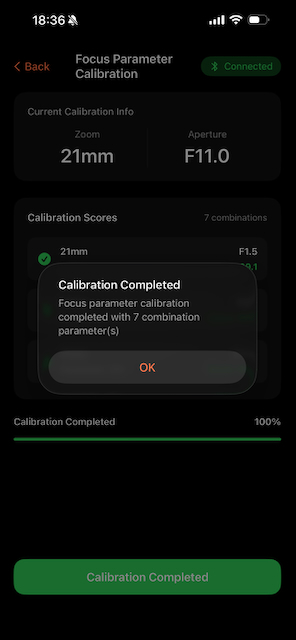
- After calibration is complete, the device is ready for use
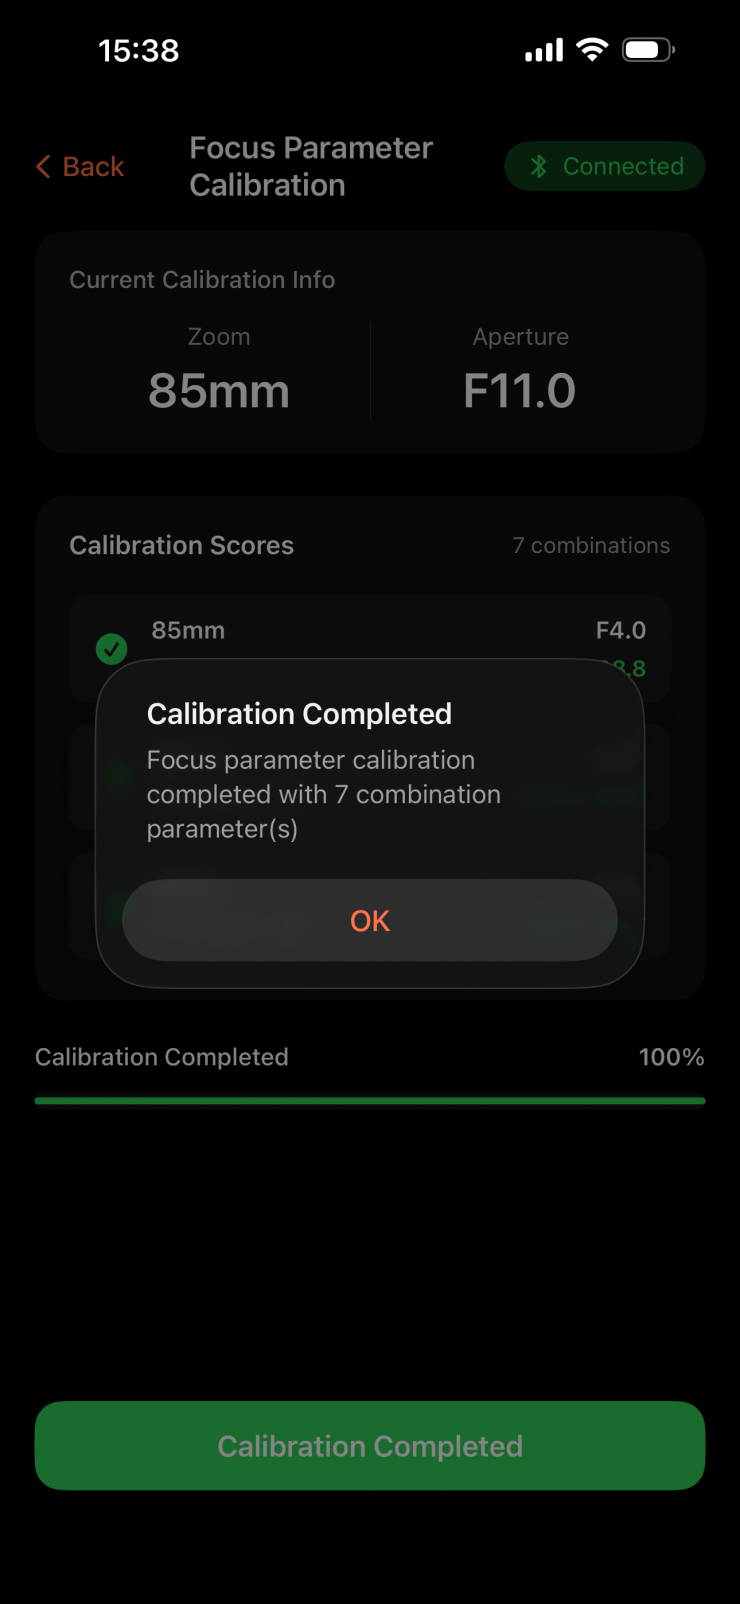
What is supposed to happen is that the app is supposed to show a “Device Reset Prompt”. You then follow the prompt to turn off the camera, wait one second, and turn it back on to complete the device reset. After the reset, the system will automatically complete focus parameter calibration and save the lens’s full data, including basic parameters and all marking calibrations.
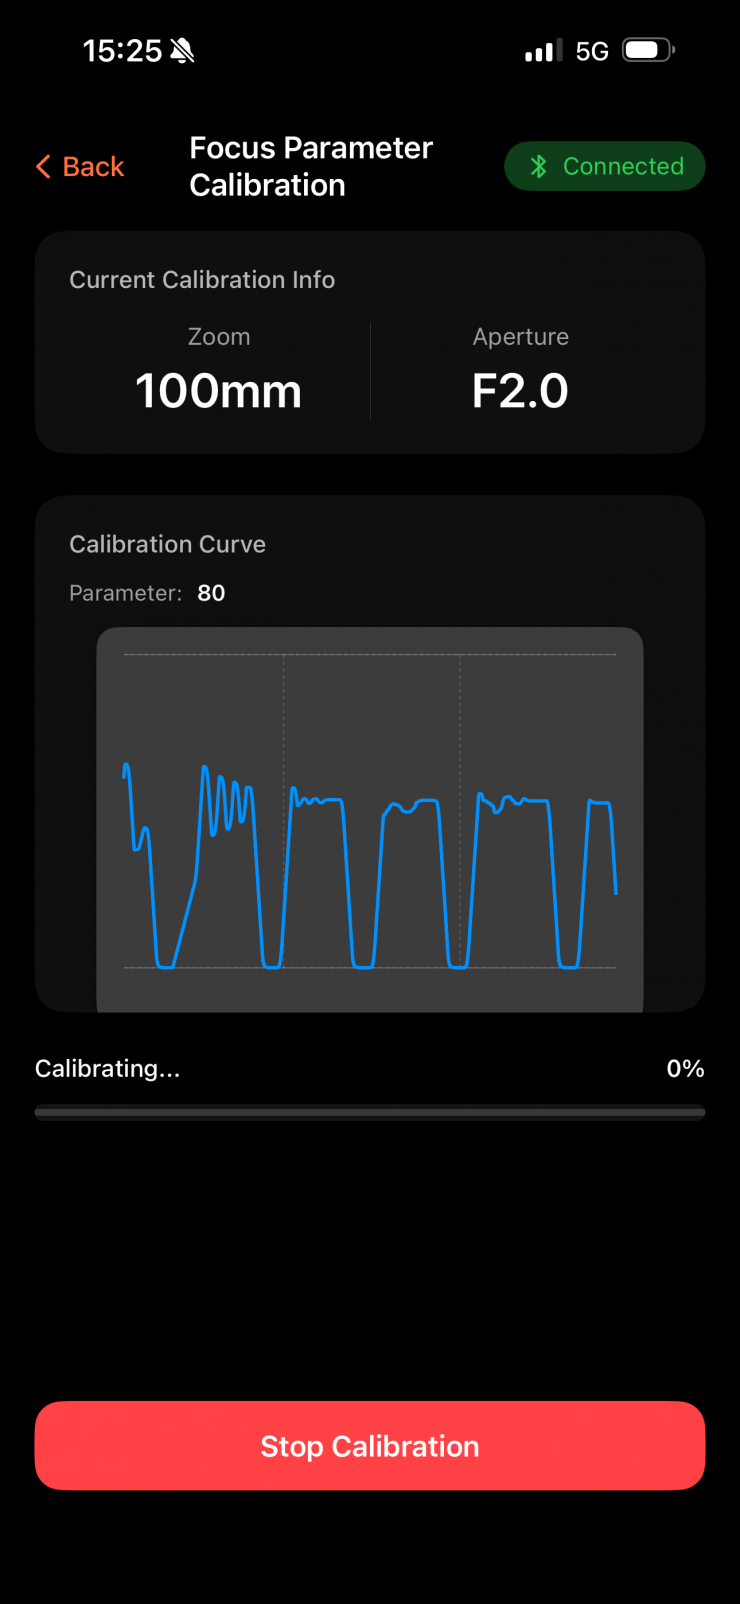
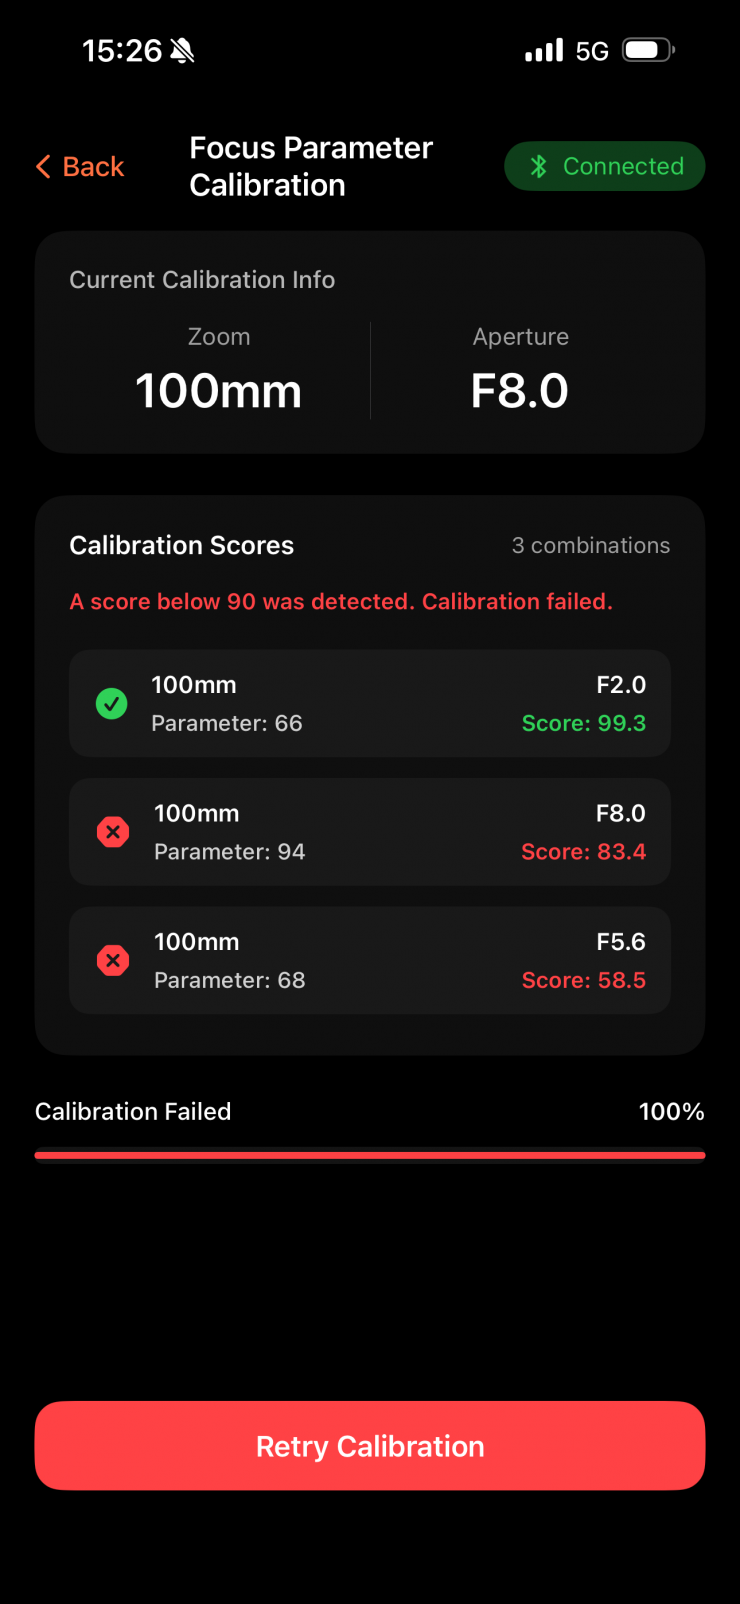
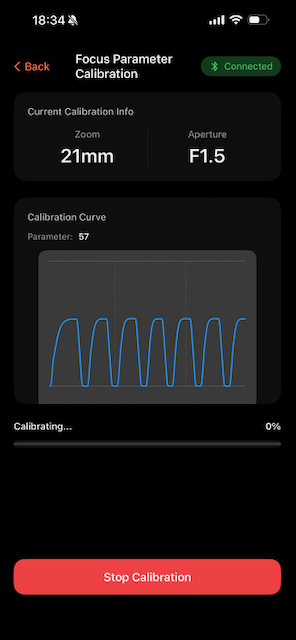
Initially, I encountered issues when trying to calibrate the lenses. It kept failing, and I couldn’t understand why, as I was following the included instructions provided by Viltrox. Most times when trying to do the calibration, I wouldn’t get the ‘Device Reset Prompt‘. There is no explanation as to why this wasn’t happening or any way of troubleshooting it. Also, I am not sure what the point of the moving graph display is in the app, because it doesn’t actually tell you anything.
What makes things even more frustrating is that the calibration process takes quite a long time if you are putting in a lot of aperture values, and you don’t know if there are any issues until it finishes. This means you can end up wasting a lot of time trying to get something to work.
I contacted Viltrox, and some of the instructions they gave me were different from those in the manual.
They told me that since they utilize the machine’s CMOS sensor for visual recognition, please adhere to the following guidelines during calibration:
1. Exposure Settings: Enable Auto ISO and Auto Shutter. Ensure the environment is well-lit to prevent underexposure.
2. Calibration Target: Do not use the blank paper included in the package. Instead, we recommend using textured objects or items with clear text, such as books or figurines.
3. Positioning & Focus Breathing: Keep the subject centered in the frame across all focal lengths. Avoid placing the object too close or too far away. If the subject appears too large in the frame, excessive focus breathing may compromise the accuracy of the calibration.
I am not sure why Viltrox doesn’t clearly list that you need to have Auto ISO and Auto Shutter enabled. With any new product, the instructions need to be crystal clear and well-explained so that there is less confusion. A troubleshooting guide also needs to be included. Hopefully, this is something Viltrox can improve on before the adapter actually starts shipping.
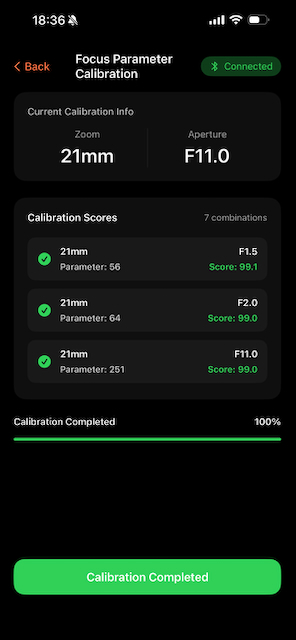
With the Focus motor, after calibration, it should stop at the nearest position. With the Iris motor, after calibration, it should stop at the minimum iris value. With the Zoom motor, after calibration, it should stop at the wide-angle (W) position.

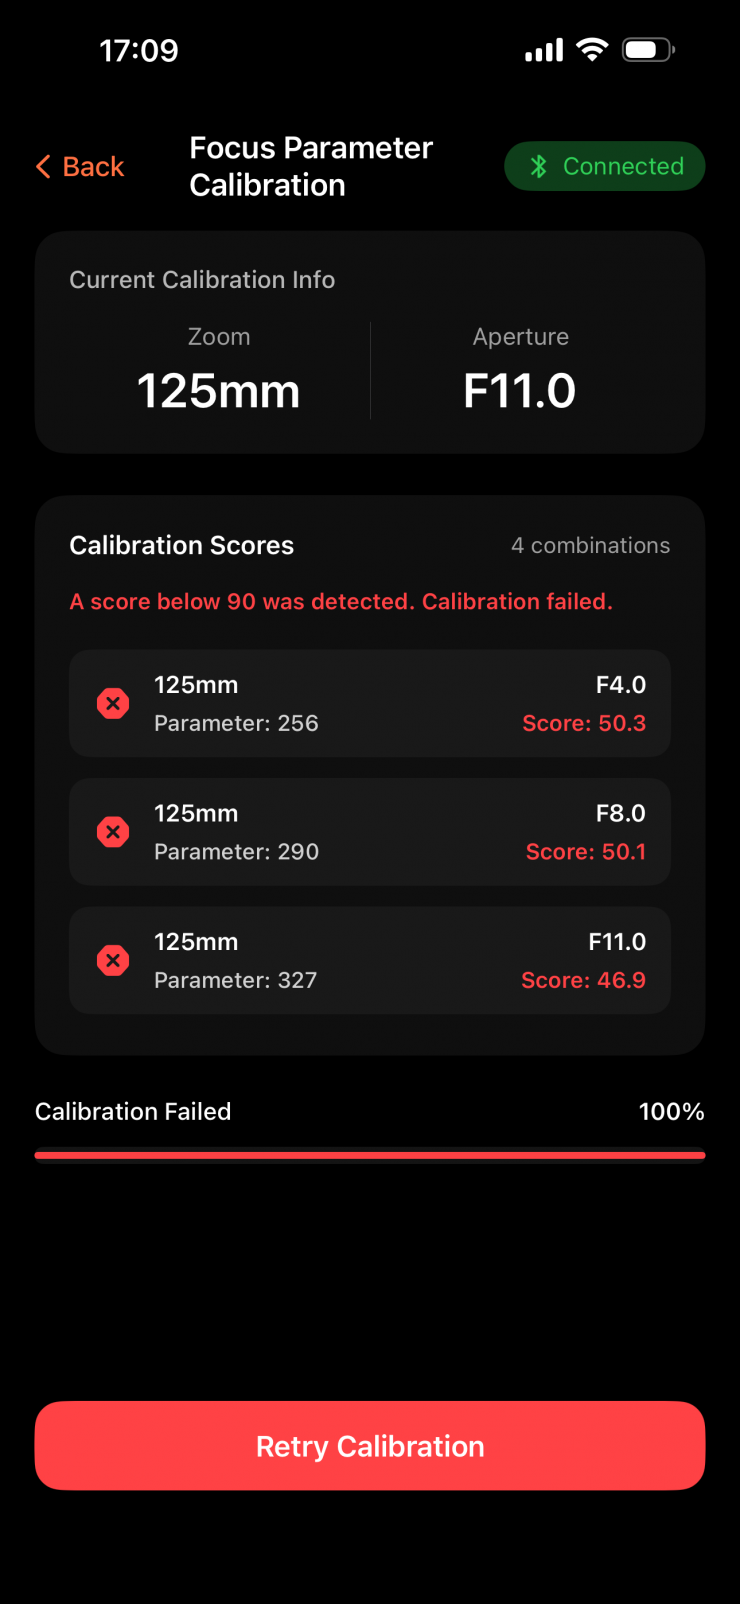

I tried out these new instructions, but I still ran into issues. Only two lenses out of 6 differnt ones I tried calibrated correctly. There was no rhyme or reason as to what the issue was. A lens would eventually calibrate after doing it multiple times, and then as soon as you went to calibrate a new lens in the exact same spot, it would completely fail.

I got in contact with Viltrox again, and we troubleshooted the problem, and it came down to one small thing. Viltrox labels their Motors with an L/R switch, but the way they have done it is a little strange. I say this because the L/R orientation switch is only correct if you have an inverted motor on a top rod!
If you are using the motor on traditional bottom mouned 15mm rods, the L/R switch doesn’t make any sense. For the system to work properly, a motor mounted on the right-hand side of the camera needs to be set to L, and a motor that is mounted on the left-hand side needs to be set to R. This small problem meant that the system wasn’t working correctly, and it wouldn’t calibrate!

Once this problem was sorted, I had no issues calibrating lenses.
I talked to Viltrox about this, and they are aware of the issue and will be doing something to rectify it in the app. This should also be clearly mentioned in the manual because otherwise, users are going to run into the same issues I did.
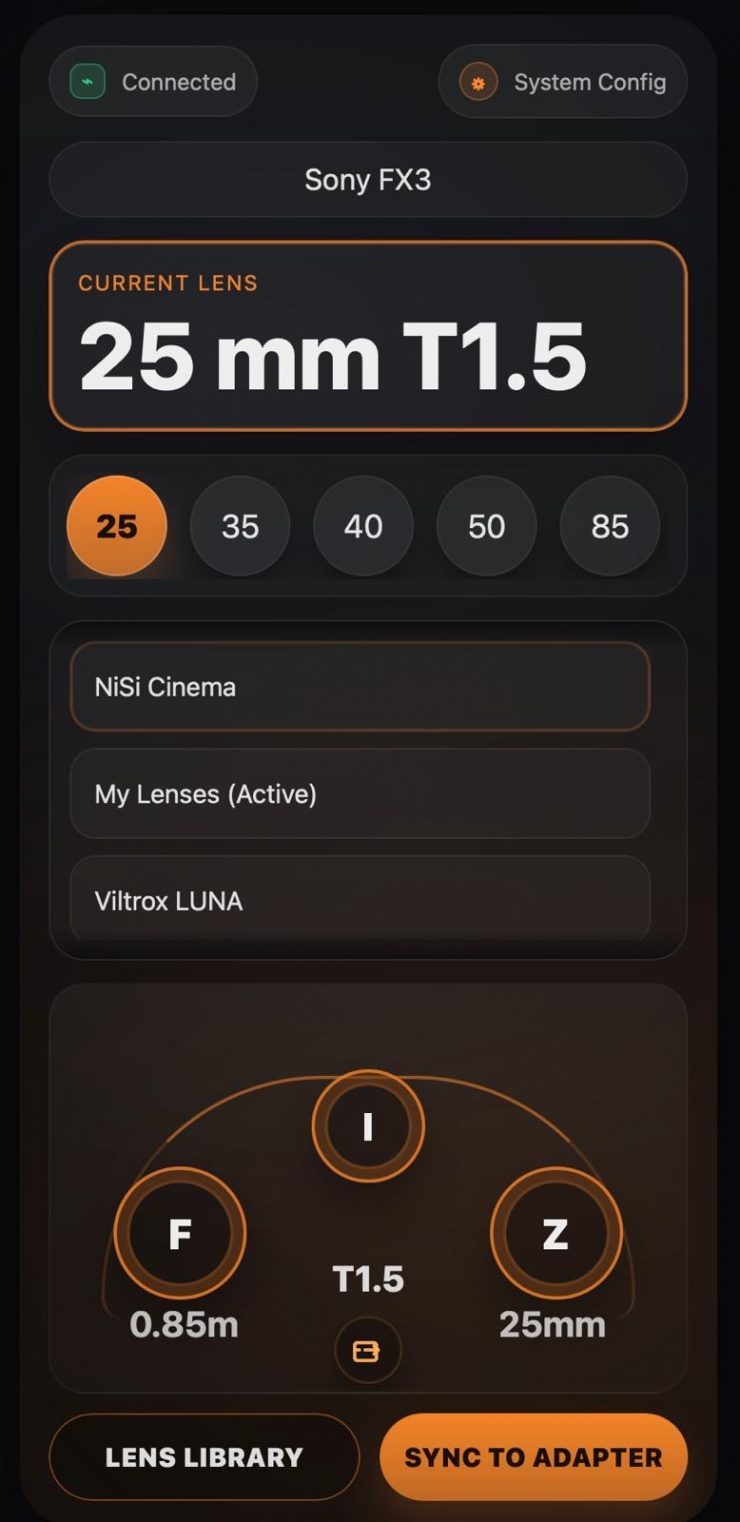
Viltrox did tell me that they will be updating the app to make the UI more intuitive and easier to use. This will hopefully be in place before it starts to ship. Above, you can sort of see what it will potentially look like.
No PL /i lens data
The adapter doesn’t have any PL /i lens data capabilities. This would be handy to have, as it would give the ability for a lens to be instantly recognized by the camera and adapter. You could also get a pass-through data, which would be handy for virtual productions, VFX, etc.
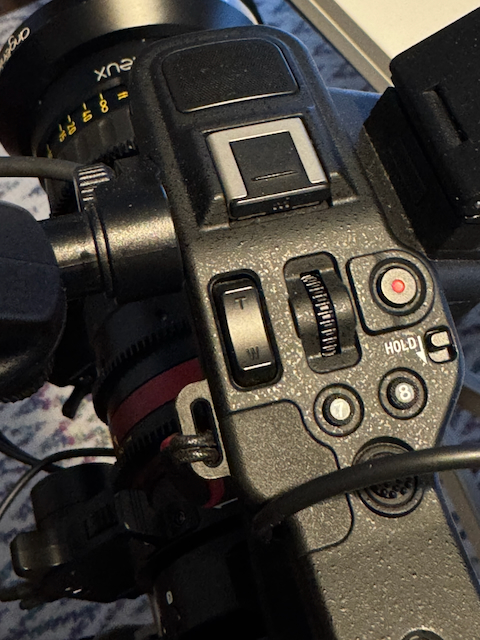
Build Quality
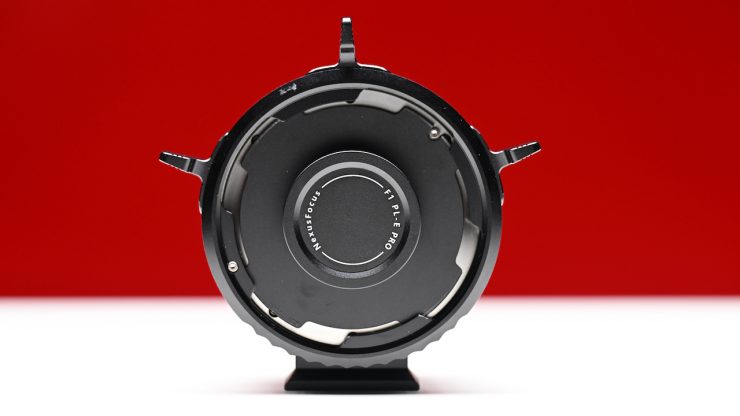
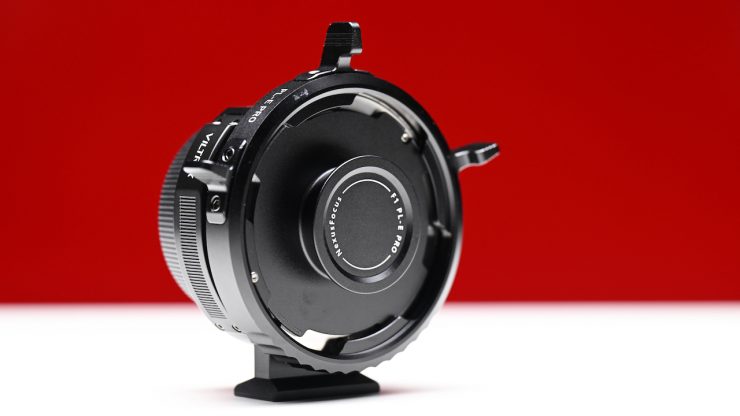
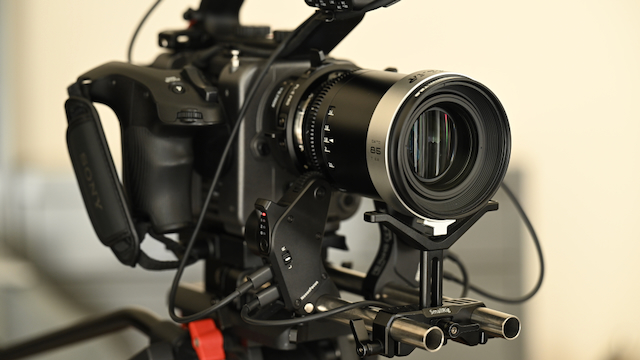
The Viltrox NexusFocus F1 Adapter is solidly made and constructed.
There is a removable foot support on the adapter, which is handy if you are using it with a small-sized camera and would prefer to mount the adapter directly to a monopod/tripod.

The buttons on the side aren’t overly tactile, but they get the job done.

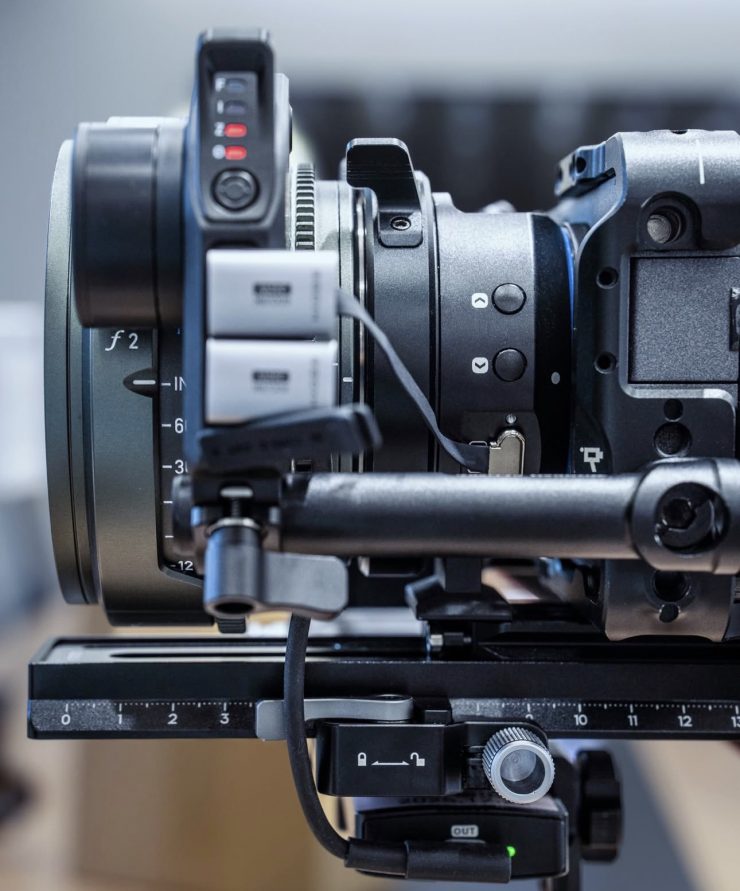
There was nothing that I came across on the adapter when it came to build quality that concerned me, except for some wobble between the FX6’s mount and the adapter.
Above, you can see what I mean.
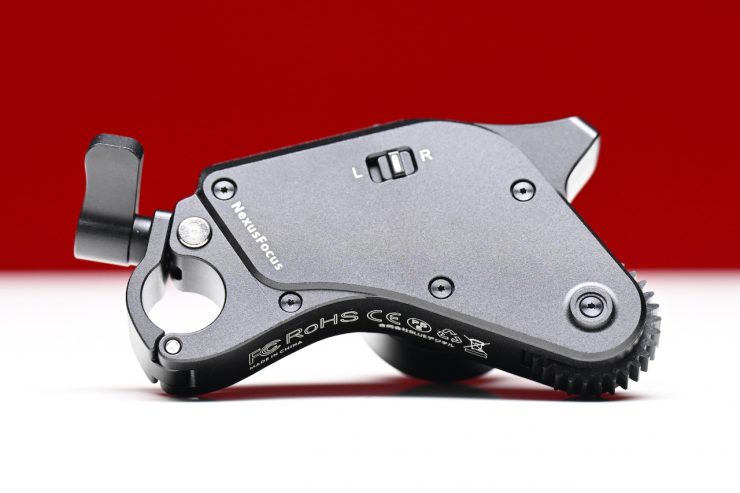
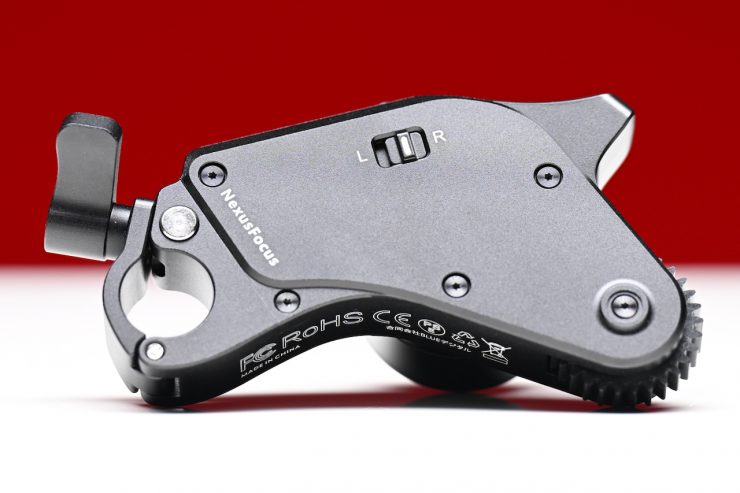
The motors aren’t overly heavy, but they are still reasonably well constructed. Unfortunately, they don’t come with any ability to increase the height, as the 15mm rod mount is fixed to the motor.
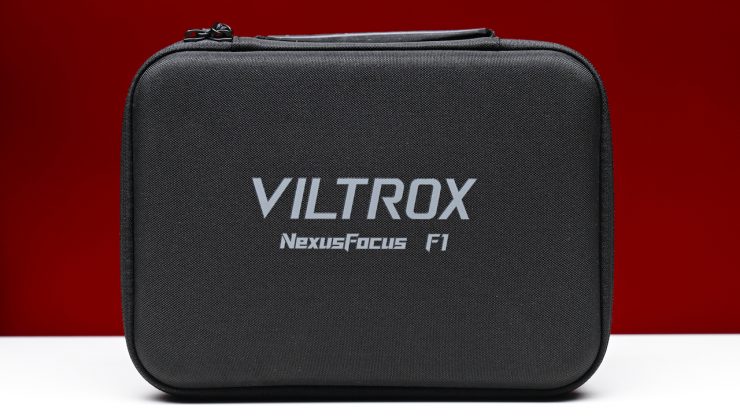
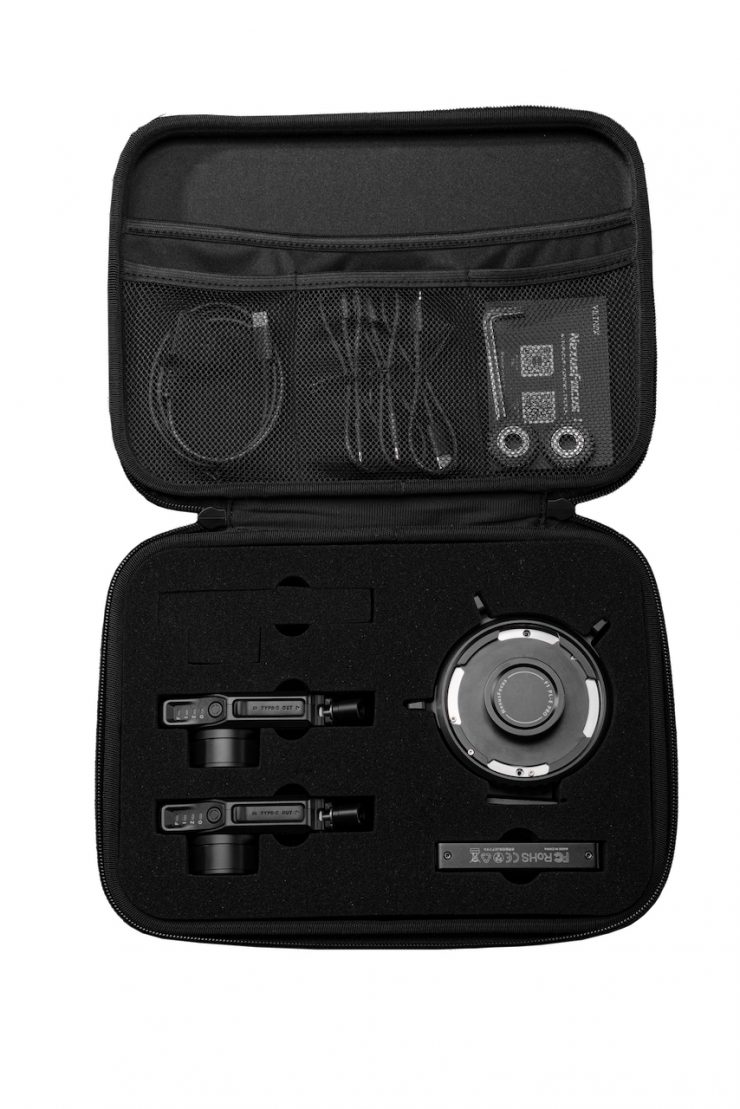
The kit comes in a reasonably nice carry case.


You also get a two-sided focus chart.
Usability
As the NexusFocus F1 Adapter relies on a camera’s AF system, the results are going to be different depending on what camera you happen to be using. Newer Sony cameras with more advanced AF systems are going to perform better than older cameras.
Sony cameras, which feature a built-in AI processing unit, such as the Alpha 1 III, Alpha 9 III, Alpha 7R V, Alpha 7C II, Alpha 7CR, ZV-E1, FX2, Alpha 6700, and ZV-E10 M2, are going to perform the best.
Before changing a lens, you need to make sure that you turn off the camera power. If the lens is changed while the camera is powered on, the camera adapter ring will fail to recognize the new lens and will continue using the previous lens’s adaptation data, which may cause lens damage.
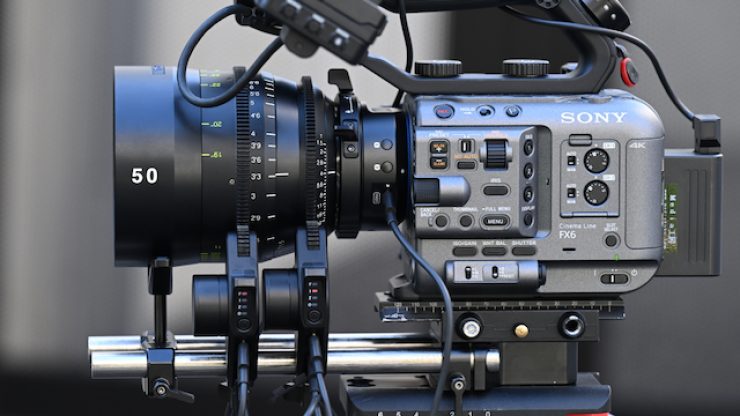
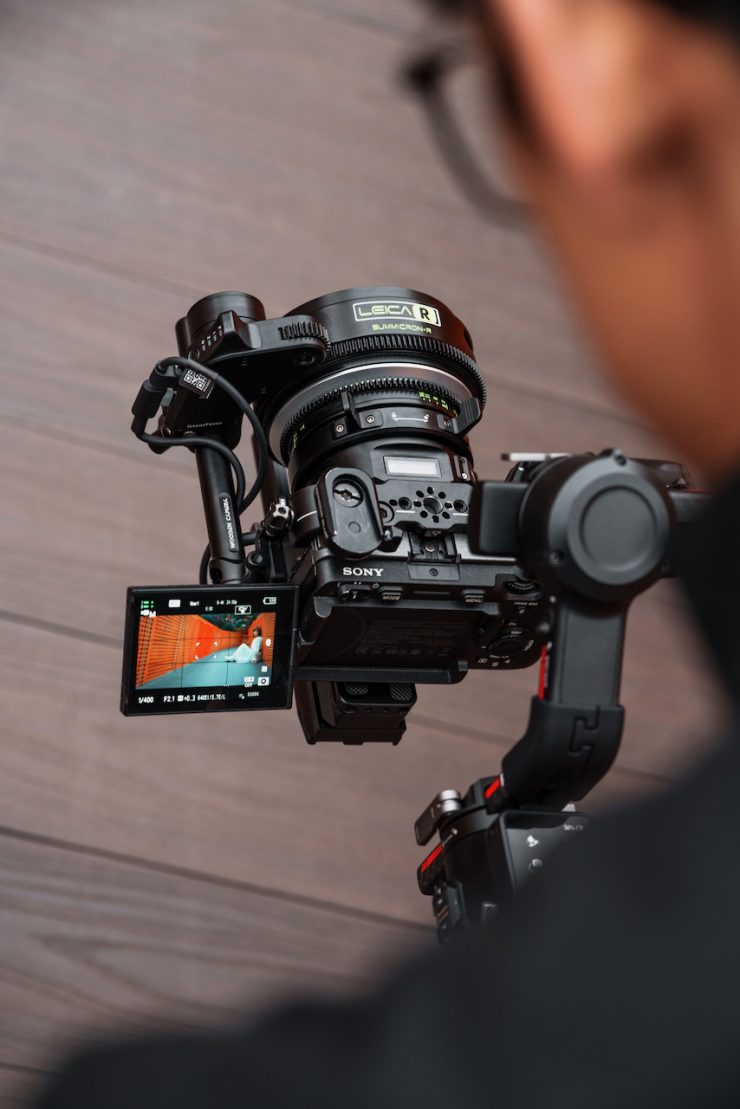
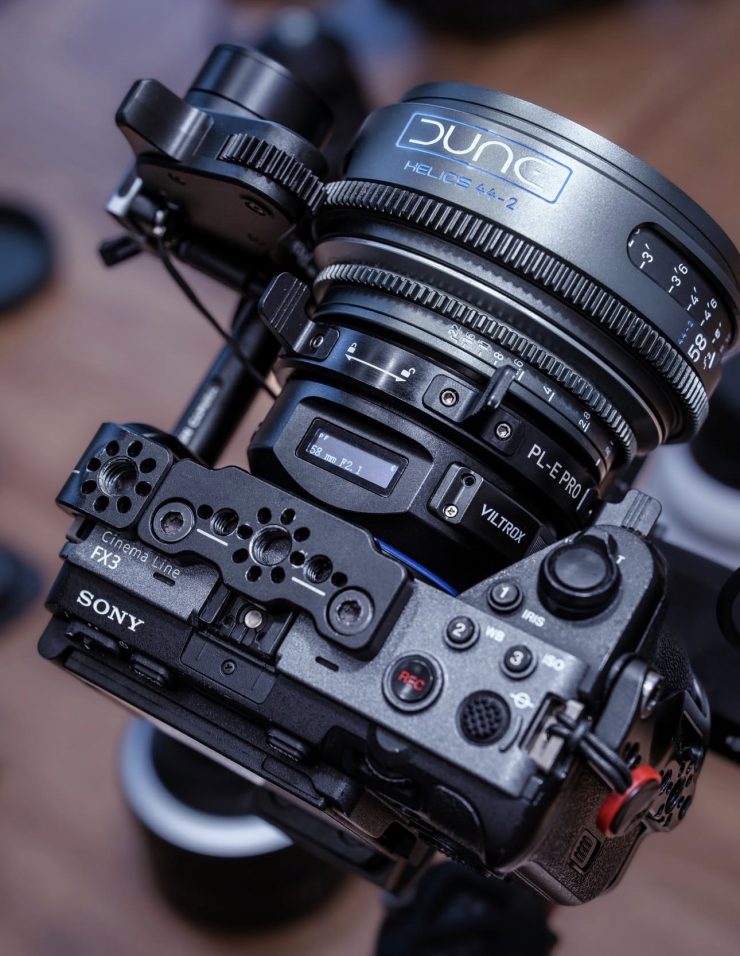
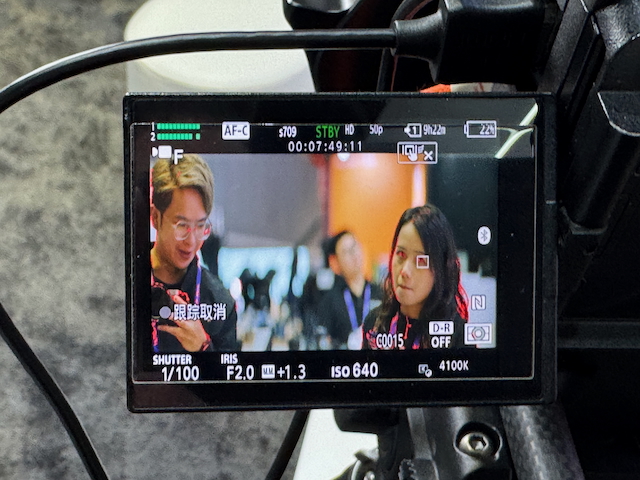
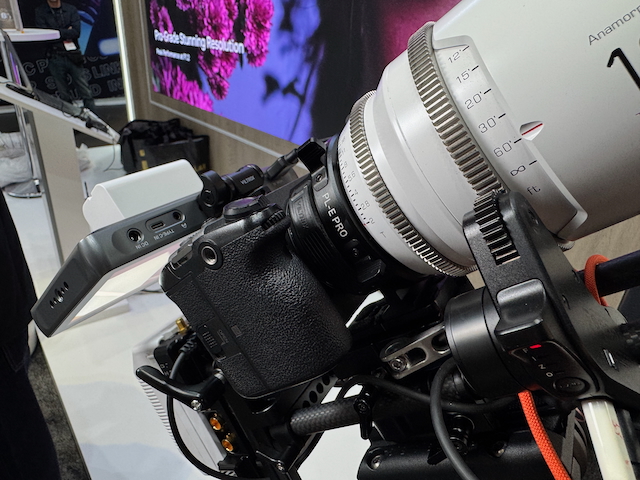
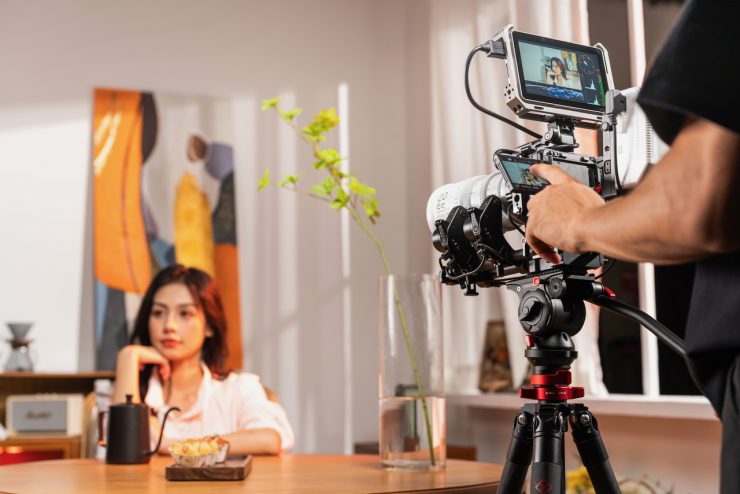
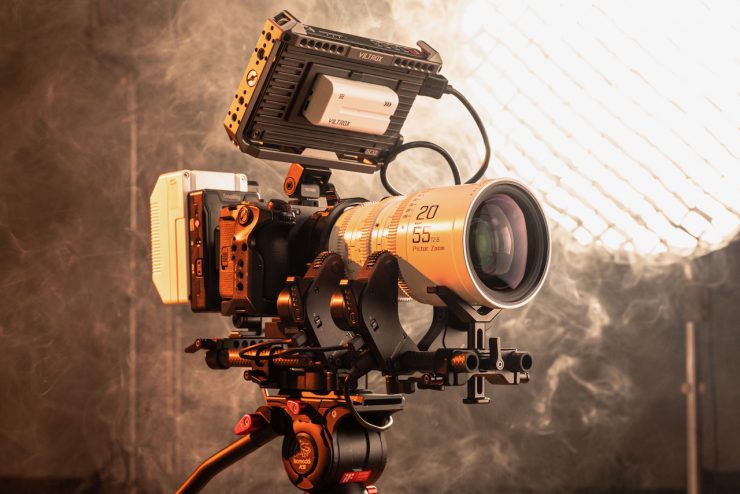
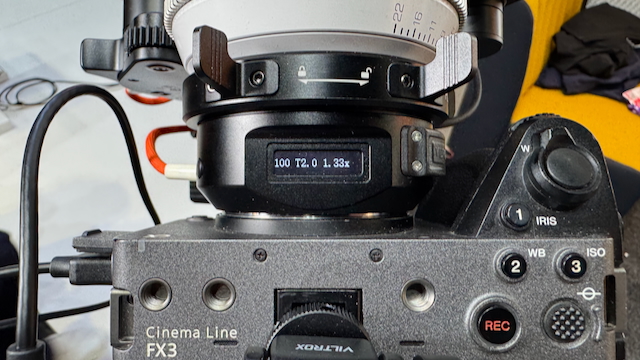
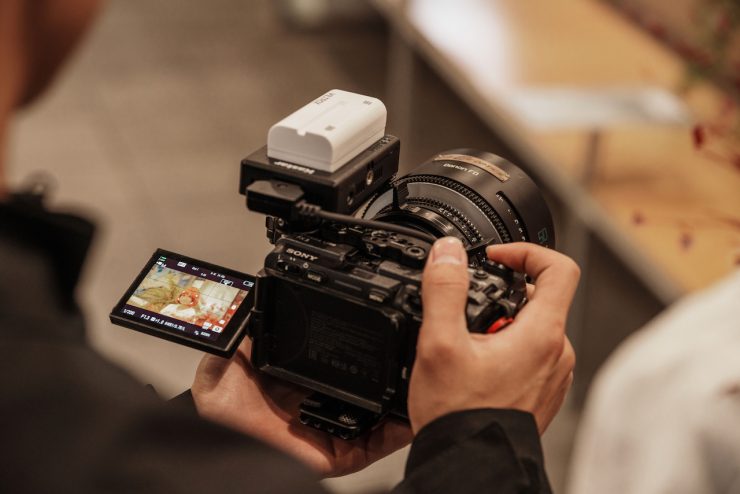
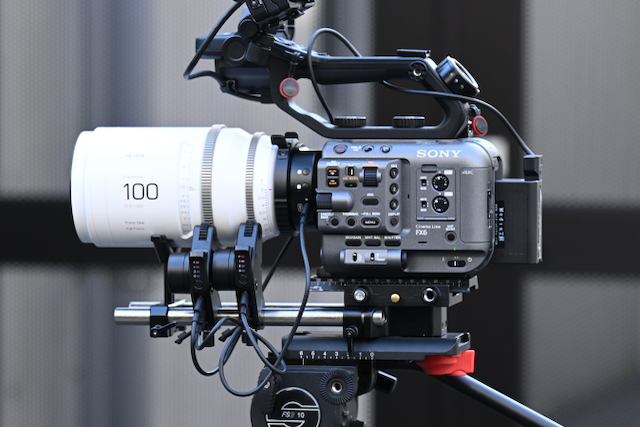
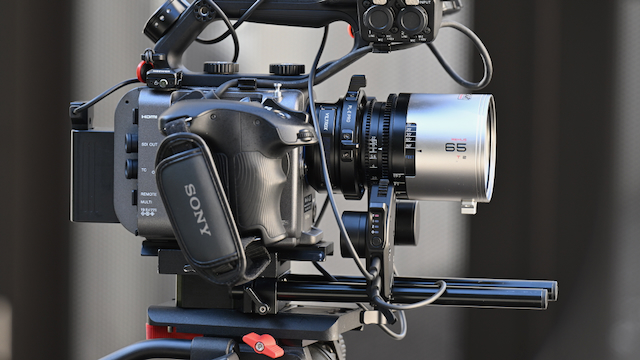
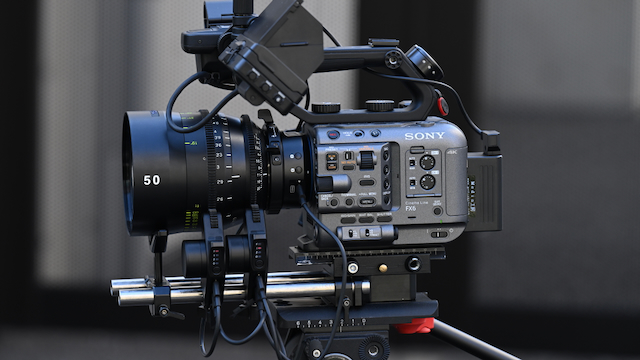
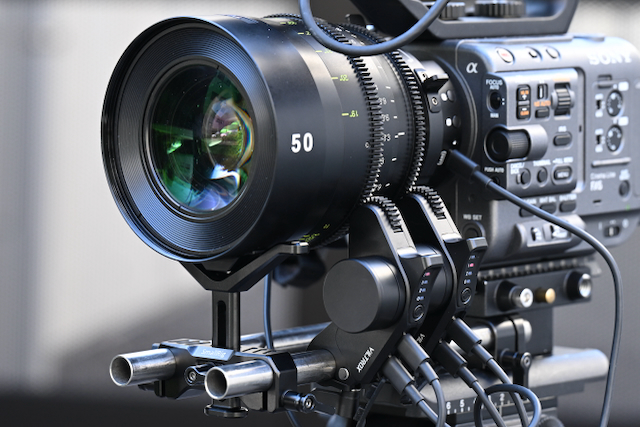
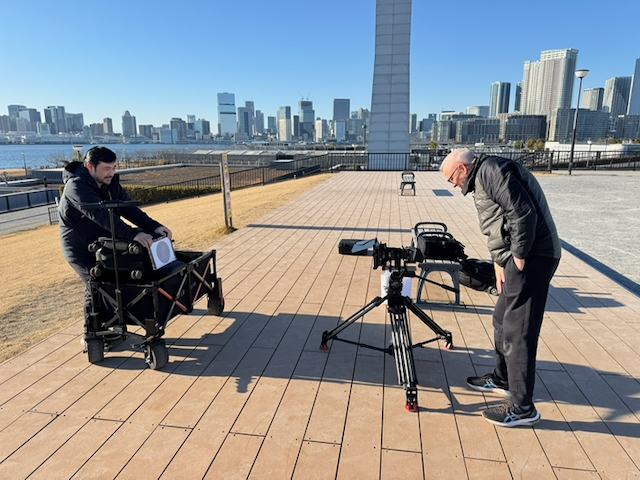
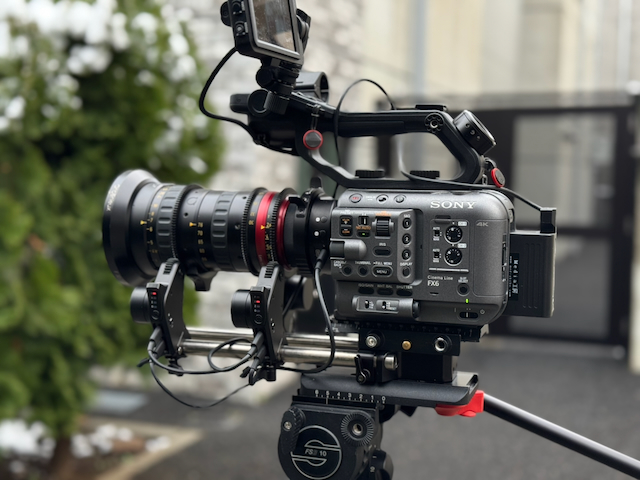
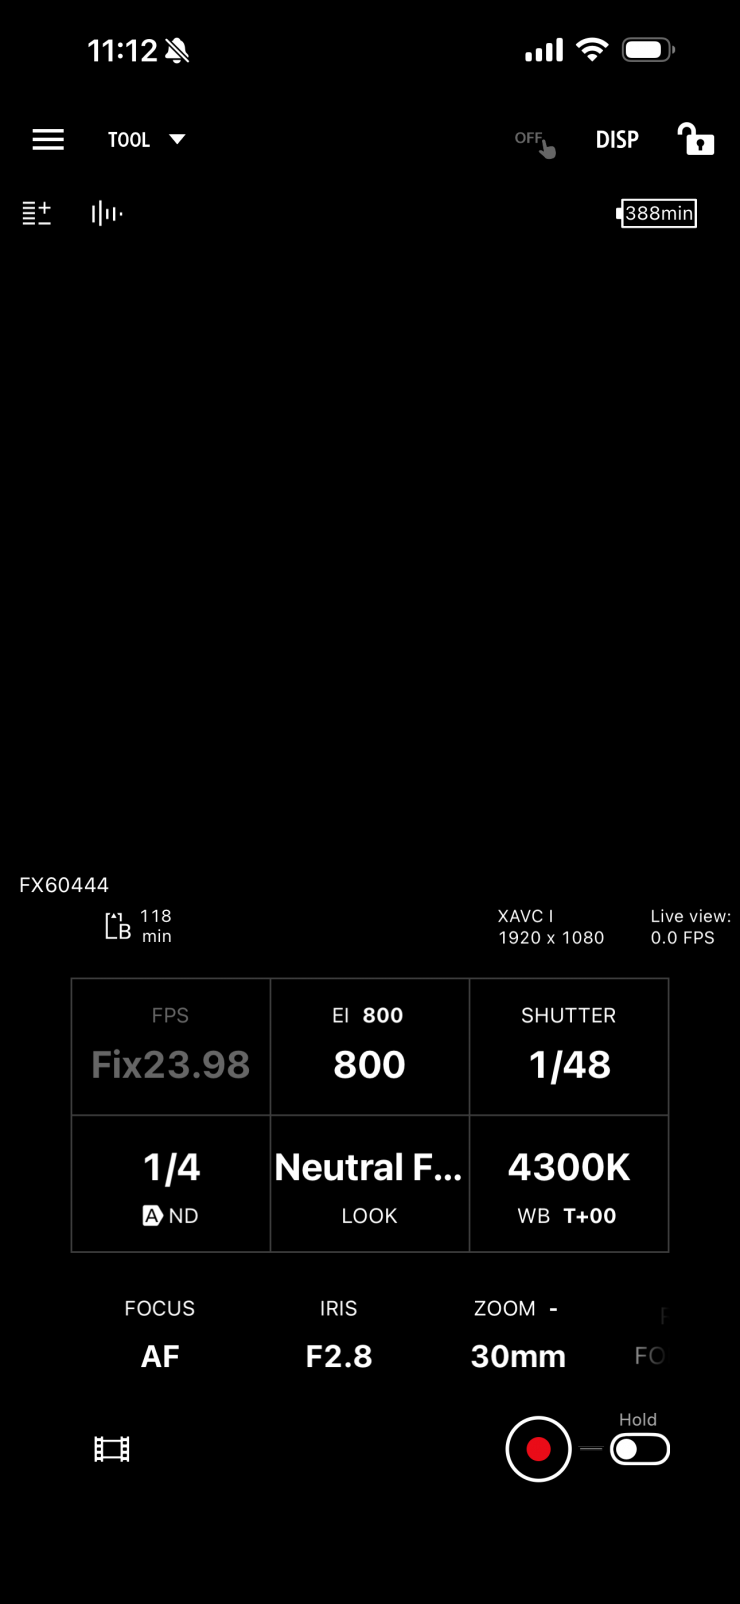
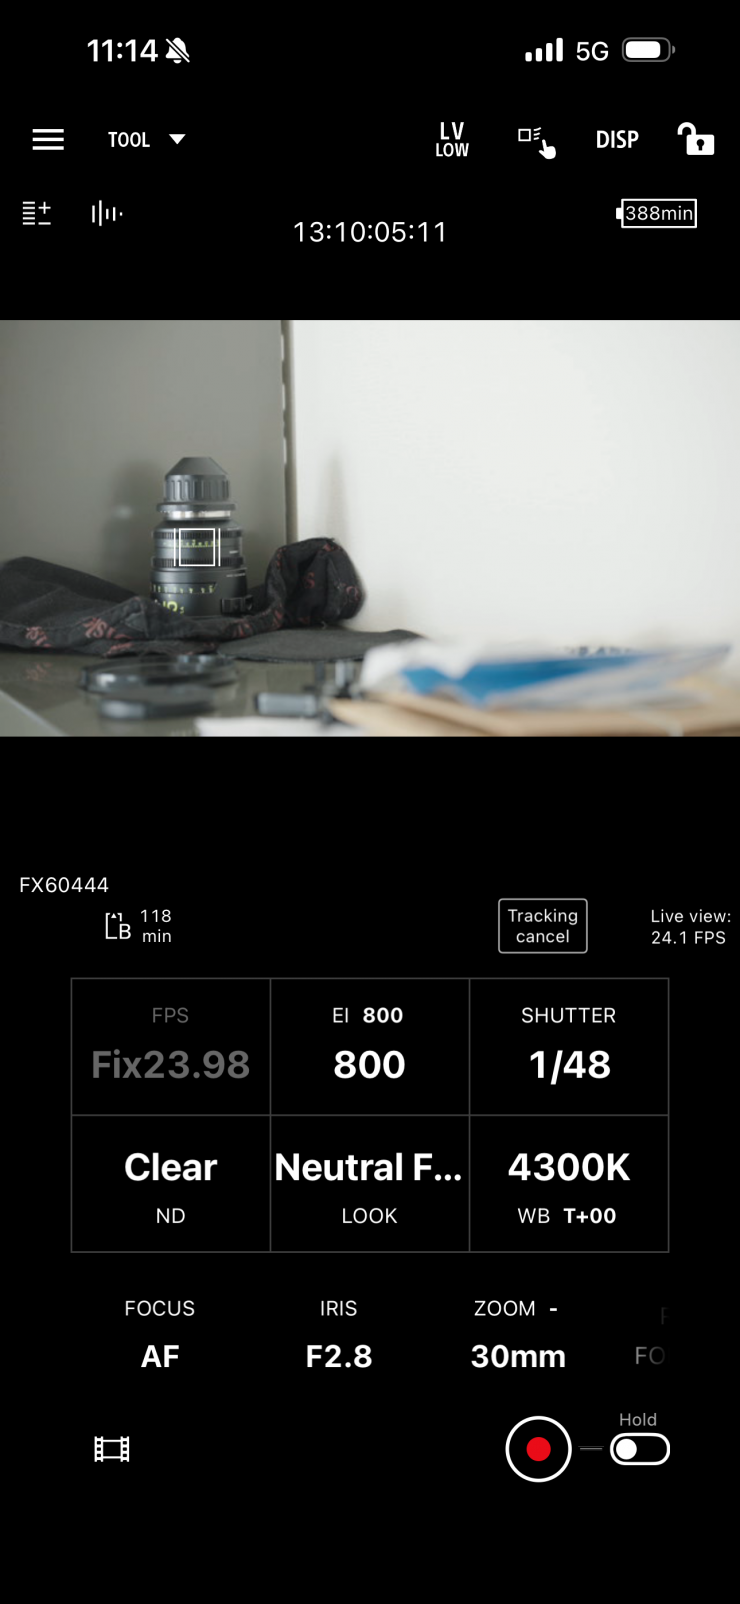
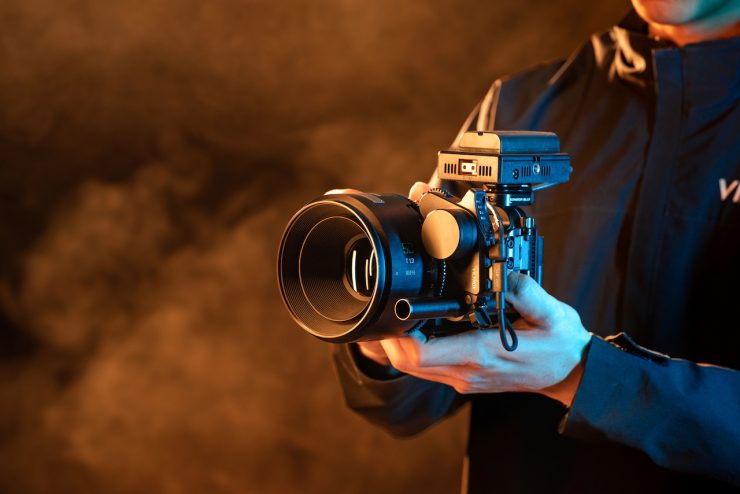
I wanted to test out the Viltrox NexusFocus F1 adapter with what are arguably Sony’s two most popular cameras for video shooters, the FX6 and FX3.
Sony FX6

The Viltrox NexusFocus F1, once calibrated correctly, worked well on the FX6.
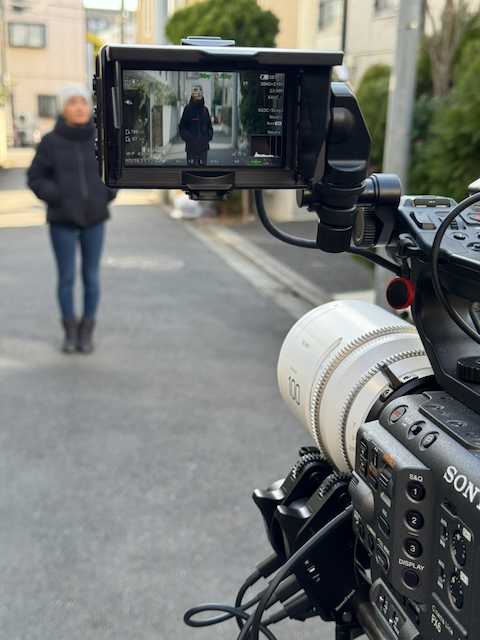
While it isn’t as fast as using a native AF lens (because it has to send the information to motors), it still does a good job. For the most part, I didn’t encounter any strange issues, as essentially everything is a limitation of the camera’s AF system.
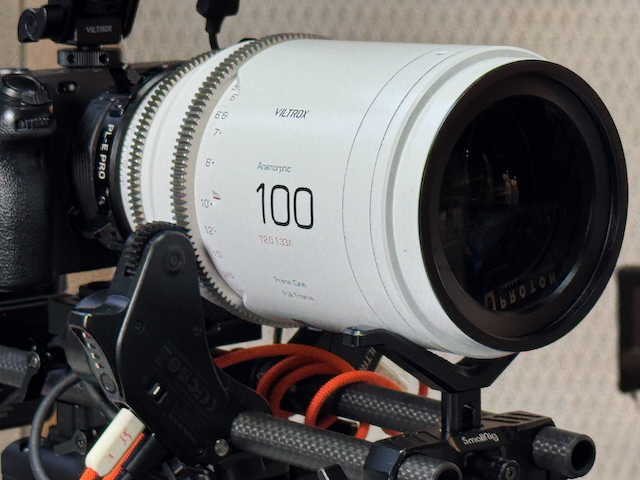
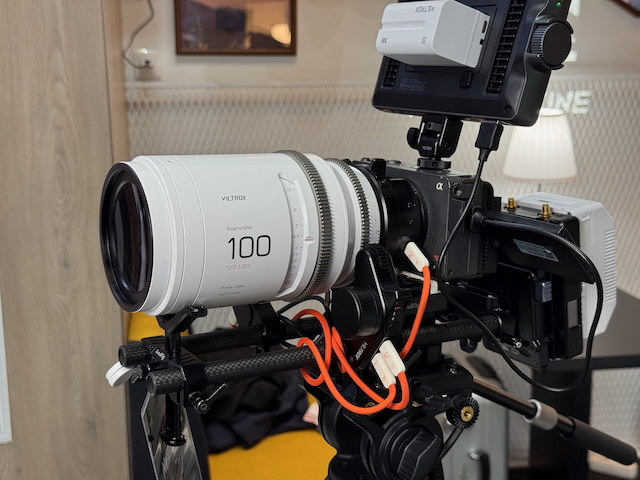
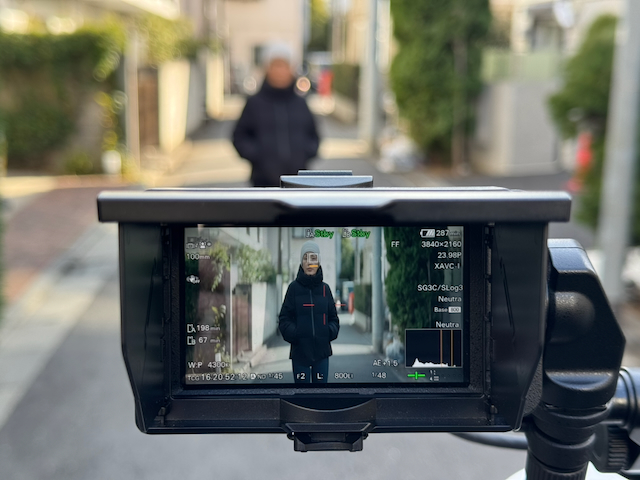
Above, you can see some example shots I did using the Viltrox Epic 100mm F2 1.33x anamorphic lens.
Above, you can see some example shots I did using the NiSi AUREUS 85mm T1.4 lens.
For these examples, I was solely interested in the AF performance. Please excuse the camera shake as I was using the touch focus screen!
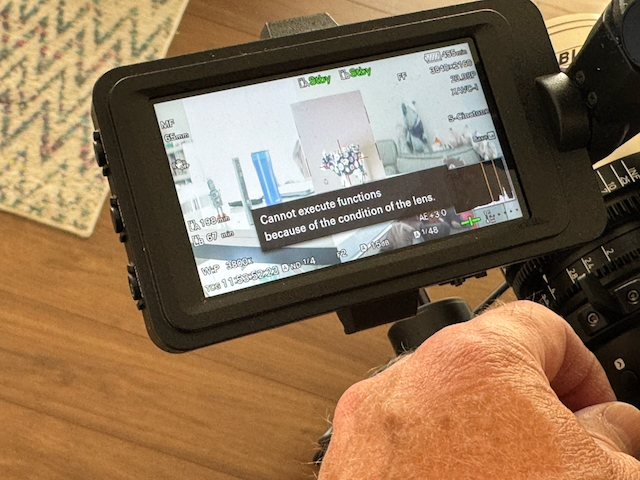
There is a bit of a catch when using the FX6 with a 1.33x anamorphic. What you need to be careful with is that if you select the 1.33x desqueeze option in the FX6, you can’t use AF, and therefore, the adapter won’t work! Just to be clear, this is a Sony problem and not a Viltrox one.
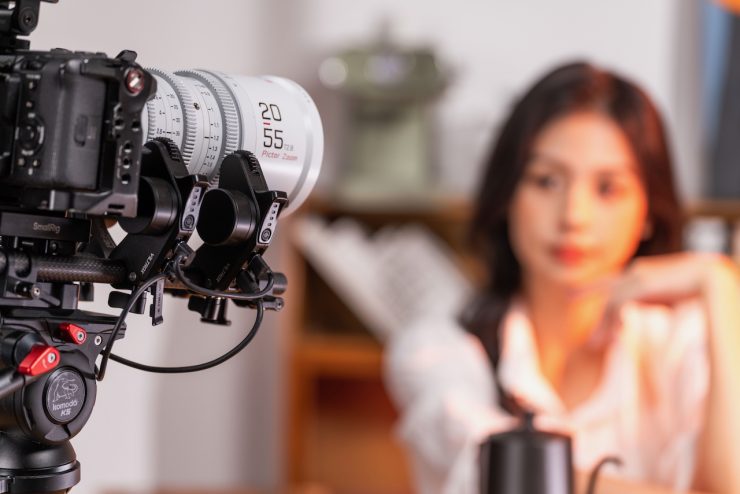
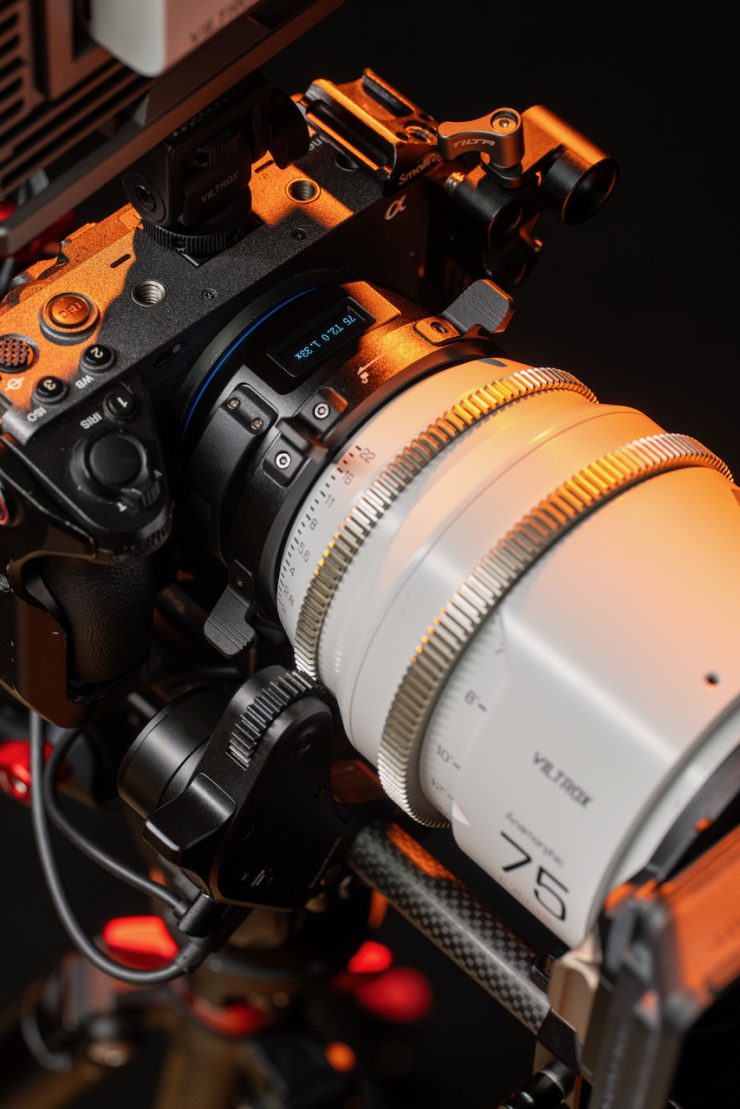
Sony FX3

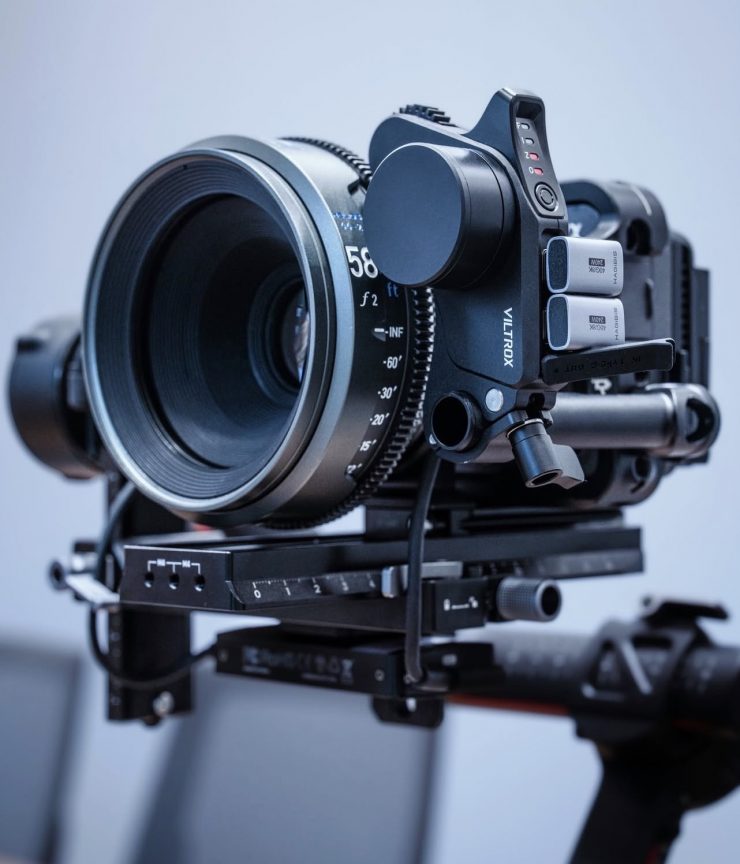
The adapter worked in a very similar way on the FX3 as it did on the FX6. This comes as no real surprise, given they share the same sensor. As you can see, the overall footprint of the camera setup does become a lot bigger.
Does it work with anamorphic lenses?
I also tried to calibrate 1.5x and 2x anamorphic lenses on the Sony FX6. In short, yes, it does work; however, as a lot of affordable anamorphic lenses aren’t overly sharp when used wide open, the AF system can’t lock onto a subject precisely enough, and at wider aperture settings, everything ends up being a little soft. This problem is also amplified by certain Sony cameras being unable to have de-squeezed anamorphic viewing options or open gate shooting modes.
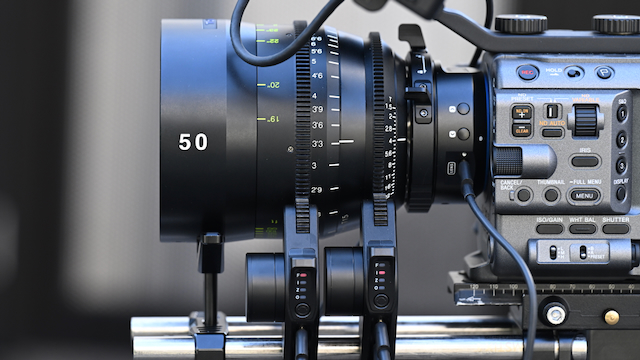
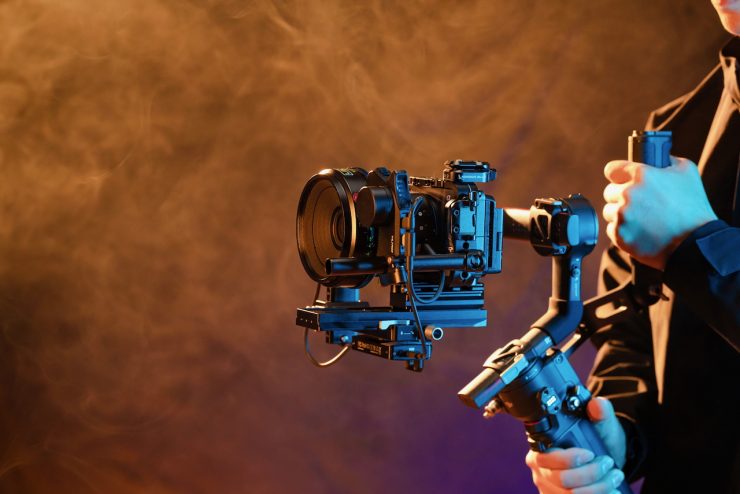
Using a zoom lens
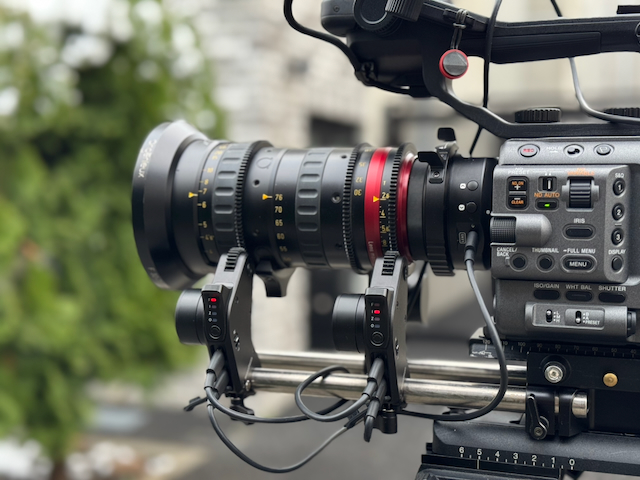
If you have three motors, you can control focus, iris, and zoom. You can use the zoom rocker or lever on the FX6, FX3, etc., to control the zoom motor.
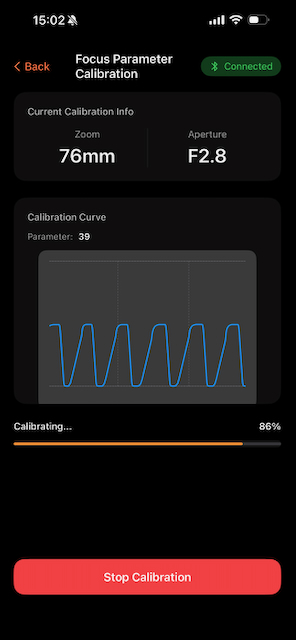
With a zoom lens, the calibration process takes considerably longer because it needs to go through all of the focal lengths individually. I tried it out with an Angenieux 30-76mm T2.8 zoom, and it took around 10 minutes to calibrate.
Above, you can see a couple of quick shots I did to show the zoom working.
One thing you need to be aware of is that if you have the motor for the zoom on the right-hand side of the camera on a bottom rod, the zoom rocker on the camera will work in the reverse direction. This is because you can’t change the direction of the motor. If it were on the right-hand side of the camera, it would need to be on a top-mounted rod for the zoom rocker direction to be correct. I would recommend keeping the zoom motor on the left-hand side of the camera if you are using bottom rods to avoid this issue.
Another issue I came across is that if you want to use a zoom lens and you only have two motors, you can’t set it up correctly because it asks for a zoom motor. If you, for example, have an 80-200mm lens and you only have two motors, you can only calibrate the lens at one fixed focal length.
If you just want to use one motor to control the focus when using a zoom lens, you ned to go into the app and change the aperture and zoom values to the same value.
After doing this, you can go ahead and just run one motor, and it will work. Just to to reiteerate, you still need three motors to be able to calibrate a zoom lens, regardless of whether you just want to control focus.
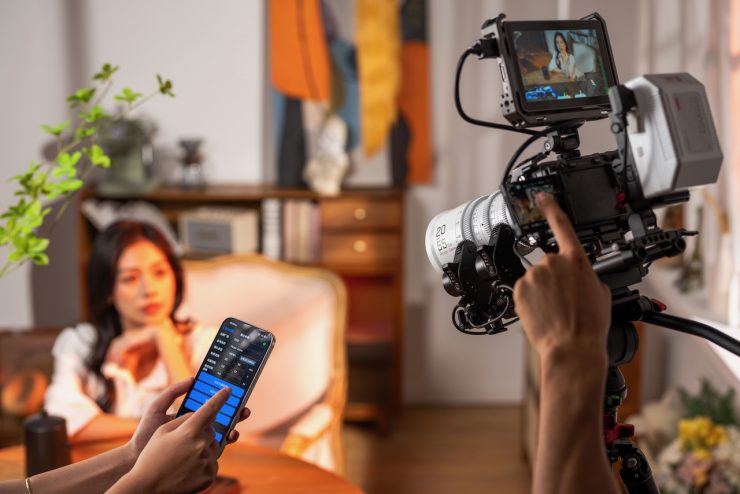
Sony Monitor & Ctrl APP

You can use the Sony Monitor & Ctrl APP with the Viltrox NexusFocus F1 adapter. It behaves in exactly the same way as if you were using a native AF lens.
This is a very handy combination, especially if you want to remotely control manual PL mount lenses on a Sony camera.
It’s not an entirely new concept
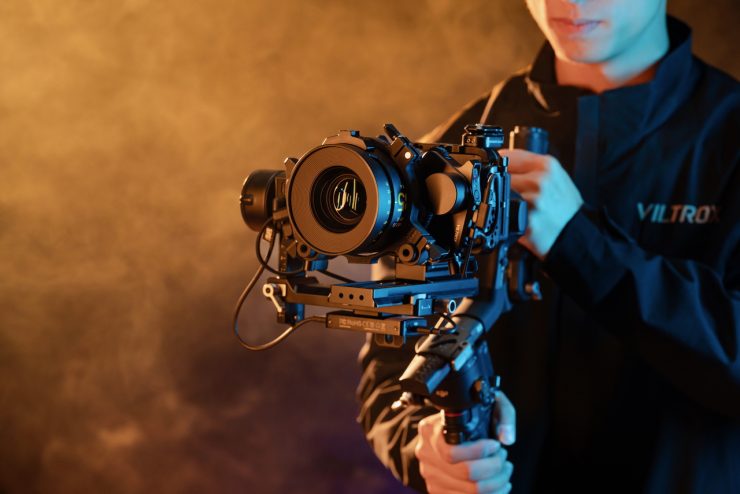
The Viltrox NexusFocus F1 adapter builds on previous concepts that enabled AF with manual stills lenses.
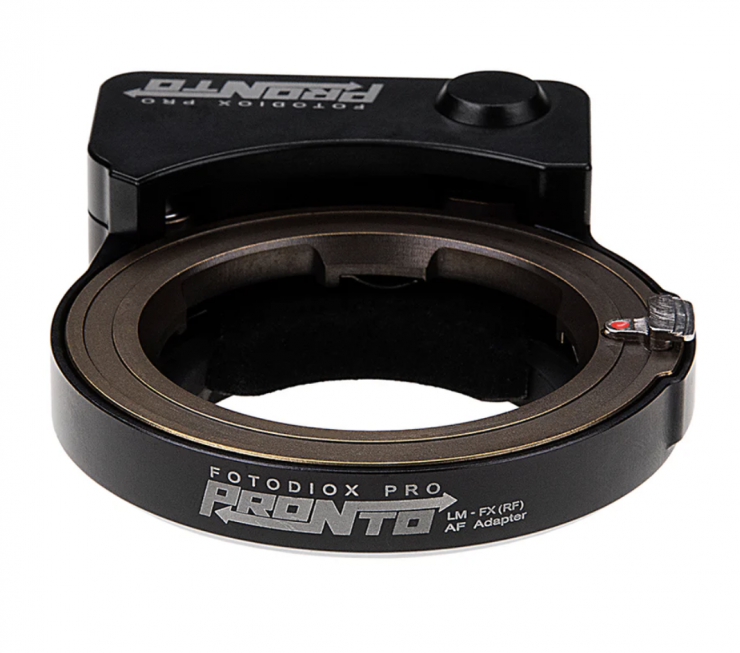

Products like the Fotodiox PRONTO and Techart PRO Autofocus Adapters that give you AF-S capabilities when using manual focus Leica M Mount Lenses on various camera systems have been around for quite a long time, but they have severe limitations.
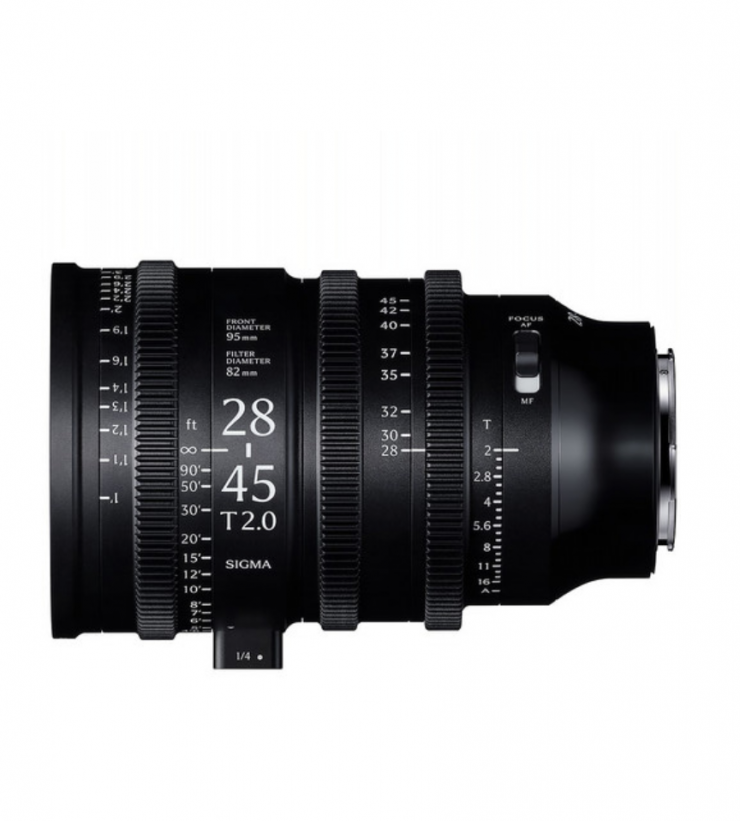
We have also seen cinema lenses with AF capabilities, including Sigma’s 28-45mm T2 Cine zoom lens, and AF anamorphic lenses from companies such as Blazar and Sirui.
Of course, there have been quite a few so-called “cine lenses” with AF before, but a lot of them were still lenses that have a manual aperture and the word cine tacked on.
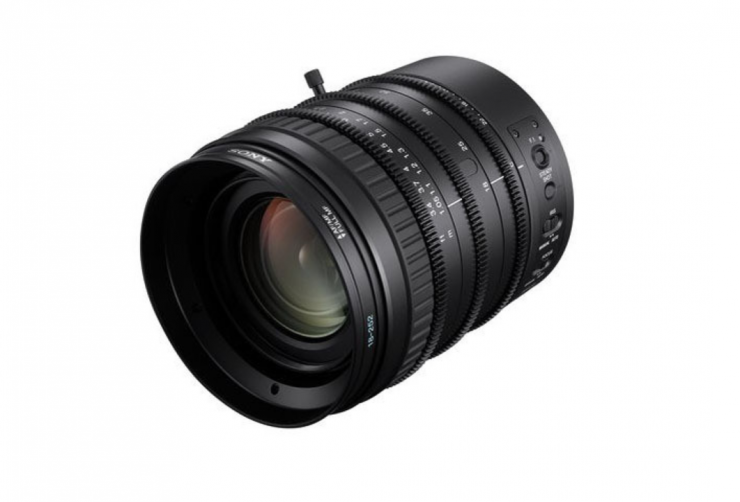
In fact, if you go back 14 years, Sony released the 18-252mm T3.9-T6.8 zoom lens that was for FZ mount that featured AF. This was arguably the first cinema zoom with AF capabilities, albeit not very good ones!
I reviewed that lens at the time on the site.
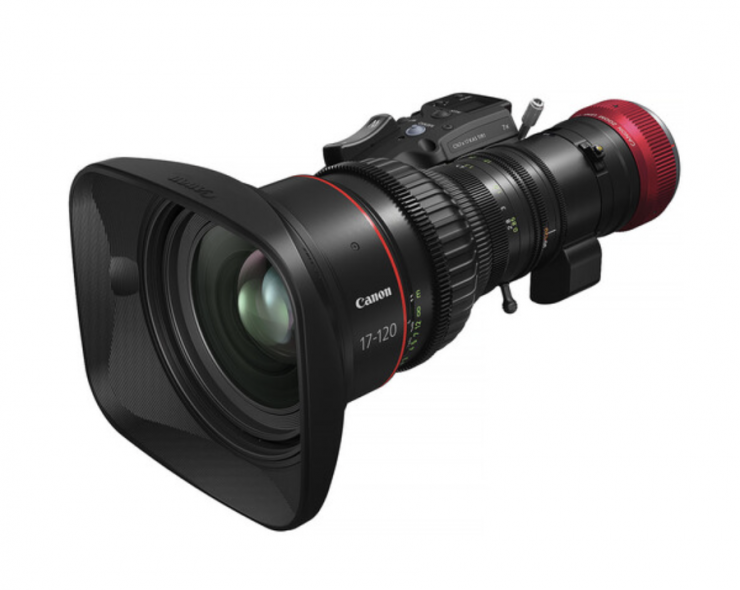
Canon also had a few Cine Zooms, such as the Cine-Servo 17-120mm T2.95-3.9 Lens (Canon RF), that could do Dual-Pixel CMOS AF II when combined with compatible cameras such as the EOS C400.
The trouble with most of the cine lens solutions that enable AF is the lack of hard stops and the fly-by-wire focusing system that is utilized. This makes manual focusing tricky to do.
No Variable ND solution
An issue with the NexusFocus F1 is that if you are using it with a mirrorless hybrid or smaller-sized digital cinema camera that doesn’t have built-in ND, you are going to have to use a matte box and ND with a lot of cine lenses. Although in saying that, there are a lot of smaller-sized cine lenses on the market that allow you to attach common-sized variable ND filters.
I think a lot of shooters, especially those using mirrorless hybrids or smaller-sized digital cinema cameras that don’t have built-in ND, would have liked to have seen a solution that features a rear-mounted variable ND filter. I imagine that there could be some limitations or technical reasons why the NexusFocus F1 doesn’t include one.
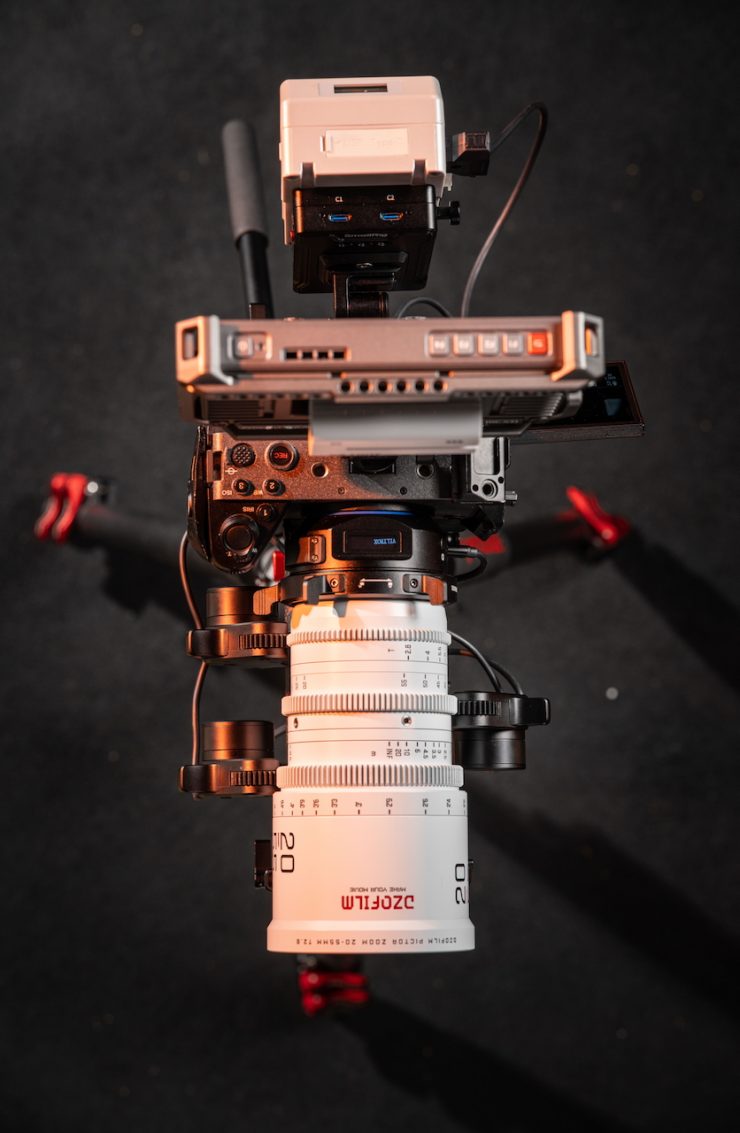
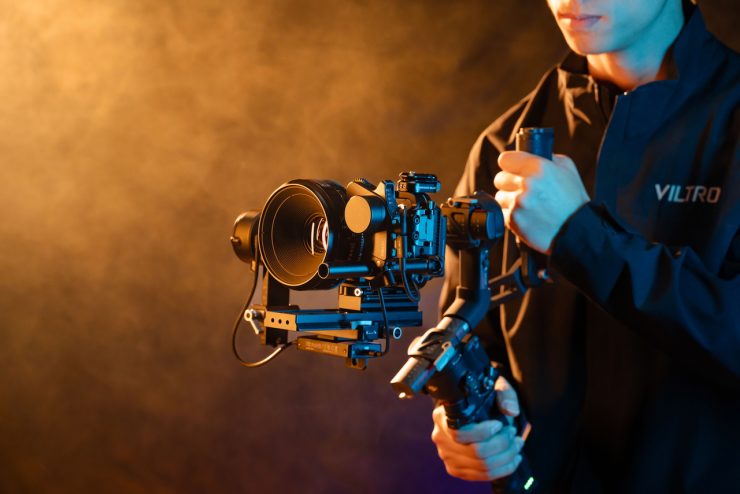
Increased Footprint


With smaller-sized digital cinema cameras or mirrorless hybrids, you are going to increase your camera’s footprint, as you need to add motors, rods, and power for the adapter. This is something you need to keep in mind.

If you are just using a single motor, then you can get away with making it slightly smaller, but remember, you do need to use two motors initially for the calibration process.
If you want AF, why not just use an AF lens in the first place
Just to play the Devil’s advocate for a second, you could very well make a valid argument that if you need to use AF, then why not just use an AF lens to begin with? On a smaller-sized camera, like a mirrorless hybrid, sticking with native AF lenses is arguably going to be a better option for certain types of work. As soon as you need to add motor(s), a powering solution, and multiple cables, you add more points of potential failure.
In saying all of that, it is good to have options, and what you ultimately decide to use is completely up to an individual’s requirements and how they like to work. For some shooters, the NexusFocus F1 Adapter will be extremely useful, but for others it won’t.
Will Viltrox be making the NexusFocus F1 Adapter in other mounts?
The current solution is only PL to Sony E mount, but Viltrox did tell me that they are looking into doing other mounts.
Pricing & Availability
The NexusFocus F1 Adapter was launched on Kickstarter on the 15th of January. Here are the prices:
- Super Early Bird Kit: $5,499HKD / $699 USD (Limited to 10 Kits)
- Early Bird Kit: $6,299HKD / $799 USD (Limited to 200 Kits)
- Early Access Kit A – Dual Motor: $6,999HKD / $899 USD (Limited to 2000 Kits)
- Early Access Kit B – Triple Motor: $8,199HKD / $1,049 USD
After the Kickstarter ends, the retail prices will be:
- $8,599HKD / $1,099 USD (dual motor kit)
- $10,199HKD / $1,299 USD (triple motor kit)
The estimated delivery for the adapter is March 2026.
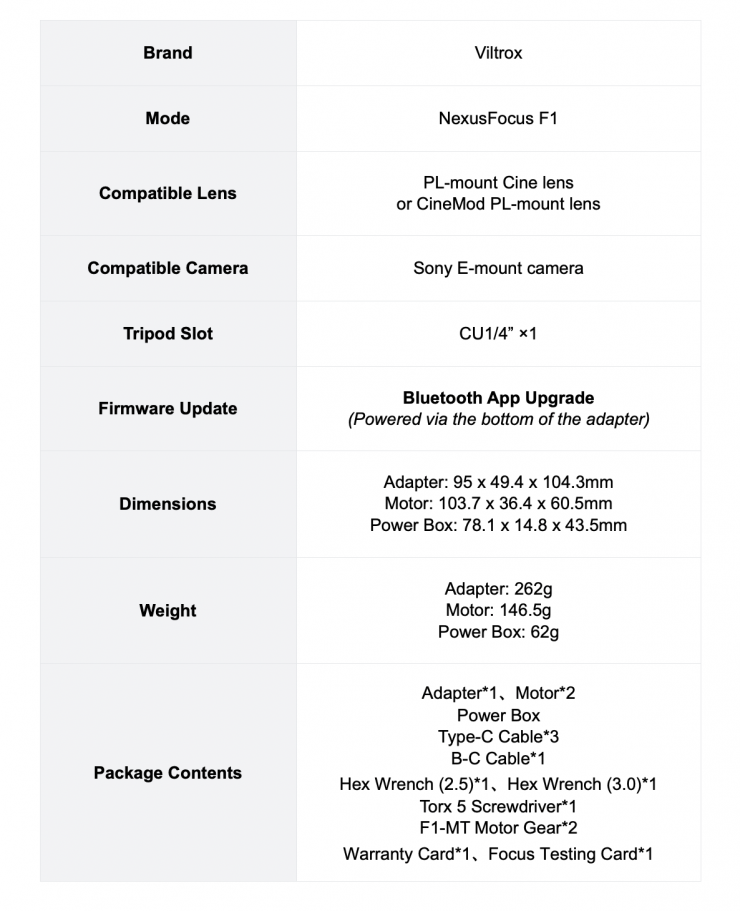
Specifications
A Competitor is coming
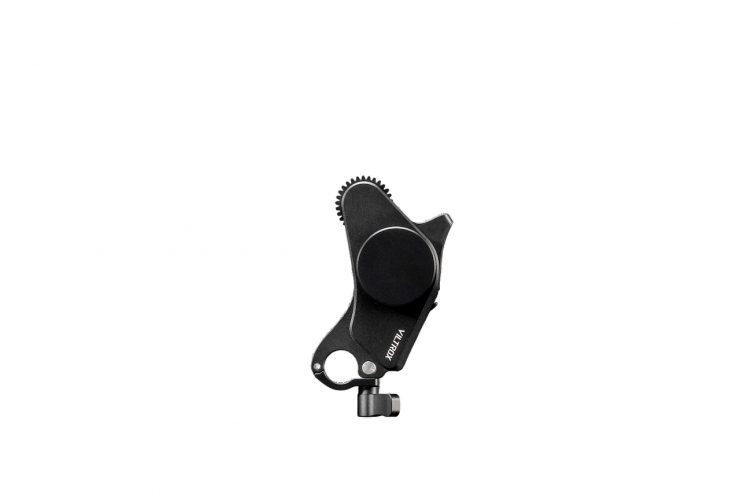
Tilta has officially announced its new Nucleus Autofocus Adapter. The Nucleus Autofocus Adapter brings modern autofocus performance to manual PL mount cinema lenses. Unlike common LiDAR solutions, the adapter leverages the camera’s native autofocus system to drive lens focus and aperture adjustments.


According to Tilta, filmmakers love the character of vintage and cinema glass but sometimes avoid them due to their manual focus limitations. Tilta wanted to bridge this gap by combining the look and character of these lenses with the speed and convenience of modern autofocus control.


This system uses the camera’s native phase-detection autofocus and translates that data directly to external motors through the Nucleus-M II Wireless Control System. A built-in lens library allows for fast and easy calibration, while the adapter intercepts AF data to drive the motor with accurate, responsive focus. The system is also compatible with both the Nucleus-M II motor and the Nano II motor. When using the system with two wireless motors, users can adjust the iris via the camera’s electronic control.

Unlike the competing Viltrox NexusFocus F1 adapter, you don’t require an app for lens data entry and calibration. Everything can be done directly on the adapter.

Lens data can be edited and shared across devices as the adapter unit’s built-in storage stores lens data, which can also be accessed on Nucleus series hand-unit when connected.

For traditional workflows, the Nucleus-M II FIZ unit can override autofocus so that a 1st AC cvan pull focus manually. The E-mount Autofocus Adapter is compatible with select Sony cameras including the FX6. Sony E-mount will be supported first, followed by Canon RF mount support. Further mounts should come in the future.
Pricing & Availability


Preorders start at $269 USD are are now open. The Tilta Nucleus Auto Focus Adapter (E to PL) starts at $269 USD, which is a 10% discount from February 5th through April 6th with shipping beginning after April 7th.


You can also buy it in a Dual Nano II Motor Kit for $449 USD.
Final Thoughts
Whatever your thoughts might be about the Viltrox NexusFocus F1 adapter, it is great to see innovation. Any tool that comes along that provides users with a new way of doing things should always be embraced.
Once a lens is calibrated correctly, the product works really well, and as I previously mentioned, the only limitations with how it will perform come down to your camera’s AF system. Viltrox, at least in my opinion, needs to come up with a way where you only need one motor to do basic calibration, because a lot of users will ultimately only want to control focus.
It was pretty easy to get consistently good results with the NexusFocus F1 Adapter. What you need to consider carefully with a product like this is the increased footprint you need to create to use it, and the addition of cables and power. For me personally, I think a solution like this makes more sense on a camera like the FX6, because of its built-in ND, but it is also likely to appeal to users of cameras such as the FX3.
The app and user manual arguably require a bit more detail, especially when it comes to troubleshooting, as you can be left in the dark when running into any issues. I would also like to see Viltrox put out instructional videos that go through the whole setup process and what you can do if you are having issues.
It is also nice that you can use it in conjunction with the Sony Monitor & Ctrl APP. This allows you to remotely control manual PL mount lenses, which is handy if they are on a crane, dolly, up high, etc.
Whether or not it’s a product that will work for you is going to entirely depend on the way you like to operate and what your requirements are.
If you are working in fast-paced environments and need to change lenses quickly, then this solution may not be for you. For small production companies and shooters who own PL mount lenses and use Sony E mount cameras, it would work well, depending on the project. The solution would also make sense if you have a dedicated camera set up on a gimbal and you want to use a PL mount lens, but still want to benefits that AF offers.
The Viltrox NexusFocus F1 adapter is a good product that works as advertised. The current limitation for a lot of people will be the fact that it is only currently available for Sony E mount.