Sponsored Article
The quality of the footage drones can capture has steadily increased since they first gained popularity over a decade ago. I remember flying some early DJI drones, and I was in love with the ability to capture footage from a unique point of view, but I remember thinking about how much more detailed the footage that came from my cameras.
Drones have improved in every way since the early days: longer battery life, greater range, better object avoidance, and an ever-increasing array of software tools to help create cinema-worthy camera movements.
The most critical improvement for video and photo users is image quality.
No matter how good the footage is from these drones, one thing is inescapable—footage quality depends on lighting conditions. With (relatively) small sensors necessary for drones to keep to a reasonable size, it’s easy to capture footage that requires more dynamic range than the sensor can handle. A shadowy forest lit by a midday sun can result in lost detail in the shadows, blown-out highlights, or both.
Flying a drone at golden hour improves things as the soft, colorful light helps take the edge off these challenging conditions. Still, capturing footage in the few fleeting moments of perfect lighting is only sometimes practical or possible.
Often, especially on drones with fixed apertures, the sun’s brightness can be so great that it’s impossible to avoid overexposing the image. ISO can only be lowered so much; once this limit has been reached, it’s impossible to prevent overexposure.
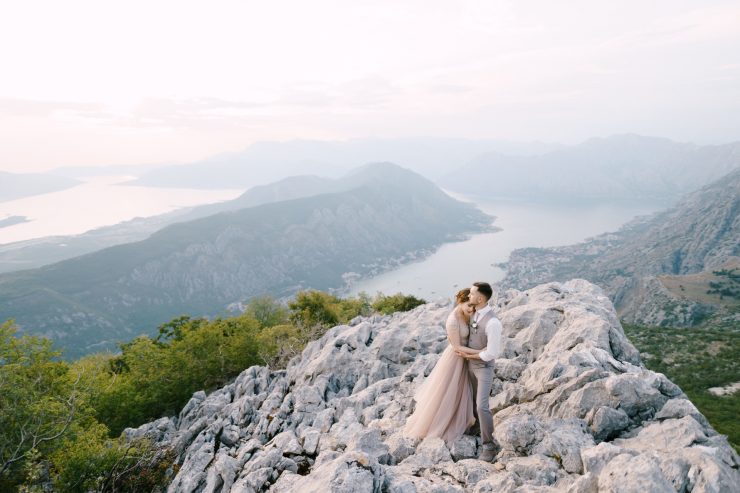
Wedding videographers, real estate videographers, and many other drone creatives need to fly when and where the job demands. Often this is the middle of the day when the sun is high and harsh, and conditions are the absolute worst for the dynamic range capabilities of drone sensors.
For example, traditionally, a bride’s dress is either white or a shade off from white, while a groom’s clothing is typically very dark. These are the widest extremes possible in photography, and the challenge of capturing details in the dark clothing without blowing out the highlights in the light clothing is hard enough with a full-sized camera sensor.
Flying a drone at a wedding introduces its own challenges, with a birds-eye perspective that is particularly harsh without the ground-level objects that can provide softer shadows such as a tree or an overhang.
Without a neutral density filter a videographer is forced to either expose the shot for the highlights of the dress and lose all detail in the suits (making groomsmen and groomswomen look like they’re shrouded in a black sack).
Using a Neutral Density filter reduces the apparent brightness of the highlights, allowing for an exposure where both the white and black clothing are able to be captured without losing highlights.
Without a filter, this image suffers from tremendous amounts of overexposure, washing the sky out completely and eliminating the details in the background.

For nature and landscape videographers and photographers, the challenges are similar, though more about creativity than documentary in nature.
The human eye can balance out light in a scene so big fluffy clouds look detailed and textured, but for a drone sensor, clouds can easily overexpose and turn into blobs of brightness. This can ruin a good landscape, turning clouds from interesting details into distracting objects.
By attaching a neutral density filter, a drone user can capture the clouds and the landscape without over or under-exposing the scene.
Since the amount of filtering necessary changes at different times of day, having a set of ND filters of various intensities allows a drone creator to pick exactly the right amount of filtering for the amount of brightness in a scene.
Reflections are an additional concern for those capturing footage from subjects with reflective surfaces, such as windows on buildings or bodies of water. Trying to Photoshop the reflections of a neighboring building from a real estate shot is a nightmare. It’s equally hard to enhance or remove reflections of objects on the surface of a body of water.
As with most things photographic, it’s better to fix these problems in the real world than it is to fix them in post.
Filtering It Out
For terrestrial creators (anyone capturing footage here on the planet’s surface), dealing with challenging lighting conditions is equally important but much easier.
If you want to shoot a scene on a bright day, you can either stop down your scene to reduce incoming light or lower your ISO. But if your scene calls for the artistic look of a wide-open aperture, and you’re already at ISO 100, things get more challenging, especially with video.
Many video formats require setting the camera at a base ISO, often ISO 800 or higher. If you’re trying to shoot video in bright light at 1/60th to match your frame rate, and you need to capture at ISO 800, you’re going to blow out your highlights.
The solution is to use a neutral density (ND) filter. These simple but vital pieces of optical glass reduce incoming light without adding a color cast. ND filters come in various strengths and minimize light, so shooting a scene at the proper ISO and aperture without blowing out all the highlights is possible.
Neutral density filters are helpful by reducing the highest brightness level of a scene, so you don’t have to meter for the highlights and lose your shadows. A filter can’t change the dynamic range as it is inherent to the sensor, but it can help give you control over the image and potentially boost the shadows.
For those trying to reduce reflections, circular polarizers filter out reflections. Anyone who has worn polarizing sunglasses knows the difference they make in visibility.
Screw a neutral density filter or circular polarizer onto your camera’s lens, and you’re good to go. Since a filter is a piece of optical glass that sits ahead of your lens, having a high-quality filter is vital to image quality.
You can’t just screw a filter onto your drone, though. Or can you?
Putting It On
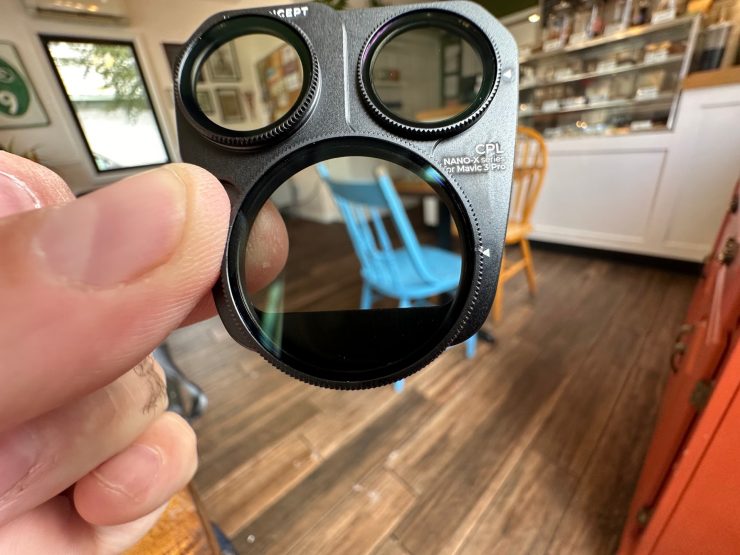
Many drones have replaceable front lens elements and covers that are designed to keep objects from scratching the lens (or lenses). Most drone users have yet to learn that these elements are removable, allowing for filters to be attached in place of the clear glass.
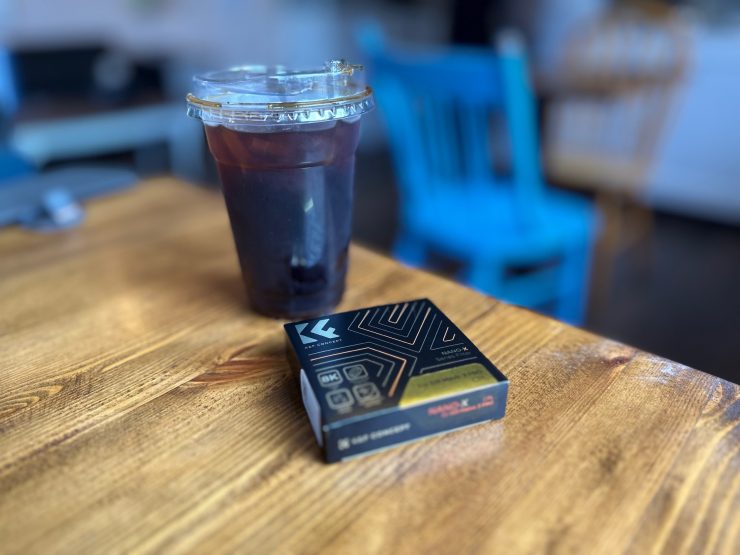
K&F CONCEPT makes various drone filters crafted from AGC optical glass. The company’s high-end Nano-X PRO filters are the highest quality filters K&F CONCEPT makes and have a multi-layer coating that reduces flaring and ghosting while also preventing oil, dust, and moisture from sticking to the lenses.
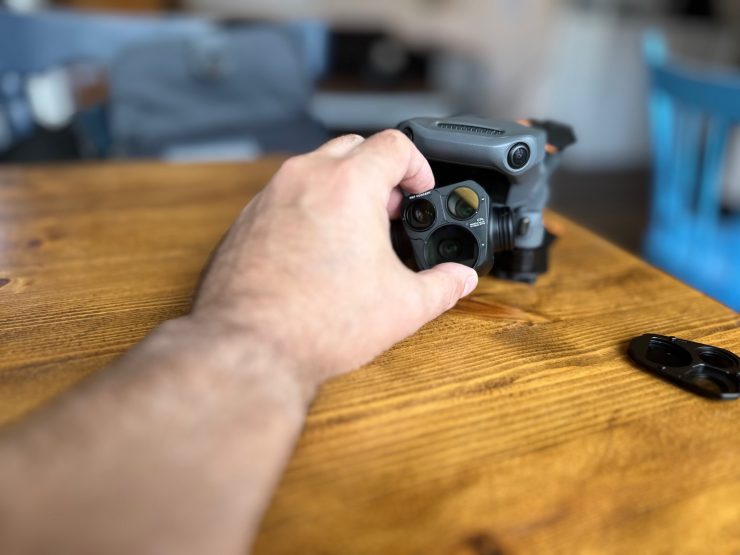
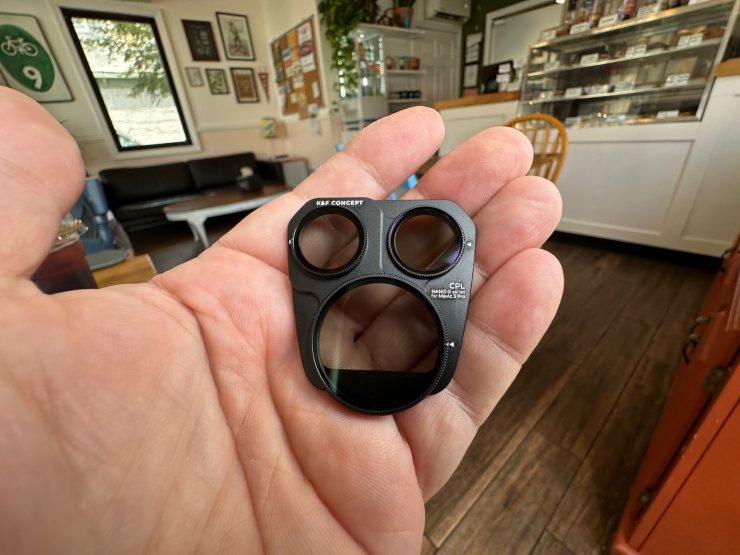
The company also makes circular polarizers to reduce reflected light, which is relatively unique in the drone filter market. K&F CONCEPT has filters for single-lens drones like the Mavic 3 Classic and multi-lens drones like the Mavic 3 Pro and 3 Pro Cine. Filter installation is simple. For most drones, all that’s needed is to turn the installed lens covers to pop them off and then slide on a new filter.
In all, there are filters for a dozen types of drones, and there are dozens of filters available, including kits with multiple neutral density filters, allowing for precise image improvement in any lighting condition. Variable neutral density filters allow a specific amount of light reduction to be dialed in precisely.
Filters are tested to ensure they don’t affect the performance of the camera’s gimbal system, so there’s no risk of the filters causing sluggishness on poor performance when orienting the cameras.
Quality Images
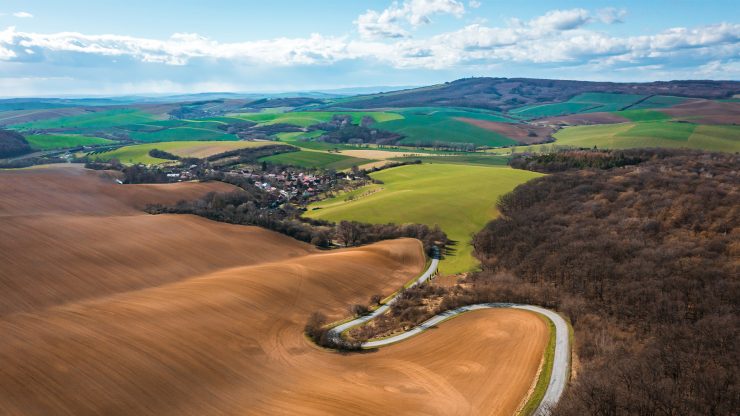
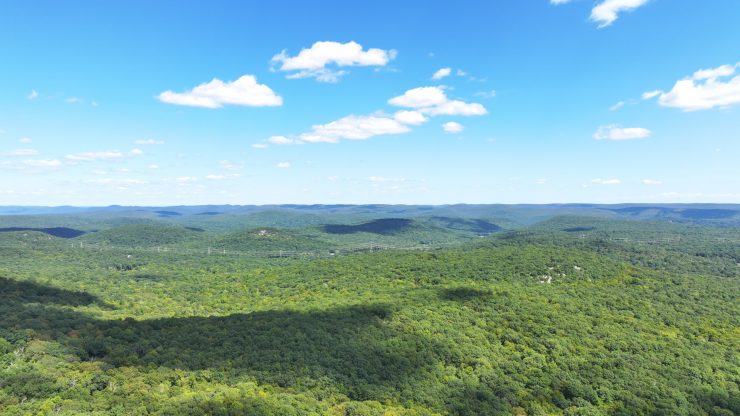
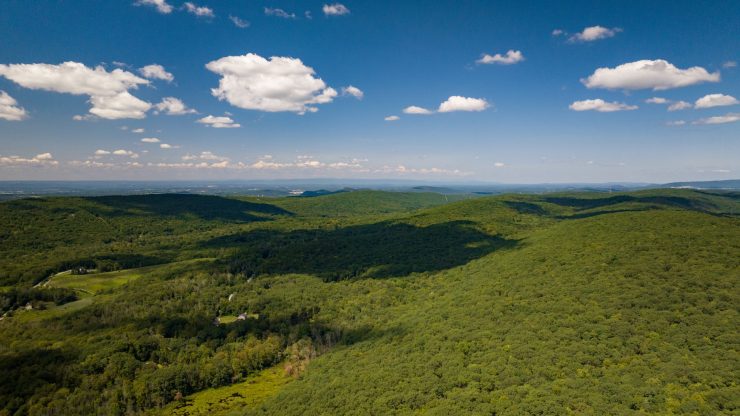
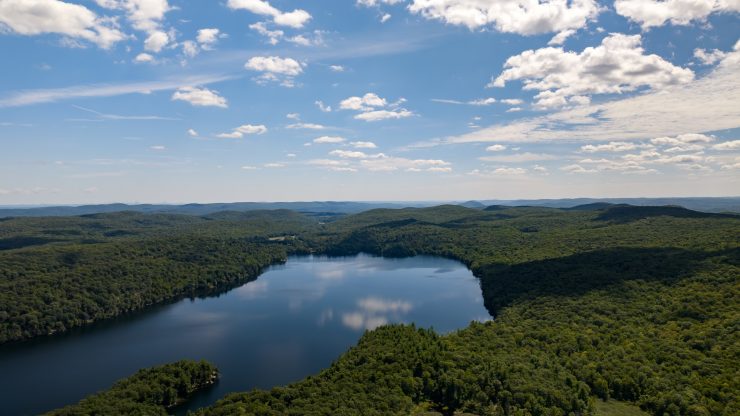
These first images are from the Mavic 3 Pro Cine without any filters attached. While they’re good images, they exhibit overexposure and loss of detail.
Without Filter
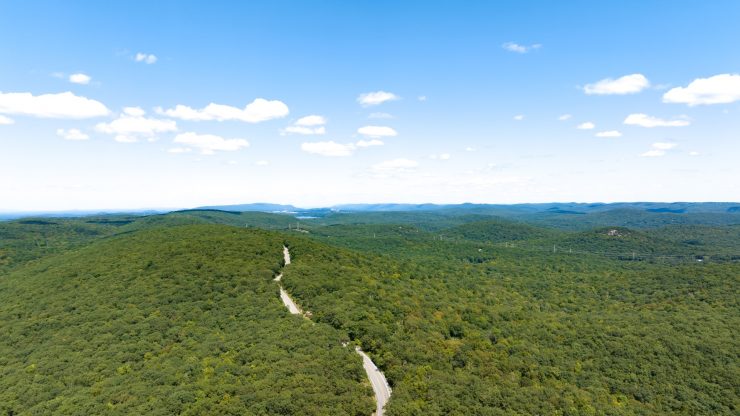
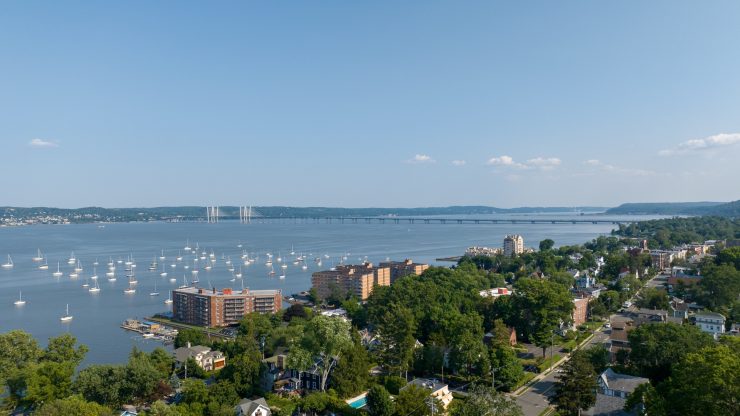
With Filter
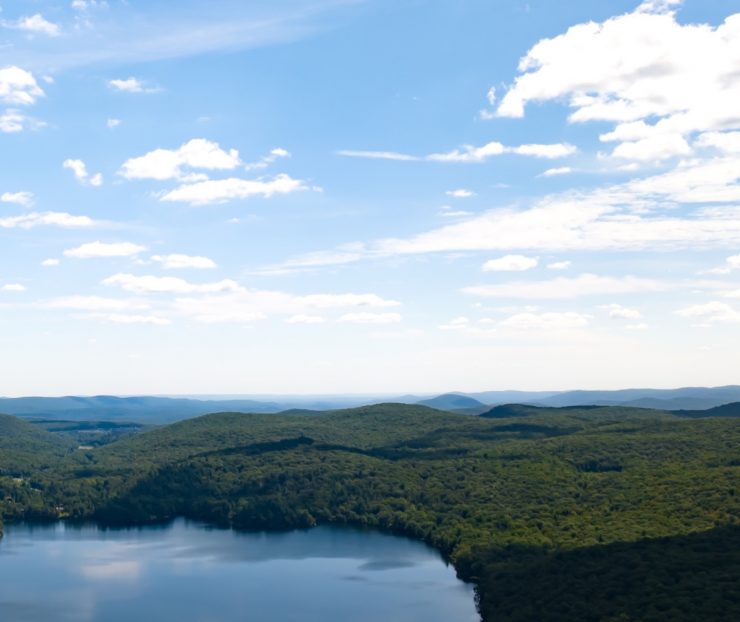
Simply by replacing the glass covering of the Mavic with the K&F CONCEPT ND filters, we see immediate improvement, even without zooming into the details. Notice the better tonality, color saturation, and details due to minimizing over and underexposure.
Image and video quality are immediately improved with the filters attached, and video editing software requires no color adjustment.
Conclusions
With individual filters costing $19.99 to $31.99, a small investment in optical quality quickly becomes the most significant investment you can make in image quality.
K&F CONCEPT filters are available at Amazon Kentfaith, B&H, and Adorama. The company also makes many filter sets for standard camera lenses to improve non-drone photo and video images.
The company also makes an innovative square filter system, allowing sheets of their high-end optical filters to be slid into a holder that fits on any lens without the need to buy a filter for each lens size in your camera bag.
Having won the Red Dot Design Award and iF Design awards this year (and as an Amazon Best Seller), the quality and construction of K&F CONCEPT’s products is top-notch. Recognized by these organizations means that the design and construction of K&F CONCEPT’s filters are top-notch.
K&F CONCEPT also makes tripods, camera bags, and other camera accessories, which can also be found at Amazon, K&F CONCEPT, Kentfaith, B&H, and Adorama.
Without a good complement of filters, it’s possible to make good photos and videos, but with compromises in image quality and creative outcomes. A good set of ND filters elevates drone photography (pardon the pun) and allows for creative compositions impossible without them.