Imagine Products has released ShotPut Pro v. 2022 at IBC 2022 in Amsterdam. ShotPut Pro v.2022 brings consistency and efficiency to every stage of the offloading process.
If you are not familiar with ShotPut Pro it is an industry-standard for offloading video, audio, and photo files. It is popular because it features a simple user interface and robust copy speeds making it indispensable for today’s file-based workflows.
So let’s see what is new in v. 2022.
Use custom tokens in your naming scheme
Using custom tokens in your naming can be useful because they can be utilized repeatedly once they are created. When creating a custom token, you can customize it however you like and assign it a value.
Here is a quick overview of what using the custom token looks like in ShotPut Pro:
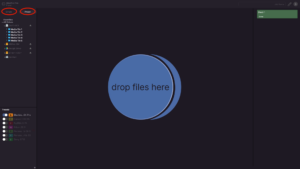
Drag the “Custom Token” token into the box.
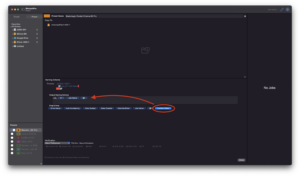
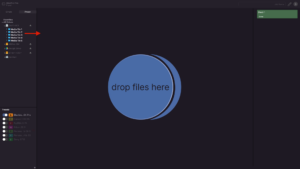
Then, on the Custom Token button, click on the arrow on its right to reveal a drop-down menu.

From this drop-down menu, click “Edit”.
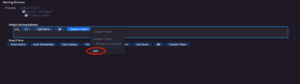
A pop-up menu will show where you can edit the name/value of the Custom Token.

For this example, we will rename the “Custom Token” into “Production Type”. You can also assign the custom token a value. We will assign it the value “TV Commercial”.

Now once you click “Ok”, the changes will show in the box.

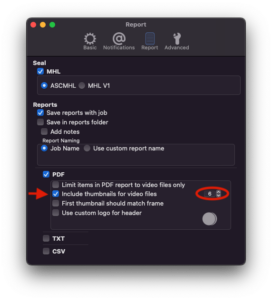
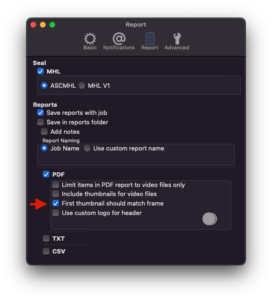
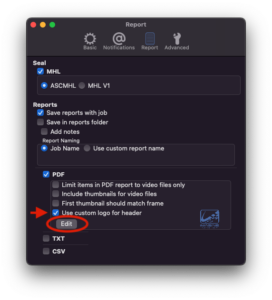
Customize your PDF report
ShotPut Pro v. 2022 provides users with 4 customization options specific to the PDF reports. These options include the following:
Limit items in PDF report to files only: Only files recognized as media files are added to the report. Exclusions include accessory files (i.e. image/audio/text files).
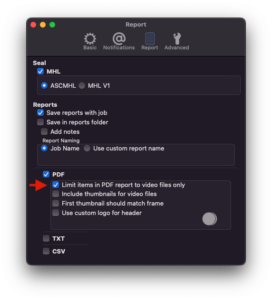
Include thumbnails for video files: You can choose anywhere from 1-10 thumbnails to include in the PDF report.
The first thumbnail should match the frame: Rather than ShotPut Pro grabbing a thumbnail from an equally distributed location, the first thumbnail will be the very first frame of the video.
Use a custom logo for the header: You can select a PNG, tiff, or jpeg file to use as the logo on your reports.
Learn how to create and change the date format
Learning about how date formatting in ShotPut Pro works is useful because it can save you lots of time and effort in the future. The above video explains all about date formatting in ShotPut Pro.
How to navigate the Job Details View and how to interpret your report
Here’s a simple walk-through of the Job Details View:
First, select either Simple Mode or Preset Mode.
In this example, we will select Preset Mode and use/enable an existing preset from the bottom left. Then, drag and add a file to offload.
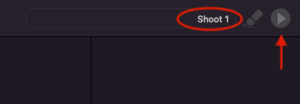
Now give it a job name, then click run in the upper right corner.
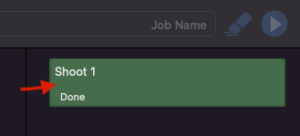
To bring up the Job Details View, click anywhere on the completed job.
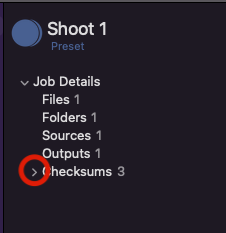
View the job name and the mode used in the upper left of the Job Details View. See the specifics of the job further down. These specifics include information on how many files, folders, sources, and outputs were involved in the job.
Click the arrow to the left to see additional information on the checksum types used.
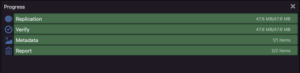
The Job Progress panel is on the right hand side. This allows you to see how much of the file has been replicated and verified and how much is left remaining. For longer jobs, this view will update in real-time for each stage.
During the Replication stage, your files are read from the source and are simultaneously written to each destination.
After Replication, your offload will be verified. This means checksums will be generated for each destination and compared against the generated source checksums to confirm file integrity.
Finally, in the Report phase, you’ll be able to see how many reports have been generated, and how many are still left. The number of reports is based on the options you selected in the Preferences menu.
In the lower half of this page is the Job Flow View
Starting with the file or files you are offloading, it then shows the source, the device being used, and the destination.
To the right of the destination is a preview of the folder name created by your offload. This visual is particularly helpful for keeping track of destinations when offloading to multiple drives.

To access the reports for your jobs, click the blue icon next to the report progress bar in the upper right.
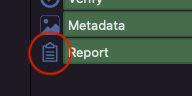
This replaces the Job Flow View with one containing your reports.
By selecting the report name to the left, you can look through each of the reports you have enabled.
You can also navigate to the report in Finder by clicking on the icon for the specific report you are viewing. This is an incredibly useful feature and has now been added directly into ShotPut Pro so you won’t have to leave the app to view them.