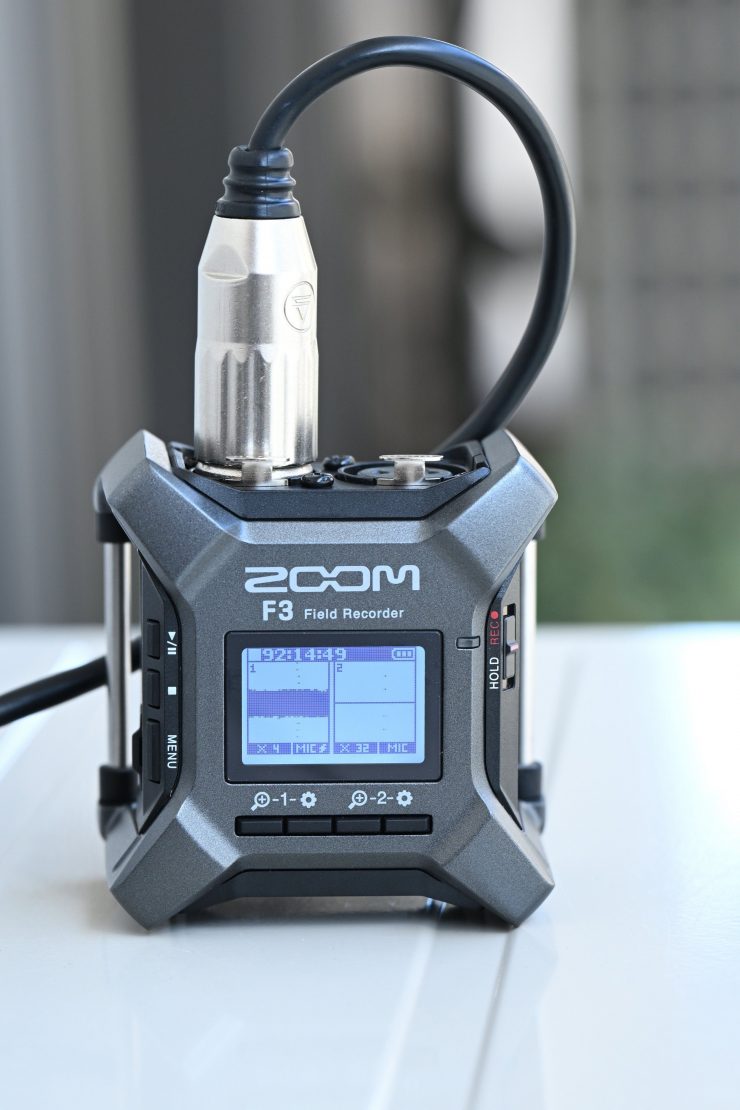
ZOOM announced the F3 professional field recorder back in January. This portable 2-channel recorder is equipped with two XLR balanced inputs and it can record 32-bit float in the WAV format. It also has a headphone out and a line out.
The F3 is equipped with two AD converters (dual AD converters) for low gain and high gain, and it is claimed to achieve a high S/N ratio when capturing sound in both quiet and loud environments. The input signal can be recorded in a 32-bit float WAV format. 32-bit float is handy in certain situations where the sound levels can suddenly increase without warning or when you need to set and forget your recorder and have no way of monitoring or adjusting the levels.
What you clearly need to know upfront is when you are using the ZOOM F3 as an audio recorder you can only record in 32-bit float.
Key features
- 32-bit float recording 2-input / 2-track field recorder
- No gain adjustment required
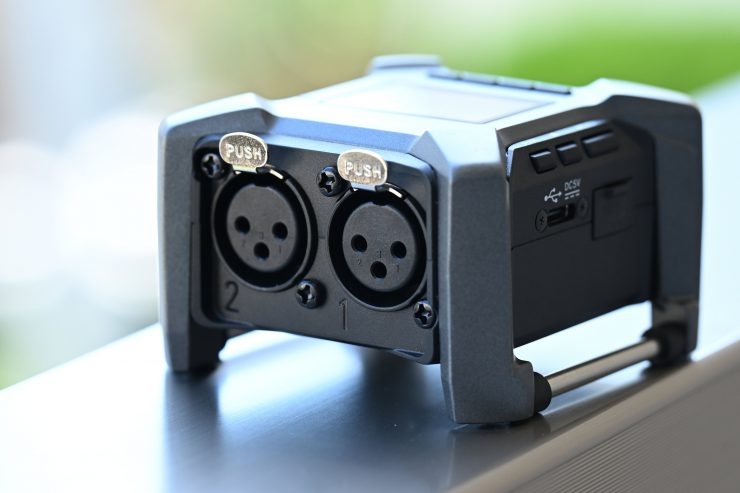
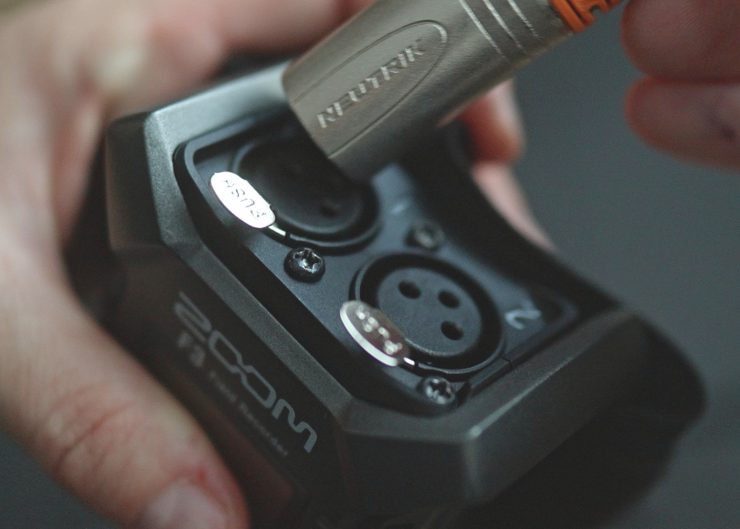
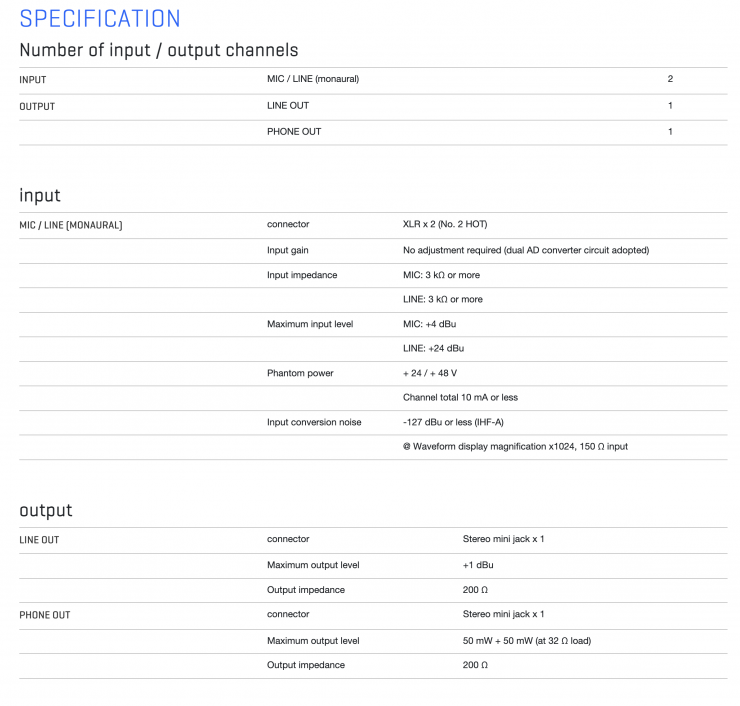
- Two independent XLR balanced inputs (with locking mechanism)
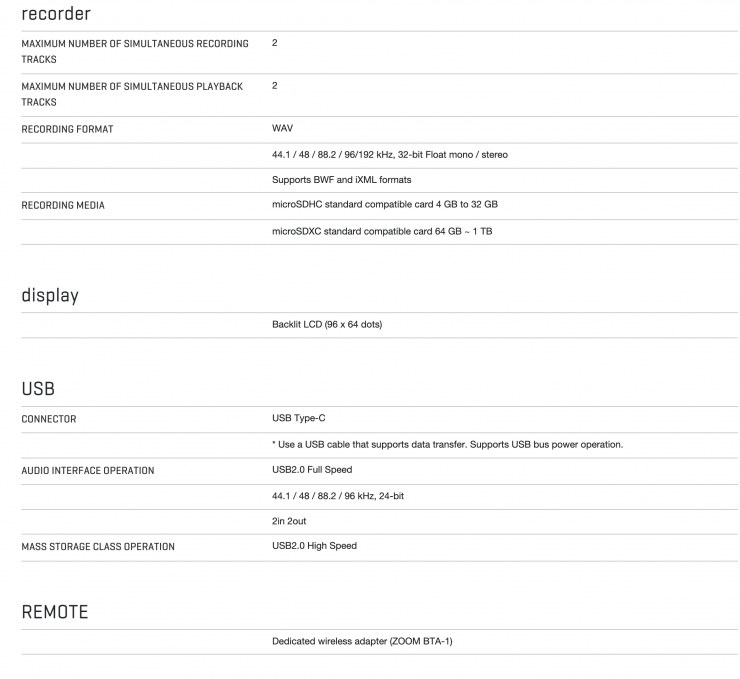
- Up to 192kHz sampling / 32-bit fixed float, recorded in monaural or stereo WAV format
- High-quality mic preamplifier that achieves an ultra-low noise floor of EIN -127dBu or less
- REC hold function to prevent erroneous operation during recording
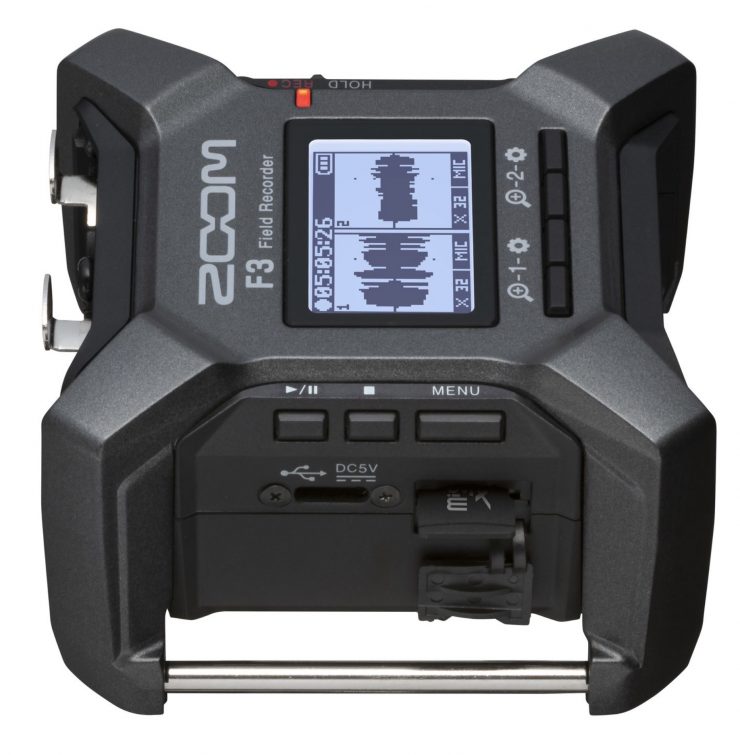
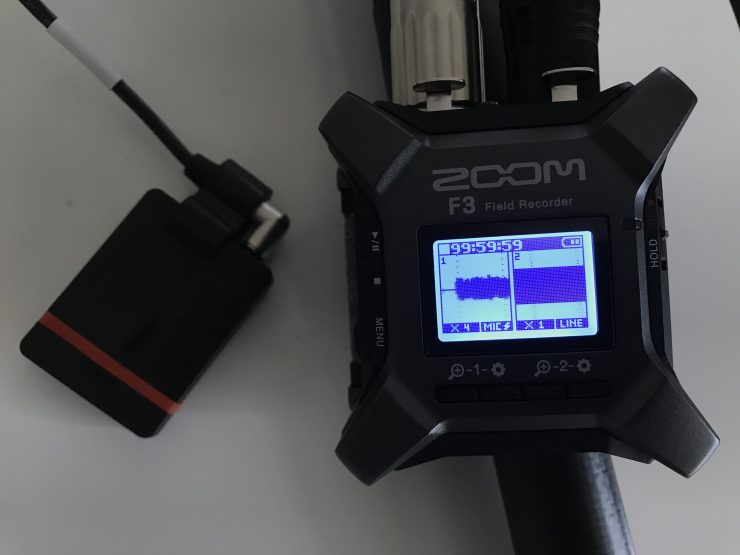
- Monitor input signal with real-time waveform display
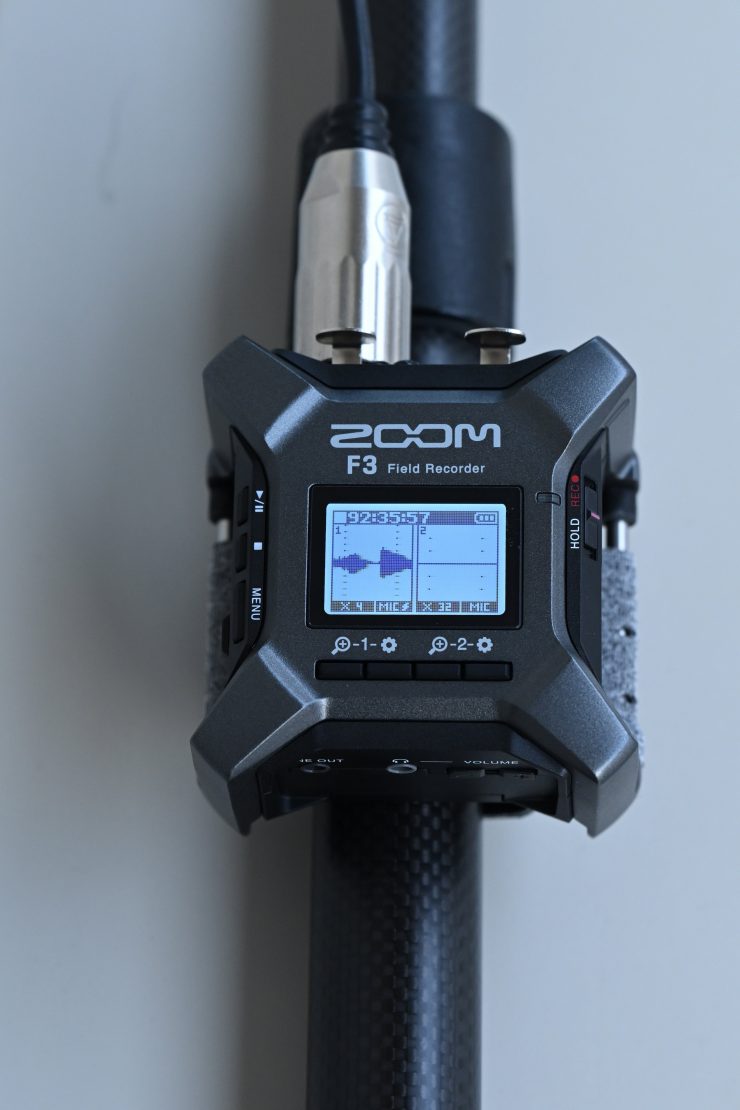
- Compact and robust housing that can be attached to the boom microphone with Velcro
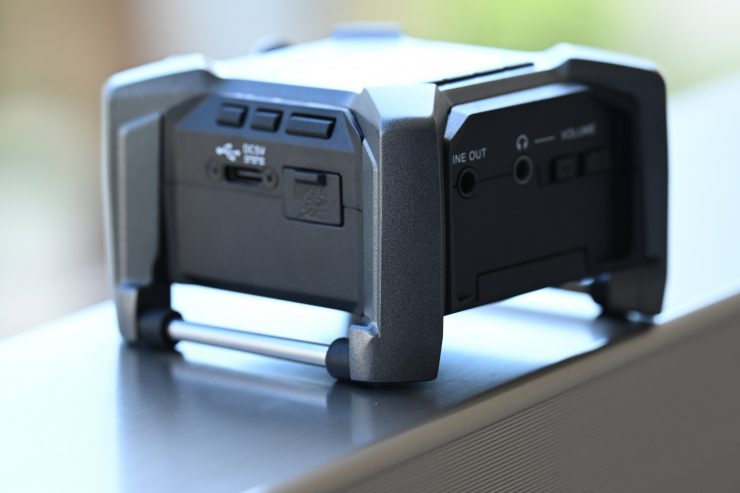
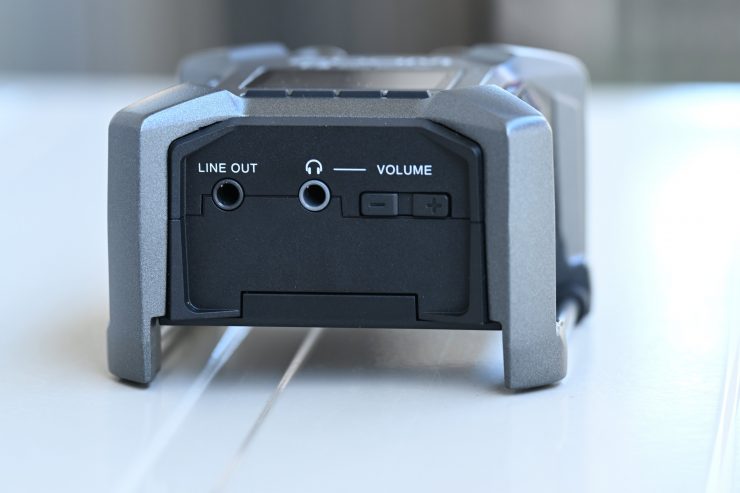
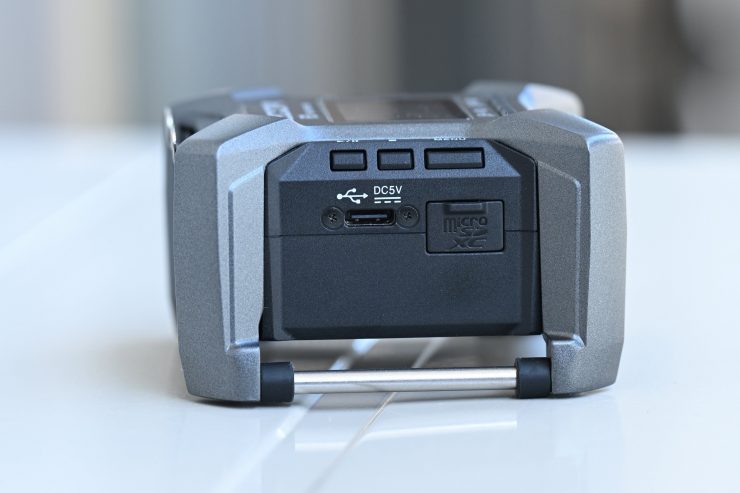
- Headphone output and LINE output terminal with dedicated volume control for 3.5mm plug
- Direct recording to microSDHC / microSDXC (supports up to 1TB)
- High-precision time code that realizes accurate synchronization with video *
- Remote control from the Android / iOS app “F3 Control” via Bluetooth connection **
- 2 in / 2 out, up to 96kHz / 32bit float compatible *** USB audio interface function
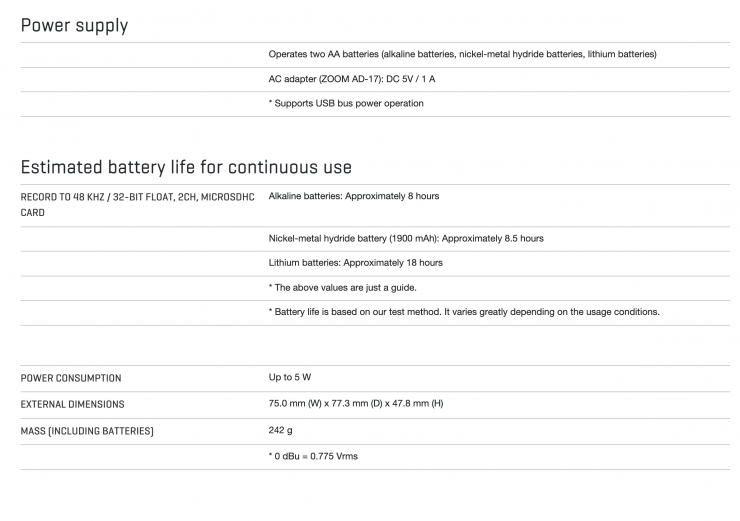
- Driven for 8 hours or more with 2 AA alkaline batteries
- Powered by 2 AA batteries, AC adapter (sold separately AD-17) or USB mobile battery
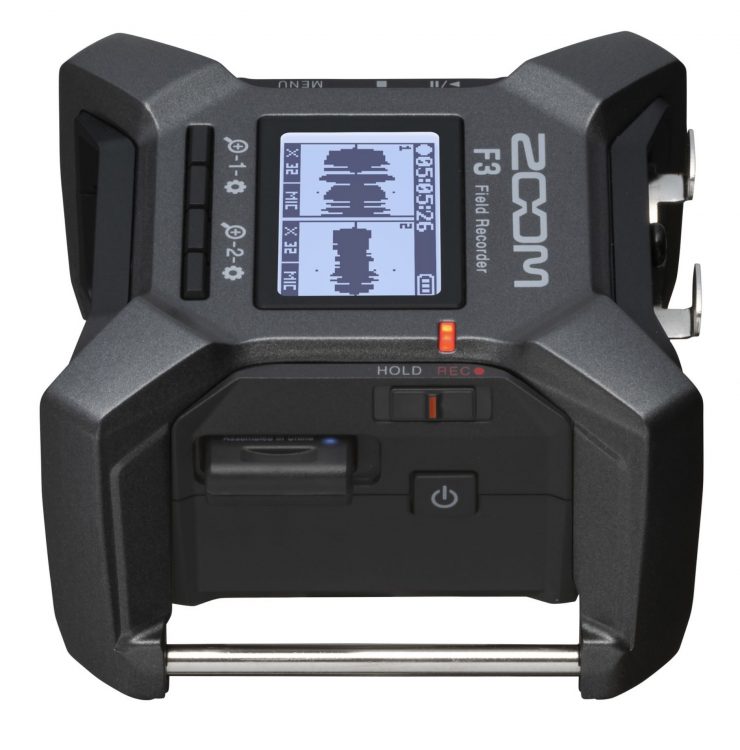
Size & Weight
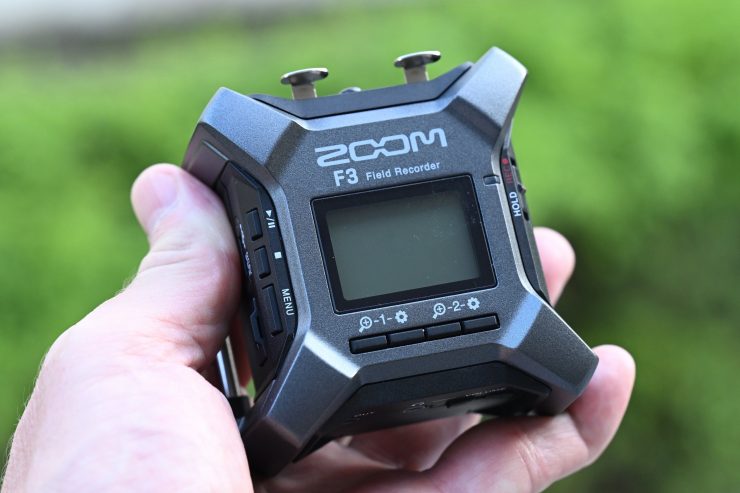
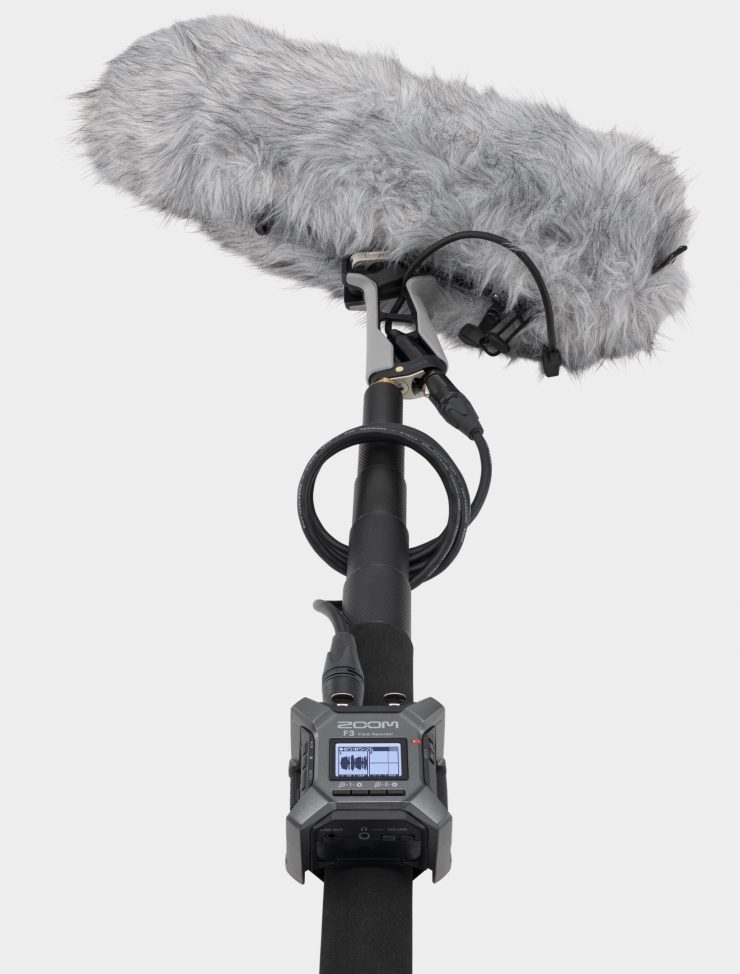
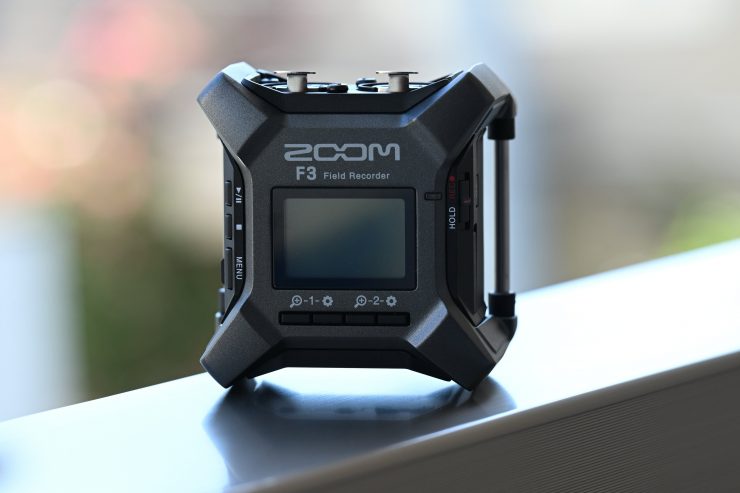
The ZOOM F3 has been designed to be palm-sized and compact. It features a robust housing and it can be attached to a boom pole with Velcro.
The F3 weighs in at 242g / 8.53oz (with batteries) and it has physical dimensions of 75mm (W) a 77.3mm (D) x 47.8mm (H). I like this small size, because you can just throw one into a bag and then you always have a portable recorder with you.
The side bars on the edges of the F3 make it easy to clip onto a bag or other objects.
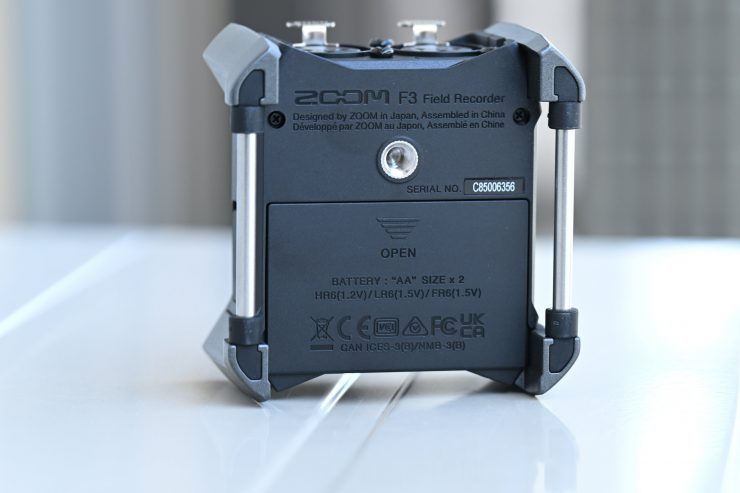
On the back of the F3, there is a 1/4-20″, but because of the design of the side bars, you really need to use some type of monitor arm to use it.
Build Quality
The F3 is made out of aluminum and plastic. The aluminum surrounds feature a sort of x-shaped design and this was done on purpose to prevent more fragile parts of the field recorder from getting damaged.
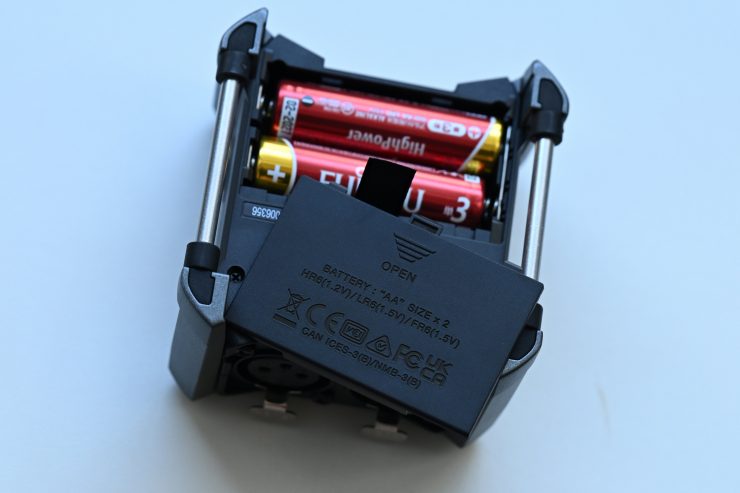
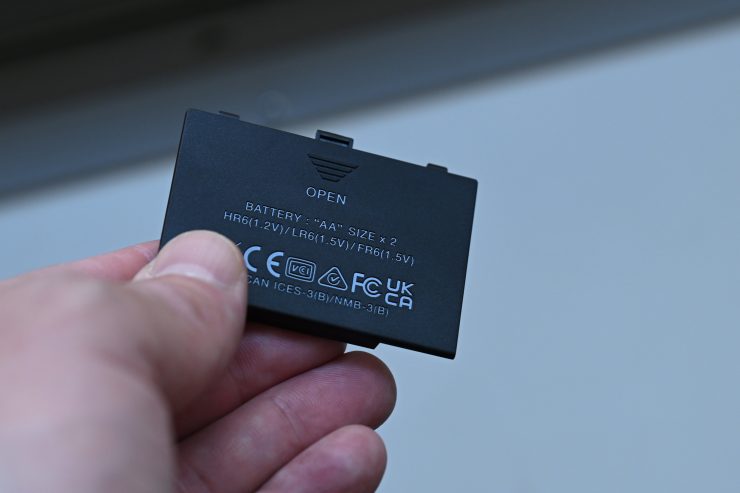
The battery cover and tabs are all made out of plastic, and I did find the battery door to be a little on the flimsy side. You can actually bend the battery cover pretty easily with your fingers and if anything is going to break on the unit, this would be it.
The overall build quality of the F3 is pretty solid for a product at this price point.
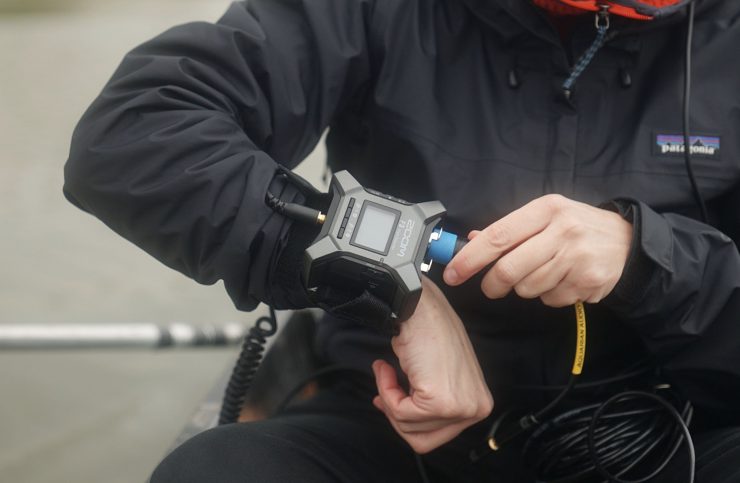
How is it powered?
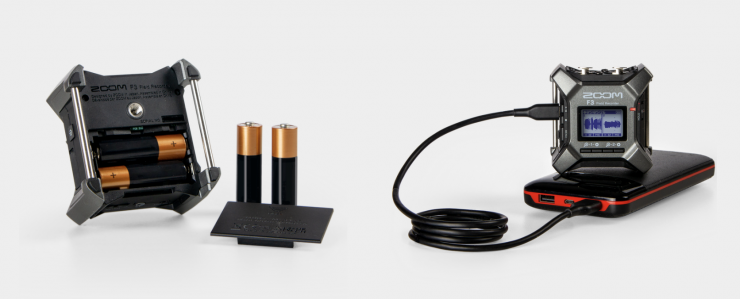
The F3 can be powered by two AA batteries, an optional AC adapter, or a USB powerbank. ZOOM claims that the battery life when using AA batteries is up to 7.5 hours. What you clearly need to know is the battery life will vary drastically depending on the type of batteries you are using. Below you can see the approx. battery life you should expect:
Alkaline batteries: about 2 hours
Ni-MH batteries (1900 mAh): about 3 hours
Lithium batteries: about 7.5 hours
What you also need to know is that if you use the ZOOM F3 with microphones that require phantom power those operational times will go down.
A power supply connected to the USB port will be given priority over batteries. When you are running the F3 via the USB-C input you will notice that the battery indicator disappears from the screen.
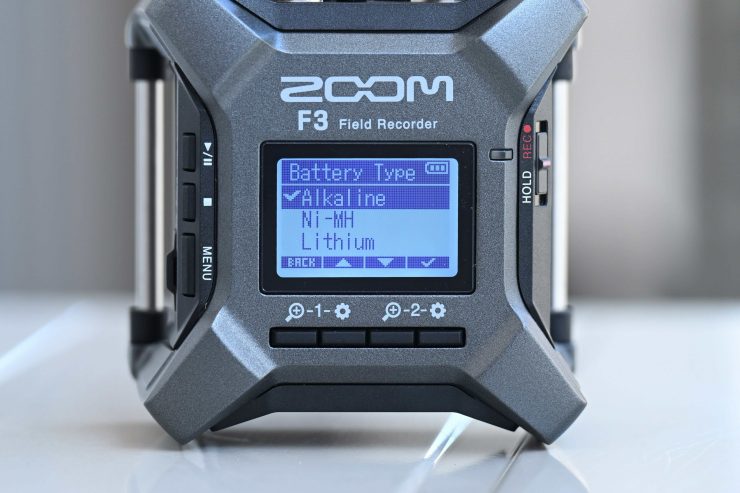
You should only use one type of battery (Alkaline, Ni-MH or Lithium) at a time. You also need to set the type of battery you are using correctly in the F3 menu so that the amount of remaining battery charge can be shown accurately.
From my testing having a Sanken CS-M1 attached to the F3 while recording using Lithium batteries, I was able to get just over 6 hours of battery life.
The battery life is so so for a field recorder. 6 hours is borderline for what I would personally consider acceptable for a product that you may be using a lot during a day, and you can only achieve this by using Lithium batteries. In saying that, depending on your use case scenario you may well find that the battery run time is perfectly sufficient.
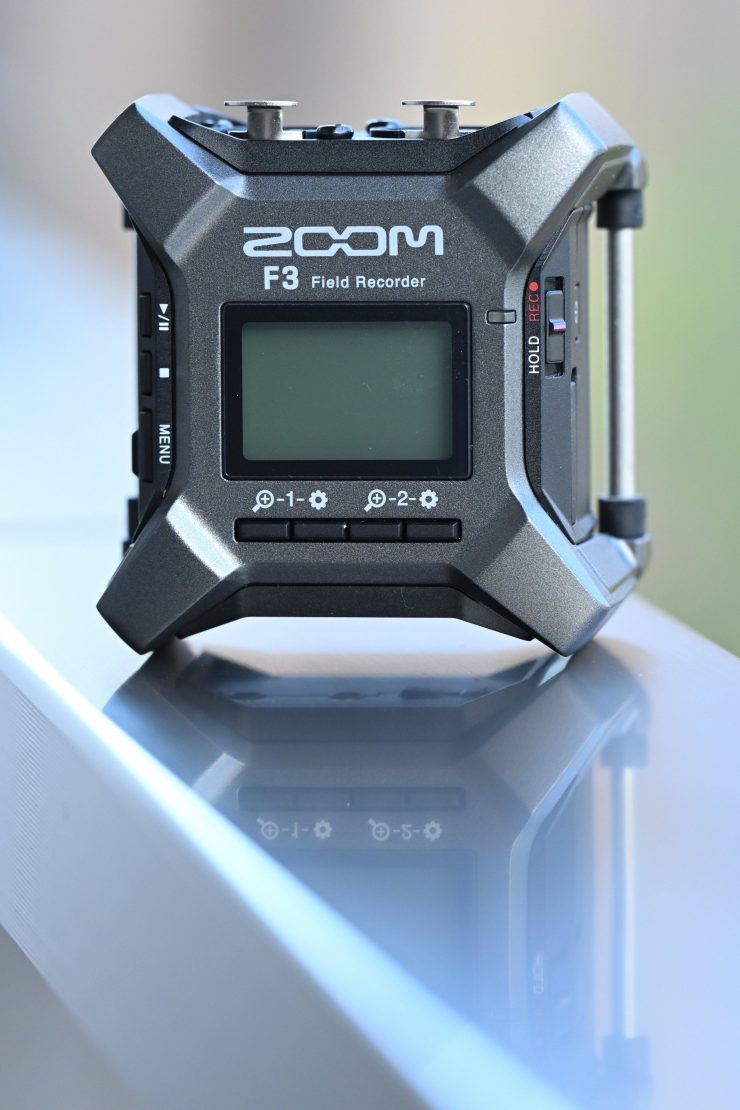
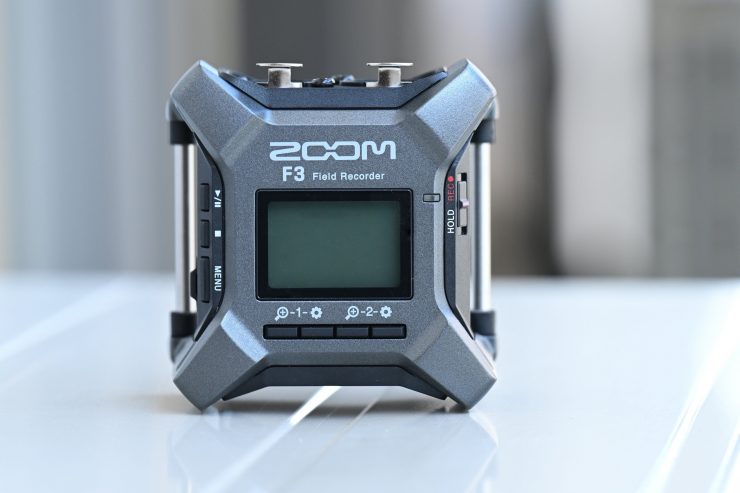
Controls
The Zoom F3 features the following buttons and controls:
- PLAY button: This starts and pauses file playback
- STOP button: This stops recording and playback
- MENU button: This opens the Menu Screen and returns to the Home Screen
- REC/HOLD switch: Use this to start recording and to disable button operation.
- 1/operation button: When the Home Screen is open, this adjusts the amplification of the Input 1 waveform. When other screens are open, this operates the function of the icon shown at the bottom of the
- 2/operation button: When the Home Screen is open, this adjusts the amplification of the Input 2 waveform. When other screens are open, this operates the function of the icon shown at the bottom of the screen.
The controls are fairly easy to use but they are a little old school and the whole menu and operation interface feel outdated. Making changes could be easier because you have to constantly press combinations of buttons. While nothing is overly complicated, it is always a good idea to read the manual.
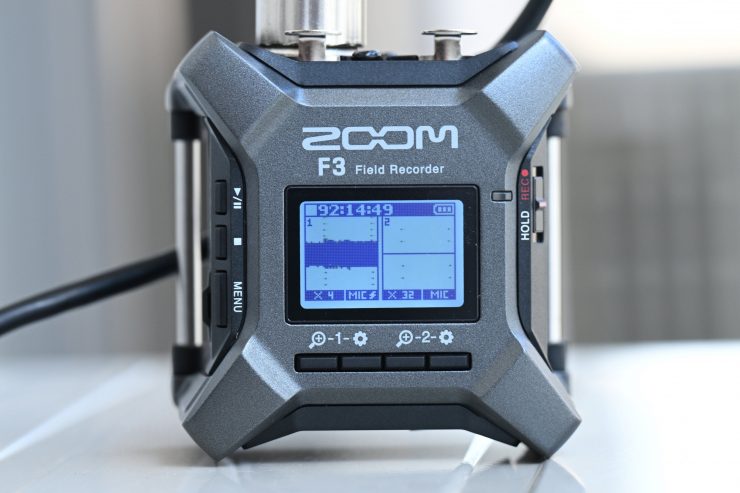
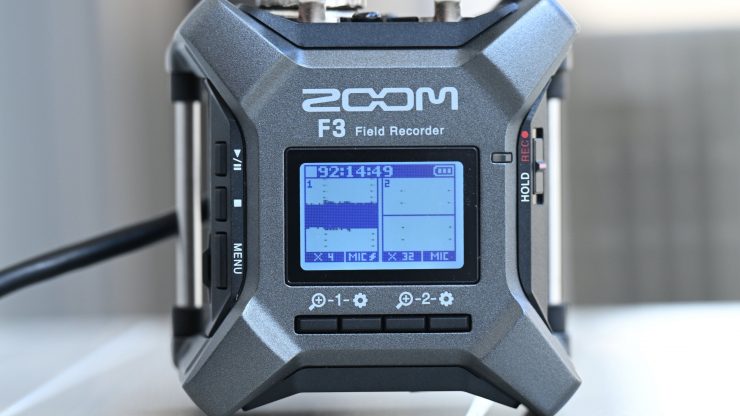
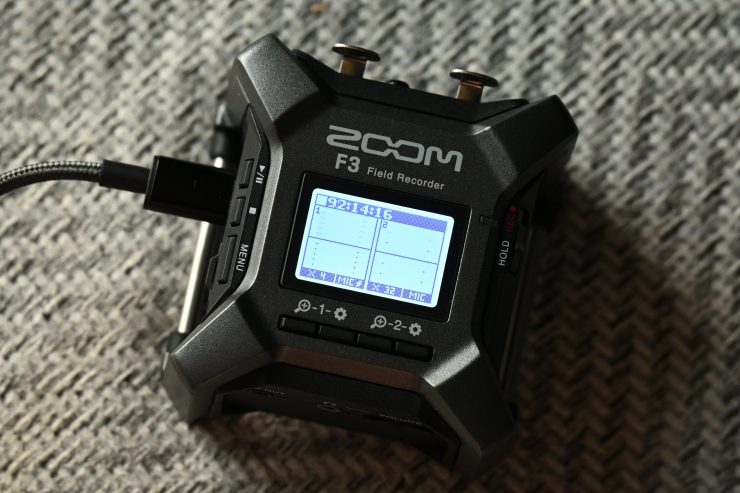
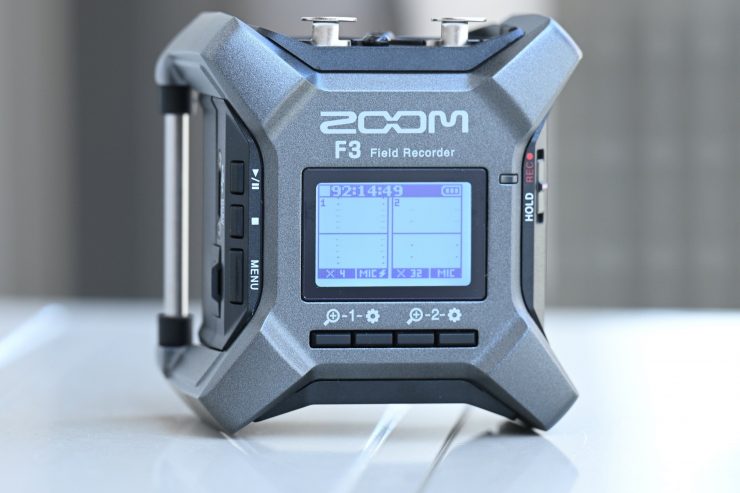
The LCD display screen is quite easy to see and what you will notice is that there aren’t any meters at all on the F3. Instead, all you can see are the waveforms being recorded in real-time. The whole premise behind the F3 is that it has been designed to almost be a set-and-forget product where you don’t have to worry too much about setting input levels. This is because it only records in 32-bit float. I did, however, find that the waveforms are a little hard to judge when setting levels. We are all so used to seeing levels on audio recording devices, so setting levels based on what you are seeing on a waveform is a little more tricky to do. I constantly found that the levels I was setting were being recorded too low.
Speaking of 32-bit float, with the F3 you need to set your input level before you start recording. If you try and make any adjustments once the F3 is recording it won’t do anything.
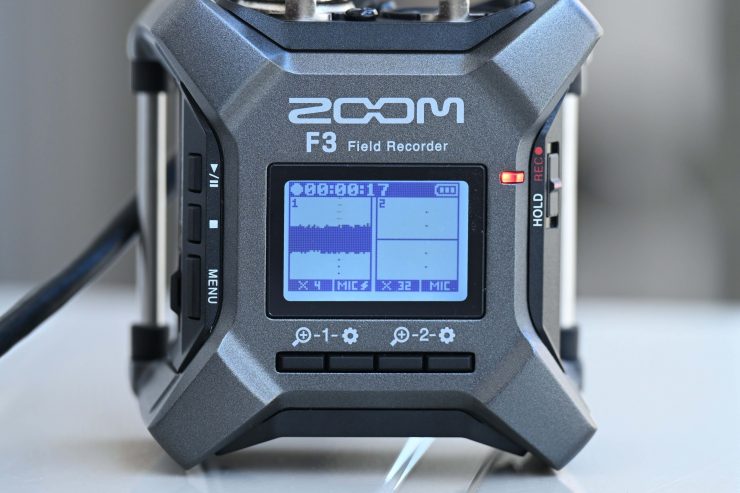
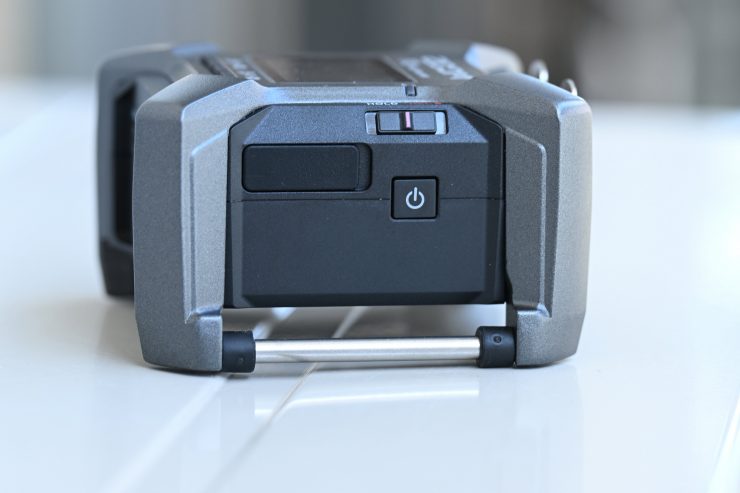
The one small complaint I have is that the F3 doesn’t clearly display when it is or isn’t recording. Yes, there is a small red LED indicator, however, I would have preferred to have seen a red record box or similar be displayed when you are recording as this would make it much clearer to the end user. Unfortunately, because of the monotone screen on the F3, this isn’t possible. Even a visual indicator that clearly says Recording would have been helpful.
I also found that the On/Off switch is way too easy to accidentally bump and you can end up turning off the F3 without a lot of effort. I would have preferred to have seen a system where you need to physically hold the button down for a few seconds rather than just touch it once. Now, in saying that, you can just slide the record switch over to Hold so that you can’t accidentally turn it off.
XLR Inputs
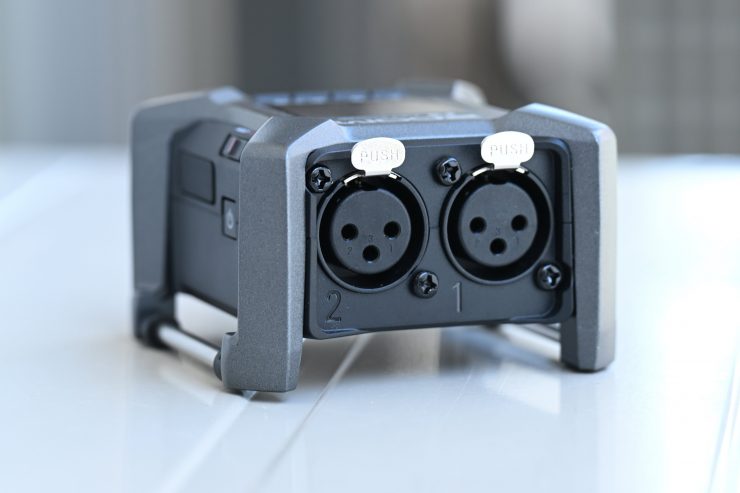
You can connect dynamic and condenser mics with XLR plugs to Inputs 1 and 2. When connecting mics, you need to make sure that you set the Input Source to Mic. in the Setting input sources part of the menu.
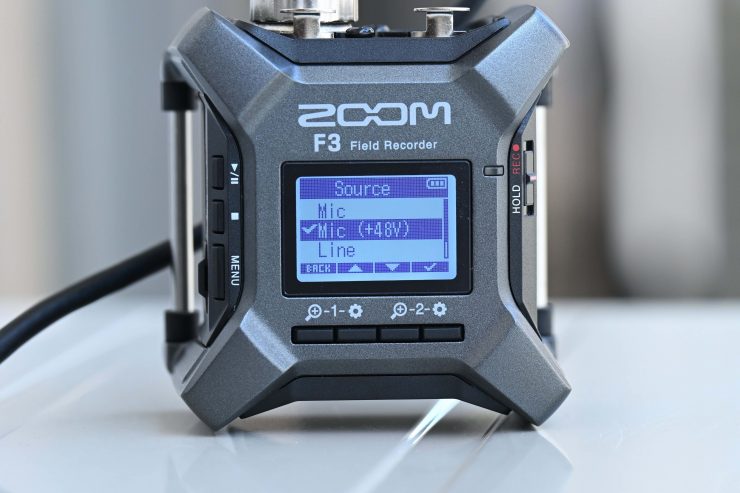
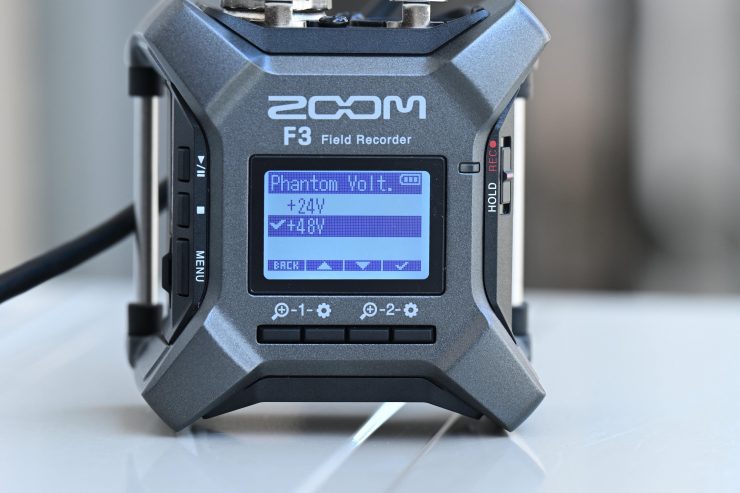
You can choose to supply Phantom power (+24 V/+48 V) to condenser mics. in the same Setting input sources part of the menu.
Mixers and other line-level equipment can be connected using cables with XLR plugs. Again, when connecting line-level equipment, set the Input Source to Line in the Setting input sources part of the menu.
The following parameters can be set for each input:
| ITEM | EXPLINATION |
| On/Off | This turns the input on or off |
| Source | This sets the input source and phantom power on/off status of the track |
| Phantom Volt. | The voltage of the phantom power can be changed |
| HPF | The high pass filter can cut low frequencies to reduce the sound of wind, vocal pops and other noise |
| Invert Phase | The phase of input signals can be inverted. This is useful when sounds cancel each other out due to mic setting |
| Delay | If there are differences in the timing of input sounds, use this function to correct them when recording |
The maximum input level for the XLR inputs is +4dBU. What that means is that if you are using a sensitive microphone and working in very loud environments then it is still possible to get distortion, despite the recorder capturing 32-bit float. If you start exceeding the capabilities of the microphone you are using, 32-bit float isn’t going to save you.
One thing that is missing is a 3.5mm input. This would have been handy to have for attaching certain devices.
Line Out
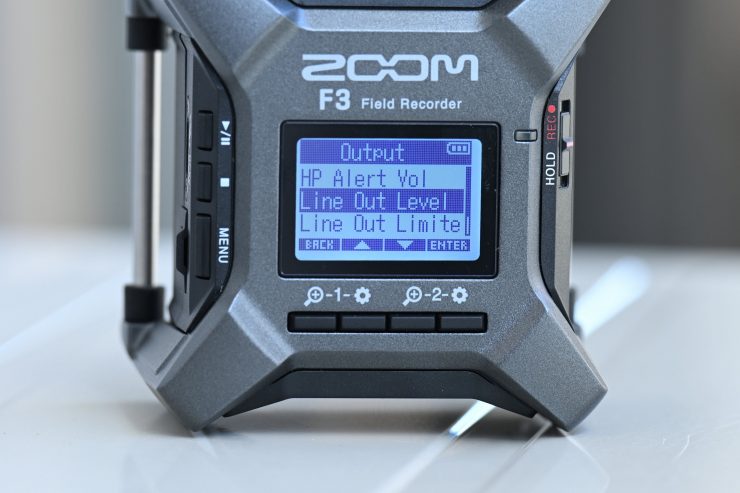

The Zoom F3 also features a 3.5mm Line output (that can also be set to mic level) for sending signals to equipment or a mirrorless hybrid, etc. The Zoom F3 allows you to send a test tone so that you can adjust the levels on the device you are sending the signal to.
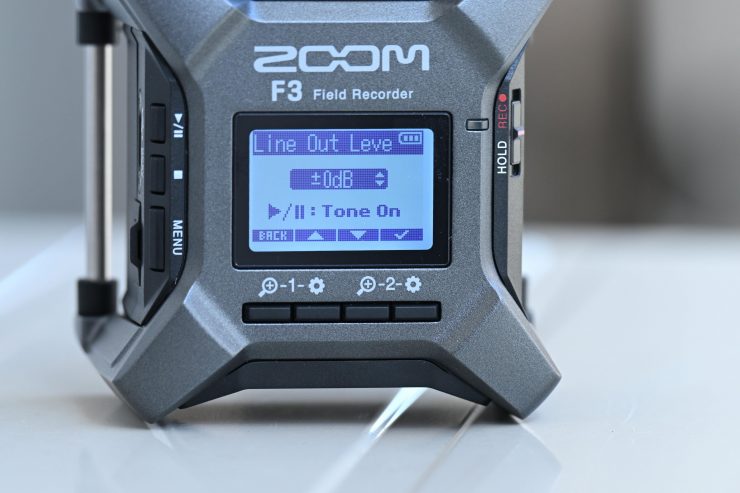
While checking the audio level meter of the connected equipment, make adjustments to the input gain of that device until the audio signal level is about −6 dB. You do this because the output test tone is a 1kHz sine wave at −6 dBFS.
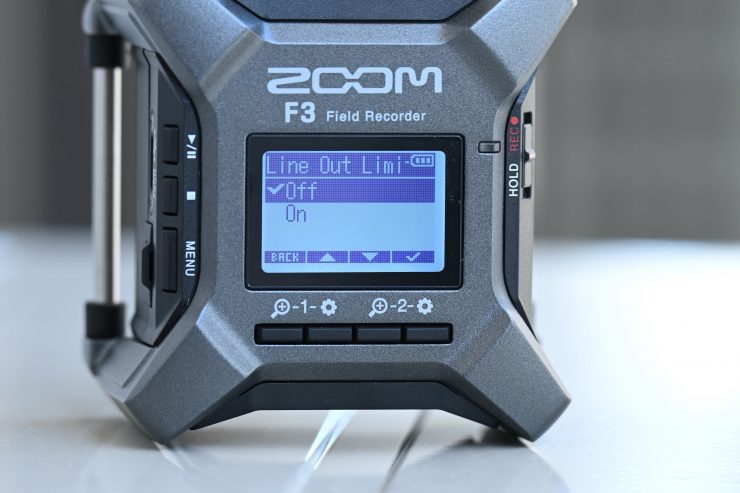
There is a limiter you can enable if the line output signal levels are too high for the equipment you are connecting to.
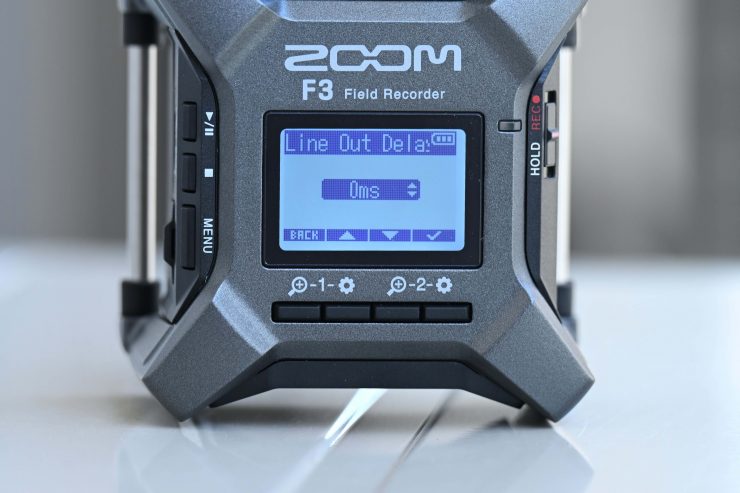
You can also set a delay on the line out.
A word of warning, be careful with the volume if you are monitoring the sound with headphones because the test tone gets sent through the headphone out as well as the line out. I learned this the hard way!
Setting Input Sources

This is perhaps the most important aspect of properly setting up a field recorder. You need to make sure you select the proper input source or you can end up damaging equipment.
| ITEM | WHAT YOU WOULD USE THIS FOR |
| Mic | Use when connecting a mic or other equipment with a low input level |
| Mic (+48V) | Use when connecting equipment with mic level input that requires phantom power |
| Line | Use when connecting line-level equipment. The input level will be reduced 20 dB compared to when “Mic” or “Mic (+48V)” is selected |
| Line (+48V) | Use when connecting equipment with line level input that requires phantom power |
I really do need to stress that you should never connect equipment that is not compatible with phantom power. If you do and you have set the Zoom F8 to Mic (+48V) or Line (+48V) there’s a good chance that it could end up costing you money.
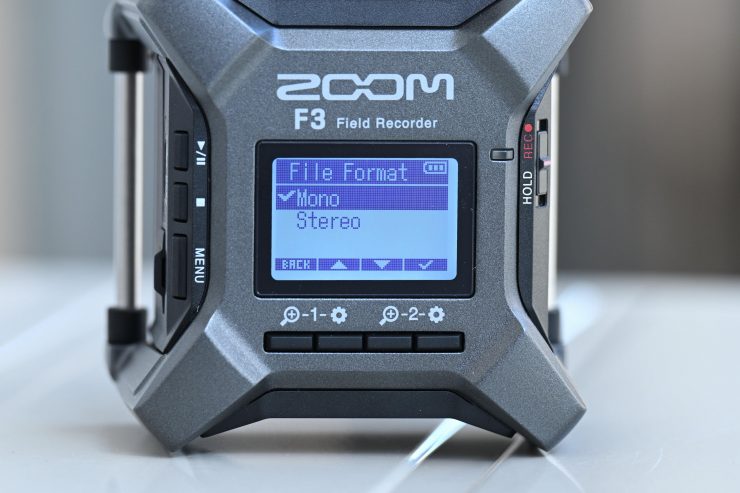
You can also select to record in Mono or Stereo depending on your requirements.
If you select Mono then one audio track is recorded in one file. If the On/Off setting for both Inputs 1 and 2 is On when recording, two WAV files will be created.
If you select Stereo two audio tracks are recorded in one file. The Input 1 signal is recorded on track 1 and the Input 2 signal is recorded on track 2 separately.
One thing to note is that depending on whether you select Mono or Stereo, the sound monitored from the headphone and line outputs will change as follows:
Mono: mono mix
Stereo: stereo with Input 1 on left channel and Input 2 on right channel
There is no way to just select Ch1 or Ch2 and listen to it through both sides of the headphones.
Pre-Recording
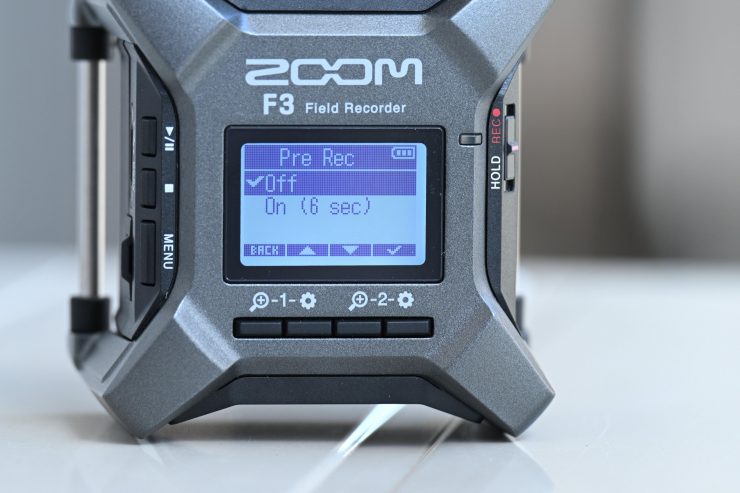
The Zoom F3 does have a pre-recording function and how long you can capture before pressing record depends on the sample rate you are using.
Sample rate Pre-recording time
44.1 kHz 6 seconds
48 kHz 6 seconds
88.2 kHz 3 seconds
96 kHz 3 seconds
192 kHz 1 second
Pre-recording is always a handy feature to have on a field recorder, particularly if you are using it to capture natural ambient sounds.
What does it record to?
The Zoom F3 records to microSDHC / microSDXC cards with a capacity of up to 1TB.
Having up to a 1TB card allows for extremely long record times. I wouldn’t be rushing out and buying a 1TB card because you can record for around 92 hours and 35 minutes hours with a 128GB card.
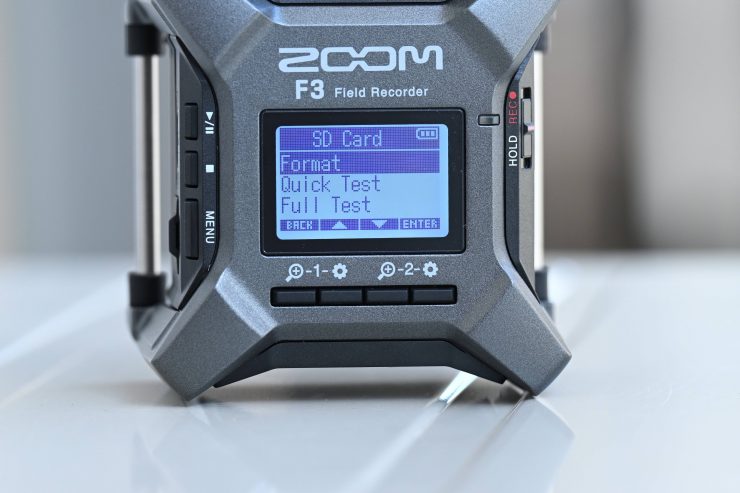
One of the functions I like in F3 is that you can actually run a test on the card you have to see if it works in the recorder.
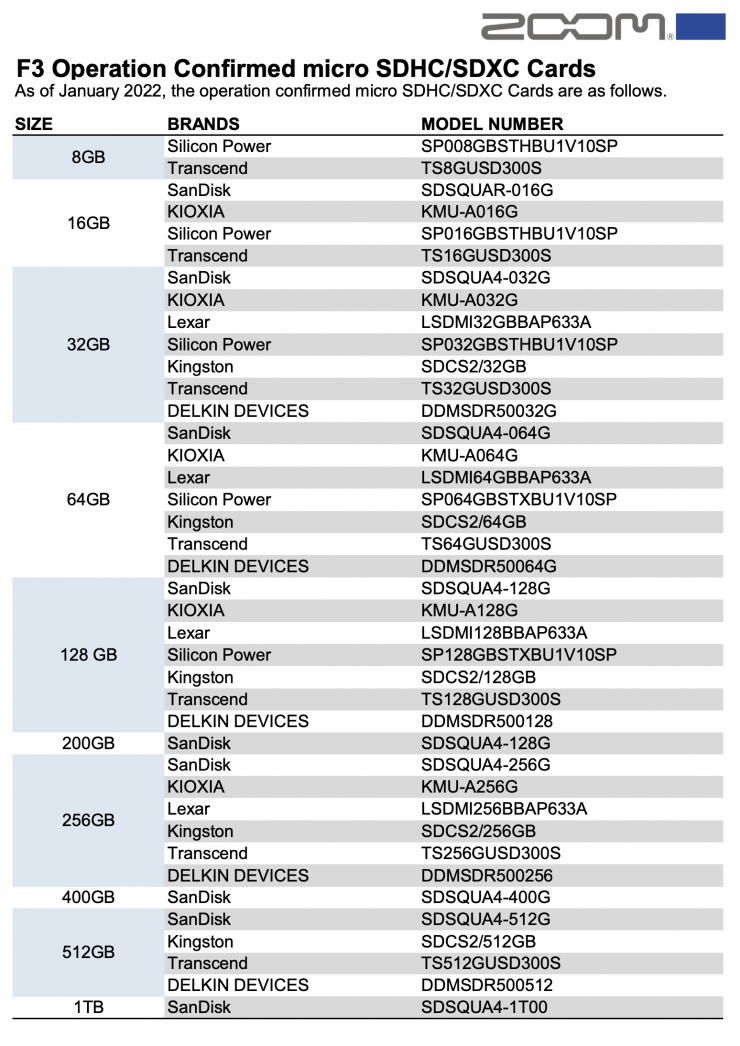
The ZOOM F3 is compatible with a lot of different cards, but it is always wise to use ones that have been tested by the manufacturer. Above you can see a list of approved cards.
Is it easy to get up and running?
Getting the Zoom F3 up and running is a fairly easy process and it doesn’t take long to do. These are the steps you need to follow:
- Insert a microSD card (this may sound stupid, but hey, people do forget!)
- Supply power (AA batteries / AC adapter)
- Connect mics/other equipment to inputs
- Turn the power on
- Make settings related to input
- Make settings related to recording
Remote Control
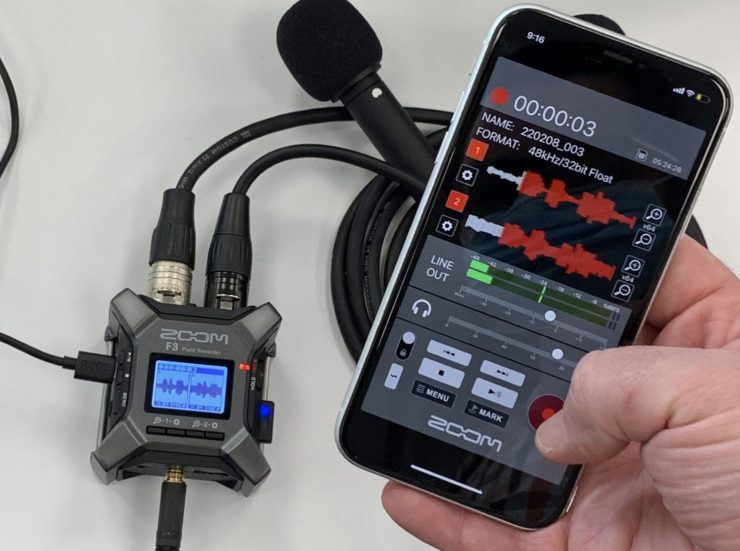
You can remote control the F3 by using an Android / iOS app and Bluetooth. The only trouble is that to do this you need to buy the optional Zoom BTA-1 Bluetooth Adapter for ARQ AR-48, L-20, R20, H3-VR & F6 which costs $39 USD.
The app will work over a distance of up to 30′ / 10m.
It is a little strange in 2022 to see companies still making you purchase Bluetooth dongles. I don’t see why ZOOM just didn’t put the Bluetooth inside of the unit. It is easy to lose Bluetooth dongles. They may have not included Bluetooth to keep the cost down, but I think most people would have been happy to have had Bluetooth included and to pay slightly more for the product.
Timecode?
There is timecode, however, it is only compatible with the Atomos UltraSync Blue and the optional BTA-1 Bluetooth adapter. This is a strange decision by Zoom because the F3 would have far more widespread appeal if you could use it with any timecode device. I would happily pay an extra $100 to get a BNC timecode input.
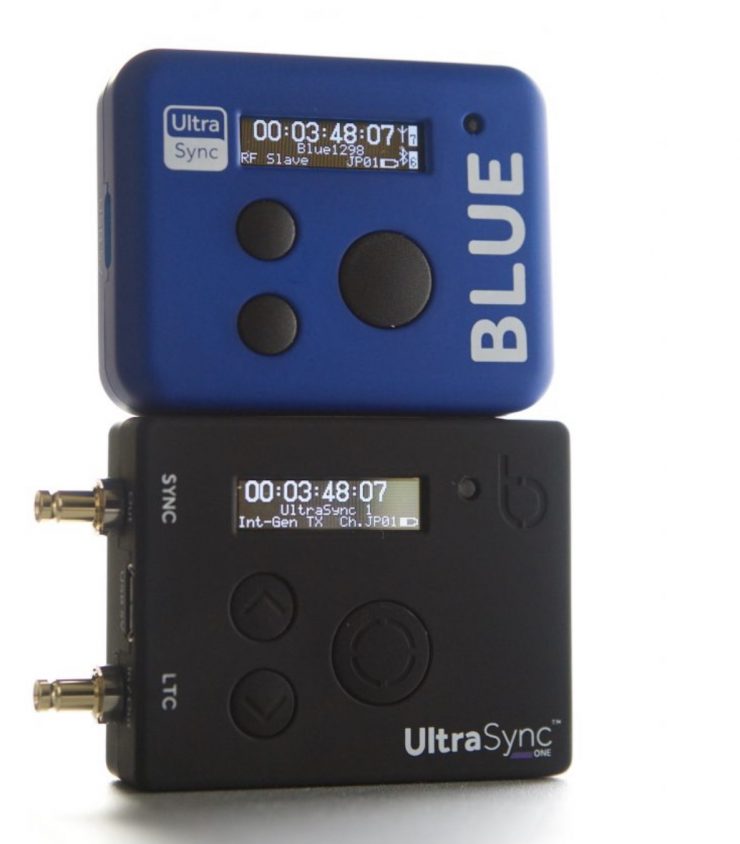
The only way to use an UltraSync BLUE with other cameras and not select Atomos devices and mobile apps would be if you already happened to own an UltraSync ONE. The UltraSync BLUE is able to communicate with an UltraSync ONE.
The UltraSync BLUE is easy to use with an UltraSync ONE. Although, for this to work, the UltraSync BLUE needs to act as an RF Slave. The UltraSync BLUE can’t act as an Int-Gen TX.

I don’t know too many people using the Atomos Ultrasync BLUE and its limited compatibility with other devices is probably a big reason why. If you want to know more about the UltraSync BLUE I have previously reviewed it on the site.
At least, in my opinion, it doesn’t make sense to lock users into one particular timecode solution when using a device that costs $350 USD. Having a simple BNC timecode in/out would have made this a much more attractive product to a wider audience.
Now, the other option you do have is to just feed an LTC timecode signal into Track 1 via an XLR cable. This does work, however, you end up losing one of your audio tracks on the F3. If you just need to record one audio track and you need timecode sync between the F3 and a camera then this option is arguably the easiest solution.
Dual AD Convertors
For each input circuit, the F3 has two AD converters with different input gains. This design enables high-quality audio recording without the need to adjust gain settings. The F3 utilizes the exact same dual A/D converters and low-noise preamps found in the Zoom professional F-Series recorders.
The Zoom F3 has a claimed self-noise measurement of -127dBu, which is pretty impressive. This is only marginally louder than only 2 dB louder than a lot of the high-end Sound Devices mixer/recorders.
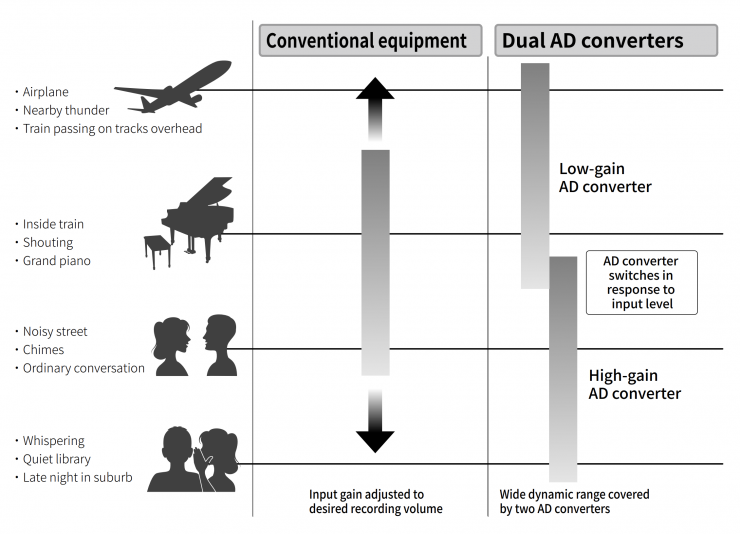
What this means in Laymen’s terms, is that the Zoom F3 is constantly monitoring data from the two AD converters, and automatically selecting the one that provides the best recording results. So when you have loud or soft sounds it is able to automatically select whether to use the Low-gain AD convertor or the High-gain AD convertor.
32-bit Float
32-bit float WAV files offer a big advantage over conventional 16/24-bit linear WAV files. 32-bit float WAV files have the advantage of being able to maintain high resolution even at low volumes.
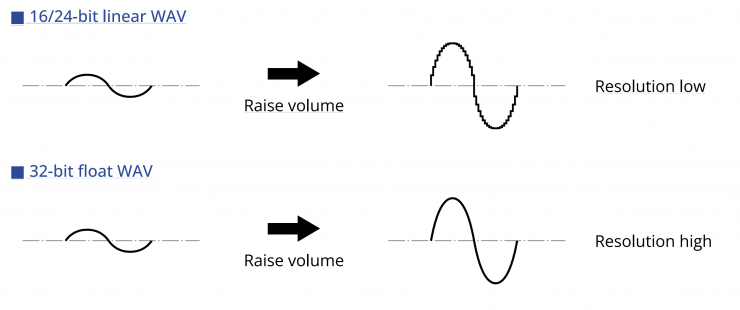
What this means is that quiet sounds can be made louder when editing after recording without degrading their quality.
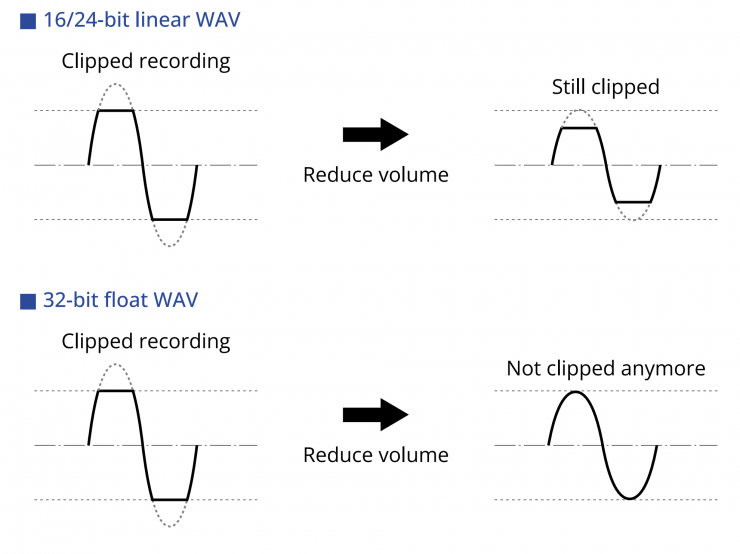
Conversely, if a recorded waveform is clipped you can lower its volume and restore an unclipped waveform because the data in the 32-bit float WAV file itself is not clipped. 32-bit provides a huge safety net, but in saying that, I still like to make sure that what I am recording is being done at a reasonable level so I prefer to set levels on the device myself before hitting record.
I personally like to use 32-bit in environments where the noise levels can suddenly drastically change and in situations where I can’t monitor the audio or give it my full attention.
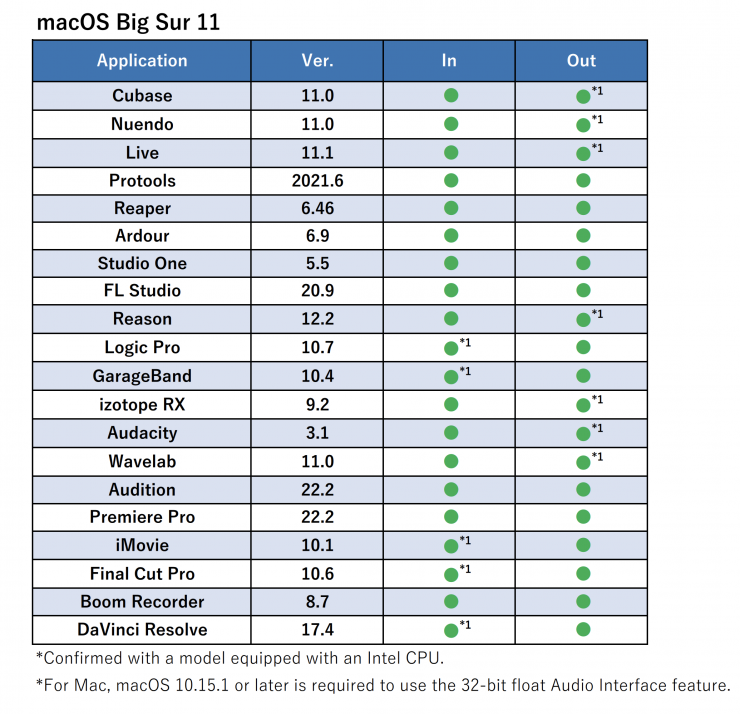
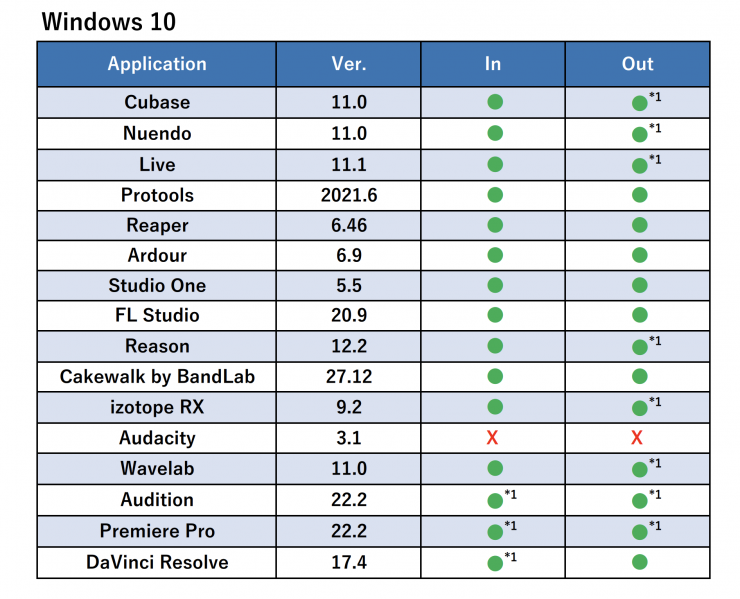
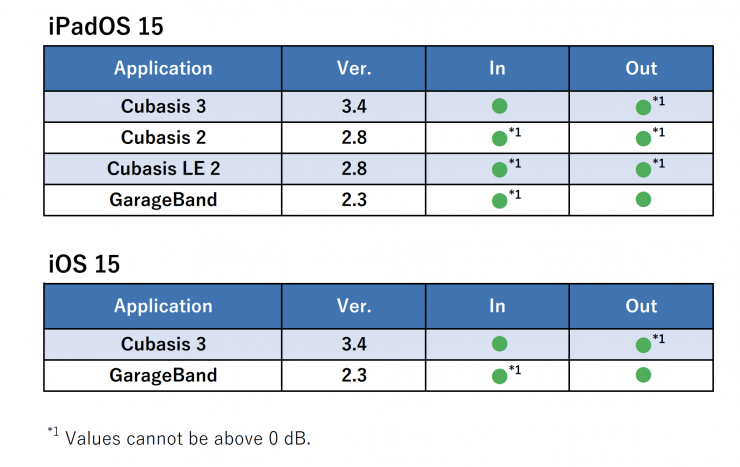
As of March 2022, the above applications have been confirmed to support 32-bit float.
Using the F3 as an audio interface
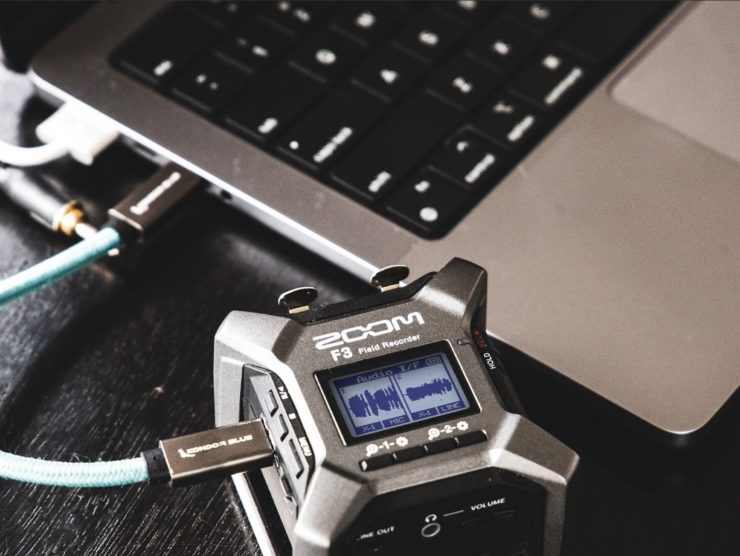
The F3 can be used as a 2-in/2-out audio interface. Signals input to the F3 can be sent to a computer, smartphone or tablet, and playback signals from a computer, smartphone or tablet can be output from the F3.
32-bit float format is supported, and functions such as mono mix and direct
monitor are also available. With the mono mix function, the monitor sound of Input 1 and 2 and the signals sent to a computer, smartphone or tablet can be mixed in mono. This is useful when you do not want the signals sent to the computer, smartphone or tablet to be stereo. This is handy when doing things like webcasting.
To connect to computers, smartphones, and tablets you need to go into the menu and select USB Audio I/F, and press to confirm.
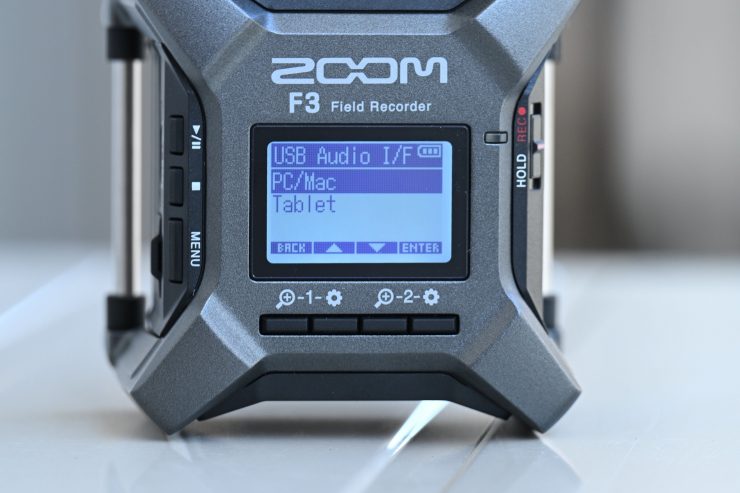
You then need to select the type of device that you want to connect to (the choices are Mac/PC or Tablet) and then you press to confirm once again.

The next step is to select the format to be used for the audio interface. Your choices are Linear or Float. Before choosing Float (32-bit), you need to know if the app used on your computer, smartphone or tablet supports the 32-bit float format.
One of the other things you need to be aware of is that you cannot record on the F3 when you are using it as an audio interface.
No drivers are necessary for use with smartphones, tablets and Mac computers. If you have a Windows computer then you need to install the F3 driver.
Real World Performace
Having a compact, lightweight field recorder is all good and well, but at the end of the day, the audio quality needs to be good.
The F3 certainly punches above its weight and you can capture really good audio with this device. What you need to keep in mind is that the quality of audio recordings is determined by numerous variables: the mic you are using, the placement of that mic, where you are recording audio, and the quality of the recorder.
Above you can hear a few audio samples using the ZOOM F3. I purposely recorded sounds at low and high levels and then normalized the levels in FCP. I haven’t done any adjustments apart from the levels.
When testing out the ZOOM F3 I didn’t encounter any interference from Wi-Fi or RF devices. In all honesty, I didn’t expect that I would encounter any issues as this is a professional and not a consumer product. With some more affordable consumer products, they can be very susceptible to picking up RF interference. I have had this issue before with certain microphones that haven’t been well shielded picking up radio transmissions.
What it is and what it isn’t
Let me just put this out there, if you are looking for a compact, inexpensive 2-channel field recorder just to record ambient audio, then the Zoom F3 is a great choice.
If you are looking for an audio field recorder and you need to sync timecode with a camera, then this isn’t a device I would recommend. The fact that the F3 needs an additional (optional) Bluetooth dongle, and that dongle only works with the Atomos Ultrasync BLUE, makes it extremely limited when it comes to timecode sync.
If you are looking for a compact, inexpensive 2-channel field recorder then the Zoom F3 is a great choice.
As far as audio quality is concerned, the self-noise is right up there with very expensive mixer/recorders from industry standard companies.
The aluminum body adds great durability and the built-in USB-C port allows for easy powering via an external power bank for extremely long run times on a single charge.
Additionally, 32-bit float means you’ll never experience clipping again, and you don’t have to fuss with setting gain levels.
Price & Availability
The ZOOM F3 is available for $349.99 USD.
Final Thoughts
Despite a few small issues and quirks, the ZOOM F3 is a very capable and well-performing portable field recorder.
Its tiny size means you can just throw one into a bag so you have access to a field recorder when needed.
I primarily see this as a device for capturing ambient sound or for using with smaller-sized cameras that don’t have decent audio capabilities. Though, that’s not to say that it couldn’t be used for other purposes.
The almost closed-off timecode system choice of going just with the Ultrasync BLUE is a strange decision. You can only use the Ultrasync BLUE with a couple of products and I would have much preferred to have seen ZOOM just put a BNC timecode in/out or at the very least some type of adapter cable. That way this product would become much more versatile.
The set and forget 32-bit recording is a great feature, and the general build quality is pretty decent if you don’t count the battery door.
ZOOM has made quite a unique and interesting product with the F3 and it is worth looking at if you want an easy-to-use 2-channel field recorder that won’t take up much space.