While the Atomos Ninja V+ has been out for some time, I wanted to try it with the Canon R5 and ProRes Raw. I do have to state I don’t shoot in Raw very often due to the nature of my fast-paced news promo schedule, and I don’t find the increased file sizes, and flexibility Raw brings to be worth some of the pain editing and archiving these files brings. I appreciate the technology and the option to use ProRes Raw in certain situations. I understand the value for higher-end production where heavy color grading and the need for 10-bit and higher are helpful.
Computers have improved a lot over the years and can handle these Raw files better, but most will either transcode or have a proxy workflow to make a not-so-new computer from catching on fire or just stopping in its tracks.
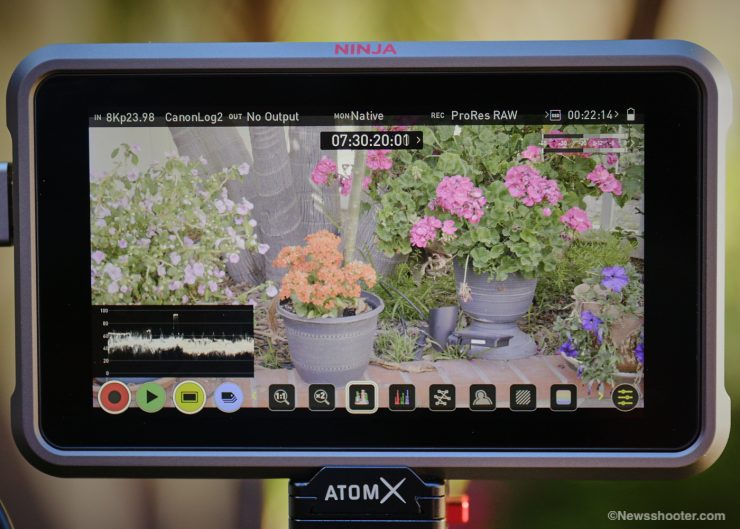
8K Sample Video
Above is a sample of 8K Raw I shot in the yard. It looks beautiful to me but on my maxed out specification 2017 iMac editing native in FCPX with high-quality playback drops many frames. When I set the playback to performance, it plays back fine, but the IQ is lower. Not a bad tradeoff since I can edit with minor issues and no rendering. Proxie would solve this for the most part. I will say the image is excellent.
Diffrences from Ninja V
Outside of the grey color, the Ninja V+ looks identical to the Ninja V. They boot up the same, and the tools all perform the same. The differences are inside the recorder via an updated processor for the more demanding Raw format. The metal housing gives it a solid feel and should withstand a lot of use.
EOS R5 and NinJa V / Ninja V+ Specification Differences
| AtomOS 10.73 | Ninja V+ | Ninja V |
| HDR Compatibility | Advanced HDR | Not Specified |
| Video Format | HDMI (8/10-Bit 4:2:2) ProRes Raw 8K Raw: 8192 x 4320 23.98p, 24p, 25p, 29.97p 5K Raw Cropped: 23.98p, 24p, 25p, 29.97p, 59.94p DCI 4K: 120/60/50/30/25/24 UHD 4K: 60/50/30/25/24 1080p: 120/60/50/30/25/24 1080i: 60/50 720p: 60/50 | HDMI (8/10-Bit 4:2:2) ProRes Raw 5K Raw Cropped: 23.98p, 24p, 25p, 29.97p DCI 4K: 60/50/30/25/24 UHD 4K: 60/50/30/25/24 1080p: 120/60/50/30/25/24 1080i: 60/50 720p: 60/50 |
| Encoding Formats | Up to 7680 x 4320 ProRes 422, HQ, LT, Raw, Raw HQ 8/10-Bit 4:2:2 at up to 120 fps H.265 422 10-Bit 4:2:2 at up to 120 fps H.265 422 8/10-Bit 4:2:0 at up to 120 fps DNxHR HQ, HQX, LB, SQ 8/10-Bit | Up to 4097 x 2160 ProRes 422, HQ, LT, Raw, Raw HQ 8/10-Bit DNxHR HQ, HQX, LB, SQ 8/10-Bit |
| Retail Price | $999.00 USD | $599.00 USD |
Canon EOS R5 HDMI RAW Support
ProRes RAW Recording:
- 8K (8224 x 4336) at 23.98p, 24p, 25p, 29.97p
- 5K (5088 x 2680) at 23.98p, 24p, 25p, 29.97p, 50p, 59.94p
- WB and ISO Controls for FCP Settings slider adjustments
Record Times with ProRes Raw
- 1TB @ 8K30 ProRes RAW HQ: ~40 minutes
- 1TB @ 8K30 ProRes RAW: ~42 minutes
- 1TB @ 5K60 ProRes RAW HQ: ~43 minutes
- 1TB @ 5K60 ProRes RAW: ~50 minutes
- 500GB @ 8K30 ProRes RAW HQ: ~20 minutes
- 500GB @ 8K30 ProRes RAW: ~21 minutes
- 500GB @ 5K60 ProRes RAW HQ: ~22 minutes
- 500GB @ 5K60 ProRes RAW: ~25 minutes
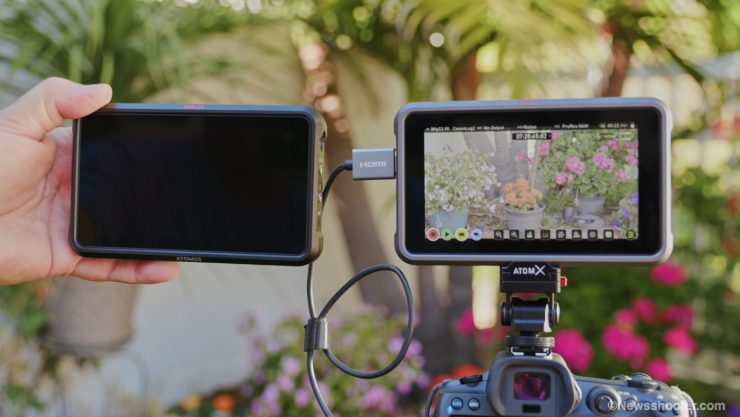
One of the main differences is the ability to capture 8K ProRes Raw up to 29.97p from the Canon R5. The monitor looks very similar to the original, including the brightness and color. All the Atomos 5″ monitors look pretty good and have an excellent operating and menu system. This stands out from the others and should be considered when choosing a monitor. It can be frustrating fiddling through buttons and menus to turn on scopes or focus tools, not with the Ninja V+. It’s all touchscreen, and once you get used to where everything is, it’s speedy to navigate.
One thing hasn’t changed. Always use approved media. Going cheap will cause issues or unforeseen problems. If you only have one shot and no do-overs, don’t risk it.
Canon EOS R5 C HDMI RAW Support
The new Canon R5 C can also record ProRes Raw with the Ninja V+ and has its own options.
- 8K (8192 x 4320) at 23.98p, 24p, 25p, 29.97p
- 6K (5952 x 3140) at 23.98p, 24p, 25p, 29.97p, 50p, 59.94p
- 3K (2976 x 1570) at 23.98p, 24p, 25p, 29.97p, 50p, 59.94p
- WB and ISO Controls for FCPX Settings slider adjustments
The Ninja V also supports ProRes Raw from the Canon R5 C but with less options, mainly no 8K mode or 6K at 50p and 59.95p.
- 6K (5952 x 3140) at 23.98p, 24p, 25p, 29.97p
- 3K (2976 x 1570) at 23.98p, 24p, 25p, 29.97p, 50p, 59.94p
- WB and ISO Controls for FCP Settings slider adjustments
Ninja V+ Pro Kit
The NInja V+ Pro Kit is nice. It comes with ProRes Raw and H.265 preinstalled. What isn’t included are SSD media and batteries. The hardshell travel case is excellent and includes custom-cut firm foam and slots for drives and accessories.
Included Items
- Atomos Ninja V+ 5.2″ 8K HDMI H.265 Raw Recording Monitor
- RAW over SDI Pre-Activated
- H.265 (HEVC) codec Pre-Activated
- (1) Master Caddy II
- Battery Eliminator/Dummy Battery
- Power Adapter
- Neoprene Sleeve
- Hard Case
- Atomos AtomX SDI Module for Ninja V
- Limited 1-Year Warranty
- D-Tap Cable
- AtomX 5″ Sun Hood
- Limited 1-Year Warranty
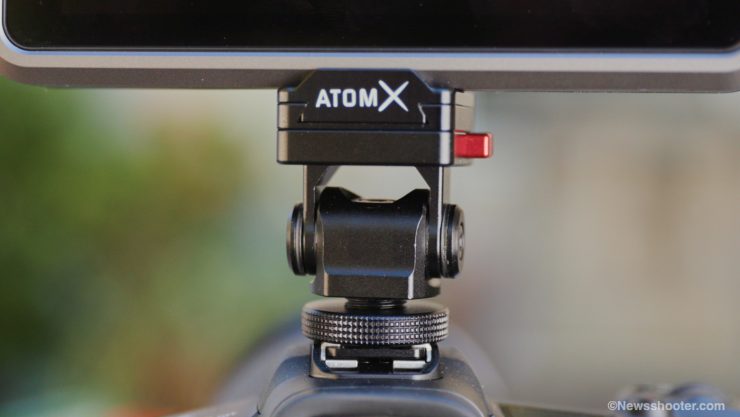
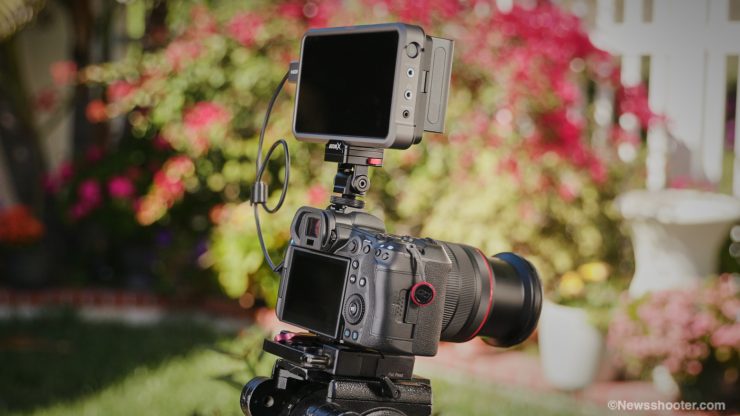
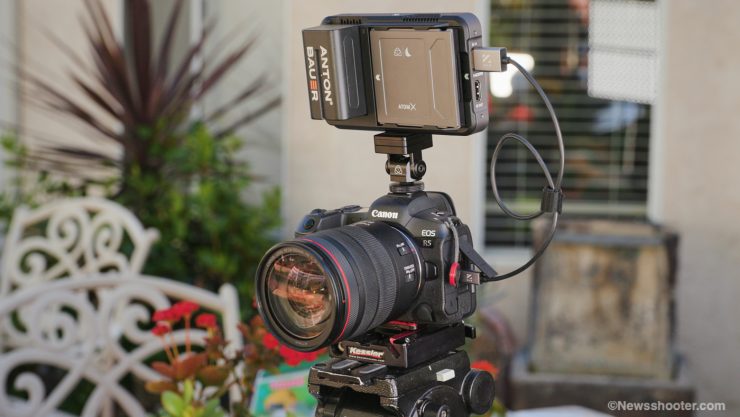
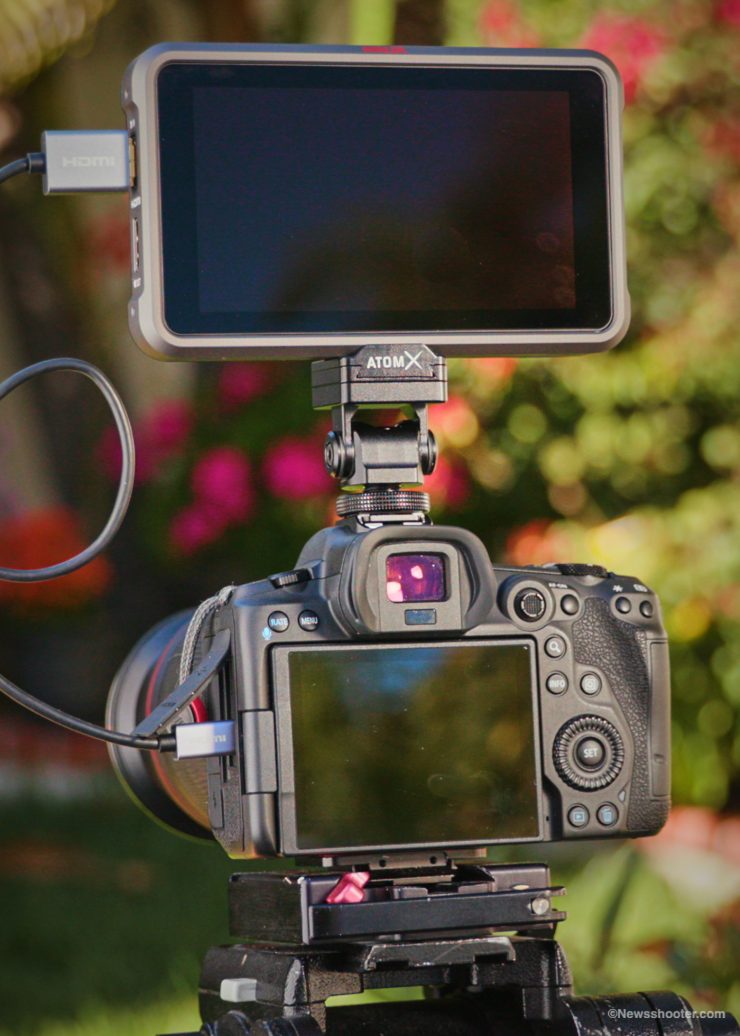
I like the sold separately Atomos AtomX Monitor Mount. It has a lip on the quick release plate to prevent twisting and loosening, and the QR system is handy for faster disassembly from the camera. We have a lot of options for monitor mounts these days.
The QR isn’t necessary in some ways, as taking off a cold shoe is fast enough. It is not cheap at $99, but I think it’s a good solution. The mount tilts and swivels with friction. It can be tightened with a hex wrench as it will periodically loosen when used over time. This is typical with all friction mounts, or at least that is my experience with them.
Setting up for ProRes RAW
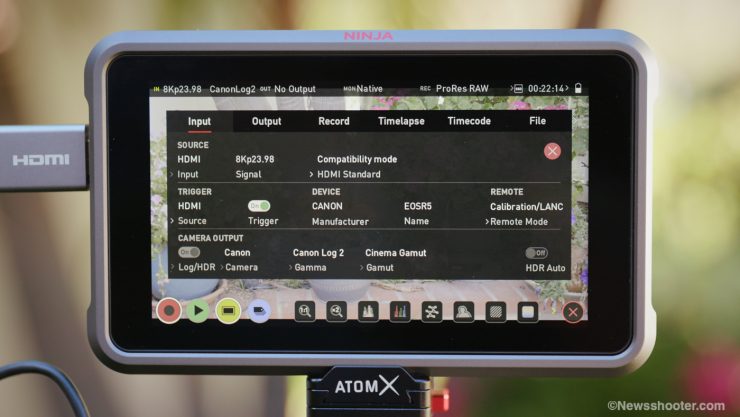
You can’t just plug it in and get ProRes Raw. It takes a few setting changes to get the R5, and Ninja V+ synced up to work together. Fortunately, it’s easy, and you will navigate with ease over time.
It takes a little fuss to set up the record trigger, but following the above directions from Atomos is helpful. If you have all the settings correct and still not getting the HDMI trigger to work, shut the Ninja V+ off and on, and it will work. Rebooting! What a surprise. 😀
Why Shoot 8K external instead of Internal?
That is an excellent question! Here are a few reasons.
One big one is the internal Canon Raw Light option is tough to edit, and if you have a big project, it will slow your system down considerably. ProRes Raw is better. Straight ProRes 422 is also, but obviously, it’s not a raw format.
If you don’t have or want to buy CFexpress Type B media cards.
These cards are currently expensive. A SanDisk CFexpress type B costs $500 for a 512GB card, while an Angelbird 1TB AV Pro CFexpress 2.0 Type B $750.00.
When you move to SSD drives, you get more for your money. A Angelbird AtomX SSDmini 500GB cost $200. A 1TB model $400, and a 2TB $550. The Angelbird 2TB is the value play as it’s only $150 more, and you get twice the capacity of the 500GB. These prices fluctuate over time. You will need more cards or drives for larger projects with such big files. This will add up fast.
The other hot topic is overheating.
The camera will perform more reliably since you are not generating heat with the internal recording. If you don’t use the HDMI record trigger and start the recording from the Ninja V+, you can record for an unlimited time instead of a 30-min limit.
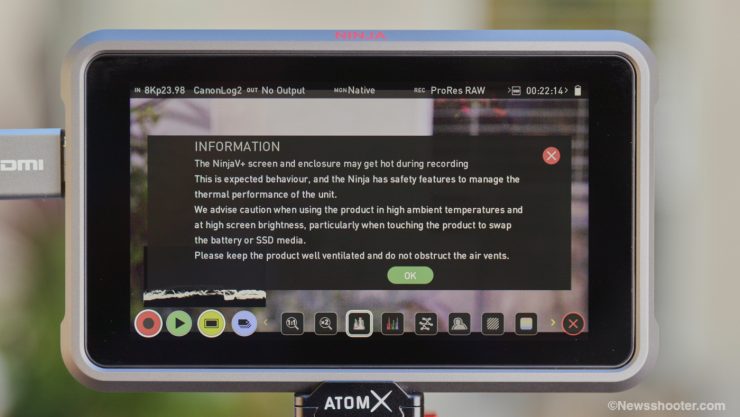
The Ninja V+ also gets hot, and when you boot it up, you get a screen that lets you know. While using external recording will help with overheating, you have to keep an eye out for it even when using the Ninja V+. The issue will vary depending on the ambient temperature of the location and how long you continuously record.
Editing ProRes Raw
So you have some tasty ProRes Raw footy, and you want to edit it. This is where things still are a bit frustrating as not all NLE’s support ProRes Raw the same way. If you want to get the most of any Raw file, you will want the full options available for editing.
Side note on Raw files. They could require some noise reduction since this is bypassed from the camera processing. For the most part, I have found the files to look pretty clean, mainly because I avoided underexposing.
Final Cut Pro
Hands done, the best option is to use FCPX, as it has all the bells and whistles you would expect from an Apple-centric codec. This includes white balance and ISO setting adjustments. It’s the best way to edit ProRes Raw.
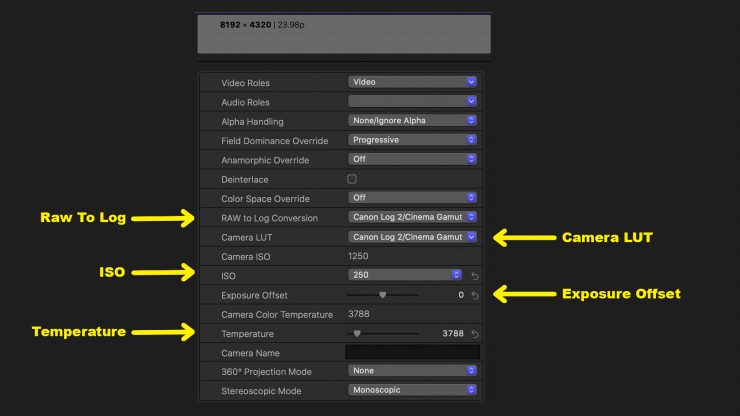
All the Raw controls are in one place, and it’s so simple to make changes with the scopes on and see everything in one place. The big benefits are Temperature, ISO, and Exposure Offset. FCPX also handles these files much better than Premiere Pro. If I switch to ‘Better Performance” in the playback settings, it’s actually not too bad. Once you start editing and grading, adding more clips to the project, things will slow down. On an M1-based Mac, editing will be much better.
Premiere Pro
You can edit ProRes Raw with Premiere Pro, but it’s not as robust as FCPX. All you have for Raw settings are exposure and Color Space options. Not very robust at all. This also goes for Canon Raw Light. I shot Canon Raw Light with the C200, and it wasn’t a good experience with Premiere Pro.
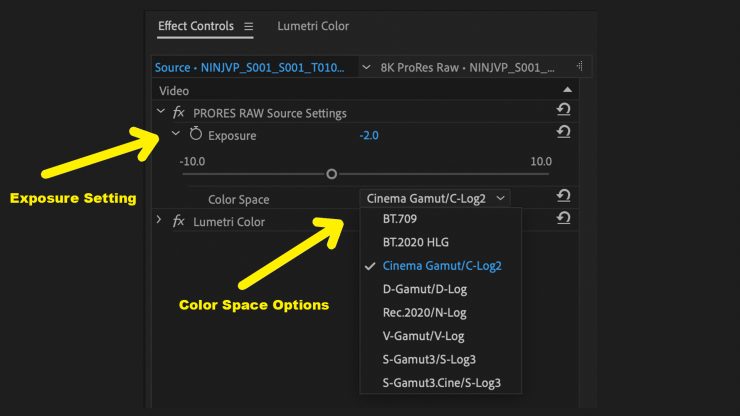
The procedure to edit color grade ProRes Raw is several annoying steps. First, you double-click the clip to load it into the source window. Then you select Effect Controls, and there is where you see the options above. After you select the Color Space, you can adjust the Exposure. I’m not clear on how this setting works with the Raw file instead of using Lumetri Color. From here, you can color grade with whatever you like to use. I wish Adobe would put the Raw settings in Lumetri Color as having to load the original clip from the bin into the preview in order to make settings changes feels like a workaround and not a workflow.
For Canon Raw Light files, I ended up using Canon’s free Cinema Raw Development software to set the white balance and ISO settings, and color settings and exported them to ProRes for editing. While this isn’t ideal, it works better than Proxie or, god forbid, native. This was on a 2017 iMac, so that is part of the performance issues, but you can’t see the color grades on the Raw clip when editing with proxies. Not ideal.
With the 8K ProRes Raw files, one clip on a sequence timeline wouldn’t playback in real-time on my 2017 iMac. This doesn’t surprise me as my iMac is a bit old for such large Raw files. The new M1 Macs will work much better.
Avid Media Composer
In 2021 Avid added the ability to edit natively with ProRes Raw. I haven’t used the NLE in a long time, and I’m not clear if it gives you the full abilities that FCPX does. I doubt this is the case and is probably more like Premiere Pro with the most basic features and is mainly a way to at least edit the footage. If you know more, please leave a comment on the workflow.
DaVinci Resolve
Edit with DaVinci Resolve? Since it doesn’t support ProRes Raw, you will have to transcode. Short and sweet. Your best option is FCPX, and that is one of the significant issues, in general, I have with Raw Codes for video. It’s not as flexible as Raw codecs for photography, unfortunately. I always shoot stills in Raw as it’s it saves my bacon when I edit a screw-up. Plus, the room for editing is amazing.
A lot of this applies to Raw video as well, but the limited NLE compatibility and workarounds are frustrating. Other compatible apps are ASSIMILATE SCRATCH, Colorfront, FilmLight Baselight, and Grass Valley Edius.
An Invitation. A Colour The Trails Story
Levi Allen did an excellent job on the launch video with the combo in 8K, and well worth watching.
Final Thoughts
I have to admit I’m very impressed with the image quality of the 8K ProRes Raw files I shot. The detail is great, and Raw delivers the “fix it post” so well, but you still have to get in the ballpark; however, just like stills in Raw, you have so much control in post, especially with FCPX.
Shooting 8K with the Canon R5 increases the rolling shutter, so you must be aware of the issue and avoid fast-moving subjects or camera shake.
While 8K is amazing to get from a mirrorless camera, I’m more likely to shoot 5K as that is plenty of resolution for most of my work, but shooting 5K means it would be in S35 crop mode. Hmmm. Decisions, decisions. 5K 60p is handy.
I don’t deliver in 4K, and If I did, I would be much more interested in 8K; however, I fully understand how resolution will continue to grow. These things keep lapping over, so nothing new, really.
Atomos made a worthy upgrade with the Ninja V+. I would pay the extra $400 to get 8K from the R5 plus future updates that will support more cameras and whatever the future brings us. For example, the R5 C is already supported with the current AtomOS 10.73 update. Atomos has and is still updating the Ninja V, but I feel it’s basically hitting its limits to what it can do as far as resolution and ProRes Raw goes. Nothing lasts forever.
I would have liked to see a few upgrades with the image. Not that it’s bad, but maybe a few more nits? It has 1000nits, and in today’s market, we are seeing 2000nits and beyond in smaller monitors. This alone would make a huge usability improvement. The fan noise is the same, and for the most part, they operate identical, but something more would have made it a no-brainer. With that said, I would still opt for the Ninja V+ as future-proofing is better than possibly buying something that is long in the tooth.