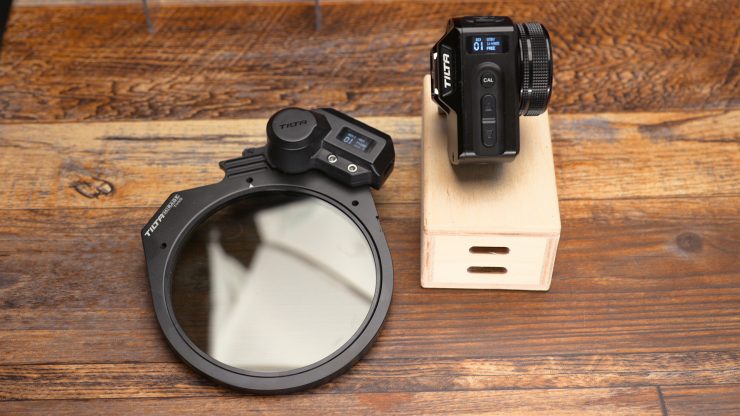
Tilta has a new Mirage matte box that has a few tricks up its sleeve. The big one is a motorized variable ND filter. It comes in two options. The basic kit comes with the Mirage matte box and 95mm round filter holder, another complete kit with the motor, controller, variable ND, and mounting hardware.
Here is the complete list of what you get with each Tilta Mirage Matte Box Kit.
Tilta Mirage Matte Box $119
- Tilta Mirage Matte Box with top flag
- (1) 95mm round filter holder
- 28mm, 67mm, 72,mm, 77mm lens adapters
- Travel case
Tilta Mirage Motorized Kit $599
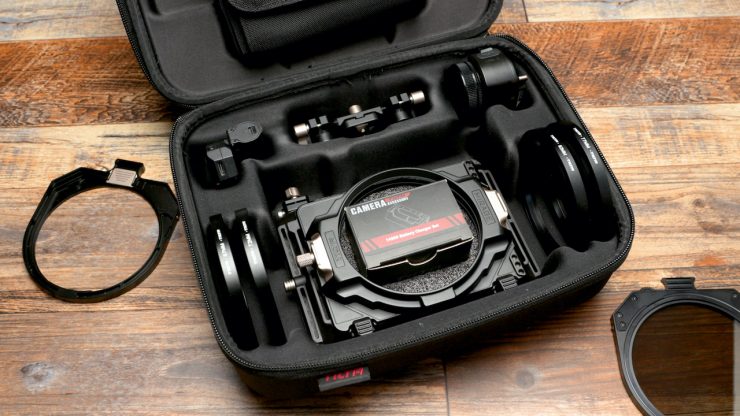
- Tilta Mirage Matte Box with top flag
- (1) 95mm round filter holder
- 28mm, 67mm, 72,mm, 77mm lens adapters
- Variable ND built into the holder – .3 to 2.7 (1-8 stops)
- Mirage Nano Motor
- Mirage wireless controller
- Nucleus Nano mounting hardware
- Battery charger
- 15mm rail mount for matte box
- Six slot filter case
- Travel case
The Tilta Mirage VND Kit ($369) comes with everything except the motor and controller. You can also buy a la carte.
- Single filter adapter $12
- Lightweight Filter Clamp-On Adapter $29
- 95mm Variable ND for Tilta Mirage $219
- Nucleus Nano Motor Adapter for Tilta Mirage $29.00
- Wireless Controller for Tilta Mirage $189
- Wireless Motor for Tilta Mirage $149
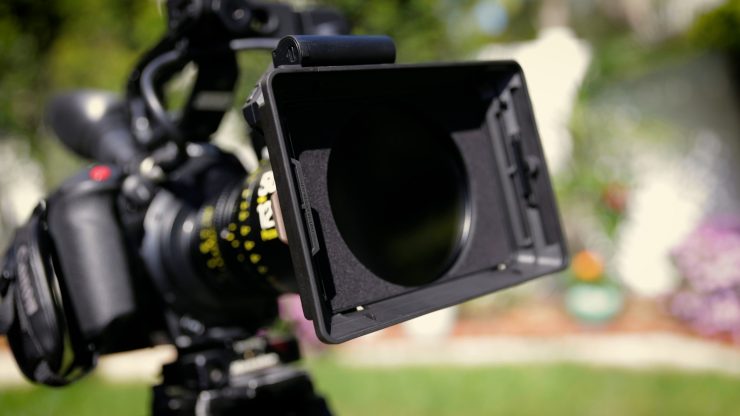
The Matte Box
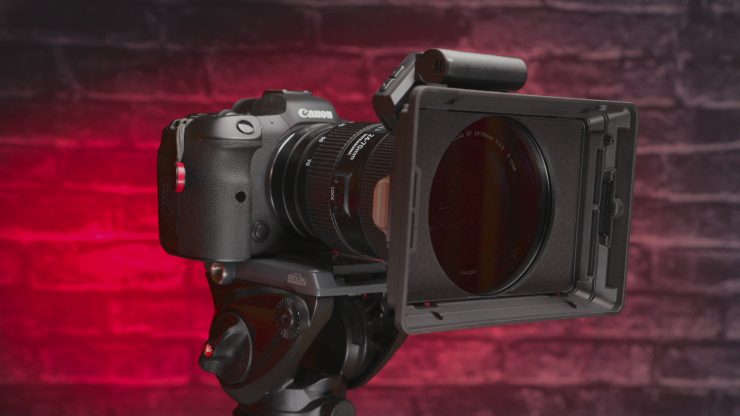
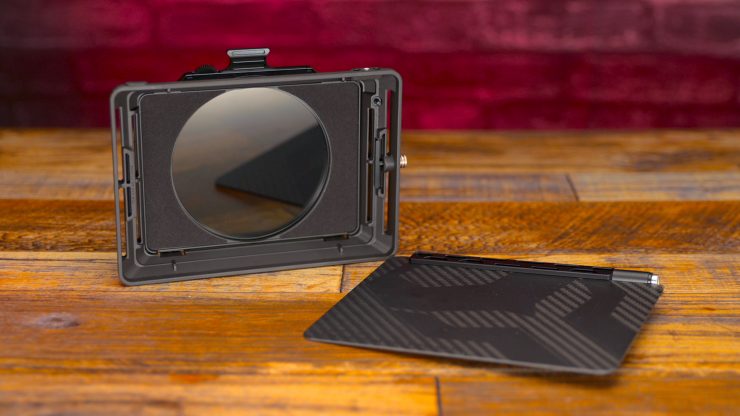
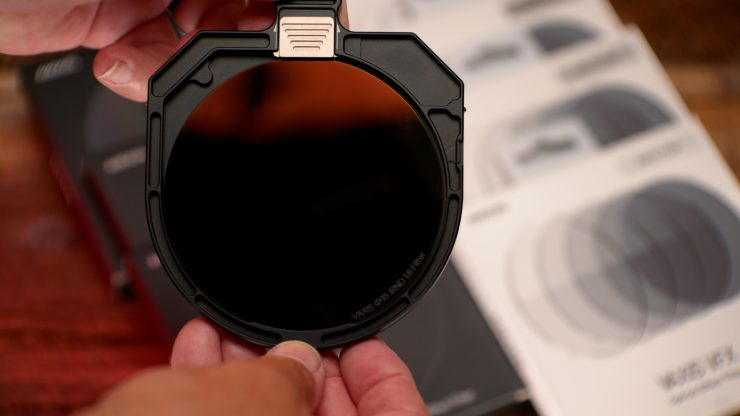
The composite plastic matte box is light in weight. The variable ND slides into the top and locks in place with a sliding switch on the side. On the front, a 4×4.56″ filter pops in and locks. No holder is used.
The clamp-on mount is 95mm; therefore, it will mount directly to some cinema lenses.
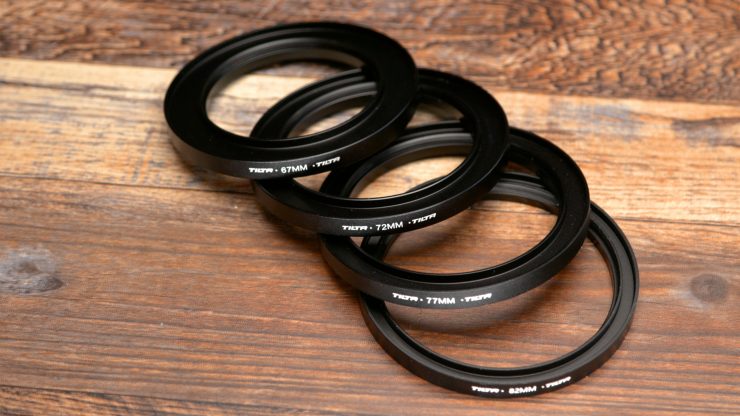
The kit includes 67mm, 72mm, 77mm, and 82mm lens adapters for stills lenses. Coming soon 52mm, 55mm, 58mm, 62mm, 85mm plus an 80mm for cine lens.
You can take the matte box off the frame and go super lightweight with only the variable ND filter and the motor for a super-compact setup. This is a good option for lighting conditions that won’t cause a flare, and a compact format is needed. The matte box shade is removable from the base, and Tilta has a few other options coming. With the shade removed, you can stack several 4×5.65″ filters with an adapter tray. This tray isn’t available yet but will be available shortly.
The matte box has some slits in the hood to allow airflow when using the Mirage on cars and drones.
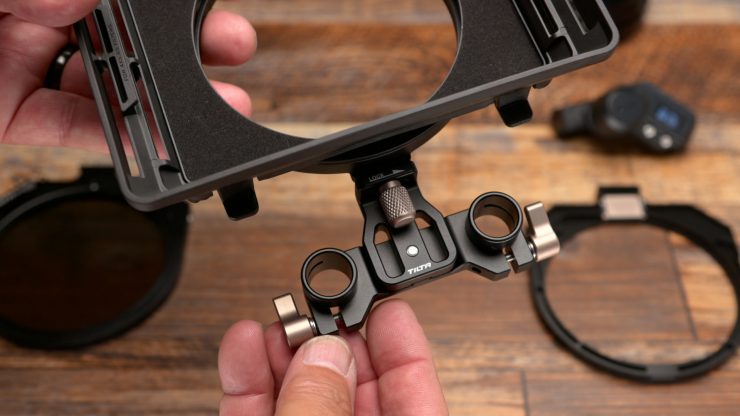
The complete kit includes a 15mm rail mount that has verticle adjustments. It’s not a lot, so your rails should be in the standard distance for them to work correctly.
Variable ND Filter
The big selling point outside the value pricing is the variable .3 to 2.7 or 8 stops neutral density filter. Add on a motor for wireless control, and you have a pretty cool setup.
Variable ND is handy when you don’t have the time or the extra help when shooting. Fumbling with filters can slow things down. That’s where a Variable ND shines, but it has a trade-off: a color shift and vignetting.
In general, you will see some in all neutral density filters. With Variables, it’s worse as you are dealing with two polarizers to create the ND effect. To avoid issues, you should always white balance after changing the strength of the variable ND. I know that sounds like a PITA, but it will save you time in post fixing it. Depending on the camera and the lighting, using auto white balance is a good option. Just as long as you know your camera won’t go wack and constantly change the temp with consistent lighting.
Another tip is to test the variable ND. Take a white balance with a grey card full screen without the filter, and then put the filter on. Shoot the grey card at different ND strengths and look at an RGB parade to see the color shifts. Hopefully, you don’t have a lot of shifts as that is harder to fix in post.
I would have liked if the ND wheel had markings for the amount of ND used when rotating the wheel. Based on the f-stop differences I see in the exposure level, I have to guess how strong it is—using the variable ND manually.
Variable ND Tests
I tested the Variable ND by white balancing without the filter on then slid the variable ND into the matte box.
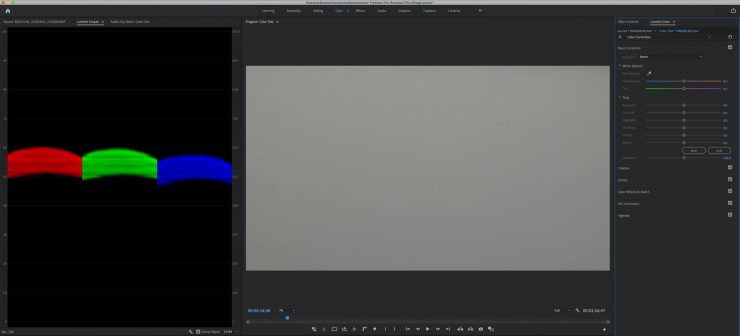
I found a slight decrease in the blue channel.
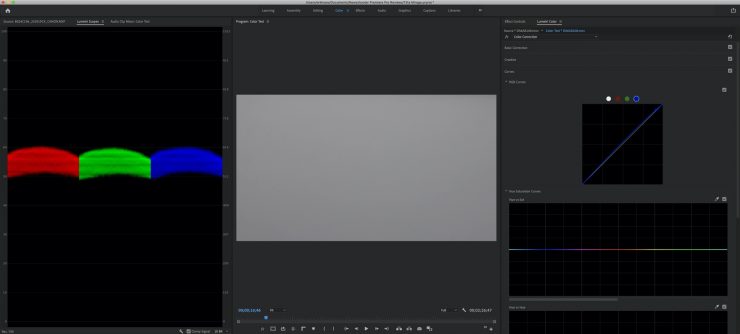
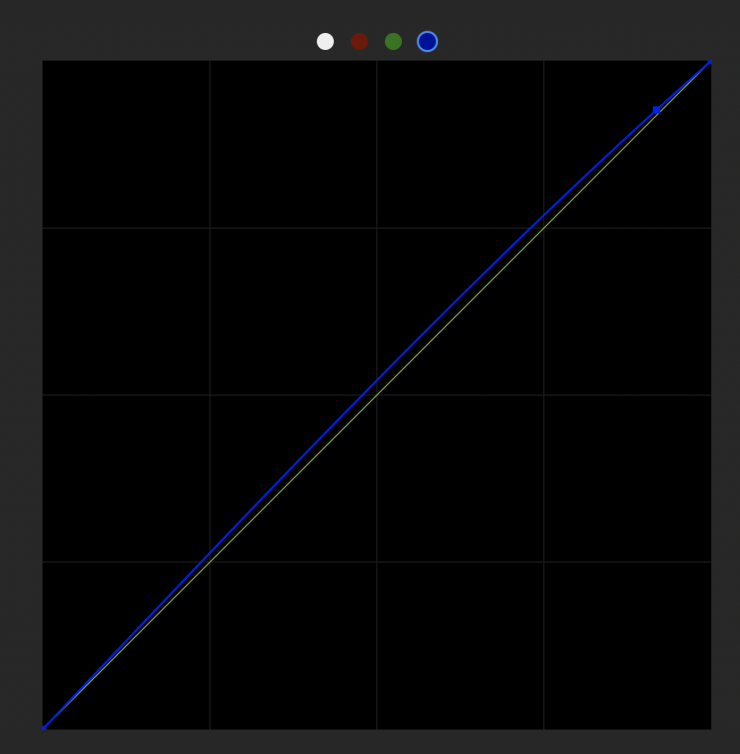
With a simple push of the blue channel in post, it was easily adjustable.

Above is the results of only adjusting the exposure to match and lifting the blue channel using curves. Very simple to correct. If you white balance with the VND on, you won’t need to color correct. However, it shows the VND does have a slight decrease in the blue channel.
VND X-Pattern
An issue all variables have is the X Pattern when the filter is rotated closer to the end. It’s unavoidable. While the Mirage VND has hard stops on both ends of the VND, it does go farther than it should as you will creep into the X Pattern as you get closer to the end of the hard stop. Tilta states to prevent vignetting to use ND settings of 0.3-2.1 for wide lenses and 2.1-2.7 for focal lengths beyond 35mm.
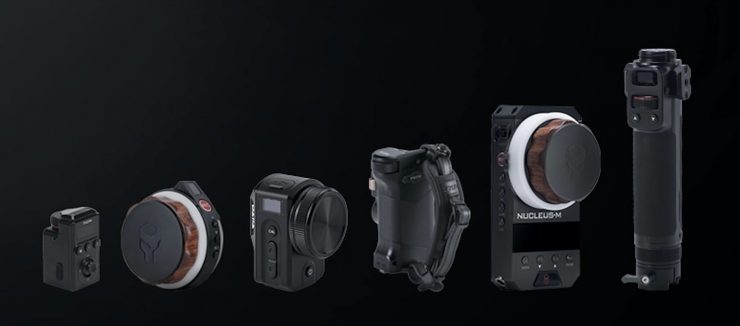
Motorized VND
The one trick the Mirage has is the ability to use the included motor and controller to change the strength of the VND wirelessly. The motor also works with the Nano and Nucleus-M controllers. A plus if you have them, and the Nano is also compact. One downside to using the Nucleus Nano motor is it requires external power as opposed to the simplicity of the Mirage that uses a battery. It would be great to see the Nucleus Nano motor get a battery added to it. It sure makes the rig much cleaner.
Pairing is simple. Select the same channel on both motor and controller, and it is ready to go.
14500 Battery Power
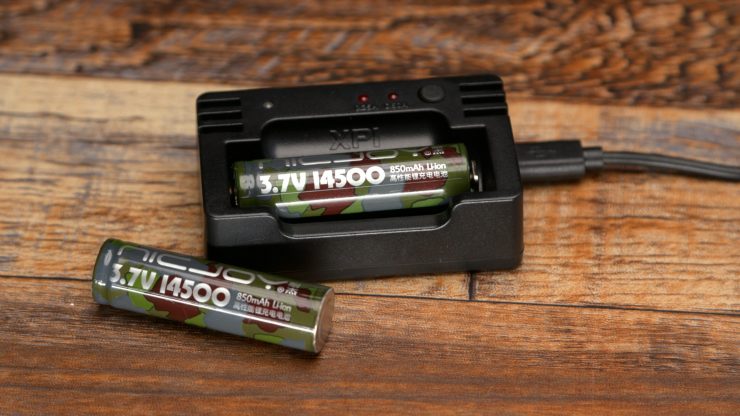
Both the motor and controller require a 14500 series battery. These are not common. They may look like a AA, but they are not. The kit includes a 14500 charger but no batteries. These are the same batteries the Nucleus Nano controller uses.
Both the motor and controller have a USB-C connector for power and firmware updates.
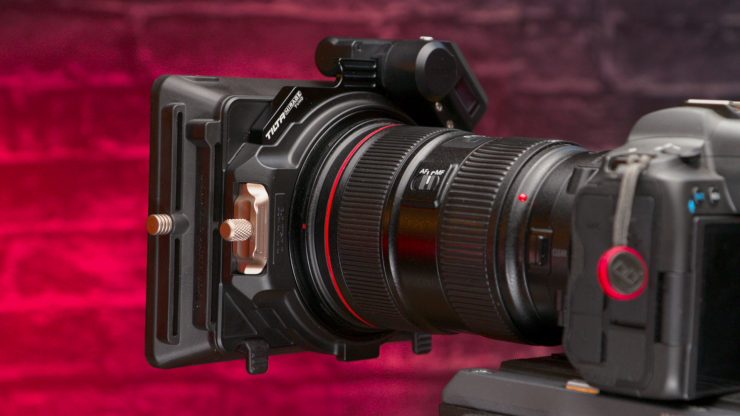
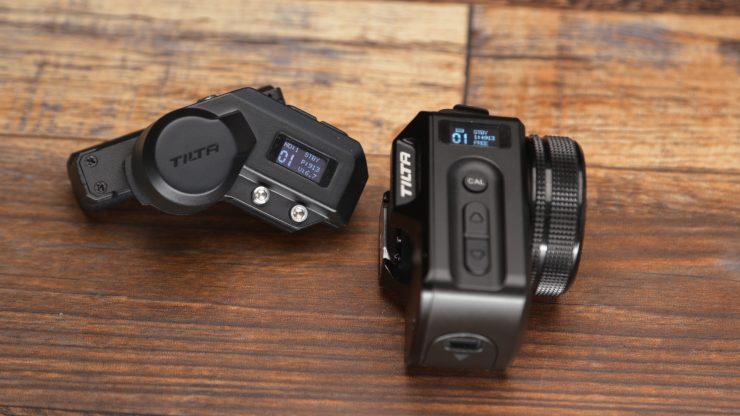
Mirage Motor
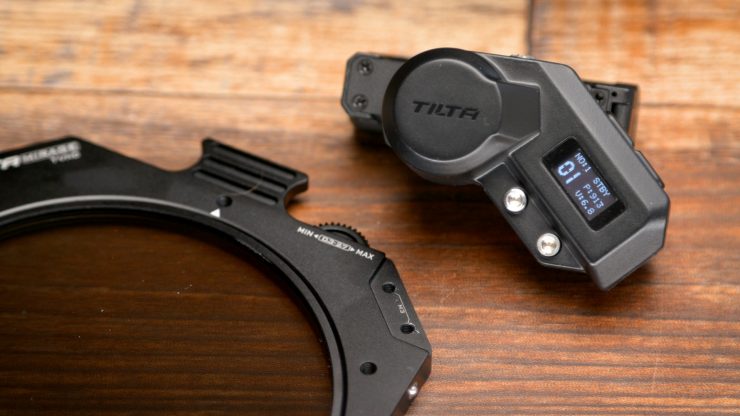
The motor is small and very light even with the 14500 battery installed.
It mounts on the Mirage VND frame with two screws. Lining up the gears is important as they are small. I recommended taking the battery compartment off so you can see the gears better.
With the motor is installed, you don’t have manual access to rotate the VND. It can only be controlled with the controller. Yes, you can take the battery compartment off, but it’s not very usable that way as the gears block access.
The motor doesn’t have a power switch. You either take the battery out or release the battery pack from the motor to turn it off.
Controller
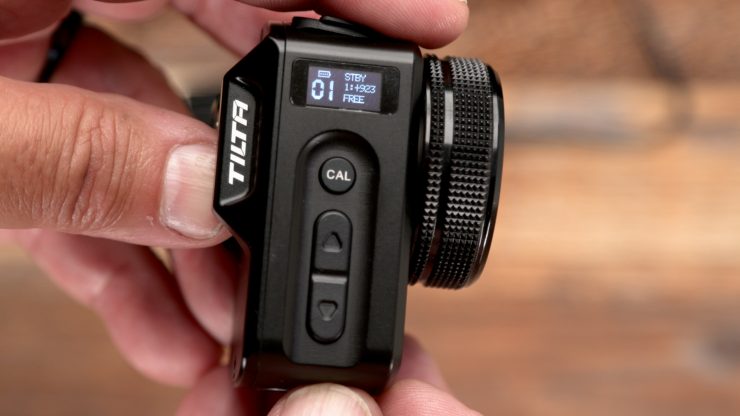
The controller is small and lightweight. It uses the 14500 battery as well. It can be attached to monitors, gimbals, or camera cages via a NATO connection and included NATO rail adapter.
Out of the box, both motor and controller were set to ch.1. To calibrate, it’s best to turn the controller wheel entirely to the left and press the CAL button on the controller for a few seconds, then calibration starts. The option is to use the motor to calibrate by pressing the up button for 3 seconds. Both methods will calibrate the hard stops on the filter.
All done!
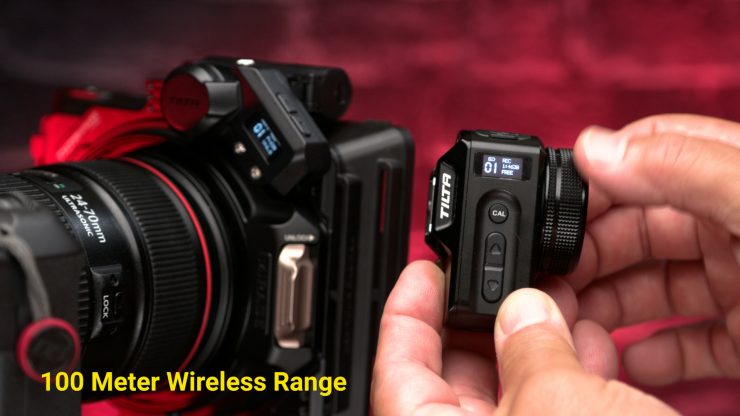
The wireless range is 100 meters or 328 feet. Tilta will be releasing an amplifier to extend the single to two kilometers or 1.25 miles.
You have 15 channels to choose from. This is a good thing since Nucleus controllers could also be used or onset simultaneously.
The LED status menu on both the motor and controller are bright indoors; however, it’s barely readable outside.
Speaking of Nucleus Controllers. The Mirage motor is compatible with the full line of Tilta controllers.
Calibrating The Motor and Controller
The demo kit I received didn’t come with any documentation, and I did my best to figure out how to calibrate these two units. With both units set to the same number and channel, turn the controller knob fully counterclockwise. Then press and hold the controller CAL button for 3 seconds. The motor will go to the hard stop end and back. Now they are calibrated.
It’s essential to have a charged battery in the motor as it acts a bit buggy when the battery is near its end of life.
Proprietary Filter Sizes
This brings me to the proprietary thing. When you purchase an industry-standard matte box, you have the option to use a lot of different filters made by several companies. The possibilities are vast. If you get into a system that strays from the standard, you are stuck with the options for that product. This is a trade-off since the Tilta Mirage Motorized matte box kit is priced very competitively at $599. This includes the variable ND and an extra 95mm filter holder, plus the effects filters start at $60.
95mm Round Filters
The kit comes with a 95mm round filter holder. 95mm isn’t a standard size; however, Tilta wanted to make the system smaller and lighter yet still work with many lenses. To keep with the compact size approach, they went with a 95mm size round filter. The review kit came with several ND filters and three effects filters
95mm Clamp-on Adapter
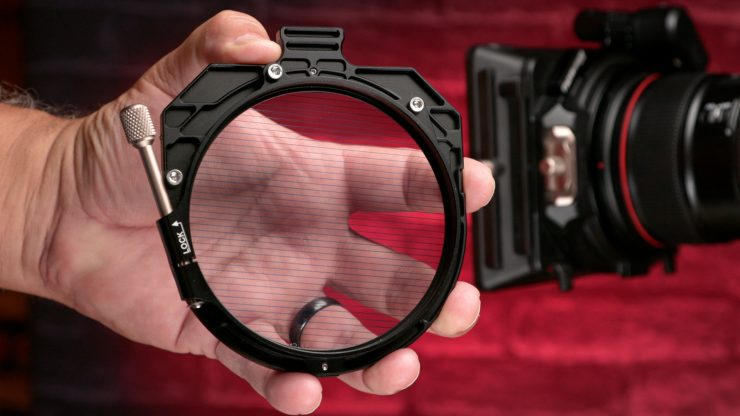
This is a good option if you have cinema lenses. Tilta has a 95mm clamp-on adapter that attaches to the 95mm circular filter frame’s frame. Now you can add filters easily and swap them out quickly.
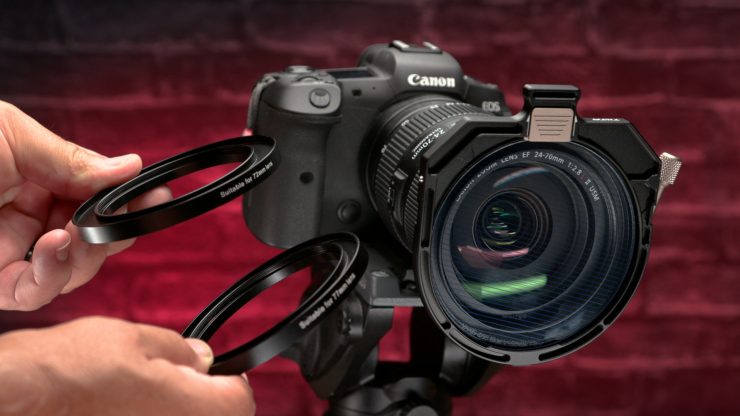
The Clamp-on adapter also works with the included 28mm, 67mm, 72mm, and 77mm lens adapters that come with the matte box. This system is faster to work with than traditional screw-on filters.
Vaxis 95mm Filters
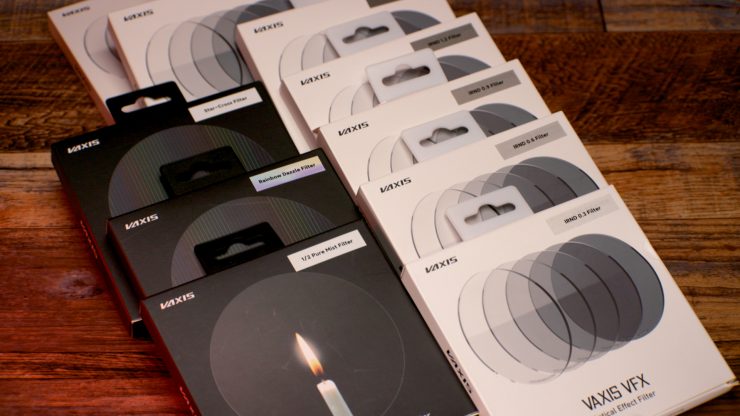
Tilta has partnered with Vaxis for the Mirage 95mm filters. These can work with any lens so long as you get the filter frame, clamp-on adapter, and lens adapters for 95mm clamp.
Tilta/Vaxis has thirty filters in total available, including a complete set of neutral densities.
Effects filters and Single NDs will cost between $59-$79 each. This is a fair deal since you will be using a proprietary filter size.
Variable ND in a Matte Box
The idea to have a variable ND inside of a matte box isn’t new. PolarPro has one as well as several 138mm drop-in versions from Revar and Lindsey Optics. These are expensive products that don’t come with a matte box, except the PolarPro Basecamp kit includes the variable ND. The one downside is that the PolarPro Basecamp Matte Box Kit ($700) and the Tilta Mirage use a proprietary size filter, so you need to buy PolarPro filters or the Vaxis 95mm filters for the Tilta Mirage.
Below are some examples of VND filters in a tray.
Some pricing examples
- Tiffen 138mm Variable ND in Matte Box-Mountable Rubber Donut for 143mm Openings – $797
- Revar Cine Alan Gordon Enterprises 4 x 5.65 / 138mm Variable ND Kit A with Rota Pola Rota-Tray – $720
- Alan Gordon Enterprises Revar Cine 6.6 x 6.6 Rota Pola Frame with Circular Polarizer – $810
- Lindsey Optics Brilliant² 4 x 5.65″/138mm Variable Neutral Density Filter – $900
The Mirage is a nice matte box. The build is excellent and mounts securely with the clamp-on. I like the optional 95mm clamp-on adapter that attaches to the filter frame. This opens up more usability if you invest in Vaxis filters.
It’s also an interesting product with the wireless motor for the VND filter. It all works well together, and Tilta is pricing the complete Mirage kit very competitively at $599.
If you want to take advantage of filters, you will need to purchase the proprietary 95mm versions from Tilta/Vaxis. You can also use 4×5.6 filters inserted in the front of the Mirage, plus an accessory add-on that lets you stack them. You will have to take the shade off to do this. I like how much thought went into the system, and it looks like expandability will keep growing.
Its best use will be for small/compact setups with stills lenses. The adapters fit nice and snug for a solid connection to the front of the lens. It’s a good thing they went with a 95mm clamp-on size as it will also fit many cinema lenses. While it has some proprietary features, Tilta did an excellent job opening it to more lens options.


