
The PILOTCINE AtomCUBE RX50P RGBWW is a new compact, portable LED panel light that can be powered in three different ways.
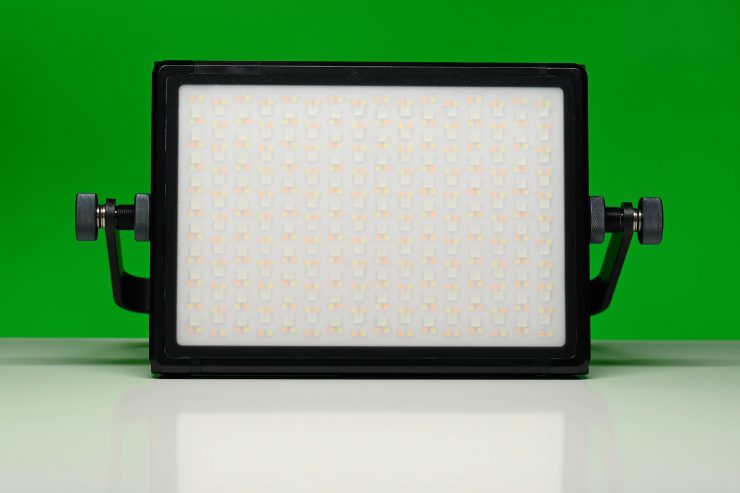
There are lots of RGBWW panel lights on the market, but not many are the size of the PILOTCINE AtomCUBE RX50P.
Key features
- Color Temperature: 2500-8500K
- Measures 9 x 6.5″
- CCT and RGB Modes
- CRI/TLCI: 95/99, 100-240 VAC, 15 FX
- 10″ LED light panel with up to 60W output power
- Compact, lightweight, ultra slim, and versatile
- Built-in 84 Wh battery
- Ultra bright, 6200 Lux at 1.6′, 2500-8500K with magenta/green adjustment of CCT
- Bluetooth-mesh 2.0 technology, quick controlling response and synchronization
- “CUBERSYNC” app control
- 6 Personalized effects settings
- Compatible with OTA upgrade tech
- DMX module design for multi-control
- DMX2MESH support to DMX512 and MESH wireless network
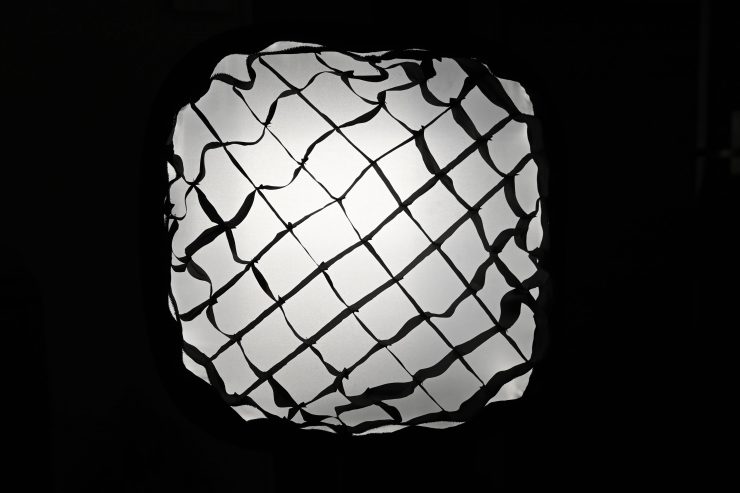
- Quick release barndoor design and adjustable soft light diffuser
- Dims 0-100%
- V-Mount Plate for Optional Batteries
- Barndoors
Design


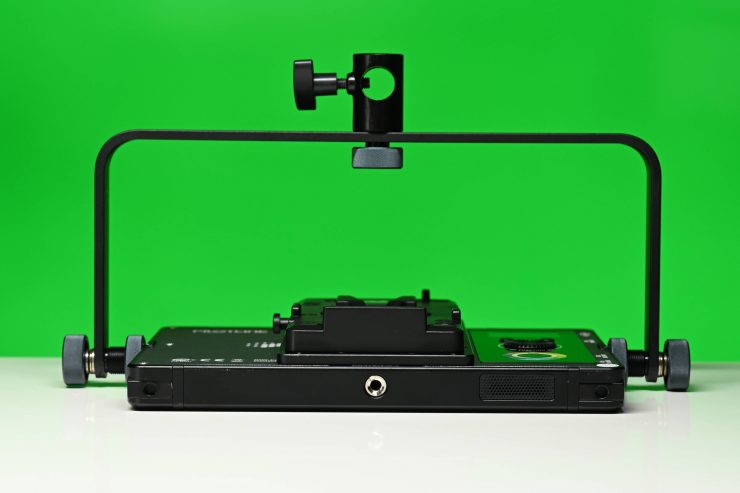
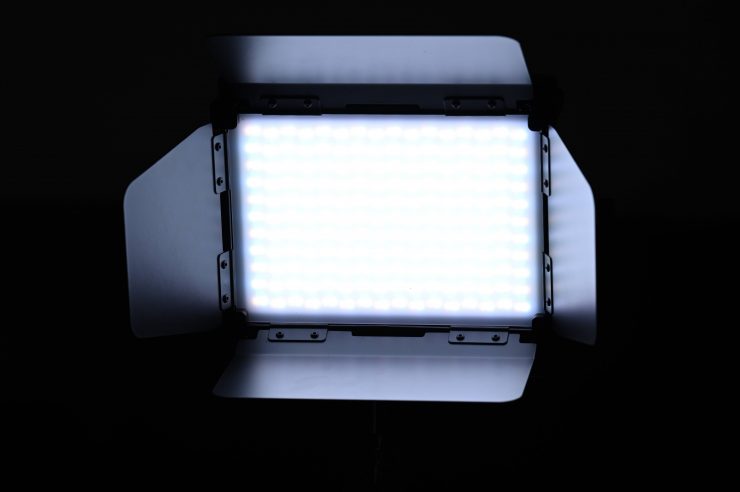
PILOTCINE has designed the light to be compact and portable. For solo shooters or anyone that has to travel a lot, having a light that doesn’t take up a lot of space makes sense.
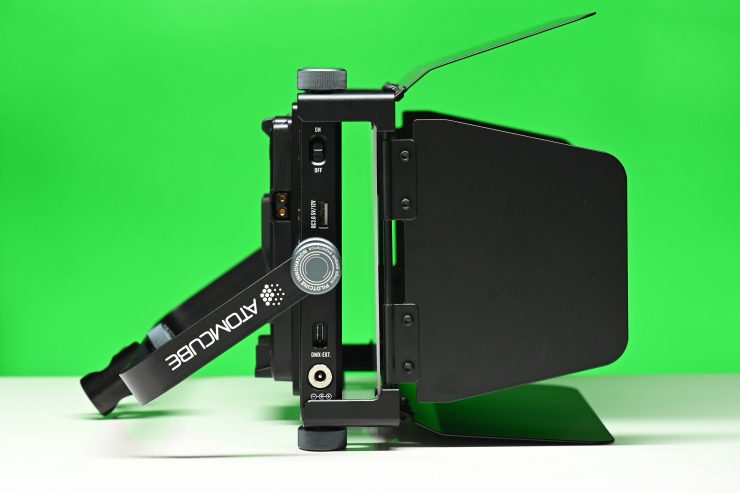
The light can be used as a fully independent stand alone unit. The whole concept is to have a fixture that is quick to pull out and use. The light with the yoke frame and the barndoors fits inside the included carrying case. The yoke frame and barndoors can be detached if need be.
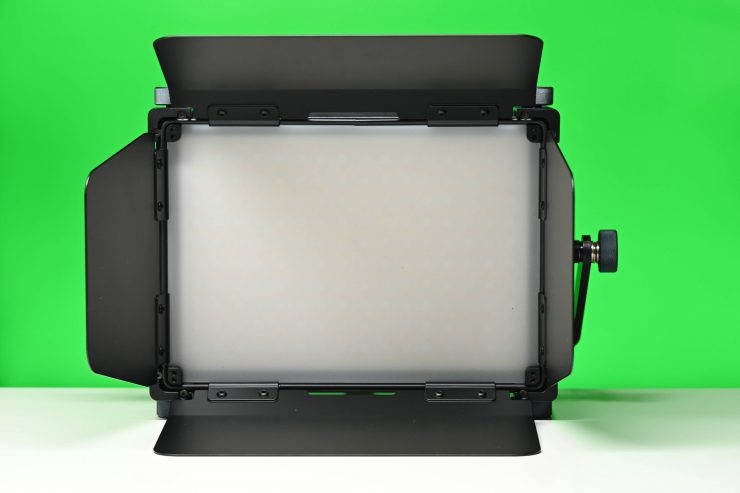
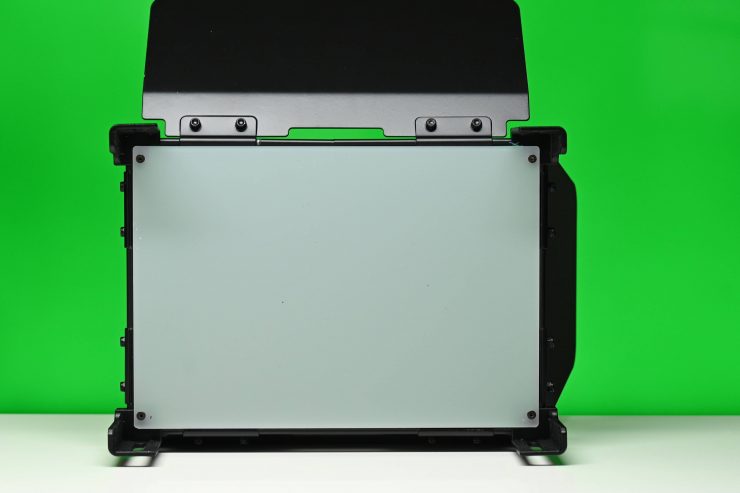
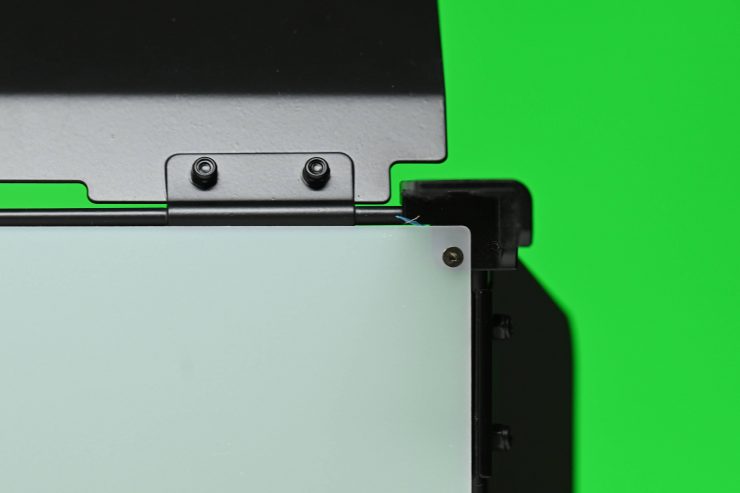
What is a little unusual is that the light diffusion panel is attached via four screws directly to the barndoors. If you want to take the diffusion panel off you need to use the included Allen key. This is a strange design, to say the least.
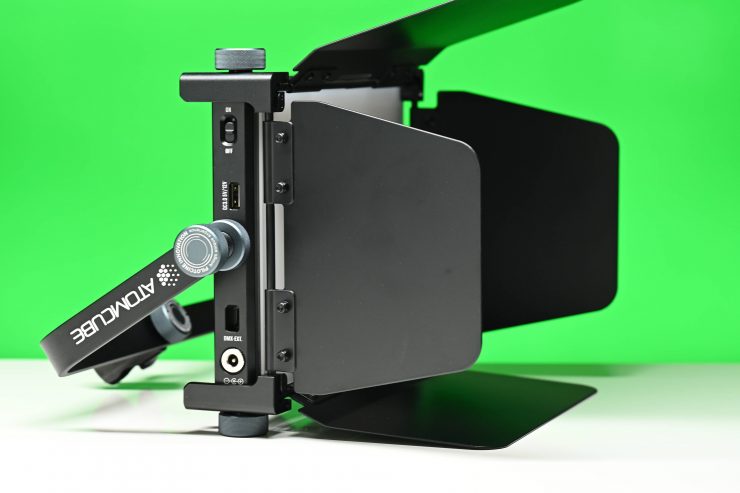
The only benefit of having the diffusion attached to the barndoors is that you can move it further away from the light due to the design of how the barndoors attach to the light. This is conceptually a good idea, however, the diffusion panel is so light that it doesn’t make a huge difference to the quality of the light.
What do you get?
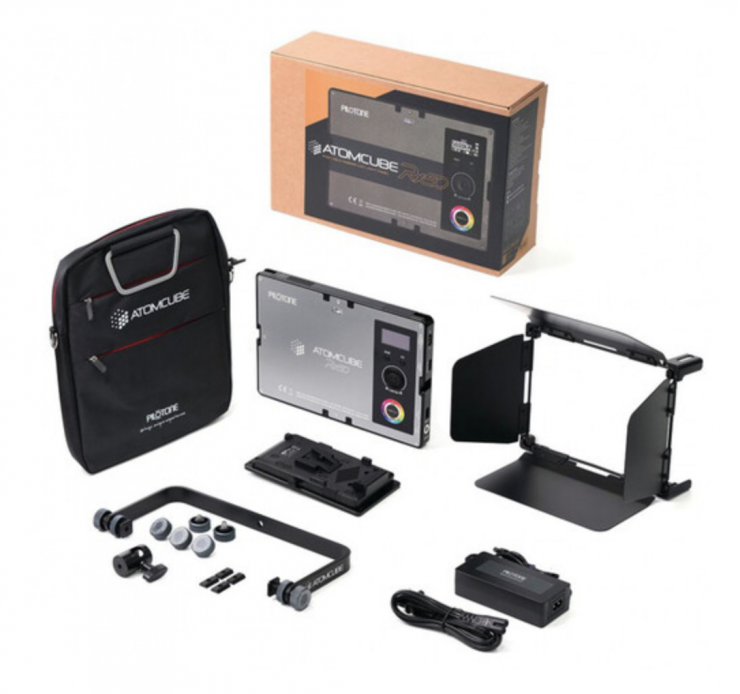
With the version I was testing you get the below items in the kit:
- PILOTCINE AtomCUBE RX50 10″ Portable RGBWW LED Light Panel (Platinum Edition)
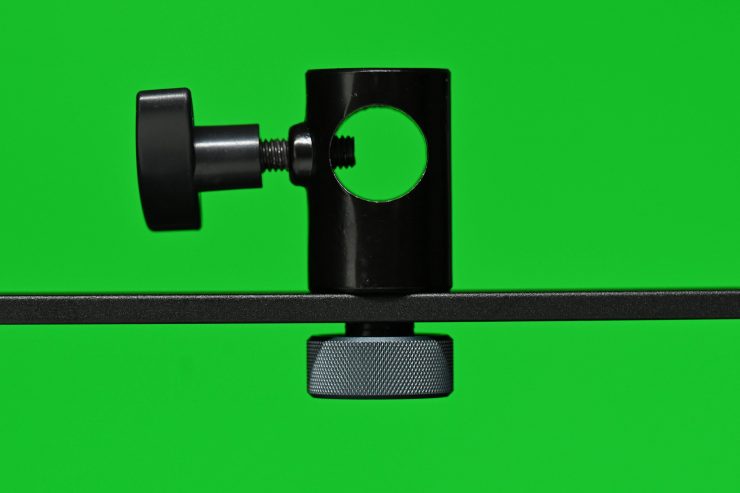
- U-Frame with Hot-Shoe Quick Release Adapter
- AC Charger
- Metal Barndoors with Diffuser Panel
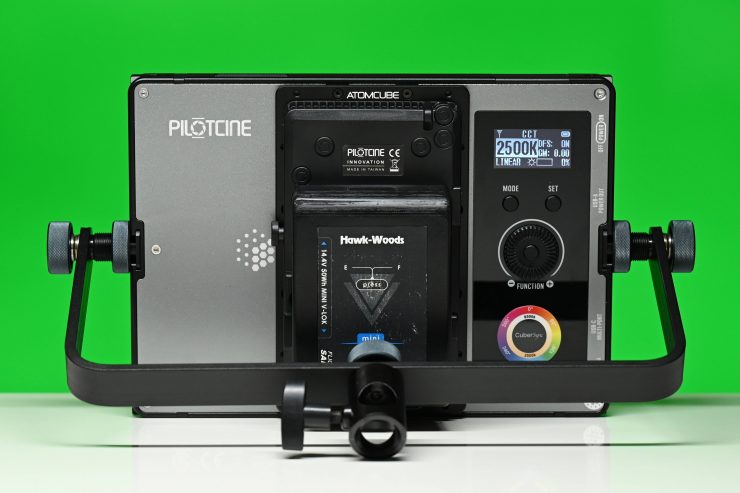
- V-Mount Battery Plate with Cage Frame
- Portable Bag
- Limited 1-Year Warranty
Build Quality

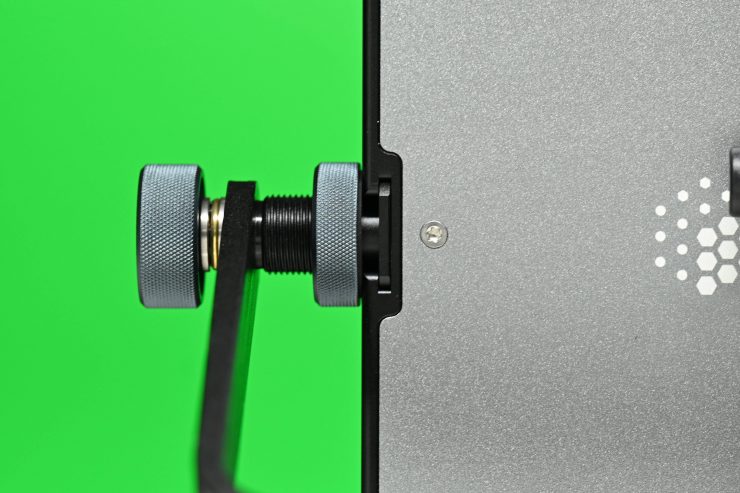
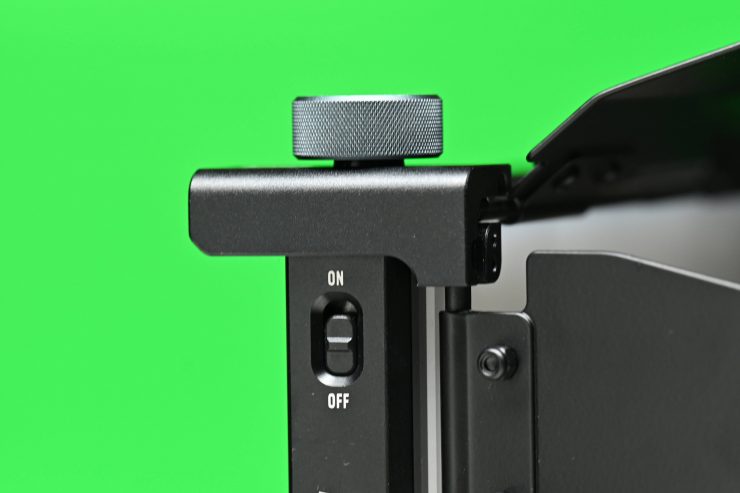
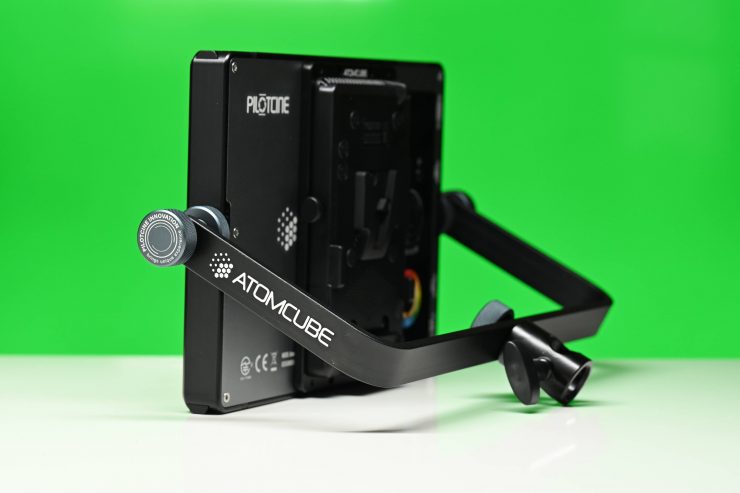
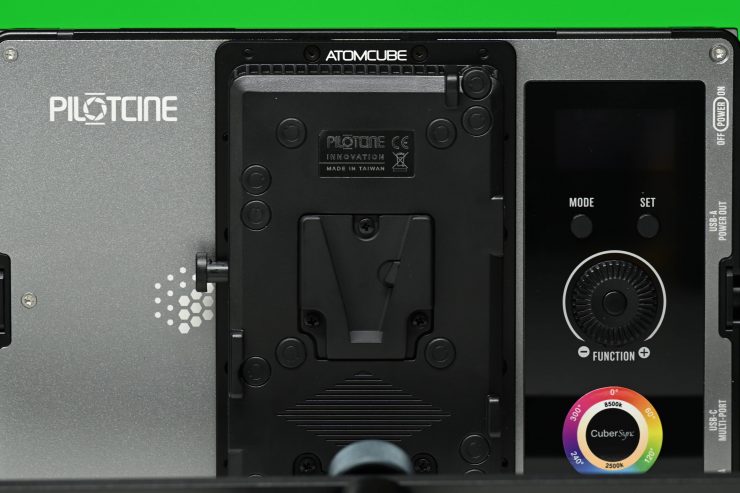
For the most part, the build quality of AtomCUBE RX50P is pretty good. The casing of the light is made out of aluminum. The light feels very solid and the yoke frame and barndoor locks tighten down securely.
The LCD screen does look a little old-fashioned and I did find that the selection scroll wheel was quite sticky and sometimes it didn’t work very well.
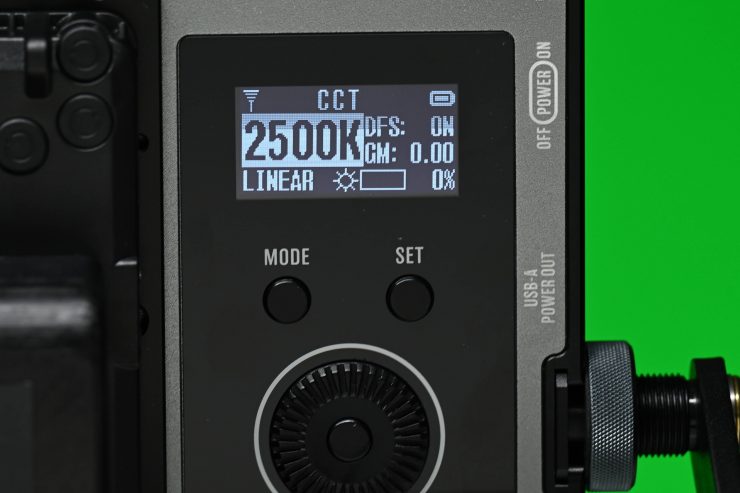
The LCD screen is also not straight and it is on an angle. This tells me that attention to detail is somewhat lacking.
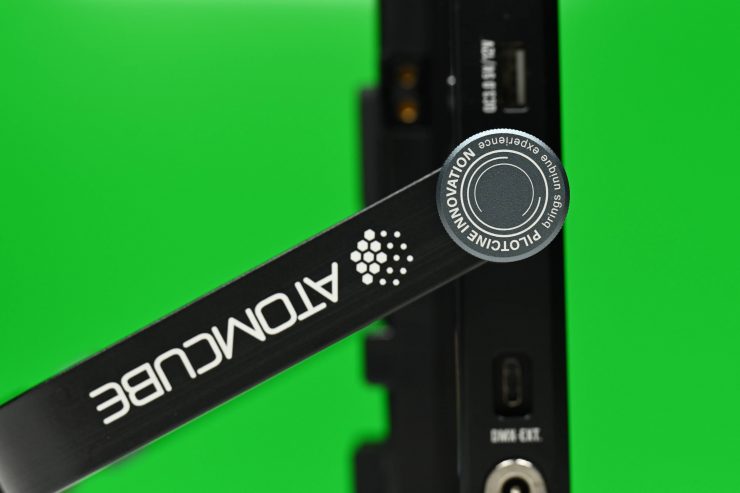
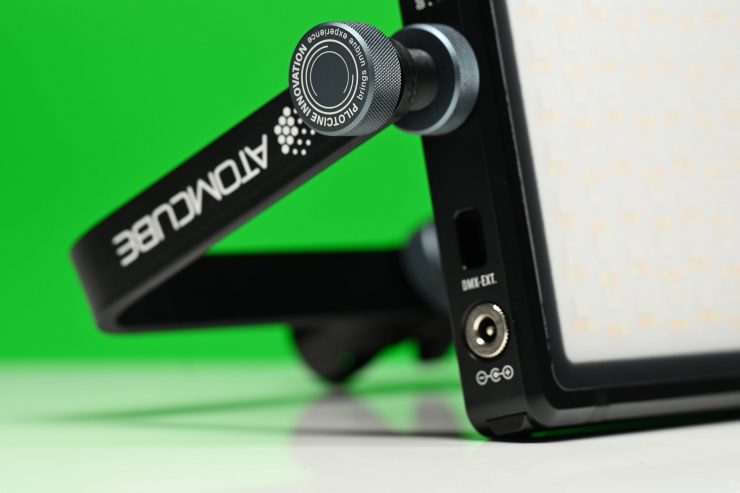
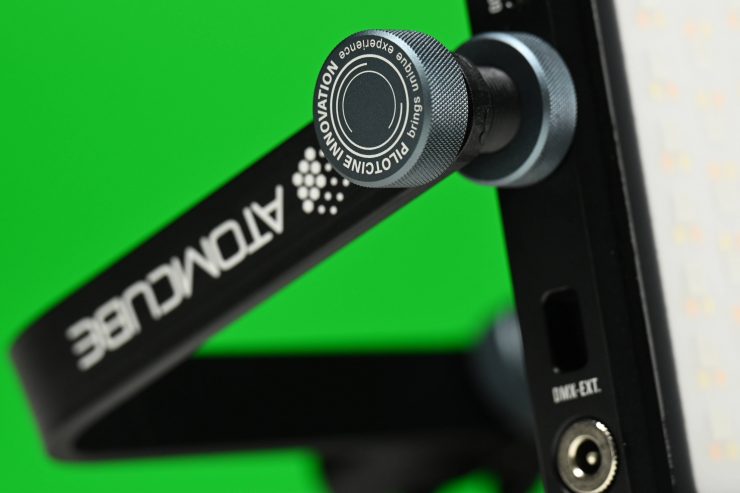
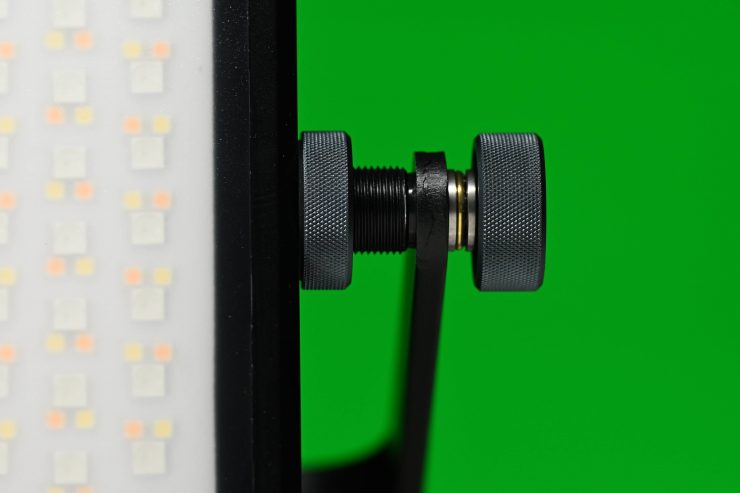

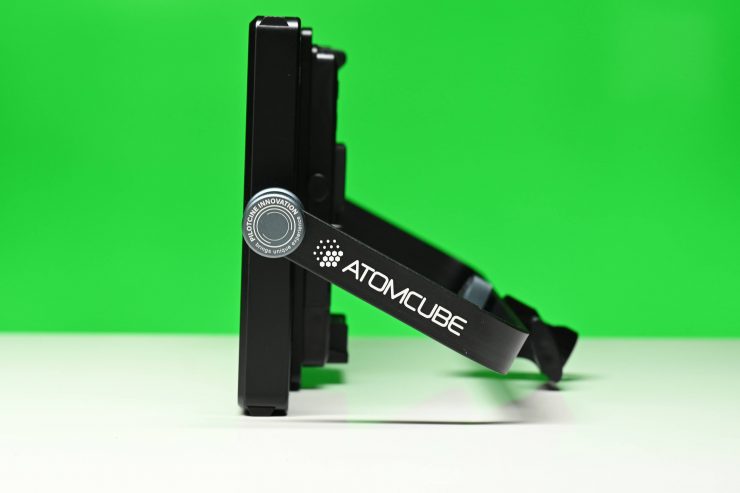
The yoke frame is nice and robust and offers a full range of rotation.
While I like how solidly made the casing and yoke frame are, it almost feels like that same level of quality didn’t transfer over to the control buttons.
Size & Weight
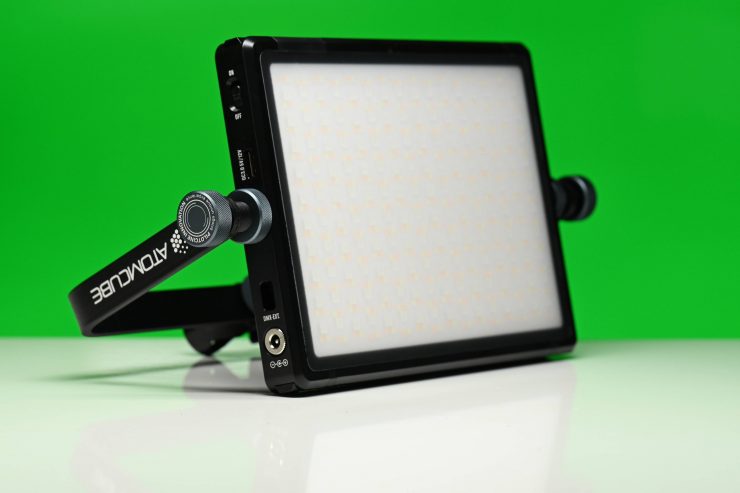
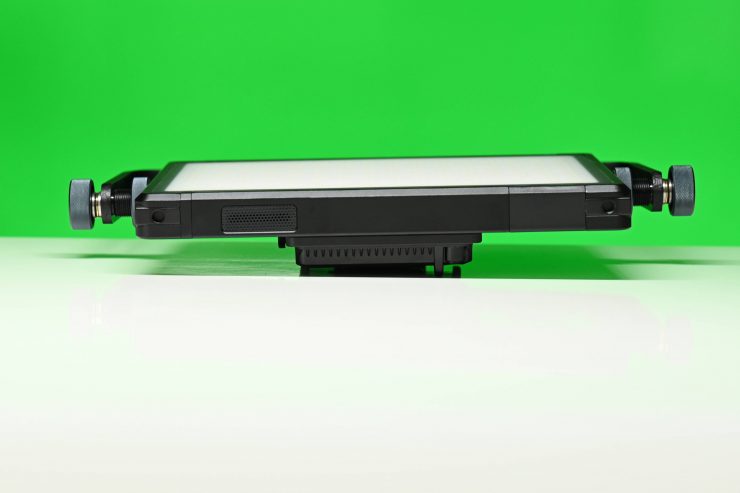
The fixture has dimensions of 8.9 x 6.4 x 0.8″ (22.6 x 16.3 x 2.0 cm) and it weighs in at 2.6lb (1.2kg). This is relatively lightweight considering its size and capabilities.
Below you can see how that weight compares to a few other RGBWW panel style lights that have similar dimensions.
| Weight | |
| PILOTCINE AtomCUBE RX50P | 2.6 lb / 1.2 kg |
| Lupo Actionpanel Full Color LED Panel | 4.4 lb / 2.00 kg |
| Creamsource Micro Color Pro Kit | 7.50 lb / 3.4 kg |
Power Draw
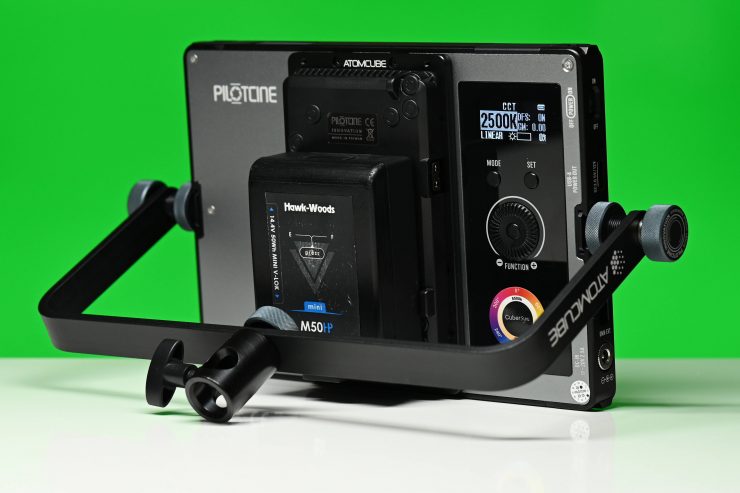
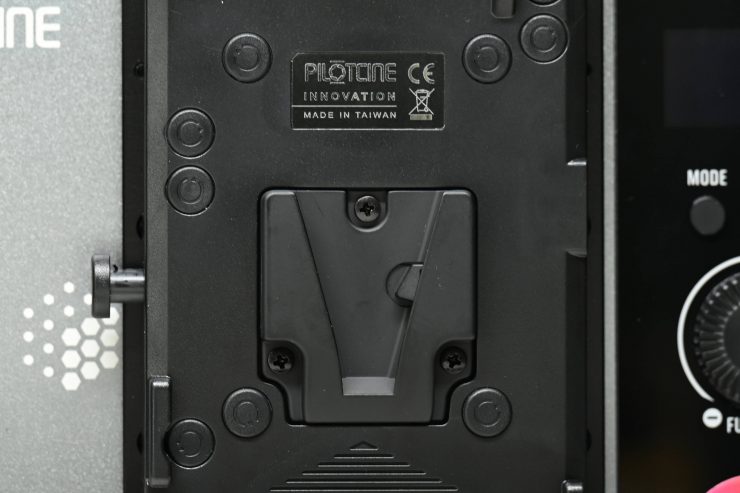
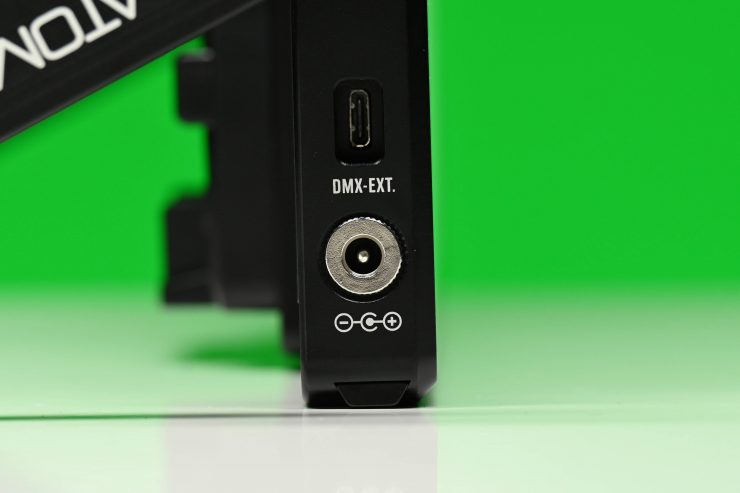
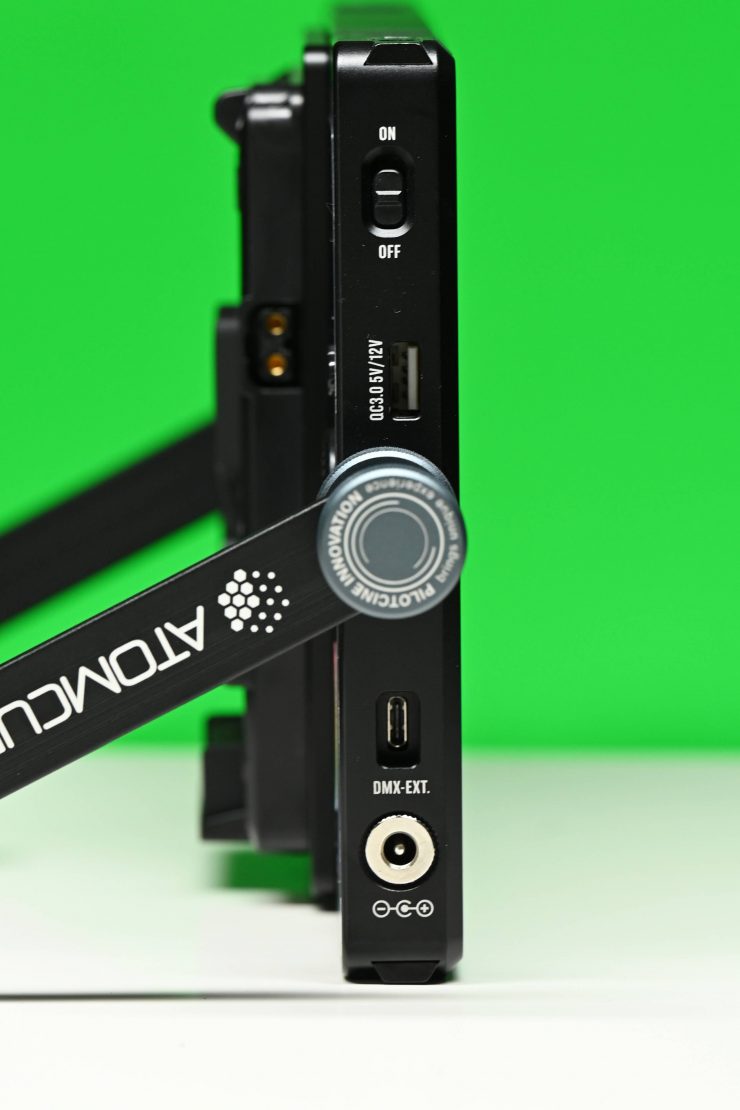
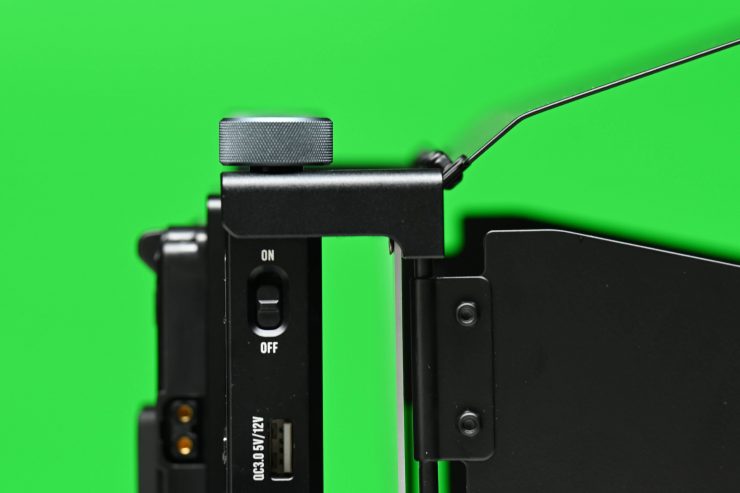
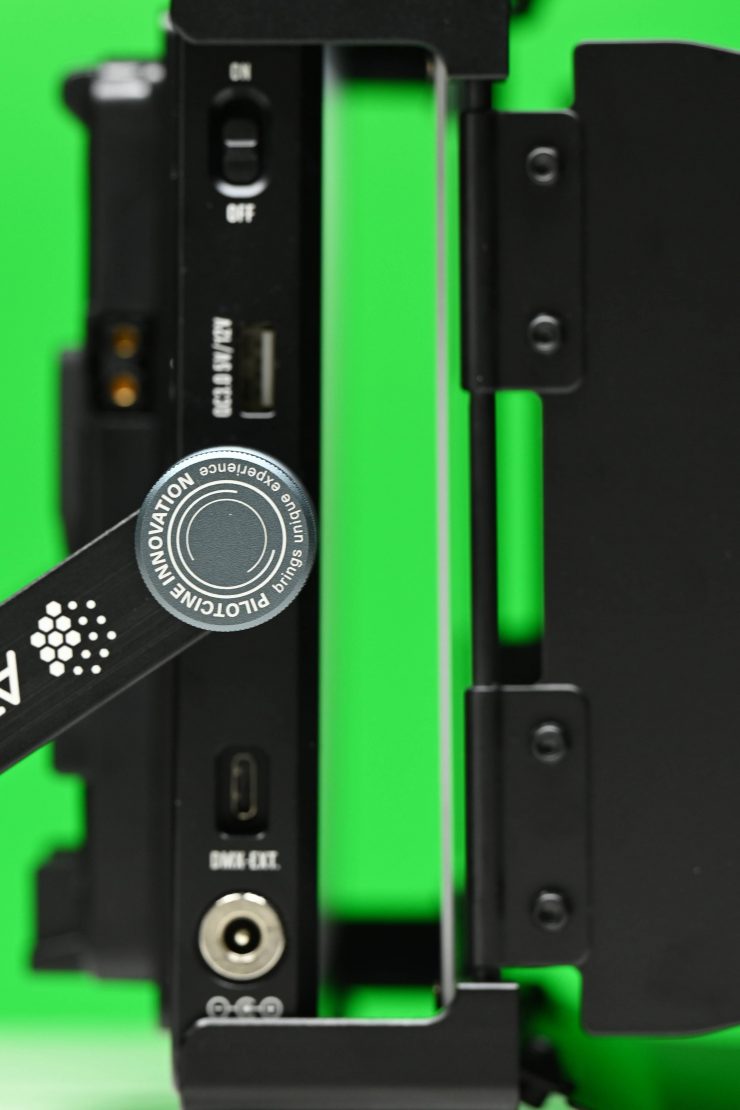
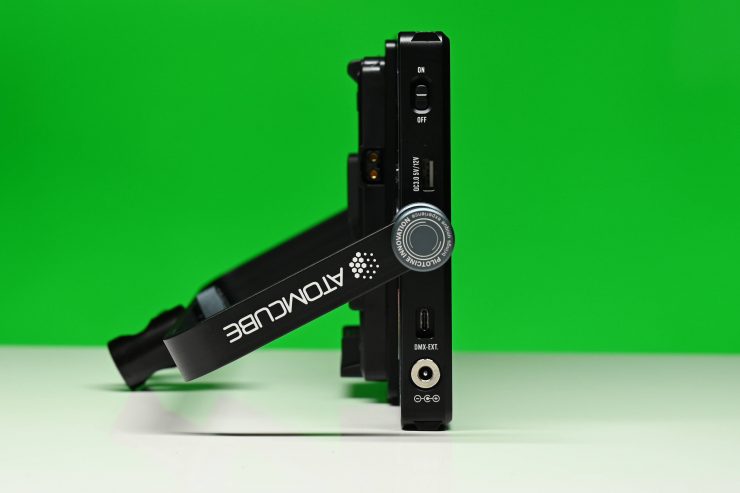
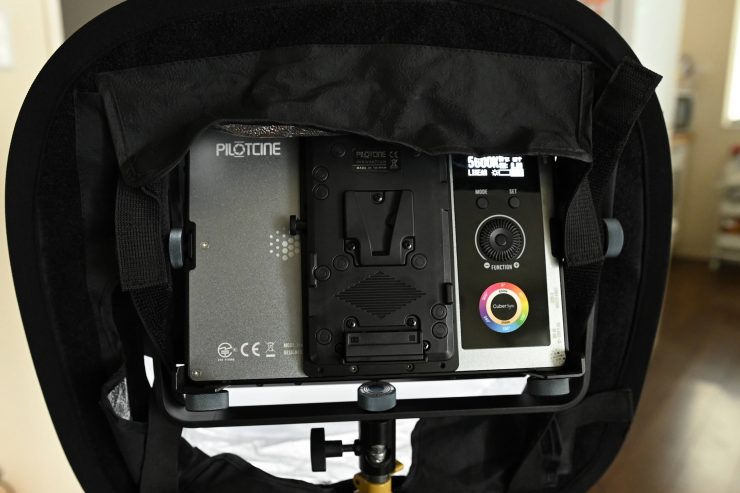
The PILOTCINE AtomCUBE RX50P draws 60W and can be run off its internal Built-in lithium battery (16.8V 5000mAh/ 84 Wh), via a V-Mount battery, or from mains power. This three-way powering makes the AtomCUBE RX50P quite versatile and unique.
This low power draw allows the light to run at full power for around 2 hours. You can also power it off a V-Mount battery if you need to run it remotely for long periods of time.
The internal battery can be charged via the 24V DC-IN, or through Type-C (PD 3.0 30W+). It is nice that you can charge it through USB-C PD, but it is a lot quicker to charge it via mains power.
| Power Draw | |
| PILOTCINE AtomCUBE RX50P | 60W (nominal) |
| Lupo Actionpanel Full Color LED Panel | 60W (nominal) |
| Creamsource Micro Color Pro Kit | 80W (nominal) |
Above you can see a power draw comparison between some of the competing lights.
The low power draw and the ability to run the fixture for long periods of time from a flight safe battery make this fixture a very good solution for anyone who travels a lot.
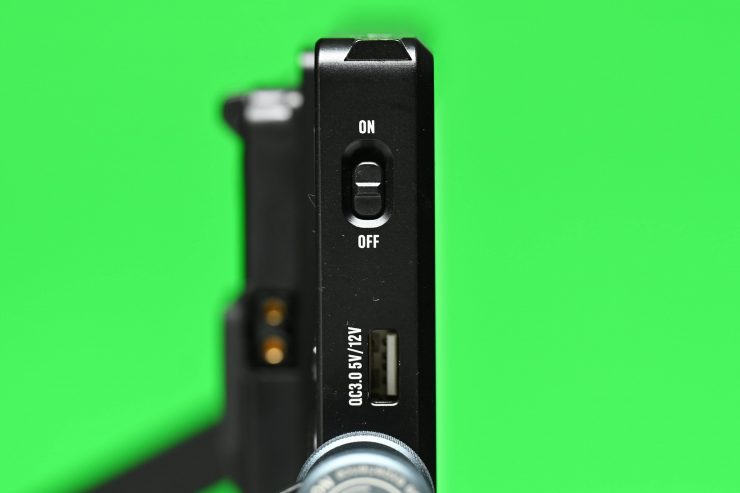
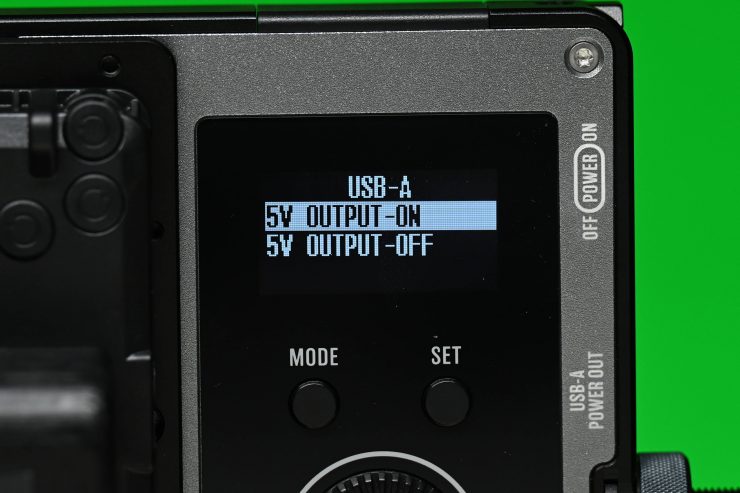
The fixture also has a 5V USB output that you can turn on or off in the menu.
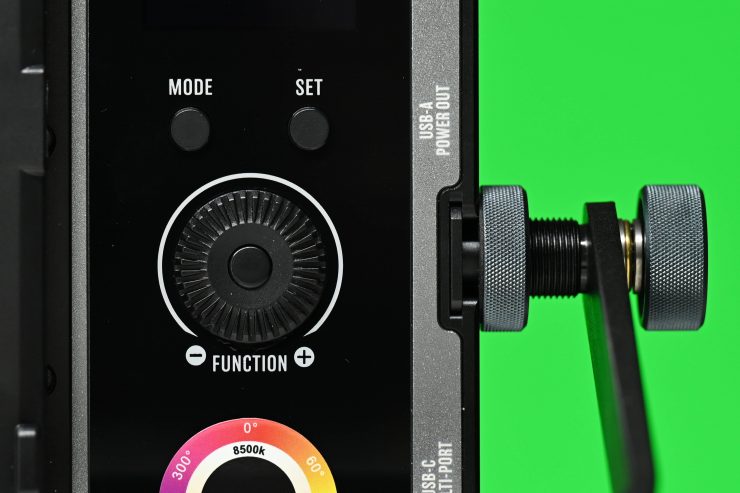
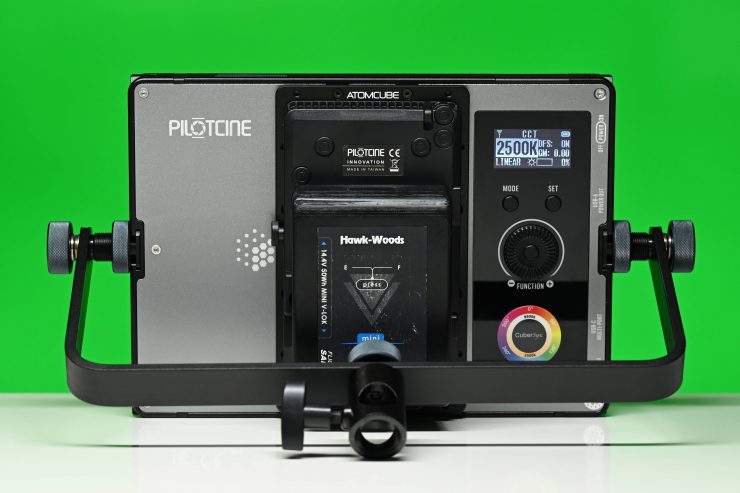
Controls & Operation
The physical controls on the PILOTCINE AtomCUBE RX50P are pretty basic and I personally found them a little old school.

While the menu system is not overly complicated I would have preferred dedicated brightness and CCT dials instead of having to select what parameter you want to change and then use the scroll wheel to access it.
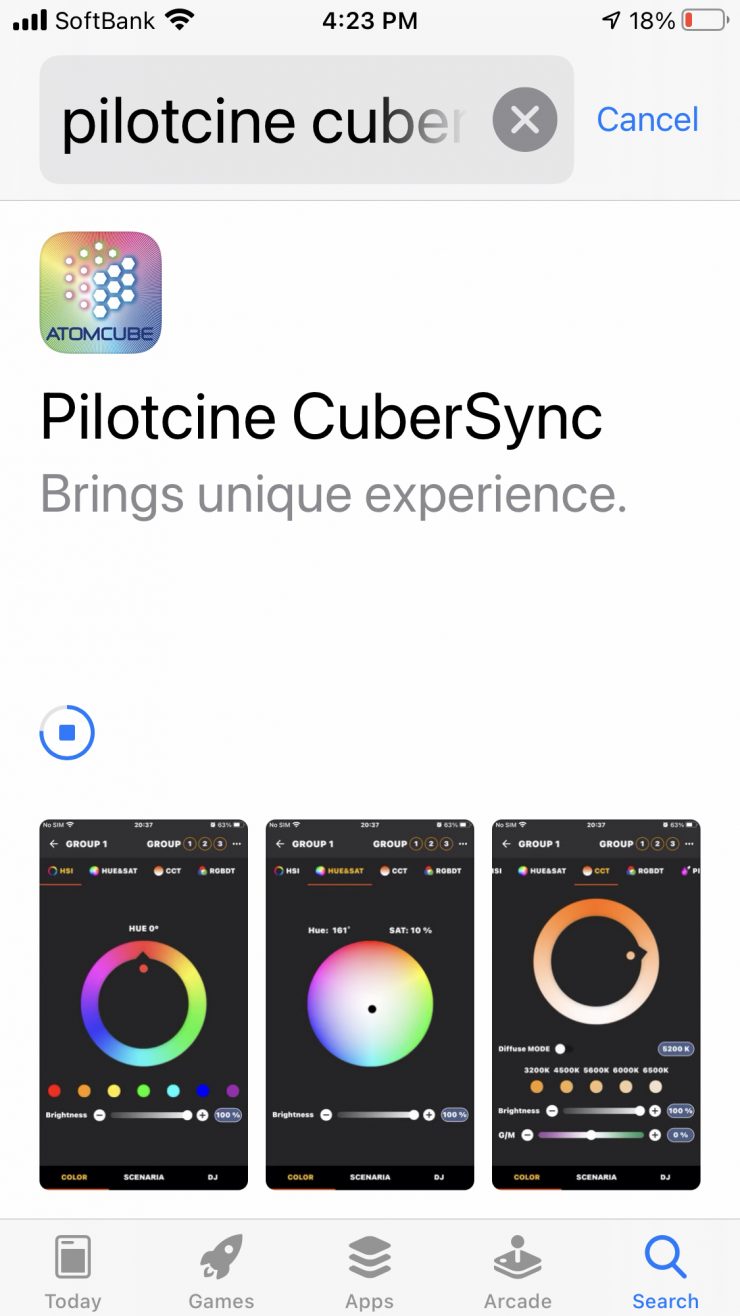
Luckily the AtomCUBE RX50P features Bluetooth Mesh and you can use the PilotFly AtomCUBE Cubersync app to control the fixture, or any other Pilotfly or PILOTCINE light. Unfortunately, you can’t use the older AtomCUBE app and also control older fixtures such as the ATOMCube RX1.
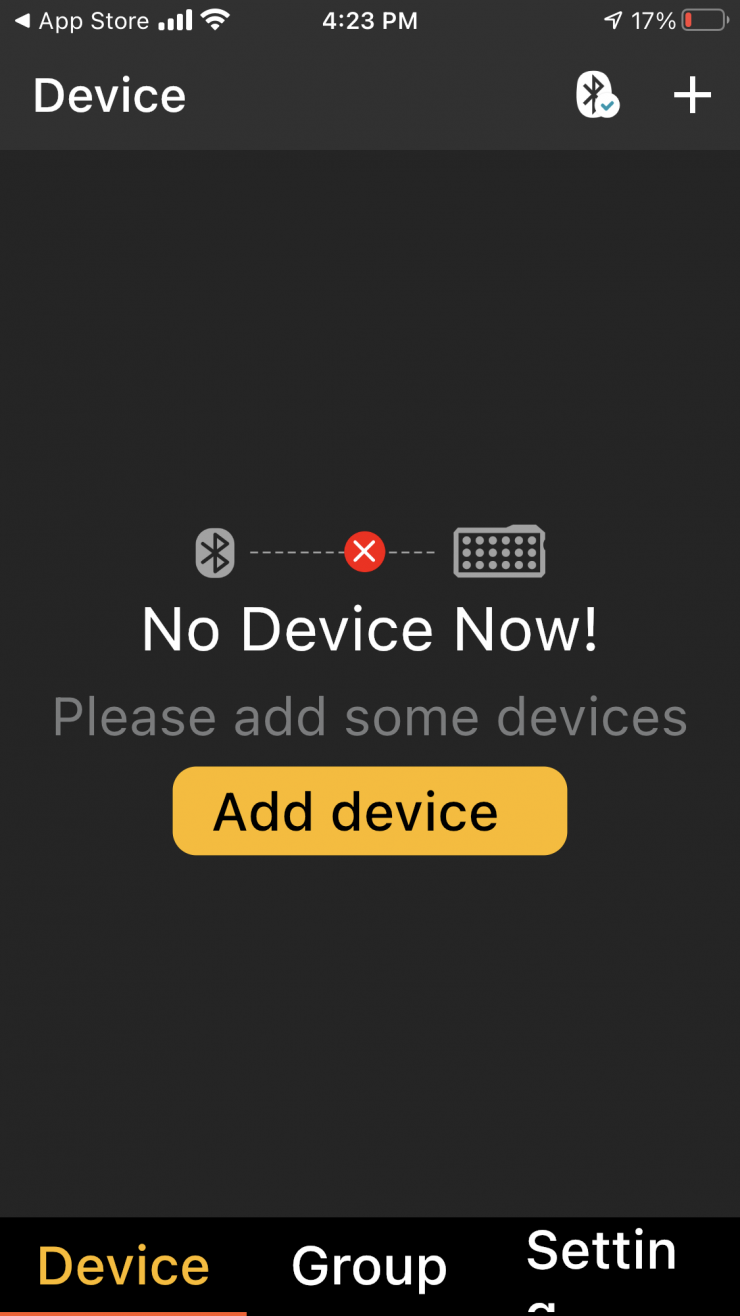
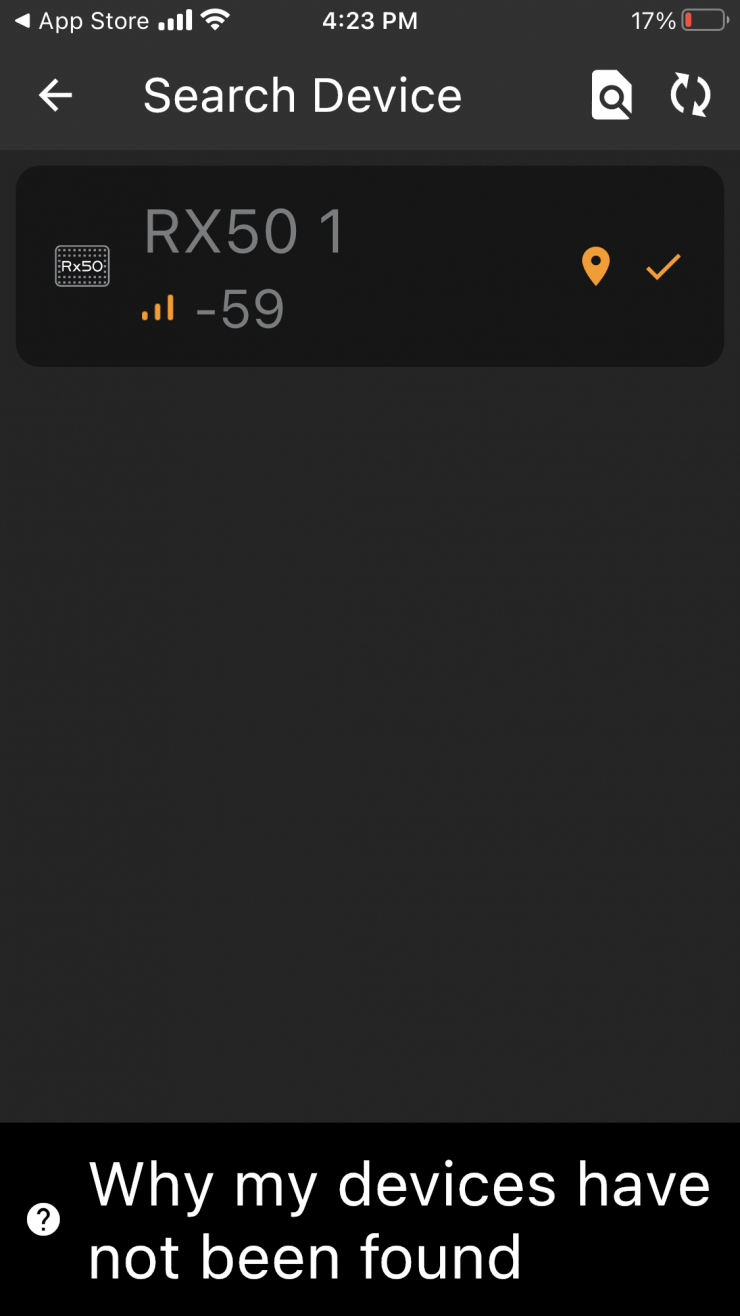
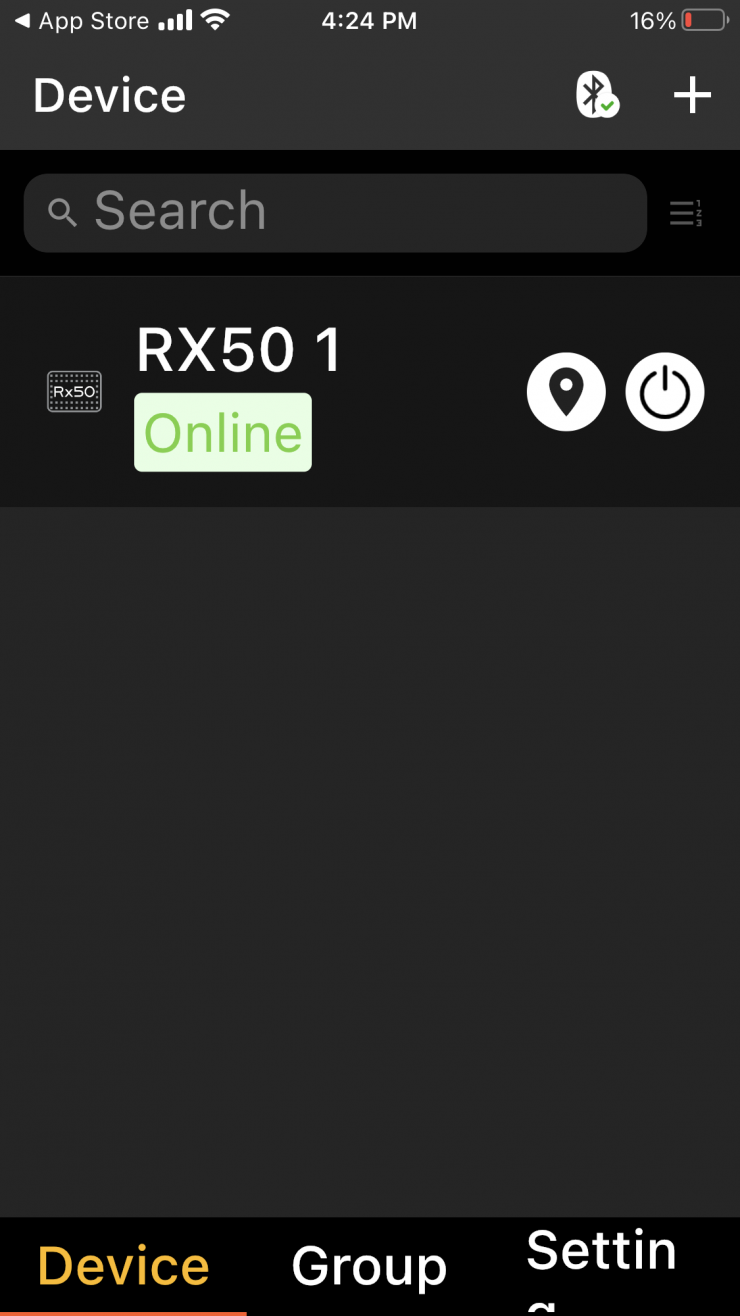
The Cubersync app is easy to connect up to. I prefer using it over the physical controls onboard the light.

The control layout on the app is simple, responsive, and easy to use. I prefer using it over the physical controls onboard the light.
Operating Modes
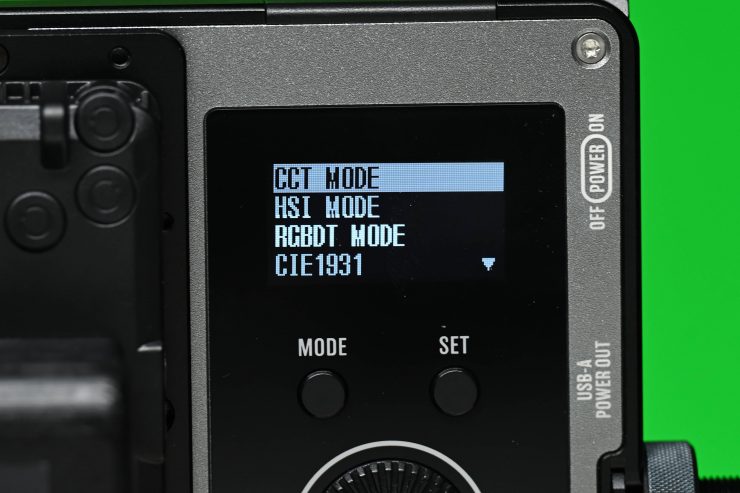
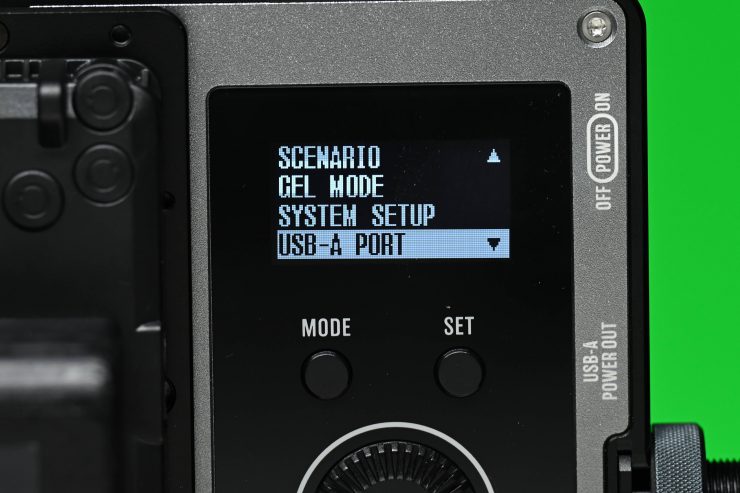
The fixture offers seven lighting modes when using the controls onboard the light. These are:
- Correlated Color Temperature (CCT) Mode
- HSI Mode
- RGBDT Mode
- CIE1931 Mode
- Scenario Mode
- GEL Mode
- DMX Mode
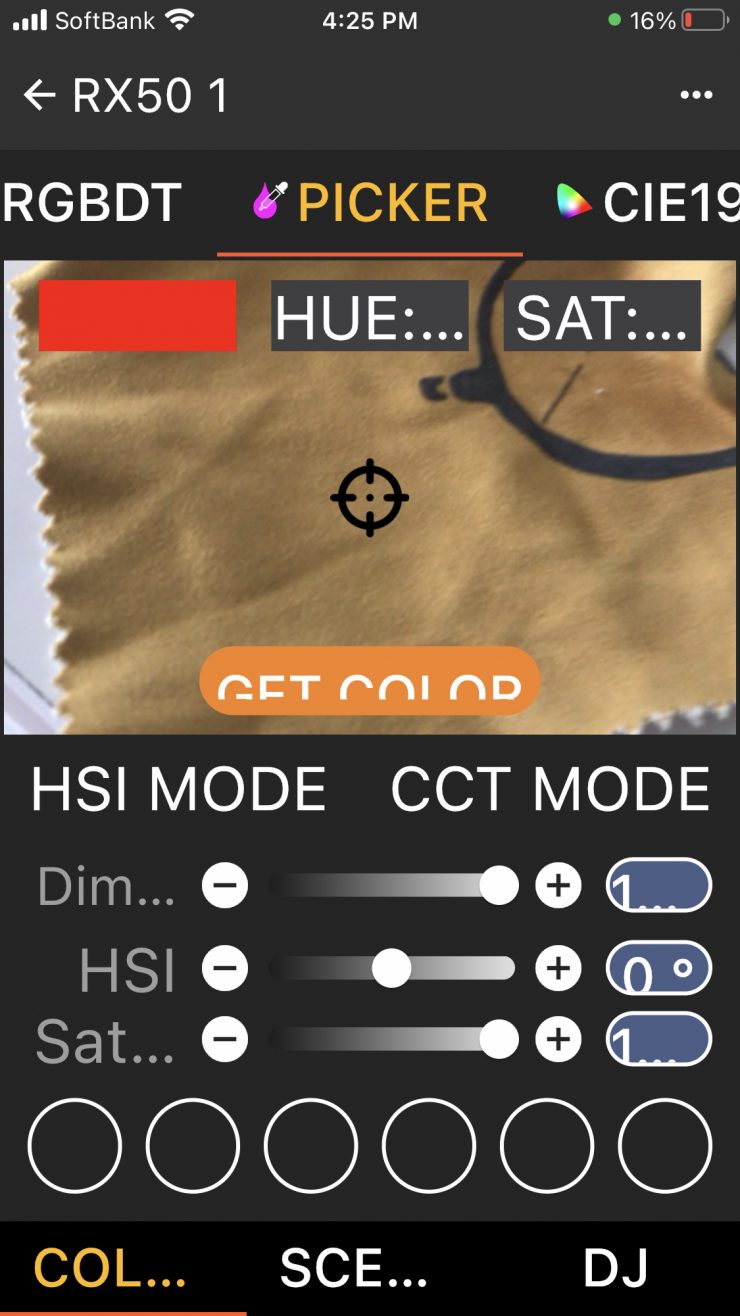
If you use the Cubersync app there is an additional Color Picker Mode. What is a little strange is that some of the modes are called different names on the app than what they are labeled in the onboard menu. This is somewhat confusing and I am not sure why this is the case.
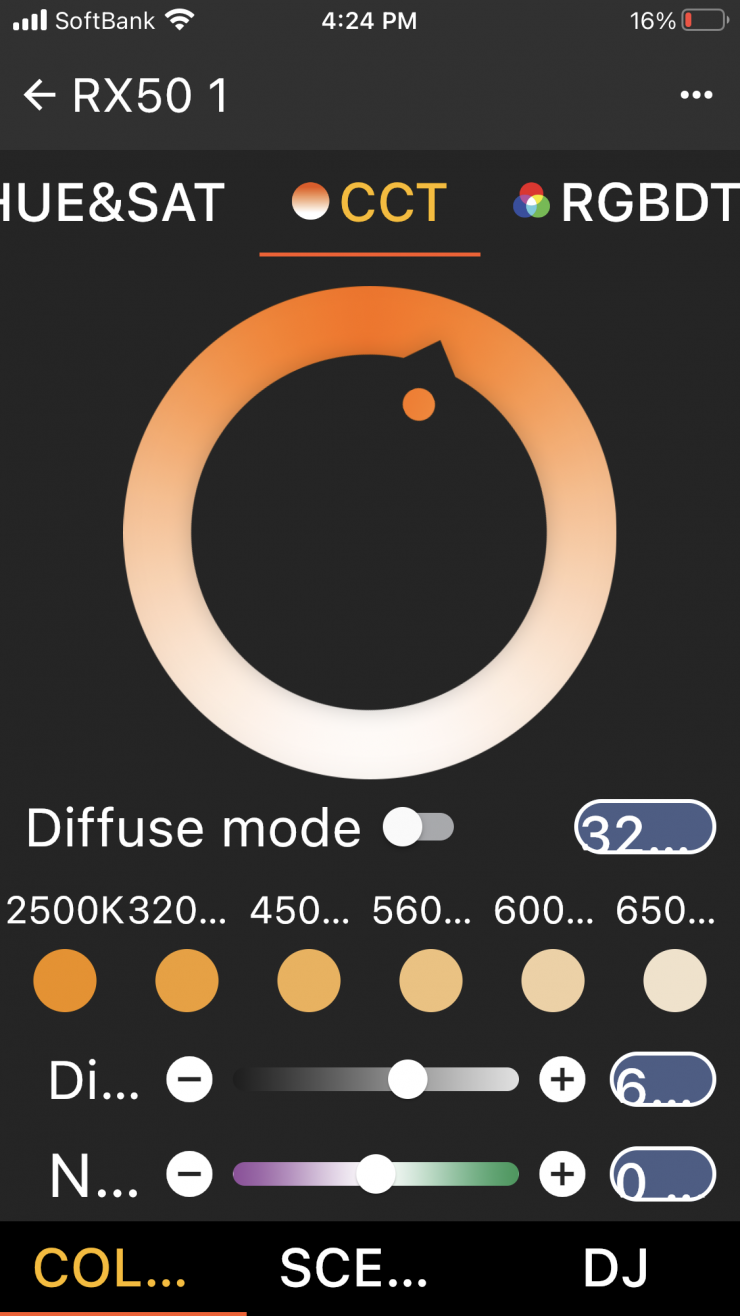
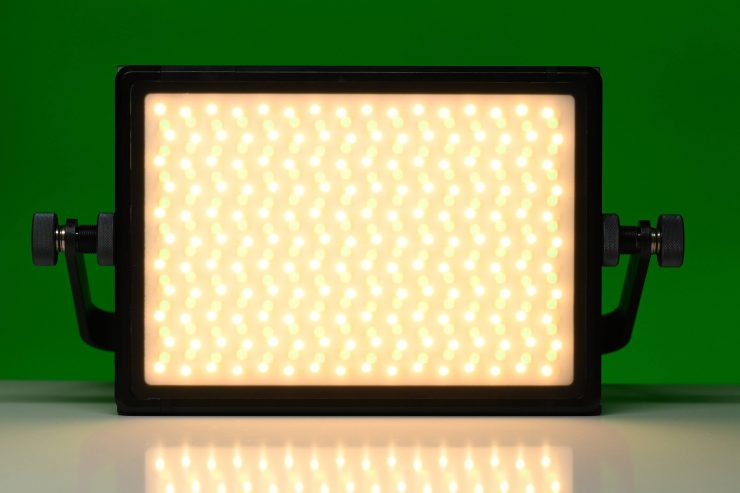
Correlated Color Temperature (CCT) Mode
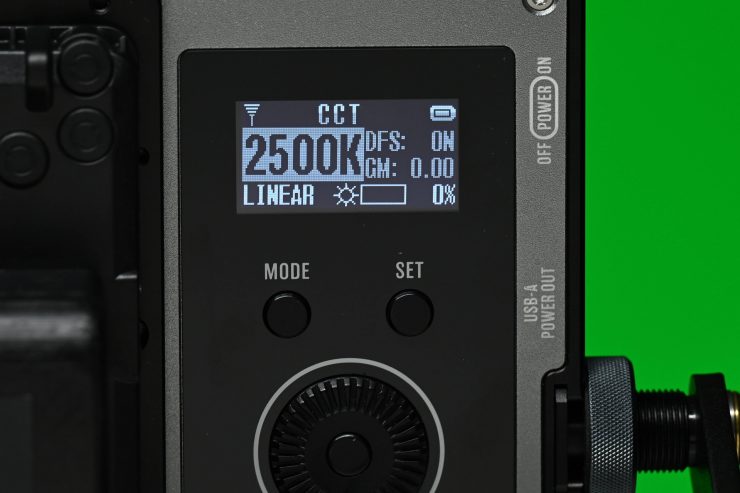
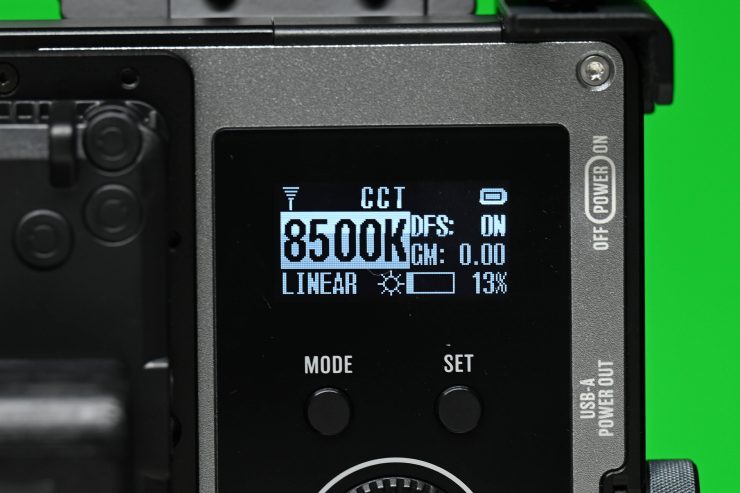
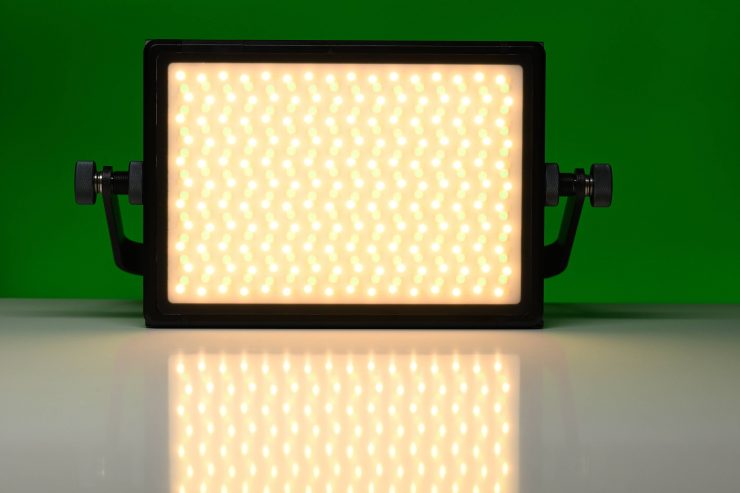
This is the mode most people are going to use the light in the majority of the time. In the CCT Mode, you have full access to making Kelvin color temperature adjustments between 2500K to 8500K. These adjustments can be made in increments of 100K using either the onboard controls or the app.
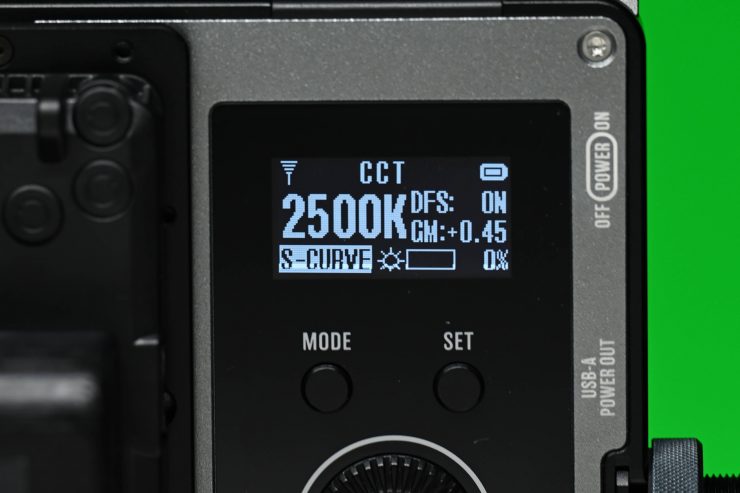
You also have full +/- green adjustment available which is extremely handy. Being able to dial in more or reduce the amount of green coming from your lighting source can make a huge difference. Different camera companies use different sensors in their cameras and they all react differently to light. Some camera sensors may lean towards magenta, and some, more towards green. By making CCT adjustments you can dial in the light so that it looks better for whatever camera system you are using.
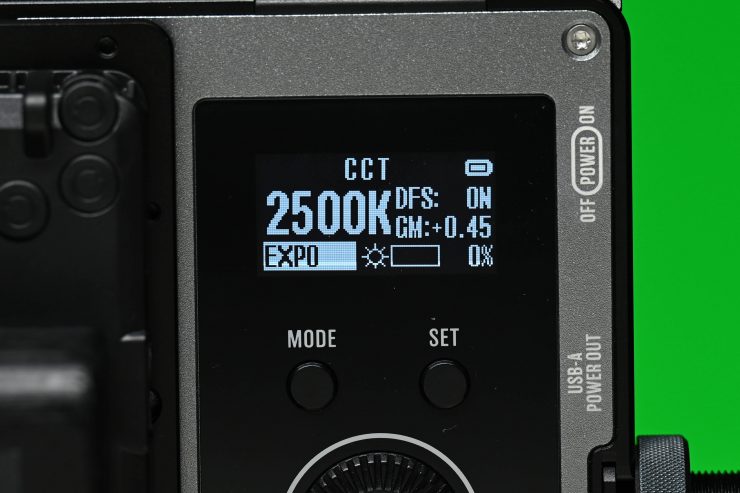
You can also change the dimming curve between Linear, Expodential, and S-Curve.
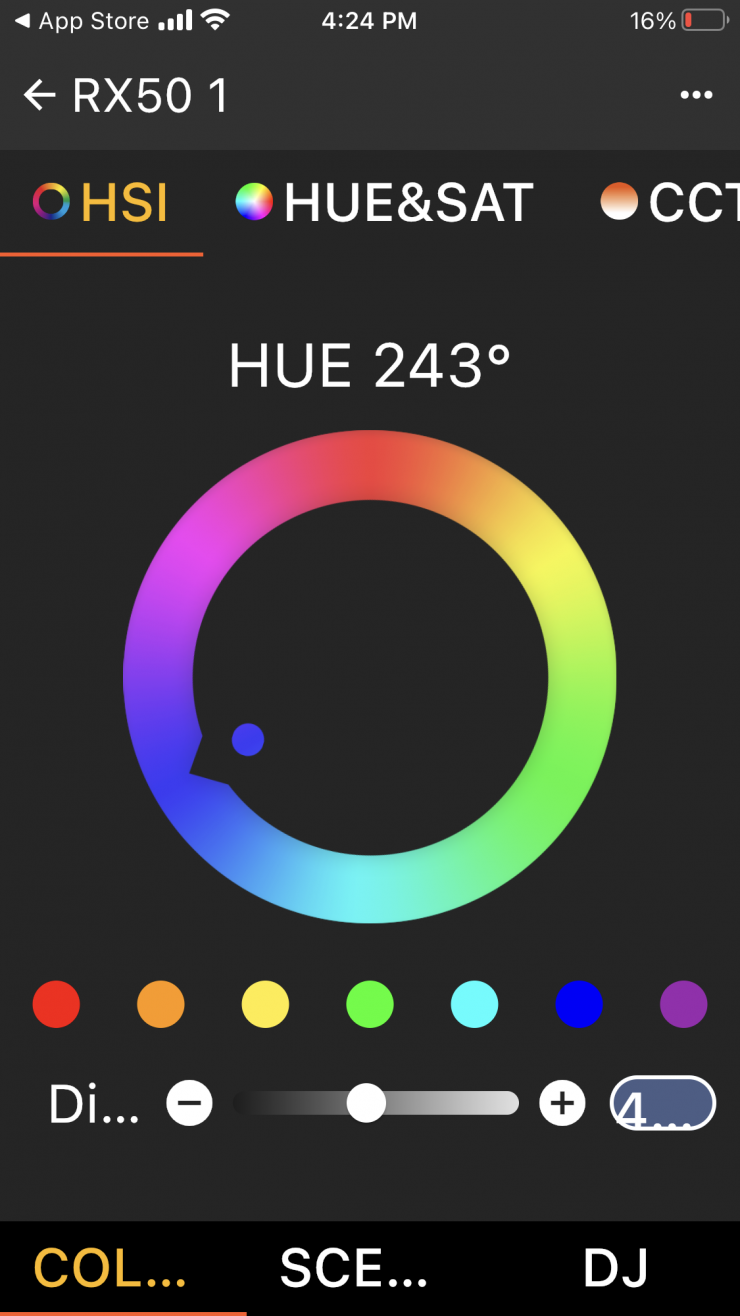
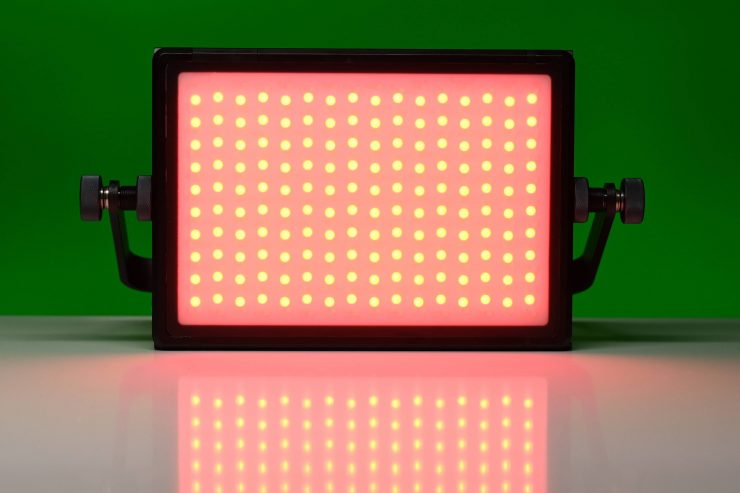
HSI Mode
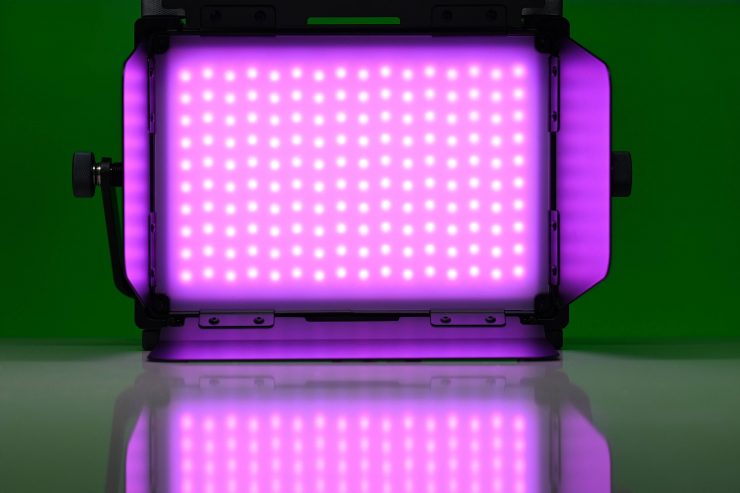
The HSI mode lets you create just about any color you can think of. It gives you full hue and saturation control as well as intensity. By manipulating, the hue and saturation you can create some really interesting colors that depending on the project you are working on can really add some creative flair. I quite like using this mode to create a lot of color separation between the foreground and background, or for recreating a really cold or warm looking image.
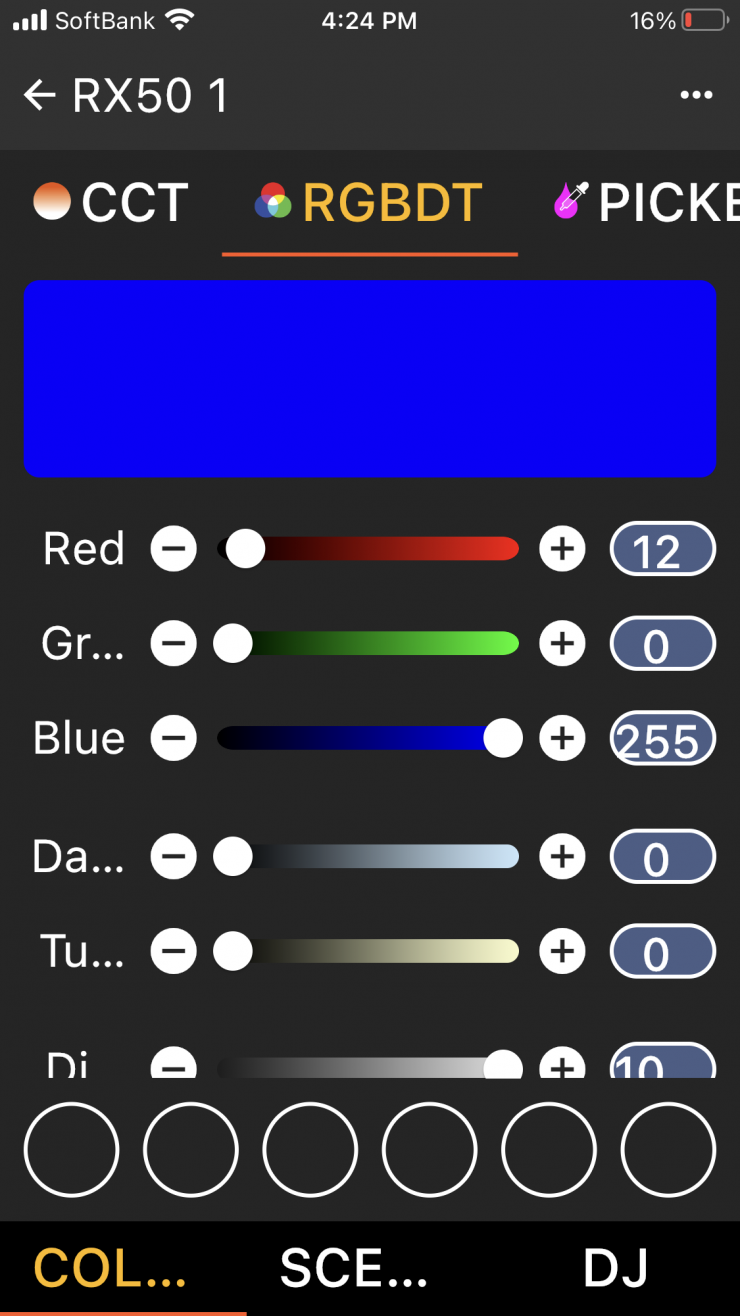
RGBDT Mode
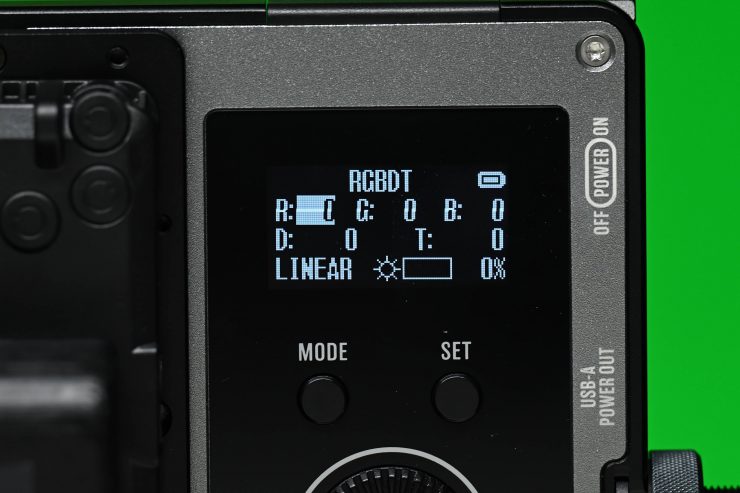
In the RGBDT Mode, you can independently control Red, Green, and Blue, as well as the amount of Tungsten or Daylight.
CIE1931 Mode
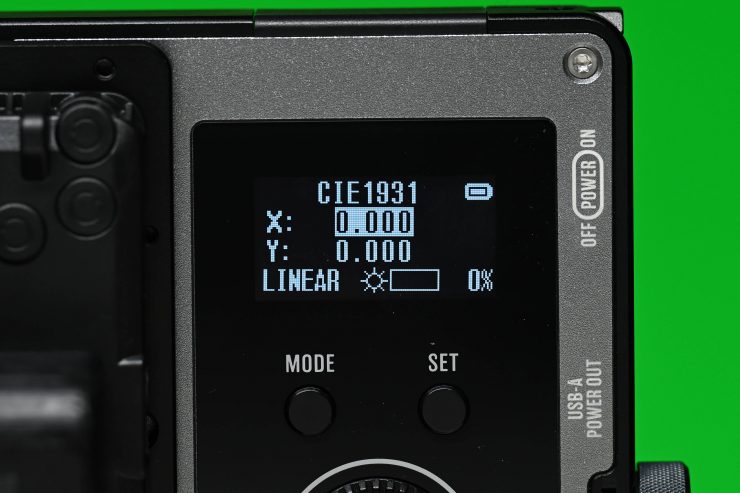
In CIE1931 Mode you can change the color that the light produces by changing the X and Y values.
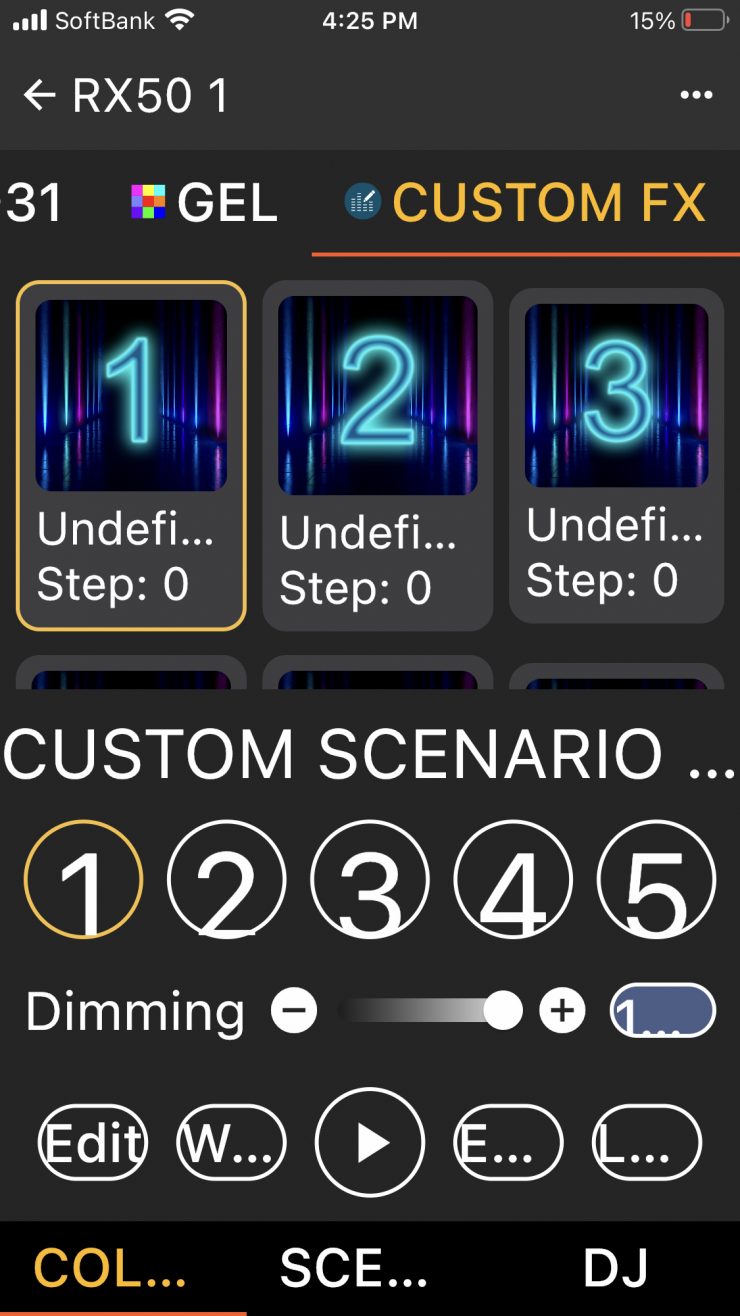
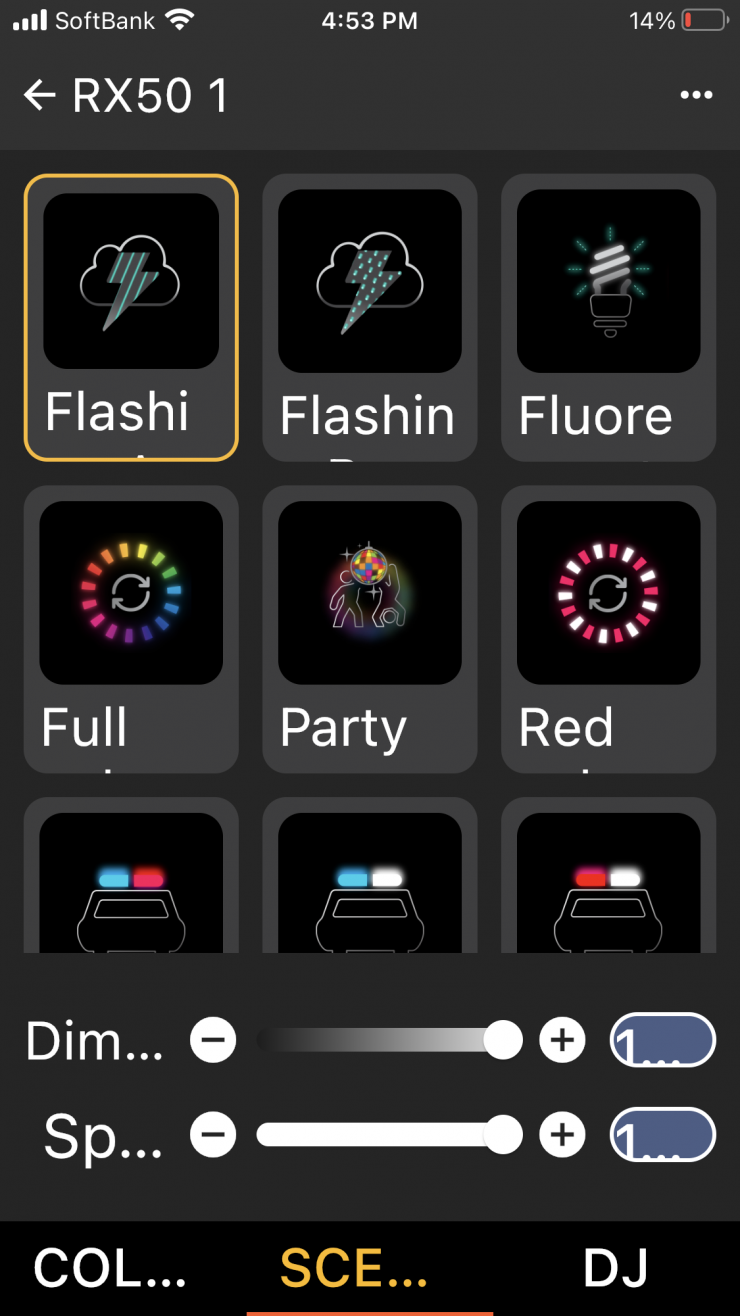
Scenario Mode (Custom FX)
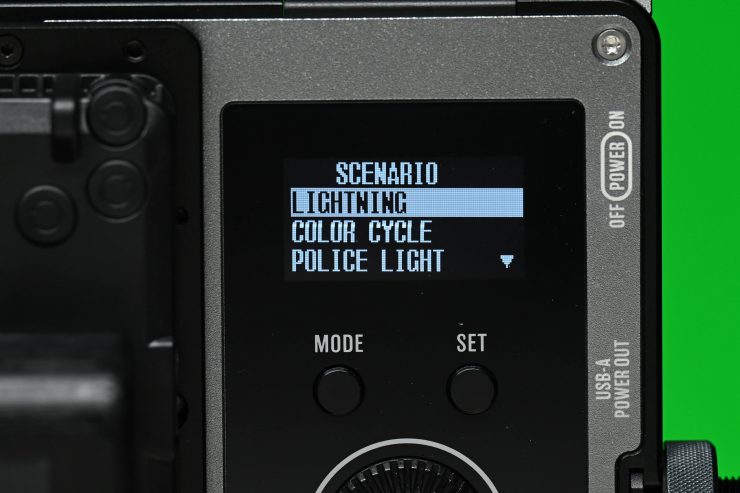
IN the Scenario Mode, labeled as Custom FX in the app, you can use a range of effects as well as create custom sequences.
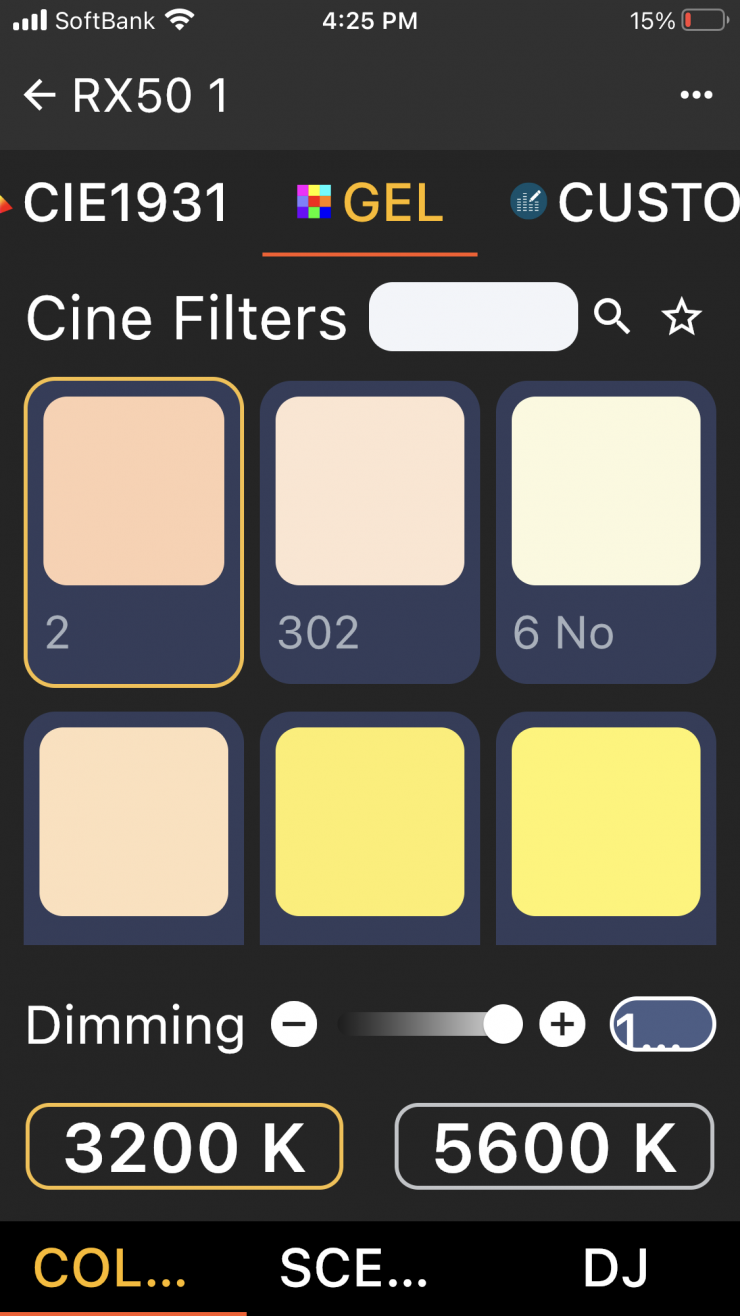
Gel Mode
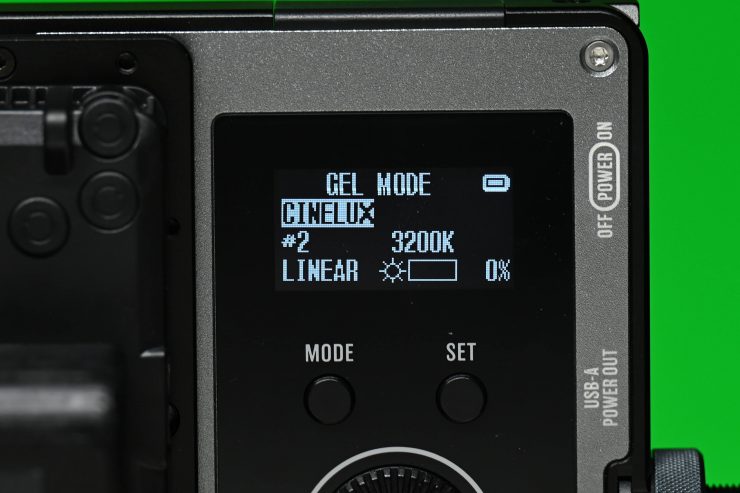
In Gel Mode you can choose a range of different gels. There are quite a few gels to choose from, however, the amount isn’t as comprehensive as you would find on a lot of other lights.
DMX Mode
In DMX Mode you can turn the DMX on or off, change the channel and change the DMX operating mode.
Fan Noise?
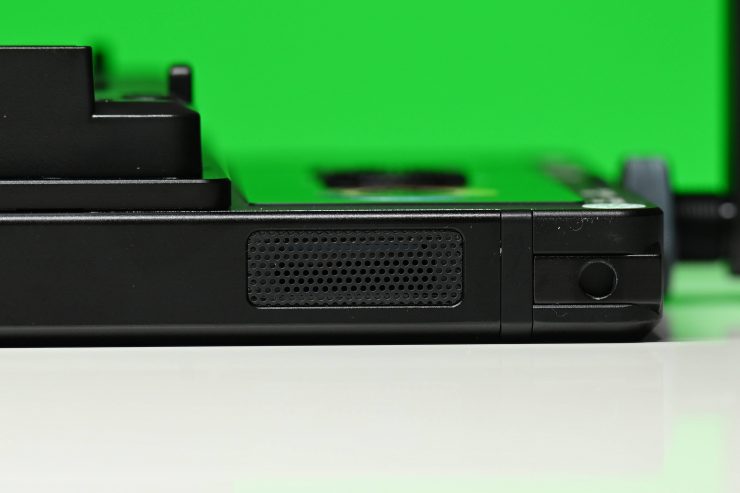
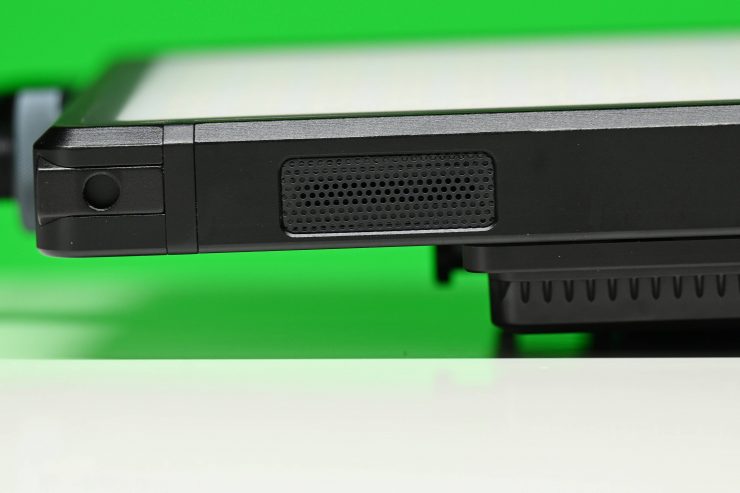
PILOTCINE doesn’t list that the AtomCUBE RX50P has a fan, but it does. There are air inlets and outlets on the top and bottom of the fixture. The light runs completely silent for about 10 or so minutes and then the fan kicks in. This fan is noisy, and given the output of this fixture isn’t terribly high, if you are using it for an interview then the noise is going to be a problem.
Above you can listen to how much noise the fixture makes.
There are no options in the menu for controlling the fan. Even if I turned the output from 100% down to 10% the fan stayed on. After about 5 minutes the fan eventually turned off. When I turned it back to 100% the fan stayed off for about 3-5 minutes and then it came back on again.
The light does also get pretty hot to the touch, especially after it has been on for a while.
Beam Angle
The beam angle of the AtomCUBE RX50P is 120 degrees, and if you use the diffuser it is 140 degrees.
Firmware Upgradable
One of the nice features of the AtomCUBE RX50P is that PILOTCINE will continue to add features to the light over time.
Photometrics
So now let’s get to the photometric results. I always test lights in this way so that I get a reference to how they compare to other fixtures. Results only tell part of the story and should never be used alone to judge a light. I have found from extensive testing over the years that certain lights that have good photometric results don’t always look good, and lights that have worse photometric scores can sometimes look better than their results indicate.
Output & Kelvin color temperature accuracy
I tested the AtomCUBE RX50P at a variety of Kelvin color temperatures with a Sekonic C-800 Spectrometer to find out how much output the light had and how accurate the Kelvin color temperature reproduction was. All readings are taken at a distance of 1m (3.28ft) in a controlled environment.
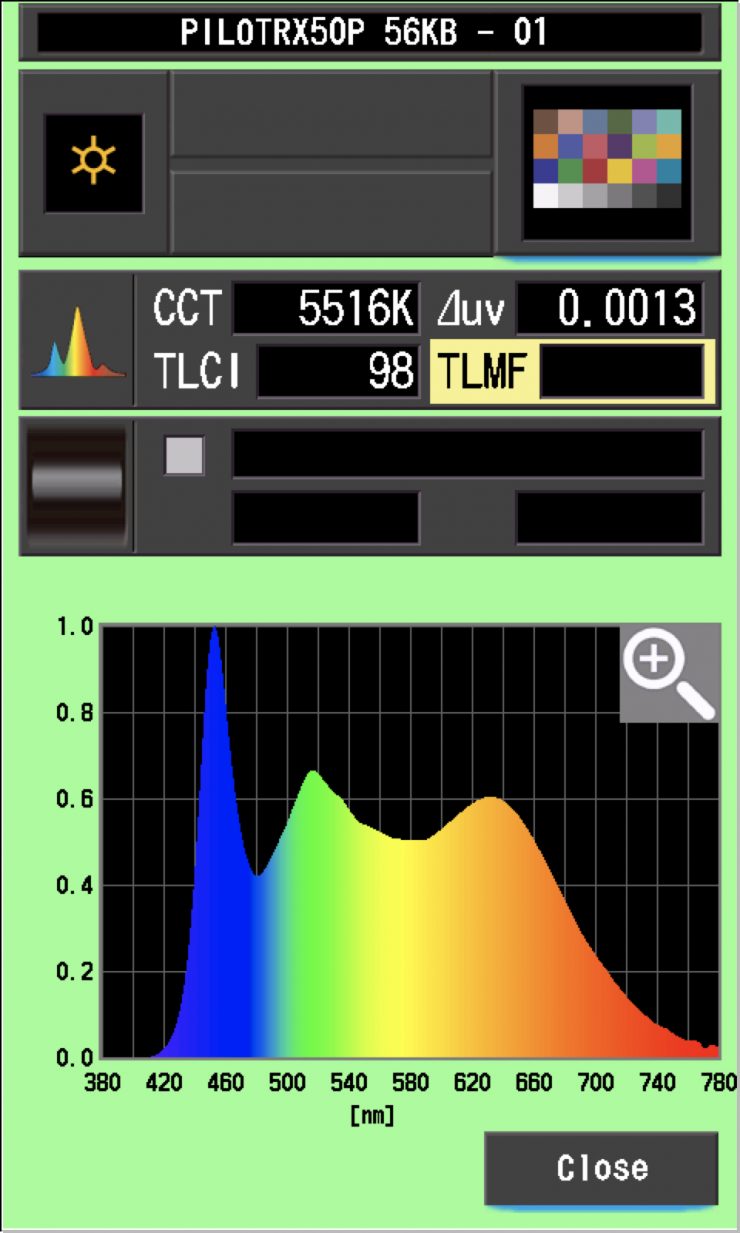
5600K
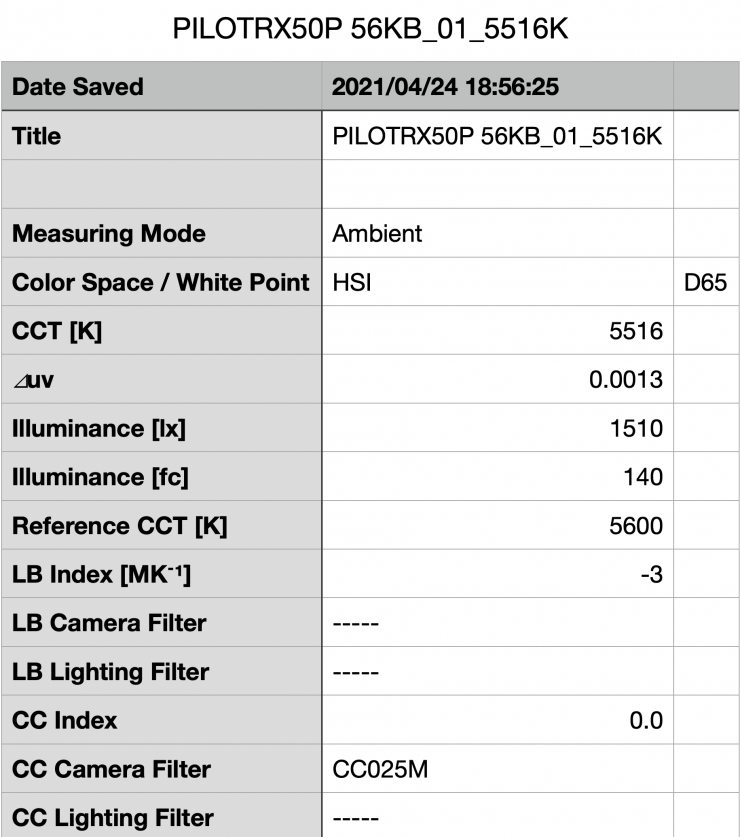
Above you can see the light recorded

The light produced a Kelvin color temperature of 5516K and it had a CC Index score of 0.
For a panel of this size that only draws 60W, the amount of output you are getting is ok.
How does this compare to some other similar sized RGBWW lights that we have previously reviewed:
| Output at 5600K | |
| PILOTCINE AtomCUBE RX50P | 1510 lx |
| Lupo Actionpanel Full Color LED Panel | 5960 lx (40°) |
| Creamsource Micro Color Pro Kit | 14400 lx (open face) |
| Creamsource Micro Color Pro Kit | 1880 lx (60°) |
As you can see the AtomCUBE RX50P doesn’t have as much output as the other two lights.
Now, you need to be acutely aware that some of these lights have a tighter beam angle than others, and the Creamsource draws more power. With the Ceamsource you can also add holographic lenses to the front of it to change the beam angle.
As far as an accurate rendition of creating a 5600K source here is how the competition compares.
| CCT @ 5600K | |
| PILOTCINE AtomCUBE RX50P | 5516K |
| Lupo Actionpanel Full Color LED Panel | 6207K |
| Creamsource Micro Color Pro Kit | 5560K |
The Creamsource was slightly more accurate, but not by much. Both the PILOTCINE and the Creamsource were a lot more accurate than the Lupo.
5600K (Diffusion)
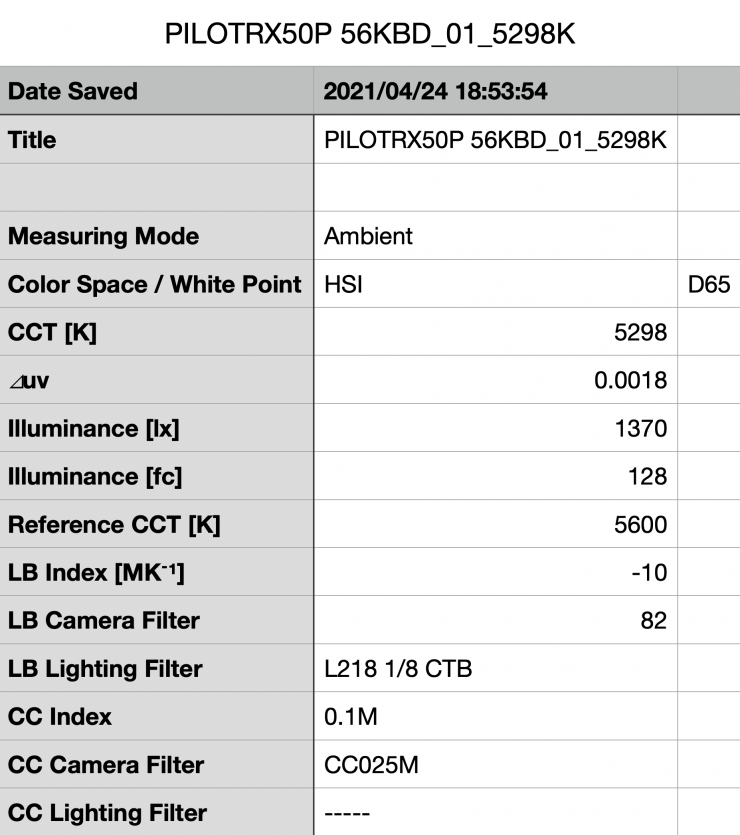
The AtomCUBE RX50P comes with barndoors and diffusion.. Above you can see that the light recorded
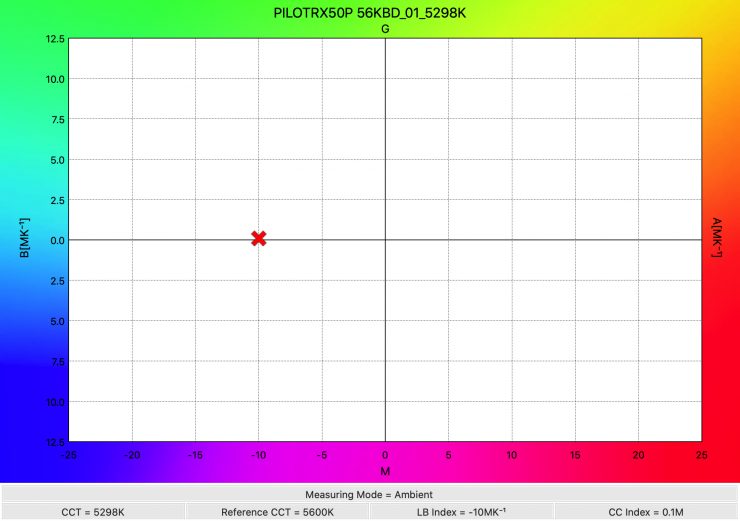
The light produced a Kelvin color temperature of 5298K as opposed to the 5516K it recorded without the diffusion. This shows me that the diffusion panel is altering the Kelvin color temperature.
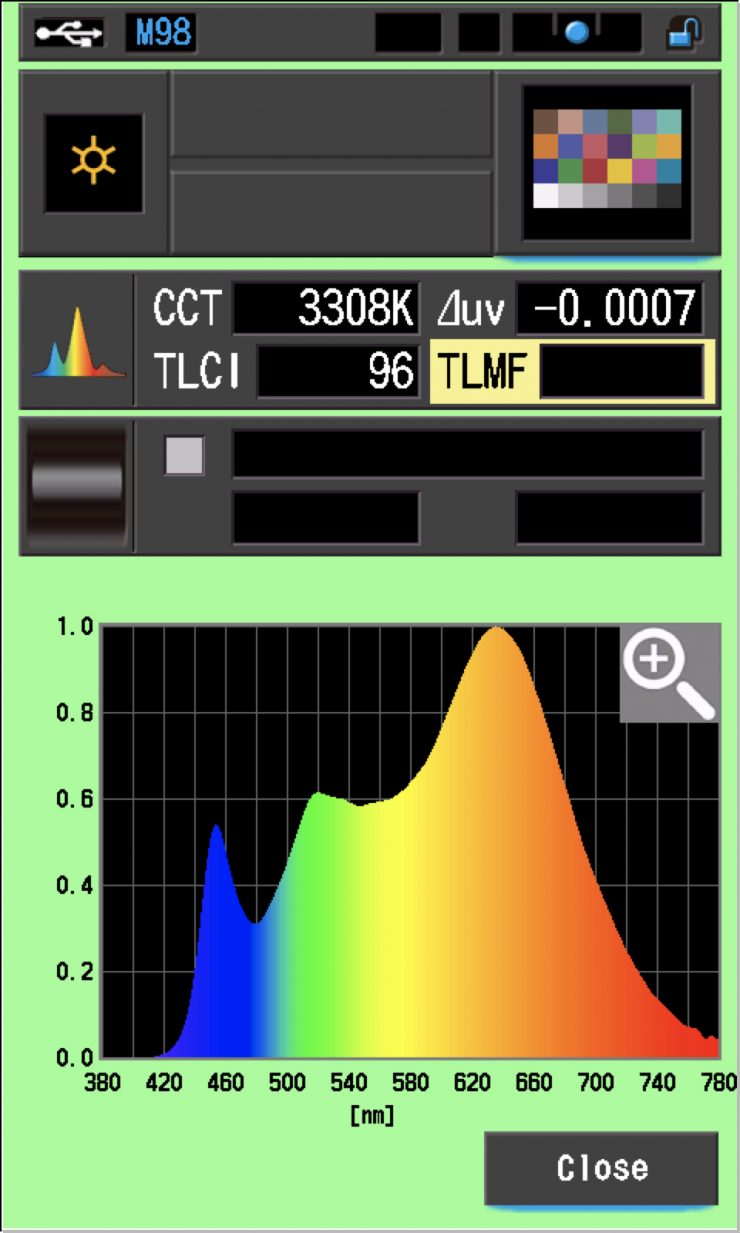
3200K
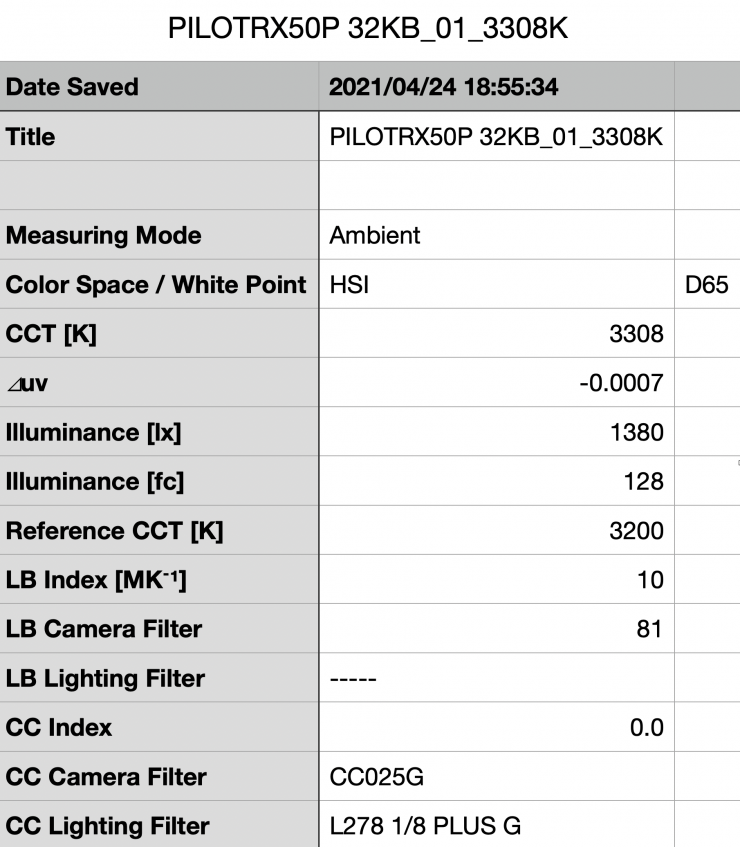
Above you can see the lights output when it was set at 3200K. It produced 1380 lx (128 fc), which was 8.6% less than the 1510 lx it produced at 5600K.
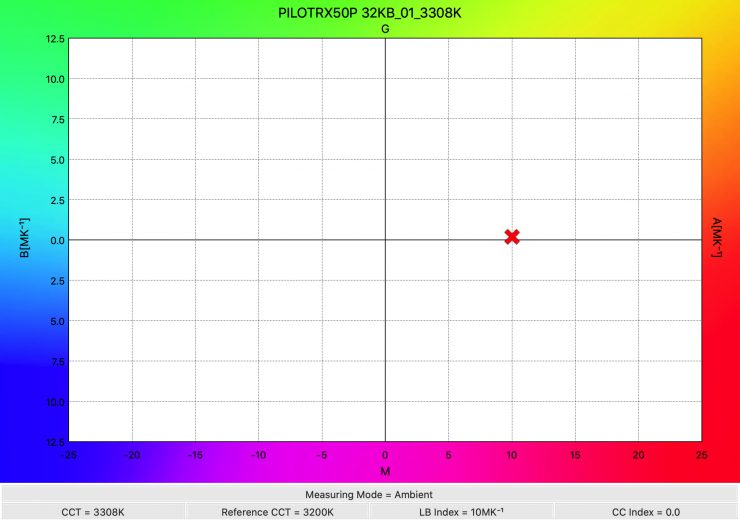
As far as Kelvin color temperature accuracy goes, it recorded a reading of 3308K which was reasonably good. The fixture had a CC reading of 0.0.
How does this compare to some other similar sized RGBWW lights that we have previously reviewed:
| Output at 3200K | |
| PILOTCINE AtomCUBE RX50P | 1380 lx |
| Lupo Actionpanel Full Color LED Panel | 4760 lx (40°) |
| Creamsource Micro Color Pro Kit | 14400 lx (open face) |
| Creamsource Micro Color Pro Kit | 1870 lx (60°) |
As you can see the AtomCUBE RX50P doesn’t have as much output as the other two lights.
Now, you need to be acutely aware that some of these lights have a tighter beam angle than others, and the Creamsource draws more power. With the Ceamsource you can also add holographic lenses to the front of it to change the beam angle.
As far as an accurate rendition of creating a 3200K source here is how the competition compares.
| CCT @ 3200K | |
| PILOTCINE AtomCUBE RX50P | 3308K |
| Lupo Actionpanel Full Color LED Panel | 3210K |
| Creamsource Micro Color Pro Kit | 3332K |
The Lupo is the most accurate of the three lights when used at 3200K.
How does it perform at various Kelvin color temperatures?
Summary of results
| OUTPUT | KELVIN COLOR TEMPERATURE READING | |
| 2500K | 1400 lx | 2567K |
| 3200K | 1380 lx | 3308K |
| 4500K | 1500 lx | 4502K |
| 5600K | 1510 lx | 5516K |
| 6500K | 1550 lx | 6391K |
| 8000K | 1570 lx | 7923K |
| 8500K | 1710 lx | 8597K |
These results show me that the lights output is fairly consistent from 2500K to 8000K. In somewhat of a surprise, the light has the most amount of output when used at 8500K. The output varies by 19.2% from the highest to the lowest figures I recorded. The light is very consistent when it comes to producing accurate Kelvin color temperatures across its range. The light is at its most Kelvin color-accurate when used at 4500K.
Does the light’s Kelvin color consistency change once it is dimmed down?
With a lot of LED lights, the Kelvin color temperature can change significantly once you start dimming the fixture down. So how does the AtomCUBE fair? Below you can see the performance of the light.
| CCT | |
| 100% Output | 5516K |
| 75% Output | 5504K |
| 50% Output | 5611K |
| 25% Output | 5545K |
| 10% Output | 5328K |
As you can see the light’s Kelvin color temperature does not alter in any significant way except when you start getting down towards around 10% output.
How linear is the output?
I wanted to see how linear the light’s output was when used at 5600K. Below you can see the results.
| lx | |
| 100% Output | 1510 lx |
| 75% Output | 1140 lx |
| 50% Output | 662 lx |
| 25% Output | 279 lx |
| 10% Output | 146lx |
The results show me that the light’s output is reasonably linear once you start dimming the fixture down. At 50% output, it had 56.1% less output than when it was used at 100% output. At 25% output, the light had 81.5% less output than when it was used at 100%. This shows me that the light’s output while not completely linear is still reasonably good.
Watts vs Output
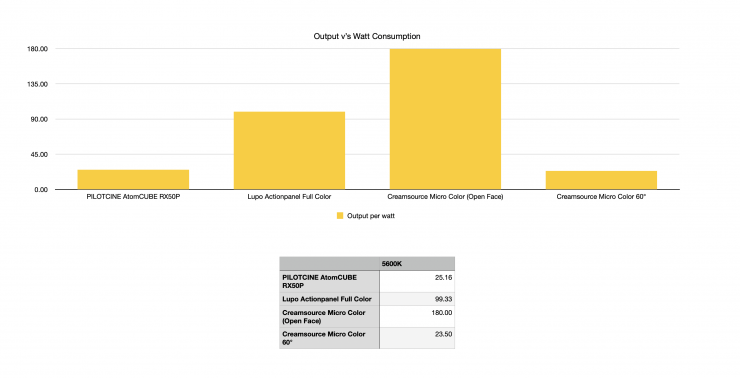
In terms of watts vs output, above you can see a comparison table showing the amount of output compared to the power draw of all of the lights when used at 5600K. Now, they all don’t have an identical beam angle, so please keep that in mind.
Color Rendering
5600K
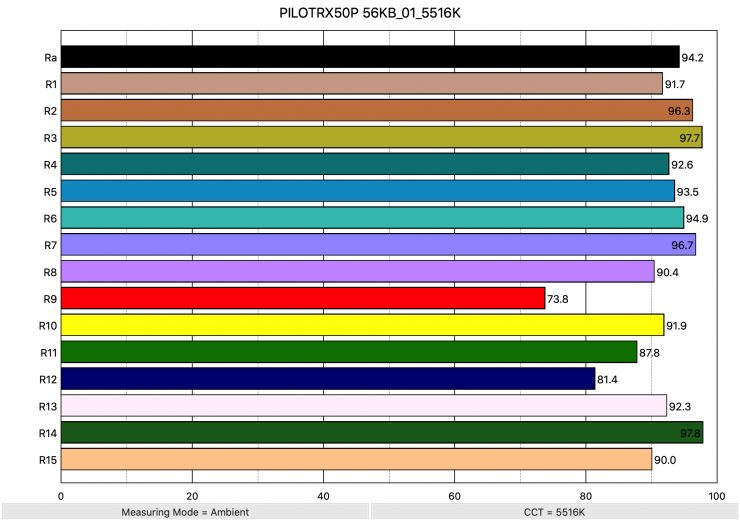
So now that we have seen how much output the AtomCUBE RX50P produces, how does it perform when it comes to replicating accurate colors. Above you can see that when the light was set at 5600K it recorded an average CRI (R1-R8) of 94.2 and an extended CRI (R1-R15) of 91.25. For replicating accurate skin tones it recorded for R9 73.8 (red), 92.3 for R13 (closest to caucasian skin tones), and 90.0 for R15 (closest to Asian skin tones). These were ok results.
When used at 5600K the light recorded a TLCI score of 98.
How does this compare to some other competing RGBWW lights that we have previously reviewed when used at 5600K? Below you can see:
| Extended CRI | |
| PILOTCINE AtomCUBE RX50P | 91.25 |
| Creamsource Micro Colour | 93.52 |
| Lupo Actionpanel Full Color | 92.63 |
The Creamsource had the best extended CRI score when used at 5600K of these three lights, but it is fairly close.
3200K
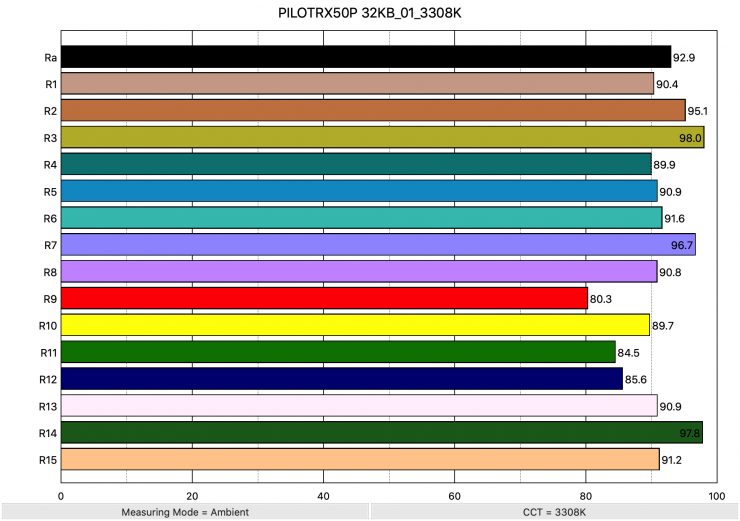
Above you can see the scores for when the light was used at 3200K. It recorded an average CRI (R1-R8) of 92.9 and an extended CRI (R1-R15) of 90.89. For replicating accurate skin tones it recorded 80.3 for R9 (red), 90.9 for R13 (closest to caucasian skin tones), and 91.2 for R15 (closest to Asian skin tones).
Again, just like at 5600K, these results were ok but nothing outstanding.
When used at 3200K the light recorded a TLCI score of 96.
How does this compare to some other competing RGBWW lights that we have previously reviewed when used at 3200K? Below you can see:
| Extended CRI | |
| PILOTCINE AtomCUBE RX50P | 90.89 |
| Creamsource Micro Colour | 94.45 |
| Lupo Actionpanel Full Color | 92.46 |
The Creamsource had the best extended CRI score when used at 3200K of these three lights, but just like at 5600K it was very close.
Thoughts on Color Accuracy
The PILOTCINE AtomCUBE RX50P scores at both 3200K and 5600K were ok. However, these scores didn’t actually affect real-world performance. It just goes to show you that you should never judge a product based on technical results alone.
What you clearly need to understand, and I want to continue to stress this point, is that all lights react differently to different camera and sensor combinations. One particular light may look better with an ARRI camera, and another light may look better with a Canon camera, etc.
Don’t read too much into CRI scores because they rarely tell the whole story of any light. You have to look at all the different results and tests to get a full conclusion about any lighting fixture.
CC Index & ⊿uv
The CC Index displays the CC correction value and whether any magenta or green need to be added or subtracted. 1 CC corresponds to 035 Kodak CC values or 1/8 Rosco filter values. Any reading less than +1.00 or -1.00 and you’re probably not going to need to make any kind of adjustment. The ⊿uv is the value to show how much this light is away from being an ideal light source (black body radiation = incandescent lamp). As with the CC Index you want this number to theoretically be zero. Kelvin is not a linear value, so we need to convert from Kelvin to MK-1 to compare the values of color temperature. To calculate from Kelvin to Mired is MK-1= 1*1000000/Kelvin. While this may sound confusing, it is the only way of measuring if the Kelvin shift is significant enough to warrant having to use a filter for correction. Below are the results for the PILOTCINE AtomCUBE RX50P.
Kelvin Vs MK-1
| Kelvin | Difference in K | MK-1 | Difference in MK-1 | |
| SET VALUE | 2500K | 0 | 400 | 0 |
| ACTUAL READING | 2567K | 67 | 389.55 | -10.45 MK-1 |
| SET VALUE | 3200K | 0 | 312.5 | 0 |
| ACTUAL READING | 3308K | 108 | 302.29 | -10.21 MK-1 |
| SET VALUE | 4500K | 0 | 222.22 | 0 |
| ACTUAL READING | 4502K | 2 | 222.12 | -0.10 MK-1 |
| SET VALUE | 5600K | 0 | 178.57 | 0 |
| ACTUAL READING | 5516K | 84 | 181.29 | 2.27 MK-1 |
| SET VALUE | 6500K | 0 | 153.84 | 0 |
| ACTUAL READING | 6391K | 109 | 156.47 | 2.63 MK-1 |
| SET VALUE | 8000K | 0 | 125 | 0 |
| ACTUAL READING | 7923K | 77 | 126.21 | 1.21 MK-1 |
| SET VALUE | 8500K | 0 | 117.64 | 0 |
| ACTUAL READING | 8597K | 97 | 116.31 | 1.33 MK-1 |
These figures might look confusing, but what it tells me is that the light is very Kelvin color-accurate from 4500K up to 8500K. Any MK-1 score that is under -9/9 means you wouldn’t have to use any color correction gels. The MK-1 scores for this light were just ok. At 4500K and below the scores weren’t nearly as good.
CC INDEX & ⊿uv
| CC INDEX | ⊿uv | |
| 2700K | 0.1M | 0.0015 |
| 3200K | 0.0 | -0.0007 |
| 4500K | 0.0 | -0.0005 |
| 5600K | 0.0 | 0.0013 |
| 6500K | 0.0 | 0.0032 |
| 8000K | 0.0 | 0.0062 |
| 10000K | 0.0 | 0.0063 |
These scores are exceptionally good. The consistency of the AtomCUBE RX50P across the board is very impressive.
TM-30
TM-30 is a relatively new color rendering standard that was developed to deal with the limitations of CRI. TM-30 looks at 99 individual colors. These 99 colors are categorized into seven groups: nature, skin color, textiles, paints, plastics, printed material, and color systems.
TM-30 scores go from 0 – 100. The higher the score, the more accurate a light is at producing colors. Any TM-30 Rf score in the ’90s is considered to be good. What is interesting and something that you need to be very aware of is that two separate light sources with the exact same CRI scores can render colors very differently. A light with a high CRI rating could have a low TM-30 score. Conversely, a light with a good TM-30 score could have a bad CRI score.
Now, there are two measurements associated with TM-30, Rf and Rg.
- Rf (Color Fidelity)
- Rg (Color Gamut)
With Rf value, ideally you want a score in the 90’s.
With Rg value, a score below 100 indicates that the light source renders colors with less saturation than the reference source. So ideally you want this score to be above 100.


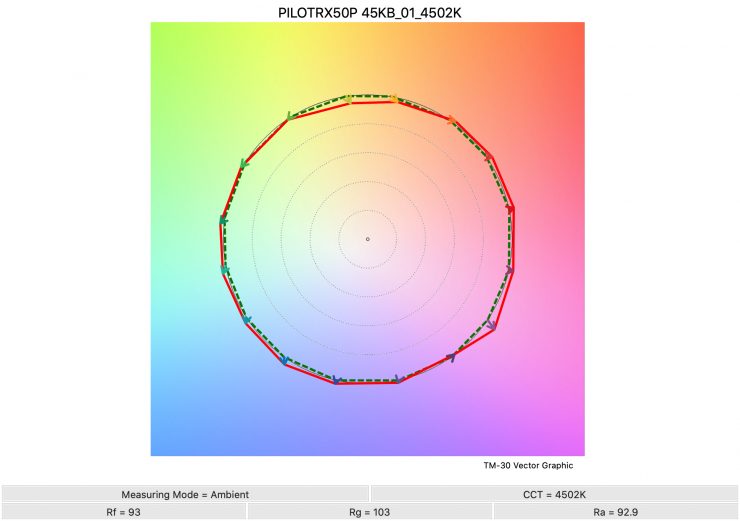
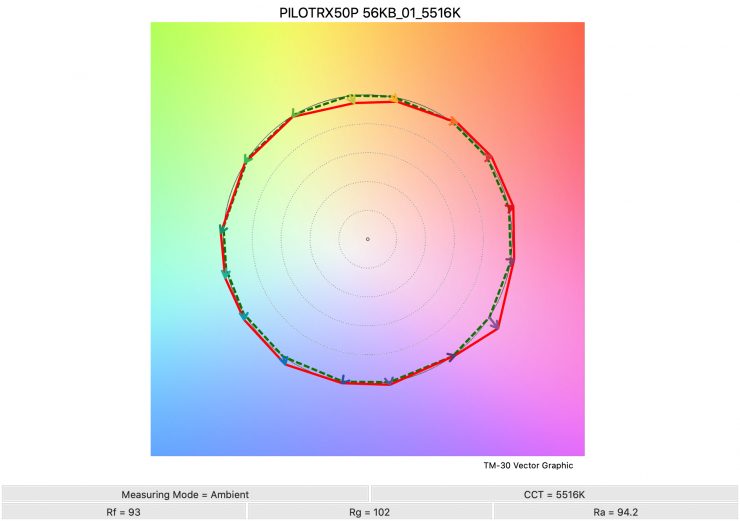

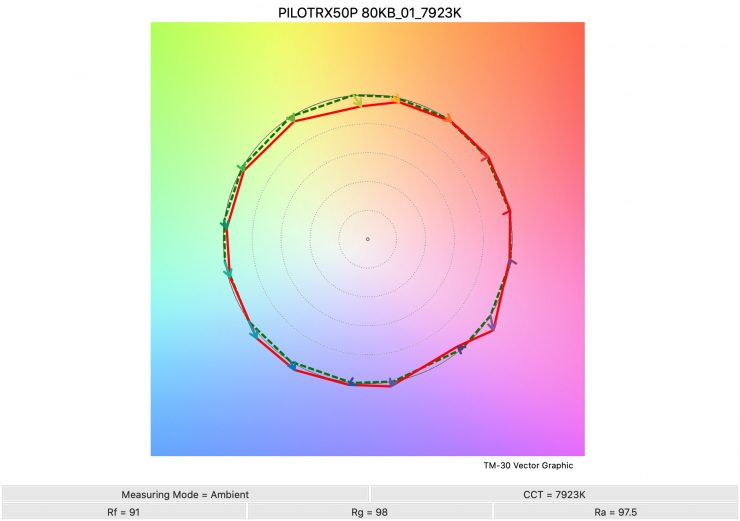

Above you can see the scores for the Litepanels Gemini 1×1 HARD at various Kelvin color temperatures.
| Rf (Color Fidelity) | Rg (Color Gamut) | |
| 2500K | 92 | 98 |
| 3200K | 93 | 102 |
| 4500K | 93 | 103 |
| 5600K | 93 | 102 |
| 6500K | 92 | 101 |
| 8000K | 91 | 98 |
| 8500K | 91 | 98 |
SSI
SSI (Spectral Similarity Index) was developed by the Sci-Tech Council of the Academy. SSI gives me the ability to set any light as a standard, or use predefined standards (such as CIE D55), and then give other lights an SSI score based upon how well they will match.
Standards such as CIE D55 measure spectral response and compare it directly against an ideal light source.
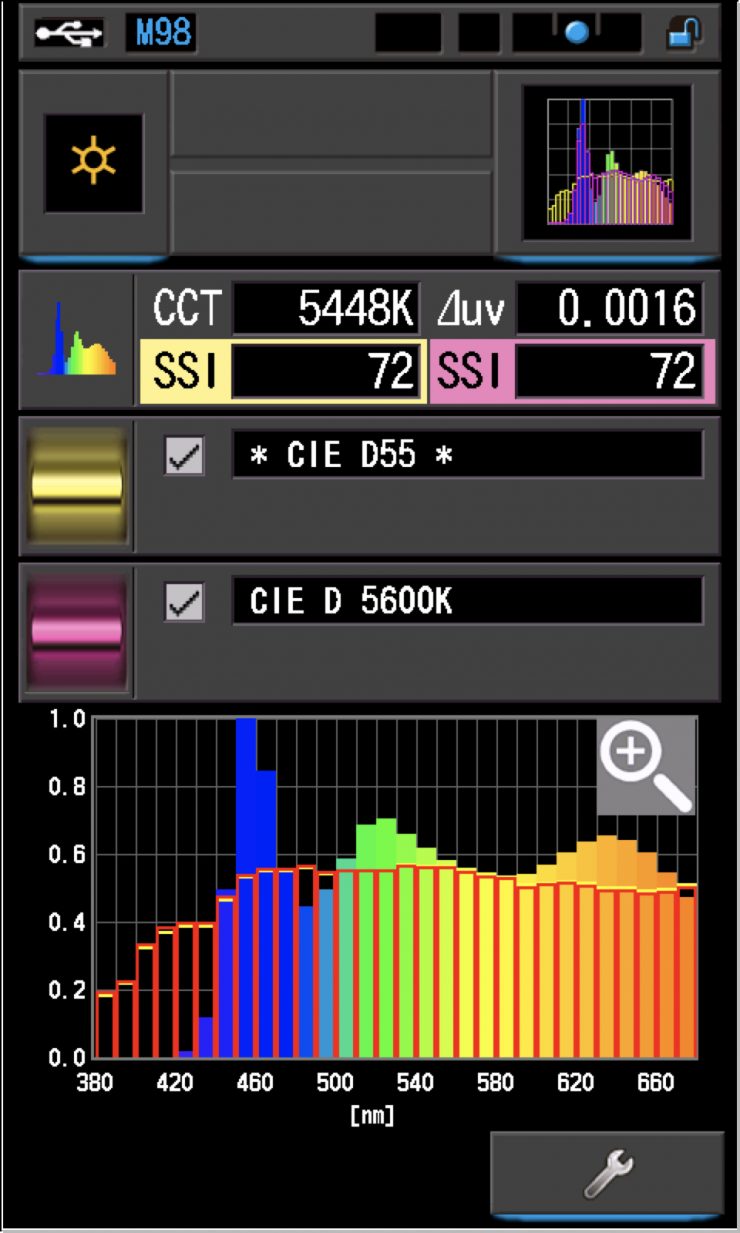
In the above graph above the gold bars indicate a perfect CIE D55 source. The red bars indicate a perfect CIE D 5600K source. This lets us compare how close to a perfect 5600K lighting source the AtomCUBE RX50P is. A score in the low 70’s is typical for a 5600K LED source.
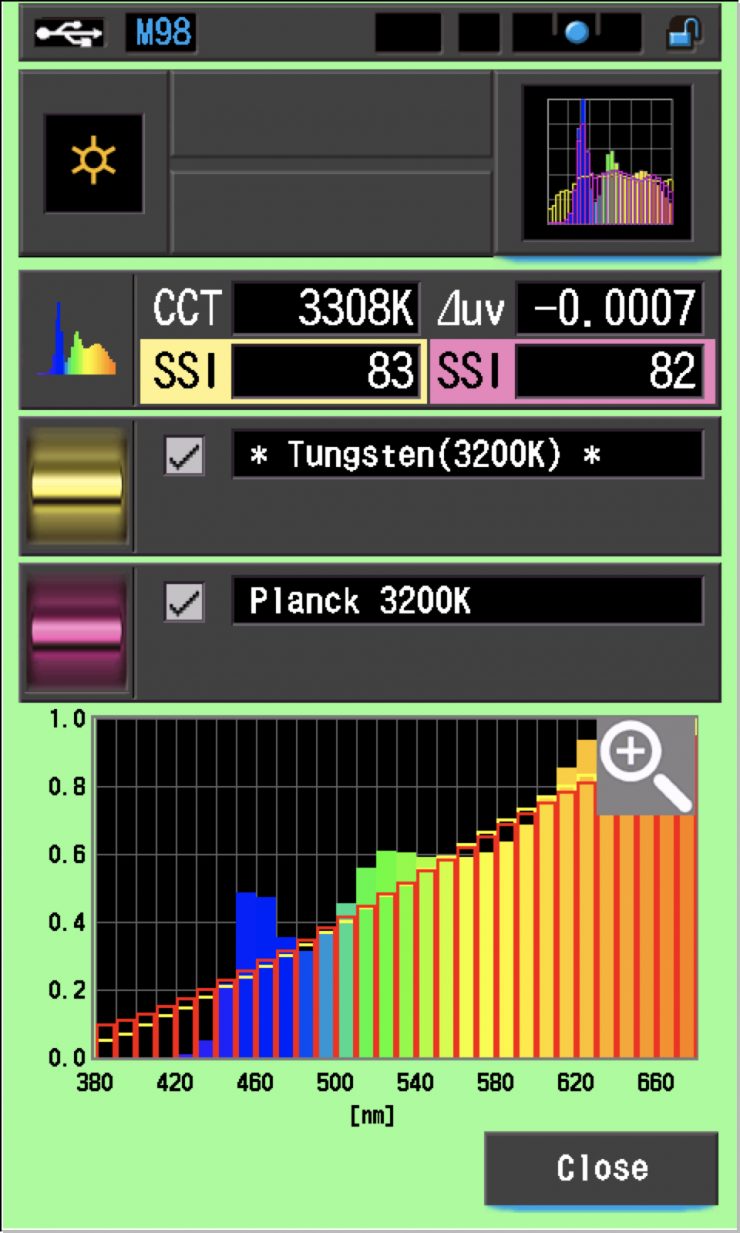
In the above graph, the red bars indicate a perfect Planck 3200K source. The gold bars indicate a perfect 3200K Tungsten source. This lets us compare how close to a perfect 3200K lighting source the AtomCUBE RX50P is. Any SSI score in the ’80s is very good for a 3200K LED light. As you can see, LED lights have a hard time replicating colors below about 450nm.
The main reason we want to record SSI scores is so we can see how well they match with other lights. As a test, I was curious to see how well the AtomCUBE RX50P matched the ARRI Orbiter and the Litepanels Gemini 1×1 HARD.
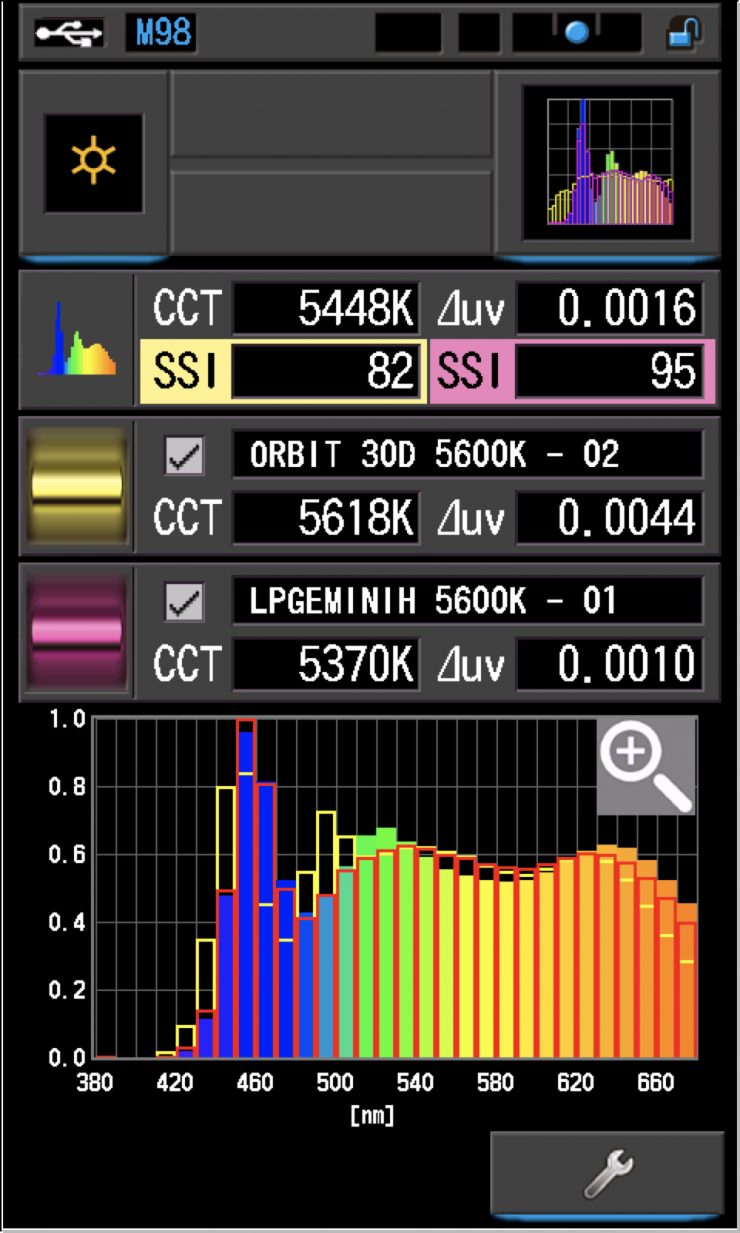
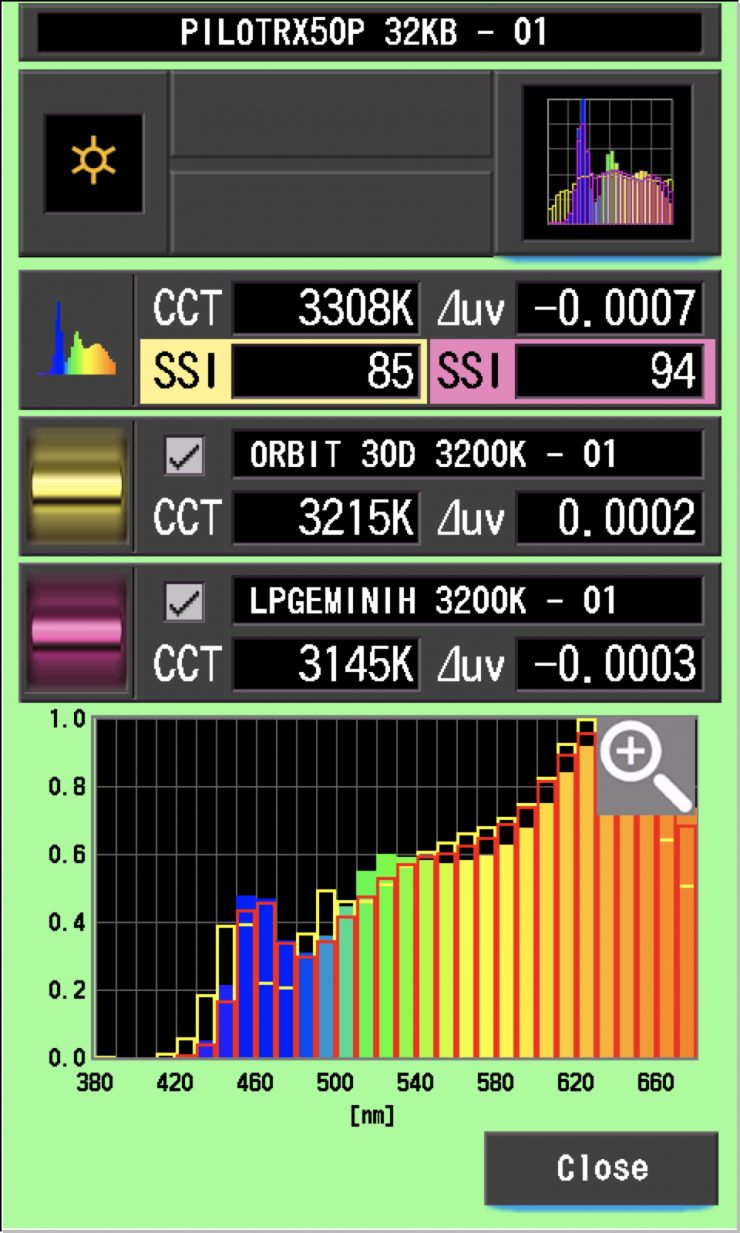
Above you can see that the AtomCUBE RX50P actually matches quite well with the Litepanels Gemini 1×1 HARD, but not so well if used in conjunction with the ARRI Orbiter.
SPECTRAL DISTRIBUTION
5600K
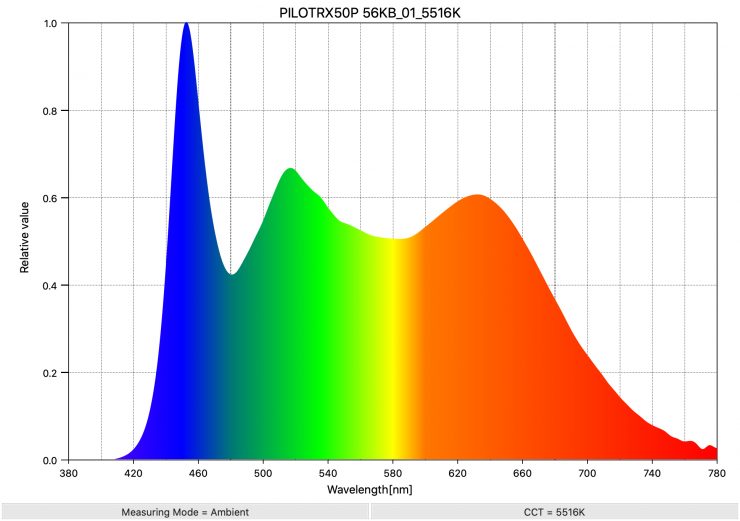
Above you can see the spectral distribution of the AtomCUBE RX50P when it is set at 5600K. The spectral distribution does show a slight green spike.
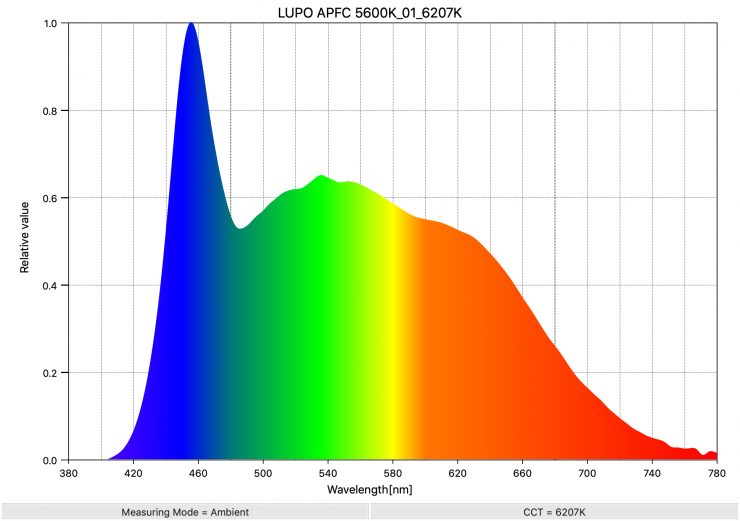
As a comparison, above you can see the spectral distribution of the Lupo Actionpanel Full Color when it is set at 5600K. The spectral distribution is more linear than that of the AtomCUBE, however, the Lupo is missing significant color information at 660nm and above.
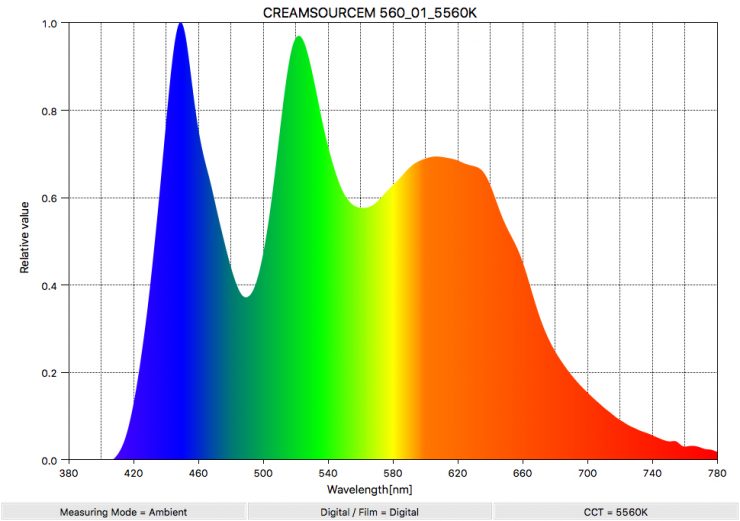
As another comparison, you can see the spectral distribution of the Creamsource Micro Color when it is set at 5600K. The Creamsource has a very full spectrum, but it also has a considerable green spike.
3200K
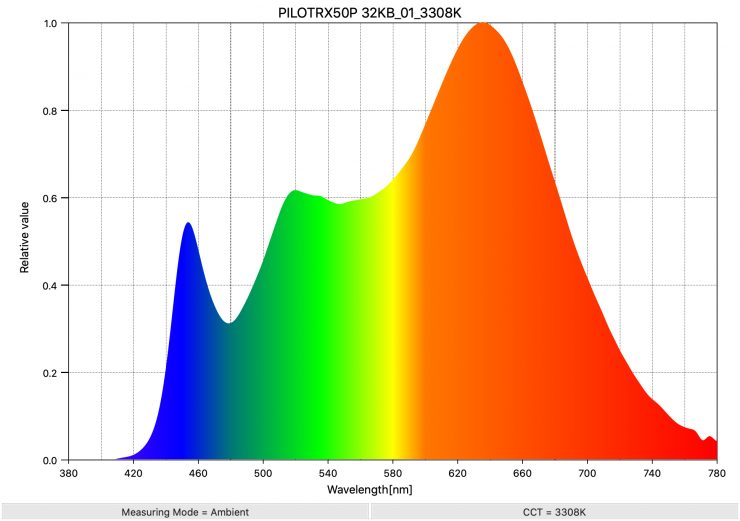
Above you can see the spectral distribution of the AtomCUBE RX50P when it is set at 3200K. The spectral distribution is ok 3200K, but the light does have a slight push towards green.
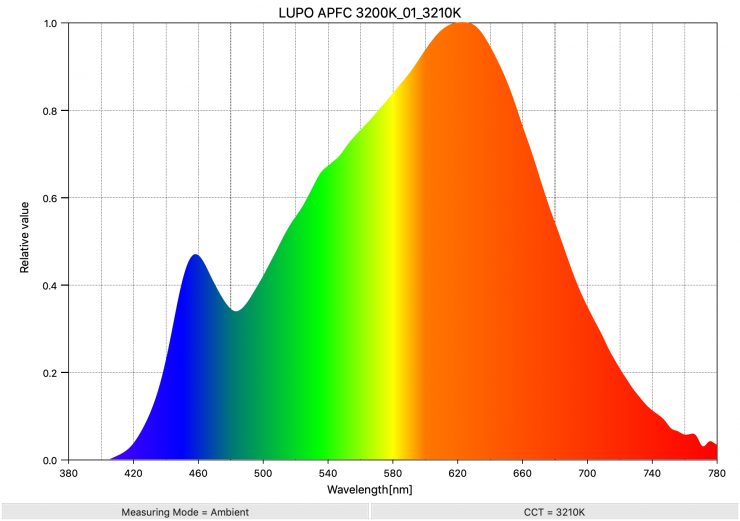
Above you can see the spectral distribution of the Lupo Actionapanel Full Color when it is set at 3200K. The spectral distribution is excellent for this light.
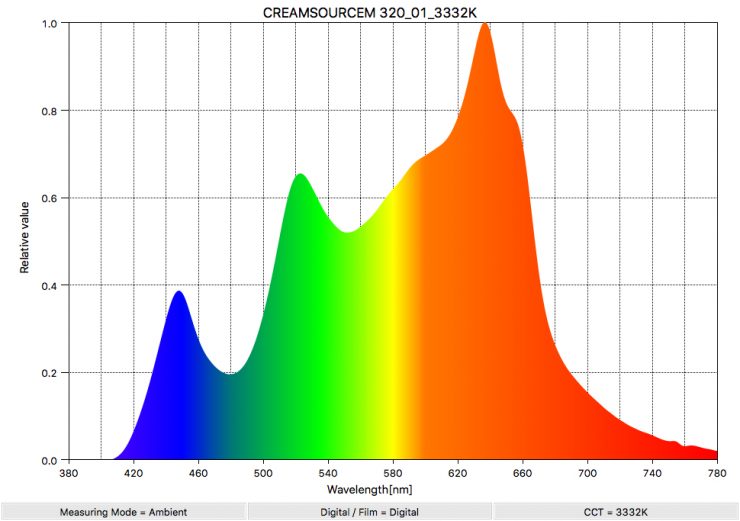
Above you can see the spectral distribution of the Creamsource Micro Color when it is set at 3200K. Just like at 5600K it has a fairly considerable green spike.
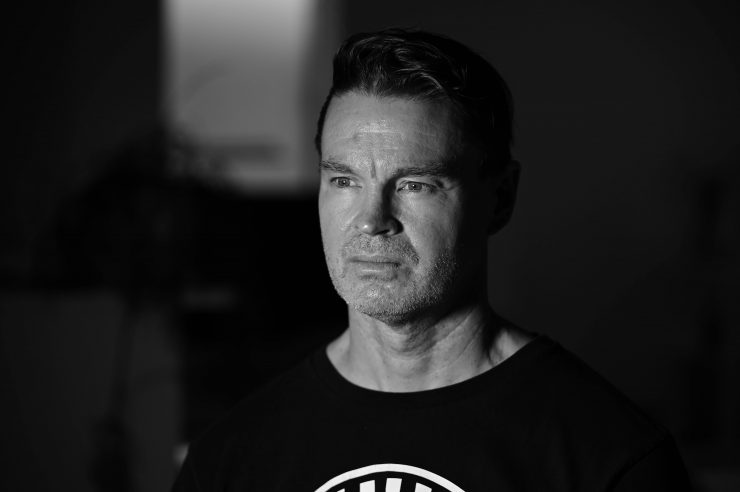
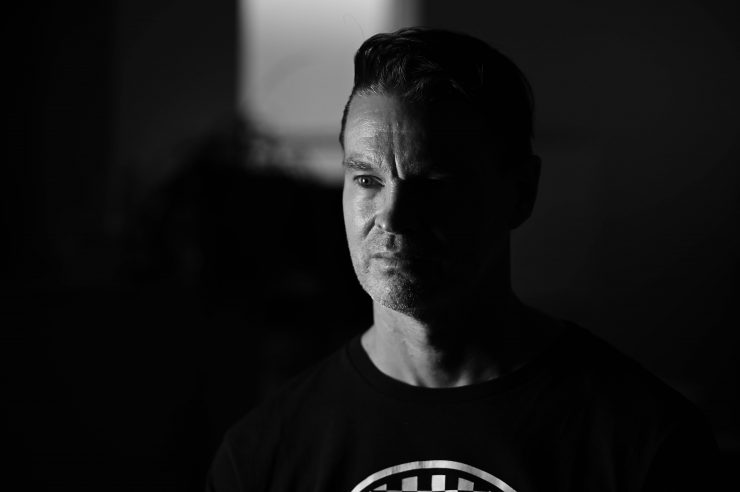
Real World performance & quality of light
As I say in every lighting review, photometric scores only tell you part of the story. So photometric scores aside, how does the AtomCUBE RX50P perform in the real world? The light actually performs reasonably well. While it may not be as impressive as a lot of the other lights I have reviewed on the site, it still manages to get the job done with minimal fuss.
The output is decent enough for a light of this size, but the included diffusion panel doesn’t do that much. The quality of the light isn’t overly soft and you need to take that into account when using it. The issue is, once you start adding more diffusion in front of the light to actually soften it up you lose considerable output.
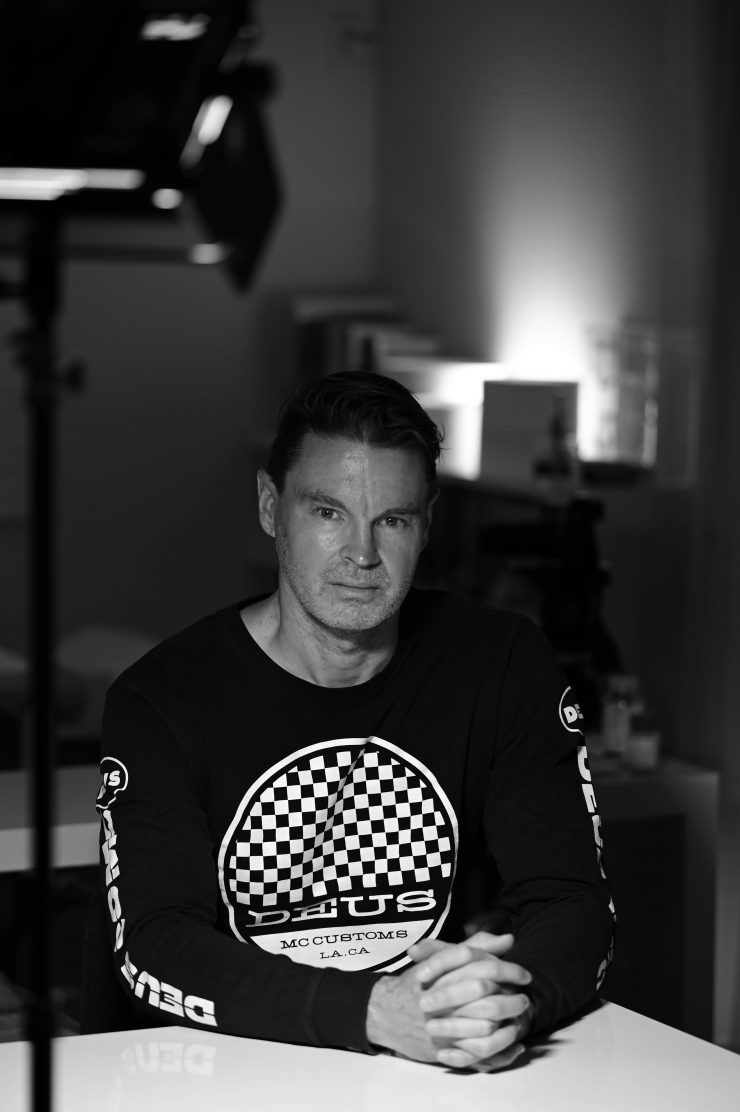
I found that as an interview key light the quality of light is a little too hard for my taste. Again the diffusion panel that is attached to the barndoors doesn’t really do much at all.
If you are going to use it as a key light then I found that if you moved the barndoor mount as far out from the fixture as possible and then attached your own diffusion you could create a slightly softer quality of light. Again, the issue is that you are reducing the output from a light that only has around 1500lx at 1m. Now, this is ok if you are in a room where you can completely control all of the light, but if you are not, you will run into issues. I personally find small-sized sources far from ideal for interview lighting, especially if you are just trying to rely on using just one.


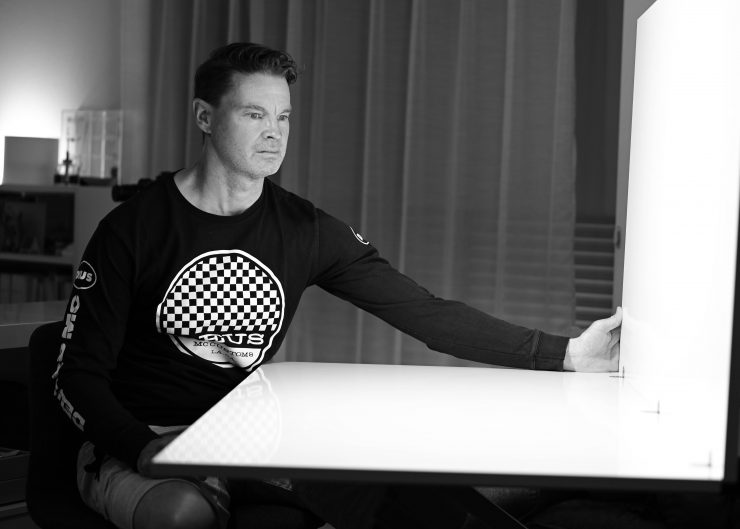
I find with small lights such as these you are much better off bouncing them into something to create a more flattering, bigger, softer source. Above you can see a few examples of bouncing the light straight down into a table and into also bouncing the light into a large white source.
You also need to factor in that there doesn’t seem to be any accessories such as softboxes available for this light. That does somewhat limit its usefulness.
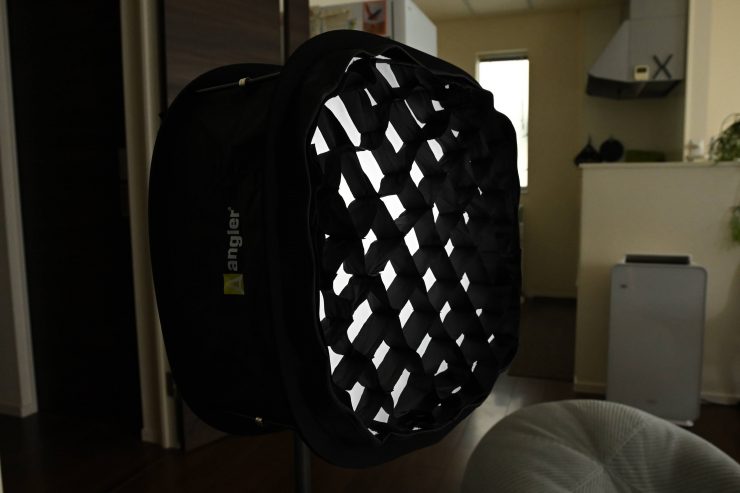
In saying that, above you can see a few quick examples of using the light with an Angler Collapsible Softbox for 12×12″ LED Light Panels. I used this because I happened to have one sitting around. While it isn’t a perfect fit, it still works.
The elephant in the room is that the light has significant fan noise and if you are using it when recording audio this is going to be a big problem. I am not sure why companies still make lighting fixtures that are really noisy. There are no excuses here because this is not a large fixture with a high power draw. I thought that the reason the fan is so noisy maybe because of the internal battery, but it isn’t. It doesn’t matter whether you run it off a V-Mount battery or mains power, the noise is still there.
The nice aspects about the light are the in-built battery, low power draw, relatively low weight, compact size, and app control.
As a small travel light, it ticks a lot of boxes because it doesn’t take up much space in a bag and you can power it remotely without even needing a battery. However, it doesn’t tick all of the boxes, because the fan noise is going to be of concern if you need to record audio. In my opinion, this makes it completely unusable for interview situations.
Whether the in-built battery causes you issues when flying if you were to check it in is something I am not sure about. In theory, it should be ok to check it in as it is part of the product, but some airlines may not see it that way.
Most RGBWW lights I have tested perform well and in a lot of cases your splitting hairs in terms of which light looks better. Also, almost every RGBWW light being released these days has effects, HSI, CCT, and Gel modes. What usually sets the lights apart is build quality, usability, and accessories that are available.
Price
The PILOTCINE AtomCUBE RX50 is available in several different versions:
- PILOTCINE AtomCUBE 10″ RX50 RGBWW Portable Video Light Panel $549 USD
- PILOTCINE AtomCUBE 10″ RX50 RGBWW Portable Deluxe Video Light Panel $649 USD
- PILOTCINE AtomCUBE RX50 10″ Portable RGBWW LED Light Panel (Platinum Edition) $749 USD
As I have previously mentioned the direct competition in terms of size, and power draw comes from the Lupo Actionpanel Full Color $780 USD and Creamesource Micro Color $1495 USD.
If you want a comparable kit that is similar to the PILOTCINE AtomCUBE RX50 10″ Portable RGBWW LED Light Panel (Platinum Edition) that I was testing, then the Lupo Actionpack Full Color LED Light Panel Kit will set you back $987 USD, and the Creamsource Micro Color Pro Kit (V-Mount Battery Plate) will cost you $1,995 USD.
This does mean that the PILOTCINE AtomCUBE RX50P is quite a lot cheaper than the competition, however, Lupo and Creamsource are both well-established and respected lighting companies, so some potential buyers of the PILOTCINE may still think the AtomCUBE RX50 is too expensive.
Full Specifications
Color Temperature 2500 to 8500K
Color Modes Full RGB Tuning
Color Accuracy Standard CRI 95 (claimed)
TLCI 99 (claimed)
Dimming Yes, 0 to 100%
Housing Material Aluminum
Photometrics 576 fc / 6200 Lux at 1.6′ / 0.5 m (claimed)
Fixture Dimensions 8.9 x 6.4 x 0.8″ / 22.6 x 16.3 x 2.0 cm
Fixture Weight 2.6 lb / 1.2 kg
Battery Plate 1 x V-Mount
Mounting Yoke Mount
Remote Control Type Bluetooth, DMX
AC Input Power 100 to 240 VAC, 50 / 60 Hz
DC Input Power 24 VDC
Power Source AC Adapter, External Battery
Max Power Consumption 60 W
Internal Battery Run Time 2 Hours at Full Power
Conclusion
The PILOTCINE AtomCUBE RX50P is a decent light that strikes a nice balance between features, portability, and easy operation.
Its biggest drawcard is the compact size, low weight, and ability to be powered in three different ways. Having an in-built battery is a nice addition, especially as it allows you to power the light for a few hours remotely.
The downside to this light is the in-built fan noise that will suddenly just appear without warning. This is a big red flag to me and I wouldn’t recommend this light for use where critical audio is being recorded.
The app control and Bluetooth MESH work really well and this is a much easier way to control the light than using the onboard controls.
The output from the light is ok, but if you do need to create a softer source then placing your own diffusion in front of it will somewhat compromise its versatility for what it can be used for. What you need to clearly remember is that this isn’t a large-sized fixture so it is never going to be able to replace a larger source.
In saying that, you could simply just use two of these and create a larger fixture. As there is a 1/4-20″ tapped hole on the bottom of the fixture you could mount one light on top of the other. I am a little surprised that PILOTCINE didn’t think about making a dual-frame where you could mount two of these fixtures together.
The build quality of the housing and yoke frame is good, but the physical controls and the scroll wheel feel a little cheap.
As a compact, power-efficient travel fixture it would appear to be a good choice, however, the noise is a deal-breaker for me.


