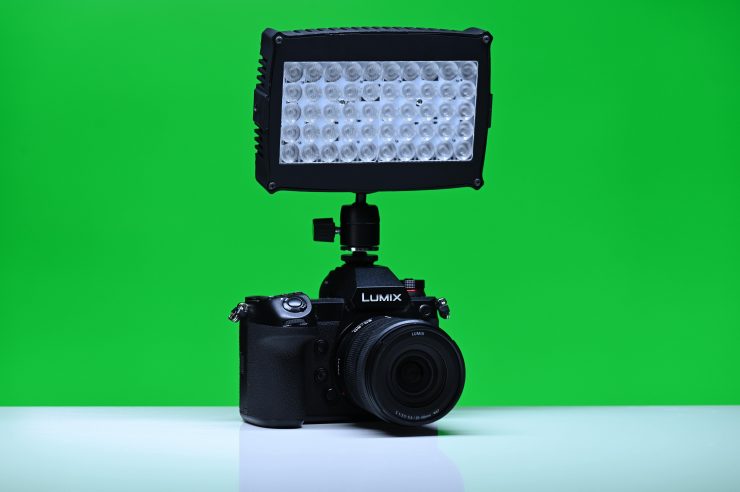
Lupo recently announced the Kickasspanel Full Color LED light. The Kickasspanel is an on-camera light with a ridiculous amount of output.
I have reviewed a lot of Lupo fixtures in the past and one thing they don’t lack is output. The 1×1 and 2×1 Superpanels punch well above their weight so I am hoping that is true with the Kickasspanel.
Key features
- 2800 to 10000K Color Temperature
- 96 CRI and 98 TLCI (claimed)
- 2100 lux at 3.3′ Distance
- RGBWW & CCT Modes
- Gel Presets & Special Effects Modes
- L-Series Plate, AC/DC, USB Type-C Inputs
Kickass
Who said that Italian’s don’t have a sense of humor. Whether or not the name has anything to do with the Kick-Ass movie is doubtful, but it at least gave me an excuse to include the trailer for the movie.
If you are going to call your light the Kickasspanel you better be able to back it up with something special. Lupo claims that the light can output 2100 Lux at a distance of 1m (3.3ft). 2100 lx is almost as much output as some 1×1 LED panels on the market produce.
To show you how crazy the output is from the Lupo, as a comparison, the Aputure MC puts out 121 lx 11.3 (fc) at the same distance.
So, let’s get on with the review.
RGBWW

So what exactly is RGBWW? The “W” and “W” in RGBWW stand for warm white. The Kickaspanel has a Kelvin color temperature range of 2800-10,000K.
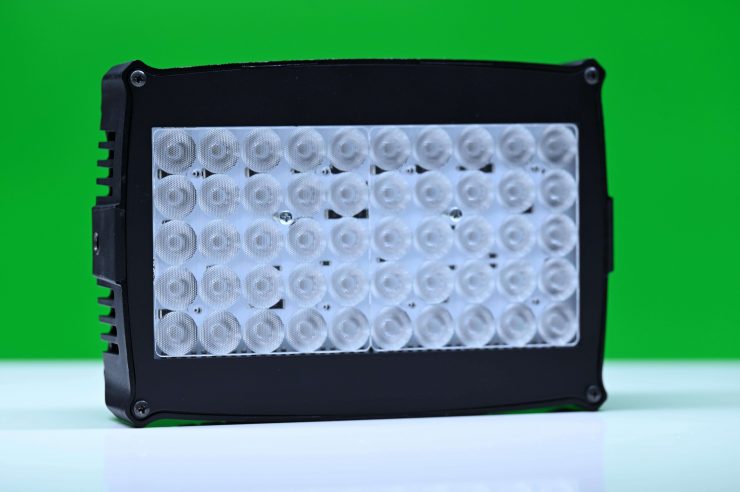
Build Quality


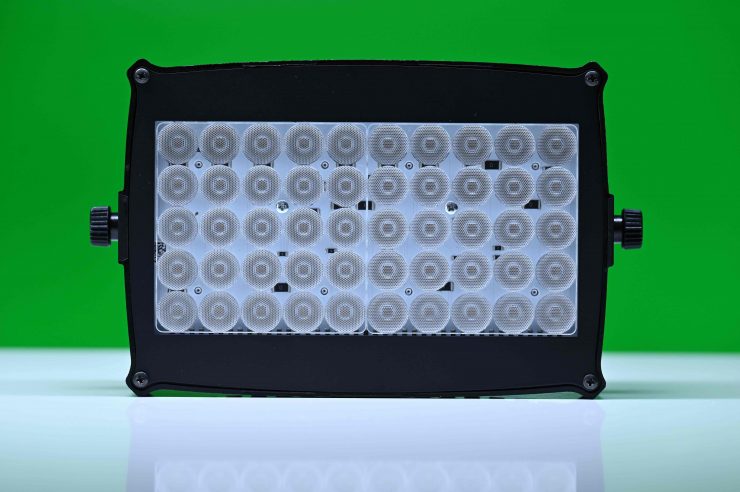
The Kickasspanel features a simplistic design. Lupo has just concentrated on making it robust and easy to use.
The casing of the fixture is made out of reinforced technopolymer and the light is nice and robust. This reinforced technopolymer is the same material Lupo uses for all of its lights.
It is matte black in color which is good because it doesn’t reflect any light. The only problem I found with the finish on the casing of the light is it is very prone to scratches. While this is more of a cosmetic issue, than a build quality issue, some potential buyers may not like this.
From using other Lupo lights over the last four to five years I have yet to encounter a single problem when it comes to reliability or build quality. A lot of manufacturers (and I’m not sure if this applies to Lupo or not) are really pushing their LED lights to the limits and the lifespan of those fixtures can certainly be compromised. Given the Kickasspanel’s high output it will be interesting to see how it stands up over a long period of time.

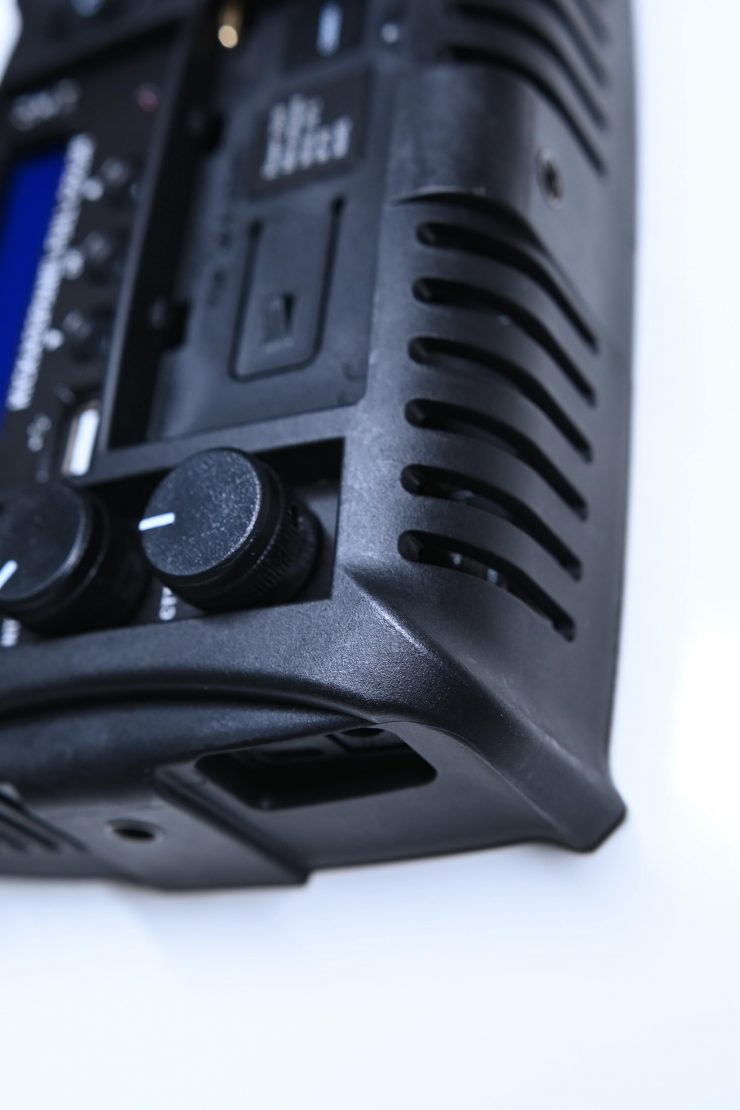
The three main adjustment dials are ok, but they are not very tactile. I found that it was really easy to bump them and you end up changing the parameters you set. If you turn the light off and then you bump one of the dials, when you turn it back on the parameters you originally set will have been changed. Interestingly enough, the three dials all had various levels of resistance.
The light isn’t sealed in any way, and I don’t think you would want to use it outdoors in any sort of inclement weather conditions.
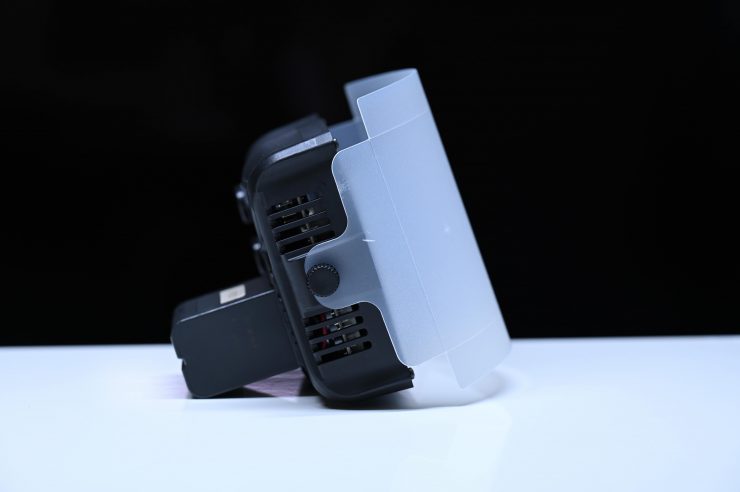
Weight & Size
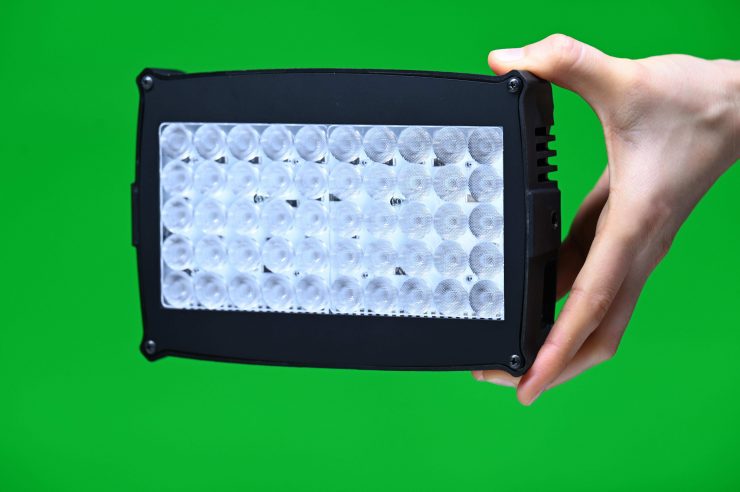
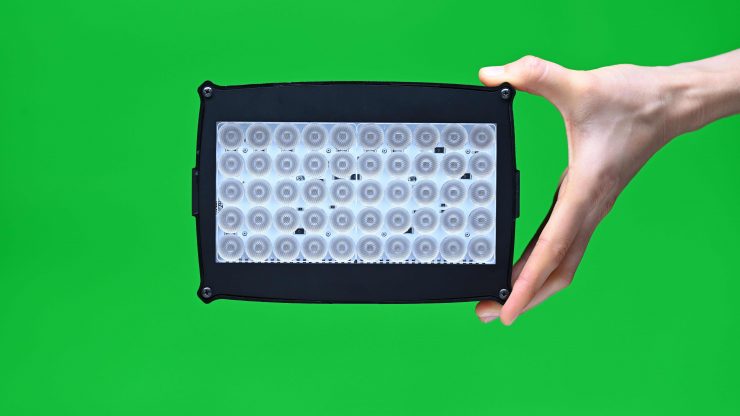
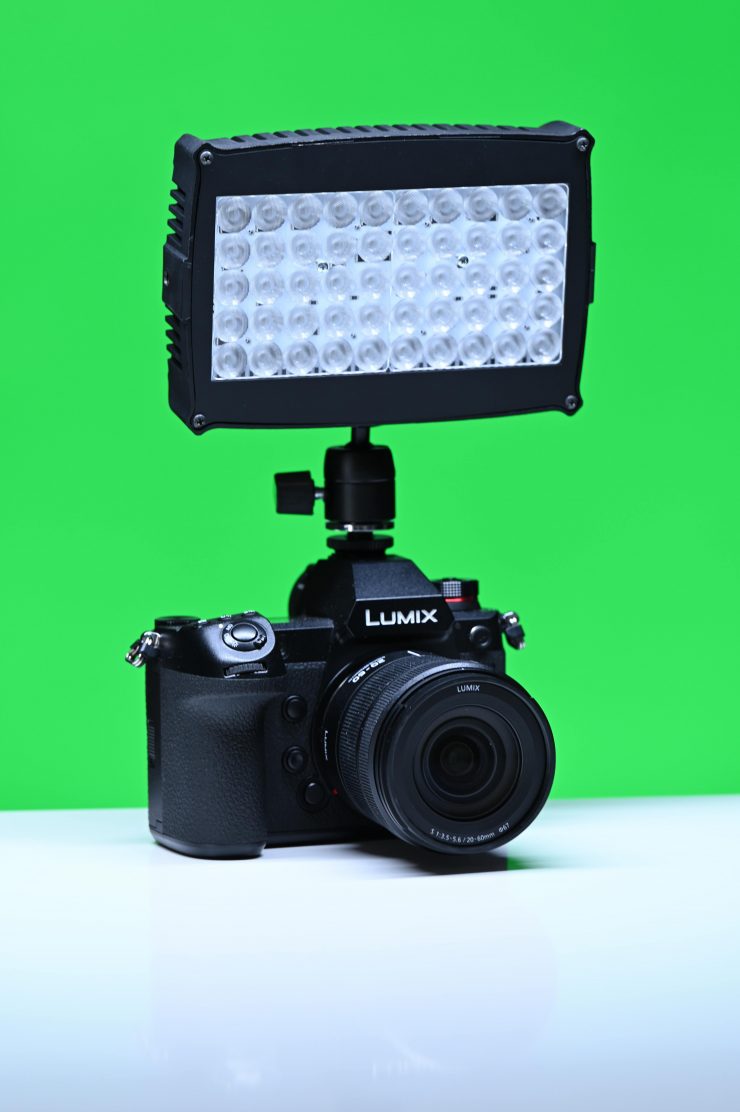
The Kickasspanel weighs in at 530g / 18.69 oz, and it has physical dimensions of 7 x 4.7 x 1.8″ / 18 x 12 x 4.5 cm. This makes it relatively large and heavy as far on-camera lights are concerned.
So how does this weight compare to some other similar sized RGBW lights? Below you can see:
| Weight | |
| Lupo Kickasspanel | 530g / 18.69 oz |
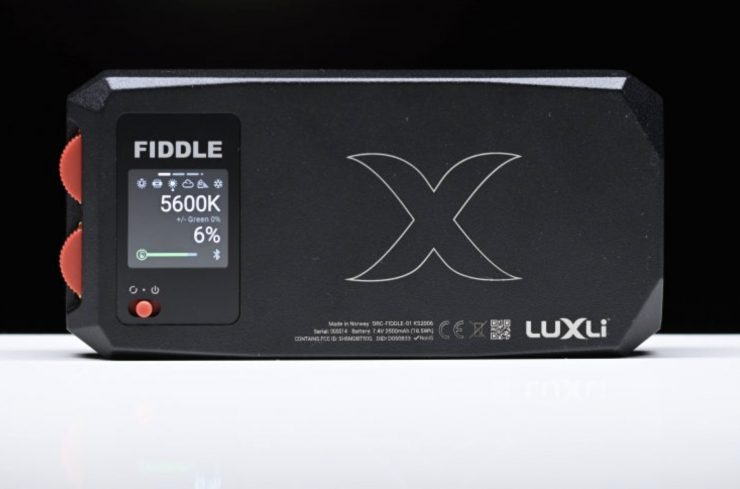
| Luxli Fiddle | 282g / 9.94 oz |
| PFY Matrix Pocket-Sized Portable Bi-Color RGB Light | 249g / 8.78 oz |
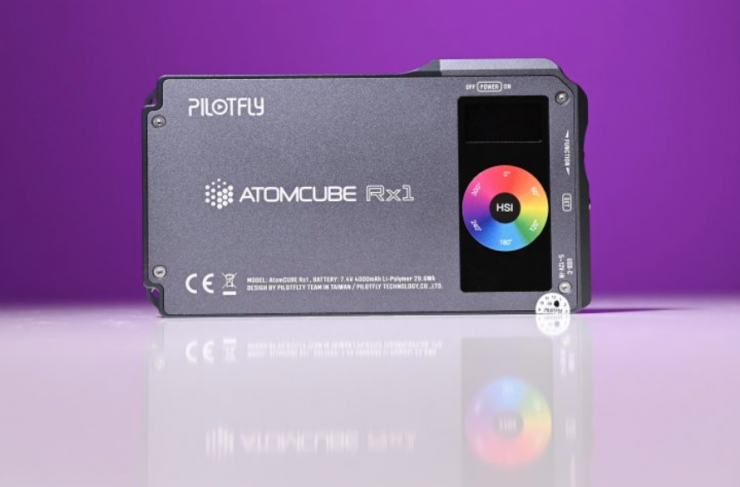
| Pilotfly AtomCUBE Rx1 RGBCW Pocket LED | 275g / 9.70 oz |
| YY-C150 RGB LED video light | 265g / 9.34 oz |
| BOLING Pocket LED RGB Video Light | 260g / 9.17 oz |
| Aputure MC RGBWW LED Light | 130g / 4.59 oz |
| Falcon Eyes PockeLite F7 RGBW On-Camera Light | 300g / 10.58 oz |
As you can see, the Kickasspanel is quite a bit heavier than some of the other competing lights, it also has a far larger footprint. This is something you need to factor in if you want to mount the light on smaller sized cameras.
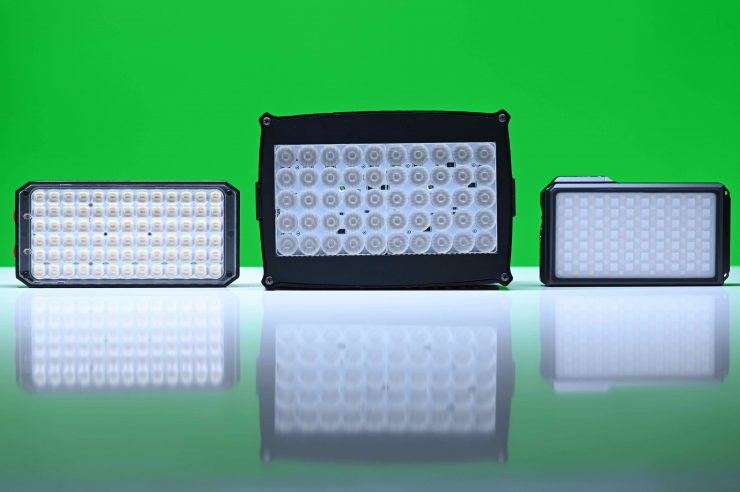
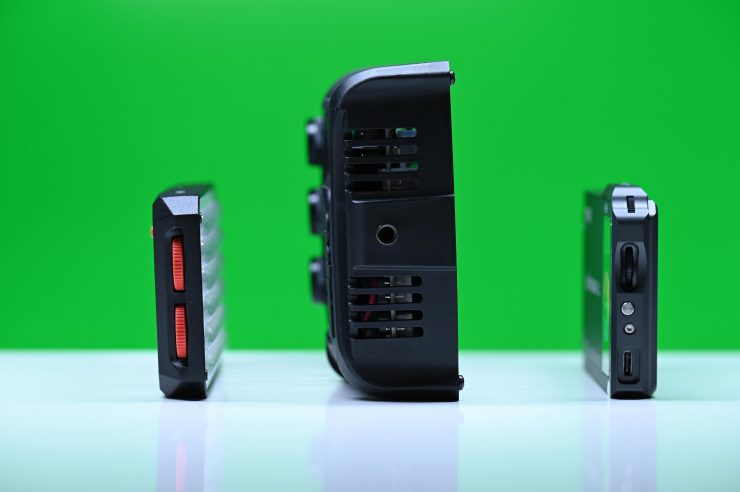
Above you can see how the size compares against a Luxli Fiddle and a Pilotfly AtomCUBE Rx1 RGBCW Pocket LED.
If you are going to use it as an on-camera light is is much more suited for ENG cameras and large or mid-sized digital cinema cameras.
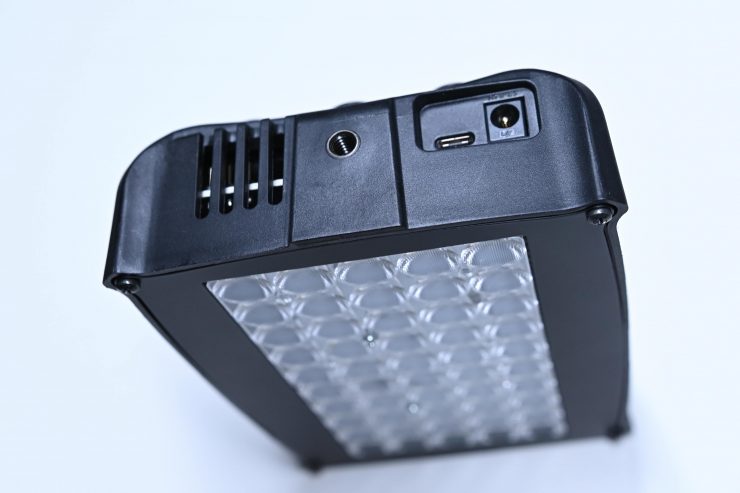
Mounting
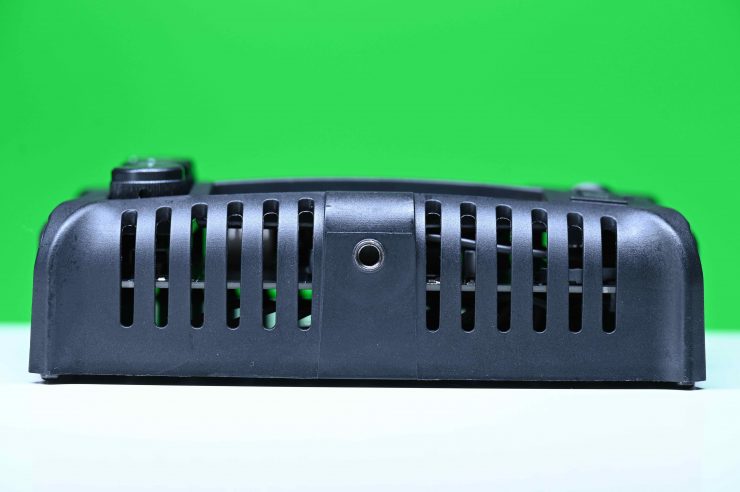

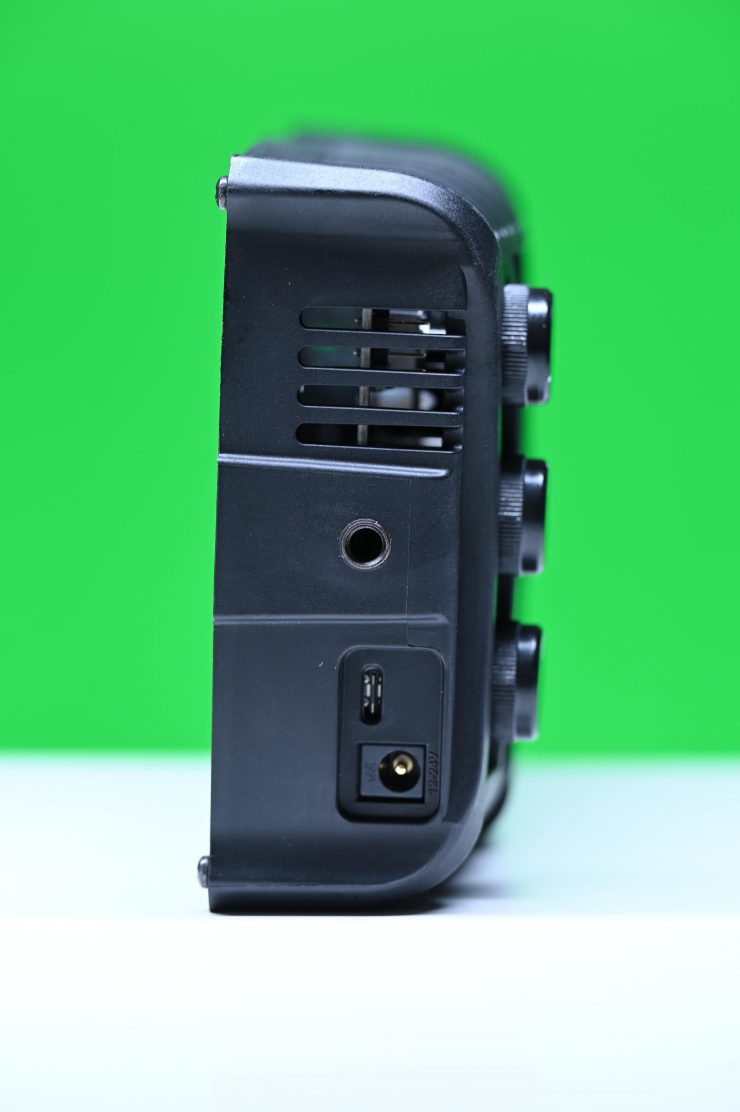
The Kickasspanel has three 1/4 20″ mounting points. One on either side of the fixture, and one on the bottom.
With so many mounting points you could easily attach a bunch of Kickasspanels together to create a larger source.
Power Draw
The light draws 20W which is a little higher than most other competing on-camera RGBWW lights, but it is still extremely low given the claimed output of the fixture.
So how does the power draw compare to other similar fixtures:
| Power Draw | |
| Lupo Kickasspanel | 20W |
| Luxli Fiddle Pocket | 18W |
| PFY Matrix Pocket-Sized Portable Bi-Color RGB Light | 14W |
| Pilotfly AtomCUBE Rx1 RGBCW Pocket LED | 15W |
| YY-C150 RGB LED video light | 12W |
| BOLING Pocket LED RGB Video Light | 12W |
| Aputure MC RGBWW LED Light | 5W |
| Falcon Eyes PockeLite F7 RGBW On-Camera Light | 12W |
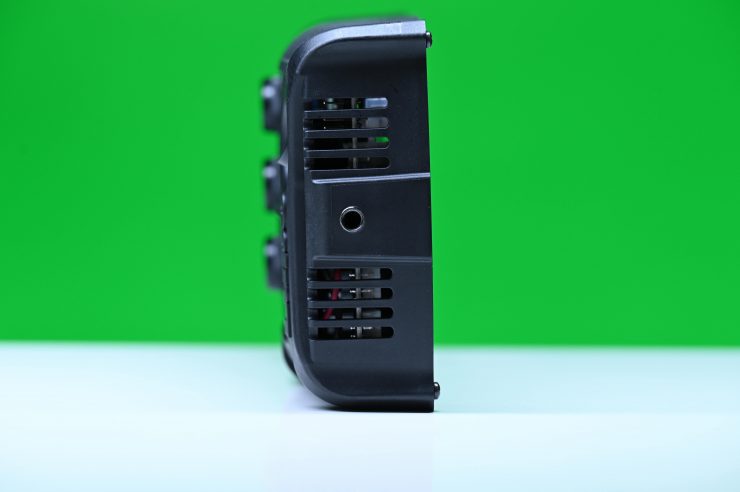
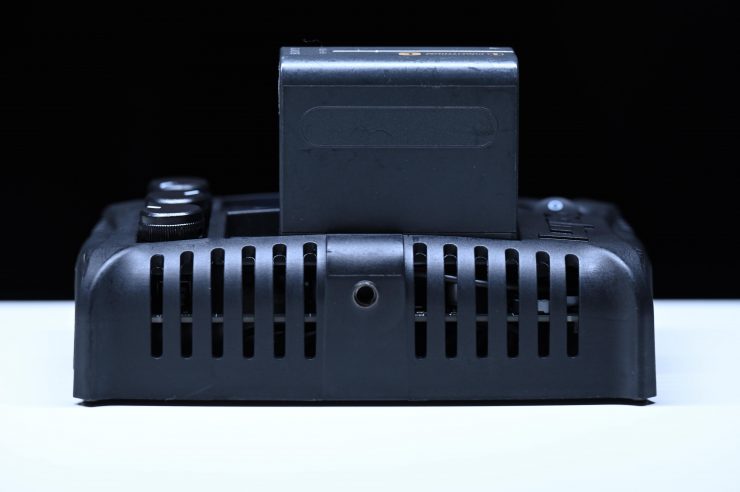
Unlike a lot of small, compact on-camera style LED lights, the Kickasspanel doesn’t feature an in-built battery. Instead, you can power it in a number of ways.
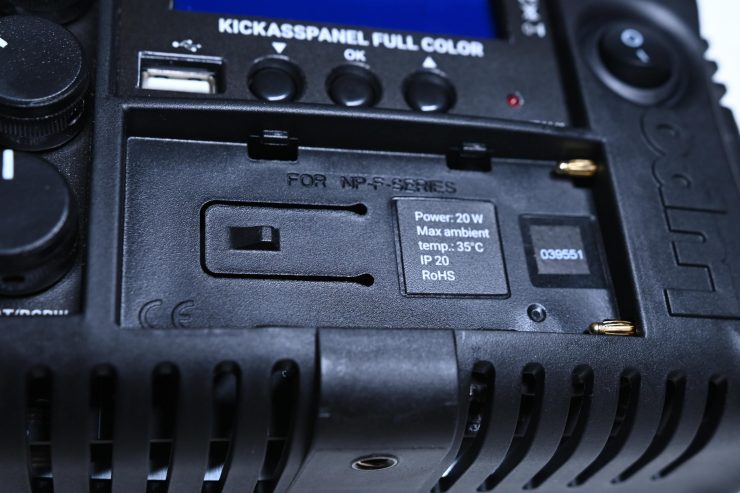
The first is to run it off a Sony NP style battery.

The second is via a USB-C input. Now, you do need to be aware that if you are powering the light via USB-C the maximum output gets reduced to 50%.
The third is to use a D-tap to DC power cable. The fourth is via mains power.
Now, you need to be aware that you don’t get a Sony NP style battery, a D-tap to DC input cable, or a mains power supply for the Kickasspanel. If you need any of these items, you need to factor this into the overall cost of the light.
As a comparison, below are the run times you can get from competing lights that feature an in-built battery.
| RUN TIME | |
| LuxliFiddle Pocket | 180min |
| PFY Matrix Pocket-Sized Portable Bi-Color RGB Light | 240min* |
| Pilotfly AtomCUBE Rx1 RGBCW Pocket LED | 180min |
| YY-C150 RGB LED video light | 180min* |
| BOLING Pocket LED RGB Video Light | 140min* |
| Aputure MC RGBWW LED Light | 120min |
| Falcon Eyes PockeLite F7 RGBW On-Camera Light | 110min* |
*Claimed run times (not tested)
Built-in batteries certainly have their pros and cons. Yes, it is nice to grab a light and not have to worry about finding a battery and putting it onto the back of a light, but the flip side is, once that internal battery dies you can’t use the light anymore.
While I do like the power options that Lupo has made available, by the time you put a Sony NP battery on the Kickasspanel you are going to increase its weight.
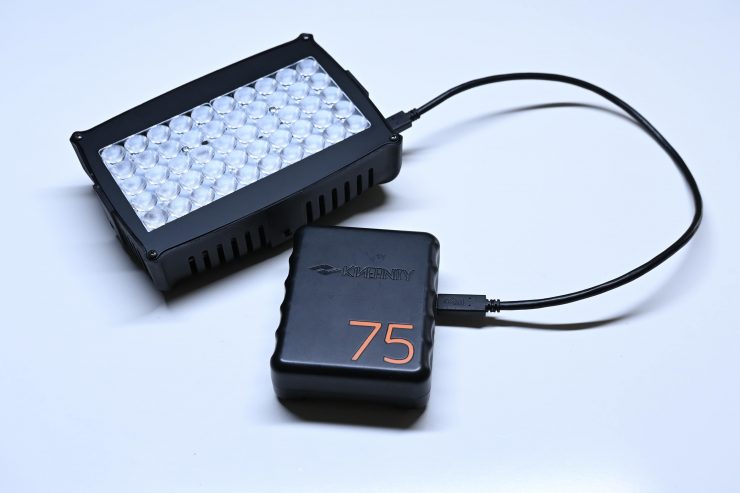
Now. I tried powering the light off a camera battery that has a USB-C output, but the Kickasspanel wouldn’t power up. I could only get the light to work through USB-C when I plugged it into a power bank.
I am not sure why this is? The manual states that the USB source only has to be a minimum of 2A.
What the?
What I found very alarming about the Lupo Kickasspanel is in the included instruction manual it says that the device is for indoor use only.
It goes on to say that the maximum, ambient temperature it will work in is 35c.
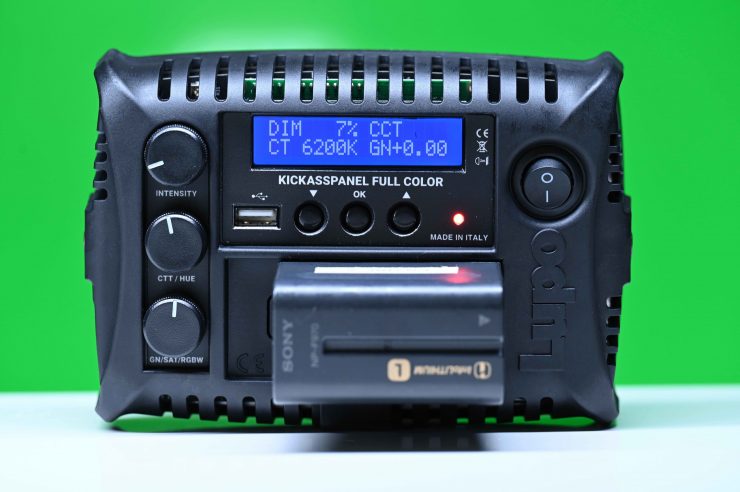
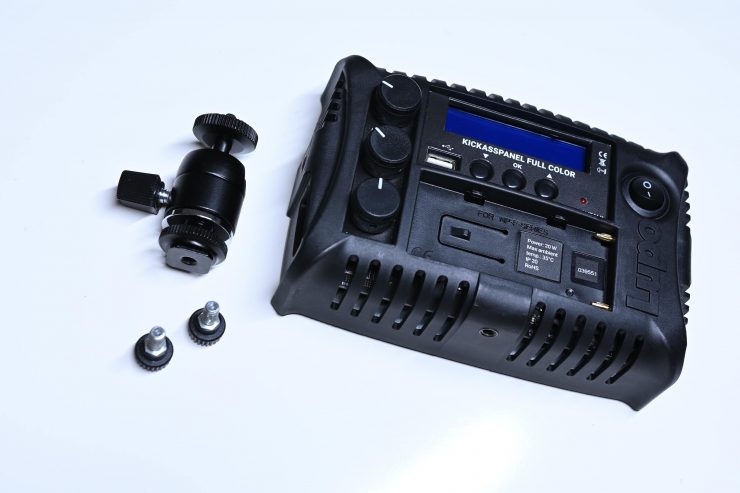
Controls & Menu System
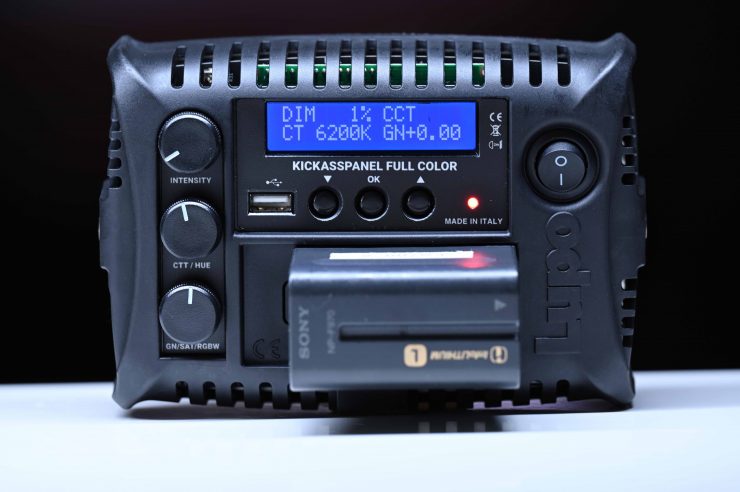
Lupo has kept the exact same operating system you will find on any of its fixtures. While this does give anyone who has used a Lupo fixture previously a sense of familiarity, it isn’t the easiest system to get the hang of for first time users.
I really wish that Lupo would update their operating system. It is starting to feel a little old school, especially since most competing lights have nice graphic interfaces and clearly laid out information. While making basic adjustments is fairly easy, making changes in the menu requires the use of three different buttons.

The rear LCD screen is easy enough to see and while it gives you clear and concise information about the light it could be better.
As I have already mentioned, the Kickasspanel uses a combination of dials and buttons. If you are familiar with other Lupo lights the menu system and operation are the same as all of their other fixtures.
Operating Modes
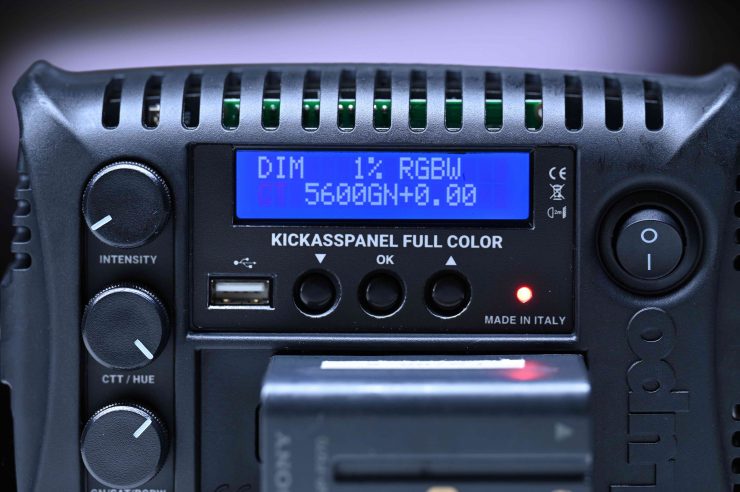
CCT Mode
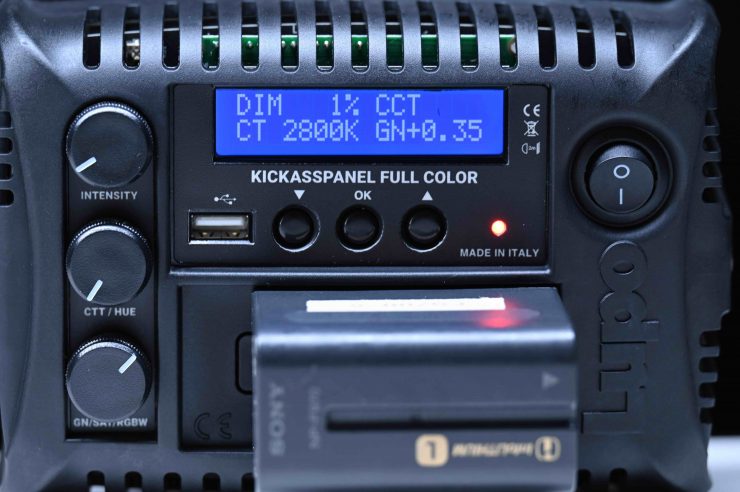
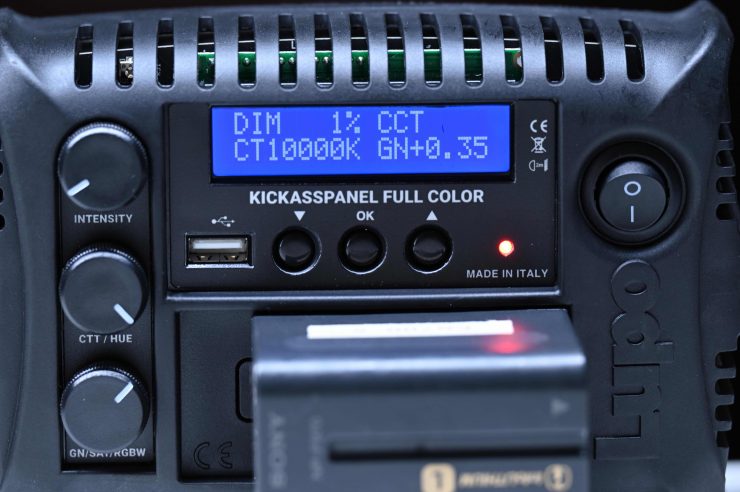
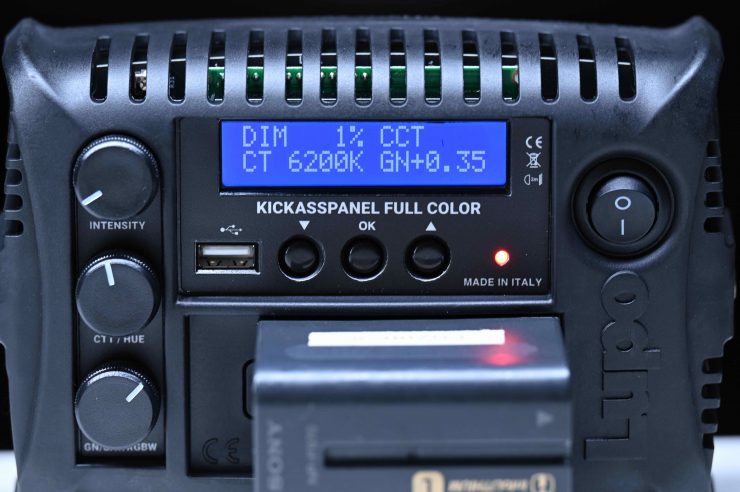
The traditional correlated color temperature (CCT) mode allows you to adjust your color temperature from 2800 to 10,000K in 50K increments. This lets you emulate any lighting condition, from the cool hues of bright sunlight to the warmth of a tungsten bulb. Dimming can be done in increments of 1%. Unlike some lights, the Kickasspanel actually stays on all the way down to 1%.
CCT Mode is the one most users will find themselves using the most often.
In this mode, you can also make adjustments to Green or magenta.
HSI Mode
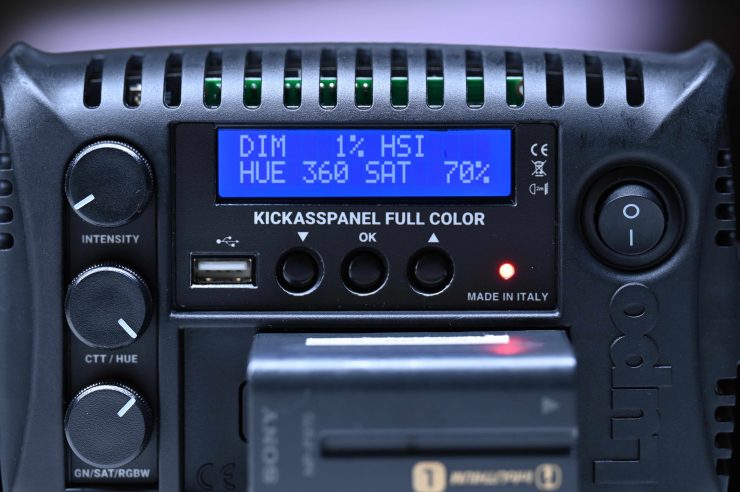
In HSI mode you can adjust the hue of the color (HUE), the color saturation (SAT), and the intensity of the light.
RGBW Mode
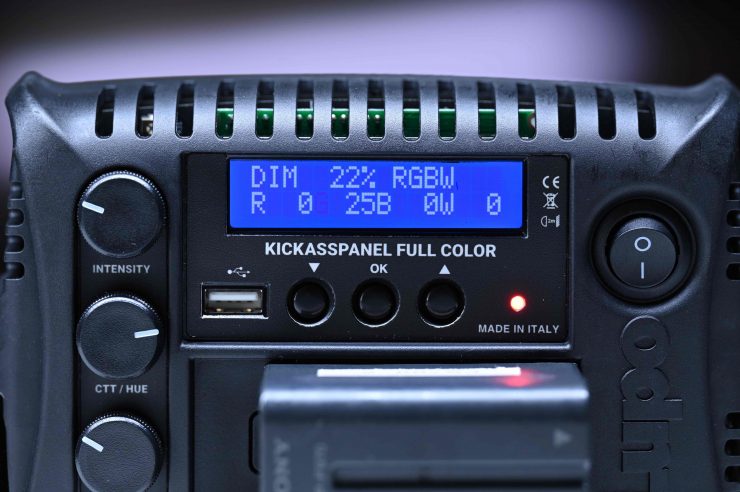
The RGBW Mode, allows you to individually set the values for R,G,B, and W. In this mode you can also adjust the intensity of the light
Special Effect Mode
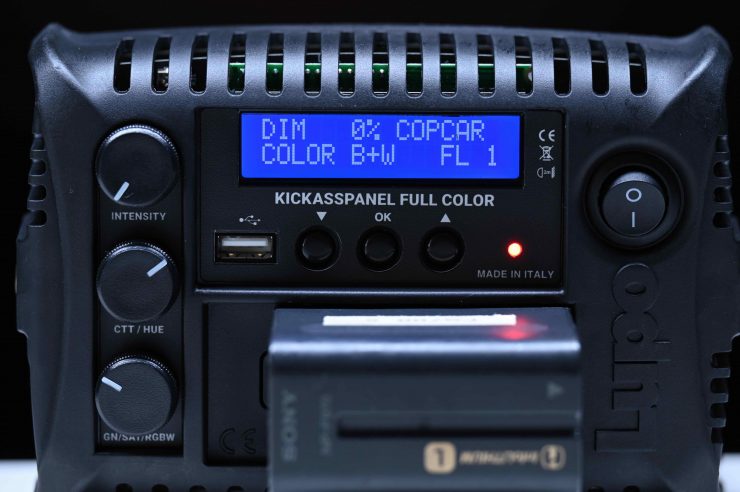
The Kickasspanel also features a range of special effects. Each effect is adjustable, but the range of adjustments you can make is a little limiting. These special effects are nice to have, but how often or if you even use them at all will depend on the type of work you do.
Below are the included effects:
- Strobe
- Party
- Copcar
- Disco
- Television
- Paparazzi
- Lightning
- Explosion
- Fireworks
- Fire
Presets
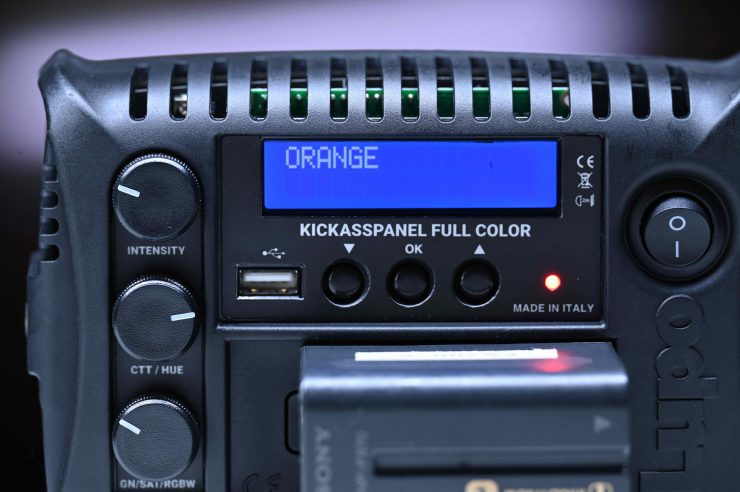
The Kickasspanel features 53 presets, 48 of these are already preset in the factory. The remaining 5 spots are user-assignable.
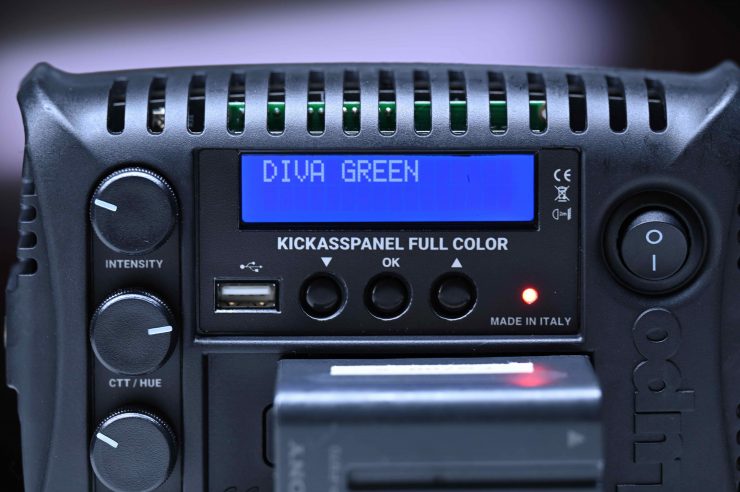
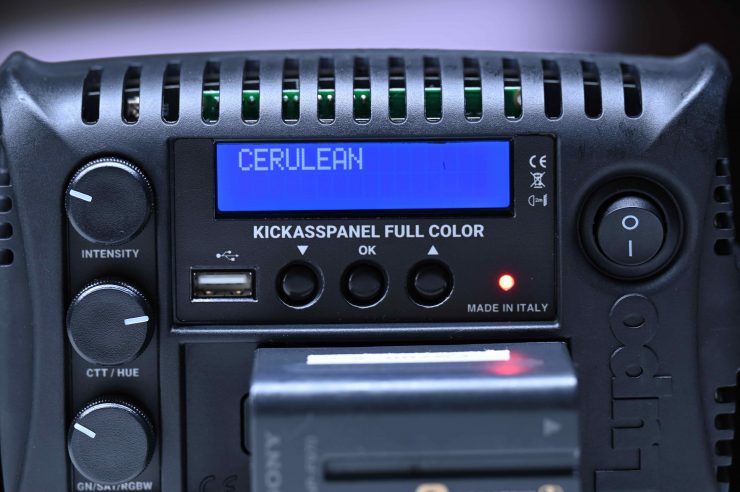
Now, a lot of these presets are actually gels. The problem is you need to scroll through them all to find which one you want.
I did find that saving presets was a little difficult as you needed to remember a combination of buttons.
Control green & magenta color shifts
TheKickasspanel lets you adjust +/-green values. This is an incredibly useful feature that lets you get rid of color casts and makes it easier to match other lights that you may be using. If you are using lights from different manufacturers they are all going to behave differently. By being able to offset green or magenta you can get the Kickasspanel to closely match another source. For instance, if you happen to be shooting in an office building with overhead fluorescent lights, they may well have a color cast, if you can’t turn them off, you may want to replicate that same look with the Kickasspanel. By playing with the +/-green values you can.
It is nice to see that Luupo has set up the +/-green values using the normal CC values you find in a lot of cameras and some other lights.
No App
The Kickasspanel can’t be controlled via any type of app. Again, this is something that a lot of the competition offers. For me personally, the ability to be able to control all of the aspects of the light from a smartphone or a tablet is a big deal. It lets me make adjustments to the light while I’m still standing behind the camera so I don’t need to go over to the light, adjust it, and then walk back to the camera to see how it looks.
Without an app or a nice graphic interface, controlling RGB modes is a lot more difficult than when using some other lights that feature a virtual color palette in the form of a simple, clear interface.
Lupo’s philosophy has always been to make solid, reliable lighting fixtures. This philosophy follows on to the Kickasspanel. It has been designed to just get on with the job without any of the bells and whistles. If you like all of the bells and whistles like app control and fancy graphic interfaces then this isn’t the light for you.
Beam Angle

The Lupo Kickasspanel has a beam angle of 40°. This beam angle is fairly tight, but the light still manages to light up a reasonable area.
| Beam Angle | |
| Lupo Kickasspanel | 40° |
| LuxliFiddle Pocket | 72° |
| PFY Matrix Pocket-Sized Portable Bi-Color RGB Light | Not Listed |
| Pilotfly AtomCUBE Rx1 RGBCW Pocket LED | Not Listed |
| YY-C150 RGB LED video light | 120° |
| BOLING Pocket LED RGB Video Light | Not Listed |
| Aputure MC RGBWW LED Light | Not Listed |
| Falcon Eyes PockeLite F7 RGBW On-Camera Light | 61° |
Above you can see the beam angle of other on-camera style RGBW lights
Diffusion Panel
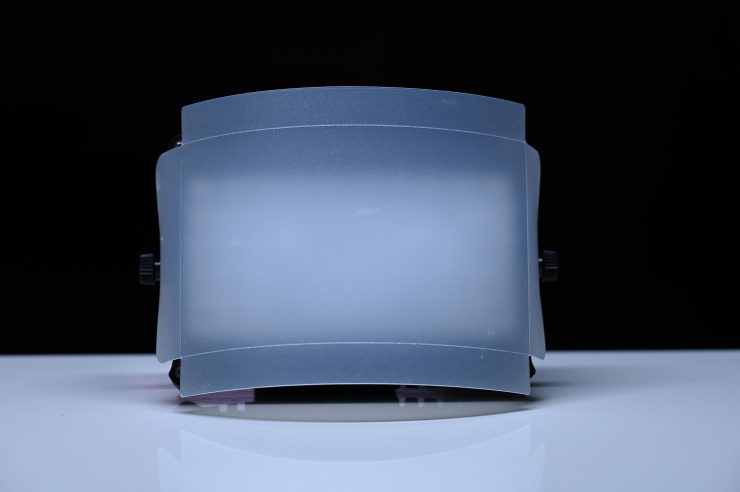
The Kickasspanel comes with an included diffusion panel that attaches via two screws to the left and right side 1/4 20″ threads.
There is nothing overly special about the diffusion panel, but it gets the job done and helps to soften up the light when needed.
Photometrics
So now let’s get to the photometric results. I always test lights in this way so that I get a reference to how they compare to other fixtures. Results only tell part of the story and should never be used alone to judge a light. I have found from extensive testing over the years that certain lights that have good photometric results don’t always look good, and lights that have worse photometric scores can sometimes look better than their results indicate.
Different lights can also look different depending on what camera you happen to be using.
Output & Color Temperature Accuracy
I tested the Lupo Kickasspanel at a variety of Kelvin color temperatures with a Sekonic C-800 Spectrometer to find out how much output the light had and how accurate the Kelvin color temperature reproduction was.
Look, it is always nice to have lights that have additional modes and features, but let’s face it, we all want a fixture that can create nice white light.
All readings are taken at a distance of 1m (3.28ft) in a controlled environment.
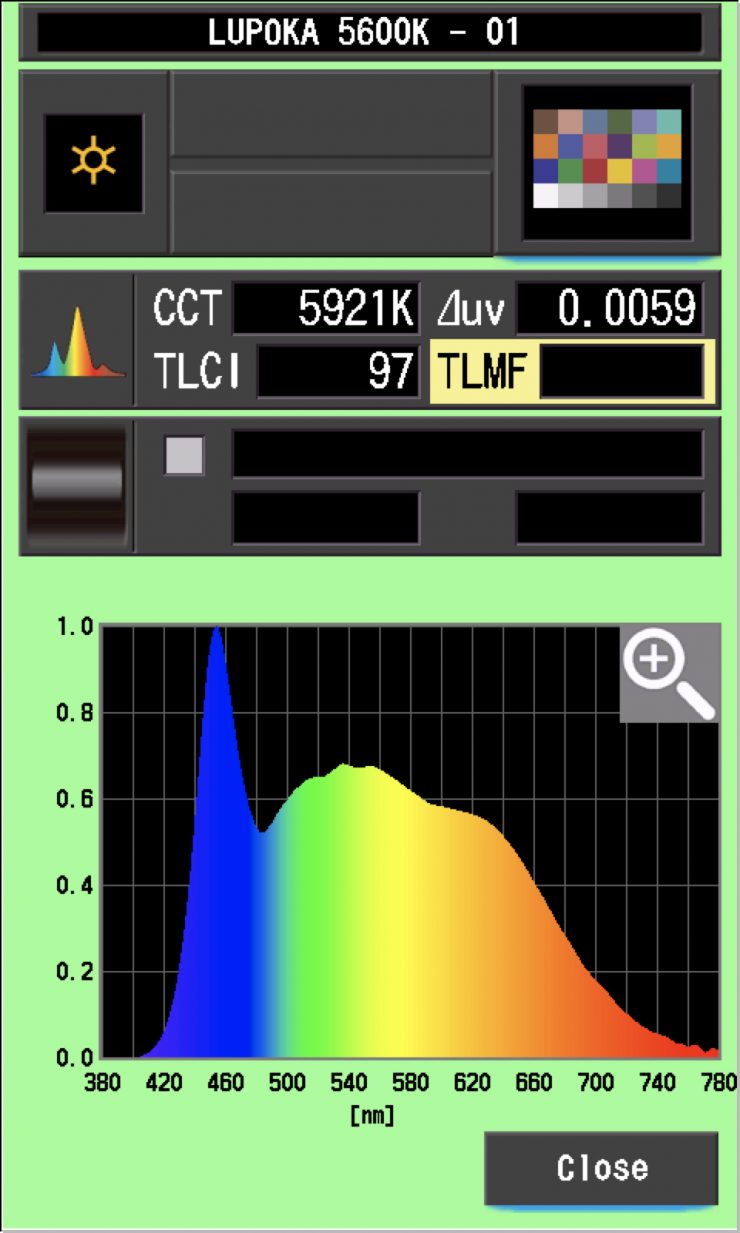
5600K
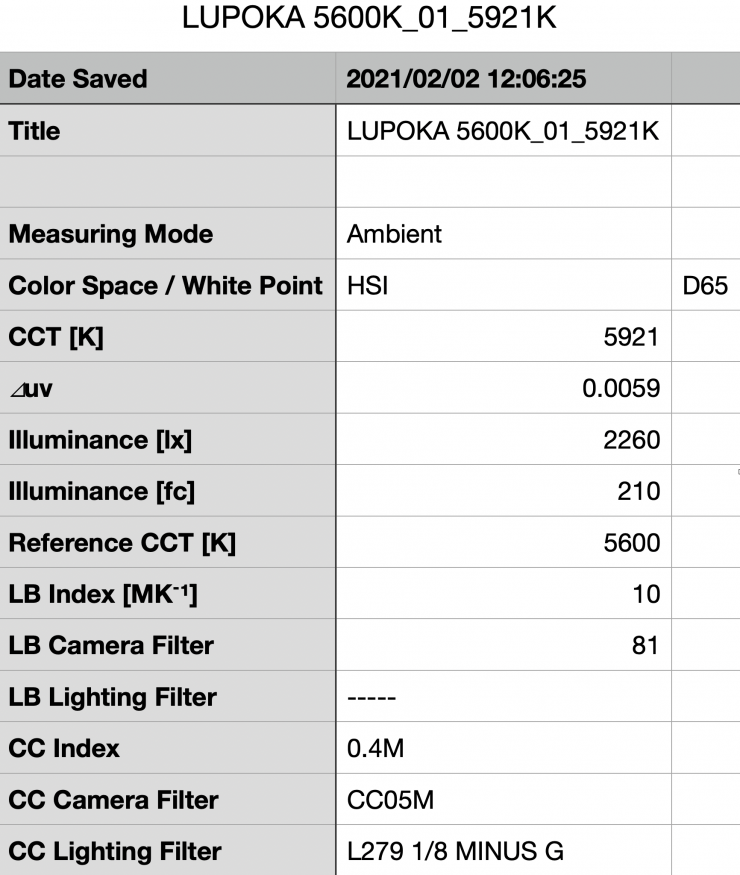
Above you can see that the Kickasspanel recorded an output of 2260 lx (210 fc) when set at 5600K. This was actually slightly higher than the 2100lx quoted by Lupo. This is a lot of output from a light of this size, even from something with a 40° beam angle.
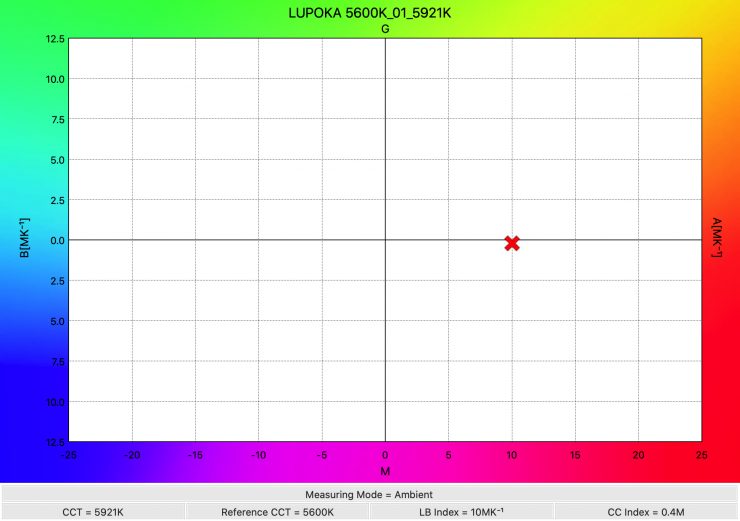
The light recorded a Kelvin color temperature reading of 5921K which was more than 300K off being correct.
Diffusion
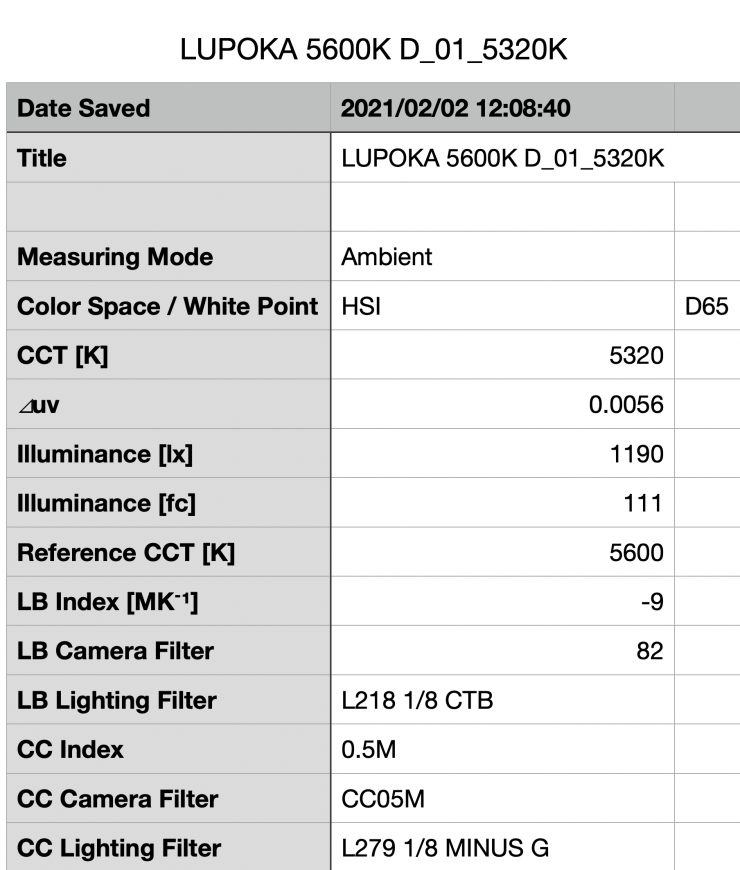
Above you can see how much output the light had when using the included diffusion panel. The Kickasspanel recorded an output of 1190 lx (111 fc) when set at 5600K with the diffusion panel. This was 47.3% less than when the light is used without the diffusion panel.
So, how does the output at 5600K compare to the Luxli Fiddle and Pilotfly AtomCUBE Rx1 RGBCW Pocket LED Video Light that I previously reviewed? Well, let’s see.
| Output at 5600K | |
| Lupo Kickasspanel | 2260 lx |
| Luxli Fiddle | 522 lx |
| Pilotfly AtomCUBE Rx1 RGBCW Pocket LED | 382 lx |
The Lupo Kickassapanel certainly packs a punch. The output is more than 4x that of the Luxli Fiddle.
As far as an accurate rendition of creating a 5600K source here is how it compares to the Luxli Fiddle and the Pilotfly AtomCUBE Rx1 RGBCW Pocket LED:
| Kelvin Color Temperature (when set at 5600K) | |
| Lupo Kickasspanel | 5921K |
| Luxli Fiddle | 5622K |
| Pilotfly AtomCUBE Rx1 RGBCW Pocket LED | 5330K |
As you can see, the Luxli Fiddle is by far the most color-accurate fixture out of the three at replicating a 5600K source.
3200K

Above you can see the light’s output when it was set at 3200K. It produced 1840 lx (171 fc), which was 18.6% less than the 2260lx it produced at 5600K.
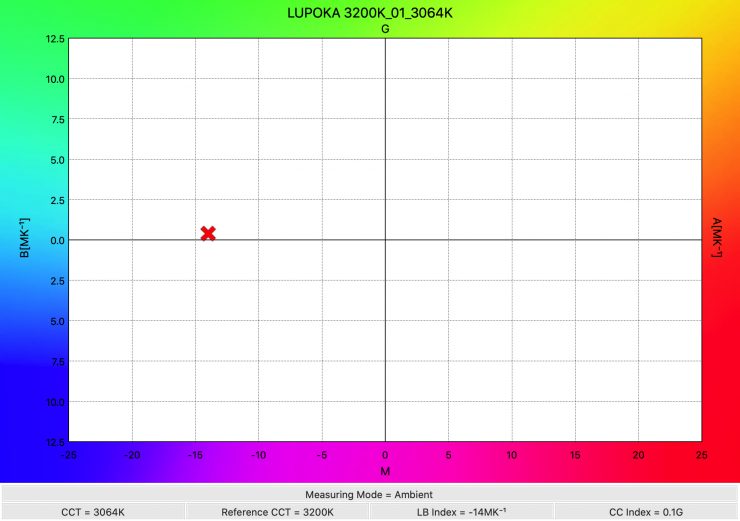
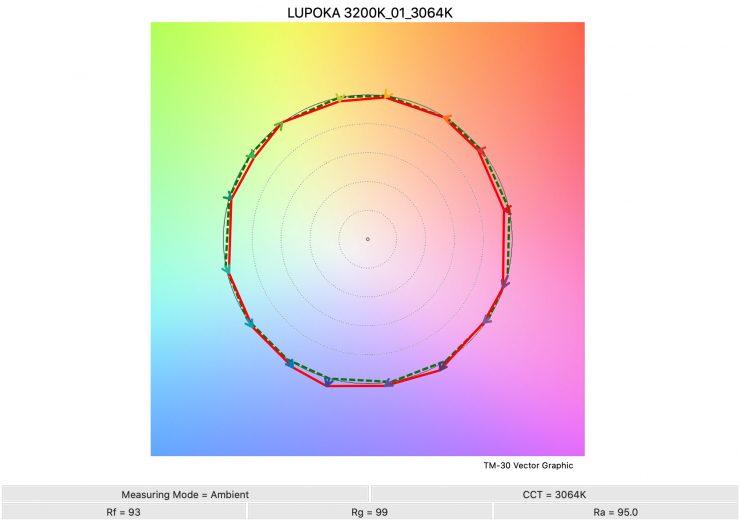
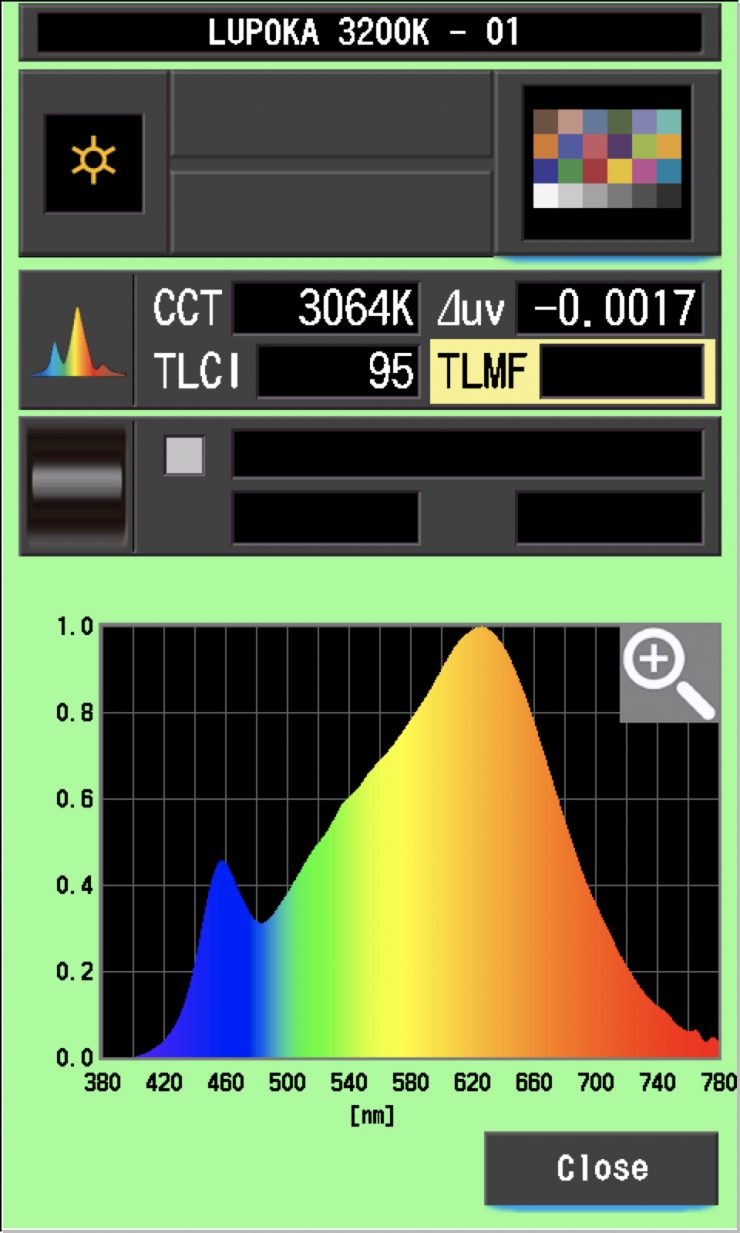
As far as Kelvin color temperature accuracy goes, it recorded a reading of 3064K.
Diffusion
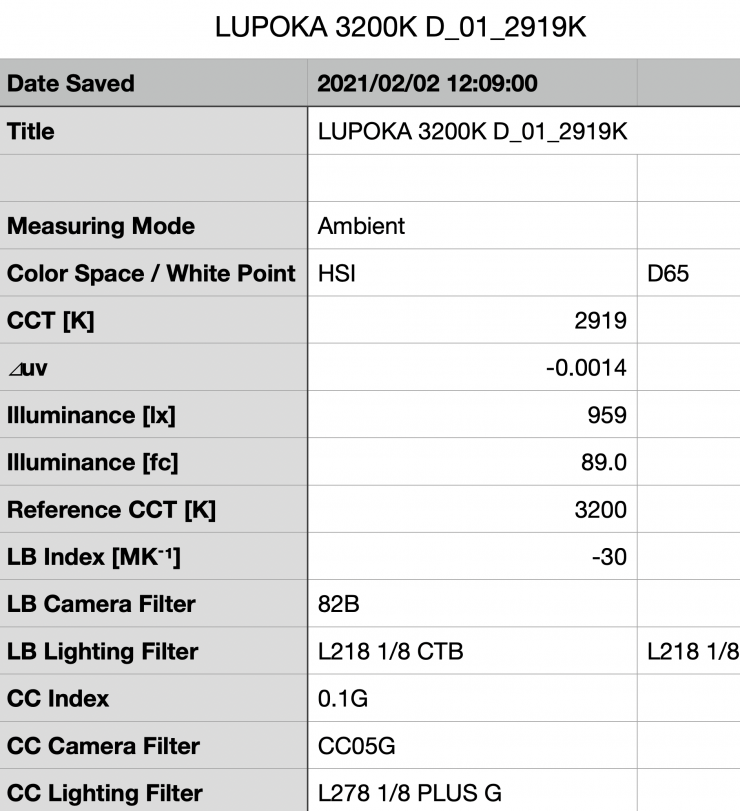
Above you can see how much output the light had when using the included diffusion panel. The Kickasspanel recorded an output of 959 lx (89 fc) when set at 3200K with the diffusion panel. This was 47.8% less than when the light is used without the diffusion panel.
So, how does this compare to the Luxki Fiddle and the Pilotfly AtomCUBE Rx1 RGBCW Pocket LED? Below you can see:
| Output at 3200K | |
| Lupo Kickasspanel | 1840 lx |
| Luxli Fiddle | 500 lx |
| Pilotfly AtomCUBE Rx1 RGBCW Pocket LED | 371 lx |
As far as an accurate rendition of creating a 3200K source here is how it compares against the Luxli Fiddle and the Pilotfly AtomCUBE Rx1 RGBCW Pocket LED:
| Kelvin Color Temperature (when set at 3200K) | |
| Lupo Kickasspanel | 3064K |
| Luxli Fiddle | 3232K |
| Pilotfly AtomCUBE Rx1 RGBCW Pocket LED | 3317K |
Just like at 5600K, the Luxli had a better Kelvin color temperature than the other two lights.
RGB Output
With most RGBW lights if you use them to generate or create colors the output gets massively reduced. So how does the Kickasspanel fare?
I decided to do a test to see how much output the light had when I created a super-saturated color.
In the HSI mode, choosing a saturated red (360 degrees), and set to 100% output, the light recorded an output of 652 lx. This is something you need to be clearly aware of when using RGB and HSI modes. The output is going to be significantly lower than when using the light in CCT mode.
In saying that, 652 lx is a good amount of output and that is around 5x higher than most other small-sized RGBW lights.
How does it perform at various Kelvin color temperatures?
Summary of results (medium diffusion)
| OUTPUT | KELVIN COLOR TEMPERATURE READING | |
| 2800K | 1950 lx | 2676K |
| 3200K | 1840 lx | 3064K |
| 4500K | 1850 lx | 4388K |
| 5600K | 2260 lx | 5921K |
| 6500K | 2060 lx | 6322K |
| 8000K | 2040 lx | 7314K |
| 10000K | 2020 lx | 9244K |
These results show me that the light’s output is very consistent at almost all Kelvin color temperatures. The light’s output only varies by 18.6% across the whole Kelvin spectrum. At 5600K to 10000K the light’s output only varies by 40 lx.
The light’s Kelvin color temperature consistency is not great and this is something you need to be mindful of when working with the fixture.
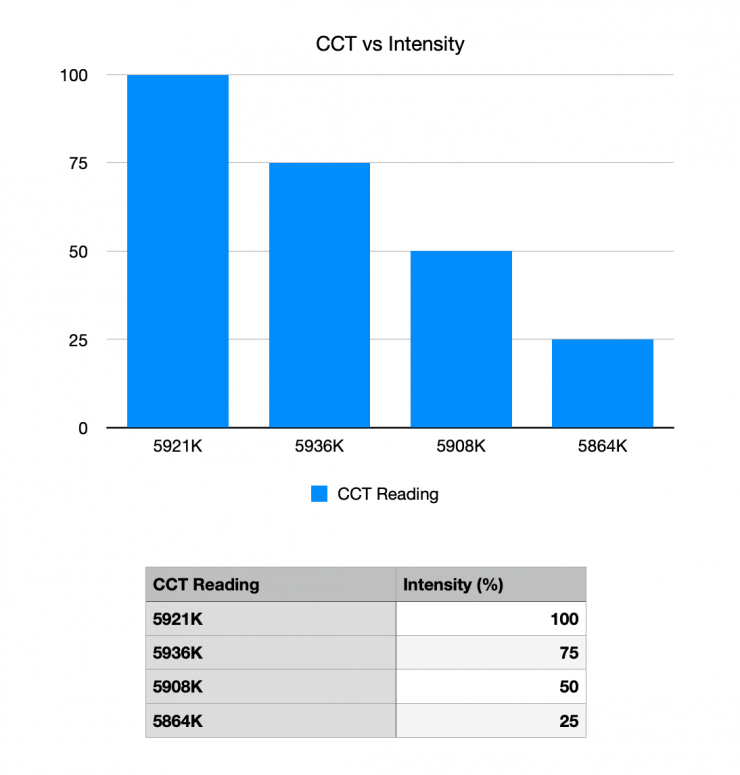
Is the output Linear?
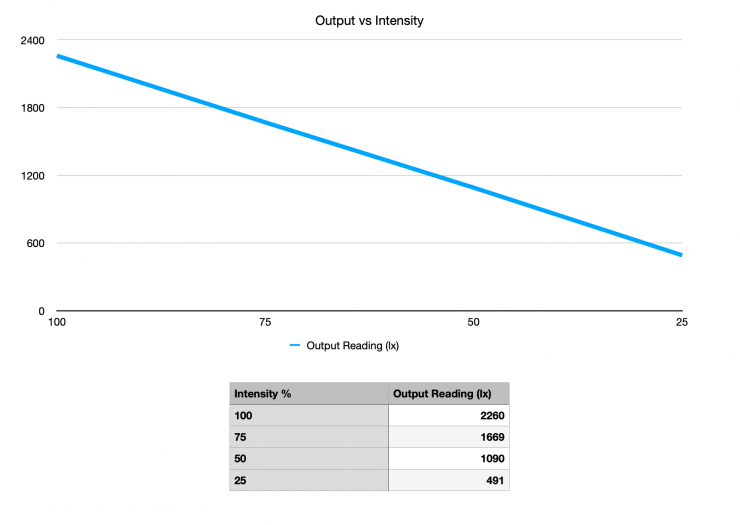
Above you can see how much output the light had at 5600K when the output was set at 100%, 75%, 50%, and 25%. As you can see, the output is very linear once you start dimming the fixture down.
Does the light lose Kelvin Color Accuracy once you start dimming it down?
Some LED lights do not maintain accurate Kelvin color temperature accuracy once you start dimming them down. So how does the Kickasspanel fare when set at 5600K?
Above you can see that the light Kelvin color temperature only varies by 72K which is extremely impressive. This tells me that the light maintains Kelvin color accuracy once you start dimming it down.
Output per watt
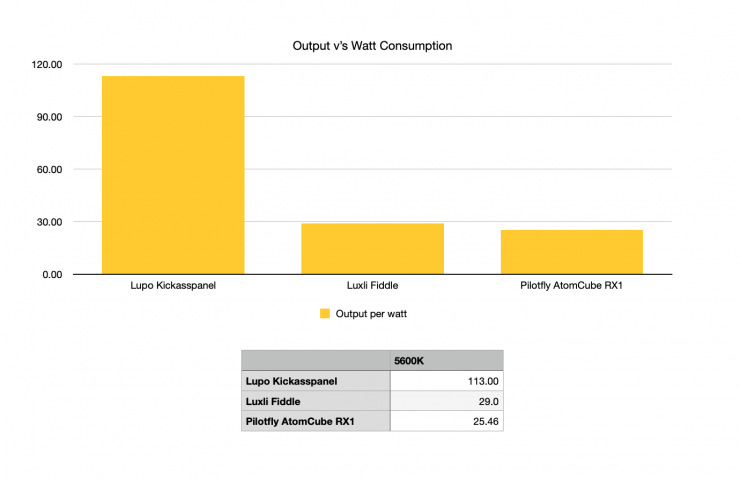
Above you can see a comparison table showing the amount of output compared to the power draw of all of the lights. Now, they all don’t have identical beam angles, nor power draws so please keep that in mind.
Despite all of this, the Kickasspanel puts out a whopping 113 lx for every Watt it consumes.
CC Index & ⊿uv
The CC Index displays the CC correction value and whether any magenta or green need to be added or subtracted. 1 CC corresponds to 035 Kodak CC values or 1/8 Rosco filter values. Any reading less than +1.00 or -1.00 and you’re probably not going to need to make any kind of adjustment. The ⊿uv is the value to show how much this light is away from being an ideal light source (black body radiation = incandescent lamp). As with the CC Index you want this number to theoretically be zero. Kelvin is not a linear value, so we need to convert from Kelvin to MK-1 to compare the values of color temperature. To calculate from Kelvin to Mired is MK-1= 1*1000000/Kelvin. While this may sound confusing, it is the only way of measuring if the Kelvin shift is significant enough to warrant having to use a filter for correction. Below are the results for the Kickasspanel:
Kelvin Vs MK-1
| Kelvin | Difference in K | MK-1 | Difference in MK-1 | |
| SET VALUE | 2800K | 0 | 357.14 | 0 |
| ACTUAL READING | 2667K | 133 | 374.95 | -17.85 MK-1 |
| SET VALUE | 3200K | 0 | 312.50 | 0 |
| ACTUAL READING | 3064K | 136 | 326.37 | 13.87 MK-1 |
| SET VALUE | 4500K | 0 | 222.22 | 0 |
| ACTUAL READING | 4388K | 112 | 227.89 | 5.67 MK-1 |
| SET VALUE | 5600K | 0 | 178.57 | 0 |
| ACTUAL READING | 5921K | 321 | 168.89 | -9.68 MK-1 |
| SET VALUE | 6500K | 0 | 153.85 | 0 |
| ACTUAL READING | 6322K | 178 | 158.17 | 4.32 MK-1 |
| SET VALUE | 8000K | 0 | 125 | 0 |
| ACTUAL READING | 7314K | 686 | 136.72 | 12.72 MK-1 |
| SET VALUE | 10000K | 0 | 100 | 0 |
| ACTUAL READING | 9244K | 756 | 108.17 | 8.17 MK-1 |
These figures might look confusing, but what it tells me is that the light is not very Kelvin color accurate and you would need to use color correction gels or alter settings on the light when using it at 2800K, 3200K, and 8000K. Any MK-1 score that is above or below +/- 10 MK-1 would require the use of color correction gels. These MK-1 difference scores were not that great. In saying that, these are technical results that don’t mean that the light won’t actually look good.
CC INDEX & ⊿uv
| CC INDEX | ⊿uv | |
| 2800K | 0.5G | -0.0038 |
| 3200K | 0.1G | -0.00017 |
| 4500K | 0 | -0.0007 |
| 5600K | 0.4M | -0.0059 |
| 6500K | 0.2M | -0.0053 |
| 8000K | 0.2M | -0.0065 |
| 10000K | 0 | 0.0084 |
Color Rendering
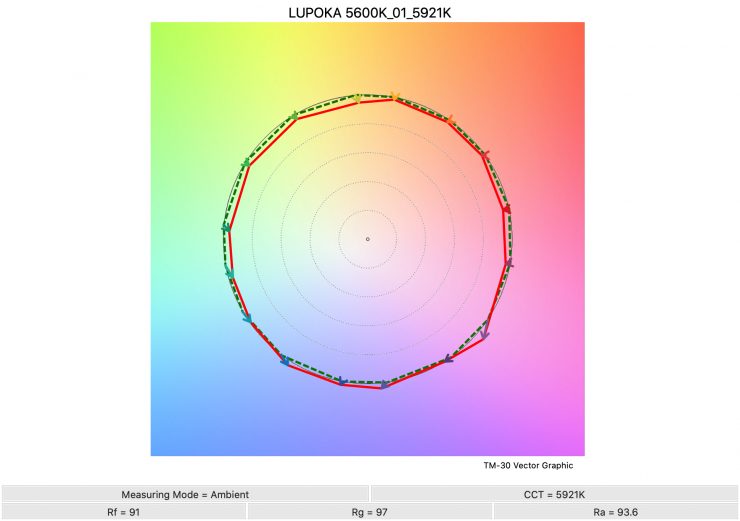
5600K
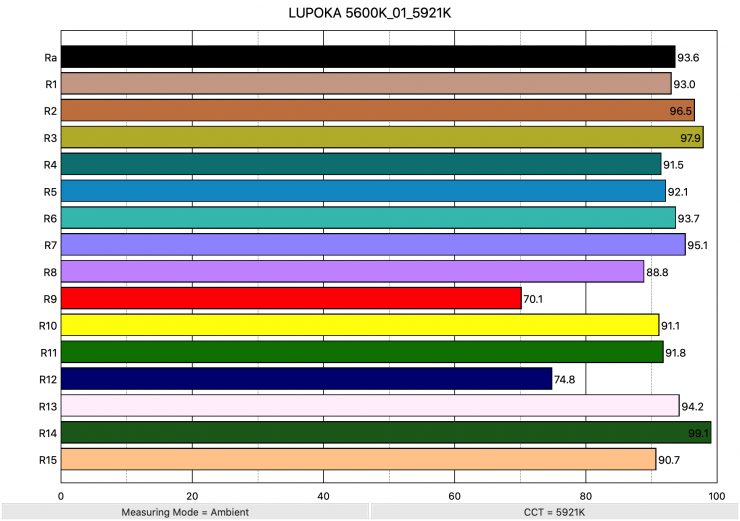
So now that we have seen how much output the Kickasspanel produces, how does it perform when it comes to replicating accurate colors. Above you can see that when the light was set at 5600K it recorded an average CRI (R1-R8) of 93.6 and an extended CRI (R1-R15) of 90.69. For replicating accurate skin tones it recorded for R9 70.1 (red), 94.2 for R13 (closest to caucasian skin tones), and 90.7 for R15 (closest to Asian skin tones). These results were ok, but not great.
The light, when set at 5600K, recorded a TLCI score of 97.
How does this compare to the Luxli Fiddle and Pilotfly AtomCUBE Rx1 RGBCW Pocket LED that previously reviewed when used at 5600K? Below you can see:
| Average CRI | Extended CRI | |
| Lupo Kickasspanel | 93.6 | 90.69 |
| Luxli Fiddle | 97.3 | 95.38 |
| Pilotfly AtomCUBE Rx1 RGBCW Pocket LED | 94.5 | 92.3 |
3200K
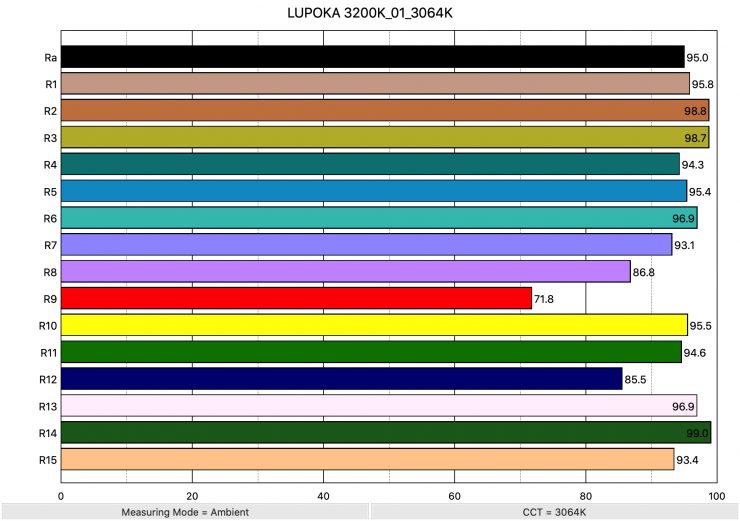
Above you can see the scores for when the light was used at 3200K. It recorded an average CRI (R1-R8) of 95.0 and an extended CRI (R1-R15) of 93.1. For replicating accurate skin tones it recorded 71.8 for R9 (red), 96.9 for R13 (closest to caucasian skin tones), and 93.4 for R15 (closest to Asian skin tones).
These results were better than when the light was set at 5600K.
The light, when set at 3200K, recorded a TLCI score of 95.
How does this compare to Luxli Fiddle and the Pilotfly AtomCUBE Rx1 RGBCW Pocket LED when used at 3200K? Below you can see:
| Average CRI | Extended CRI | |
| Lupo Kickasspanel | 95.0 | 93.1 |
| Luxli Fiddle | 97.5 | 96.32 |
| Pilotfly AtomCUBE Rx1 RGBCW Pocket LED | 94.7 | 93.2 |
Just like at 5600K, the Luxli Fiddle recorded higher scores than the Lupo and the Pilotfly.
SSI
SSI (Spectral Similarity Index) was developed by the Sci-Tech Council of the Academy. SSI gives me the ability to set any light as a standard, or use predefined standards (such as CIE D55), and then give other lights an SSI score based upon how well they will match standards such as CIE D55. This way I can measure spectral response and compare it directly against an ideal light source. This is actually a much better test than recording CRI scores.
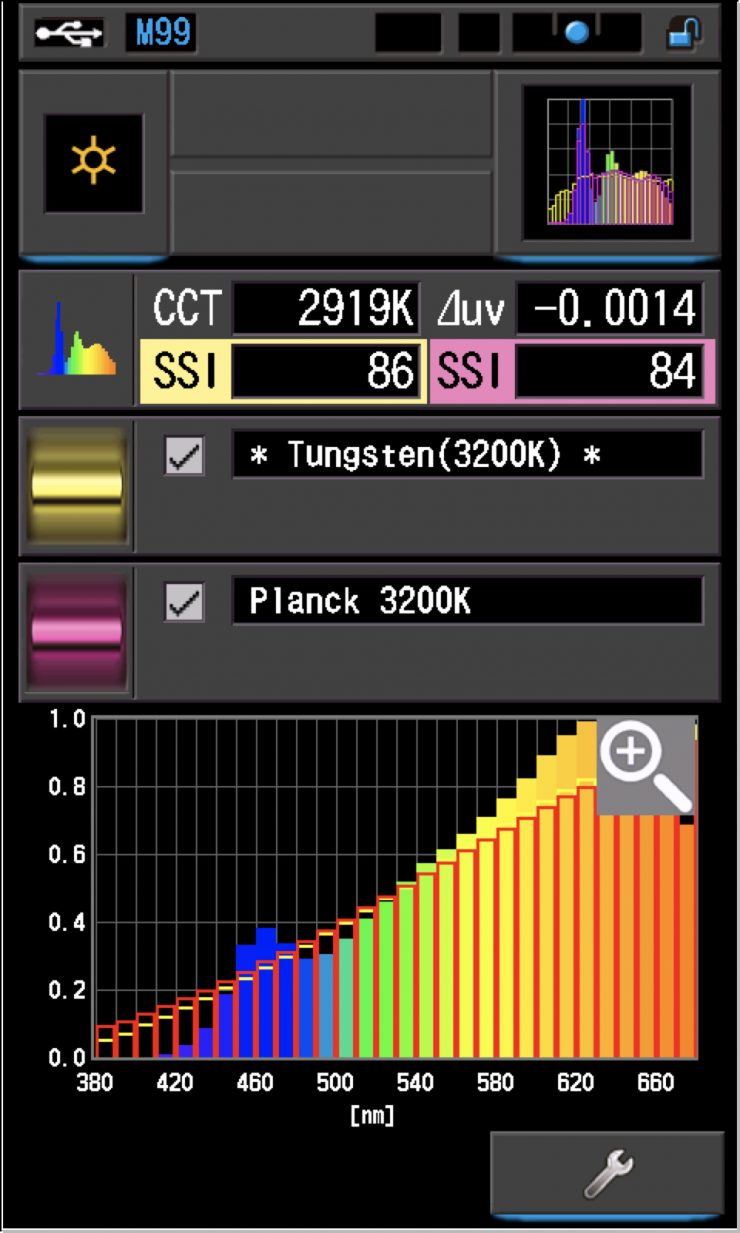
In this graph, the red bars indicate a perfect Planck 3200K source. The gold bars indicate a perfect 3200K Tungsten source. This lets us compare how close to a perfect 3200K lighting source the Lupo Kickasspanel is. Any SSI score in the low ’80s is very good for a 3200K LED light. The Lupo scored in the mid-’80s which were excellent scores. As you can see, LED lights have a hard time replicating colors below about 450nm.
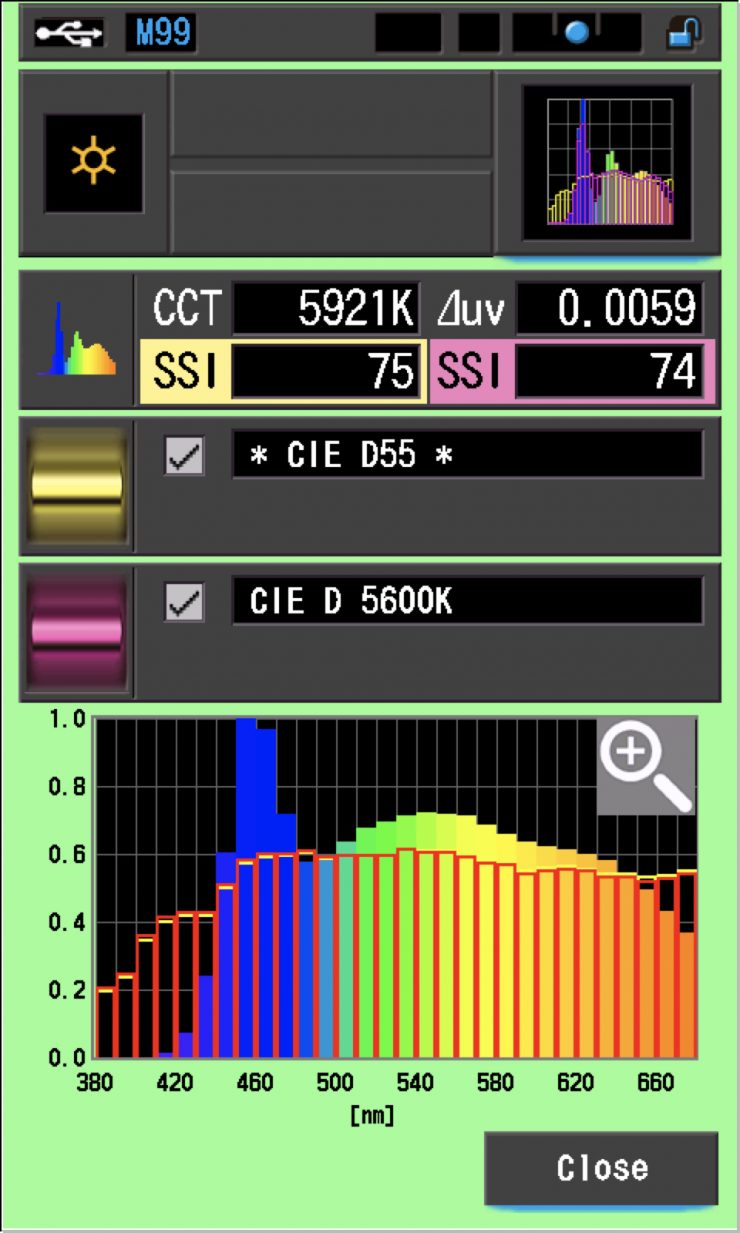
In the graph above the gold bars indicate a perfect CIE D55 source. The red bars indicate a perfect CIE D 5600K source. A score in the low 70’s is very good for a 5600K LED source.
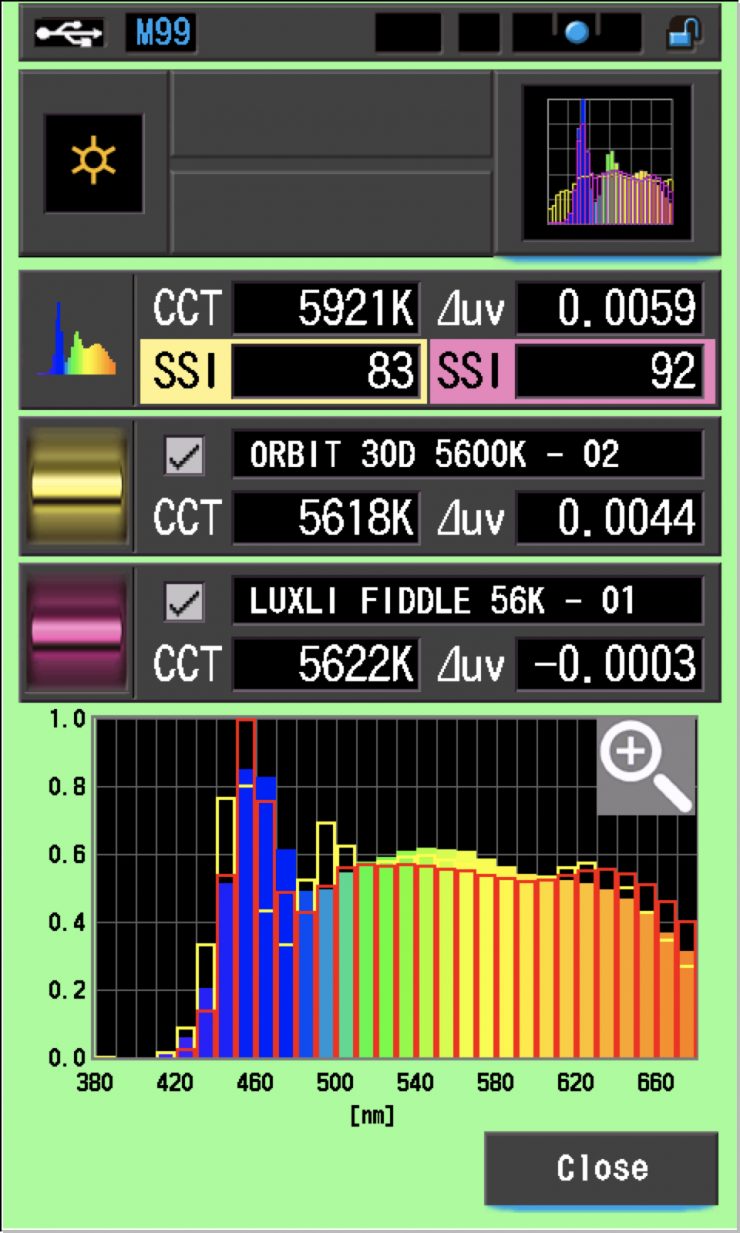
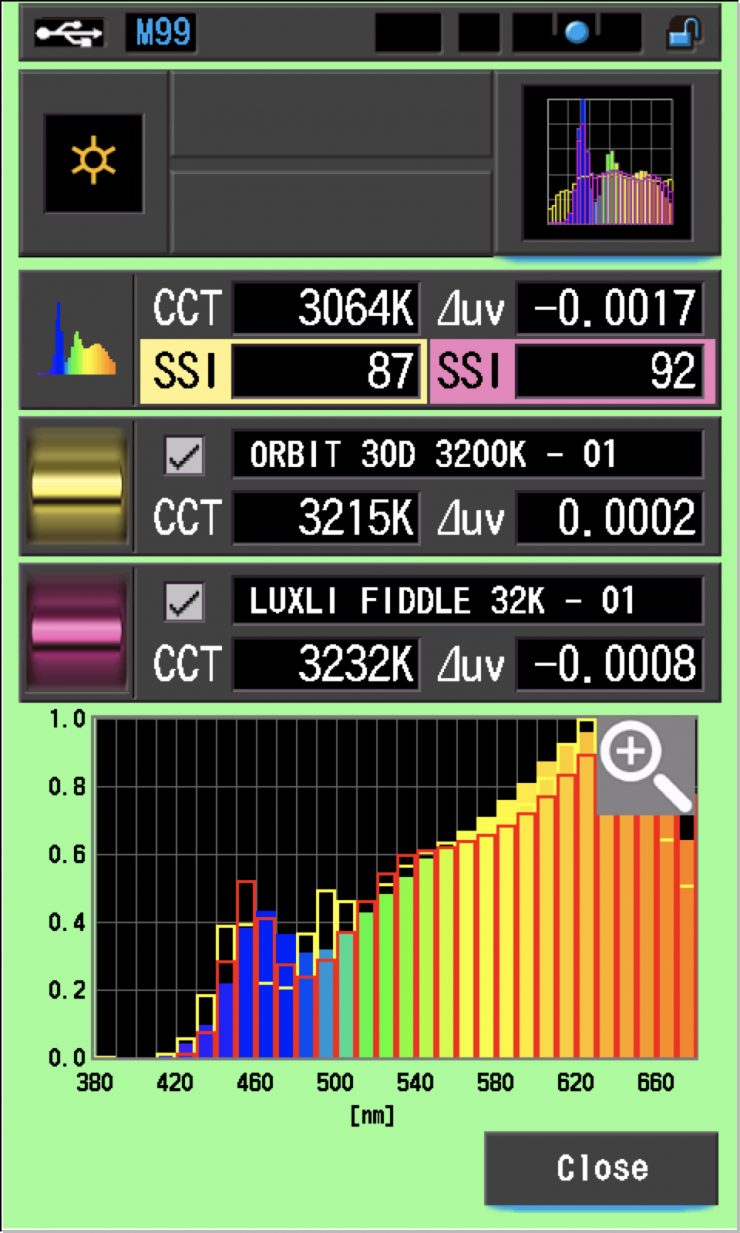
The main reason we want to record SSI scores is so we can see how well they match with other lights. As an example, let’s see how well it matches with an ARRI Orbiter and a Luxli Fiddle. Above you can see the results at 3200K and 5600K. As you can see, the lights didn’t match. Although a low 90’s or high 80’s score, means they wouldn’t be drastically off.
SSI tests are a great way of telling you what lights you own or use will work well together.
Spectral Distribution
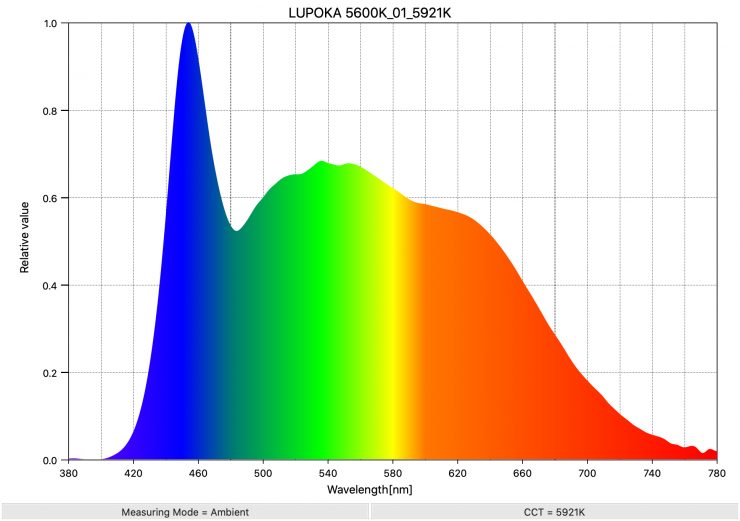
Above you can see the spectral distribution of the Kickasspanel when it is set at 5600K. The spectral distribution is very full and even.

Above you can see the spectral distribution of the Lupo when it is set at 3200K. The spectral distribution is quite full and nice and linear where it should linear.
Real-World Performance & Quality of Light
As I always say, photometric scores only tell you part of the story. Seeing what the light looks like and how it works in the real world is much more important than just looking at photometric data.

Lupo Kickasspanel 800 ISO 1/50th F9 
Pilotfly AtomCUBE Rx1 800 ISO 1/50th F4.5 
Luxli Fiddle ISO 800 1/50th F5
Above you can see what the light looks like at 100% power without diffusion compared to the Luxli Fiddle and Pilotfly AtomCUBE Rx1 RGBCW
Pocket LED. I set all three lights at the exact same distance from the subject.
The light’s output is extremely impressive, and this allows the fixture to be used in situations where other similar-sized lights wouldn’t have enough output.
The light can be made to look quite soft, but anytime you diffuse a small source you are going to lose quite a lot of output. Luckily with the Kickasspanel, it has enough output that you can diffuse it while maintaining enough intensity.

Indirect bounce 
Direct with diffusion panel 
With diffusion, light at a 90 degree angle
Above you can see a couple of frames where I am using the included diffusion, and also bouncing the light into some white material without using the diffusion panel. All these examples are just using the single Kickasspanel and no other lights.
Indirectly bouncing the light isn’t the best of ideas unless you are in a very controlled environment where you only need a small amount of light. In saying that, in the right environment the light’s output is enough that it will still work when being used indirectly. Because of the tight beam angle, you don’t get much spill which certainly helps for certain interviews.

If you don’t diffuse the light you will get hatched shadows if the object you are illuminating is too close to something else. In most instances, you probably won’t be doing this with a light, but it is important that you are aware of it.
Above you can see what the beam spread of the fixture looks like when used at a distance of 3m (9.84ft). The light’s beam spread is quite tight and this will make it more suitable for some applications rather than others.
I did find that the light does take a while to power up once you turn it on. It takes around 5-7 seconds for the light to appear once you turn it on. This could be a problem in run and gun situations where you need the right instantly. This is something you need to be aware of if you are thinking about purchasing this light.
If the Lupo Kickasspanel were a tool, it would be a sledgehammer. It has been designed to deliver a ton of output and it makes no apologies for doing that. Look, it may be lacking some of the bells and whistles of some of the other similar sized RGB lights that are available, but it certainly makes up for that with its output.
Having digital filters, and special effects may be nice, but most potential buyers of the Kickassapanel are just going to be buying it for its sheer output.
If you are after an on-camera light that is a little more refined and is more color accurate, then the Luxli Fiddle is probably a better option.
Firmware Updatable
Like a lot of today’s lights, the Kickasspanel is fully firmware upgradeable.
Who is the Kickasspanel aimed at?
There is no reason why you couldn’t use the Kickasspanel for a lot of different applications, but it is probably a fair assumption to say that it is being aimed as a very powerful on-camera light or a small-sized light that you could potentially use to replace larger panels in a pinch.
You could use a few of these lights as a very small interview kit. While they will never replace larger sources, if you have to pack light and move quickly the Kickasspanel lights are certainly up to the task.
The light is competitively priced given its feature set and performance, although it will cost you a little more than some other similar alternatives on the market.
Other Alternatives
As I have previously mentioned, the main competition for the Kickasspanel comes in the form of the following lights:
- Luxli Fiddle
- PFY Matrix Pocket-Sized Portable Bi-Color RGB Light
- Pilotfly AtomCUBE Rx1 RGBCW Pocket LED
- YY-C150 RGB LED video light
- BOLING Pocket LED RGB Video Light
- Aputure MC RGBWW LED Light
- Falcon Eyes PockeLite F7 RGBW On-Camera Light
All of these lights have their strengths and weaknesses. It is important to note that a lot of these competing lights are actually the same light that has just been rebranded under a different name.
Price & Availability
The Lupo Kickasspanel is priced at $298 USD. This cost makes it quite a bit higher than all of the competition. However, I personally think that the output of the Kickasspanel places it in an altogether different category.
Below you can see how the price compares to the competition:
| Price | |
| Lupo Kickasspanel | $298 USD |
| Luxli Fiddle | $199 USD |
| PFY Matrix Pocket-Sized Portable Bi-Color RGB Light | $149 USD |
| Pilotfly AtomCUBE Rx1 RGBCW Pocket LED | $169 USD |
| YY-C150 RGB LED video light | $69 USD |
| BOLING Pocket LED RGB Video Light | $119 USD |
| Aputure MC RGBWW LED Light | $90 USD |
| FalconEyes PocketLite F7 RGB LED | $99 USD |
In the Box
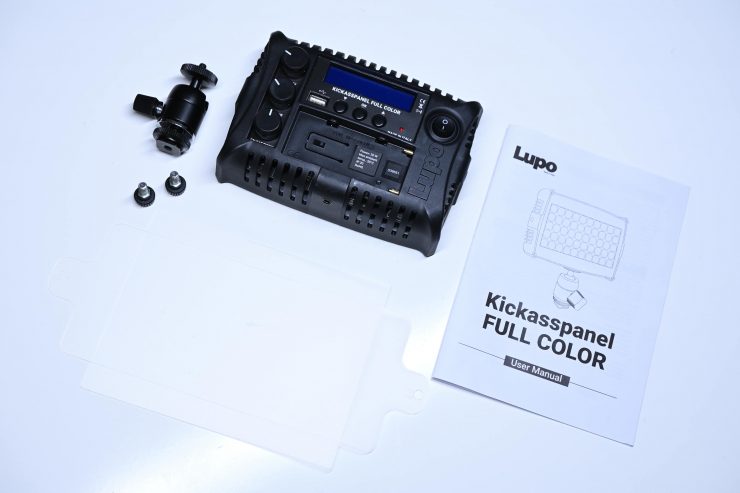
This is what you get with the Lupo Kickassapanel:
• Lupo Kickasspanel
• Ball head with integrated cold shoe and 1/4 20″
• USB Type-C to USB cable
• QuickStart guide
• Diffuser
Accessories
Lupo has a couple of accessories for the light. These include:
- AC Power Cord cable and AC Adapter
- NP-F Series Battery (7.4V)
- V-Mount Battery (14.8V)
- Lupo D-Tap Cable for Lupoled
No Kits
It would be nice to have seen Lupo make a three-light kit utilizing Kickasspanels. A couple of small softbox attachments and lightweight light stands in a compact bag would make for a nice run and gun solution.
Conclusion

The Lupo Kickasspanel is far from a one-trick pony, but its primary purpose is to create a ton of output from a small-sized source, and it certainly does that.
The color accuracy is better than the photometric data suggests, but I do have a feeling that Lupo has somewhat had to make a compromise between output and color accuracy. The build quality is good and the light is relatively easy to operate and use.
The output is fairly consistent no matter what Kelvin color temperature you run the light at. In a lot of ways, the Kickassapanel is a much better alternative to other smaller sized RGBW lights because it has a lot more output. If you are using one of these lights to illuminate a background or to place in a scene as a practical, it is more versatile than some of the smaller fixtures that have limited output.
The Lupo Kickasspanel is like a sledgehammer. It is brute and unforgiving. It doesn’t pretend to be something that it isn’t. If you are after a compact RGBW light that packs a punch, then look no further than the Lupo Kickasspanel.
Like what we do and want to support Newsshooter? Consider becoming a Patreon supporter and help us to continue being the best source of news and reviews for professional tools for the independent filmmaker.


