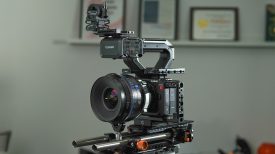
The new PortKeys Keygrip multifunctional camera grip allows some camera controls alongside being a grip. Having a grip on a camera like a RED or Z Cam is an excellent addition since these cameras are basically sensors in a box.
On the control side, if I can get to settings and features on the camera quicker, then I’m all in for the twofer!
This isn’t the first time I’ve played with the Keygrip. Portkeys sent me an early release model that wasn’t ready for primetime. I’m hoping the revised retail version will be improved. I’m not going to detail the issue, because it’s a good idea for a company to send their products out for testing and address the problems that come up. For that, I applaud you. Okay, here we go!
Having the ability to control camera functions and settings, plus record trigger all from one device, is very convenient. Similar to how a Canon Cinema EOS and Sony Cinema Cameras do with there included grip.
Camera Compatability & Functions

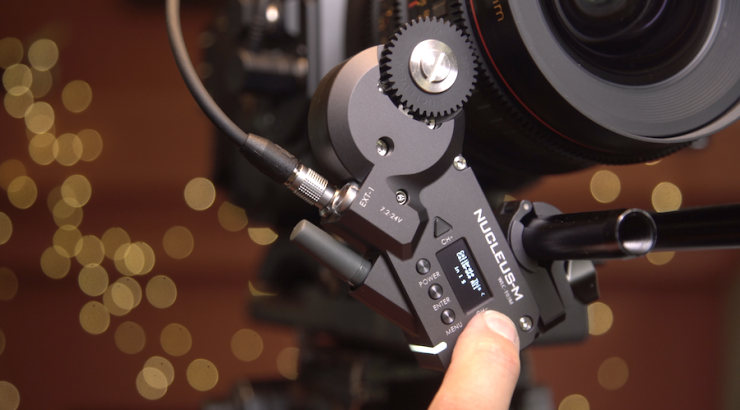
As you can see on the roadmap the Keygrip, is compatible with several popular cameras from the likes of Canon, Red, Sony, Panasonic, Z Cam, and Blackmagic Design. The grip is also designed to use with the Tilta Nucleus-N, and Nucleus-M follow focus systems.
Panasonic Cameras
- GH5, GH5s, S1, S1H, G9
Z Cam
- E2, E2-S6, E2-F6, E2-F8
Blackmagic Design
- Pocket Cinema Camera 4K, Pocket Cinema Camera 6K
Sony
- FS7, FS5, A9, A7 II, A7 III, A7 IV, A6000, A6300, A6400, A6500, RX100, RX02
Canon
- 1Dx Mark II, 5DS, 5DS R, EOS R, 5D MK IV, 5D MK III, 5D MK II, 6D, 80D
Red
- No specific model has been given
Tilta Follow Focus
- Nucleus-N, Nucleus-M
Cable Options
- LANC
- Sony Multicontrol
- Canon Mini USB
- Canon 5D Mark IV
- Panasonic
- Tilta Nucleus N
- Tilta Nucleus M
- Red
It’s never easy to make a product that will work with several different cameras at a price that is considered affordable. The Keygrip comes in at $399 US and includes the cable you select for the camera or accessory you want to use. The options are a standard LANC or a specific camera/accessory.
Dummy Battery Option
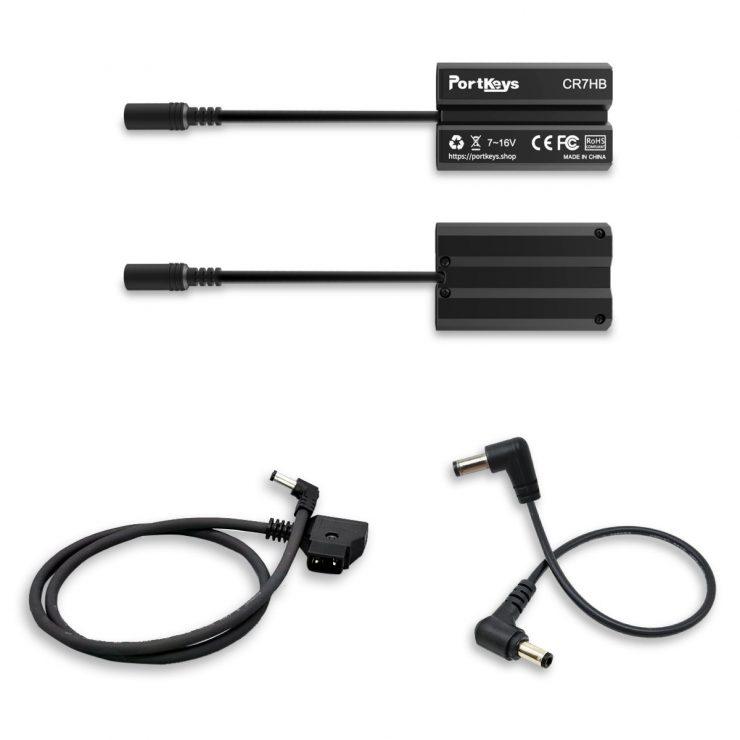
Portkeys offer a dummy battery with two cable connector options included. A DC-B mount Power Cable 40cm, and a DC-DC Elbow Power Cable 20cm.
What’s included
- Keygrip
- Rosette Mount
- Control Cable for the specific camera selected (1)
- USB Cable for Upgrade (1)
- 18650 Series Battery (2)
- USB Battery charger with 2-Slot
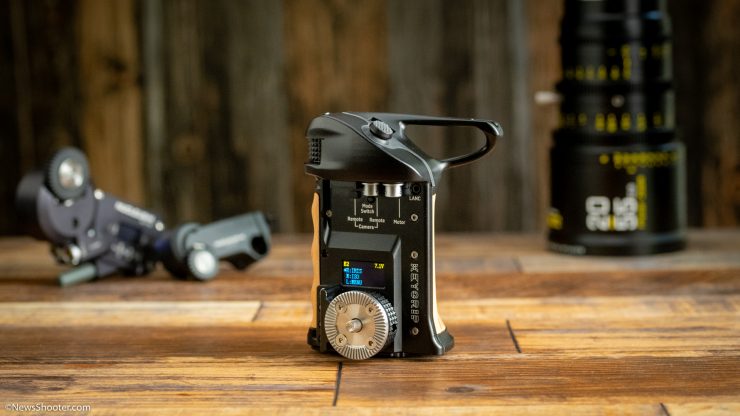
Functions and Controls
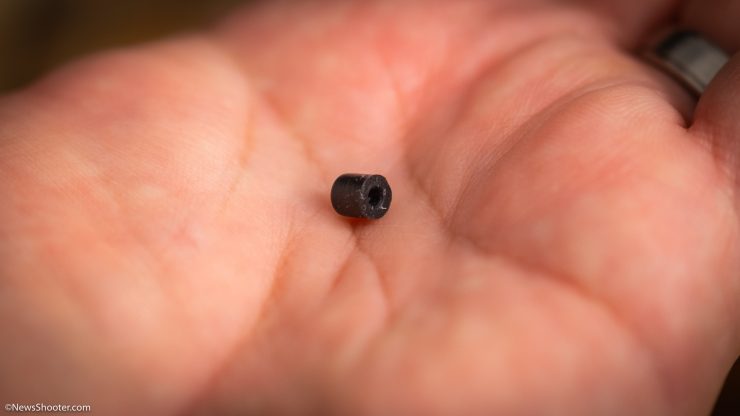
The keygrip has three customizable function settings. The small three-position switch on the front is used to select those presets. It ships with a tiny rubber cover that easily slips off. I’m surprised I haven’t lost it yet.
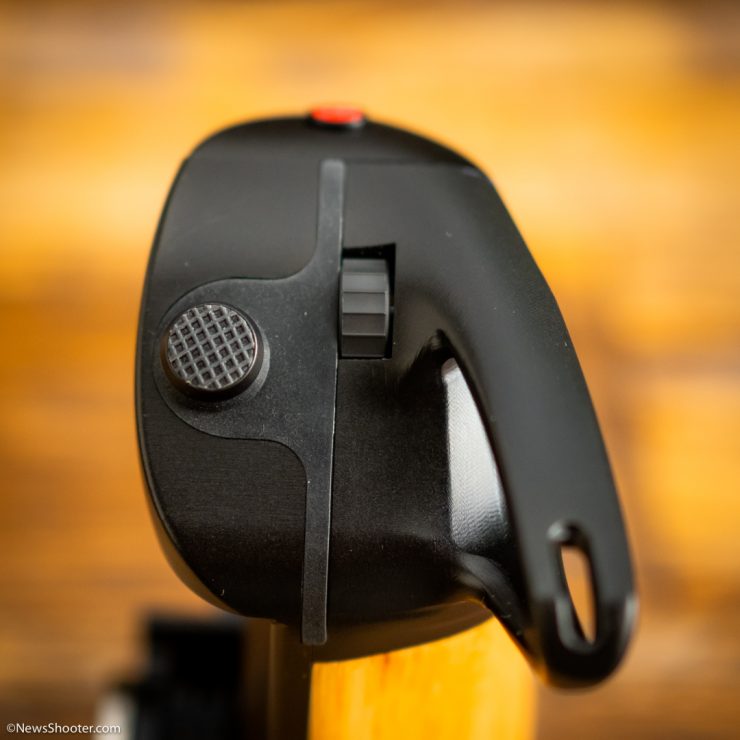
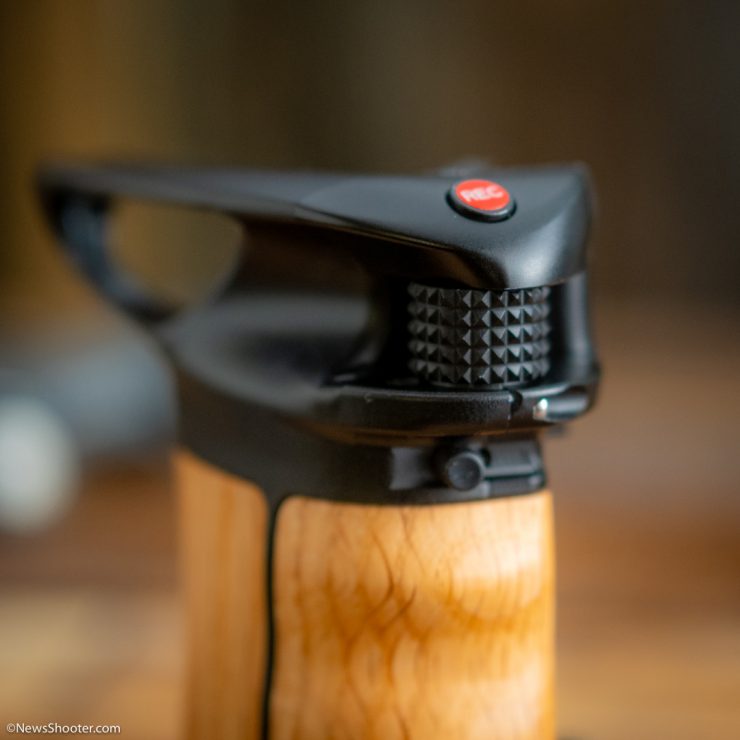
On top is a REC button to start/stop recording, as well as a wheel with a push function, and a joystick with up, down, right, and left plus push in.
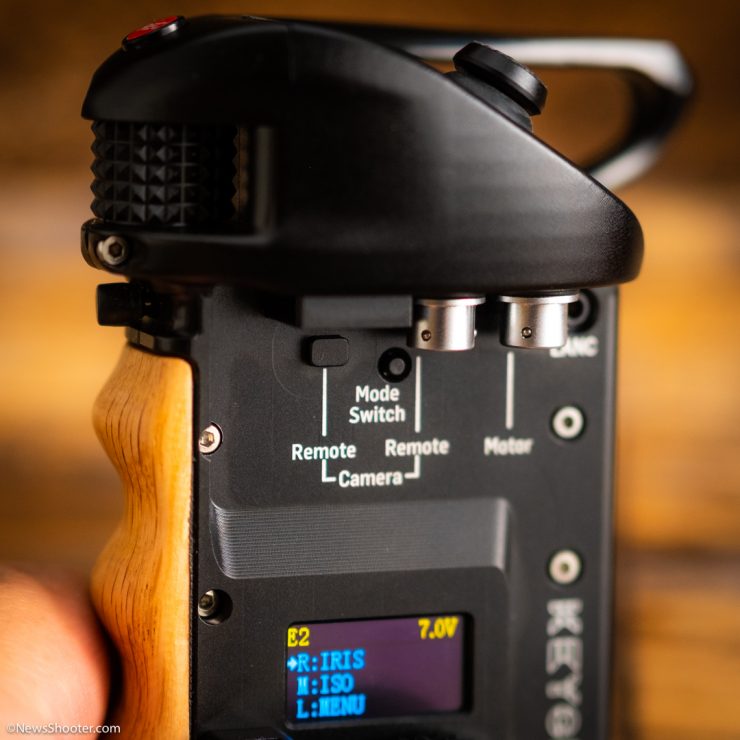
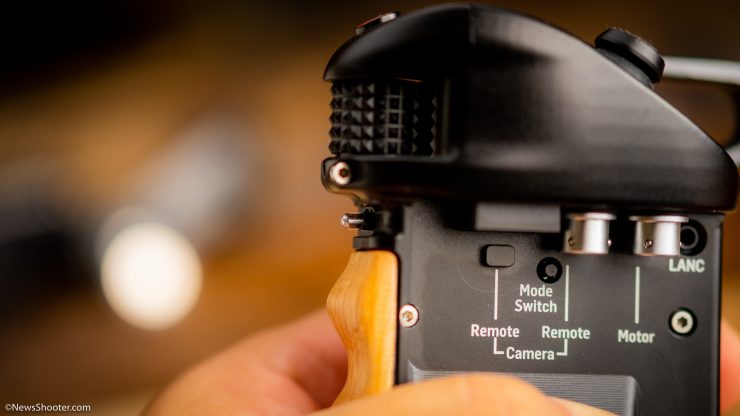
On the inside of the Keygrip is three ports.
On the left is a USB port for connecting to a camera, and the other two are Lemo ports for Camera Remote and Tilta Motor input for Tilta Nucleus N and M.
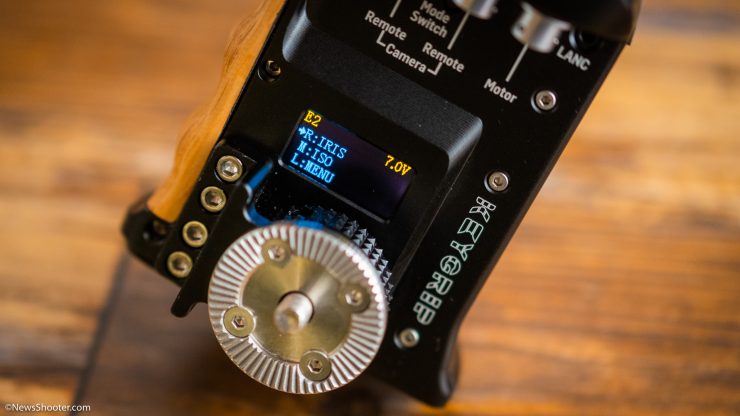
The focus wheel on the front is only usable with the Tilta Nucleus N and M system. You can’t program it for other functions. This might be a negative as it’s could’ve handy for other functions like IRIS, eND, or ISO levels.
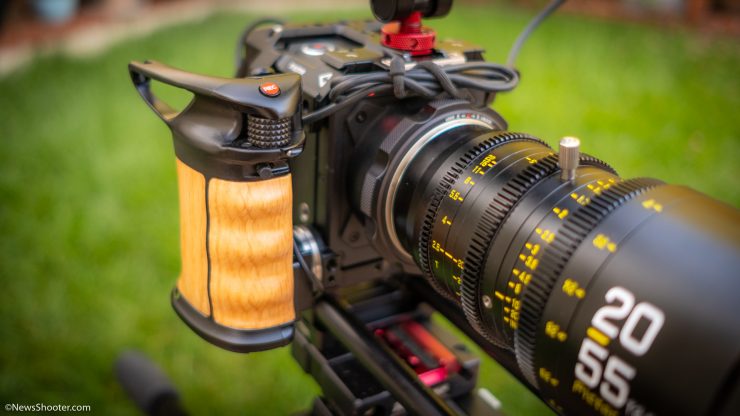
The Grip
The Keygrip mounts with a standard Rosette. It’s placed at the bottom of the grip. This position works fine with my Tilta cage for the E2-F6 as it has a built-in Rosset that is also located on the lower portion of the cage.
The kit comes with a rosette on a mount that can be added to a cage and get the grip where you need it.
The purpose of a camera grip is too fit comfortably in your hand so you can operate the camera without fatigue.
The Keygrip is a combination of metal and wood but is primarily a metal structure with wood pieces.

The Keygrip is too small for my hand. It barely fits. I don’t think I have large paws by any means and is a tight fit. If it were an inch longer, it would make a big difference.
It doesn’t matter too much since you don’t have to use it to stabilize and hold the camera. This is where the Keygrip makes up for its size shortcomings.
On top is a long metal extension that also feels odd in-between my thumb and index finger. It’s uncomfortable and sort of digs in, plus it limits the angle since it pushes down on the hand. It would be better if it were deeper.
Having that extra mass helps when shooting handheld as it rests a little more on the top of your hand while gripping the rig, however, it is not comfortable. The only purpose it has is for attaching the included pad. Maybe it’s not the actual metal piece, but my hand doesn’t fit well on the grip, making it feel like a tight pair of shoes.
On the bottom is where the included batteries go. An on/off switch is next to the battery door. When not in use, the batteries should be removed as the grip will drain them over time.
LCD Menu
With very little real estate to work with the LCD screen for programming, the Keygrip is on the inside of the grip. The screen is bright, and the text is sharp.
To program the grip, you will have to have it off the camera as seeing it when mounted isn’t possible. This isn’t an issue for the most part, as I have my three favorite settings saved and don’t need to see them. When using it with the Tilta Nucleus you cant see the A/B marks that are set.
Programming The Keygrip
Programming is easy to perform once you get used to how the menu structure and button sequences are. To enter the settings, the Keygrip has to be off the camera as you won’t be able to see the LCD screen or access the Mode Switch that enters the menu.
When it’s powered up the screen shows the current three settings. They are as follows.
R – Right
M- Middle
L – Left
The three-way switch on the front selects the setting and is based on being behind the camera.
To open the Menu, tap on the Mode Switch button. It’s tiny but not difficult to use. Then the dial is used to select the three options, then, use the scroll wheel button to select the setting to change. Pushing up on the joystick backs out of the setting and menu. Once you get to the first MENU screen, tap the Mode Switch and you are ready to use the Keygrip.
In the main menu, you have Camera, Function, and System.
Camera is for selecting the camera you want to use.
Function is for selecting the three presets.
System has options for Wheel Direction, Language, and firmware version, plus the firmware update option.
A nice touch is if you use several compatible cameras, the Keygrip will save each camera’s settings. This makes it very convenient and quick. Simply go into the menu and select the desired camera, and the settings are recalled.
Some functions work better than others. I primarily tested the Portkeys Keygrip with the Z Cam E2-F6. Therefore, some of the quirks I experienced might not be present with other cameras, but I have a feeling there will be others present with different cameras.
Available Settings For The Z Cam
You have several options to pick from, and that is a good thing. Not all of them are useful for everyone so it’s great to have a good selection. For example, I didn’t find frame rates and variable frame rate useful, as it goes into each mode without being able to select the one you actually need. This is better and safer to set using the menu.
Here are the camera settings available when using the Z Cam E2.
- Iris
- ISO
- Shutter
- ND
- CCT
- Frames Per Second
- Variable Frame Rate
- Resolution
- Focus +/-
- Zoom
- Playback
- Menu
- Function
- F1
- F2
- F3
Menu
Having a faster way to navigate the menu is handy, however, it has some issues.
I love the ability to navigate the menu quickly and change settings. If you have the menu set to display on an external monitor, it’s even better.
To open the menu, tap on the joystick, and navigate the options with either the joystick or the wheel. The wheel works better. Once you find the setting to change, tap the wheel to enter the setting. Use the same technique to make changes. When done, tap on the joystick several times to back out.
I found one quirk with the MENU option. If you have a User Button saved to the up or down arrow on the Z Cam, that function is also active on the joystick and the scrolling wheel when you are out of the menu. It defaults to the down arrow. If I don’t have anything assigned to the down arrow, then the Keygrip will use the up arrow setting. Ugh.
On the Z Cam, I have the down arrow set to ISO. I had accidentally opened and changed the ISO several times. It would be great if I could turn this off, but I couldn’t find a way to customize the selected function. The only option would be not to have anything assigned to either down and up buttons on the Z Cam. I’m not sure if a firmware update could fix this or not.
ISO
I like the ability to change exposure settings like ISO with the keygrip as using the up and down buttons on top of the camera is not so great. When ISO is selected the thumb dial scrolls the ISO levels. The joystick also scrolls the ISO values, however, I found the dial to be more responsive. No quirks with the ISO function controls.
Iris
When using electronic lenses, the iris control is very nice. On the Z Cam, you have to select Iris and use the up and down arrows to make changes. It’s much faster to use the Keygrip. For some reason, Portkeys also added a One-Shot AF if you push the joystick or the scroll wheel in. While this might be helpful, it can also screw up your focus if you accidentally push them in.
I go back and forth on this as you can disable autofocus on the lens, and it’s no longer an issue, but there are times when a quick One-Shot AF works well.
eND
Just like the ISO settings, the eND works very well.
Some functions I don’t want to have on the Keygrip, such as resolution. The RES option scrolls through the settings in the order present when on the menu. It’s not very useful, and I would worry about accidentally making changes if selected. Going into the menu is a better option.
Focus +/-
The Focus +/- option is for electronic lenses. The wheel and joystick make the changes. It changes the focus very slowly. In fact, it might be too slow. For fine-tuning, it’s pretty good, but if you are set to close focus, getting to a farther focus will take an eternity. The fix is to use One-Shot AF then dial it in with the wheel. Is this faster than just manually focusing? I don’t think it is.
I think this is a missed opportunity. If it would focus faster or just be more responsive, then a follow focus would be less desirable. I’m sure the limitations are present, but I feel it would be a good feature to make better.
Tilta Nucleus N and M Control
The Tilta Nucleus integration is a great idea, but I found some problems.
Nucleus Nano Control
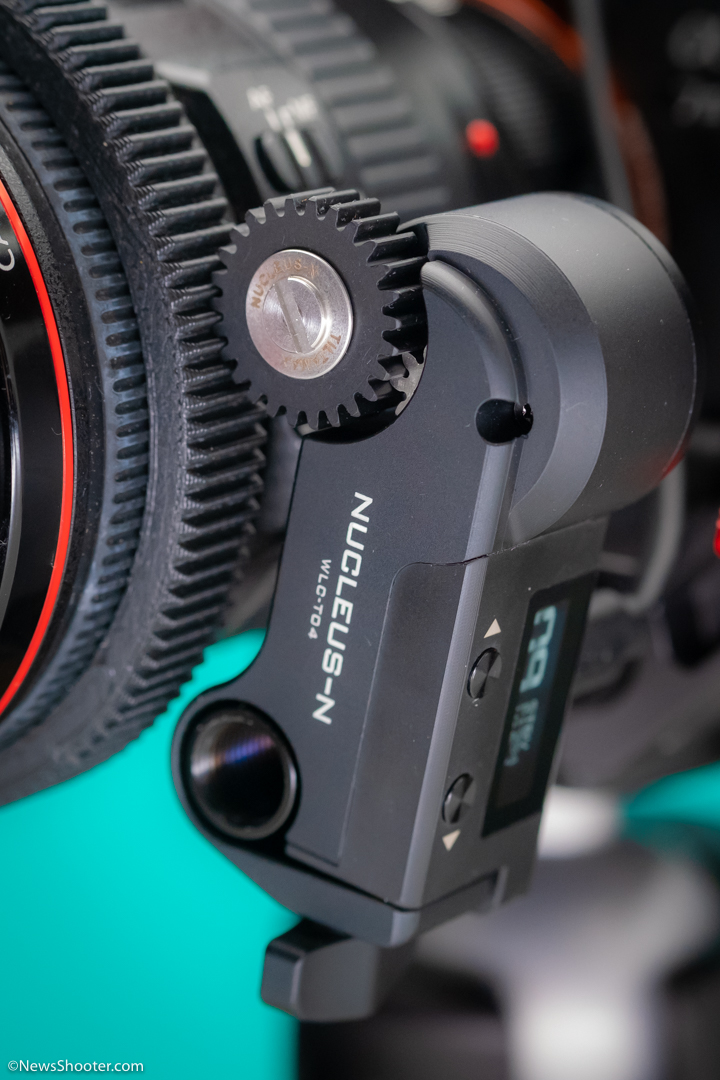
It’s very cool the Keygrip will also work with the Nucleus Nano. To connect the Nano, it’s all done with one cable that powers and sends data for control. I like the simplicity of a single cable.
To calibrate the Nano you use the down arrow on the motor. Focusing with the Nano works very well.
You can set up an A-B option by cueing the focus then pushing the joystick in and then to the right. Refocus and do it again. Now the A/B points are set.
I have two issues. Since the LCD is on the inside of the grip it’s difficult to see if the A/B points were registered and saved. The other is the wheel on the grip that is solely for using the Tilta follow focus, has a very long throw, and is small. A little rack focus isn’t possible with a single pass.
Nucleus M
On the back of the grip is a Motor input for the Nucleus M. This cable is expensive at $50.00. I bought one that was defective and returned it for a replacement.
With a working cable, I tested the Neuclus M motor. It powered up but unfortunately, I wasn’t able to calibrate the motor. I’m going to assume the Keygrip isn’t supplying enough power as it locks up as soon as I start calibration from the motor.
To see what could be the issue, I connected the motor with a D-Tap cable that sends 16 volts and the motor calibrated perfectly several times. I then reconnected with the Keygrip, and the same issue occurred. The motor just locks up when I start calibration.
I would say the Keygrip isn’t working correctly for reliable control of the Nucleus M motor from my testing. Maybe the issue can be addressed with firmware but I feel it’s a lack of proper power from the grip to the motor that is causing the lockup.
Other Options
- CAMEOGEAR CameoGrip Retro Handgrip $499.00
- RVRLR Clutch $395
Conclusion
The Portkeys Keygrip has a lot going for it, but with a few quirks that add to whether it’s a viable all-purpose grip. Making a product that works with several cameras will always have some issues. That is to be expected. The good news is it can be updated to address those issues. Portkeys are open to making it work better.
One thing that can’t be fixed with firmware is the size of the grip. I would like to see a larger version that is more ergonomic with a more natural wood feel as opposed to metal.
I like using the Keygrip when on a tripod. Finding the most useful shortcuts to use in the three positions is better than using the camera to make changes and the Tilta Nucleus Nano motor works very well. I’m disappointed the Nucleus M motor wasn’t usable.
The PortKeys Keygrip retails for $399
Like what we do and want to support Newsshooter? Consider becoming a Patreon supporter and help us to continue being the best source of news and reviews for professional tools for the independent filmmaker.