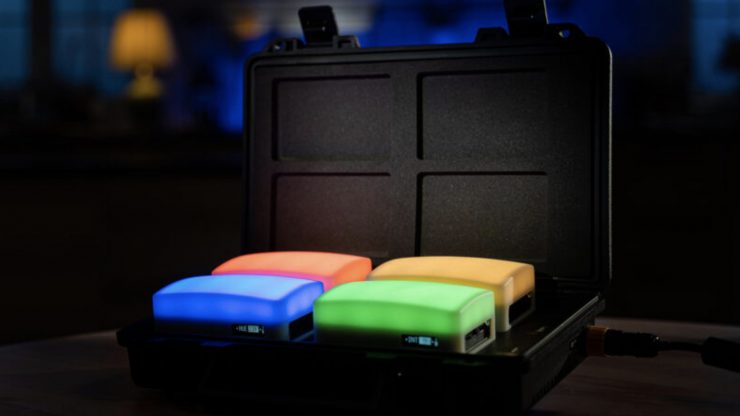
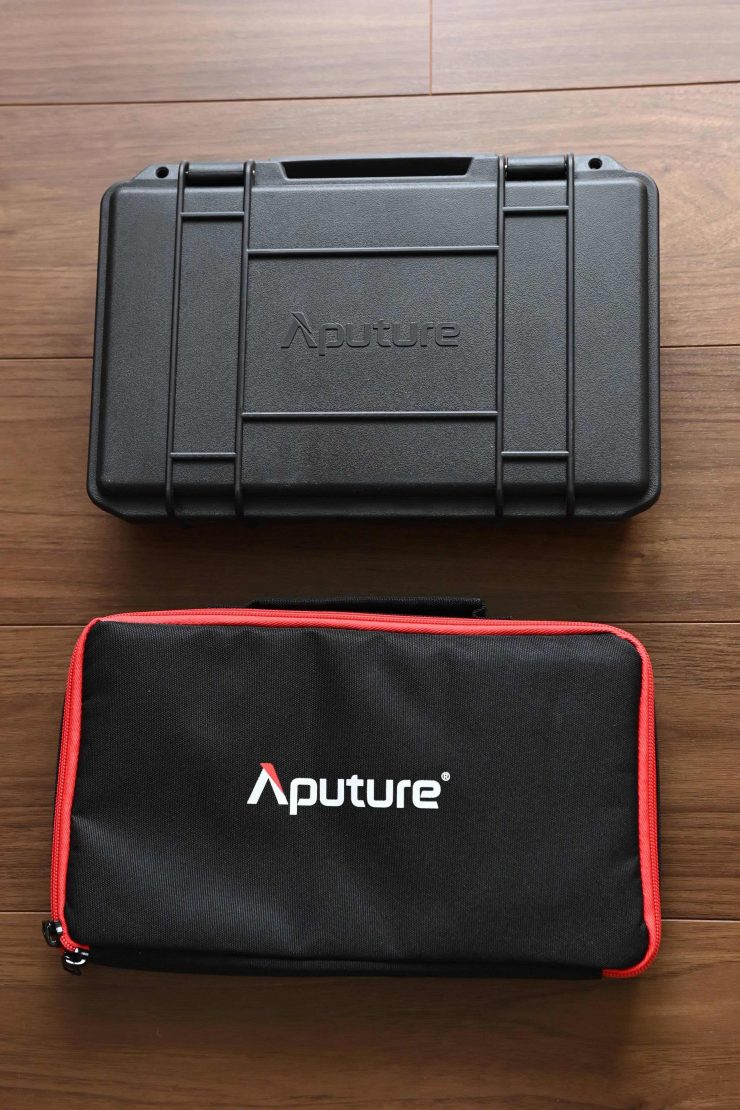
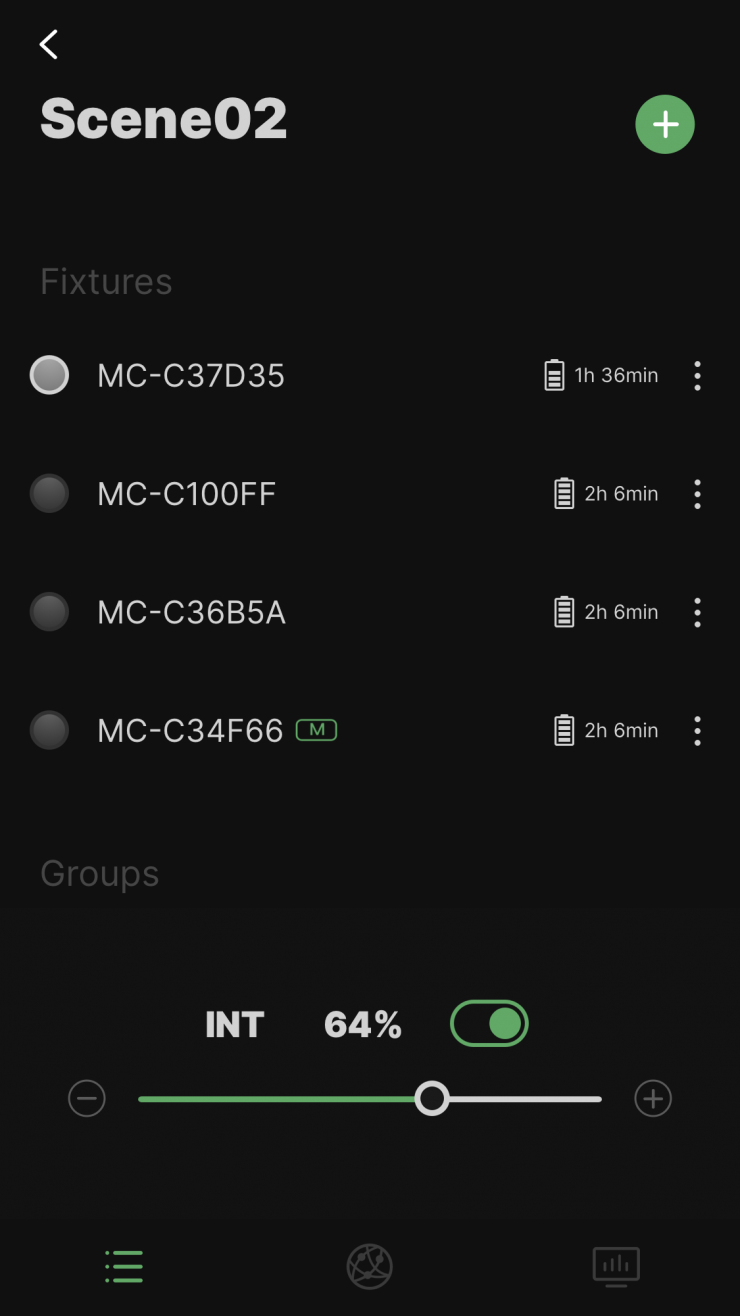
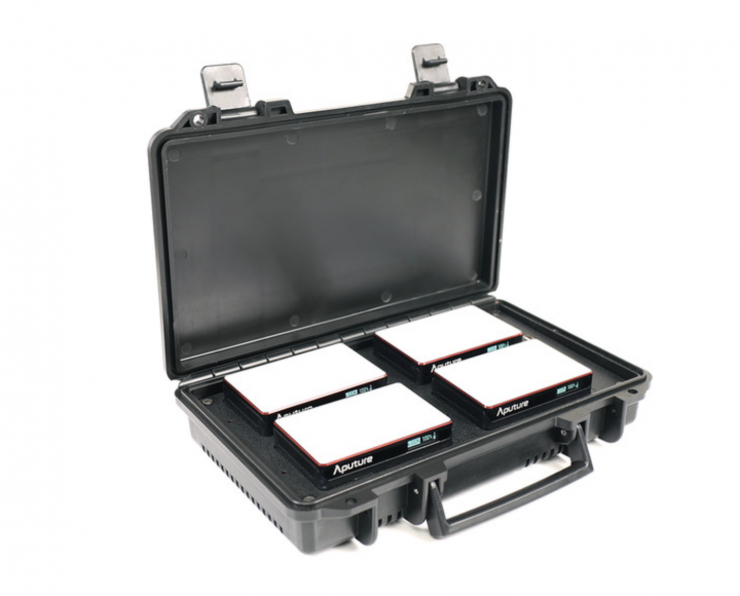
The Aputure MC 4-Light Travel Kit consists of four Aputure MC light fixtures, a charging case, and a bunch of accessories.
The Aputure MC isn’t new, but the travel kit is. The Aputure MC RGBWW LED Light was first shown to us in April 2019. Since that time it has gained a good reputation for being an affordable RGBWW LED Light that features RGB LEDs, as well as both tungsten- and daylight-balanced LEDs. From the 27th July, you will be able to buy it in the form of a 4-Light travel kit, and eventually, it will also be available as a 12-Light Production Kit
Concept
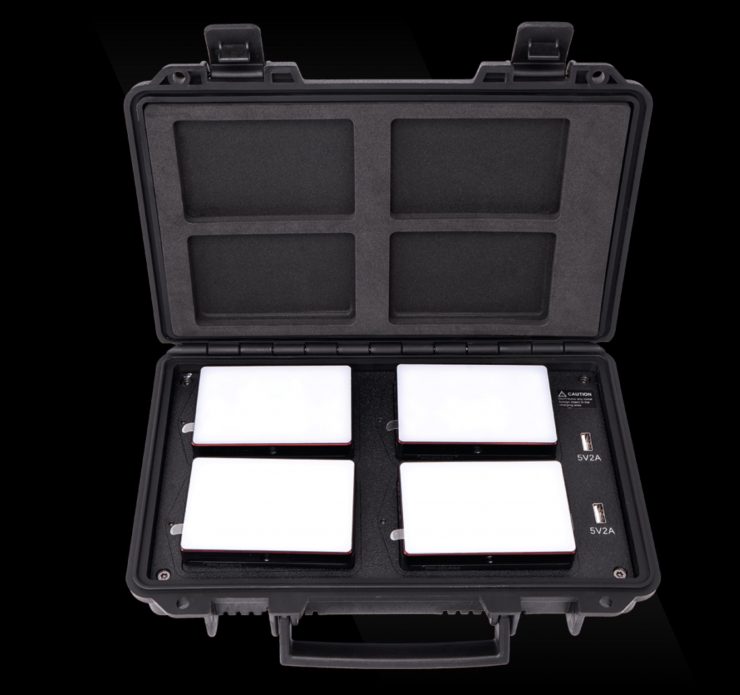
The MC-4 Travel kit has been designed to be a compact, portable all-in-one lighting solution. The idea behind it is you can use four lights and then put them into a case and charge them. Aputure states, ‘Designed for guerrilla and travel filmmakers. Bundling convenient wireless chargers into a durable hardshell case, that’s slim enough to fit in a camera bag or backpack.’
So what is it and what do you get?
Below is everything you get in the kit:
- Aputure MC 4-Light Travel Kit with Charging Case
- 4 x MC Light Fixtures (No Accessories)
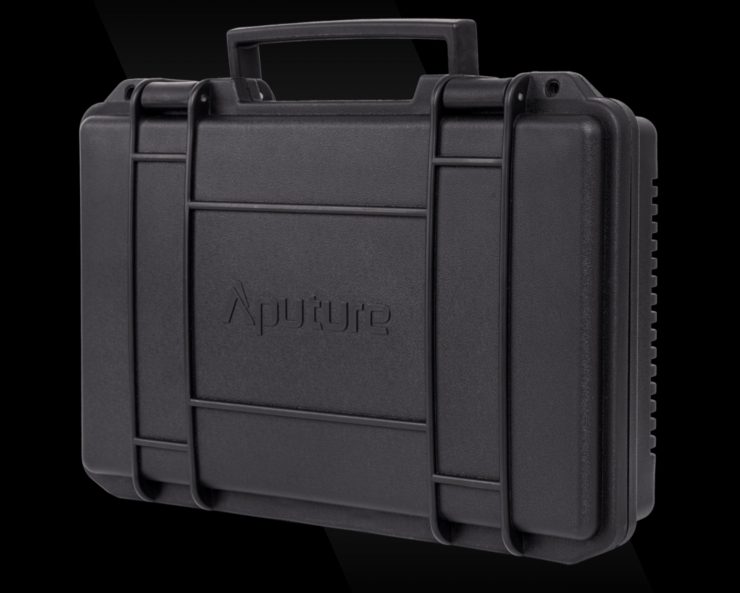
- Wireless Charging Hard-Shell Case
- Accessory Bag
- 2 x Silicone Rubber Diffuser
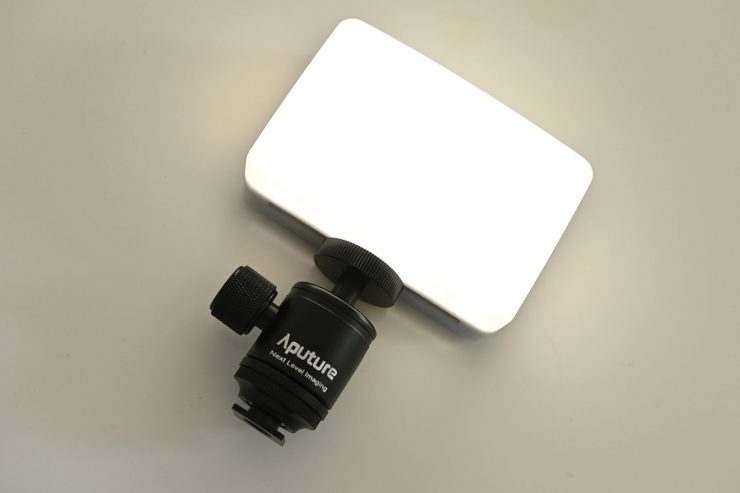
- 2 x Mini Cold Shoe Ball Head
- Charging Case Power Supply
- Power Cable
- 1/4″-20 Screw kit
- Limited 1-Year Warranty
While Aputure does give you quite a few accessories I am always puzzled why lighting manufacturers continue to make kits that don’t feature accessories for all of the lights within that kit.
Aputure gives your 4 lights, but you only get 2 silicone rubber diffusers and 2 mini cold shoe ball heads. Why are there only two of each of these items when there are 4 lights? That is a good question. It isn’t as if all the accessories and the lights are in one case. The accessories are bundled separately.
Just to be clear, I’m not having a dig at just Aputure. So many lighting kits I have purchased in the past were guilty of this as well. Whether it be a three-light kit with two light stands or a four-light kit with two battery plates, if you are going to make a kit you should do it properly.
While I appreciate what Aputure has tried to do, it doesn’t make a lot of sense to me to call something a travel kit but then give customers a case and then include another bag that has all of the accessories in it.
To be fair, the case is nice and compact and it won’t take up a lot of space. In Aputure’s defense, I can see the conundrum that they faced when designing this kit. You either include the accessories separately or you have to make the case bigger to fit in all of those accessories.
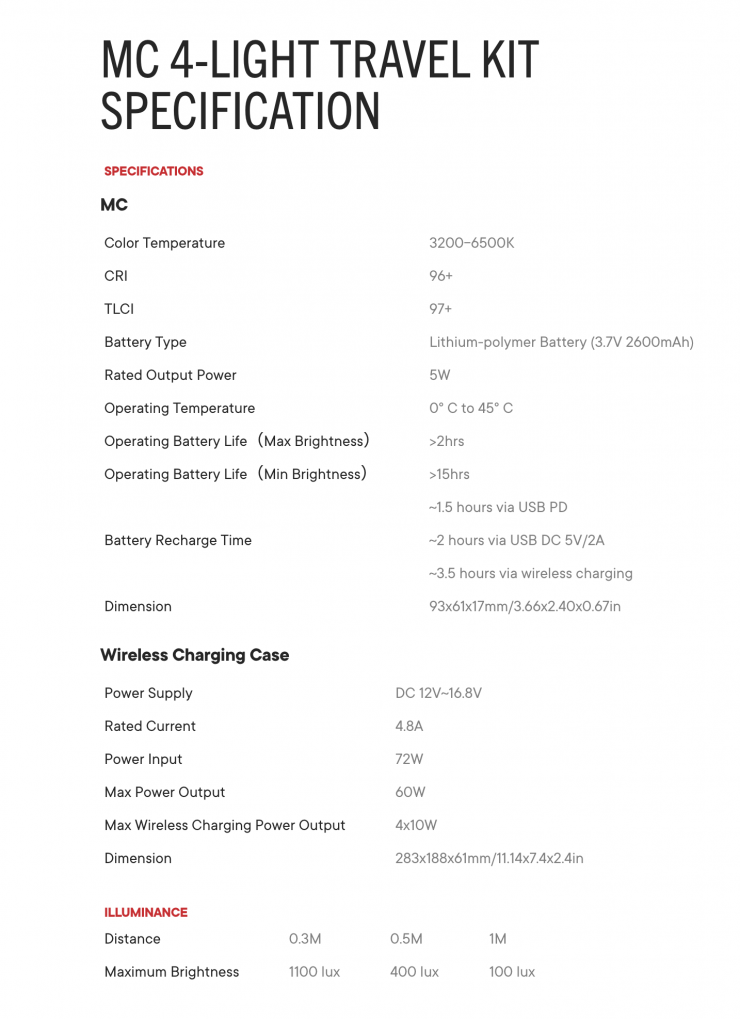
Charging
The 2600 mAh integrated batteries on the MC fixtures will run them for up to two hours at maximum brightness. The fixtures support USB Type-C PD (Power Delivery) quick-charging protocol for rapid charging, and it also supports the Qi wireless charging protocol, making it compatible with most wireless chargers.
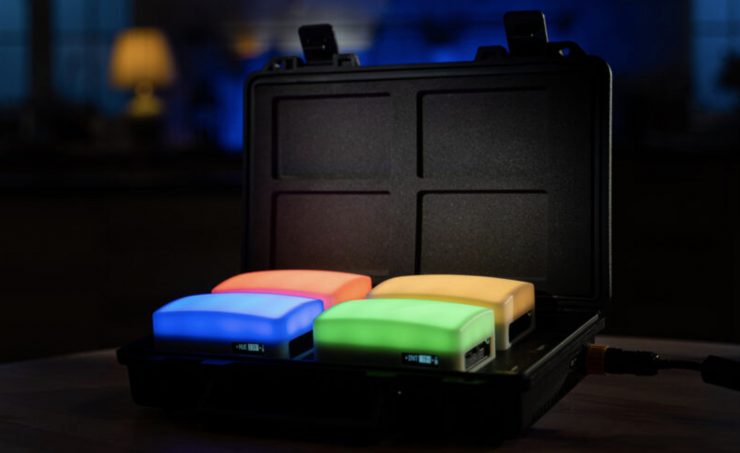
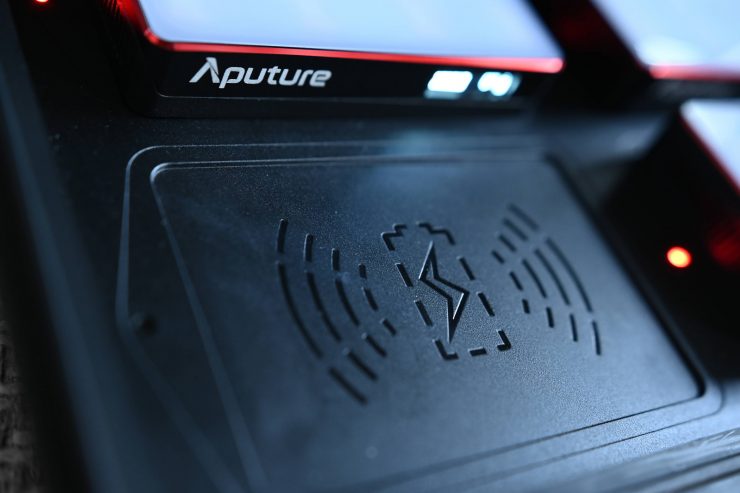
With the MC 4-Light Travel Kit, Aputure gives you one big wireless charger in the form of the travel case.
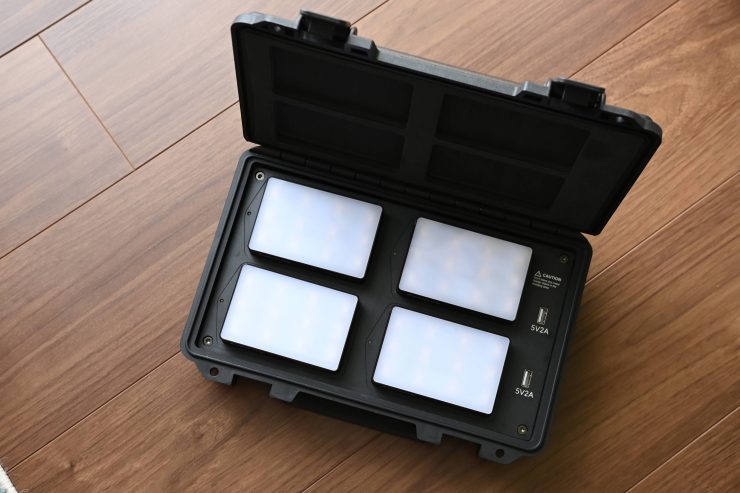
So how does it work? The included case can be used to wirelessly charge the lights using the included power supply. The case also incorporates two 5 VDC USB power ports for charging mobile accessories.

All you have to do is place the lights in the case and connect the power cable and power supply to a mains outlet. Next to the lights in the case, you will see a small LED light. When it is red, the light is still charging. When it is green the light is fully charged.
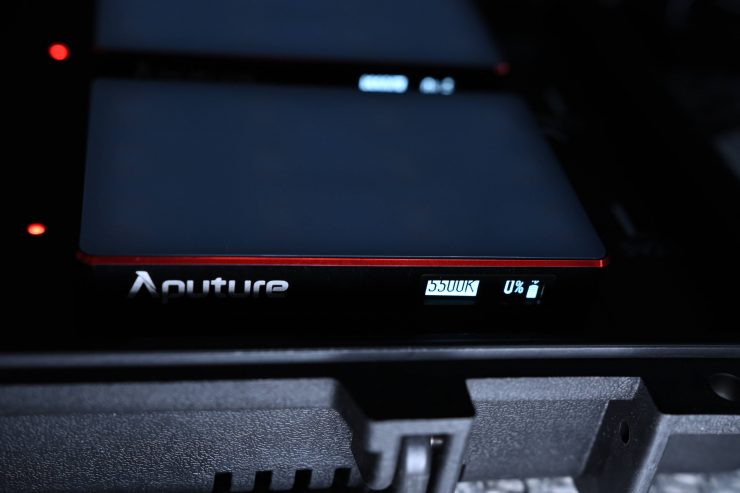
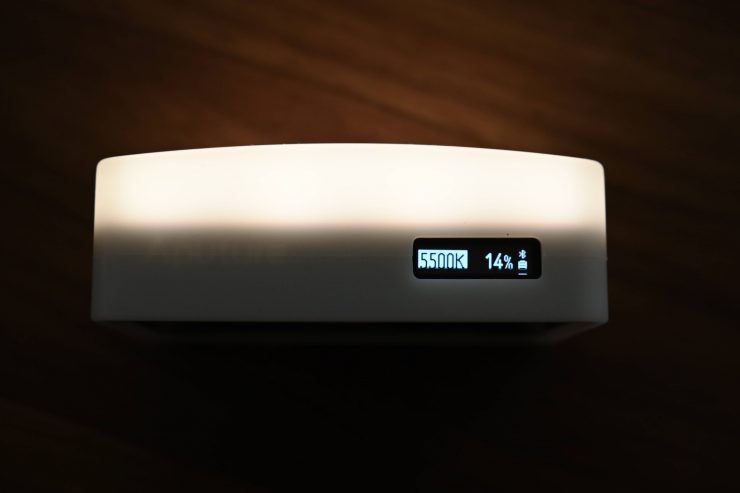
You can also see the battery charging of the individual lights on the display. You can also see the charging status through the Sidius Link App.
Aputure states that you shouldn’t have the case closed when you are charging the lights. There is heat generated so you need to be careful.
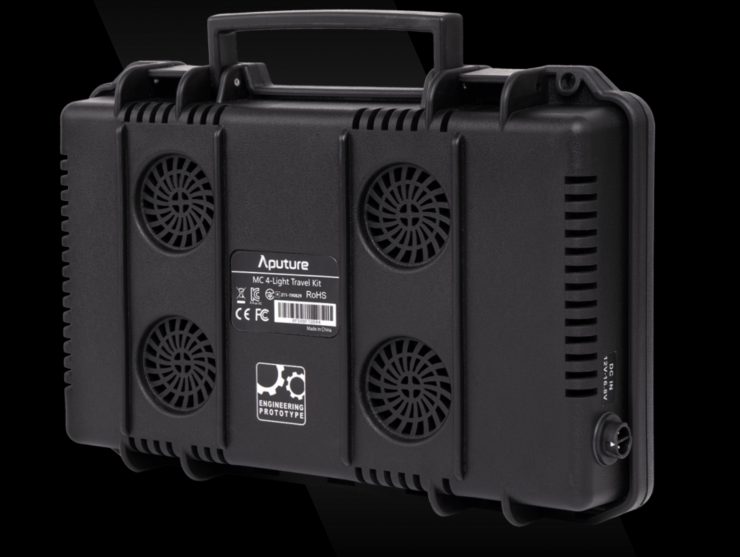
On the bottom of the case, you will see some cooling outlets.
Now, the wireless charging is pretty slow. It takes 3.5 hours to charge a battery.
If you don’t want to use the case to charge the lights, you can charge them through USB-C. This only takes 1.5 hours.
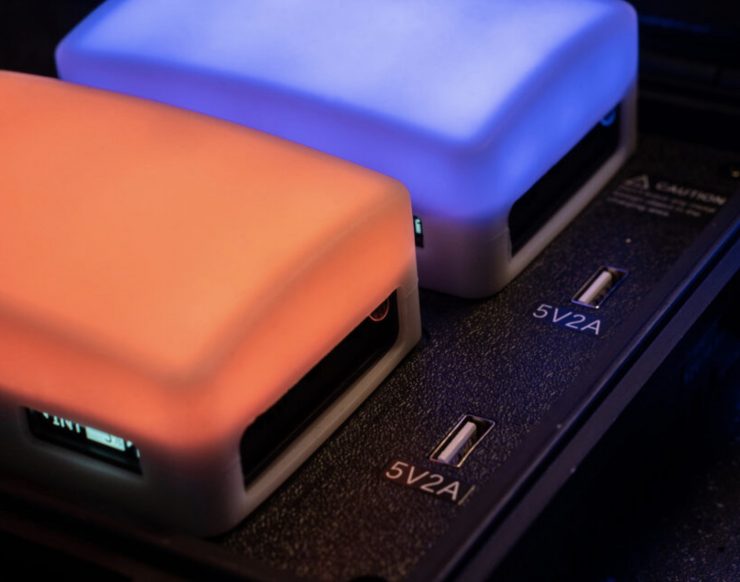
In the case, you will also find two 5V 2A outlets so you can charge a phone or various accessories. It would have been nice to have seen a USB-C outlet on there as well.
The MC 4-Light Kit can also be powered using an optional D-Tap 2-Pin Power Cable, meaning you can charge your MC with D-Tap cinema batteries on the go.
Meet the Aputure MC
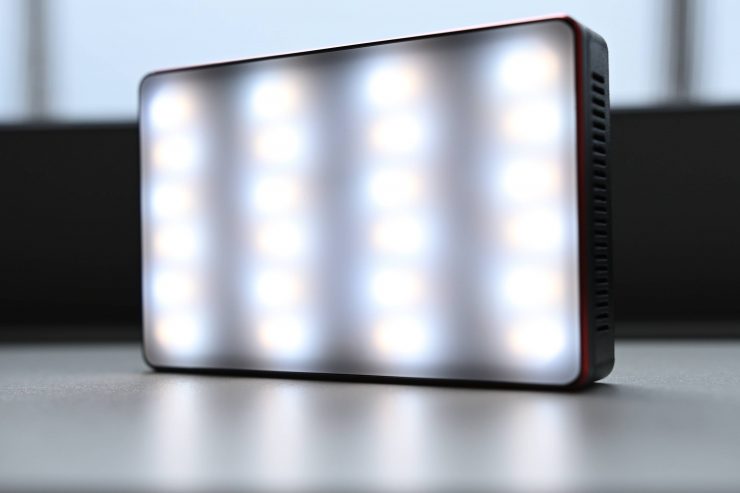
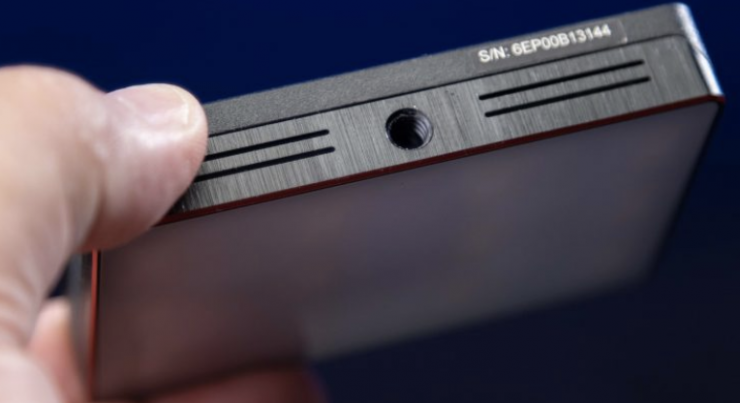
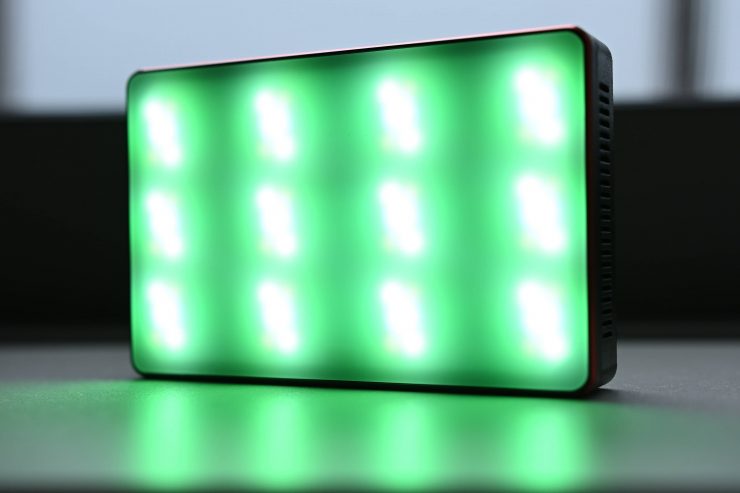
I can’t talk about the kit without going into more detail about the lights themselves. The MC light fixtures are part of the Aputure M-series of lights and feature RGB LEDs, as well as both tungsten- and daylight-balanced LEDs, creating a full hue-controllable LED light that emits up to 95% of the BT.2020 color gamut.
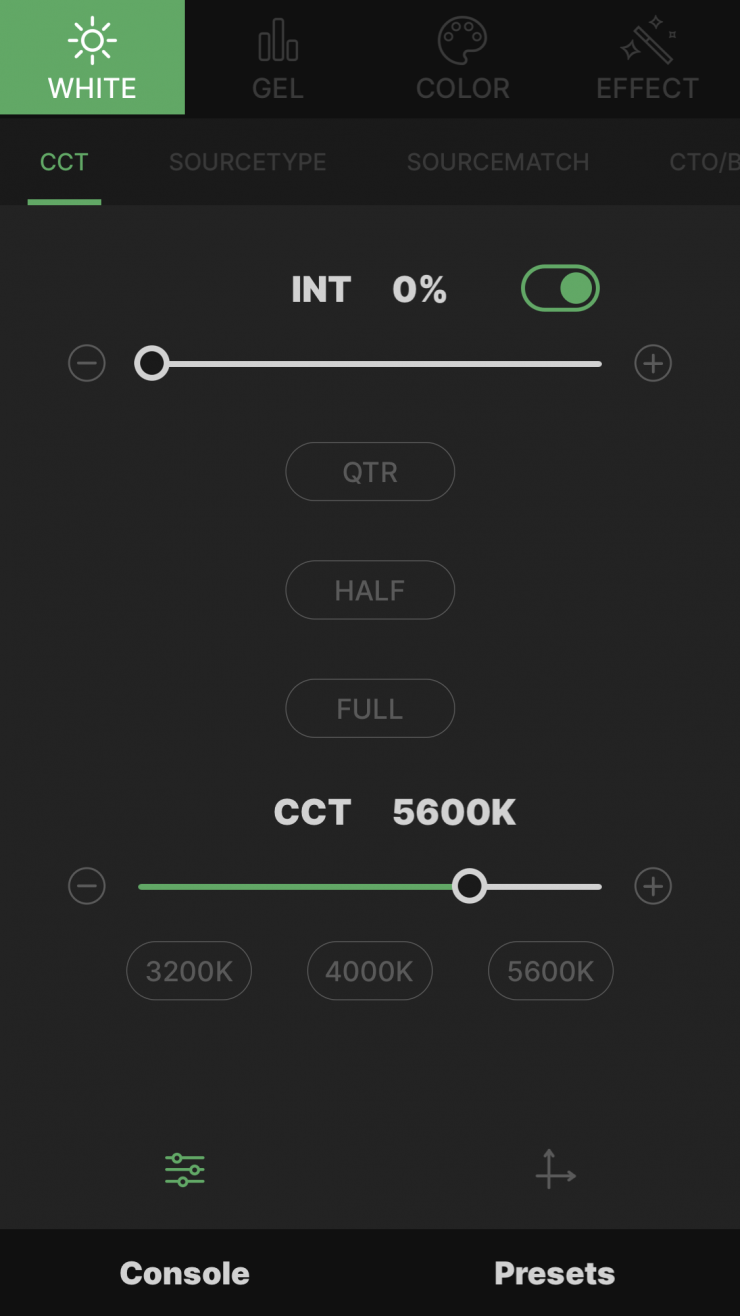
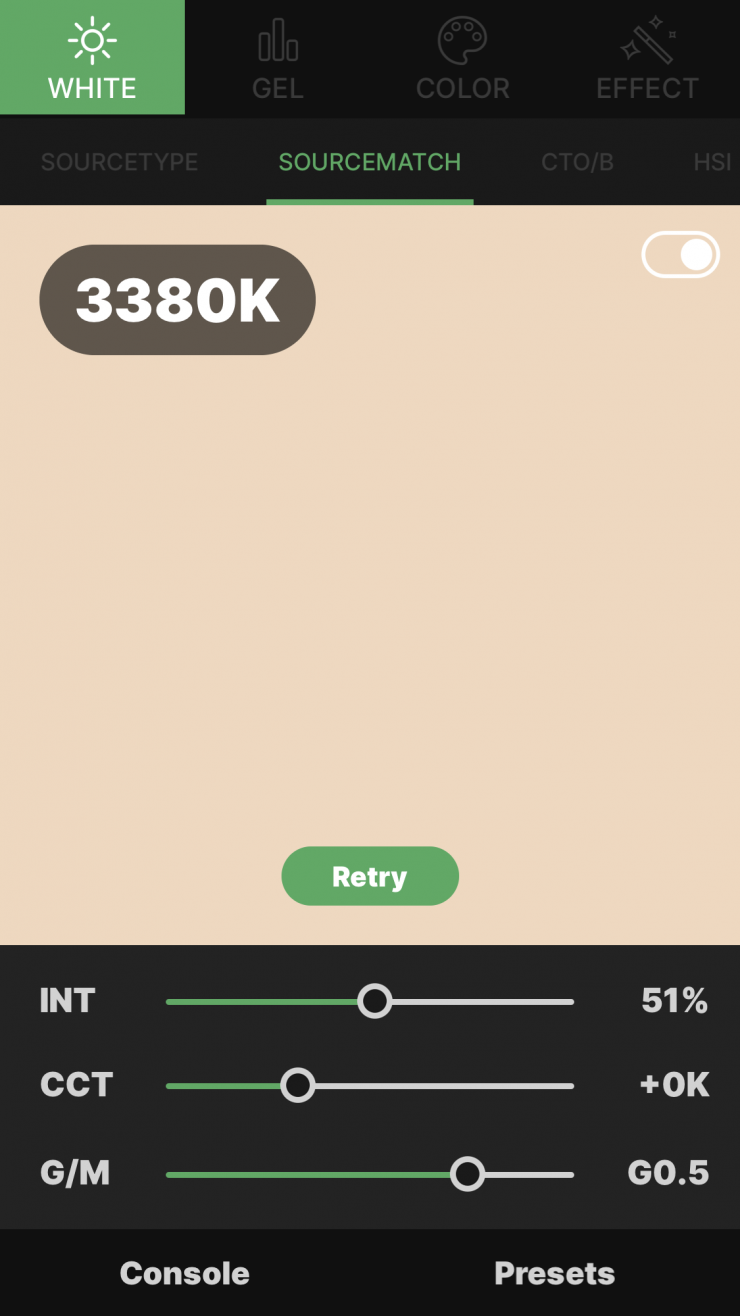
The fixture is dimmable from 100 to 0% brightness, has 360° of hue control, and 100 levels of color saturation adjustment. The light has a color temperature range of 3200 to 6500K that is adjustable in 100K increments.
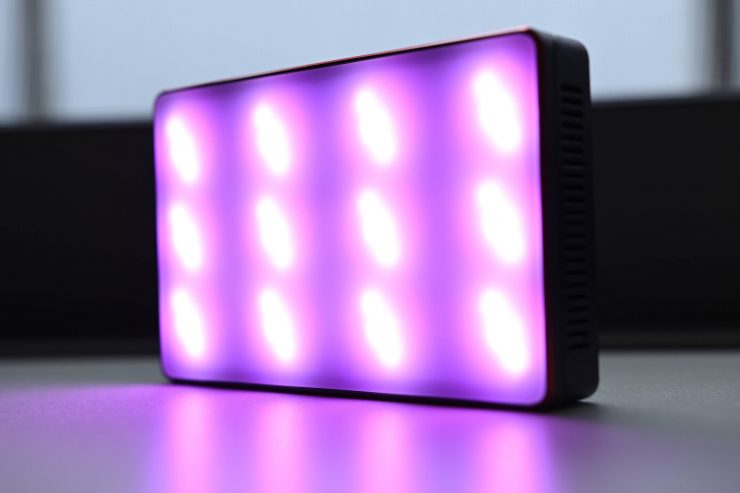
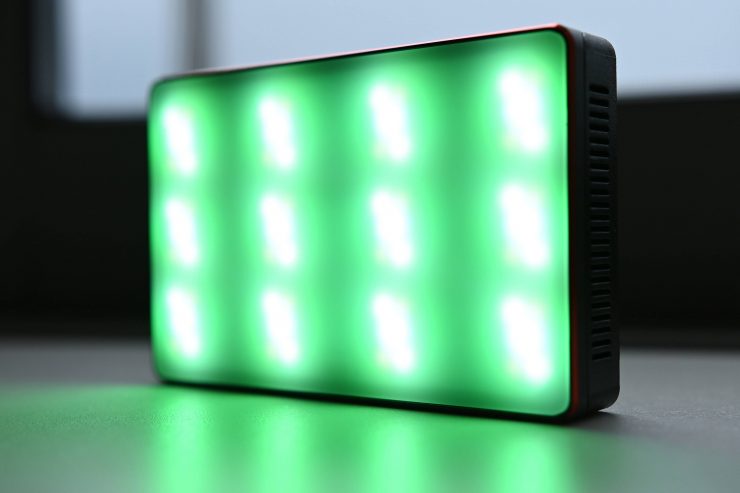
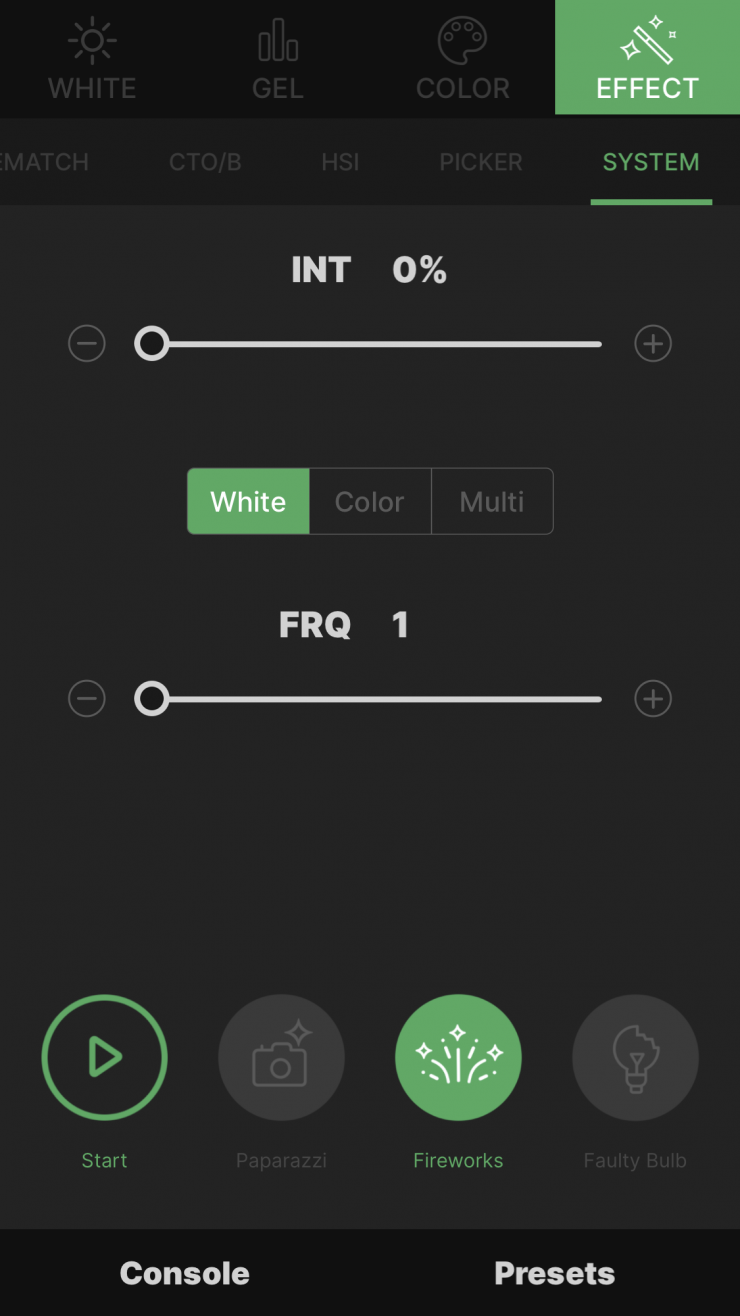
In addition to the HSI and CCT settings, the light has nine built-in FX settings. In the MC’s FX mode, you can toggle between any of the built-in lighting effects presets. Below are all of the FX lighting modes:
- Paparazzi
- Fireworks
- Faulty bulb
- Lightning
- TV
- Pulsing
- Fire
- Party
- Cop car
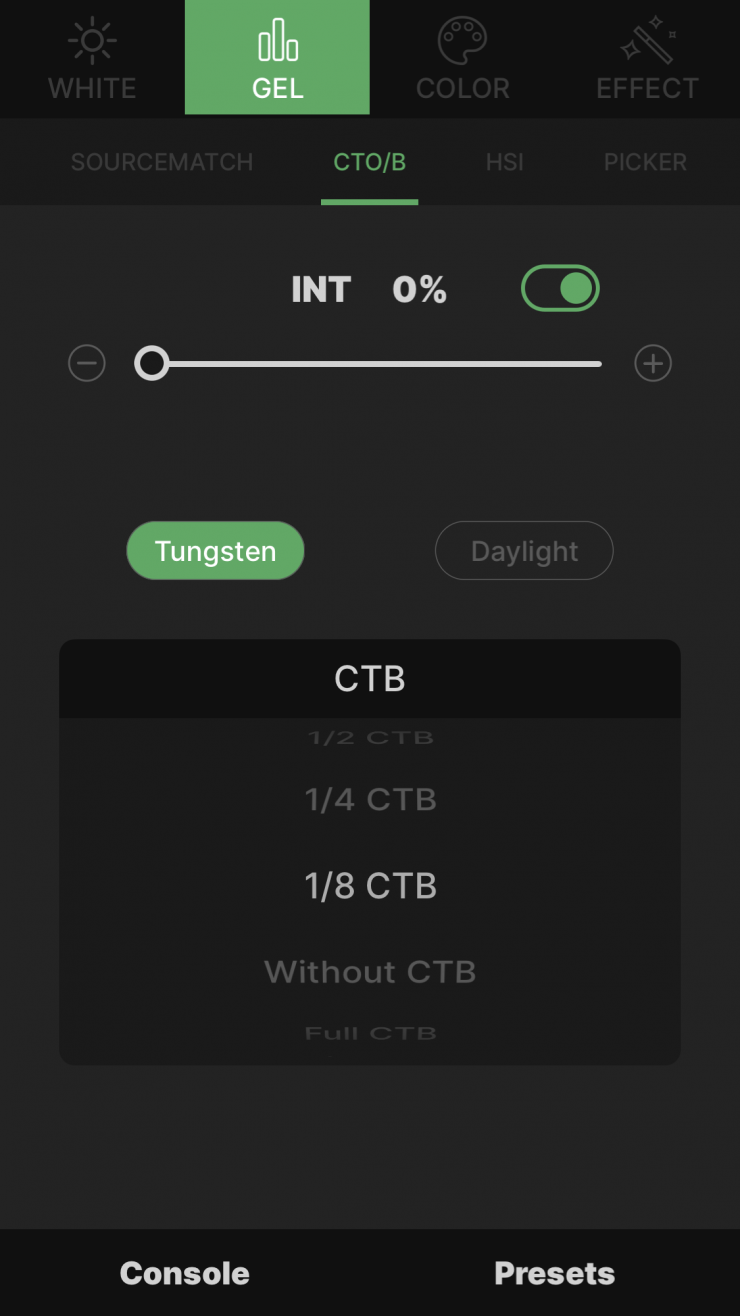
On-Board Color Correction Gels
When using the MC with other lights that might not match you can make adjustments by adding CTB (Color Correct Blue) or CTO (Color Correct Orange) depending on the mode you are in. For a light this small that’s pretty impressive.
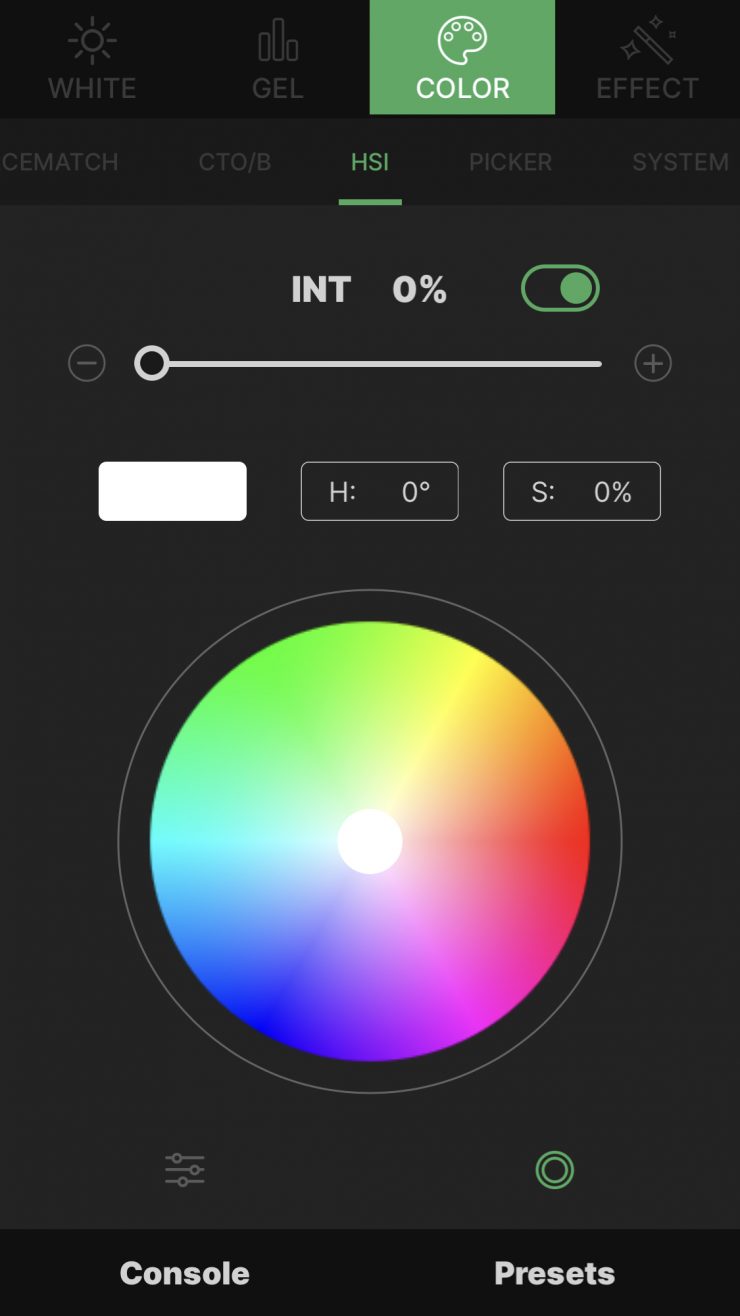
HSI Color Effects
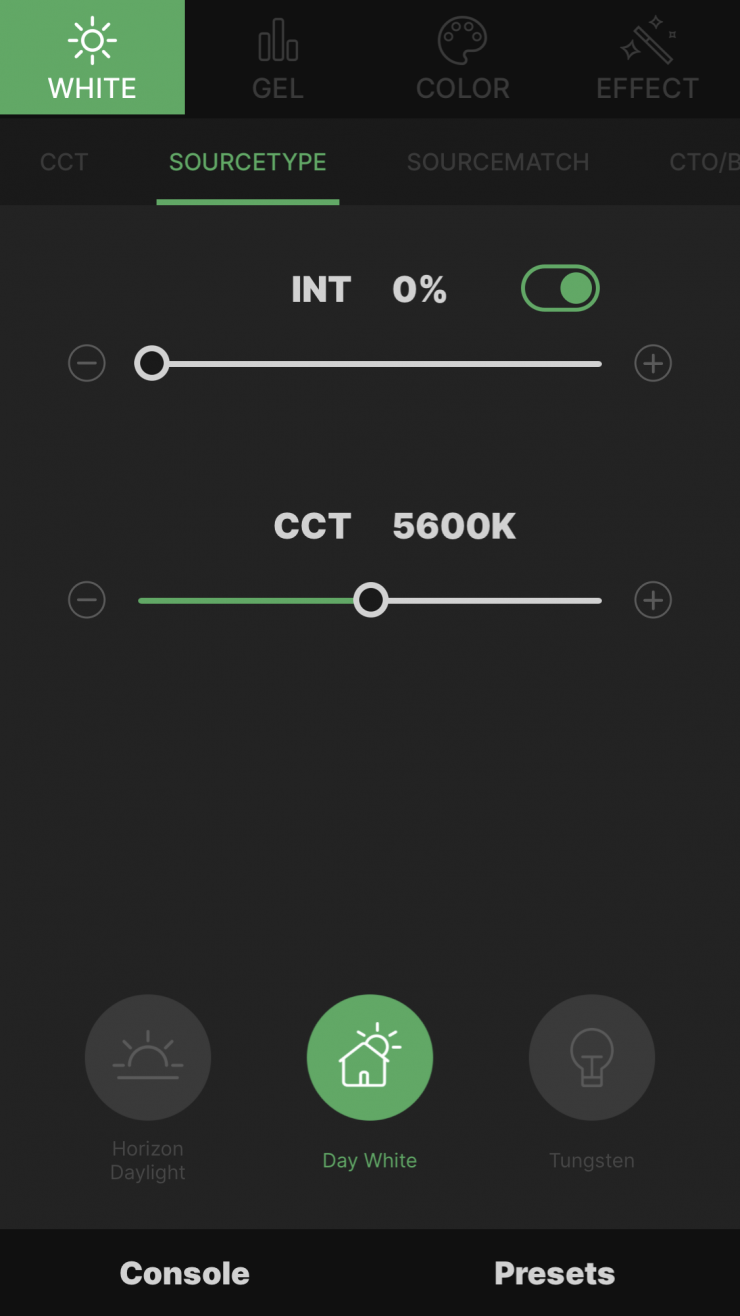
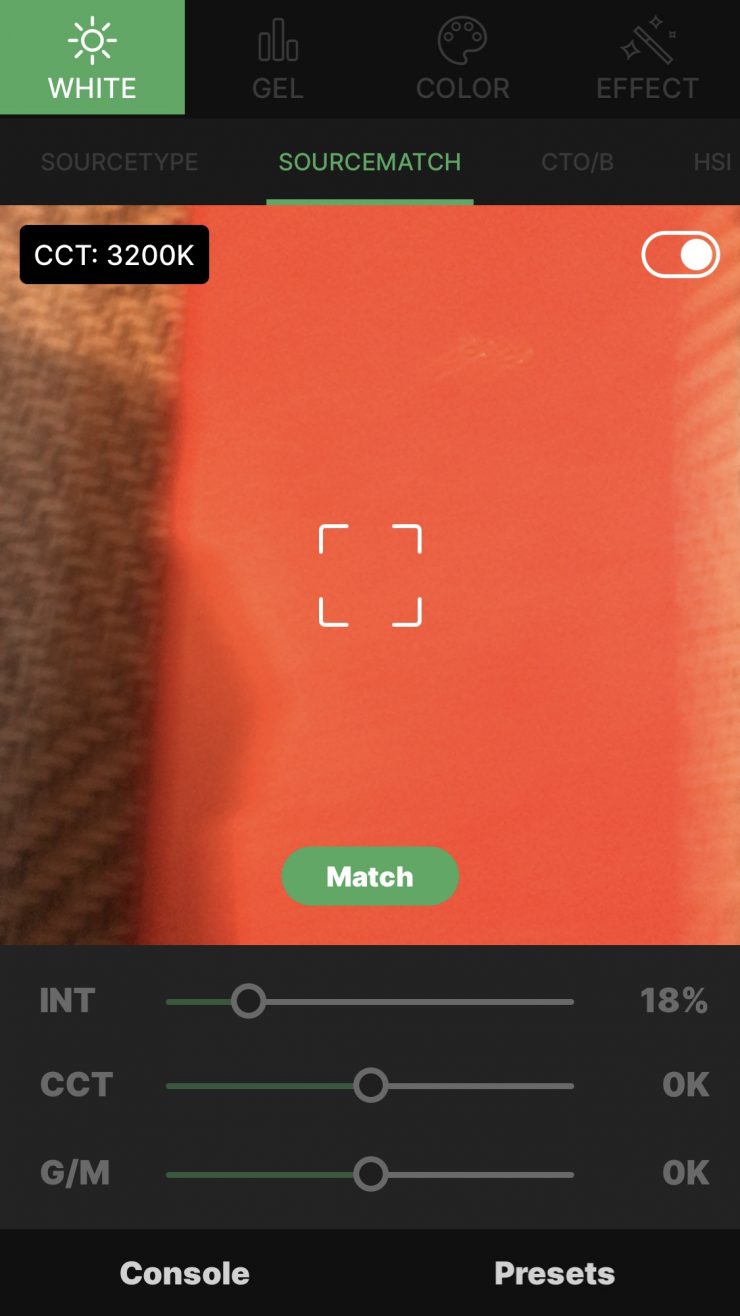
The MC when paired with the Sides Link app gives you easy to use color control. Yes, you can make changes directly on the fixture but using the app is much better. If the light is tucked away and you want to see different options the Sidius Link app comes in very handy.
More on Sidius Link a little bit later in the review.
Mounting
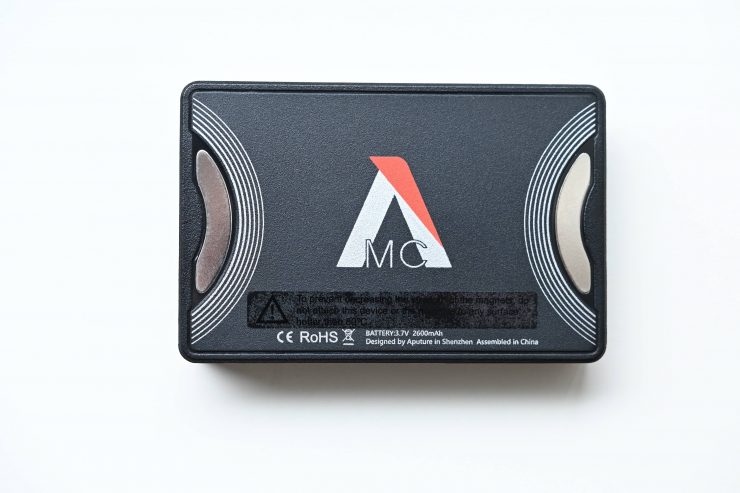
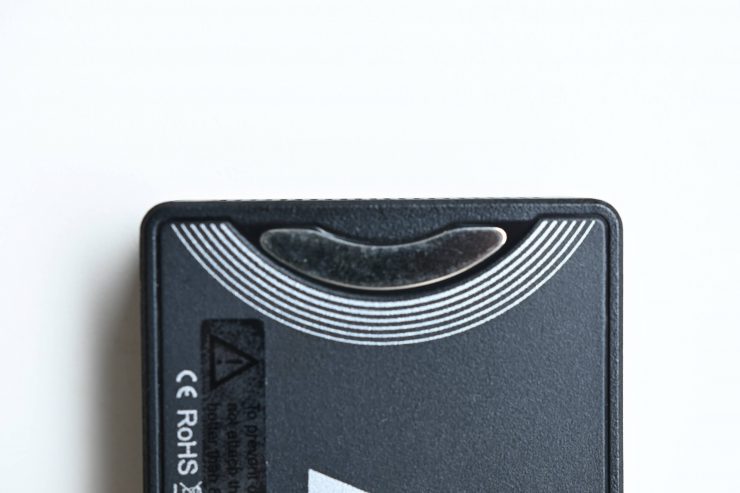
The lights can be mounted using the built-in 1/4″-20 threaded mounting hole or attached to metal items via its built-in magnets.
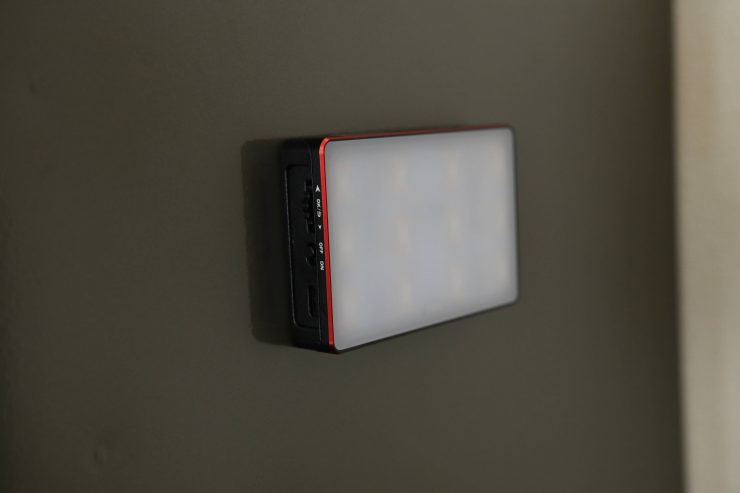
One of the great features of the MC4 is the built-in magnets. I really like this implementation, because it makes the light very easy to mount. The magnets are also super strong so you don’t have to worry about the light falling off whatever metal surface you attach it to.
Build Quality
The lights are reasonably well made, but the display and the adjustment dial do feel a little on the cheap side.
To be honest, this is a $90 USD light so I wasn’t expecting premium build quality. For its intended market and use, I think most people will be happy with it.
Controls & Bluetooth Mesh
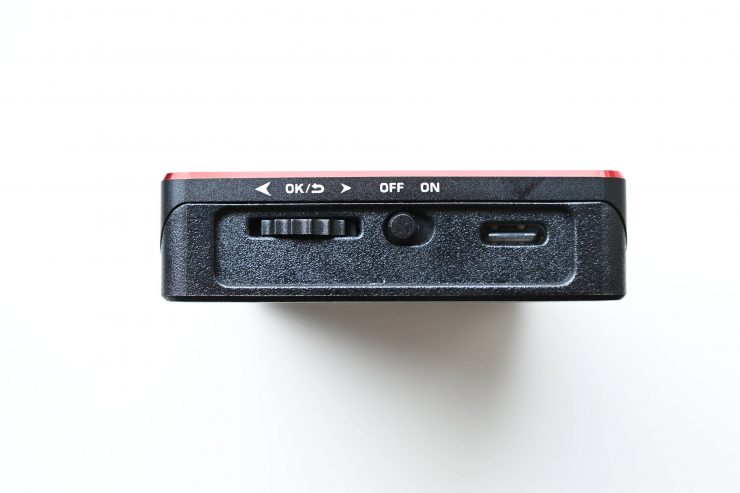
The lights have an OLED display screen and a control wheel. To switch between modes you need to push and hold the control wheel. To adjust between brightness and color temperature you click the wheel once. This is an ok way of controlling the lights, but it isn’t the best implementation I have seen.
What I also found to be a little odd is that even though you can adjust the Kelvin color temperature in 100K increments, when you are moving the control wheel there are gaps where nothing changes on the screen.
The lights are also compatible with the Aputure Sidus Link app enables you to remotely control your lights from a mobile device. The lights themselves use Sidus Mesh technology.
This new type of Bluetooth technology allows for up to 65,536 devices to be connected at the same time. This is more of a marketing line than anything else. No one is ever going to connect up 65,536 devices. Aputure’s Sidus Mesh technology allows you to control up to 100 lights in a stable network. You can control a single light, or all of them simultaneously, from the Sidus Link mobile app. The Sidus Mesh network can extend up to 1300′ with no more than 262′ between compatible light fixtures.
Using Sidius Link
To control the Aputure MC RGBWW lights remotely you need to download the Sidius Link App.
For some reason, you need to sign up to use it. This requires sending an email address and then you will receive a verification code.
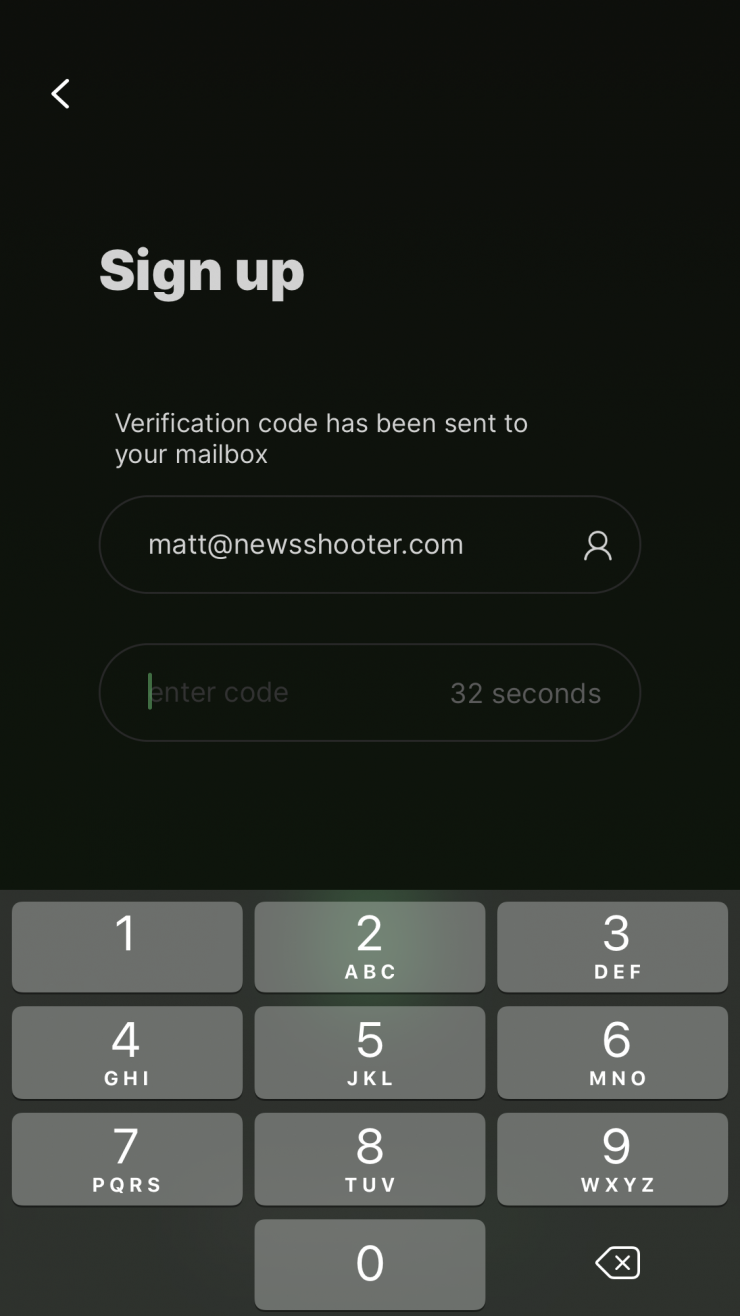
I tried doing this multiple times and I never received a verification code. Eventually, after trying three different email addresses it worked. Apps are supposed to be easy to use, the first impression I got from Sidius Link wasn’t a positive experience.
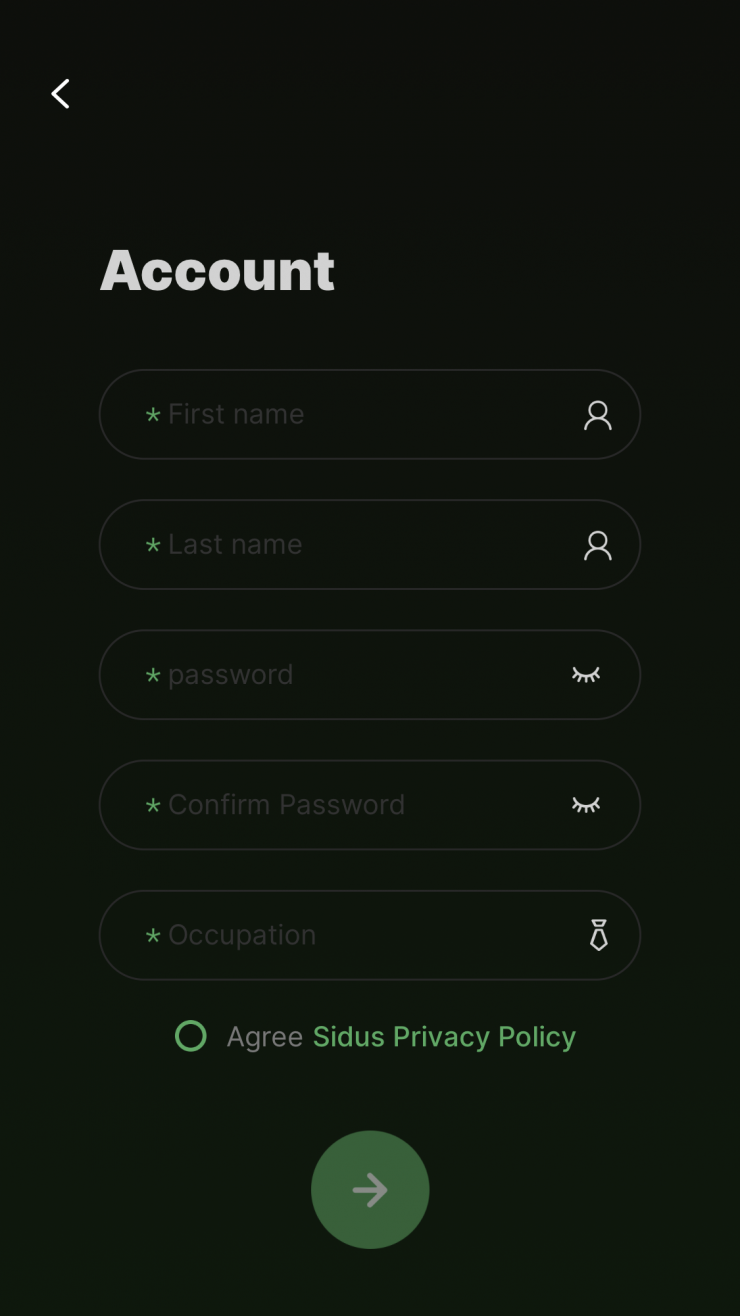
The problem is once you do get a verification code you then get taken to another screen where you need to enter more details. After you fill out that form you have to fill out even more information. I’m not sure why any of this information is really required. This seems like nothing more than gathering data on the user.
This is probably why it currently has a 2.3-star rating on the Apple App Store.
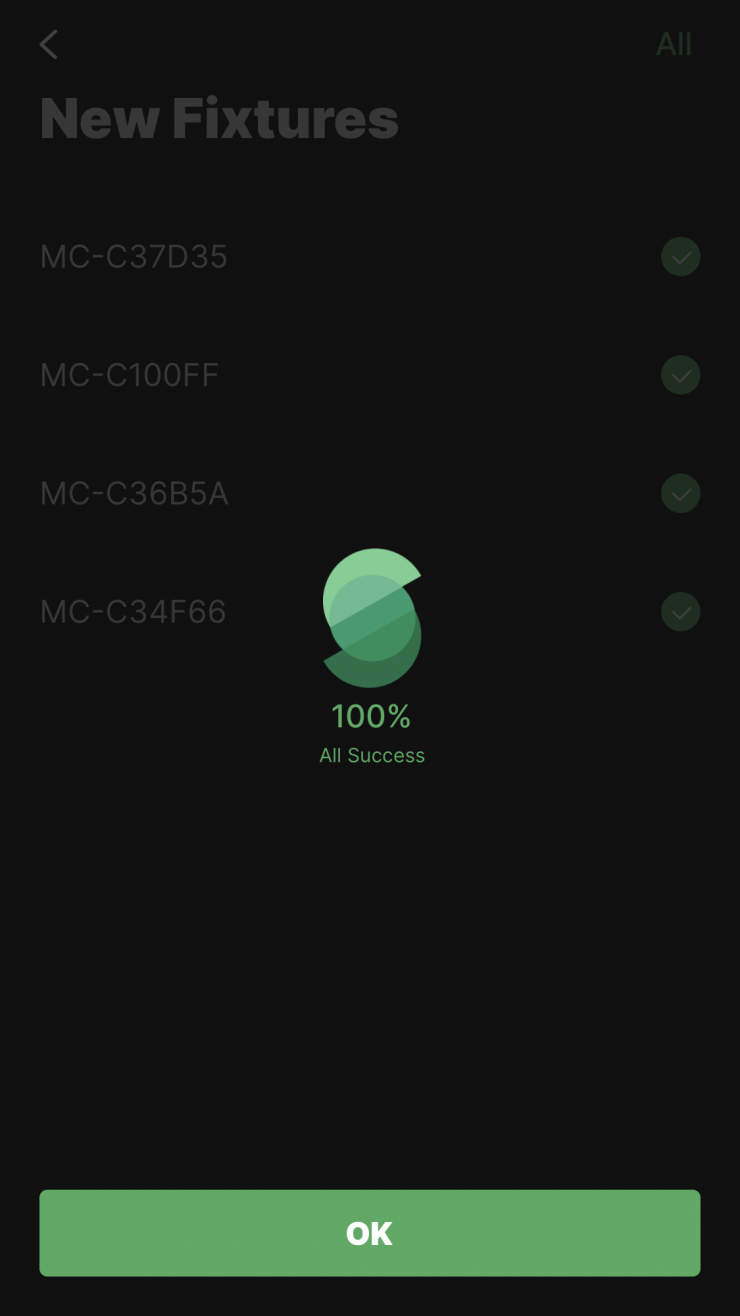
Setting up your MC-4 Light Travel Kit to work with Sidius Link does take a bit of time. You need to select what Aputure product you want to use and then register it using the serial number. The serial number for the Travel kit is on the bottom of the case.
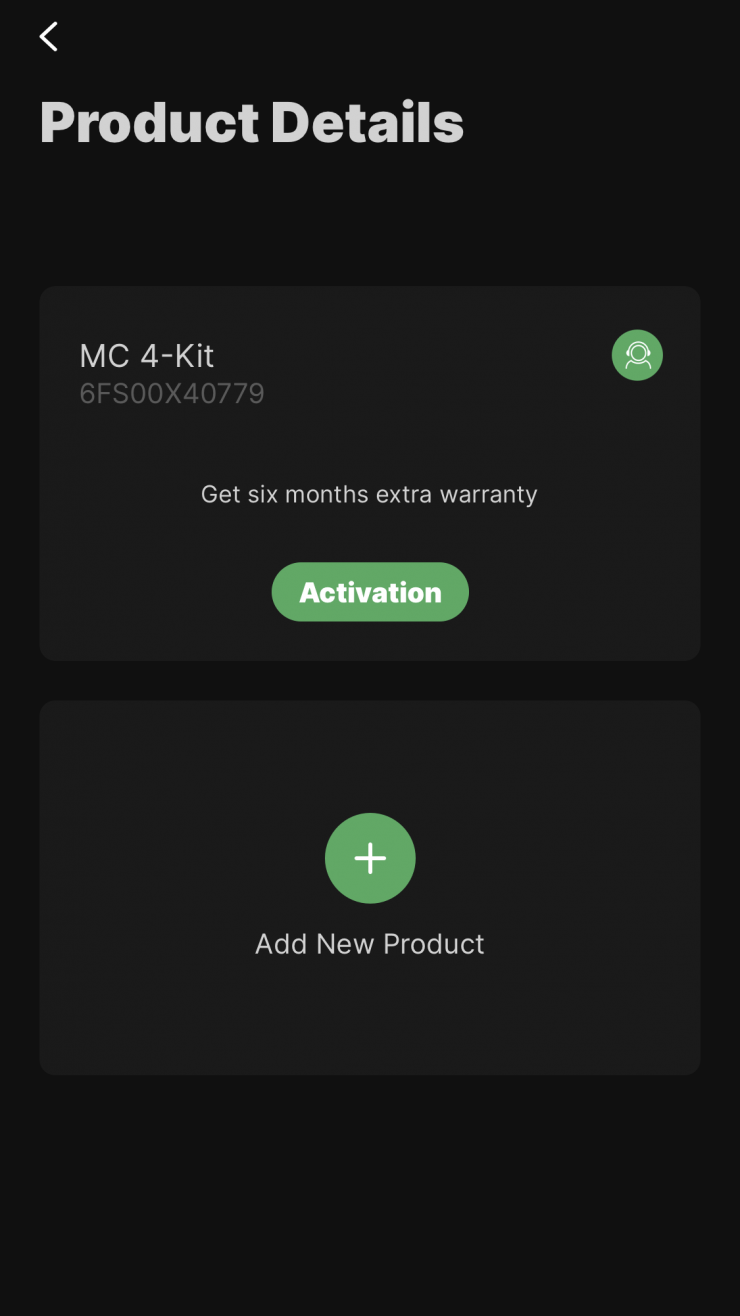
Once you have done this, you then click on the MC 4-Kit. You then have to create a Scene and then add each of your lights individually. This requires turning all four fixtures on and then entering the BT menu and activating it.
But, wait, there is more! Then you have to select all of the lights to add them into your Sidius Link Scene.
After that, you need to wait until Sidius Link adds them all to the system. This takes a good 45 seconds to do.
Finally, you can then get to a screen where you can control your lights. The good thing is you only have to do this tedious process once.
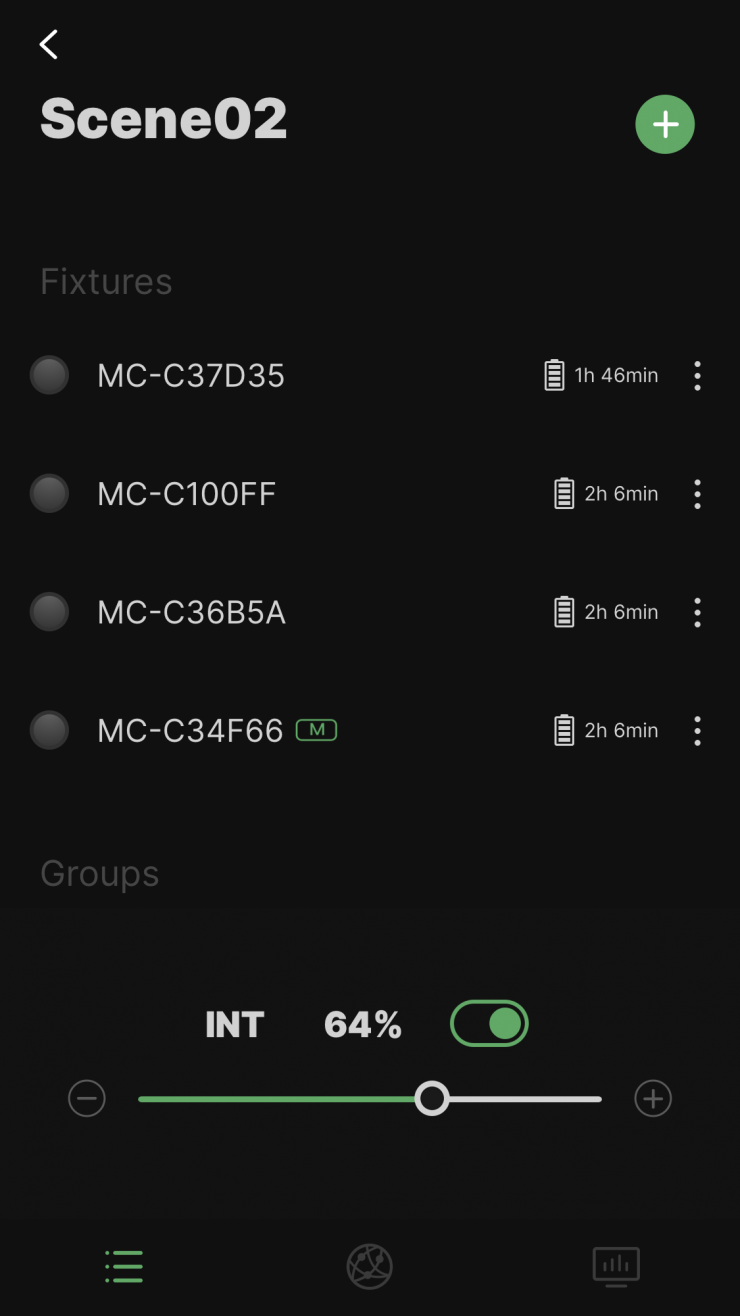
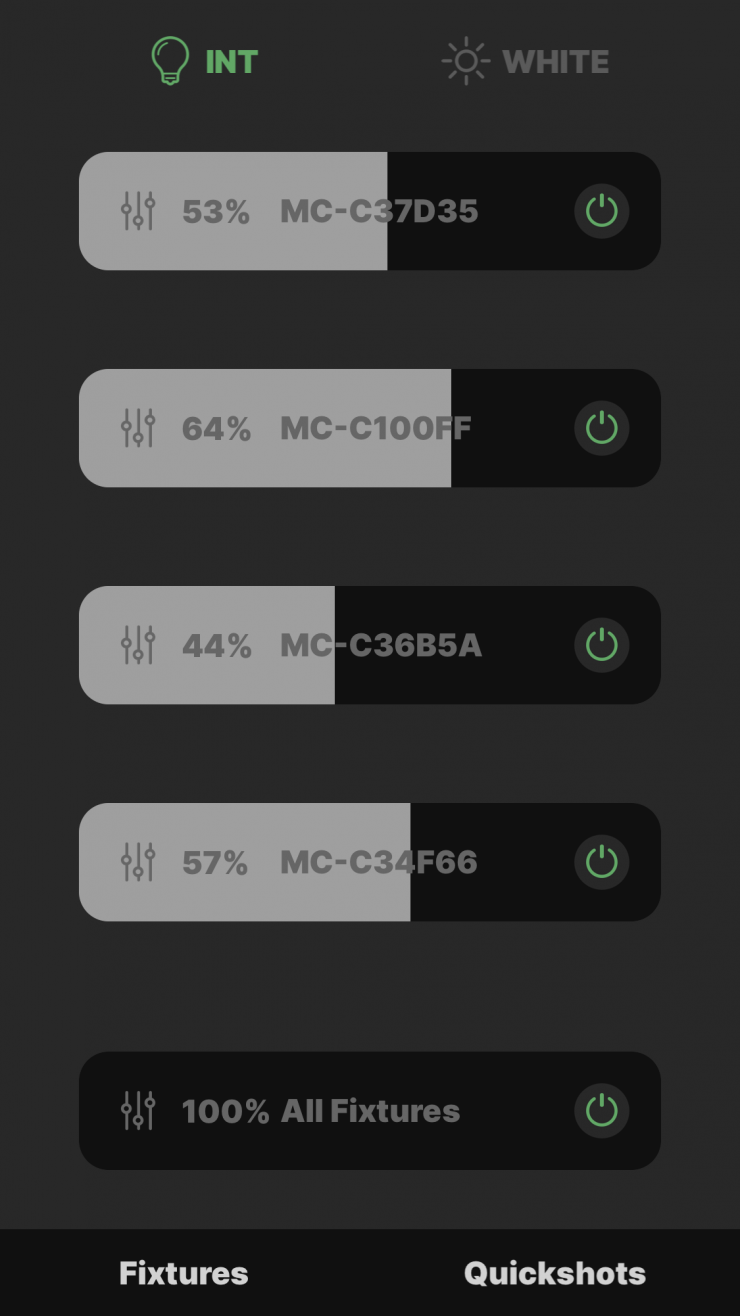
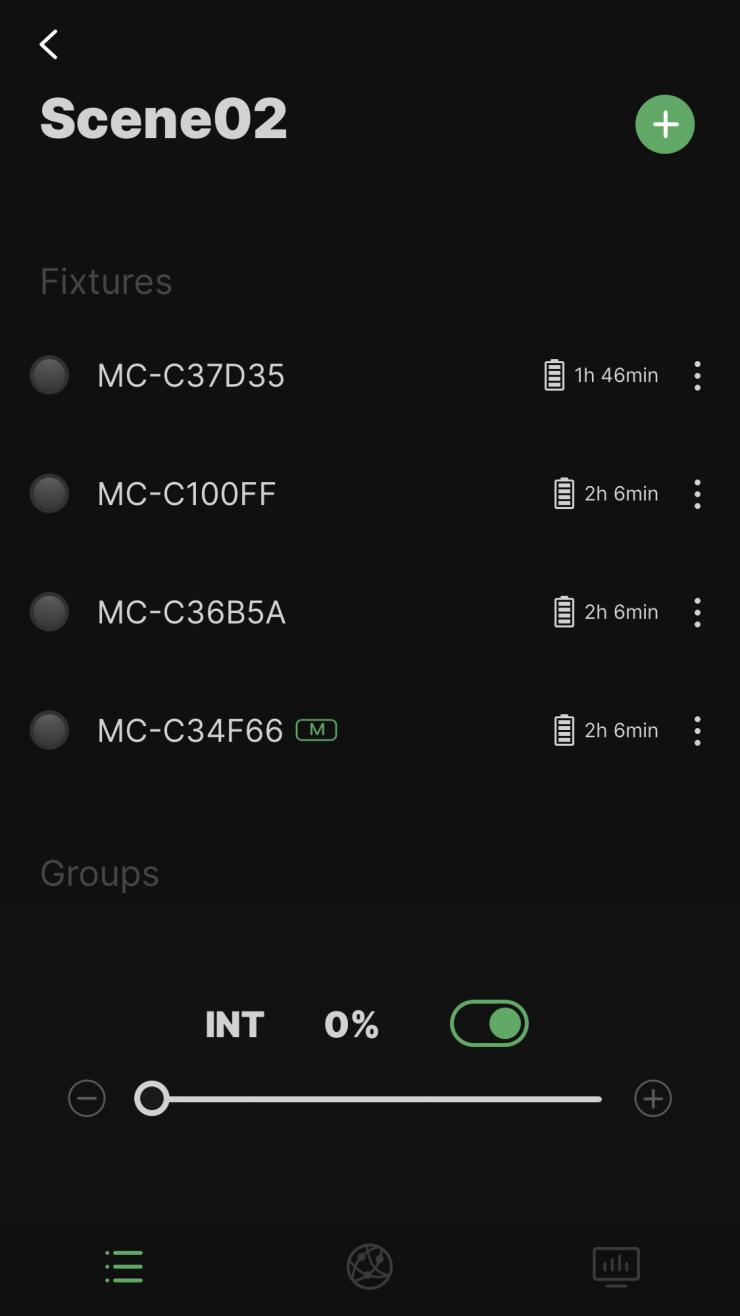
Now you can control all of the lights at once where if you make one change it is applied to all of the lights. You can also make changes to individual lights or turn individual lights on or off.
If you want to see which light is which you can just select a light and it will then flash for around 5 seconds.
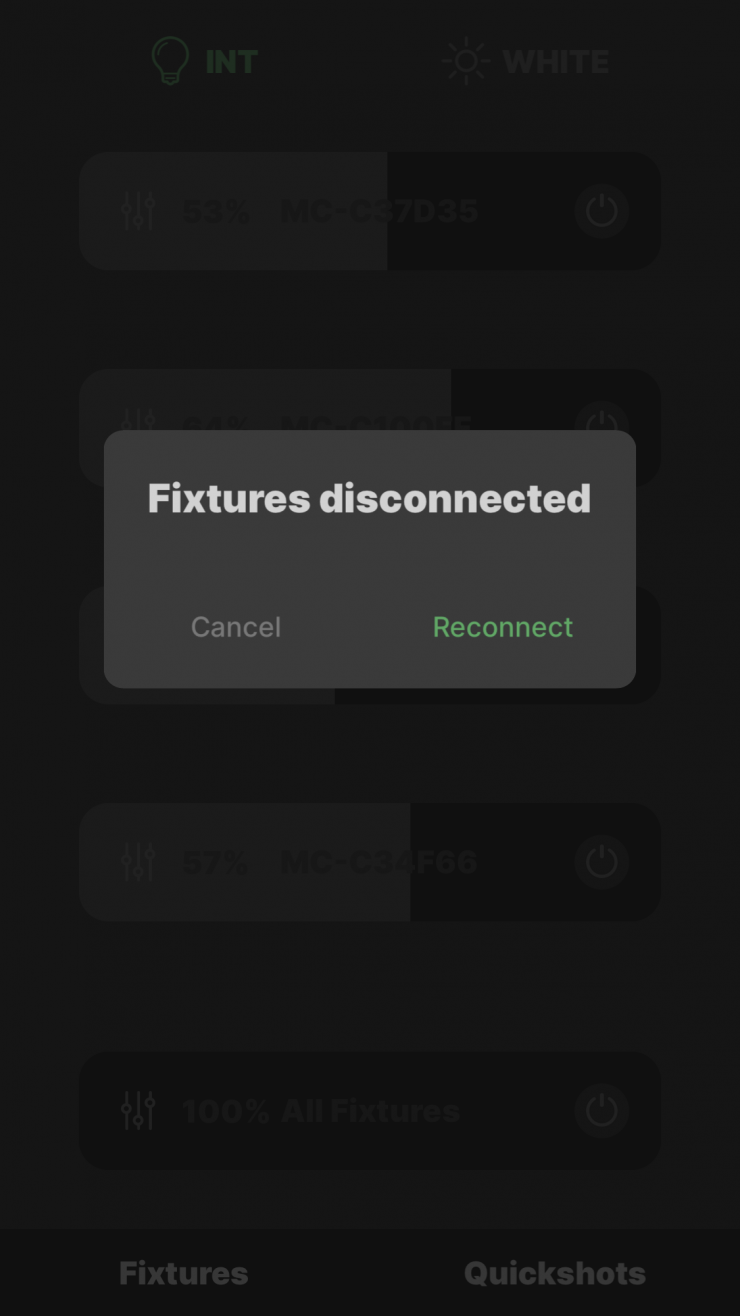
If you turn the lights off, you can simply turn them back on and then hit Reconnect, and then you are good to go again.

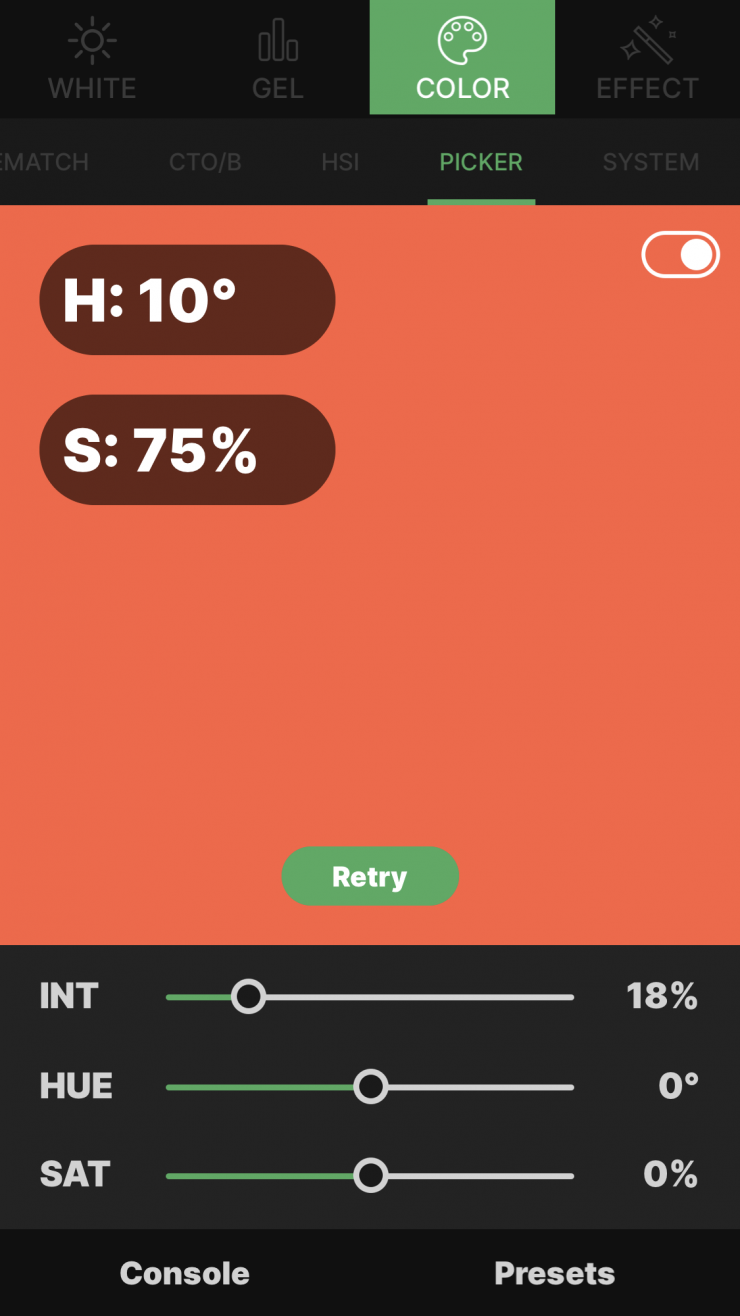
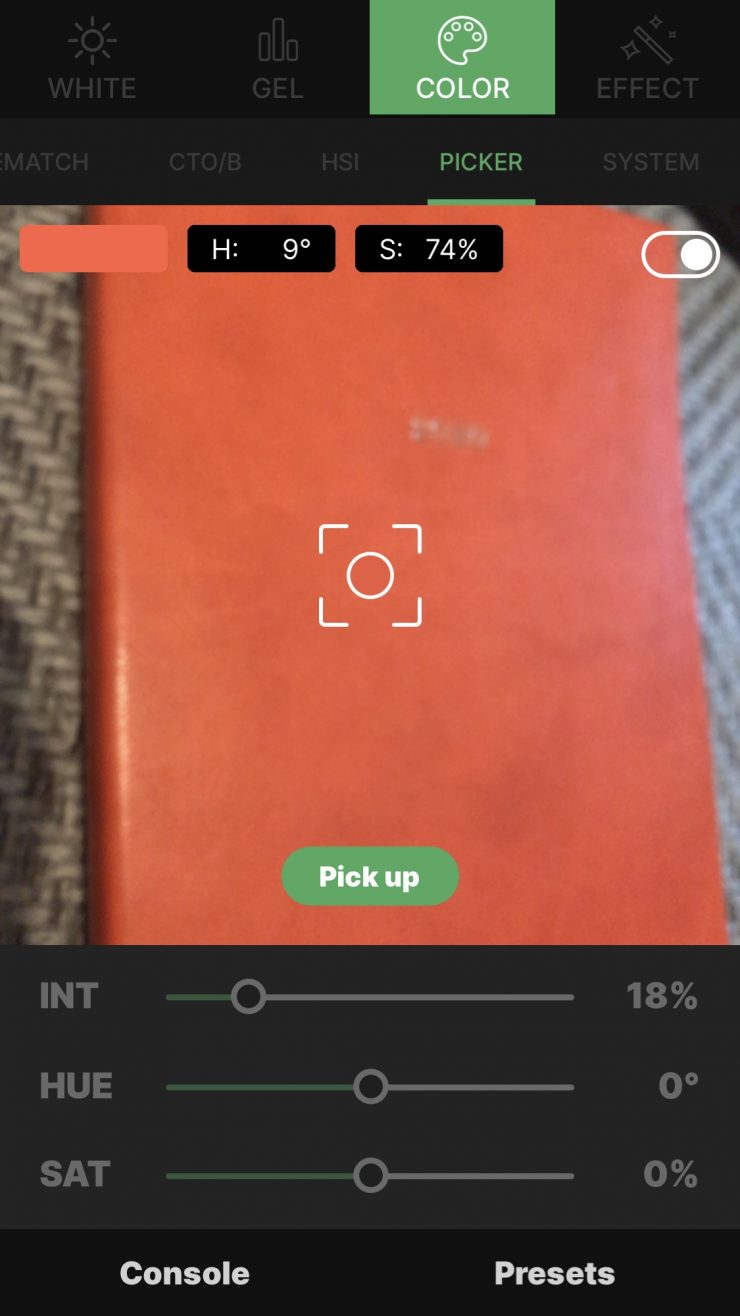
There is a color picker function within the app where you can take a picture with your smartphone and then it will attempt to create that color with your light. This works reasonably well, but it won’t work for all types of colors.
The Sidius Link App is certainly fully featured and you can do a lot, but there are so many screens that it can take some time to work out what you are doing. Sometimes less is more. To be fair, Aputure has put a lot of features into this App, but it could be simplified a little more.
Output & Kelvin color temperature accuracy
Erik already did a hands-on with the Aputure MC last year, but I thought I would do my due diligence and test the fixtures that come in this kit.
I tested the Aputure MC at a variety of Kelvin color temperatures with a Sekonic C-800 Spectrometer to find out how much output the light had and how accurate the Kelvin color temperature reproduction was. All readings are taken at a distance of 1m (3.28ft) in a controlled environment.
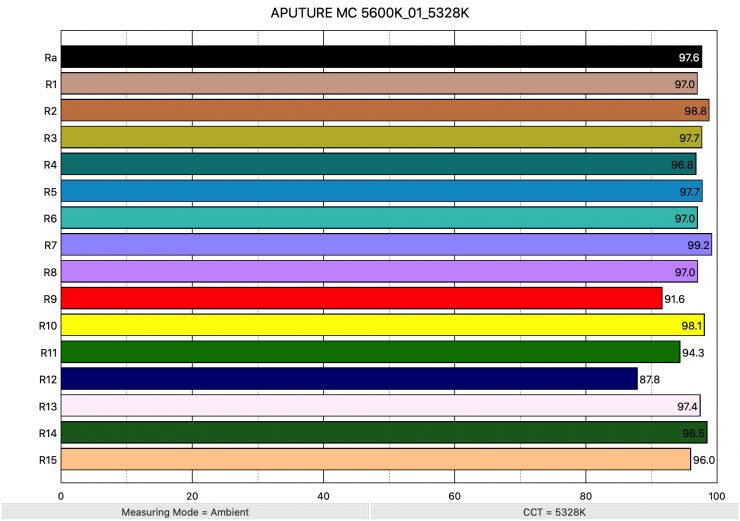
5600K
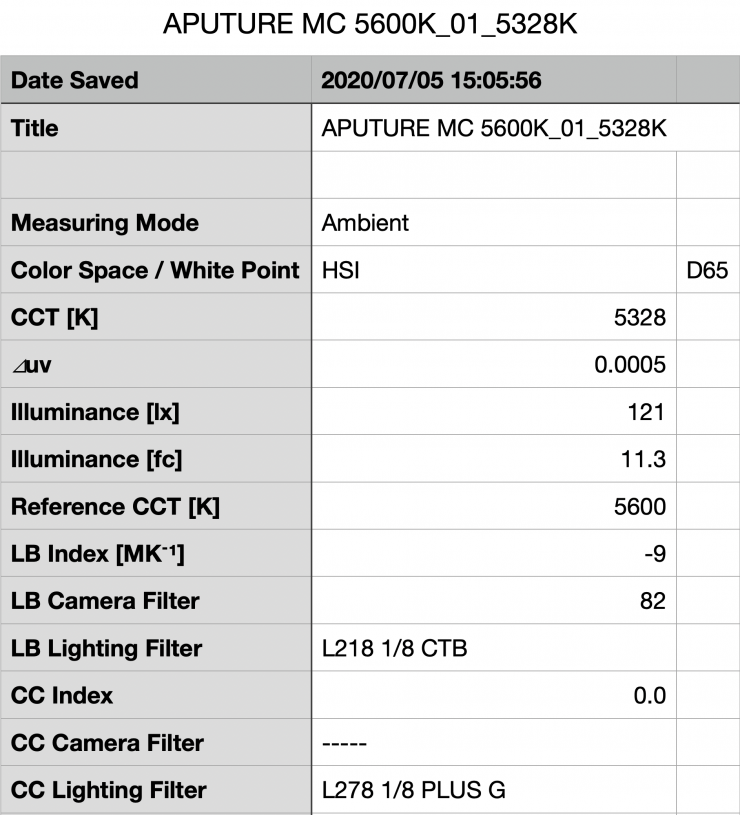
Above you can see the light recorded an output of 121 lx 11.3 (fc) when set at 5600K. Aputure claims an output of 100 lx at 1m, My testing showed that it exceeded that figure.
This output is not a lot and you need to keep this in mind when using the fixture. The MC is a small light, with a small output and it will only be suitable to use for select applications.
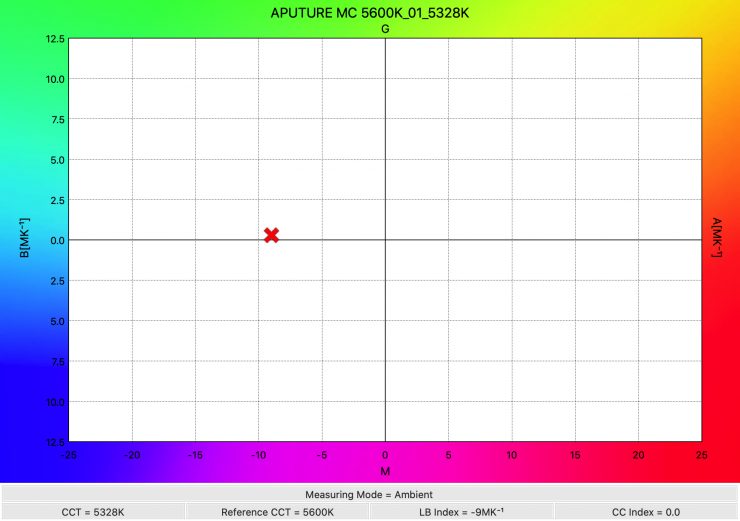
The MC produced a Kelvin color temperature of 5328K. The Superpanel had a CC Index score of 0. The 5328K reading was ok, but I expect better for a 5600K source.
3200K
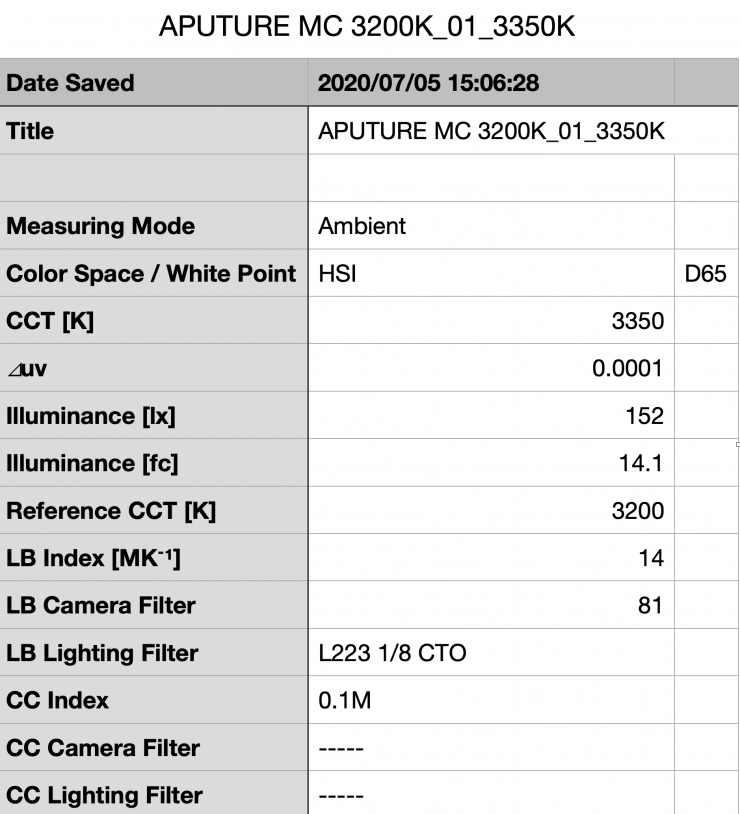
Above you can see the light recorded an output of 152 lx (14.1 fc) when set at 3200K. The output was 25.62% more than when using the light at 5600K.
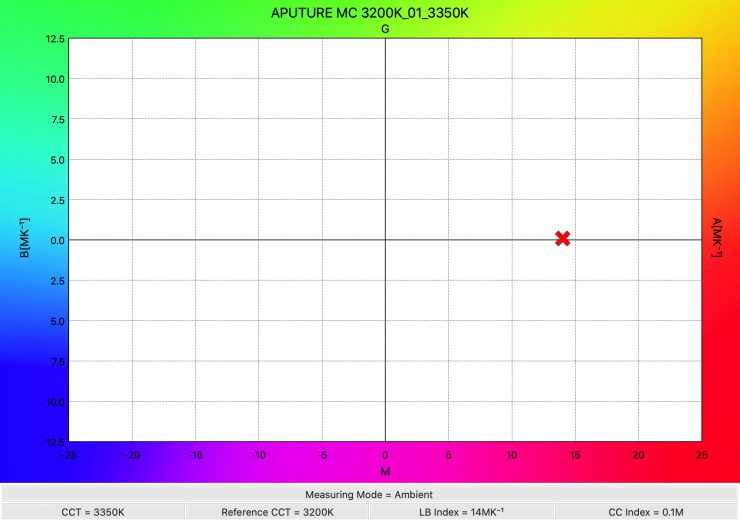
The MC produced a Kelvin color temperature of 3350K. Again, this was an ok reading, but it could be better. The light had a 0.1M CC Index score.
As the Aputure MC can produce Kelvin color temperatures from 3200K up to 6500K, I thought I’d also test the light at its extremes.
Summary of output and Kelvin color temperature results
3200K – 152 lx (14.1 fc) and a Kelvin color temperature reading of 3350K
4500K – 145 lx (13.5 FC) and a Kelvin color temperature reading of 4661K
5600K – 121 lx (11.3 fc) and a Kelvin color temperature reading of 5328K
6500K – 132 lx (12.2 lx) and a Kelvin color temperature reading of 6120K
These results show me that the lights output is the highest at 3200K and it starts to gradually increase as the Kelvin color temperature goes up. Surprisingly at 5600K it had the lowest output. The Kelvin color temperate accuracy of the light could be better.
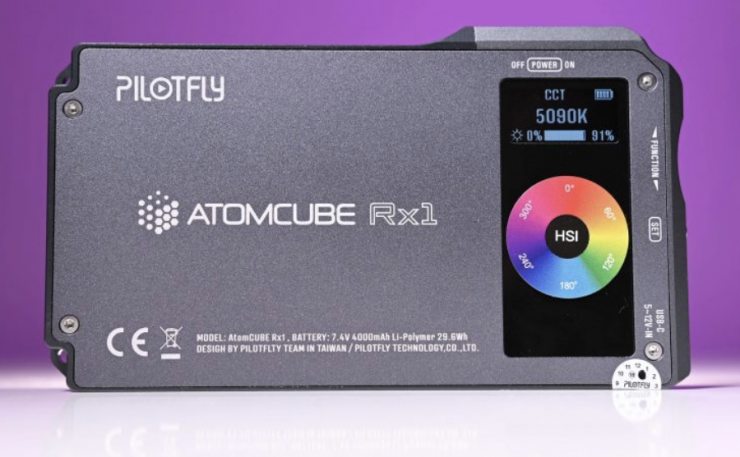
So how do this output and Kelvin color accuracy compare to a similar style light such as the Pilotfly ATOMCUBE RX1 RGBCW Video Light? Well, below you can see:
3200K
| Aputure MC | Pilotfly ATOMCUBE RX1 | |
| Output | 152 lx | 371 lx |
| Kelvin Color Temperature | 3350K | 3317K |
| CC Index | 0.1M | 0.6G |
5600K
| Aputure MC | Pilotfly ATOMCUBE RX1 | |
| Output | 121 lx | 382lx |
| Kelvin Color Temperature | 5328K | 5330K |
| CC Index | 0 | 0.8G |
The Pilotfly ATOMCUBE RX1 has way more output than the Aputure and has very similar Kelvin color temperature accuracy. Before you jump to conclusions, wait till you see some more of the comparisons I do further down in the review.
CC Index & ⊿uv
The CC Index displays the CC correction value and whether any magenta or green need to be added or subtracted. 1 CC corresponds to 035 Kodak CC values or 1/8 Rosco filter values. Any reading less than +1.00 or -1.00 and you’re probably not going to need to make any kind of adjustment. The ⊿uv is the value to show how much this light is away from being an ideal light source (black body radiation = incandescent lamp). As with the CC Index you want this number to theoretically be zero. Kelvin is not a linear value, so we need to convert from Kelvin to MK-1 to compare the values of color temperature. To calculate from Kelvin to Mired is MK-1= 1*1000000/Kelvin. While this may sound confusing, it is the only way of measuring if the Kelvin shift is significant enough to warrant having to use a filter for correction. Below are the results for the Aputure:
Kelvin Vs MK-1
| Kelvin | Difference in K | MK-1 | Difference in MK-1 | |
| SET VALUE | 3200K | 0 | 312.5 | 0 |
| ACTUAL READING | 3350K | 150 | 298.51 | 13.99 MK-1 |
| SET VALUE | 4500K | 0 | 222.22 | 0 |
| ACTUAL READING | 4661K | 161 | 213.17 | 9.05 MK-1 |
| SET VALUE | 5600K | 0 | 178.57 | 0 |
| ACTUAL READING | 5328K | 272 | 187.69 | -9.12 MK-1 |
| SET VALUE | 6500K | 0 | 136.93 | 0 |
| ACTUAL READING | 6120K | 380 | 163.39 | -26.46 MK-1 |
These figures might look confusing, but what it tells me is that the light could be more Kelvin color accurate. Any MK-1 score that is under -9/9 means you wouldn’t have to use any color correction gels. With this light at 3200K and 6500K, you would need to correct the light by either making adjustments to the Kelvin color temperature on the light itself or use color correction gels.
CC INDEX & ⊿uv
| CC INDEX | ⊿uv | |
| 3200K | 0.1M | 0.0001 |
| 4500K | 0.2.M | 0.0013 |
| 5600K | 0.0 | 0.0005 |
| 6500K | 0.2G | -0.0001 |
Color Rendering
So now that we have seen how much output and what the Kelvin color temperature accuracy is of the Aputure MC let’s see how it performs when it comes to replicating accurate colors.
5600K
Above you can see that when the light was set at 5600K it recorded an average CRI (R1-R8) of 97.6 and an extended CRI (R1-R15) of 96.3. For replicating accurate skin tones it recorded 91.6 for R9 (red), 97.4 for R13 (closest to caucasian skin tones), and 96 for R15 (closest to Asian skin tones).
These were good scores, but CRI scores are not the best way of judging modern-day LED fixtures.
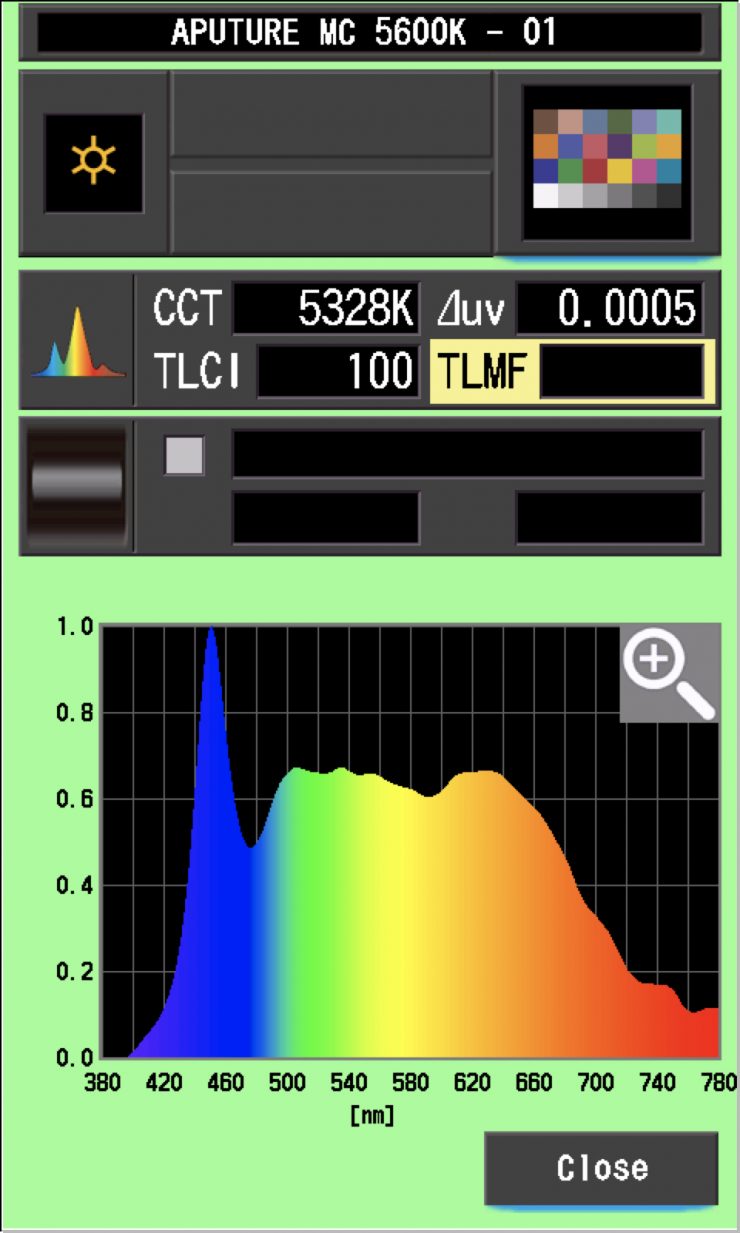
The light had a perfect TLCI score at 5600K of 100. Please don’t get carried away by the TLCI score. TLCI measurements are not the best way to judge an LED lighting source, especially if you are using a CMOS sensor camera.
3200K
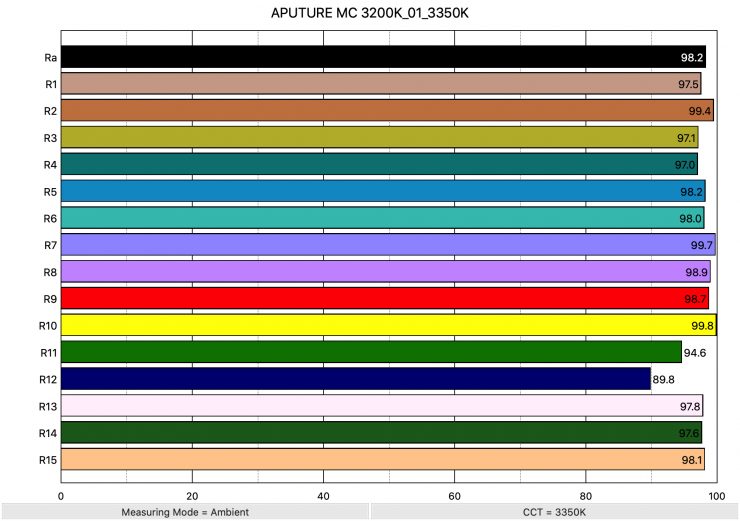
Above you can see the scores for when the light was used at 3200K. It recorded an average CRI (R1-R8) of 98.2 and an extended CRI (R1-R15) of 97.48. For replicating accurate skin tones it recorded 98.7 for R9 (red), 97.8 for R13 (closest to caucasian skin tones), and 98.1 for R15 (closest to Asian skin tones). These results were excellent.
At 3200K the light had a TLCI score of 99.
So how do these results compare to a light like the Pilotfly ATOMCUBE RX1? Below you can see:
3200K
| Aputure MC | Pilotfly ATOMCUBE RX1 | |
| Extended CRI | 97.48 | 93.2 |
| R9 | 98.7 | 90.9 |
| R13 | 97.6 | 92.6 |
| R15 | 98.1 | 93 |
5600K
| Aputure MC | Pilotfly ATOMCUBE RX1 | |
| Extended CRI | 96.3 | 92.3 |
| R9 | 91.6 | 80.2 |
| R13 | 97.4 | 93.9 |
| R15 | 96 | 90.1 |
The Aputure has better CRI scores across the board when compared to the Pilotfly.
Spectral distribution
Let’s now look at the lights spectral distribution.
5600K
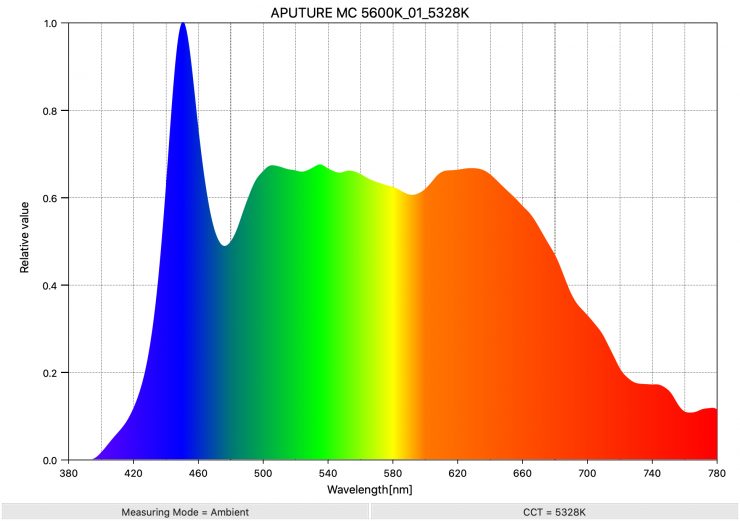
Above you can see the spectral distribution of the Aputure when it is set at 5600K. The spectral distribution is very good at 5600K. While there are a few dips and ridges, it is a very full spectrum.
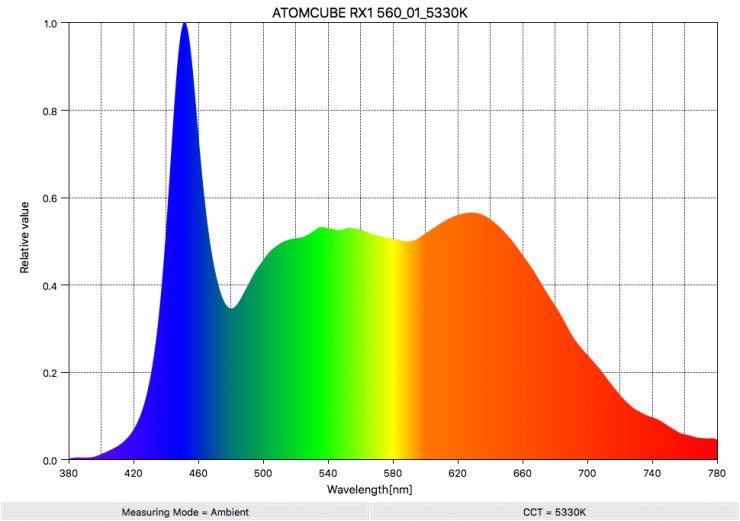
As a comparison, above you can see the spectral distribution of the Pilotfly ATOMCUBE RX1 5600K.
The spectral distribution of the Aputure is a lot fuller and better than that of the Pilotfly.
3200K
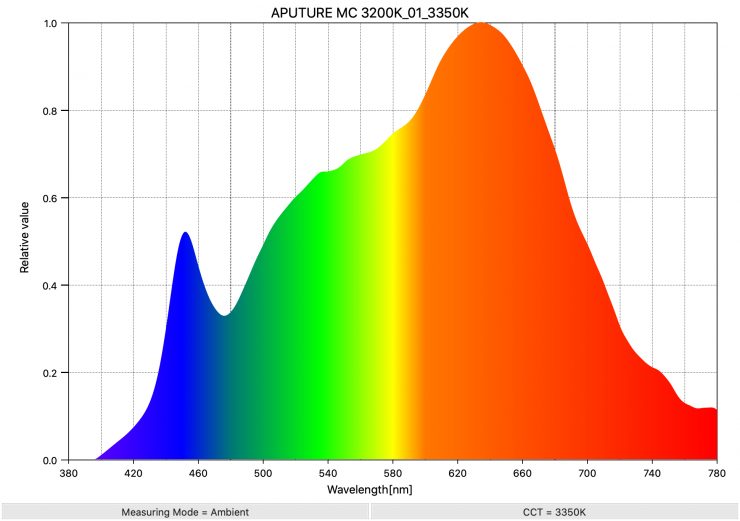
Above you can see the spectral distribution of the Aputure when it is set at 3200K. The spectral distribution is excellent at 3200K and the light doesn’t have any large green spikes. This spectral distribution is very good for a LED light at 3200K.
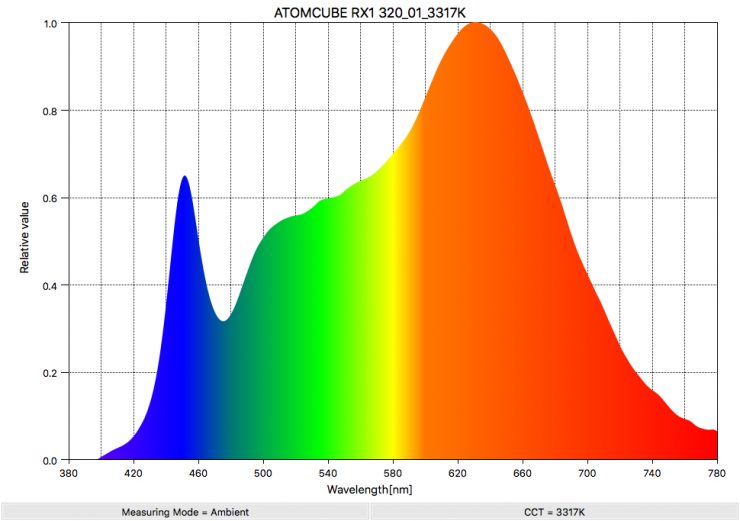
Above you can see the spectral distribution of the Pilotfly ATOMCUBE RX1 when set at 3200K.
As you can see, the Pilotfly has a small green push compared to the Aputure.
SSI
SSI (Spectral Similarity Index) was developed by the Sci-Tech Council of the Academy. SSI gives me the ability to set any light as a standard, or use predefined standards (such as CIE D55), and then give other lights an SSI score based upon how well they will match standards such as CIE D55 measure spectral response and compare it directly against an ideal light source.
SSI is by far the best way of judging how good a LED light is. It is a far better indicator than CRI or TLCI.
3200K
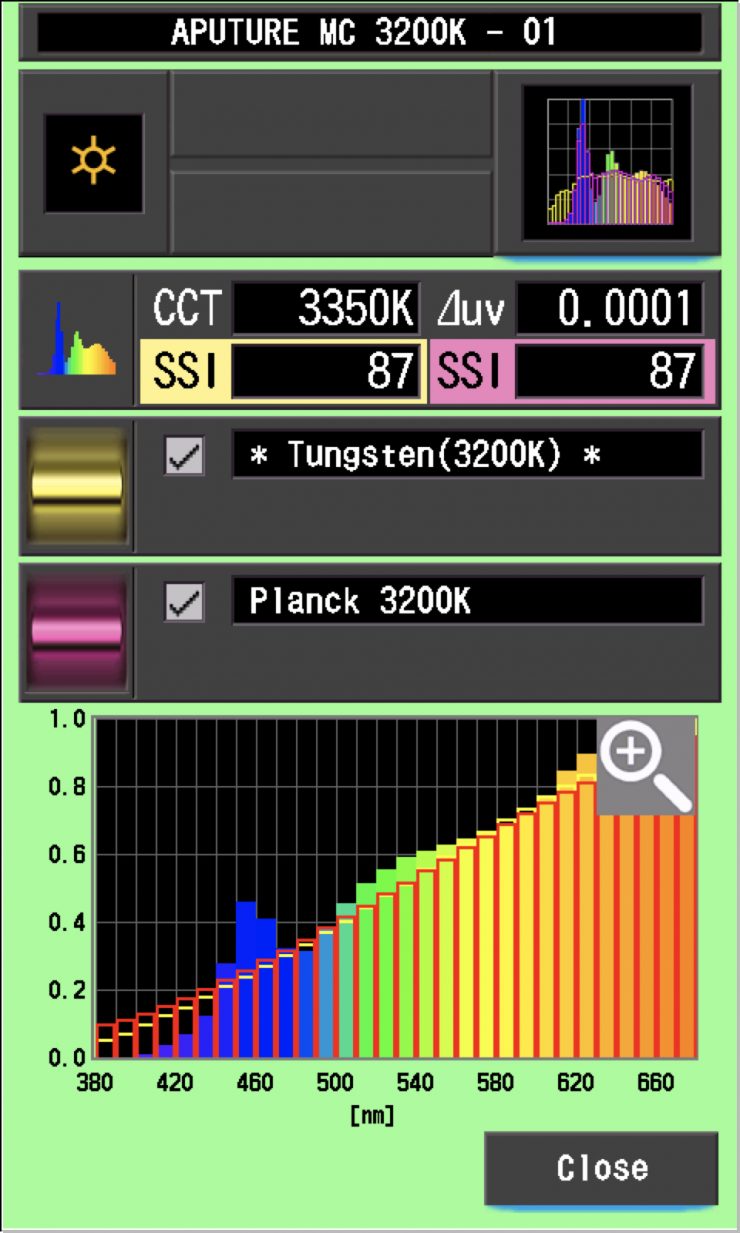
In this graph, the Gold bars indicate a perfect 3200K (Tungsten source. The Red bars indicate a Planck 3200K source. This lets us compare how close to a perfect 3200k lighting source the Aputure is. A score in the low to mid-80s is very good for a 3200K LED light, however, the Aputure had scores of 87, which is higher than any 3200K score I have seen to date.
5600K
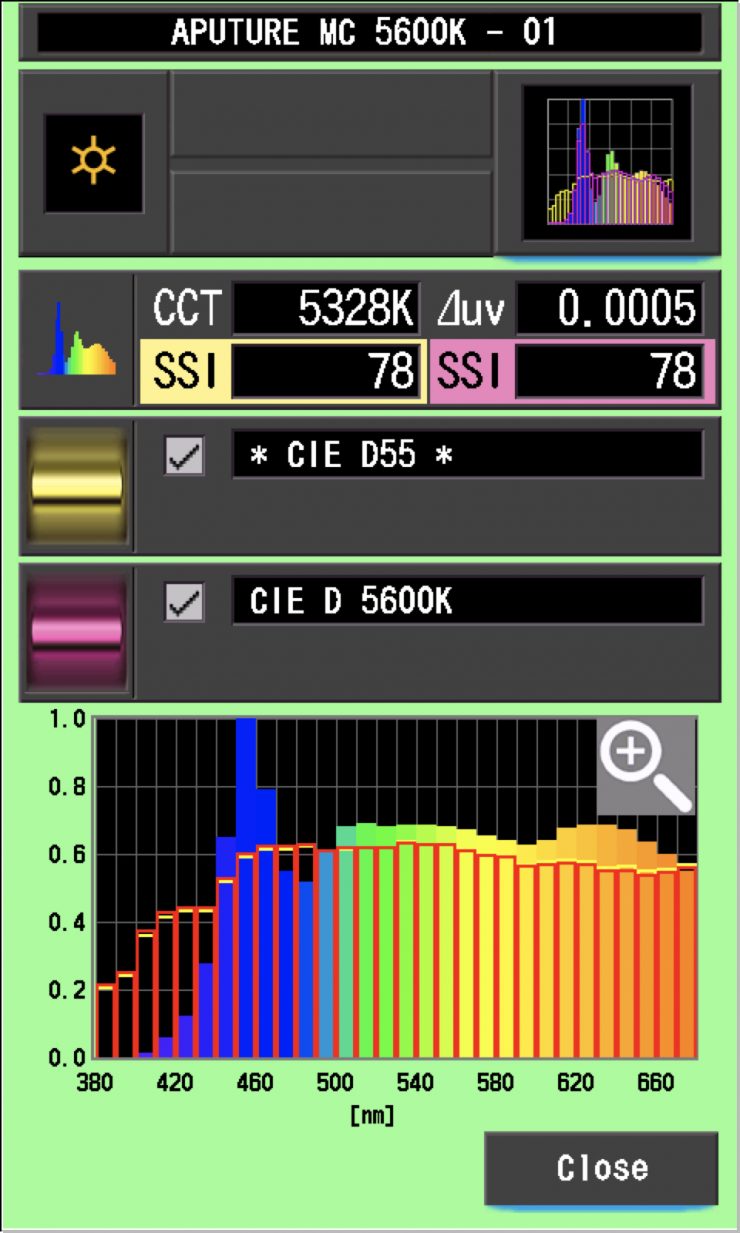
In this graph above the gold bars indicate a perfect D55 source. The Red bars indicate a 5600K source. This lets us compare how close to a perfect 5600K lighting source the Aputure is. A score in the low 70’s is very common for most 5600K LED sources. The Aputure had scores of 78, which is excellent for a 5600K LED light.
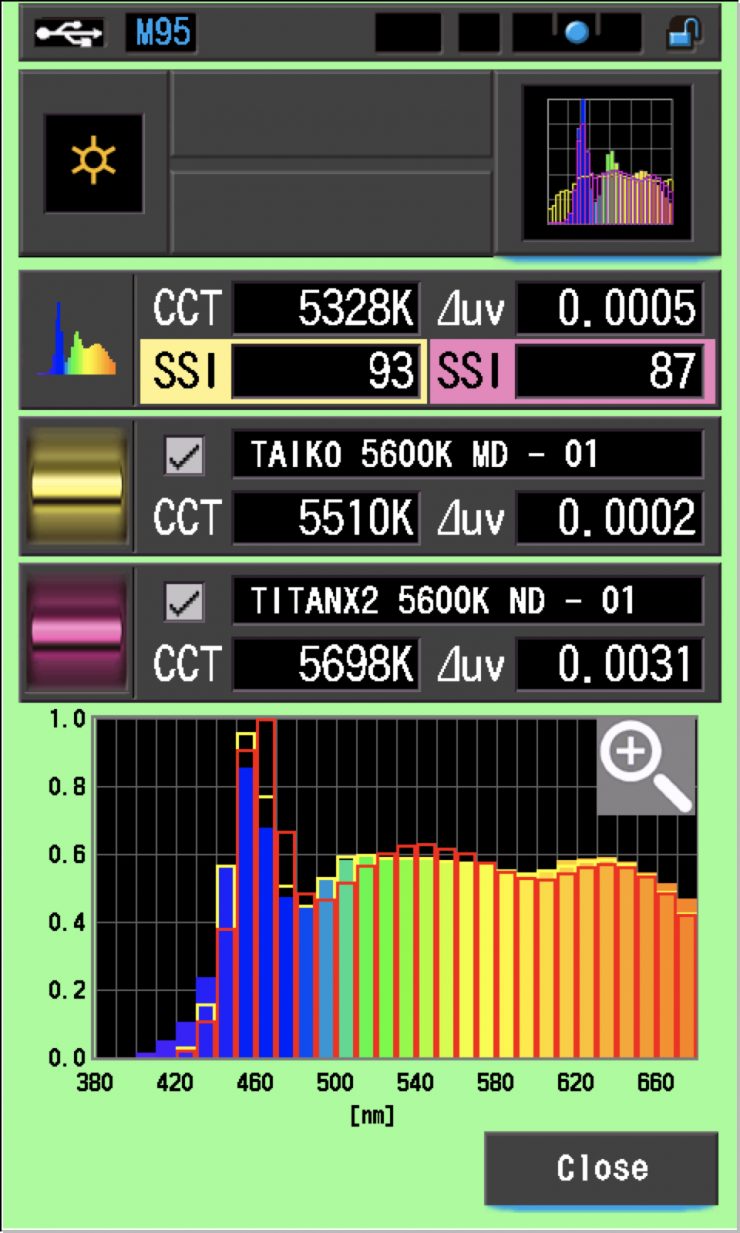
The main reason we want to record SSI scores is so we can see how well they match with other lights. Just as an example, let’s see how well the Aputure matched the Rotolight Titan X2 and the Luxli Taiko when all three lights are set at 5600K. As you can see the Aputure matches fairly well against both lights, but you would need to make adjustments to try and get them to match more closely.
So how do the Aputure’s SSI scores compare to the Pilotfly ATOMCUBE RX1? Below you can see:
| Pilotfly ATOMCUBE RX1 | Aputure MC |
| 3200K | 3200K |
| Tungsten (3200K): 83 | Tungsten (3200K): 87 |
| Planck 3200K: 82 | Planck 3200K: 87 |
| 5600K | 5600K |
| CIE D55: 74 | CIE D55: 78 |
| CIE D 5600K: 74 | CIE D 5600K: 78 |
As you can see, the Aputure has better SSI scores than the Pilotfly.
Real world performance & quality of light
As I always say, photometric scores only tell you part of the story. So do the scores from the Aputure MC translate into real-world performance?
Despite not having great Kelvin color temperature accuracy, the Aputure MC still has an excellent spectral response and SSI scores. This is a very good light as far as accuracy goes, despite what the Kelvin color temperature results show.
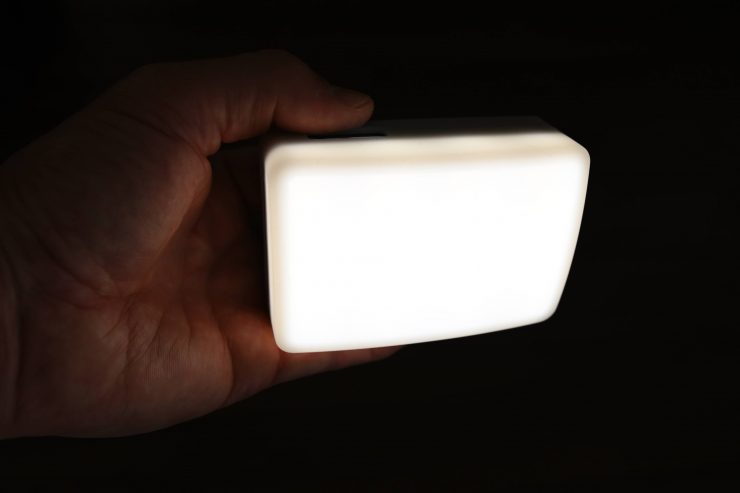
The light it does create is quite nice, but you need to remember that the output is relatively low. You also need to take into account that the beam angle is fairly narrow.
Small-sized lights like the MC are only going to be suitable to use as an accent light, an on-camera light (if you don’t require much output) or for lighting smaller sized objects where you can place the light nice and close.
As a stand-alone single MC light, the use is fairly limited to darker environments where a little color or highlight is needed from a short distance away. When using a single MC in HSI RGBWW mode the LUX drops to approximately half of the output. If your key is putting out 300 LUX the little MC won’t be as effective, however, if the environment is moody and somewhat dark it could work.
In the sample above Erik shot at a shutter speed of 1/50 at f5 and an ISO of 400. For lighting, the key is a Speckular kit inside a softbox set at low output and the Aputure lantern with 300d II set to 8%. The MC is placed approximately 1-foot from the subject.
With a four or twelve fixture kit you have a lot of options to use them as practicals peppered all over a scene. With the Sidus Link App and mesh feature, you can easily control up to 100 MC lights in a stable environment or treat them as one bank. It’s up to your creativity on how best to use the MC LED light.
How does it compare to the competition?
As we have seen throughout this review, the Aputure MC is very color accurate compared to the Pilotfly ATOMCUBE RX. However, it does have significantly less output. There are literally countless small-sized RGBWW LED lights out there, so I’m not even going to try and compare them all.
Instead, I have just been focusing on a light I have previously reviewed and that has very similar functionality
Let’s break down what both lights offer:
| Aputure MC RGBWW | Pilotfly ATOMCUBE RX1 | |
| Kelvin Color Range | 3200-6500K | 2500K-8500K |
| Weight | 4.59 oz / 130 g | 9.70 oz / 275 g |
| Display | Yes | Yes |
| Bluetooth Mesh | Yes | Yes |
| App | Yes | Yes |
| FX Lighting Modes | Yes | Yes |
| Integrated Battery | Yes, 2600 mAh | Yes, 4000 mAh |
| Wireless Charging | Yes | No |
| Power Input | USB Type-C | USB Type-C |
| Mounting | 1/4″-20 Female, Magnetic | 1/4″-20 Female |
| Max Power Consumption | 5W | 15W |
| Price | $90 USD | $169 USD |
Do you actually need an RGBWW light?
Just because we want something, doesn’t necessarily mean that we need it. Whether you actually need an RGBW light, especially a small-sized one really depends on the type of things that you shoot.
Even if you have no need for creating colors or using effects with your lighting, RGBWW lights usually give you access to creating a far wider range of Kelvin color temperatures than their regular LED counterparts.
Price & Availability
The Aputure MC-4 Light Travel Kit starts shipping on July 27th and it is competitively priced at $499 USD.
Conclusion
Aputure MC lights themselves are very color accurate and I love the built-in magnets. While they may be a little underpowered, the ability to hide them in small spaces and to be able to mount them to a wide array of metal objects shouldn’t be overlooked.
The Sidius Mesh and App control are both excellent and if you are working in small crews or as a solo operator it is great to be able to control multiple lights at once.
As far as the Travel Kit is concerned, I like the concept and idea behind it, but in my personal opinion, it almost seems a bit gimmicky.
While it does work as advertised, wouldn’t it be easier to just attach up the lights to a USB-C power hub and charge them all at once? This would actually take up less space than keeping the lights in the case. As all of the accessories are in a separate bag you are going to need to put the case and that bag in another bag anyway.
All-in-all, Aputure continues to innovate and think outside of the box, and while the concept of this kit may be better than the reality, you have to applaud companies who try something new and different.
To be fair, the 4 Light Travel Kit is only going to cost you about $100 USD more than buying four separate MC lights. You also get a bunch of accessories, so even if you don’t end up liking or using the case, it doesn’t really matter.
The lights themselves are nice and color accurate, but their output is rather low, so you need to carefully consider what you want these lights for if you are considering purchasing.
Like what we do and want to support Newsshooter? Consider becoming a Patreon supporter and help us to continue being the best source of news and reviews for professional tools for the independent filmmaker.


