The DJI Osmo Pocket was just announced, and luckily here at Newsshooter, we have been able to get hold of a full production version for a couple of days to review. This review is based on how the product performs as a professional filmmaking tool, and not as a consumer device. So without further ado, let’s get on with it.
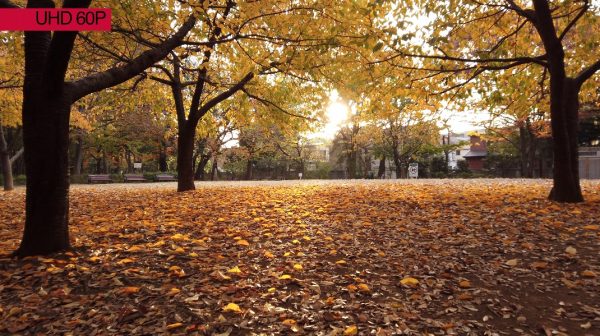
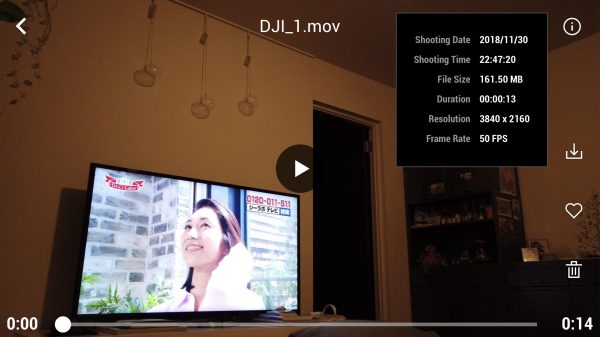
If you want to download some original clips from the Osmo Pocket you can below:
From the air to the ground
The Osmo Pocket is quite literally a drone camera that has been attached to a handle. Just like the original Osmo, the Pocket leverages DJI’s drone technology and a lot of the tech that they have developed over recent years. DJI has always pushed the boundaries with what is possible. The Mavic Pro really was an engineering marvel, given its capabilities and small size. The Osmo Pocket builds on this philosophy of miniaturizing tech and making a product that is as small as possible. But will it be a case of style over substance?
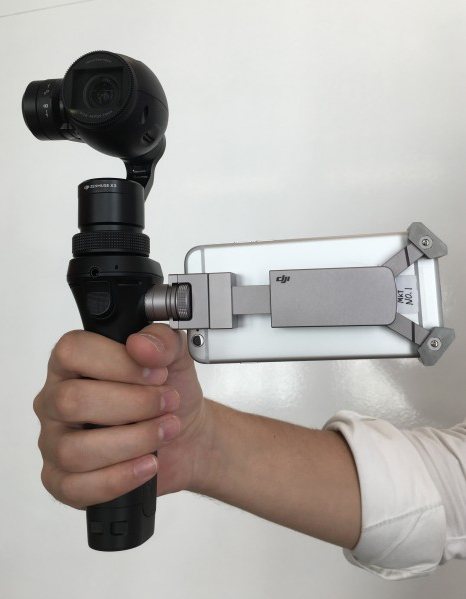
If you compare the original Osmo which was only released three years ago, to the Osmo Pocket, you can see just how far technology has come. DJI is essentially giving you a very similar product that is a fraction of the size at a lower price.
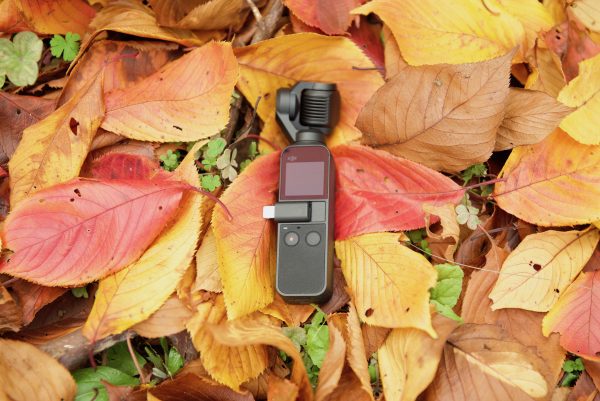
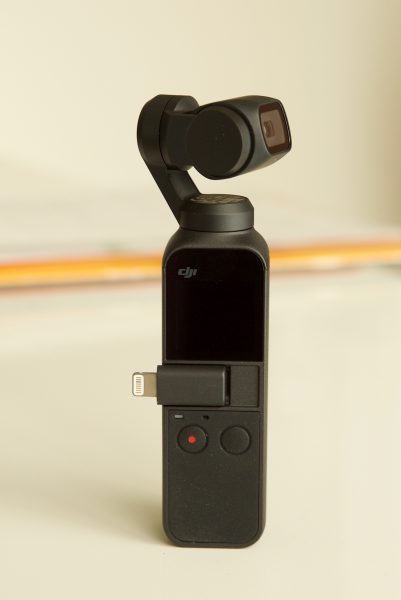
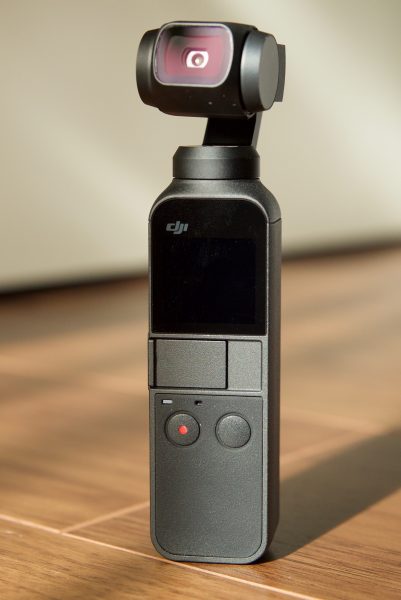
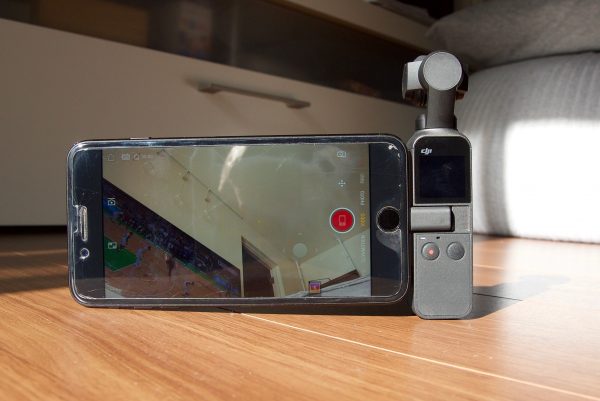
The DJI Osmo Pocket is tiny
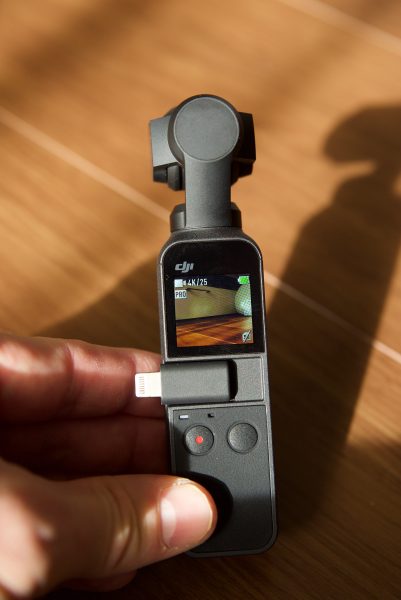
The Osmo Pocket is absolutely tiny and unlike the BMPCC 4K, this actually does fit in your pocket. I wasn’t quite ready for just how small and lightweight it actually is. It’s 4.8″ (12.19cm) tall and weighs just 4 oz (113.4g). The physical size (or more specifically, the lack of) is what sets it apart from any other product on the market.
What the DJI Osmo Pocket is and what it isn’t
I’m going to come out and say it, the Osmo Pocket is a consumer product, not a professional one, and I have absolutely no problem with that. DJI isn’t targetting this product at professional users, but that’s not to say it can’t be used in a professional environment, but you really need to be aware of its limitations. Anyone who buys an Osmo Pocket and expects it to be some sort of miracle device that can replace other more expensive gimbals and cameras is probably going to be disappointed.
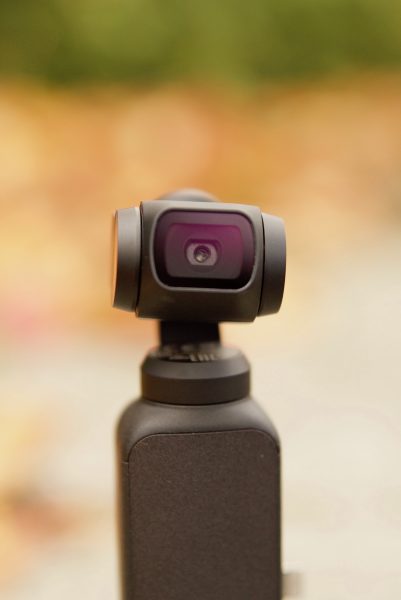
The image quality is not going to rival a GH5, BMPCC 4K, X-T3, Sony a7, or any other similar camera. The Osmo Pocket uses a tiny 1/2.3-inch sensor and a fixed f 2.0 lens. The focal length is around 26-28mm (35 mm format equivalent).
It’s certainly not a replacement for a larger gimbal, but more of an additional tool you can keep in your bag. Even though it is squarely aimed at the massive consumer market, there is no reason it can’t be used by a professional. If you were, or still are an Osmo owner or user, you will probably be quite happy with what the Pocket has to offer. In saying that, it does have quite a few limitations, and as long as you are aware of those limitations, you can get fairly decent results in the right conditions.
For Vloggers, VJs, news crews, people wanting to shoot BTS footage, and anyone who needs to get occasional stabilized shot and not draw attention to themselves, the Pocket is a nice bit of kit to have in your bag.
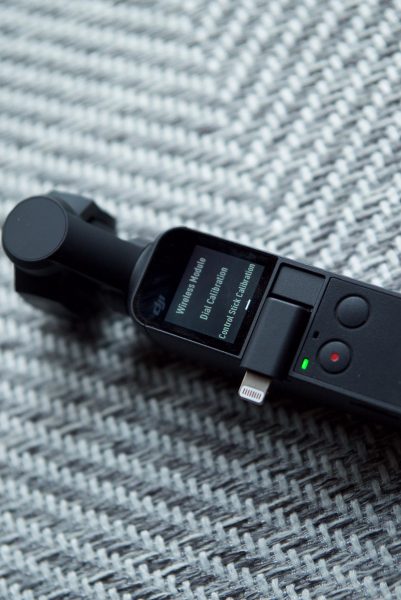
Buttons and control layout
The buttons and layout of the Osmo Pocket are simple and straightforward. With this device being aimed at a large consumer market, DJI needed to design the Pocket to be easy to use and operate.

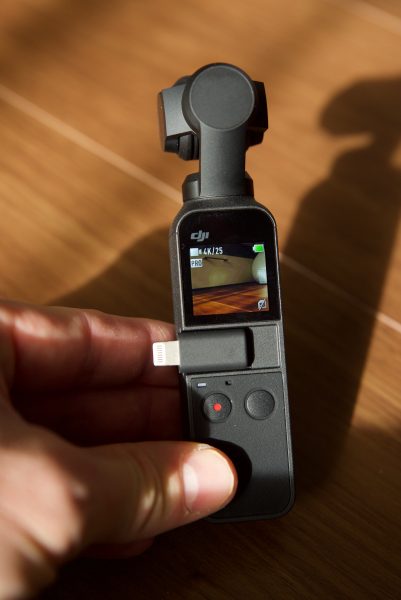
There are only two buttons on the Pocket, a record button and a multi-purpose button that acts as the power on/off, menu button and as a function button when you are shooting. There is also a kind of locking hot shoe style interface where the lightning connector, USB-C connector, and accessories can be attached. Speaking of locking connectors, if you don’t have a phone that uses a lightning or USB-C port then you won’t be able to attach your phone to the Osmo Pocket. The only way of using a phone that doesn’t have a lightning or USB-C interface would be to use the optional DJI wireless module.
When you are shooting the multi-purpose button does three things:
One press – A single press of the button toggles between Video and stills mode.
Two presses – By pressing the button twice, you recenter the gimbal and camera.
Three presses – By pressing the button 3 times, you flip the gimbal into selfie mode. If you press it three times again it will spin back into its original position.
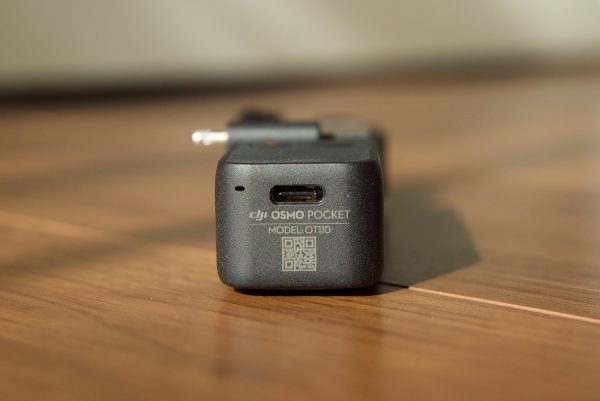
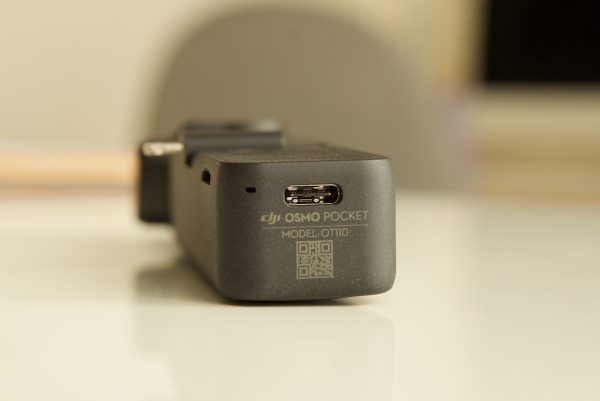
At the bottom of the gimbal, there is a USB interface for charging.
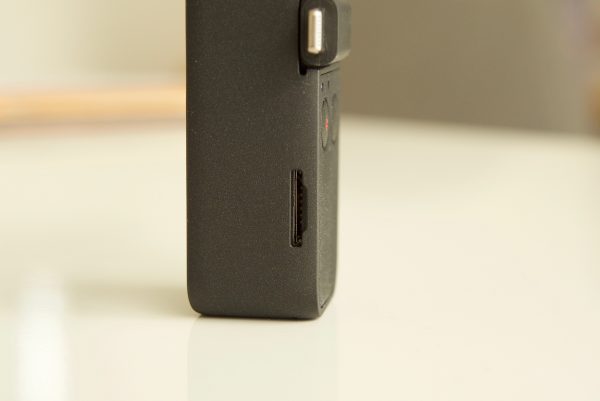
On the side, there is the slot for the Micro SD card.
There are no mounting points anywhere on the Osmo Pocket. If you want to mount it to something you will need to buy the additional accessory mount. I found a way around this by just using a simple smartphone mount. I really do wish DJI had of at least put a single 1/4-20″ thread on the bottom of the Pocket.
Osmo Pocket Build quality
The Osmo Pocket is surprisingly fairly solidly made. I guess that DJI had to take into account that it was going to mainly be a consumer product and people are bound to drop it. The body of the Pocket is a lot more robust than the gimbal and camera (no surprises there). The weakest link is definitely the camera. That’s not to say it’s going to break easily, but it will break before the body of the Pocket does.
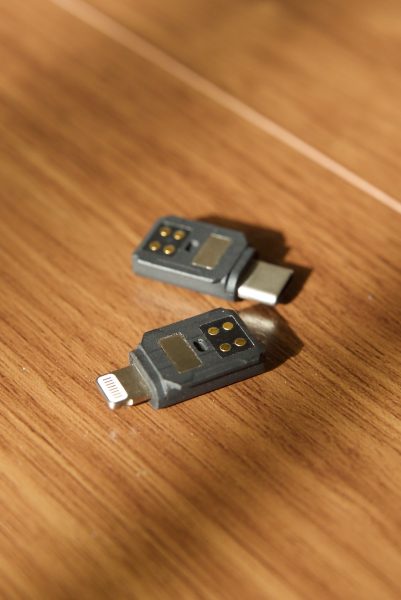
The locking hot shoe style interface is nice and robust and I found that the lightning and USB-C connectors stay firmly in place.
What do you get?
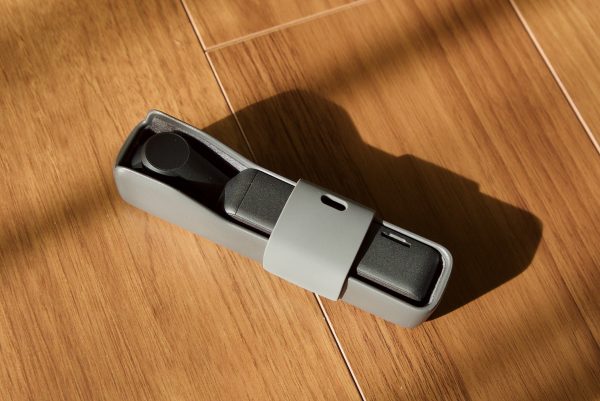
The Osmo Pocket comes with a lightning and a USB-C connector, a USB charging cable, a lanyard, and a nice carry case.
Touchscreen
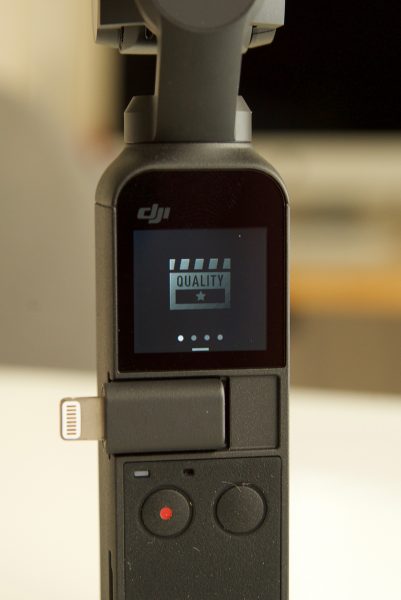
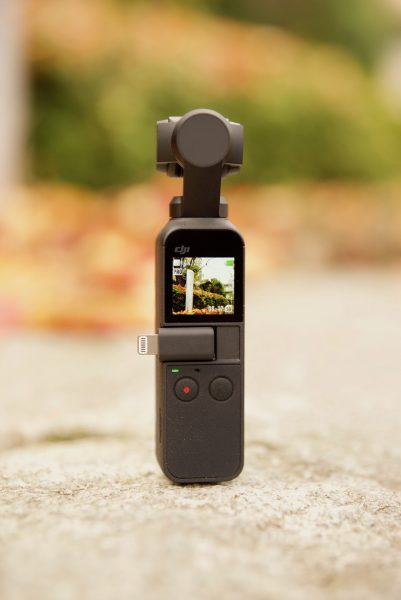
The gimbal camera uses a 1-inch integrated touch screen that is reasonable quality and can act as a live view as well as allowing you to toggle through the various shooting modes, adjust settings, and review your footage.
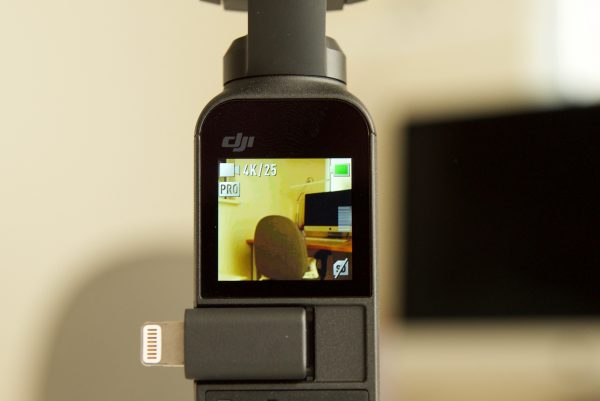
The inbuilt screen is postage stamp size and you can’t realistically expect to be able to judge anything more than framing on it. I do like that the Pocket does have a screen because at least you can see what is being recorded and frame up your shots (well sort of). The weird thing about the touchscreen is that in its default mode it displays a 4:3 image and not a 16:9 one. This means what you are seeing and what you are actually recording are two totally different things.
You can, however, change it to a 16:9 image in the settings menu. It’s not very clearly labeled and you can see what that option looks like above.
Speaking of the touchscreen, it is very responsive to the touch and easy to use. DJI has done a nice job with the interface on such a tiny screen. This is how it works:
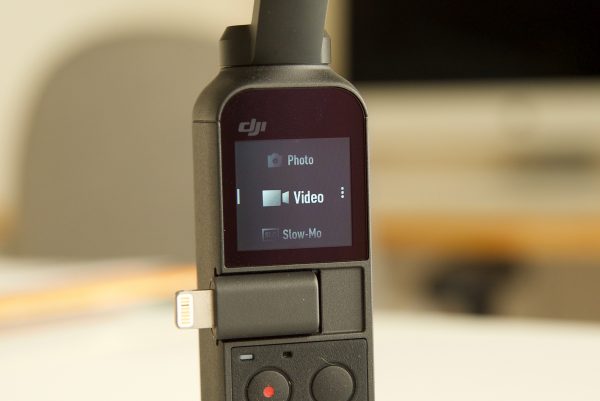
Swipe left – This gets you into your shooting modes where you can choose from Photo, Video, Slow-Mo, Timelapse, and Pano.
Swipe Right – This goes into playback mode so you can view your clips.
Swipe Up – This goes into your gimbal control mode where you can press to recenter the gimbal, flip the gimbal into selfie mode, change from slow follow to fast follow (or vice versa), and change between tilt lock, FPV, and Follow modes. What I like is when you press on the icons it tells you exactly what they are.
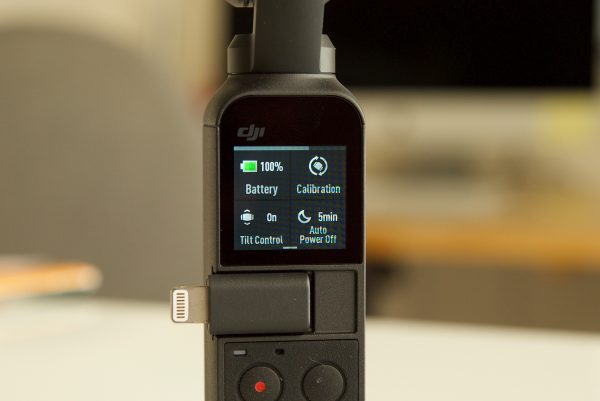
Swipe Down – This goes into the settings mode where you can see your battery level, Calibrate the gimbal, turn the tilt control on and off, enable the auto power off function after 5 minutes, see how much media storage you have and reformat your card, change the antiflicker setting, change the operating language, find out what firmware you are running, change the panorama mode, and change the brightness of the touchscreen.
It’s very easy to get out of the menu system, all you need to do is press one button. While the controls are pretty good on the touchscreen, they are somewhat limiting and you really do need to use the app on a smartphone to make a lot of the key changes. There is no way on the touchscreen of changing, let alone seeing key information like shutter speed, ISO, and white balance. You also can’t change between the auto and manual video shooting modes.
If you have made manual settings with a smartphone attached and then you disconnect your phone, the Osmo Pocket will keep those same settings.
The touchscreen display is really only useful if you are primarily shooting in the Auto mode. By default, the Osmo Pocket automatically goes to 4K 30p if you don’t have a smartphone attached and aren’t using the app.
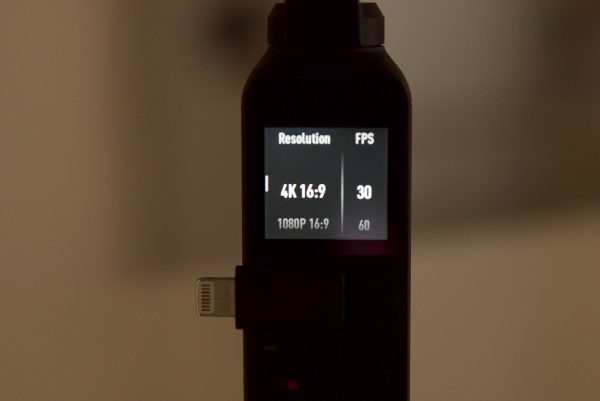
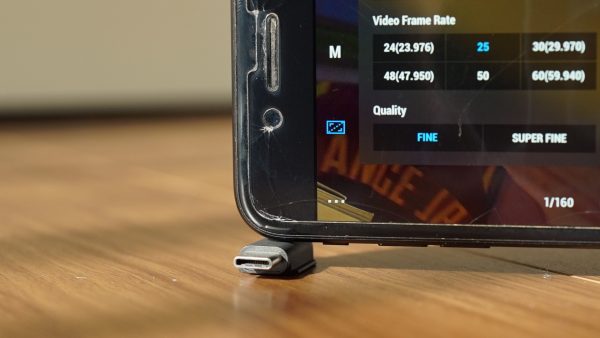
You can change the resolution and frame rates by swiping left once you are in the video menu. Strangely this only allows you to choose between either 30p or 60p. There are no options to choose 24, 25, 48 or 50p. If you want to shot in these resolutions then you need to select them using the Mimo app. Hopefully, this will change with a firmware update.
Battery
The Osmo Pocket uses a built-in LiPo 875 mAh battery. This can’t be replaced or removed. DJI quote an operating time of 140 mins when shooting 1080p 30 fps video continuously and a charging time of 73 mins.
Yes, it’s a pity the Pocket doesn’t have a removable battery that you can swap out, but the good news is that the battery charges up really quickly. I was finding that it took just over an hour for a completely dead battery to get charged up to full capacity.
I found the battery life to be more than acceptable if you are just going to use the Pocket for a few hours or a handful of shots. If you are taking it somewhere remote or you want to shoot with it for a whole day then you will need to get hold of a USB power bank.
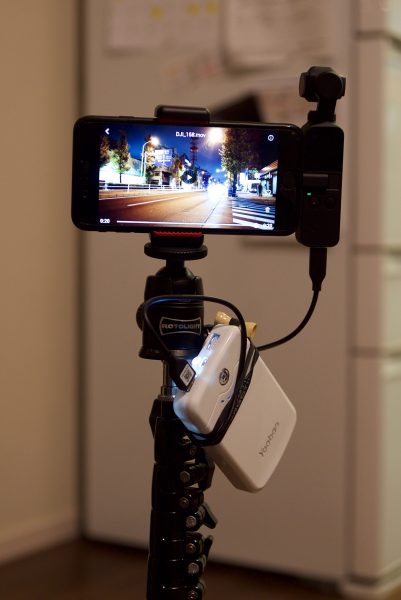
The nice thing is, you can actually charge and operate the Pocket at the same time. If you have a USB power bank it’s pretty easy to just plug it in and use it with the Pocket. I recommend you use a long cable and perhaps place the USB power bank in your pocket (not the Pocket, but your actual pocket!) because you can’t really attach it to the Pocket or your phone.
DJI Mimo app
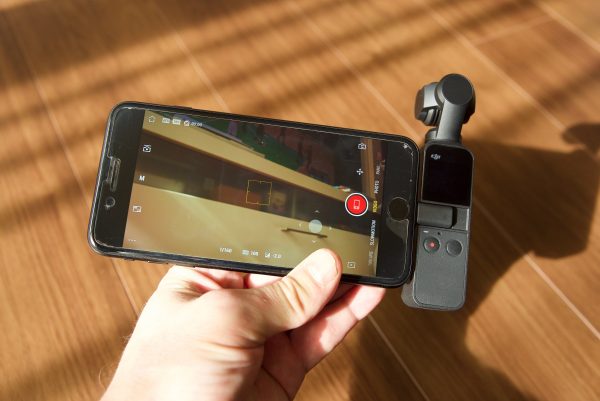
To get the most out of the Osmo Pocket you really do need to use the Mimo app and a smartphone. The Mimo app lets you monitor the Pocket’s image in real time as well as control all of its functionality and features. The only downside to using the app is you have to connect your smartphone to the Pocket, which takes away from the compact nature of the product.
Ideally, I think the best solution is to probably get the optional Wireless Module. That way you can connect via Bluetooth and make changes and monitor on your smartphone while maintaining the small footprint that the Pocket has. It’s strange that the Bluetooth wasn’t built into the Pocket, maybe they just ran out of room, or they just want to you spend more money by buying additional accessories.
Frame rates and resolution
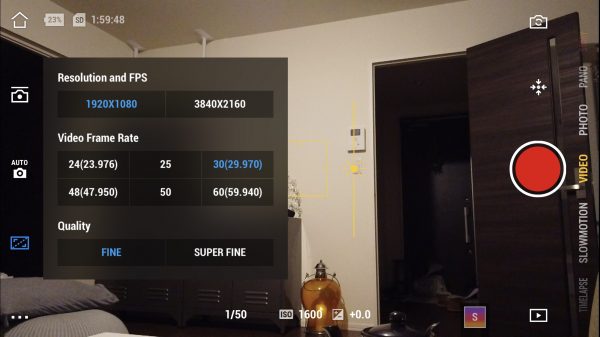
Despite being a consumer product for the masses, the Osmo Pocket has quite a few frame rates and resolutions to choose from. If you want to shoot in anything other than 30p or 60p you need to be in the Pro mode and not the Basic mode. Once in the Pro mode you can select 24 (23.976), 25, 30 (29.970), 48 (47.950), 50 or 60 (59.940). Now anyway you look at it, 4K 60p is impressive in a device this size. Even the new Mavic Pro 2 can’t do 4K 60p.

The Pocket can record in .Mov or .MP4. The H.264. Mov codec being used is a variable bitrate YUV 4:2:0 codec that records in an ITU-R BT.709. color space. I did a few tests where I shot the exact same shot (a moving shot to stress the codec) in both HD and UHD at 25p using the Fine and the Superfine setting. I also tested both UHD and HD at 60p (this can only be done in the Fine setting). I wanted to see exactly what bitrates were being recorded in the various modes and resolution.
Here are the results:
HD Superfine 25p – 30.71 MBit/s
HD Fine 25p – 24.85 MBit/s
HD Fine 60p- 67.16 MBit/s
UHD Superfine 25p – 87.75 MBit/s
UHD Fine 25p – 79.88 MBit/s
UHD Fine 60p – 100.23 MBit/s
Now as this is a variable bit rate codec these figures will change depending on the shot you are doing. It was interesting to see that the HD bitrate is still very low, regardless of whether you are shooting in Superfine or Fine. The difference when shooting in Superfine or Fine in UHD is very marginal and I’m not sure you would actually be able to tell the difference between the images.
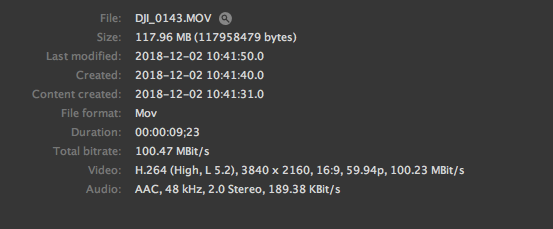
DJI likes to spruce that the Osmo Pocket can record at 100 MBit/s but this is only the case if you are shooting in UHD 60p.
Auto and Manual shooting modes
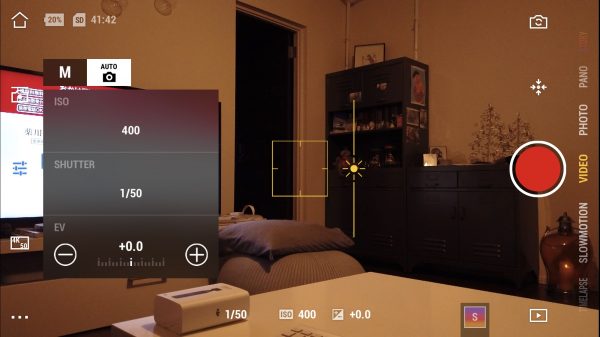
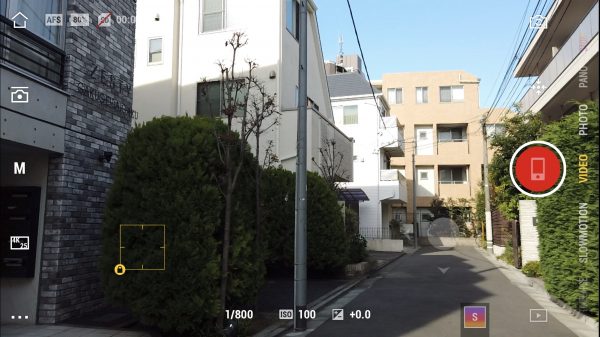
You can choose to shoot in an Auto mode or M (manual) mode. If you use the Auto mode your ISO and Shutter speed are changed automatically. The only thing you can manually adjust is the EV, but even if you do adjust it, the ISO and shutter speed will automatically adjust to compensate.
The Auto mode allows you to just turn the gimbal on, hit record, and capture usable footage in a hurry without having to do anything. Given how quickly the Osmo Pocket turns on, you could literally pull this out of your pocket and capture an event that was unfolding in front of you in seconds.
I found that the Auto mode worked ok in nice even lighting conditions, but it does struggle in high contrast or high dynamic environments. The auto exposure does take a bit of time to adjust (although it does do it quite smoothly). Just like the exposure, the AFC (Auto focus continual) works ok if you are in nice even lighting situations, but as soon as you try to use it in contrasty conditions it starts to struggle and is very slow at making adjustments.
Manual Video controls
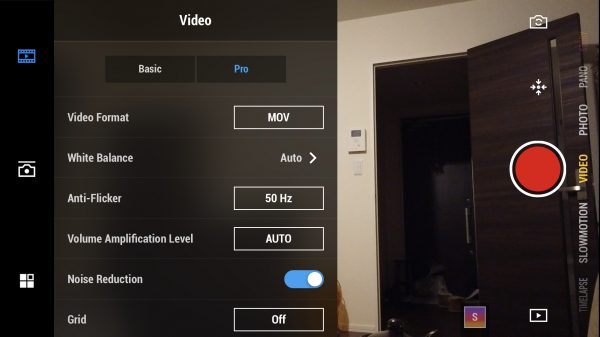
For any professional user of any camera, having manual control over key parameters is a must. While the Osmo Pocket doesn’t give you a ton of manual controls, a lot of the key parameters you would want to change manually can be changed. The Pro mode will also have a Color tab where you can change between normal and D-Cinelike (this wasn’t available on the version of the app I was using).
You have to be in the Pro mode in video settings to take advantage of most of the manual control options that are available on the Osmo Pocket. In the Pro mode, you have the ability to control the following:
White Balance

You can choose from a variety of preset white balances or you can dial in your own Kelvin color temperature. I found that the auto white balance did a pretty good job unless you were in mixed lighting conditions. When using the custom white balance setting I still found that the white balance never quite looked right to my eye. Without being able to do a physical white balance the colors you will get will always be slightly off. Again, in nice even normal lighting conditions it’s fine, but as soon as you get into mixed lighting it does struggle.
Anti-Flicker
This is very useful to have and can help you avoid flicker from fluorescent lights. There is a setting where you can choose to select either 50 or 60Hz, but you can only change this in the Auto shooting mode. In the manual shooting mode, it defaults to whatever frame rate you have chosen to use. It’s strange that you can’t change it in the manual shooting mode as if you want to shoot in say 25p in a country that is 60Hz, you can’t change the anti-flicker to 60Hz, it will be stuck on 50Hz.
Volume Amplification Level
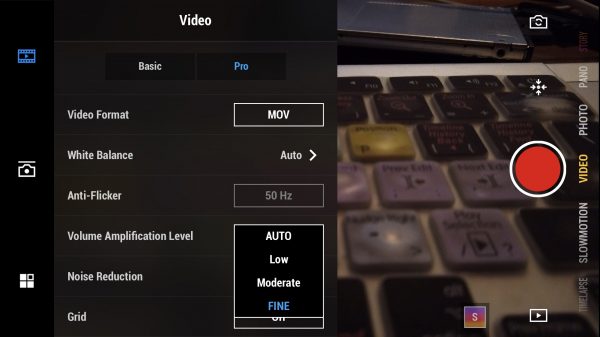
This allows you to adjust the in-built microphone between Auto, Low, Moderate, and Fine.
Noise Reduction
This turns on/off noise reduction.
Overexposed
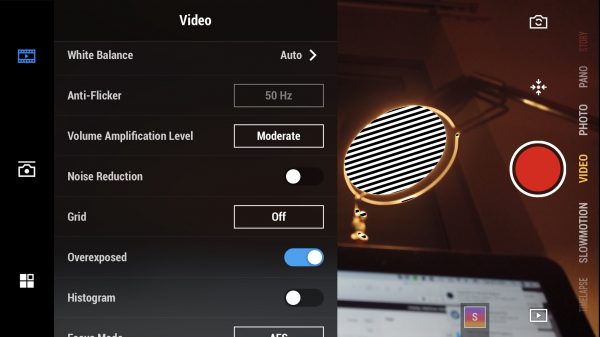
Overexposed is actually zebras. There is no way of changing this, it simply just shows you zebras on areas that are overexposed.
Histogram

There is a basic histogram you can bring up on the Pocket. This is handy to have as there aren’t any other exposure assist tools available on the Pocket, apart from the EV. You can change the position of the histogram by simple dragging it on the screen.
Auto Focus Mode
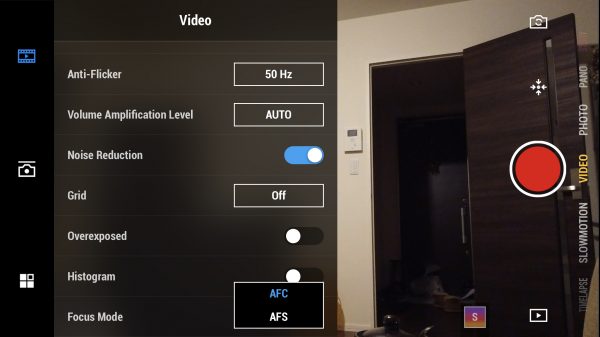
There are two focus modes available on the Osmo Pocket, AFC (Auto focus continual), and AFS (Auto focus single). When you use the AFC mode, whatever the yellow box is on is what will be in focus. When the yellow box is thicker it has grabbed focus, when it is thinner it hasn’t locked onto anything yet.
You can lock the focus by holding down the yellow box until a little lock symbol comes up.
I found the AFC to be fairly slow in a lot of cases and it takes quite a long time for the focus to transition from something that is close to something that is far away. It also doesn’t work well in constrasty scenes or low light conditions.
I found the AFS mode to be a lot quicker and more responsive, but it does mean you have to physically touch the screen to select focus.
ISO
In video mode, the ISO can be adjusted from 100 up to 3200.
Shutter Speed
In video mode, the shutter speed can be changed from 1/25 up to 1/8000. The shutter speed can only be shown in degrees and can’t be shown as a shutter angle. The shutter speed always has to be manually adjusted it won’t follow the 180-degree shutter rule. If you select 60p for example, the shutter speed won’t automatically jump to 1/120. The only exception is if you choose the slow-motion shooting mode. In this mode, the slowest shutter speed available is 1/120.
EV
The EV is a nice way of at least being able to know whether your exposure is in the ballpark or not. If you are in the Auto shooting mode there is a brightness slider so you can overide the exposure. But it is important to note that this conversely affects your ISO and shutter speed.
The only manual feature that is missing is aperture control and that’s missing because the camera has a fixed F2.0 lens. It would have been nice if the Osmo Pocket had an adjustable aperture, but it doesn’t. For a stabilized 3-axis gimbal that can capture UHD 3840 x 2160 60p images and costs $349 USD, it’s hard to complain that it doesn’t have an adjustable aperture lens.
Superfine
There are two quality setting modes, Fine and Superfine. When using the Superfine video setting, footage gets recorded at a higher bit-stream.
Superfine can only be used when you select Pro in the video settings. If you are in the Basic video mode then the option for Superfine is greyed out. You cannot use the Superfine setting when you choose frame rates above 30p in either HD or UHD recording.
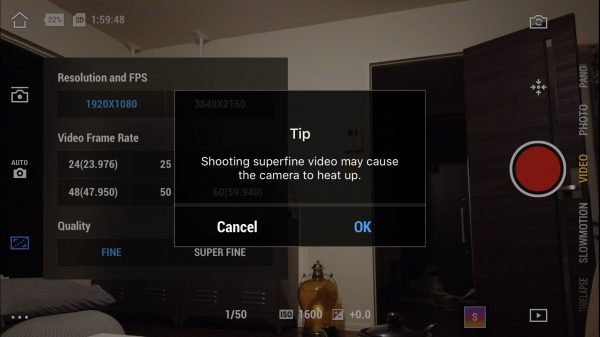
There is a warning that comes up if you do select Superfine that says, Shooting superfine video may cause the camera to heat up. This is a fairly vague warning that may leave people a little confused. Does it mean that the camera will get really hot and shut down, or does it mean that it will just get a little bit warmer to the touch but everything will still be ok?
From my time testing the camera I did definitely notice that the Osmo Pocket did get a lot hotter when selecting the Superfine setting. It didn’t turn off or come up with any warnings, it simply just got hotter to the touch.
Picture profiles, adjustments, and D-Cinelike
There are no picture profiles available on the Osmo Pocket and no D-Log. There is also no way of changing sharpness, saturation, or contrast. Basically what you see is what you get. It would have been nice to have had the ability to change the image parameters, but at the end of the day this is a consumer product, so it’s not a massive surprise to me that DJI didn’t include any of these features.
The Osmo Pocket will have a D-Cinelike color profile option you can choose, but in the version of the app I was testing, it wasn’t yet available. According to DJI, D-Cinelike video will be available for app updates that will be released soon.
Focus Tracking
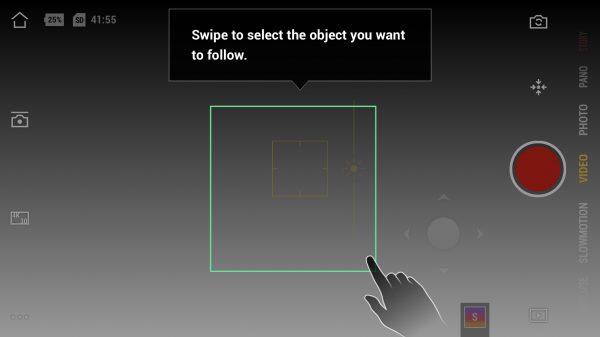
Just like on some of the DJI drones, you can track an object or a person by simply drawing a box on the screen. This can only be done on a smartphone using the app. You can select object tracking on the Pocket’s touchscren, by double tapping, but you can’t draw a box around anything.
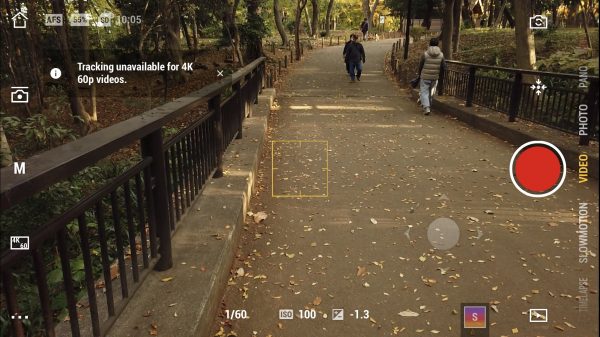
The tracking function is available in almost all the shooting modes (including slo-mo), but not when doing 4K 50/60p.
I found the tracking to be a little hit and miss. Sometimes it worked fairly well and other times it didn’t. It also seems to have a bit of a slight delay where it is always trying to catch up with the subject you are tracking.
How do you get into underslung or briefcase mode?
DJI recommends two methods for doing this:
Method 1:
Lock the gimbal, hold the Osmo Pocket handle, tilt the camera until the camera faces straight ahead, and the Osmo Pocket will enter Flashlight mode automatically. Hold the Osmo Pocket upright to exit Flashlight mode.
Method 2:
In Follow mode, hold the Osmo Pocket handle, tilt the camera until it faces straight ahead, swipe up on the screen, and click Recenter to enter Flashlight mode. Hold the Osmo Pocket upright, and click Recenter again to exit Flashlight mode.
Slow motion
If you select to shoot in the Slow Motion mode it does this with quite a substantial sensor crop. There isn’t any official specification on what the crop actually is, but I estimate it to be around 2x.

It also seems to default to 1080 30p and there is no way you can change the frame rate to anything else. This is bizarre, to say the least. The Pocket also doesn’t tell you anywhere what the actual frame rate is. All you get is a little icon that says 1080 4x. The video that is captured is 120fps in a 30p file. This means it is already slowed down and you don’t need to conform it later on. The max bitrate when recording in slow motion is around 25 MBit/s.
As far as the image quality goes in slow motion, it’s actually ok, but it’s not nearly as good as the normal modes. The low bit rate and compression certainly don’t help and there are quite a lot of image artefacts and noise present in the image. In nice shooting conditions the slow motion can look decent, but if you try and use it in tricky lighting conditions you will quickly see its limitations.
UPDATE: Apparently there have been reports that this feature is going to be removed from the shipping units. I contacted DJI directly and found out that it won’t be in the shipping version, and neither will Story Mode. Both Slow Motion and Story Mode will, however, be available at some stage, but that availability is not yet known.
DJI Osmo Pocket 4k Image quality

The actual video quality really depends on what you are doing with the Osmo pocket. It’s fairly decent in controlled conditions, but it struggles in certain shooting scenarios.
What separates the big boys from the little boys is how a camera handles mixed lighting conditions, high dynamic range scenes, and shooting scenarios that aren’t perfect. Any camera can look good in nice even light or controlled conditions and its hard to pick a cheap camera from an expensive one. Where cheaper cameras fall over is in difficult conditions that aren’t controlled or when you using them in mixed lighting.
This is exactly the case with the Osmo Pocket. The footage looks pretty good in nice even light, and scenes without a lot of dynamic range. As soon as you try and use the camera in mixed lighting, high dynamic range scenes, or where there is a strong light source, it tends to fall over. That’s not to say the image becomes unusable, but you do need to know this camera’s limitations.
With no picture profiles (although D-Cinelike is coming), you really do need to shoot in a way that is going to very close to how you want your final image to look. As I mentioned earlier it’s a 4:2:0 code that has a fairly low bitrate unless you are shooting in UHD 60p. You can’t go pushing it or trying to correct issues in your edit. There is also no way of adjusting sharpness, contrast or saturation so the images you get do look overly sharp in a lot of situations.
Now I did purposely try and push the Osmo Pocket by shooting in very difficult lighting conditions to see how it held up. There is no point in reviewing any type of camera if you are just going to go and shoot some shots in nice even lighting conditions. You really need to see how a camera performs in the real world. Some of the conditions I shot in would have been a challenge for even the most capable of cameras.
You can still get nice results, but again, and I’m going to keep stressing this throughout the review, you need to know its limitations. In saying all of this, I was fairly happy with quite a lot of the shots I got. Look, it’s certainly a capable camera, but in all honesty, the results you obtain are not going to be that much better than what you could get from one of the latest smartphones.
In my opinion, the footage you can obtain from the Osmo Pocket is very similar to that of the original Mavic Pro at most frame rates. It has a similar look and feel to it, but overall it’s a little bit sharper and has slightly fewer issues due to compression. That’s not to say the Pocket still doesn’t suffer from compression issues because it certainly does in some shooting scenarios. I don’t think this is a camera that is available on any of DJI’s drones, I have a feeling it is a brand new camera. There is a good chance this may be the same camera that ends up on something like the Mavic Air 2.

The camera also has that quite nasty and not very pleasing flare that is reminiscent of what you will get from most fixed camera DJI drones. This should improve slightly with the use of ND filters.
Any light that is shining straight down the barrel of the lens tends to cause a magenta tinge to your images. This is not something that can be easily corrected later on.
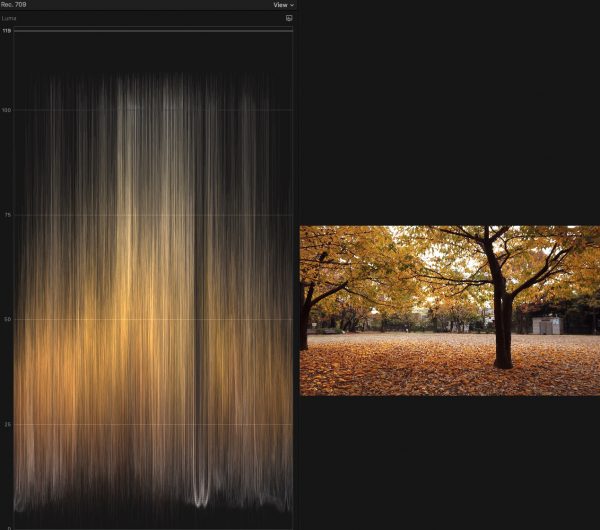
It’s no coincidence that the best looking images are when you record in UHD in 60p. I did do some tests in HD, but with the low bitrate, I found the images looked quite soft compared to when you shoot in UHD.
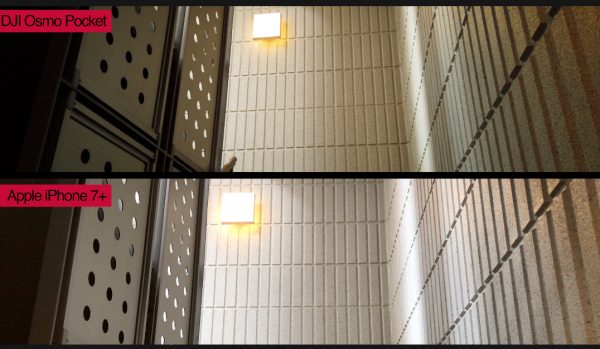
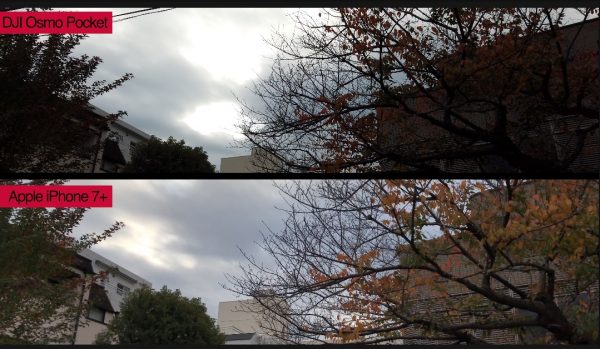
Dynamic range
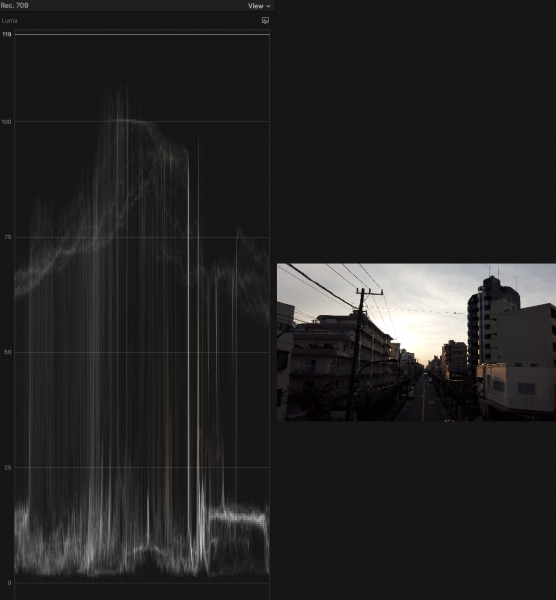
The Osmo Pocket’s dynamic range is not great. Above you can see the lack of information in the mids and shadows if you try and protect the highlights. The way DJI are processing the image seems to elude to the fact that they want to crush the mids and shadows to reduce noise.
Above you can see that even though the highlights are clipping, there isn’t much detail being preserved in the shadows or mids.

Above is an extreme example, but if you try and expose for your mids in a high dynamic range scene the highlights become massively blown out and the overall image falls apart.
Unfortunately, I wasn’t able to test the D-Cinelike color profile. Whether you could obtain better results using D-Cinelike given the fact that it’s a relatively low bitrate 4:2:0 8-bit codec that is being recorded, I’m not so sure.
In pointing out all of these limitations, you do need to keep in mind that this is a $349 USD camera/gimbal that can capture 4K 60p that fits in your pocket. I’m willing to give the Osmo Pocket a hall pass when it comes to image quality because, in all honesty, I was never expecting it to be any better than it actually is.
How does the DJI Osmo Pocket image compare to an iPhone?
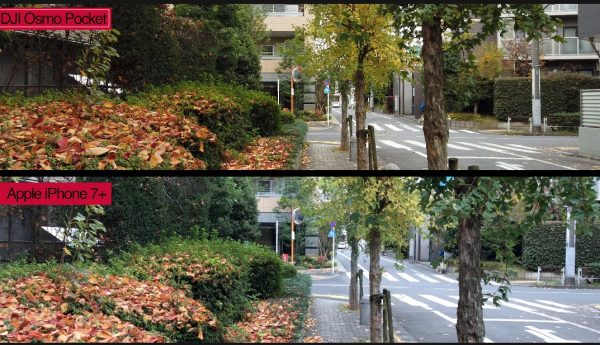
As far as an image comparison goes I wanted to see how the Osmo Pocket compared to an iPhone, in this case, an iPhone 7+. Now you may why be asking, why is he comparing this to an iPhone? Well, everyone is carrying around smartphones these days and they are quite capable of capturing pretty good results in the right conditions. The Osmo Pocket is no different. Both the iPhone and the Osmo Pocket use small sensors so I think it is a fair comparison.
I did a couple of short tests with both the Osmo Pocket and the iPhone 7+ recording UHD 30p in their auto modes. I wanted to see how the overall image quality compared, as well as to see how they both dealt with noise and mixed lighting conditions. Both cameras looked quite different in their auto settings. The iPhone image is a little cooler and the black levels are slightly raised. The iPhone also has quite a desaturated image compared to the Osmo Pocket, but the image from the Pocket is far sharper and more detailed than that of the iPhone.
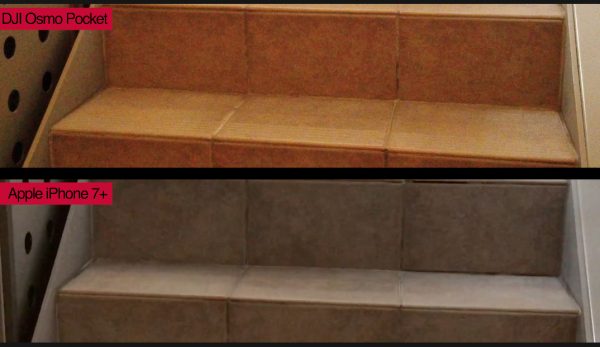
As far as noise goes, they are fairly similar, but I found that the iPhone seemed to be cleaner when used in dark environments. The iPhones cleaner image does come at the expense of sharpness and detail. The Osmo Pocket’s image is sharper and more detailed.
The iPhone (at least when the auto settings are used) seems to handle mixed lighting conditions a lot better than the Osmo Pocket. The iPhone image looks more natural, while the Osmo Pocket seems to take on quite strong color casts. In saying that, this could come down to the auto white balancing functionality of both cameras.
As far as highlight handling goes, again they were very similar. In the auto settings, the iPhone 7+ does seem to capture a lot more information in the mids and shadows, whereas the Osmo Pocket seems to crush them down quite a lot.
The ISO and shutter speed shift in Auto mode is quite a bit slower on the Osmo Pocket than it is on the iPhone.
If you use a latest generation smartphone with an app like FilmicPro or Mavis, I think you would find that the image quality would be fairly similar to that of the Pocket.
You really do need ND Filters
The optional ND filters that will be available for the Pocket are in my opinion, an absolute must. Even at 100 ISO on normal sunny days, you will have to run upwards of 1/400th shutter to maintain correct exposure. Running such high shutter speeds does give the images a very almost overly sharpened look.
Low light performance
The Osmo Pocket isn’t a low light powerhouse. If you have ever used a DJI Phantom, Mavic or Spark you will be well aware that you can’t really push the ISO very much. The Osmo Pocket performs well at 100 and 200 ISO, and 400 is ok, 800 and beyond start to get quite noisy. At 1600 and especially 3200 you start to see very blocky fixed pattern noise. I would be happy using it up to 800, and in a pinch, I would use 1600 or 3200 if I had absolutely no other options.
There is a Noise Reduction mode you can activate, but in all honesty, I couldn’t really tell much of a difference with it turned on or off at higher ISOs.
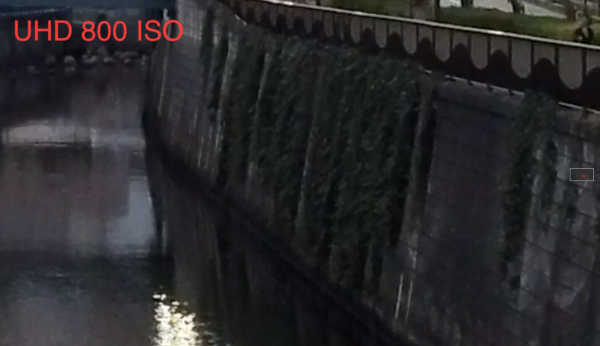
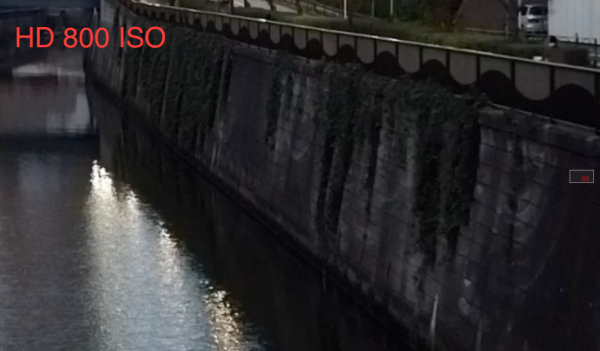
I tested the camera’s low light performance in HD as well as UHD. In HD there is significantly less noise than when shooting in UHD, particularly at higher ISOs. Above you can see a 200% crop in at 800 ISO on both the UHD and HD images. The HD images have far less fixed pattern noise and are generally cleaner at any ISO levels above 400. If you shoot in UHD and then edit in 1080, the noise becomes slightly less noticeable.
Usability
This is probably the cameras biggest selling point. Its tiny size and weight mean it can be literally kept in your pocket and you can just pull it out and use it at any time. The convenience factor of this alone makes the Osmo Pocket worth getting.
The usability of the Pocket if you don’t want to connect it to your smartphone and use the app is quite limiting. You really do need to use a smartphone and the app to get the best results out of the Pocket.
The app is simple and easy to use and being able to hook up a large, bright screen to it certainly helps with composition, framing, and getting proper exposure and focus. This is something that can’t easily be done with just the Pocket alone.
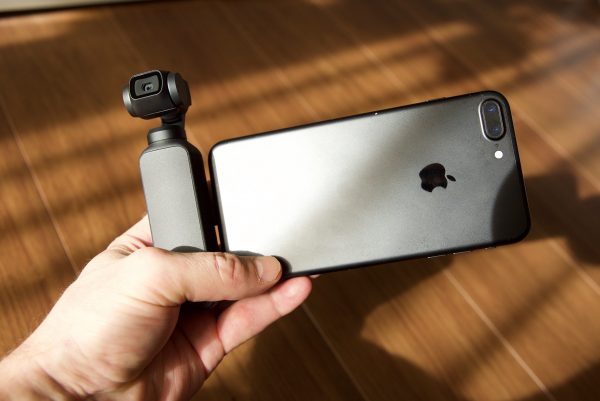
The only problem with using a smartphone is that all of the weight is being supported by the lightning or USB-C connector. This means that quite often both devices (your phone and the pocket) are wiggling around slightly. This causes your gimbal shots to not be as smooth as they could be. You really do need to hold both the Pocket and your phone at the same time. I can see a lot of people breaking the lightning or USB-C connector on the Pocket.
If you place the Osmo Pocket down on a flat surface with the phone attached, it is going to lean to the left. While this isn’t a big problem, you should be aware of it.
I actually found that by placing the included USB-C connector under the left hand of the phone, put everything back up to the right height.
Osmo Pocket Gimbal performance
I’m not going to sugar coat it, I didn’t find the gimbal performance of the Osmo Pocket to be that amazing. It’s not nearly on the same level as say a one-handed gimbal from Zhiyun or DJI’s own Ronin-S. When using the Osmo Pocket the gimbal performance just never seems smooth or refined. The Pocket’s gimbal was probably originally designed for drone use and not for use on the ground.
While it does do an adequate job for following subjects I found it was a little shaky if you start trying to move around too much. A lot of this could be related to having a smartphone attached to Pocket that is causing the balance to get thrown off ever so slightly. To check I did some tests with using the Pocket with a smartphone attached and without. I didn’t find any noticeable difference in the gimbals performance.
As the gimbal is based on drone technology, it’s no real surprise that the Pocket performs well at high speeds. I found the smoothest shots I was able to obtain actually came when I was riding a pushbike.
At times the footage looks like it is jumping around a little bit and has a look that is very reminiscent of what you would see from a camera using optical stabilization. I asked DJI directly to see if the Pocket was using a combination of optical and mechanical stabilization. They told me that the Pocket has no optical stabilization and the only stabilization being done is mechanically through the use of the gimbal.
Audio
The Osmo Pocket does have a built-in microphone, actually two built-in microphones. DJI says that the microphones adopt a noise-reduction algorithm, greatly improving the Osmo Pocket’s recording quality. The quality is ok, but it is not great, it’s also quite susceptible to wind noise. You wouldn’t want to rely on the internal microphones in the Pocket for any kind of quality audio capture. It’s best to think of it as a scratch mic.
What you do need to be aware of is that no audio meters get displayed on the Pocket’s touchscreen, and you can’t see any audio meters on the Mimo app until you hit the record button. You can’t physically set any audio levels, all you can do is choose either Auto, Low, Moderate, and Fine. These sort of act as audio level controls, but I think it would be far easier to have just had an option for Auto as well as the ability to manually set a level.
There is also no headphone jack so you can’t monitor the audio in any way. When you play back clips using the Mimo app you can listen to the audio.
You will be able to attach an external microphone to the Pocket, but that can only be done by purchasing the optional DJI Osmo Pocket 3.5mm Adapter.
Timelapse
The timelapse options on the Osmo Pocket are actually pretty good and you can manually set the recording interval (from 3-60 seconds), the length of the timelapse you want, as well as your ISO and shutter speed.
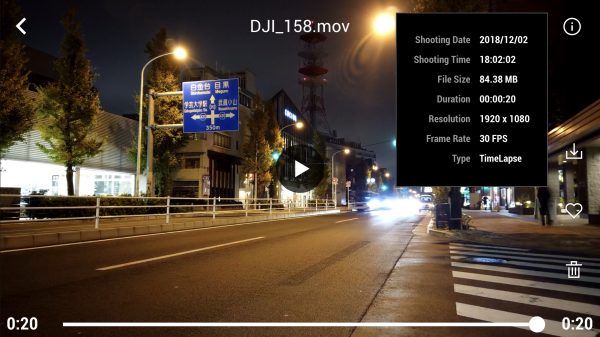
The only problem I found, is just like the Slow Motion recording, the file only gets recorded in HD in 30p. You can’t do a UHD timelapse and you can’t select any other frame rates.
Playback
You can see and play back all of your video clips and photographs on the Osmo Pocket. You can see key information, export the clips straight from your phone, or trash anything you don’t want to keep.
DJI Osmo Accessories
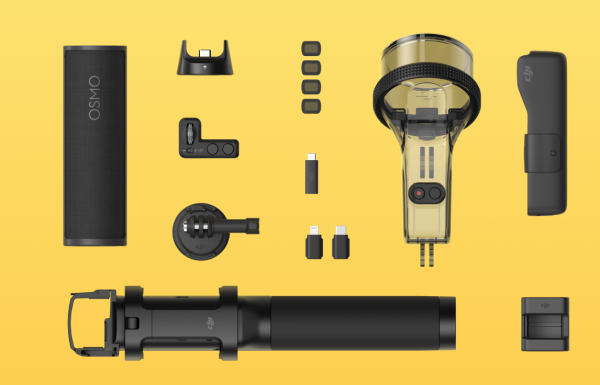
I can never quite work out why DJI releases a product and then you have to wait for ages for the accessories to become available. Wouldn’t it make more sense to have all of them available at launch?
Here is the entire line of accessories will be available.
Accessory Mount- The accessory mount makes Osmo Pocket compatible with action camera accessories so you’re able to capture your adventure footage, such as when mounted on a helmet, backpack or your wrist.
Wireless Module– The wireless module supports Wi-Fi and/or Bluetooth transmission between Osmo Pocket and your smartphone, providing remote access to the camera feed and control of Osmo Pocket; perfect for setting up a Timelapse or Motionlapse on a busy city street.
Controller Wheel– The wheel allows you to precisely control gimbal movement (left-right or up-down) enabling you to easily adjust the composition of your shot. Re-center the gimbal or switch to selfie mode easily with dedicated buttons on the handle.
Expansion Kit– The expansion kit includes the Accessory Mount, Wireless Module and Controller Wheel.
ND Filters Set- Specifically designed for Osmo Pocket, ND filters attach to the front of the camera to reduce the amount of light entering the sensor. The ND Filter Set offers several levels of filter darkness and allows for more control over the camera’s aperture, exposure time, and sensor sensitivity settings.
Waterproof Case- Bring a unique underwater perspective to your footage using the Waterproof Case which can be placed at a depth of 60 meters.
Extension Rod– The Extension Rod attaches to the Lightning or USB-C port and provides 31 inches of reach to Osmo Pocket, opening a world of new creative angles that are normally difficult or impossible to get. A gimbal control joystick and camera button on the handle were designed for remote control when using the Extension Rod and a tripod was added to the bottom for expanded use cases
Charging Case– This dual-purpose case not only protects Osmo Pocket while in transit but charges it as well. Dedicated sections were added into the case for your MicroSD card and ND filters so you can quickly grab your Osmo Pocket and know you’re ready to capture those moments and adventures.
3.5mm Adapter– The 3.5mm Adapter allows you to connect an external microphone if you prefer to capture audio using a separate device.
DJI Osmo Competition
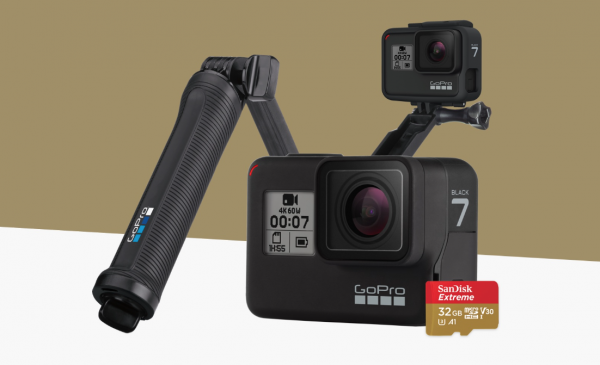
I know the Osmo Pocket is bound to get compared to the GoPro HERO7, but in all honesty, I feel like they are two completely different tools, despite their similarities. The HERO7 has a much wider field of view (6mm min – 33mm max) and is a lot more robust for use in action sports and mounting on cars etc.
I actually think the Osmo Pocket’s main competition is from smartphones. With the video and still recording capabilities continually improving on smartphones, you can get some pretty decent results in the right conditions. Just about everyone has a smartphone and it’s something that we almost always have with us. Despite the Pocket’s portability, you will have to convince potential buyers that it’s worth carrying around another device that offers similar image quality.
In a lot of ways, it replaces the need for using a smartphone and a gimbal for capturing video. The video quality of the Pocket and most of the latest smartphones is fairly even. What DJI have done is combined a similar level of image quality into a gimbal. If you are using say a DJI Osmo Mobile and a smartphone, the Osmo Pocket is going to offer you similar results in a much more compact form factor.
Hopefully, there is an Osmo Pocket Pro in the works
A lot of professional shooters would be fairly happy if DJI released an Osmo Pocket Pro that utilizes the same camera that is on the Mavic Pro 2. If it had a larger 1″ sensor, H.265 recording and 10-bit, even if it had to be physically bigger, I think it would tick a lot of boxes for people looking for a small, compact and more professional solution.
Is the Osmo Pocket price too expensive?
$349 USD doesn’t sound like a lot of money, heck most of the media cards I own cost more than this, but for a consumer market, it might be a little on the pricey side. I’m surprised DJI didn’t actually make something with slightly less functionality and market it for $199 USD.
I personally think the price is ok given what it can do and its feature set.
A glimpse into the future?
The Osmo Pocket gives us a glimpse of what may be possible in the future. As technology improves, companies are able to pack a lot more features and abilities into smaller products. In some regards, the Osmo Pocket is a compromise between size and quality. The only way DJI could make a product this small was to use a relatively small sensor. If you wanted to put a larger sensor camera, such as the one that comes with the Mavic Pro 2 onto a Pocket then the overall size of the product would also increase.
I really like the concept behind what DJI have done and it’s impressive that they have managed to fit so much technology and usability into such a small device.
DJI Osmo Pocket Review Conclusion
Despite some of its limitations, I really like the Osmo Pocket. It’s just a really cool product that is bound to find its way under a lot of Chrismas trees this year. Even though it costs $349 USD (which is expensive for a consumer product like this), I still think it will sell in droves. Just look at how many people have bought drones.
No, it doesn’t have any picture profiles, it can’t shoot in Log, it’s not particularly great in mixed light, it doesn’t handle highlights particularly well, and the gimbal performance could be better, but you know what, none of that matters. The size, convenience factor, and capabilities of the Osmo Pocket make you forget about what it can’t do, and remind you what it can do.
The Osmo Pocket is a bit of a jack of all trades, master of none. It’s a capable device that I think a lot of shooters will buy just to keep in their kit. I like to think of it as a nice emergency camera that I can keep in my pocket or a bag and pull out in situations where I need to shoot something that isn’t possible with another camera.


