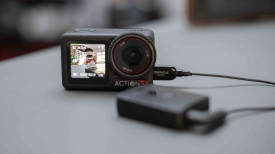
DJI lent us an Osmo X5R, which is a Raw-shooting, interchangeable-lens version of the handheld Osmo gimbal camera I’ve owned for a while now. The X5R takes Micro 4/3 lenses instead of the fixed lens of the original Osmo.
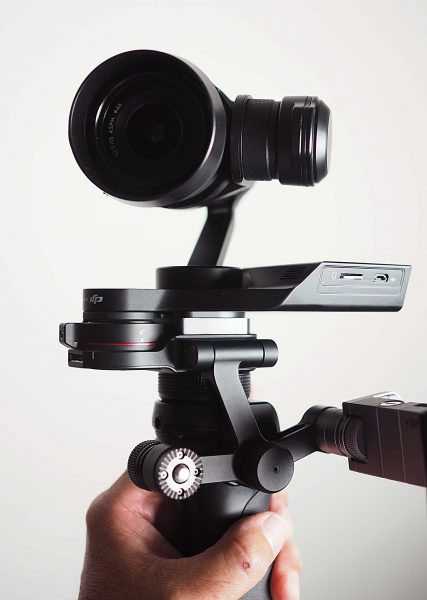
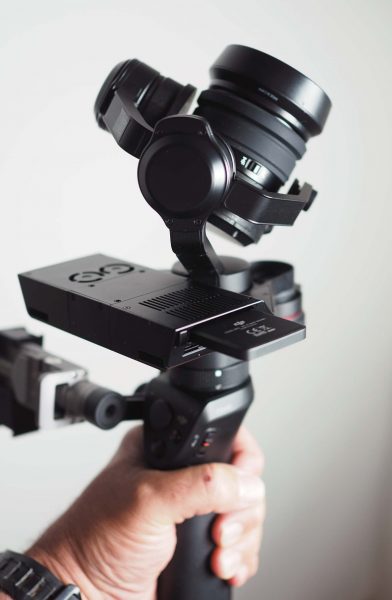
The Osmo X5R is a combination of several separate pieces: A regular Osmo stabilized camera, a $99 adapter that goes on top of the Osmo grip, and the $3,600 Zenmuse X5R camera and SSD drive (from the Inspire drone) with a 15mm f/1.7 lens, that replaces the standard Osmo camera. The X5R shoots Raw files onto a removable 512GB SSD drive (included) while simultaneously recording compressed footage onto a micro SD card. The 512GB card is $1500 if you want another one.

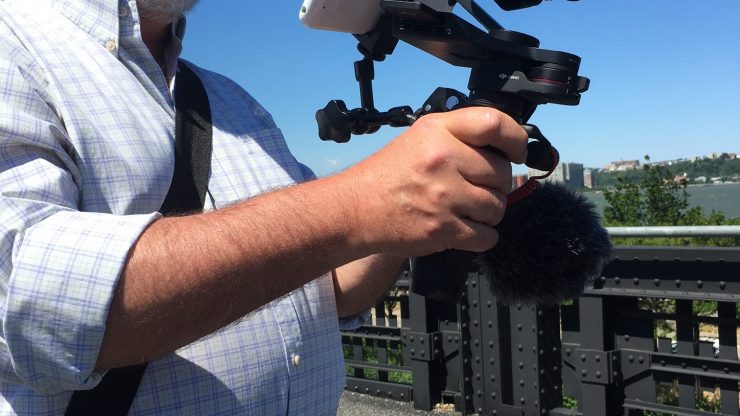
I recently went out onto New York’s High Line park in strong gusting winds to try out the Osmo X5R. The video above shows the results – it’s a mix of Raw and compressed but can you tell the difference? The Raw parts were shot in UHD/4K 3840×2160. The B-roll was edited from Raw files and eyeballed for color correction in the DJI CineLight Raw conversion program as it was converted to ProRes422 for editing. The audio is from the Osmo via a Rode VideoMicro mic.
The roughly 13 minutes of footage I shot took over 12 hours to convert on a Macbook Pro laptop. The footage where you’re seeing synced sound of the drummer/musician was taken from the micro SD card and is basically the compressed proxy footage (but still UHD/4K) straight out of the camera – not Raw (this should be very similar, if not identical, to the output of the non-Raw version of the X5). Compare this to the Raw footage from all the other scenes, which has much less sharpening and can be tweaked quite a bit for exposure and color as it’s converted. The included SSD card has the CineLight program on it or it can also be downloaded from DJI’s site. On my laptop, the Raw files weren’t viewable in the Mac Finder and you have to use CineLight to look at them.
The Raw files have no audio at all after conversion to ProRes. I had to use the compressed footage to get audio, which makes syncing a chore, with no audio waveforms to match. Unlike the standard Osmo, the X5R needs an external microphone for audio as well. The part that houses the SSD drive has fans that make a fairly loud turbine-like whine. You won’t be able to use audio from this camera shot in quiet places.
Battery life with the standard Osmo battery in the grip is very short – I went through two batteries to shoot 13 minutes. They make an adapter to use a DJI Phantom 3 drone battery, but it uses a dummy battery with a cable to connect, so you’re adding complexity and another thing to juggle.
While the standard Osmo fits in a small violin-style case that can be hauled around in your gear bag just in case you need it, the Osmo X5R is not bag-friendly and feels fragile, and really isn’t easy to set down on a table.
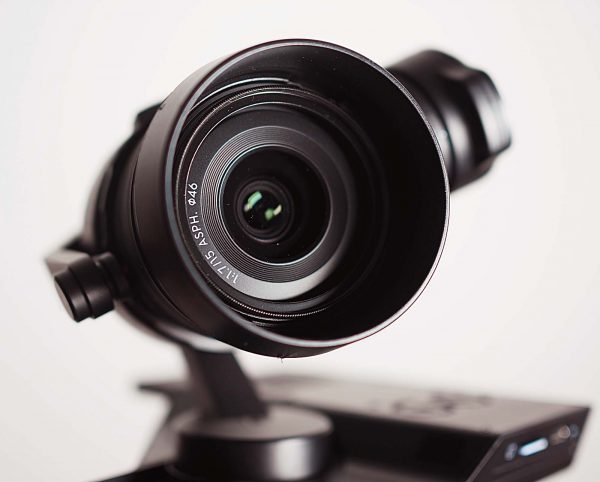
The camera has a Micro 4/3 lens mount and comes with a 15mm f/1.7 lens which looks a lot like Panasonic’s $600 Leica 15mm f/1.7 lens. The DJI version hides an aperture ring and focus ring under a rubber dust cover. Images from the lens are sharp and contrasty, which is the equivalent of a 30mm lens on a full-frame 35mm camera. I also tried an Olympus 25mm lens on the camera, and it will balance fine, though I didn’t use it enough to decide if it was really useful – it’s hard to keep subjects in focus.
The handgrip has a joystick and a trigger that control where the lens is pointing, but you need a phone to control the camera settings and exposure. You can’t use the Osmo at all until you connect the camera to your phone with the DJI Go app – and the internet – and register.
If you turn the camera off (which you’ll do constantly to save battery) when you start up again it defaults to a wide-open f/1.7 lens and cranks up the shutter speed. You’ll need neutral density filters – the standard 15mm lens takes 46mm filters. (I didn’t have one the right size when I shot on the High Line, so you’ll see the result of high shutter speeds.) You can adjust settings for exposure in the app on your iPhone fairly easily. You can also tap your subject on the screen to focus. You can see how fast it focuses, when I tapped the screen to focus at 1:36 in the video above. But it doesn’t seem to have continuous follow focus, which limits the usefulness of shallow depth-of-field. The only viable option to track focus is to add DJI’s focus controller which can be used to manually focus compatible 4/3 lenses using their internal motors. The problem for solo shooting is that this is a bulky unit that adds additional cost – it is also near impossible to judge accurate focus from an iPhone display and is probably best operated by a second person with a larger screen to see what’s what.
As you can see at 1:32 in the video, the X5R does have rolling shutter issues. And it shares the same walking bounce as the regular Osmo. But the Raw files from the camera are very cinematic compared to the compressed files of the same scene. Color and dynamic range are certainly improved. Although the extremely long conversion times for the Raw files preclude using this on news coverage, the image quality may be worth it for specific shots in a film shot on cinema cameras. The images are lovely.