Beeble has announced Beeble Camera, which allows you to turn an iPhone into a mini virtual production studio with real-time tracking and AI-powered VFX.

Users can turn their iPhone into a mini virtual production studio with real-time tracking and AI-powered VFX. Recordings are then uploaded directly to the Beeble Web Platform, where they can be instantly processed.
Beeble’s core web platform runs on its own AI model, SwitchLight 2.0, which enables users to generate normal, specular, albedo, and PBR passes, giving full control over lighting even when the shoot has wrapped. The release of Beeble Camera aims to make these capabilities more accessible to everyone, including indie filmmakers and content creators who want to engage in VFX but have a limited budget.
Powered by LiDAR and ARKit, Beeble Camera tracks the device’s position and depth in real time while filming, anchoring footage to real-world space. Recordings are then uploaded directly to the Beeble Web Platform, where they can be instantly processed into camera-tracked, rotoscoped, and relightable VFX passes.
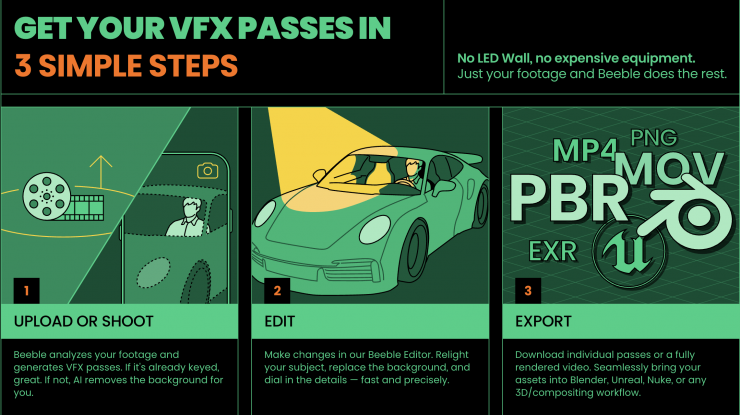
With Beeble Camera, creators can:
- Shoot with iPhone – capture footage with real-time camera tracking.
- Process instantly – generate AI-powered roto and VFX passes in Beeble Web.
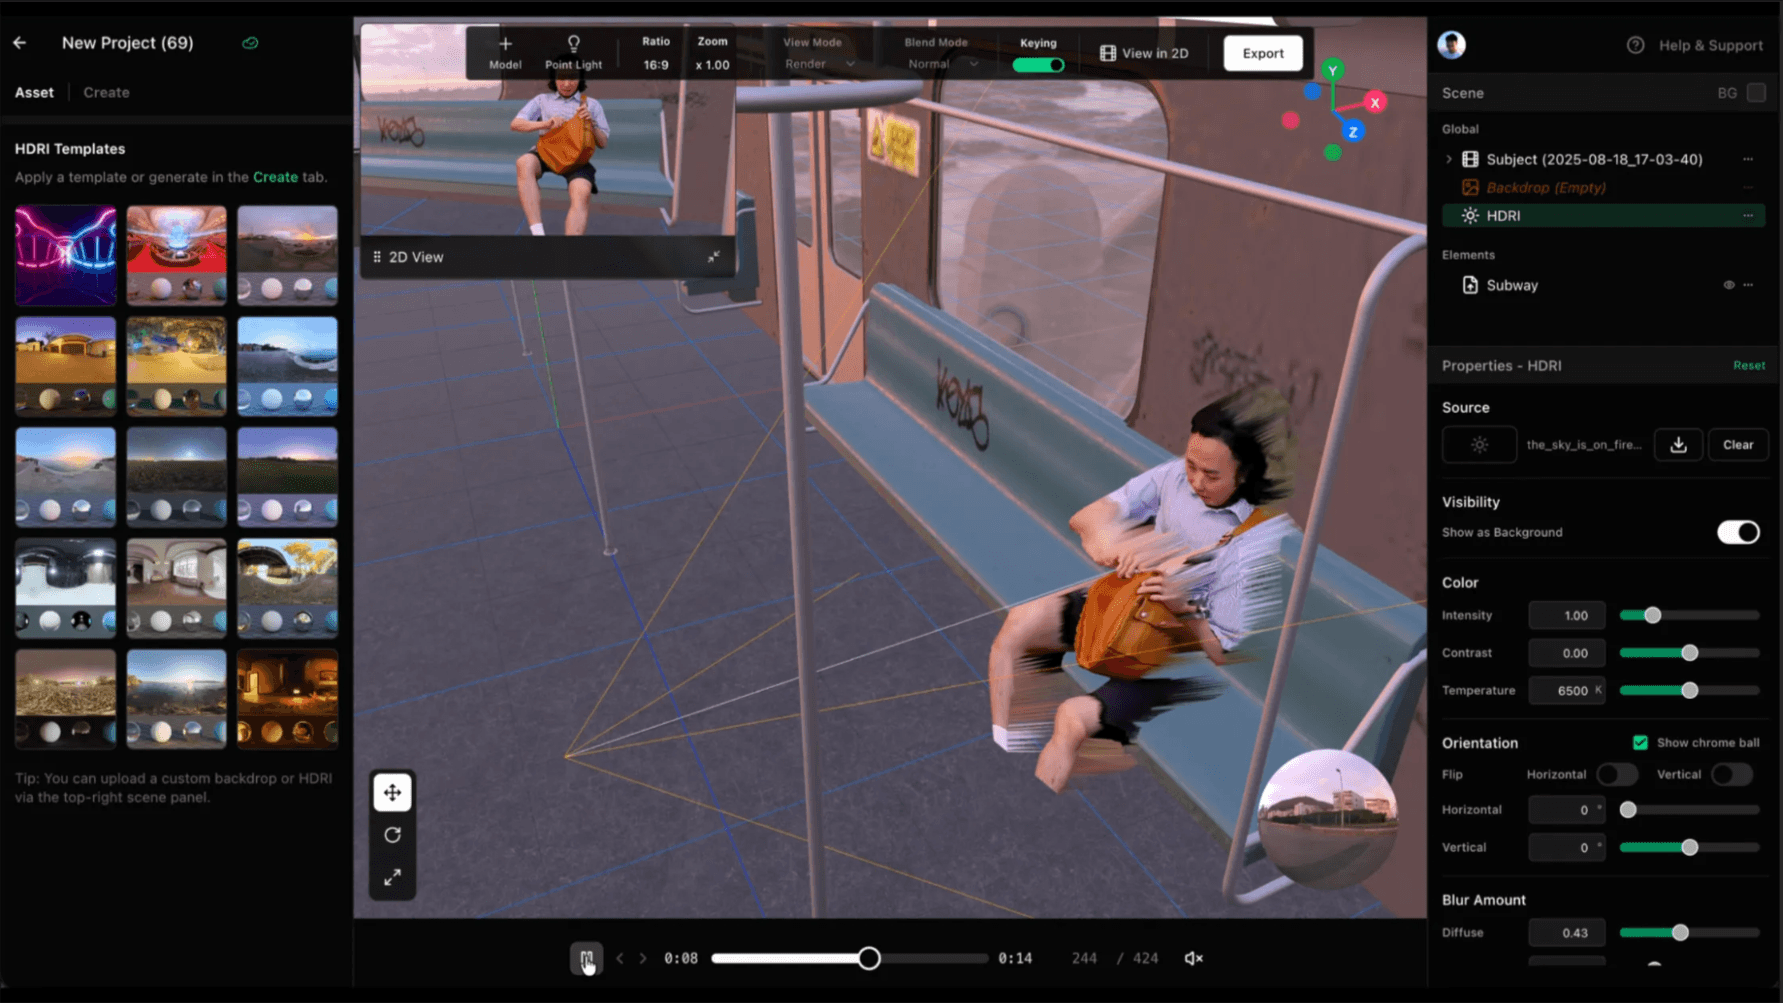
- Composite seamlessly – continue projects in Beeble Studio or export to Blender.
How to Use
2.1 Setting up your space
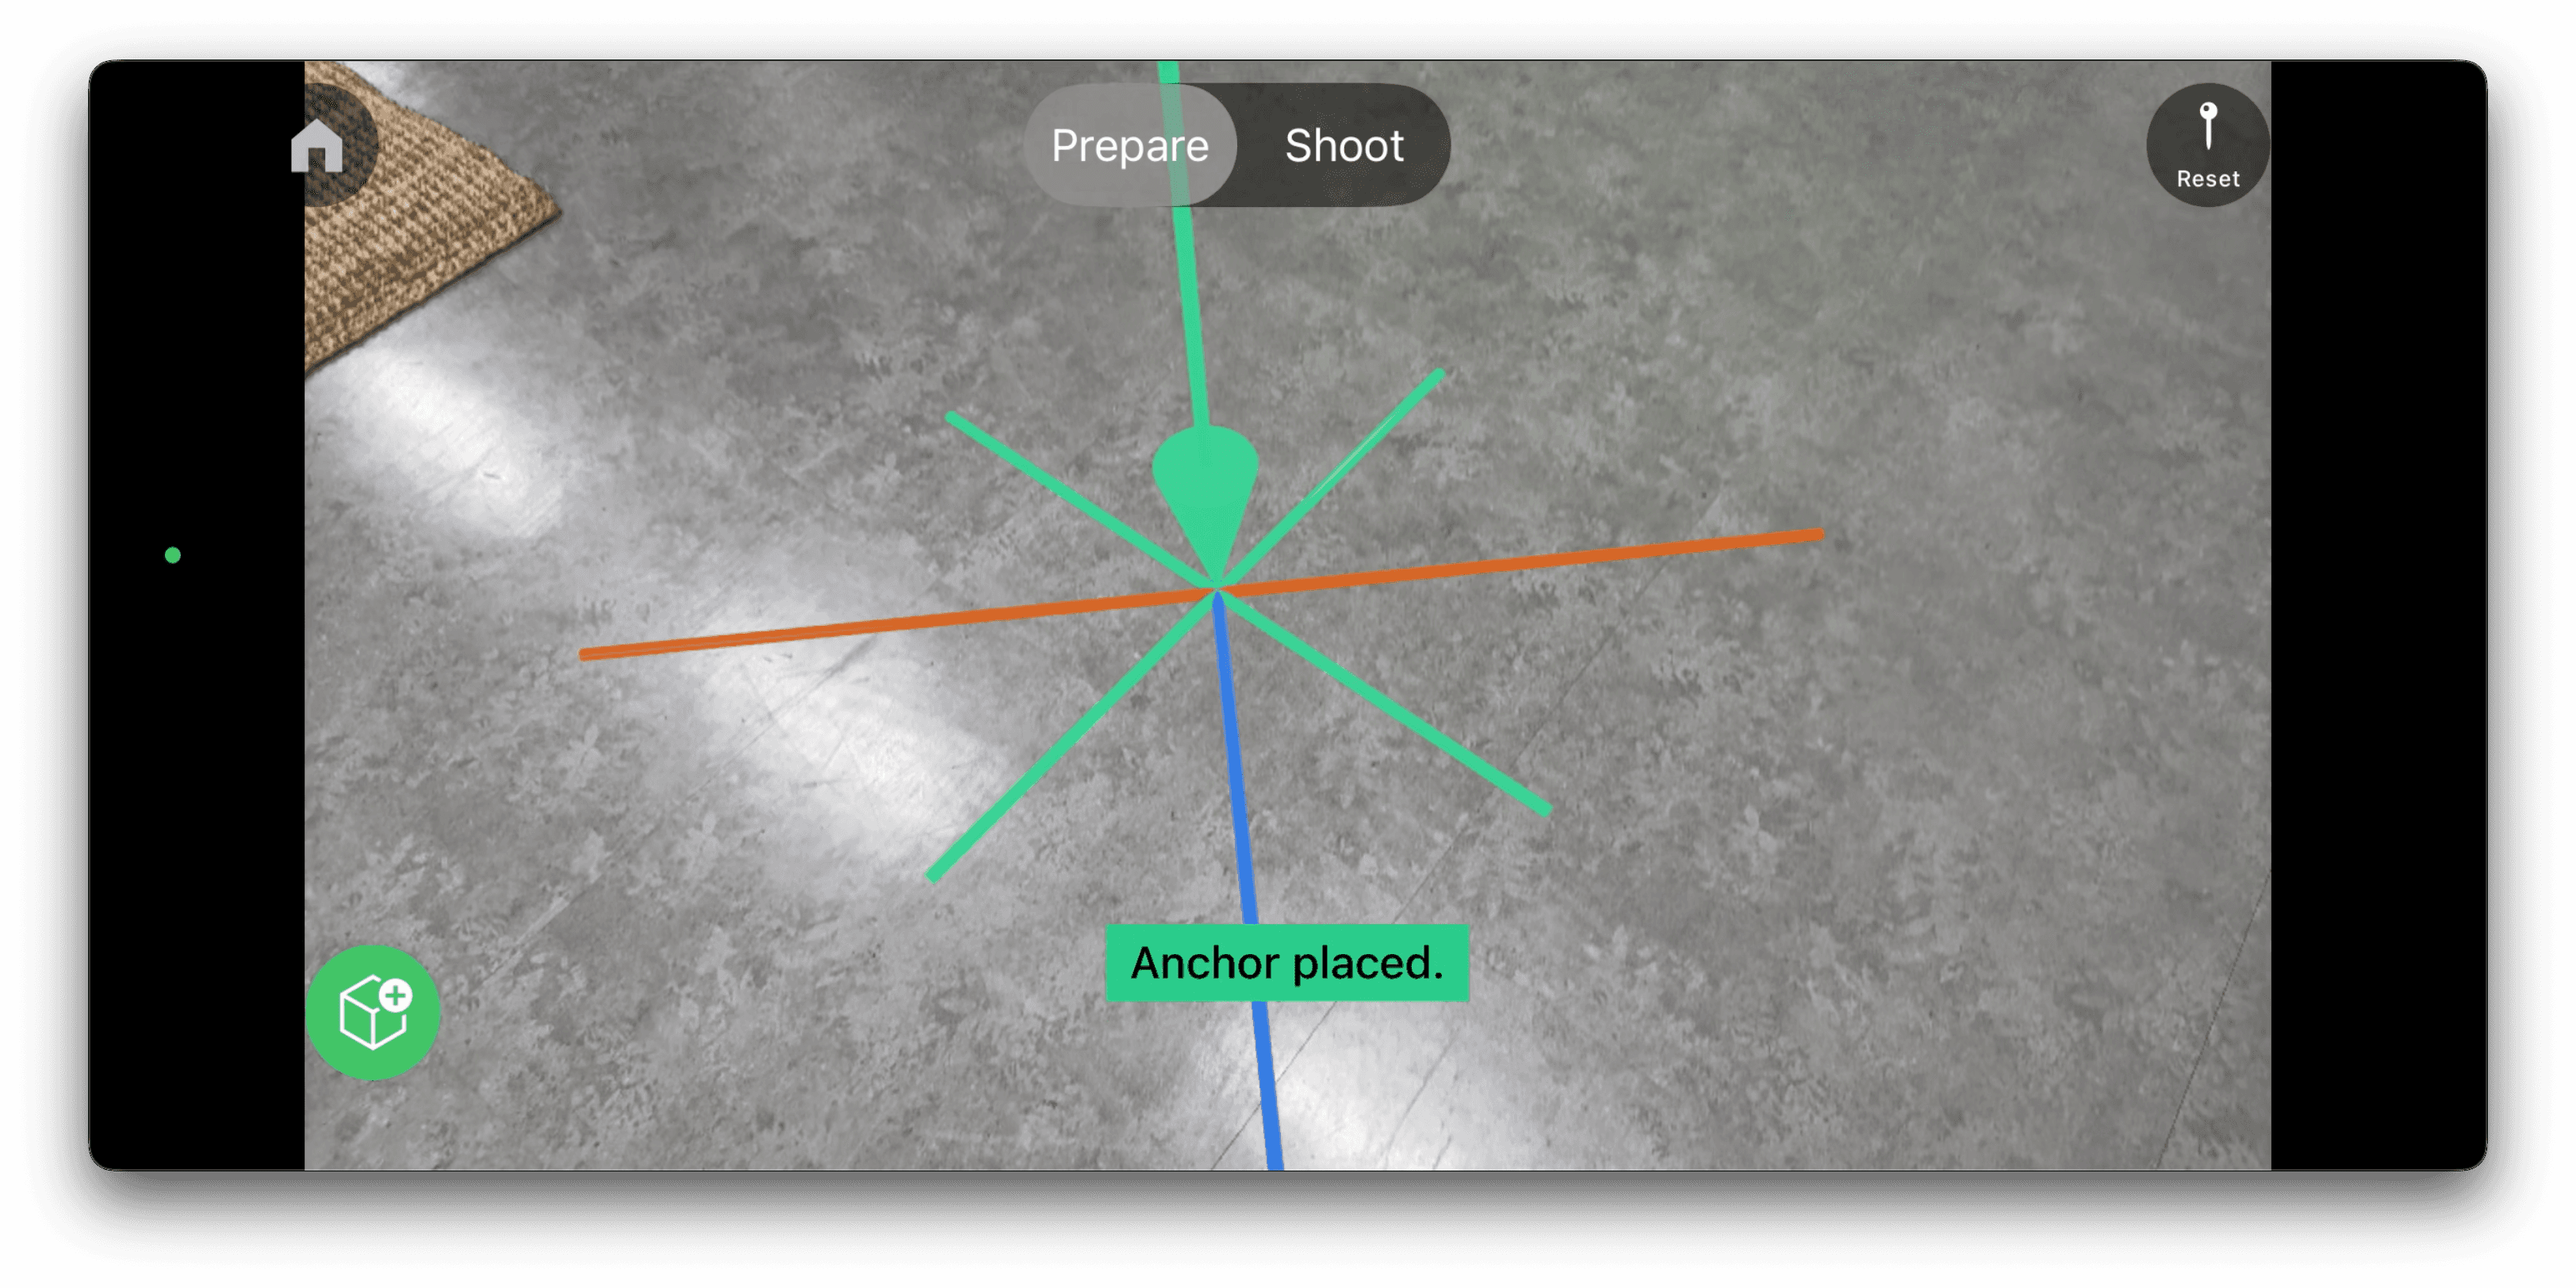
- Scan the Area: Move your device to scan your space. ARKit will automatically detect surfaces and spatial features. When it identifies the floor, a square shaped focus indicator will appear.
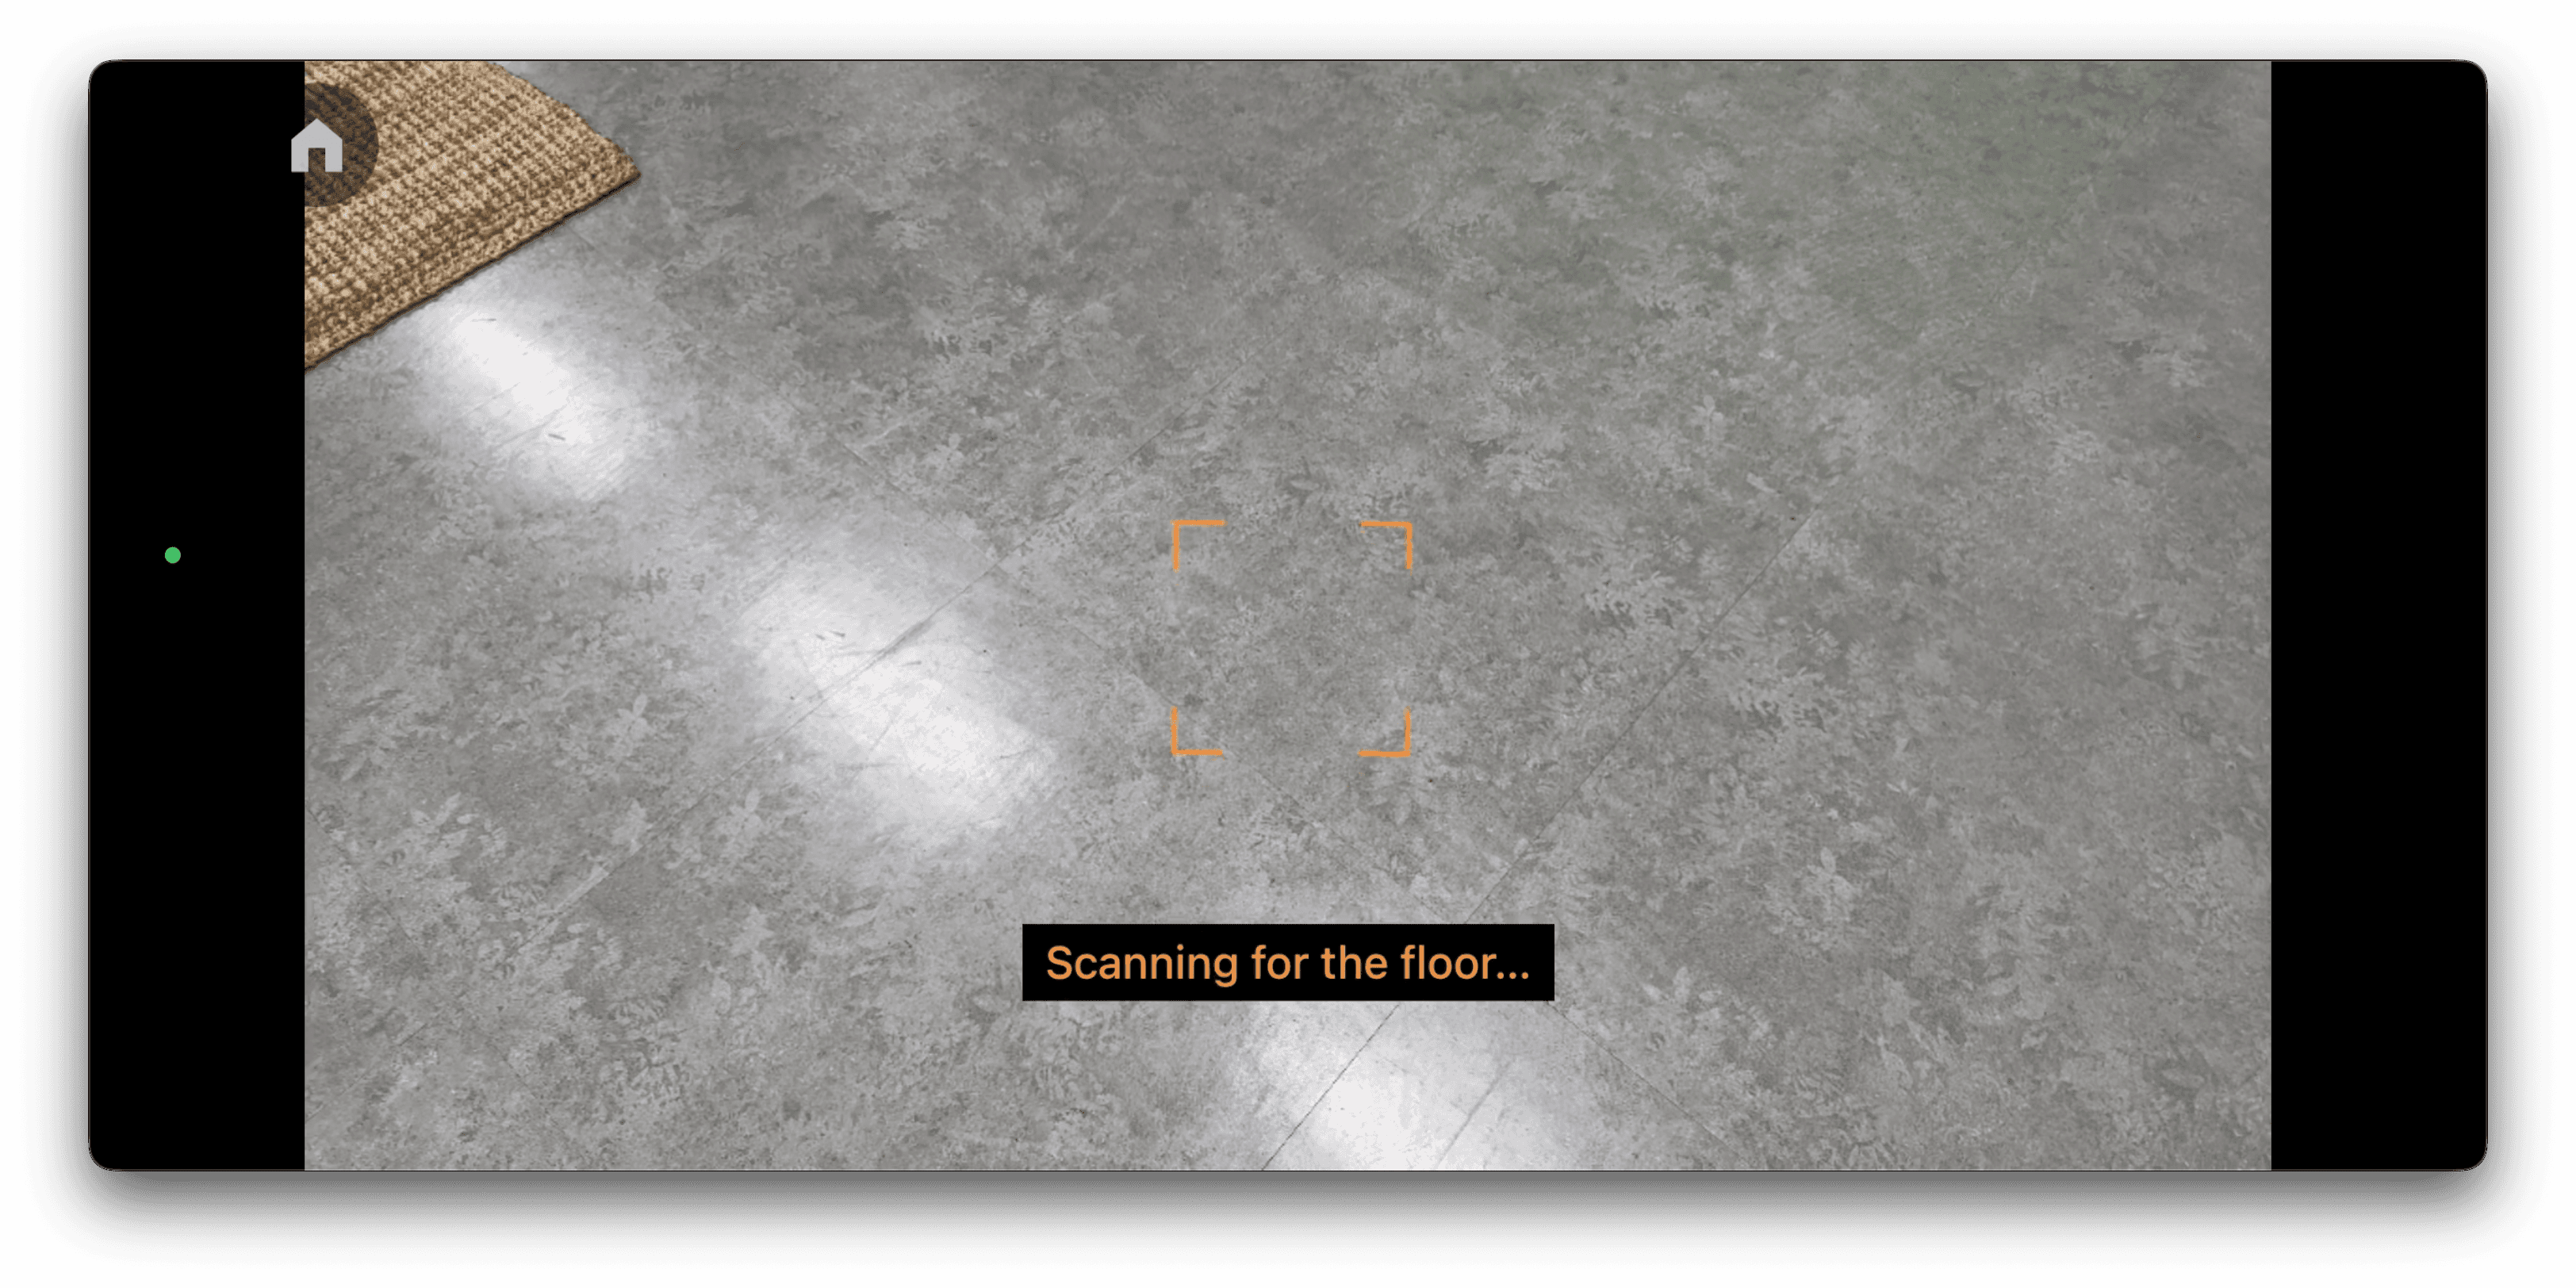
- Set Origin: Tap the floor grid to set your origin. This anchors the tracked scene to your space and ensures consistent camera tracking.
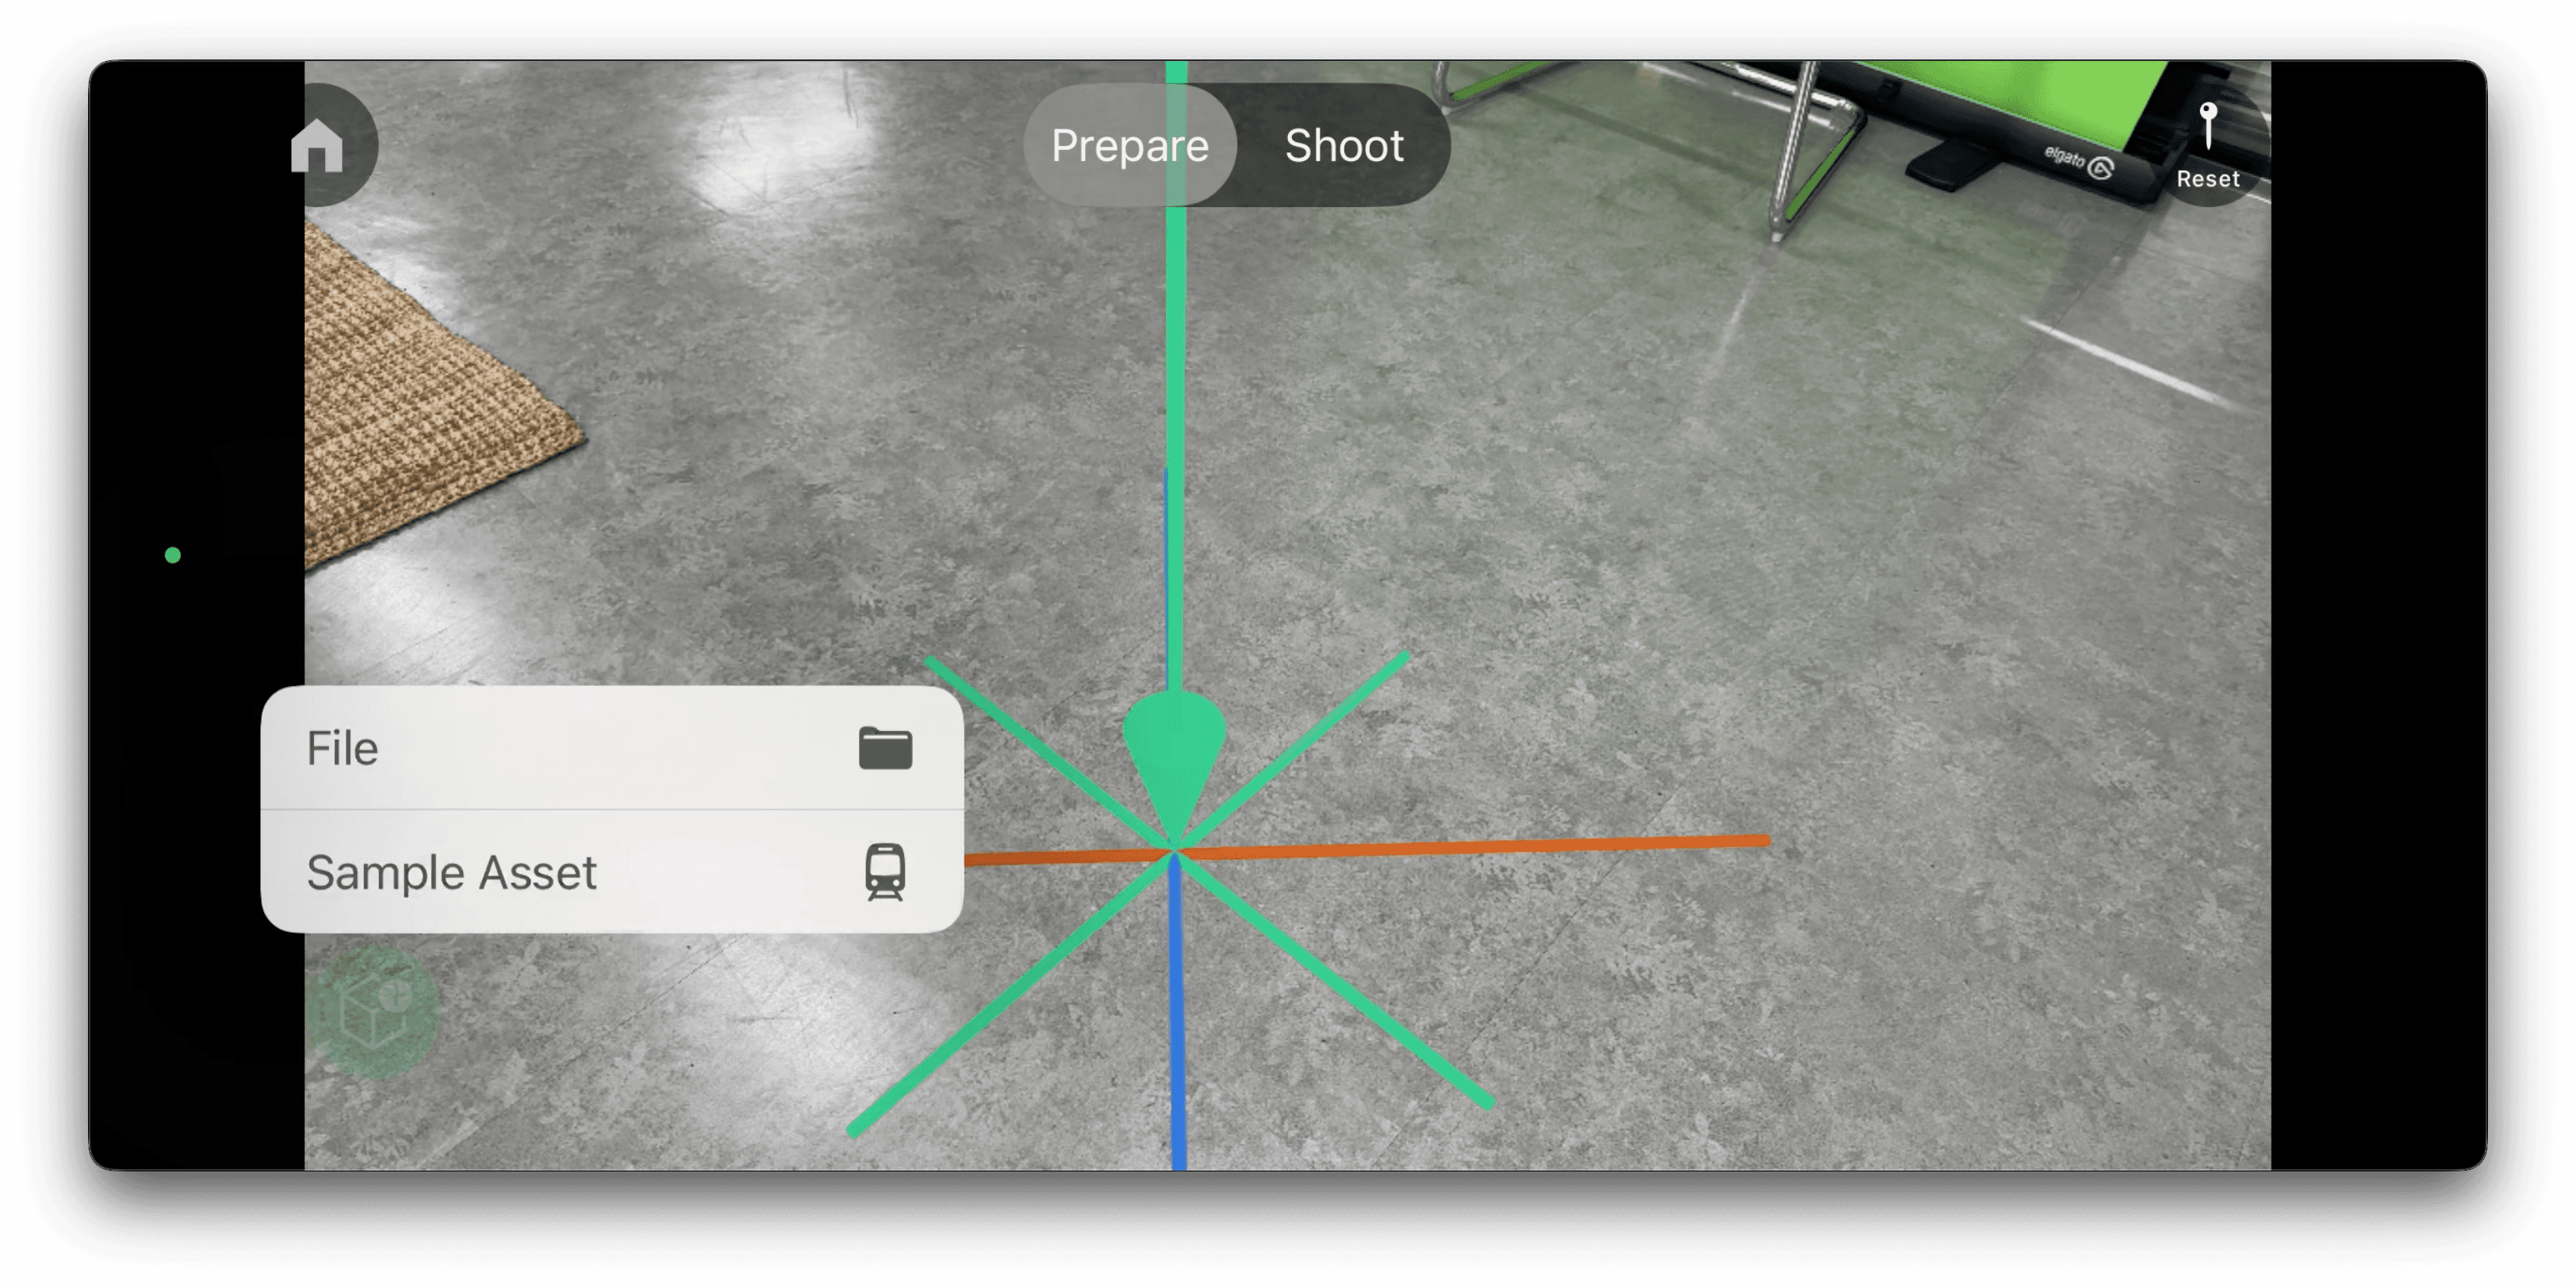
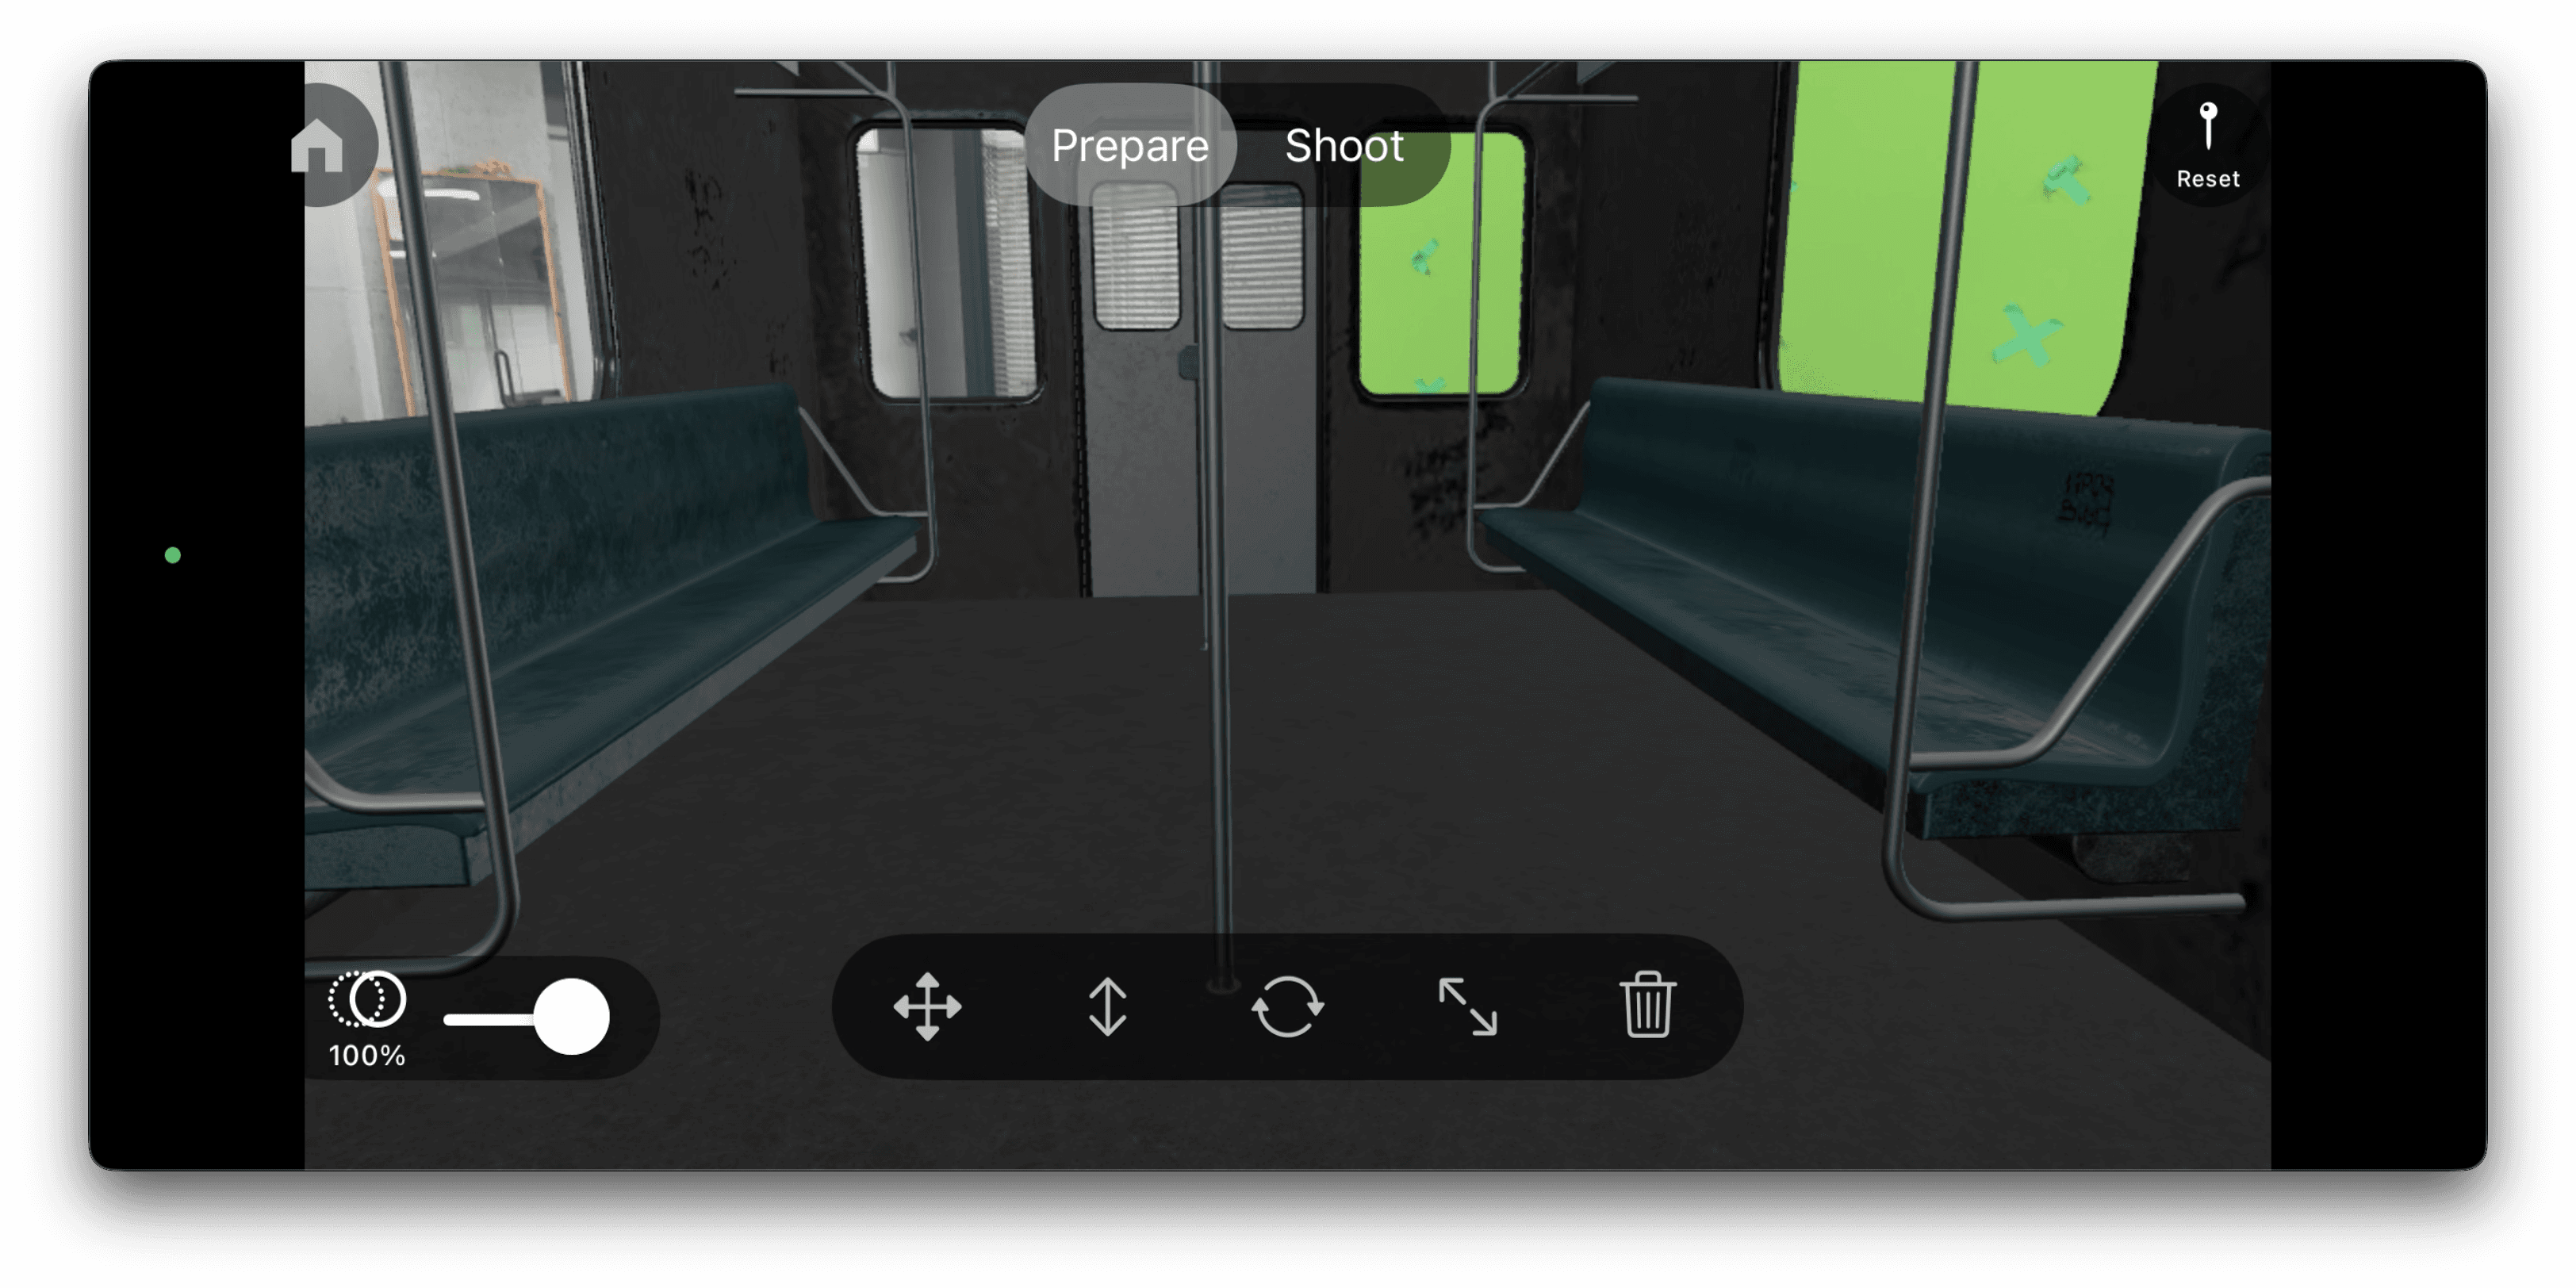
- (Optional) Place 3D Model: Place a
.usdzfile into your scene as a visual reference. Scale, move, and rotate the object freely.
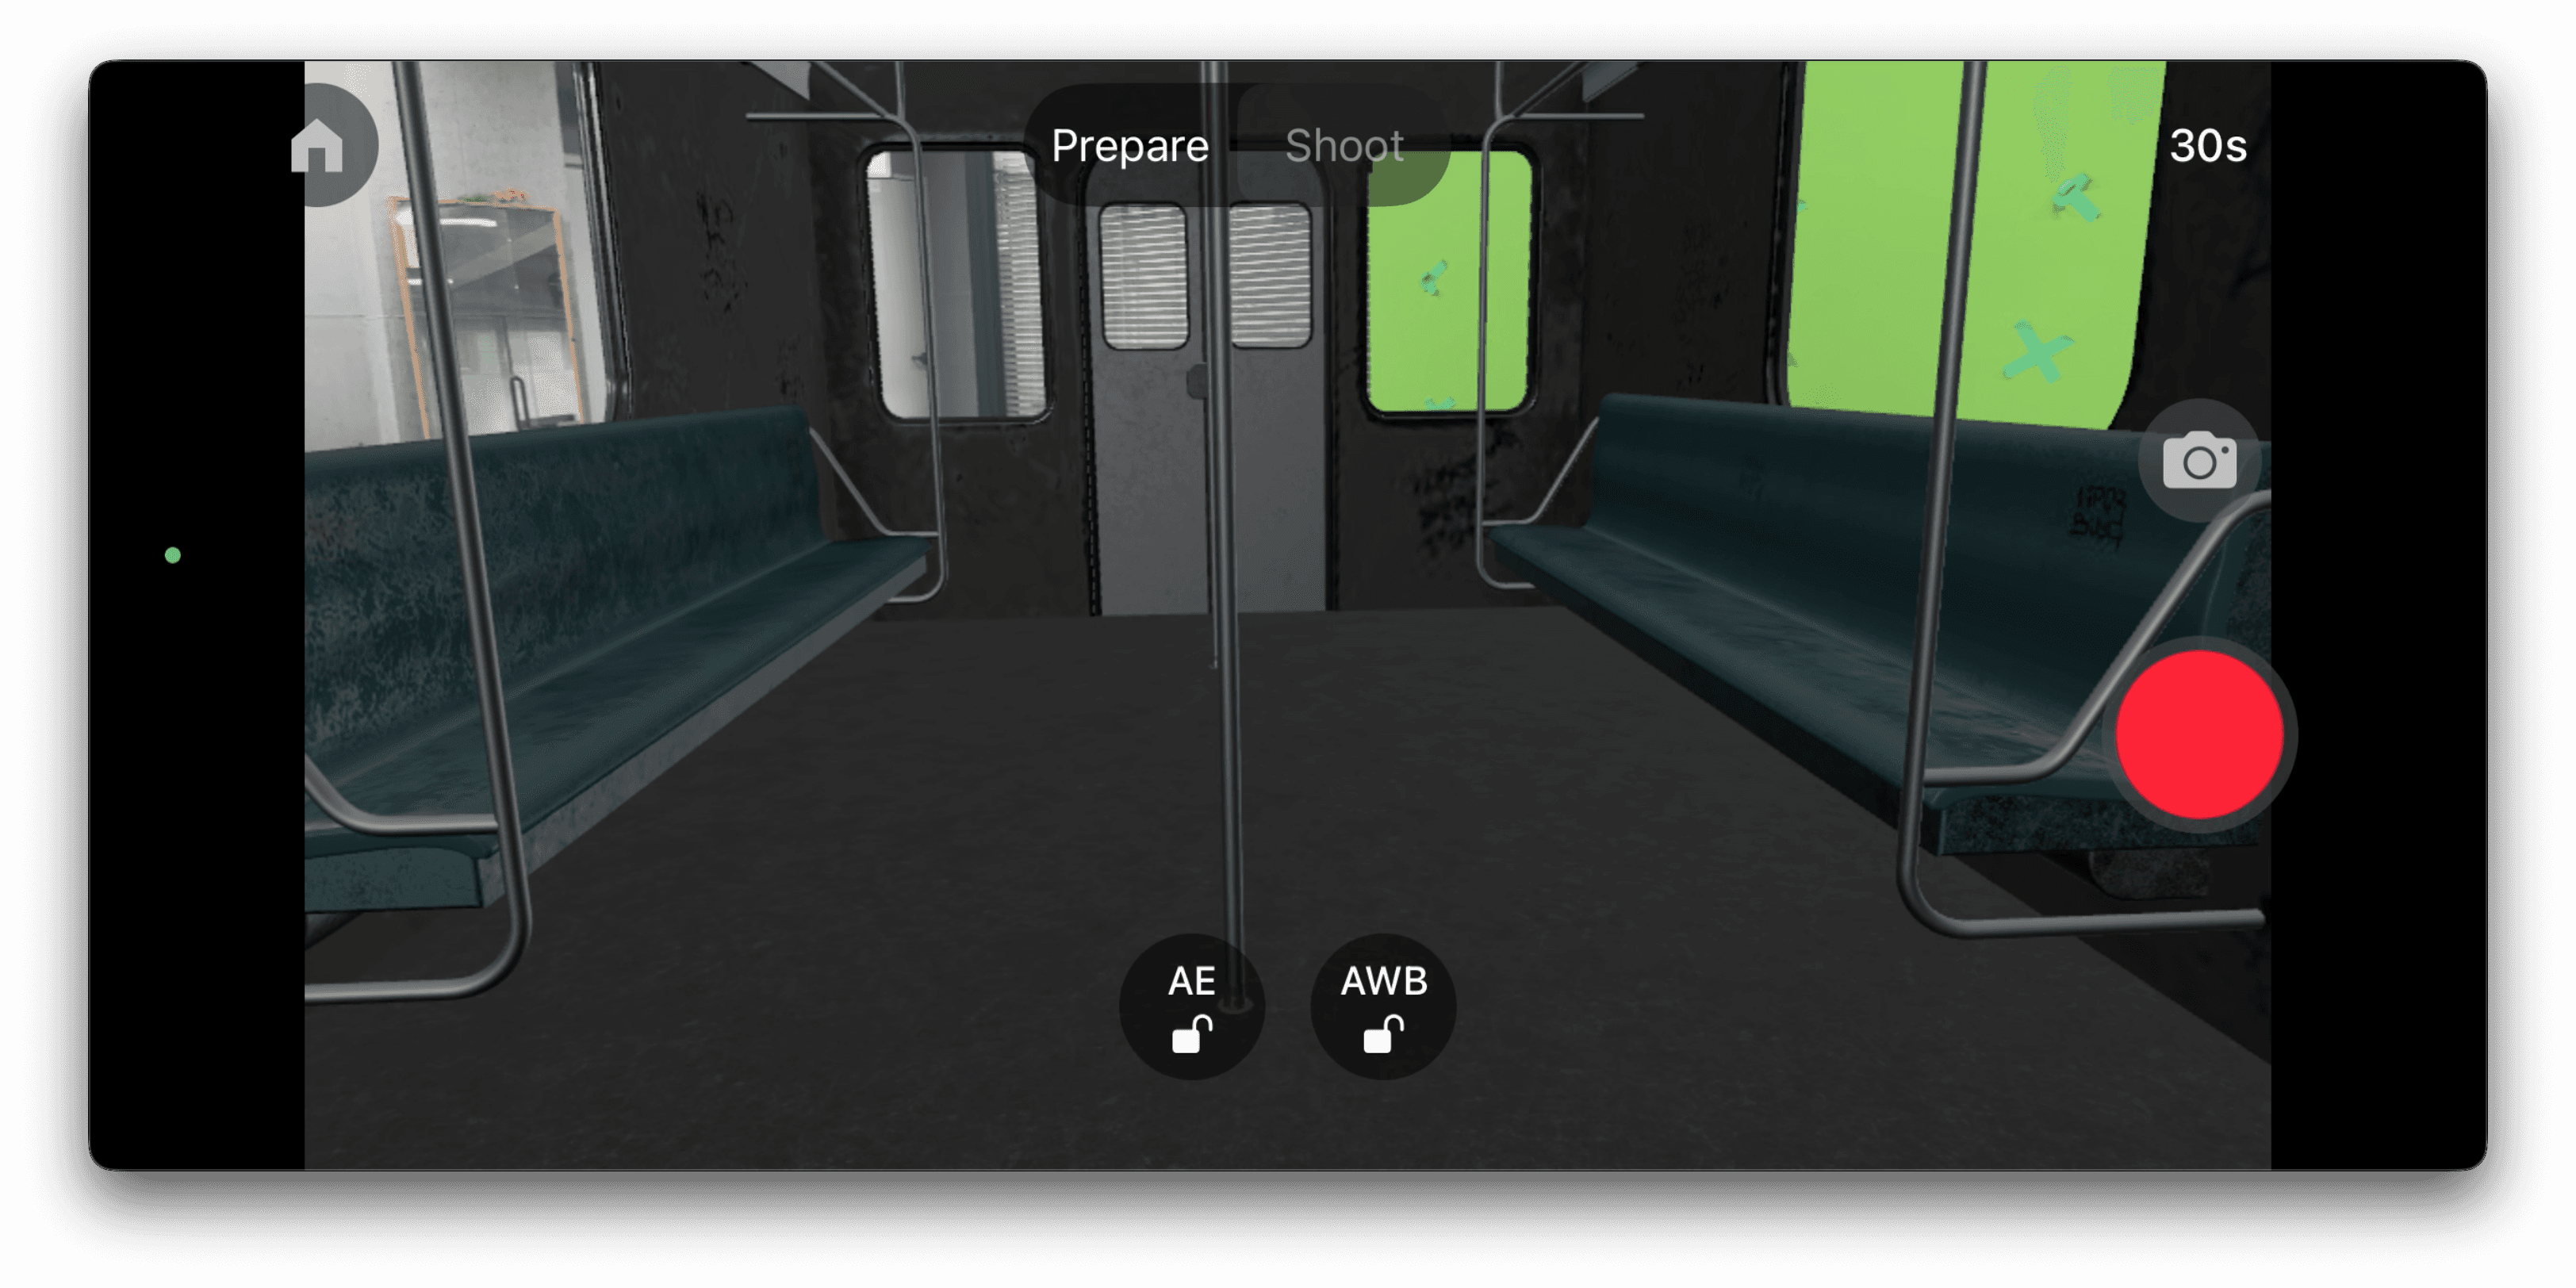
2.2 Start Recording
Once setup is complete, switch to Shoot mode and tap Record. While recording, your iPhone’s position and orientation, and depth data are tracked in real time using LiDAR and ARKit.
💡 Tips for better results
- Wipe your lens before shooting to ensure clear capture
- Use a gimbal to keep the camera as stable as possible
- Shoot in areas with even lighting and clean background
2.3 Upload and Process
After recording, simply tap Upload to send your footage to the Beeble Web.
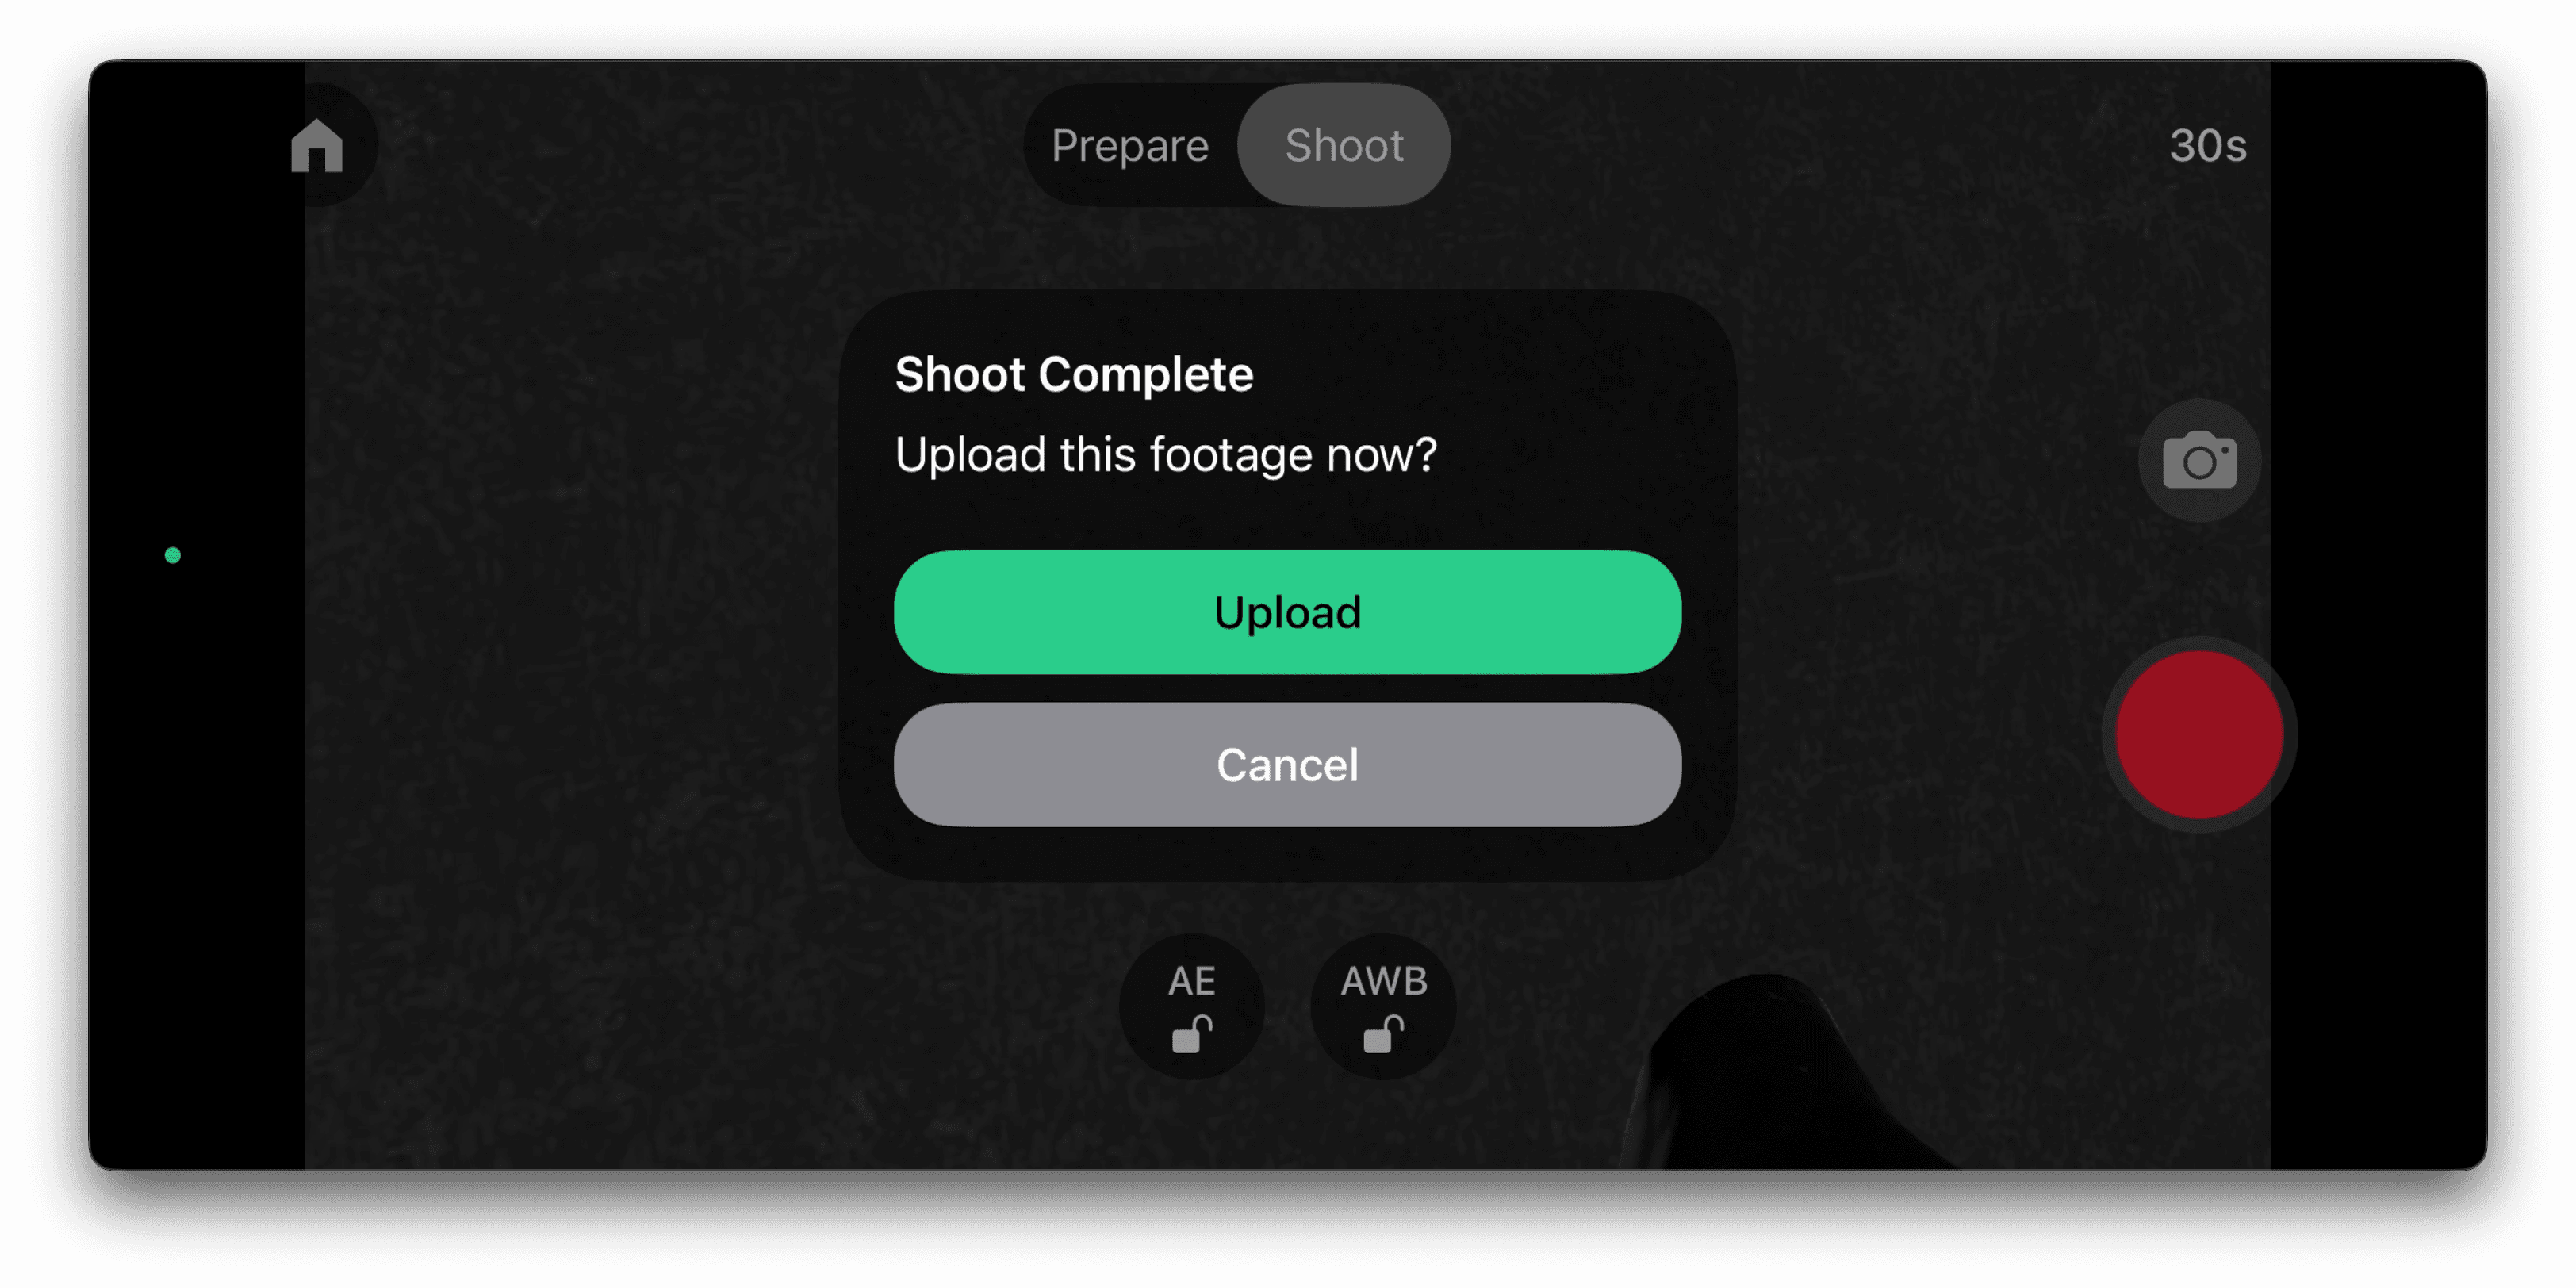
Once the upload is complete, head over to app.beeble.ai.

There, you can process your video into a camera-tracked, rotoscoped, relightable VFX pass with our AI.
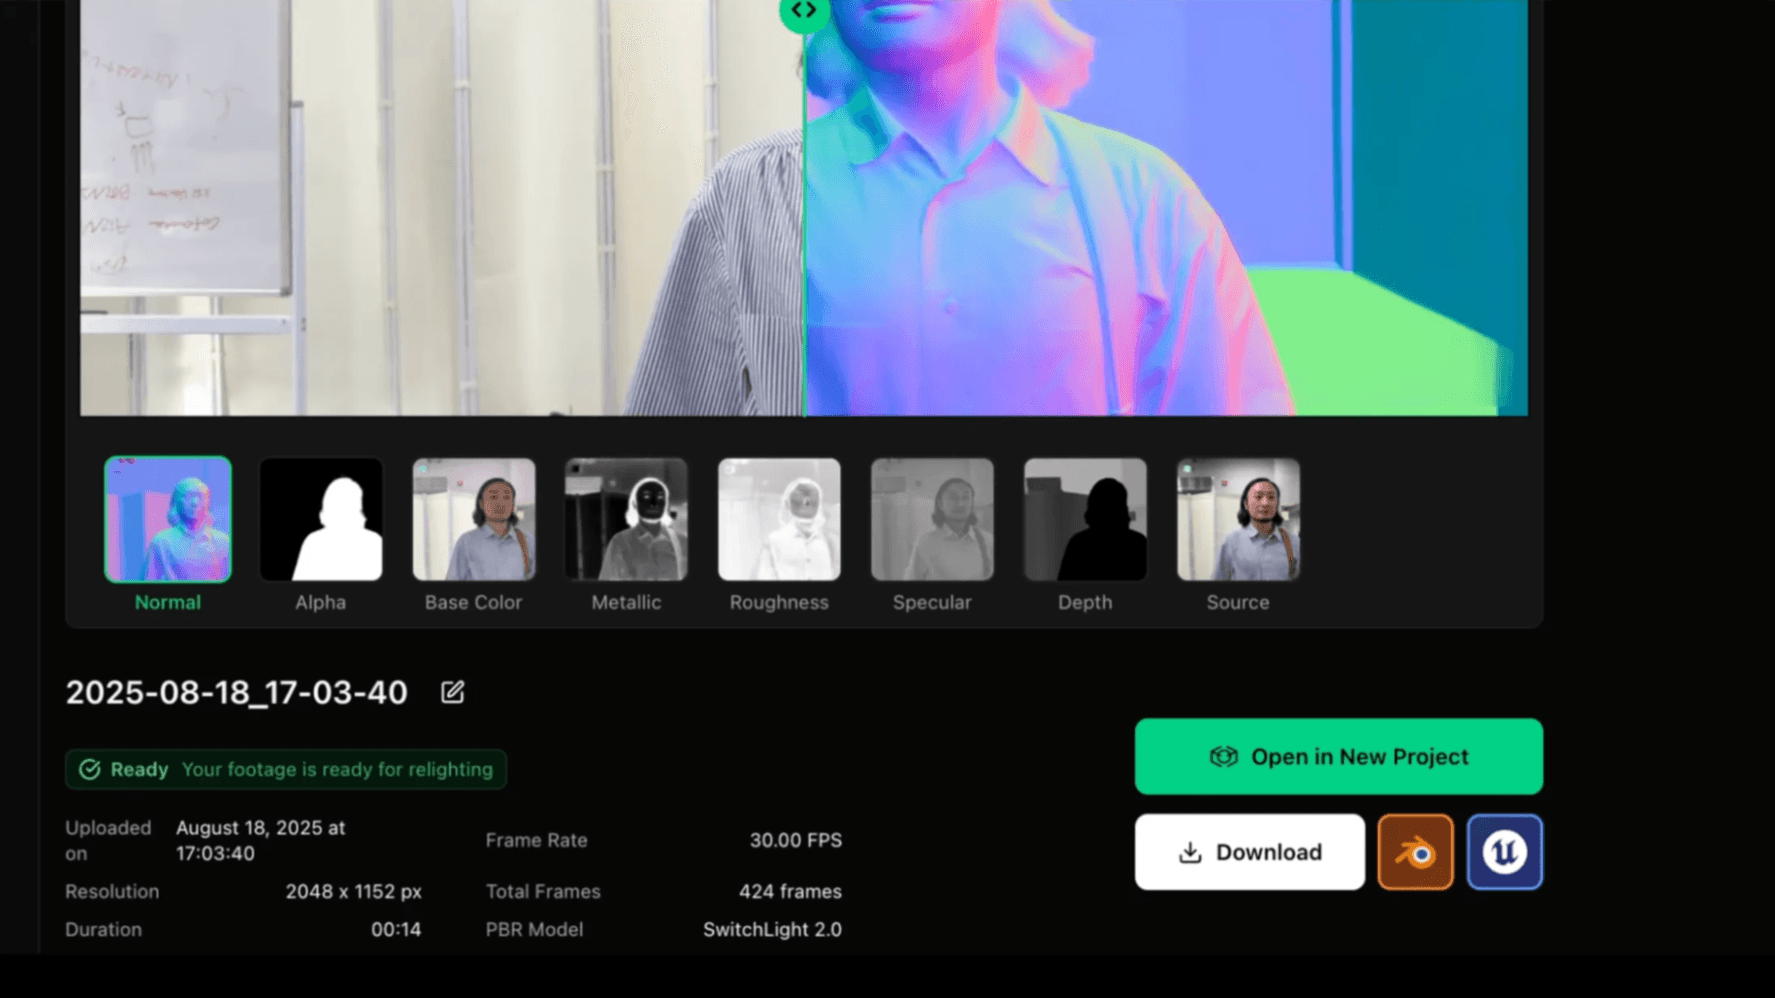
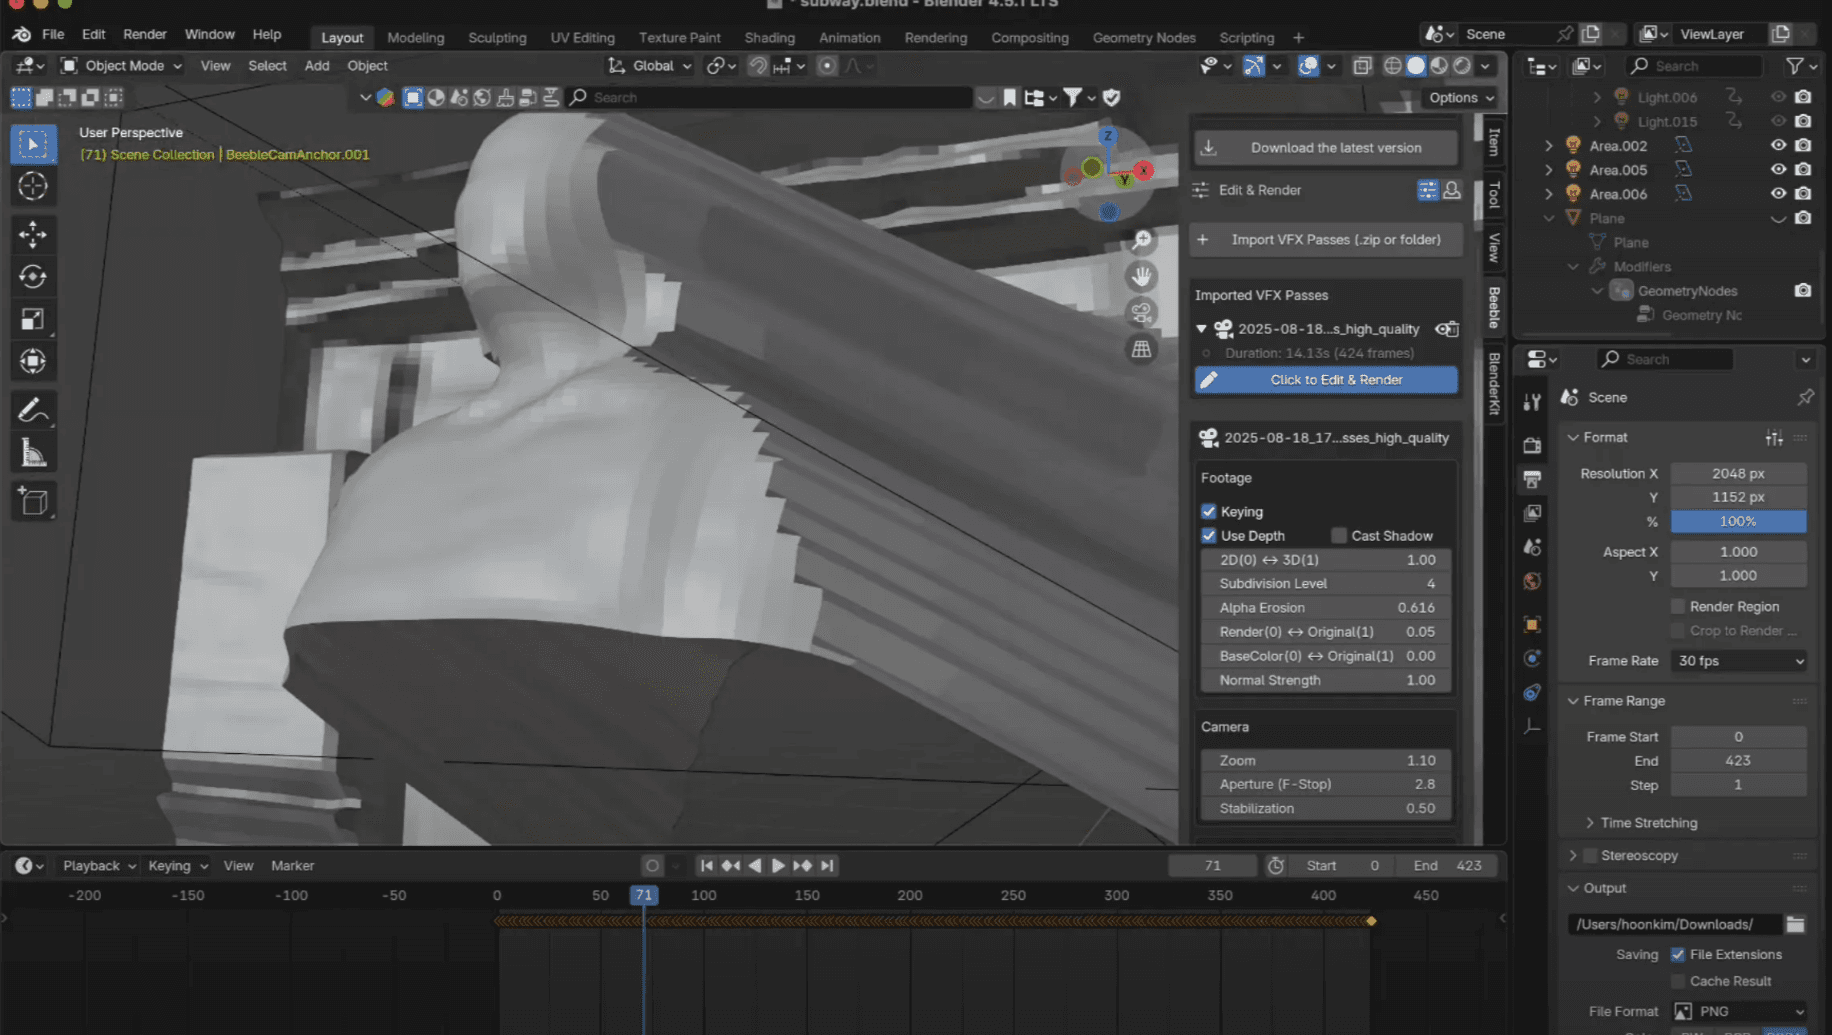
Your processed footage can be opened directly in the Beeble Studio or exported to DCC tools like Blender for further post-production.
Compositing in Beeble Editor
You can then create a new project for a quick composite.
To load the same 3D model you used during filming,
- Convert it to
.glbusing Blender or other software - Upload the
.glbfile to Beeble Editor
Since we have the metadata of how the 3D scene was placed, this will place the 3D model just like it was shot.
Compositing in Blender
For advanced compositing, bring your footage into Blender using the Beeble Blender add-on. The camera tracking data will be included as well. You can check out the add-on and instructions here: https://app.beeble.ai/plugins
Beeble Camera is available now on the App Store. You can learn more at beeble.ai/guides/beeble-camera.