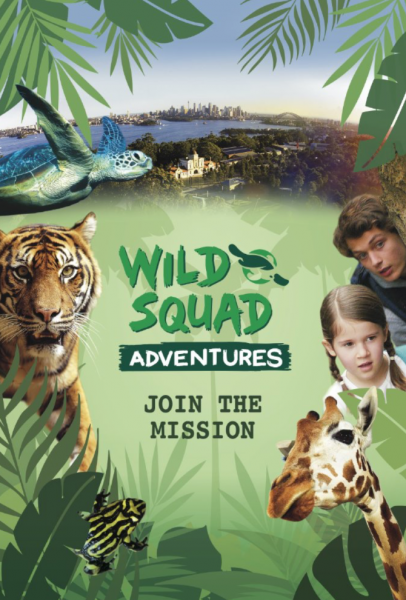
Among many other things, the short live action narrative “Wild Squad Adventures” has the rare distinction of being a film that has been made to screen in one theatre in the world; and that theatre’s primary purpose is to show this one film.
The film forms part of a major push by Sydney’s Taronga Zoo to build awareness of the massive amount of conservation work that it does around the world and to inspire audiences to get involved in conservation and protecting animals and the natural environment.
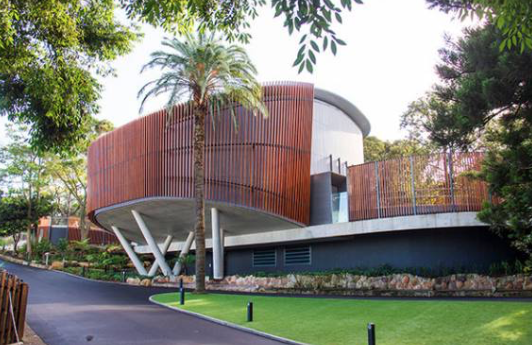
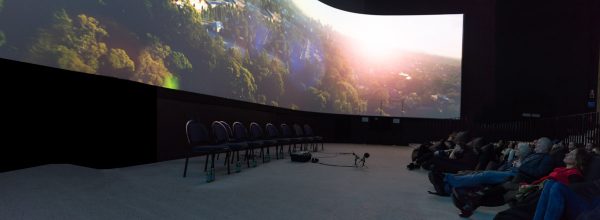
So to make sure that audiences see this important message Taronga has created an epic, permanent cinema in the zoo with a picture and sound system that has never been seen before.
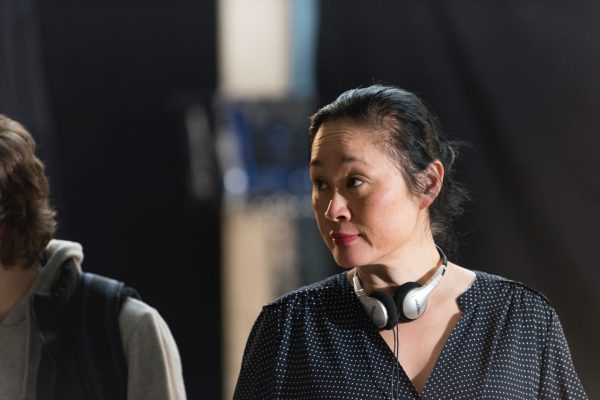
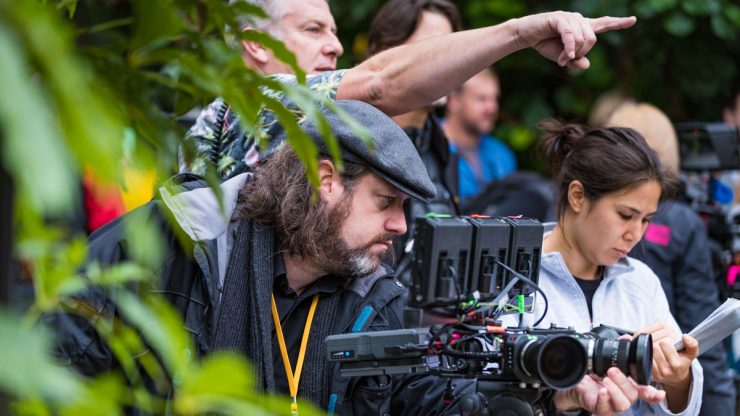
I came on board as Producer and Director of Photography along with my partner, Writer-director Clara Chong after construction had already begun on the theatre but before the specifications of the screen, projection and sound systems had been finalised.
As we started to wade into uncharted technical waters, Clara was rapidly developing the script to communicate what Taronga needed to, in a way that best connected with the audience.
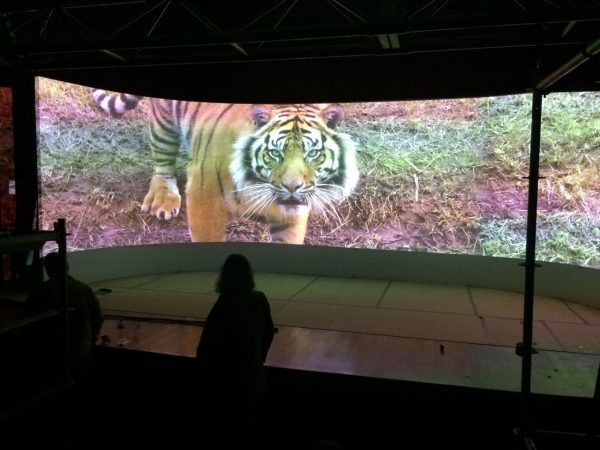
By the time we approached principal photography the picture format had been set as 5.4K in a 5:1 aspect ratio, shown through three projectors. If that wasn’t drastic enough, the screen would be over 80ft across, as wide as an IMAX screen and curved around the audience.
As I soon learned through researching how to make it work… this was completely unprecedented.
Big and wide and curved
There are plenty of massive screens. There are plenty of ultra-wide aspect screens. There are big curved screens. And there are big screens for dramatic cinema. No one has been crazy enough to attempt them all at once. But here we were.
The first thing to sort out was what cameras we were shooting on. The technical brief we received specified three to five cameras in an array to be stitched together into a single image.
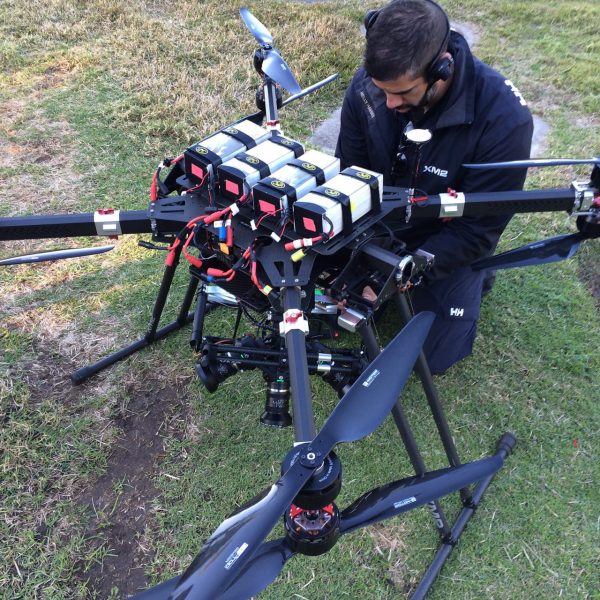
The challenge here was to get the right angle of view at the same time as the right aspect ratio and enough resolution for the audience who would be sitting incredibly close to the big screen. To complicate things even more, we had pitched the idea of doing drone work with whatever camera array we used.
Very early in the process, I had started talking with Stephen Oh and Quentin Peel at XM2 Aerial about what we were trying to achieve and how to make it work.
Weaving Blackmagic
It was Quentin who first suggested to me the Blackmagic Micro Cinema Cameras for their quality and low size and weight. When I started to consider this option, I realised that another major advantage of the Micros is that they have an incredibly small footprint and this would be a major factor in making the convergence work effectively.
This issue was dealt with in the legendary Cinerama format by having three 35mm cameras with the front of the lenses very close together and the left and right views cross-shooting. This helped enormously with convergence but meant that the angle of view could not go further than 146º before the other lens would come into shot.
To match the Taronga theatre’s screen, we needed a much wider angle of view and so the left and right cameras would have to be pointing outwards and shooting their own side of the image. Because of this, the larger the camera body, the more it would impact on the convergence.
The Micro cameras were a great solution with interchangeable lenses, on-board RAW or ProRes recording and a footprint smaller than a coffee mug.
Lensing
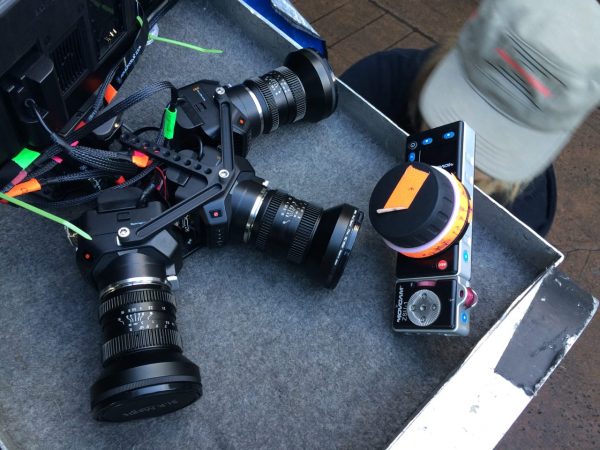
Having settled on the BMD Micros the next part of the equation became lenses. We knew that the rig would have to be built specifically for a certain type of lens and that this would have to work both in the air and on the ground.
There are so many lenses available now, many obscure ones that this became one of the most intensive bits of research in the process. Eventually I found SLR Magic, a Hong Kong based brand who manufacture a 10mm cine prime lens that is relatively small and lightweight, has full manual controls and minimal distortion.
The minimal edge distortion was very significant. Clara also didn’t want fisheye lens distortion. Although it is possible to correct almost any amount of distortion in the stitching process, the stretching of the image involved in doing this correction inevitably causes a loss of resolution around the joins.
They turned out to be fantastic lenses and their native MFT mount meant that they would go directly onto the Micro cameras without need for any adapters. Since they would mostly be used at or near infinity, this was an added bit of piece of mind. Their MFT image circle was a little larger than the Micro cameras’ Super16 frame, which meant that we were using the sweet spot in the middle of the lens– this helped even more with edge distortion. At the same time it wouldn’t be cropping in too much and losing a lot of the lens’s resolution as would happen with a full frame lens on Super16.
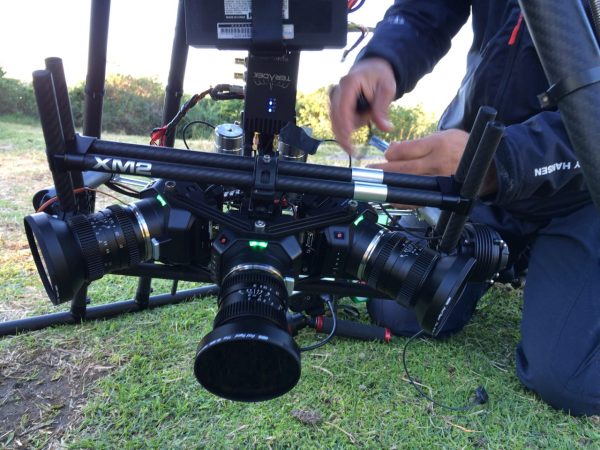
Designing a custom rig

Once we had locked in the 10mms, XM2 continued with the design of the rig to hard mount the three cameras into the panoramic array that would become known as the “Trident”. XM2’s in-house CAD designers were able to turn our calculations into a digital 3D model that could be checked and assessed. Once we had agreed that the design was correct they then checked again by making a 3D printed version to mount the actual cameras onto and confirm that everything was going to work in the real world.
With a complete success in the first 3D printed mount, we then moved to the much more expensive process of having the mount CNC machined out of a single piece of aircraft grade aluminium. This gave the rig the essential combination of strength and light weight that would allow it work properly on the drone as well as on the ground.
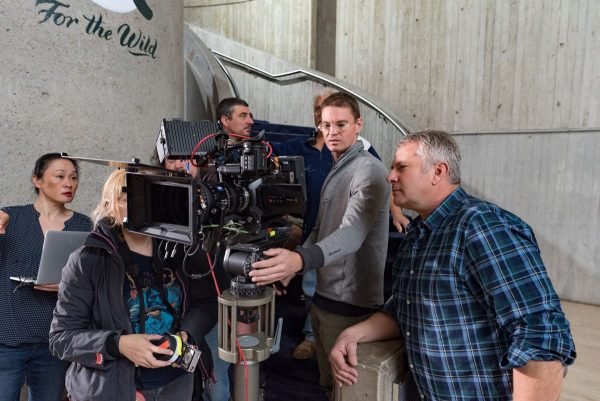
Monitoring three cameras at once
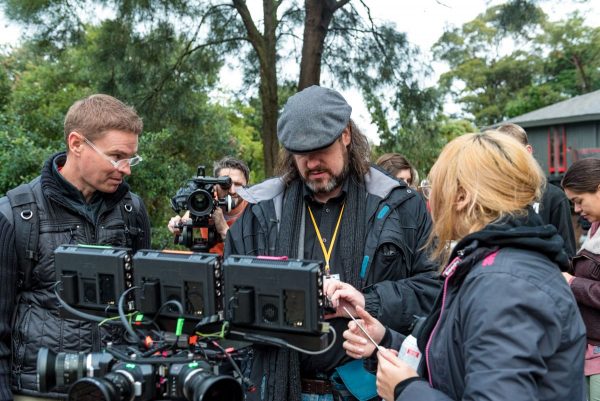
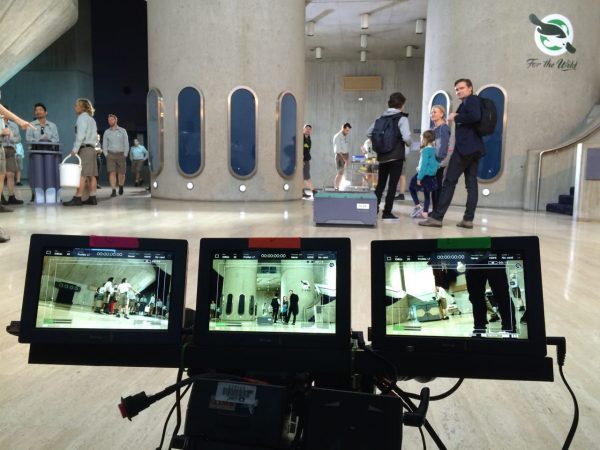
The ground version of the rig was completed with three Blackmagic Video Assist 4K monitors mounted to the rear, allowing it to be operated on a conventional tripod head. The initial plan was to have the monitors arranged in an arc to match the cameras but this made it difficult to scan the three images while operating, so Quentin suggested having them in a straight line and this approach worked very successfully.
Finalising the projection
At the same time as all of this was happening we had been consulting with IMAX Sydney to benchmark what we were planning, and projectionist Cameron Glendinning put us in touch with John Mitchell. John is one of the world’s leading authorities on the Cinerama format and gave us a heads up on many of the technical issues that Cinerama encountered and how they were dealt with.
Cinerama began by using three 35mm six-perf cameras, each with a 27mm lens to create their curved 2.6:1 image. As we were starting to realise with our plan, this sort of array is quite limited in achieving any sort of drama coverage. Because of the inability to change focal length combined with the fact that within a particular distance from the lenses, the convergence would not occur and the images could not be re-combined on screen.
For Cinerama this changed in 1963 when It’s A Mad, Mad, Mad, Mad World was produced as “Super-Cinerama” using a single 70mm camera with Panavision Ultra-70mm Anamorphic lenses and then projected in Cinerama theatres using a special projection lens to fill the curved screen.
Clara and I had been discussing the limitations of the the panoramic array and I began to think a combination of array and single camera coverage might be the best way to achieve what was needed.
I put this idea to John Mitchell who said that this is exactly what Cinerama filmmakers in the mid to late 60’s wanted to do by combining the 3 x 35mm and single Super-70mm techniques, using the array for scenic shots and then the single camera for the drama coverage. This would be the best of both worlds with the extreme angle of view for the epic shots and then the flexibility of single camera and different lenses for the rest of the coverage. While this was tested successfully, the reason this combination was never used on an actual film in Cinerama was that on film it was far too expensive, even for the prestige blockbusters of the day.
One of the great things about shooting and finishing digitally, is that mixing formats is actually no big deal.
This gave me enough confidence that this would be the ideal way to go, so it became urgent to choose what would be the single camera to intercut with the Trident rig.
Choosing a camera… and an operator
To get a jump start on matching the footage I thought that using another Blackmagic camera might make things easier. At the time production units of the URSA Mini 4.6K had just started to make their way onto the market. At 4.6K it would require a slight blow up to the 5.4K master format but since the plan was to use it for closer coverage, I thought this might not be too big of an issue.
Once we started testing this process it very quickly became clear that the 4.6K sensor was more than up to the job. What we did find though was that in certain circumstances even the mildest compression could be visible. This meant that we would need to be using the URSA’s Lossless RAW mode which would deliver around six minutes per 128GB CFast 2.0 card.
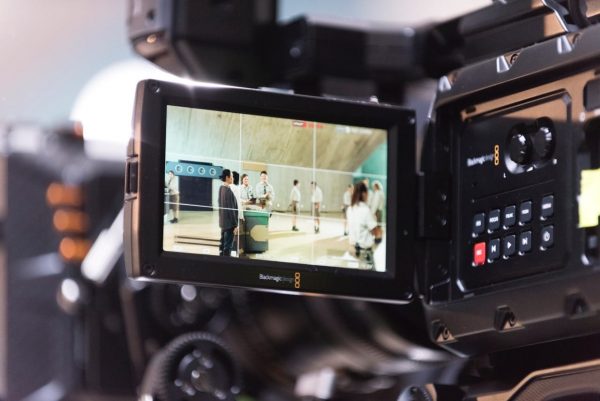
I also realised that the horizontal lines in the “thirds” markers that are available on the Blackmagic cameras and monitors accurately match a 5:1 aspect ratio, making it straightforward to frame for the format whether it was through the viewfinder, on-board LCD or external monitors.
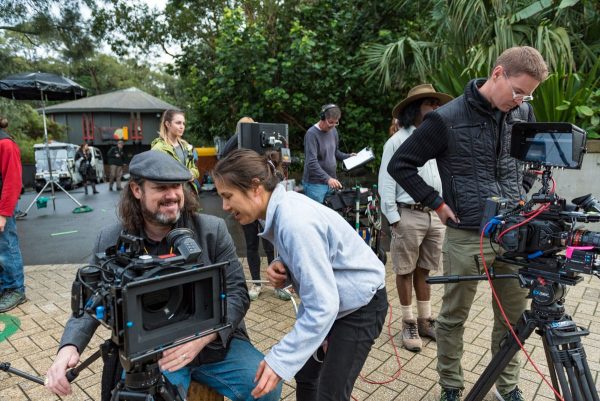
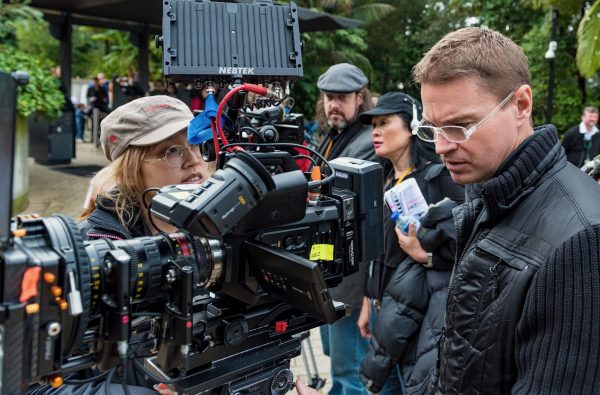
As we approached the main shoot I contacted Matthew Allard ACS to see if he would consider operating the A-camera for the shoot. Clara and I had been looking forward to working with Matt on a shoot for years and luckily with this project, the timing worked out.
A big part of this was wanting to have someone with both the technical and aesthetic sensibility to be able keep a close eye on the pictures in the midst of the complex and fast shoot.
The film contains two distinct worlds, the “magical realism” of the actual zoo and the sci-fi underground bunker of Wild Squad HQ. In talking with Matt about our options for lenses, I had the idea of using different brands of lenses to help with the two different looks.
I knew that we would need to be on zooms for the A-Camera because of the speed that we would have to be working and to be flexible enough in working with children and animals so much.
Different lenses for different looks
We settled on using Matt’s own Angenieux Optimo Style 16-30mm and the 30-76mm, both T2.8 for the above ground world of the zoo and the Zeiss 15-30mm and 28-80mm T2.9 for the HQ bunker. My thought process was that the gentler, slightly romantic look of the Angenieux would work well for the zoo’s magical realism look and that the clean, neutral look of the Zeiss would give us a great base for the HQ’s sci-fi look. I must admit that I stopped myself and wondered if I was imposing cultural stereotypes onto these French and German lenses but they really do have these different looks!
The two zoom kits were supplied to match the A-Camera’s PL mount and for the times when we wanted to bring a second camera into play, I could jump on and operate our B-Camera which was EF mount with a kit of Samyang/Rokinon primes. I was confident that I could match the EF Primes to both of the zoom kits in the color grade – which begs the question of why shoot with different lenses for different looks?
Even though it’s possible to match most characteristics of lenses the fact that we had these different flavours in the original footage gave us a solid jumping-off point for crafting the rest of those distinct looks.
Adding pop in post
Clara was very keen to take advantage of the beautiful Angenieux lens flares in the zoo, but with overcast weather for most of the exterior shoot, these had to be added in the grade using the Sapphire lens flare plugin. We eventually designed our own flares in Sapphire to get the exact warm, gentle flares look we wanted and applied these in Resolve, so that we could adjust the grade and the flare interactively on each shot.
Using the Sapphire flares in the grading also allowed us to add consistent flares to the stitched Trident shots, which was of course impossible to achieve in camera as the three lenses were facing in different directions.
Getting the shot
Using the Trident on the ground required careful positioning of crew, particularly on interiors where almost the entire room was visible in one shot. In a location we called the Steam Punk room, a plant room that formed the link between the wall and the HQ bunker, this created a particularly interesting lighting challenge because so much of the room was visible all at once. Gaffer Steve Schofield found a number of great hiding places for lamps behind the plant equipment and we were able to get a lovely sense of depth in the Trident shot.
In HQ we used the Trident for the big establishing shots of the massive bunker, which became to background for the holograms which were one of the main VFX elements in the film. We eventually set the Trident up in a little doorway alcove with the essential crew squeezed in behind the camera. All other crew had to leave the room as the entire space was visible from one wall to the other.
Lighting for a Trident
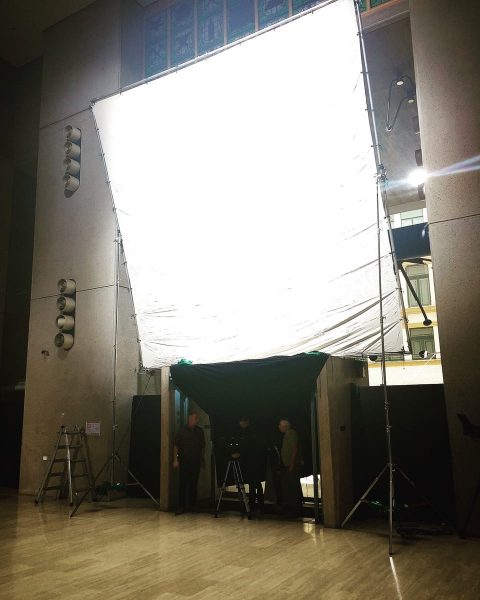
In HQ, Steve suggested using the third floor balcony above the foyer to position a 6K HMI pointed at a 20×20 bounce rigged along the back wall. This was the only part of the room consistently out of shot and gave us a good soft base illumination for the room. From there we were able to position 6K and 4K HMIs on floorstands to key and backlight as required. These were mostly through a 6×6 or 12×12 diffusion frame and on some of the most important close ups of Gillian and Scout we double diffused the light with a 4×4 positioned halfway between the lamp and a 6×6. As well as being quick to set up, this technique also takes up less space in both depth and width and creates a great character of soft light.
We also used smaller units with theatrical color gels to create pools of color in parts of the the background. These were mostly strong blues and this created enough balance that we could then add some warmth to the fill light with a quarter CTO.
Over ground, underwater: Shooting endangered species
The third component of the film is three stories about endangered animals that Taronga is involved with protecting. These were shot in a variety of locations including the Kosciuszko National Park, Taronga’s Western Plains Zoo in Dubbo and an underwater shoot in Queensland. These were kept as simple as possible from a crew and equipment point of view. On most of these shoots I operated the URSA Mini and used the Samyang prime kit and a small collection of Canon SLR zooms.
Not surprisingly, this included L-Series lenses but I also found that some of the EF-S lenses which are designed for the smaller APS-C DSLRs delivered amazing results, since that format is so close to the URSA Mini’s Super35 Sensor. The unexpected hero of these was the Canon 55-250mm which is a lens you would commonly see tourists carrying. When we ended up further away from the Sumatran Tiger than expected because it didn’t follow the scent trail that had been laid down for it, I was able to whip out the 55-250 and managed to get some of the sharpest and most dramatic shots in the film at 250mm. Of course, this was helped by the fact that I was shooting at around f/8, where most lenses are pretty sharp! But these were shots that we otherwise would not have got.
For the underwater sequence with the Green Sea Turtle we brought in underwater maestro, Roger Buckingham ACS. Roger was still building his underwater housing for the URSA Mini at the time, so we shot this sequence with his Sony F5 in 4K XAVC using his GL Optics Zooms.
The 4K 10 bit-XAVC actually worked quite well, especially with the underwater effect buying us a little more wiggle room on sharpness and contrast than you get on the surface! Also helping this sequence was the fact the footage only had to work in its own right and didn’t have to directly match to anything else.
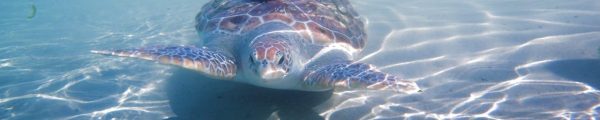
For most people, seeing the massive close up of the sea turtle’s face on the big screen is one of the highlights of the film.
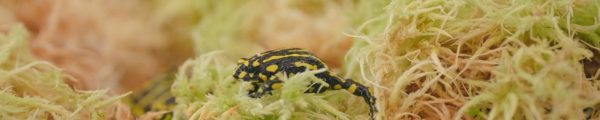
The other featured animal is the Corroboree Frog, which is a tiny Australian highland frog that is seriously endangered but starting to make a comeback with Taronga’s conservation efforts. The release of the frogs in the Kosciuszko National Park created a couple of special problems. We pushed ahead with the shoot in mid-June in order to get it shot before snow covered the mountains. Despite this, it was already too cold to release the frogs and we would not be able to get to the areas that were actually safe from the disease that is destroying the frog population.
Get to the chopper!
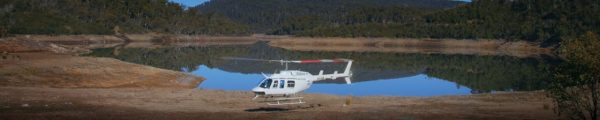
We travelled by car into the national park, which was already closed to the public, and then used a Bell Jetranger helicopter as both transport and action vehicle to get to a very remote area that was a believable habitat for the frogs. We had originally planned to come back weeks later with the Trident on the drone to get travelling aerials since the rig was still being built. However, on the day we had the smoothest air I’ve ever encountered in a chopper, so I was able to shoot very useable handheld images out the door of the Jetranger using the Canon 24-105. With only a tiny bit of stabilisation in Resolve this footage actually held up on the 5.4K screen even with the curvature issues of the format.
In the remote frog habitat area, Taronga’s Michael McFadden carried a box to the right area and mocked up the release of the frogs. The close-ups of the actual frogs were shot months later in the safety of Taronga’s back-of-house area.
The wide shots in the mountains were shot with the Samyang 16mm T2.2, which is a great wide angle lens for Super-35 as it neatly covers that image circle and the 35mm T1.5 for closer shots, bearing in mind that were were severely cropping vertically to get the 5:1 frame. For the closeups of the frogs I used the Samyang 100mm Macro and was thoroughly impressed with the results from the lens on the big screen.
A job for a jib
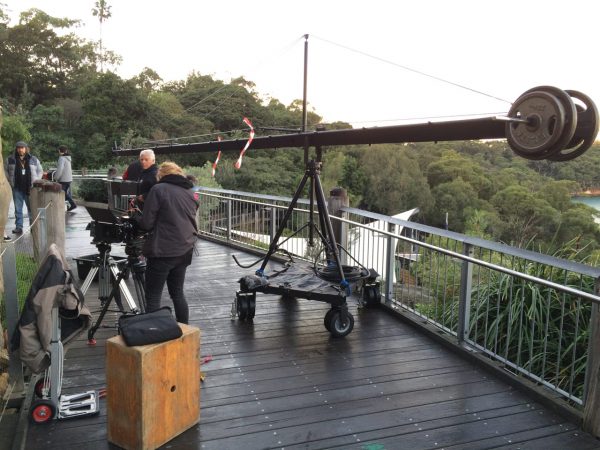
We made use of a 30ft Jimmy Jib with remote head both in the Zoo and the HQ location.
Although the format made it difficult to find opportunities to use the Jib for moving shots, it was essential to get the required angles for several key moments in the film. When the family is at the wall which is the hidden entrance to the HQ bunker, the cast are standing on a boardwalk that runs alongside the wall which sits well up on a terraced hillside.
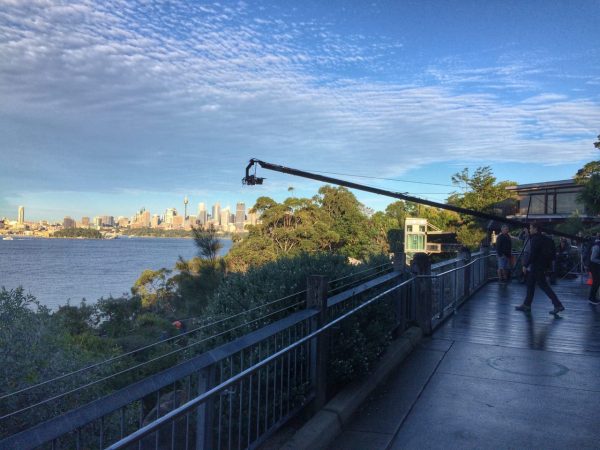
The only way to get a static wide shot looking back at the wall was to have the Jimmy Jib base on the boardwalk and swing the camera out into the air. However, once we were in this setup we did manage to get one “Spielbergian” crane up for the tense moment when the family arrive at the wall. Our Key Grip, Pip “The Grip” Shapiera is a whizz at controlling the remote head with the joystick, so Matt and I were happy for him to take over the operating duties for that shot.
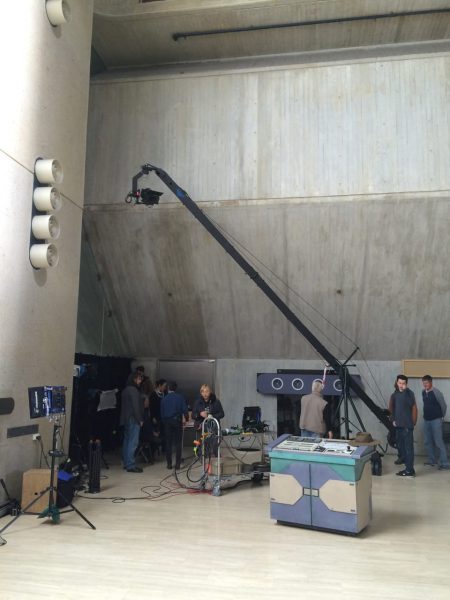
In HQ we also used the Jimmy Jib to get angles on the mezzanine level as the mum frantically looks for her missing child.
The rest of the time at the zoo the cameras were on tripods, Matt’s A-Camera on his Sachtler and my B-Camera on my Miller.
In HQ, the marble floor made it easy to put the cameras on dollies or bazookas for quick repositioning. Although the dollies moved very smoothly on the marble floor, the restrictions of the curved screen made it impossible to get any moving shots – something that required quite a bit of discipline from Clara, Matt and I, as we would all have loved to add plenty of camera movement!
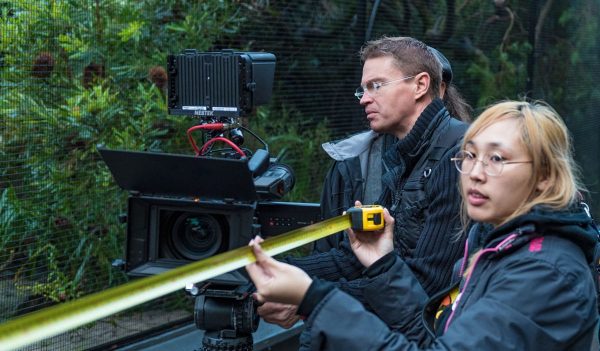
Staying close to the action
Clara and I are not fond of a traditional “video village” setup as we like to stay close to the action. In both locations we had two Blackmagic SmartView 4K monitors which allowed us to see a clear 4K image in a size that was easy enough to keep close to the cameras. The grips team just put a black floppy behind the monitor so that we had an uninterrupted view while watching, without being stuck in the black tent that has become so common for digital shoots. The SmartView’s also allowed us to use the thirds markers to see the 5:1 frame while still being able to see what was happening above and below the main frame.
This was particularly helpful as it allowed Clara to see moments where she knew she would be able to rack the image up or down in the edit so save a separate setup. This was particularly useful when shooting group shots of the family where the parents would be in the main frame and at the same time we picked up a “free” shot of the kids in the lower part of the image. Because we needed to comply with the strict working hours for children under NSW law, these additional shots turned out to be very valuable additions in the edit.
Final thoughts
The finished film includes original footage from seven cameras, 18 lenses and everything from under the water to up in the air.
In the end, some of the most striking shots were done with some of the most inexpensive lenses and yet those same lenses would have failed miserably for the bulk of the film’s screen time, where we relied on the high-end cine zooms to get the job done beautifully, quickly and reliably.
For me this highlights how much modern cinematography is about choosing the right tools for the job. There is no “best” camera or lens… it’s just a matter of what you need to do, how you want it to look and finding the tools that make that happen.


