X-Rite ColorChecker charts have been around for some time now, but I thought our audience would like to see just how useful they are for making sure you are capturing accurate colours on location.
The concept behind using a colour checker chart is that you can capture an image of the chart when you’re on location, and then once you’re finished you can use programs such as Davinci Resolve or Color Finale Pro to create an exact colour match based on the chart you shot. This is as simple as selecting the colour checker chart you were using in a drop down menu, lining up the chart with your mouse and clicking OK. This takes a lot of the guesswork out, and gives you a very good starting point from which to move forward with your colour grade.
The ColorChecker Video chart is very useful for not only helping you get ideal exposure, and matching multiple cameras, but it also provides you with consistent colour information no matter where you are working.
Two different versions
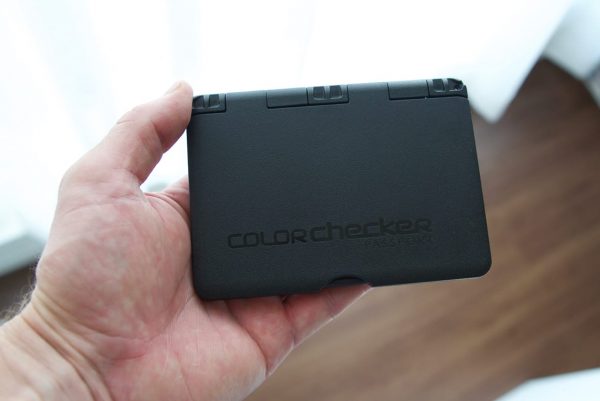
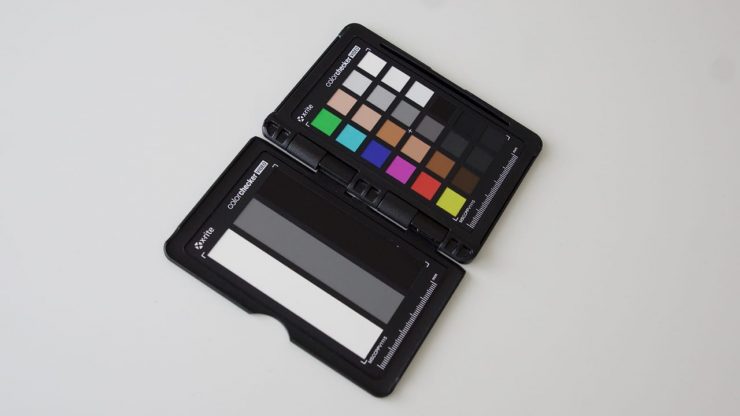
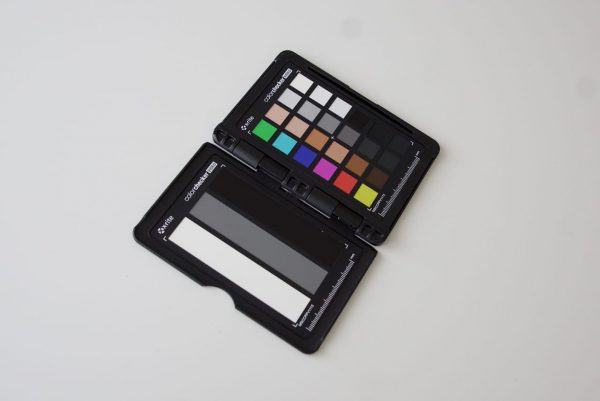
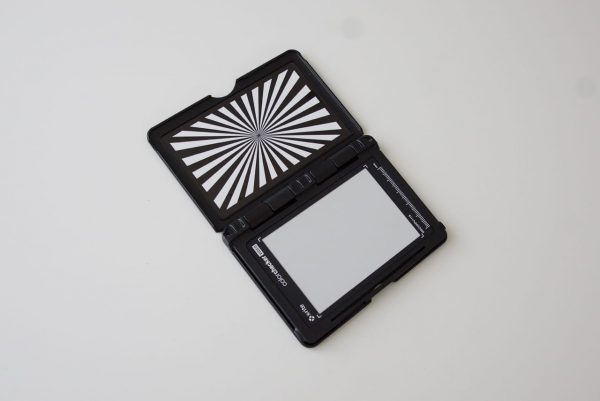
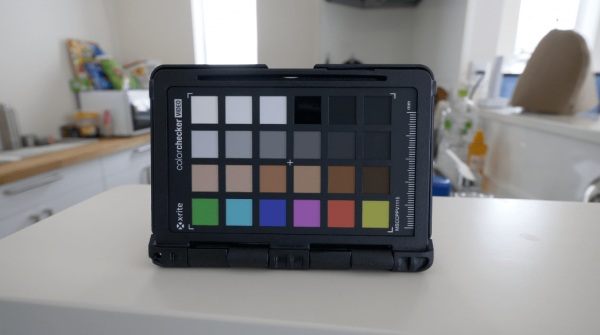
The ColorChecker charts come in two versions- the ColorChecker Passport Video and the ColorChecker Video. The smaller Passport Video comes in a ruggedised pocket-sized hard case and it features four colour/camera calibration targets, a colour chip chart, and a white balance and grayscale card. The larger ColorChecker Video only has a combination colour chip chart and grayscale, as well as a 60% white balance card.
So what are the charts actually for?
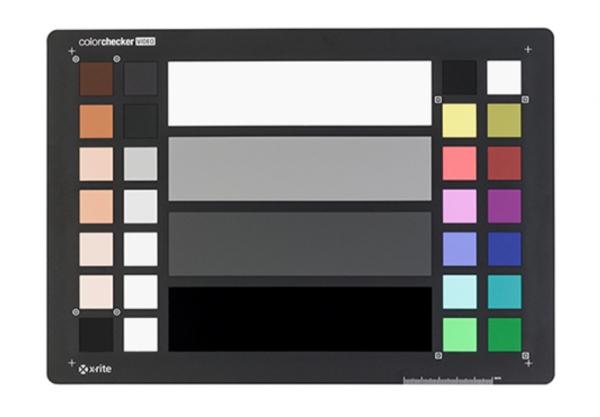
Video Color Chips
Includes six chromatic color chips aligned with video production, six skin tones chips, six gray balance chips, and six highlight and shadow chips (including a high gloss black) to achieve the ideal color balance.
White Balance Target
Creating in-camera white balance helps to start at a neutral point for all images you capture. Balancing your footage to a consistent colour balance makes editing go smoother, and is less jarring when cutting from one shot to the next. The consistent color balance can also speed up colour correction.
Grayscale Target
The three panels of the grayscale target are white, 40 IRE gray, and black. These targets can be used to align the exposure and contrast of cameras you may be matching on set, and can help ensure that mid-tones, such as flesh tones, are rendered accurately. The combination of the white, gray, and black patches allow you to evaluate your exposure to prevent your highlights from clipping, while protecting your shadow detail, and 40 IRE provides a good standard to compare your exposure on faces to.
Focus Target
The focus target can be used to confirm / adjust your lens’s flange focus / back focus distance. You can also use it to shoot focus test and compare your different lenses sharpness to each other.
How to use the Colour Checker Chart in the field
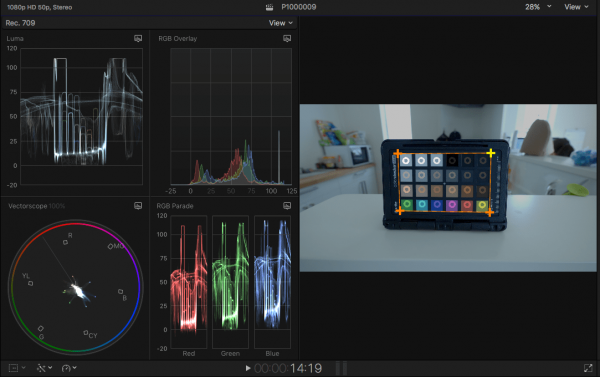
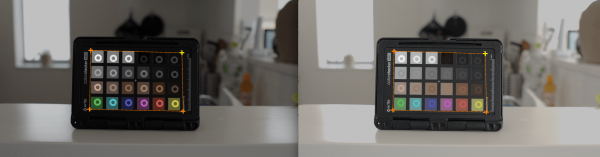
All you have to do is hold the colour chart up in your scene and roll your camera for a few seconds, it’s as simple as that. The only thing you do need to make sure of is that the chart can clearly be seen and isn’t too small in frame.
If you are a FCPX and Colour Finale Pro user you can only use the pocket sized ColorChecker Passport Video. If you try and use the larger ColorChecker Video it won’t work.
Post workflow
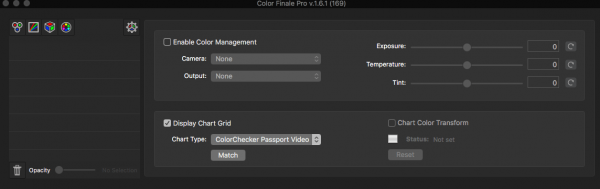
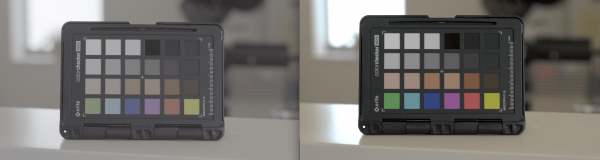
Once you get your material back in the edit it is fairly easy to use the recorded information you took with the ColorChecker chart. All you need to do is go to a frame where your ColorChecker chart is in shot, and then in the case of Colour Finale Pro, you just click on Display Chart Grid and then select ColorChecker Passport Video.
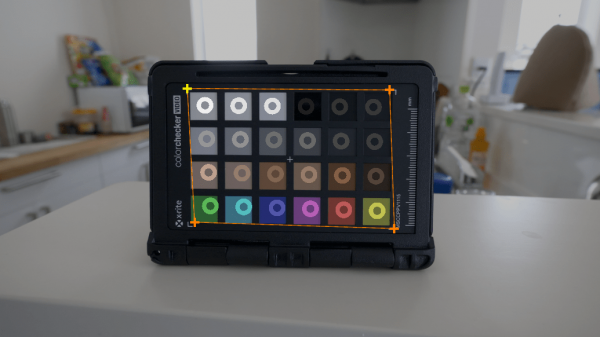
You then place your mouse over the bottom right colour square on your chart and click. This brings up a small crosshair, and from there you create a square box that you can then move around until all the coloured squares are lined up.

Once you have done this all you need to do is click Match and you are done.
Results
The ColorChecker chart helps take a lot of guesswork out of obtaining accurate colours when you are working. There are always times where you may not quite set your white balance to the right kelvin temperature and you end up with footage that doesn’t look right. By taking the time to hold up a ColorChecker chart for a few seconds, you give yourself a colour reference that can save a lot of time once you get back to edit.
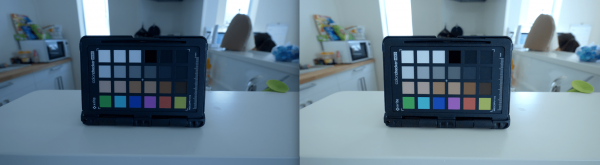
From my tests I found that you could not only correct footage that was shot with the wrong white balance, but you could also easily correct slightly under- or over- exposed material reasonably quickly. Of course the ColorChecker isn’t a magic solution for fixing everything, and it’s not going to be able to fix badly underexposed or overexposed material.
You do have to also remember that when you are filming the ColorChecker chart that you place it in the lighting conditions you are exposing for. The ColorChecker chart is not a mind reader and it doesn’t know the look you are after. If you hold it up and you have a bright window in the background which is quite a few stops over where you are holding the ColorChecker chart you are going to run into problems. In this scenario when you go into the edit and line up the chart and click match it is going to expose correctly for the chart and you will have a very blown out background. This is however, easy correctable as all you need to do is bring down the exposure in post.
The ColorChecker chart can also be used with Log recorded footage, although it doesn’t necessarily give you the best results from my experience. I found if you have Log material I got better results from first adding a LUT to the image and then doing the colour match.
Final thoughts
While the ColorChecker charts work really well, you have to be disciplined enough to remember to use them. I often found that when I was in a rush I would forget to hold it up for a few seconds. The downside of using the smaller and more compact ColorChecker Passport Video is that I often found myself having to take the camera off a tripod and move it closer to my subject to record a few seconds with it in frame. Unfortunately as a FCPX and Colour Finale Pro user I am forced to use the Passport version as the software isn’t compatible with the larger ColorChecker Video. If you are a DaVinci Resolve user then both versions of the ColorChecker charts will work.
For matching up different cameras it works pretty well. While in my opinion it doesn’t give you an exact match, it does get fairly close, and at least it gives you a good starting point for getting it even closer.
The X-Rite ColorChecker charts are a nice addition to your kit bag, particularly the ColorChecker Passport Video due to its small size. They do come at a cost though, with the ColorChecker Passport Video retailing at $128.99US, and the larger X-Rite ColorChecker Video at $118.99US. Yes they are a lot of money, but if your time is valuable and you want to be able to make corrections to your vision very quickly then you may well find it worth it.
X-Rite also makes another kit that consists of both the ColorChecker Passport Video and ColorChecker Videoa for $247.98US.