Wimius and MGCool are part of a new wave of action camera brands. When you think of action cameras, the first name that pops into your head is GoPro, but times they are a-changing. The market that they dominated for so long is now home to a lot of new competitors that offer similar specifications for much less money.
Wimius and MGCool
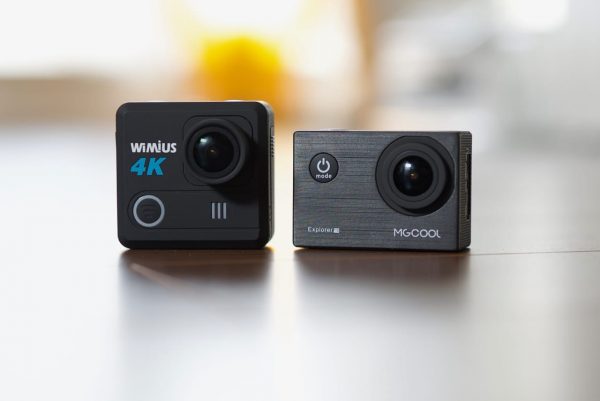
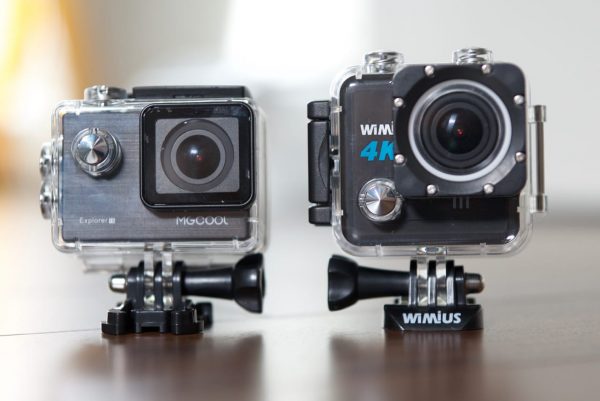
Two of these newcomers are Wimius and MGCool, two companies you have probably never heard of before. Wimius makes the 4K (it’s actually UHD) Action Cam L1 that costs $79.99 US, and MGCool has the UHD Explorer 1S which also retails for $79.99 US. The price is not the only thing these cameras have in common, their functionality and specifications are almost identical. Not only are both of these cameras very wallet-friendly, but they also come with a lot of additional accessories. So lets have a look at what they both have to offer.
Wimius Action Cam L1
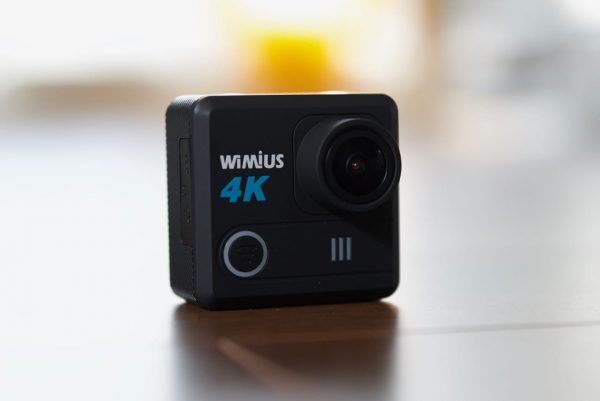
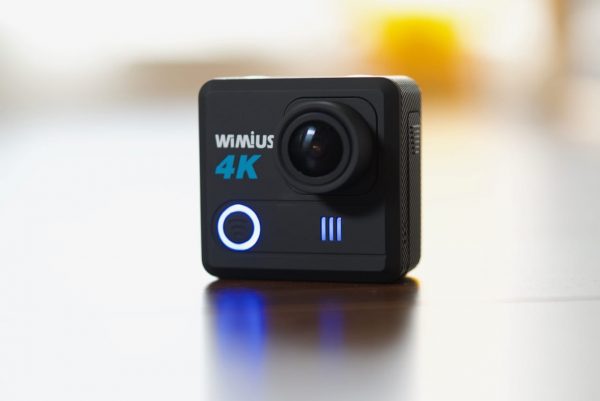
The Wimius Action Cam L1 uses a Sony IMX078 image sensor and a Novatec chip that is capable of recording UHD footage at up to 24p, as well as taking 20MP stills. The camera can also double as a web camera if you hook it up via the USB cable to your computer.
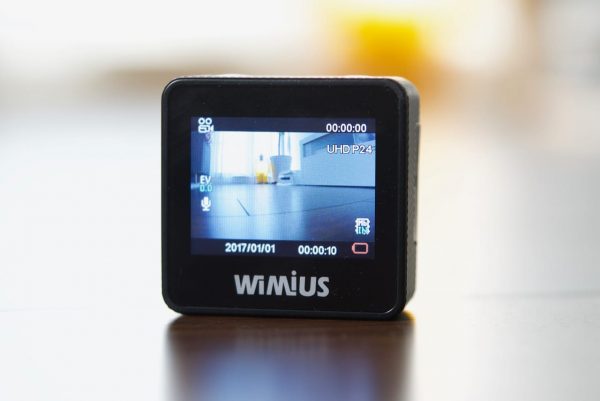
The camera has a built in 2″ LCD screen, and a lens that can capture a 170° field of view. The field of view can be changed between Wide, Medium, and Narrow. The camera accepts Micro USB cards up to 32GB in size (expandable to 64GB) and can be controlled via WiFi through an iOS or Android app. It also has a mini HDMI port for external output to a monitor or recorder.
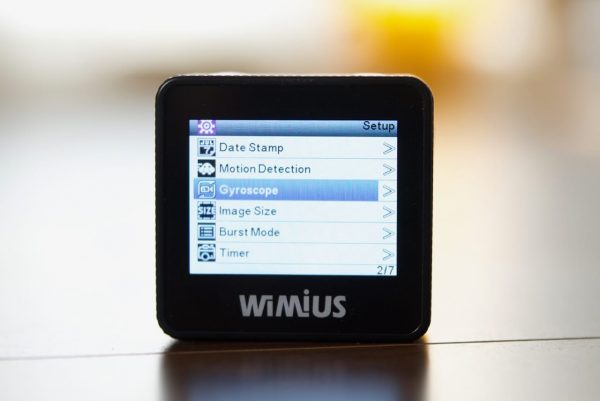
The LCD screen on the back is clear and sharp, which is nice to see on a such a low cost camera.
No PAL frame rates

While the camera is capable of recording UHD at up to 24p, 2K at up to 30p, HD at 60p, and 720p at up to 120fps, it doesn’t have any PAL frame rates which is a big problem if you want to record in 25 or 50p. There is also a timelapse video function where you can set the camera to record at intervals of 1/2/5/10/30 or 60 seconds. A loop recording mode also lets you choose to overwrite whatever you have just recorded every three, five or 10 minutes.
Not true UHD
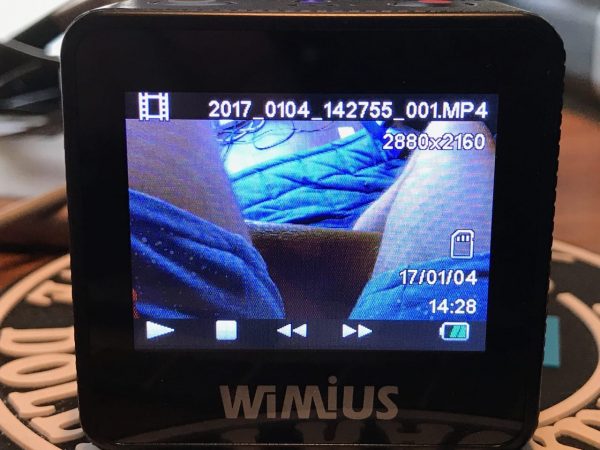
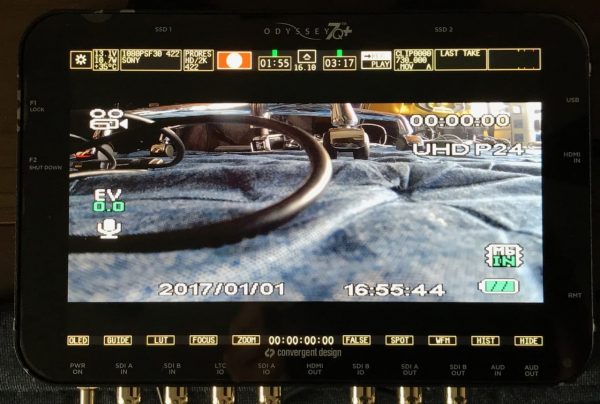
What I found alarming was that when I had the camera recording in UHD 24p, when I went to play back the image on the cameras LCD screen information pops up saying 2880×2160. Now I’m not mathematician but i’m pretty sure UHD should be 3840×2160. This 2880×2160 frame rate was again confirmed to me when I bought the footage into FCP X. Now 2880×2160 is actually a 4:3 aspect ratio, so what the Wimius L1 is actually recording is interpolated UHD, which basically means during the recording it takes the 4:3 2880×2160 image and re-stretches it back out to 3840×2160 on playback.
Interpolation basically means taking information that was not originally there and adding it. The effects of this can vary based on the type of interpolation used, but in general, it is not good. The recording will only ever contain 2880×2160 pixels, and interpolating these pixels to create UHD is not true UHD. This camera cannot capture true UHD, and as far as I am concerned it is very misleading to the consumer who is buying a camera on the premise that it can record UHD.
Image stabilisation
The L1 has built in gyro stabilisation as well as a steady shot mode, and you can have both modes active at once. I found that although they do an OK job of eliminating unwanted jittery movement from your images, it’s far from perfect.
Manual controls
As far as manual controls are concerned, you have a few, but the options are limited. The ISO can be changed between 100/200/400 or set to Auto. Likewise the white balance can be set for Daylight/Cloudy/Tungsten/Fluorescent or Auto. There is no way of manually adjusting the white balance to a specific colour temperature.
There are some EV settings so you offset the auto exposure, the choices are -2.0, -5/3, -4/3. -1.0, -2/3, -1/3, +2/3, +1/3, +1.0, +4/3 +5/3, and +2.0. Most action cameras have a habit of underexposing images when the sensor detects a bright light source so it’s nice to see that you can overexpose your images to compensate for this.
Motion detection
The camera has a Motion Detection setting which on paper sounds like a good thing, but there is no explanation in the instruction manual for how it actually works. From what I found once you set it in the menu and you go back to your record screen it just starts recording straight away. You would think that there would be some sort of built-in delay from when you get out of the menu to when it becomes activated. The trouble is as soon as you set it and you press buttons to get back out of the menu, the camera senses movement and starts recording.
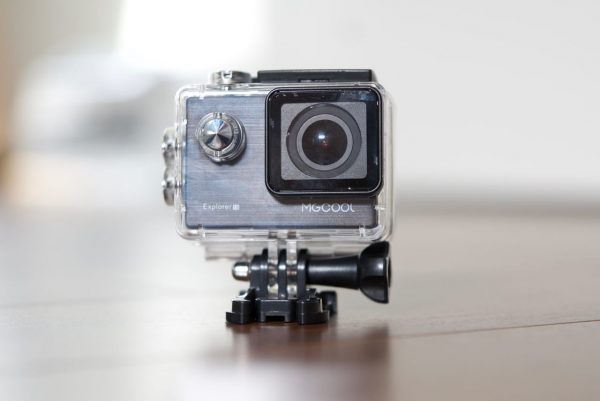
Build quality
The L1 is well built considering its low cost. The camera’s casing is robust and all of the buttons are responsive. It may well be a small thing but I like that the camera’s covers that give you access to the battery and card/output slots are actually attached to the camera so you won’t lose them when you take them off.
Battery
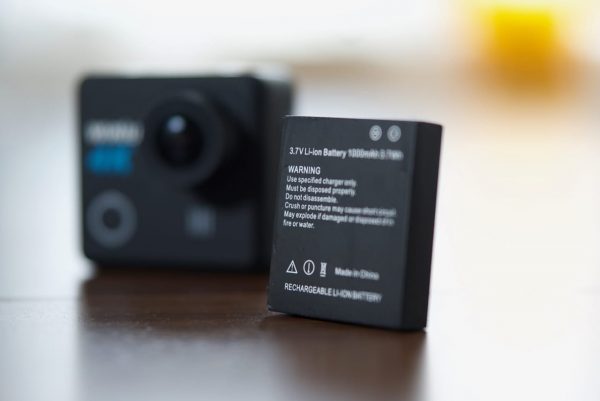
The L1 uses a replaceable 1000mAH battery that allows you to record for around 90 minutes when shooting in HD. The battery takes about two hours to recharge. The nice thing I discovered is that the camera will actually allow you to record even when it is charging. The downside is that you can’t charge it while it’s in the housing. When the camera isn’t in the housing there is no easy way of mounting it to anything without using something like tape.
Wifi app
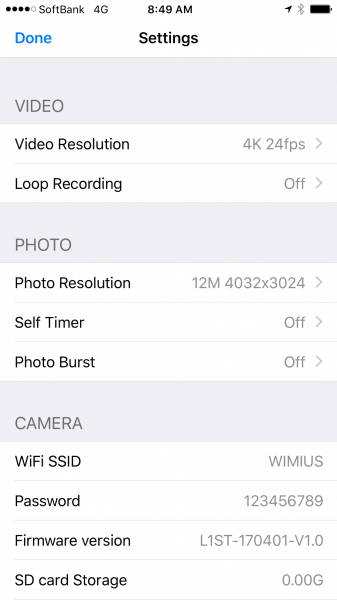
Wimius have their own Android and iOS app that allows you to make changes to the L1. You can change basic settings such as the resolution, switching between photo/video capture mode, formatting the card, and playing back clips, but there is no way of changing important parameters such as the ISO and white balance. This is a bit of a oversight as to me these are the things you are normally going to have to adjust once you have the camera set up and ready to record.
The other frustrating thing is that you can only view your camera’s image when you are holding your phone or tablet in the vertical position. If you move your phone into the horizontal position the screen orientation does not flip. This is far from ideal and it means you can only see a tiny image on your screen. The delay from when you move the camera to when you see the image adjust on the screen is around about 0.3 of a second, which while not ideal, is still workable for most applications.
Menu system
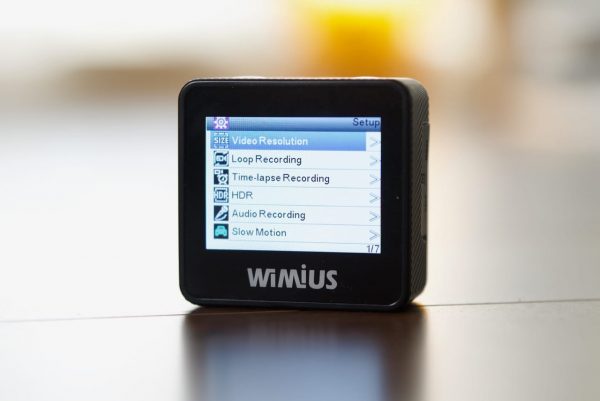
The menu system is very reminiscent of the old GoPro models where you need to use the three buttons on the camera to cycle through settings and make changes. Just like the old GoPros this is a fiddly and counterintuitive process that makes it slow to make changes. I would have much preferred to see a touchscreen interface, but in saying that, I guess it is important to note that this is a camera that only costs $79.99 US.
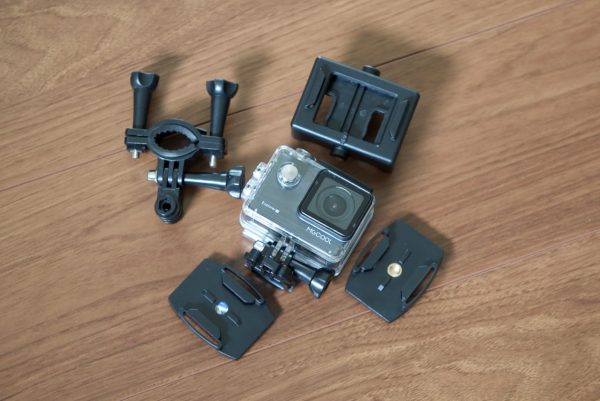
Included accessories
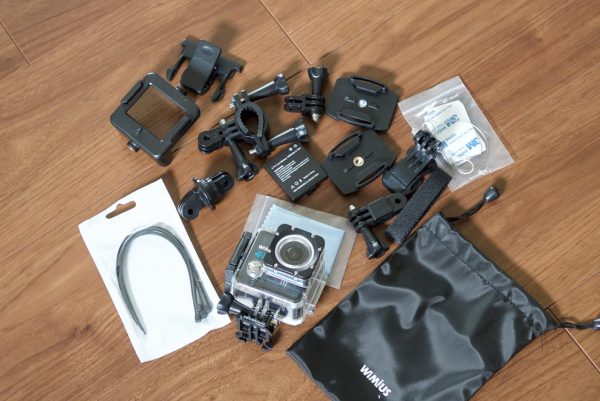
One of the nice things about the camera is that it comes with a ton of accessories included. For $79.99 US I was surprised by just how much came with the camera. If this was a GoPro, these accessories alone would have cost more than the L1.
The L1 comes in a 30m (98.42) underwater housing, which looks very similar to a GoPro housing from a Hero 4. The catch mechanism on the housing is well made and locks down securely. The accessory mounts are exactly the same as those found on GoPros, so if you have old ones laying around they will work with the L1.
Included with the camera you get a soft bag to put your L1 in, a lens cleaning cloth, two 1000mAh batteries, helmet mounts, handle bar mount, 1/4 20″ mounts, extension pieces and a bunch of other items. I really like how they have done this and including all the accessories lets you get up and shooting quickly.
Image quality
A lot of action cameras, particularly at this price point, are using the same or similar Sony sensor so the image quality you are going to get is going to be fairly consistent across all of those cameras.
The L1 images are overly saturated and I wish there was a way of being able to desaturate them in camera. The colours are so vivid that they make everything look artificial. The UHD 24p material is in all honesty not that great and if you have a lot of movement or action going on in your shots then it struggles. This is due to the interpolation I mentioned earlier in the article. The camera does look a lot better if you drop the resolution down to 2.5k, or HD. The only time I would probably shoot in the UHD mode is if I was doing a video timelapse.
MGCool Explorer 1S
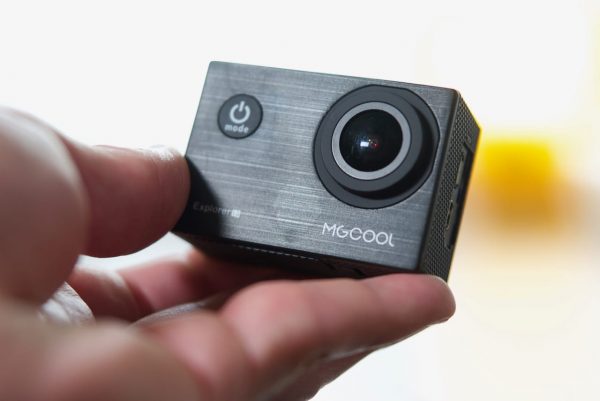
The Explorer 1S uses the exact same Sony IMX078 1 2/3″ image sensor that is found in the Wimius L1. The only difference being is that I think MGCool are using a newer Novatec NT9660 chip. In a lot of regards it is a very similar camera to the L1, but just in a different housing.
The camera is smaller and lighter than the L1, and despite its low price, it seems to be well made. It comes with a 2″ LCD screen, and a lens that can capture a 170° field of view. The field of view can be changed between 170°, 140°, 110°, and 70°. It can take Micro USB cards up to 64GB and just like the L1 it can also can be controlled via WiFi through an iOS or Android app. It also has a micro HDMI port for outputting to a monitor or external recorder.
No PAL framerates
The camera can record UHD at up to 24p, 2K at up to 30p, HD at 60p, and 720p at up to 120fps, but like the L1 it doesn’t have any PAL framerates which is a big problem if you want to record in 25 or 50p. There is also a timelapse video function where you can set the camera to record at intervals of 1/2/5/10/30 or 60 seconds. A loop recording mode also lets you choose to overwrite whatever you have just recorded every one, three or five minutes.
True UHD?
Unlike the Wimius L1, the Explorer 1S does display that it is recording proper UHD. It does however use the same Sony IMX078 1 2/3″ image sensor that is in the L1, and unfortunately the MCGool is doing the same interpolation as the Wimius L1. The fact that it is displaying the recording as 3840×2160 is quite cheeky and I would rather they have shown me that it was only recording 2880×2160. Wimius and MGCool are not the only companies stating that their cameras can capture UHD. Other cameras such as the AKASO EK7000 4K WIFI Sports Action Camera, and the F60 Allwinner V3 also claim that their action cams can capture UHD.
HDMI output
The HDMI output isn’t clean and you can’t output UHD. Outputting over HDMI is pretty much pointless except for basic monitoring.
Image stabilisation
The Explorer 1S has a built in gyro stabilisation mode, but no steady shot. The gyro mode does work very well and makes big difference to your footage if the camera is shaking or moving.
Manual controls
The manual controls are identical to those found on the Wimius L1. The ISO can be changed between 100/ 200/400 or set to Auto. Likewise the white balance can be set for Daylight/Cloudy/Tungsten/Fluorescent or Auto. There is no way of manually adjusting the white balance to a specific colour temperature.
The same EV settings of -2.0, -5/3, -4/3. -1.0, -2/3, -1/3, +2/3, +1/3, +1.0, +4/3 +5/3, and +2.0 are also available.
Motion detection
The Motion Detection setting is again identical to that found on the WimiusL1 and performs and reacts in exactly the same way.
Build quality

The 1S is solidly constructed and the buttons are responsive to the touch. Unlike the 1S though, the compartment covers are not attached and I found that I managed to lose one within the first few days of using the camera.
Battery

The 1S uses a replaceable 1050mAh Li-ion battery that lets you record 1080p for up to about 80 minutes. The battery takes about two hours to recharge.
WiFi app
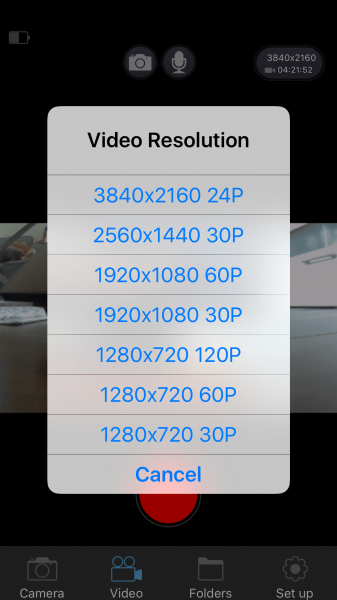
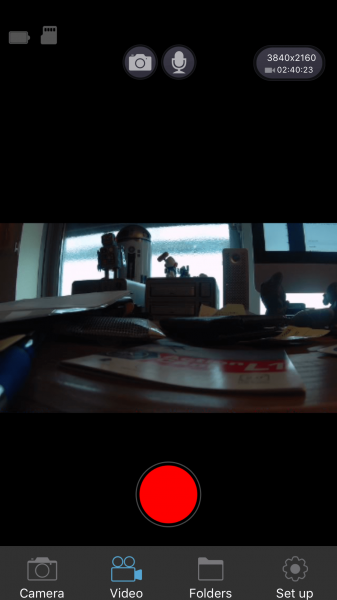
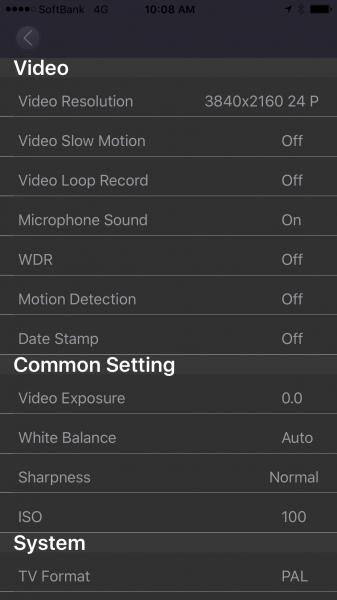
The MGCool Android and iOS app that allows you to make changes to the 1S. Unlike the Wimius L1 you can change all of the important settings such as the resolution, switching between photo/video capture mode, formatting the card, playing back clips, as well as parameters such as the ISO and white balance.
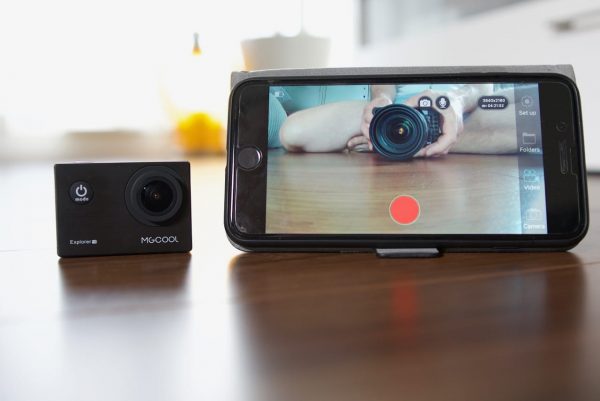
The nice thing about the MGCool app is that you can view a much larger image as the screen image flips when you turn your phone or tablet into the vertical position.
The delay between when you move the camera and what you see on the screen over WiFi is very good and only has the slightest lag. It certainly is a lot better than that of the Wimius L1.
Menu system

The menu system is almost identical to that of the Wimius L1, but at least MGCool have put up and down selection buttons on the side of the camera. This makes it far easier to cycle backwards and forwards in the menu and make adjustments. I did however find that once I was using the WiFi the camera would occasionally freeze up and I couldn’t go back into the menu. The only way to get around this was to turn the camera off and on again.
Included accessories
The 1S doesn’t come with as many accessories as the Wimius, but you still get a 30m waterproof case, camera bracket, clip, USB data cable, bicycle mount, two helmet mounts and an adapter.
Just like the Wimius, the MGCool uses accessory mounts that are exactly the same as those found on GoPros, so if you have old ones laying around they will work.
Image quality
To my eye the UHD recordings on the MGCool Explorer 1S are fairly similar to those of the Wimius L1. In all honesty there isn’t a massive difference between the two especially when recording in UHD. Recording in HD provides a lot better results. I did find that the black levels were slightly more elevated than those of the Wimius.
The colours, although still a little overly saturated for my liking, are nicer than those of the Wimius L1. The overall image quality that the Explorer 1S offers is not too bad and I would happily use it on shoots where I needed a quick couple of inserts from an action camera.
So which one would I choose?
I don’t think either camera is as good as a new GoPro Hero 5, but given that the Wimius and MGCool cost one fifth as much I wouldn’t expect that to be the case. Both the Wimius and MGCool feature a lot of bang for your buck, but both cameras are creating interpolated UHD from a 4:3 2880×2160 image is disappointing and misleading to consumers. If I am buying a camera marketed as recording in UHD, then I want to actually be able to record in UHD.
The Wimius L1 isn’t a bad camera, it’s just not a good camera if you want to record in UHD. If you are happy to shoot in 2.5K or HD then I think you will be fairly happy with the results. The camera comes with a ton of accessories and for some shooters the lack of true UHD recording may not be a deal breaker like it is for me.
The image quality of both cameras when recording in UHD is poor. The images lack detail and are noisy even when the cameras are set to their lowest ISO settings. Both cameras look significantly better when recording in HD, and even if you take a UHD recorded image and put it onto a HD timeline, the HD material still looks better.
The winner for me is the MGCool Explorer 1S, but it’s only marginally better than the Wimius L1. It just feels like a slightly more refined product, with a less saturated image, a better WiFi app and a menu system that’s easier to navigate. The camera is smaller than the Wimius, but it doesn’t come with as many accessories. I’m not too bothered by this as I have a ton of old GoPro mounting accessories sitting in a box.
It’s amazing to see just how far action camera technology has come, and the fact that you can now buy a half decent camera for under $80 US is impressive in its own right. At that price, they are almost becoming a disposable commodity where you can take multiple cameras and put them in situations where they could get badly damaged or destroyed.
The MGCool Explorer 1S retails for $79.99 US and can be purchased from a range of online vendors found here. The Wimius L1 also retails for $79.99 US, and can be purchased on Amazon.