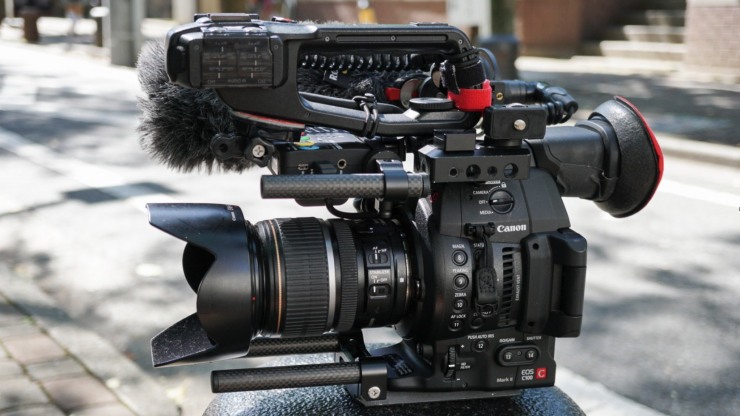
I’m always looking at ways to make my Canon C100 Mark II set-up more work friendly, not just for me, but for the people around me too. I’m primarily working as a one man band who shoots both stills and video, and I’m always looking for ways to optimize my gear without spending a lot of money. My goal with the C100 Mark II was to make the set up as compact as possible, even with the addition of a ProRes recorder, wireless mic and light. I wanted to do this without loosing the ergonomics of the handle, and allowing all these parts to be detached quickly in order to switch to stabilizer and gimbal use. The whole set up also needed to be easy to pack and transport.
So lets have a look at all the modifications I’ve made:
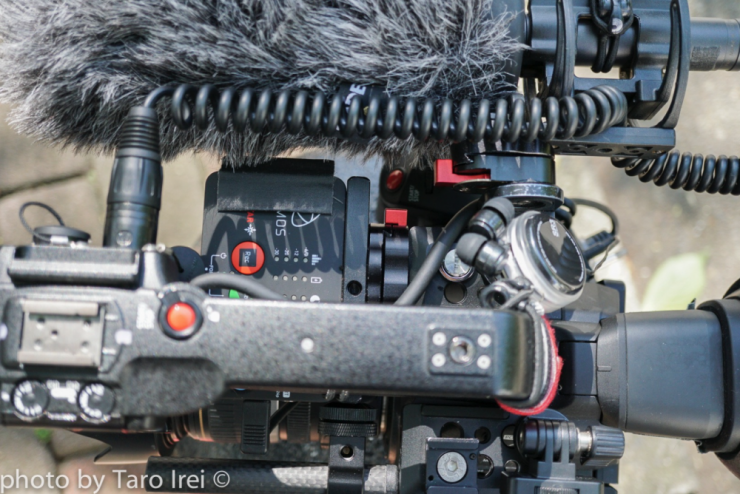
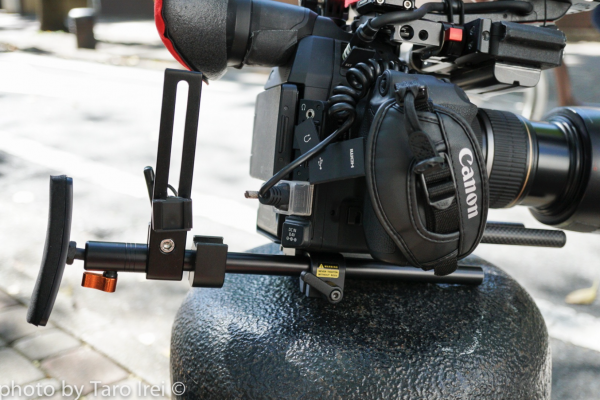
Atomos Ninja Star
The Ninja Star is a compact and affordable ProRes recorder that uses CFast cards. It automatically starts and stops recording with the C100, so it’s very good for run-and-gun applications. I mount it between the handle and the lens. To do this, I added a top plate between the camera and the handle, that gave me a bunch of ¼ inch and 3/8 inch holes. Both the microphone and Ninja Star are attached to this plate.
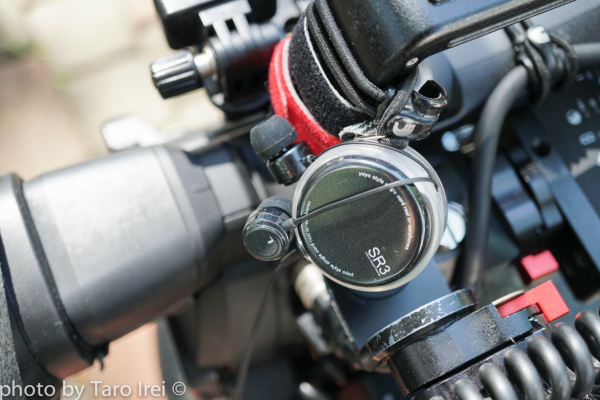
Canon C100 HDMI Lock
Canon’s HDMI connectors have the option to use a locking HDMI cable to protect the fragile HDMI connectors. Instead of using a locking cable I added a cheap HDMI lock adapter that I found on Amazon. It’s not made for Atomos cables, but with a little sawing and cutting, it works fine. This prevents the connector from bending and breaking internal parts of the camera.
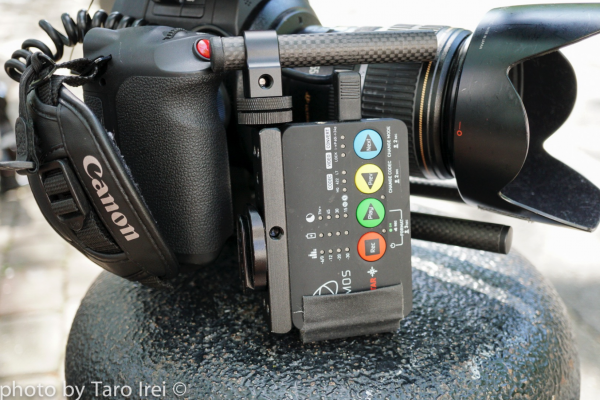
On the side of the camera where I mounted the Ninja, I attached a 15mm single rod holder to the mounting plate that comes with the device. This small rod serves to protect the HDMI connector at the recorder end. The whole thing is attached to the top plate via a quick release. This makes it easier to change the recorder’s batteries as well.
Mic holder
I’m often at press events where stills photographers are standing behind me, and they often complain about the height of my camera. To solve this problem, I moved the mic holder down and to the side, and used a quick release connector to get the mic out of the way and keep the cameras footprint smaller. The other reason for doing this is that by default the camera is too tall to fit in most bags. Reconfiguring this way shaves an inch or so off and lowers the center of gravity.
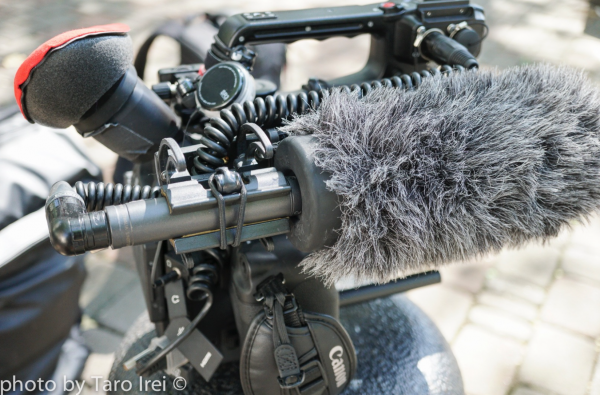
Another benefit of this modification is that I can use the super wide EF-S 10-18mm lens without the mic accidentally showing up in the top right corner of my frame. The mic can also be released by itself for a quick interview; for this reason I use a coiled XLR cable. I can also release it at the quick release and mount it on my boom that has the same quick release system, hence saving me the need to carry another mic suspension. I also chose to raise the mic holder a little from the camera top plate in order to clear some space for my hand to move the camera dials without the microphone getting in the way.
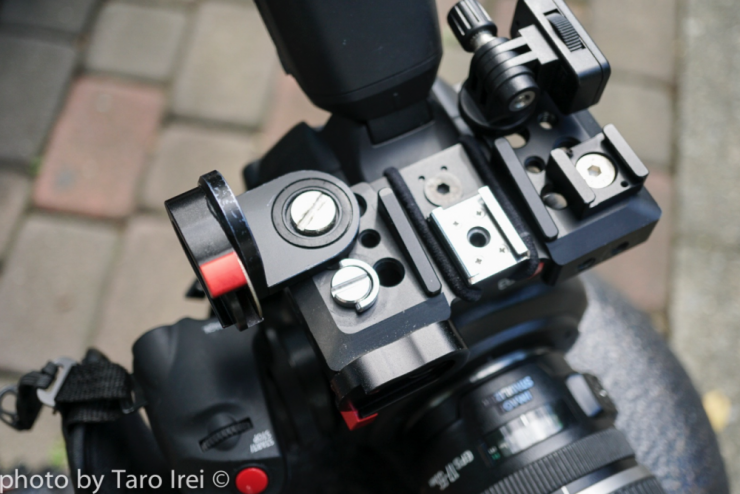
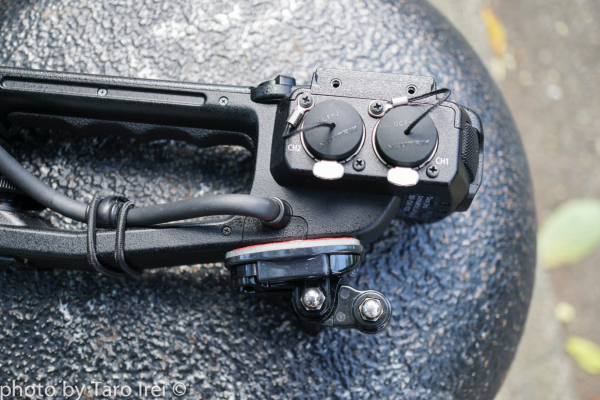
Wireless Microphone
There are 3 ways I can attach a wirelesss mic (or other devices) without loosing the handle usability.

1. The back ¼ inch hole on the handle – I used a Home Depo metal bracket and bend it with some pliers. Then added two ¼ inch screws to hold things in place.
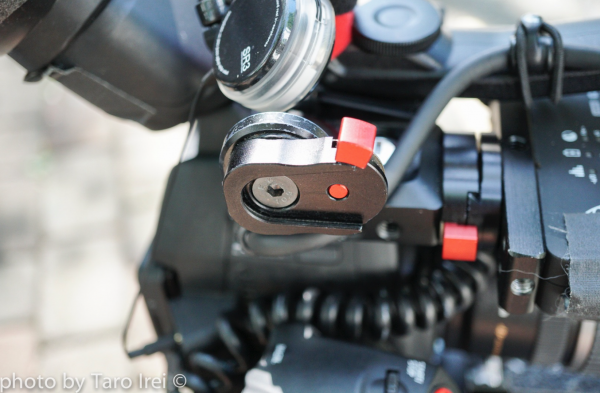
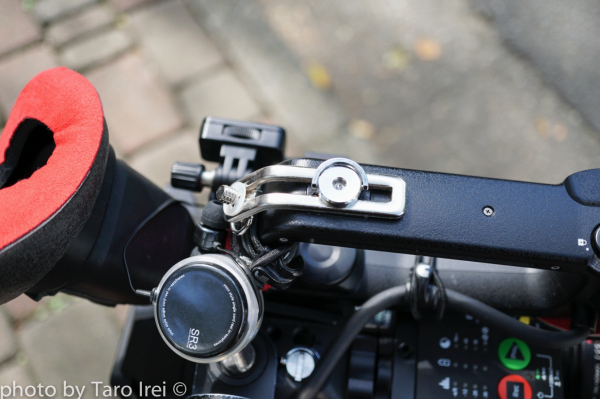
2. There is a small swivel mount on the camera top plate. The Mic can be attached here as well.
3. Cold shoe mounts on the gunstock.
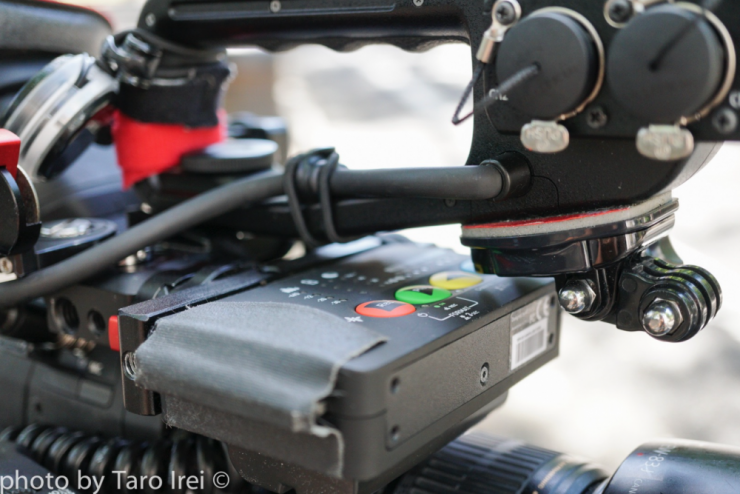
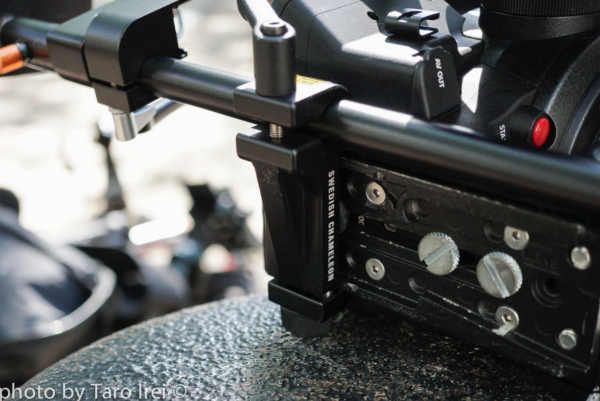
Shoulder mount
A lot of the shoulder rigs I tried before were too cumbersome as you have to add an external evf, handles, etc, and the heat exhaust vent of the camera ends up on your ears, which is annoying. I find this camera light enough to operate without a full shoulder rig. Instead I use a simple gunstock held in place by a Swedish Chameleon bracket that works with Manfrotto 501 tripod plates. It is easy to mount and you can adjust the length as well.
Earphones
Although these are not a replacement for proper headphones, I keep a pair of these tied onto the camera for emergencies.
Go Pro mount
I mounted a GoPro plate underneath the factory top handle on the C100 Mark II, and I use this sometimes so that I can have a continual wide shot being recorded. This is very handy in run and gun situations.

Poor Man’s Prompter
I made a simple iPad holder, using a couple of GoPro bits and pieces, to allow me to have a tele prompter.
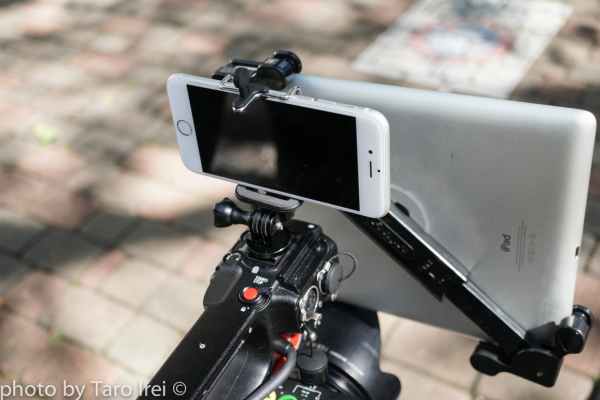
I can also add an iPhone facing me to control and monitor the prompter software.
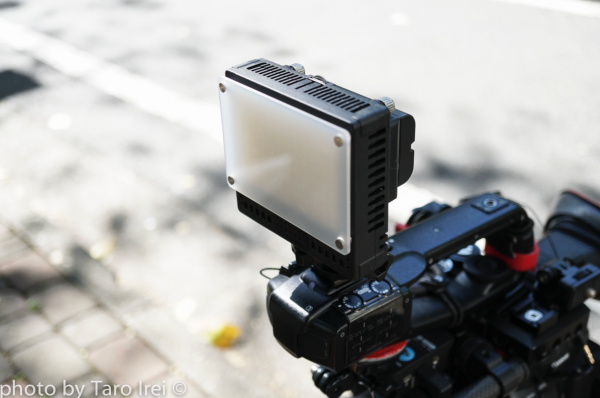
Light
A Cineroid LED light is also held by the same GoPro mount. I try to utilise the GoPro mounts for various bits of equipment, as it is less pieces I have to carry. They are lightweight and can be configured in many different ways.
Tripod plate
My tripod plate is secured to the camera with 6 screws. The standard ¼ and 3/8 inch screws, and four 4mm screws drilled through the plate to match the extra holes that Canon C100 and C300’s have on the base of the camera. I’ve also added 15mm rods to the front of the plate. The rail to lens height is not the standard, but you can still use belt follow focus systems. Personally I don’t use a follow focus most of the time, but the rails are there if I do, and if not then they still give me different camera holding positions, without raising the camera height. And yes, more stuff can be added to the rails, maybe a cup holder?
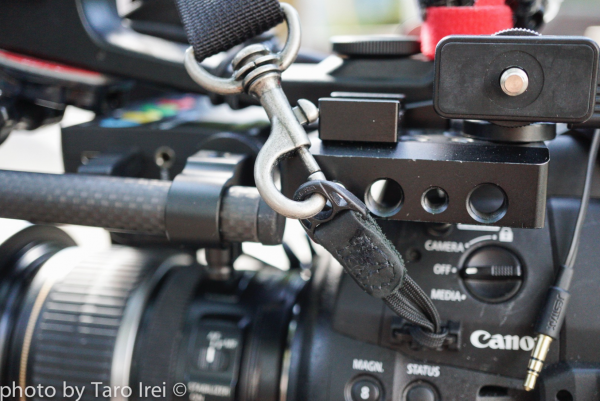
Camera Strap
Since I use the camera with sliders and stabilizers as well, I use carabiner connectors to attach a strap. I can attach and detach the strap very rapidly.
Spares
I keep an extra ¼ inch screw on the top plate. Also extra cable ties on the handle, these are especially handy when attaching XLR cables from a venue’s PA system.
So there is a look at my DIY modifications for my C100 Mark II. All of these modifications can be done for not much money, and I have found that they have made my camera more versatile and easy to use. If you have any questions about my set up feel free to ask me in the comments section below.
Taro Irei is a freelance stills and video cameraman based in Tokyo.
https://www.facebook.com/taroireiphotography/