By site editor Dan Chung:
Most factual shooters can only dream of using anamorphic lenses for their productions. The distinctive distorted bokeh and streaky lens flares are usually the domain of the movies and high end TV drama. Historically these lenses were designed to squeeze the image to allow cinematographers to shoot widescreen films, using regular aspect ratio 35mm film cameras. The films shot this way are then shown using anamorphic projection lenses so that they display in the correct widescreen aspect ratio on the cine screen. Byproducts of the process were the optical distortions and flares that we now think of as the anamorphic look. In the digital age it is actually these imperfections that have many DPs wanting to shoot anamorphic.
Anamorphic cine lenses from Panavision, Hawk, Cooke, Zeiss, Lomo and Kowa can cost tens of thousands of dollars and in some cases you can’t buy the one you want even if you have the money. Most of these lenses squeeze the image 2x, which creates the cine standard 2.39:1 aspect ratio image from a 4 perf 35mm film (Wikipedia has a good explanation of this here https://en.wikipedia.org/wiki/Anamorphic_format ). To get the 2.39:1 aspect in the digital world you can either 2x squeeze the image (using your editing software) from a 4:3 sensor camera like some ARRI Alexa models and Panasonic’s GH4 (and then very slightly crop it), or take a regular 16:9 aspect sensor image and squeeze it 2x, then crop in at the sides. The advantage of shooting with a 4:3 sensor with existing 2x lenses is that more of the image circle of the lens is used vertically at any given focal length.
If you do shoot with a 16×9 sensor you can simply leave the image uncropped, which results in the ultra-letterbox image that you see at the top of this page (more on this later). Alternatively you can crop the image at both sides provided you have enough sharpness and resolution. Below is the same video seen at the start of this article, but cropped to the 2.39:1 aspect ratio.
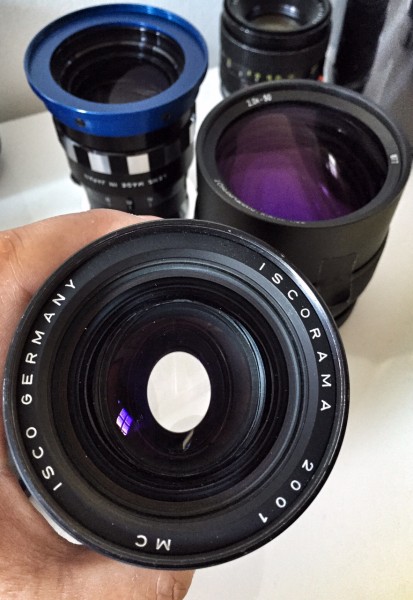
A few years ago, shooters looking for affordable alternatives started taking vintage anamorphic convertors – many designed for projection purposes – and adapting them to fit onto the front of regular lenses. They usually stretch the image 1.5x or 2x. These can work quite nicely but are becoming increasingly scarce and most of the cheaper ones don’t render a particularly good image. In addition, the add-on lens design requires both the main lens and the anamorphic adapter to be separately focused (with the exception of the clever ISCO lenses) and this can be impractical for real world shooting.
Third-party makers SLR Magic and Letus have stepped in to offer modern day counterparts, but until now all of these have had the same problem of requiring the operator to focus the main lens and the anamorphic adapter separately. They have also been limited to squeeze ratios of less than 2x, the previous SLR magic adapter being just 1.33x. So why not stick with 1.33x or 1.5x? Even though 2x is harder to achieve, it’s desirable to many shooters because it looks more “anamorphic” – the increased distortion of the bokeh is exactly what they want.
Another issue with anamorphic lenses is that they have limited close-focusing capabilities. With some add-on lenses the closest focus is several metres away. The solution to this is to add close-up diopter lenses that can reduce the minimum focus, but take time to attach.
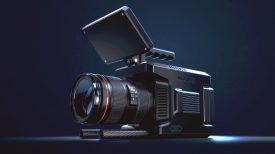
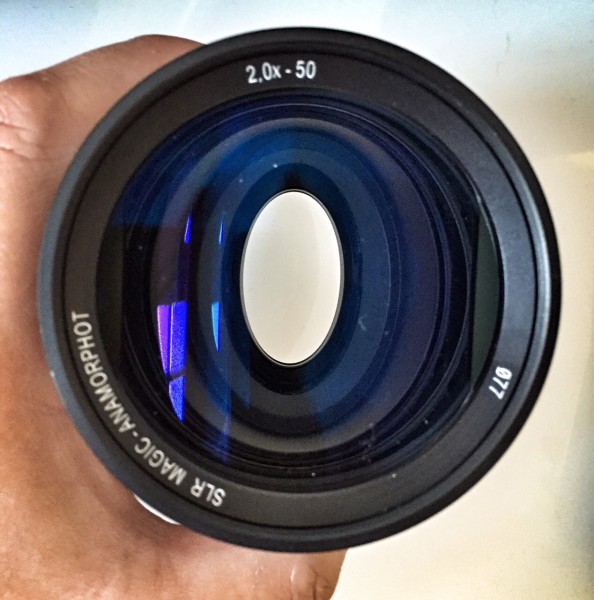
The latest combination of equipment from SLR Magic aims to provide an affordable and easily manageable alternative for people who don’t have access to anamorphic cine lenses. There are two key parts – the 2x Anamorphot anamorphic adapter and the brand new Rangefinder variable diopter. The Rangefinder name refers to the idea that it is a measuring instrument. Distance can be measured by looking at the markings on the lens.
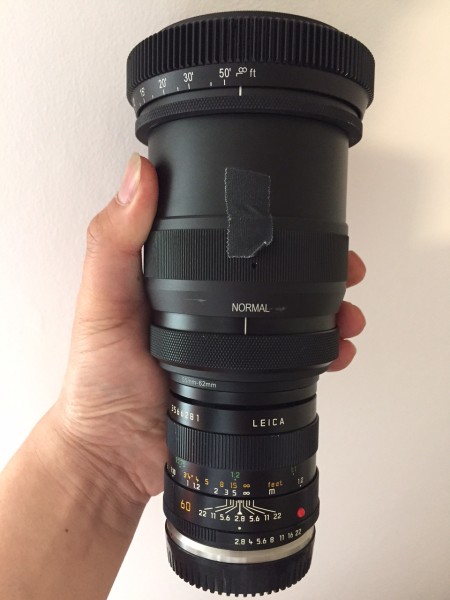
The Anamorphot is a substantial hunk of glass, but manageable. Looking down the barrel you will see the blue/purple coatings which create the anamorphic flares. It has a 62mm filter thread at its rear that allows you to mount it to your main lens, and a 77mm thread at the front for attaching filters. Step rings can be used if you have a lens with smaller diameter front threads. The Anamorphot is then paired with the main lens of your choice – although this must meet the right criteria. The front element of the lens should be no larger than about 50mm in diameter, and I found that when using a Super35 16×9 crop sensor the focal length needs to be around 50mm. If you are using a full frame sensor then I would recommend trying lenses from 70mm upwards. Because the adapter is not built to fit specific stills lenses a perfect match is hard to attain. SLR Magic have signalled that in the future they will make their own complete Anamorphic solution with matched lens and adapter.
With stills lenses SLR Magic recommend that you set the lens no wider than about f4 to keep the image usable – although you can go faster if you like the dreamy look. In testing, I paired it with an old Leica R 60mm f2.8 macro and also a Minolta 58mm f1.2.
When you look at the front of an anamorphic lens the elements look oval and not round. The adapter needs to be attached and carefully aligned with the main lens. If it is slightly off axis then vertical lines will appear to be skewed and generally this looks bad. To make sure this is done correctly you can follow the instructions in this video from SLR Magic:
Like other Anamorphic adapters the Anamorphot can be focused from near to far and can be used in a dual focus arrangement. What transforms it into a more usable setup is the Rangefinder.
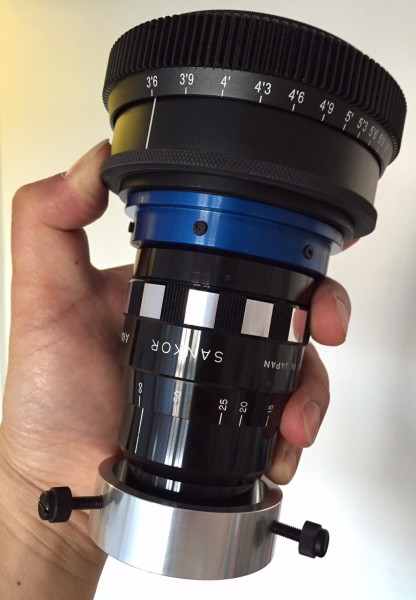
The Rangefinder is a focusable diopter lens that is attached to the front of the anamorphic lens and provides a single focus ring for the whole setup. It comes in two versions and the more expensive cine version is required for the Anamorphot.
To use it you set both the main lens and Anamorphot adapter at infinity, and then focus normally using just the Rangefinder. You can also focus down to around 3ft 6” without the need for additional diopter filters. This is genius.
The focus ring has a rotation of 240 degrees and is cine-geared for use with follow and remote focus. This is ideal if you are shooting with a remote focus system or follow focus, but makes it hard to focus with a hand on the lens (in common with most cine lenses). It took me several turns to get from one end to the other. It is nice and smooth, though, and has witness markings to make a focus puller’s life easier. The Rangefinder has a special locking thread system that allows the adaptor to be rotated so the marks are visible and lined up where you want them.
The front of the Rangefinder rotates, which is bad news if you planned to use a variable ND filter or clip-on matte box. The front of the Rangefinder also extends when you focus closer – making it hard to use with rail-mounted matte boxes. The simplest filter solution is to use a camera with built-in ND filters. If you don’t, then you need to screw 82mm filters into the Rangefinder’s front thread. 82mm is not the most common filter size so the extra cost of ND filters will have to be factored in if you need them to work in daylight with your camera. SLR Magic tell me that they are working on an affordable set of 82mm ND filters that will be of high quality.
The Rangefinder isn’t restricted to working with the 2x Anamorphot. It can work with many other vintage anamorphic adapters. EOSHD.com has tested the Rangefinder with a vintage Kowa 2x anamorphic and reported good results. There will be cheaper versions with 72mm, 58mm, or 52mm thread sizes for $299 US, but without the witness markings.
It can also work on stills lenses without an anamorphic adapter. Used this way it can provide cine geared focussing for many stills lenses of 35mm or longer (in full-frame). The stills lens is set to infinity and all focusing is done with the Rangefinder. When paired with Nikon lenses it has the benefit of correcting the focus direction too. This is potentially a great way to make stills lenses more usable, although there will be some trade off in resolution, distortion and flare. We aim to test this in the future. Andrew Chan of SLR Magic explains this use in the video below:
CineGear 2015: Andrew Chan of SLR Magic shows how the Rangefinder works from Dan Chung on Vimeo.
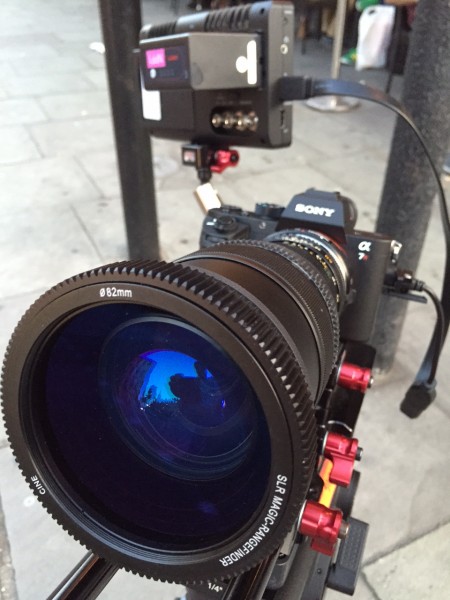
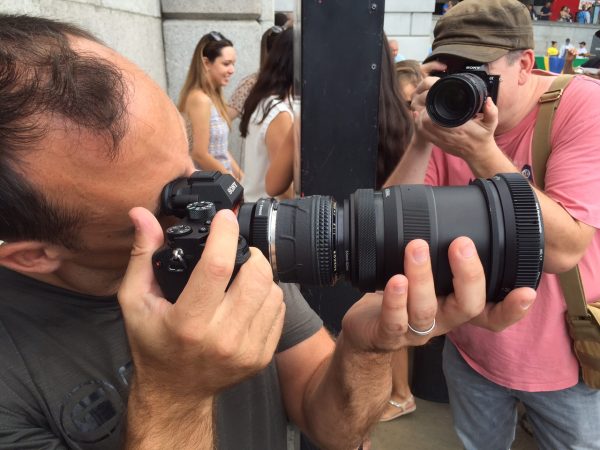
The combination of Rangefinder, Anamorphot and main lens is pretty cumbersome. I would recommend using a lens support system and rails to keep everything secure. Despite its quirks, what you end up with is a long but usable lens arrangement that, when set up properly, handles much like a proper anamorphic cinema lens. But what are the results like and what is it like to work with?
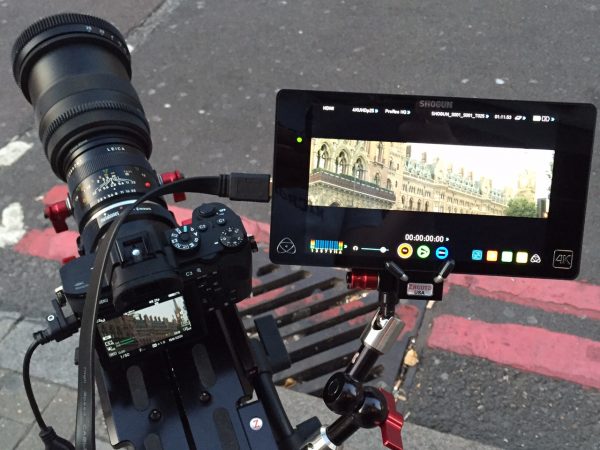
To find out I paired it with my Sony a7R II and headed out into the streets of London.
The first thing you learn when shooting anamorphic lenses is that getting your verticals straight is critical. Even the slightest amount of lean can look very odd unless you want to achieve a ‘starship about to go into warp’ effect (see the video below). After trying handheld shooting for a day I rapidly came to the conclusion that using a solid tripod like my Sachtler Video18P was a much better idea. Taking time to make sure each shot was 100% levelled was important.
I decided I would shoot my test with the a7R II in S35 mode, aiming for a super-letterboxed 3.56:1 final aspect. I knew that this could be cropped in post to a more conventional 2.39:1 later. With a Minolta 58mm f1.2 lens set around f4 had lovely bokeh but were pretty soft as you can see in this video which I shot with my friend James Tonkin of Hangman Studios:
After trying various other lenses I decided that the Leica 60mm macro set at between f4.5 and f5.6 was a better bet for the look I was after – I prefer a sharper image, although on the down side this means the anamorphic distortion is less obvious. With the Leica, the image stays reasonably sharp towards the edges of the frame.
To attach the lens to the Anamorphot, all I needed was a 55-62mm step ring. The next step is to check that infinity is set correctly. First set the Anamorphot at infinity, point the camera at a point on the horizon, then focus the main lens so it is in sharp focus. Most of the time this will mean the main lens is simply set to infinity, but in the case of my Leica it was actually a bit closer than that. When this is done the witness markings should be accurately set for focus pulling if that is the way you work.
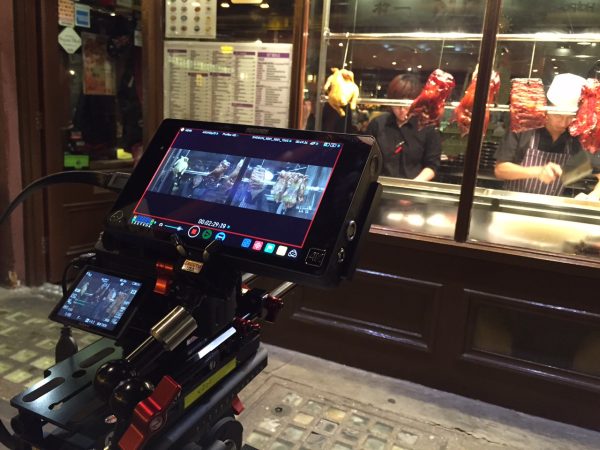
To keep the whole setup together and secure I put camera and lens onto my Zacuto VCT baseplate and used a Zacuto lens support which straps down the lens, preventing unintended movement. I then attached an Atomos Shogun 4K recorder to allow me to monitor the image and record it in Prores 4:2:2. The Shogun had the ability to display anamorphic aspect ratios added in a recent firmware update and this makes everything much easier to compose (like other smaller cameras the a7R II can’t display anamorphic footage squeezed on its built-in EVF and monitor). If you are looking to output at 2.39:1 from a 2x with a 16:9 sensor then you will still need to add some extra markings with tape on the display. Also, focus magnification on the Shogun seems to be disabled when in anamorphic mode, so I ended up relying on the a7R II’s built-in display magnifier for focus checking.
It is worth mentioning that critical focusing with the a7R II in the viewfinder or rear screen isn’t as clear as it should be. For some reason, when magnified, the image preview is a bit soft, even though the recorded image is sharp. If you are shooting S-Log 2 then the lack of contrast makes this doubly difficult. When working with anamorphics, this makes things very tricky. (note: You can record video while the camera is in photo mode and this gives a sharper magnification function. The downside is that there seems to be a gamma shift when recording is triggered making exposure hard to judge prior to recording).
I was extremely impressed with the low light footage from the combination. The camera performed very well and the anamorphic flares that the Rangefinder/Anamorphot combination produces are very attractive. I did add flares to a couple of the shots by shining my iPhone’s torch at the lens from just out of shot – I might have overdone it, but this was for fun after all.
The 3.56:1 footage at the start of this article was edited in Premiere and given a quick grade using FilmConvert. Below is an ungraded version:
On the downside, the Anamorphot adapter doesn’t allow you to go very wide. For establishing shots and general views you really need a wider lens; something like a 30mm would be ideal for the a7R II. Hopefully there will be larger and wider 2x Anamorphic adapters or lenses in the future at a reasonable price.
So, would I actually use this set-up for one of my productions? Frankly, I have never seen a DSLR or compact system camera produce a result so filmic, so if a client were up for it I would definitely be prepared to give it a go. It would have to be the right kind of shoot, though; one where I can control most of what goes on and that mainly uses tripods or sliders. Even though the Anamorphot/Rangefinder combination is a huge step forward in usability, it is still best suited to a crew environment where there is someone else to worry about focus and talent that can hit the right marks at the right moment.
Not being able to go wider than about 50mm (on Super35) is another issue. The obvious solution is to shoot those shots normally on a wide angle and then simply crop them, hoping that for the time they are on screen no one will notice. Close focus is limited for practically all anamorphic lenses. This limits their usability but with a planned shoot this is something you can work around.
Handheld shooting can be done, but be prepared for a high percentage failure rate – getting the camera dead level and nailing focus is hard. Having to rotate the focus ring 240 degrees to go from close focus to infinity is just too much to cope with. For most faster-paced documentary stuff it isn’t really practical.
Still, this is a great fun bit of kit, and one that can bring some serious production value to your footage if you put in the effort. If you can sell the look to your clients, go for it.
For more details keep an eye on the SLR Magic website.