By site editor Dan Chung:
Body and handling:
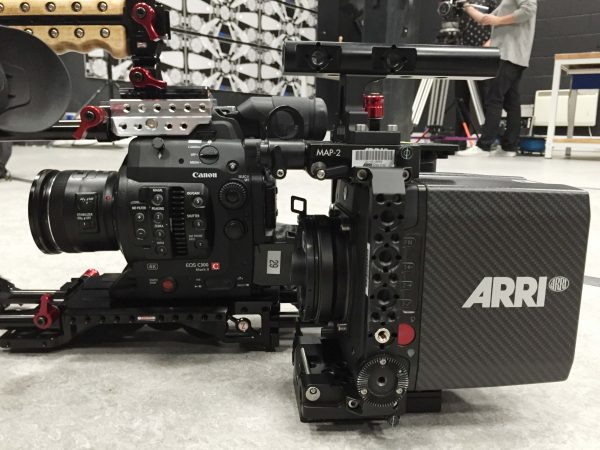
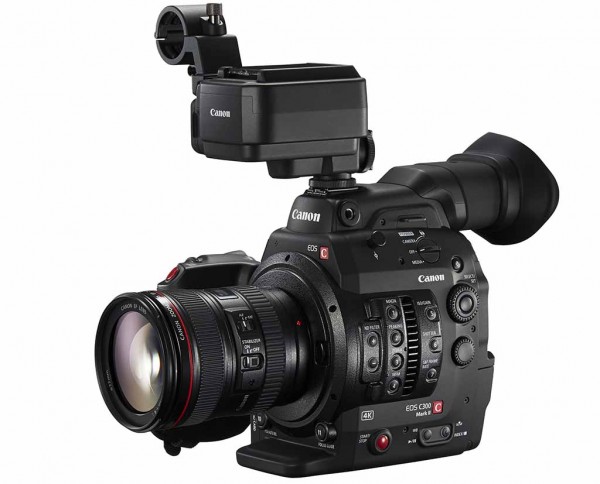
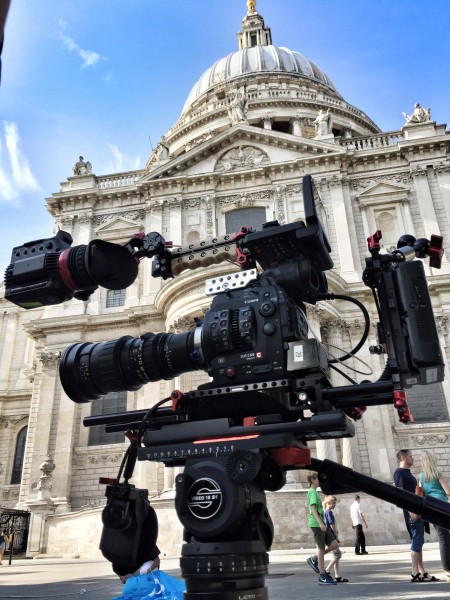
At first glance you might be hard pushed to tell the difference between the body of the original Canon C300 and the 4K C300 mkII. The design of the new camera is essentially the same, with several tweaks to improve usability.
Just as with the original, the strengths of the C300mkII can also be seen as its weaknesses, depending on your point of view. The upright form factor makes for easy handholding without a rig, but if you want to balance the camera on your shoulder then you need extra third party gear.
The first thing you notice when you take the mkII out of the box is that it is a bit heavier and less ‘plastic’ than the original camera. The shell now appears to be made out of stronger metal that looks like it is die-cast. Out of sight underneath the skin is a substantial metal subframe which the camera is built around. There are a few extra buttons and connectors, but not many other obvious differences. Look closer and you’ll see vents on the side and rear of the camera that are designed to keep the camera cool even when shooting 4K.
Now the overall size, shape and weight of the camera are actually not dissimilar to a RED Epic or and ARRI Alexa MINI. It’s just that the C300 mkII body is a bit more curvy.
LCD screen/audio pack:
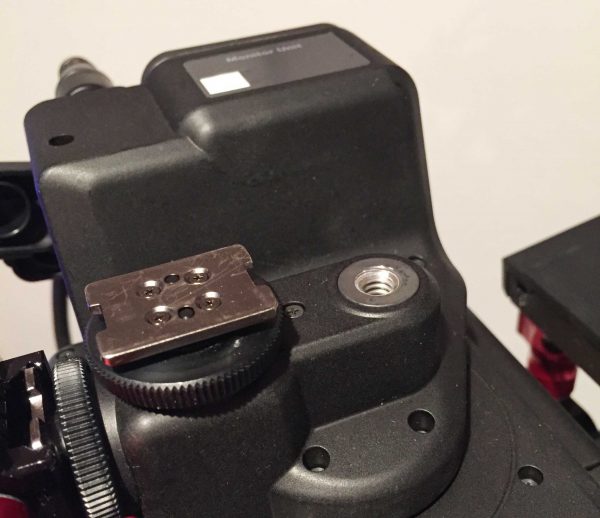
The LCD screen/XLR audio pack also looks very similar to the original. There have been some very useful changes, though, including the addition of a 1/4 20 mounting thread on the base of the pack. This allows you to mount it more easily on the end of a magic arm, or elsewhere on your rig. The audio/video cable connections have been re-engineered.
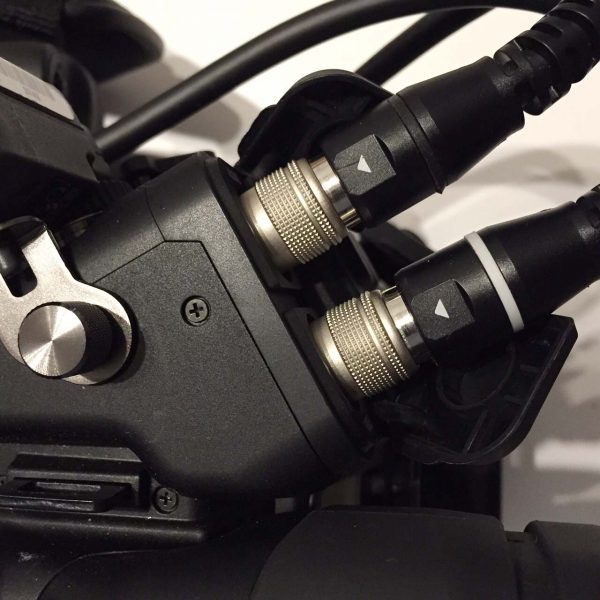
There are now connectors at both ends, meaning that if a cable breaks it can now be replaced without a trip to the service centre. Audio is now carried on one, and video on other – for some reason, on the original C300, both cables carried audio and video so that if one broke you lost all connection to the camera; this has happened to me on a shoot.
The LCD screen itself remains largely unchanged from the original design and resolution is still a relatively low 854×480 pixels. One great bit of news, though, is that the existing Zacuto C300 Z-finders and Diety finders fit straight onto the new screen without modification. On the downside, the screen still doesn’t have a touch facility for autofocus – something that is present on the humble 70D. This would greatly aid autofocus and I’m baffled that it isn’t on the camera.
Another optional accessory for the camera is an audio only version of the pack which is much smaller and only has a single cable connection. This is something I always wanted on the original C300 and it’s great to see Canon listening to users on this. It can be mounted directly to the top handle and has all the basic audio controls and dual XLR connections. Essentially, this makes the C300 mkII much more like the C100 mkII to handle, just heavier. What I don’t know at this point is how much it is going to cost.
Audio:
On the subject of audio, the camera now has four channels of internal recording: two from the XLR inputs, and two from the 3.5mm minijack. There is also an internal mic which is great for scratch audio. It would however have been nice to see a higher quality built-in mic included as standard – something the cheaper C100 has always had.
Built-in EVF:
The built-in EVF on the rear of the camera is also improved to a 1.17 million dots (1024 x RGB x 576) OLED. It is certainly clearer and easier to use than the original and works well when simply handholding the camera on its own without rigging. That said, it is still in a very poor position for on-the-shoulder shooting and I would recommend using an external EVF instead for monitoring during run-and-gun work.
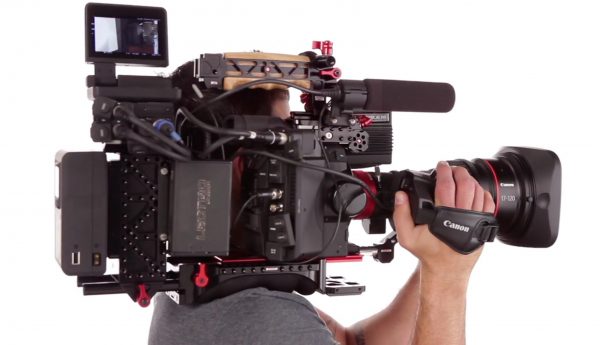
Design and ergonomics:
The handgrip remains pretty much unchanged apart from the colour of the record button, which is now red. It has a single custom button on the rear of the grip which can be configured to lock autofocus, or activate magnification. What is really needed is a second button so you can do both without taking your hand off the handgrip. The original handgrip on my C300 began to creak a little as a result of use and I hope the new one doesn’t do this – only time will tell.
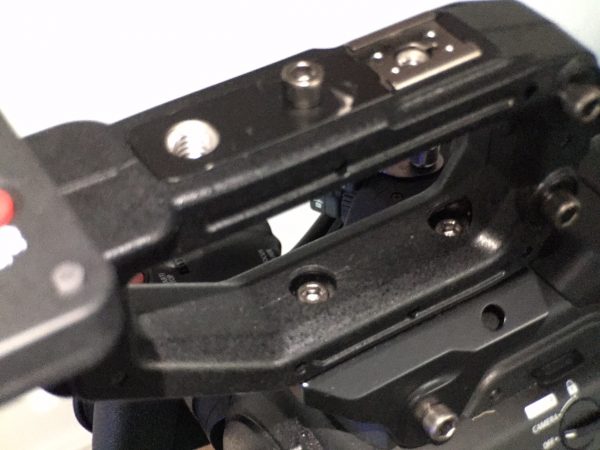
Canon have totally redesigned the top handle on the camera and it now mounts via a much more secure top helmet. This is a new metal top plate that mounts between the camera’s cold shoe and the handle part. It is certainly much more solid than before and it completely stops the annoying wiggle that you get with the original C300. The problem with this for me is that it takes far too long to attach and detach the handle – something that I did all the time on the old C300 to get it into my backpack for travel. To take it off you need to use an allen key and the bolts are really not very accessible. This would be a real problem for my day-to-day work.
Thankfully, Zacuto have a much neater solution in the form of their new C300 mkII helmet and handle, part of their complete Recoil rig for the camera. This substitutes for the Canon parts and provides lots more screw holes to which you can add their NATO rail and handle. It can attach and detach quickly – backpack issues solved. This is a far better solution for me and it also adds several accessory shoes and a rod mount for the Zacuto Axis EVF mount. You can mount the LCD/audio pack with Z-finder attached to transform it into an EVF, or if you want an even clearer view you can add a Gratical EVF and mount the pack on the rear of the handle to use as a monitor.
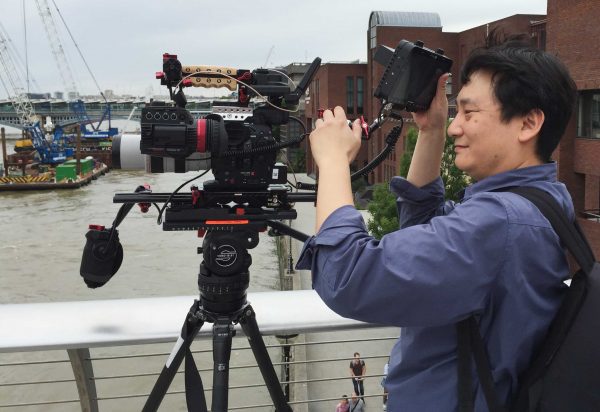
Because the C300 mkII is otherwise ergonomically the same as the C300, it still needs a shoulder rig if you want to be able to handhold it for long periods. Luckily for me, other parts of the Zacuto Recoil system are the same as those I already owned for the C300, so if you have them already then there is no need to get new ones. The VCT baseplate and grip relocator from Zacuto were my preferred rigging for the C300, and still are for the mkII. There are a plethora of solutions from other manufacturers but nothing so far that balances so well on my shoulder. It will be interesting to see what the IBC trade show in Amsterdam will bring from the competition.
You can see the whole system at work in this video from Zacuto below:
Zacuto also have a second rig in the works that is designed for more ENG style shooting with servo zoom lenses. Details are scarce at the moment but it looks to be well designed.
Control interface:
The menus and button layout of the C300 mkII will be instantly familiar to anyone who has used the original. There are, however, even more options than before and it can get pretty confusing setting the camera up the first time to work the way you want it to. As with the original, you can create custom setups that can be saved to the SD card for later recall – which is a good thing.
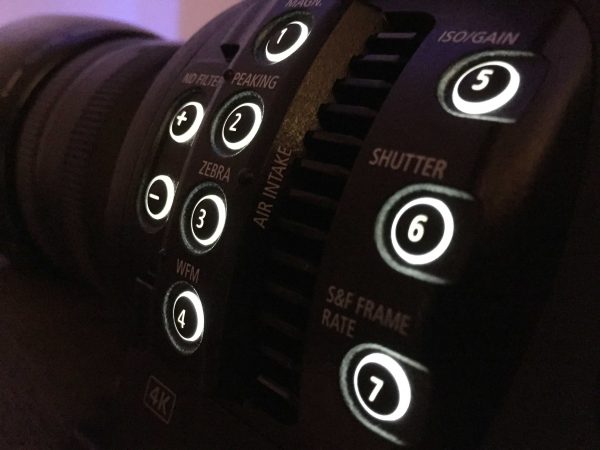
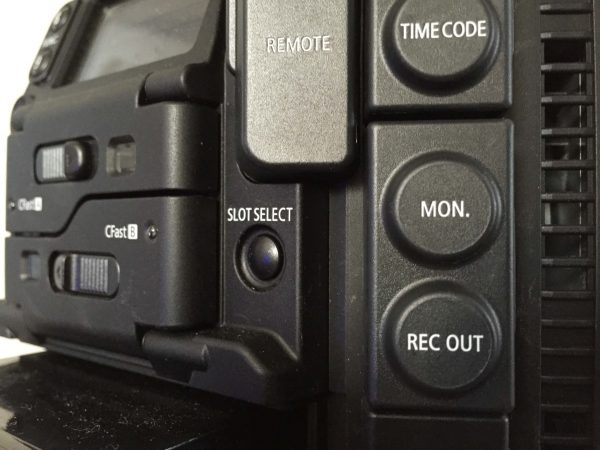
You can now customise the buttons on the side of the camera to light up in the dark. This is great if you are messing with settings, although the downside is that in a news or documentary environment it can draw unwanted attention to the camera. You can turn the lights off, but I couldn’t find a way to do that and still have the orange settings display on the rear of the camera light up (which is pretty essential to make adjustments). Still, I think the lights are helpful in most low-light shooting conditions and I’m glad to see the feature on the camera.
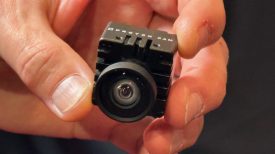
Lens mount:
The camera comes with an electronic EOS lens mount by default. You can purchase a PL version or a locking EF version (like the EF C500) to be put into the camera instead of the standard EOS one. The price for these hasn’t been set yet but Canon say that they aren’t user changeable and will require return to a service centre for installation. Quite why the locking version of the mount isn’t standard on the camera I have no idea – maybe because some run-and-gun users value faster lens changes instead of the most solid lens mount?
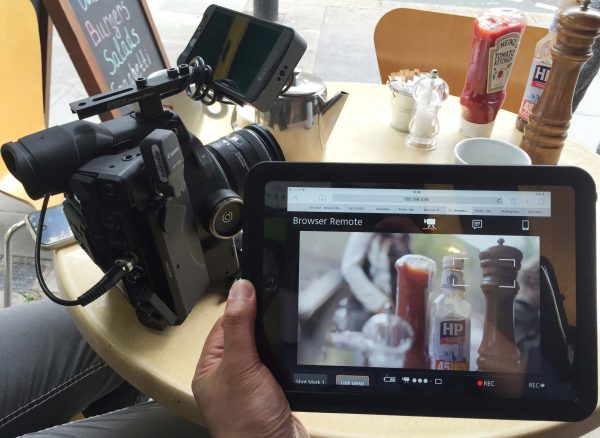
Remote control:
The camera has a Lanc connection and also a dedicated Canon remote socket for external camera control. These should take care of most remote triggering needs. There is also the ability to trigger the camera, change settings and monitor a live video feed using an iPad or smartphone. You can select a point of focus by simply tapping on the screen – which is very neat. To do this you need the optional WFT-E6 wireless transmitter. You can connect via a peer-to-peer wireless network and view from a simple browser based interface.

This is certainly a great idea for studio based applications, but I found it problematic in busy urban environments. Like other wi-fi video monitoring devices, it struggles when the airwaves become crowded. I tried using it in London’s busy Camden Market but found it would have significant delays or simply freeze up. The Sony FS7 comes with a wireless control included for free (although there is no live stream on it) and I do wish Canon did the same or just built wireless control directly into the camera. As it is, I would be reluctant to pay nearly $600 for the WFT-E6.
Media:
The two CF card slots of the C300 have been replaced with dual CFast 2.0 cards, and also a SD card slot where HD proxies can be recorded. CFast 2.0 is rapidly becoming an industry standard format with ARRI and Blackmagic Design also using them in their cameras. CFast 2.0 cards can handle the much higher data rates that the C300 mkII requires for 4K and HD 4:4:4 recording. Compact flash cards just wouldn’t cut it. As with the original C300 you can record to one and then the other CFast 2.0 slot, or both at the same time for an in-camera backup.
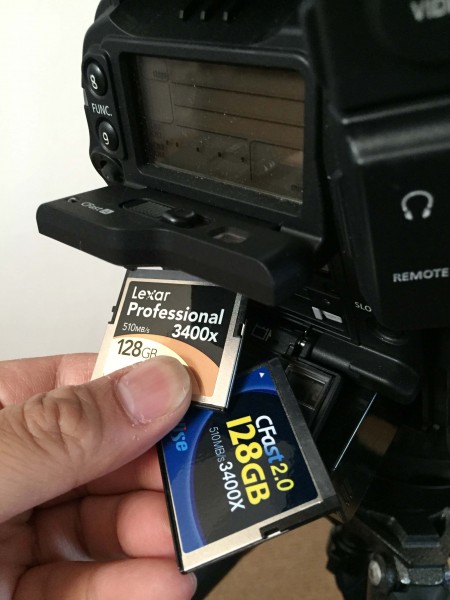
You will also need a new card reader, of course, and I would recommend a Thunderbolt one as transferring large amounts of data can be slow. During my testing I’ve discovered that not all CFast 2.0 cards play nice with the camera. The Wyse CFast 2.0 cards that work fine in our Blackmagic Design URSA failed to work in the C300 mkII. I had to swap to a Lexar CFast 2.0 card instead. CFast 2.0 cards aren’t cheap and you will need at least a couple to get going, so factor this in when pricing up a C300 mkII kit.
Video connections:
There are now two SDI ports on the rear of the camera for external recording and/or monitoring. One big change is that these can be customised to display the signal with a variety of LUTs. Also, you can configure the SDI output to show all the camera’s on-screen controls. Importantly, you can also have one of the outputs magnify the image when checking for focus – this is something most other video cameras simply can’t do. The big deal is that the magnification function can be controlled by the operator direct from the handgrip when using any external HD-SDI EVF or monitor – no more reaching around the side of your EVF to find the right button to press. If you go for an EVF like the Zacuto Gratical X, then you might not need to buy the magnification function option.
One feature that has been carried over from the C500 is the 4K 4:4:4 RAW SDI output. This allows you to hook up a compatible external RAW recorder like the Convergent Design Odyssey 7Q+ (with the correct Canon license pack http://www.convergent-design.com/products/odyssey-raw/canon-c500.html#videos ) and have it record Canon’s proprietary RAW format.
Power:
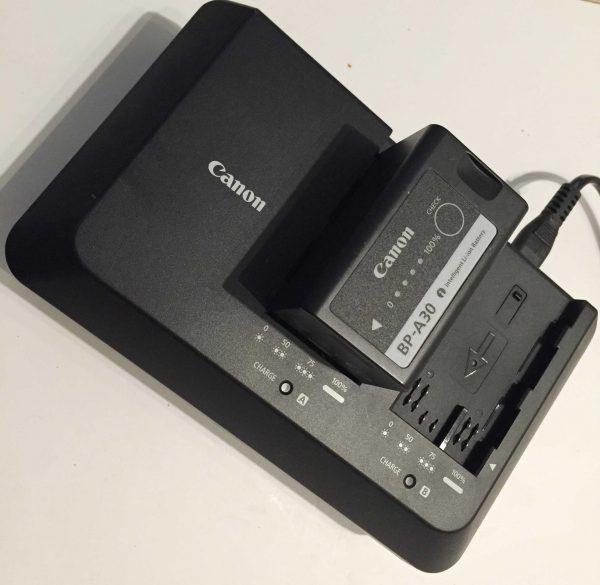
There is an all-new 14.4V battery in the C300 mkII. It is almost the same size as the older ones, yet much more powerful. With the camera recording at very high resolutions and bitrates Canon needed to move away from their BP-U range to something more powerful. The new batteries also come with a new charger. This can charge two batteries, which is useful, but unfortunately it is also rather big and heavy. For a camera that is often used by people trying to travel as light as possible, the new charger is a real pain. I hope Canon also make a smaller charger of the same size as the one that comes with the original C300.
On the original C300 I used Swit batteries with an external power tap barrel connector – these were great for running an EVF or wireless video transmitter like the Teradek Cube off the same battery as the camera. I hope Swit can make something similar for the C300 mkII, but for now any extra devices you add to the camera will need their own power.
As with the rigging and the memory cards, the new battery system is going to introduce more costs to the total package for anyone upgrading from the original.
There is also a Lemo connector for power input, which should make things easier if you want to power the camera from an external v-lock or Anton Bauer battery instead.
ND filters:
One great thing about the C300 mkII is the addition of a second rotating ND filter wheel. There are now a total of six ND settings (OFF、2 stops、4 stops、6 stops、8 stops and 10 stops). The second filter wheel can be engaged via a custom setting. Because the second ND adds extra glass in the optical path, it does throw off the focus marks on lenses when engaged. I found that with EF stills lenses this wasn’t really a problem as the distance scales aren’t really that useful on them. Engaging the second filter wheel does require re-calibration of scales or shimming of lenses if you want accurate witness marks on cinema lenses.
I found that with both filters engaged in very bright light I could shoot at f2 or even wider at the base 800 ISO. Pretty impressive. No other camera around has this and if super-wide apertures are your thing then you will be very happy.
Conclusion:
Depending on your point of view, the C300mkII design is either a great thing, or an opportunity missed. The C300 cameras sharply divide opinion between operators: some love the oversized DSLR design, which lends itself to handholding, monopods and gimbals, while others complain it isn’t easy to mount on your shoulder for shooting and doesn’t have traditional ENG camera type controls. Some operators love the detachable LCD screen/XLR audio pack; others wonder why these can’t just be on the camera body.
The obvious camera for comparison is Sony’s FS7, which was designed for on-the-shoulder shooting from the outset. Although it can be improved with third party accessories, it still works reasonably well as a shoulder-mounted camera straight out of the box. Audio is built-in and so is a control grip that extends out in front of the camera on an arm. It was an immediate hit with documentary and factual TV shooters.
The C300mkII design was obviously a conscious decision on the part of Canon – they clearly thought that if it ain’t broke, then don’t fix it. I did enjoy using the camera simply handheld without any extra rigging, but this isn’t the only way I would need to use it. Like a RED or an Alexa MINI, the C300 mkII can be made to work really well shoulder-mounted if you add a nicely balanced rig like the Zacuto Recoil, but this does add expense unless you already have one for an original C300. Even fully rigged, I still think a Sony FS7 with Movcam or Zacuto balanced shoulder setup is better on the shoulder than the C300 mkII – there are simply fewer dangling wires and bits bolted on. The FS7 just feels more ‘together’.
I would really like to have seen audio controls and XLR connections built into the body. Still, if you prize the C300 mkII image then you might consider the extra cost of the Canon worthwhile.
In our next article on the camera we will take a closer look the image.